

Page 1
PHILIPS
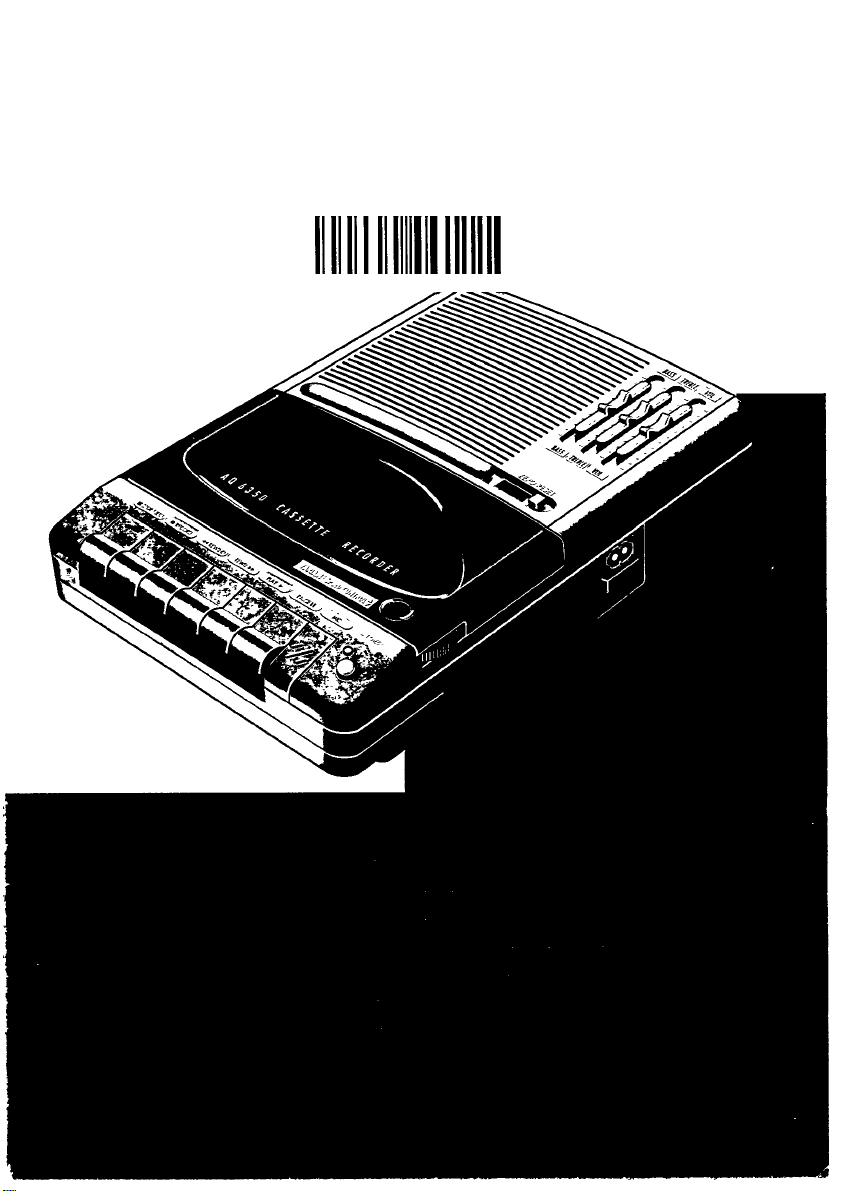
AQ 6350 Cassette Recorder
0 0 0 0 0 "001110
Page 2
STOP-EJECT ■
RECORD
« REWIND
F.FWD
PUYP-
PAUSE
6xC-cells-R14-UM2
MIC
BAT.CHECK
Page 3

English
CASSEHE PLAYBACK
During cassette playback the LINE IN socket@ should not be
occupied.
• Press STOP-EJECT ■ and insert a cassette Ifig. 4t, for
playback, any cassette type can be inserted.
• Press PLAY ►and playback will start.
• Adjust the sound with the controls VOLjume), BASS and
TREBLE.
• To vary the the musical pitch of the cassette piayback, use the
SPEED CONTROL (also see 'SPEED CONTROL').
• To stop, press STOP-EJECT ■.
- The set is then switched off.
Reproduction is possible through:
- the buiJt-in loudspeaker.
- a loudspeaker box connected to the LS "3 socket ©. The
recorder loudspeaker is then switched off.
- a headphone connected to the EAR socket @. The loud
speaker is then switched off.
- an amplifier, radio or recorder connected to the EAR socket©.
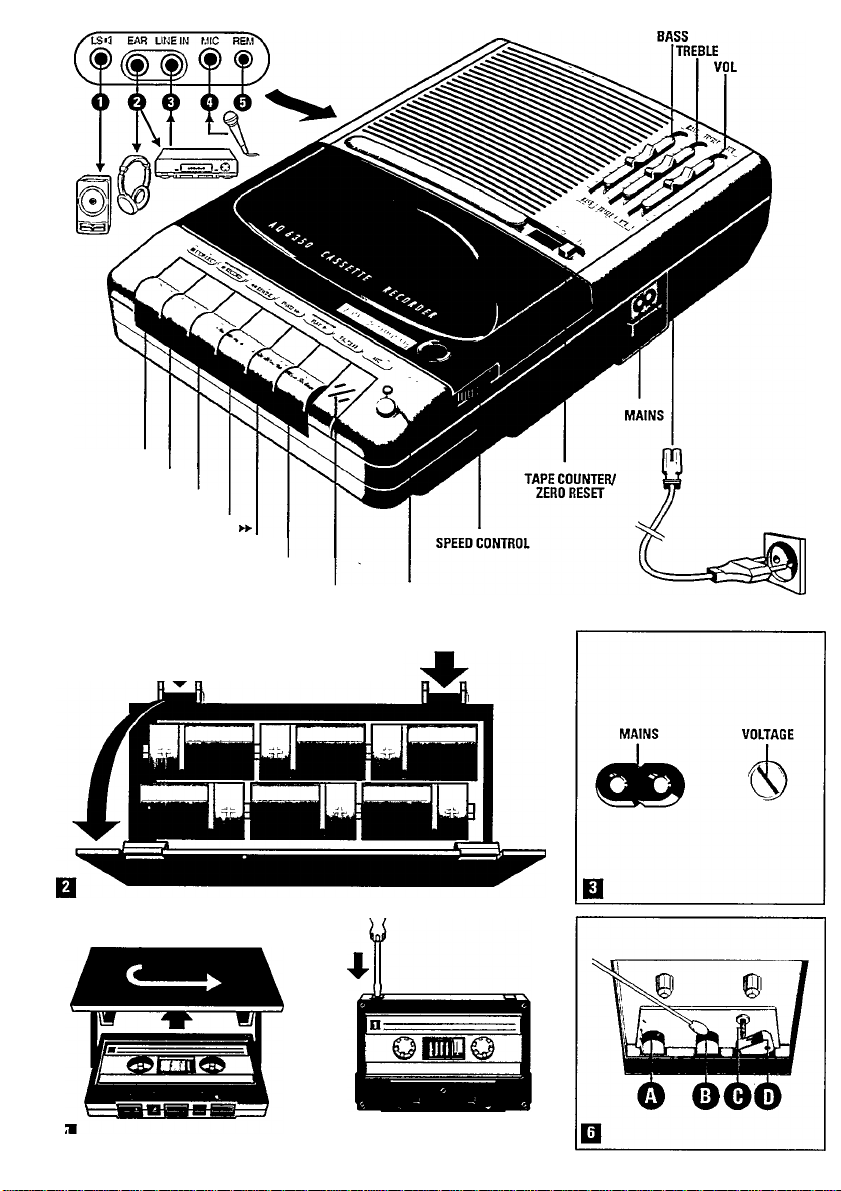
MAINTENANCE
Clean the parts indicated in fig. 6 after every 50 hours of
operation or, on average, once a month:
• Open the cassette holder by pressing STOP-EJECT «.
• Use a cotton bud slightly moistened with alcohol or a special
head cleaning fluid.
• .^Press PLAY ► and clean the rubber pressure roller ® Ifig. 6).
• Then press PAUSE and clean the capstan ©,
recording/playback head ® and erase head ®.
• After cleaning, press STOP-EJECT «.
• Cleaning of the heads ® and ® can also be done by playing
a cleaning cassette through once.
Do not expose the set, batteries and cassettes to rain, moisture,
sand, or to excessive heat e.g. from heating equipment or in
motor cars parked in the sun.
The type plate is located on the base of the set.
This product complies with the radio interference requirements
of the European Community.
The loudspeaker is then switched off.
Important! The EAR 2 output signal Is affected by the position of
the controls VOLIumel BASS and TREBLE, so set these controls
to their midposition.
SPEED CONTROL
____________________________
Using SPEED CONTROL, the tape speed of the cassette playback
can be changed slightly, in consequence of which the musical
pitch and rhytm of the cassette playback will be changed as
well.
The SPEED CONTROL is only operative during cassette playback,
not during cassette recording.
FAST WINDING AND REWINDING
______________
• Press F(ast) F(or)W(ar)D ►► or ■« REWIND.
• Fastwinding/rewinding can be stopped by pressing
STOP-EJECT«.
END OF CASSETTE___________________________
When the end of the tape is reached during recording, playback
and fast fonward winding or rewinding, the pressed recorder
buttons will automatically be released.
SAFEGUARD AGAINST ERASURE
_______________
• Keep the cassette side to be safeguarded in front of you
Ifig. 5f and break out the left tab.
- Now recording on this side is not possible any more.
• You can render this safeguard ineffective by covering the
aperture now existing with a piece of adhesive tape.
Page 4

STOP-EJECT
RECORD*
* t REWIND
RFWD»-
PLAYP-
PAUSE
6xC-ceIls-R14-UM2
MIC
BAT.CHECK
Page 5

Australia
New Zealand
Guarantee and Service valid for Australia
The benefits given to the purchaser by this warranty are in addition to all
other rights and remedies, which, under the Trade Practices Act or other
Commonwealth or State law, the purchaser or owner has in respect of the
product
The Philips product carries the following warranties;
- C-seriesHiR-systems 12 months.
- Compact Disc Players: 12 months.
- Home Audio Systems: 6 months.
- Clock radios, portable radios, cassette recorders, cassette players and
radio recorders: 30 days.
Any defect in materials or workmanship occurring within the specified
period from the date of delivery, will be rectified free of charge by the
retailer from’whom this product was purchased.
Note: Please retain your purchase docket to assist prompt service.
Conditions of this warranty
1. All claims for warranty service must be made to the retailer from whom
this product was purchased. All transport charges incurred in connec
tion with warranty service or replacement will be paid by the
purchaser,
2. These warranties do not cover batteries and extend only to defects in
materials or workmanship occurring under normal use of the product
where operated in accordance with our instructions.
Philips Consumer Products Division,
Technology Park,
Figtree Drive, Australia Centre,
Homebush 2140,
New South Wales
Guarantee and Service for New Zealand
Thank-you for purchasing this quality Philips product.
Philips New Zealand Ltd guarantees this product against defective compo
nents and faulty workmanship for a period of 12 months. Any detect in
materials or workmanship occurring within 12 months from the date of
purchase subject to the following conditions will be rectified free of
charge by the retailer from whom this product was purchased.
Conditions
1. The product must have been purchased in New Zealand, As proof of
purchase, retain the original sales docket.
2. The guarantee applies only to faults caused by defective components,
or faulty workmanship on the part of the manufacturer
3. The guarantee does not cover failures caused by misuse, neglect,
normal wear and tear, accidental breakage, use on the incorrect volt
age. use contrary to operating instructions, or unauthorised
modification to the product or repair by an unauthorised technician.
4. Reasonable evidence (in the form of a sales docket) must be supplied
to indicate that the product was purchased no more than 12 months
prior to the date of your claim.
5. In the event of a failure. Philips shall be under no liability for any injury,
or any loss or damage caused to property or products other than the
product under guarantee.
This guarantee does not prejudice your rights under common law and
statute, and is in addition to the normal responsibilities of the retailer and
Philips.
Howto claim
Should your Philips product fail within the guarantee period, please return
it to the retailer from whom it vjas purchased. In most cases the retailer
will be able to satisfactorily repair or replace the product.
However, should the retailer not be able to conclude the matter satisfac
torily. or if you have other difficulties claiming under this guarantee,
please contact
__________________
The Guarantee Controller,
Philips New Zealand Ltd.
BP.O. Box 41.021
Auckland
0(09)84 94 160
fax 0(09) 84 97 858
©This sign on the packaging is oniy meant for Germany.
®Ce signal sur l'emballage concerne uniquement l'Allemagne.
©Dieses Zeichen auf der Verpackung gilt nur für Deutschland.
® Dit teken op de verpakking geldt alleen voor Duitsland.
©Este símbolo en el embalaje es únicamente para Alemania.
©Este símbolo na embalagem é só para a Alemanha.
©Questo contrassegno sull'Imballaggio interessa solo la Germania.
©Dette mærke har kun betydning i Tyskiand.
©Recirkulationsmàrket pà tórpackningen avsedd endast for Tyskiand.
©Tämä merkki pakkauksessa koskee vain Saksaa.
TCtext/RR 1292/1
Page 6

(|^ Suomi
PIKAKELAUS ETEEN JA TAAKSE
• Paina painiketta Rast) F(or)W(ar)D ►► tai « REWIND.
• Pysayta pikakelaus painikkeella STOP-EJECT ■.
KASETIN LOPUnUA
Kun nauha loppuu tallennuksen, toiston tai pikakelaujsen aikana,
vapautuvat painetut nauhankuljetuskytkimet automaattisesti.
TALLENTEEN SUOJAUS
• Jos haluat suojata tahattomalta poispyyhkimiselta esimerkiksi
kasetin 1-puolen, irrota nuolen osoittama kieieke (kuva 5).
- Nyt kasetin 1-puolelle ei voi enaâ tallentaa.
México
1 No abrir, riesgo de choque electrice
¡Verifique que el voltaje de alimentación
A
NOM
1 Para evitar el riesgo de choque eléctrico, no quit« la tapa. I
1 En caso de requerirservicio,d¡rijase al personal calificado. |
Es necesario que lea cuidadosamente su instructivo de manejo.
Garantía
................................................
• Myohemmin aukko voidaan peittââ teipilla, jos kasettia
haiutaan jalleen kayttaa tallennukseen.
HOITO
____________________________________
Puhdista kuvassa 6 naytetyt osat noin 50 kayttotunnin vaiein tai
keskimaarin kerran kuukaudessa.
• Avaa kasettipesa painamalla STOP-EJECT B-painiketta.
• Kostuta vanupuikko puhdistusspriihin tai magneettipaiden
Danmark
Typeskiltet findes pá undersiden afapparaten.
Dette produkt overholder kravene til radio-interferens af Euro-
pxisk Feellesskab.
Bemeerk: Netafbryderen er sekundsert indkoblet og afbryder
ikke strpmmen fra nettet. Den indbyggede netdel er derfor tilslut-
tet til lysnettet sá leenge netstikket sidder i stikkontakten.
puhdistusaineeseen.
• Paina PLAY ►-painiketta ja pyyhi puristusrulla (g) (kuva 6).
• Paina PAUSE-painiketta ja pyyhi vetoakseli © seka
tallennus/toistopââ ® ja poistopââ ®.
• Paina puhdistuksen jalkeen STOP-EJECT B-painiketta.
• Magneettipaat ® ja ® voidaan puhdistaa myos kâyttëmâila
puhdistuskasettia.
CK) Norge
Typeskilt fínnes pá apparatens underside.
Observer: Nettbryteren er sekundert innkoplet. Den innebygde
netdelen er derfor ikke frakoplet nettet sá lenge apparatet er tii-
siuttet nettkontakten.
Suojaa laite, paristot ja kasetit sateelta ja kosteudelta, alaka
jâtâ niitâ pitkâksi aikaa liian kuumaan, esim. aurinkoon
pysâkôityyn autoon. Laite ei saa olla alttiina tippu- tai
roiskevedelle.
Arvokilpi sijaitseen laitteen pohjassa
Oikeus muutoksiin varataan.
(0) Australia
Guarantee
..............
New Zealand
Guarantee
........................
PRECAUCIÓN - ADVERTENCIA
ATENCIÓN
sea el requerido para su aparato
NOM
A
a la vuelta
..see reverse side
..see reverse side
Page 7

English
SUPPLY
Battery supply
• Open the battery compartment ¡fig. 21 and insert as indicated
six batteries, type R14, UM2 or C-cells.
- The batteries are in good condition as iong as the battery
indicator lights up:
- during recording and playback, or
- when pressing the battery check button (BAT. CHECK).
When checking the battery condition, the MAINS socket may
not be occupied.
• Remove the batteries if exhausted or if they will not be used
again for a long period.
- The battery supply is switched off when the set is connected
to the mains. To change over to battery supply, pull out the
plug from the MAINS socket.
Mains supply
• Check if the mains voltage as shown on the type plate (on the
base of the set) corresponds to your local mains voltage. If it
does not, consult your dealer or service organisation.
• If the set is equipped with a VOLTAGE SELECTOR (fig. 3), set
this selector to the local mains voltage.
• Connect the mains lead to the MAINS socket and the wall
socket (fig. / and3).
- The mains supply is switched on.
• To disconnect the set from the mains completely, withdraw
the mains plug from the wall socket..
Important notes for users in the U.K.:
Mains plug
RECORDING
Copyright: Recording is permissible insofar as copyright or
other rights of third parties are not infringed.
For U.K. only: Recording and playback of material may require
consent. See Copyright Act 1956 and The Performer's Protection
Acts 1958 to 1972.
Recording possibilities:
from the built- in microphone (MIC)
Nothing should then be connected to the sockets MIC 0 or LINE
IN0.
Monitoring during microphone recordings is not possible.
from the external microphone socket IMIC(i)l
When connecting a microphone, the built-in microphone (MIC) is
switched off.
Monitoring during microphone recordings is not possible.
If the microphone is provided with a start/stop remote control,
the remote plug may be connected to the socket REM (s). It is
then possible to start and stop recording and playback from the
microphone, provided the RECORD 9key or the PLAY>- key are
pressed the PAUSE key must not be used in this case).
from the LINE IN socket®
Connect an amplifier, a radio or recorder to the LINE IN socket
The built-in microphone (MIC) is then switched off.
mixing the LINE IN® and MIC® signals
The signal from the microphone socket (MIC ©) can be mixed
with the LINE IN signal @.
When monitoring, only the LINE IN signal will be heard.
This apparatus is fitted with an approved moulded 13 Amp
plug. To change a fuse in this type of plug proceed as follows:
• Remove fuse cover and fuse.
• Fix new fuse (5 Amp) which should be a BS1362, A.S.T.A. or
BSI approved type.
• Refit the fuse cover.
If the fitted plug is not suitable for your socket outlets, it
should be cut off and an appropriate plug fitted in its place.
If the mains plug contains a fuse, this should have a value of
5 Amp. If a plug without a fuse is used, the fuse at the
distribution board should not be greater than 5 Amp.
Note:. The severed plug must be disposed to avoid a possible
shock hazard should it be inserted into a 13 Amp socket
elsewhere.
Howto connect a plug
The wires in the mains lead are coloured with the following
code: blue = neutral (N), brown = live. (L)
As these colours may not correspond with the colour markings
identifying the terminals in your plug, proceed as follows:
• Connect the blue wire to the terminal marked N or coloured
black.
• Connect the brown wire to the temninal marked L or
coloured red.
• Do not connect either wire to the earth terminal in the plug,
marked E (or +) or coloured green (or green and yellow).
Before replacing the plug cover, make certain that the cord
• Press STOP-EJECT ■ to open the cassette holder.
• Insert the cassette with the full reel on the left [fig. 4) and
close the cassette holder.
For recording you must use a NORMAL cassette (lEC I) on
which the tabs (fig. 5) ate not broken out.
At the very beginning of the tape, no recording will take place
during the first 7 seconds when the leader tape passes the
recorder heads.
• Press PAUSE.
• Press RECORD •; in doing so PLAY ► is automatically
pressed too.
• Now start recording by pressing PAUSE again.
You can also start recording without using PAUSE; simply
press RECORD • and recording will start.
- The automatic recording level control ensures that all sounds
are recorded at the correct level.
• When monitoring during recording, adjust the sound with the
controls VOL(ume), BASS and TREBLE: these controls do not
affect the recording.
Monitoring during microphone recordings is not possible.
• For brief interruptions, press PAUSE: press again to restart
recording.
• To stop, press STOP-EJECT ■.
- The set is then switched off; on pressing again, the cassette
holder will open.
grip is clamped over the sheath of the lead - not simply over
the two wires
Page 8

3140-106-19821 Printed in Hong Kong
 Loading...