

Page 1
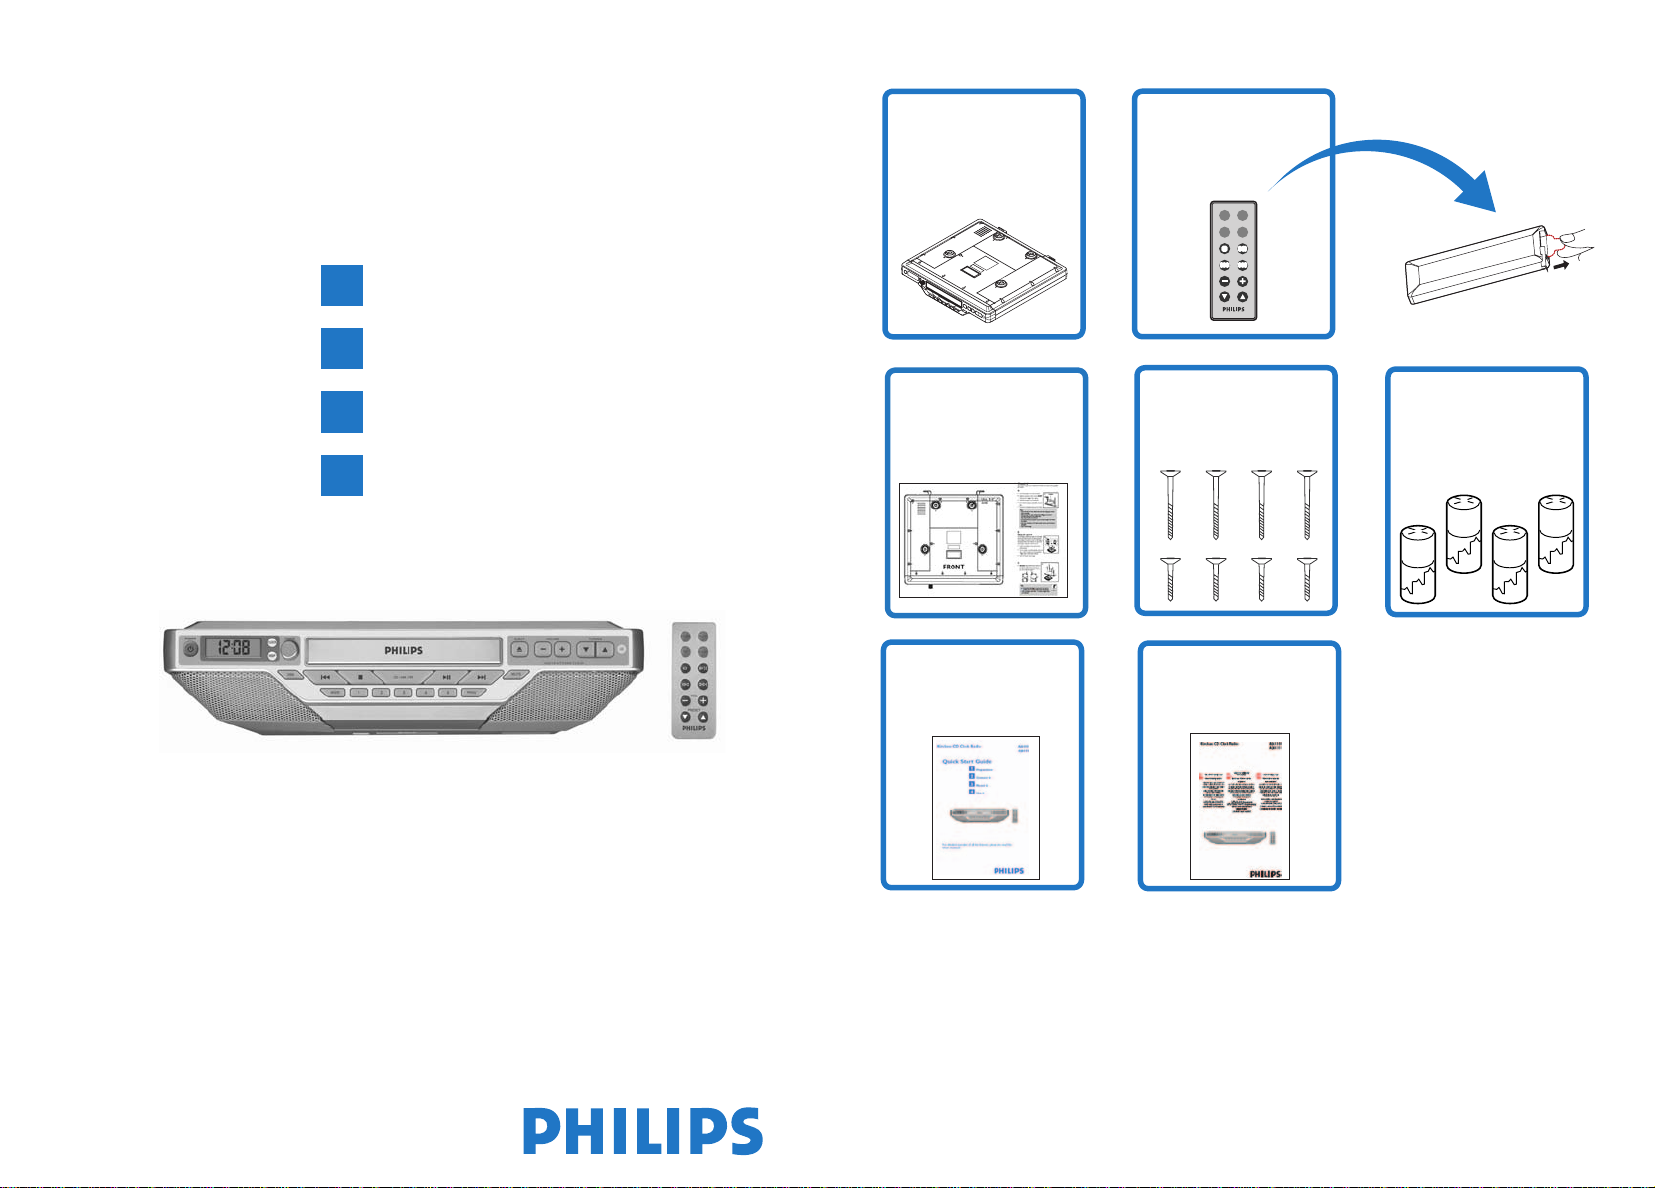
What’s in the box
Kitchen CD Clock Radio AJ6110
AJ6111
Quick Start Guide
1
Preparation
2
Connect it
3
Mount it
4
Use it
Kitchen CD Clock
Radio
Mounting
template
Quick start guide
Remote control
with 1 x CR2025
battery
POWER
MUTE
CD
RADIO
VOL
PRESET
8 x screws
User manual
4 x spacers
For detailed operation of all the features, please also read the
User manual.
Page 2
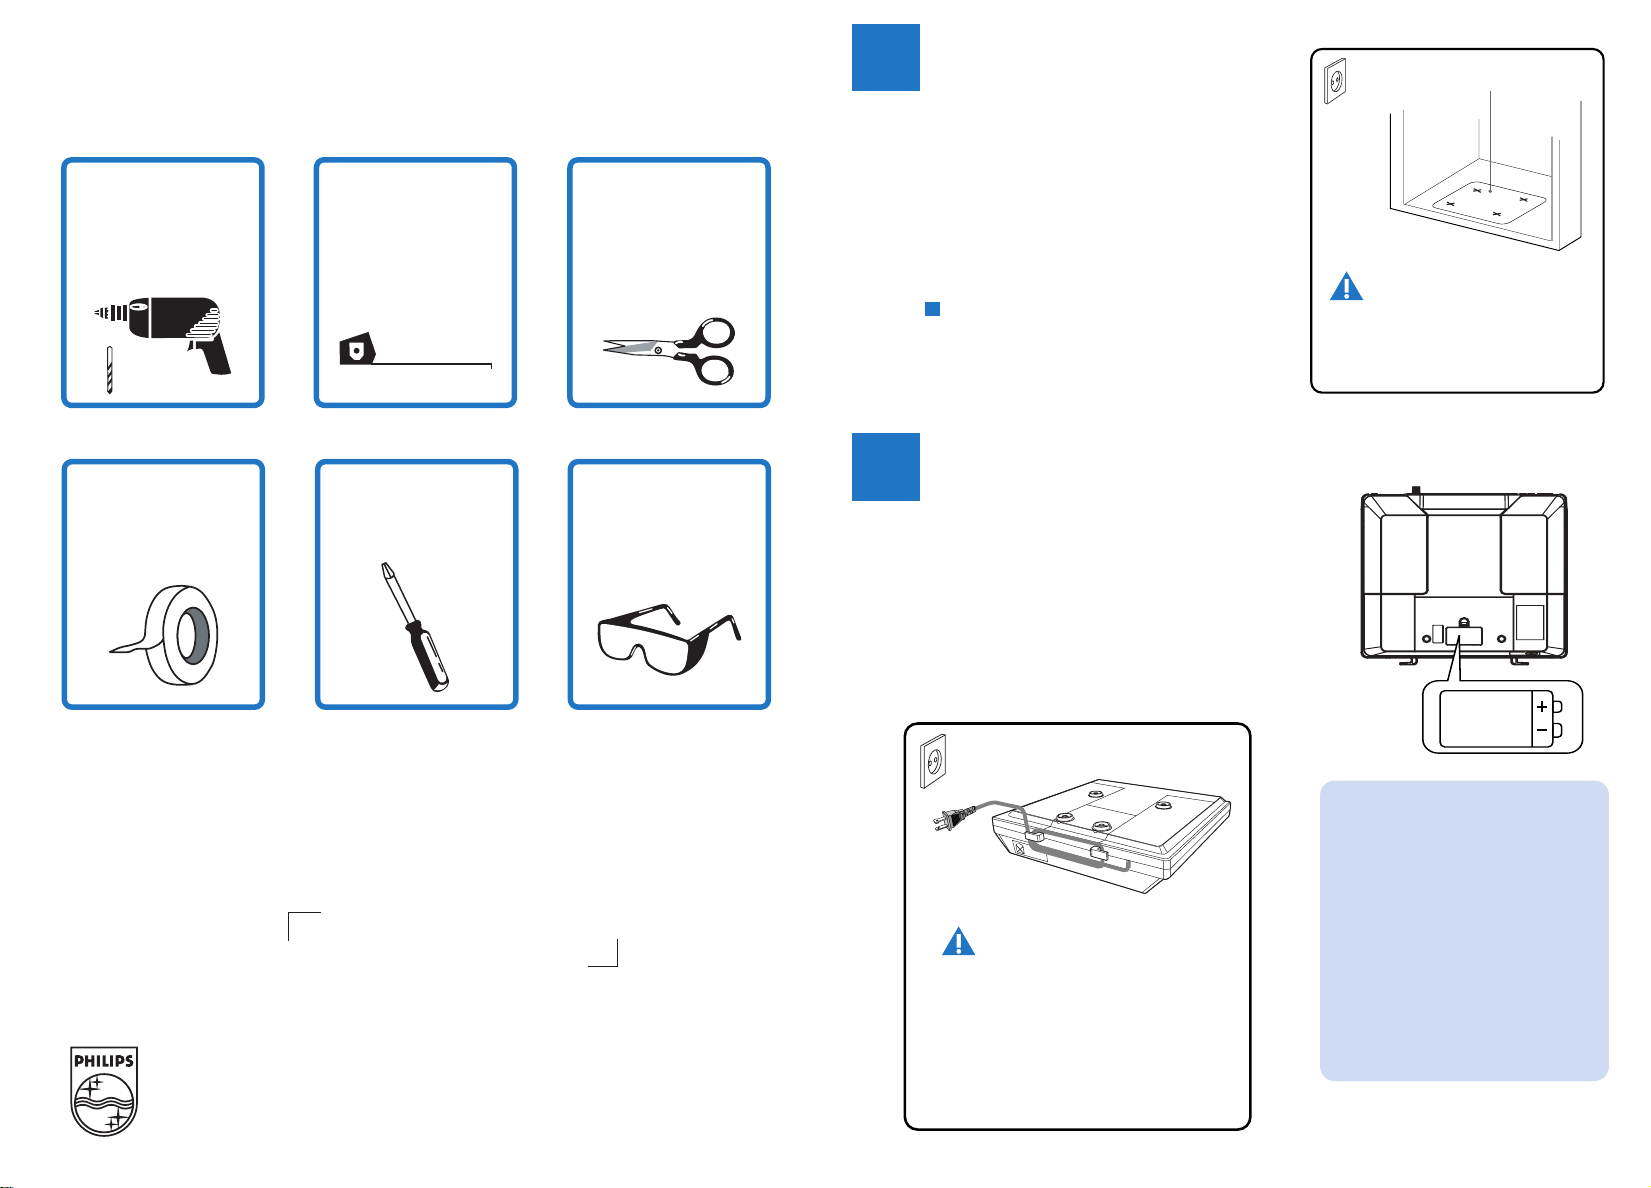
What else you'll need
These tools (not included) will help you mount the unit as described in part 3 Mount it, and on the
template.
1
Preparation
For best performance, install the unit as far as
possible from sources of noise and interference
(e.g. fridges, microwaves, fluorescent lamps)
Template
a
Electric drill
Sellotape
Ta pe measure
Screwdriver
Scissors
Safety goggles
a Find a mounting location near a wall outlet.
b Use the mounting template to test the design and
thickness your kitchen cabinet bottom.
c Before you decide where and how to place your unit,
try the following connections.
2
( See below)
2
a For memory back-up power supply, insert 1 x 9V
b Connect the AC power cord to the wall socket.
Connect it
battery (preferably alkaline, not supplied)
with the correct polarity
b
To reduce the risk of fire,
do not place any heating or
cooking apparatus beneath
this unit.
1 x 9V
battery
W
2006 © Koninklijie Philips Electronics N.V. All rights reserved.
PHILIPS CONSUMER ELECTRONICS NORTH AMERICA P.O. Box
671539, Marietta, GA. 30006-0026
http://www.philips.com
AL-0608
To prevent obstruction or
danger, use the power cord posts
to wrap the power cord so that
excess cord does not hang down.
Tip
We recommend you insert a 9V
battery for memory back-up
power supply. In the event of a
power interruption, this will help
safeguard the clock, timer settings
and preset radio stations.To save
energy, the display switches off
and you will not be able to operate the CD/ Tuner functions.
Page 3

Mount it
3
Ask a friend to help out. An extra hand to hold
the unit makes mounting easier and quicker
A
Cut the template to fit inside the cabinet.
•
• Align the template border marked "FRONT" along the
front edge of your cabinet.
• Use adhesive tape to fix the template.
• Drill 1/4 inch holes, as marked X on the template.
• Remove the template when you finish drilling.
A
Template
C
Manually fasten the 4 long screws down into the spacer holder holes to mount your set. Start
•
screwing at opposite corners of the unit for better suppor t.
C
Tip
Tip
– Clean the bottom of the cabinet surface and also empty your cabinet before mounting.
– Place the unit in a clean, safe place when drilling to avoid wood shavings dropping into the
ventilation slots.
– Use a nail to start each drill hole.
– Drill from the bottom upwards if you do not have enough room inside the cabinet.
– Hold your drill firmly at 90owith the cabinet bottom and drill holes at low speed.
– Clear wood shavings.
B
Using the spacers
On the spacers, there are 4 pairs of notch length
options. Depending on the thickness of you cabinet bottom (with/ without an overhang), these notch lengths
correspond to the 4 notch height in the space holders,
and allow you to adjust to the best height to help you
mount the unit.
B
Spacer
L (Low)
Arrow
• Measure the height of the cabinet bottom and/over-
hang.
• Tu rn the spacer counterclockwise to determine
which of the 4 heights is most suitable: Low • •
High. Align to the arrow indication.
• Inser t the spacers accordingly.
L••H (4 heights)
H
To prevent damage to your
set, do not use an electric
drill to secure screws when
mounting!
– If the overhang is more than 1 1/4 inch, use
longer screws (not included).
L
Page 4

Use it
4
A
1 On the set, press and hold CLOCK.
2 Hold down or press ∞ or § repeatedly to set the hour.
3 Press CLOCK to confirm the setting.
4 Repeat step 3 to set the minute.
5 Press CLOCK to confirm the setting.
For full details, please read and follow the instructions inside the User manual.
Setting the clock
➜ The hour digits start flashing (AM 12: 00 by default).
➜ The minute digits start flashing.
C
Playing discs
1 Press POWER to on, then press CD/AM/FM
once or more to select CD source.
2 Press 0 EJECT to open the CD compar tment
3 Insert a disc with the printed side facing up.
Press 0 again to close the compar tment
➜ Playback starts automatically. Display shows
current track number
4 To pause playback, pressÉÅ.To resume playback,
press the button again
5 To stop playback, pressÇ
➜ Display shows the total number of tracks
MP3-CD/CD-R/CD-RW COMPATIBLE
MICRO SYSTEM
MCM760 MICRO SYSTEM
To turn on the Daylight Saving Time (DST) mode
1 In the standby mode, press and hold DISP on the set.
➜ Current time setting moves ahead by 1 hour.
DST appears.
2 Press DISP again.
➜ The set returns to normal time setting. DST disappears.
B
Setting the timer
1 On the set, press TIMER to activate.
➜ 015 flashes. TIMER appears
2 Tu r n the TIMER control counter-/clockwise to
adjust your timer period (from 1 to 180 minutes).
➜ Display shows selected timer period.
3 Press TIMER to confirm.
➜ Timer period starts to count down. TIMER flashes
4 To cancel the timer, press TIMER during the countdown.
➜ Display shows the clock time.
D
Tuning to radio stations
1 Press POWER to on, then press then press
CD/AM/FM once or more to select radio source
(AM or FM)
2 Press and hold ∞ / § until the frequency in the
display starts running
➜ The radio automatically tunes to a station of
sufficient reception
3 Repeat step 2 if necessary until you find the desired
radio station
➜ To tune to a weak station, press ∞ / § briefly
and repeatedly until optimal reception is found
Tip
To Improve radio reception:
– For FM, extend and adjust the AC power cord
 Loading...