

Page 1

www.philips.com/support
Always there to help you
Question?
Contact
Philips
Register your product and get support at
AJ2000
AJ2000_93_UM_EN.indd 1 5/06/2017 3:09:04 PM
User manual
Page 2

AJ2000_93_UM_EN.indd 2 5/06/2017 3:09:04 PM
Page 3

Contents
1 Important 2
Safety 2
2 Your clock radio 3
Introduction 3
What's in the box 3
Overview of the clock radio 4
3 Get started 5
Connect power 5
Set clock 6
Turn on 6
Adjust display brightness 6
4 Listen to FM radio 7
Prepare FM antenna 7
Store FM radio stations automatically 7
Select a preset FM radio station 7
Tune to FM radio stations 7
Store FM radio stations manually 7
5 Set alarm timer 8
Set alarm 8
Switch off the alarm 8
6 Set sleep timer 9
7 Product information 10
Specications 10
8 Troubleshooting 11
9 Notice 12
Care of the environment 12
1EN
AJ2000_93_UM_EN.indd 1 5/06/2017 3:09:04 PM
Page 4

1 Important
Safety
Warning
• Never remove the casing of this clock radio.
• Never lubricate any part of this clock radio.
• Never place this clock radio on other electrical
equipment.
• Keep this clock radio away from direct sunlight, naked
amesorheat.
• Make sure that you always have easy access to the
power cord, plug or adaptor to disconnect the clock
radio from the power.
• Read and follow these instructions.
• Make sure that there is enough free space
around the clock radio for ventilation.
• Onlyuseattachments/accessoriesspecied
by the manufacturer.
• Use only power supplies listed in the user
manual.
• Unplug this clock radio during lightning
storms or when unused for long periods
of time.
• Battery usage CAUTION – To prevent
battery leakage which may result in bodily
injury, property damage, or damage to the
clock radio:
• Install the battery correctly, + and - as
marked on the clock radio.
• Remove the battery when the clock
radio is not used for a long time.
• The battery shall not be exposed to
excessiveheatsuchassunshine,reor
the like.
• The clock radio shall not be exposed to
dripping or splashing.
• Do not place any sources of danger on the
clockradio(e.g.liquidlledobjects,lighted
candles).
• Where the plug of the Direct Plug-in
Adapter is used as the disconnect device,
the disconnect device shall remain readily
operable.
Risk of swallowing batteries!
• The device may contain a coin/button
type battery, which can potentially be
swallowed. Keep the battery out of reach
of children at all times! If swallowed, the
battery can cause serious injury or death.
Severe internal burns can occur within two
hours of ingestion.
• If you suspect that a battery has been
swallowed or placed inside any part of the
body, seek immediate medical attention.
• When you change the batteries, always
keep all new and used batteries out of
reach of children. Make sure that the
battery compar tment is completely secure
after you replace the battery.
• If the battery compar tment cannot be
completely secured, discontinue use of the
product. Keep out of reach of children and
contact the manufacturer.
Note
• The type plate is located on the bottom of the
apparatus.
2 EN
AJ2000_93_UM_EN.indd 2 5/06/2017 3:09:04 PM
Page 5

2 Your clock radio
Congratulations on your purchase, and
welcometoPhilips!Tofullybenetfromthe
support that Philips offers, register your product
at www.philips.com/welcome.
Introduction
With this clock radio, you can:
• listen to FM radio;
• view time; and
• set two alarms.
What's in the box
Check and identify the contents of your
package:
Always there to help you
Register your product and get support at
www.philips.com/support
Question?
Contact
Philips
Short User manual
• Clock radio
• Printed materials
3EN
AJ2000_93_UM_EN.indd 3 5/06/2017 3:09:04 PM
Page 6
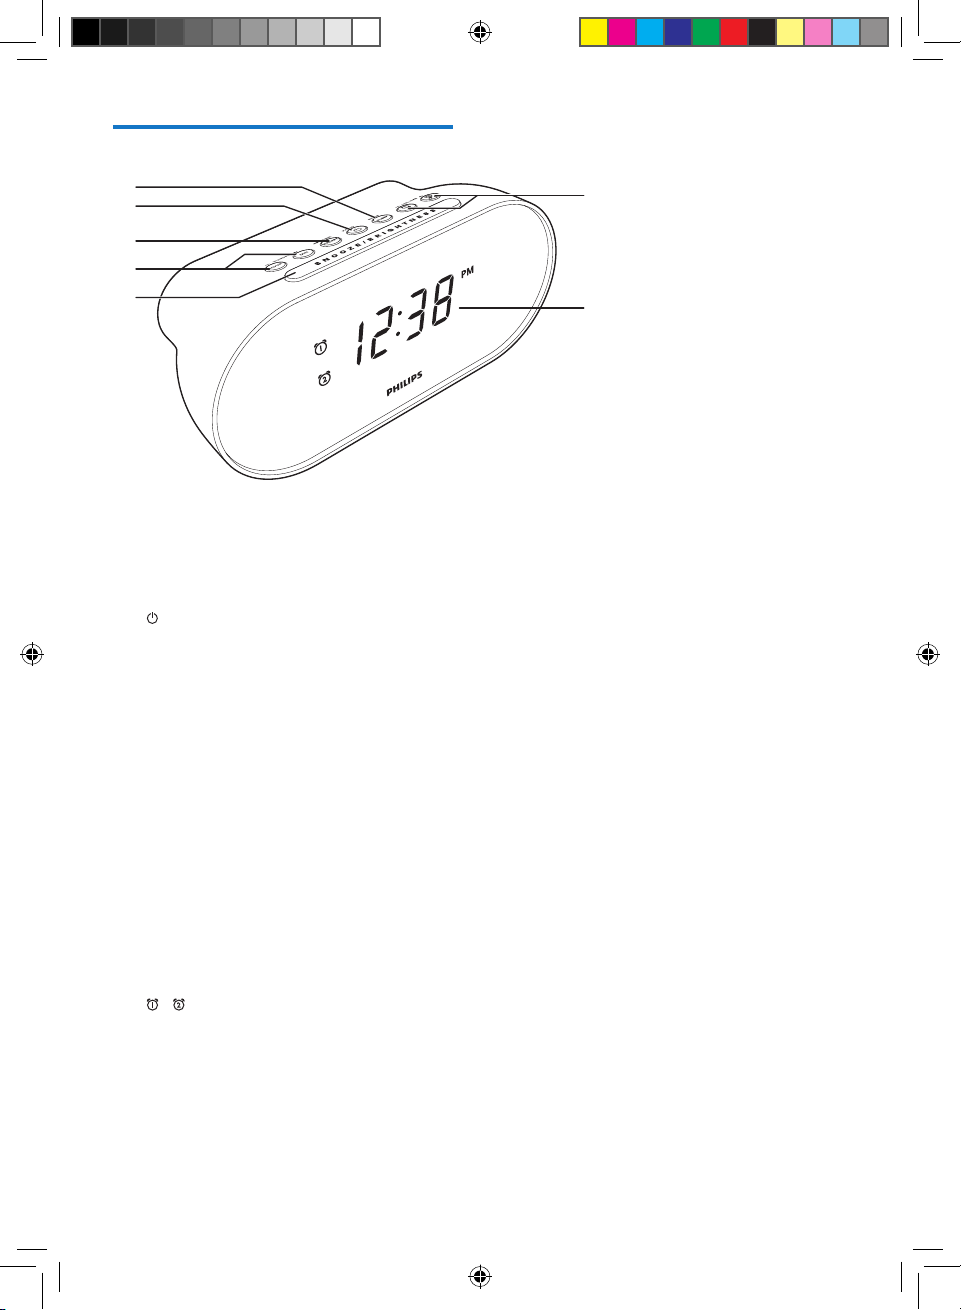
Overview of the clock radio
a
c
d
e
g
f
b
a SCAN/SLEEP
• Scan and store radio stations
automatically.
• Set sleep timer.
b /RADIO
• Turn the radio on or off.
c SET TIME/PRESET
• Set time.
• Store FM radio stations manually.
• Select a preset radio station.
d HOUR/MIN/- TUNING +
• Adjust hour and minute.
• Adjust 12/24 hour format.
• Tune to FM radio stations.
e SNOOZE/BRIGHTNESS
• Snooze the alarm.
• Adjust display brightness.
f Display panel
• Show current status.
g / /- VOLUME +
• Set alarm.
• Activate or deactivate alarm timer.
• Adjust volume.
4 EN
AJ2000_93_UM_EN.indd 4 5/06/2017 3:09:05 PM
Page 7
3 Get started
Always follow the instructions in this chapter in
sequence.
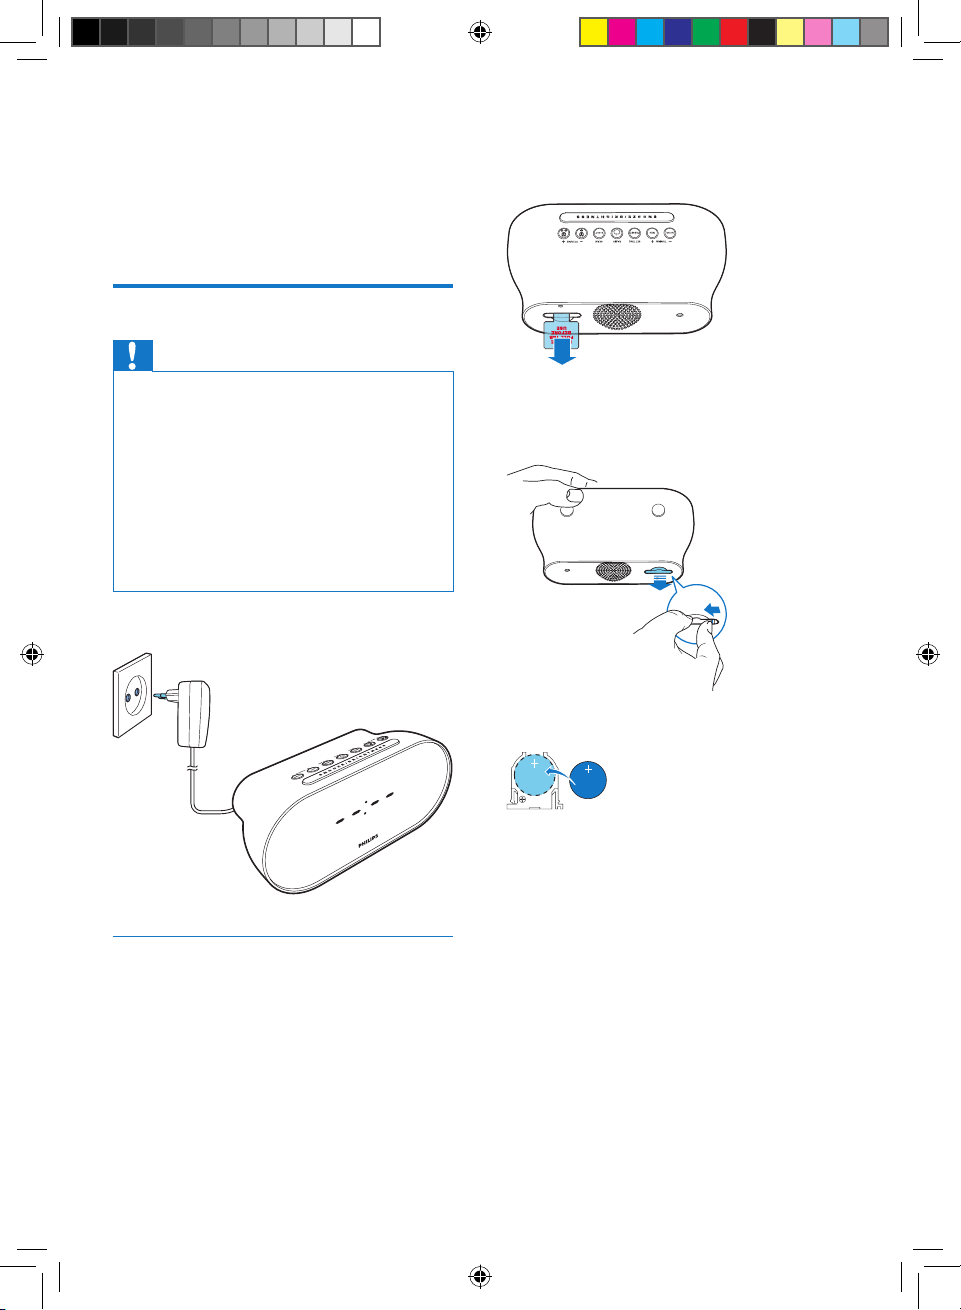
Connect power
For rst-time use:
Remove the protective tab to activate the
battery.
Caution
• Risk of product damage! Make sure that the power
voltage corresponds to the voltage printed on the back
or underside of the clock radio.
• Risk of electric shock! When you unplug the AC power
plug, always pull the plug from the power outlet. Never
pull the cord.
• Risk of explosion! Keep the battery away from heat,
sunshineorre.Neverdiscardbatteryinre.
• Danger of explosion if battery is incorrectly replaced.
Replace only with the same or equivalent type.
• The battery contains chemical substances, so it should
be disposed of properly.
Connect the power adaptor to the wall outlet.
To replace the battery:
1 Push the clip to the left and pull out the
battery tray.
2 Inser t 1 x CR2032 batter y as illustrated.
CR2032
CR2032
Back-up battery
You can only use AC power as power supply.
The lithium CR2032 battery can only back up
clock and alarm settings.
When power is disconnected, the display
backlight is off.
5EN
AJ2000_93_UM_EN.indd 5 5/06/2017 3:09:06 PM
Page 8
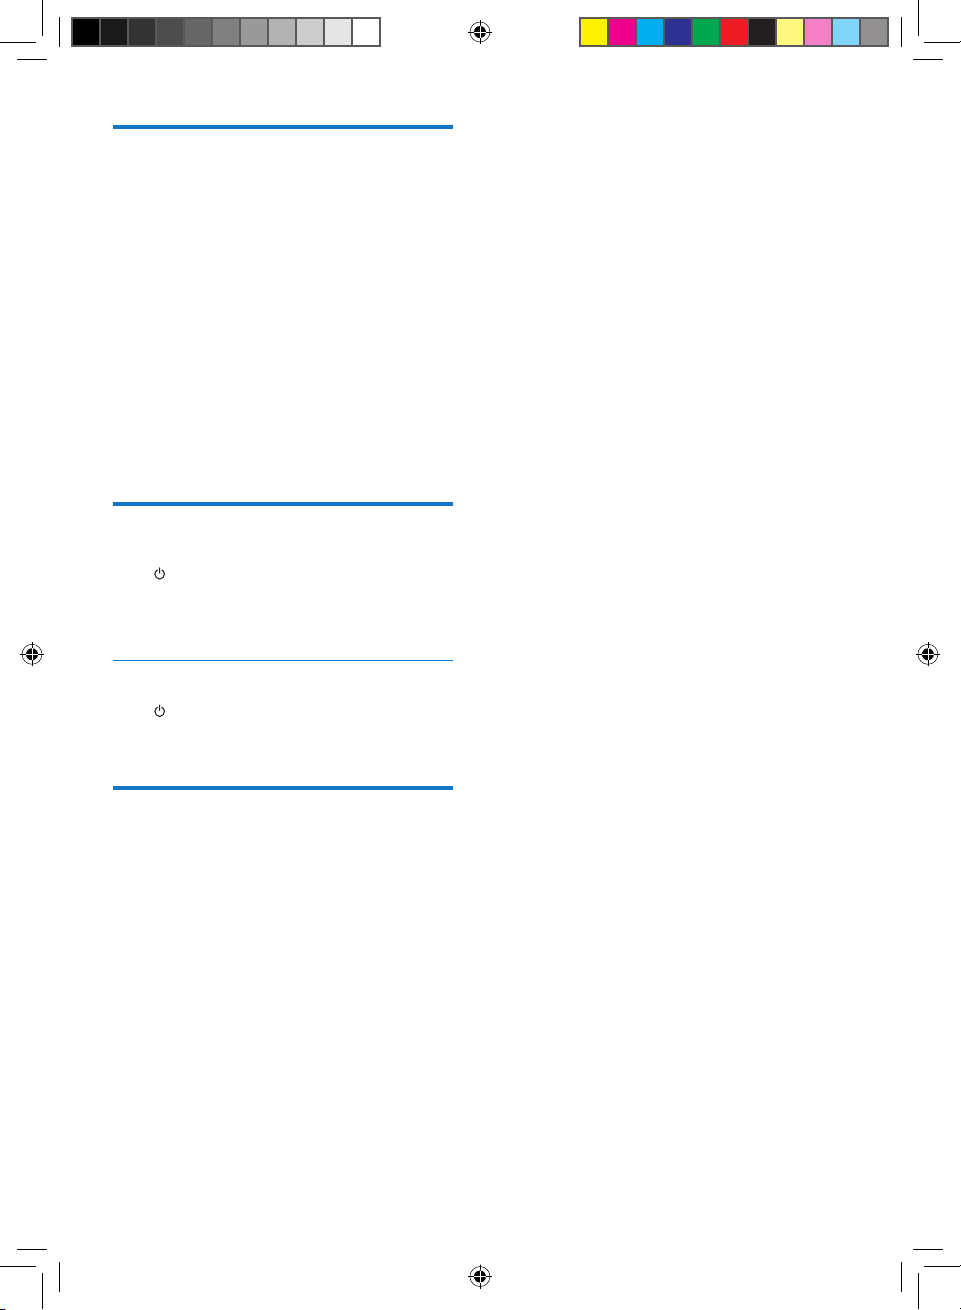
Set clock
1 In standby mode, press and hold SET TIME
for two seconds to activate clock setting
mode.
» [24H] begins to blink.
2 Press HOUR or MIN to set 12/24 hour
format.
3 Press SET TIMEtoconrm.
4 Press HOUR and MIN repeatedly to set
hour and minute respectively.
5 Press SET TIMEtoconrm.
» The set time is displayed.
Turn on
Press to turn on the radio.
» The product switches to FM tuner
mode.
Switch to standby
Press again to switch to standby.
» The clock (if set) is displayed.
Adjust display brightness
Press BRIGHTNESS repeatedly to select
different brightness levels:
• High
• Medium
• Low
6 EN
AJ2000_93_UM_EN.indd 6 5/06/2017 3:09:06 PM
Page 9
4 Listen to FM
radio
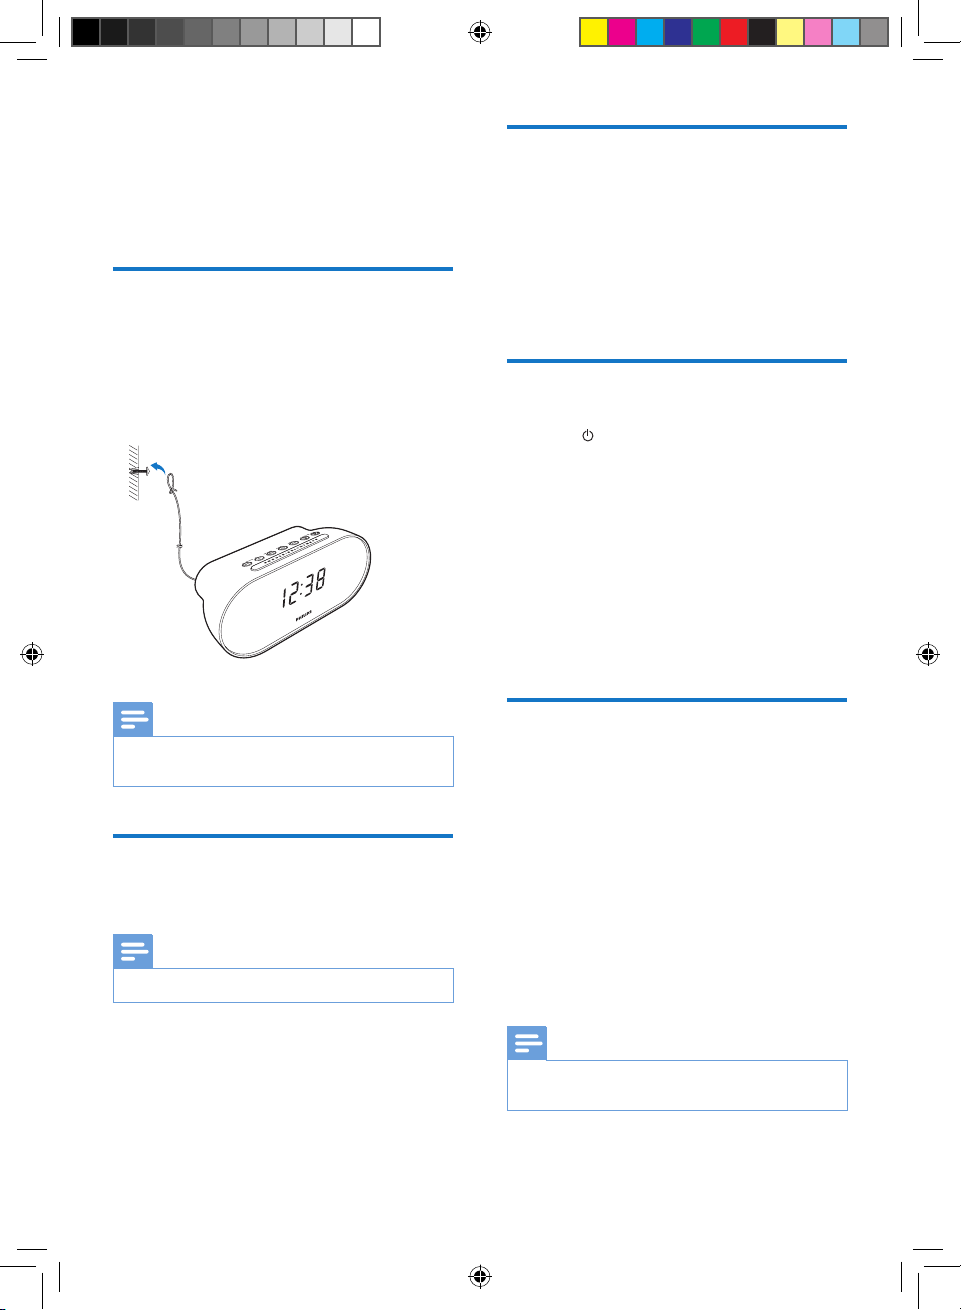
Prepare FM antenna
1 Fully extend and adjust the position of
thepig-tailantennauntilyoundthebest
reception.
2 Fix the antenna as illustrated.
Select a preset FM radio station
In FM tuner mode, press PRESET repeatedly to
select a preset radio station.
• While listening to FM radio, press VOLUME + repeatedly to increase or
decrease volume.
Tune to FM radio stations
1 Press RADIO to turn on FM radio.
2 Press and hold - TUNING + for two
seconds.
» The clock radio tunes to a station with
strong reception automatically.
• Tonetunetheradiostation,you
may press - TUNING + repeatedly to
change a frequency.
3 Repeat step 2 to tune to more radio
stations.
Note
• To prevent interference, position the antenna as far as
possible from any other electrical appliances.
Store FM radio stations manually
1 In FM tuner mode, tune to an FM radio
Store FM radio stations automatically
station.
2 Press and hold PRESET for two seconds.
» The preset number begins to blink.
3 Press HOUR or MIN to select a number.
Note
• You can store a maximum of 20 FM radio stations.
In FM tuner mode, press and hold SCAN for
two seconds.
» The clock radio stores all the available
FM radio stations automatically.
» Therstavailablestationbroadcasts
automatically.
AJ2000_93_UM_EN.indd 7 5/06/2017 3:09:06 PM
4 Press PRESETtoconrm.
5 Repeat steps 1 to 4 to store other stations.
Note
• To remove a pre-stored station, store another station
in its place.
7EN
Page 10
5 Set alarm timer
Set alarm
You can set two alarms to ring at different time
via different alarm sources.
Note
• Make sure that you have set the clock correctly.
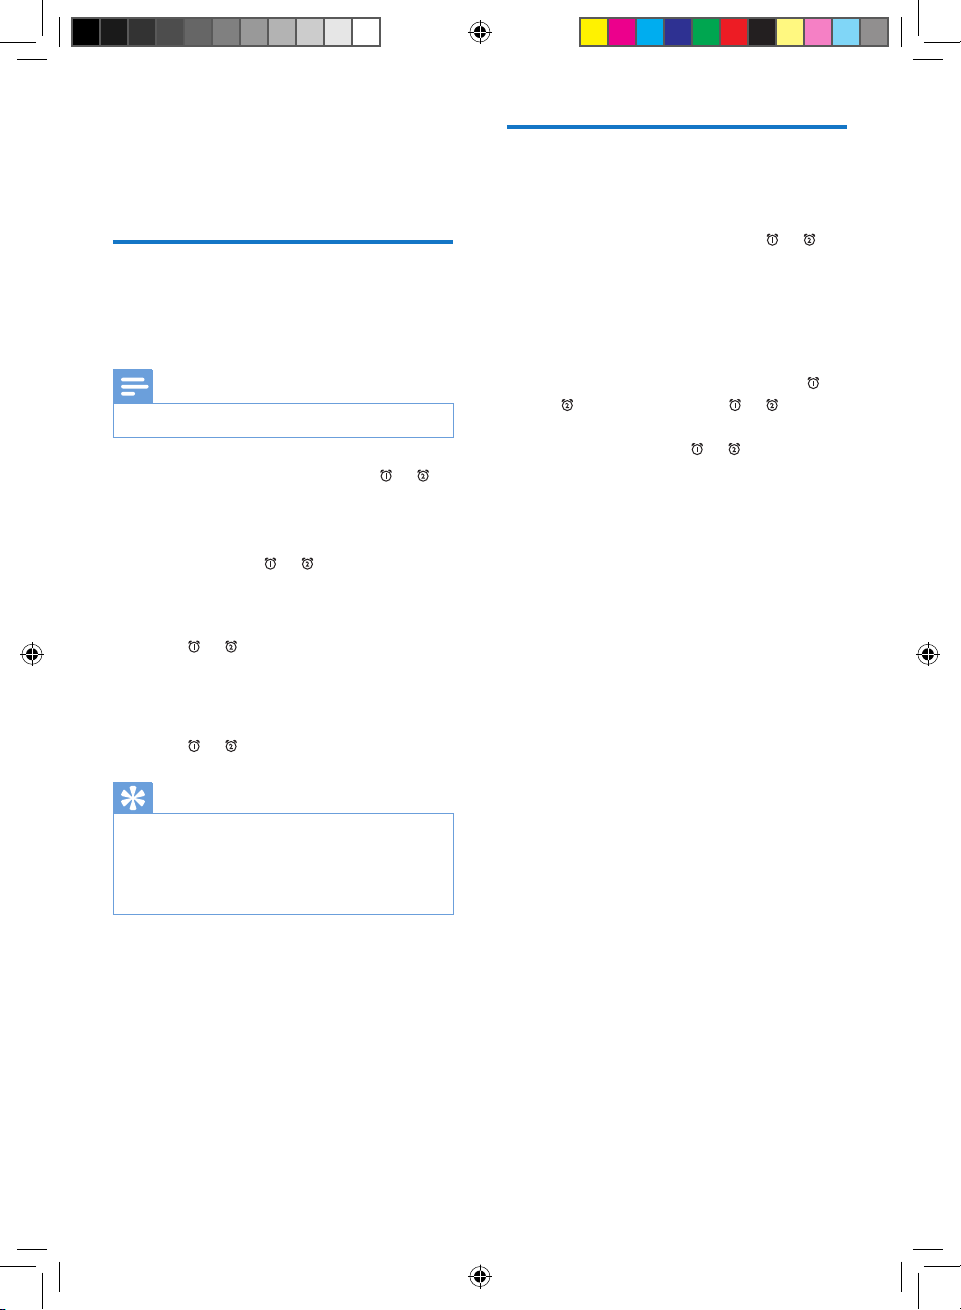
1 In standby mode, press and hold or
for two seconds to activate alarm setting
mode.
» The hour and minute digits and the
alarm icon ( or ) begin to blink.
2 Press HOUR and MIN repeatedly to set
hour and minute.
3 Press or toconrm.
4 Press HOUR or MIN to select alarm source:
• buzzer or,
• your last listened FM station.
5 Press or againtoconrm.
Switch off the alarm
Select one of the following ways to switch off
the alarm.
• When the alarm goes off, press or .
» The alarm repeats itself in subsequent
days.
• When the alarm goes off, press SNOOZE.
» The alarm snoozes and repeats ringing
nine minutes later.
• To cancel the alarm completely, press
or once or more until or icon
disappears.
» The alarm icon ( or ) appears if
the alarm timer is on and disappears
if it is off.
Tip
• The alarm volume is not adjustable, but will go up
gradually to gently wake you up.
• If FM radio is selected as alarm source, yet you are
listening to FM radio at the alarm time, buzzer alarm
will go off instead.
8 EN
AJ2000_93_UM_EN.indd 8 5/06/2017 3:09:07 PM
Page 11
6 Set sleep timer
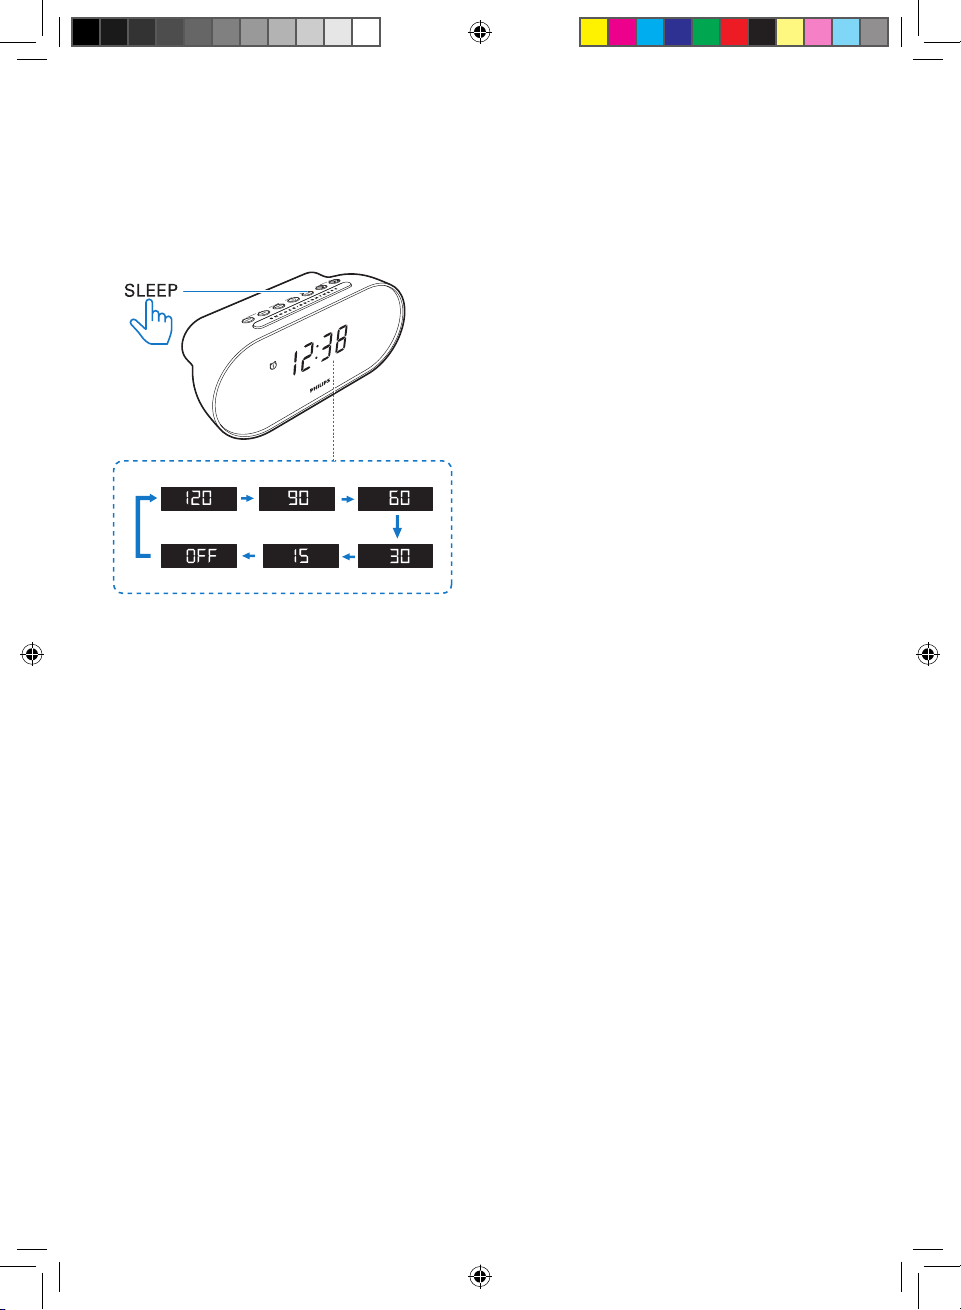
Sleep timer enables the radio to be
automatically switched off after a preset period.
1 Press SLEEP repeatedly to select the sleep
timer period (in minutes).
» The clock radio switches to standby
mode automatically after the preset
period.
To deactivate the sleep timer:
In sleep timer setting mode, press SLEEP
repeatedly until [OFF] appears.
9EN
AJ2000_93_UM_EN.indd 9 5/06/2017 3:09:07 PM
Page 12
7 Product
information
Note
• Product information is subject to change without prior
notice.
Rated Output Power 0.7W RMS @ 10%
THD
Acoustic Frequency
Response
Speaker Driver 1x1.5”,8Ω
Tuner Frequency Range FM: 87.5 - 108 MHz
Preset Station 20
Power Supply
(Power Adapter)
Battery 1 x CR2032 battery
Standby Power
Consumption
Dimensions - Main Unit
(W x H x D) 185 x 85 x 81 mm
Weight - Main Unit 0.3 kg
250 Hz - 13 kHz
Brand name: PHILIPS;
Model:
SW0500500-A07;
Input: 100-240V~,
50/60 Hz, 300 mA
Max;
Output: 5 V ,
500 mA;
for time/alarm
backup
<1 W
10 EN
AJ2000_93_UM_EN.indd 10 5/06/2017 3:09:07 PM
Page 13
8 Troubleshooting
Warning
• Never remove the casing of this device.
To keep the warranty valid, never try to repair
the system yourself.
If you encounter problems when using this
device, check the following points before
requesting service. If the problem remains
unsolved, go to the Philips Web page (www.
philips.com/support). When you contact Philips,
make sure that the device is nearby and the
model number and serial number are available.
No power
• Make sure that the AC power plug of the
clock radio is connected properly.
• Make sure that there is power at the AC
outlet.
No response from the clock radio
• Disconnect and reconnect the AC power
plug, then turn on the clock radio again.
Poor radio reception
• Keep the clock radio away from other
electronic devices to avoid radio
interference.
• Fully extend and adjust the position of the
pig-tail antenna.
Alarm does not work
• Set the clock/alarm correctly.
11EN
AJ2000_93_UM_EN.indd 11 5/06/2017 3:09:07 PM
Page 14
9 Notice
Anychangesormodicationsmadetothis
device that are not expressly approved by
Gibson Innovations may void the user’s
authority to operate the equipment.
Care of the environment
Disposal of your old product and battery
Your product is designed and manufactured
with high quality materials and components,
which can be recycled and reused.
Do not throw away the product with the
normal household waste at the end of its life,
buthanditinatanofcialcollectionpointor
recycling. By doing this, you help to preserve the
environment.
Environmental information
All unnecessary packaging has been omitted.
We have tried to make the packaging easy to
separate into three materials: cardboard (box),
paper pulp (buffer) and polyethylene (bags,
protective foam sheet.)
Your system consists of materials which can
be recycled and reused if disassembled by
a specialized company. Please observe the
local regulations regarding the disposal of
packaging materials, exhausted batteries and old
equipment.
12 EN
AJ2000_93_UM_EN.indd 12 5/06/2017 3:09:07 PM
Page 15
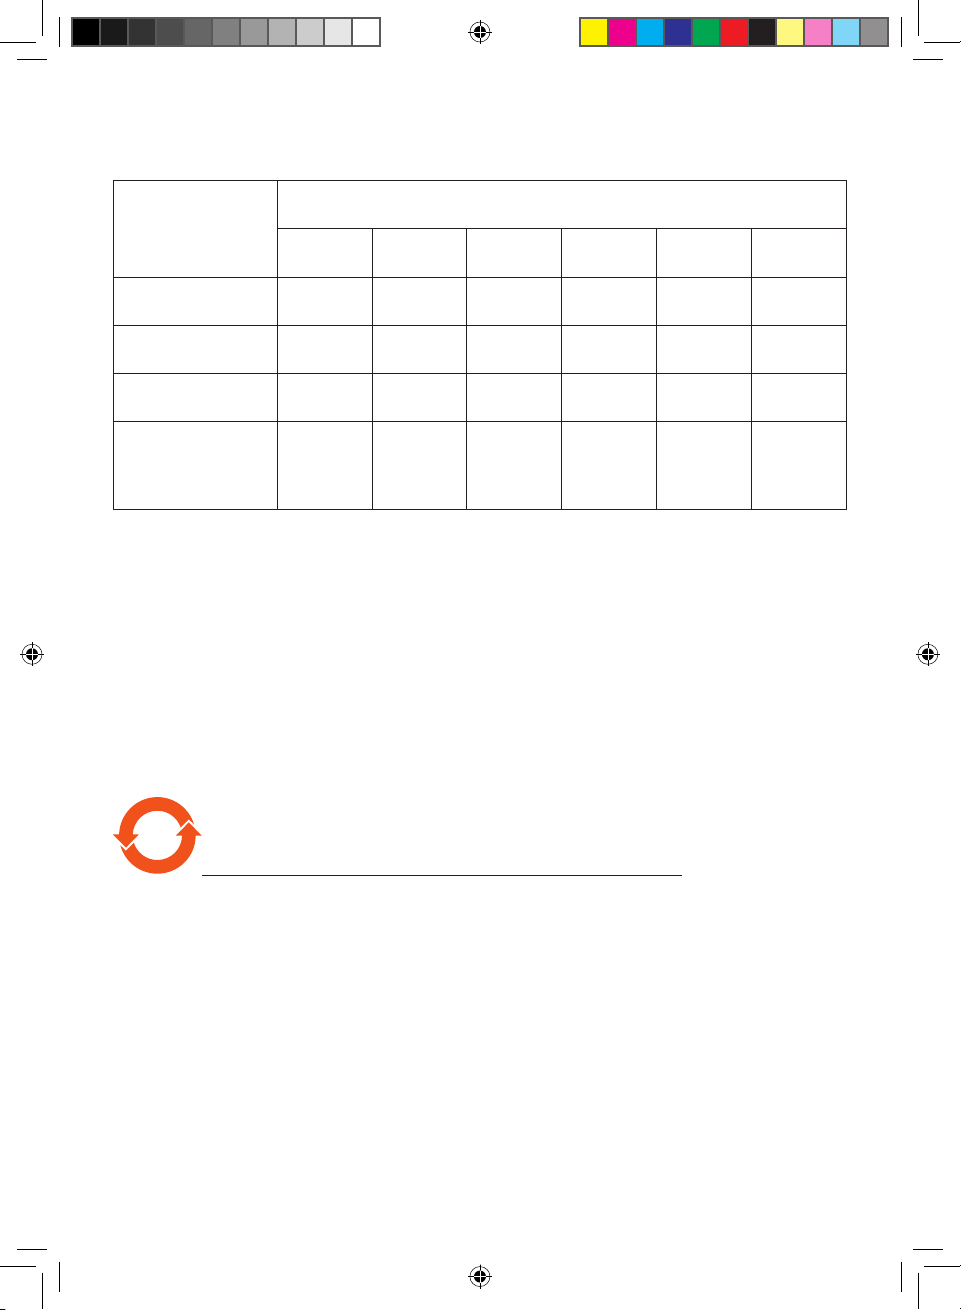
部件名称
Name of the
parts
Housing
外壳
Loudspeakers
喇叭单元
PWBs
电路板组件
Accessories
(cables)
附件(电源线,连
接线)
产品中有害物质的名称及含量
Names and Contents of Hazardous Substances
有害物质
Hazardous Substance
铅
(Pb)
O O O O O O
O O O O O O
X O O O O O
X O O O O O
汞
(Hg)
镉
(Cd)
六价铬
(Cr (VI))
多溴联苯
(PBB)
多溴二苯醚
(PBDE)
本表格依据
SJ/T 11364
的规定编制。
The table is formulated according to SJ/T 11364.
: 表示该有害物质在该部件所有均质材料中的含量均在
O
GB/T 26572
规定的限量要求以下。
O: Indicates that this hazardous substance contained in all of the
homogeneous materials for this part is below the limit requirement in
GB/T 26572.
×: 表示该有害物质至少在该部件的某一均质材料中的含量超出
×:
Indicates that this hazardous substance contained in at least one
GB/T 26572
规定的限量要求。
of the homogeneous materials used for this part is above the limit
requirement in GB/T 26572.
环保使用期限
此标识指期限(十年),电子电气产品中的有害物质在正常使用的条件下不会发生外泄或突变,
用户使用该电子电气产品不会对环境造成严重污染或对其人身、财产造成严重损害的期限。
Environmental Protection Use Period
This logo refers to the period (10 years) during which the hazardous
substances in electronic and electrical products will not leak or mutate so
that the use of these [substances] will not result in any severe environmental
pollution, any bodily injury or damage to any assets.
AJ2000_93_UM_EN.indd 13 5/06/2017 3:09:08 PM
Page 16
2017 © Gibson Innovations Limited. All rights reserved.
This product has been manufactured by, and is sold under the responsibility
of Gibson Innovations Ltd., and Gibson Innovations Ltd. is the warrantor in
relation to this product.
Philips and the Philips Shield Emblem are registered trademarks of Koninklijke
Philips N.V. and are used under license.
AJ2000_93_UM_V1.0
AJ2000_93_UM_EN.indd 14 5/06/2017 3:09:08 PM
 Loading...