

1 2
Control buttons
© 2019 Koninklijke Philips N.V.
All rights reserved.
4241 210 97864
AC5659
A B
C
Display panel
D
E
F
G
H
EN User manual 1
CS Příručka pro uživatele 19
HU Felhasználói kézikönyv 37
PL Instrukcja obsługi 57
RO Manual de utilizare 79
SK Príručka užívateľa 99
UK Посібник користувача 118

3
4
5
6
23
24
25
26
11
15
19
7
8
12
16
20
3’
9
13
17
21
3’
10
14
18
3’
22
3’
27
31
35
28
32
3’
29
33
3’
30
34
3’

English
Contents
1 Important 2
Safety 2
2 Your air purier 5
Product overview (g. a) 5
Controls overview (g. b) 5
3 Getting started 6
Installing the lters 6
Wi-Fi connection 6
4 Using the air purier 7
Understanding the air quality light 7
Turning on and o 8
Changing the Auto mode setting 8
Changing the fan speed 9
Using the light on/o function 9
Switching the display indicator 10
Setting the child lock 10
5 Cleaning 11
Cleaning schedule 11
Cleaning the body of the air
purier 11
Cleaning the air outlet cover 11
Cleaning the air quality sensor 11
Cleaning the pre-lter 12
6 Replacing the lters 13
Filter replacement indicator 13
Replacing the lters 13
Filter reset 14
7 Storage 14
8 Troubleshooting 15
9 Guarantee and service 17
Order parts or accessories 17
10 Notices 17
Electromagnetic elds (EMF) 17
Recycling 18
Notice 18
Simplied EU declaration of
conformity 18
Environmental friendly paper used. Thanks for your contribution to save trees.
1EN

1 Important
Safety
Read this user manual carefully before
you use the appliance, and save it for
future reference.
Danger
• Do not let water or any
other liquid or ammable
detergent enter the
appliance to avoid electric
shock and/or a re hazard.
• Do not clean the
appliance with water,
any other liquid, or a
(ammable) detergent to
avoid electric shock and/
or a re hazard.
• Do not spray any
ammable materials
such as insecticides or
fragrance around the
appliance.
Warning
• Check if the voltage
indicated on the
appliance corresponds to
the local power voltage
before you connect the
appliance.
• If the power cord is
damaged, you must have
it replaced by Philips, a
service center authorized
by Philips, or similarly
qualied persons in order
to avoid a hazard.
• Do not use the appliance
if the plug, the power cord,
or the appliance itself is
damaged.
• This appliance can be
used by children aged
from 8 years and above
and persons with reduced
physical, sensory or
mental capabilities or
lack of experience and
knowledge if they have
been given supervision or
instruction concerning use
of the appliance in a safe
way and understand the
hazards involved. Child
shall not play with the
appliance. Cleaning and
maintenance shall not be
made by children without
supervision.
• Do not block the air inlet
and outlet, e.g. by placing
items on the air outlet or
in front of the air inlet.
• Make sure that foreign
objects do not fall into the
appliance through the air
outlet.
2 EN

English
• Standard WiFi interface
based on 802.11b/g/n at
2.4 GHz with a maximum
output power of 31.62 mW
EIRP.
Caution
• This appliance is not
a substitute for proper
ventilation, regular
vacuum cleaning, or use
of an extractor hood or
fan while cooking.
• If the power socket used
to power the appliance
has poor connections,
the plug of the appliance
becomes hot. Make
sure that you plug the
appliance into a properly
connected power socket.
• Always place and use the
appliance on a dry, stable,
level, and horizontal
surface.
• Leave at least 20cm free
space behind and on both
sides of the appliance
and leave at least 30cm
free space above the
appliance.
• Do not place anything on
top of the appliance.
• Do not sit or stand on
the appliance. Sitting or
standing on the appliance
may lead to potential
injury.
• Do not place the
appliance directly below
an air conditioner to
prevent condensation
from dripping onto the
appliance.
• Make sure all lters
are properly installed
before you switch on the
appliance.
• Only use the original
Philips lters specially
intended for this
appliance. Do not use any
other lters.
• Combustion of the lter
may cause inreversible
human hazard and/or
jeopardize other lives. Do
not use the lter as fuel or
for similar purpose.
• Avoid knocking against
the appliance (the air inlet
and outlet in particular)
with hard objects.
• Always lift or move the
appliance by the handle
on back side of the
appliance.
3EN

• Do not insert your ngers
or objects into the air
outlet or the air inlet to
prevent physical injury
or malfunctioning of the
appliance.
• Do not use this appliance
when you have used
indoor smoke-type insect
repellents or in places
with oily residues, burning
incense, or chemical
fumes.
• Do not use the appliance
near gas appliances,
heating devices or
replaces.
• Always unplug the
appliance after use
and before cleaning,
or carrying out other
maintenance or replacing
the lters.
• Do not use the appliance
in a room with major
temperature changes,
as this may cause
condensation inside the
appliance.
• To prevent interference,
place the appliance at
least 2 meters away from
electrical appliances that
use airborne radio waves
such as TVs, radios, and
radio-controlled clocks.
• The appliance is only
intended for household
use under normal
operating conditions.
• Do not use the appliance
in wet surroundings or in
surroundings with high
ambient temperatures,
such as the bathroom,
toilet, or kitchen.
• The appliance does
not remove carbon
monoxide (CO) or radon
(Rn). It cannot be used
as a safety device in
case of accidents with
combustion processes
and hazardous chemicals.
• If you need to move the
appliance, disconnect the
appliance from the power
supply rst.
• Do not move the
appliance by pulling its
power cord.
• Always cleanse your
hands after changing the
lters.
4 EN
English
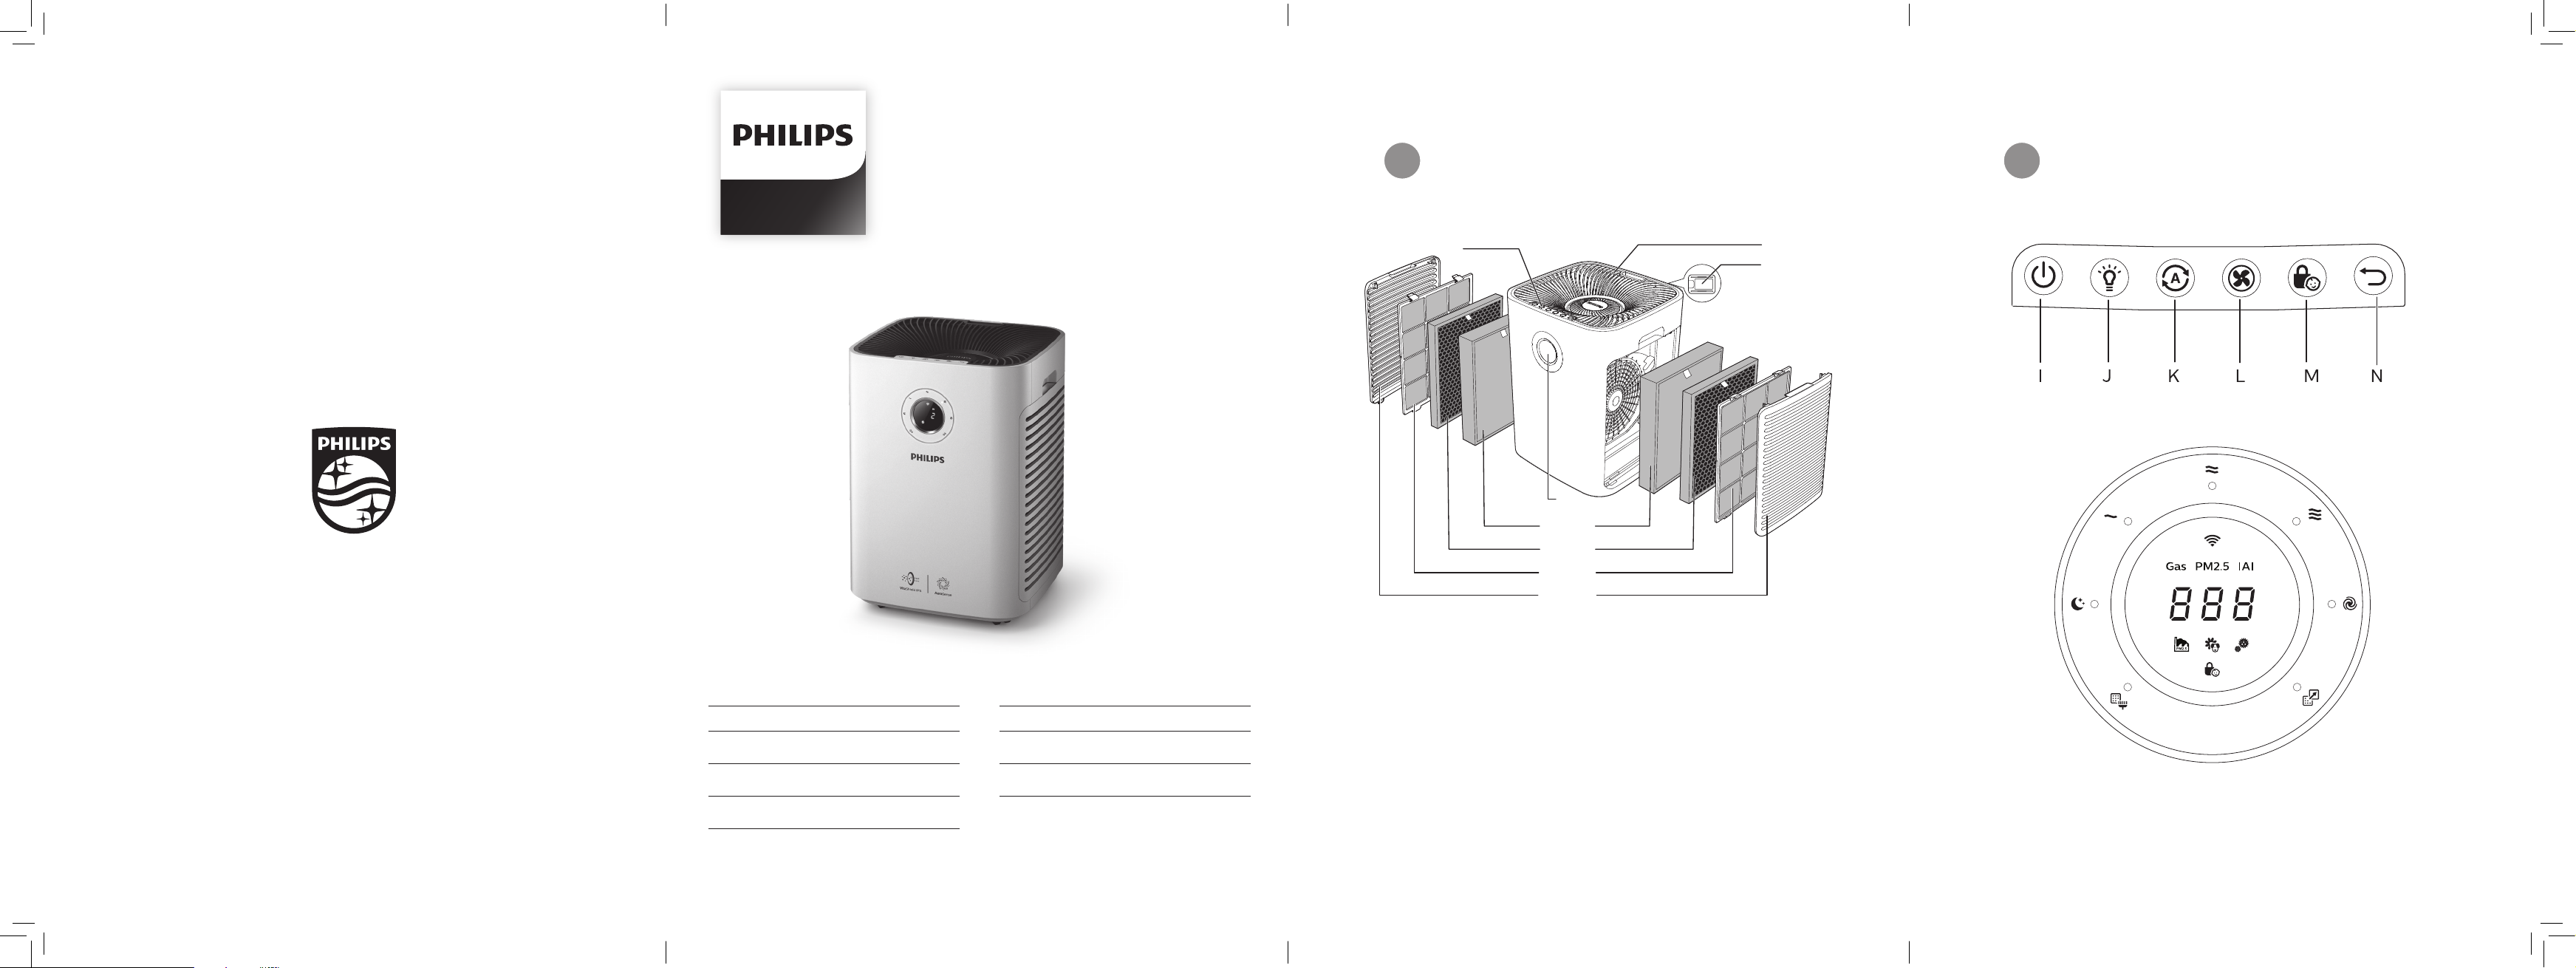
2 Your air purifier
Congratulations on your purchase, and
welcome to Philips!
To fully benet from the support that
Philips oers, register your product at
www.philips.com/welcome.
Controls overview
(g. b)
Control buttons
I Power on/o button
J Light on/o button
K Auto mode button
Product overview (g. a)
A Control buttons
B Air outlet cover
C Air quality sensor
D Display panel
NanoProtect lter Series 3
E
(FY5185)
NanoProtect lter Active Carbon
F
(FY5182)
G Pre-lter
H Side covers
L Fan speed button
M Child lock button
N Reset button
Display panel:
Sleep mode
Speed 1
Speed 2
Speed 3
Turbo
Filter replacement alert
Pre-lter cleaning alert
Wi-Fi indicator
Gas display
PM2.5 display
Indoor Allergen Index
Pollution mode
Allergen mode
Bacteria & Virus mode
Child lock indicator
5EN

3 Getting started
Installing the lters
8 Repeat the above steps and
assemble the lter for the other side
of the air purier.
9 Wash your hands thoroughly after
installing lters.
Note
• Make sure the air purier is unplugged
from the electrical outlet before
installing the lters.
• Make sure the side of the lter with the
tag is pointing towards you.
1 Pull the top part of the side panel to
remove it from the air purier
(g. c).
2 Press the two clips down (1) and pull
the pre-lter towards you (2)
(g. d).
3 Remove all lters (g. e).
4 Remove all packaging materials
from the lters (g. f).
5 Place the thick lter (FY5185) into
the air purier and then the thin
Active Carbon lter (FY5182). The
model numbers are shown on each
lter (g. g).
6 Attach the pre-lter back into the
air purier (g. h).
Note
• Make sure the side with the two clips
is pointing towards you, and that all
hooks of the pre-lter are properly
attached to the purier.
7 Reattach the front panel by pressing
the top part of the panel onto the
top of the air purier (1). Then, gently
push the panel against the body of
the air purier (2) (g. i).
Wi-Fi connection
Setting up the Wi-Fi connection
for the rst time
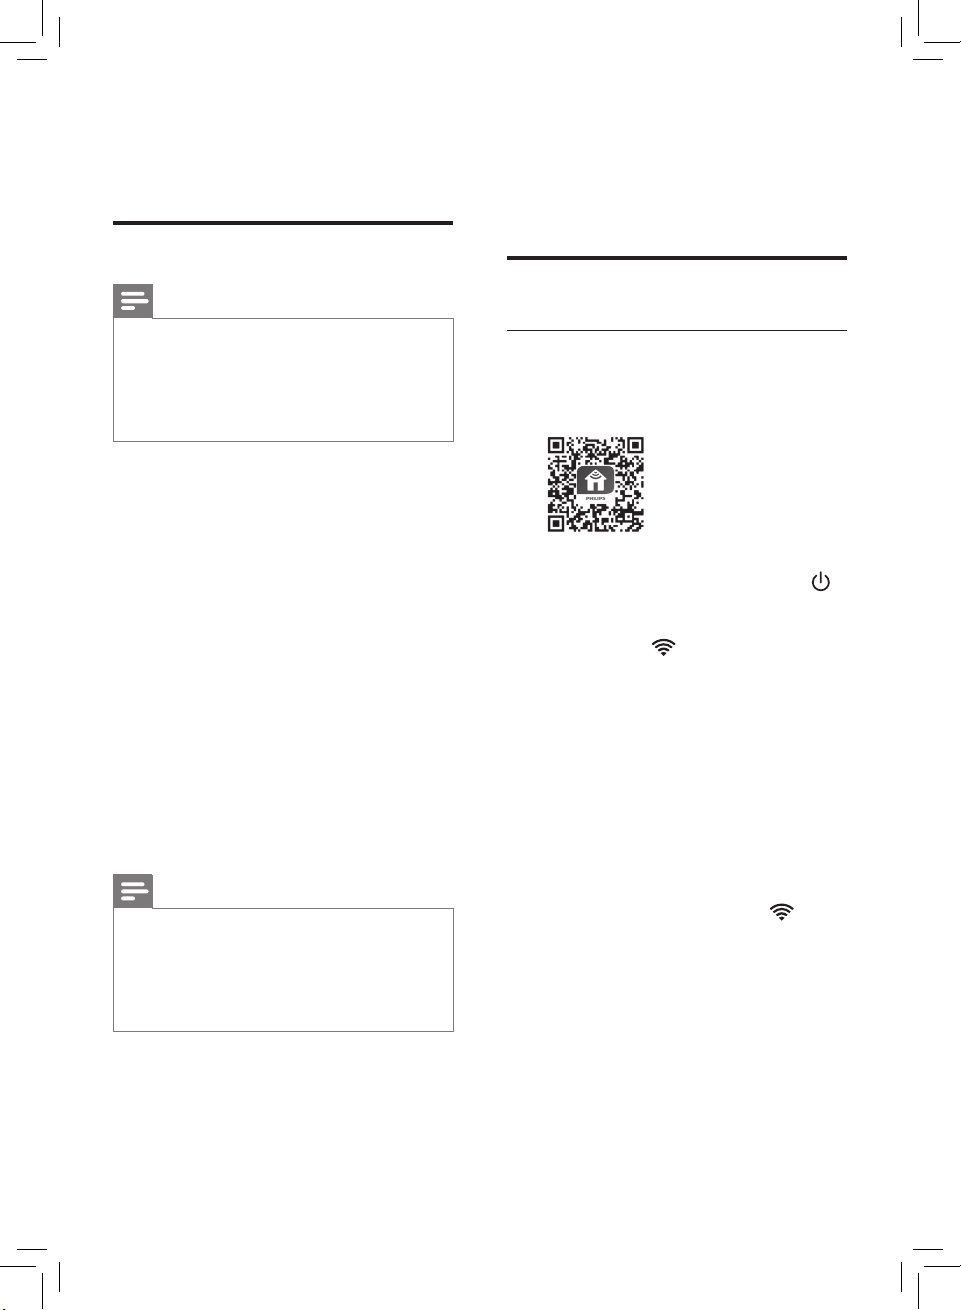
1 Download and install the Philips
"Clean Home+" app from the App
Store or Google Play.
2 Put the plug of the air purier in the
power socket and touch
on the air purier.
» The Wi-Fi indicator
orange for the rst time.
to turn
blinks
3 Make sure that your smartphone or
tablet is successfully connected to
your Wi-Fi network.
4 Launch the "Clean Home+" app and
click on "Connect a New Device"
or press the "+" button on the top
of the screen. Follow the onscreen
instructions to connect the air
purier to your network.
5 After the successful pairing and
connection, the Wi-Fi indicator
will light up white. If pairing
is not successful, consult the
troubleshooting section, or the
help section in the "Clean Home+"
App for extensive and up-to-date
troubleshooting tips.
6 EN
English
Note
• This instruction is only valid when
the air purier is being set up for the
rst time. If the network has changed
or the setup needs to be performed
again, consult section "Reset the Wi-Fi
connection" on page 7.
• If you want to connect more than
one air purier to your smartphone
or tablet, you have to do this one by
one. Complete the set up of one air
purier before you turn on the other air
purier.
• Make sure that the distance between
your smartphone or tablet and the air
purier is less than 10 m without any
obstructions.
• This App supports the latest versions
of Android and iOS. Please check
www.philips.com/cleanhome for the
latest update of supported operating
systems and devices.
Reset the Wi-Fi connection
4 Using the air
purifier
Understanding the air
quality light
PM2.5
level
≤12 Blue Good
13-35 Blue-Purple Fair
36-55 Purple-Red Poor
>55 Red Very poor
The air quality light automatically goes
on when the air purier is switched on,
and lights up all colors in sequence.
After approximately 30 seconds, the
air quality sensors select the color that
corresponds to the surrounding air
quality of airborne particles.
Air quality
light color
Air quality
level
Note
• This applies when the default network
to which your purier is connected has
changed.
• Reset the Wi-Fi connection when your
default network has changed.
1 Put the plug of the air purier in the
power socket and touch
on the air purier.
to turn
2 Touch and simultaneously for
3 seconds until you hear a beep.
» The air purier goes to pairing
mode.
» The Wi-Fi indicator
orange.
blinks
3 Follow the steps 4-5 in "Setting up
the Wi-Fi connection for the rst
time" section.
PM2.5
AeraSense sensing technology
accurately detects and quickly responds
to even the slightest particle change in
the air. It provides you with reassurance
with real-time PM2.5 feedback.
IAI
The professional-grade AeraSense
sensor detects the level of indoor air
allergen and with numerical feedback
from 1 to 12 the potential risk level of
indoor air allergens can be displayed. 1
indicates best air quality.
GAS
With an advanced as sensor, a display
ranging from L1 to L4 shows the density
level of potential harmful gases (incl.
VOC, odor, etc.) detected. L1 indicates
best air quality.
7EN
Turning on and o
Note
• Always place the air purier on a
stable, horizontal, and level surface
with the front of the unit facing away
from walls or furniture.
• For optimum purication performance,
close doors and windows.
• Keep curtains away from the air inlet or
air outlet.
1 Put the plug of the air purier in the
power socket.
2 Touch to switch on the air purier
(g. j).
» The air purier beeps.
» The air purier operates under
the Pollution mode by default.
» When the air purier is warming
up, "
screen. After measuring the
particulate matter only in the
air, the air purier shows the
PM2.5 level and operates in the
auto mode with
the screen (g. k).
» After 30 seconds, the air
purier shows the IAI level
on the screen. The air quality
sensor automatically selects
the appropriate air quality light
color.
" displays on the
displayed on
3 Touch and hold for 3 seconds to
switch o the air purier.
Note
Changing the Auto mode
setting
You can choose the Pollution mode
), Allergen mode ( ), or the
(
Bacteria & Virus mode ( ).
Pollution mode
The specially designed pollution
mode can eectively remove airborne
pollutants such as PM2.5.
• Touch the Auto mode button
select the Pollution mode (g. l).
» Auto (
screen.
) and display on the
Allergen mode
The extra-sensitive allergen mode
is designed to react to even a small
change in allergen levels in the
surrounding air.
• Touch the Auto mode button
select the Allergen mode (g. m).
» Auto (
screen.
) and display on the
Bacteria & Virus mode
The bacteria & virus mode boosts the
airow to quickly reduce bacteria &
viruses.
• Touch the Auto mode button
select the Bacteria & Virus mode
(g. n).
» Auto (
screen.
) and display on the
to
to
to
• If the air purier stays connected to
the electrical outlet after turning OFF,
the air purier will operate under the
previous settings when turned ON
again.
8 EN
English
Changing the fan speed
In addition to the Auto modes, there are
several fan speeds available.
When using the manual fan speed
settings, the purier will still monitor the
air quality, but it will not automatically
adjust the fan speed if it detects
changes in the air quality.
Turbo (t)
In turbo mode, the air purier operates
on the highest speed.
• Touch the fan speed button
select the turbo mode (
» The "
» The turbo speed indicator
" displays on the screen.
goes on.
to
) (g. q).
Sleep mode ( )
In sleep mode, the air purier operates
quietly at a very low speed.
• Touch the fan speed button
select the sleep mode (SL) (g. o).
» The "
screen.
» The sleep mode indicator
goes on.
" displays on the
to
Manual
• Touch the fan speed button
repeatedly to select the fan speed
you need (g. p):
(Speed 1)
(Speed 2)
(Speed 3)
Tips
• If the air quality light lights up blue,
it indicates that the air quality is
good, and you can select a lower fan
speed. On the other hand, if the air
quality light lights up red-purple or
red, it indicates that the air quality
is unhealthy, and you can select a
higher fan speed to purify the air more
quickly.
Using the light on/o
function
With the light dimming button, you can
switch on or o the air quality light,
the display screen and the function
indicator if desired.
1 Touch the light dimming button
once, the air quality light will be
dimmed.
2 Touch the light dimming button
again, the air quality light will go o.
3 Touch the light dimming button
for the third time, all lights will be on
again.
9EN

Switching the display
indicator
The air purier has three display
indicators, PM2.5 index, IAI index and
Gas level.
Note
• The air purier operates in PM2.5 index
by default.
1 Touch the light dimming button
for 3 seconds to switch to IAI display
mode (g. r) .
» The IAI indicator and the actual
IAI index display on the screen.
2 Touch the light dimming button
for 3 seconds again to switch to Gas
level display (g. s).
» The Gas indicator and the
actual Gas level display on the
screen.
3 Touch the light dimming button
for 3 seconds again to switch back
to PM2.5 display mode (g. t).
» The PM2.5 level displays on the
screen.
Setting the child lock
1
Touch and hold the child lock
button
child lock (g. u).
» The child lock icon
» When the child lock is on,
for 3 seconds to activate
displays
on the screen.
all the other buttons are not
responsive.
2 Touch and hold the child lock
button
deactivate child lock.
» The child lock icon
Note
• You can still control the appliance
through the App even child lock is
activated.
for 3 seconds again to
disappears.
Note
• It is possible that the air quality light
may still be red even if the PM2.5
index is very low. It's normal. This is
because that at least one of the index
( the IAI index or Gas level) is high that
turns the air quality light to red. The
appliance real-time displays the air
quality index with the highest risk.
10 EN

English
5 Cleaning
Cleaning the body of the
air purier
Note
• Always turn the air purier o and
unplug from the electrical outlet
before cleaning.
• Never immerse the air purier in water
or any other liquid.
• Never use abrasive, aggressive, or
ammable cleaning agents such as
bleach or alcohol to clean any part of
the air purier.
• Only the pre-lter is washable. The air
lters are not washable.
• Do not attempt to clean the lters or
air quality sensor with a vacuum.
Cleaning schedule
Frequency Cleaning method
Wipe the surface of
When
necessary
Every two
months
When the prelter cleaning
indicator
lights up and
F0 displays on
the screen
the appliance with
a soft dry cloth
Clean the air outlet
cover
Clean the air quality
sensor with a dry
cotton swab
Clean the pre-lter
Regularly clean the inside and outside
of the air purier to prevent dust from
collecting.
1 Use a soft, dry cloth to clean both
the interior and exterior of the air
purier.
2 The air outlet can also be cleaned
with a dry, soft cloth.
Cleaning the air outlet
cover
To unlock the air outlet cover, grab
1
the handle on the cover and pull
the cover up (g. v).
2 Clean the cover with a brush (g. w).
3 To reattach the cover, mount it onto
the top of the appliance rst, and
then push the side with the handle
towards the appliance (g. x).
Cleaning the air quality
sensor
Clean the air quality sensor every
2 months for optimal functioning of the
purier.
Note
• If the air purier is used in a dusty
environment, it may need to be
cleaned more often.
• If the humidity level in the room is
very high, condensation may develop
on the air quality sensor and the air
quality light may indicate a poorer air
quality even though the air quality is
actually good. If this occurs, clean the
air quality sensor or use the air purier
on a manual speed setting.
11EN

1 Switch o the air purier and unplug
from the power socket.
2 Clean the air quality sensor inlet and
outlet with a soft brush (g. y).
3 Open the air quality sensor cover
(g. z).
4 Clean the air quality sensor, the
dust inlet and the dust outlet with a
damp cotton swab (g. {).
5 Dry all parts thoroughly with a dry
cotton swab.
6 Reattach the air quality sensor cover
(g. |).
Cleaning the pre-lter
Clean the pre-lter when F0 is displayed
on the screen and the pre-lter cleaning
indicator
is on (g. }).
1 Switch o the air purier and unplug
from the power socket.
2 Pull the top part of the side panel to
remove it from the air purier
(g. c).
3 Press the two clips down (1) and pull
the pre-lter towards you (2)
(g. d).
4 If the pre-lter is very dirty, use a
soft brush to brush away the dust.
Then wash the pre-lter under
running tap water (g. ~).
5 Allow the pre-lter to air dry
thoroughly before placing back in
the air purier.
6 Put the pre-lter back into the air
purier (g. h).
Note
• To optimize the lifetime of the pre-lter,
make sure it air dries completely after
cleaning.
• Wash your hands after handling the lter.
• Make sure the side with the two clips is
pointing towards you, and that all hooks
of the pre-lter are properly attached to
the air purier.
7 To reattach the front panel, press the
top part of the panel onto the top of
the air purier (1). Then, gently push
the panel against the body of the air
purier (2) (g. i).
8 Put the plug of the air purier in the
power socket.
9 Touch the button to switch on the
appliance.
10 Touch and hold the reset button
for 3 seconds to reset the pre-lter
cleaning time.
11 Wash your hands thoroughly after
installing lters.
12 EN
English
6 Replacing the
filters
Filter replacement
indicator
This air purier is equipped with a
lter replacement indicator to make
sure that the air purication lter is in
optimal condition when the air purier
is operating. When the lters need to be
replaced, the lter code displays on the
screen (see Filter alert chart).
If the lters are not replaced in time,
the air purier will stop operating and
automatically lock to protect the air
quality in the room. Replace the lters
as soon as possible according to the
lter code.
Filter alert light
status
A3 displays on the
screen and the
lter replacement
alert
C7 displays on the
screen and the
lter replacement
alert
A3 and C7 display
on the screen
alternately and the
lter replacement
alert
goes on
goes on
goes on
Action
Replace the
NanoProtect
lter Series 3
(FY5185)
Replace the
NanoProtect lter
Active Carbon
(FY5182)
Replace both
lters
1 Turn o the air purier and unplug
from the power socket.
2 Take out the used air lter according
to the lter alert light status
displayed on the screen. Discard
used lters (g. ).
Replacing the lters
Note
• The air lters are not washable or
reusable.
• Always turn o the air purier and
unplug from the electrical outlet
before replacing the lters.
• Do not clean the lters with a vacuum.
• If the pre-lter is damaged, worn or
broken, do not use. Visit
www.philips.com/support or contact
the Consumer Care Center in your
country.
Note
• Do not touch the pleated lter surface,
or smell the lters as they have
collected pollutants from the air.
3 Remove all packaging material from
the new lters (g. f).
4 Place the new lters into the air
purier (g. g).
5 Put the plug of the air purier in the
power socket.
6 Touch and hold the reset button
for 3 seconds to reset the lter
lifetime counter.
13EN

Note
• Wash your hands after changing a lter.
• This air purier has no other user-
serviceable parts. For assistance,
contact the Consumer Care Center in
your country.
Filter reset
You can replace lters even if there is
no lter replacement code displayed on
the screen. After replacing a lter, you
need to reset the lter lifetime counter
manually.
1 Touch and simultaneously for
3 seconds to enter the lter reset
mode (g. €).
» Code (A3) of the NanoProtect
lter Series 3 displays on the
screen.
2 Touch and hold for 3 seconds to
force reset the lter lifetime counter
of the NanoProtect lter Series 3
(g. ).
3 Code (C7) of the NanoProtect lter
Active Carbon displays on the
screen after the lifetime counter of
the NanoProtect lter Series 3 has
been reset (g. ‚).
4 Touch and hold for 3 seconds to
force reset the lter lifetime counter
of the NanoProtect lter Active
Carbon and exit the lter reset
mode (g. ƒ).
7 Storage
1 Turn o the air purier and unplug
from the power socket.
2 Clean the air purier, air quality
sensor and pre-lter (see chapter
‘Cleaning’).
3 Let all parts air dry thoroughly
before storing.
4 Wrap the lters and pre-lters
separately in air tight plastic bags.
5 Store the air purier, lters and pre-
lters in a cool, dry location.
6 Always thoroughly wash hands after
handling lters.
14 EN

English
8 Troubleshooting
This chapter summarizes the most common problems you could encounter with the
appliance. If you are unable to solve the problem with the information below, contact
the Consumer Care Center in your country.
Problem Possible solution
The air purier
does not work
even though it is
switched on.
The airow that
comes out of
the air outlet is
signicantly weaker
than before.
The air quality
does not improve,
even though the air
purier has been
operating for a long
time.
The color of the air
quality light always
stays the same.
The air purier
produces a
unpleasant smell.
• Check if the top cover is properly installed.
• The lter replacement indicator has been on continuously
but you have not replaced the corresponding lter, and the
air purier is now locked. In this case, replace the lter and
reset the lter lifetime counter.
• The pre-lter is dirty. Clean the pre-lter (see chapter
"Cleaning").
• Check if the packing material is removed from the lters.
• One of the lters has not been placed in the air purier
or a lter is not placed properly. Make sure that all lters
are properly installed in the following order, starting with
the innermost lter: 1) NanoProtect lter Series 3 (FY5185);
2) NanoProtect lter Active Carbon (FY5182); 3) pre-lter.
• The air quality sensor is wet. Make sure that the air quality
sensor is clean and dry (see chapter "Cleaning").
• The air quality sensor is dirty. Clean the air quality sensor
(see chapter "Cleaning").
• The rst few times you use the appliance, it may produce
a plastic smell. This is normal. However, if the appliance
produces a burnt smell, contact your Philips dealer
or an authorized Philips service center. The lter may
produce smell after being used for a while because of
the absorption of indoor air. Remove the lter and place
it where it has direct sunlight and ventilation for several
hours. Re-install and try using it again. If the odor remains,
please replace the lter.
The air purier is
loud.
• If the air purier is too loud, change the fan speed to a
lower fan speed level. When using the air purier in a
bedroom at night, choose the sleep mode.
15EN
Problem Possible solution
The air purier still
indicates that I
need to replace a
lter, but I already
did.
Error code "E1"
displays on the
screeen.
Error codes "E2",
"E3", "E4" or "E5"
displays on the
screen.
Which App I should
download?
The Wi-Fi setup is
not successful.
• Perhaps you did not reset the lter lifetime counter. Plug
in the air purier, touch
touch and hold the reset button
to switch on the air purier, and
for 3 seconds (see
Filter reset section).
• The motor has malfunctions. Contact the Consumer Care
Center in your country.
• The sensor has malfunctions. Contact the Consumer Care
Center in your country.
• Download and install the Philips "Clean Home+" app from
the App Store or Google Play.
• If the router your purier is connected to is dual-band
and currently it is not connecting to a 2.4GHz network,
please switch to another band of the same router (2.4GHz)
and try to pair your purier again. 5GHz networks are not
supported.
• Web authentication networks are not supported.
• Check if the purier is within range of the Wi-Fi router. You
can try to locate the air purier closer to the Wi-Fi router.
• Check if the network name is correct. The network name is
case-sensitive.
• Check if the Wi-Fi password is correct. The password is
case-sensitive.
• Retry the setup with the instructions in section ‘Set up the
Wi-Fi connection when the network has changed’.
• The Wi-Fi connectivity can be interrupted by electromagnetic
or other interferences. Keep the appliance away from other
electronic devices that may cause interferences.
• Check if the mobile device is in airplane mode. Make sure
to have the airplane mode deactivated when connecting
to the Wi-Fi network.
• Consult the help section in the App for extensive and upto-date troubleshooting tips.
16 EN
English
9 Guarantee and
service
10 Notices
If you need information or if you have
a problem, please visit the Philips
website at www.philips.com or contact
the Philips Consumer Care Center in
your country (you nd its phone number
in the worldwide guarantee leaet). If
there is no Consumer Care Centre in
your country, go to your local Philips
dealer.
Order parts or
accessories
If you have to replace a part or want to
purchase an additional part, go to your
Philips dealer or visit
www.philips.com/support.
If you have problems obtaining the
parts, please contact the Philips
Consumer Care Center in your country
(you can nd its phone number in the
worldwide guarantee leaet).
Electromagnetic elds
(EMF)
This Philips appliance complies with all
applicable standards and regulations
regarding exposure to electromagnetic
elds.
Compliance with EMF
Koninklijke Philips N.V. manufactures
and sells many products targeted at
consumers, which, like any electronic
apparatus, in general have the ability
to emit and receive electromagnetic
signals.
One of Philips' leading Business
Principles is to take all necessary health
and safety measures for our products,
to comply with all applicable legal
requirements and to stay well within the
EMF standards applicable at the time of
producing the products.
Philips is committed to develop,
produce and market products that
cause no adverse health eects. Philips
conrms that if its products are handled
properly for their intended use, they
are safe to use according to scientic
evidence available today.
Philips plays an active role in the
development of international EMF
and safety standards, enabling Philips
to anticipate further developments in
standardization for early integration in
its products.
17EN

Recycling
This symbol means that this product
shall not be disposed of with normal
household waste (2012/19/EU).
Follow your country’s rules for the
separate collection of electrical and
electronic products. Correct disposal
helps prevent negative consequences
for the environment and human health.
Notice
App Store is a service mark of Apple Inc.
Google Play is a trademark of Google
Inc.
This Philips appliance and Clean
Home+ app applied multiple open
source softwares, Copies of open
source software license text used in this
product can be derived from websitewww.philips.com/cleanhome.
Simplied EU declaration
of conformity
Hereby, Philips Consumer Lifestyle B.V.
declares that the radio equipment type
AC5659 is in compliance with Directive
2014/53/EU. The full text of the EU
declaration of conformity is available at
the following internet address:
www.philips.com.
18 EN
Čeština
Obsah
1 Důležité 20
Bezpečnost 20
2 Vaše čistička vzduchu 23
Přehled výrobku (obr. a) 23
Přehled ovládacích prvků
(obr. b) 23
3 Začínáme 24
Instalace ltrů 24
Připojení Wi-Fi 24
4 Použití čističky vzduchu 25
Jak funguje kontrolka kvality
vzduchu 25
Vypnutí a zapnutí 26
Změna nastavení
automatického režimu 26
Změna rychlosti ventilátoru 27
Používání funkce zapnutí/
vypnutí osvětlení 27
Zapnutí ukazatele na displeji 28
Nastavení dětské pojistky 28
6 Výměna ltrů 31
Indikátor výměny ltru 31
Výměna ltrů 31
Resetování ltru 32
7 Uskladnění 32
8 Odstraňování problémů 33
9 Záruka a servis 35
Objednání dílů nebo doplňků 35
10 Upozornění 35
Elektromagnetická pole (EMP) 35
Recyklace 36
Oznámení 36
Zjednodušené EU prohlášení
o shodě 36
5 Čištění 29
Plán čištění 29
Čištění těla čističky 29
Čištění krytu pro výstup vzduchu 29
Čištění snímače kvality vzduchu 29
Čištění předltru 30
S použitím papíru šetrného k přírodě Děkujeme, že pomáháte chránit stromy
19CS

1 Důležité
Bezpečnost
Před použitím přístroje si pozorně
přečtěte tuto uživatelskou příručku a
uschovejte ji pro budoucí použití.
Nebezpečí
• Zamezte proniknutí
vody, jiné kapaliny nebo
hořlavého čisticího
prostředku do přístroje.
Předejdete tak úrazu
elektrickým proudem a/
nebo požáru.
• Přístroj nečistěte vodou,
jakoukoli jinou tekutinou
ani (hořlavým) čisticím
prostředkem. Předejdete
tak úrazu elektrickým
proudem a/nebo požáru.
• Kolem přístroje
nerozstřikujte žádné
hořlavé látky, jako jsou
například insekticidy nebo
parfémy.
Varování
• Dříve než přístroj připojíte
do sítě, zkontrolujte,
zda napětí uvedené
na přístroji souhlasí
s napětím v místní
elektrické síti.
20 CS
• Pokud by byl poškozen
napájecí kabel, musí
jeho výměnu provést
společnost Philips,
autorizovaný servis
společnosti Philips nebo
obdobně kvalikovaní
pracovníci, aby se předešlo
možnému nebezpečí.
• Pokud byste zjistili závadu
na zástrčce, na napájecím
kabelu nebo přímo na
přístroji, přístroj dále
nepoužívejte.
• Děti od 8 let věku a osoby
s omezenými fyzickými,
smyslovými nebo
duševními schopnostmi
nebo nedostatkem
zkušeností a znalostí
mohou tento přístroj
používat v případě, že
jsou pod dohledem
nebo byly poučeny
o bezpečném používání
přístroje a chápou rizika,
která mohou hrozit. Děti
si s přístrojem nesmí hrát.
Čištění a údržbu nesmí
provádět děti bez dozoru.
• Vyvarujte se zablokování
vstupu a výstupu vzduchu,
např. umístěním předmětů
na výstup vzduchu nebo
před vstup vzduchu.

Čeština
• Dbejte na to, aby do
přístroje skrz výstup
vzduchu nespadly cizí
předměty.
• Standardní rozhraní WiFi
založené na standardu
802.11b/g/n při 2,4 GHz s
maximálním výstupním
výkonem 31,62 mW EIRP.
Upozornění
• Tento přístroj nenahrazuje
řádné větrání, pravidelné
vysávání prachu nebo
použití digestoře či
ventilátoru během vaření.
• Pokud je v zásuvce
použité k napájení
přístroje špatný kontakt,
začne se zástrčka přístroje
přehřívat. Dbejte na to,
abyste přístroj zapojili do
řádně instalované síťové
zásuvky.
• Přístroj vždy pokládejte
a používejte na suchém,
stabilním, vyrovnaném a
vodorovném povrchu.
• Za přístrojem a po obou
jeho stranách ponechejte
alespoň 20 cm volného
prostoru a zároveň
ponechejte alespoň
30 cm volného prostoru
nad přístrojem.
• Na přístroj nic
nepokládejte.
• Na přístroj si nesedejte
ani na něj nestoupejte.
Sednutí nebo stoupnutí
si na přístroj může vést
k potenciálnímu zranění.
• Neumisťujte přístroj přímo
pod klimatizaci, zabráníte
tak tomu, aby na něj
kapala kondenzovaná
voda.
• Před zapnutím přístroje
se ujistěte, že všechny
ltry jsou správně
nainstalovány.
• Používejte pouze
originální ltry značky
Philips určené přímo pro
tento přístroj. Žádné jiné
ltry nepoužívejte.
• Spalování ltru může
způsobit nevratné
ohrožení lidského zdraví
nebo ohrožení života
jiných osob. Nepoužívejte
ltr jako palivo ani pro
podobný účel.
• Dbejte na to, abyste
do přístroje (zejména
do vstupu a výstupu
vzduchu) nenarazili
tvrdým předmětem.
21CS

• Přístroj vždy zvedejte
nebo s ním pohybujte
pomocí rukojeti na zadní
straně.
• Aby se zabránilo úrazu
nebo závadě přístroje,
nevkládejte do výstupu či
vstupu vzduchu prsty ani
předměty.
• Nepoužívejte tento
přístroj, pokud jste použili
repelent proti hmyzu
kouřového typu pro vnitřní
prostory nebo na místech
se zbytky oleje, hořící
vonnou tyčinkou nebo
chemickými výpary.
• Nepoužívejte přístroj
v blízkosti plynových
zařízení, topných zařízení
nebo krbů.
• Po použití a před čištěním,
prováděním údržby nebo
výměnou ltrů přístroj
vždy odpojte od zdroje
napájení.
• Nepoužívejte zařízení
v místnosti s velkými
změnami teploty, protože
by tím mohlo dojít
ke kondenzaci uvnitř
přístroje.
• Aby nedocházelo k rušení,
umístěte přístroj nejméně
2 metry od elektrických
zařízení využívajících
vzdušných rádiových vln,
např. televizorů, rádií a
rádiem řízených hodin.
• Přístroj je určen pouze
pro domácí použití za
běžných provozních
podmínek.
• Nepoužívejte přístroj ve
vlhkém prostředí nebo
v prostředí s vysokými
okolními teplotami,
například v koupelně, na
záchodě nebo v kuchyni.
• Přístroj neodstraňuje
oxid uhelnatý (CO) ani
radon (Rn). Není možné jej
použít jako bezpečnostní
zařízení v případě
nehod se spalovacími
procesy a nebezpečnými
chemikáliemi.
• Pokud potřebujete přístroj
přemístit, nejprve ho
odpojte od napájení.
• Nepohybujte přístrojem
tažením za napájecí kabel.
• Po výměně ltrů si vždy
umyjte ruce.
22 CS
Čeština
2 Vaše čistička
vzduchu
Gratulujeme k nákupu a vítáme vás
mezi uživateli výrobků společnosti
Philips!
Chcete-li plně využívat výhod, které
nabízí podpora společnosti Philips,
zaregistrujte svůj výrobek na adrese
www.Philips.com/welcome.
Přehled ovládacích prvků
(obr. b)
Tlačítka ovládání
I Tlačítko zapnutí/vypnutí
Tlačítko zapnutí/vypnutí
J
osvětlení
K Tlačítko automatického režimu
L Tlačítko rychlosti ventilátoru
M Tlačítko dětské pojistky
Přehled výrobku (obr. a)
A Tlačítka ovládání
B Kryt výstupu vzduchu
C Snímač kvality vzduchu
D Panel displeje
E Filtr NanoProtect řady 3 (FY5185)
Aktivní uhlíkový ltr NanoProtect
F
(FY5182)
G Předltr
H Boční kryty
N Tlačítko reset
Panel displeje:
Úsporný režim
Rychlost 1
Rychlost 2
Rychlost 3
Turbo
Výstraha k výměně ltru
Výstraha k vyčištění předltru
Ukazatel Wi-Fi
Zobrazení škodlivých plynů
Zobrazení režimu PM2.5
Index vnitřních alergenů
Režim Znečištění
Režim proti alergenům
Režim bakterie a viry:
Ukazatel dětské pojistky
23CS
3 Začínáme
Instalace ltrů
8 Výše zmíněné kroky zopakujte
a ltry umístěte i z druhé boční
strany čističky vzduchu.
9 Po instalaci ltrů si pečlivě umyjte
ruce.
Note
• Před instalací ltrů zkontrolujte, zda
je čistička vzduchu odpojená od
elektrické sítě.
• Zkontrolujte, že je strana ltru
s poutkem otočená směrem k vám.
1 Vytáhněte horní část bočního
panelu a sejměte panel z čističky
vzduchu (obr. c).
2 Zatlačte dva zaklapávací uzávěry
dolů (1) a vysuňte předltr směrem
k sobě (2) (obr. d).
3 Vyjměte všechny ltry (obr. e).
4 Odstraňte veškerý obalový materiál
z ltrů (obr. f).
5 Nejprve do čističky vzduchu
umístěte silný ltr (FY5185)
a poté slabý ltr s aktivním
uhlíkem (FY5182). Čísla modelu
jsou vyznačena na každém ltru
(obr. g).
6 Vložte předltr zpět do čističky
vzduchu (obr. h).
Note
• Zkontrolujte, že strana se dvěma
zaklapávacími uzávěry je otočená
směrem k vám a že všechny háčky
předltru jsou řádně připevněny
k čističce.
7 Přední panel znovu nasaďte
zatlačením horní části panelu na
vrchní část čističky vzduchu (1).
Potom jemně zatlačte panel do těla
čističky (2) (obr. i).
Připojení Wi-Fi
První nastavení Wi-Fi připojení
1 Stáhněte si a nainstalujte aplikaci
Philips “Clean Home+” z obchodu
App Store nebo Google Play.
2 Zapojte zástrčku čističky vzduchu
do zásuvky a stisknutím tlačítka
čističku zapněte.
» Ukazatel Wi-Fi při prvním
spuštění
oranžově zabliká.
3 Zkontrolujte, zda je smartphone
nebo tablet úspěšně připojen k síti
Wi-Fi.
4 Spusťte aplikaci “Clean Home+” a
klikněte na “Připojit nové zařízení”
nebo stiskněte tlačítko “+” v horní
části obrazovky. Postupujte podle
pokynů na obrazovce a připojte
čističku vzduchu k vaší síti.
5 Po úspěšném spárování a navázání
připojení se ukazatel Wi-Fi
rozsvítí bílým světlem. V případě,
že párování neproběhne úspěšně,
podívejte se do části věnované
řešení potíží v aplikaci “Clean
Home”, kde jsou uvedeny podrobné
a aktuální tipy k odstraňování
problémů.
24 CS

Čeština
Note
• Tyto pokyny jsou určeny pouze pro
první nastavování čističky vzduchu.
Pokud měníte síť nebo je nutné
přístroj znovu nastavit, podívejte se do
části
“Resetování připojení Wi-Fi” na
straně 25.
• Pokud chcete ke svému smartphonu
nebo tabletu připojit více čističek
vzduchu, je nutné připojovat jedno
zařízení po druhém. Dokončete
nastavení jedné čističky vzduchu
předtím, než zapnete jinou čističku.
• Vzdálenost mezi smartphonem či
tabletem a čističkou vzduchu musí
být menší než 10 m a mezi zařízeními
nesmí být překážky.
• Tato aplikace podporuje nejnovější
verze systémů Android a iOS.
Na stránkách www.philips.com/
cleanhome najdete nejnovější
aktualizaci podporovaných operačních
systémů a zařízení.
Resetování připojení Wi-Fi
Note
• Tento postup platí v případě změny
sítě, ke které je čistička připojená.
• Resetujte připojení Wi-Fi v případě
nové výchozí sítě.
1 Zapojte zástrčku čističky vzduchu
do zásuvky a stisknutím tlačítka
čističku zapněte.
2 Současně stiskněte tlačítka a
na dobu 3 sekund, dokud se neozve
pípnutí.
» Čistička vzduchu přejde do
režimu párování.
» Ukazatel Wi-Fi
zabliká.
oranžově
3 Postupujte podle kroků 4–5 v části
“První nastavení Wi-Fi připojení”.
4 Použití čističky
vzduchu
Jak funguje kontrolka
kvality vzduchu
Barva
Úroveň
PM2.5
≤12 Modrá Dobrý
13-35
36-55
>55 Červená
Kontrolka kvality vzduchu se
automaticky zapne při zapnutí čističky
a postupně rozsvítí všechny barvy.
Přibližně po 30 sekundách zvolí snímač
kvality vzduchu barvu, která odpovídá
kvalitě okolního vzduchu.
kontrolky
kvality
vzduchu
Modronachová
Nachovočervená
PM2.5
Detekční technologie AeraSense přesně
detekuje i tu nejmenší změnu obsahu
částic ve vzduchu a rychle na ni reaguje.
Dá vám jistotu v podobě zpětné vazby
PM2.5 v reálném čase.
IAI
Snímač profesionální úrovně AeraSense
zjistí úroveň vnitřních alergenů a díky
číselné zpětné vazbě se škálou od 1
do 12 je pak možné zobrazit jejich
potenciální riziko. Číslo 1 ukazuje
nejvyšší kvalitu vzduchu.
Úroveň
kvality
vzduchu
Přijatelný
Špatný
Velmi
špatný
25CS

Škodlivé plyny
Pomocí snímače AS zobrazí displej
se škálou L1 až L4 úroveň hustoty
nalezených potenciálně škodlivých
plynů (včetně těkavých organických
chemikálií, zápachu atd.). L1 ukazuje
nejvyšší kvalitu vzduchu.
Vypnutí a zapnutí
3 Stiskem a podržením tlačítka na
3 sekundy čističku vzduchu vypněte.
Note
• Když zůstane čistička po vypnutí
připojená k elektrické síti, bude
po opětovném zapnutí pracovat
v předchozím nastavení.
Note
• Čističku vzduchu vždy umisťujte
na stabilní, horizontální a rovný
povrch tak, aby přední část jednotky
směřovala pryč od zdí a nábytku.
• Pro optimální čisticí výkon zavřete
dveře a okna.
• Ke vstupu nebo výstupu vzduchu by se
neměly dostat závěsy.
1 Zapojte zástrčku čističky vzduchu
do síťové zásuvky.
2 Stisknutím tlačítka čističku
zapněte (obr. j).
» Čistička vzduchu zapípá.
» Ve výchozím nastavení je
čistička vzduchu spuštěná v
režimu znečištění.
» Když se čistička zahřívá, na
displeji se zobrazí značka
“
”. Po změření množství
částic ve vzduchu čistička
vzduchu zobrazí úroveň PM2.5
a funguje v automatickém
režimu, přičemž na obrazovce
se zobrazuje
» Po 30 sekundách se
zobrazí na displeji čističky
hladina IAI. Snímač kvality
vzduchu automaticky vybere
odpovídající barvu pro kvalitu
vzduchu.
(obr. k).
Změna nastavení
automatického režimu
Můžete si vybrat z režimů znečištění
), Alergeny ( ) a Bakterie a viry
(
( ).
Režim Znečištění
Speciálně navržený režim proti
znečištění dokáže efektivně odstraňovat
poletující nečistoty na úrovni PM2.5.
• Stisknutím tlačítka automatického
režimu
(obr. l).
Režim proti alergenům
Mimořádně citlivý režim proti alergenům
je navržený tak, aby reagoval i na malé
změny v úrovni alergenů v okolním
vzduchu.
• Stisknutím tlačítka automatického
režimu
(obr. m).
vyberte režim znečištění
» Na displeji se zobrazí symboly
Auto (
» Na displeji se zobrazí symboly
Auto (
) a .
vyberte režim Alergeny
) a .
26 CS

Čeština
Režim Bakterie a viry
Režim proti bakteriím a virům zvýší
průtok vzduchu, čímž se rychle sníží
množství bakterií a virů ve vzduchu.
• Stisknutím tlačítka automatického
režimu
a viry (obr. n).
vyberte režim Bakterie
» Symboly Auto (
zobrazí na displeji.
) a se
Změna rychlosti
ventilátoru
K automatickým režimům je navíc
k dispozici i několik rychlostí ventilátoru.
Při použití manuálního nastavení
rychlosti ventilátoru bude čistička
i nadále sledovat kvalitu vzduchu,
ale v případě zjištění změny v kvalitě
vzduchu rychlost ventilátoru
automaticky nezmění.
Režim spánku ( )
V režimu spánku čistička pracuje
potichu při velmi nízké rychlosti.
• Stisknutím tlačítka rychlosti
ventilátoru
(SL) (obr. o).
» Na displeji se zobrazí zpráva
“
» Ukazatel režimu spánku
stále aktivní.
Manuální
• Opakovaným stisknutím tlačítka
rychlosti ventilátoru vyberte
požadovanou rychlost ventilátoru
(obr. p):
(Rychlost 1)
(Rychlost 2)
(Rychlost 3)
vyberte režim spánku
”.
je
Tipy
• Jestliže se kontrolka kvality vzduchu
rozsvítí modře, znamená to, že je
kvalita vzduchu dobrá a vy můžete
nastavit nižší rychlost ventilátoru.
Pokud se ovšem kontrolka kvality
rozsvítí purpurově nebo červeně,
znamená to, že je kvalita vzduchu
nízká a vy můžete nastavit vyšší
rychlost ventilátoru, aby se vzduch
rychleji pročistil.
Turbo (t)
V režimu turbo pracuje čistička na
nejvyšší rychlost.
• Stisknutím tlačítka rychlosti
ventilátoru
(
) (obr. q).
» Na displeji se zobrazí zpráva “ ”.
» Ukazatel rychlosti turbo
stále aktivní.
vyberte režim turbo
je
Používání funkce
zapnutí/vypnutí
osvětlení
Pomocí tlačítka ztlumení osvětlení
můžete v případě potřeby zapnout
nebo vypnout kontrolku kvality vzduchu,
displej a kontrolku funkcí.
1 Jedním stisknutím tlačítka ztlumení
osvětlení
kvality vzduchu.
se ztmaví kontrolka
2 Opětovným stisknutím tlačítka
ztlumení osvětlení
kvality vzduchu vypne.
se kontrolka
3 Po třetím stisknutí tlačítka ztlumení
osvětlení
všechna světla.
se znovu rozsvítí
27CS

Zapnutí ukazatele na
displeji
Čistička má tři různé ukazatele: Index
PM2.5, index vnitřních alergenů (IAI) a
index úrovně škodlivých plynů.
Note
• Ve výchozím nastavení je čistička
vzduchu spuštěná v režimu znečištění.
1 Pokud chcete přepnout na režim
zobrazení IAI, stiskněte tlačítko
ztlumení osvětlení
(obr. r).
» Ukazatel indexu vnitřních
alergenů (IAI) a jeho skutečná
hodnota se zobrazí na displeji.
na 3 sekundy
2 Pokud chcete přejít do režimu
zobrazení úrovně výparů, znovu
stiskněte na 3 sekundy tlačítko pro
ztlumení světel
» Ukazatel úrovně výparů a její
skutečná hodnota se zobrazí na
displeji.
(obr. s).
3 Pokud se chcete přepnout zpět
na index PM2.5, stiskněte znovu
tlačítko ztlumení osvětlení
3 sekundy (obr. t).
» Na obrazovce je uvedena
hladina PM2.5.
na
Note
• Je možné, že kontrolka kvality světla
bude stále svítit červeně, přestože
bude index PM2.5 velmi nízký. To
je běžné. Děje se to, protože má
minimálně jeden ze dvou dalších
indexů (IAI a úroveň výparů)
vysokou úroveň a kvalita vzduchu
je tak označena červeně. Přístroj tak
v reálném čase ukazuje úroveň kvality
vzduchu u indexu, který představuje
nejvyšší riziko.
Nastavení dětské
pojistky
1
Stiskněte tlačítko dětské pojistky
a jeho podržením na 3 sekundy
aktivujte dětskou pojistku (obr. u).
» Na displeji se zobrazí ikona
dětské pojistky
» Když je dětská pojistka zapnutá,
žádná ostatní tlačítka nereagují.
.
2 Opětovným stisknutím tlačítka
dětské pojistky
na 3 sekundy deaktivujte dětskou
pojistku.
» Ikona dětské pojistky
Note
• Přístroj můžete ovládat
prostřednictvím aplikace, i když je
dětská pojistka aktivovaná.
a jeho podržením
zmizí.
28 CS
 Loading...