

A
B
C
AC4231
Original instruction by Philips
1
2
D
IAI
Gas
PM2.5
1
E
F
© 2021 Philips Domestic Appliances Holding B.V.
All rights reserved.
Tussendiepen 4 a, 9206AD Drachten, The Netherlands
3000.064.2216.1 (21/05/2021)
EN User manual 1
DA Brugervejledning 17
DE Benutzerhandbuch 33
ES Manual del usuario 51
FI Käyttöopas 68
FR Mode d’emploi 84
IT Manuale utente 101
NL Gebruiksaanwijzing 117
NO Brukerhåndbok 134
PT Manual do utilizador 150
SV Användarhandbok 167
3
PM2.5
Gas
Clean surface
of
long press
to reset.
4
5
6
22
23
25
Filter
cleaning completed.
7
8
IAI
PM2.5
Gas
1
9
10
Speed 1
26
Filter has been replaced.
27
IAI
PM2.5
Gas
1
IAI
PM2.5
Gas
1
Change lter
Change lter
then long
then long
press to
press to
reset lter
reset lter
+
3s
11
Turbo Mode
15
12
16
PM2.5
IAI Gas
2
13
17
Filter status
100%
14
18
IAI
PM2.5
IAI Gas
2
3s
19
20
IAI
PM2.5
Gas
1
lter and
21

English
Contents
1 Important ��������������������������������������������������������������������������������������� 2
Safety ������������������������������������������������������������������������������������������������������������������������������ 2
Electromagnetic elds (EMF) ���������������������������������������������������������������������������������4
Recycling ����������������������������������������������������������������������������������������������������������������������� 4
Simplied EU declaration of conformity ����������������������������������������������������������� 5
2 Your air purier �����������������������������������������������������������������������������5
Product overview (Fig a) ��������������������������������������������������������������������������������������� 5
Controls overview (Fig b) ��������������������������������������������������������������������������������������5
3 Getting started ������������������������������������������������������������������������������6
Installing the lter ������������������������������������������������������������������������������������������������������6
Understanding Wi-Fi indicator ����������������������������������������������������������������������������� 6
Wi-Fi connection ������������������������������������������������������������������������������������������������������� 7
4 Using the air purier ��������������������������������������������������������������������8
Understanding the air quality light ���������������������������������������������������������������������8
Turning on and o ������������������������������������������������������������������������������������������������������9
Changing the day mode setting ���������������������������������������������������������������������������9
Changing the night mode setting ������������������������������������������������������������������������9
Switching the display indicator ���������������������������������������������������������������������������10
Using the light on/o function �������������������������������������������������������������������������� 10
Checking the lter status ���������������������������������������������������������������������������������������10
5 Cleaning and maintenance ������������������������������������������������������ 10
Cleaning schedule �����������������������������������������������������������������������������������������������������11
Cleaning the body of the air purier �������������������������������������������������������������������11
Cleaning the particle sensor ����������������������������������������������������������������������������������11
Cleaning the surface of the lter �������������������������������������������������������������������������12
Replacing the lter ���������������������������������������������������������������������������������������������������12
Filter reset ��������������������������������������������������������������������������������������������������������������������13
6 Storage ������������������������������������������������������������������������������������������13
7 Troubleshooting ������������������������������������������������������������������������� 14
8 Guarantee and service ���������������������������������������������������������������16
Order parts or accessories ������������������������������������������������������������������������������������ 16
1EN

1 Important
Safety
Read this user manual carefully before you use the appliance, and save it for future reference�
To ensure the best performance, please ensure your purier is upgraded to the latest version�
You can do this upgrade via the Clean Home+ app�
Danger
• Do not clean the appliance with water, any other liquid, or a
(ammable) detergent, nor let them enter the appliance, to avoid
electric shock and/or a re hazard�
• Do not spray any ammable materials such as insecticides or fragrance
around the appliance�
Warning
• Check if the voltage indicated on the appliance corresponds to the
local power voltage before you connect the appliance�
• Avoid placing the power cord from trac area and arrange near the
place where will not be tripped over�
• If the power cord is damaged, you must have it replaced by Philips, a
service center authorized by Philips, or similarly qualied persons in
order to avoid a hazard�
• Do not use the appliance if the plug, the power cord, or the appliance
itself is damaged�
• This appliance can be used by children aged from 8 years and above
and persons with reduced physical, sensory or mental capabilities or
lack of experience and knowledge if they have been given supervision
or instruction concerning use of the appliance in a safe way and
understand the hazards involved� Children under 8 years old should not
approach the appliance without adult’s supervision�
• Children shall not play with the appliance�
• Cleaning and maintenance shall not be made by children without
supervision�
• Do not block the air inlet and outlet, e�g� by placing items on the air
outlet or in front of the air inlet�
2 EN

English
• Make sure that foreign objects do not fall into the appliance through
the air outlet�
• Do not heat up lter or appliance, to avoid device damage or re hazard�
• Do not spray any liquid on lter for cleaning, it may damage internal
structure of lter�
• Standard WiFi interface based on 802�11b/g/n at 2�4 GHz with a
maximum output power of 31�62 mW EIRP�
Caution
• This appliance is not a substitute for proper ventilation, regular vacuum
cleaning, or use of an extractor hood or fan while cooking�
• Always place and use the appliance on a dry, stable, level, and
horizontal surface�
• Leave at least 20cm free space around the appliance and leave at least
30cm free space above the appliance�
• Do not sit or stand on the appliance� Do not place anything on top of
the appliance�
• Do not place the appliance directly below an air conditioner to prevent
condensation from dripping onto the appliance�
• Wear mask and gloves when cleaning lter surface and/or replacing
lter�
• When disposing the lter, please seal the lter into a disposable bag
bag and follow the advice of your local health authorities for handling
potentially infected surfaces�
• Only use the original Philips lters specially intended for this appliance�
Do not use any other lters�
• Combustion of the lter may cause irreversible human hazard and/
or jeopardize other lives� Do not use the lter as fuel or for similar
purpose�
• Avoid knocking against the appliance (the air inlet and outlet in
particular) with hard objects�
• Do not insert your ngers or objects into the air outlet or the air inlet to
prevent physical injury or malfunctioning of the appliance�
• If appliance is blocked, please bring the appliance to Philips, a service
center authorized by Philips, or similarly qualied person service�
3EN
• Do not use this appliance when you are smoking indoor, or you have
used indoor insect repellents, disinfectant, or in places with oily
residues, burning incense, or chemical fumes�
• Do not use the appliance near gas appliances, heating devices or
replaces�
• Always unplug the appliance when you want to move, clean appliance,
replace the lter or carry out other maintenance�
• The appliance is designed to be used in commercial area�It is intended
for indoor use under normal operation condition�
• Do not use the appliance in wet surroundings or in surroundings with
high humidity or high ambient temperatures�
• The appliance does not remove carbon monoxide (CO) or radon (Rn)� It
cannot be used as a safety device in case of accidents with combustion
processes and hazardous chemicals�
• The recommended temperature for using the device is from 5°C to
45°C, relative humidity level is ≤85%� The device may stop working
or get damaged if not following the recommended temperature and
humidity level�
• The recommended temperature range for device storage is from -20°C
to 55°C� The device will be damaged if stored in extreme climate out of
range�
• Air puriers only serve as a part of virus preventive plan, they are not
the solution alone against a potential viral transmission�
• The noise emission sound pressure level is below 70dB(A)�
Electromagnetic elds (EMF)
This Philips appliance complies with all applicable standards and regulations regarding
exposure to electromagnetic elds�
Recycling
This symbol means that this product shall not be disposed of with normal household
waste (2012/19/EU)�
Follow your country’s rules for the separate collection of electrical and electronic products�
Correct disposal helps prevent negative consequences for the environment and human
health�
4 EN
English
Simplied EU declaration of conformity
Hereby, DAP B�V� declares that the radio equipment type AC4231 is in compliance with
Directive 2014/53/EU� The full text of the EU declaration of conformity is available at the
following internet address: www�philips�com�
2 Your air purifier
Congratulations on your purchase of air cleaner AC4231�
To fully benet from the support that Philips oers, register your product at
www�philips�com/welcome�
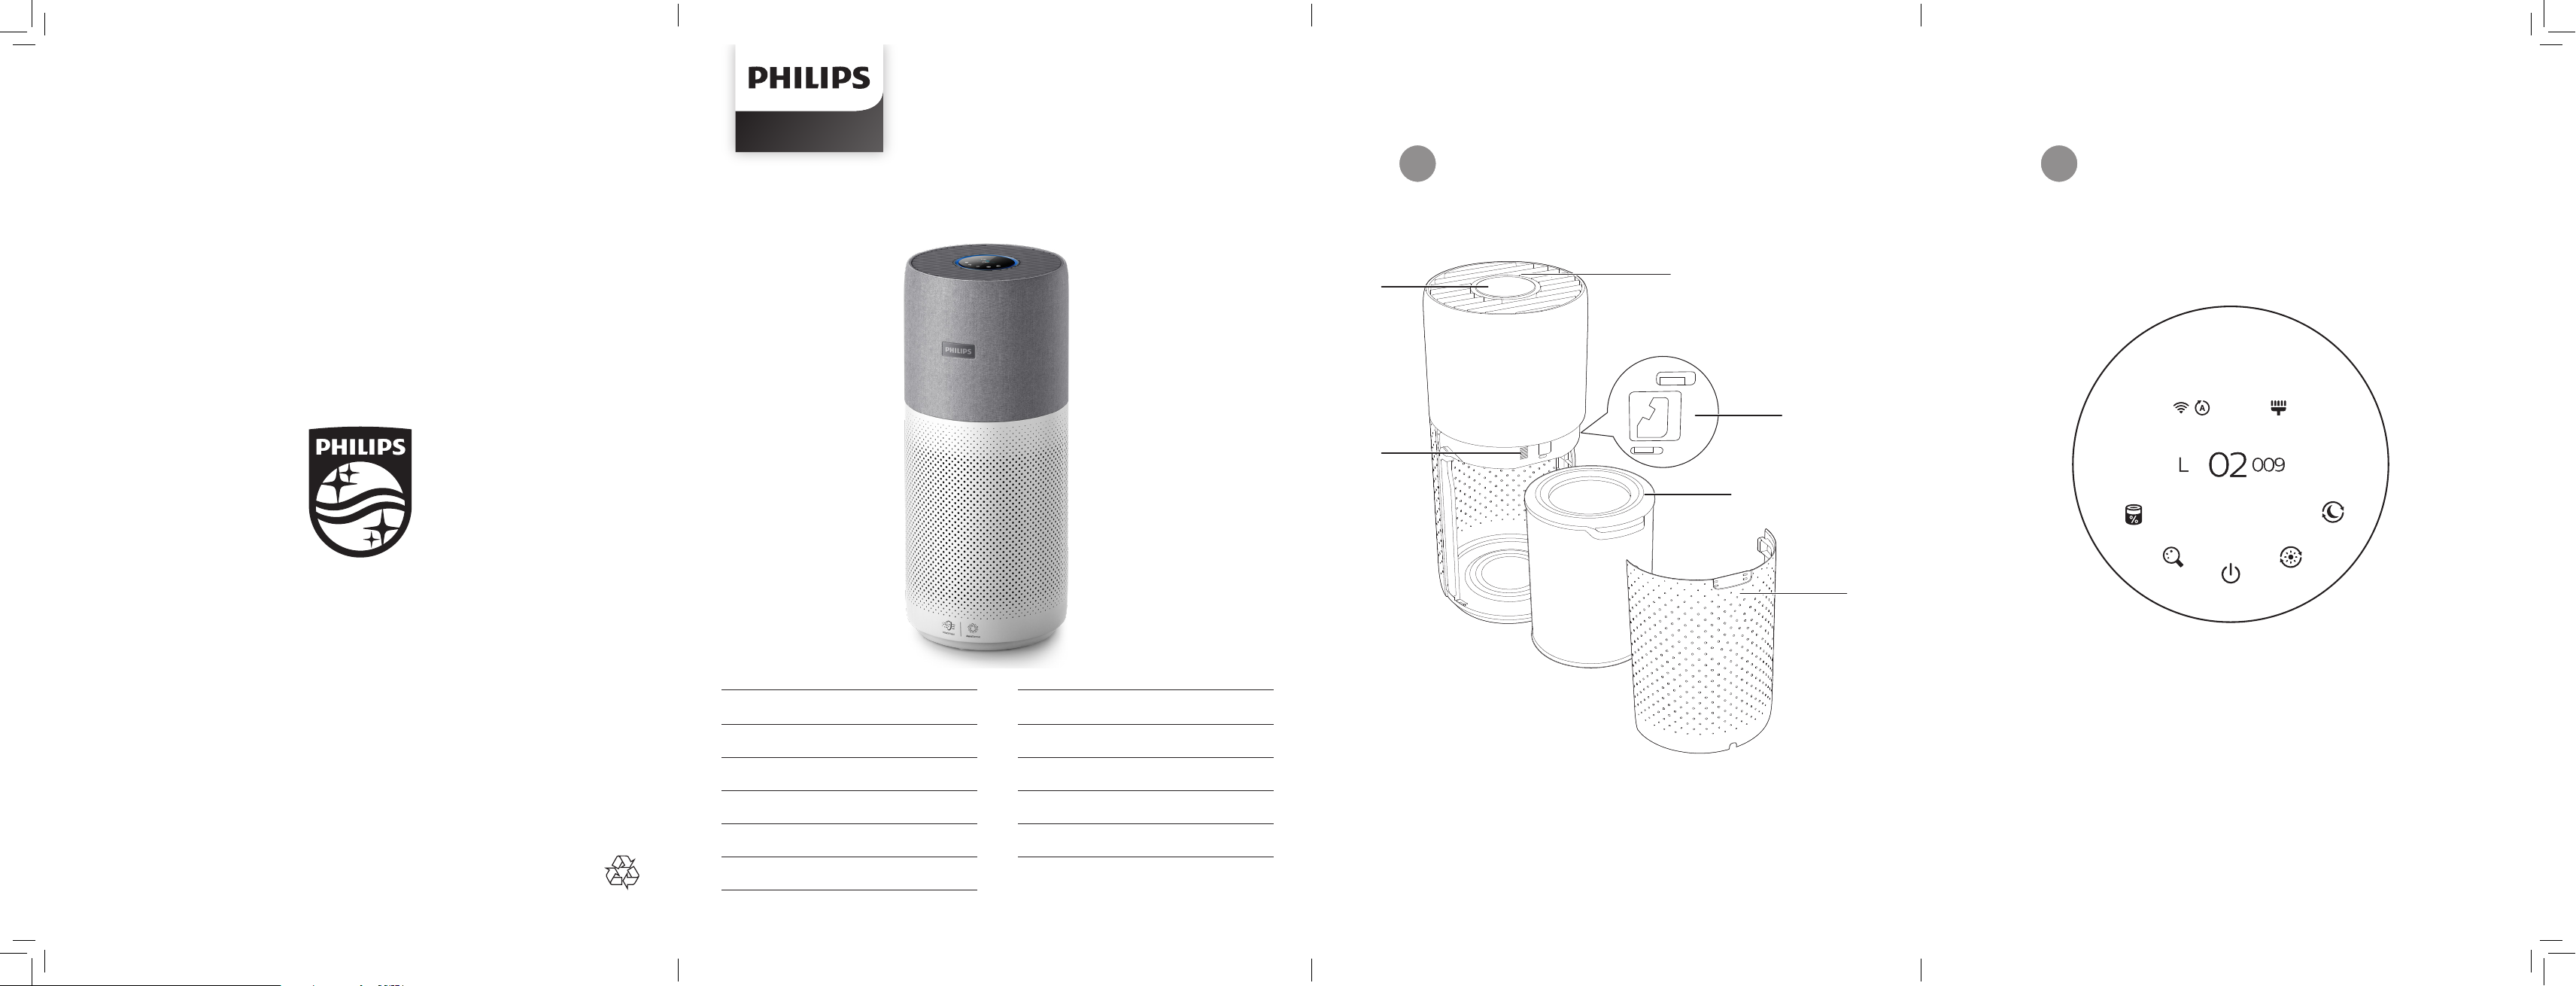
Product overview (Fig a)
A Control panel
B Gas sensor
C Air outlet
D Particle sensor
E NanoProtect lter Series 3 (FY4440/30)
F Back cover
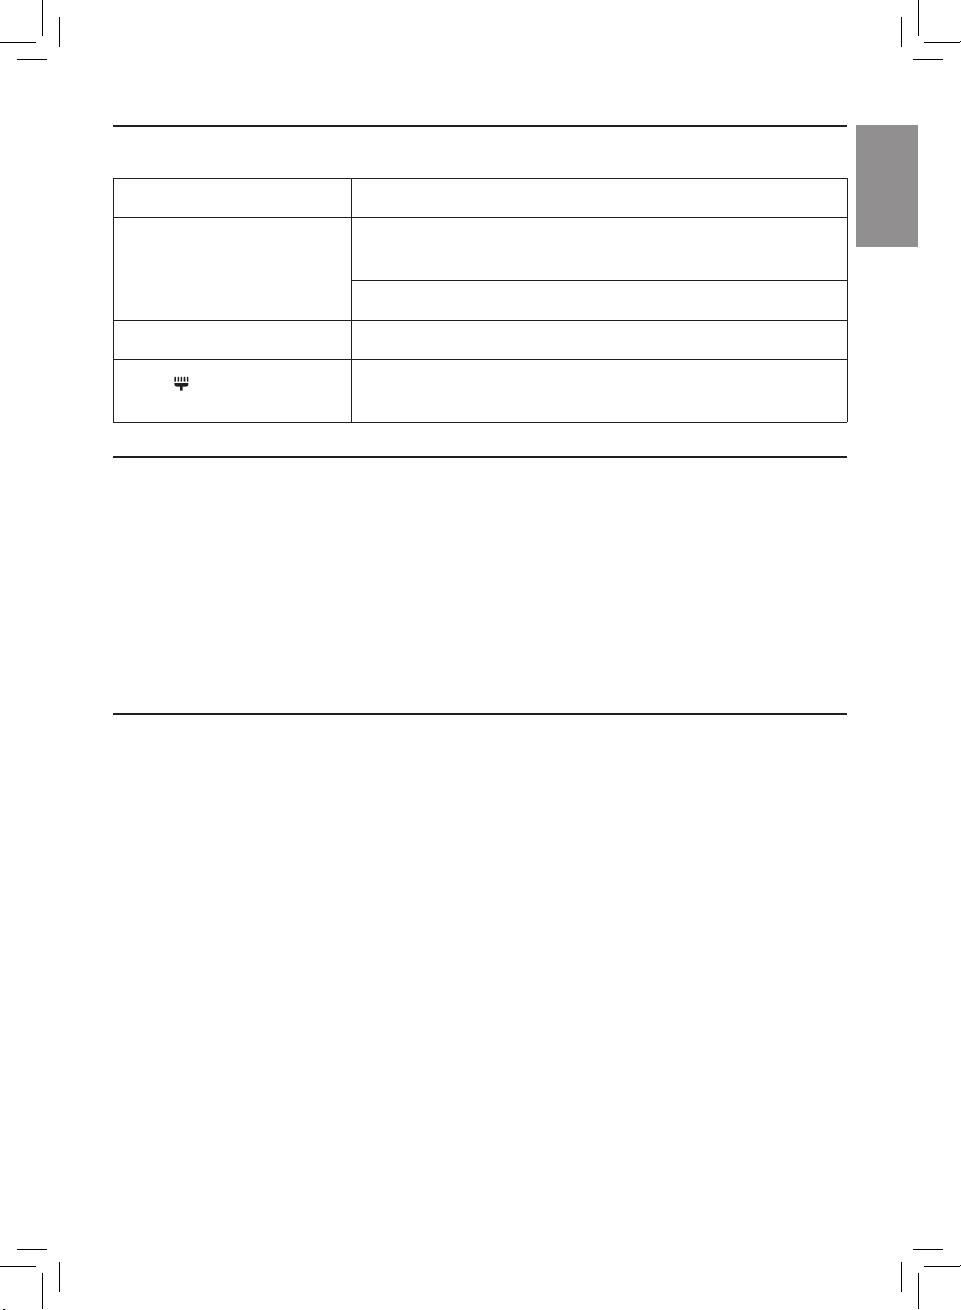
Controls overview (Fig b)
Control buttons
Filter status/reset button
Power on/o button Day mode button
Night mode button
Display switch/Light on/light o
button
5EN
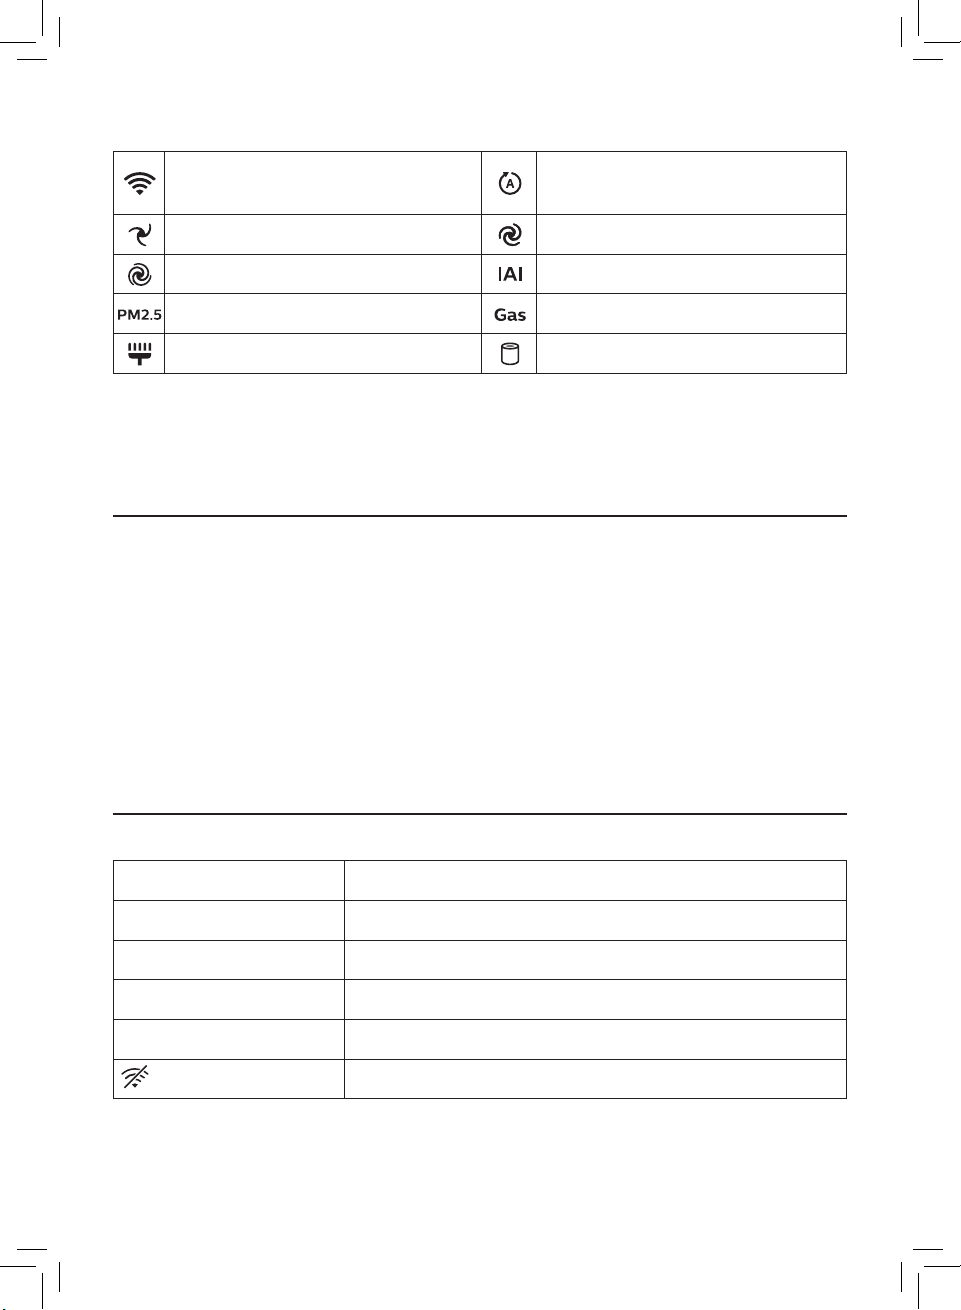
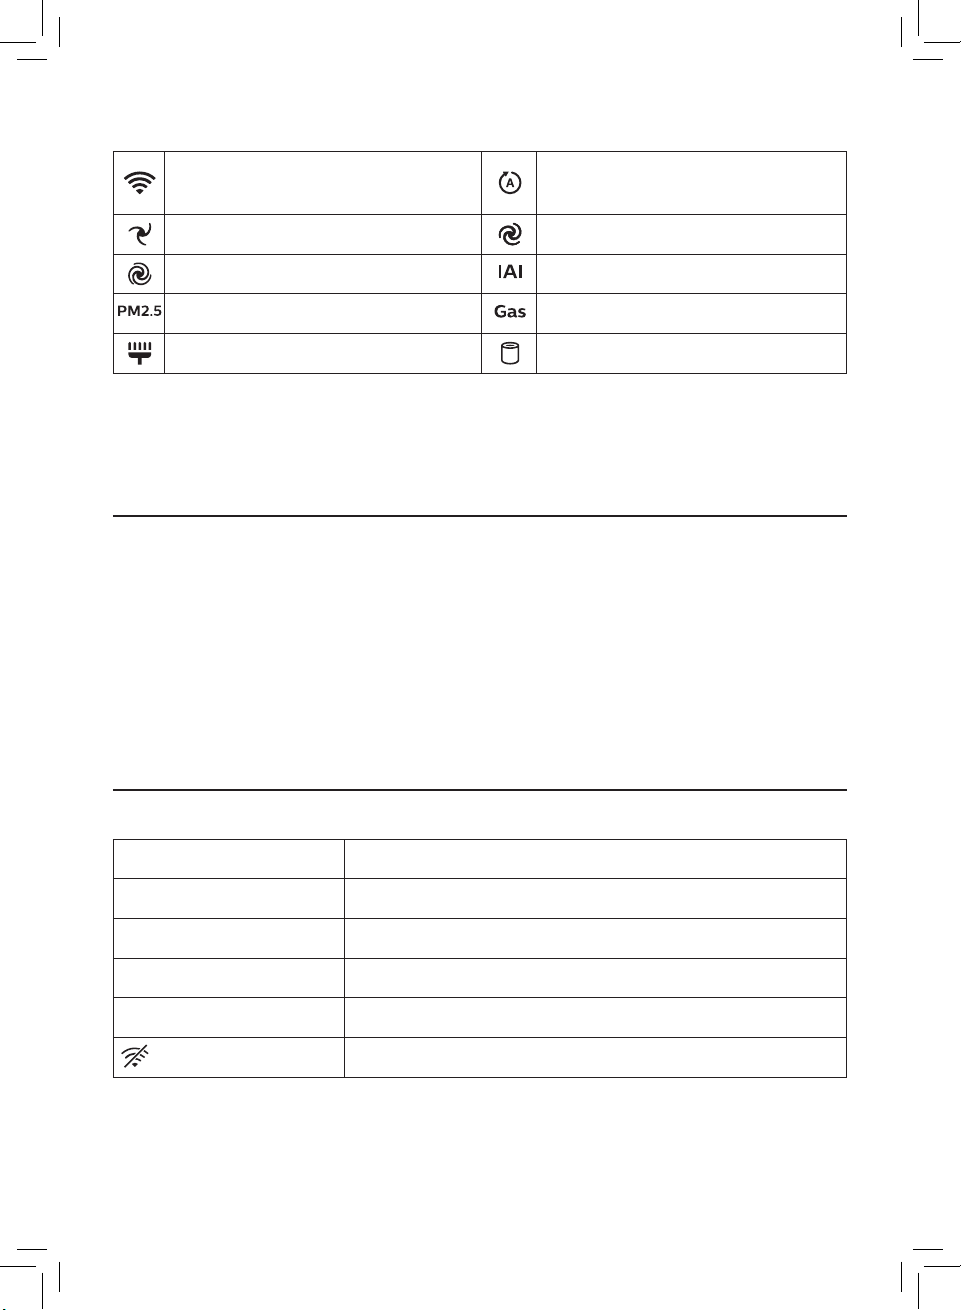
Display panel
Wi-Fi indicator
Manual speed 1 Manual speed 2
Turbo mode Indoor Allergen Index display
PM2�5 display Gas pollution display
Filter cleaning alert Filter replacement alert
Auto mode (day)/
Allergy Sleep mode (night)
3 Getting started
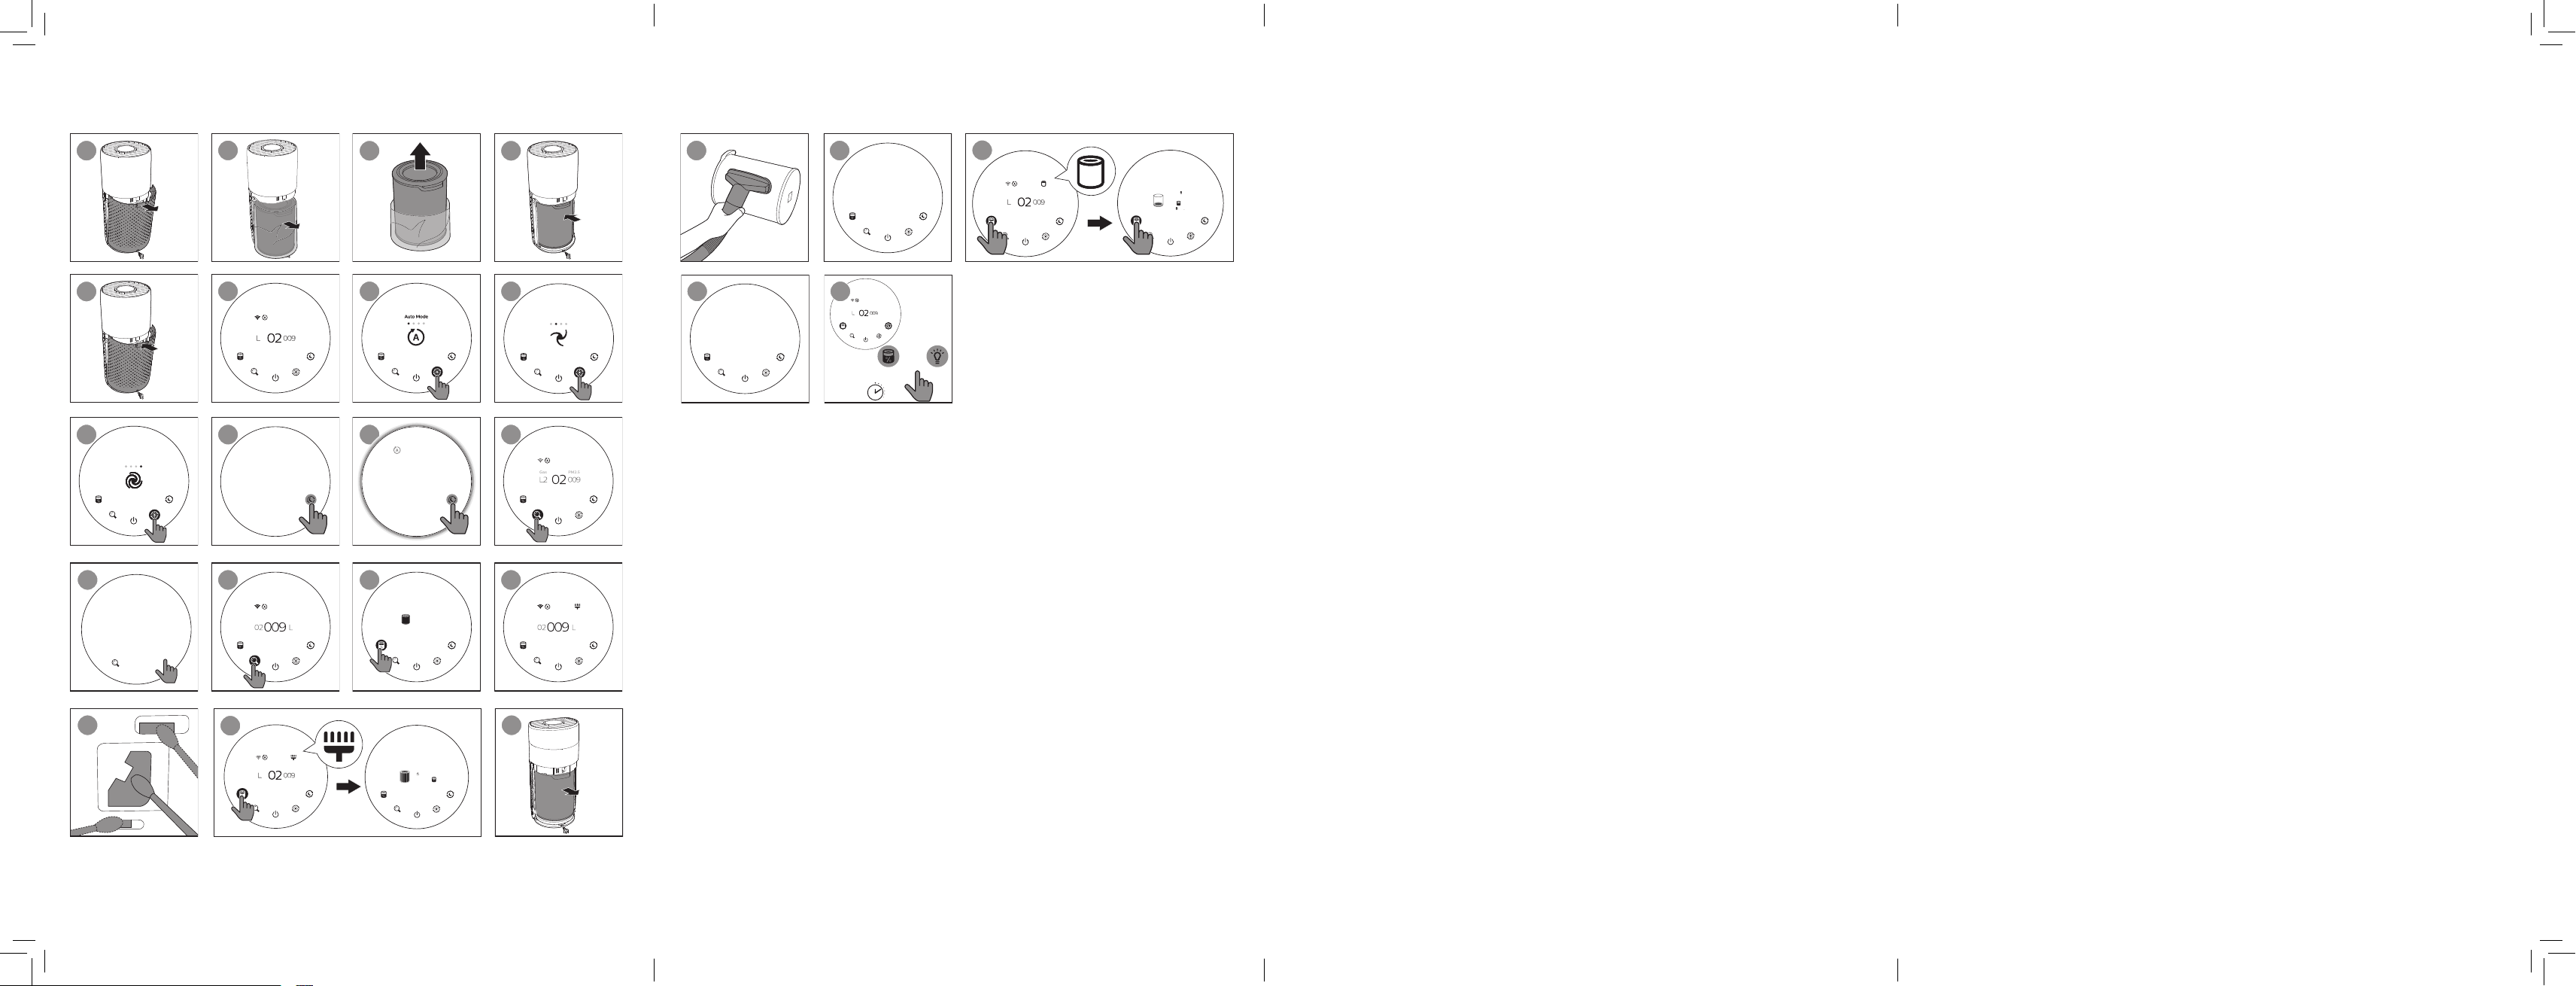
Installing the lter
Remove all packaging of the lter before rst use�
Note: Make sure the air purier is unplugged from the electrical outlet before installing the
lter�
1 Pull the back cover and remove it from the appliance (g c)�
2 Pull the lter from the appliance (g d)�
3 Remove all packaging materials of the air purication lter (g e)�
4 Put the lter back into the appliance (g f)�
5 Reattach the back cover (g g)�
Understanding Wi-Fi indicator
Wi-Fi icon status Wi-Fi connection status
Blink in orange Connecting to the smartphone
Stable in orange Connected to the smartphone
Blink in white Connecting to the server
Stable in white Connected to the server
Wi-Fi function disabled
6 EN

English
Wi-Fi connection
Note:
• Corporate/Enterprise networks (e�g� certicates, network proles) are not supported� We
recommend setting up the Philips Air Puriers on a dedicated network created for IoT
devices or WPA2-Personal networks�
• Conguration details are provided in the Clean Home+ app (e�g� Mac address) to help
set-up on managed networks�
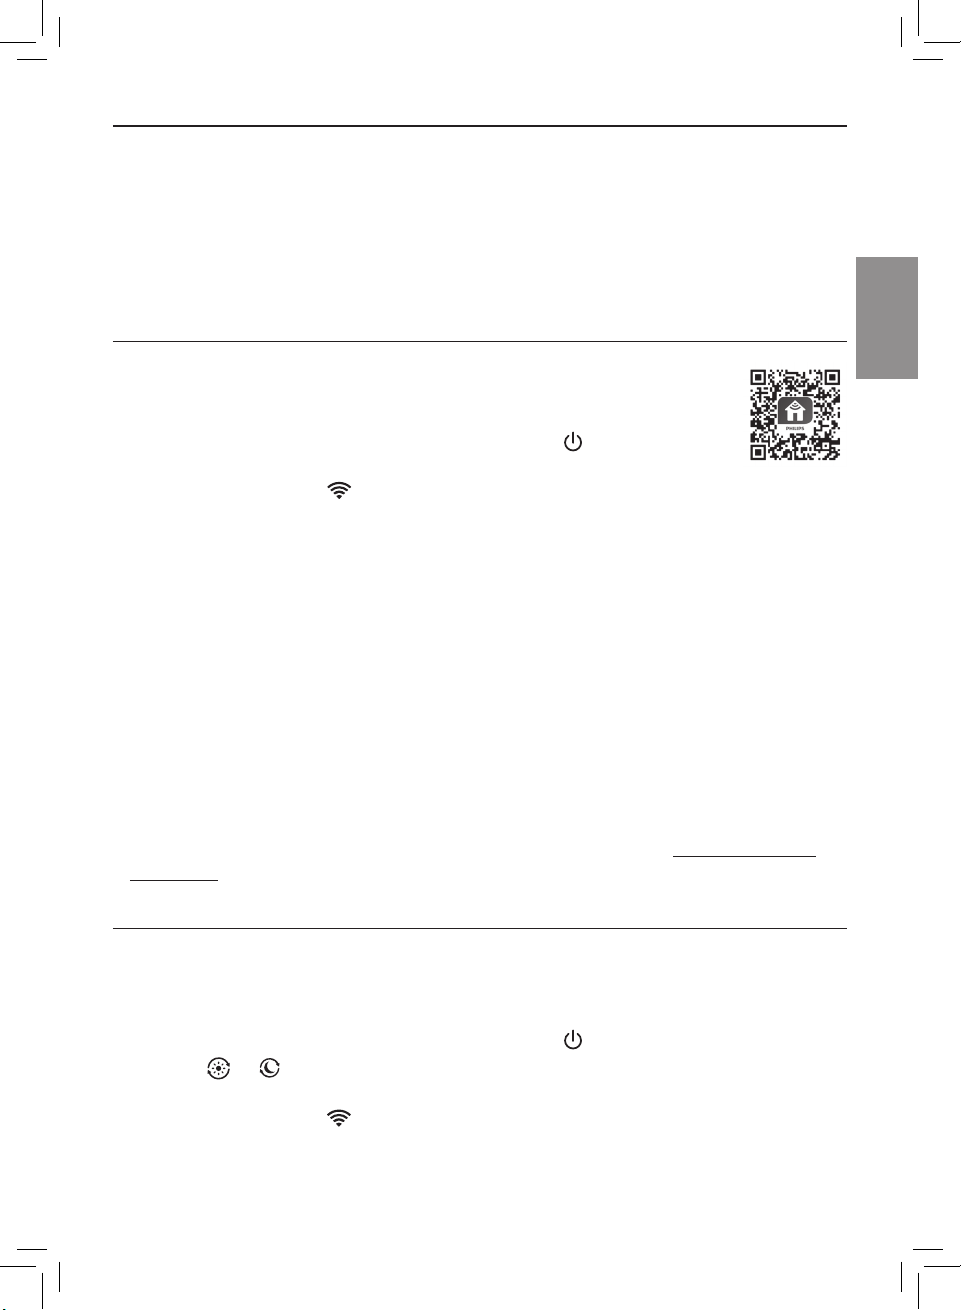
Setting up the Wi-Fi connection for the rst time
1 Download and install the Philips “Clean Home+” app from the App Store or
Google Play�
2 Put the plug of the air purier in the power socket and touch to turn on
the air purier�
» The Wi-Fi indicator blinks orange for the rst time�
3 Make sure that your smartphone or tablet is successfully connected to your Wi-Fi
network�
4 Launch the “Clean Home+” app and click on “Connect a New Device” or press the “+”
button on the top of the screen� Follow the onscreen instructions to connect the air
purier to your network�
Note:
• Enterprise/Additional webpage authentication networks are not supported�
• This instruction is only valid when the air purier is being set up for the rst time� If the
network has changed or the setup needs to be performed again, see Chapter “Reset the
Wi-Fi connection” on page 7�
• If you want to connect more than one air purier to your smartphone or tablet, you have to
do this one by one�
• Make sure that the distance between your smartphone or tablet and the air purier is less
than 10 m without any obstructions�
• This App supports the latest versions of Android and iOS� Please check www�philips�com/
cleanhome for the latest update of supported operating systems and devices�
Reset the Wi-Fi connection
Note:
• Reset the Wi-Fi connection when your default network has changed�
1 Put the plug of the air purier in the power socket and touch to turn on the air purier�
2 Touch and simultaneously for 3 seconds until you hear a beep�
» The air purier goes to pairing mode�
» The Wi-Fi indicator blinks orange�
3 Follow the steps 3-4 in “Setting up the Wi-Fi connection for the rst time” section�
7EN
4 Using the air purifier
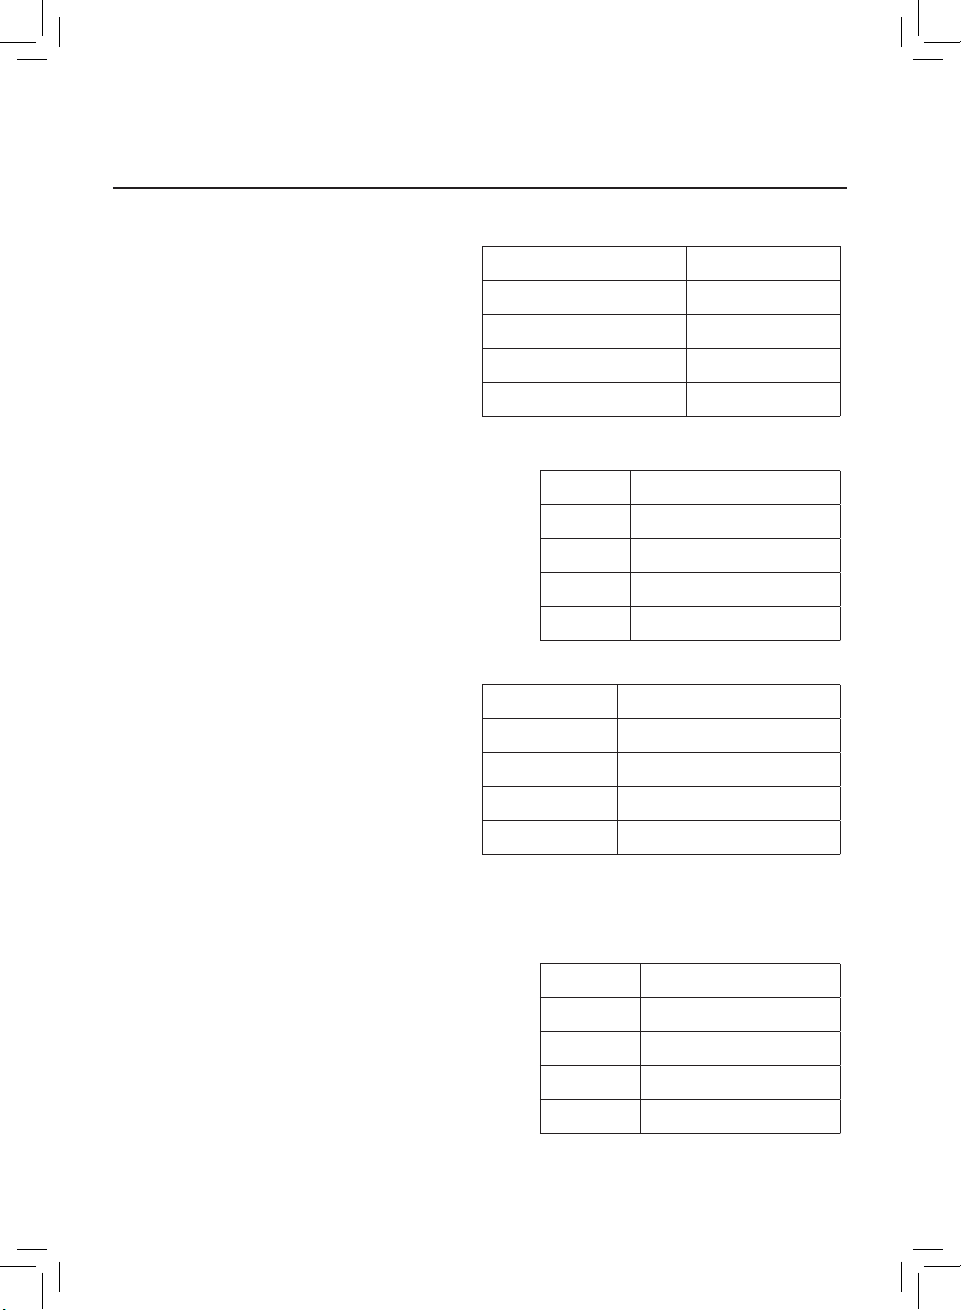
Gas level Air quality light color
L1 Blue
L2 Blue-purple
L3 Purple-red
L4 Red
Understanding the air quality light
The air quality light automatically goes
on when the air purier is switched on,
and lights up all colors in sequence� After
approximately 30 seconds, the particle
sensor selects the color that corresponds
to the surrounding air quality of airborne
particles�
The color of the air quality light is
determined by the highest risk index among PM2�5, IAI and Gas readings�
IAI
The professional-grade AeraSense sensor detects
the level of indoor air allergen and with numerical
feedback from 1 to 12 the potential risk level of
indoor air allergens can be displayed� 1 indicates
best air quality�
Air quality light color Air quality level
Blue Good
Blue-purple Fair
Purple-red Poor
Red Very poor
IAI level Air quality light color
1-3 Blue
4-6 Blue-purple
7-9 Purple-red
10-12 Red
PM2�5
AeraSense sensing technology accurately
detects and quickly responds to even the
slightest particle change in the air� It provides
you with reassurance with real-time PM2�5
feedback�
Most of the indoor air pollutants fall under
PM2�5 – which refers to airborne particle
pollutants smaller than 2�5 micrometers�
Common indoor sources of ne particles are tobacco smoke, cooking, burning candles� Some
airborne bacteria and the smallest mold spores, pet allergen and dust mite allergen particles
also fall under PM2�5�
PM2�5 level Air quality light color
≤12 Blue
13-35 Blue-purple
36-55 Purple-red
>55 Red
GAS
With an advanced gas sensor, a display ranging from
L1 to L4 shows the level change of potential harmful
gases (incl� VOC, odor, etc�) detected� L1 indicates best
air quality�
8 EN
English
Turning on and o
Note:
• For optimum purication performance, close doors and windows�
• Keep curtains away from the air inlet or air outlet�
1 Put the plug of the air purier in the power socket�
2 Touch to switch on the air purier�
» The QR code for App is displayed on the screen for the rst use, you can scan it and
download the App�
» The air purier operates in the auto mode with IAI displayed on the center of the
screen�
» After measuring the air quality, the air purier automatically switches to the display
which has the highest readings among PM2�5, IAI and Gas (g h)�
3 Touch and hold the button for 3 seconds to switch o the air purier�
Note: If the air purier stays connected to the electrical outlet after turning OFF, the air
purier will operate under the previous settings when turned ON again�
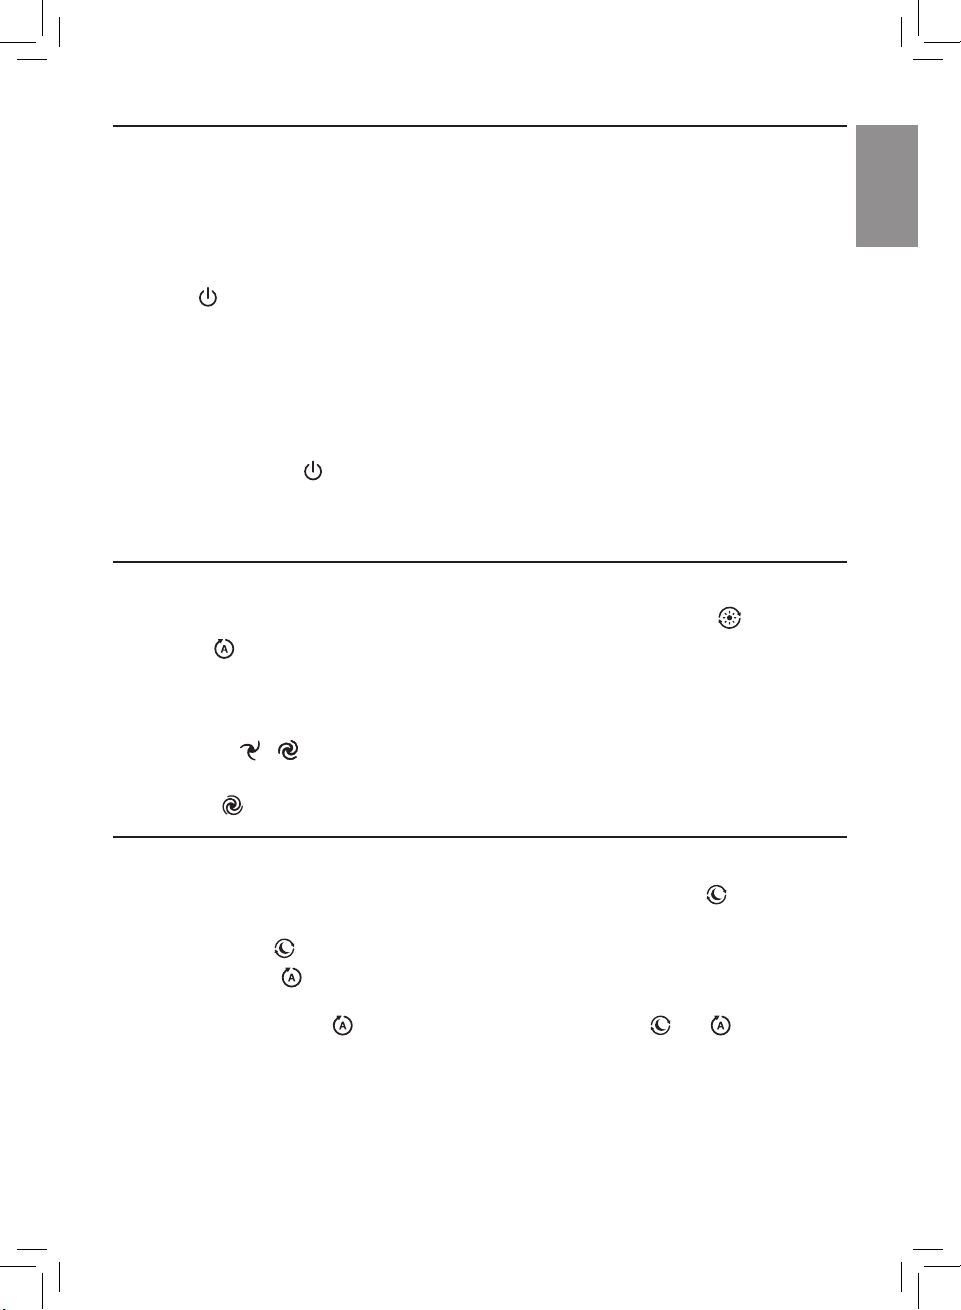
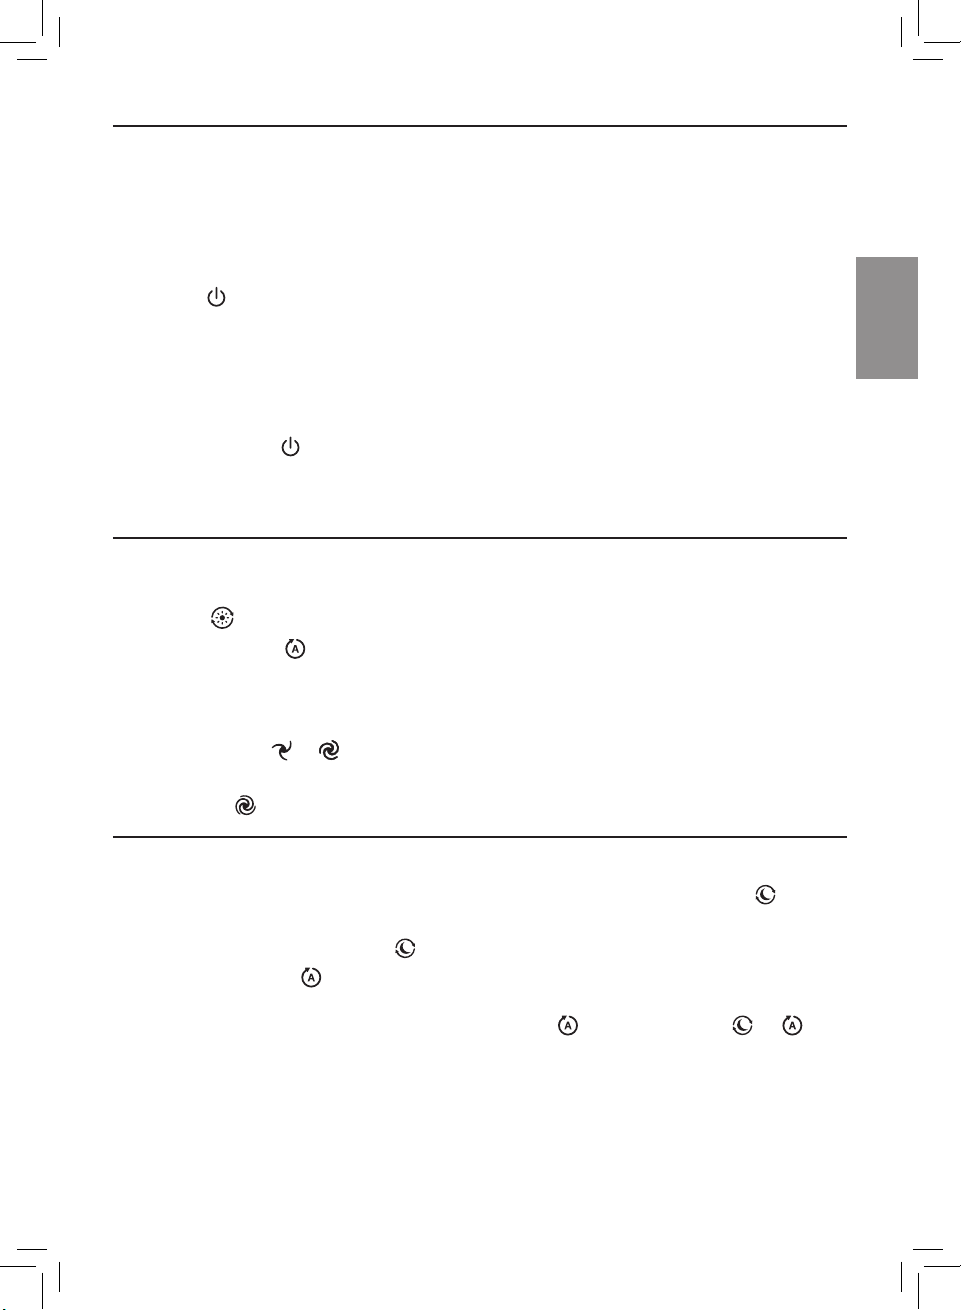
Changing the day mode setting
You can choose Auto mode, speed 1, speed 2 or Turbo mode by touching the button�
Auto mode ( ): In Auto mode, the dual-sensor senses the air quality in real-time and the
appliance automatically adjusts the fan speed in accordance with the ambient air quality�
The control panel can automatically adjust display screen brightness according to the
ambient light (g i)�
Manual speed ( & ): In manual mode, the air purier operates on speed 1 or speed 2
(g j)�
Turbo mode ( ): In Turbo mode, the air purier operates on the highest speed (g k)�
Changing the night mode setting
You can choose normal Sleep mode or Allergy Sleep mode by touching the button�
Normal Sleep mode: In normal Sleep mode, the air purier operates quietly at a low speed�
After 3 seconds, the button dims, all lights and buttons are o (g l)�
Allergy Sleep mode ( ): In Allergy Sleep mode, the air puriers responds to night-time
dust events and switches the device to a more powerful mode– while keeping the sound
level suitable for sleep� The indicator displays on the screen� The and dims, other
buttons are o (g m)�
Touch any button to wake up from the sleep mode� Then, if no further operation within
3 seconds, all lights will be dim again�
9EN
Switching the display indicator
Note:
• The IAI level is displayed on the central of the screen by default�
1 Touch the
button once to switch the display indicator (g n)�
Using the light on/o function
With
the light sensor, the control panel can automatically turn on, turn o or dim according to
the ambient light� The control panel will be o or dim when the ambient light is dark� You can
touch any button to wake up all lights� Then, if no further operation, all lights will be o or dim
again to match with the ambient light
You can touch and hold the button for 3 seconds manually to turn o all lights and the
control pa
nel� Touch any button to wake up all lights (g p)�
(g o)�
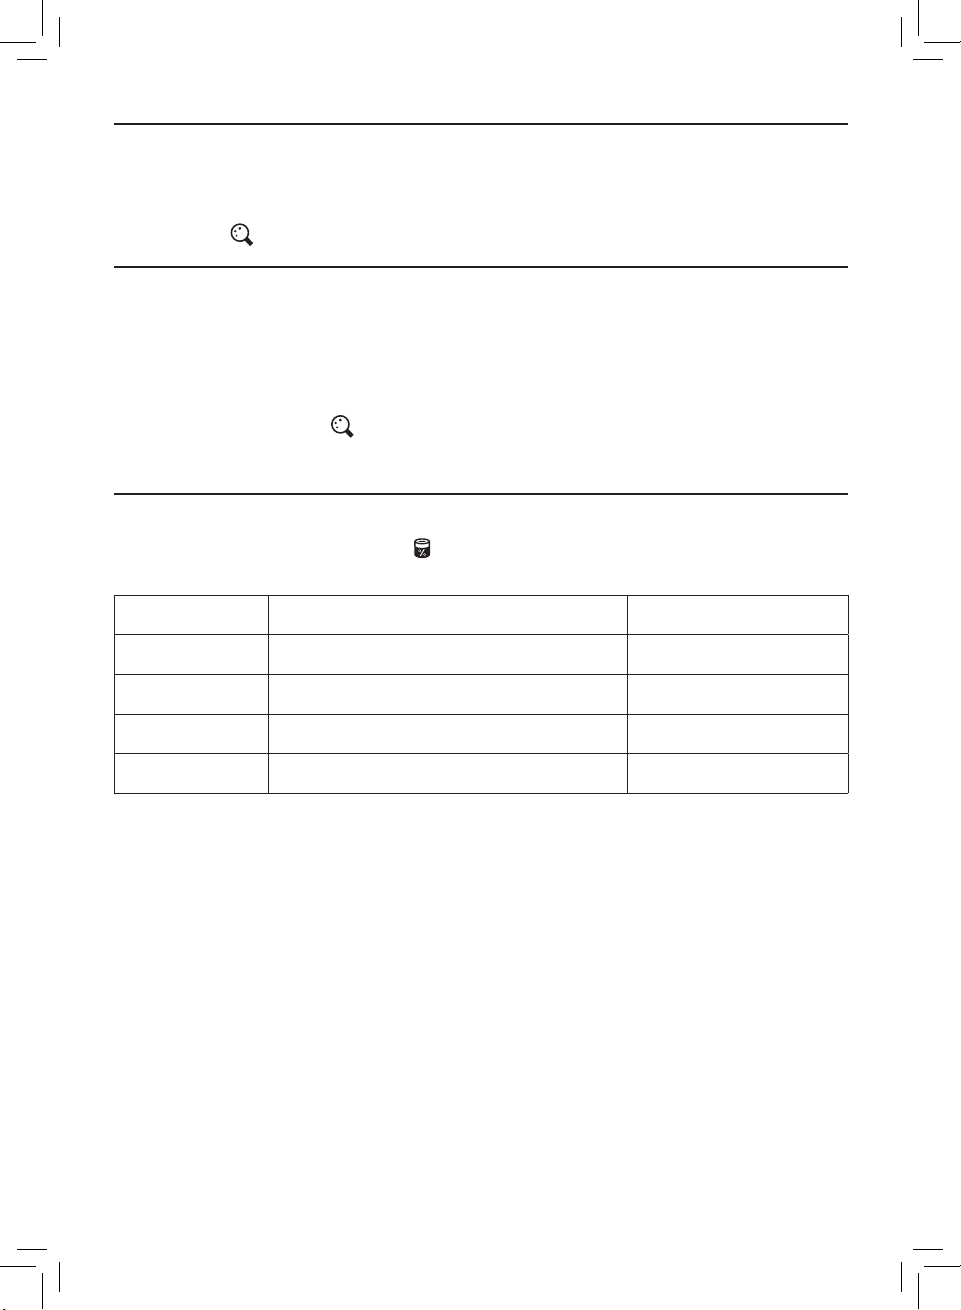
Checking the lter status
• Touch the lter status check/reset button to check the lter service life status (g q)�
» The percentage of remaining service life of the lter displays on the screen�
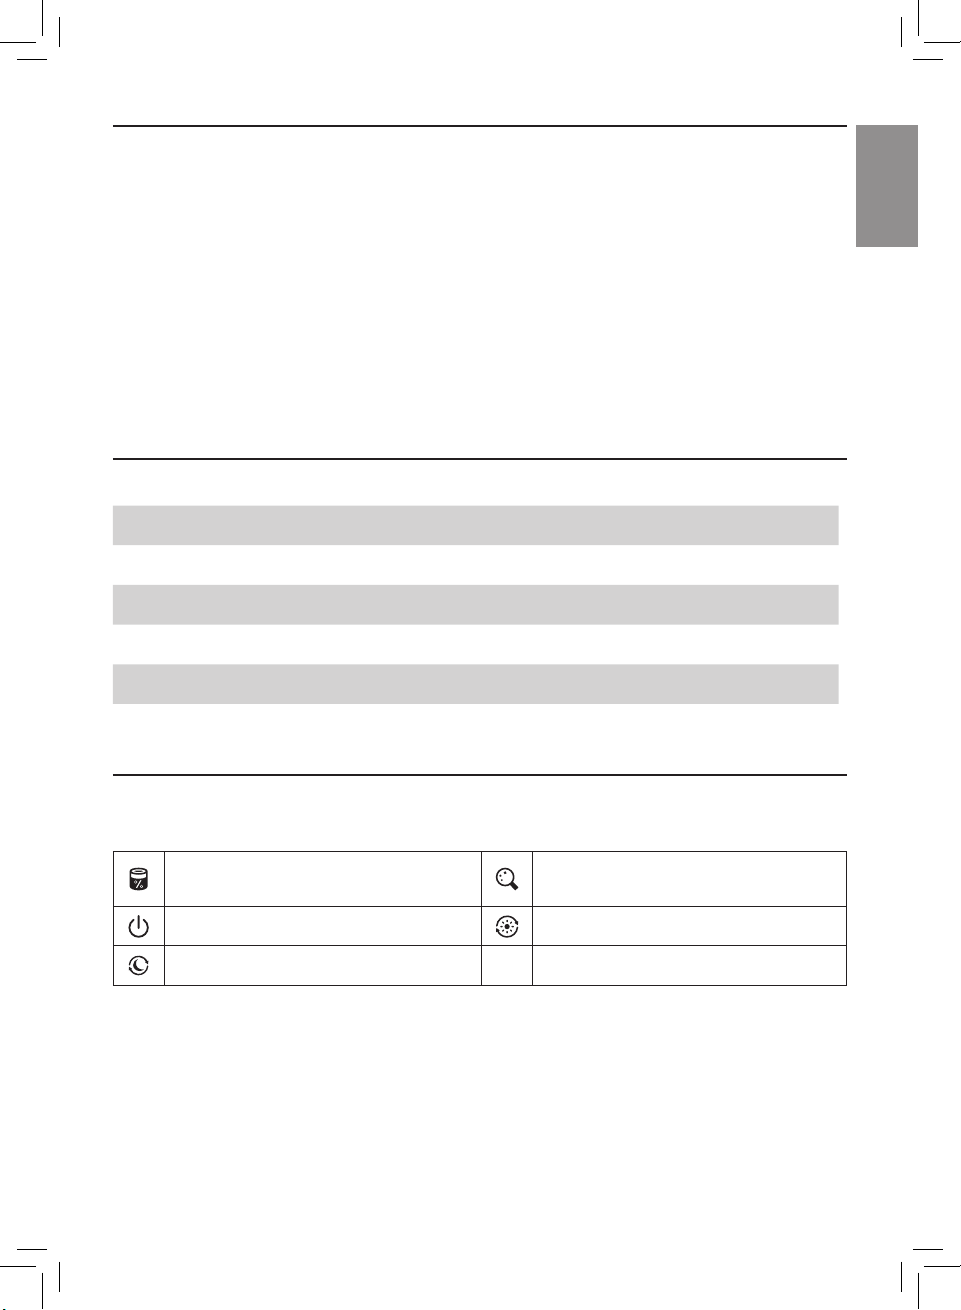
Icon color Filter life indication Display (%)
Blue Optimal service life 16-100
Blue-purple Good service life 9-15
Purple-red Service life almost reaches the end 4-8
Red Service life ends, replace the lter 0-3
Note: The appliance goes back to normal display if no operations after 3 seconds�
5 Cleaning and maintenance
Note:
• Always unplug the appliance before you clean it�
• Never immerse the appliance in water or any other liquid�
• Never use abrasive, aggressive, or ammable cleaning agents such as bleach or alcohol to
clean any part of the appliance�
• Never use any liquids (including water) to clean the lter�
• Do not attempt to clean the particle sensor and gas sensor with a vacuum cleaner�
10 EN
English
Cleaning schedule
Frequency Cleaning method
Wipe the fabric part of the appliance with a damp cloth,
When necessary
Every two months Clean the particle sensor with a dry cotton swab
When displays on the
(g r)
screen
wipe the plastic part of the appliance with a soft, dry cloth
Clean the air outlet cover
Clean the surface of the lter
Cleaning the body of the air purier
Regularly clean the inside and outside of the air purier to prevent dust from collecting�
1 Wipe the fabric surface gently with a damp cloth�
2 Use a soft, dry cloth to clean both the interior and exterior of the air purier and the air
outlet�
Note:
• The fabric covered on the appliance can not be removed�
• Do not use hot water, alcohol, harsh cleaners to clean the fabric�
Cleaning the particle sensor
Clean the particle sensor every 2 months for optimal functioning of the appliance�
Note:
• If the air purier is used in a dusty environment, it may need to be cleaned more often�
• If the humidity level in the room is very high, condensation may develop on the particle
sensor and the air quality light may indicate a more poor air quality even though the air
quality is actually good� If this occurs, clean the particle sensor�
• The gas sensor doesn’t need to be cleaned�
1 Switch o the air purier and unplug from the power socket�
2 Pull the back cover and remove it from the appliance (g c)�
3 Clean the particle sensor with a damp cotton swab (g s)�
4 Dry all parts thoroughly with a dry cotton swab�
5 Reattach the back cover (g g)�
11EN

Cleaning the surface of the lter
Filter alert light status Action
The lter cleaning alert
displays on the screen
(g t)
�
Clean the surface of the lter with a vacuum cleaner�
1 Switch o the air purier and unplug from the power socket�
2 Pull the back cover and remove it from the appliance (g c)�
3 Pull the lter from the appliance (g u)�
4 Clean the surface of the lter with a vacuum cleaner (g v)�
5 Put the lter back into the appliance (g f)�
6 Reattach the back cover (g g)�
7 Put the plug of the air purier in the power socket�
8 Touch the button to switch on the appliance�
9 Touch and hold the lter status check/reset button for 3 seconds to reset the lter
cleaning time (g w)�
» The screen displays a message “Filter cleaning completed”�
10 Wash your hands thoroughly after cleaning the lter�
Replacing the lter
Understanding the healthy protection lock
This air purier is equipped with a lter replacement indicator to make sure that the air
purication lter is in optimal condition when the air purier is operating� When the lter
need to be replaced, the lter replacement alert lights up red�
If the lter is not replaced in time, the air purier will stop operating and automatically lock to
protect the air quality in the room� Replace the lter as soon as possible�
Replacing the lter
Note:
• The lter is not washable or reusable�
• Always turn o the air purier and unplug from the electrical outlet before replacing the
lter�
12 EN

English
Filter alert light status Action
The lter replacement alert lights
(g x)
up
Replace the NanoProtect lter Series 3
(FY4440/30)
1 Switch o the air purier and unplug from the power socket�
2 Pull the back cover and remove it from the appliance (g c)�
3 Pull the lter from the appliance (g u)�
4 Remove all packaging materials of the new lter (g e)�
5 Put the new lter into the appliance (g f)�
6 Reattach the back cover (g g)�
7 Put the plug of the air purier in the power socket�
8 Touch the button to switch on the appliance�
9 Touch and hold the lter status check/reset button for 3 seconds to reset the lter
lifetime counter (g y)�
10 Wash your hands thoroughly after replacing the lter�
Note: Do not smell the lter as it has collected pollutants from the air�
Filter reset
You can replace the lter even before lter replacement alert ( ) displays on the screen�
After replacing a lter, you need to reset the lter lifetime counter manually�
1 Touch the power button for 3 seconds to turn o the appliance and unplug from
power socket�
2 Put the power plug in the power socket (g z)�
3 Within 15 seconds after power on, touch and hold and button for 3 seconds to
reset the lter lifetime counter (g {)�
6 Storage
1 Turn o the air purier and unplug from the power socket�
2 Clean the air purier, particle sensor and the surface of the lter (see chapter “Cleaning
and maintenance”)�
3 Let all parts air dry thoroughly before storing�
4 Wrap the lter in air tight plastic bags�
5 Store the air purier, lter in a cool, dry location�
6 Always thoroughly wash hands after handling the lter�
13EN

7 Troubleshooting
This chapter summarizes the most common problems you could encounter with the
appliance� If you are unable to solve the problem with the information below, contact the
Consumer Care Center in your country�
Problem Possible solution
The appliance does
not work even though
it is plugged in�
The airow that
comes out of the air
outlet is signicantly
weaker than before�
The air quality does
not improve, even
though the appliance
has been operating
for a long time�
The color of the air
quality light always
stays the same�
The appliance
produces a strange
smell�
• The lter replacement alert has been on continuously but you
have not replaced the corresponding lter� As a result, the
appliance is now locked� In this case, replace the lter and long
press to reset the lter lifetime counter�
• The surface of the lter is dirty� Clean the surface of the lter (see
the chapter “Cleaning and maintenance”)�
• Check if the packing material is removed from the lter�
• The lter has not been placed in the appliance� Make sure that
the lter (FY4440/30) is properly installed�
• The particle sensor is wet� The humidity level in your room is high
and causes condensation� Make sure that the particle sensor is
clean and dry (see the chapter “Cleaning and maintenance”)�
• Room size is large or the outdoor air quality is poor�
For optimum purication performance, please close the doors
and windows when operating the air purier�
• There are indoor pollution resources� For instances, smoking,
cooking, incense, perfume or alcohol�
• Filter reaches the end of life� Replace the lter with a new one�
• The particle sensor is dirty� Clean the particle sensor (see the
chapter “Cleaning and maintenance”)�
• The rst few times you use the appliance, it may produce a plastic
smell� This is normal� However, if the appliance produces a burnt
smell even if removing lter, contact your Philips dealer or an
authorized Philips service center� The lter may produce smell
after being used for a while because of the absorption of indoor
gases� It’s recommended that you reactivate the lter by putting it
in direct sunlight for repeated use� If odor still exists, replace the
lter�
14 EN

English
Problem Possible solution
The appliance is extra
loud�
Error code “E1”
displays on the
screen�
The Wi-Fi setup is
not successful�
• It's normal if the appliance runs at the Turbo mode�
• In the Auto mode, if the appliance is too loud, maybe the
appliance runs at high speed because air quality becomes worse,
or your personalized setting in App triggers a higher fan speed�
You can choose the Sleep mode, or change the settings in the
App�
• If there is abnormal sound, contact the Consumer Care Center in
your country�
• If anything drops into air outlet, it may also cause abnormal loud
sound� Immediate turn o appliance, turn appliance upside down,
to get foreign objectives out of appliance�
• The motor has malfunctions� Contact the Consumer Care Center in
your country�
• If the router your purier is connected to is dual – band and
currently it is not connecting to a 2�4GHz network, please switch
to another band of the same router (2�4GHz) and try to pair your
purier again� 5GHz networks are not supported�
• Web authentication networks are not supported�
• Check if the purier is within range of the Wi-Fi router� You can try
to locate the air purier closer to the Wi-Fi router�
• Check if the network name is correct� The network name is casesensitive�
• Check if the Wi-Fi password is correct� The password is casesensitive�
• Retry the setup with the instructions in section “Reset the Wi-Fi
connection”�
• The Wi-Fi connectivity can be interrupted by electromagnetic or other
interferences� Keep the appliance away from other electronic devices
that may cause interferences�
• Check if the mobile device is in airplane mode� Make sure to have
the airplane mode deactivated when connecting to the Wi-Fi
network�
• Consult the help section in the App for extensive and up-to-date
troubleshooting tips�
15EN

8 Guarantee and service
If you need information or if you have a problem, please visit the Philips website at
www�philips�com or contact the Philips Consumer Care Center in your country (you can nd
its phone number in the worldwide guarantee leaet)� If there is no Consumer Care Center in
your country, go to your local Philips dealer�
Order parts or accessories
If you have to replace a part or want to purchase an additional part, go to your Philips dealer
or visit www�philips�com/support�
If you have problems obtaining the parts, please contact the Philips Consumer Care Center in
your country (you can nd its phone number in the worldwide guarantee leaet)�
16 EN

Dansk
Indhold
1 Vigtigt ������������������������������������������������������������������������������������������� 18
Sikkerhed �������������������������������������������������������������������������������������������������������������������� 18
Elektromagnetiske felter (EMF) ������������������������������������������������������������������������� 20
Genbrug ����������������������������������������������������������������������������������������������������������������������20
Forenklet EU-overensstemmelseserklæring �������������������������������������������������� 21
2 Din luftrenser �������������������������������������������������������������������������������21
Produktoversigt (g� a) �����������������������������������������������������������������������������������������21
Oversigt over betjeningsknapper (g� b) �������������������������������������������������������21
3 Kom godt i gang ��������������������������������������������������������������������������22
Montering af lteret ������������������������������������������������������������������������������������������������22
Om Wi-Fi-indikator �������������������������������������������������������������������������������������������������22
Wi-Fi-forbindelse ����������������������������������������������������������������������������������������������������23
4 Brug af luftrenseren ������������������������������������������������������������������ 24
Om luftkvalitetslyset �����������������������������������������������������������������������������������������������24
Sådan tændes og slukkes apparatet ����������������������������������������������������������������25
Ændring af indstillingen Dagstilstand ��������������������������������������������������������������25
Ændring af indstillingen Nattilstand �����������������������������������������������������������������25
Skift af visningsindikator �������������������������������������������������������������������������������������� 26
Sådan bruger du lampens tænd/sluk-funktion ������������������������������������������ 26
Kontrollér lterets status ��������������������������������������������������������������������������������������26
5 Rengøring og vedligeholdelse ������������������������������������������������ 26
Rengøringsskema ����������������������������������������������������������������������������������������������������27
Rengøring af luftrenserens kabinet ������������������������������������������������������������������� 27
Rengøring af partikelsensor ��������������������������������������������������������������������������������� 27
Rengøring af lterets overade ������������������������������������������������������������������������� 28
Udskiftning af lteret ��������������������������������������������������������������������������������������������� 28
Filternulstilling ��������������������������������������������������������������������������������������������������������� 29
6 Opbevaring ��������������������������������������������������������������������������������� 29
7 Fejlnding ����������������������������������������������������������������������������������� 30
8 Garanti og service �����������������������������������������������������������������������32
Bestilling af dele eller tilbehør ����������������������������������������������������������������������������32
17DA

1 Vigtigt
Sikkerhed
Læs denne brugsvejledning omhyggeligt igennem, inden apparatet tages i brug, og gem den
til eventuelt senere brug�
For at sikre den bedste ydeevne skal du sørge for, at din luftrenser er opgraderet til den
nyeste version� Du kan foretage denne opgradering i Clean Home+-appen�
Fare
• Undlad at rengøre apparatet med vand eller andre væsker eller
(brandbart) rengøringsmiddel eller at lade disse trænge ind i apparatet
for at undgå elektrisk stød og/eller brandfare�
• Sprøjt ikke brændbare materialer som f�eks� insektgift eller parfume
omkring apparatet�
Advarsel
• Kontrollér, om den angivne netspænding på apparatet svarer til den
lokale netspænding, før du slutter strøm til apparatet�
• Undgå at placere netledningen i områder, hvor der færdes mange
mennesker, og placer det et sted, hvor man ikke falder over det�
• Hvis netledningen beskadiges, må den kun udskiftes af Philips, et
autoriseret Philips-serviceværksted eller en tilsvarende kvaliceret
fagmand for at undgå enhver risiko�
• Brug aldrig apparatet, hvis netstik, netledning eller selve apparatet er
beskadiget�
• Dette apparat kan bruges af børn fra 8 år og opefter og af personer med
reducerede fysiske, sensoriske eller mentale evner eller manglende
erfaring og viden, hvis de er blevet instrueret i sikker brug af apparatet
og forstår de medfølgende risici� Børn under 8 år bør ikke nærme sig
apparatet uden opsyn af en voksen�
• Lad ikke børn lege med apparatet�
• Rengøring og vedligeholdelse må ikke foretages af børn uden opsyn�
• Luftindtag og -udtag må ikke blokeres, f�eks� ved at stille ting på
luftudtaget eller foran luftindtaget�
• Sørg for, at fremmedlegemer ikke falder ind i apparatet gennem
luftudgangen�
18 DA

Dansk
• Opvarm ikke lteret eller apparatet for at undgå beskadigelse af
enheden eller brandfare�
• Sprøjt ikke væske på lteret i forbindelse med rengøring, da det kan
beskadige lterets indre�
• Standard Wi-Fi-grænseade baseret på 802�11b/g/n ved 2,4 GHz med
en maksimal udgangseekt på 31,62 mW EIRP�
Forsigtig
• Apparatet kan ikke bruges som erstatning for grundig udluftning,
støvsugning eller brug af emhætte eller udsugning under madlavning�
• Anbring og brug altid apparatet på et stabilt, plant og vandret underlag�
• Der skal være mindst 20 cm fri plads rundt om apparatet, og der skal
være mindst 30 cm fri plads over apparatet�
• Du må ikke sidde eller stå på apparatet� Placer ikke noget ovenpå
apparatet�
• Placer ikke apparatet direkte under et klimaanlæg for at forhindre, at
der drypper kondensvand på apparatet�
• Bær maske og handsker ved rengøring af lteroveraden og/eller
udskiftning af lter�
• Ved bortskaelse af lteret skal du forsegle lteret i en pose til
engangsbrug og følge de lokale sundhedsmyndigheders råd
vedrørende håndtering af potentielt incerede overader�
• Brug kun de originale ltre fra Philips, der er særligt beregnede til dette
apparat� Anvend ikke andre ltre�
• Afbrænding af lteret kan forårsage alvorlig fare for mennesker og/eller
bringe andres liv i fare� Brug ikke lteret som brændsel eller lignende
formål�
• Undgå at støde mod apparatet (særligt luftindtag og -udtag) med
hårde genstande�
• Stik aldrig dine ngre eller genstande ind i luftudtaget eller -indtaget
for at undgå fysiske skader eller funktionsfejl af apparatet�
• Hvis apparatet er blokeret, skal du medbringe det til Philips, et
autoriseret Philips-serviceværksted eller en tilsvarende kvaliceret
servicevirksomhed�
19DA

• Brug ikke apparatet, når du ryger indendørs, eller når du bruger
indendørs insektmidler, desinfektionsmidler eller på steder med
olierester, brændende røgelse eller kemiske dampe�
• Brug ikke apparatet i nærheden af gasapparater, varmeapparater
eller brændeovne/kaminer�
• Tag altid stikket ud af stikkontakten, hvis du vil ytte eller rengøre
apparatet, eller hvis du vil udskifte lteret eller udføre anden
vedligeholdelse�
• Apparatet er designet til brug i erhvervsområder� Det er beregnet til
indendørs brug under normale driftsforhold�
• Brug ikke apparatet i våde omgivelser eller i omgivelser med høj
luftfugtighed eller høje rumtemperaturer�
• Apparatet fjerner ikke kulilte (CO) eller radon (Rn)� Det kan
ikke bruges som en sikkerhedsenhed i tilfælde af ulykker med
forbrændingsprocesser og farlige kemikalier�
• Den anbefalede temperatur ved brug af enheden er fra 5 °C til 45 °C
med en relativ luftfugtighed på ≤ 85 %� Enheden kan holde op med
at fungere eller blive beskadiget, hvis det anbefalede temperatur- og
fugtighedsniveau ikke følges�
• Det anbefalede temperaturområde for opbevaring af enheden er fra
-20 °C til 55 °C� Enheden vil blive beskadiget, hvis den opbevares under
ekstreme forhold uden for dette temperaturområde�
• Luftrensere fungerer kun som en del af en virusforebyggende plan og er
ikke løsningen mod en potentiel virusoverførsel alene�
• Støjniveauet er under 70 dB(A)�
Elektromagnetiske felter (EMF)
Dette Philips-apparat overholder alle branchens gældende standarder og regler angående
eksponering for elektromagnetiske felter�
Genbrug
Dette symbol betyder, at dette produkt ikke må bortskaes sammen med almindeligt
husholdningsaald (2012/19/EU)�
Følg dit lands regler for særskilt indsamling af elektriske og elektroniske produkter� Korrekt
bortskaelse er med til at forhindre negativ påvirkning af miljøet og menneskers helbred�
20 DA

Dansk
Forenklet EU-overensstemmelseserklæring
DAP B�V� erklærer herved, at radioudstyret, type AC4231, overholder direktivet 2014/53/
EU� Den komplette tekst i EU-overensstemmelseserklæringen er tilgængelig på følgende
internetadresse: www�philips�com�
2 Din luftrenser
Tillykke med dit køb af AC4231-luftrenseren�
For at få fuldt udbytte af den støtte, Philips tilbyder, skal du registrere dit produkt på
www�philips�com/welcome�
Produktoversigt (g� a)
A Kontrolpanel
B Gassensor
C Luftudtag
D Partikelsensor
E NanoProtect-lter i 3-serien (FY4440/30)
F Bagdæksel
Oversigt over betjeningsknapper (g� b)
Betjeningsknapper
Filterstatus/nulstilling Skift af visning/lys til/lys fra
Til/fra Dagstilstand
Nattilstand
21DA
Visningspanel
Wi-Fi-indikator
Manuel hastighed 1 Manuel hastighed 2
Turbotilstand Visning af indendørs allergiindeks
PM2�5-visning Gasforureningsvisning
Filterrengøringsalarm Advarsel om udskiftning af lter
Automatisk tilstand (dag)/
Allergi-sleep-tilstand (nat)
3 Kom godt i gang
Montering af lteret
Fjern al lterets emballage før brug�
Bemærk: Sørg for, at stikket til luftrenseren er taget ud af stikkontakten, før lteret monteres�
1 Træk i bagdækslet, og fjern det fra apparatet (g� c)�
2 Træk lteret ud af apparatet (g� d)�
3 Fjern alle emballagematerialer fra luftrenserlteret (g� e)�
4 Sæt lteret tilbage i apparatet (g� f)�
5 Sæt bagdækslet på igen (g� g)�
Om Wi-Fi-indikator
Wi-Fi-ikonets status Wi-Fi-forbindelsesstatus
Blinker orange Forbinder til smartphone
Konstant orange Tilsluttet til smartphone
Blinker hvidt Forbinder til serveren
Konstant hvid Tilsluttet til serveren
Wi-Fi-funktion deaktiveret
22 DA
Dansk
Wi-Fi-forbindelse
Bemærk:
• Virksomhedsnetværk (f�eks� certikater, netværksproler) understøttes ikke� Vi anbefaler,
at du sætter Philips-luftrenseren op på et netværk, der er udviklet til IoT-enheder eller
WPA2-Personal-netværk�
• Kongurationsoplysninger ndes i Clean Home+-appen (f�eks� Mac-adresse) for at hjælpe
med opsætning på administrerede netværk�
Opsætning af Wi-Fi-forbindelsen for første gang
1 Download og installer appen Philips "Clean Home+" fra App Store eller
Google Play�
2 Sæt stikket til luftrenseren i stikkontakten, og tryk på for at tænde for
luftrenseren�
» Wi-Fi-indikatoren blinker orange den første gang�
3 Kontroller, at din smartphone eller tablet har oprettet forbindelse til dit Wi-Fi-netværk�
4 Start appen "Clean Home+", og klik på "Connect a New Device" eller tryk på knappen
"+" øverst på skærmen� Følg instruktionerne på skærmen for at tilslutte luftrenseren til
dit netværk�
Bemærk:
• Enterprise/yderligere godkendelsesnetværk til websiden understøttes ikke�
• Denne vejledning gælder kun, når luftrenseren opsættes første gang� Hvis netværket er
ændret, eller opsætningen skal foretages igen, se kapitlet "Nulstil Wi-Fi-forbindelsen" på
side 23�
• Hvis du vil slutte mere end én luftrenser til din smartphone eller tablet, skal du gøre det en
ad gangen�
• Sørg for, at afstanden mellem din smartphone/tablet og luftrenseren er mindre end 10 m
uden forhindringer�
• Denne app understøtter de nyeste versioner af Android og iOS� Gå til www�philips�com/
cleanhome for at få de seneste oplysninger om understøttede operativsystemer og
enheder�
Nulstil Wi-Fi-forbindelsen
Bemærk:
• Nulstil Wi-Fi-forbindelsen, når dit standardnetværk er ændret�
1 Sæt stikket til luftrenseren i stikkontakten, og tryk på for at tænde for luftrenseren�
2 Tryk på og samtidigt i 3 sekunder, indtil der lyder et bip�
» Luftrenseren skifter til parringstilstand�
» Wi-Fi-indikatoren blinker orange�
3 Følg trin 3-4 i afsnittet "Opsætning af Wi-Fi-forbindelsen første gang"�
23DA

4 Brug af luftrenseren
Gasniveau Luftkvalitetslysets farve
L1 Blå
L2 Blå-lilla
L3 Lilla-rød
L4 Rød
Om luftkvalitetslyset
Luftkvalitetslyset tænder automatisk, når
luftrenseren tændes, og tænder alle farver
i rækkefølge� Efter ca� 30 sekunder vælger
partikelsensoren den farve, som svarer til den
omgivende luftkvalitet af luftbårne partikler�
Farven på luftkvalitetslyset bestemmes af
højeste risikofortegnelse blandt aæsninger
af PM2�5, IAI og gas�
IAI
Den professionelle sensor AeraSense registrerer
det indendørs luftallergenniveau og kan angive
risikograden for indendørs luftallergener på en
numerisk skala fra 1 til 12� 1 angiver bedste luftkvalitet�
Luftkvalitetslysets
farve
Blå God
Blå-lilla Middel
Lilla-rød Ringe
Rød Meget dårlig
IAIniveau
1-3 Blå
4-6 Blå-lilla
7-9 Lilla-rød
10-12 Rød
PM2�5
AeraSense-registreringsteknologi registrerer
nøjagtigt og reagerer hurtigt på selv den mindste
partikelændring i luften� Det giver dig tryghed med
PM2�5-feedback i realtid�
De este indendørs forureningskilder hører
ind under PM2�5, som refererer til luftbårne
forureningspartikler, som er mindre end
2�5 mikrometer� Almindelige indendørs kilder til
ne partikler er tobaksrøg, madlavning, brændende stearinlys� Nogle luftbårne bakterier og
de mindste mugsporer, PET-allergener og støvmideallergenpartikler hører også ind under
PM2�5�
PM2�5niveau
≤ 12 Blå
13-35 Blå-lilla
36-55 Lilla-rød
> 55 Rød
Luftkvalitetsniveau
Luftkvalitetslysets
farve
Luftkvalitetslysets
farve
GAS
Med en avanceret gassensor angiver displayet på en
skala fra L1 til L4 niveauet for potentielt skadelige
luftarters massefylde (inkl� VOC, lugt osv�)� L1 angiver
bedste luftkvalitet�
24 DA
Dansk
Sådan tændes og slukkes apparatet
Bemærk:
• Optimal rensning af luften opnås ved at lukke døre og vinduer�
• Hold gardiner på afstand af luftindtag eller luftudtag�
1 Sæt stikket til luftrenseren i stikkontakten�
2 Tryk på for at tænde for luftrenseren�
» QR-koden til appen vises på skærmen, inden den bruges første gang� Du kan scanne
den og downloade appen�
» Luftrenseren er i automatisk tilstand med IAI vist midt på skærmen�
» Efter måling af luftkvaliteten, skifter luftrenseren automatisk til det display, der har
den højeste aæsning af PM2�5, IAI og gas (g� h)�
3 Tryk på knappen i 3 sekunder for at slukke for luftrenseren�
Bemærk: Hvis luftrenseren stadig er sluttet til stikkontakten efter slukning, vil luftrenseren
køre med de foregående indstillinger, når den tændes igen�
Ændring af indstillingen Dagstilstand
Du kan vælge automatisk tilstand, hastighed 1, hastighed 2 eller turbotilstand ved at trykke
på knappen �
Automatisk tilstand ( ): I automatisk tilstand registrerer dobbeltsensoren luftkvaliteten i
realtid, og apparatet justerer automatisk blæserhastigheden i overensstemmelse med den
omgivende luftkvalitet� Kontrolpanelet kan automatisk justere skærmens lysstyrke i forhold
til det omgivende lys (g� i)�
Manuel hastighed ( og ): I manuel tilstand arbejder luftrenseren ved hastighed 1 eller
hastighed 2 (g� j)�
Turbotilstand ( ): I turbotilstand kører luftrenseren med den højeste hastighed (g� k)�
Ændring af indstillingen Nattilstand
Du kan vælge sleep-tilstand eller allergi-sleep-tilstand ved at trykke på knappen �
Normal dvaletilstand: I normal dvaletilstand kører luftrenseren støjsvagt med lav hastighed�
Efter 3 sekunder dæmpes knappen , alle lys og knapper er slukket (g� l)�
Allergi-sleep-tilstand ( ): I allergi-sleep-tilstand reagerer luftrenserne på forekomst af
støv om natten og skifter enheden til en mere eektiv tilstand – samtidig med at lydniveauet
holdes på et niveau, der er velegnet til søvn� Indikatoren vises på skærmen� og
dæmpes, andre knapper er slukket (g� m)�
Tryk på en vilkårlig knap for at aktivere fra sleep-tilstand� Hvis der ikke længere er brug for
det inden for 3 sekunder, vil alle lys blive dæmpet igen�
25DA

Skift af visningsindikator
Bemærk:
• IAI-niveauet vises midt på skærmen som standard�
1 Tryk på knappen
én gang for at skifte visningsindikatoren (g� n)�
Sådan bruger du lampens tænd/sluk-funktion
Med
lyssensoren kan kontrolpanelet automatisk tænde, slukke eller dæmpe lyset afhængigt af
det omgivende lys� Kontrolpanelet vil være slukket eller blive dæmpet, når det omgivende lys
er svagt (mørkt)� Du kan trykke på en vilkårlig knap for at vække alle lys� Hvis der ikke er nogen
yderligere handling, slukkes eller dæmpes alle lys igen, så de passer til det omgivende lys
(g� o)�
Du kan trykke på knappen manuelt i 3 sekunder for at slukke alt lys og kontrolpa
på en vilkårlig knap for at vække alle lys (g� p)�
nelet� Tryk
Kontrollér lterets status
• Tryk på knappen for lterstatus/nulstilling for at kontrollere lterets levetid (g� q)�
» Filterets resterende levetid i procent vises på skærmen�
Ikonets farve Indikator for lterets levetid Visning (%)
Blå Optimal levetid 16-100
Blå-lilla God levetid 9-15
Lilla-rød Levetid næsten udløbet 4-8
Rød Levetid udløber, udskift lteret 0-3
Bemærk: Apparatet går tilbage til normal visning efter 3 sekunders inaktivitet�
5 Rengøring og vedligeholdelse
Bemærk:
• Tag altid stikket ud af stikkontakten, inden apparatet rengøres�
• Apparatet må aldrig kommes ned i vand eller anden væske�
• Anvend aldrig slibende, aggressive eller brændbare rengøringsmidler, f�eks� klor eller sprit,
til at rengøre nogen dele af apparatet�
• Brug aldrig væsker (herunder vand) til rengøring af lteret�
• Forsøg ikke at rengøre partikelsensoren og gassensoren med en støvsuger�
26 DA
Dansk
Rengøringsskema
Hyppighed Rengøringsmetode
Tør apparatets stofbetrukne del med en fugtig klud, og tør
Når det er nødvendigt
Hver anden måned Rengør partikelsensoren med en tør vatpind
apparatets plastikbetrukne del med en blød, tør klud
Rengør luftudtagsdækslet
Når vises på skærmen
(g� r)
Rengør lterets overade
Rengøring af luftrenserens kabinet
Rengør regelmæssigt luftrenseren indvendigt og udvendigt, så der ikke samler sig støv�
1 Tør den stofbetrukne overade forsigtigt med en fugtig klud�
2 Brug en blød, tør klud til at rengøre luftrenseren og luftudtaget både indvendigt og
udvendigt�
Bemærk:
• Den stofbetrukne del på apparatet kan ikke tages af�
• Brug ikke varmt vand, alkohol eller skrappe rengøringsmidler til at rengøre stoet�
Rengøring af partikelsensor
Rengør partikelsensoren hver 2� måned for optimal funktion af apparatet�
Bemærk:
• Hvis luftrenseren anvendes i støvede omgivelser, kan det være nødvendigt at rengøre den
oftere�
• Hvis luftfugtighedsniveauet i rummet er meget højt, kan der dannes kondens på
luftkvalitetssensoren, og luftkvalitetslyset kan angive en dårligere luftkvalitet, selvom
luftkvaliteten faktisk er god� Hvis dette sker, skal du rense partikelsensoren�
• Gassensoren behøver ikke at blive renset�
1 Sluk for luftrenseren, og tag stikket ud af stikkontakten�
2 Træk i bagdækslet, og fjern det fra apparatet (g� c)�
3 Rengør partikelsensoren med en fugtig vatpind (g� s)�
4 Tør alle dele grundigt med en tør vatpind�
5 Sæt bagdækslet på igen (g� g)�
27DA

Rengøring af lterets overade
Lysindikator for lterstatus Handling
Filterrengøringsalarmen
vises på skærmen
(g� t)
Rengør lterets overade med en støvsuger�
�
1 Sluk for luftrenseren, og tag stikket ud af stikkontakten�
2 Træk i bagdækslet, og fjern det fra apparatet (g� c)�
3 Træk lteret ud af apparatet (g� u)�
4 Rengør lterets overade med en støvsuger (g� v)�
5 Sæt lteret tilbage i apparatet (g� f)�
6 Sæt bagdækslet på igen (g� g)�
7 Sæt stikket til luftrenseren i stikkontakten�
8 Tryk på knappen for at tænde apparatet�
9 Tryk på knappen for lterstatus/nulstilling i 3 sekunder for at nulstille lterets
rengøringstid (g� w)�
» Skærmen viser beskeden "Filter cleaning completed"�
10 Vask hænderne grundigt efter rengøring af lteret�
Udskiftning af lteret
Om beskyttelseslåsen til sund luft
Denne luftrenser er udstyret med en indikator for udskiftning af lteret, der skal sikre, at
luftrensningslteret er i optimal stand, når luftrenseren er i brug� Når lteret skal udskiftes, vil
alarmen for udskiftning af lteret lyse rødt�
Hvis lteret ikke udskiftes i tide, stopper luftrenseren og bliver automatisk låst for at beskytte
luftkvaliteten i rummet� Udskift lteret så snart som muligt�
Udskiftning af lteret
Bemærk:
• Filteret må ikke vaskes og heller ikke genbruges�
• Sluk altid for luftrenseren, og tag stikket ud af stikkontakten, før lteret udskiftes�
Lysindikator for lterstatus Handling
Alarmen for udskiftning af lteret
(g� x)
lyser
28 DA
Udskift NanoProtect-lteret i 3-serien
(FY4440/30)
 Loading...