

Philips TV Software Upgrade with Portable Memory
Introduction
Philips offers software upgrade capability for your TV using USB portable memory. After you have
completed the software upgrade, your TV will typically perform better. What improvements are
made depends on the upgrade software you are using as well as the software your TV contained
before the upgrade. You can execute the software upgrade procedure yourself. Be aware that the
content of this document is addressing technical and software skill ed users.
Preparing a portable memory for software upgrade
For the procedure you will require:
A personal computer with web browsing capability.
An archive utility that supports the ZIP-format (e.g. WinZip for Windows or Stufflt for Mac
OS).
A preferably empty USB memory stick.
Note: Only FAT/DOS-formatted portable memory is supported.
New software can be obtained from your dealer or can be downloaded from the
www.philips.com/support
1. Go to www.philips.com/support
2. Follow the procedure to find the information and the software related to your TV.
3. Select the latest software upgrade file and download it to your PC.
4. Decompress the ZIP-file and copy the “autorun2k9f.upg” to the root directory of the
USB portable memory.
Note: Only use software upgrades that can be found on the www.philips.com/support
web site.
Verifying the version of the TV software
Before starting the software upgrade procedure, it is advised to check that what the current TV
software is:
1. Select Current Software Info in the Installation Menu
2. Observe the version and the description of the current software
Automatic software upgrade procedure
For an automatic software upgrade copy the “autorun2k9f.upg” file in the root directory of the
USB portable memory.
website:
using the web browser on your PC.
1. Power off your TV and remove all memory
devices.
2. Insert the USB portable memory that
contains the downloaded software upgrade.
3. Switch on your TV and at startup, the TV
will scan the USB portable memory until it
finds the update content. The TV will
automatically go to the upgrade mode. After
a few seconds it will display the software
upgrade application.
4. Upgrading will now begin and the status of
the upgrade procedure will the displayed.
Warning:
You are not allowed to remove the USB
portable memory during the upgrade
procedure!
In case of a power drop during the upgrade
procedure, don’t remove the USB portable
memory from the TV. The TV will continue
the upgrade as soon as the power comes
back.
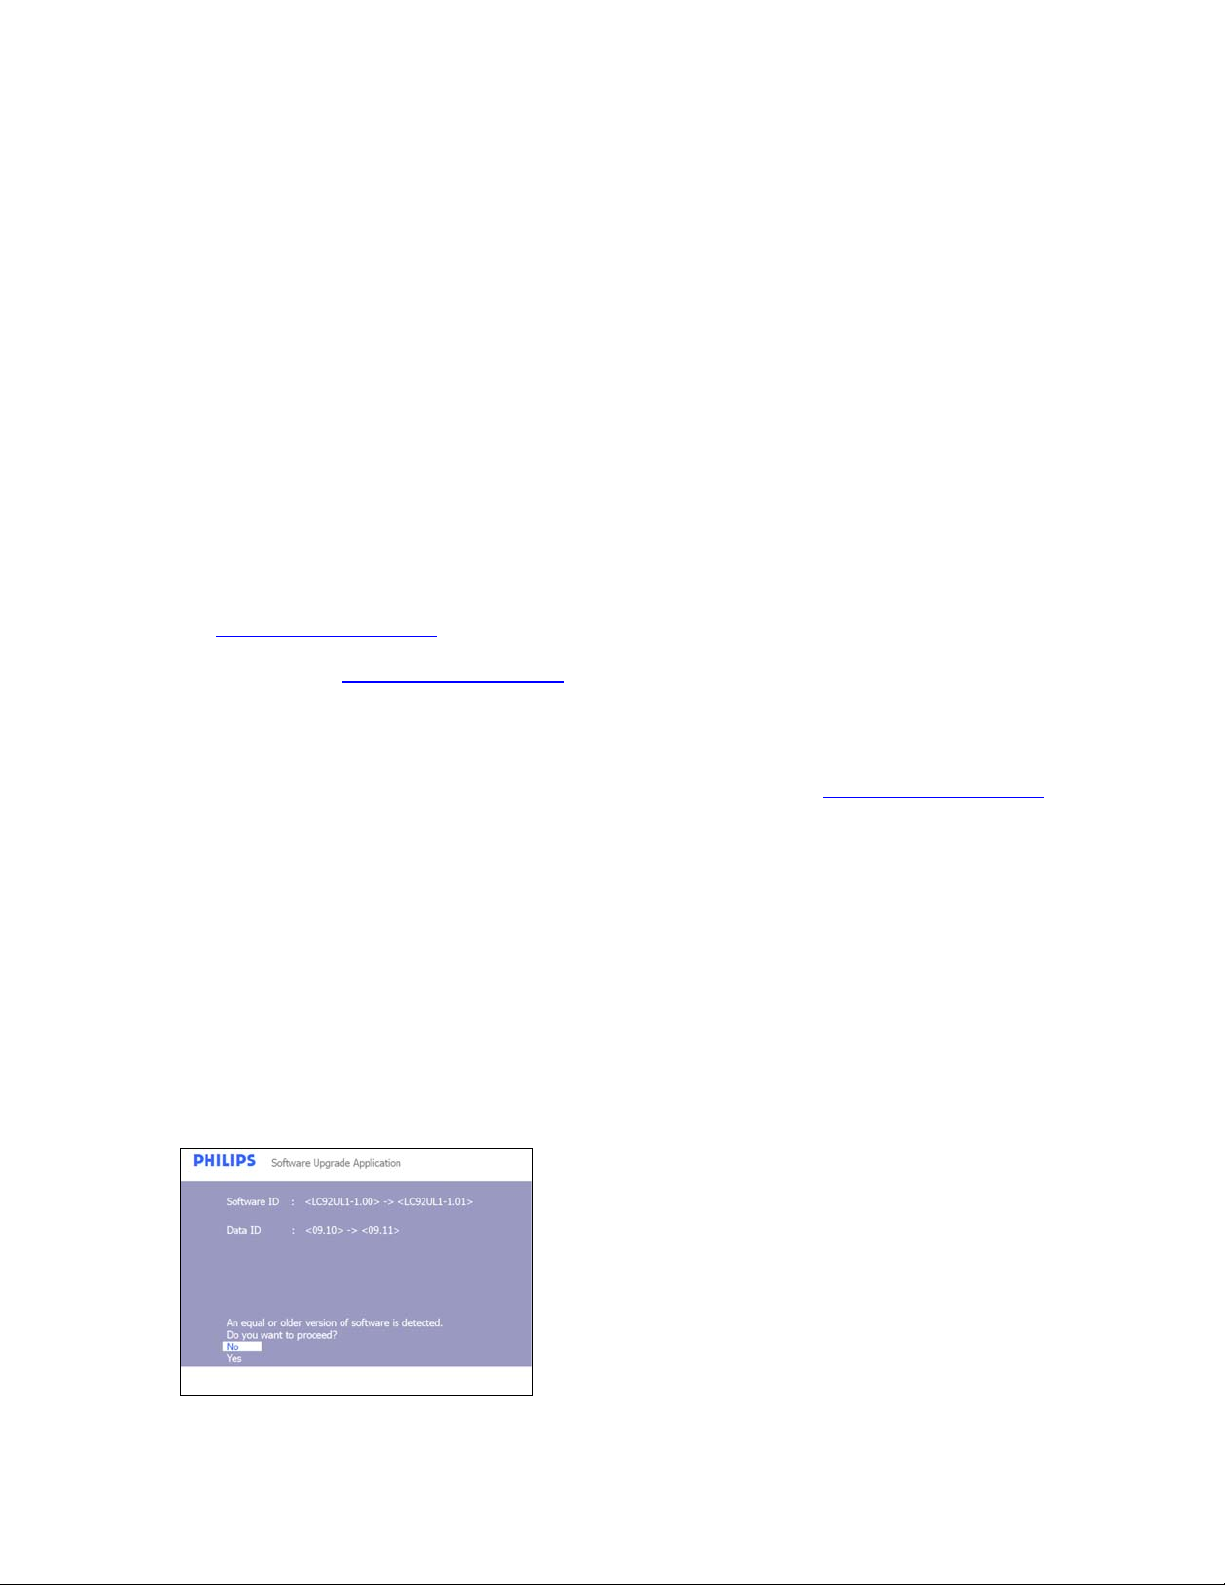
If you try to upgrade to a software version
lower than the current version, a
confirmation will be asked. Downgrading to
older software should only be done in case
of real necessity.
If an error occurs during the upgrade you
should retry the procedure or contact your
dealer.
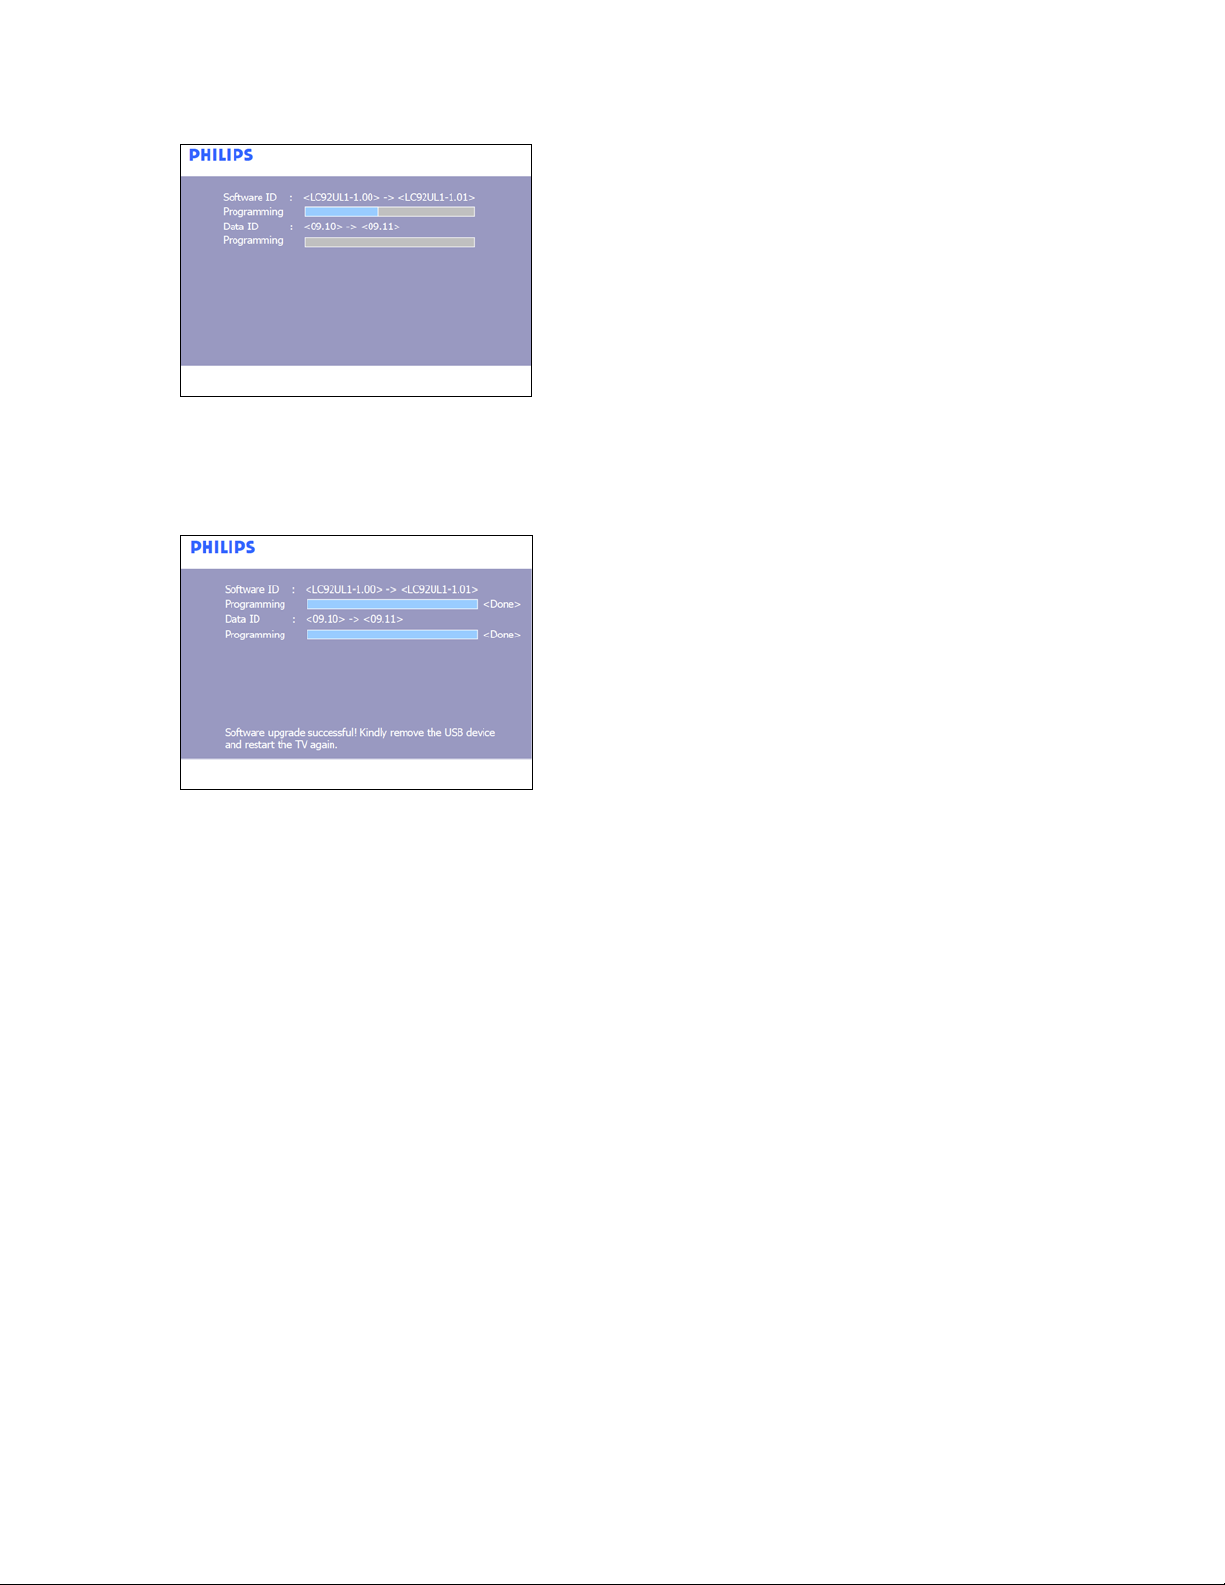
5. When the software upgrade as successful,
remove the USB portable memory and
restart your TV. Your TV will start up with
the new software.
Note: Once the upgrade is finished use
your PC to remove the TV software from
your USB portable memory.

Software History
LC92UL1-0.11
Release for SSB TR
LC92UL1-1.02
Initial Release for Set TR
LC92UL1-1.03
Initial Release for Set PS
LC92UL1-1.04
The followings problems were solved in this release.
(1) Garbage seen at the bottom of the screen
(2) Set hang during power on / off test with IR
(3) System reboot during firmware upgrade after leaving cF mode
(4) Display bottom 5 lines blur
LC92UL1-1.07
The followings problems were solved from last release
(1) Audio Plop through HDMI using cable box from Scientific Atlanta & Direct TV
(2) Change of Sport mode profile from DNM minimum to DNM Off
(3) Speaker DC protection is not working
(4) No audio when playback Audio CD with picture format 1080P via HDMI.
(5) DNM is always on after power on off.
(6) Can see more on top and bottom with 720P picture.
(7) Black mute instead of blue in no ident/signal channels/external sources after exiting
Setting Assistants.
(8) Audio and video out of sync on HDMI after select [AV Reset settings] from TV menu
LC92UL1-1.08
The followings problems were solved in this release.
(1) DNM performance improvement
LC92UL1-1.09
The followings problems were solved in this release.
(1) Omit color patterns during ''keyboard scan test''
(2) Change in RETAIL Mode PQ Profile "Sports" together with Flash Data ver 09.21 and
NVM version 09.15
(3) Define picture format OOB requirement in NVM
(4) DVI audio will only present when there is DVI content (video) present on a HDMI port
(5) Play symbol is displayed when MP3 song is not playing.
LC92UL1-1.04

LC92UL1-1.10
The followings improvements were made in this release.
(1) Stress Test Issue (Channel +/-)
(2) Hdmi4 no video/ no audio issue & HDMI L/R reversed issue in production.
(3) Active control On with Light Sensor in / out of factory mode
(4) Solved the Keyboard Power ON Issue
(5) To include HDMI EDID NVM data update via USB port
(6) To introduce the 2nd source GDDR3 memory
LC92UL1-1.11
The followings improvements were made in this release.
(1) Screen is shifted to the right in 576p in HDMI and 576i and 480i in AV1 and AV2
(2) Video lost in display rack at shop floor setup environment.
(3) Raster seen for a sec before exiting the USB mode
LC92UL1-1.12
The followings improvements were made in this release.
(1) HDMI L/R reversed.
(2) Letter and Accent of "A" in Album is too small and accent "I" for certain Spanish mp3 files
title i
s not correct.
(3) Spanish Help text for Equalizer menu is not complete
(4) Accent placement of Spanish words of "Pacifico" and "Dia" in MENU to be corrected
(5) Dram manual mode setting
LC92UL1-1.13
The followings improvements were made in this release.
(1) Lost HDCP Authorization issue.
(2) Flashing in the 52 inch version when navigating in the picture/music menu if an HDMI
input is selected while a USB is connected.
(3) Flashing image when changing from antenna to cable mode.
 Loading...