

Philips 40PFT6510-12, 50PFT6510-12, 55PFT6510 Instruction manual

Register your product and get support at
www.philips.com/welcome
6510/6550 series
User Manual
40PFT6510
40PFT6550
50PFT6510
50PFT6550
55PFT6510
55PFT6550

Contents
1 TV Tour 4
1.1 Ultra HD TV 4
1.2 Philips Android TV 4
1.3 Using Apps 4
1.4 Playing Games 4
1.5 Movies and missed programmes 4
1.6 Pause TV and Recordings 4
1.7 Smartphones and Tablets 5
1.8 Social Networks 5
1.9 3D 5
1.10 Ambilight 5
1.11 Ambilight + Hue 5
1.12 Bluetooth Connection 6
2 Setting Up 7
2.1 Read Safety 7
2.2 TV Stand and Wall Mounting 7
2.3 Tips on Placement 7
2.4 Power Cable 7
2.5 Antenna Cable 8
3 Connect your Android TV 9
3.1 Network and Internet 9
3.2 Google Account 12
3.3 Philips App Gallery 12
4 Connect Devices 14
4.1 About Connections 14
4.2 CAM with Smart Card - CI+ 16
4.3 Receiver - Set-Top Box 17
4.4 Home Theatre System - HTS 18
4.5 Smartphones and Tablets 19
4.6 Blu-ray Disc Player 19
4.7 DVD Player 20
4.8 Bluetooth - Speakers and Gamepads 20
4.9 Headphones 21
4.10 Game Console 21
4.11 Gamepad 22
4.12 USB Hard Drive 22
4.13 USB Keyboard 23
4.14 USB Flash Drive 24
4.15 Photo Camera 24
4.16 Camcorder 24
4.17 Computer 24
5 Switching On and Off 26
5.1 On, Standby or Off 26
5.2 Philips Logo Brightness 26
5.3 Keys on TV 26
5.4 Sleep Timer 26
5.5 Switch Off Timer 26
6 Remote Control 28
6.1 Key overview 28
6.2 Voice search 29
6.3 Keyboard 30
6.4 Pairing the Remote Control 31
6.5 IR Sensor 31
6.6 Batteries 31
6.7 Cleaning 31
7 Channels 33
7.1 Install Channels 33
7.2 Channel Lists 33
7.3 Watching channels 33
7.4 Favourite Channels 36
7.5 Text / Teletext 37
7.6 Interactive TV 38
8 TV Guide 40
8.1 What You Need 40
8.2 TV Guide Data 40
8.3 Using the TV Guide 40
9 Recording and Pause TV 42
9.1 Recording 42
9.2 Pause TV 43
10 Top Picks 45
10.1 About Top Picks 45
10.2 Now on TV 45
10.3 TV on Demand 45
10.4 Video on Demand 46
11 Home Menu 47
11.1 About the Home Menu 47
11.2 Open the Home Menu 47
11.3 Search and Voice Search 47
11.4 Restricted Profile 47
12 TV Menu 48
12.1 About TV Menu 48
12.2 Open TV Menu 48
13 Netflix 49
14 Sources 50
14.1 Switch to a device 50
14.2 Options for a TV Input 50
14.3 Device Name and Type 50
14.4 Game or Computer 50
14.5 Rescan Connections 51
15 Apps 52
15.1 About Apps 52
15.2 Google Play 52
15.3 App Gallery 53
15.4 Start or Stop an App 53
15.5 Lock Apps 53
15.6 Manage Apps 55
15.7 Storage 55
16 Games 56
16.1 What You Need 56
16.2 Gamepads 56
16.3 Play a Game 56
16.4 Split Screen Gaming 56
16.5 Ideal Game Settings 57
17 Internet 58
17.1 Start Internet 58
17.2 Options on Internet 58
18 Videos, Photos and Music 59
18.1 From a USB Connection 59
18.2 From a Computer or NAS 59
18.3 From a Cloud Storage Service 59
18.4 Play your Videos 59
18.5 View your Photos 60
18.6 Play your Music 60
19 Smartphones and Tablets 62
19.1 Philips TV Remote App 62
2

19.2 Google Cast 62
19.3 Miracast 62
19.4 AirPlay 63
19.5 MHL 63
20 Ambilight 65
20.1 Ambilight Style 65
20.2 Ambilight Off 65
20.3 Ambilight Settings 65
21 3D 66
21.1 What You Need 66
21.2 3D Glasses 66
21.3 Watch 3D 67
21.4 Optimal 3D Viewing 67
21.5 Care of the 3D Glasses 67
21.6 Health Warning 67
22 Multi View 69
22.1 Text and TV 69
22.2 App Gallery and TV 69
22.3 HDMI and TV 69
23 Settings 70
23.1 Picture 70
23.2 Sound 75
23.3 Ambilight Settings 78
23.4 Eco Settings 80
23.5 General Settings 81
23.6 Clock, Region and Language 84
23.7 Universal Access 86
24 Wireless and Networks 89
24.1 Network 89
24.2 Bluetooth 89
25 Android Settings 90
31.1 Terms of Use - TV 131
31.2 Terms of Use - Smart TV 131
31.3 Terms of Use - Philips App Gallery 131
32 Copyrights 132
32.1 MHL 132
32.2 Ultra HD 132
32.3 HDMI 132
32.4 Dolby Digital Plus 132
32.5 DTS Premium Sound ™ 132
32.6 DLNA Certified® 132
32.7 Microsoft 132
32.8 Wi-Fi Alliance 133
32.9 Kensington 133
32.10 Other Trademarks 133
Index 134
26 Channel Installation 91
26.1 Antenna/Cable Installation 91
26.2 Channel List Copy 93
27 Software 95
27.1 Update Software 95
27.2 Software Version 95
27.3 Open Source Software 95
27.4 Open Source License 96
27.5 Announcements 122
28 Specifications 123
28.1 Environmental 123
28.2 Power 123
28.3 Operating System 124
28.4 Reception 124
28.5 Display Type 124
28.6 Display Input Resolution 124
28.7 Dimensions and Weights 124
28.8 Connectivity 125
28.9 Sound 125
28.10 Multimedia 125
29 Help and Support 126
29.1 Register your TV 126
29.2 Using Help 126
29.3 Troubleshooting 126
29.4 Online Help 128
29.5 Support and Repair 128
30 Safety and Care 129
30.1 Safety 129
30.2 Screen Care 130
31 Terms of Use 131
3

1
TV Tour
1.1
Ultra HD TV
This TV has an Ultra HD display. Its resolution is four
times as much as normal HD displays. Ultra HD
means 8 million pixels for the most refined and lifelike
picture on TV.
On top, the new Ultra Pixel HD Engine continuously
converts any incoming TV signal into Ultra HD
resolution. So you can enjoy this stunning picture
quality the moment you switch on the TV. Or you can
watch native Ultra HD videos through an HDMI
connection. Ultra HD offers TV viewing that is crisp
and sharp even on a big screen.
Google, Android, Google Play and other marks are
trademarks of Google Inc. The Android robot is
reproduced or modified from work created and
shared by Google and used according to terms
described in the Creative Commons 3.0 Attribution
License.
http://creativecommons.org/licenses/by/3.0/legalco
de
1.3
Using Apps
To get you started, some practical Apps are preinstalled on your TV.
The Apps pages show the collection of Apps
(Applications) on your TV. Like Apps on your
smartphone or tablet, the Apps on your TV offer
specific functions for an enriched TV experience.
Apps like TV games or weather forecasts (a.o.). Or
start an Internet Browser App, like Google Chrome, to
surf the Internet.
1.2
Philips Android TV
This a Philips Android TV™.
Android TV offers thousands of movies, shows and
games from Google Play, YouTube and your favourite
apps.*
Voice search and personalised recommendations
mean more time being entertained and less time
hunting for something good. With Google Cast built in,
you can easily cast movies, shows and photos from
your Chromebook or Android device to your TV.**
With the Philips TV Remote App on your
smartphone or tablet, you have your TV channels at
your fingertips. Send a photo to the large TV screen or
follow your favourite cooking show on your tablet in
the kitchen. From now on your TV is part of your
mobile household.
Connect the TV to your home network and the
Internet.
* The TV must be connected to the
Internet. Subscriptions might be required for certain
content providers.
** Casting optimized for selected services only.
Streaming quality for other content might vary.
Supported operating systems and devices: Android
2.3 and higher, iOS® 7 and higher, Windows® 7 and
higher, Mac OS® 10.7 and higher and Chrome OS
(version 38 or higher).
For more information, in Help, press the colour
key Keywords and look up Apps.
1.4
Playing Games
This TV is your big screen for gaming. Big enough for
two.
You can play a game from a connected Game
Console, a game from an installed App or simply an
online game on a website. You can set the TV to the
ideal settings for gaming, to allow quick and
responsive action. If you play a multi-player game
with split screens, you can set the TV to show each
screen as a full screen simultaneously. Each player
can focus on his own game to play.
1.5
Movies and missed
programmes
To get a rental video, you don't need to leave the
house.
Open Video on Demand and get that latest movie
streamed to your TV directly. Open the video store
App, create your personal account, select the movie
and press play.
Video on Demand is available in selected countries.
For more information, in Help, press the colour
key Keywords and look up Video on Demand.
4

1.6
1.9
Pause TV and Recordings
If you connect a USB Hard Drive, you can pause and
record a broadcast from a digital TV channel.
Pause your TV and answer that urgent phone call or
simply take a break during a sports match, while the
TV stores the broadcast on the USB Hard Drive. You
can watch it again later.
With a USB Hard Drive connected, you can also
record digital broadcasts. You can record while you
are watching a programme or schedule a recording of
an upcoming programme.
For more information, in Help, press the colour
key Keywords and look up Pause
TV or Recording.
1.7
Smartphones and Tablets
The new Philips TV Remote App is your new TV
buddy.
With the TV Remote App on your smartphone or
tablet, you master your media around you. Send
photos, music or videos to your big TV screen or
watch any of your TV channels live on your tablet or
phone. Open the TV Guide and schedule a recording
for tomorrow. Your TV at home will do the job. Switch
on Ambilight+hue and set the coziest colour effects in
your living room. With the TV Remote App you are in
control. You might consider to simply lower the TV
volume.
Download the Philips TV Remote App from your
favourite app store today.
3D
Your new TV is a 3D TV.
Enjoy the immersive experience of watching a movie
in 3D. Play a movie in 3D on your Blu-ray Player or
rent a 3D movie from a Video Store from the Home
menu, Video on Demand.
The TV uses the Active 3D technology to watch 3D in
its full resolution.
For more information, in Help, press the colour
key Keywords and look up 3D.
1.10
Ambilight
Ambilight is the most elegant and exclusive feature
of your new Philips TV.
A subtle glow of coloured light that shines from
behind the screen - expanding your visual
experience. With Ambilight your eyes relax but your
mind is fully taken up by what you see.
With Ambilight+hue you even expand Ambilight
further. Bringing in the wireless controlled bulbs
of Philips Hue*. All of them setup to fill your room
with colours that fit what's on TV.
You will miss Ambilight when you switch it off.
* Separately available.
1.11
Ambilight + Hue
It's free.
The Philips TV Remote App is available for iOS and
Android.
1.8
Social Networks
No need to get up to check your friend's messages on
your computer.
On this TV you get the messages from your social
network on your TV screen. You can send a return
message from your couch.
For more information, in Help, press the colour
key Keywords and look up Apps.
Your Ambilight TV
Philips' unique Ambilight technology goes beyond
the ordinary. It not only makes your screen seem
much wider, it also makes your viewing experience
more immersive by projecting an extra-wide glow
from the sides of your TV screen onto the surrounding
wall. Colour, vibrancy and excitement move beyond
the screen and into your living room, bringing with
them a more thrilling, intense and immersive viewing
experience.
Ambilight + Hue
Fill your space and your life with the wonder of
Ambilight. Ambilight + hue* allows you to extend the
Ambilight experience throughout your room.
With Ambilight+hue you even expand Ambilight
further. Bringing in the wireless controlled bulbs
of Philips Hue*. All of them setup to fill your room
with colours that fit what's on TV.
Your Ambilight TV and hue bulbs ‘talk’ wirelessly to
5

each other, surrounding you in the emotion, power
and colour of Ambilight.
*Hue kit available separately.
1.12
Bluetooth Connection
Your TV has Bluetooth technology inside.
You can connect extra wireless speakers or a wireless
headphone. Forget connecting cables, pairing your
device with the TV is enough.
For more information, in Help, press the colour
key Keywords and look
up Bluetooth or Wireless Speakers.
6
2
Setting Up
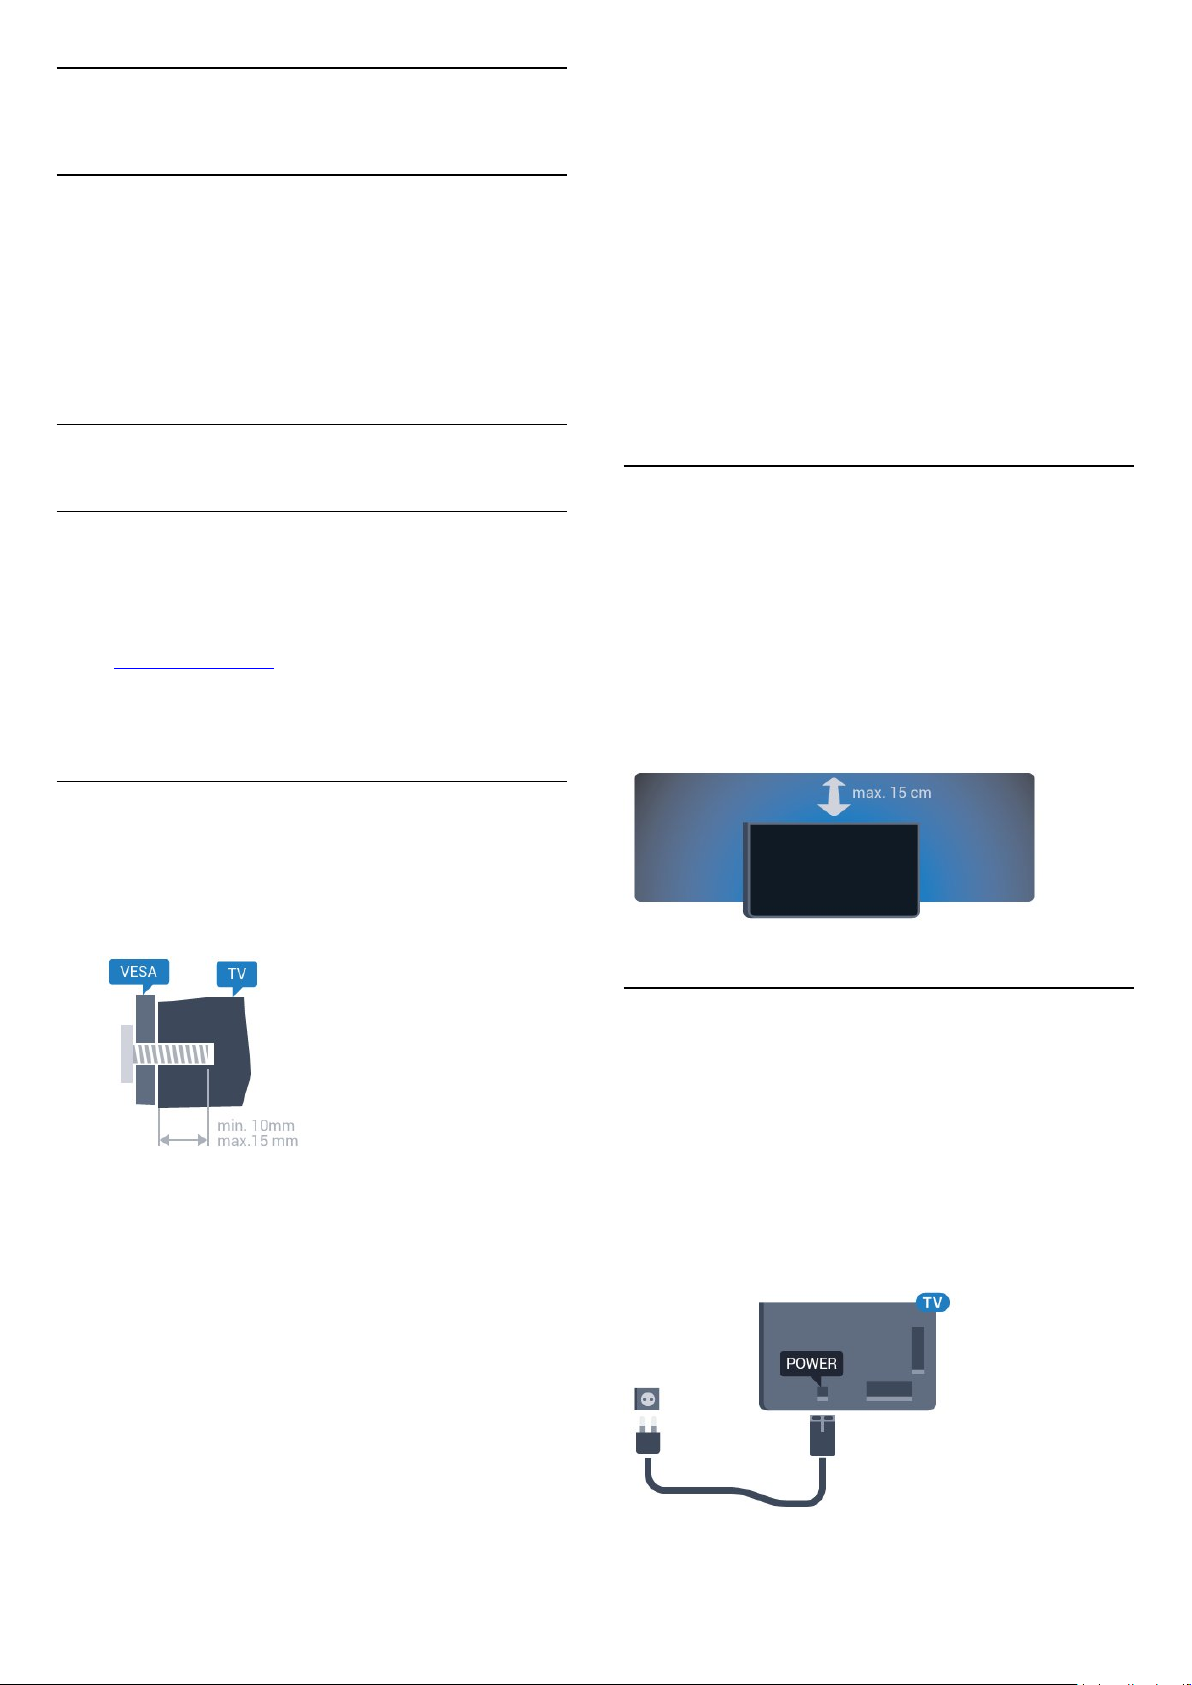
threaded bushes on the back of the TV.
Make sure that the metal screws, to mount the TV to
the VESA-compliant bracket, go about 10mm deep
inside the threaded bushes of the TV.
2.1
Read Safety
Read the safety instructions first before you use the
TV.
To read the instructions, in Help, press the colour
key Keywords and look up Safety Instructions.
2.2
TV Stand and Wall Mounting
TV Stand
You can find the instructions for mounting the TV
stand in the Quick Start Guide that came with the TV.
In case you lost this guide, you can download it
from www.philips.com.
Use the product type number of the TV to look for
the Quick Start Guide to download.
Caution
Wall mounting the TV requires special skills and
should only be performed by qualified personnel. The
TV wall mounting should meet safety standards
according to the TVs weight. Also read the safety
precautions before positioning the TV.
TP Vision Europe B.V. bears no responsibility for
improper mounting or any mounting that results in
accident or injury.
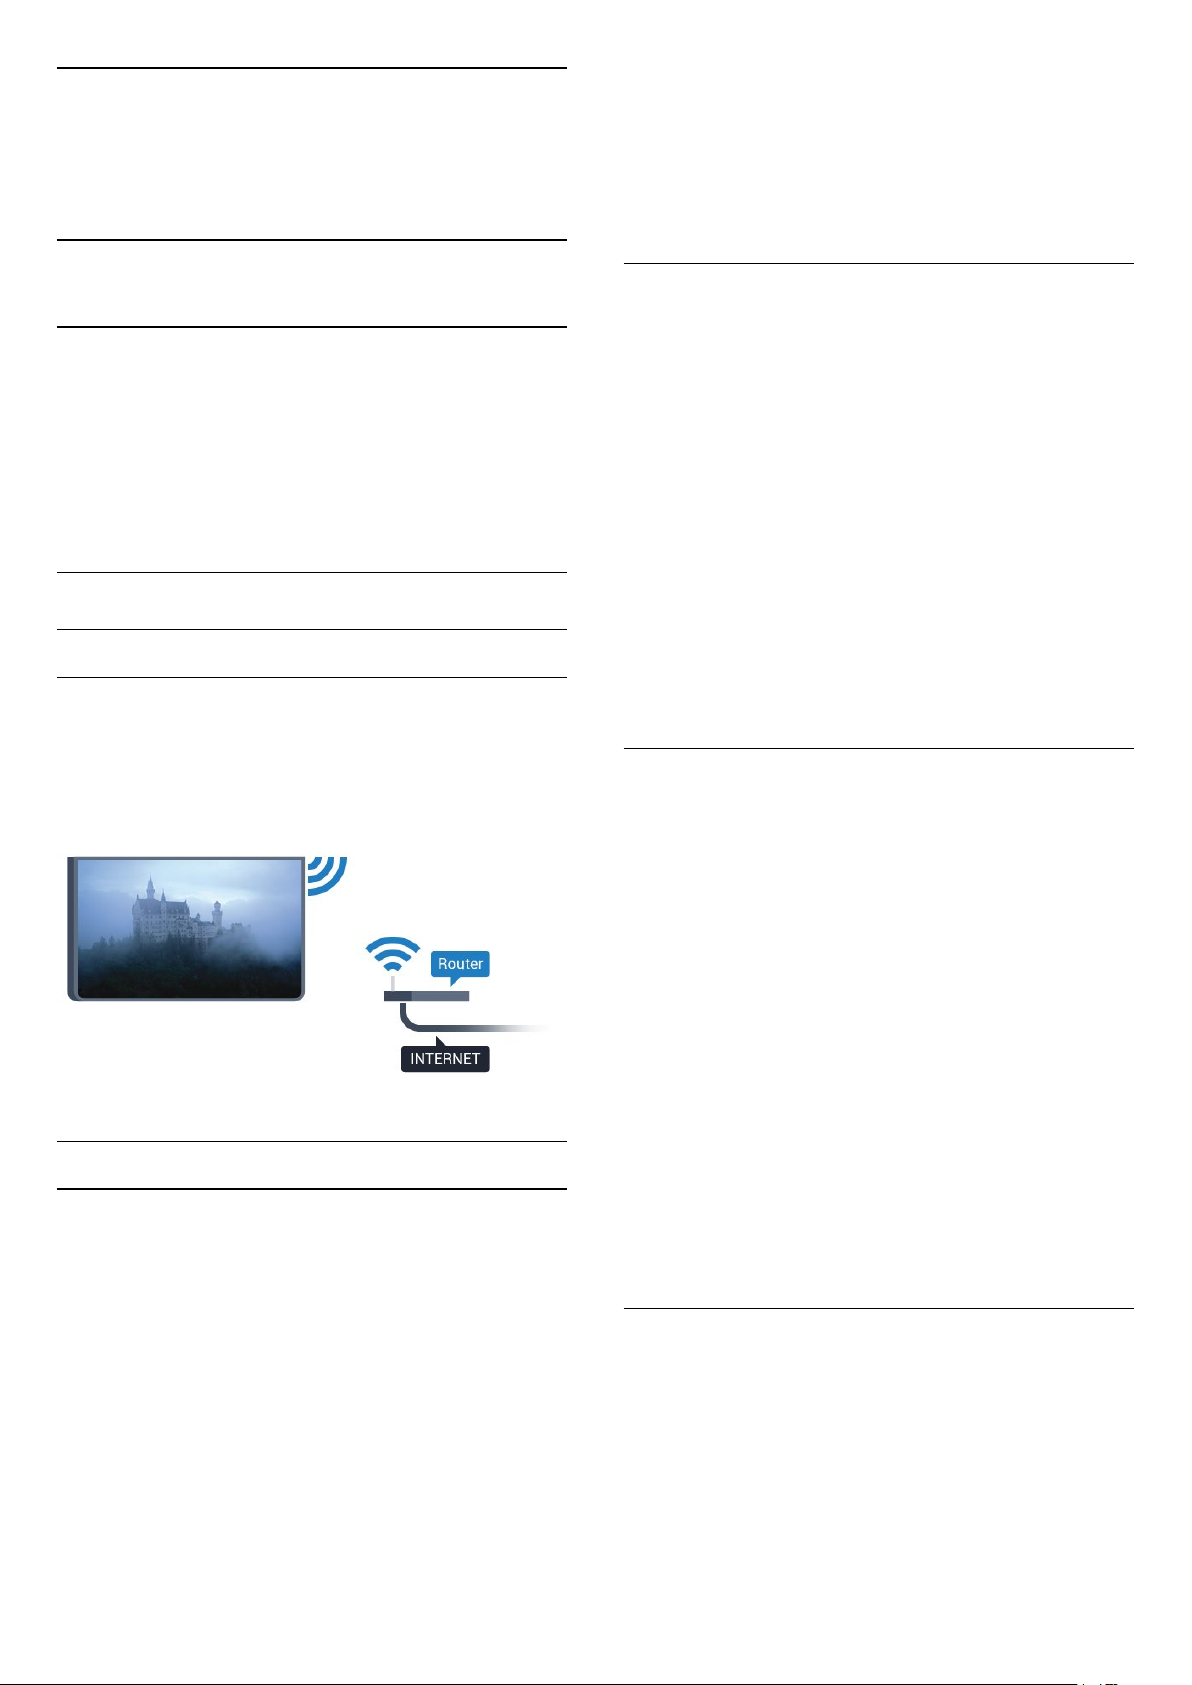
2.3
Tips on Placement
• Position the TV where light does not shine directly
on the screen.
• Dim lighting conditions in the room for best
Ambilight effect.
• Position the TV up to 15 cm away from the wall.
• The ideal distance to watch TV is 3 times its diagonal
screen size. When seated, your eyes should be level
with the centre of the screen.
Wall Mounting
Your TV is also prepared for a VESA-compliant wall
mount bracket (sold separately).
Use the following VESA code when purchasing the
wall mount . . .
• 32PFx6500
VESA MIS-F 100x100, M4
• 40PFx6510,
40PFx6540, 40PFx6550, 40PFx6560, 40PFx6580
VESA MIS-F 200x200, M4
• 50PFx6510,
50PFx6540, 50PFx6550, 50PFx6560, 50PFx6580
VESA MIS-F 400x200, M6
• 55PFx6510,
55PFx6540, 55PFx6550, 55PFx6560, 55PFx6580
VESA MIS-F 400x200, M6
• 65PFx6520
VESA MIS-F 400x400, M6
Preparation
First remove the 4 plastic screw caps out of the
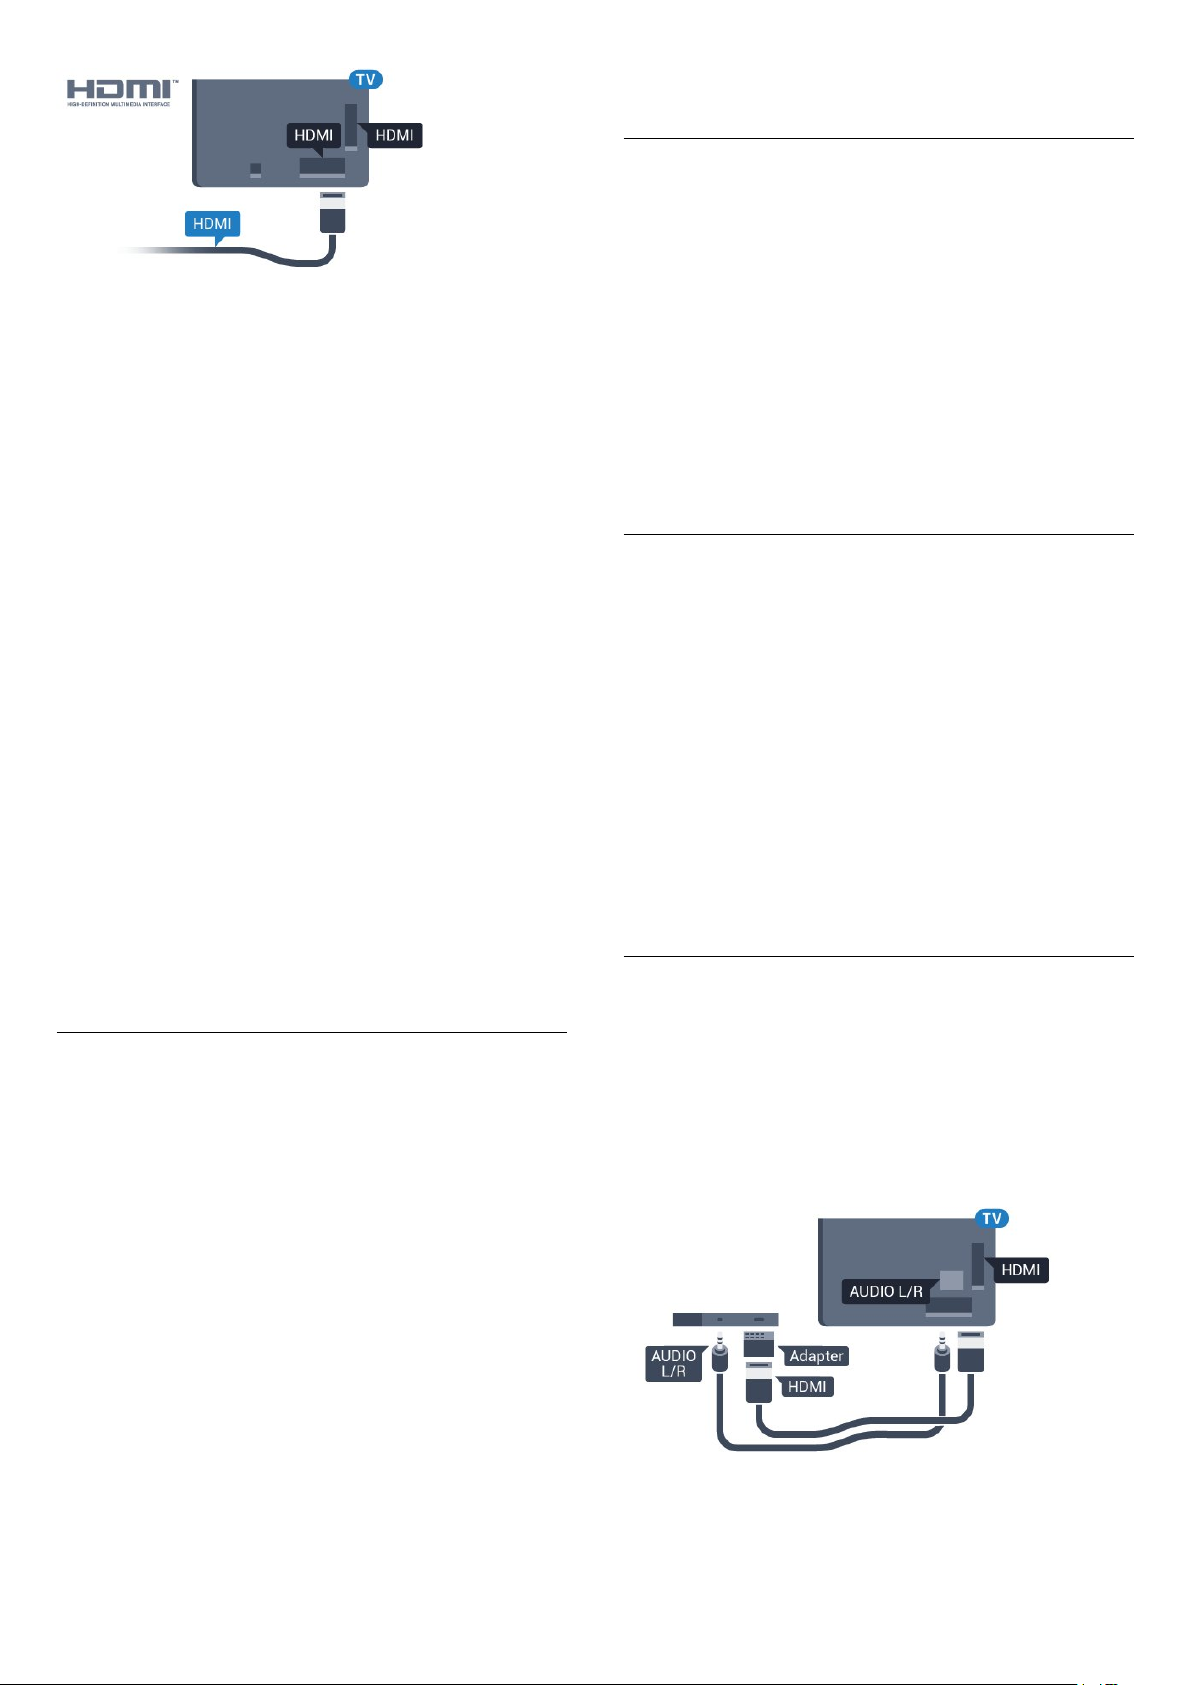
2.4
Power Cable
• Insert the power cable into the POWER connector
on the back of the TV.
• Make sure the power cable is securely inserted in
the connector.
• Make sure that the power plug, in the wall socket, is
accessible at all times.
• When you unplug the power cable, always pull the
plug, never pull the cable.
Although this TV has a very low standby power
7

consumption, unplug the power cable to save energy
if you do not use the TV for a long period of time.
For more information, in Help, press the colour
key Keywords and look up Switching On for
more information on switching the TV on or off.
2.5
Antenna Cable
Insert the antenna plug firmly into
the Antenna socket at the back of the TV.
You can connect your own antenna or an antenna
signal from an antenna distribution system. Use an
IEC Coax 75 Ohm RF antenna connector.
Use this antenna connection for DVB-T and DVB-C
input signals.
8
3
Connect your
Android TV
3.1
Network and Internet
Home Network
To enjoy the full capabilities of your Philips Android
TV, your TV must be connected to the Internet.
Connect the TV to a home network with a high-speed
Internet connection. You can connect your TV
wirelessly or wired to your network router.
Connect to Network
Wireless Connection
What You Need
6 - Depending on the type of router, enter your
encryption key - WEP, WPA or WPA2. If you entered
the encryption key for this network before, you can
select OK to make the connection immediately.
7 - A message will be shown when the connection is
successful.
WPS
If your router has WPS, you can directly connect to
the router without scanning for networks. If you have
devices in your wireless network that use the WEP
security encryption system, you cannot use WPS.
1 - Press , select All Settings and press OK.
2 - Select Wireless and Networks and
press (right) to enter the menu.
3 - Select Wired or Wi-Fi > Connect to
Network and press OK.
4 - Select WPS then press OK.
5 - Go to the router, press the WPS button and return
to the TV within 2 minutes.
6 - Select Connect to make the connection.
7 - A message will be shown when the connection is
successful.
To connect the TV to the Internet wirelessly, you need
a Wi-Fi router with a connection to the Internet.
Use a high-speed (broadband) connection to the
Internet.
Make the Connection
Wireless
To make a wireless connection…
1 - Press , select All Settings and press OK.
2 - Select Wireless and Networks and press
(right) to enter the menu.
3 - Select Wired or Wi-Fi > Connect to
Network and press OK.
4 - Select Wireless and press OK.
5 - In the list of found networks, select on your
wireless network. If your network is not in the list
because the network name is hidden (you switched
off the SSID broadcast of the router), select Add New
Network to enter the network name yourself.
WPS with PIN Code
If your router has WPS with a PIN code, you can
directly connect to the router without scanning for
networks. If you have devices in your wireless
network that use the WEP security encryption system,
you cannot use WPS.
1 - Press , select All Settings and press OK.
2 - Select Wireless and Networks and
press (right) to enter the menu.
3 - Select Wired or Wi-Fi > Connect to
Network and press OK.
4 - Select WPS with PIN code and press OK.
5 - Write down the 8-digit PIN code shown on
screen and enter it in the router software on your PC.
Consult the router manual on where to enter the PIN
code in the router software.
6 - Select Connect to make the connection.
7 - A message will be shown when the connection is
successful.
Problems
Wireless network not found or distorted
• Microwave ovens, DECT phones or other Wi-Fi
802.11b/g/n devices in your proximity might disturb
the wireless network.
• Make sure that the firewalls in your network allow
access to the TV's wireless connection.
• If the wireless network does not work properly in
your home, try the wired network installation.
9

Internet does not work
• If the connection to the router is OK, check the
router connection to the Internet.
The PC and Internet connection are slow
• Look in your wireless router's user manual for
information on indoor range, transfer rate and other
factors of signal quality.
• Use a high-speed (broadband) Internet connection
for your router.
DHCP
• If the connection fails, you can check the DHCP
(Dynamic Host Configuration Protocol) setting of the
router. DHCP should be switched on.
Wired Connection
What You Need
To connect the TV to the Internet, you need a
network router with a connection to the
Internet. Use a high-speed (broadband) connection
to the Internet.
Network Settings
View Network Settings
You can view all current network settings here. The
IP and MAC address, signal strength, speed,
encryption method, etc.
To view the current network settings…
1 - Press , select All Settings and press OK.
2 - Select Wireless and Networks and
press (right) to enter the menu.
3 - Select Wired or Wi-Fi > View Network
Settings and press OK.
4 - Press (left) repeatedly if necessary, to close
the menu.
Network Configuration
If you are an advanced user and want to install your
network with Static IP addressing, set the TV to Static
IP.
To set the TV to Static IP…
Make the Connection
To make a wired connection…
1 - Connect the router to the TV with a network cable
(Ethernet cable**).
2 - Make sure that the router is switched on.
3 - Press , select All Settings and press OK.
4 - Select Wireless and Networks and
press (right) to enter the menu.
5 - Select Wired or Wi-Fi > Connect to
Network and press OK.
6 - Select Wired and press OK. The TV constantly
searches for the network connection.
7 - A message will be shown when the connection is
successful.
If the connection fails, you can check the DHCP
setting of the router. DHCP should be switched on.
**To fulfill EMC regulations, use a shielded FTP Cat.
5E Ethernet cable.
1 - Press , select All Settings and press OK.
2 - Select Wireless and Networks and
press (right) to enter the menu.
3 - Select Wired or Wi-Fi > Network
Configuration and press OK.
4 - Select Static IP and press OK to enable Static
IP Configuration.
5 - Select Static IP Configuration and configure the
connection.
6 - You can set the number for IP
Address, Netmask, Gateway, DNS 1, or DNS 2.
7 - Press (left) repeatedly if necessary, to close
the menu.
Switch On with Wi-Fi (WoWLAN)
You can switch this TV on from your smartphone or
tablet if the TV is in Standby. The setting Switch On
with Wi-Fi (WoWLAN) must be switched on.
To switch on WoWLAN…
1 - Press , select All Settings and press OK.
2 - Select Wireless and Networks and
press (right) to enter the menu.
3 - Select Wired or Wi-Fi > Switch On with Wi-Fi
(WoWLAN) and press OK.
4 - Select On and press OK.
5 - Press (left) repeatedly if necessary, to close
the menu.
10

Switch on Wi-Fi connection
You can switch on or off Wi-Fi connection on your
TV.
To switch on Wi-Fi…
1 - Press , select All Settings and press OK.
2 - Select Wireless and Networks and
press (right) to enter the menu.
3 - Select Wired or Wi-Fi > Wi-Fi On/Off and
press OK.
4 - Select On and press OK.
5 - Press (left) repeatedly if necessary, to close
the menu.
Digital Media Renderer - DMR
If your media files do not play on your TV, make sure
that the Digitial Media Renderer is switched on. As a
factory setting, DMR is switched on.
To switch on DMR…
1 - Press , select All Settings and press OK.
2 - Select Wireless and Networks and
press (right) to enter the menu.
3 - Select Wired or Wi-Fi > Digital Media Renderer
- DMR and press OK.
4 - Select On and press OK.
5 - Press (left) repeatedly if necessary, to close
the menu.
press (right) to enter the menu.
3 - Select Wired or Wi-Fi > Wi-Fi Miracast
Connections and press OK.
4 - Select Clear All and press OK.
5 - Press (left) repeatedly if necessary, to close
the menu.
Wi-Fi Smart Screen
To watch digital TV channels on your smartphone or
tablet with the Philips TV Remote App, you must
switch on Wi-Fi Smart Screen. Some scrambled
channels might not be available on your mobile
device.
To switch on Wi-Fi Smart Screen…
1 - Press , select All Settings and press OK.
2 - Select Wireless and Networks and
press (right) to enter the menu.
3 - Select Wired or Wi-Fi > Wi-Fi Smart
Screen and press OK.
4 - Select On and press OK.
5 - Press (left) repeatedly if necessary, to close
the menu.
TV Network Name
If you have more than one TV in your home network,
you can give the TV a unique name.
Switch on Wi-Fi Miracast
Switch on Wi-Fi Miracast to share the screen of your
smartphone, tablet or computer on the TV.
To switch on Miracast…
1 - Press , select All Settings and press OK.
2 - Select Wireless and Networks and
press (right) to enter the menu.
3 - Select Wired or Wi-Fi > Wi-Fi Miracast and
press OK.
4 - Select On and press OK.
5 - Press (left) repeatedly if necessary, to close
the menu.
For more information, in Help, press the colour
key Keywords and look up Miracast™, switch
on.
Clear Wi-Fi Miracast connection
Clear the list of connected and blocked devices that
are used with Miracast.
To clear Miracast connections…
1 - Press , select All Settings and press OK.
2 - Select Wireless and Networks and
To change the TV name…
1 - Press , select All Settings and press OK.
2 - Select Wireless and Networks and
press (right) to enter the menu.
3 - Select Wired or Wi-Fi > TV Network Name and
press OK.
4 - Enter the name with the on-screen keyboard or
the remote control keyboard (if available).
5 - Select to confirm the change.
6 - Press (left) repeatedly if necessary, to close
the menu.
Clear Internet Memory
With Clear Internet Memory, you can clear all
Internet files and logins stored on your TV, such as
passwords, cookies, and history.
To clear the Internet memory…
1 - Press , select All Settings and press OK.
2 - Select Wireless and Networks and
press (right) to enter the menu.
3 - Select Wired or Wi-Fi > Clear Internet
Memory and press OK.
4 - Select OK to confirm.
5 - Press (left) repeatedly if necessary, to close
the menu.
11

File Sharing
Android Settings
The TV can connect to other devices in your wireless
network, like your computer or smartphone. You can
use a computer with Microsoft Windows or Apple OS
X.
On this TV, you can open photos, music and videos
stored on your computer.
3.2
Google Account
Sign In
To enjoy the full capabilities of your Philips Android
TV, you can sign in to Google with your Google
Account.
By signing in you'll be able to play your favourite
games across phone, tablet and TV. You'll also get
customised video and music recommendations on
your TV home screen as well as access to YouTube,
Google Play and other apps.
Sign In
Use your existing Google Account to sign in to
Google on your TV. A Google Account consists of an
email address and a password. If you don't have an
Google Account yet, use your computer or tablet to
create one (accounts.google.com). To play games
with Google Play, you need a Google+ profile. If you
did not sign in during the first TV installation, you can
always sign in later.
To sign in after you did the TV installation…
1 - Press , select All Settings and press OK.
2 - Select Android Settings and press OK.
3 - Press (down) and select Personal > Add
account and press OK.
4 - Press OK on SIGN IN.
5 - With the remote control keyboard, enter your
email address and press the small OK key at the
right of the keyboard.
6 - Enter your password and press the same
small OK key to sign in.
7 - Press (left) repeatedly if necessary, to close
the menu.
If you want to sign in with another Google Account,
first sign out and sign in with the other account.
You can set or view several Android specific settings
or information. You can find the list of apps installed
on your TV and the storage space they need. You can
set the language you like to use with Voice
Search. You can configure the onscreen keyboard or
allow apps to use your location. Explore the different
Android settings. You can go
to www.support.google.com/androidtv for more
information on these settings.
To open these settings…
1 - Press , select All Settings and press OK.
2 - Select Android Settings, and press OK.
3 - Explore the different Android settings.
4 - Press BACK if necessary, to close the menu.
3.3
Philips App Gallery
Philips Apps
Connect the TV to the Internet to enjoy apps selected
by Philips. These apps are made specially for TV. The
Philips App Gallery offers a wide diversity of apps.
For some countries, you can install apps of a local
Videostore or apps from TV broadcasters in your
country. The latter can offer Catch-Up TV services.
The Philips App Gallery collection of apps can differ
per country or region.
Some App Gallery apps are pre-installed on your TV.
To install other apps from the App Gallery, you will be
asked to agree to the Terms of Use. You can set the
Privacy Settings according to your preference.
Terms of Use
To install and use the Philips App Gallery apps, you
must agree to the Terms of Use. If you did not agree
to these terms during the first TV installation, you can
always agree to them later. The moment you agree to
the Terms of Use, some apps will be available
immediately and you can browse the Philips App
Gallery to install other apps.
To agree on the Terms of Use after you did the TV
installation…
1 - Press HOME and select Philips Collection >
App Gallery and press OK to open the App Gallery.
2 - You can select Terms of Use, then press OK to
read.
3 - Select Accept and press OK. You cannot undo
this approval.
4 - Press BACK to close the menu.
12

Privacy Settings
You can set some privacy settings for the Philips App
Gallery apps.
• You can allow technical statistics to be send to
Philips.
• You can allow personal recommendations.
• You can allow cookies.
• You can switch on the Child Lock for 18+ rated apps.
To set the Philips App Gallery privacy settings…
1 - Press HOME and select Philips
Collection > App Gallery and press OK to open
the App Gallery.
2 - You can select Privacy Policy, then press OK to
read.
3 - Select Accept and press OK. You cannot undo
this approval.
4 - Press BACK to close the menu.
13

4
Connect Devices
4.1
About Connections
Connectivity Guide
Always connect a device to the TV with the highest
quality connection available. Also, use good quality
cables to ensure a good transfer of picture and
sound.
When you connect a device, the TV recognizes its
type and gives each device a correct type name. You
can change the type name if you wish. If a correct
type name for a device is set, the TV automatically
switches to the ideal TV settings when you switch to
this device in the Sources menu.
If you need help to connect several devices to the TV,
you can visit the Philips TV connectivity guide. The
guide offers information on how to connect and
which cables to use.
HDMI cables support HDCP (High-bandwidth Digital
Content Protection). HDCP is a copy protection signal
that prevents copying content from a DVD disc or Bluray Disc. Also referred to as DRM (Digital Rights
Management).
HDMI ARC
All of the HDMI connections on the TV have HDMI
ARC (Audio Return Channel).
If the device, typically a Home Theatre System (HTS),
also has the HDMI ARC connection, connect it to any
of the HDMI connections on this TV. With the HDMI
ARC connection, you do not need to connect the
extra audio cable that sends the sound of the TV
picture to the HTS. The HDMI ARC connection
combines both signals.
You can use any HDMI connection on this TV to
connect the HTS but ARC is only available for 1
device/connection at a time.
HDMI MHL
Go to www.connectivityguide.philips.com
Antenna port
If you have a Set-top box (a digital receiver) or
Recorder, connect the antenna cables to run the
antenna signal through the Set-top box and/or
Recorder first before it enters the TV. In this way, the
antenna and the Set-top box can send possible
additional channels to the Recorder to record.
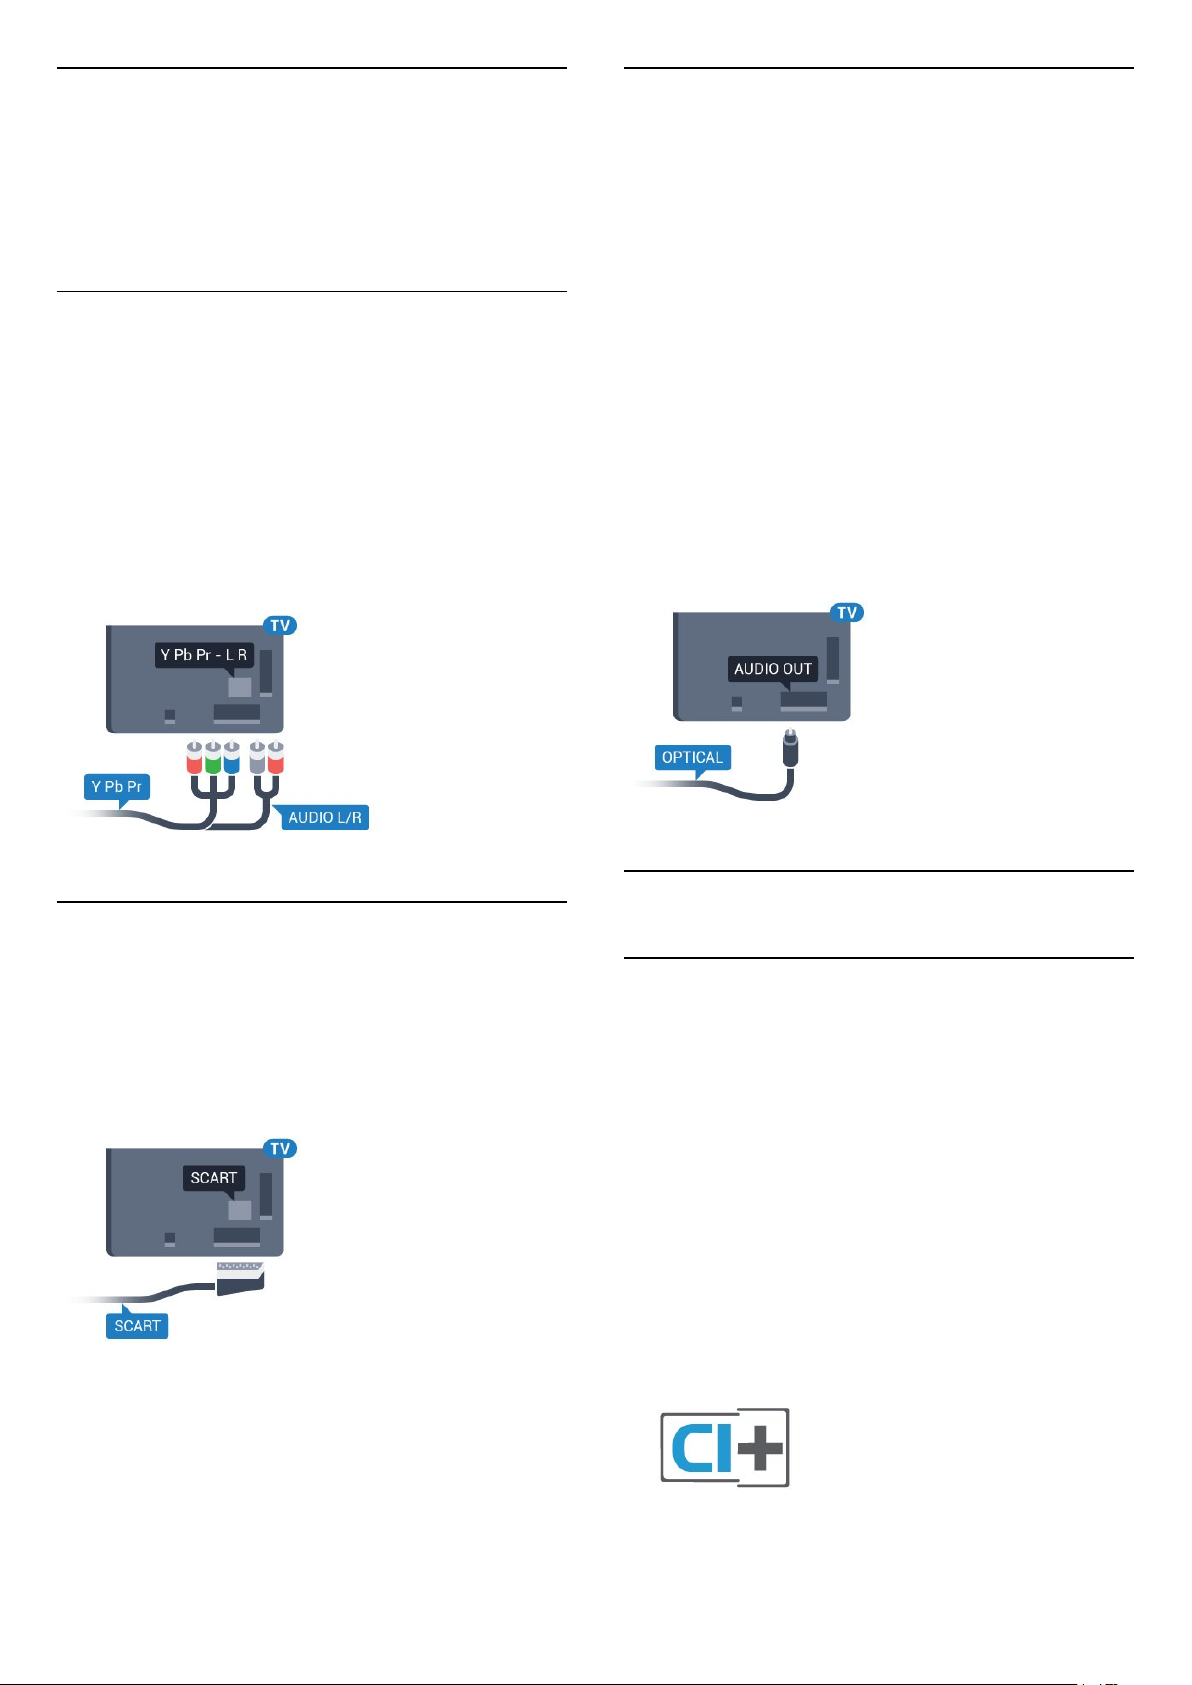
HDMI ports
HDMI Quality
An HDMI connection has the best picture and sound
quality. One HDMI cable combines video and audio
signals. Use an HDMI cable for TV signal.
For best signal quality transfer, use a High speed
HDMI cable and do not use an HDMI cable longer
than 5 m.
With HDMI MHL, you can send what you see on your
Android smartphone or tablet to a TV screen.
The HDMI 4 connection on this TV
incorporates MHL 2.0 (Mobile High-Definition Link).
This wired connection offers great stability and
bandwidth, low latency, no wireless interference and
good quality sound reproduction. On top of that, the
MHL connection will charge the battery of your
smartphone or tablet. Although connected, your
mobile device will not be charging when the TV is on
standby.
Inform yourself about what passive MHL cable is
suited for your mobile device. In particular, with the
HDMI connector for the TV on one side, the type of
connector you need to connect to your smartphone
or tablet.
MHL, Mobile High-Definition Link and the MHL Logo
are trademarks or registered trademarks of the MHL,
LLC.
HDMI CEC - EasyLink
Copy protection
EasyLink
An HDMI connection has the best picture and sound
quality. One HDMI cable combines video and audio
signals. Use an HDMI cable for High Definition (HD)
TV signals. For best signal quality transfer, use a High
speed HDMI cable and do not use an HDMI cable
longer than 5 m.
14
control.
EasyLink On or Off
You can switch EasyLink on or off. The TV comes with
the EasyLink settings switched on.
To switch off EasyLink completely…
EasyLink HDMI CEC
If your devices are connected with HDMI and have
EasyLink, you can operate them with the TV remote
control. EasyLink HDMI CEC must be switched On on
the TV and the connected device.
With EasyLink you can operate a connected device
with the TV remote control. EasyLink uses HDMI CEC
(Consumer Electronics Control) to communicate with
the connected devices. Devices must support HDMI
CEC and must be connected with an HDMI
connection.
EasyLink setup
The TV comes with EasyLink switched on. Make sure
that all HDMI CEC settings are properly set up on the
connected EasyLink devices. EasyLink might not work
with devices from other brands.
HDMI CEC on other brands
The HDMI CEC functionality has different names on
different brands. Some examples are: Anynet, Aquos
Link, Bravia Theatre Sync, Kuro Link, Simplink and
Viera Link. Not all brands are fully compatible with
EasyLink.
1 - Press , select All Settings and press OK.
2 - Select General Settings and press (right) to
enter the menu.
3 - Select EasyLink, press (right) and
select EasyLink one step further.
4 - Select Off.
5 - Press (left) repeatedly if necessary, to close
the menu.
EasyLink Remote Control
If you want devices to communicate but you don't
want to operate them with the TV remote control, you
can switch off EasyLink Remote Control separately.
To switch EasyLink Remote Control on or off…
1 - Press , select All Settings and press OK.
2 - Select General Settings and press (right) to
enter the menu.
3 - Select EasyLink > EasyLink Remote
Control and press OK.
4 - Select On or Off and press OK.
5 - Press (left) repeatedly if necessary, to close
the menu.
Example HDMI CEC branding names are property of
their respective owners.
Operate Devices
To operate a device connected to HDMI and set up
with EasyLink, select the device or its activity in the
list of TV connections. Press SOURCES , select a
device connected to an HDMI connection and
press OK.
Once the device is selected, the TV remote control
can control the device. However the
keys HOME and OPTIONS and some other
TV keys, are not forwarded to the device.
If the key you need is not on the TV remote control,
you can select the key in the Options menu.
Press OPTIONS and select Controls in the
menu bar. On the screen, select the device key you
need and press OK.
Some very specific device keys might not be available
in the Controls menu.
DVI to HDMI
If you still own a device that only has a DVI
connection, you can connect the device to any of
the HDMI connection with a DVI to HDMI adapter.
Use a DVI to HDMI adapter if your device only has a
DVI connection. Use one of the HDMI connections
and add an Audio L/R cable (mini-jack 3.5mm) to
Audio In for sound, on the back of the TV.
Only devices that support EasyLink Remote
Control function will respond to the TV remote
15
Copy protection
Audio Out - Optical
DVI and HDMI cables support HDCP (High-bandwidth
Digital Content Protection). HDCP is a copy protection
signal that prevents copying content from a DVD disc
or Blu-ray Disc. Also referred to as DRM (Digital
Rights Management).
Y Pb Pr - Component
Y Pb Pr - Component Video is a high quality
connection.
The YPbPr connection can be used for High Definition
(HD) TV signals. Next to the Y, Pb and Pr signals add
the Audio Left and Right signals for sound.
Match the YPbPr (green, blue, red) connector colours
with the cable plugs when you connect.
Use an Audio L/R cinch cable if your device also has
sound.
Audio Out - Optical is a high quality sound
connection.
This optical connection can carry 5.1 audio channels.
If your device, typically a Home Theatre System
(HTS), has no HDMI ARC connection, you can use this
connection with the Audio In - Optical connection on
the HTS. The Audio Out - Optical connection sends
the sound from the TV to the HTS.
You can set the type of the audio out signal to fit the
audio capabilities of your Home Theatre System.
For more information, in Help, press the colour
key Keywords and look up Audio Out Settings.
If the sound does not match the video on screen, you
can adjust the audio to video synchronisation.
For more information, in Help, press the colour
key Keywords and look up Audio to Video
Sync.
Scart
SCART is a good quality connection.
The SCART connection can be used for CVBS and
RGB video signals but cannot be used for High
Definition (HD) TV signals. The SCART connection
combines video and audio signals. The SCART
connection also supports NTSC playback.
4.2
CAM with Smart Card - CI+
CI+
This TV is ready for the CI+ Conditional Access.
With CI+ you can watch premium HD programmes,
like movies and sports, offered by digital TV operators
in your region. These programmes are scrambled by
the TV operator and descrambled with a prepaid CI+
module.
Digital TV operators provide a CI+ module
(Conditional Access Module - CAM) and an
accompanying smart card, when you subscribe to
their premium programmes. These programmes have
a high level of copy protection.
Contact a digital TV operator for more information on
terms & conditions.
16

Smart Card
Digital TV operators provide a CI+ module
(Conditional Access Module - CAM) and an
accompanying smart card, when you subscribe to
their premium programmes.
Insert the smart card into the CAM module. See the
instruction you received from the operator.
To insert the CAM in the TV…
1 - Look on the CAM for the correct method of
insertion. Incorrect insertion can damage the CAM
and TV.
2 - While looking at the back of the TV, with the front
of the CAM facing towards you, gently insert the CAM
into the slot COMMON INTERFACE.
3 - Push the CAM in as far as it will go. Leave it in the
slot permanently.
When you switch on the TV, it may take a few minutes
before the CAM is activated. If a CAM is inserted and
subscription fees are paid (subscription methods can
differ), you can watch the scrambled channels
supported by the CAM smart card.
4.3
Receiver - Set-Top Box
Cable Box
Use 2 antenna cables to connect the antenna to the
Set-top box (a digital receiver) and the TV.
Next to the antenna connections, add an HDMI cable
to connect the Set-top box to the TV.
Alternatively, you can use a SCART cable if the Settop box has no HDMI connection.
The CAM and smart card are exclusively for your TV. If
you remove the CAM, you will no longer be able to
watch the scrambled channels supported by the
CAM.
Passwords and PIN codes
For some CAMs, you must enter a PIN code to watch
its channels. When you set the PIN code for the CAM,
we recommend you to use the same code you are
using to unlock the TV.
To set the PIN code for the CAM…
1 - Press SOURCES .
2 - Select the channel type you are using the CAM
for.
3 - Press OPTIONS and select Common
Interface.
4 - Select the TV operator of the CAM. The following
screens come from the TV operator. Follow the onscreen instruction to look up the PIN code setting.
Switch Off Timer
Switch off this automatic timer, if you only use the
remote control of the Set-top box. Switch this timer
off to prevent the TV from switching off automatically
after a 4 hour period without a key press on the
remote control of the TV.
For more information, in Help, press the colour
key Keywords and look up Switch Off
Timer for more information.
Satellite Tuner
Connect the dish antenna cable to the Satellite
receiver.
Next to the antenna connection, add an HDMI cable
to connect the device to the TV.
Alternatively, you can use a SCART cable if the device
has no HDMI connection.
17
Switch Off Timer
Switch off this automatic timer, if you only use the
remote control of the Set-top box. Switch this timer
off to prevent the TV from switching off automatically
after a 4 hour period without a key press on the
remote control of the TV.
For more information, in Help, press the colour
key Keywords and look up Switch Off
Timer for more information.
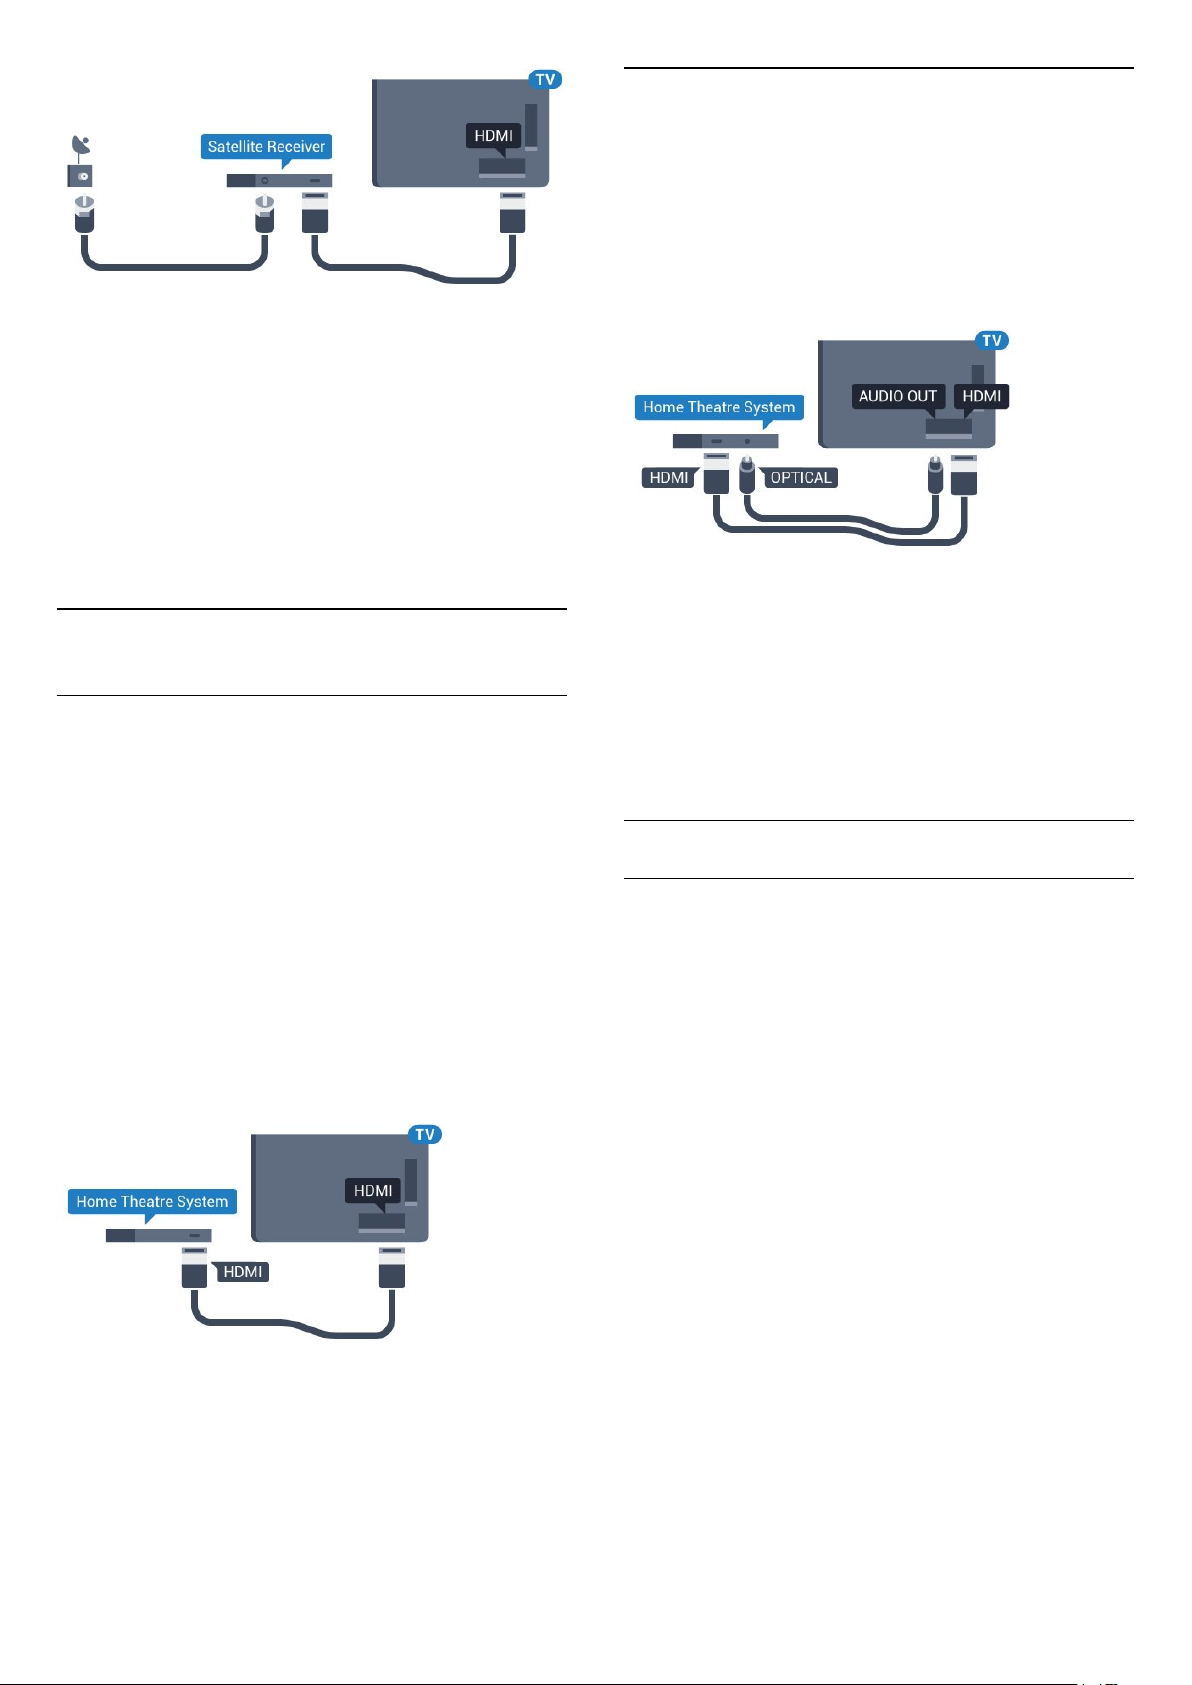
4.4
Home Theatre System - HTS
Connect with HDMI
Use an HDMI cable to connect a Home Theatre
System (HTS) to the TV. You can connect a Philips
Soundbar or an HTS with a built-in disc player.
If the Home Theatre System has no HDMI ARC
connection, add an optical audio cable (Toslink) to
send the sound of the TV picture to the Home Theatre
System.
Audio to video synchronisation (sync)
If the sound does not match the video on screen, you
can set a delay on most Home Theatre Systems with
a disc player to match the sound with the video.
Connect with HDMI ARC
Use an HDMI cable to connect a Home Theatre
System (HTS) to the TV. You can connect a Philips
Soundbar or an HTS with a built-in disc player.
HDMI ARC
If your Home Theatre System has an HDMI ARC
connection, you can use any HDMI connection on the
TV to connect. With HDMI ARC, you do not need to
connect the extra audio cable. The HDMI ARC
connection combines both signals.
All HDMI connections on the TV can offer the Audio
Return Channel (ARC) signal. But once you have
connected the Home Theatre System, the TV can
only send the ARC signal to this HDMI connection.
Audio to video synchronisation (sync)
If the sound does not match the video on screen, you
can set a delay on most Home Theatre Systems with
a disc player to match the sound with the video.
For more information, in Help, press the colour
key Keywords and look up Audio to Video
Sync.
For more information, in Help, press the colour
key Keywords and look up Audio to Video
Sync.
Audio Out Settings
Audio Out Delay
With a Home Theatre System (HTS) connected to the
TV, the picture on TV and the sound from the HTS
should be synchronised.
Automatic audio to video sync
With recent Philips Home Theatre Systems, the audio
to video sync is done automatically and always
correct.
Audio sync delay
For some Home Theatre Systems you might need to
adjust the audio sync delay to synchronise the audio
to the video. On the HTS, increase the delay value
until there is a match between picture and sound. A
delay value of 180ms may be required. Read the user
manual of the HTS. With a delay value set up on the
HTS, you need to switch off Audio Out Delay on the
TV.
To switch off Audio Out Delay…
1 - Press , select All Settings and press OK.
2 - Select Sound and press (right) to enter the
menu.
3 - Select Advanced > Audio Out Delay and
press OK.
18

4 - Select Off.
5 - Press (left) repeatedly if necessary, to close
the menu.
Audio Out Offset
If you cannot set a delay on the Home Theatre
System, you can set the TV to sync the sound. You
can set an offset that compensates for the time
necessary for the Home Theatre System to process
the sound of the TV picture. You can set the value in
steps of 5ms. Maximum setting is -60ms.
The Audio Out Delay setting should be switched on.
2 - Select Sound and press (right) to enter the
menu.
3 - Select Advanced > Audio Out Levelling and
press OK.
4 - Select More, Medium, or Less, then press OK.
5 - If the volume difference is large, select More. If
the volume difference is small, select Less.
6 - Press (left) repeatedly if necessary, to close
the menu.
Audio Out Levelling affects both the Audio Out Optical and HDMI ARC sound signals.
To synchronise the sound on the TV…
1 - Press , select All Settings and press OK.
2 - Select Sound and press (right) to enter the
menu.
3 - Select Advanced > Audio Out Offset and
press OK.
4 - Use the slider bar to set the sound offset and
press OK.
5 - Press (left) repeatedly if necessary, to close
the menu.
Audio Out Format
If you have a Home Theatre System (HTS)
with multichannel sound processing capabilities like
Dolby Digital, DTS® or similar, set the Audio Out
Format to Multichannel. With Multichannel, the TV
can send the compressed multichannel sound signal
from a TV channel or connected player to the Home
Theatre System. If you have a Home Theatre System
without multichannel sound processing, select Stereo.
To set Audio Out Format…
1 - Press , select All Settings and press OK.
2 - Select Sound and press (right) to enter the
menu.
3 - Select Advanced > Audio Out Format and
press OK.
4 - Select Multichannel or Stereo (uncompressed),
then press OK.
5 - Press (left) repeatedly if necessary, to close
the menu.
Problems with HTS sound
Sound with loud noise
If you watch a video from a plugged in USB flash drive
or connected computer, the sound from your Home
Theatre System might be distorted. This noise is heard
when the audio or video file has DTS sound but the
Home Theatre System has no DTS sound processing.
You can fix this by setting the Audio Out Format of
the TV to Stereo (uncompressed).
Press for All
Settings > Sound > Advanced > Audio Out
Format.
No sound
If you cannot hear the sound from the TV on your
Home Theatre System, check if you connected the
HDMI cable to an HDMI ARC connection on the
Home Theatre System. All HDMI connections on the
TV are HDMI ARC connections.
4.5
Smartphones and Tablets
To connect a smartphone or tablet to the TV, you can
use a wireless or wired connection.
Wireless
For a wireless connection, on your smartphone or
tablet download the Philips TV Remote App from
your favourite app store.
Audio Out Levelling
Use the Audio Out Levelling setting to level the
volume (loudness) of the TV and the Home Theatre
System when you switch over from one to another.
Volume differences can be caused by differences in
sound processing.
To level the difference in volume…
1 - Press , select All Settings and press OK.
Wired
For a wired connection, use the HDMI 4 MHL
connection on the back of the TV. In Help, press the
colour key Keywords and look up HDMI
MHL for more information.
19
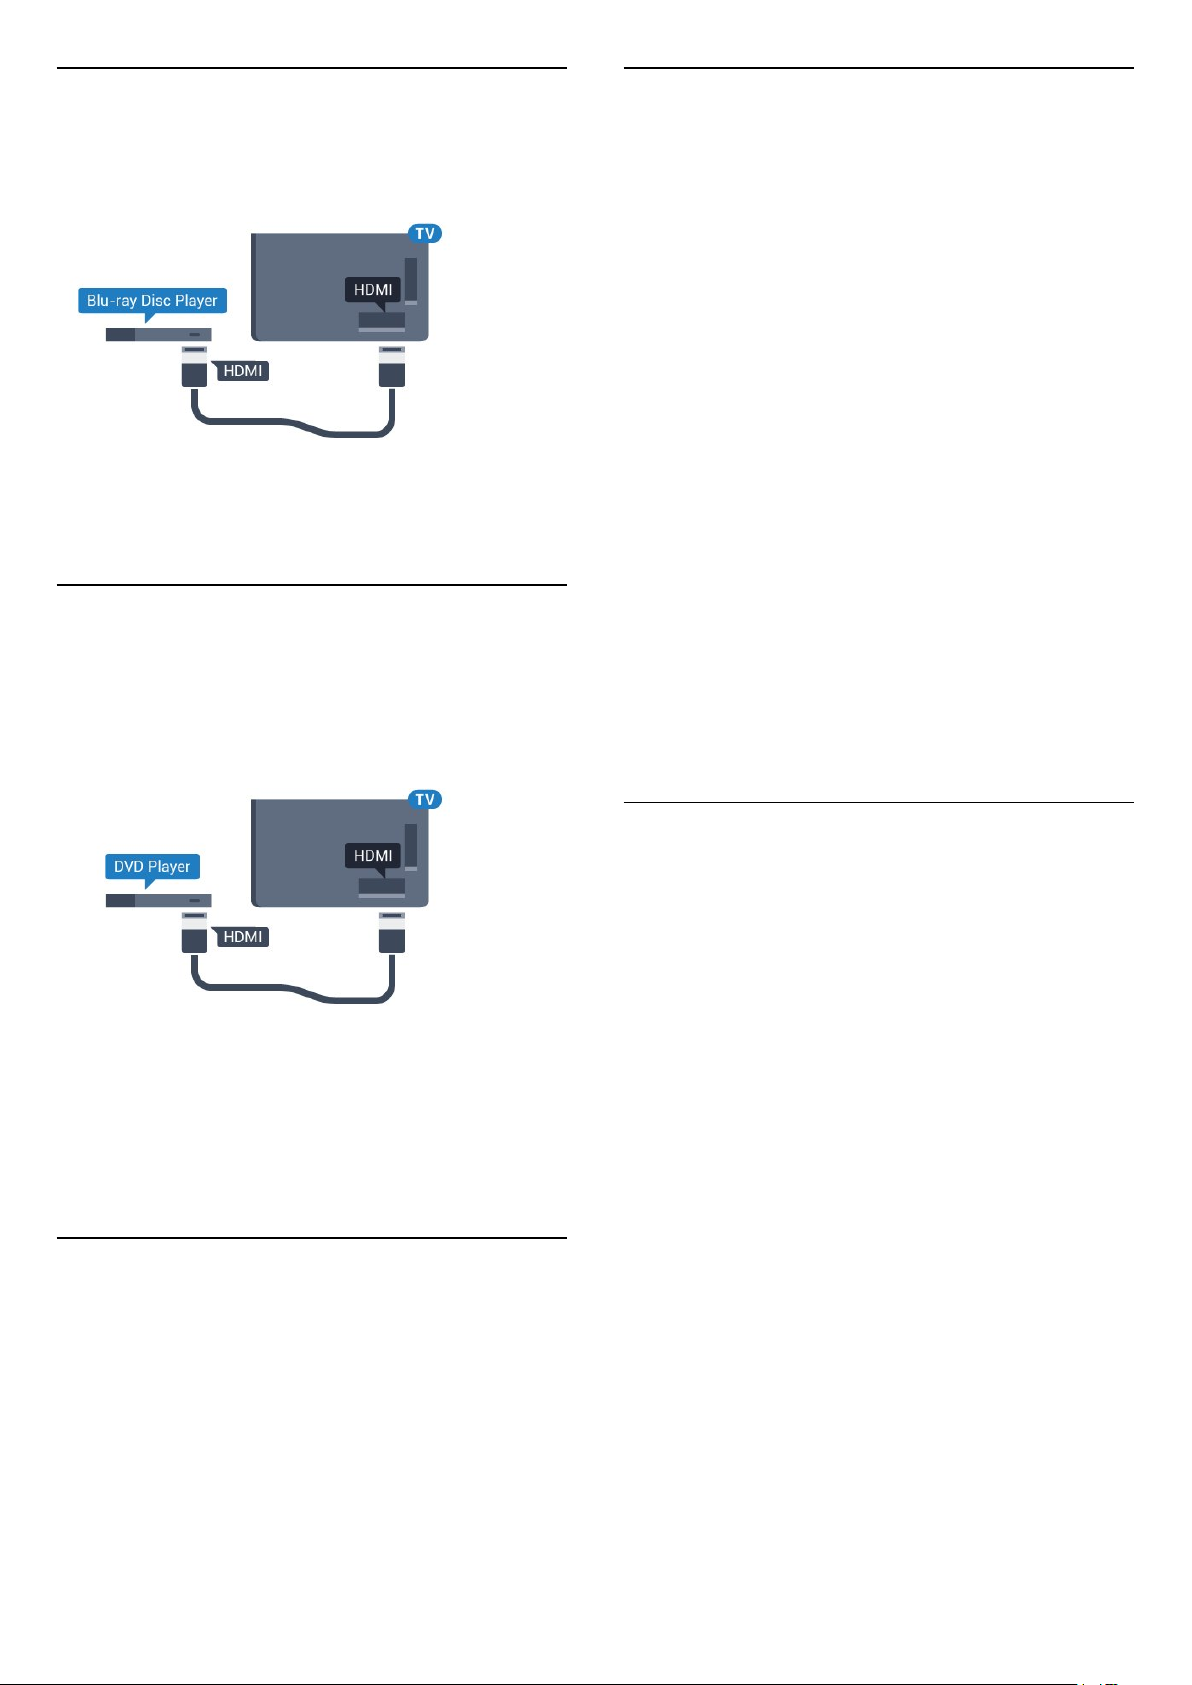
4.6
Blu-ray Disc Player
Use a High speed HDMI cable to connect the Bluray Disc player to the TV.
What You Need
You can connect a wireless device with Bluetooth® to
this TV – a wireless speaker, a subwoofer, a sound
bar or headphones. You can also connect a wireless
gamepad with Bluetooth LE.
To play the TV sound on a wireless speaker, you must
pair the wireless speaker with the TV. You can pair
some wireless speakers and a maximum of 4
Bluetooth LE (low energy) devices. The TV can only
play the sound on one speaker at a time. If you
connect a subwoofer, the sound is played on the TV
and the subwoofer. If you connect a sound bar the
sound is played on the sound bar only.
If the Blu-ray Disc player has EasyLink HDMI CEC,
you can operate the player with the TV remote
control.
4.7
DVD Player
Use an HDMI cable to connect the DVD player to the
TV.
Alternatively, you can use a SCART cable, if the
device has no HDMI connection.
If the DVD player is connected with HDMI and has
EasyLink CEC, you can operate the player with the TV
remote control.
For more information on EasyLink, in Help, press the
colour key Keywords and look up EasyLink
HDMI CEC.
4.8
Bluetooth - Speakers and
Gamepads
Attention - Audio to Video syncronisation
Many Bluetooth speaker systems have a high, so
called, 'latency'. High latency means that the audio
lags behind the video, causing unsynchronised 'lip
sync'. Before you purchase a wireless Bluetooth
speaker system, inform yourself about the newest
models and look for a device with a low latency
rating. Ask your dealer for advice.
For more information on how to pair a wireless
speaker, in Help, press the colour key Keywords
and look up Bluetooth, Pairing.
Pairing a Device
Position the wireless speaker within a distance of 5
meters from the TV. Read the user manual of the
device for specific information on pairing and on
wireless range. Make sure the Bluetooth setting on TV
is switched on.
Once a wireless gamepad is paired, you can use it.
When a wireless speaker is paired, you can select it to
play the TV sound. When a device is paired, you do
not need to pair it again unless you remove the
device.
To pair a wireless speaker with the TV…
1 - Switch on the wireless speaker and place it within
range of the TV.
2 - Press , select All Settings and press OK.
3 - Select Wireless and Networks and
press (right) to enter the menu.
4 - Select Bluetooth > Search Bluetooth Device,
and press OK.
5 - Select Search and press OK. Follow the
instuctions on screen. You will pair the device with the
TV and the TV will store the connection.
6 - Select the type of device (headphone,
subwoofer, …), select Next and press OK.
7 - Press (left) repeatedly if necessary, to close
the menu.
For more information on how to select the wireless
20
speaker, in Help, press the colour
key Keywords and look up Speakers, Select.
For more information on the Bluetooth On or Off
setting, in Help, press the colour
key Keywords and look up Bluetooth, On or
Off.
To adjust the volume…
1 - Press , select Headphone Volume and
press OK.
2 - Press the arrows (up) or (down) to adjust
the value.
3 - Press (left) repeatedly if necessary, to close
the menu.
Select a Device
Once a wireless Bluetooth speaker is paired, you can
select it to play the TV sound.
To select a speaker to play the TV sound…
1 - Press , select Speakers and press OK.
2 - Select the loudspeaker system you want and
press OK.
3 - Press (left) repeatedly if necessary, to close
the menu.
Remove a Device
You can connect or disconnect a wireless Bluetooth
device. When a Bluetooth device is connected, you
can use the gamepad or hear the TV sound through
the wireless speaker. You can also remove a wireless
Bluetooth device. If you remove a Bluetooth device,
the device will be unpaired.
To remove or disconnect a wireless device…
1 - Press , select All Settings and press OK.
2 - Select Wireless and Networks and press OK.
3 - Select Bluetooth > Remove Device and
press OK.
4 - In the list, select the wireless device and
press OK.
5 - Select Disconnect or Remove and press OK.
6 - Select OK and press OK to confirm.
7 - Press (left) repeatedly if necessary, to close
the menu.
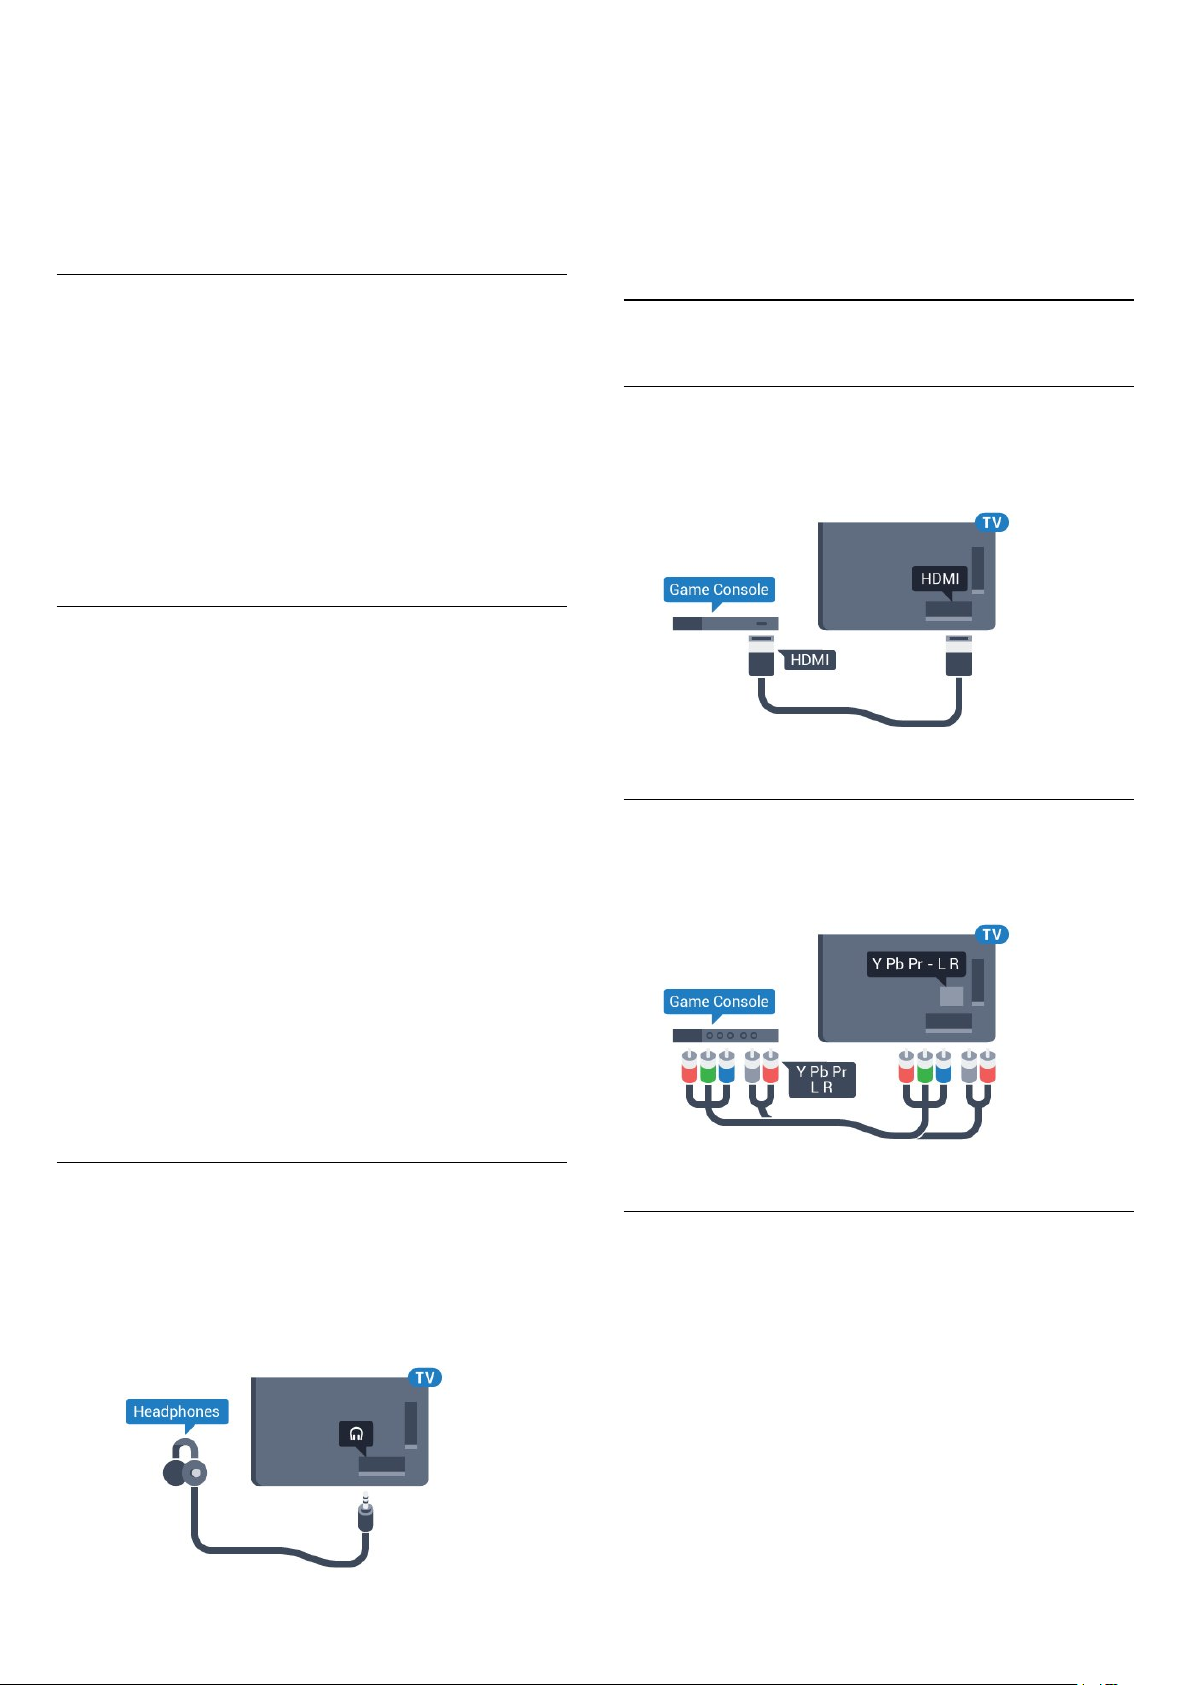
4.10
Game Console
HDMI
For best quality, connect the game console with a
High speed HDMI cable to the TV.
Y Pb Pr
Connect the game console with a component video
cable (Y Pb Pr) and an audio L/R cable to the TV.
4.9
Headphones
You can connect a set of headphones to
the connection on the back of the TV. The
connection is a mini-jack 3.5mm. You can adjust the
volume of the headphones separately.
Scart
Connect the game console to the TV with a
composite cable (CVBS) and an audio L/R cable to
the TV.
If your game console only has Video (CVBS) and
Audio L/R output, use a Video Audio L/R to SCART
adapter (sold separately) to connect to the SCART
connection.
21

Best Setting
Before you start playing a game from a connected
game console, we advice you to set the TV in the
ideal setting Game.
Suitable Gamepads
A selected range of wireless Gamepads are suited
and tested for use on this TV. Other Gamepads might
not be fully compatible.
The suited Gamepads are…
• Logitech F710
• Logitech F510
• Xbox 360 Wireless Controller for Windows
• Speedlink Strike FX Wireless Gamepad
• Sony Play Station wired
• Mad Catz C.T.R.L. Mobile Gamepad for Android
• Ipega, PG-9023
• Ipega, PG-9025
• PhoneJoy gamepad
When you finish playing a game and start watching
TV again, remember to switch the Game or
Computer setting back to Off.
To set the TV to the ideal setting…
1 - Press , select All Settings and press OK.
2 - Select Picture and press (right) to enter the
menu.
3 - Select Advanced > Game or Computer, and
select the device type you want to use. To switch
back to TV, select Off.
4 - Press (left) repeatedly if necessary, to close
the menu.
4.11
Gamepad
Connect a Gamepad
To play games from the Internet on this TV, you can
connect a selected range of wireless Gamepads. You
can use Gamepads with a USB nano receiver or
gamepads with Bluetooth.
To connect a Gamepad with a USB nano receiver…
1 - Plug in the small nano receiver in one of the USB
connections on the side of the TV. The wireless nano
receiver comes with the Gamepad.
2 - If the Gamepad is switched on, you can use the
Gamepad.
You can connect a second Gamepad in the second
USB connection on the side of the TV.
Bluetooth
To connect a wireless gamepad with Bluetooth,
in Help, press the colour key Keywords and look
up Bluetooth, Pairing.
Problems
To solve possible interference with other wireless
devices on TV…
• Use a USB extension cord and move the nano
receiver about 1 meter away from the TV.
• Alternatively, you can use a powered USB hub
connected to the TV and plug in the nano receivers in
the USB hub.
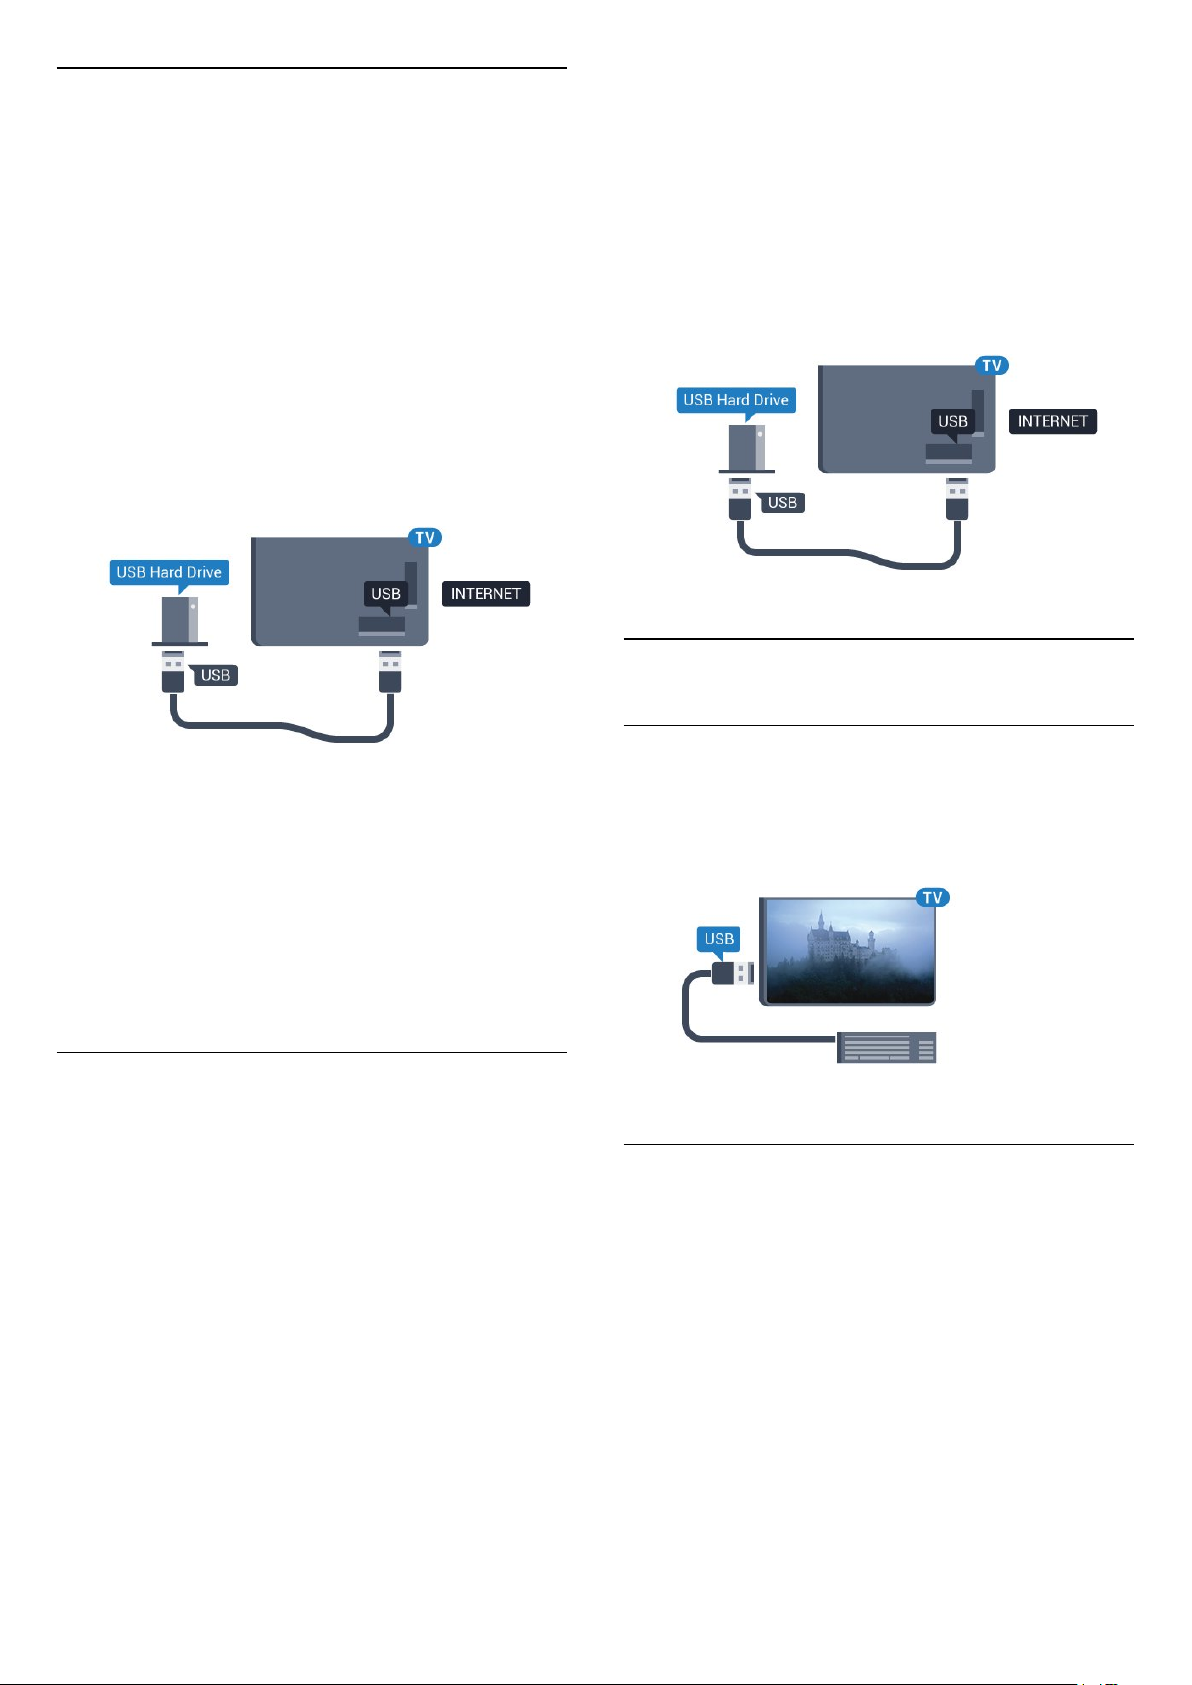
4.12
USB Hard Drive
What You Need
If you connect a USB Hard Drive, you can pause or
record a TV broadcast. The TV broadcast must be a
digital broadcast (DVB broadcast or similar).
To Pause
To pause a broadcast, you need a USB 2.0
compatible Hard Drive with a minimum of 4GB disk
space.
To Record
To pause and record a broadcast, you need a
minimum of 250GB disk space. If you want to record
a broadcast with TV guide data from the Internet, you
need to have the Internet connection installed on
your TV before you install the USB Hard Drive.
For more information on how to install a USB Hard
Drive, in Help, press the colour
key Keywords and look up USB Hard Drive,
installation.
22
Installation
Before you can pause or record a broadcast, you
must connect and format a USB Hard Drive.
Formatting removes all files from the USB Hard Drive.
1 - Connect the USB Hard Drive to one of
the USB connections on the TV. Do not connect
another USB device to the other USB ports when
formatting.
2 - Switch on the USB Hard Drive and the TV.
3 - When the TV is tuned to a digital TV channel,
press (Pause). Trying to pause will start the
formatting.
Follow the instructions on screen.
When the USB Hard Drive is formatted, leave it
connected permanently.
1 - Connect the USB Hard Drive to one of the USB
connections on the TV. Do not connect another USB
device to the other USB ports when formatting.
2 - Switch on the USB Hard Drive and the TV.
3 - When the TV is tuned to a digital TV channel,
press (Pause). Trying to pause will start the
formatting. Follow the instructions on screen.
4 - The TV will ask if you want to use the USB Hard
Drive to store apps, agree to the question if you do.
5 - When the USB Hard Drive is formatted, leave it
connected permanently.
4.13
Warning
The USB Hard Drive is formatted exclusively for this
TV, you cannot use the stored recordings on another
TV or PC. Do not copy or change recording files on
the USB Hard Drive with any PC application. This will
corrupt your recordings. When you format another
USB Hard Drive, the content on the former will be lost.
A USB Hard Drive installed on your TV will need
reformatting for use with a computer.
Formatting
Before you can pause or record a broadcast, or store
apps, you must connect and format a USB Hard
Drive. Formatting removes all files from the USB Hard
Drive. If you want to record broadcasts with TV Guide
data from the Internet, you must setup the Internet
connection first before you install the USB Hard Drive.
Warning
The USB Hard Drive is formatted exclusively for this
TV, you cannot use the stored recordings on another
TV or PC. Do not copy or change recording files on
the USB Hard Drive with any PC application. This will
corrupt your recordings. When you format another
USB Hard Drive, the content on the former will be lost.
A USB Hard Drive installed on your TV will need
reformatting for use with a computer.
To format a USB Hard Drive…
USB Keyboard
Connect
Connect a USB keyboard (USB-HID type) to enter text
on your TV.
Use one of the USB connections to connect.
Configure
To install the USB keyboard, switch on the TV and
connect the USB keyboard to one of
the USB connections on the TV. When the TV
detects the keyboard for the first time, you can select
your keyboard lay-out and test your selection. If you
select a Cyrillic or Greek keyboard layout first, you
can select a secondary Latin keyboard layout.
To change the keyboard layout setting when a layout
was selected…
1 - Press , select All Settings and press OK.
2 - Select General Settings and press (right) to
enter the menu.
3 - Select USB Keyboard Settings, and press OK to
23

start the keyboard setup.
4.15
Photo Camera
Special Keys
Keys for entering text
• Enter key = OK
• Backspace = delete character before cursor
• Arrow keys = navigate within a text field
• To switch between keyboard layouts, if a secondary
layout is set, press the Ctrl + Spacebar keys
simultaneously.
Keys for apps and Internet pages
• Tab and Shift + Tab = Next and Previous
• Home = scroll to the top of the page
• End = scroll to the bottom of the page
• Page Up = jump one page up
• Page Down = jump one page down
• + = zoom in one step
• - = zoom out one step
• * = fit the web page to the screen width
4.14
USB Flash Drive
You can view photos or play your music and videos
from a connected USB flash drive.
To view photos stored on your digital photo camera,
you can connect the camera directly to the TV.
Use one of the USB connections on the TV to
connect. Switch on the camera after you made the
connection.
If the contents list does not appear automatically,
press SOURCES , and select USB.
Your camera might need to be set to transfer its
content with PTP (Picture Transfer Protocol). Read
the user manual of the digital photo camera.
For more information on viewing photos, in Help,
press the colour key Keywords and look
up Photos, Videos and Music.
4.16
Camcorder
HDMI
For best quality, use an HDMI cable to connect the
camcorder to the TV.
Insert a USB flash drive in one of
the USB connections on the TV while the TV is
switched on.
The TV detects the flash drive and opens a list
showing its content.
If the contents list does not appear automatically,
press SOURCES and select USB.
To stop watching the USB flash drive content,
press EXIT or select another activity.
To disconnect the USB flash drive, you can pull out
the flash drive anytime.
For more information on watching or playing content
from a USB flash drive, in Help, press the colour
key Keywords and look up Photos, Videos and
Music.
Audio Video LR / Scart
You can use an HDMI, YPbPr or SCART connection to
connect your camcorder. If your camcorder only has
Video (CVBS) and Audio L/R output, use a Video
Audio L/R to SCART adapter (sold separately) to
connect to the SCART connection.
24

4.17
Computer
Connect
You can connect your computer to the TV and use
the TV as a PC monitor.
2 - Select Picture and press (right) to enter the
menu.
3 - Select Advanced > Game or Computer, and
press OK.
4 - Select Game (for gaming) or
select Computer (for watching a movie).
5 - Press (left) repeatedly if necessary, to close
the menu.
With HDMI
Use an HDMI cable to connect the computer to the
TV.
With DVI to HDMI
Alternatively, you can use a DVI to HDMI adapter
(sold separately) to connect the PC to HDMI and an
audio L/R cable (mini-jack 3.5mm) to AUDIO IN L/R
on the back of the TV.
Remember to set Game or Computer setting
to Off when you stop playing the game.
Ideal Setting
If you connect a computer, we advice you to give the
connection, on which the computer is connected, the
correct device type name in the Source menu. If you
then switch to Computer in the Source menu, the TV
is set to the ideal Computer setting automatically.
You can manually switch the ideal setting to Off for
watching TV or Game for playing a game from a
connected game console (remember to switch back
to Off when you stop playing a game).
If you switch to a source and change the Game or
Computer setting, it will be stored for this selected
source.
To set the TV to the ideal setting…
1 - Press , select All Settings and press OK.
25

5
Switching On and
Off
5.1
On, Standby or Off
Before you switch on the TV, make sure you plugged
in the mains power in the POWER connector on the
back of the TV.
press OK.
5 - Press (left) repeatedly if necessary, to close
the menu.
5.3
To put the TV in Standby when the indicator light is
off, press the small joystick key on the back of the TV.
The indicator will light up.
With the TV in Standby, press on the remote
control to switch the TV on. Alternatively,
press HOME .
Switch back to Standby
To switch the TV to Standby, press on the remote
control.
Switch Off
To switch the TV Off, press the joystick key. The
indicator light goes off.
The TV is still connected to the mains power but
consumes very little energy.
To switch off the TV completely, disconnect the
power plug.
When disconnecting the power plug, always pull the
power plug, never the cord. Ensure that you have full
access to the power plug, power cord and outlet
socket at all times.
Keys on TV
If you lost the remote control or its batteries are
empty, you can still do some basic TV operations.
To open the basic menu…
1 - With the TV switched on, press the joystick key on
the back of the TV to bring up the basic menu.
2 - Press left or right to
select Volume, Channel or Sources.
3 - Press up or down to adjust the volume or tune to
the next or previous channel. Press up or down to go
through the list of sources, including the tuner
selection. Press the joystick key to slide out the
camera.
4 - The menu will disappear automatically.
To switch the TV off, select TV Off and press the
joystick key.
5.4
Sleep Timer
5.2
Philips Logo Brightness
You can switch off or adjust the brightness of the
Philips logo on the front of the TV.
To adjust or switch off…
1 - Press , select All Settings and press OK.
2 - Select General Settings and press (right) to
enter the menu.
3 - Select Philips Logo Brightness, and
press (right) to enter the menu.
4 - Select Minimum, Medium, Maximum,
or Off to switch off the lighting of the logo, then
With the Sleep Timer, you can set the TV to switch to
Standby automatically after a preset time.
To set the Sleep Timer…
1 - Press , select Sleep Timer and press OK.
2 - With the slider bar you can set the time to up to
180 minutes in increments of 5 minutes. If set to 0
minutes, the Sleep Timer is switched off. You can
always switch off your TV earlier or reset the time
during the countdown.
3 - Press BACK to close the menu.
26

5.5
Switch Off Timer
If the TV receives a TV signal but you don't press a
key on the remote control during a 4 hour period, the
TV switches off automatically to save energy. Also, if
the TV does not receive a TV signal nor a remote
control command for 10 minutes, the TV switches off
automatically.
If you use the TV as a monitor or use a digital receiver
to watch TV (a Set-Top Box - STB) and you do not
use the remote control of the TV, you should
deactivate this automatic switch off.
To deactivate the Switch Off Timer …
1 - Press , select All Settings and press OK.
2 - Select Eco Settings and press (right) to enter
the menu.
3 - Select Switch Off Timer and press OK.
4 - Press the arrows (up) or (down) to adjust
the value. The value 0 deactivates the automatic
switch off.
5 - Press (left) repeatedly if necessary, to close
the menu.
For more information on environmentally friendly TV
settings, in Help, press the colour
key Keywords and look up Eco Settings.
27

6
Remote Control
6.1
Key overview
Top
1 -
To open the TV Menu with typical TV functions.
2 - SOURCES
To open or close the Sources menu.
1 - Standby / On
To switch the TV on or back to Standby.
2 - Playback and Record
• Play , to playback.
• Pause , to pause playback
• Stop , to stop playback
• Rewind , to rewind
• Fast forward , to go fast forward
• Record , to start recording
3 -
To select one of the Ambilight style.
4 - TV GUIDE
To open or close the TV Guide.
5 -
To open the Netflix App directly. With the TV switched
on or from standby.
6 - Settings
To open the Frequent Settings menu and All Settings.
Ambilight
3 -
Direct selection of options. Blue key , opens Help.
4 - INFO
To open or close programme info.
5 - BACK
To switch back to the previous channel you selected.
To close a menu without changing a setting.
To go back to the previous App/Internet page.
6 - EXIT
To switch back to watching TV. To leave an interactive
TV application.
7 - OPTIONS
To open or close the Options menu.
8 - OK key
To confirm a selection or setting.
9 - Arrow / navigation keys
To navigate up, down, left or right.
10 - HOME
To open the Home menu.
Colour keys
7 To open the menu with recommended programmes,
Video on Demand (Rental Videos) or Online TV
(Catch Up TV).
8 - SEARCH
To open the searches page.
TOP PICKS
Middle
Bottom
28
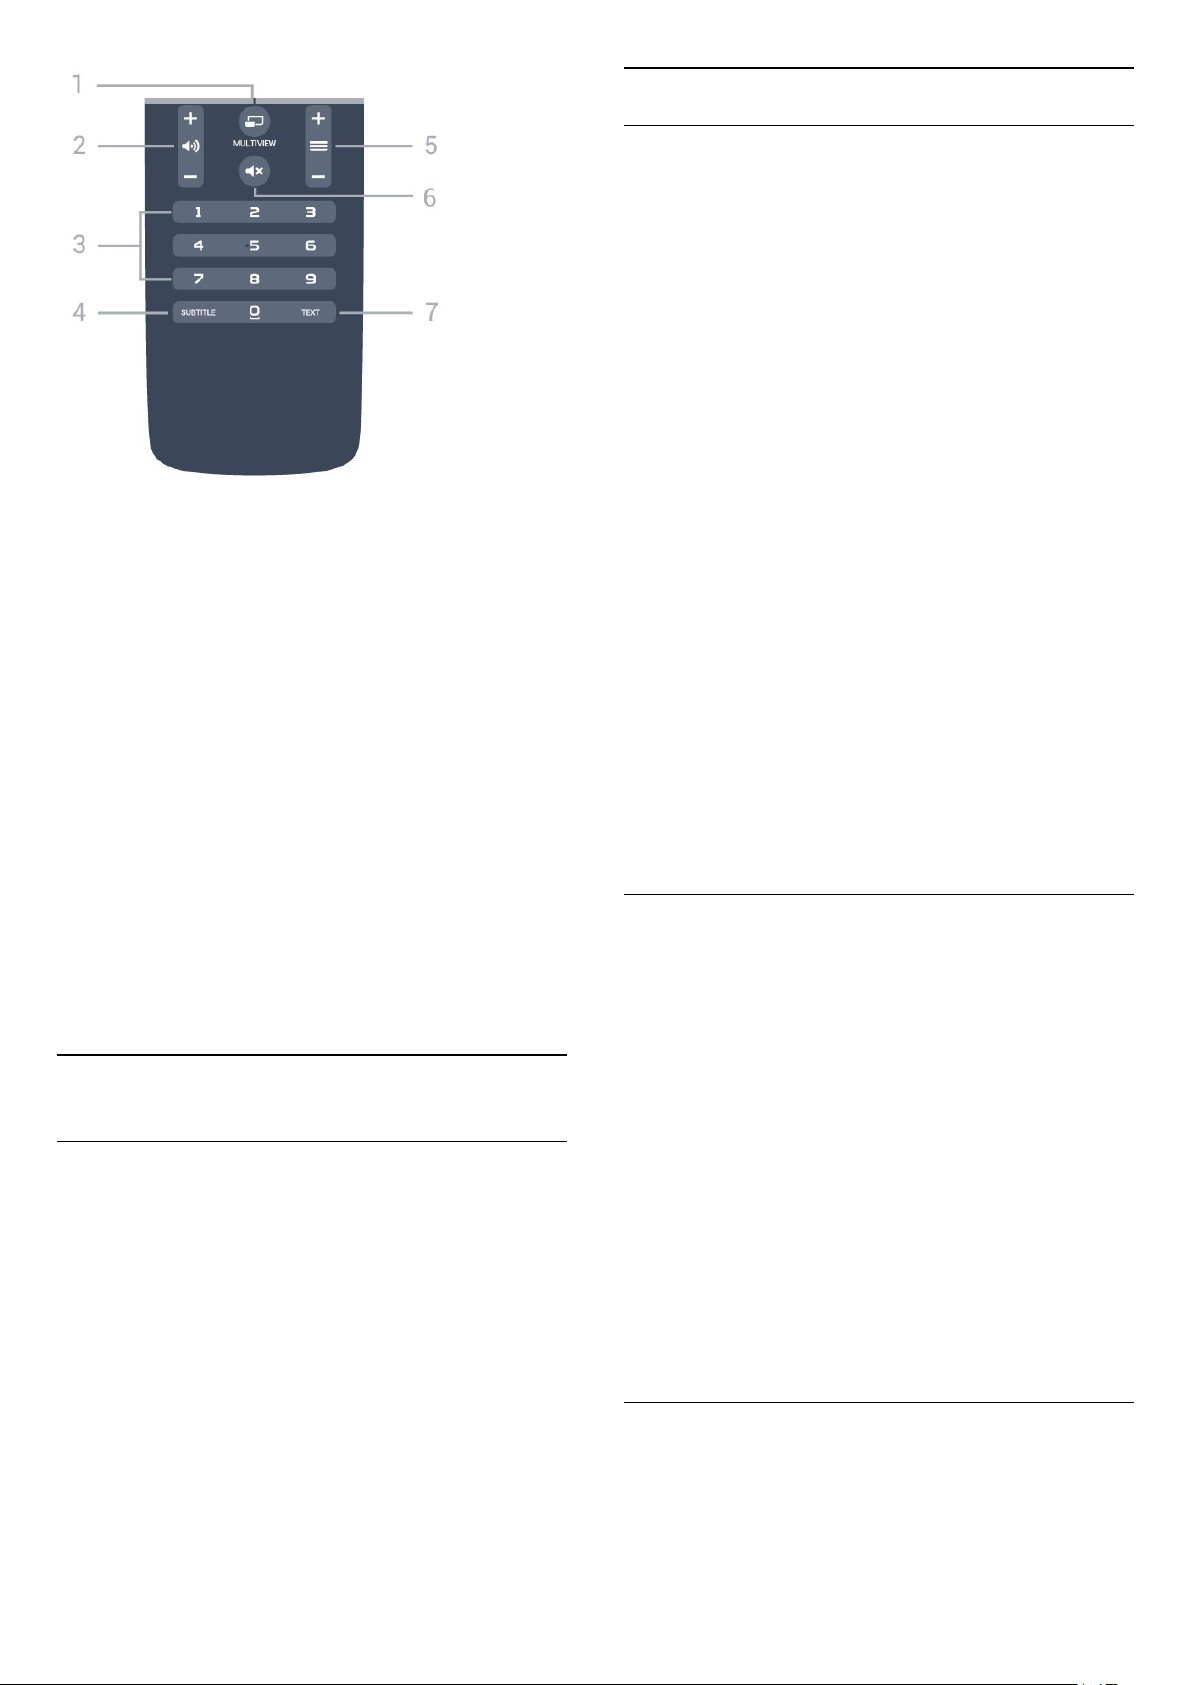
1 - MULTIVIEW
To open a small screen in the big screen.
2 To adjust the volume level.
3 - Number keys
To select a channel directly.
4 - SUBTITLE
To switch subtitles on, off or to show automatically.
5 - Channel
To switch to the next or previous channel in the
channel list. To open the next or previous page in
Text/Teletext. To start the next or previous chapter on
a disc.
Volume
Voice Search
Pairing with your TV
Thre is no microphone on your remote control, if you
want to use voice search, you must install Android
TV Remote Control app on your Android smartphone
or tablet first.
1 - On your Android smartphone or tablet, search
"Android TV Remote Contorl" in Google Play store.
2 - Download and install Android TV Remote
Control app* on your Android smartphone or
tablet .
3 - Connect your Android smartphone or tablet to
the same network as your Android TV device.
4 - Select "PhilipsTv"** on your Android smartphone
or tablet, then your Android TV will show a code on
the screen.
5 - Enter the code on your Android smartphone or
tablet to pair to your Android TV.
*You need an Android phone or tablet running
Android 4.3 or higher to use the Android TV Remote
Control app.
**The name of your Android TV is depends on the
name you set in TV Network Name. The pre-set
name is model name of this TV.
For more information, in Help, press the colour
key Keywords and look up Network, TV
Network Name.
6 -
To mute the sound or to restore it.
7 - TEXT
To open or close Text/Teletext.
6.2
Mute
Voice search
Download App from Google play
Use your Android smartphone or tablet as a remote
for your Android TV. Easily switch between d-pad,
touchpad, and gamepad modes to navigate content
and play games on your Android TV device. Tap the
microphone to start a voice search, or use the
keyboard to input text on Android TV.
To get started, connect your Android phone or tablet
to the same network as your Android TV device or
find your Android TV via bluetooth.
Works with all Android TV devices.
*You need an Android phone or tablet running
Android 4.3 or higher to use the Android TV Remote
Control app.
Using Voice search
You can search for videos, music or anything else on
the Internet with the icon at the top of the Home
menu. You can start using Voice Search any
time. Alternatively, you can use the remote control
keyboard to enter text.
To use Voice Search…
1 - Tap icon on your smartphone to start a voice
search.
2 - The icon is red on screen, the microphone is
active.
3 - Speak out clearly what you are looking for. It
might take some time for the results to appear.
4 - In the screen with search results, you can select
the item you want.
See also www.support.google.com/androidtv
Voice Search settings
You can set the language you like to use with Voice
Search.
To set the language for Voice Search…
29

1 - Press , select All Settings and press OK.
2 - Select Android Settings and press OK.
3 - Select Preferences > Speech and
press OK.
4 - Select the language you want to use and
press OK.
5 - Press BACK to go back one step or
press EXIT to close the menu.
6.3
Keyboard
Overview
To write text…
1 - Select a text field if it is not yet selected.
2 - Turn the remote control keyboard facing upwards
to activate the keyboard keys. Hold the remote
control with two hands and type with both thumbs.
3 - To hide the on screen keyboard, press BACK.
Press OK to confirm the text.
Onscreen Keyboard
Qwerty and Azerty
Overview of a Qwerty/Azerty keyboard.*
1 - Azerty character
Character position if the keyboard layout is set to
Azerty.
2 To type uppercase characters.
3 - Ω Special characters
To open the onscreen keyboard to select accented
characters or symbols.
4 - Fn key
To type a number or punctuation character.
5 - Spacebar
6 - Navigation and OK
7 - Share this
To share online what you are watching at the
moment.
Shift
If you use the onscreen keyboard to enter text, you
can configure the keyboard layout to a layout you are
used to.
To open these settings…
Press HOME, select All Settings and press OK.
5 - Select Android Settings and press OK.
6 - Select Preferences > Keyboard and
press OK.
7 - Select Configure > Language and press OK. You
can set your language keyboard layout here.
8 - Press BACK to close the menu to go back
one step.
Uppercase and Lowercase
To type an uppercase character, press the (Shift)
key just before you type the character.
To type several uppercase characters consecutively,
press and hold the key while typing.
To type uppercase constantly, press the key for
2 seconds to switch the keyboard in uppercase mode.
To switch out of uppercase mode, press the key
again. If no keys are pressed for 20 seconds, the
uppercase mode switches off automatically. Also, if
you press another modifier key, like Fn or Ω, you
switch out of uppercase mode.
* Your remote control has a Qwerty / Azerty or a
Qwerty / Cyrillic keyboard, depending on your region.
Writing Text
With the keyboard on the back of the remote control,
you can write text in any text field on screen. Turn the
keyboard facing upwards to activate the keyboard
keys. Hold the remote control with two hands and
type with both thumbs.
Numbers and Punctuation Characters
To type a number or punctuation character, press
the Fn key just before you type the number or
punctuation character you need. You can switch the
Fn mode on or off as you do for the uppercase mode.
Internet
You can use the Fn key to enter www. or .com.
30
 Loading...