

Philips 42PW9982 - 1, 42PW9982/69 User Manual

Wall mounting instruction - Safety note
See supplied booklet.
Use the poster supplied as template to determine the location of the holes.
Use at least two outside holes. The distance between the two outside holes is
16”. Failing to do this may cause instability resulting in injury.
1. Wood stud installation
Drill holes into the centre of the wall studs.
Be certain to centre the two outside holes of the bracket over two
adjacent studs.
Attach the mounting plate using the two or three centre holes in the
plate.
2. Concrete wall installation
Drill the holes and secure the anchor bolts in accordance with the
instructions for HILTI anchor bolts. Place the mounting plate on the
anchor bolts. Place and tighten the washers and the nuts on the anchor
bolts.
Note: Do not insert the power plug in a wall socket before all connection are
made.
!

1
English
Contents
Your remote control . . . . . . . . . . . . . . . . . . . . . . . . . . . . . . . . . . . . . . . 2
Preparation . . . . . . . . . . . . . . . . . . . . . . . . . . . . . . . . . . . . . . . . . . . . . . . 3
Installation
Search for and store TV channels . . . . . . . . . . . . . . . . . . . . . . . . . . . . . 4
Select the menu language . . . . . . . . . . . . . . . . . . . . . . . . . . . . . . . . . . . . 4
Automatic installation . . . . . . . . . . . . . . . . . . . . . . . . . . . . . . . . . . . . . . . 5
Manual installation . . . . . . . . . . . . . . . . . . . . . . . . . . . . . . . . . . . . . . . . . 5
Give name . . . . . . . . . . . . . . . . . . . . . . . . . . . . . . . . . . . . . . . . . . . . . . . . 6
Reshuffle the channel list . . . . . . . . . . . . . . . . . . . . . . . . . . . . . . . . . . . . 6
Select favourite TV channels . . . . . . . . . . . . . . . . . . . . . . . . . . . . . . . . . 6
Install TV setup . . . . . . . . . . . . . . . . . . . . . . . . . . . . . . . . . . . . . . . . . . . . 7
The keys on the front of the receiver box . . . . . . . . . . . . . . . . . . . . . . 9
Operation
Use of the remote control . . . . . . . . . . . . . . . . . . . . . . . . . . . . . . . . . . 10
Use of the main menu . . . . . . . . . . . . . . . . . . . . . . . . . . . . . . . . . . . . . 12
Picture menu . . . . . . . . . . . . . . . . . . . . . . . . . . . . . . . . . . . . . . . . . . . . 12
Sound menu . . . . . . . . . . . . . . . . . . . . . . . . . . . . . . . . . . . . . . . . . . . . . 13
Features menu . . . . . . . . . . . . . . . . . . . . . . . . . . . . . . . . . . . . . . . . . . . 15
Dual Screen . . . . . . . . . . . . . . . . . . . . . . . . . . . . . . . . . . . . . . . . . . . . . 17
Teletext . . . . . . . . . . . . . . . . . . . . . . . . . . . . . . . . . . . . . . . . . . . . . . . . 18
Peripheral equipment
Connect Peripheral equipment and computer . . . . . . . . . . . . . . . . . . . 20
Select Peripheral equipment . . . . . . . . . . . . . . . . . . . . . . . . . . . . . . . . . 26
Record with your videorecorder . . . . . . . . . . . . . . . . . . . . . . . . . . . . . 28
Tips . . . . . . . . . . . . . . . . . . . . . . . . . . . . . . . . . . . . . . . . . . . . . . . . . . . . 29
Index . . . . . . . . . . . . . . . . . . . . . . . . . . . . . . . . . . . . . . . . . . . . . . . . . . . 29
Guarantee conditions . . . . . . . . . . . . . . . . . . . . . . . . . . . . . . . . . . . . . . 30
VCR 1
VCR 2
DVD
AMP
TUNER
TAPE
SAT
CD
TV
2
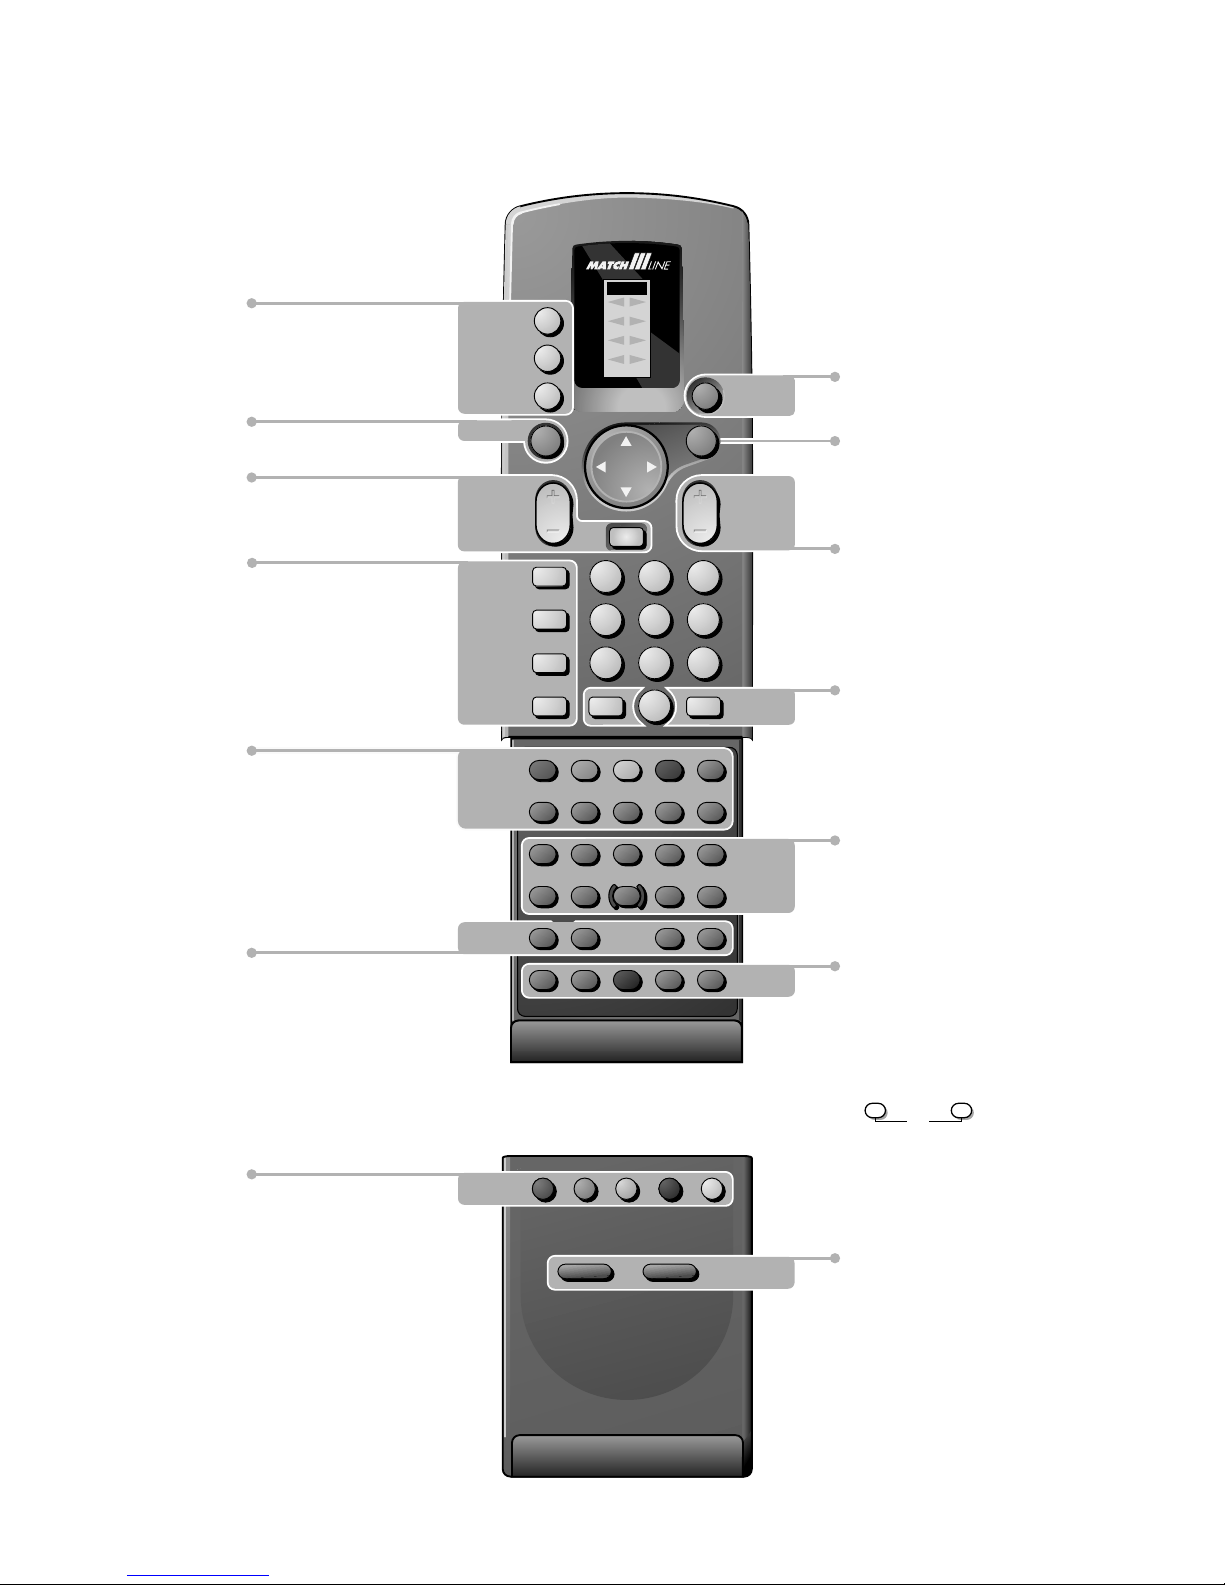
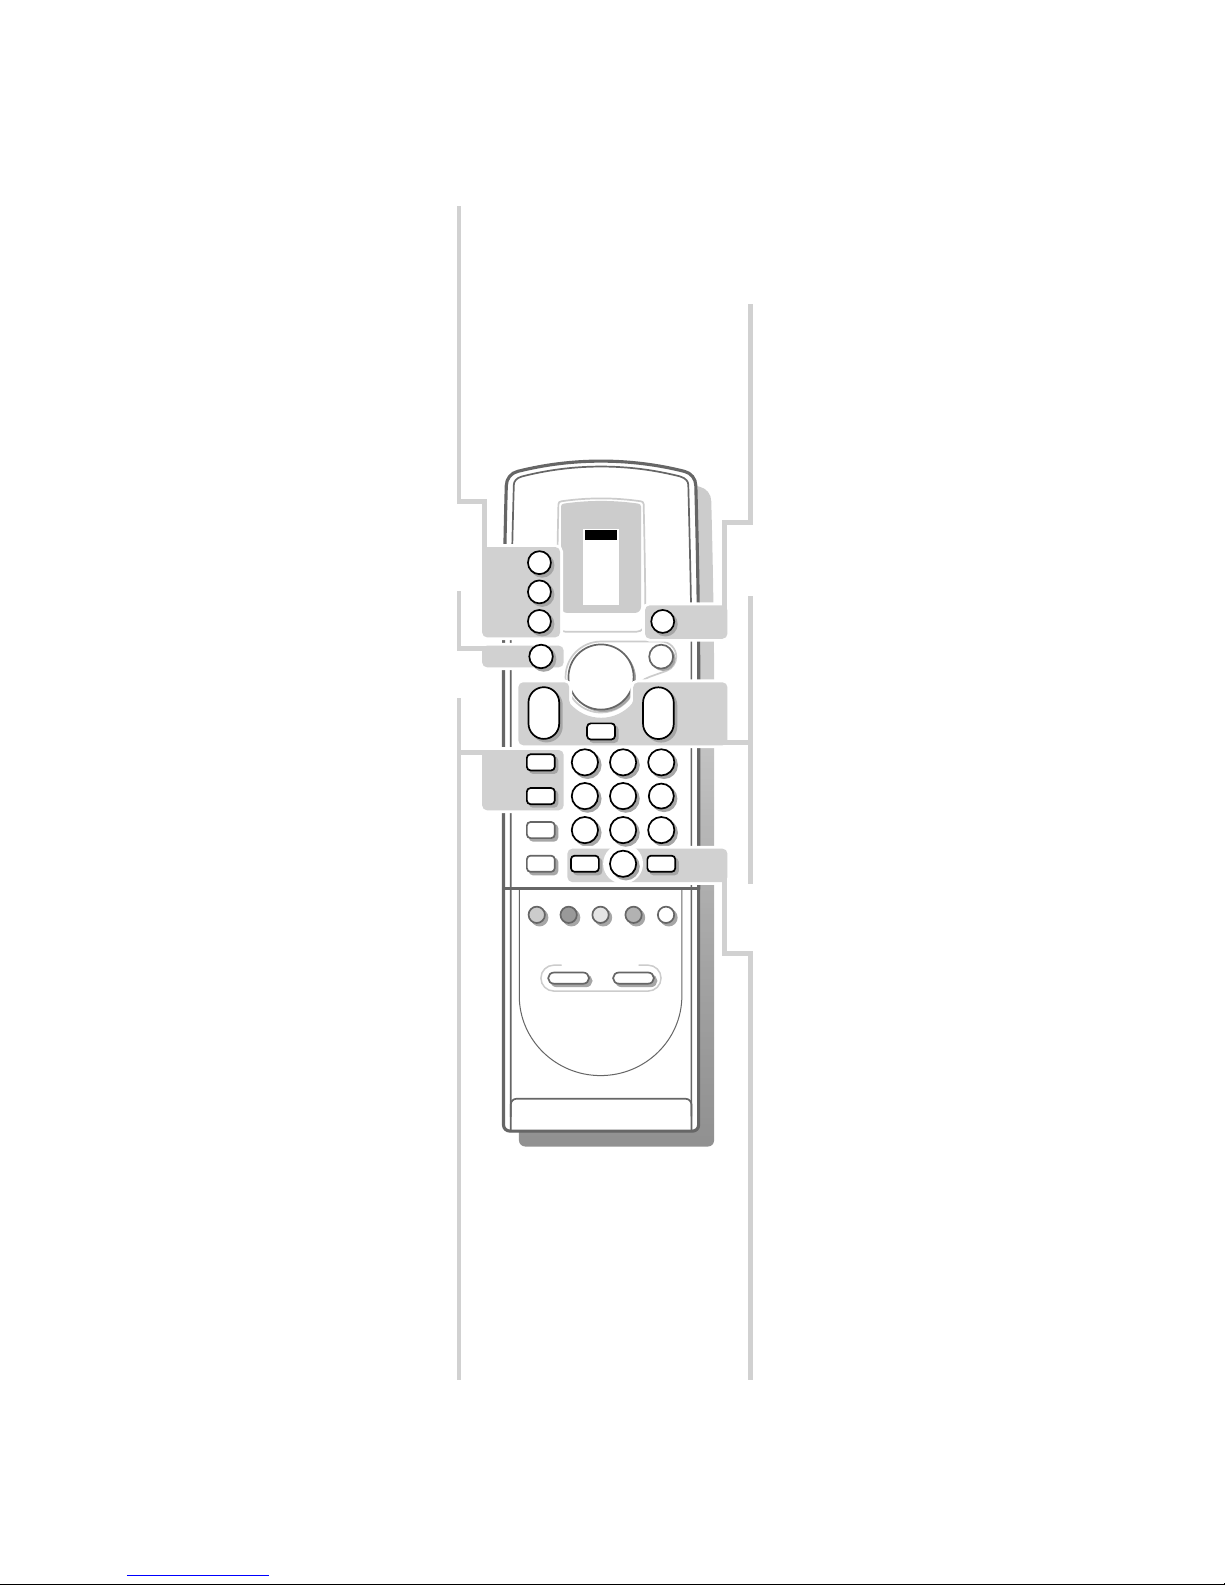
Your remote control
p. 10 V volume key
¬ sound mute
p. 10
q picture format
p. 10 X bilingual choice
p. 11 j continuous subtitles /
subtitle language selection
(DVD - Digital Video Disc)
p. 18 b teletext on/off
p. 17 Dual screen
- P+ channel selection
c switching screens
d freeze the subpicture
B switch to standby p. 10
i on screen info p. 10
0 previous channel p. 10
Videorecorder p. 27
Digital Video Disc p. 27
S freeze the main picture p. 11
P reduce image noise
fi mosaic screen
s personal preferences
Installation p. 4
sS
yÚ
A select your choice p. 12
OK activate your choice
P channel selection p. 10
Smart Controls
p. 11 picture and sound
settings
B
1
23
4
56
789
0
TV
M
u
OK
¬
i
0
a
P
b
q
X
j
b
ce
fh
U
k
‡
Ï
N
C
π
†
Ò
®
+
-
PP
c
d
S
P
fi
s
T-C
AUDIO
PICTURE SOUND
b
DVD SELECT DVD
p. 26 u selection of VGA, A/V 1,
A/V 2,A/V 3 or A/V 4
M peripheral selection
TV TV selection
p. 17
b dual screen on/off
p. 12
PICTURE, SOUND, FEATURES
menus, channel list
Dolby Pro Logic menu
p. 18 direct txt page or subject selection
p. 18 Teletext
direct txt page or subject selection
k index page selection
e interrupt
c mix tv/txt picture
h enlarge
f solution to riddles
U subcode selection
3
Preparation
Make sure that the wall mount (see wall mounting instructions
supplied) is being fixed securely enough so that it can carry at least
50 kg.
Do not insert the power plug in a wall socket before all connections
are made.
& Place the receiver box wherever you want, but leave at least 5 cm space free
all around the box for ventilation.
(E.g. on the ground, in a cupboard, behind a wall, in another room....)
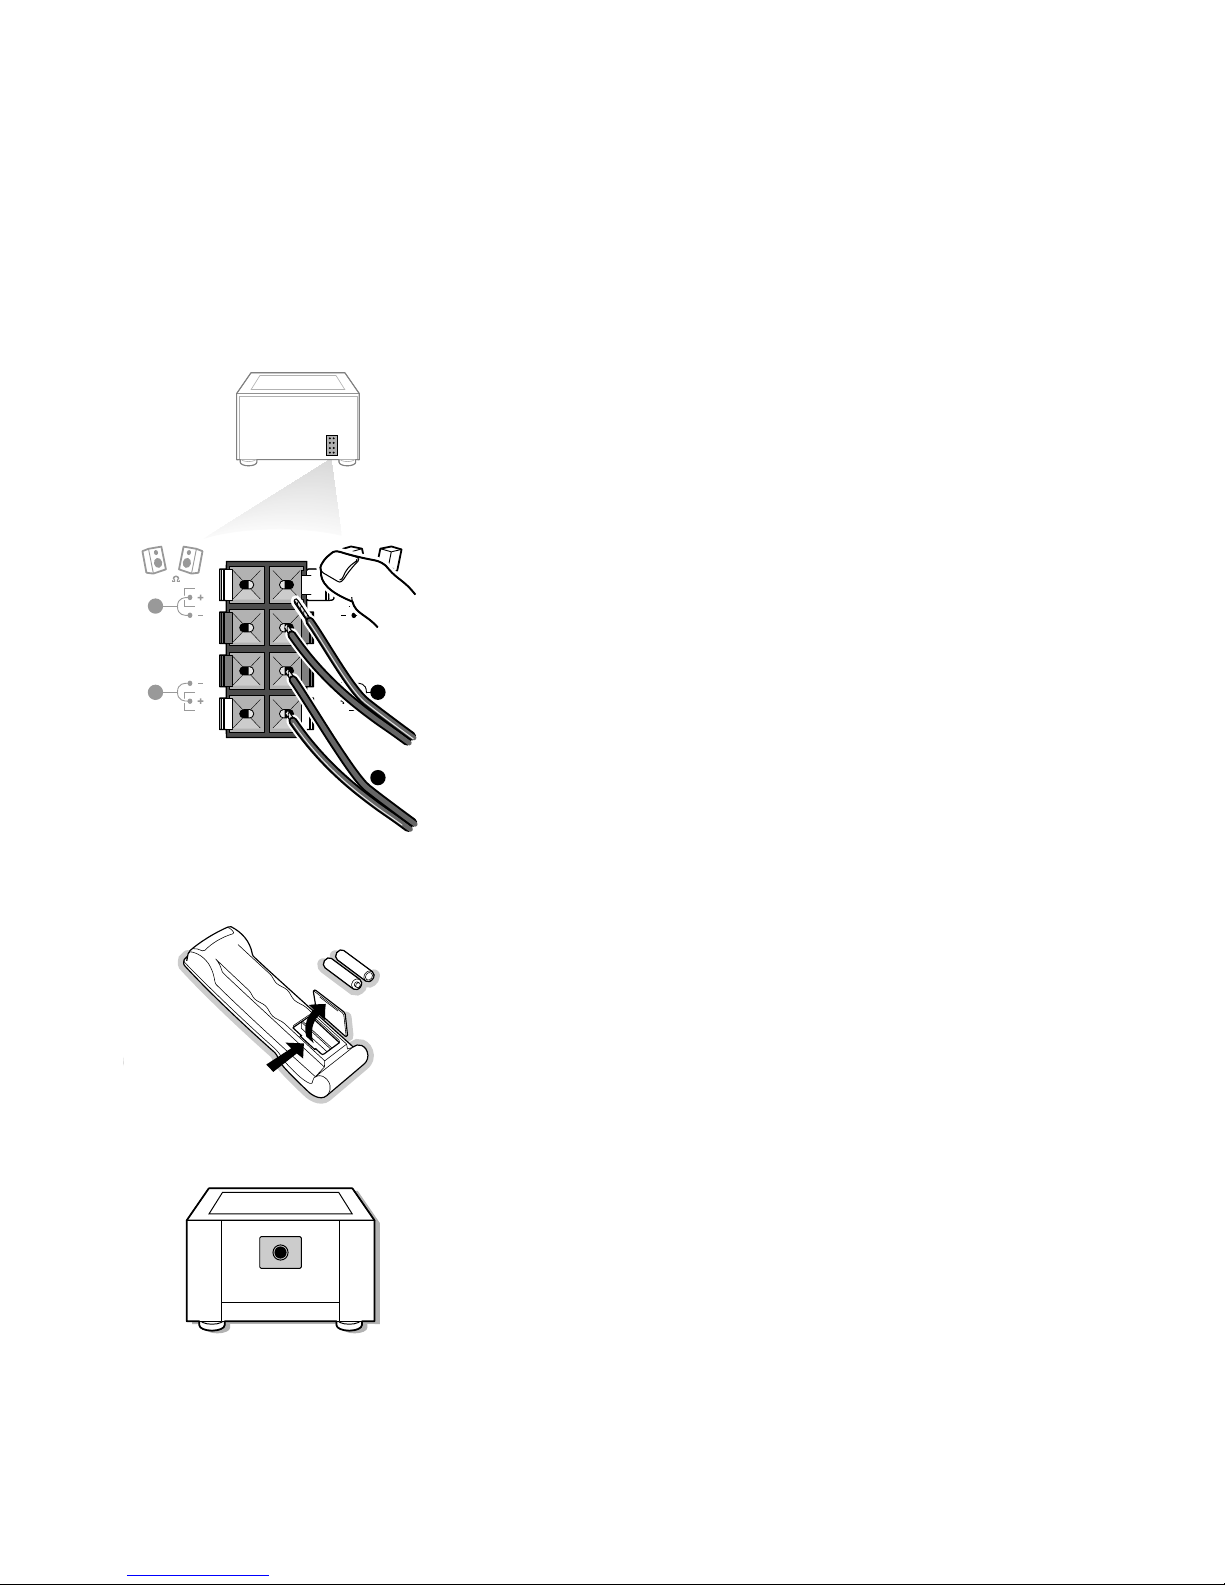
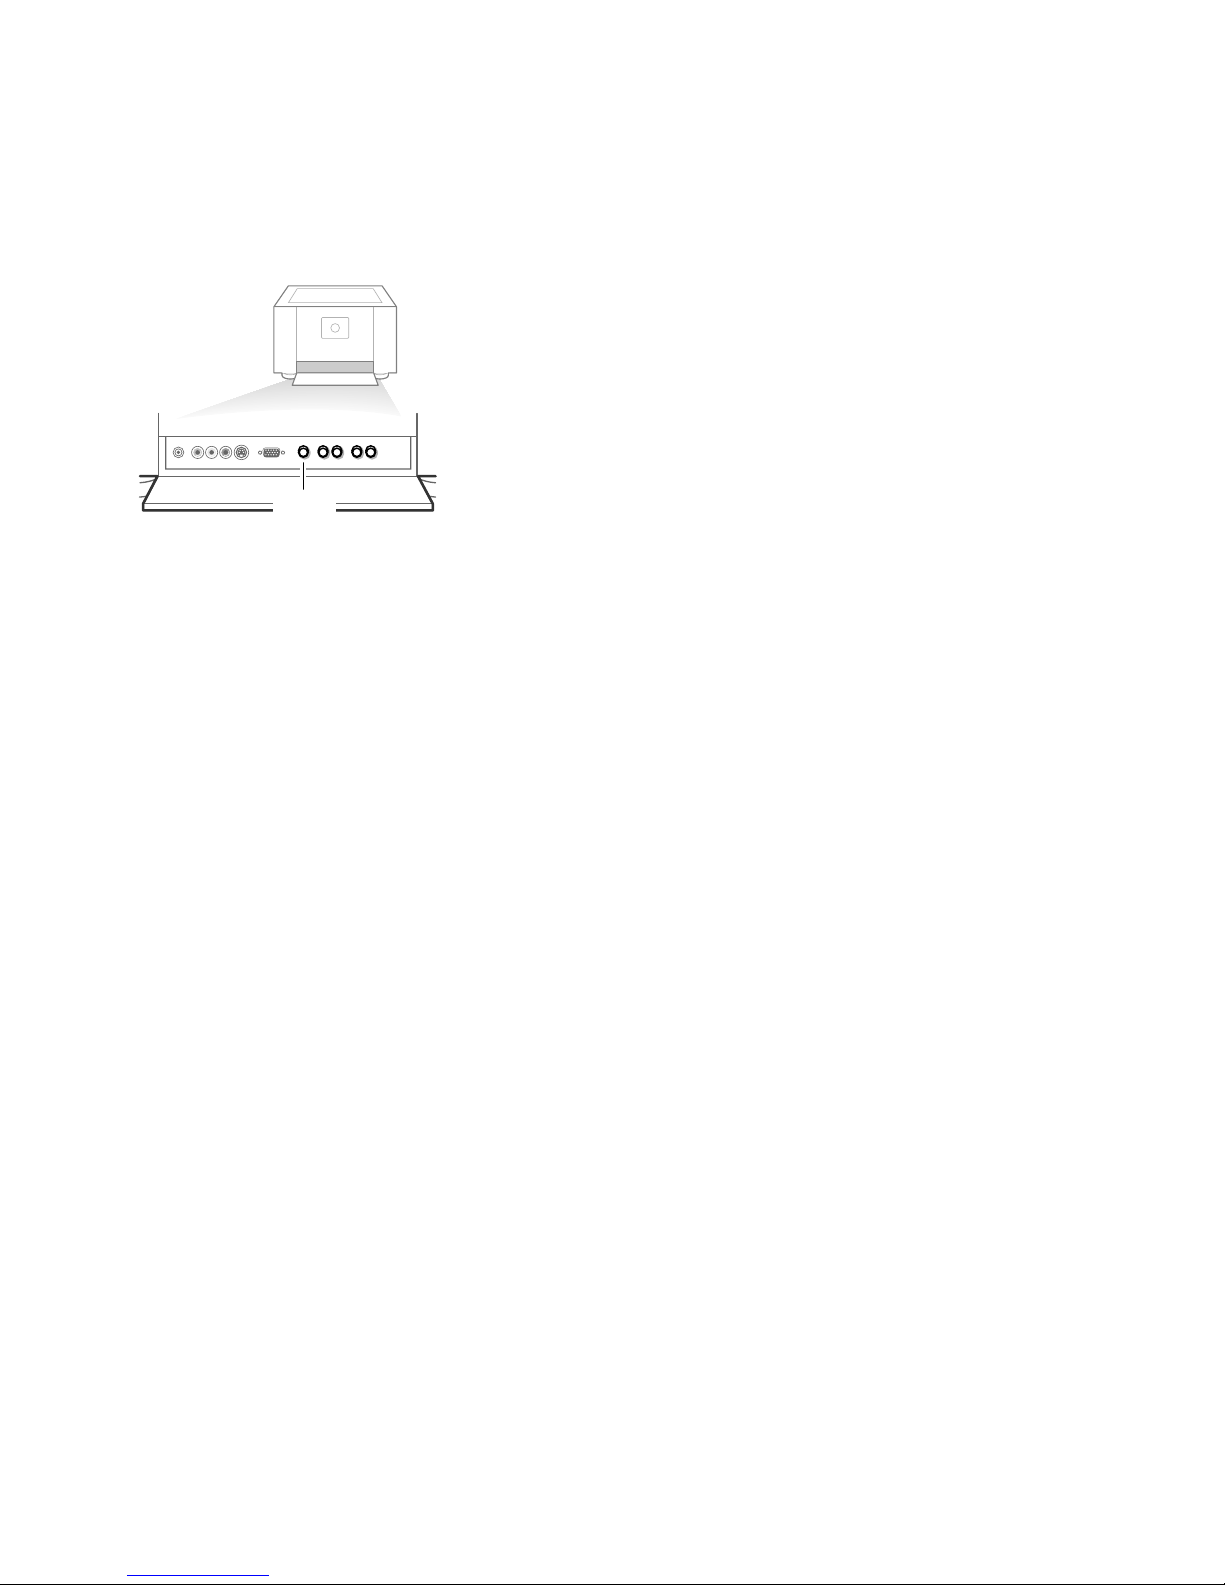
é Connect one of the supplied aerial cables 1, and the
DISPLAY POWER 3,
DISPLAY VIDEO 2, and SUBWOOFER 4 cables as shown in the inside
frontcover of this handbook.
Make sure all screws of the cables 2 and 3 are tighted well.
“ Check if the red loudspeaker button at the back of the receiver is in the
INTERNAL SPEAKERS position.
‘ Connect the two Surround Sound rear loudspeakers supplied 5.
Always connect both Surround Sound loudspeakers: the left rear loudspeaker
at
REAR L; the right rear loudspeaker at REAR R.
Push the connector clip down and insert the end of the wire into the opening: the
positive wire (the one with the black line) to the grey loudspeaker connection; the
negative wire to the black loudspeaker connection. Do not insert the wires too far.
The Surround Sound loudspeakers should always be located behind or to either side of
the listener. If preferred you can also hang the loudspeakers on the wall.
( To connect your computer, see p. 24.
To connect other peripherals, see p. 20.
In order to obtain the best result, please use only the supplied antenna cables
between the receiver box and videorecorder, and between videorecorder and
antenna connector.
§ Insert the mains plug supplied 6 into the power socket at the back of the
receiver and in the wall socket with a mains voltage of 110-240V.
Please, only use the supplied rim-earthed mains cord with its built-in
suppressor to ensure safety and suppress EMC.
è Remote control: Remove the cover of the battery compartment.
Insert the 2 batteries supplied (Type R03G-1,5V).
Press the TV key next to the display to be sure your remote control is in the
TV mode.
The batteries supplied do not contain the heavy metals mercury and cadmium.
Nevertheless in many countries exhausted batteries may not be disposed of with your
household waste. Please ensure you dispose of exhausted batteries according to local
regulations.
! Switch TV on : Press the power button A on the front of the receiver.
A green indicator and the screen light up.
If the indicator is red, press the + P - key or a digit key on the remote control.
The green indicator blinks every time you press a key on the remote control.
When you switch on your set for the first time, the
MENU LANGUAGE automatically
appears on the screen. Alternatively the explanation appears in the different
languages.
L
R
R
L
R
EXTERNAL
FRONT
SPEAKERS
REAR
SPEAKERS
8
6
RO3 / AAA
4
Installation
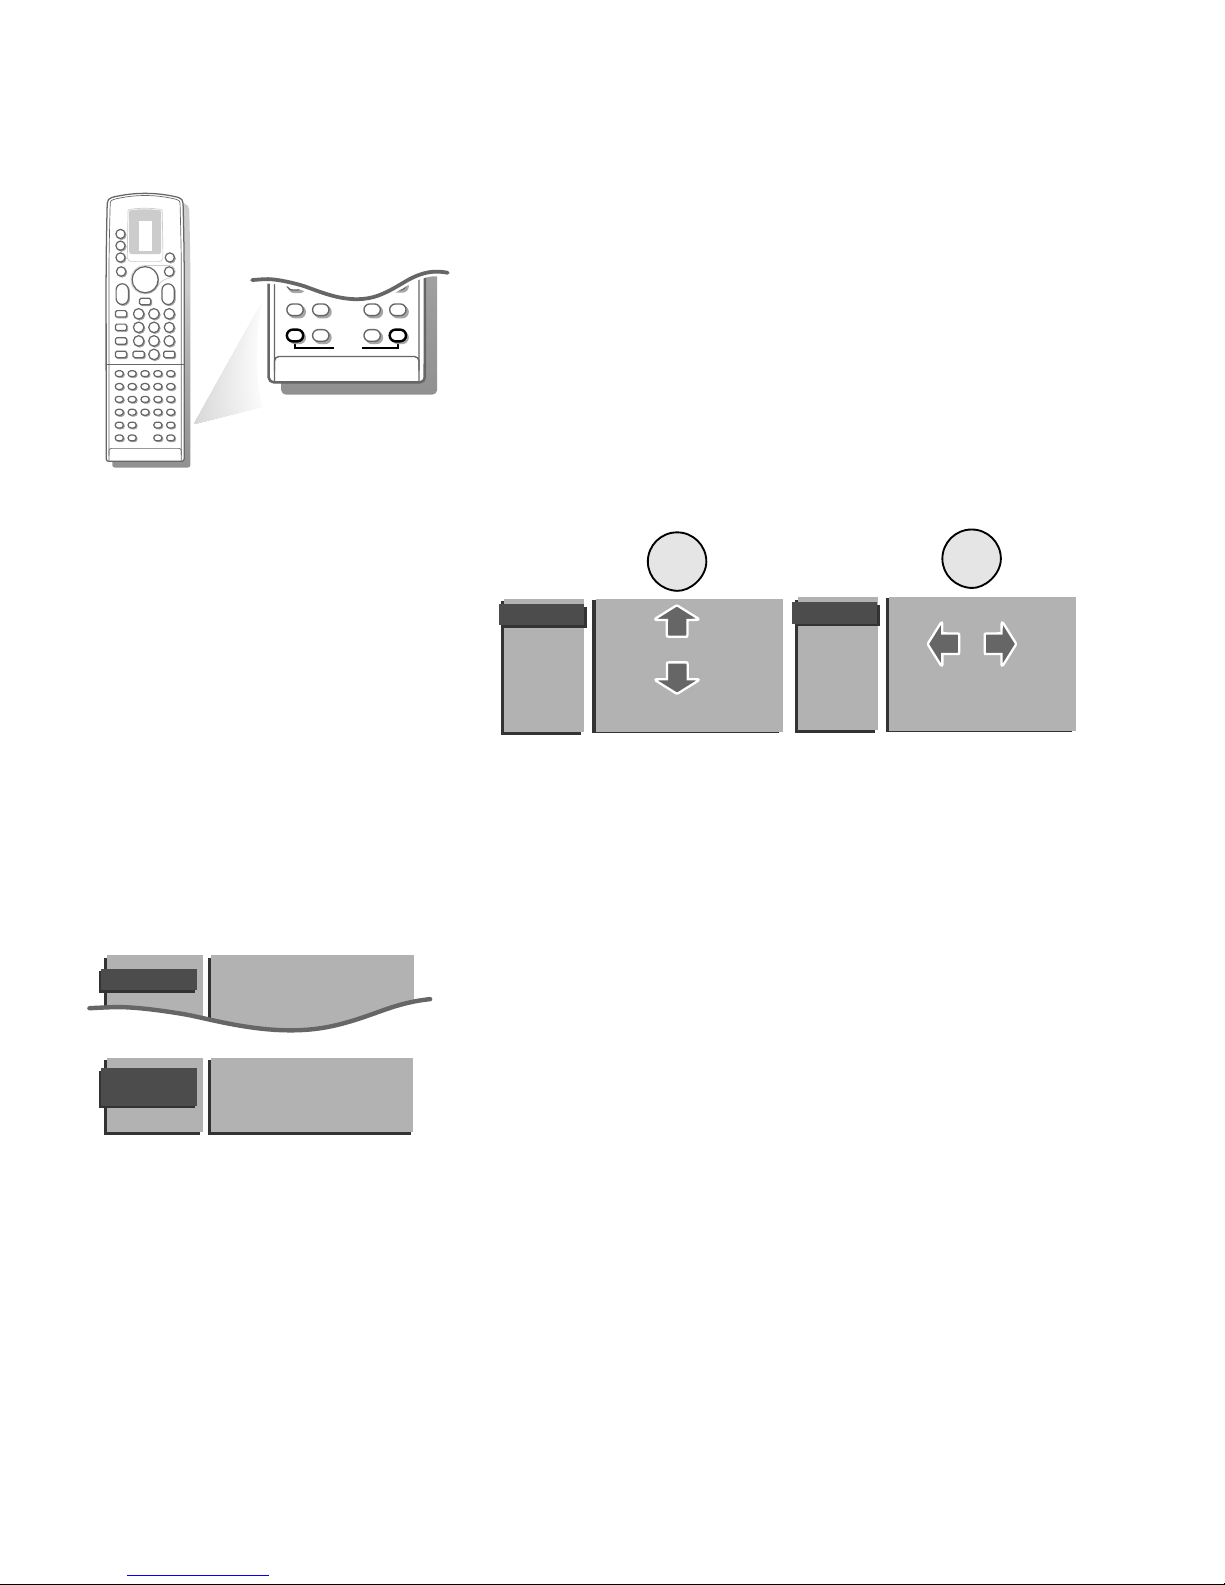
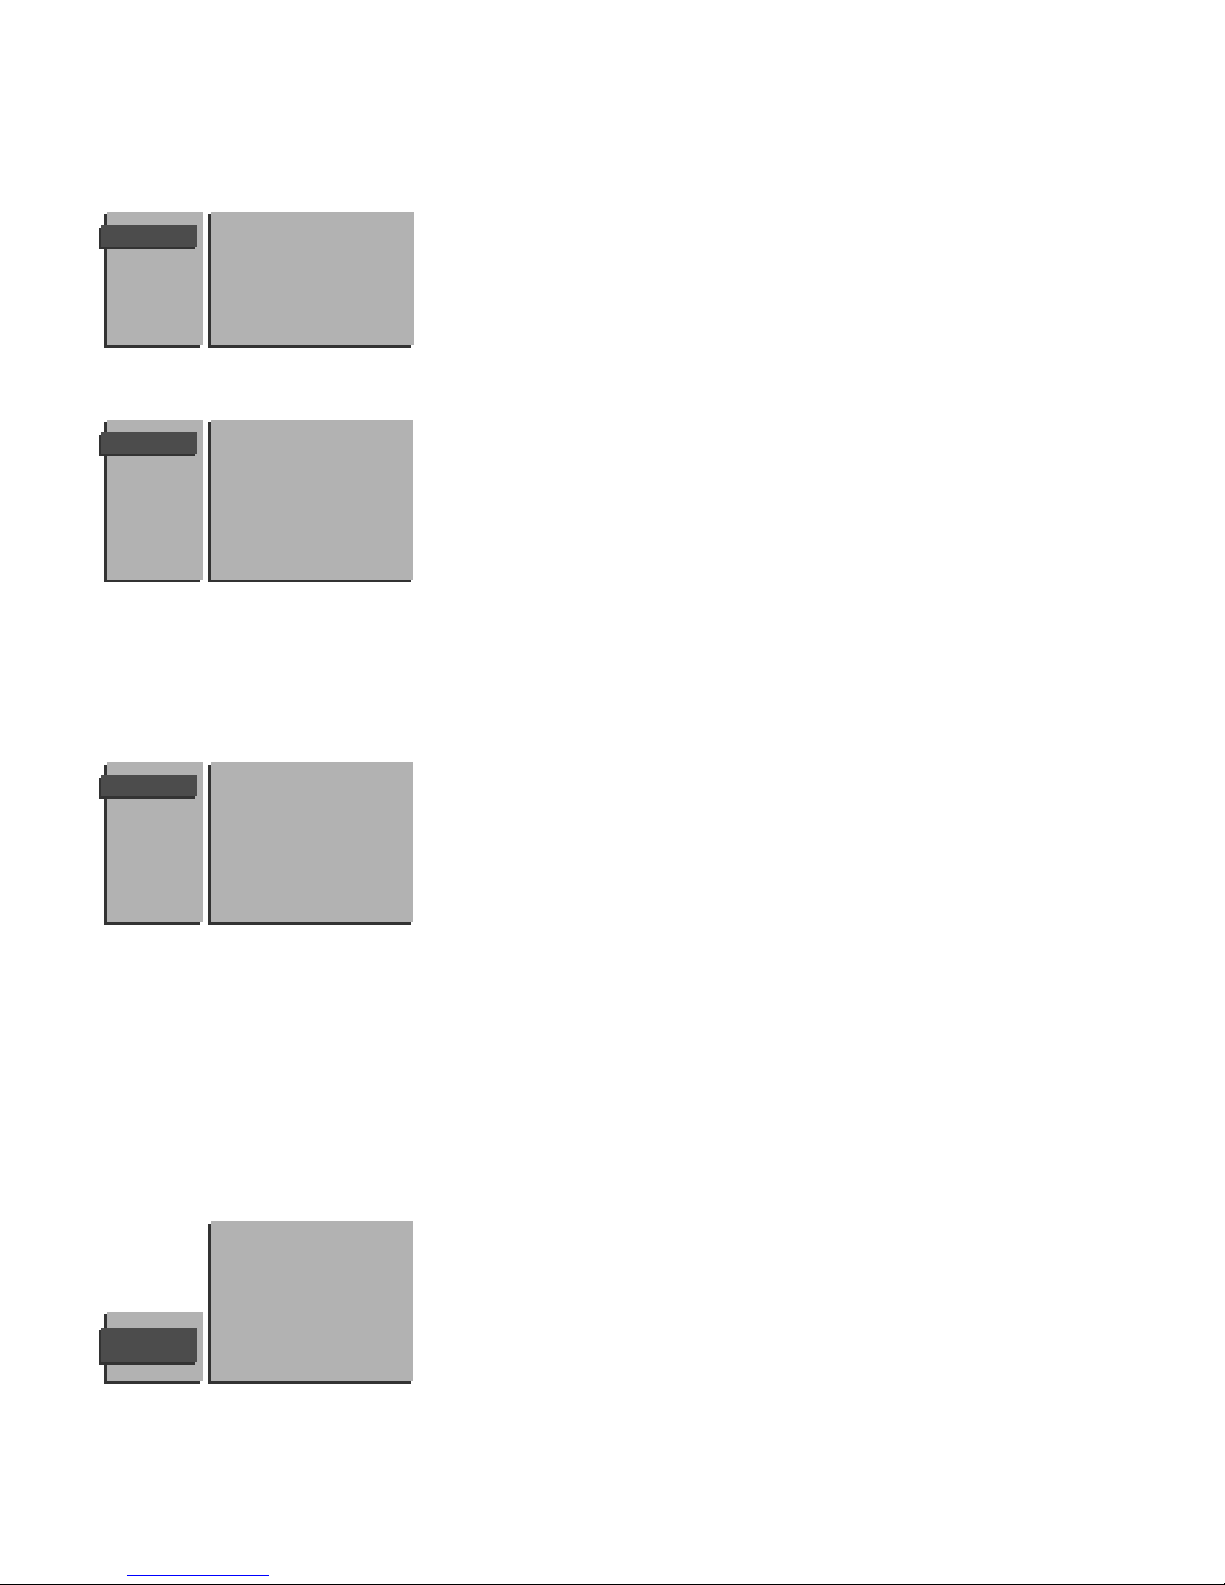
Select the INSTALLATION MENU
& Open the door of the remote control.
é Press S and s at the same time.
To use the menus
& Use the A keys to select a menu or menu item.
é Press the OK key to activate.
“ Press one of the colour menu keys on the door of the remote control to
return or to switch menu off.
π
†
Ò
C
‡
P
S
fi s
dc
TXT
d
fh
U
yÚ
+
-
PP
b
Menu Language
Automatic Installation
Manual Installation
Give Name
Reshuffle
Favourite Channels
Setup
INSTALLATION
B
B
B
B
Menu Language
Automatic Installation
Manual Installation
Give Name
Reshuffle
Favourite Channels
Setup
INSTALLATION
B
B
B
B
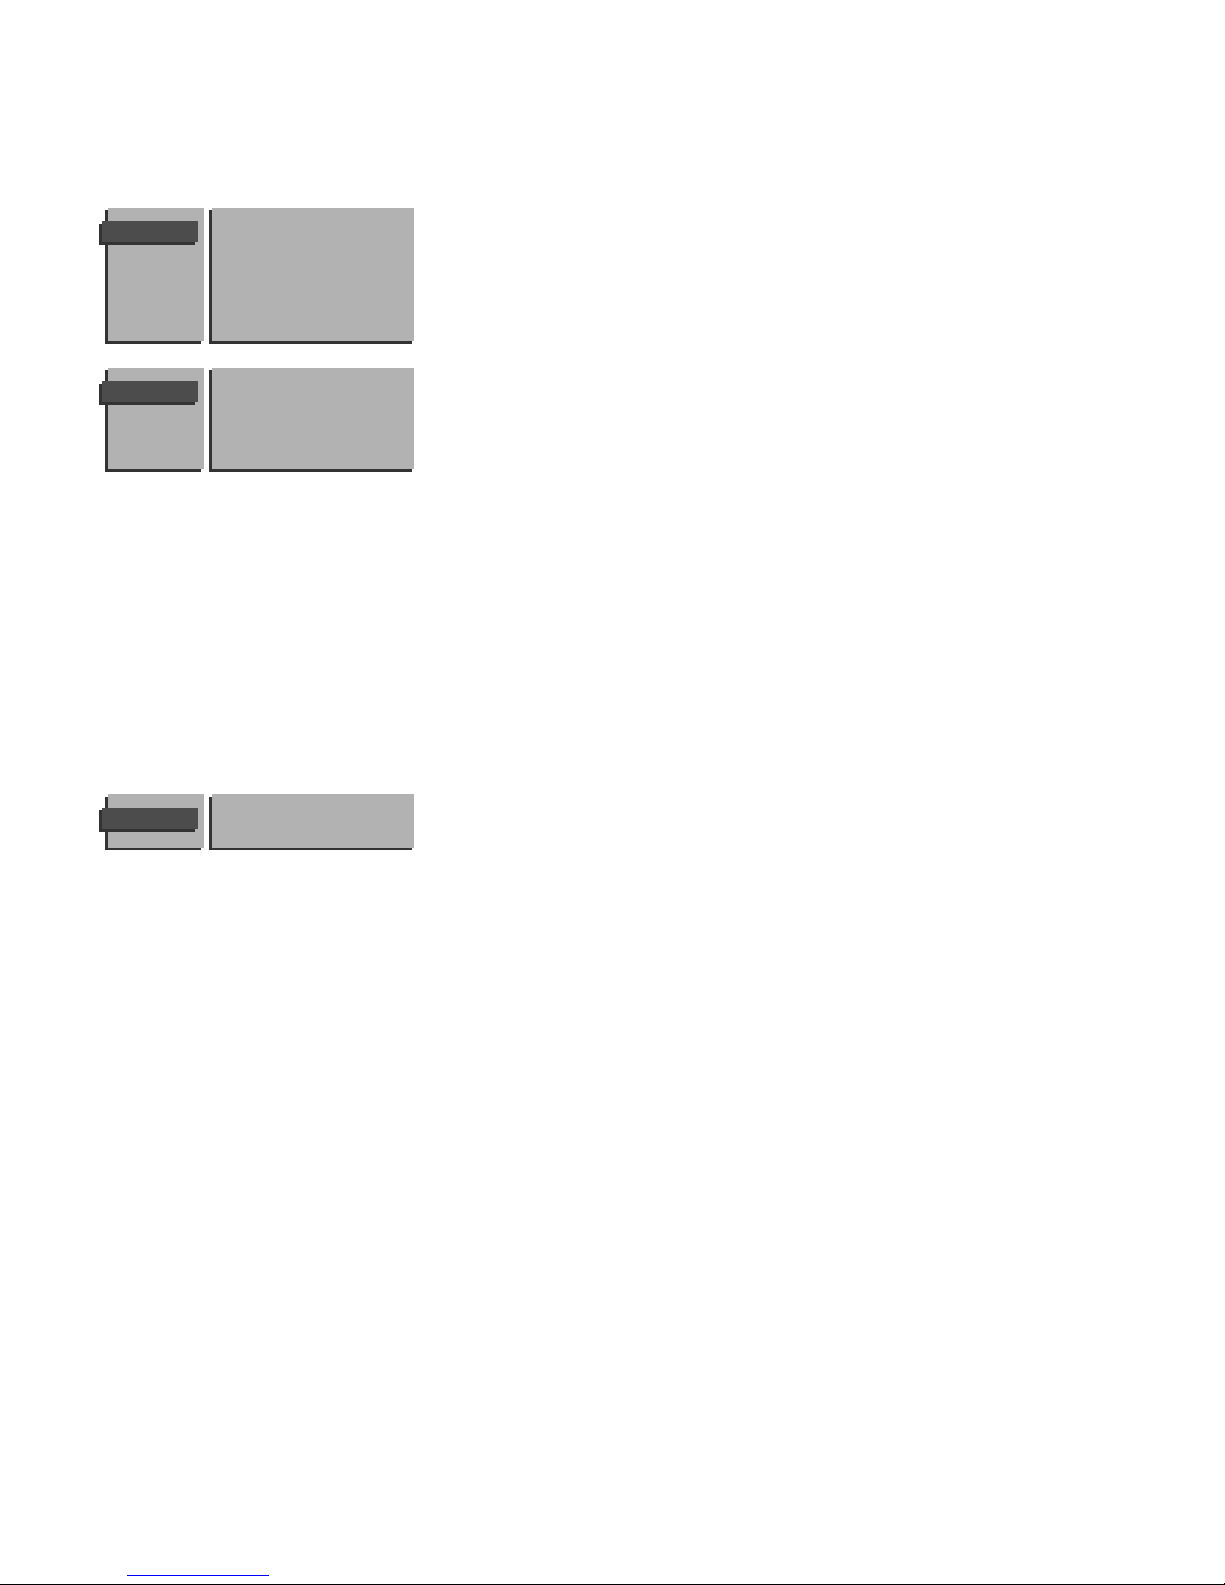
Store TV channels
First, you have to select your language.
& Select the Menu Language in the
INSTALLATION menu and press the
OK key.
é Select your language and press the OK key.
You can now search for and store the TV channels in two different ways: using
automatic installation or manual installation (tuning-in channel by
channel).
• Select your choice and press the OK key.
Menu Language
Automatic Installation
Manual Installation
Give Name
INSTALLATION
MENU
LANGUAGE
English Chinese
5
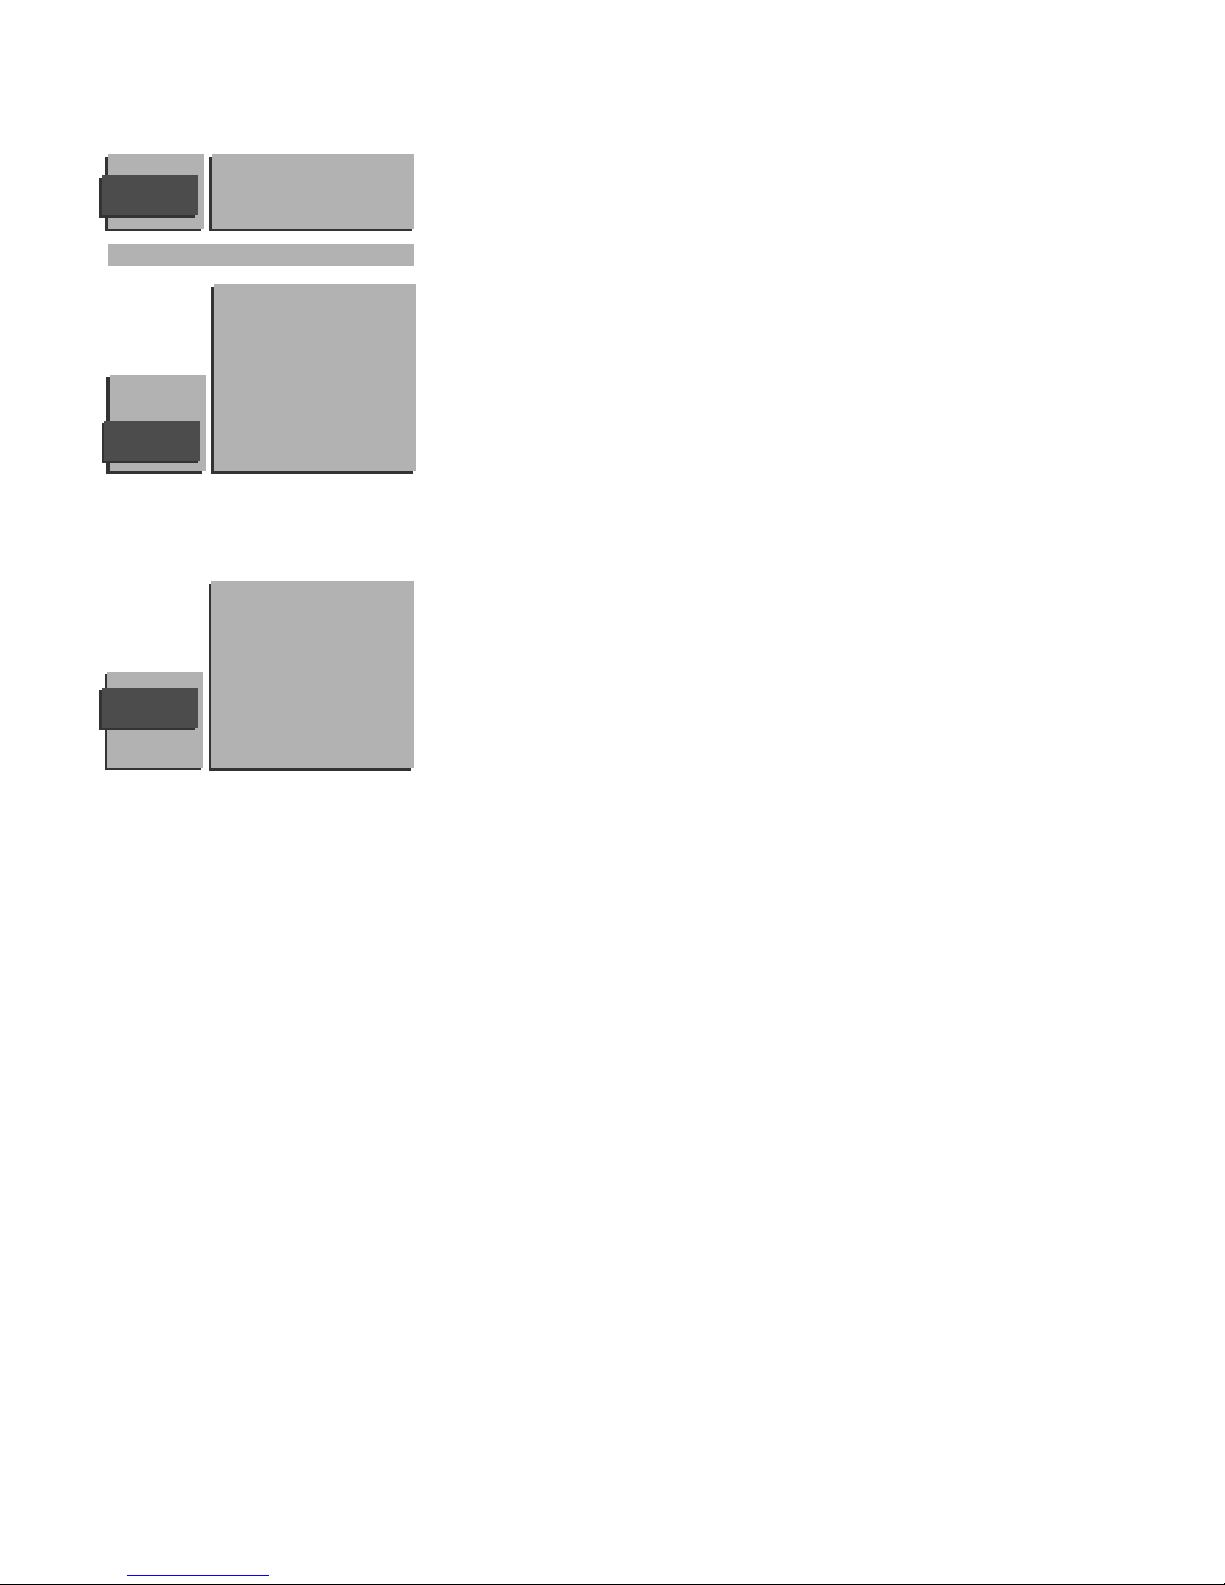
Automatic Installation
Searching O%.....................100%
AUTOMATIC
INSTALLATION
MANUAL
INSTALLATION
05 10
16 11
27 12
38 13
4 9 ...
System
Search
Channel No.
Store
Automatic installation
& In the Automatic Installation menu select On with the pπ keys to activate
the searching.
All TV channels are searched for and stored automatically.
Wait until the Searching bar at the bottom of the screen has disappeared.
é Press one of the colour menu keys on the door of the remote control to
return to the Installation menu.
Manual installation
Searching for and storing TV channels is done channel by channel.
You must go through every step of the Manual Installation menu.
& Select the system
• Select another system setting when there is intermittent sound due to weak
signal or poor reception.
é Search for a TV channel
The frequency increases until a TV channel is found.
In case of poor reception, you can improve the reception by adjusting the
frequency with the + P - key.
Direct selection of a TV channel
If you know the frequency, enter the 3 digits of the frequency directly with the
digit keys 0 to 9.
“ Enter the channel number
‘ Store steps & to “
• Select Store and press the OK key.
( Repeat the steps & to ‘ to store another TV channel.
To exit from the menu
• Press one of the colour menu keys on the door of the remote control.
AUTOMATIC
INSTALLATION
0 10 ...
1 ... 11 ...
2 ... 12 ...
3 ... 13 ...
4 ... .. ...
. ... .. ...
. ... .. ...
. ... .. ...
Automatic Installation Off
6
According to your preference you can change the order of the stored TV
channels.
& Select Reshuffle in the
INSTALLATION menu and press the OK key.
é Select the channel number you want to change.
Use the p or π keys to select another column of the channel list.
“ Press the OK key.
‘ Select the new number.
( Press the OK key again.
Repeat the reshuffling until all TV channels are allocated as you like.
§ Press one of the colour menu keys to return to the
INSTALLATION menu.
Reshuffle the channel list
RESHUFFLE
90
VGA 0
91 A/V 1 1 SUPER
92 A/V 2 2 CNN
93 A/V 3 3 ....
94 A/V 4 4 ....
95 5 ....
96 .......
97
98
99
Select Favourite TV channels
FAVOURITE
CHANNELS
VGA 0 ... 10 ...
A/V 1 1 ... 11 ...
A/V 2 2 ... 12 ...
A/V 3 3 ... 13 ...
A/V 4 4 ... 14 ...
5 ... 15 ...
..... ......
Channel Number
Favourite
It is possible to assign a name to a TV channel. A name with up to 5 letters or
numbers can be given to the channel numbers 0 to 99. For example SUPER,
CNN,... Between 99 and 0, in the column in the middle, you can also name
any peripherals that are connected.
& Select Give Name in the
INSTALLATION menu and press the OK key.
é Select the channel number.
“ Press the OK key.
‘ Select the character with the o or œ keys.
( Select the following position with the p or π keys.
§ Select a following character.
è Press the OK key when finished.
! Press one of the colour menu keys to return to the
INSTALLATION menu.
A space, numbers or other special characters are located between Z and A.
GIVE NAME
90
VGA 0
91 A/V 1 1 CNN
92 A/V 2 2 SUPER
93 A/V 3 3 ....
94 A/V 4 4 ....
95 5 ....
96 .......
97
98
99
Give name
After leaving the installation you can browse through the TV channels by
pressing the + P - key. Only those TV channels which are in the favourite list
will be displayed. The non-favourite TV channels can still be selected with the
digit keys.
You can also do this for a channel number reserved for the channels you
receive from your decoder.
& Select Favourite channels in the
INSTALLATION menu and press the
OK key.
é Select your channel number.
“ Select Favourite.
‘ Select Yes or No.
( Repeat é to ‘ for every TV channel you want to change into a favourite
or a non-favourite TV channel.
§ Press one of the colour menu keys to return to the
INSTALLATION menu.
Menu Language
Automatic Installation
Manual Installation
Give Name
Reshuffle
Favourite Channels
Setup
INSTALLATION
7
& Select Setup in the INSTALLATION menu and press the OK key.
é Use the red menu key to return or to switch the displayed menu off.
Audio Output
If you have audio equipment connected to your receiver, you can select two
types of audio output.
• Select Variable with the p or π keys if you want to adjust the volume via
the TV when using your audio equipment to reproduce the TV sound signal. It
is possible that the volume control of the audio equipment needs to be
adjusted.
Select Constant if you want to adjust the volume with the volume control of
your audio equipment or if you want to record the sound of a TV channel to
an audio recorder (tape, DCC,...).
CD-i/Photo CD
See Connect Peripheral Equipment, Other equipments, p. 22.
External amplifier
This menu item can only be selected in case you did NOT select external
loudspeakers (with the red loudspeaker button at the back in
INTERNAL
SPEAKER position).
• Select No: - if you did not connect an audio amplifier at the back of your
receiver. The menu item Centre Mode in Setup 1 menu can not
be selected;
- if you want to make a sound recording from your TV on an
audio recorder. See also Audio Output;
- if you do not want to use the external audio amplifier for
reproduction of the left and right channel of the Dolby signal.
• Select Yes: - if you connected an audio amplifier to AUDIO L and R at the
back of your receiver (see Connect Peripheral Equipment,
Audio Equipment, p. 22) and you want to enjoy even more
impressive sound.
All TV loudspeakers only function as centre speaker and the
speakers connected to the audio amplifier reproduce the left
and right channel.
The menu item Audio Output can not be selected.
In the menu item Centre Mode in Setup 1 menu you can select
either Normal or Phantom (the sound from the centre speaker is
reproduced via the left and right loudspeakers of the amplifier).
Install TV setup
Menu Language
Automatic Installation
Manual Installation
Give Name
Reshuffle
Favourite Channels
Setup
INSTALLATION
Audio Output
CD-i/Photo CD
Ext Amplifier
Setup 1
Setup 2
SETUP
Surround Mode
Centre Mode
SETUP 1

8
Surround Mode
According to the broadcast sound modes, select the Surround Sound
possibilities:
Pro Logic with Dolby Pro Logic broadcasting. Nice effects can be reached in
Pro Logic mode with good stereo broadcasts.
Dolby 3 Stereo if no surround speakers are connected or if
oversynthesized sounds result in annoying surround effects.
Hall with mono or poor stereo broadcasting.
Off if you want to switch off Surround Sound.
Which loudspeakers are active, depends on the selected Surround mode.
See Dolby Pro Logic Install, p. 14.
Note: If you have only connected a right and left external loudspeaker and no centre
speaker, select Pro Logic and not Dolby3 Stereo in the Surround
Mode menu item. See also Centre mode, Phantom selection.
Centre Mode (only selectable in Dolby 3 Stereo or Pro Logic when you have
connected and selected external loudspeakers and if connected
an external amplifier)
With internal speakers: the item centre mode can not be selected.
With external speakers: (external left and right loudspeakers and a centre
loudspeaker. See Connect Peripheral Equipment, External Loudspeakers,
p. 23)
Note : Do not forget to put the red loudspeaker button at the back of the receiver in
the
EXTERNAL SPEAKERS position.
• When in Surround Mode you have selected Pro Logic, you can select
Normal, Phantom or Wide in the Centre Mode;
• When in Surround Mode you have selected Dolby 3 Stereo, you can
select Normal or Wide in the Centre Mode;
• Select Phantom if no external centre speaker is connected;
• Select Normal if you have connected a small centre speaker which can not
reproduce low frequencies (< 100 Hz);
• Select Wide if you have connected a full range external centre speaker.
Information Line
After the selection of a TV channel or after pressing the i key on the
remote control, a TV channel which broadcasts teletext may transmit the
name of the TV channel or the channel name or another message which
appears briefly in the information line at the bottom of the screen.
When selected Off, the information line will only appear after pressing the
i key, and not after the selection of a TV channel.
Picture mute
• Press the p or π keys to select a Blue or Black screen when there is no
picture or information.
• Press one of the colour menu keys repeatedly.
The
INSTALLATION menu reappears.
Fast exit from the menus
• Press one of the colour menu keys repeatedly to switch off all menus.
Surround Mode
Centre Mode
SETUP 1
Information Line
Picture mute
SETUP 2
9
The keys in front of the receiver box
Should your remote be lost or broken you can still change some of the basic
picture and sound settings.
• Press the LOCAL MENU key behind the door at the front of the receiver
repeatedly to select Volume, Brightness, Colour or Contrast.
• Press the Volume - or + key to adjust the chosen selection.
The
CHANNEL - and + keys enable you to select the TV channels.
Note: If the message Child Lock On appears, the child lock must be switched off
before you can use the
CHANNEL - and + keys on the receiver to select a
TV channel. See p. 15.
The selected adjustment automatically switches off when after 10 sec. no
action has been executed.
LOCAL
MENU
10
Use of the remote control
u Select your computer or
external A/V sources
Press this key repeatedly to select
VGA,
A/V 1, A/V 2, A/V 3 or A/V 4, according to
where you connected your peripherals
(see p. 26).
M Mode selection
Press this key repeatedly to indicate the
peripheral equipment you want to operate
with the remote control.
TV TV operation
Press this key to use the remote control
directly in the TV mode.
V Volume
The volume is adjusted. If you want to store
the volume adjustment in the memory, see
the Features menu, General PP store, p. 15
to store the same volume adjustment for all
the stored TV channels.
P Channel selection
To browse through the TV channels
activated in the Favourite Channel menu. See
p. 7.
¬ Mute key
Interrupt the sound or restore it.
B Standby
The set is switched to standby and the red
indicator lights up in front of receiver box
and the screen.
To switch the TV on again, press - P + or the
digit keys.
Your TV consumes energy in the standby-mode.
Energy consumption contributes to air and water
pollution. We advise to switch off your TV
overnight instead of leaving it on standby. You
save energy.
0/9 Digit keys
To select a TV channel.
For a two digit channel number, enter the
second digit within 2 seconds.
0 Previous channel
The previously selected TV channel is
displayed.
i Permanent channel number
Screen information
Press for 5 seconds to activate/de-activate
the continuous display of the channel
number.
Press briefly to display information about the
selected TV channel and channel, the sound
reception, the selected DNR setting and
picture format and the remaining time set
with the sleeptimer.
b Dual screen See p. 17
q Picture format
Press the q key repeatedly to select
another picture format: 4:3, Movie Expand
14:9, Movie Expand 16:9 with or without
subtitling, Super Wide, Wide Screen or
Auto Format.
When in Movie Expand 14:9 or 16:9 picture
format, you can make subtitles visible or not
with the o or œ keys.
Sometimes video recorders or TV channels
carry special signals which will automatically
switch the TV to the correct screen format.
Selecting Auto format, the screen will be
filled as much as possible with the picture
when TV channels are not carrying special
signals detecting the correct screen format.
Auto format is disabled when in Dual Screen.
Note: In VGA mode press the q key to switch
between a 4:3 or a 16:9 picture format.
In Dual screen mode press the q key to switch
between a full or a squeezed picture format.
VCR 1
VCR 2
DVD
AMP
TUNER
TAPE
SAT
CD
TV
π
π
π
π
OK
M
u
TV
q
X
B
1
23
456
79
PICTURE SOUND
+
-
V
P
+
-
¬
0
ib
j
8
0
SMART CONTROLS
b
X Bilingual choice and sound mode
selection
Press this key
• to switch from Stereo to Mono sound,
in case of stereo transmission or
• to switch from Digital Sound to Digital
Sound available, in case of digital
transmission;
• to choose between language Y (Dual Y) or
language Z (Dual Z), in case of bilingual
transmission.
The setting is stored for each TV channel
separately.
 Loading...