

Philips 40HFL5783L/F7, 40HFL5783D/F7, 40HFL5783D, 40HFL5783L, 32HFL5763D Quick Start Setup Manual
...Page 1

Quick Start Setup Guide
40HFL5783D
40HFL5783L
32HFL5763D
32HFL5763L
Page 2
2 EN
Visit our World Wide Web Site at http://www.philips.com/hospitality
Know these
safety
symbols
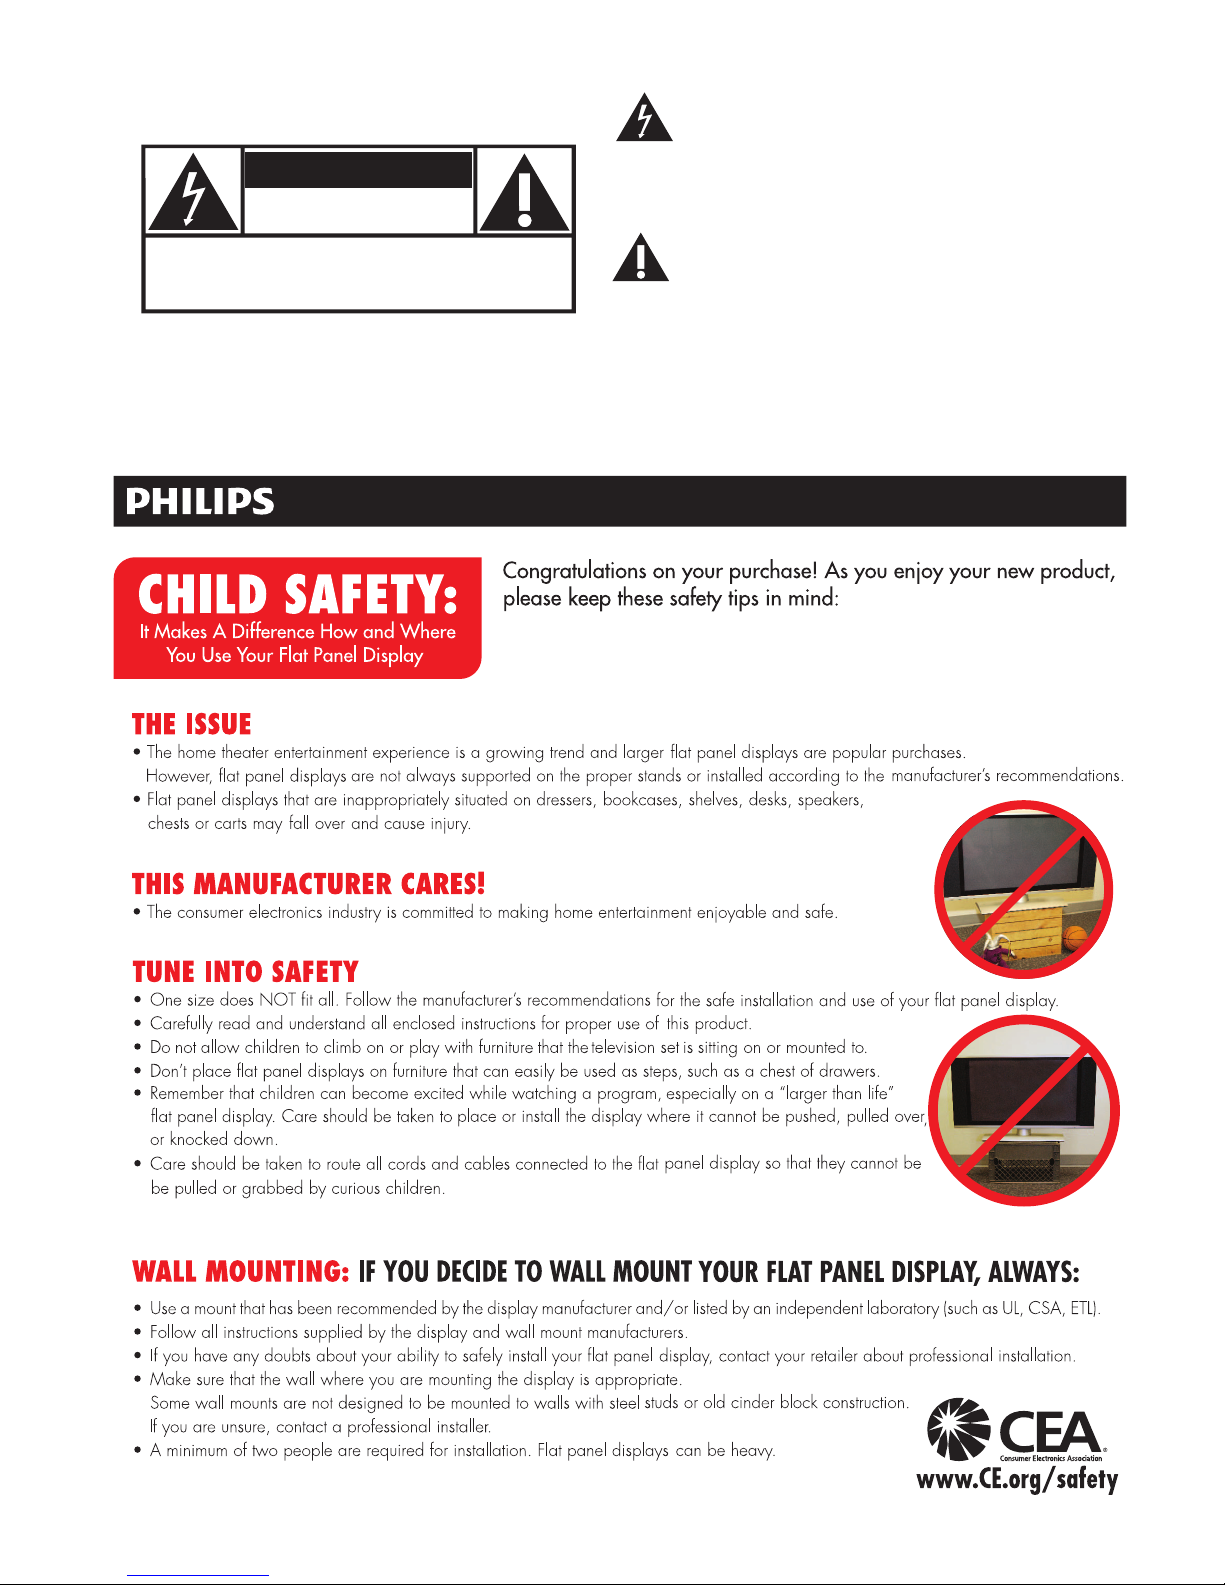
CAUTION
This “bolt of lightning” indicates un-insulated
material within your unit may cause an electrical shock. For the safety of everyone in your
household, please do not remove product
covering.
The “exclamation point” calls attention to
features for which you should read the
enclosed literature closely to prevent operating
and maintenance problems.
WARNING: To reduce the risk of fire or electric shock, this apparatus should not be exposed to rain or moisture and objects filled
with liquids, such as vases, should not be placed on this apparatus.
CAUTION: To prevent electric shock, match wide blade of plug to wide slot, fully insert.
ATTENTION: Pour éviter les choc électriques, introduire la lame la plus large de la fiche dans la borne correspondante de la prise et
pousser jusqu’au fond.
CAUTION: TO REDUCE THE RISK OF ELECTRIC SHOCK, DO NOT
REMOVE COVER (OR BACK). NO USER-SERVICEABLE PARTS
INSIDE. REFER SERVICING TO QUALIFIED SERVICE PERSONNEL.
RISK OF ELECTRIC SHOCK
DO NOT OPEN
Page 3
3EN
IMPORTANT SAFETY INSTRUCTIONS
Read before operating equipment
1. Read these instructions.
2. Keep these instructions.
3. Heed all warnings.
4. Follow all instructions.
5. Do not use this apparatus near water.
6. Clean only with a dry cloth.
7. Do not block any of the ventilation openings. Install in accordance with
the manufacturer’s instructions.
8. Do not install near any heat sources such as radiators, heat registers,
stoves, or other apparatus (including amplifiers) that produce heat.
9. Do not defeat the safety purpose of the polarized or grounding-type plug.
A polarized plug has two blades with one wider than the other. A
grounding type plug has two blades and third grounding prong. The wide
blade or third prong are provided for your safety. When the provided
plug does not fit into your outlet, consult an electrician for replacement
of the obsolete outlet.
10. Protect the power cord from being walked on or pinched particularly at
plugs, convenience receptacles, and the point where they exit from the
apparatus.
11. Only use attachments/accessories specified by the manufacturer.
12. Use only with a cart, stand, tripod, bracket, or table specified by
the manufacturer, or sold with the apparatus. When a cart is
used, use caution when moving the cart/apparatus combination
to avoid injury from tip-over.
13. Unplug this apparatus during lightning storms or when unused for long
periods of time.
14. Refer all servicing to qualified service personnel. Servicing is required
when the apparatus has been damaged in any way, such as power-supply
cord or plug is damaged, liquid has been spilled or objects have fallen
into apparatus, the apparatus has been exposed to rain or moisture,
does not operate normally, or has been dropped.
15. This product may contain lead or mercury. Disposal of these materials
may be regulated due to environmental considerations. For disposal or
recycling information, please contact your local authorities or the
Electronic Industries Alliance: www.eiae.org.
16. Damage Requiring Service - The appliance should be serviced by
qualified service personnel when:
A. The power supply cord or the plug has been damaged; or
B. Objects have fallen, or liquid has been spilled into the appliance; or
C. The appliance has been exposed to rain; or
D. The appliance does not appear to operate normally or exhibits a
marked change in performance; or
E. The appliance has been dropped, or the enclosure damaged.
17. Tilt/Stability - All televisions must comply with recommended
international global safety standards for tilt and stability properties of its
cabinets design.
• Do not compromise these design standards by applying excessive pull
force to the front, or top, of the cabinet which could ultimately
overturn the product.
• Also, do not endanger yourself, or children, by placing electronic
equipment/toys on the top of the cabinet. Such items could
unsuspectingly fall from the top of the set and cause product damage
and/or personal injury.
18. Wall or Ceiling Mounting - The appliance should be mounted to a
wall or ceiling only as recommended by the manufacturer.
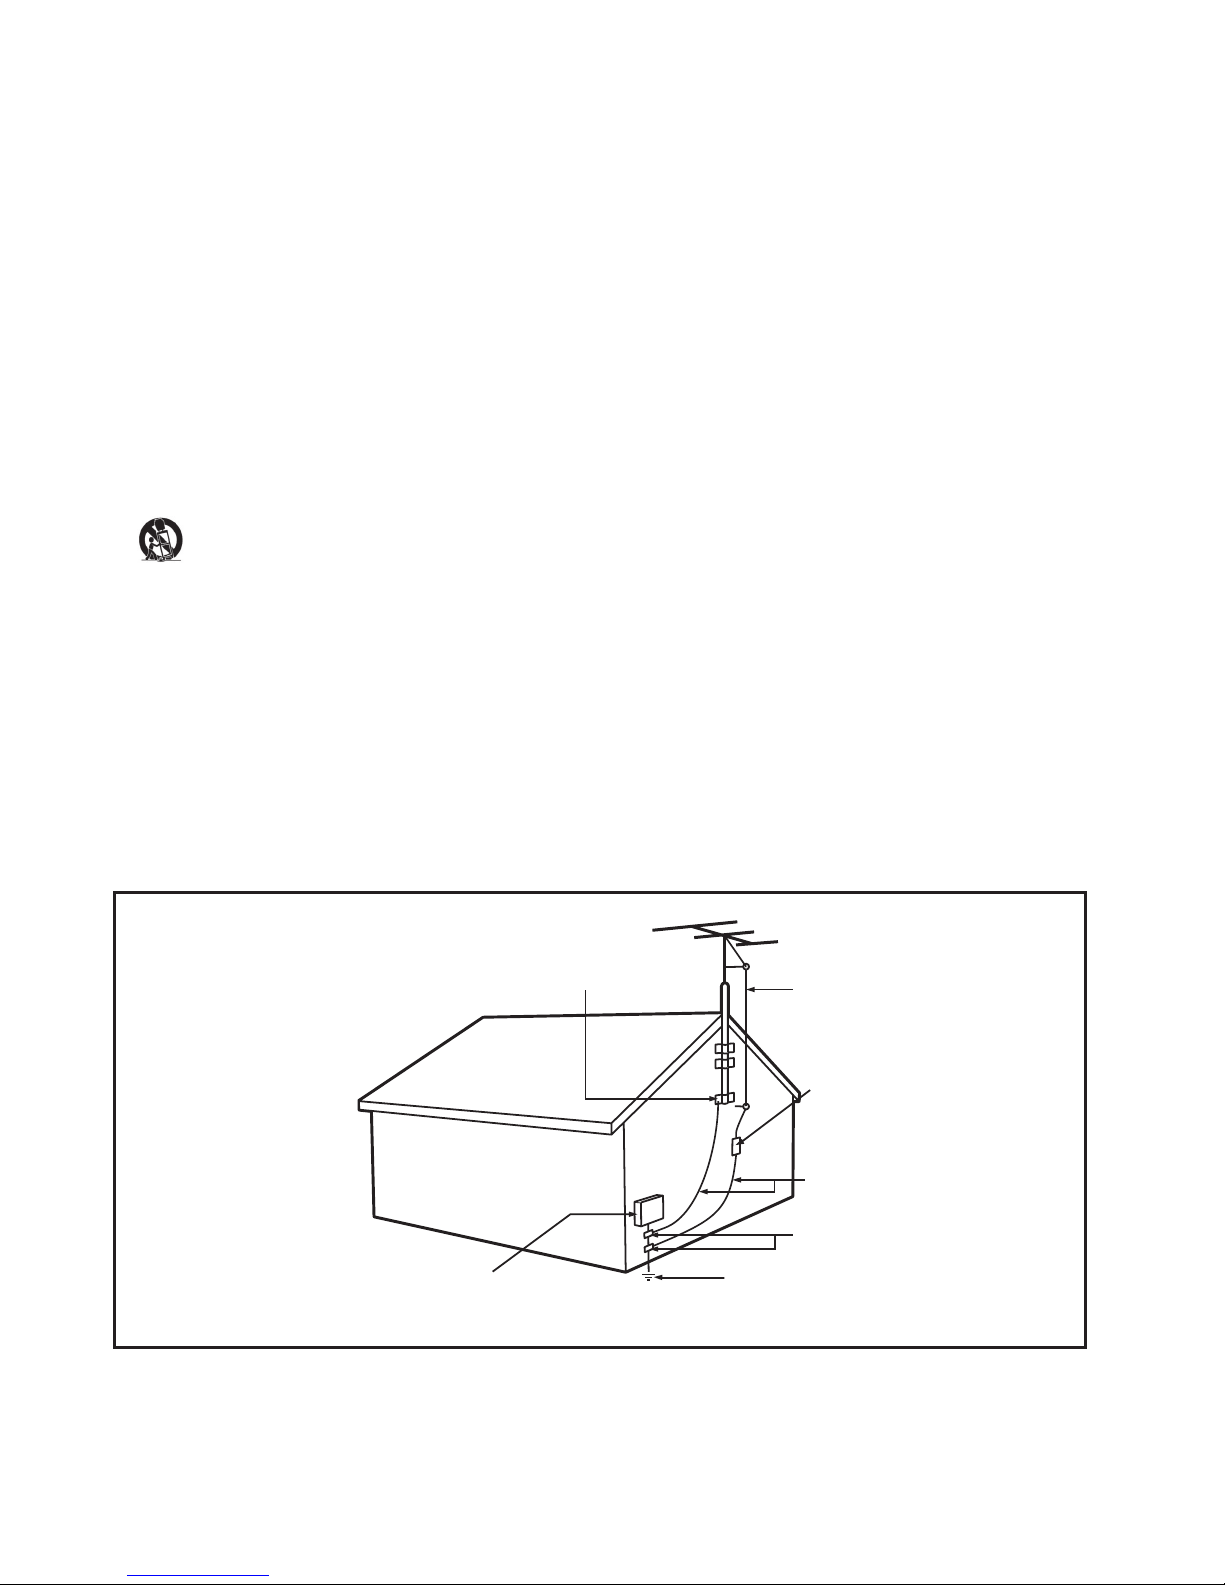
19. Power Lines - An outdoor antenna should be located away from
power lines.
20. Outdoor Antenna Grounding - If an outside antenna is connected to
the receiver, be sure the antenna system is grounded so as to provide
some protection against voltage surges and built up static charges.
Section 810 of the National Electric Code, ANSI/NFPA No. 70-1984,
provides information with respect to proper grounding of the mats and
supporting structure grounding of the lead-in wire to an antenna
discharge unit, size of grounding connectors, location of antenna
discharge unit, connection to grounding electrodes and requirements for
the grounding electrode. See Figure below.
21. Objects and Liquid Entry - Care should be taken so that objects do
not fall and liquids are not spilled into the enclosure through openings.
a) Warning: To reduce the risk of fire or electric shock, this apparatus
should not be exposed to rain or moisture and objects filled with
liquids, such as vases should not be placed on this apparatus.
22. Battery Usage CAUTION - To prevent battery leakage that may
result in bodily injury, property damage, or damage to the unit:
• Install all batteries correctly, with + and - alignment as marked on the
unit.
• Do not mix batteries (old and new or carbon and alkaline, etc.)
• The batteries (batteries installed) shall not be exposed to excessive heat
such as sunshine, fire or the like.
• Remove batteries when the unit is not used for a long time.
this reminder is provided to call the CATV system installer’s attention to Article 820-40 of
the NEC that provides guidelines for proper grounding and, in particular, specifies that the cable ground shall be connected to the
grounding system of the building, as close to the point of cable entry as practical.
EXAMPLE OF ANTENNA GROUNDING AS PER
NATIONAL ELECTRICAL CODE (NEC)
Note to the CATV system installer:
GROUND CLAMP
ANTENNA LEAD IN WIRE
ANTENNA DISCHARGE UNIT
NEC SECTION 810-20)(
GROUNDING CONDUCTORS
(
NEC SECTION 810-21)
GROUND CLAMPS
POWER SERVICE GROUNDING
ELECTRODE SYSTEM
(
NEC ART 250, PART H)
ELECTRIC SERVICE EQUIPMENT
Page 4
4 EN
WARNING
This television is considered to be a device with CLASS I construction
and it shall be connected to a main socket outlet with a protective
earthing connection.
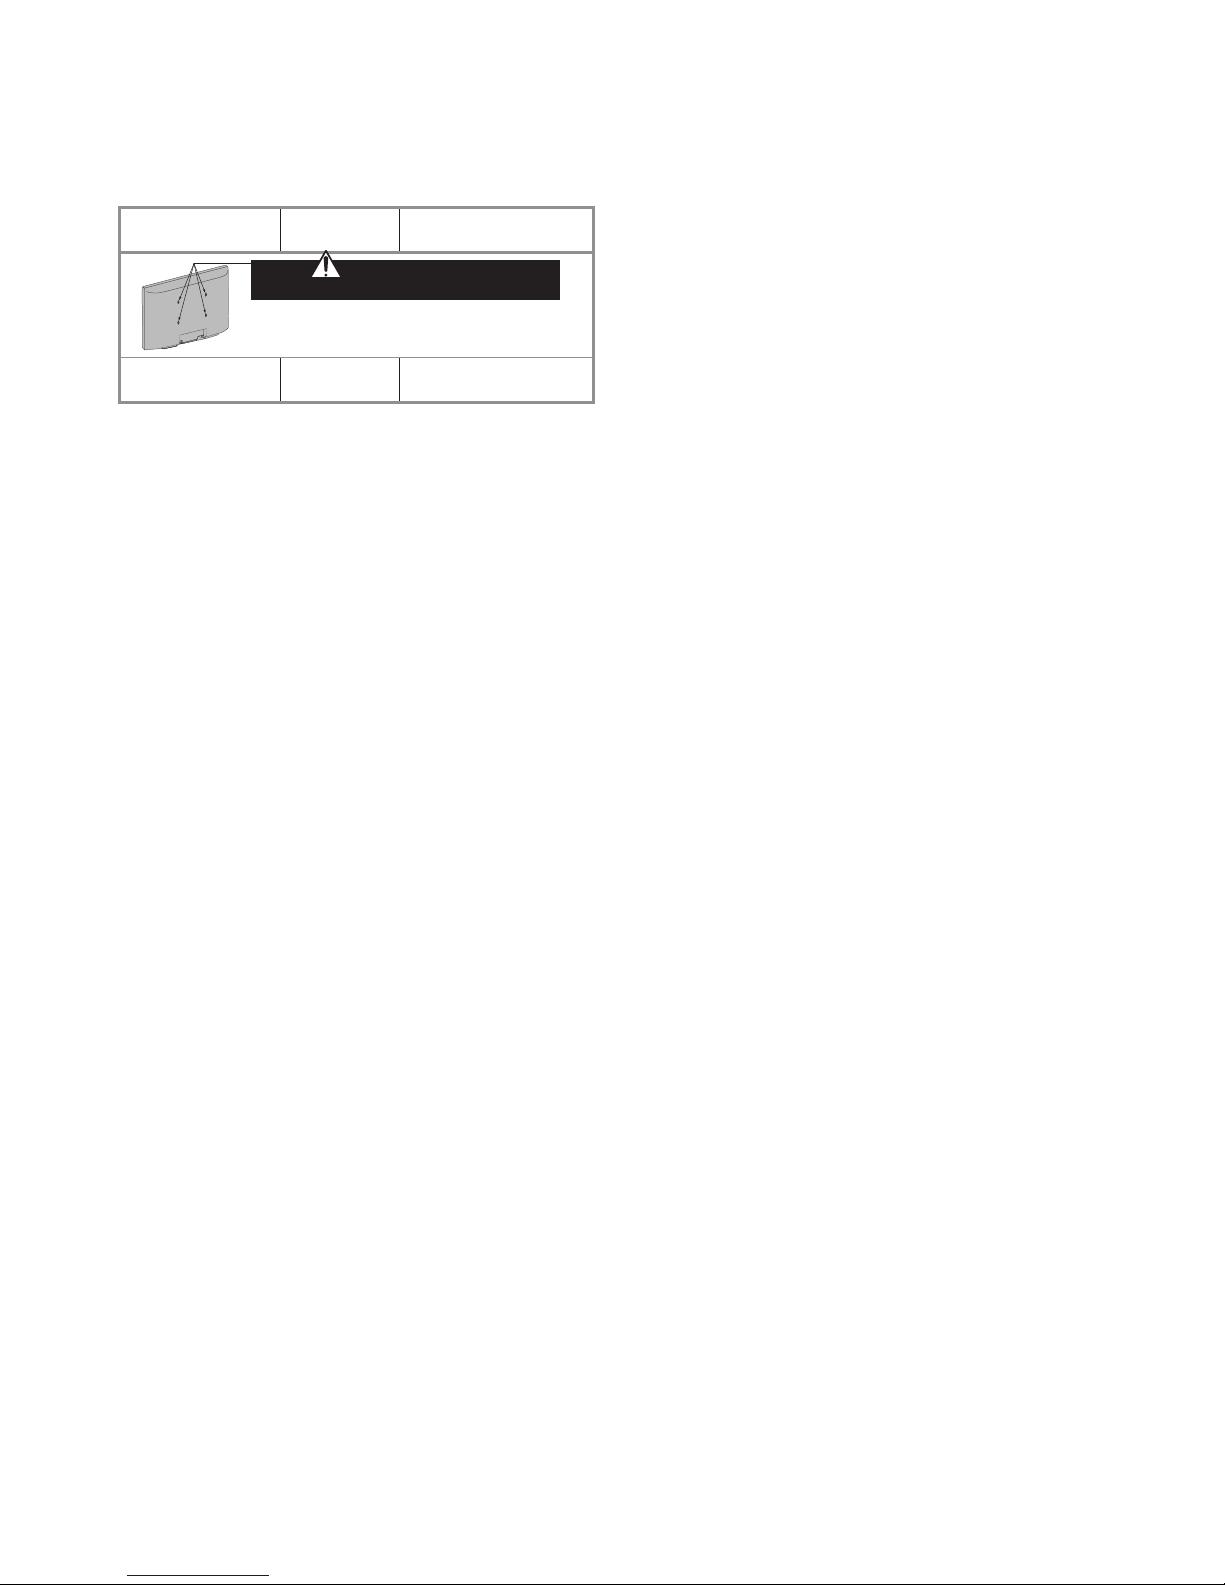
Wall Mount Bracket Kit
Brand: PHILIPS
Model # Screw dimension
32HFL5763D
32HFL5763L
SQM6435/17 M4 x 1.614” (41mm)
Do NOT use screws
packed with Wall Mount Bracket Kit.
For 40 inch TVs, you need to purchase screws
separately with dimensions described below.
40HFL5783D
40HFL5783L
SQM6435/17 M8 x 1.654” (42mm)
When installing the unit on the wall, allow this much space.
Top: 11.8 inches (30cm)
Left and right side: 5.9 inches (15cm)
Bottom: 3.9 inches (10cm)
• The Wall Mount Bracket must be installed by experts.
• The recommended Wall Mount Bracket Kit (sold separately) allows
the mounting of the TV on the wall.
Cleaning and care
• Do not touch the screen with anything hard as this may scratch,
mark or damage the screen permanently.
• Do not rub with dust clothes containing chemical treatment.
• Do not touch the surface with bare hands or a greasy cloth (some
cosmetics are harmful to the screen).
• Unplug the TV before cleaning the screen.
• When the surface becomes dusty, wipe gently with absorbent
cotton or other soft materials like chamois soaks. Do not use
acetone, toluene and alcohol cleaners because they cause chemical
damage.
• Do not use liquid or aerosol cleaners.
• Wipe off saliva or water droplets as soon as possible. Long time contact
with the screen causes deformations and color fading.
Screen care and sterilization
Avoid stationary images as much as possible. Stationary images are
images that remain on-screen for extended periods of time. Examples
include: on-screen menus, black bars and time displays. If you must
use stationary images, reduce screen contrast and brightness to avoid
screen damage.
Unplug the TV before cleaning.
Use a damp (not wet) cloth with only non-aggressive cleaners to wipe
the TV. Use another damp (not wet) cloth to clean off the cleaning
agent residue from the surface of the TV.
Recommended cleaning agents include:
• Bleach solution (10:90 concentration of bleach to water).
• Denatured alcohol (comprising of 80%-90% ethanol, 10%-
20% methanol) Risk of damage to the TV screen! Never
touch, push, rub or strike the screen with any object. To avoid
deformations and color fading, wipe off water drops as soon
as possible.
Specications are subject to change without notice. Trademarks are
the property of Koninklijke Philips Electronics N.V. or their respective
owners. P&F USA reserves the right to change products at any time
without being obliged to adjust earlier supplies accordingly.
The material in this manual is believed adequate for the intended use
of the system. If the product, or its individual modules or procedures,
are used for purposes other than those specied herein, conrmation
of their validity and suitability must be obtained. P&F USA warrants
that the material itself does not infringe any United States patents. No
further warranty is expressed or implied.
P&F USA cannot be held responsible neither for any errors in the
content of this document nor for any problems as a result of the
content in this document. Errors reported to P&F USA will be
adapted and published on the P&F USA support website as soon as
possible.
Pixel characteristics
This LCD product has a high number of color pixels. Although it has
effective pixels of 99.999% or more, black dots or bright points of light
(red, green or blue) may appear constantly on the screen. This is a
structural proper ty of the display (within common industry standards)
and is not a malfunction.
OSS declaration
Open source software
This television contains open source software. P&F USA, Inc. hereby
offers to deliver or make available, upon request, for a charge no more
than the cost of physically performing source distribution, a complete
machine-readable copy of the corresponding source code on a
medium customarily used for software interchange.
To obtain the source code, write to:
P&F USA, Inc.,
PO Box 430 Daleville, IN 47334-0430 U.S.A.
This offer is valid for three years after the date of purchase of this
product
.
Warranty
No components are user serviceable. Do not open or remove covers
to the inside of the product. Repairs may only be done by Service
Centers and ofcial repair shops. Failure to do so shall void any
warranty, stated or implied.
Any operation expressly prohibited in this manual, any adjustments, or
assembly procedures not recommended or authorized in this manual
shall void the warranty.
Federal Communications Commission Notice
This equipment has been tested and found to comply with the limits
for a Class B digital device, pursuant to part 15 of the FCC Rules.
These limits are designed to provide reasonable protection against
harmful interference in a residential installation. This equipment
generates, uses, and can radiate radio frequency energy and, if not
installed and used in accordance with the instructions, may cause
harmful interference to radio communications. However, there is no
guarantee that interference will not occur in a particular installation. If
this equipment does cause harmful interference to radio or television
reception, which can be determined by turning the equipment off and
on, the user is encouraged to try to correct the interference by one or
more of the following measures:
• Reorient or relocate the receiving antenna.
• Increase the separation between the equipment and the receiver.
• Connect the equipment into an outlet on a circuit different from
that to which the receiver is connected.
• Consult the dealer or an experienced radio or television technician
for help.
Declaration of Conformity
Trade Name : PHILIPS
Responsible Party : P&F USA, Inc.
Model : 40HFL5783D, 40HFL5783L
32HFL5763D, 32HFL5763L
Address : PO Box 430 Daleville, IN
47334-0430 U.S.A.
Telephone Number : 1-866-497-4225
Page 5
5EN
Modications
The FCC requires the user to be notied that any changes or
modications made to this device that are not expressly approved by
Philips Consumer Electronics may void the user’s authority to operate
the equipment.
Cables
Connections to this device must be made with shielded cables with
metallic RFI / EMI connector hoods to maintain compliance with FCC
Rules and Regulations.
Canadian notice
Standard Television Receiving Apparatus, Canada BETS-7 / NTMR-7.
This Class B digital apparatus meets all requirements of the Canadian
Interference-Causing Equipment Regulations.
Copyright
All other registered and unregistered trademarks are the proper ty of
their respective owners.
HDMI, the HDMI Logo, and HighDenition Multimedia Interface are
trademarks or registered trademarks of
HDMI Licensing LLC in the United States
and other countries.
Manufactured under license from Dolby
Laboratories. Dolby and the double-D
symbol are trademarks of Dolby
Laboratories.
LodgeNet and b-LAN are trademarks of LodgeNet Interactive
Corporation.
Portions of this software are copyright © The FreeType Project
(www.freetype.org).
The American Academy of Pediatrics discourages television viewing for
children younger than two years of age.
Environmental care
The packaging of this product is intended to be recycled. Contact your
local authorities for information about how to recycle the packaging.
For product recycling information,
please visit - www.recycle.philips.com
End of life directives
This LCD TV contains a lamp with Mercury, please dispose of
according to all local, state and federal laws.
Philips pays a lot of attention to produce environmentally
friendly products. Your new TV contains materials which can
be recycled and reused. At the end of its life, specialized
companies can dismantle the discarded TV to concentrate the
reusable materials and to minimize the amount of materials
to be disposed of. Please ensure you dispose of your old TV
according to local regulations.
Disposal of used batteries
The batteries supplied do not contain the heavy metals mercury and
cadmium. Never theless, in many areas batteries may not be disposed
of with your household waste. Please ensure you dispose of batteries
according to local regulations.
Regulatory notices
Warning
To reduce the risk of re or electric shock, this apparatus should not be
exposed to rain or moisture. Objects lled with liquids, such as vases, should
not be placed on this apparatus.
Caution
To prevent electric shock, match the wide blade of the plug to the wide slot,
fully inserted.
Do not place the unit on a piece of furniture that is capable of being
tilted by a child or an adult leaning, pulling, standing or climbing on it.
A falling unit can cause serious injury or even death.
This apparatus should not be placed in a built-in installation such as a
bookcase or rack unless proper ventilation is provided.
Make sure to leave a space of 4 inches (10cm) or more around this
apparatus.
How to use this guide
The Quick Start Setup Guide helps you install the Philips commercial
television, as quickly as possible. It contains the necessary information
to install the TV and congure the settings. Read and understand the
instructions in the Quick Start Setup Guide before you use your TV.
For detailed information on additional features, download the user
manual by selecting your TV model at
www.philips.com/hospitality.
As part of the Guided Install, there is PC application to support the
installation.
Guided Install for PC is an application that can be downloaded at
www.philips.com/hospitality or contact Philips agent representative, this
tool is subject to availability.
The Quick Start Setup Guide contains the following information:
• Contents of the box
• Guided installation
• Conguration of channel, advanced and Features settings
• Cloning of data
• Standalone installation instructions
As part of striving to improve the TV performance throughout
the product life, some TV menus may differ from the
illustration on this document.
Page 6
6 EN
The contents of the box
The box contains the following items:
•
TV
• TV stand
• Quick Star t Setup Guide (this document)
• Warranty sheet
• Remote control and 2 x AAA, 1.5V batteries
(only for 40HFL5783D, 32HFL5763D)
• Cable management tie
• 3-pin power cord
• TV stand hardware
• Stand-to-TV screws
(x 3 for 32HFL5763D, 32HFL5763L)
(x 4 for 40HFL5783D, 40HFL5783L)
• Stand pin (x 2 for denes TV rotation)
• Screw for Stand pin (x 4)
• TV security package
• Stand-to-TV security hex screws
(x 3 for 32HFL5763D, 32HFL5763L)
(x 4 for 40HFL5783D, 40HFL5783L)
• Security bolt and cap(x 2 each)
• Washer (x 2)
• Security nut (x 2)
• Security double-sided tape (x 4)
Note
•
The items are available on selected models only.
• An optional security tool is required to tighten the security screws and nuts.
Please contact your Philips authorized agent or distributor to purchase the
tool.
Positioning the TV
Warning
• Do not insert the AC power cord into the power socket outlet before all the
connections are made.
• Large screen TVs are heavy. 2 people are required to carry and handle a large
screen TV.
• Before you move the TV, disconnect attached cables to prevent damage to
connectors.
• Ensure that you always have easy access to the AC power cord or plug to
disconnect the TV from the power.
Mounting the Television on the Furniture
Warning
•
To prevent injury or damage, this television must be securely attached to a
furniture. Tipping, shaking, or rocking the machine may cause injury /death.
TV Setup
Philips Hospitality TVs have a USB cloning capability so you only
need to manually setup one TV - the “master TV”.
Then the complete setup conguration can be copied from the
master TV to a USB storage device which can then be used to
load the same setup conguration into all other TVs. Step 1 is to
setup the master TV as follows:
ACCESSING THE SETUP MENU
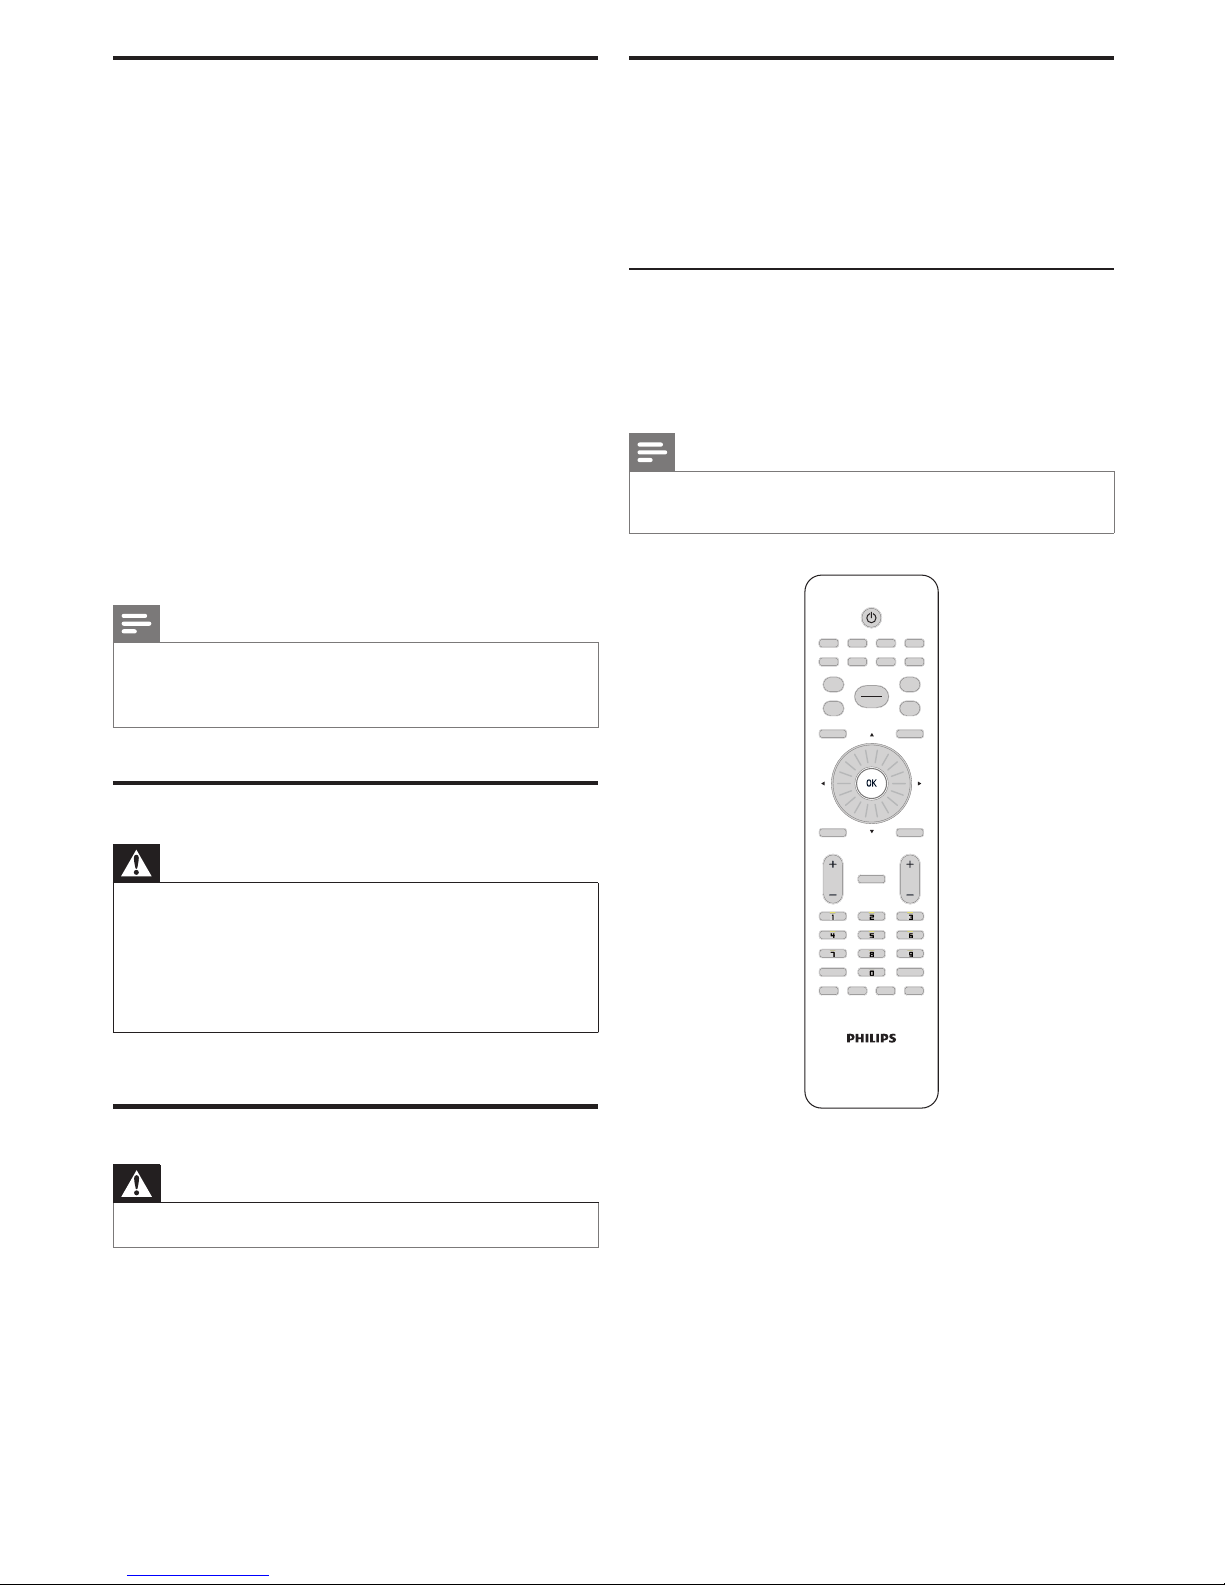
To access and adjust the setup functions, YOU MUST USE A
SPECIAL SETUP REMOTE CONTROL (not provided with the
TV) IN THE RC5 SETUP MODE. All the following instructions
assume the use of a setup remote control in the RC5 Setup
mode.
Note
•
The optional setup remote control is not included in the box. Contact your
Philips authorized agent or dealer to purchase the setup remote control.
Setup remote control might differ from the illustration.
A B C D
E
RECALL/INFO
F G RESET/UPGRADE
GUIDE
BACK/PP
ALARM/CLOCK
OPTIONS
HOME
MENU
SMART
TELETEXT
ABC DEF
JKL MNOGHI
TUV WXYZPQRS
SLEEP
AV
MUTE
CC
TV
VOL
P
RC5 GUEST
RC5 SETUP RC6 GUEST RC6 SETUP
HOSPITALITY
Page 7
7EN
Connecting the antenna and getting
started
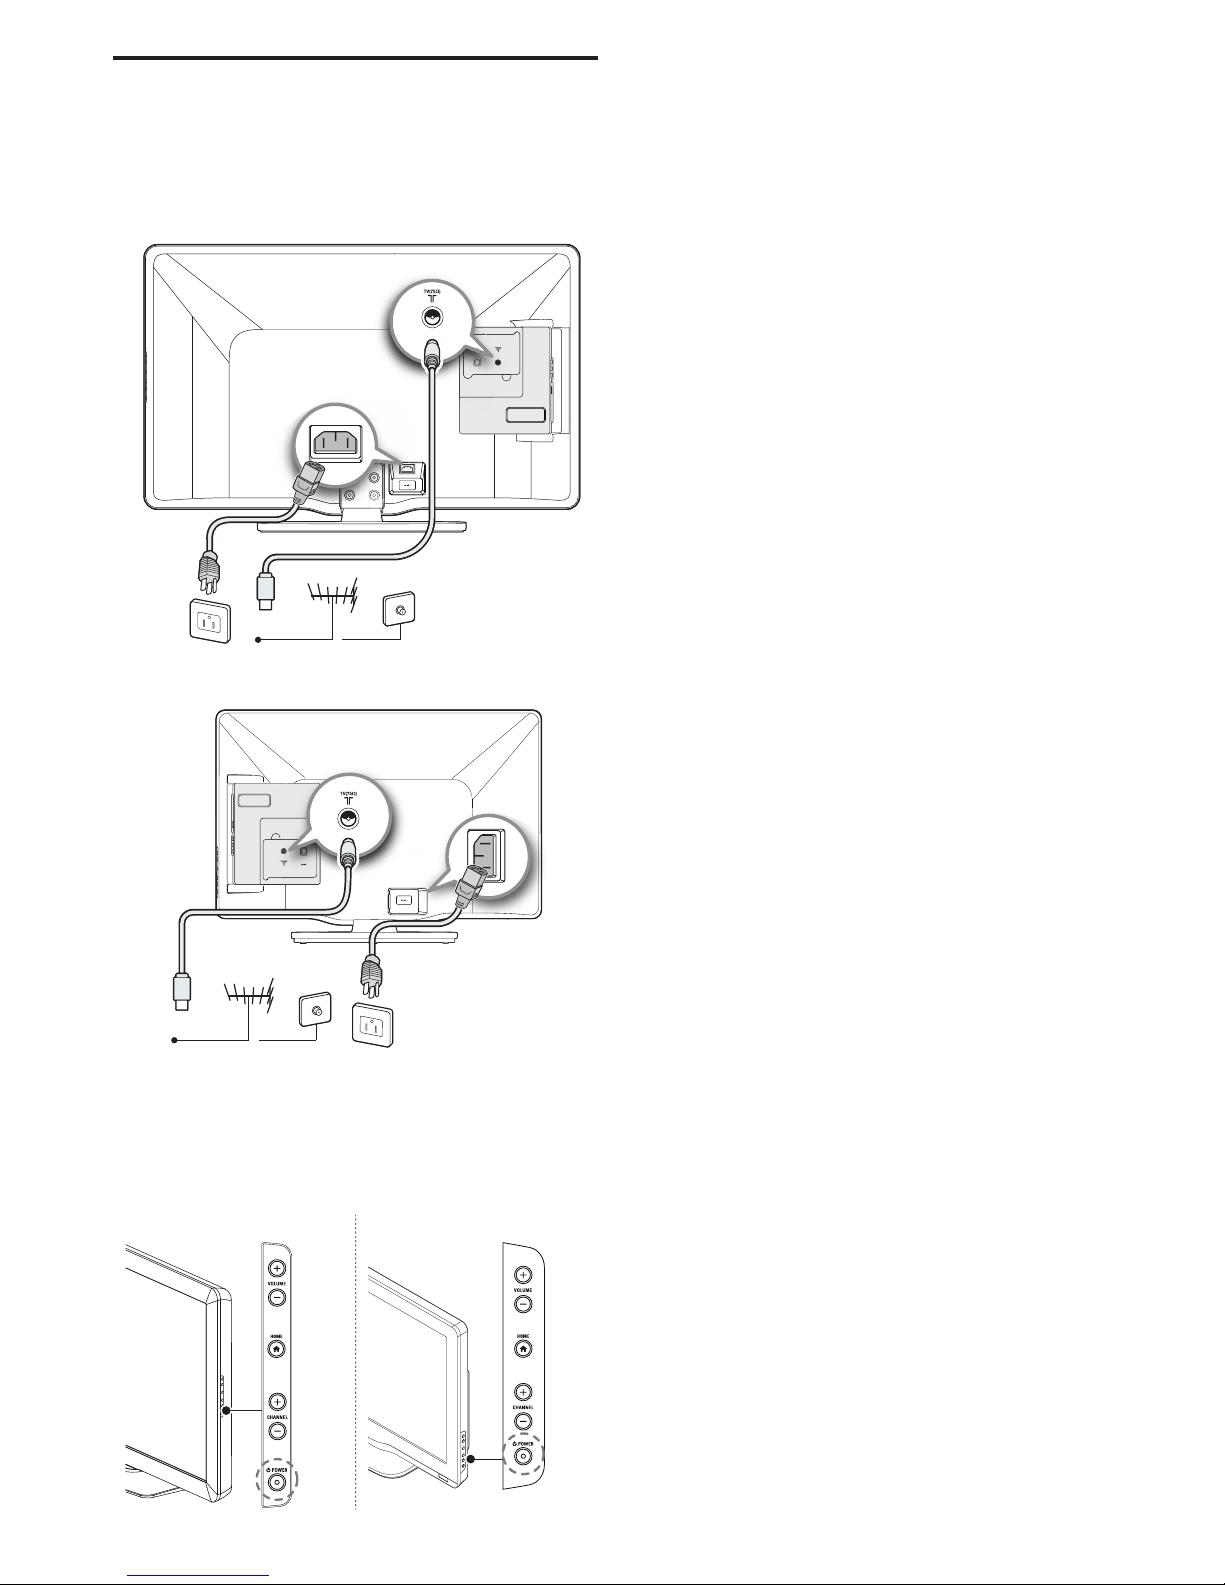
1
Connect the RF signal to the TV.
2 Plug the power cord into the power outlet.
40HFL5783D, 40HFL5783L
Cable
32HFL5763D, 32HFL5763L
Cable
3 Turn the TV on.
•
Press . POWER at the side of the TV or use the
.
(POWER) on the remote control.
• Press those buttons again to put the TV in standby mode.
The TV is not powered off completely unless it is physically
unplugged.
40HFL5783D, 40HFL5783L 32HFL5763D, 32HFL5763L
Page 8
8 EN
VIDEO
IN
AUDIO
IN
SIDE HDMI
USB
VGA IN
L R
VIDEO
IN
AUDIO
IN
SIDE HDMI
USB
VGA IN
L R
PC AUDIO
IN
PC AUDIO
IN
g
c
h
a
b
i
f
k
j
l
m
n
o
p
j
l
n
i
m
p
h
k
f
g
e
d
c
b
a
e
d
q
q
o
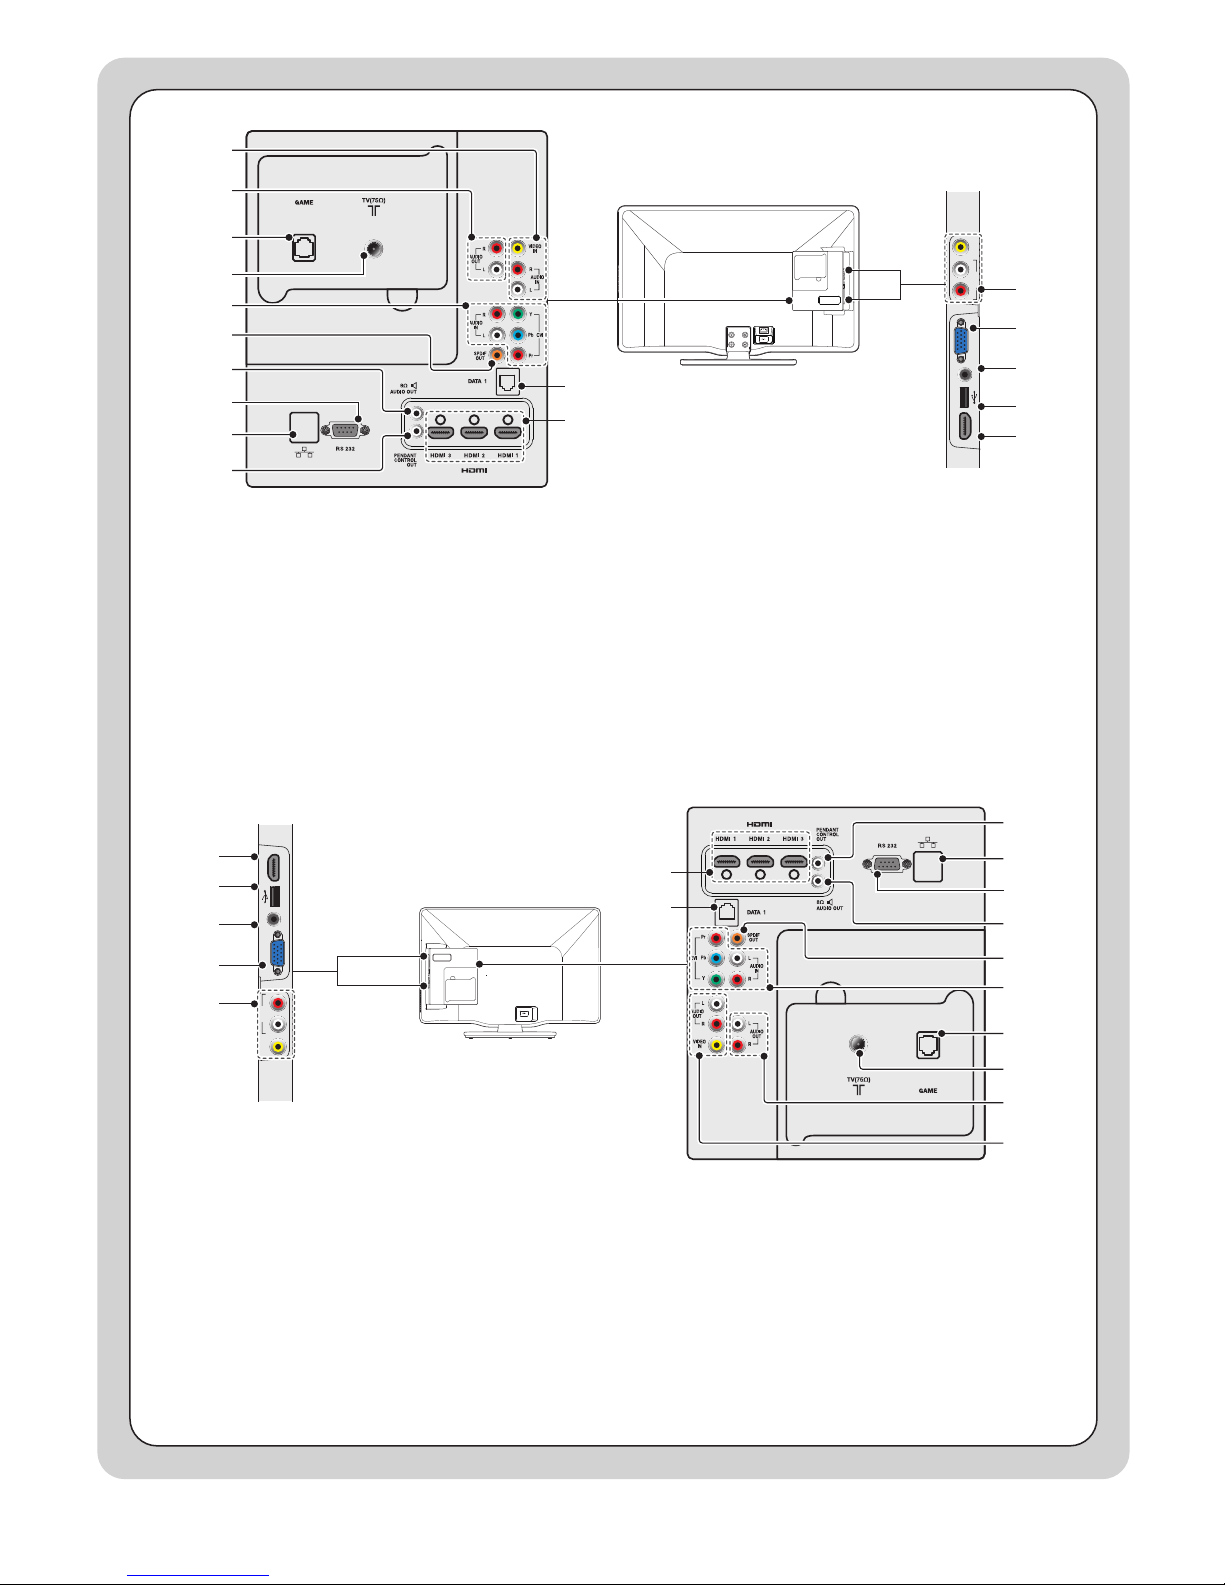
a Composite video and audio input jack
b Analog audio output jack
c Game Port (Available for 40HFL5783L only)
d Antenna input jack
e Component video and audio input jack
f Digital audio output jack
g Audio output jack 8Ω
h RS232 (Service Port)
i IP Control port
j PENDANT CONTROL output jack
(Not functional)
k DATA (RJ-12 SPI port)
l HDMI 1 / HDMI 2 / HDMI 3 input jack
m Composite video and audio input jack
n PC input jack
o Audio input jack for PC connection
p USB terminal
q SIDE HDMI
a SIDE HDMI
b USB terminal
c Audio input jack for PC connection
d PC input jack
e Composite video and audio input jack
f HDMI 1 / HDMI 2 / HDMI 3 input jack
g DATA (RJ-12 SPI port)
h PENDANT CONTROL output jack
(Not functional)
i IP Control port
j RS232 (Service Port)
k Audio output jack 8Ω
l Digital audio output jack
m Component video and audio input jack
n Game Port (Available for 32HFL5763L only)
o Antenna input jack
p Analog audio output jack
q Composite video and audio input jack
40HFL5783D, 40HFL5783L
32HFL5763D, 32HFL5763L
Page 9
9EN
Guided installation
Note
•
As part of the Guided Install, there is PC application to suppor t the
installation. Guided Install for PC is an application that can be downloaded at
www.philips.com/hospitality or contact Philips agent representative, this tool is
subject to availability.
In the 1st time (Virgin) installation, the OSD will instruct you
step by step to do the TV installation setting.
1 Guided Install – Initial Wizard.
2 Guided Install – PPV System selection.
•
If PPV System is selected as [Yes]. The Screen menu will
request for selection of Communication Type which includes
[SmartPort SPI] (select [No], [SPI-5V], [SPI-3V3]) and [Serial
Express].
3 Guided Install – Standalone Pro : Idiom selection.
(Skipped if PPV system is selected as [Yes].)
4 Guided Install – [Install TV Channels].
5 Guided Install – [Install TV Settings]: Select this option,
you can start to Install TV setting Power ON Setting.
Keyboard and RC Lock Setting, CEC Communication.
6 Guided Install – Using Premi Secure.
7 Please select your Auto Update [Channel] and [Time].
8 Guided Install – Using Guide.
•
Press [Yes] will enable the selection of [Guide category].
9 Guided Install - Guest TV Settings: Select this option, you
can set Guest TV Settings such as Closed Caption, Switch
On Program, Switch On Volume.
10 Guided Install - Guest Welcome Settings: Select this
option, you can set Guest Welcome Settings such as
Welcome Message and Welcome Logo.
11 Guided Install - Congure Advance setting such as Multi
RC, Energy Saving ([EcoPower], [ESP]), Standby Mode
([Standard] or [Fast]).
12 When above settings are done, press OK to conrm the
“Guided Install Finished” is OK.
Channel setting setup
This section describes how to change the channel settings.
1 Press MENU on the setup remote control to display the
setup menu.
2 Press
ÎïÍÆ
to select [Channel Map Setup].
•
[Current Channel Setup] options : [Channel], [Input],
[Channel Logo], [Digital], [RF Channel Number], [MPEG
Program Number], [Rings], [Guide], [Label], [Mute].
3
Go to [Guide] by pressing
ÎïÍÆ
. Select the categories
of [High Denition], [Sport], [News], [Kids], [Movies],
[Network], [Adult/Hospital], [Lifestyle], [Other/
Education] by pressing OK on the remote control on the
box in menu.
Conguration menu
This section describes how to change the TV general
performance settings. Switch On settings and Control settings.
1 Press MENU on the setup remote control to display the
setup menu.
2 Press
ÎïÍÆ
to select [Installer TV settings].
3 Press
ÎïÍÆ
to select one of the followings to congure
the settings:
•
[Language]
• [Picture]: Sets the Picture Mode or Personalized settings via different
controls.
• [Audio]: Sets the Split Audio or Personalized settings via different
controls.
• [Security]: Sets the level of security by conguring the settings
such as [Security], [Keyboard Lock], [Remote Control Lock] and
[PremiSecure].
• [Control]: Customizes the control and performance settings such as
[Digit Timeout], [3-Digit entry], [Step tuning] and [HDMI-CEC].
• [Energy Saving Features]: Sets different Power Saving modes such as
[EcoPower], [Auto Sense], [ESP], and [Standby mode].
• [Customizable UI]: Sets the level of customization of TV Graphical User
Interface.
• [Programmable UI]: Enables the TV’s Graphical User Interface to be
programmed via Flash or Browser.
• [Power On]: Sets the different Switch on Setting when AC main power
is applied.
• [Network Installation TCP/IP]: Enables the conguration of different
control parameters of the TCP/IP medium such as IP address and DNS
server.
• [Guide Category]: Enables/disables the display of the Guide Category
icons on the Guide screen.
• [Clock Setup]: Enter the TV channel number that will provide the date
and clock information.
• [Help Text]: Enables/disables the help text for menu options.
• [Factory Default]: Set to factory default Out-Of-Box setting.
Congure the switch on settings
1
Press MENU on the setup remote control to display the
setup menu.
2 Press
ÎïÍÆ
to select the [Guest TV settings] and go
one level down to [Switch On/OSD] option.
3 Press
ÎïÍÆ
to select one of the followings to congure
the settings:
•
[Hotel Logo]: Sets the Hotel Logo during turn on.
• [Welcome Picture]: Sets the Hotel Welcome Image.
• [Welcome Message]: Sets Welcome Message.
• [Switch On Program]: Sets a channel that is displayed when TV is
turned on.
• [Switch On Volume]: Species the volume at which the TV is
turned on.
• [Channel Display]: Sets the display of channel number, channel label
and channel logo on the screen.
Page 10
10 EN
Congure feature settings
Congure the EcoPower Settings
Philips continuously focuses on lowering the environmental
impact of its consumer products by adopting energy efcient
ways of power management.
This section describes how to select a setting for maximum
power savings.
1 Press MENU on the setup remote control to display the
setup menu.
2 Press
ÎïÍÆ
to select the [Installer TV settings] and
press
ÎïÍÆ
to go one level down to [Energy Saving
Features] option.
3 Press
ÎïÍÆ
to select to select one of the followings to
congure the settings:
•
[EcoPower]: Sets a power saving mode. Selection one of the
options :
• [Off]: Rich and dynamic settings, ideal for daylight use.
Disable power savings.
• [Low]: Natural picture setting. Achieve low power savings.
• [Medium]: Ideal settings for watching movies. Achieves
medium power savings.
• [High]: Applies low-energy settings. Achieves highest
possible power savings.
• [Auto Sense] (Available for 40HFL5783D / 40HFL5783L only):
Enable/disable the Light sensor of the TV. If enabled, the
ambient light conditions of the room will be measured to
automatically congure the optimum power consumption
and picture performance of the TV, according to the room
ambience conditions.
• [ESP]: Enables the customization of the duration (in hours)
in which TV will automatically turn off if there is no user
interaction via remote control or keyboard.
• [Standby]: Enables the customization of the TV standby
behavior. Set to [Standard], the TV will consume the least
power during standby, but startup time will be longer and
hospitality communication is not possible. Set to [Fast],
the TV will be best performing in terms of turn-on time
and hospitality communication is also available, but power
consumption will be higher.
Congure the guide categories
This section provides information to congure Guide
Categories icons. Guests can access these icons by pressing the
SMART GUIDE on the guest remote control.
1 Press MENU on the setup remote control to display the
setup menu.
2 Press
ÎïÍÆ
to select the [Installer TV settings] and
press
ÎïÍÆ
to go one level down to [Guide category].
3 Press
ÎïÍÆ
and OK on remote control to select one of
the followings settings :
•
[High Denition]: Enables the High Denition icon in the
Guide categories.
• [Sports]: Enables the Sports icon in the Guide categories.
• [News]: Enables the News icon in the Guide categories.
• [Kids]: Enables the Kids icon in the Guide categories.
• [Movies]: Enables the Movies icon in the Guide categories.
• [Network]: Enables the Network icon in the Guide categories.
• [Adult/Hospital]: Enables the Adult/Hospital icon in the Guide
categories.
• [Lifestyle]: Enables the Lifestyle icon in the Guide categories.
• [Other/Education]: Enables the Other/Education icon in the
Guide categories.
Congure the premisecure settings
Note
•
PREMISECURE feature prevents theft as TV only works when connected to
the proper ty distribution system.
• PREMISECURE is available on selected models only.
• PREMISECURE must be used with a Gateway Network Appliance (GNA)
device. Do not enable PREMISECURE unless the GNA has been congured
at your location. For more information on the GNA, contact your Philips
authorized agent or dealer.
This section allows the Installer to customize the Security
settings of the TV.
1 Press MENU on the setup remote control to display the
setup menu.
2 Press
ÎïÍÆ
to select the [Installer TV settings] and
press
ÎïÍÆ
to go one level down to [Security].
3 Press
ï
and Æ to go to [PremiSecure] menu.
4 Press
ÎïÍÆ
to disable or enable [PremiSecure] via [RF]
or [BLAN]*.
* This is only available on certain models.
5 Press
ÎïÍÆ
to select [PremiSecure RF channel] if [RF]
is selected.
» The TV checks for the PremiSecure ID on specic TV
channel (when enabled). If the ID is found, the TV will
function. If the ID is not found, the TV will display an
error message and not function.
Page 11
11EN
Congure the auto update settings
This section allows the Installer to enables/disables the [Auto
Update] feature of the TV. If set to [Yes], then Auto Update
will automatically check for new TV upgrades at regular
intervals at specic RF channel and upgrade the TV software
accordingly.
1 Press MENU on the setup remote control to display the
setup menu.
2 Press
ÎïÍÆ
to select the [TV Upgrade].
3 Press
ÎïÍÆ
to select [ Auto Update].
Clone TV conguration data
You can copy the conguration data from a USB storage or RF
channel to a TV or vice versa (TV to USB only). This enables
you to bypass the setup menu and congure multiple TVs by
simply using the USB storage device or RF channel.
This section describes how to clone the conguration data
from a TV to USB storage device or from a USB storage
device to a TV.
1 Press MENU on the setup remote control to display the
setup menu.
2 Press
ÎïÍÆ
to select the [TV Clone].
3 Press
ÎïÍÆ
to select [Source] to enable selection of
[RF] or [USB] clone data to be sent to TV.
•
[Source] : Select the Source from which the Clone data will
be received from (RF or USB).
• [RF Channel Number] : When selecting RF, ensure that this is
the channel that will be used to stream the data.
• [Source to TV] : This option allows for selection of clone data
from Source to TV.
• [TV to USB] : This option allows for cloning of data from TV
to USB device.
Note
•
When selecting [RF], ensure that this is the channel that will be used to
stream the data.
• RF cloning must be used with a Gateway Network Appliance (GNA) device.
For more information on the GNA, contact your Philips authorized agent or
dealer.
Installation of pay-per-view box
This section describes how to install a external pay-per-view box.
Step 1 : Set the communication mode
You must setup the correct communication protocol before
you connect the Pay-per-View box to the TV. This section
describes how to select the communication mode.
1 Press MENU on the setup remote control to display the
setup menu.
2 Press
ÎïÍÆ
to select to [PPV/VOD Options] and
[SmartPort / SPI].
3 Select [SPI-3V3] or [SPI-5V].
Step 2 : Connect the pay-per-view box
Note
•
Turn off your TV before you connect the pay-per-view box.
1 Insert the RJ12 cable of the Pay-per-View box into the
DATA1(RJ12) connector of the TV.
2 Connect the other cable as directed by the Pay-per-View
provider.
3 After completing the connections of the cable, turn on
the TV.
4 Press RECALL on the setup remote control and check
that the status of SPI ONLINE in page 3.
Multi RC
Multi RC enables control of multiple TVs in a room without any
interference from each other’s remote control.
To enable Multi RC, each remote control is set to one of the
four colors - Blue, Green, Yellow or Red. Each TV in the room
is separately programmed to a remote control of one of those
colors.
In this way, each TV responds to only one RC that is set to the
same color as the TV itself. This prevents interference from each
other’s remote control when you watch multiple TVs in a room.
1 Press MENU on the setup remote control to display the
setup menu.
2 Press
ÎïÍÆ
to select [PPV/VOD Options].
3 Press
ÎïÍÆ
to select [MultiRC].
4 Press
ÎïÍÆ
to select [Select a color code].
•
The TV is congured to respond to the RC that is set to the
same color.
5 On the guest RC, press HOME (the menu button) and
the color button (same color as above) simultaneously,
for at least 5 seconds.
•
The guest RC is set to the selected color.
6 On the guest RC, press OK for ve seconds while
pointing to the TV.
•
The TV displays the RC color and the TV color on the screen.
If they do not match, program the TV and the RC again.
Note
•
The Guest RC defaults to Blue, and a remote which has been set to any
color can operate any TV which has not been congured to a different color
yet. Therefore, if 2 TVs are being congured in the same space, then each TV/
RC pair MUST be set a their own color (one pair cannot be left as default,
otherwise both RCs will operate the TV which has not been congured).
b-LAN activation
(for L models only)
b-LAN integrated should be enable only when connected to a
LodgeNet system, check with your LodgeNet
provider for details on the services available in your area or
system already installed.
Watch your video on a USB storage
device
1
Connect your USB storage device to the TV.
2 Press MENU on the remote control to display the guest
menu.
3 Use
ÎïÍÆ
to select the [Flash Player].
Page 12
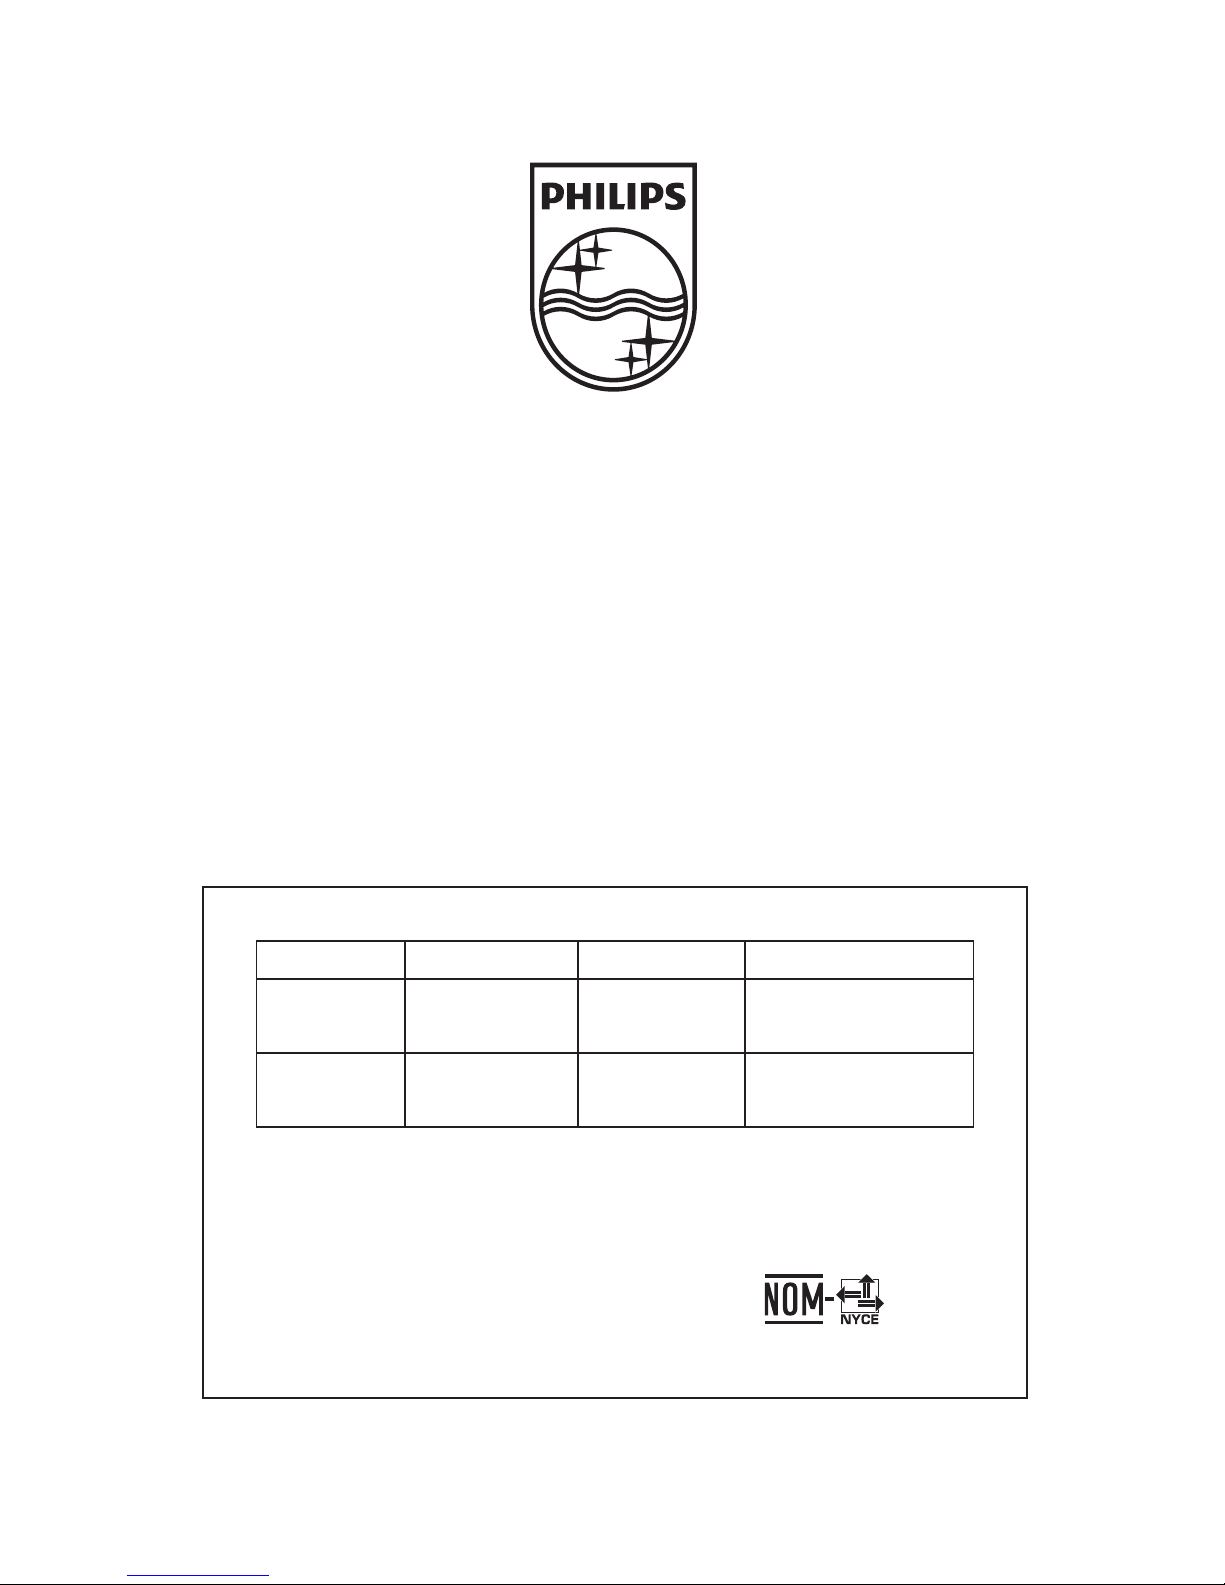
Philips and Philips Shield are used under license
of Koninklijke Philips Electronics N.V.
P&F USA, Inc.
PO Box 430 Daleville, IN 47334-0430
P&F Mexicana, S.A. de C.V.
Av. La Palma No. 6, Col. San Fernando La Herradura,
Huixquilucan Edo. de México C.P. 52787
TELEVISOR A COLOR DE CRISTAL LIQUIDO (LCD)
MODELO LCD IMAGEN VISIBLE ENERGIA
40HFL5783D/F7
40HFL5783L/F7
40”(101,60cm) 101,60cm 120V ~ 60Hz 198W
32HFL5763D/ F7
32HFL5763L/ F7
32”(81,28cm) 80,00cm 120V ~ 60Hz 120W
Comercializado por : P&F MEXICANA, S.A. de C.V.
IMPORTADOR : P&F MEXICANA, S.A. de C.V.
La Palma No. 6, Col. San Fernando La Herradura Huixquilucan,
Edo. México. MEXICO 52787 Tel: 52(55)5269-9078
PAIS DE ORIGEN : CHINA
GARANTIA INCLUIDA EN EL INSTRUCTIVO DE USO
LEA CUIDADOSAMENTE ESTE INSTRUCTIVO
ANTES DE USAR SU APARATO.
Printed in China
A17PYUH / A17PXUH / A17FYUH / A17FXUH
1EMN28959A HHHH
 Loading...