

Philips 230S8QHSB User Manual
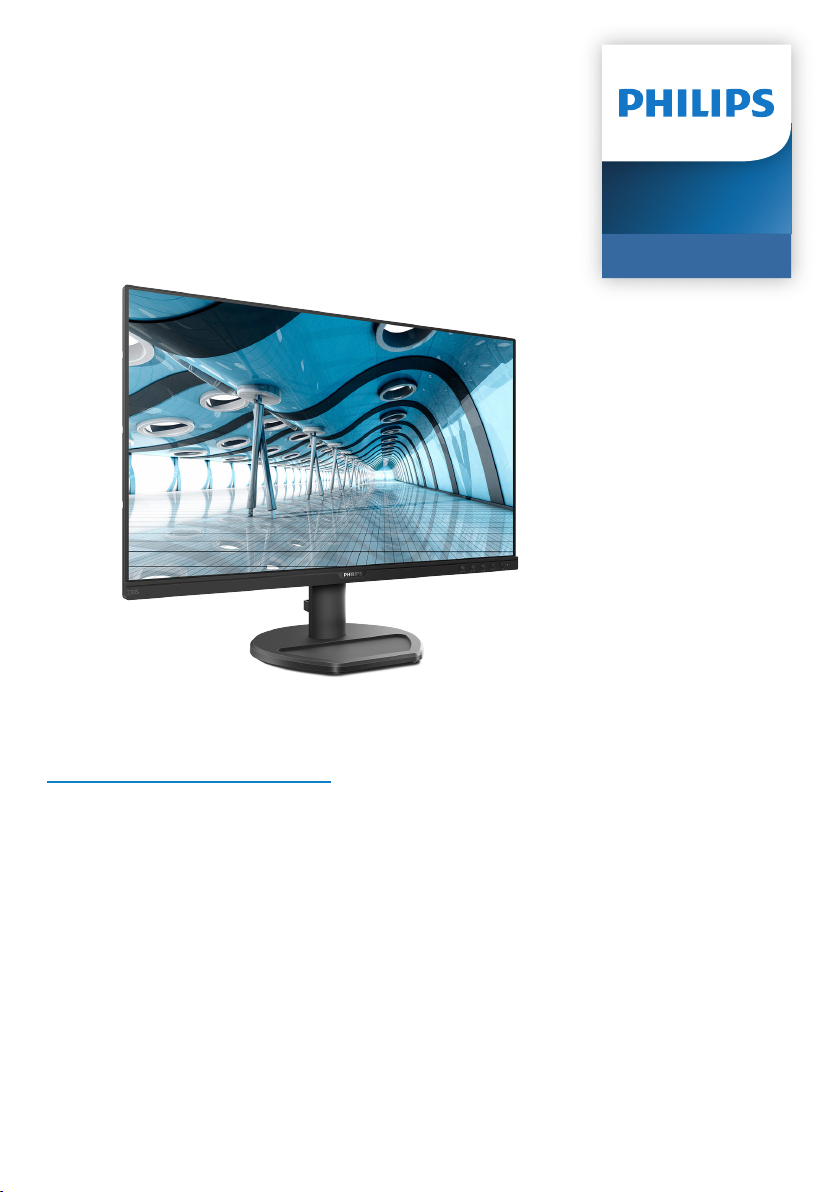
S line
230S8
S line
230S8
www.philips.com/welcome
EN User manual 1
Customer care and warranty 18
Troubleshooting & FAQs 22

Table of Contents
1. Important ...................................... 1
1.1 Safety precautions and
maintenance ................................. 1
1.2 Notational Descriptions ............ 3
1.3 Disposal of product and packing
material .......................................... 4
2. Setting up the monitor .............. 5
2.1 Installation .................................... 5
2.2 Operating the monitor ...............7
2.3 Remove the Base Assembly for
VESA Mounting ...........................9
3. Image Optimization ..................10
3.1 SmartImage .................................10
3.2 SmartContrast .............................. 11
4. Adaptive Sync ............................ 12
5. Technical Specications .......... 13
5.1 Resolution & Preset Modes ....16
6. Power Management ................. 17
7. Customer care and warranty ..18
7.1 Philips’ Flat Panel Monitors
Pixel Defect Policy ..................... 18
7.2 Customer Care & Warranty ......21
8. Troubleshooting & FAQs ......... 22
8.1 Troubleshooting ........................ 22
8.2 General FAQs .............................23

1. Important
1. Important
This electronic user’s guide is intended
for anyone who uses the Philips
monitor. Take time to read this user
manual before you use your monitor.
It contains important information and
notes regarding operating your monitor.
The Philips guarantee applies provided
the product is handled properly for
its intended use, in accordance with
its operating instructions and upon
presentation of the original invoice
or cash receipt, indicating the date of
purchase, dealer’s name and model
and production number of the product.
1.1 Safety precautions and
maintenance
Warnings
Use of controls, adjustments or
procedures other than those specified
in this documentation may result in
exposure to shock, electrical hazards
and/or mechanical hazards.
Read and follow these instructions
when connecting and using your
computer monitor.
Excessive sound pressure from
earphones and headphones can cause
hearing loss. Adjustment of the
equalizer to maximum increases the
earphones and headphones output
voltage and therefore the sound
pressure level.
Operation
• Please Keep the monitor out of
direct sunlight, very strong bright
lights and away from any other heat
source. Lengthy exposure to this
type of environment may result in
discoloration and damage to the
monitor.
• Remove any object that could fall
into ventilation holes or prevent
proper cooling of the monitor’s
electronics.
• Do not block the ventilation holes
on the cabinet.
• When positioning the monitor, make
sure the power plug and outlet are
easily accessible.
• If turning off the monitor by
detaching the power cable or DC
power cord, wait for 6 seconds
before attaching the power cable
or DC power cord for normal
operation.
• Please use approved power cord
provided by Philips all the time. If
your power cord is missing, please
contact with your local service
center. (Please refer to Customer
Care Consumer Information Center)
• Do not subject the monitor to
severe vibration or high impact
conditions during operation.
• Do not knock or drop the monitor
during operation or transportation.
• Excessive usage of monitor can
cause eye discomfort, it’s better to
take shorter breaks more often at
your workstation than longer breaks
and less often; for example a 5-10
minute break after 50-60-minute
continuous screen use is likely to
be better than a 15-minute break
every two hours. Try to keep your
eyes from eye strain while using the
screen for a constant period of time
by :
• Looking at something varying
distances after a long period
focusing on the screen.
• Conscious Blinking often while
you work.
• Gently closing and rolling your
eyes to relax.
1

1. Important
• Reposition your screen to appropriate height and angle according to your height.
• Adjusting the brightness and
contrast to appropriate level.
• Adjusting the environment lighting similar to that of your screen
brightness, avoid the uorescent
lighting, and surfaces that don’t
reect too much light.
• Seeing a doctor if your symptoms.
Maintenance
• To protect your monitor from
possible damage, do not put
excessive pressure on the LCD
panel. When moving your monitor,
grasp the frame to lift; do not lift
the monitor by placing your hand or
fingers on the LCD panel.
• Unplug the monitor if you are not
going to use it for an extensive
period of time.
• Unplug the monitor if you need to
clean it with a slightly damp cloth.
The screen may be wiped with a
dry cloth when the power is off.
However, never use organic solvent,
such as, alcohol, or ammonia-based
liquids to clean your monitor.
• To avoid the risk of shock or
permanent damage to the set, do
not expose the monitor to dust,
rain, water, or excessive moisture
environment.
• If your monitor gets wet, wipe it
with dry cloth as soon as possible.
• If foreign substance or water gets in
your monitor, please turn the power
off immediately and disconnect
the power cord. Then, remove the
foreign substance or water, and
send it to the maintenance center.
• Do not store or use the monitor in
locations exposed to heat, direct
sunlight or extreme cold.
• In order to maintain the best
performance of your monitor and
use it for a longer lifetime, please
use the monitor in a location
that falls within the following
temperature and humidity ranges.
• Temperature: 0-40°C 32-104°F
• Humidity: 20-80% RH
Important information for Burn-in/
Ghost image
• Always activate a moving screen
saver program when you leave
your monitor unattended. Always
activate a periodic screen refresh
application if your monitor will
display unchanging static content.
Uninterrupted display of still or
static images over an extended
period may cause “burn in”, also
known as “after-imaging” or “ghost
imaging”, on your screen.
• “Burn-in”, “after-imaging”, or
“ghost imaging” is a well-known
phenomenon in LCD panel
technology. In most cases, the
“burned in” or “after-imaging” or
“ghost imaging” will disappear
gradually over a period of time after
the power has been switched off.
Warning
Failure to activate a screen saver, or
a periodic screen refresh application
may result in severe “burn-in” or “afterimage” or “ghost image” symptoms
that will not disappear and cannot be
repaired. The damage mentioned above
is not covered under your warranty.
2

1. Important
Service
• The casing cover should be opened
only by qualified service personnel.
• If there is any need for any
document for repair or integration,
please contact with your local
service center. (please refer to the
chapter of “Consumer Information
Center”)
• For transportation information,
please refer to “Technical
Specifications”.
• Do not leave your monitor in a car/
trunk under direct sun light.
Note
Consult a service technician if the
monitor does not operate normally, or
you are not sure what procedure to take
when the operating instructions given
in this manual have been followed.
1.2 Notational Descriptions
The following subsections describe
notational conventions used in this
document.
Notes, Cautions and Warnings
Throughout this guide, blocks of text
may be accompanied by an icon and
printed in bold or italic type. These
blocks contain notes, cautions or
warnings. They are used as follows:
Note
This icon indicates important
information and tips that help you make
better use of your computer system.
Caution
This icon indicates information that
tells you how to avoid either potential
damage to hardware or loss of data.
Warning
This icon indicates the potential for
bodily harm and tells you how to avoid
the problem.
Some warnings may appear in alternate
formats and may not be accompanied
by an icon. In such cases, the specific
presentation of the warning is
mandated by the relevant regulatory
authority.
3

1. Important
1.3 Disposal of product and
packing material
Waste Electrical and Electronic
Equipment-WEEE
This marking on the product or on
its packaging illustrates that, under
European Directive 2012/19/EU
governing used electrical and electronic
appliances, this product may not be
disposed of with normal household
waste. You are responsible for disposal
of this equipment through a designated
waste electrical and electronic
equipment collection. To determine the
locations for dropping off such waste
electrical and electronic, contact your
local government office, the waste
disposal organization that serves your
household or the store at which you
purchased the product.
Your new monitor contains materials
that can be recycled and reused.
Specialized companies can recycle
your product to increase the amount of
reusable materials and to minimize the
amount to be disposed of.
All redundant packing material has been
omitted. We have done our utmost to
make the packaging easily separable
into mono materials.
Please find out about the local
regulations on how to dispose of your
old monitor and packing from your
sales representative.
Taking back/Recycling Information for
Customers
Philips establishes technically and
economically viable objectives
to optimize the environmental
performance of the organization's
product, service and activities.
From the planning, design and
production stages, Philips emphasizes
the important of making products that
can easily be recycled. At Philips, endof-life management primarily entails
participation in national take-back
initiatives and recycling programs
whenever possible, preferably
in cooperation with competitors,
which recycle all materials (products
and related packaging material) in
accordance with all Environmental
Laws and taking back program with the
contractor company.
Your display is manufactured with high
quality materials and components
which can be recycled and reused.
To learn more about our recycling
program please visit
http://www.philips.com/a-w/about/
sustainability.html
4
2. Setting up the monitor
2. Setting up the monitor
©
2
0
1
8
K
o
n
i
n
k
l
i
j
k
e
P
h
i
l
i
p
s
N
.
V
.
A
l
l
r
i
g
h
t
s
r
e
s
e
r
v
e
d
.
U
n
a
u
t
h
o
r
i
z
e
d
d
u
p
l
i
c
a
t
i
o
n
i
s
a
v
i
o
l
a
t
i
o
n
o
f
a
p
p
l
i
c
a
b
l
e
l
a
w
s
.
M
a
d
e
a
n
d
p
r
i
n
t
e
d
i
n
C
h
i
n
a
.
V
e
r
s
i
o
n
This product was manufactured and brought to
the market by or on behalf of Top Victory
Investments Ltd. or one of its aliates. Top
Victory Investments Ltd. is the warrantor in
relation to this product. Philips and the Philips
Shield Emblem are registered trademarks of
Koninklijke Philips N.V. used under license.
Contents:
Monitor drivers
User’s Manual
User’s Manual
www.philips.com/welcome
使用产品前请阅读使用说明
保留备用
Monitor
* VGA
* HDMI
Power
* CD
230S8
S line
Register your product and get support at
www.philips.com/welcome
Quick
Start
*Audio
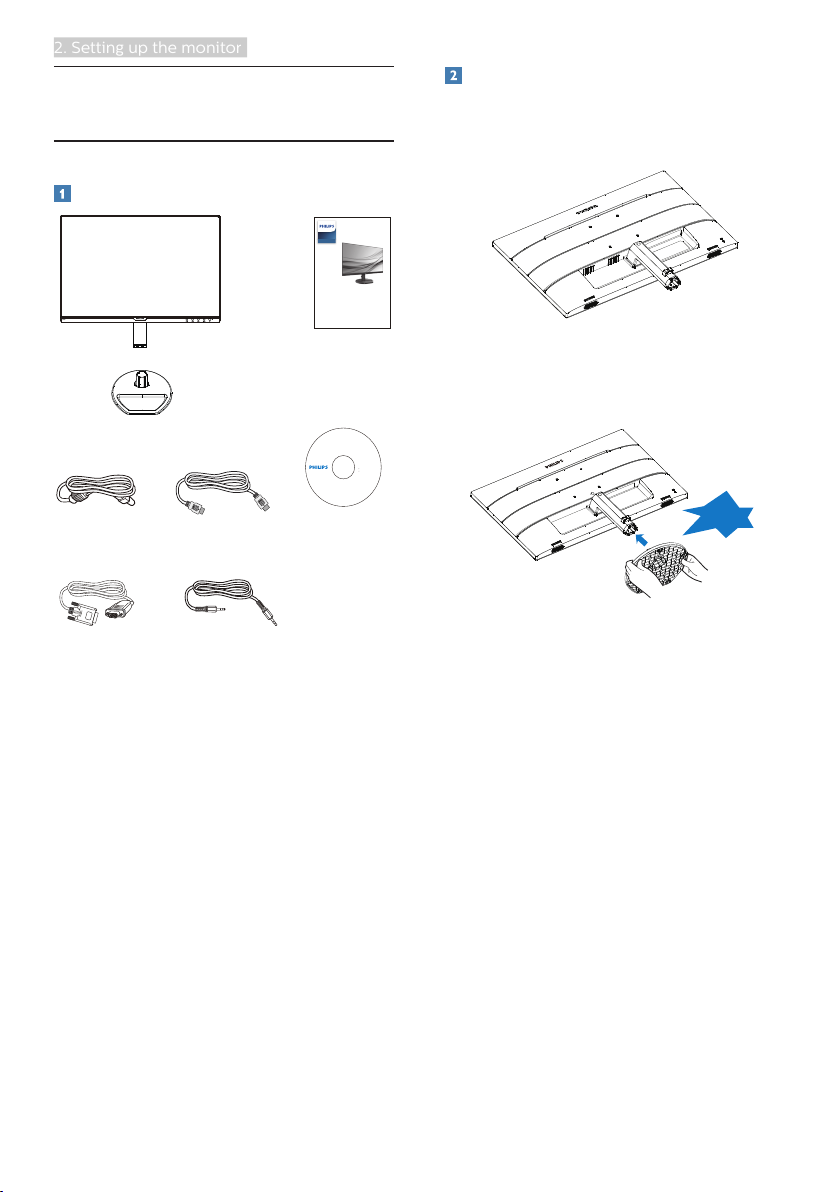
2.1 Installation
Package contents
Install the base
1. Place the monitor face down on a
smooth surface. Pay attention not
to scratch or damage the screen.
2. Hold the base stand with both
hands and firmly insert the base
stand into the base column.
CLICK!
*Different according to region.
5
2. Setting up the monitor
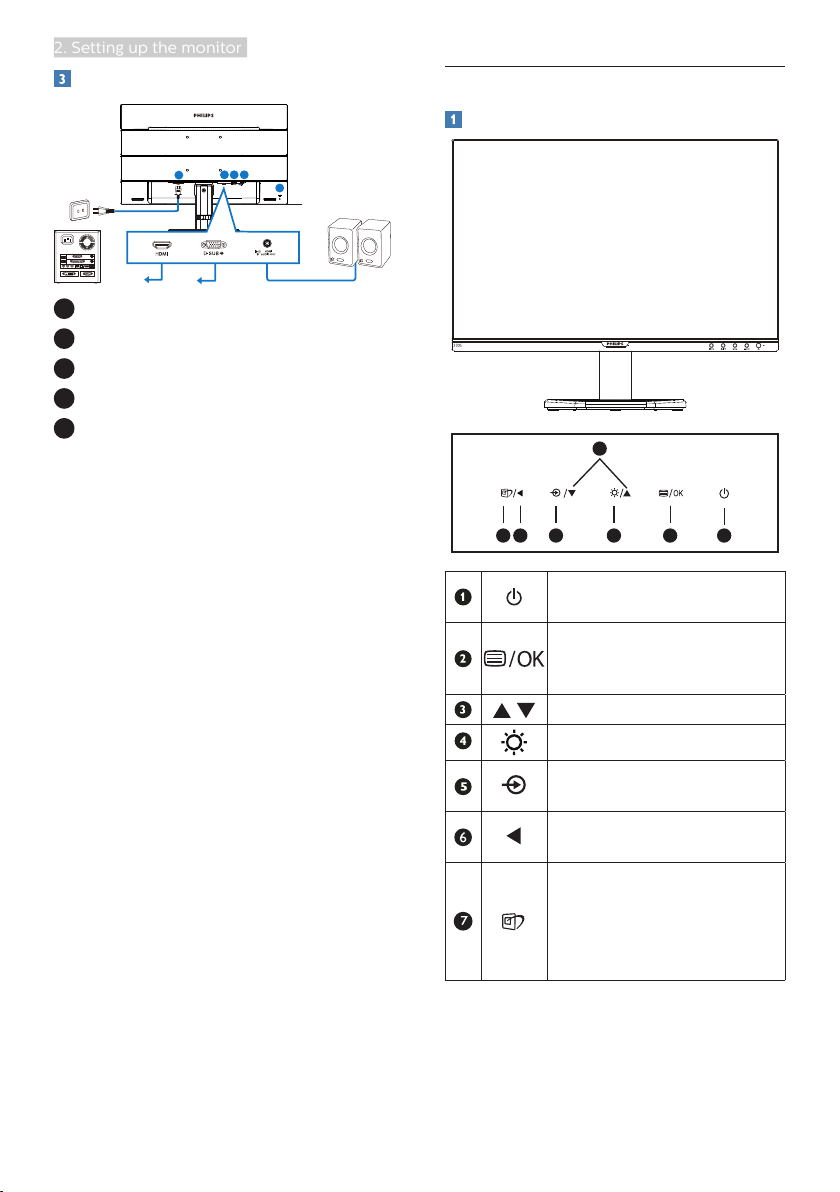
Connecting to your PC
3 42
1
1
AC power input
2
HDMI input
3
VGA input
4
HDMI Audio out
5
Kensington anti-theft lock
5
Connect to PC
1. Connect the power cord to the back
of the monitor firmly.
2. Turn off your computer and unplug
its power cable.
3. Connect the monitor signal cable to
the video connector on the back of
your computer.
4. Plug the power cord of your
computer and your monitor into a
nearby outlet.
5. Turn on your computer and monitor.
If the monitor displays an image,
installation is complete.
2.2 Operating the monitor
Description of the control buttons
3
6
7
Switch monitor’s power
ON and OFF.
Access the OSD menu
Confirm the OSD
adjustment.
Adjust the OSD menu.
Adjust the brightness level.
Change the signal input
source.
Return to previous OSD
level.
SmartImage. There are
multiple selections:
EasyRead, Office, Photo,
Movie, Game, Economy,
LowBlue Mode, Off.
25
4
1
.
6

2. Setting up the monitor
Description of the On Screen Display
Main menu Sub menu
Picture
Input
OSD Settings
Setup
Language
Color
Audio
Picture Format
Brightness
Contrast
Horizontal
Vertical
Transparency
OSD Time Out
Auto
V.Position
Phase
Clock
Resolution
Notication
Reset
Information
English, Deutsch, Español, Ελληνική, Français, Italiano,
Maryar, Nederlands, Português, Português do Brazil,
Polski , Русский, Svenska, Suomi, Türkçe, Čeština,
Українська, 简体中文, 繁體中文,日本語,한국어
Color Temperature
sRGB
User Dene
VGA
SmartResponse
SmartContrast
Gamma
Over Scan
H.Position
HDMI 1.4
Wide Screen, 4:3
0~100
0~100
0~100
0~100
O, 1, 2, 3, 4
5s, 10s, 20s, 30s, 60s
On, O
Yes, No
0~100
0~100
0~100
Native, 5000K, 6500K, 7500K,
8200K, 9300K, 11500K
Red: 0~100
Green: 0~100
Blue: 0~100
O, Fast, Faster, Fastest
On, O
1.8, 2.0, 2.2, 2.4, 2.6
0~100
0~100
On, O
Volume
Mute
On, O
Sharpness
0~100
LowBlue Mode
On
O
1, 2, 3, 4
What is On-Screen Display (OSD)?
On-Screen Display (OSD) is a feature
in all Philips LCD monitors. It allows an
end user to adjust screen performance
or select functions of the monitors
directly through an on-screen
instruction window. A user friendly on
screen display interface is shown as
below:
The OSD Menu
Below is an overall view of the structure
of the On-Screen Display. You can use
this as a reference when you want to
work your way around the different
adjustments later on.
Basic and simple instruction on the
control keys
In the OSD shown above, you can press
buttons at the front bezel of the
monitor to move the cursor, and press
OK button to confirm the choice or
change.
7
 Loading...