

Page 1

1
Introduction
Ta b le of Contents
Thank you for purchasing this television set.
This handbook has been designed to help you install and operate your TV set.
We would strongly recommend that you read it thoroughly.
Installation
Installing your television set . . . . . . . . . . . . . . . . . . . . . . . . . . . . . . . . . . . . . . . . . .2
The keys on the TV set . . . . . . . . . . . . . . . . . . . . . . . . . . . . . . . . . . . . . . . . . . . . . .2
Remote control keys . . . . . . . . . . . . . . . . . . . . . . . . . . . . . . . . . . . . . . . . . . . . . . .3
Quick installation . . . . . . . . . . . . . . . . . . . . . . . . . . . . . . . . . . . . . . . . . . . . . . . . . .4
Program sort . . . . . . . . . . . . . . . . . . . . . . . . . . . . . . . . . . . . . . . . . . . . . . . . . . . . . .4
Program name . . . . . . . . . . . . . . . . . . . . . . . . . . . . . . . . . . . . . . . . . . . . . . . . . . . . .4
Manual store . . . . . . . . . . . . . . . . . . . . . . . . . . . . . . . . . . . . . . . . . . . . . . . . . . . . . .5
Other settings in the Install menu . . . . . . . . . . . . . . . . . . . . . . . . . . . . . . . . . . . . .5
Operation
Using the radio . . . . . . . . . . . . . . . . . . . . . . . . . . . . . . . . . . . . . . . . . . . . . . . . . . . . .5
Picture settings . . . . . . . . . . . . . . . . . . . . . . . . . . . . . . . . . . . . . . . . . . . . . . . . . . . .6
Sound adjustments . . . . . . . . . . . . . . . . . . . . . . . . . . . . . . . . . . . . . . . . . . . . . . . . .6
Feature settings . . . . . . . . . . . . . . . . . . . . . . . . . . . . . . . . . . . . . . . . . . . . . . . . . . . .6
Timer function . . . . . . . . . . . . . . . . . . . . . . . . . . . . . . . . . . . . . . . . . . . . . . . . . . . .7
TV lock . . . . . . . . . . . . . . . . . . . . . . . . . . . . . . . . . . . . . . . . . . . . . . . . . . . . . . . . . .7
Teletext . . . . . . . . . . . . . . . . . . . . . . . . . . . . . . . . . . . . . . . . . . . . . . . . . . . . . . . . . .8
16:9 Formats . . . . . . . . . . . . . . . . . . . . . . . . . . . . . . . . . . . . . . . . . . . . . . . . . . . . . .9
Using the built-in DVD player
Inserting a disc . . . . . . . . . . . . . . . . . . . . . . . . . . . . . . . . . . . . . . . . . . . . . . . . . . .10
Playing a DVD or video CD . . . . . . . . . . . . . . . . . . . . . . . . . . . . . . . . . . . . . . . . .11
Playing an audio CD . . . . . . . . . . . . . . . . . . . . . . . . . . . . . . . . . . . . . . . . . . . . . . .12
Reading an picture CD . . . . . . . . . . . . . . . . . . . . . . . . . . . . . . . . . . . . . . . . . . . . .12
DVD player menu . . . . . . . . . . . . . . . . . . . . . . . . . . . . . . . . . . . . . . . . . . . . . . . . .13
Toolbar menu . . . . . . . . . . . . . . . . . . . . . . . . . . . . . . . . . . . . . . . . . . . . . . . . . . . .13
Preferences Menu . . . . . . . . . . . . . . . . . . . . . . . . . . . . . . . . . . . . . . . . . . . . . . . . .14
Setup Menu . . . . . . . . . . . . . . . . . . . . . . . . . . . . . . . . . . . . . . . . . . . . . . . . . . . . . .14
Program playing . . . . . . . . . . . . . . . . . . . . . . . . . . . . . . . . . . . . . . . . . . . . . . . . . . .15
Access control and locking . . . . . . . . . . . . . . . . . . . . . . . . . . . . . . . . . . . . . . . . . .15
Connecting peripheral equipment . . . . . . . . . . . . . . . . . . . . . . . . . . . . . . . . . . . .16
Peripherals
Video recorder . . . . . . . . . . . . . . . . . . . . . . . . . . . . . . . . . . . . . . . . . . . . . . . . . . .16
Other equipment . . . . . . . . . . . . . . . . . . . . . . . . . . . . . . . . . . . . . . . . . . . . . . . . .16
To select connected equipment . . . . . . . . . . . . . . . . . . . . . . . . . . . . . . . . . . . . .16
VCR key . . . . . . . . . . . . . . . . . . . . . . . . . . . . . . . . . . . . . . . . . . . . . . . . . . . . . . . .17
Practical information
Tips . . . . . . . . . . . . . . . . . . . . . . . . . . . . . . . . . . . . . . . . . . . . . . . . . . . . . . . . . . . .18
Glossary . . . . . . . . . . . . . . . . . . . . . . . . . . . . . . . . . . . . . . . . . . . . . . . . . . . . . . . .18
°
Recycling
The materials used in your set are either reusable or can be recycled.
To minimise environmental waste, specialist companies collect used appliances
and dismantle them after retrieving any materials that can be used again (ask
your dealer for further details).
EnglishFrançaisMagyarPyccÍËÈPolskiČeštinaSlovenčinaTürkçe
Page 2

2
The television set has 4 keys which are located
on the front or the top of the set depending
on the model.
The VOLUME - + (- ” +) keys are used to
adjust sound levels.The PROGRAM - + (- P +)
keys are used to select the required programmes.
To access the menus, simultaneously hold down
the
” - and ” + keys.The PROGRAM - +
keys may then be used to select an adjustment
and the -
” + keys to make that adjustment.
To exit from the menus, hold down the 2
” -
and
” + keys.
Note: when the Child Lock function is activated,
these keys are unavailable (refer to Features
menu on page 7).
PROGRAMVOLUME
--
++
&
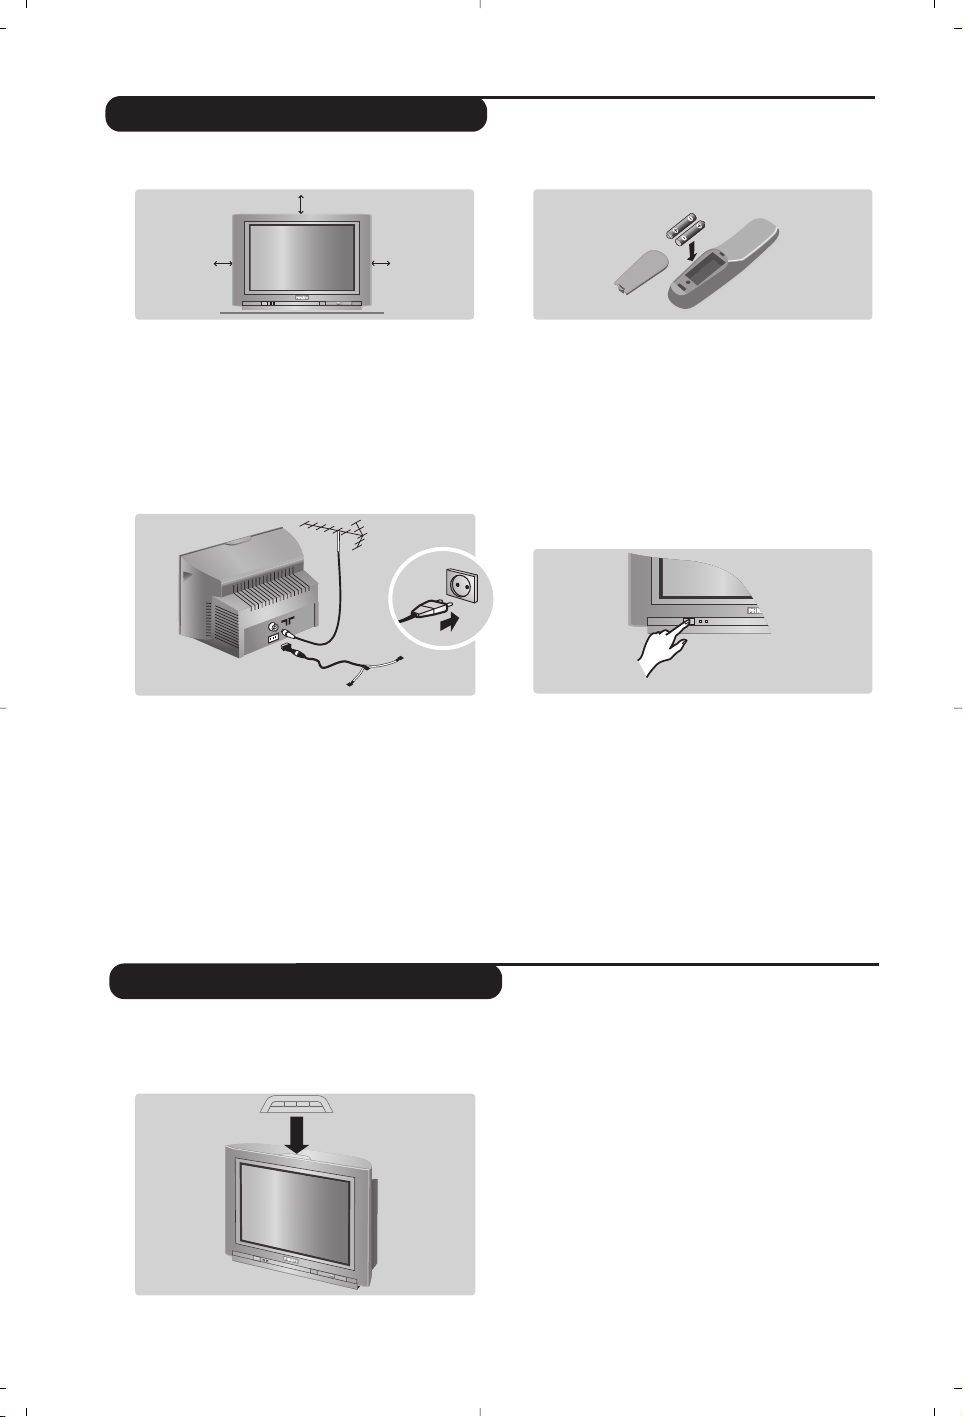
Positioning the television set
Place your TV on a solid, stable surface, leaving
a space of at least 5 cm around the appliance.
To avoid accidents, do not put anything on the
set such as a cloth or cover, a container full of
liquid (vase) or a heat source (lamp).The set
must not be exposed to water.
é
Connections
• Insert the aerial plug into the : socket at
the rear of the set.
• Insert the radio aerial socket into the FM
ANT socket using the adapter supplied.
If you are using an indoor aerial, reception may be
difficult in certain conditions.You can improve
reception by rotating the aerial. If the reception
remains poor,you will need to use an external aerial.
• Insert the mains plug into a wall socket (220240 V / 50 Hz).
“
Remote control
Insert the two R6-type batteries (supplied)
making sure that they are the right way round.
Check that the mode selector is set to TV.
The batteries supplied with this appliance do
not contain mercury or nickel cadmium. If you
have access to a recycling facility, please do not
discard your used batteries (if in doubt,
consult your dealer).When the batteries are
replaced, use the same type.
‘
Switching on
To switch on the set, press the on/off key.
A red indicator comes on and the screen
lights up. Go straight to the chapter Quick
installation on page 4.
If the television remains in standby mode,
press P
# on the remote control.
The indicator will flash when you use the
remote control.
5 cm
5 cm
5 cm
FM.
ANT.
Installing your television set
The keys on the TV set
Page 3

3
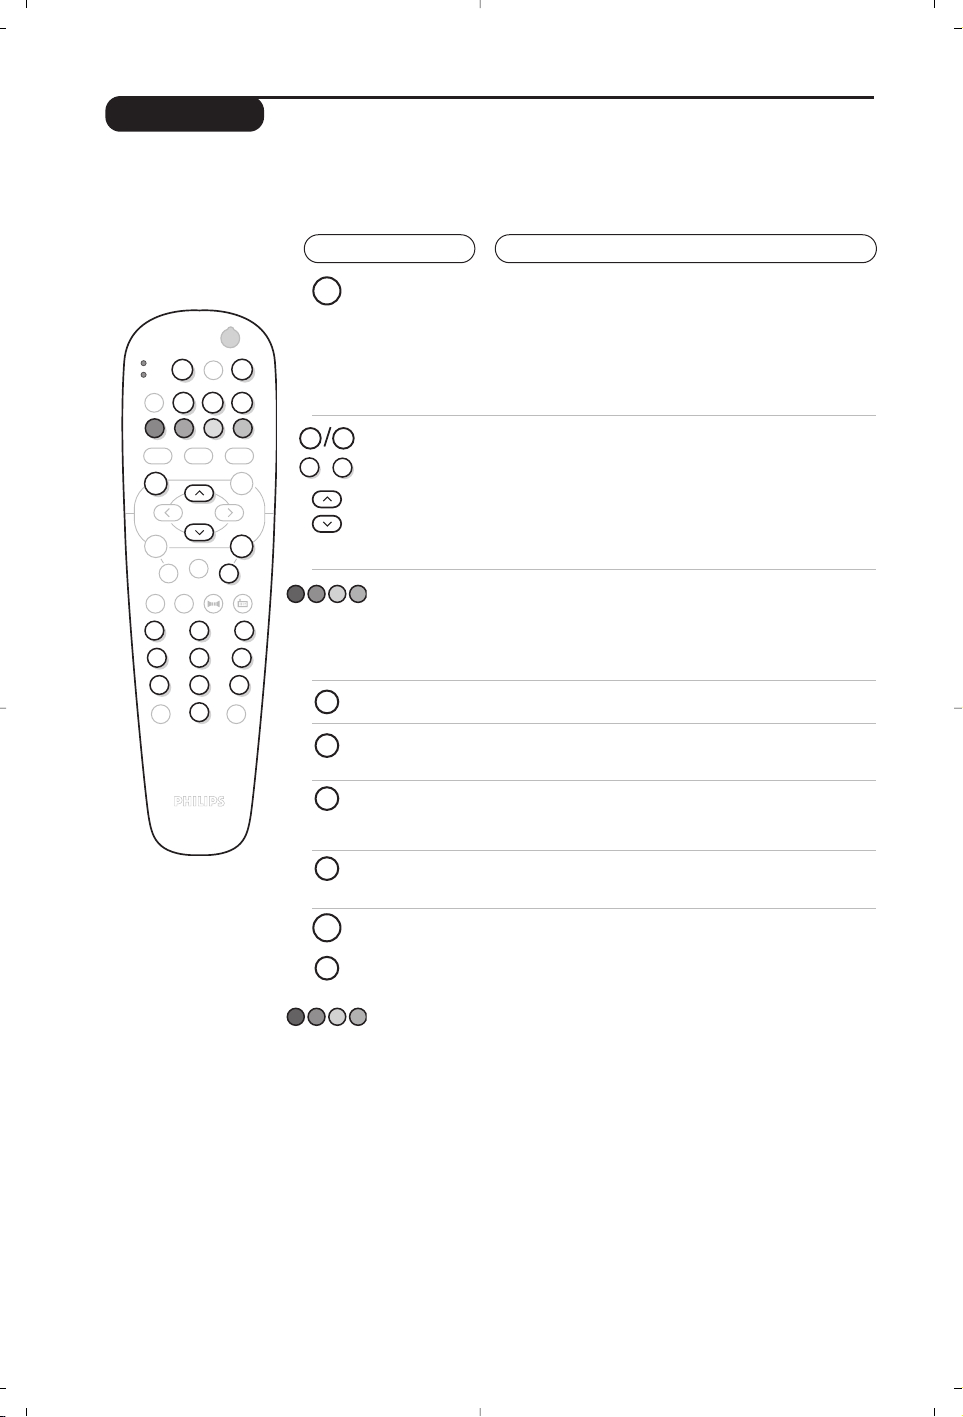
Remote control keys
DVD:language selection (p.11)
TV: sound mode
Used to force programmes in
Stereo and Nicam Stereo to Mono
or, for bilingual programmes, to
choose between Dual I or Dual II.
The Mono indication is red when in
forced position.
List of radio stations (p.5)
Mode selector (p. 17)
DVD keys (p.11)
VCR keys (p.17) and Teletext keys
(p. 8)
Pre-set sound
Used to access a series of stored
settings: Speech, Music, Theatre
and return to Personal.
TV Menu
To call up or exit the menus.
Volume
To adjust the sound level
Cursor
These 4 keys are used to move
around the menus.
Number keys
Direct access to the programmes.
For a 2 digit program,enter the
2nd digit before the dash
disappears.
Selection of EXT socket
Press several times to select
EXT1 and AV (p.16).
Standby
Lets you place the TV set on
standby.To turn on the TV, press
P @@, b,0 to 9.
DVD:subtitling language (p.11)
TV: teletext (p. 8)
DVD:OSD menu (p.13)
TV: screen information /
permanent no.
To display / clear the program
number, name (if it exists), time,
audio mode and time remaining for
the sleep feature. Press the key for 5
seconds to activate permanent
display of the number.This key is
also used to exit from the menu.
TV / DVD mode
To switch the TV set to TV or
DVD mode (p.11).
Pre-set image
Used to access a series of stored
settings: Rich, Natural,Soft,
Multimedia and return to Personal.
Mute
To mute or restore the sound.
Validation (DVD/VCR)
16:9 modes (p. 9)
Program selection
To access the next or previous
programme.
For some programs, the title of the
program will be displayed at the
bottom of the screen.
Surround Sound
To activate / deactivate the surround
sound effect. In stereo, this gives the
impression that the speakers are
further apart. For models equipped
with Virtual Dolby Surround*, you
can experience Dolby Surround Pro
Logic sound effects. In mono, a
stereo spatial effect is simulated.
Previous programme
To return to the previous
programme.
DVD menu (p.11)
RADIO / TV mode
To switch the TV set to TV or
Radio mode (p.5).
* Manufactured under license from Dolby Laboratories.
“Dolby” and the double-D symbols are trademarks of Dolby Laboratories.
.
ı
TV
VCR
¢
MODE
Ó›ŸË
·
-
TV / DVD
MENU
SUBTITLEAUDIO
ù
SYSTEM MENU
∫
Ê∆ Æ
SMARTSMART
ª
¤
DVD
MENU
++
”
OK
[
--
%
∏
12
564
879
Ø
0
P
RADIO
3
Á
Page 4
4
Quick installation
Program sort
Program name
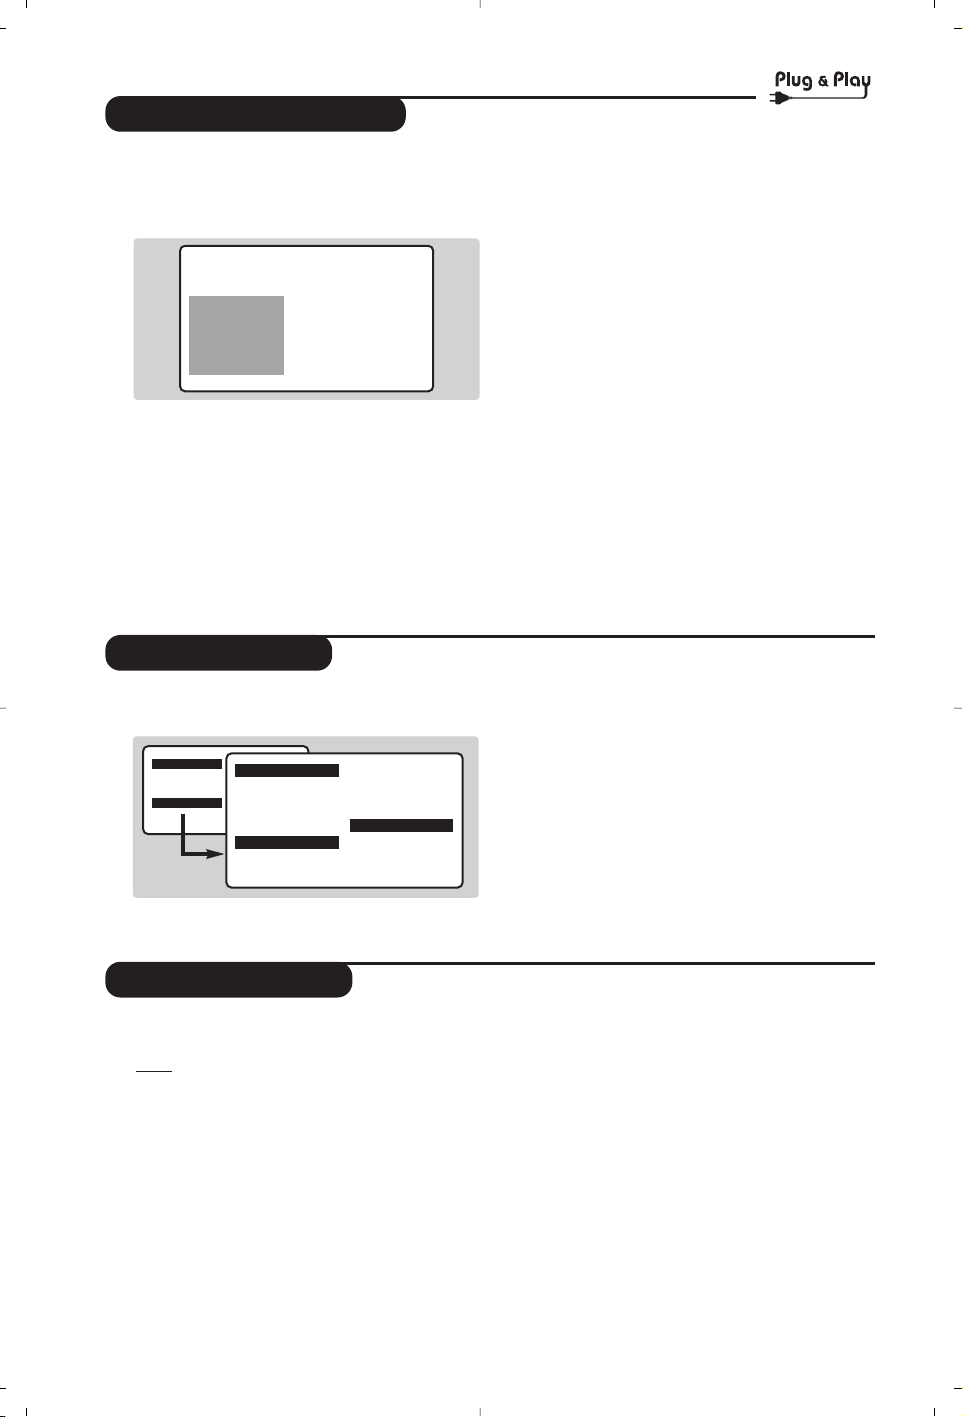
When you turn on the TV set for the first
time, a menu is displayed on screen.This menu
prompts you to select the country and
language for the menus:
If the menu is not displayed, press and hold down
the
”- and ”+ keys on the TV set for 5
seconds to display the menu.
& Use the
îÏ keys on the remote control to
select your country and validate with
¬.
If your country does not appear in the list, select
choice “. . .”
é Next select your language using the
îÏ
keys and validate with ¬.
“ The search starts automatically.All the available
TV programmes and radio stations will be
stored. This operation takes a few minutes.
The display shows the progress of the search
and the number of programs found. At the
end of the search, the menu disappears.
To exit or interrupt the search, press H.If no
programme is found, consult the possible solutions p. 18.
‘ If the transmitter or cable network sends the
automatic sort signal, the programs will be
numbered correctly. In this case, the
installation is complete.
( If this is not the case, you need to use the
Sort menu to number the programs correctly.
Some transmitters or cable networks broadcast
their own sort parameters (region, language,etc.).
In this case, indicate your choice using the
îÏ
keys and validate with ¬.
& Press key H.The Main menu is displayed on
the screen.
é With the cursor, select the Install menu
followed by the Sort menu.
“ Select the programme you want to move using
the
îÏ keys and press ¬.
‘ Then use the
îÏ keys to select the new
number and validate with
È.
( Repeat steps “ and ‘ for each program you
wish to renumber.
§ To quit the menus, press
d.
If required,you can give a name to the
programmes and external connectors.
Note:
on installation, the programs are named
automatically when an identification signal is sent.
& Press the
H key.
é With the cursor, select the Install menu,then
Name
“ Use the
îÏ keys to select the programme
to name or rename.
‘ Use the
Ȭ keys to move around the
name display area (5 characters) and the
îÏ keys to select the characters.
( When the name has been entered, use the
È key to exit.The name is stored.
§ Repeat steps “ to ( for each programme
you wish to name.
è To quit the menus, press
d.
Mainge
• Picture
• Sound
• Features
$ Install
Install
• Language
• Country
• Auto Store
• Manual Store
$
Sort
Æ
• Name
00
01 TF1
02 FR2
03ÆFR3
04 C +
05 ARTE
Select Country
Country
DK
E
F
FI
Æ GB
Language
Español
Svenska
English
Dansk
Nederlands
Page 5

5
Manual store
Other settings in the Install menu
This menu is used to store the programmes
one at a time.
& Press the
H key.
é With the cursor, select the Install menu then
Manual store:
“ System: select
Europe (automatic detection*)
or
Western Europe (BG standard),Eastern
Europe (DK standard),United Kingdom (I
standard) or France (LL’ standard).
* Except for France (LL’ standard), you must select
choice France.
‘ Search: press
¬.The search starts. Once a
programme is found, the scanning stops and its
name is displayed (when available). Go to the
next step. If you know the frequency of the
required programme,this can be entered
directly using the
0 to 9 keys.
If no picture is found, consult the possible solutions (p. 18).
( Program No.: enter the required number
with the
Ȭ or 0 to 9 keys.
§ Fine Tune: if the reception is not satisfactory,
adjust using the
Ȭ keys.
è Store: press
¬.The program is stored.
! Repeat steps ‘ to ! for each programme to
store.
ç To quit the menus, press d.
& Press the H key and select the Install menu:
é Language: to change the display language for
the menus.
“ Country: to select your country (GB for
Great Britain).
This setting is used for the search, automatic
programme sort and teletext display. If your
country does not appear in the list, select “. . .”
‘ Auto Store: to start automatic search for all
programmes available in your region. If the
transmitter or cable network sends the
automatic sort signal, the programmes will be
numbered correctly. If this is not the case, you
need to use the Sort menu to renumber the
programmes (see p.4).
Some transmitters or cable networks broadcast
their own sort parameters (region, language,etc.).
In this case, indicate your choice using the
îÏ
keys and validate with ¬.To quit or interrupt the
search, press
H. If no picture is found, consult the
possible solutions (p. 18).
( To quit the menus, press
d.
Using the radio
Choice of TV or radio mode
Press the
 key on the remote control to
switch the TV set to either TV or radio mode.
In radio mode, the number, station name
(if available), frequency and sound mode are
displayed on the screen. To enter the station
names, use the Name menu (p.4)
Program selection
Use the
09or @ P # keys to select the
FM stations (from 1 to 40).
List of radio stations
Press the ı key to display the list of radio
stations radio. Use the
îÏ keys to change
station and the
d key to exit.
Using the radio menus
Use the H key to access the specific radio setting.
Search for radio stations
If you used the quick installation, all available
FM stations have already been stored.To start
a new search,use the Install :Auto Store
menu (for a complete search) or Manual
Store (for a station by station search).The
Sort and Name menus let you sort or name
the radio stations. Operation of these menus is
the same as for the TV menus.
Screensaver (only available on certain versions)
Use the
c key to activate/deactivate the
radio screensaver.
Mainge
• Picture
• Sound
• Features
$ Install
Manual Store
$
System Europe Æ
• Search
• Program No.
• Fine Tune
• Store
Page 6

6
Picture settings
Sound adjustments
& Press H then ¬.The Picture menu is
displayed:
é Use the
îÏ keys to select a setting and
the
Ȭ keys to adjust.
Note: during the picture adjustment, only the
selected line remains displayed. Press îÏ to
display the menu again.
“ Once the adjustments have been made,select
Store and press ¬ to store them. Press d
to exit.
Description of the adjustments:
• Brightness: this changes picture brilliance.
• Colour: this changes the intensity of the colour.
• Contrast: this changes the difference
between the light and dark tones.
•
Sharpness: this changes the picture definition.
• Colour Temp.: this changes the colour
rendering:
Cold (bluer), Normal (balanced)
or
Warm (redder).
• Store: to store the picture adjustments and
settings (as well as the settings for
Contrast +
and NR in the Features menu).
& Press H, select Sound (Ï) and press ¬.
The
Sound menu is displayed:
é Use the
îÏ keys to select a setting and
the
Ȭ keys to adjust.
“ Once the adjustments have been made,select
Store and press
¬ to store these changes.
‘ To quit the menus, press
d.
Description of the settings:
• Tr e ble: this alters the high frequency sounds.
• Bass: this alters the low frequency sounds.
• Balance: this balances the sound on the left
and right speakers.
• Delta Volume*: this is used to compensate
any volume discrepancies between the
different programs or EXT sockets.This
setting is available for programs 0 to 40 and
the EXT sockets.
• AVL * (Automatic Volume Leveller): this is
used to limit increases in sound, especially on
program change or advertising slots.
• Store: this is used to store the sound settings.
* Only available on certain versions.
Feature settings
& Press H,select Features (Ï) and press ¬.
You can adjust:
é
Timer, Child Lock and Parental Cont.:
see next page
“ Contrast +: automatic adjustment of the
picture contrast which permanently sets the
darkest part of the picture to black.
‘ NR: attenuates picture noise (snow) in difficult
reception conditions.
Caution:
to store the Contrast + and NR
settings, use the Store choice in the Picture
menu.
( Rotation (only available on very large screen
sets): large screen sets are sensitive to
terrestrial magnetic field variations.This setting
is used to compensate for this by adjusting the
picture rotation.
§ To quit the menus, press
d.
Mainge
$ Picture
• Sound
• Features
• Install
Picture
$
Brightness --I------ 39
• Colour
• Contrast
• Sharpness
• Colour Temp.
• Store
Mainge
• Picture
$ Sound
• Features
• Install
Sound
•Treble -----I--- 56
• Bass
• Balance
• Delta Volume
• AVL
• Store
Page 7

7
Timer function
TV lock
This menu lets you use the TV set as an alarm.
& Press the
H key.
é With the cursor, select the
Features menu
then
Timer :
“ Sleep: to select an automatic standby period.
‘ Time: enter the current time.
Note:
the time is updated automatically each time
the TV set is switched on via the teletext information
on programme 1. If this program does not have
teletext, the update will not take place.
( Start Time: enter the start time.
§ Stop Time: enter the standby time.
è Program No.: enter the number of the
programme for the wake-up alarm.To select
FM radio use keys
Ȭ (keys 09 only
select TV programmes).When in DVD mode,
you can select
Bookmark DVD while playing a
disc if you want to be woken up at a precise
point on the disc. Press
u to confirm the
start point.
! Activate: the settings include:
•
Once for a single alarm,
•
Daily for each day,
•
Stop to cancel.
ç Press b to put the TV set in standby. It will
automatically come on at the time programmed.
If you leave the TV set on, it will just change
programmes at the time entered (and will go to
standby mode at the
Stop Time).
By combining the TV lock and Timer functions,
you can restrict the period during which the TV set
is used, for example by your children.
You can block certain programs or inhibit use
of the TV set completely by locking the keys.
Child lock
& Press H.
é With the cursor, select the
Features menu
and position
Child Lock to On.
“ Turn off the TV set and hide the remote
control.The TV set cannot be used (except via
the remote control).
‘ To cancel: position
Child Lock to Off.
Parental control
& Press the H key, select the Features menu
then Parental Cont.:
é You must enter your secret access code.
The first time you enter this, enter code 0711
twice and then enter your new code choice.
The menu is displayed.
“ Parental Cont.: Use the
îÏ keys to
select the TV programme required and
validate with
¬.The + symbol will be
displayed opposite the programmes or sockets
that are locked.From now on, to view a
locked programme, you must enter your
secret code, otherwise the screen will stay
blank.
The access to the
Install menu is also locked.
Caution, for encrypted programs using an external
decoder, you must lock the corresponding EXT
socket.
‘ Change code: this allows you to enter a new
4 digit code. Confirm your new code by
entering it a second time.
If you have forgotten your secret code, enter the
universal code 0711 twice.
( Unlock all: this is used to unlock all locked
programmes.
§ Lock All: this is used to lock all the TV
programmes and EXT connectors.
è Press the
d key to quit.
Mainge
• Picture
• Sound
$ Features
• Install
Timer
• Sleep
$
Time 10:56
• Start Time
• Stop Time
• Program No.
• Activate
Mainge
• Picture
• Sound
$ Features
• Install
Features
• Timer
• Child Lock Arrêt
• Parental Cont.
• Rotation
• Contrast +
• NR
Page 8
8
Teletext
Press :
You will obtain:
Teletext is an information system broadcast by certain channels which can be consulted like a
newspaper. It also offers access to subtitles for viewers with hearing problems or who are not familiar
with the transmission language (cable networks, satellite channels, etc.).
Teletext call
Selecting a
page
This is used to call teletext, change to transparent mode
and then exit.The summary appears with a list of items
that can be accessed. Each item has a corresponding
3 digit page number.
If the channel selected does not broadcast teletext, the
indication 100 will be displayed and the screen will remain
blank (in this case, exit teletext and select another channel).
Enter the number of the page required using the
0 to 9
or @ P # keys, îÏ. Example:page 120, enter 12
0
.The number is displayed top left, the counter turns and
then the page is displayed.Repeat this operation to view
another page.
If the counter continues to search, this means that the page is
not transmitted. Select another number.
Direct access
to the items
Coloured areas are displayed at the bottom of the screen.
The 4 coloured keys are used to access the items or
corresponding pages.
The coloured areas flash when the item or the page is not yet
available.
Contents
This returns you to the contents page (usually page 100).
Enlarge a page
Stop sub-page
acquisition
This allows you to display the top or bottom part of the
page and then return to normal size.
Certain pages contain sub-pages which are automatically
displayed successively.This key is used to stop or resume
sub-page acquisition.The indication
_ appears top left.
Hidden
information
Favourite
pages
To display or hide the concealed information (games
solutions).
Instead of the standard coloured areas displayed at the
bottom of the screen, you can store 4 favourite pages on the
first 40 channels which can then be accessed using the
coloured keys (red, green, yellow,blue). Once set, these
favourite pages will become the default every time tetetext is
selected.
& Press the H key to change to favourite pages mode.
é Display the teletext page that you want to store.
“ Press the coloured key of your choice for 3 seconds.
The page is now stored.
‘ Repeat the operation with the other coloured keys.
( Now when you consult teletext,your favourite pages
will appear in colour at the bottom of the screen.
To temporaly retrieve the standard items,press H.
To clear everything, and return the standard items as the
default, press d for 5 seconds.
ı
TV
›
VCR
¢
MODE
Ó
TV / DVD
-
MENU
+ +
”
[
- -
%
∏
OK
12
564
879
Ø
0
ù
∫
Ÿ
.
SUBTITLEAUDIO
¤
SYSTEM MENU
Ë
SMARTSMART
ª
DVD
MENU
RADIO
3
Á
¤
0 9
P
-
+
P
Ë
›
Ó
Ÿ
MENU
Ë
Page 9

9
16:9 Formats
The pictures you receive may be transmitted in 16:9 format (wide screen) or 4:3 format
(conventional screen).4:3 pictures sometimes have a black band at the top and bottom of the screen
(letterbox format).This function allows you to optimise the picture display on screen.
If your television is equipped with a 4:3 screen.
If your television is equipped with a 16:9 screen.
Press the p key to select the different modes:
This TV set is also equipped with automatic switching which will select the correct-screen
format, provided the specific signals are transmitted with the programmes.
4:3
The picture is reproduced in 4:3 format and a black band is displayed on either side
of the picture.The picture may be progressively enlarged using the
îÏ keys.
Zoom 14:9
The picture is enlarged to 14:9 format, a thin black band remains on both sides of
the picture.The
îÏ keys allow you to compress and move the image vertically
to view the top or bottom of the picture (subtitles).
Zoom 16:9
The picture is enlarged to 16:9 format.This mode is recommended when displaying
pictures which have black bands at the top and bottom (letterbox format).
Use the
îÏ keys if you wish to compress and move the image vertically to view
the top or bottom of the picture.
Subtitle Zoom
This mode is used to display 4:3 pictures using the full surface of the screen leaving
the sub-titles visible.
Use the
îÏ keys to increase or decrease the compression at the bottom of the
screen.
Super Wide
This mode is used to display 4:3 pictures using the full surface of the screen by
enlarging the sides of the picture.The
îÏ keys allow you to scroll the image up
or down the screen.
Widescreen
This mode restores the correct proportions of pictures transmitted in 16:9 using
full screen display.
Note :
when watching a DVD, you can only use the îÏ keys while the screen format is
displayed on the screen (otherwise you acceed to the DVD features).
Press the
p key to select the different modes:
4:3
The picture is reproduced in 4:3 format.
Expand 4:3
The picture is enlarged vertically.This mode is used to cancell the black bands
when watching a programme in letterbox format.
Compress 16:9
The picture is compressed vertically into 16:9 format.
Page 10
10
Using the built-in DVD player
Inserting a disc
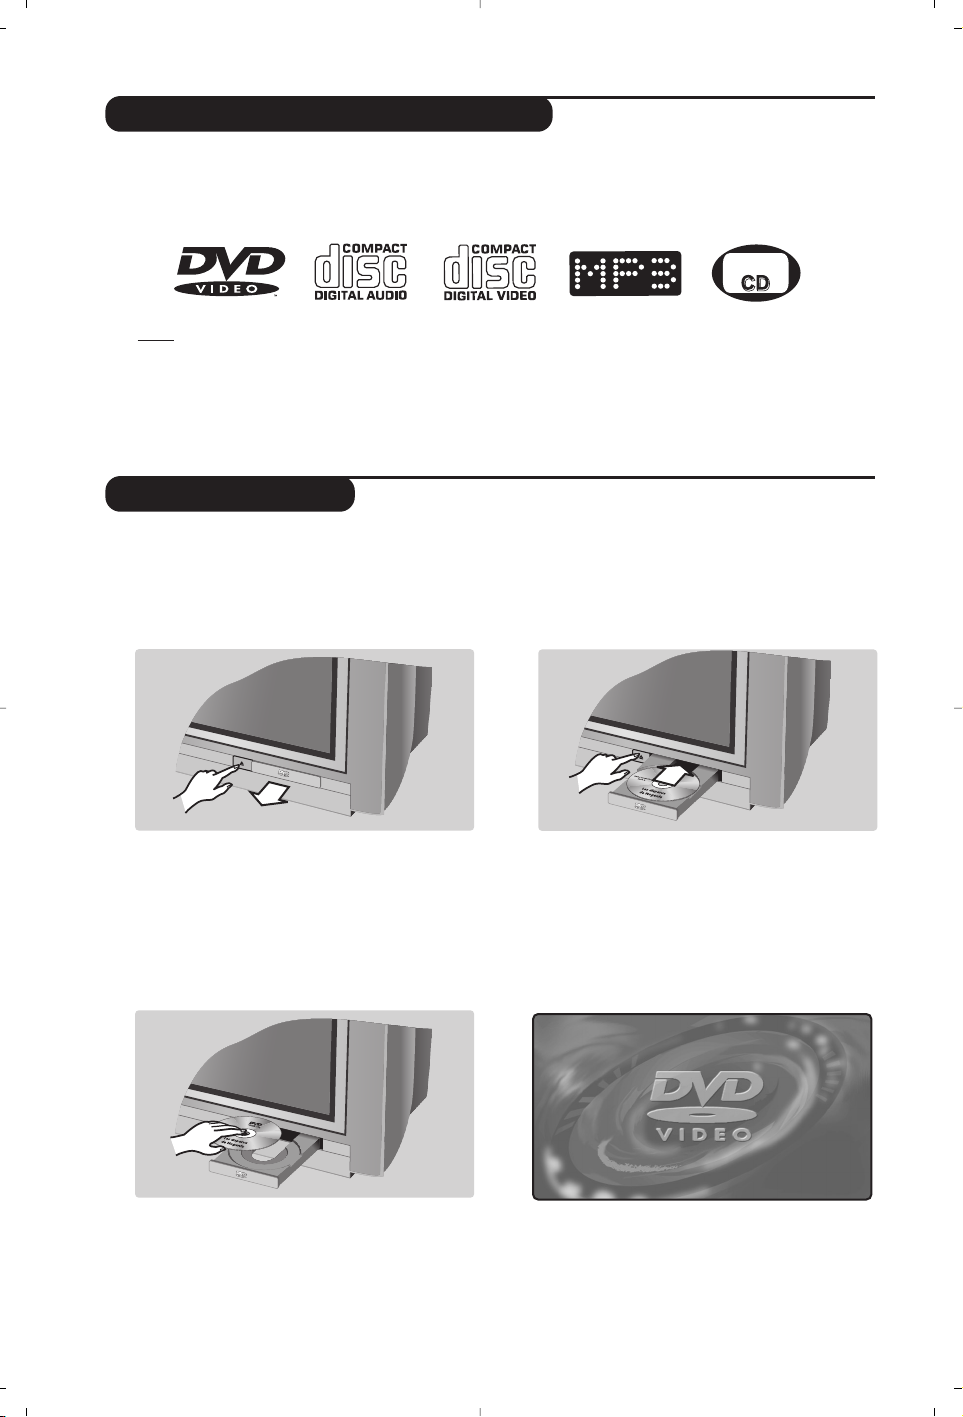
The built-in DVD player allows you to play DVD video discs, picture CDs (jpeg format) and audio
CDs (including finalised CD-Rs, CD-RWs MP3 CDs).The discs can be recognised by their logo on
the packaging.
Note:
Generally,DVD films are not placed on the market at the same time in the various regions of the world.
Accordingly, DVD players are provided with geographical zone codes. If you insert a disc which has a regional
code that is different from that of your reader,you will see a message displayed on the screen.
The disc cannot be played and you will have to remove it.
&
Opening the drawer
Press the EJECT (fl) button twice on the
front, to
the left of the drawer.
é
Inserting the disc
Place the disc in the drawer, with the label
facing upwards. Makes sure that it is positioned
correctly in the recess.
“
Closing the drawer
Gently push the drawer back in or press the
EJECT button next to the drawer to close.
The disc will begin to play.
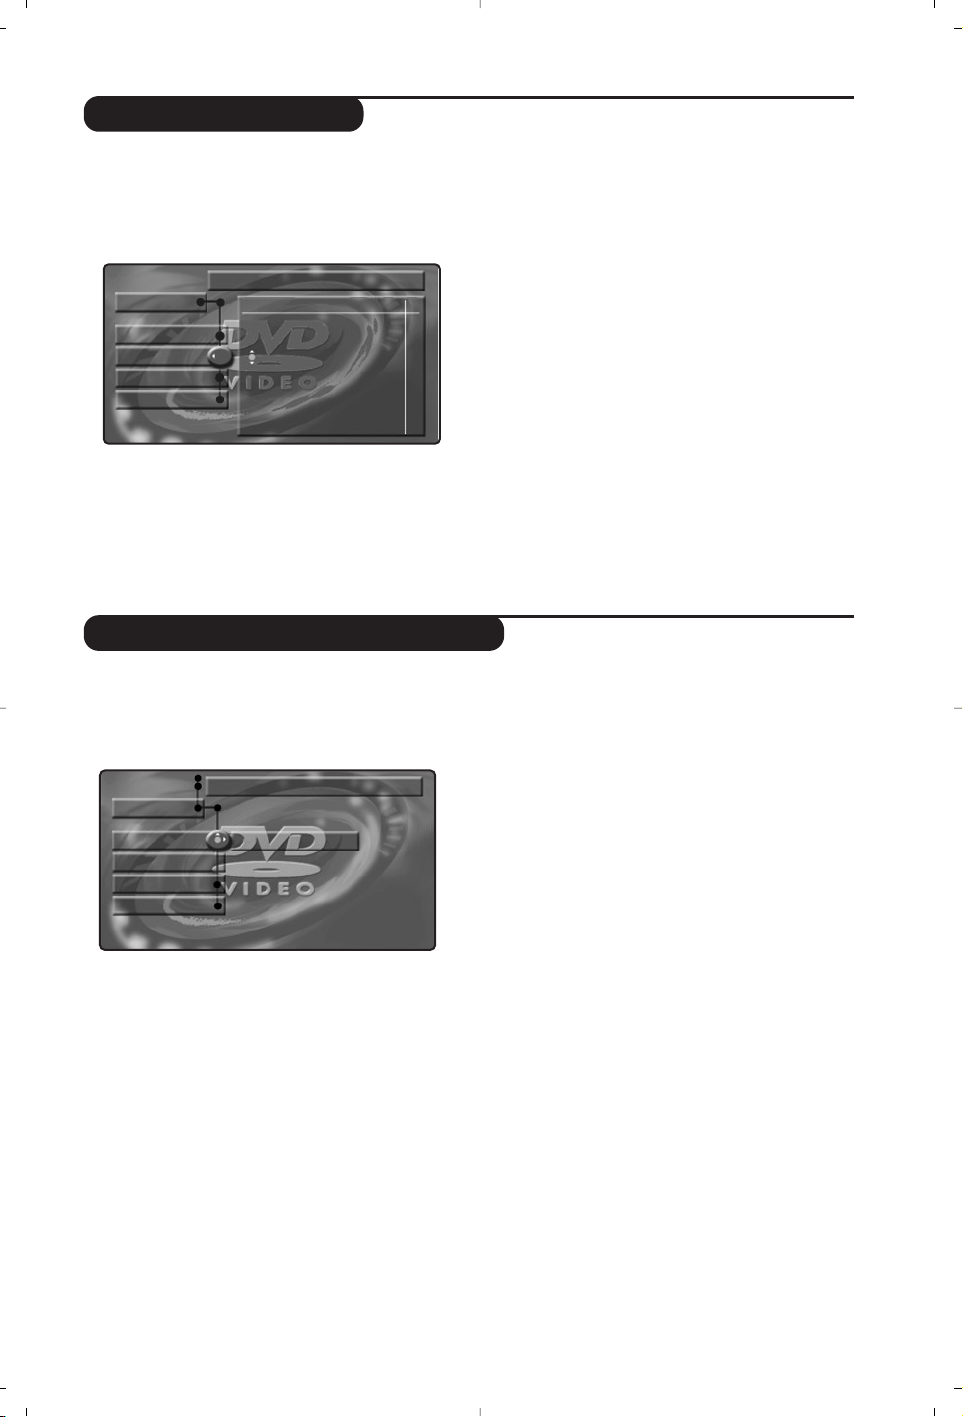
‘
Automatic play
Play begins automatically when the drawer
closes. A status window appears on the left of
the screen and indicates the current
operation, the type of disc and its length. Next,
the content of the disc is displayed.
PICTURE
Page 11

11
Playing a DVD or video CD
Play
Once the disc has been inserted and the drawer closed,play begins
automatically. Certain discs will ask you to select a heading from a
menu. Use the buttons
09 or îÏ È¬ then press u.
Stopping play
Press the
Ê button to stop play.The default screen appears and
displays information on the player status.
Re-starting play (“resume” function)
When you stop a disc mid-play (standby or ejecting the disc),you can
resume play at the exact point you stopped the disc. Simply press
the Æ button,then when you see the resume diplay, press Æ again
(otherwise the disc will start playing from the beginning).
The resume function remenbers the last 4 discs played.
Slow motion,fast forward and rewind
During play, press the
Ï button to slow play down to 1/2,1/4 or
1/8 speed. Press the
¢ or ∫ (or Ȭ) button to fast forward
or rewind at x4 or x32 speed. Press
Æ to return to normal speed.
Freeze-frame
Press
∆ (or î) to freeze the picture. Press ∆ again to move to the
next frame or
Æ to resume play.
Next / previous chapter
DVD discs are split into different chapters to allow certain scenes to
be accessed directly. Use the
@ P # keys to access the previous or
next chapter.
DVD menu
Press the æ key.The DVD menu appears.Its contents will depend
on the DVD. It allows you to access different sections,such as choice
of language, direct access to certain scenes, special production notes,
trailers, etc.
Use the
Ȭ îÏ keys to select, u confirm and æ exit.
DVD player menu
Press the
d (SYSTEM MENU) key to access or quit the DVD player
(see p. 13).
Language selection
Press the e key to select the different languages available on the
disc.The menu disappears after a few seconds.
Subtitling language
Press the
c
key to choose your subtitling language (choose off to
deactivate it).The menu disappears after a few seconds.
Ejecting the disc
Press the EJECT (fl) button located on the front of the television.
Play stops,then after several seconds the drawer opens.
Choice of TV or DVD mode
Press the
Æ key on the remote control to switch the TV set to
either TV or DVD mode.
ı
TV
ù
›
VCR
¢
∫
Ÿ
Ó
MODE
·
∆
TV / DVD
-
MENU
+ +
”
[
- -
%
∏
OK
12
564
879
Ø
0
Ê
.
SUBTITLEAUDIO
¤
SYSTEM MENU
Ë
Æ
SMARTSMART
ª
DVD
MENU
RADIO
3
Á
P
Page 12
12
Playing an audio CD
Reading a picture CD
Play
Once the disc has been inserted and the drawer has closed, play
begins automatically.A special menu appears on the screen, indicating
the number of tracks, the current track and time.
Changing tracks
Use the
@ P # keys on the remote control to change tracks or
the
09 keys to select the track of your choice.
Fast forward and rewind
Press the
¢ key or ∫ to fast forward or rewind at x4 or x8
speed. Press
Æ to return to normal speed.
Note : this function is not available with MP3 audio CDs.
Pause / stop / eject
Press
∆ to pause and Æ to resume play.
Press
Ê to stop and the EJECT (fl) button located on the front of
the television to eject the disc.
Programming a favourite track selection
This function allows you to programme a selection of tracks into the
memory (refer to menu on page 14).
Playing an audio MP3 CD
MP3 CDs allow you to store several albums on the same disc.
Use the
îÏ keys to select the albums.Press ¬ to access the
list of the different tracks. Use the
îÏ or 09 keys to select
the tracks. Use the
È key to return to the album selection list.
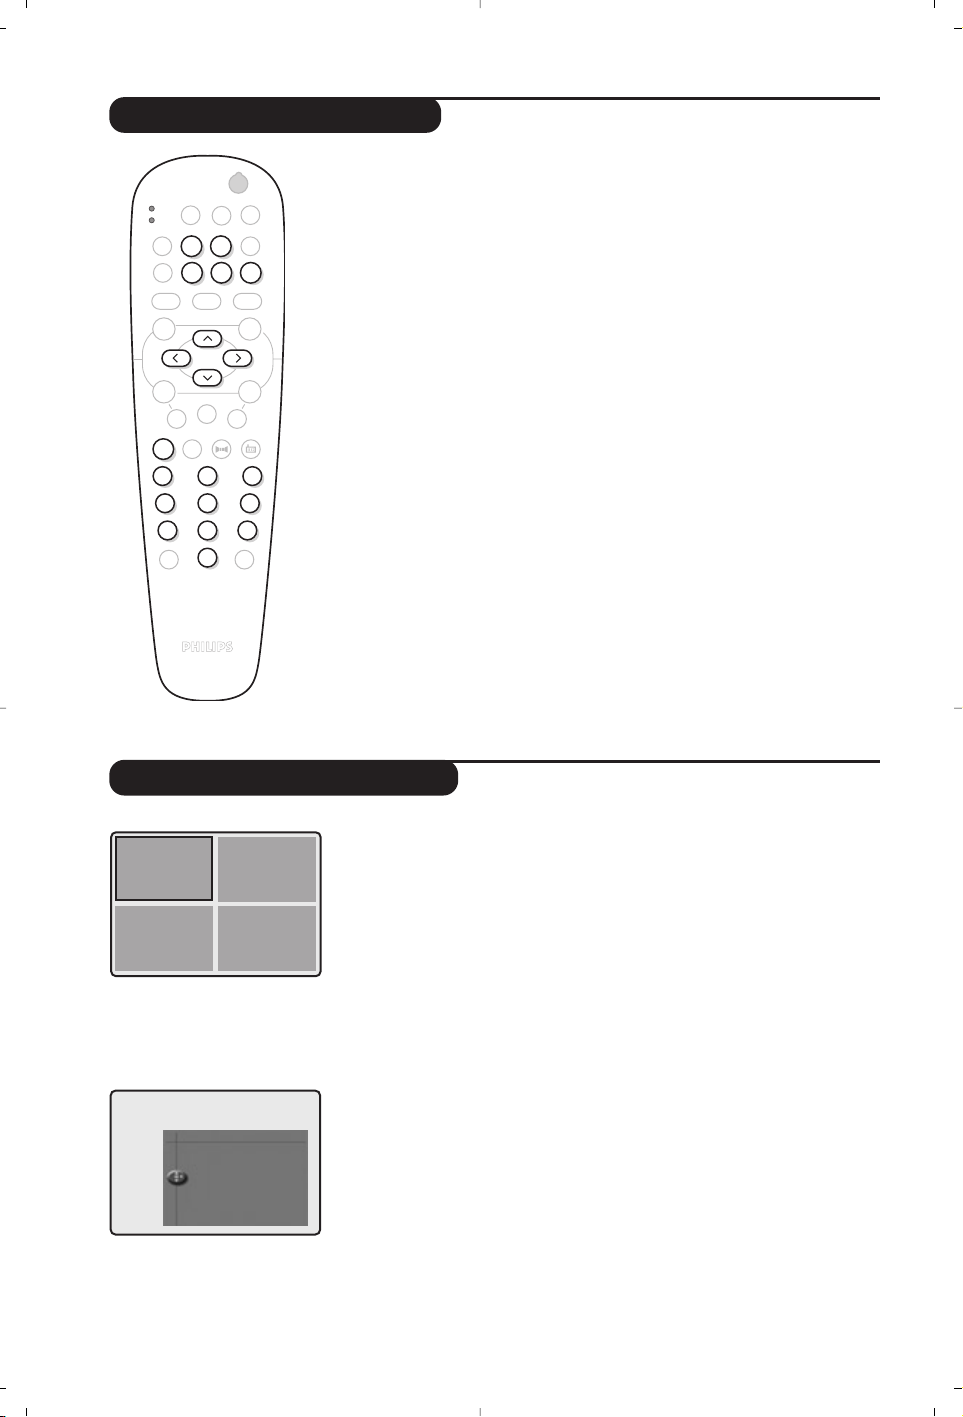
Reading and previewing
Once the disc has been inserted, reading starts straight away.
A preview of the four first pictures appears. Use the
@ P # keys to
access the previous or the next page. Use the cursor
îÏȬ
to select the desired picture and press u to display it full screen.
Press
æ to return to the preview of the pictures.
Slide show
Press
Æ to start the slide show.The pictures on the disc follow each
other automatically.To stop the slide show press
Ê.To change the
display time of the pictures,see the
Toolbar menu (p.13).
Direct selection of a picture or directory
Use the
@ P # keys to go to the previous or the next picture.
The
09 keys allow direct selection by picture number.The list of
pictures is displayed on the screen. Use the
îÏ key to navigate in
the list.
If your disc has several directories use
È to go back up to the
directory selection list. Select the directory with the
îÏ keys,
then press
¬ to return to selecting the pictures.
Picture format
The
p key allows you to change the format of the picture (see p.9).
Picture
1
2
3
4
.
ı
SUBTITLEAUDIO
›
¢
Ó
¤
ù
∫
SYSTEM MENU
Ÿ
Ë
∆
Ê
Æ
SMARTSMART
TV / DVD
ª
DVD
MENU
MODE
MENU
TV
VCR
·
-
++
”
--
%
∏
OK
12
Ø
P
[
RADIO
3
564
879
0
Á
Page 13

13
DVD player menu
Toolbar menu
This menu allows you to access all the
particular functions of the DVD player.
Press
d (SYSTEM MENU).The menu is
displayed on the screen. Use the
ȬîÏ keys to navigate the different
menus and make adjustments.
Press
d (SYSTEM MENU) again to quit.
The text is greyed when the function is not
available on the disc being read.
This menu allows you to access all the
features of the DVD player.
Press
d (SYSTEM MENU) The Toolbar menu
is displayed.Use the
Ȭ
keys to select the
different submenus:
Play option
•
Disc Navigation; to access the different
tracks on audio and picture CDs.
•
Audio; to select the audio language in the
sound track of DVD films.
You obtain direct access with the
e key.
•
Subtitle; to select
the
subtitle
language of the
DVD films.
You obtain direct access with the
c key.
Slide Show
This menu can regulate slide shows from
picture CDs.
•
Pic Time; to adjust the display time of the
pictures.
View
•
Angle; some DVDs have recorded sequences
from several camera angles.A special icon
usually appears. Use the
Ȭ keys to
select the desired angle
•
Zoom;Press u to activate zoom 2x 4x
then come back to normal size.
Use the
ȬîÏ keys to move round
in the enlarged picture.
•
Chapter Preview; to activate or deactivate
preview of DVD chapters.
•
Rotate; to change the orientation of images
for picture CDs.
Search
•
Time; use the 09 keys to select the exact
moment of the desired sequence. Press
u
to confirm. It plays at the indicated time.
•
Fast;
use the Ȭ keys to choose the
desired speed.
• Slow;
use the Ȭ keys to control the
slow motion speed.To resume normal speed
press
Æ.
• Frame by frame; use the È or ¬ keys to
display forwards or backwards frame by
frame. Press
Æ to resume normal playing.
Program:
To program your favourite tracks, see page 15.
Play Option Slide Show View
Toolbar
Preferences
Setup
Play Option Slide Show View
Toolbar
Preferences
Setup
Page 14

14
Preferences Menu
This menu regulates the DVD player
preferences.
Press
d (SYSTEM MENU) to display the
DVD player menu.
Press the
Ï key to select Preferences and
use the
Ȭ
keys to select the different
submenus:
Sound:
•
Night mode; optimises sound for listening at
low volume.
Features:
•
Help; to display/cancel an explanation zone
of menu controls at the bottom of the
screen.
•
Status window; to deactivate display of the
status window of the player.
To quit the menu: press
d.
Setup Menu
This menu allows you to change the default
settings of the DVD player.
Press
d (SYSTEM MENU) to display the
DVD player menu.Press
Ï twice to select
Setup and use the
Ȭ
keys to select the
different submenus:
Language:
•
Audio Language ; to select the preferred
language of the DVD film sound track.
•
Subtitle language; to select the preferred
subtitle language of the DVD films.
If the preferred language is available on the disc
it will be selected by default. Otherwise the first
language of the disc will be activated.
TV:
(only available on certain versions)
•
TV system ; allows you to choose Auto
(automatic detection of playing standard)
either
Pal
or
NTSC
.
Audio menu:
•
Digital output ; to choose: all, PCM only or
off.
Features:
•
PBC ; to activate/deactivate the itemisation
function available on certain video CDs.
Access: see next page
To quit the menu: press
d.
Setup
Preferences
Sound Features
Language TV Audio menu
Setup
Page 15
15
Program playing
This feature allows you to program playing by
memorising your preferred pieces.
& Press
d (SYSTEM MENU) to display Toolbar.
With the
¬
key select Program and press
Ï to display the menu:
é
Use the Ï key to select Tracks and press ¬.
“ Use the îÏ or 09 keys to select the
number of the title and confirm with
¬
.
‘ Select the desired track in the same way.
( Press u to select it.
§ Restart the operations
“ to ( as many
times as there are titles or tracks to select
(maximum 20 per disc).
You can repeat the same number several times if
you want.
è Press
d to quit.The desired tracks are
played immediately.
Stops playing the desired tracks
Position the
Program line on Off.
To consult and modify the list
Select
Playlist and press ¬.
The list of favourite tracks appears.To delete a
title select its number with the
îÏ keys
and press
u.
To delete all
Select
Clear all and press ¬.
To quit the menu: press
d.
Access control and locking
This function allows access to different locking
levels on the player.
& Press
d. Use the Ï key to select Setup
then with ¬, select Access.
é Enter your chosen access PIN.You must key it
twice to confirm.
“
Parental level: to activate locking level from 0
(deactivated) to 8 (maximum).
Some DVD discs have locking levels (1 to 8),
sometimes with replacement scenes. For example,
if you choose Level 4, all the scenes of level 4 (and
lower) will be played. Scenes with a higher level will
not be played or replaced with substitution scenes.
If the disc does not have any substitution scene, it
stops playing and you have to enter the four figure
PIN.
‘
Change PIN; To change the access PIN. You
have to key it twice to confirm.
If you have forgotten your confidential PIN
press
Ê four times.
(
Disc Lock: activates locking DVD discs and
video CDs.When you insert a disc in the
reader, a dialogue box appears. Enter your
secret PIN:
- either for
Play once (the disc can be played
as long as it not taken out of the player and
the television is playing),
- or for
Play Always (play permanently
authorised).
The player can memorise up to 50 discs.
When the list is full and another disc is added, the
last disc in the list is withdrawn.
Double sided DVDs (as well as video CDs in
several volumes) can have a different identification
PIN for each side (volume). Each side (volume)
must therefore be authorised separately.
§ Press
d to quit.
è
Suppress play authorisation
• Insert the disc in the player. It begins playing
automatically.
• When the symbol
u appears, press Ê.
The symbol
v is displayed,and play
authorisation is suppressed for this disc.
Program
Playlist
Toolbar
Program
Tracks
Clear all
Tra c k
3
1
2
Disclock
Setup
Change PIN
Parental level
Enter Current Pin
****
Access
Page 16
16
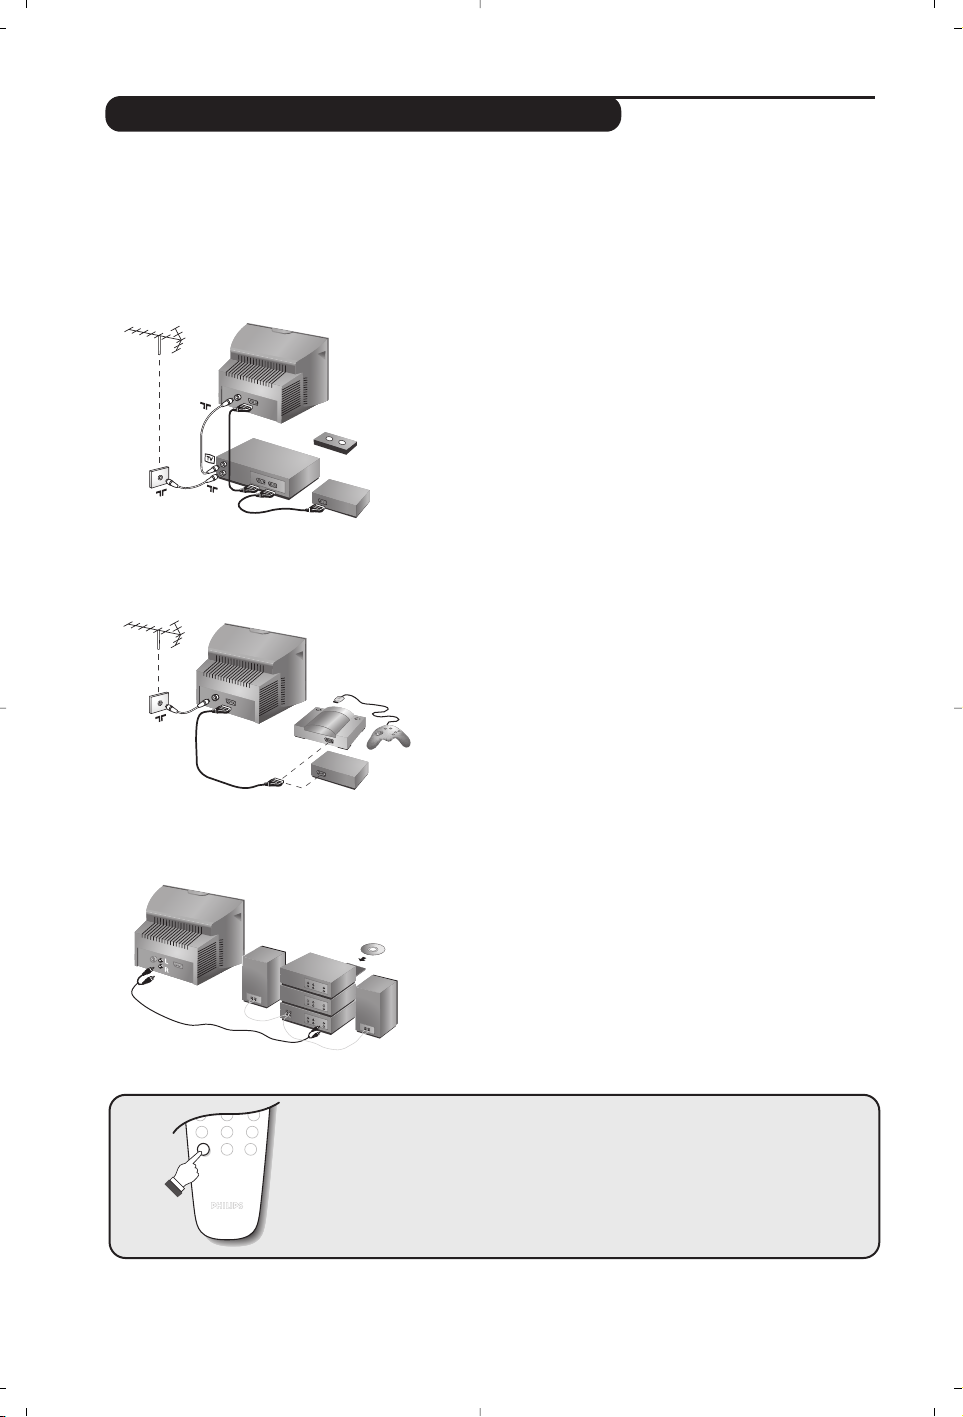
Connecting peripheral equipment
Carry out the connections shown opposite, using a good
quality euroconnector cable.
If your video recorder does not have a euroconnector socket, the
only connection possible is via the aerial cable.You will therefore
need to tune in your video recorder's test signal and assign it
programme number 0 (refer to manual store, p. 6).
To reproduce the video recorder picture, press
0.
Video recorder with decoder
Connect the decoder to the second euroconnector socket
of the video recorder.You will then be able to record
scrambled transmissions.
Video recorder
Satellite receiver, decoder, CDV,games, etc.
For TV sets with 2 SCART connectors,preferably connect
the equipment delivering RGB signals (digital decoders, DVD
players,games consoles, etc.) to EXT1 and the equipment
delivering S-VHS signals (S-VHS and Hi-8 VCRs) to EXT2.
To connect to a hi-fi system, use an audio connection cable
and connect the “L” and “R” outputs on the TV (only
available on certain versions) set to the “AUDIO IN” “L” and
“R” input on your hi-fi amplifier.
Use a digital audio connecting cable and connect the
television’s “DIGITAL AUDIO OUT” output to a “DIG IN”
input on the amplifier (amplifier with coaxial digital input).
Other equipment
Amplifier
564
879
0
Á
Ø
To select connected equipment
Press the n key to select EXT1 and on the versions with 2 scarts,
EXT2, S-VHS2 (S-VHS signals from the EXT2 socket) and AV for
the side connections (if available).
Most equipment (decoder, video recorder) carries out the switching itself.
Depending on the versions, the TV set will be equipped with 1 or 2 SCART connectors EXT1 and
EXT2 located on the rear. The EXT1 socket has audio, CVBS/RGB inputs and audio, CVBS outputs.The EXT2
socket (if available) has audio, CVBS/S-VHS inputs and audio, CVBS outputs.
VCR
Page 17

17
Make the connections as shown opposite.
With the
n key, select AV.
For a monophonic device, connect the audio signal to the
AUDIO L input. Use the e key to reproduce the sound
on the left and right speakers of the TV set.
Headphones
When headphones are connected, the sound on the
TV set will be cut.The
@ P # keys are used to
adjust the volume level.
The headphone impedance must be between 32 and
600 Ohms.
Side connections
VCR key
The remote control lets you control the main functions of the VCR.
Press the MODE key to select the required mode : VCR (video recorder)
or
TV.The remote control indicator lights up to display the selected
mode. It switches off automatically after 20 seconds if left idle.
The remote control automatically returns to TV mode.
The following keys are operational, depending on the equipment :
b standby,
¢ fast rewind,
∫ fast forward,
· recording,
∆ pause
Ê stop,
Æ play,
% timer,
H menu,
cursor navigation and adjustments,
u validation,
09 digit keys,
@ P # programme selection,
◊ index function.
* Some functions are not available on all VCRs.
The remote control is compatible with all VCRs using the RC5 standard.
ı
TV
›
ù
VCR
¢
∫
Ÿ
MODE
Ó
∆
Ê
·
TV / DVD
-
MENU
+ +
”
[
- -
%
∏
OK
12
564
879
Ø
0
.
SUBTITLEAUDIO
¤
SYSTEM MENU
Ë
Æ
SMARTSMART
ª
DVD
MENU
RADIO
3
Á
P
Page 18

18
Tips
Glossary
Poor reception
The proximity of mountains or high buildings
may be responsible for ghost pictures, echoing
or shadows. In this case, try manually adjusting
your picture:see Fine Tuning (p.5) or modify
the orientation of the outside aerial.
Does your antenna enable you to receive
broadcasts in this frequency range (UHF or
VHF band)?
In the event of difficult reception (snowy
picture) switch the NR on the
Features menu
to ON.(p.6).
No picture
If the television does not switch on, please
press the standby key
b (located on the
remote control) twice.
Have you connected the aerial socket properly?
Have you chosen the right system? (p. 5).
Poorly connected euroconnector cables or
aerial sockets are often the cause of picture or
sound problems (sometimes the connectors
can become half disconnected if the TV set is
moved or turned).Check all connections.
Peripheral equipment gives a black and
white picture
To play a video cassette, check that it has
been recorded under the same standard (PAL,
SECAM, NTSC) which can be replayed by the
video recorder.
The remote control no longer works.
Check that the mode selector on the side of
the remote control is set to TV.
No sound
If on certain channels you receive a picture
but no sound, this means that you do not have
the correct TV system. Modify the System
setting (p. 5).
Teletext
Are certain characters not displayed
correctly? Check that the Country setting
has been positioned correctly (p.5).
Does the DVD player no longer work?
Check that the disc does not have any
fingerprints on it. Clean it with a soft cloth,
wiping from the centre to the edge.
Remote control
The TV set does not react to the remote
control; the indicator on the set no longer
flashes when you use the remote control?
Replace the batteries.
Standby
When you switch the TV set on it remains in
standby mode and the indication Locked is
displayed when you use the keys on the TV set?
The Child Lock function is switched On (p.7).
If the set receives no signal for 15 mins,it
automatically goes into standby mode.
To save power, your set is fitted with components
that give it a very low power consumption when
in standby mode (less than 3 W).
Still no results?
If your TV set breaks down, never attempt to
repair it yourself:contact your dealer's aftersales service.
Cleaning the set
Only use a clean, soft and lint-free cloth to
clean the screen and the casing of your set.
Do not use alcohol-based or solvent-based
products.
RGB Signals: These are 3 Red, Green and Blue video signals which directly drive the red,green and
blue emitters in the cathode ray tube. Using these signals provides better picture quality.
NICAM sound: Process by which digital sound can be transmitted.
System:Television pictures are not broadcast in the same way in all countries.There are different
standards: BG, DK,I, and L L’.The SYSTEM setting (p. 6) is used to select these different standards.
This is not to be confused with PAL or SECAM colour coding. Pal is used in most countries in
Europe, Secam in France, Russia and most African countries.The United States and Japan use a
different system called NTSC.
16:9: Refers to the ration between the length and height of the screen.
Wide screen televisions have a ration of 16/9, conventional screen TV sets have a ration of 4/3.
Page 19

1
Introduction
Sommaire
Vous venez d’acquérir ce téléviseur,merci de votre confiance.
Nous vous conseillons de lire attentivement les instructions qui suivent pour
mieux comprendre les possibilités offertes par votre téléviseur.
Installation
Installation du téléviseur . . . . . . . . . . . . . . . . . . . . . . . . . . . . . . . . . . . . . . . . . . . . . 2
Les touches du téléviseur . . . . . . . . . . . . . . . . . . . . . . . . . . . . . . . . . . . . . . . . . . . . 2
Les touches de la télécommande . . . . . . . . . . . . . . . . . . . . . . . . . . . . . . . . . . . . . . 3
Installation rapide . . . . . . . . . . . . . . . . . . . . . . . . . . . . . . . . . . . . . . . . . . . . . . . . . . .4
Classement des programmes . . . . . . . . . . . . . . . . . . . . . . . . . . . . . . . . . . . . . . . . . 4
Nom de programme . . . . . . . . . . . . . . . . . . . . . . . . . . . . . . . . . . . . . . . . . . . . . . . .4
Mémorisation manuelle . . . . . . . . . . . . . . . . . . . . . . . . . . . . . . . . . . . . . . . . . . . . . 5
Autres réglages du menu Installation . . . . . . . . . . . . . . . . . . . . . . . . . . . . . . . . . . .5
Utilisation
Utilisation de la radio . . . . . . . . . . . . . . . . . . . . . . . . . . . . . . . . . . . . . . . . . . . . . . . .5
Réglages de l’image . . . . . . . . . . . . . . . . . . . . . . . . . . . . . . . . . . . . . . . . . . . . . . . . .6
Réglages du son . . . . . . . . . . . . . . . . . . . . . . . . . . . . . . . . . . . . . . . . . . . . . . . . . . . .6
Réglage des options . . . . . . . . . . . . . . . . . . . . . . . . . . . . . . . . . . . . . . . . . . . . . . . . .6
Fonction réveil . . . . . . . . . . . . . . . . . . . . . . . . . . . . . . . . . . . . . . . . . . . . . . . . . . . . .7
Verrouillage du téléviseur . . . . . . . . . . . . . . . . . . . . . . . . . . . . . . . . . . . . . . . . . . . .7
Télétexte . . . . . . . . . . . . . . . . . . . . . . . . . . . . . . . . . . . . . . . . . . . . . . . . . . . . . . . . . 8
Formats 16:9 . . . . . . . . . . . . . . . . . . . . . . . . . . . . . . . . . . . . . . . . . . . . . . . . . . . . . .9
Utilisation du lecteur de DVD intégré
Mise en place d’un disque . . . . . . . . . . . . . . . . . . . . . . . . . . . . . . . . . . . . . . . . . . .10
Lecture d’un DVD ou d’un CD vidéo . . . . . . . . . . . . . . . . . . . . . . . . . . . . . . . . . .11
Lecture d’un CD audio . . . . . . . . . . . . . . . . . . . . . . . . . . . . . . . . . . . . . . . . . . . . .12
Lecture d’un CD d’images . . . . . . . . . . . . . . . . . . . . . . . . . . . . . . . . . . . . . . . . . . .12
Menu du lecteur DVD . . . . . . . . . . . . . . . . . . . . . . . . . . . . . . . . . . . . . . . . . . . . . .13
Menu Barre d’outils . . . . . . . . . . . . . . . . . . . . . . . . . . . . . . . . . . . . . . . . . . . . . . . .13
Menu Préférences . . . . . . . . . . . . . . . . . . . . . . . . . . . . . . . . . . . . . . . . . . . . . . . . .14
Menu Installation . . . . . . . . . . . . . . . . . . . . . . . . . . . . . . . . . . . . . . . . . . . . . . . . . .14
Programmation de lecture . . . . . . . . . . . . . . . . . . . . . . . . . . . . . . . . . . . . . . . . . . .15
Contrôle d’accès et verrouillage . . . . . . . . . . . . . . . . . . . . . . . . . . . . . . . . . . . . . .15
Raccordements
Magnétoscope . . . . . . . . . . . . . . . . . . . . . . . . . . . . . . . . . . . . . . . . . . . . . . . . . . . . 16
Autres appareils . . . . . . . . . . . . . . . . . . . . . . . . . . . . . . . . . . . . . . . . . . . . . . . . . . 16
Pour sélectionner les appareils connectés . . . . . . . . . . . . . . . . . . . . . . . . . . . . . .16
Touche magnétoscope . . . . . . . . . . . . . . . . . . . . . . . . . . . . . . . . . . . . . . . . . . . . . .17
Informations pratiques
Conseils . . . . . . . . . . . . . . . . . . . . . . . . . . . . . . . . . . . . . . . . . . . . . . . . . . . . . . . . 18
Glossaire . . . . . . . . . . . . . . . . . . . . . . . . . . . . . . . . . . . . . . . . . . . . . . . . . . . . . . . .18
°
Directive pour le recyclage
Votre téléviseur utilise des matériaux réutilisables ou qui peuvent être recyclés.
Pour minimiser les déchets dans l'environnement,des entreprises spécialisées
récupèrent les appareils usagés pour les démonter et concentrer les matières
réutilisables (renseignez-vous auprès de votre revendeur).
Français
Page 20
Le téléviseur est équipé de 4 touches qui sont
situées, selon les versions,à l’avant ou sur le
dessus du coffret.
Les touches VOLUME - + (-”+) permettent
de régler le niveau sonore.
Les touches PROGRAM - + (- P +)
permettent de sélectionner les programmes.
Pour accéder aux menus,appuyez simultanément
sur les 2 touches
”
- et ”+. Ensuite, les
touches P - + permettent de sélectionner un
réglage et les touches
”
- + de régler.
Pour quitter le menu affiché, maintenez
appuyées les 2 touches ” - et ” +.
Remarque: lorsque la fonction
Verrou enfant est
en service, les touches sont inactivées (voir p. 7).
PROGRAMVOLUME
--
++
2
& Positionnement du téléviseur
Placez votre téléviseur sur une surface solide
et stable. Pour prévenir toute situation
dangereuse, ne pas exposer le téléviseur à des
projections d’eau et ne rien poser dessus tel
qu’un objet couvrant (napperon), rempli de
liquide (vase) ou dégageant de la chaleur (lampe).
é Raccordements
• Introduisez la fiche d'antenne TV dans la
prise
: située à l’arrière.
• Introduisez la fiche d'antenne radio dans la
prise FM ANT avec l’adaptateur fourni.
Avec les antennes d’intérieur,la réception peut dans
certaines conditions être difficile.Vous pouvez
l’améliorer en faisant tourner l’antenne. Si la réception
reste médiocre, il faut utiliser une antenne extérieure.
• Branchez le cordon d’alimentation sur le
secteur (220-240 V / 50 Hz).
“ Télécommande
Introduisez les 2 piles de type R6 fournies en
respectant les polarités.
Les piles livrées avec l’appareil ne contiennent ni
mercure ni cadmium nickel, dans un souci de
préserver l’environnement.Veillez à ne pas jeter vos
piles usagées mais à utiliser les moyens de recyclage
mis à votre disposition (consultez votre revendeur).
‘ Mise en marche
Pour allumer le téléviseur, appuyez sur la
touche marche arrêt. Un voyant s’allume en
rouge et l’écran s’illumine.Allez directement
au chapitre installation rapide,page 4.
Si le téléviseur reste en veille, appuyez sur la
touche P
# de la télécommande.
Le voyant clignote lorsque vous utilisez la
télécommande.
5 cm
5 cm
5 cm
Installation du téléviseur
Les touches du téléviseur
FM.
ANT.
Page 21

3
Les touches de la télécommande
DVD :choix du langage (p.11)
TV : Mode son
Permet de forcer les émissions
Stéréo et Nicam Stéréo en Mono
ou pour les émissions bilingues de
choisir entre Dual I ou Dual II.
L’indication Mono est rouge lorsqu’il
s’agit d’une position forcée.
Liste des stations radio (p. 5)
Sélecteur de mode (p.17)
Touches DVD (p.11),
touches magnétoscope (p.17) et
touches télétexte (p.8)
Préréglage du son
Permet d’accéder à une série de
préréglages: Parole, Musique,
Théatre et retour à Personnel.
Menu TV
Pour appeler ou quitter les menus.
Volume
Pour ajuster le niveau sonore
Curseur
Ces 4 touches permettent de
naviguer dans les menus.
Touches numériques
Accès direct aux programmes.
Pour un programme à 2 chiffres,il
faut ajouter le 2ème chiffre avant
que le trait ne disparaisse.
Sélection des prises EXT
Appuyez plusieurs fois pour
sélectionner EXT1 et AV (p.16).
Veille
Permet de mettre en veille le
téléviseur. Pour l’allumer,appuyez
sur P @#, b, 0 à 9.
DVD : sélection sous-titrages (p. 11)
TV : Appel télétexte (p. 8)
DVD :menu OSD (p.13)
TV : Info. d’écran/ n° permanent
Pour afficher / effacer le numéro de
programme, le nom (s’il existe), l’heure,
le mode son, et le temps restant de la
minuterie.Appuyez pendant 5 secondes
pour activer l’affichage permanent du
numéro.Cette touche permet
également de quitter les menus.
Mode TV / DVD
Pour permuter le téléviseur en
mode TV ou DVD
(p.11)
.
Préréglage de l’image
Permet d’accéder à une série de
préréglages: Intense, Naturel,Doux,
Multimédia et retour à Personnel.
Coupure son
Pour supprimer ou rétablir le son.
Validation (DVD/VCR)
Modes 16:9 (p. 9)
Sélection des programmes
Pour accéder au programme
inférieur ou supérieur.
Pour certains programmes le titre de
l’émission apparaît en bas de l’écran.
Son Surround
Pour activer / désactiver l’effet
d’élargissement du son. En stéréo, les
haut-parleurs paraissent plus espacés.
Pour les versions équipés du Virtual
Dolby Surround *,vous obtenez les
effets sonores arrières du Dolby
Surround Pro Logic.En mono, on
obtient un effet spatial pseudo stéréo.
Programme précédent
Pour accéder au programme
précédemment visualisé.
Menu DVD (p. 11)
Mode RADIO / TV
Pour permuter le téléviseur en
mode radio ou tv
(p.5)
.
* Fabriqué sous licence de Dolby Laboratories.
"Dolby" et le symbole double-D sont des marques de Dolby Laboratories.
.
ı
TV
VCR
¢
MODE
Ó›ŸË
·
-
TV / DVD
MENU
SUBTITLEAUDIO
ù
SYSTEM MENU
∫
Ê∆ Æ
SMARTSMART
ª
MENU
¤
DVD
++
”
OK
[
--
%
∏
12
564
879
Ø
0
P
RADIO
3
Á
Page 22

4
Installation rapide
Classement des programmes
Nom de programme
La première fois que vous allumez le
téléviseur, un menu apparaît à l’écran.
Ce menu vous invite à choisir le pays ainsi que
la langue des menus :
Si le menu n’apparaît pas, maintenez appuyées
pendant 5 secondes les touches ”- et ”+ du
téléviseur, pour le faire apparaître.
& Utilisez les touches îÏ de la télécommande
pour choisir votre pays, puis validez avec
¬.
Si votre pays n’apparaît pas dans la liste,
sélectionnez le choix “. . .”
é Sélectionnez ensuite votre langue avec les
touches
îÏ puis validez avec ¬.
“ La recherche démarre automatiquement.
Tous les programmes TV et stations radio
disponibles sont mémorisés. L’opération prend
quelques minutes. L’affichage montre la
progression de la recherche et le nombre de
programmes trouvés. A la fin, le menu disparaît.
Pour sortir ou interrompre la recherche, appuyez
sur
H. Si aucun programme n’est trouvé, reportez
vous au chapitre conseils p. 18.
‘ Si l’émetteur ou le réseau câblé transmet le
signal de classement automatique, les
programmes seront correctement numérotés.
L’installation est alors terminée.
( Si ce n’est pas le cas, vous devez utiliser le
menu
Classement pour les renuméroter.
Certains émetteurs ou réseaux câblés diffusent leurs
propres paramètres de classement (région, langage...).
Dans ce cas, vous devez indiquer votre choix avec les
touches
îÏ puis valider avec ¬.
& Appuyez sur la touche H. Le Menu Principal
s’affiche à l’écran.
é Avec le curseur, sélectionnez le menu
Installation puis le menu Classement .
“ Sélectionnez le programme que vous
souhaitez déplacer avec les touches
îÏ et
appuyez sur
¬.
‘ Utilisez ensuite les touches
îÏ pour
choisir le nouveau numéro et validez avec
È.
( Recommencez les étapes “ et ‘ autant de
fois qu’il y a de programmes à renuméroter.
§ Pour quitter les menus,appuyez sur
d.
Vous pouvez, si vous le souhaitez, donner un
nom aux programmes et prises extérieures.
Remar
que: lors de l’installation, les programmes
sont nommés automatiquement lorsque le signal
d’identification est transmis.
& Appuyez sur la touche
H.
é Avec le curseur, sélectionnez le menu
Installation, puis Nom De Prog.
“ Utilisez les touches îÏ pour choisir le
programme à nommer ou à modifier.
‘ Utilisez les touches
Ȭ pour vous
déplacer dans la zone d’affichage du nom
(5 caractères) et les touches
îÏ pour
choisir les caractères.
( Lorsque le nom est entré, utilisez la touche
È pour sortir. Le nom est mémorisé.
§ Recommencez les étapes “ à ( pour chaque
programme à nommer.
è Pour quitter les menus,appuyez sur
d.
Select Country
Country
DK
E
F
FI
Æ GB
Language
Español
Svenska
English
Dansk
Nederlands
Menu Principalge
• Image
• Son
• Options
$ Installation
Installation
• Langage
• Pays
• Mémo. Auto.
• Mémo Manuel.
$
Classement
Æ
• Nom du Prog.
00
01 TF1
02 FR2
03ÆFR3
04 C +
05 ARTE
Page 23

5
Mémorisation manuelle
Autres réglages du menu Installation
Ce menu permet de mémoriser les
programmes un par un.
& Appuyez sur la touche
H.
é Avec le curseur, sélectionnez le menu
Installation puis Mémo Manuelle :
“
Système : sélectionnez Europe (détection
automatique*) ou
Europe Ouest (norme BG),
Europe Est (norme DK), Royaume-Uni
(norme I) ou France (norme LL’).
* Sauf pour la France (norme LL’), il faut
sélectionner impérativement le choix
France.
‘
Recherche :appuyez sur ¬. La recherche
commence. Dès qu’un programme est trouvé,
le défilement s’arrête et le nom du programme
s’affiche (si disponible).Allez à l’étape suivante.
Si vous connaissez la fréquence du programme
désiré, composez directement son numéro
avec les touches
0 à 9.
Si aucune image n’est trouvée, voir conseils (p. 18).
(
No De Prog. : entrer le numéro souhaité avec
les touches
Ȭ ou 0 à 9.
§
Ajust. Fin : si la réception n’est pas
satisfaisante, réglez avec les touches
Ȭ.
è
Mémoriser :appuyez sur ¬. Le programme
est mémorisé.
! Répétez les étapes ‘ à ! autant de fois qu’il
y a de programmes à mémoriser.
ç Pour quitter les menus,appuyez sur
d.
& Appuyez sur la touche H et sélectionnez le
menu
Installation :
é
Langage : pour modifier la langue d’affichage
des menus.
“
Pays : pour choisir votre pays (F pour France).
Ce réglage intervient dans la recherche, le
classement automatique des programmes et
l’affichage du télétexte. Si votre pays n’apparaît pas
dans la liste, sélectionnez le choix “. ..”
‘
Mémo. Auto : pour lancer une recherche
automatique de tous les programmes
disponibles dans votre région.Si l’émetteur ou
le réseau câblé transmet le signal de
classement automatique, les programmes
seront correctement numérotés. Si ce n’est
pas le cas, vous devez utiliser le menu
Classement pour les renuméroter (voir p.4).
Certains émetteurs ou réseaux câblés diffusent leurs
propres paramètres de classement (région, langage, ...).
Dans ce cas, vous devez indiquer votre choix avec
les touches
îÏ puis valider avec ¬.Pour
sortir ou interrompre la recherche, appuyez sur H.
Si aucune image n’est trouvée, voir conseils (p. 18).
( Pour quitter les menus,appuyez sur d.
Utilisation de la radio
Choix du mode tv ou radio
Appuyez sur la touche
 de la
télécommande pour commuter le téléviseur en
mode tv ou radio. En mode radio, le numéro, le
nom de la station (si disponible), sa fréquence et
le mode son s’affichent à l’écran.
Pour entrer le nom des stations utilisez le menu
Nom De Prog. (p. 4)
Sélection des programmes
Utilisez les touches
09ou @ P # pour
sélectionner les stations FM (de 1 à 40).
Liste des stations radio
Appuyez sur la touche ı pour afficher la liste des
stations radio. Utilisez les touches
îÏ pour
changer de station et la touche
d pour quitter.
Utilisation des menus radio
Utilisez la touche
H pour accèder aux
réglages spécifiques à la radio.
Recherche des stations radio
Si vous avez utilisé l’installation rapide, toutes les
stations FM disponibles ont été mémorisées. Pour
lancer une nouvelle recherche,utilisez le menu
Installation : Mémo. Auto (pour une recherche
complète) ou
Mémo. Manuel (pour une recherche
station par station). Les menus
Classement et
Nom De Prog. vous permettront de classer ou
nommer les stations radio. Le fonctionnement de
ces menus est identique a celui des menus TV.
Économiseur d’écran
Utilisez la touche
c pour activer/désactiver
l’économiseur d’écran.
Menu Principalge
• Image
• Son
• Options
$ Installation
Mémo. Manuel.
$
Système France Æ
• Recherche
• No. De Prog.
• Ajust. Fin
• Mémoriser
Page 24

6
Réglages de l’image
Réglages du son
& Appuyez sur la touche H puis sur ¬.
Le menu
Image apparaît :
é Utilisez les touches
îÏ pour sélectionner
un réglage et les touches
Ȭ pour régler.
Remarque : pendant le réglage de l’image, seule la
ligne sélectionnée reste affichée.Appuyez sur
îÏ pour faire ré-apparaître le menu.
“ Une fois les réglages effectués, sélectionnez le
choix
Mémoriser et appuyer sur ¬ pour les
enregistrer.Appuyez sur
d pour quitter.
Description des réglages :
•
Lumière : agit sur la luminosité de l’image.
•
Couleur : agit sur l’intensité de la couleur.
•
Contraste : agit sur la différence entre les
tons clairs et les tons foncés.
•
Définition : agit sur la netteté de l’image.
•
Temp. Couleur : agit sur le rendu des
couleurs :
Froide (plus bleue), Normale
(équilibrée) ou Chaude (plus rouge).
•
Mémoriser : pour mémoriser les réglages de
l’image (ainsi que les réglages
Contrast + et
Réduct. Bruit situés dans le menu Options).
& Appuyez sur H, sélectionner Son (Ï) et
appuyez sur
¬. Le menu Son apparaît :
é Utilisez les touches
îÏ pour sélectionner
un réglage et les touches
Ȭ pour régler.
“ Une fois les réglages effectués, sélectionnez le
choix
Mémoriser et appuyer sur ¬ pour les
enregistrer.
‘ Pour quitter les menus,appuyez sur
d.
Description des réglages:
•
Aigus : agit sur les fréquences hautes du son.
•
Graves : agit sur les fréquences basses.
•
Balance : pour équilibrer le son sur les haut-
parleurs gauche et droit.
•
Delta Volume * : permet de compenser les
écarts de volume qui existent entre les
différents programmes ou les prises EXT.
Ce réglage est opérationnel pour les
programmes 0 à 40 et les prises EXT.
• AVL * (Automatic Volume Leveler): contrôle
automatique du volume qui permet de limiter
les augmentations du son, en particulier lors des
changements de programmes ou des publicités.
• Mémoriser : pour mémoriser les réglages du
son.
* Disponible uniquement sur certaines versions.
Réglage des options
& Appuyez sur H, sélectionner Options (Ï)
et appuyez sur
¬.Vous pouvez régler :
é
Timer, Verrou enfant et Verrou Prog. :
voir page suivante
“
Contraste + : réglage automatique du
contraste de l’image qui ramène en
permanence la partie la plus sombre de
l’image au noir.
‘
Réduct. Bruit : atténue le bruit de l’image
(la neige), en cas de réception difficile.
Attention : pour mémoriser les réglages
Contraste+ et Réduct. Bruit , il faut utiliser le
choix
Mémoriser du menu Image.
(
Déplac. Image (disponible uniquement sur les
grandes tailles d’écran) :les grandes tailles
d’écran sont sensibles aux variations du champ
magnétique terrestre. Ce réglage permet de
compenser son influence en ajustant
l’inclinaison de l’image.
§ Pour quitter les menus,appuyez sur
d.
Menu Principalge
$ Image
• Son
• Options
• Installation
Image
$
Lumière --I------ 39
• Couleur
• Contraste
• Définition
• Temp. Couleur
• Mémoriser
Menu Principalge
• Image
$ Son
• Options
• Installation
Son
• Aigus -----I--- 56
• Graves
• Balance
• Delta Volume
• AVL
• Mémoriser
Page 25

7
Fonction réveil
Verrouillage du téléviseur
Ce menu vous permet d’utiliser le téléviseur
comme un réveil.
& Appuyez sur la touche
H.
é Avec le curseur, sélectionnez le menu
Options
puis Timer :
“
Minuterie : pour sélectionner une durée de
mise en veille automatique.
‘
Heure : entrez l’heure courante.
Remarque : l’heure est mise à jour automatiquement,
à chaque mise en marche, à partir des informations
télétexte du programme n° 1. Si celui-ci n’a pas de
télétexte, la mise à jour n’aura pas lieu.
(
Heure Début : entrez l’heure de début.
§
Heure Fin : entrez l’heure de mise en veille.
è
No. de Prog : entrez le numéro du programme
désiré pour le réveil. Pour sélectionner une
radio FM, utilisez les touches
Ȭ (les
touches
09 permettent uniquement de
sélectionner les programmes tv).
En mode DVD, lors de la lecture d’un disque,
vous pouvez sélectionner
Mark DVD, si vous
voulez être réveillé à un endroit précis du
disque.Appuyez sur
u pour valider l’endroit
du démarrage.
!
Prog. Activée :vous pouvez régler :
•
Une fois pour un réveil unique,
•
Quotidien pour tous les jour,
•
Arrêt pour annuler.
ç Appuyez sur
b pour mettre en veille le
téléviseur. Il s’allumera automatiquement à
l’heure programmée. Si vous laissez le
téléviseur allumé, il changera uniquement de
programme à l’heure indiquée (et se mettra
en veille à l’
Heure de Fin).
La combinaison des fonctions
Verrou TV et
Timer permet de limiter la durée d’utilisation du
téléviseur, à vos enfants par exemple.
Vous pouvez verrouiller certains programmes
ou interdire complètement l’utilisation du
téléviseur en verrouillant les touches.
Verrou enfant
& Appuyez sur H.
é Avec le curseur, sélectionnez le menu
Options
et positionnez Verrou Enfant sur Marche.
“ Éteignez le téléviseur et cachez la
télécommande. Le téléviseur devient inutilisable
(seule la télécommande permet de l’allumer).
‘ Pour annuler: positionnez
Verrou Enfant sur
Arrêt.
Verrou programmes
& Appuyez sur la touche H, sélectionnez le
menu
Options puis Verrou Prog. :
é Vous devez entrer votre code confidentiel
d’accès. La première fois,tapez 2 fois le code
0711 puis saisissez le code de votre choix.Le
menu apparaît.
“
Prog. Verrou :
utilisez les touches îÏ pour
sélectionner le programme TV souhaité et validez
avec
¬
. Le symbole + s’affiche devant les
programmes ou les prises qui sont verrouillés.
Désormais, pour visualiser un programme
verrouillé, vous devez entrer le code
confidentiel, sinon l’écran restera noir.
L’accès au menu
Installation est également
verrouillé. Attention, dans le cas des programmes
cryptés qui utilisent un décodeur extérieur, il faut
verrouiller la prise EXT correspondante.
‘
Changer code : permet d’entrez un nouveau
code à 4 chiffres. Confirmez en le tapant une
deuxième fois.
Si vous avez oublié votre code confidentiel, entrez le
code universel 0711 deux fois.
(
Tout Effacer : permet d’effacer tous les
programmes verrouillés.
§
Tout Verrou : permet de verrouiller tous les
programmes TV et prises EXT.
è Appuyez sur la touche
d pour quitter.
Menu Principalge
• Image
• Son
$ Options
• Installation
Timer
• Minuterie
$
Heure 10:56
• Heure Début
• Heure Fin
• No. De Prog
• Prog. Activée
Menu Principalge
• Image
• Son
• Options
• Installation
Options
• Timer
• Verrou Enfant Arrêt
• Verrou Prog.
• Deplac. Image
• Contraste +
• Reduct. Bruit
Page 26

8
Télétexte
Appuyez sur :
Vous obtenez :
Le télétexte est un système d'informations, diffusé par certaines chaînes, qui se consulte comme un
journal. Il permet aussi d'accéder aux sous-titrages pour les personnes malentendantes ou peu
familiarisées avec la langue de transmission (réseaux câblés,chaînes satellites,...).
Appel
télétexte
Sélection
d’une page
Permet d’appeler le télétexte, de passer en mode
transparent puis de quitter. Le sommaire apparaît avec la
liste des rubriques auxquelles vous pouvez accéder. Chaque
rubrique est repérée par un numéro de page à 3 chiffres.
Si la chaîne sélectionnée ne diffuse pas le télétexte, l'indication
100 s'affiche et l'écran reste noir (dans ce cas, quittez le
télétexte et choisissez une autre chaîne).
Composer le numéro de la page désiré avec les touches
0 à 9 ou @ P #,
îÏ
.Exemple: page 120, tapez
120. Le numéro s’affiche en haut à gauche, le
compteur tourne, puis la page est affichée.
Renouvelez l'opération pour consulter une autre page.
Si le compteur continue à chercher, c’est que la page n'est pas
transmise. Choisissez un autre numéro.
Accès
direct aux
rubriques
Des zones colorées sont affichées en bas de l’écran.
Les 4 touches colorées permettent d’accéder aux
rubriques ou aux pages correspondantes.
Les zones colorées clignotent lorsque la rubrique ou la page
n’est pas encore disponible.
Sommaire
Pour revenir au sommaire (généralement la page 100).
Agrandissement
d'une page
Arrêt de
l'alternance
des sous-pages
Pour afficher la partie supérieure, inférieure, puis revenir à
la dimension normale.
Certaines pages contiennent des sous-pages qui se
succèdent automatiquement. Cette touche permet
d’arrêter ou reprendre l'alternance des sous-pages.
L'indication _ apparaît en haut à gauche.
Informations
cachées
Pages
préférées
Pour faire apparaître ou disparaître les informations
cachées (solutions de jeux).
Pour les programmes télétexte 0 à 40,vous pouvez
mémoriser 4 pages préférées qui seront ensuite
directement accessibles avec les touches colorées (rouge,
verte, jaune, bleue).
& Appuyez sur la touche
H pour passer en mode pages
préférées.
é Affichez la page télétexte que vous souhaitez mémoriser.
“ Appuyez ensuite pendant 3 secondes sur la touche
colorée de votre choix.La page est mémorisée.
‘ Renouvelez l’opération avec les autres touches colorées.
( À présent, dès que vous consultez le télétexte, vos
pages préférées apparaissent en couleur en bas de
l’écran. Pour retrouver les rubriques habituelles,
appuyez sur H.
Pour tout effacer, appuyez sur d pendant 5 secondes.
ı
TV
›
ù
VCR
¢
MODE
MENU
∫
Ÿ
Ó
TV / DVD
-
+ +
”
[
- -
%
∏
OK
12
564
879
Ø
0
.
SUBTITLEAUDIO
¤
SYSTEM MENU
Ë
SMARTSMART
ª
DVD
MENU
RADIO
3
Á
¤
0 9
P
-
+
P
Ë
›
Ó
Ÿ
MENU
Ë
Page 27
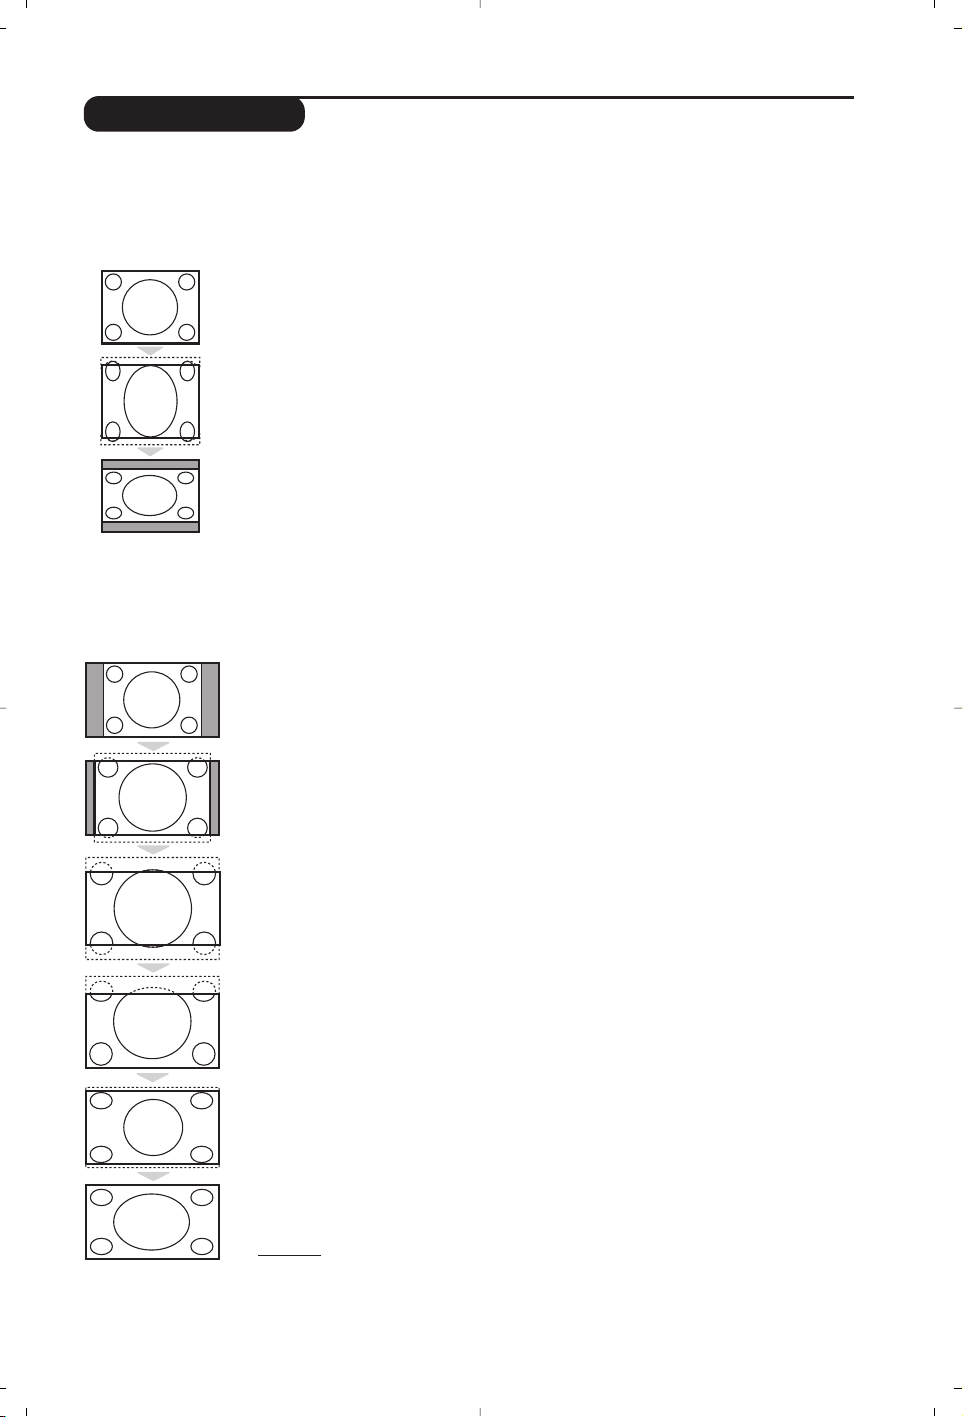
9
Formats 16:9
Les images que vous recevez peuvent être transmises au format 16:9 (écran large) ou 4:3 (écran
traditionnel). Les images 4:3 ont parfois une bande noire en haut et en bas (format cinémascope).
Cette fonction permet d’éliminer les bandes noires et d’optimiser l’affichage des images sur l’écran.
Si votre téléviseur est équippé d’un écran 4:3
Si votre téléviseur est équippé d’un écran 16:9
Appuyez sur la touche p pour sélectionner les différents modes :
Le téléviseur est équipé d’une commutation automatique qui décode le signal spécifique
émis par certains programmes et sélectionne automatiquement le bon format d’écran.
4:3
L’image est reproduite au format 4:3,une bande noire apparaît de chaque côté de
l’image.Vous pouvez agrandir progressivement l’image en utilisant les touches
îÏ
.
Zoom 14:9
L’image est agrandie au format 14:9, une petite bande noire subsiste de chaque côté
de l’image. Les touches
îÏ
permettent de comprimer l’image verticalement
pour faire apparaître le haut ou le bas de l’image (sous-titres).
Zoom 16:9
L’image est agrandie au format 16:9. Ce mode est recommandé pour visualiser les
images avec bande noire en haut et en bas (format cinémascope). Utilisez les touches
îÏ si vous voulez faire apparaître le haut ou le bas de l’image.
Sous-Titres
Ce mode permet de visualiser les images 4:3 sur toute la surface de l’écran en
laissant visibles les sous-titres. Utilisez les touches
îÏ
pour faire descendre ou
remonter le bas de l’image.
Super 4:3
Ce mode permet de visualiser les images 4:3 sur toute la surface de l’écran en
élargissant les côtés de l’image. Utilisez les touches
îÏ
pour compresser l’image
verticalement.
Plein Écran
Ce mode permet de restituer les bonnes proportions des images transmises en
16:9 en les affichant en plein écran.
Important : en lecture DVD, vous pouvez utiliser les touches îÏ uniquement pendant que
l’affichage du format est présent à l’écran (sinon vous accédez aux fonctions du DVD).
Appuyez sur la touche p pour sélectionner les différents modes :
4:3
L’image est reproduite au format 4:3
Extension 4:3
L’image est élargie verticalement.
Ce mode permet de supprimer les bandes noires
des images au format cinémascope.
Compress 16:9
L’image est comprimée verticalement au format 16:9.
Page 28

10
Utilisation du lecteur de DVD intégré
Mise en place d’un disque
Le lecteur de DVD intégré permet de lire les disques DVD vidéo ainsi que les CD vidéo, les CD
d’images (format jpeg) et les CD audio (y compris les CD-R, CD-RW finalisés et CD MP3).
Les disques sont reconnaissables par leur logo situé sur l’emballage.
Remar
que : Généralement, les films DVD ne sont pas mis sur le marché au même moment dans les diverses
régions du monde. De ce fait, les lecteurs DVD sont dotés de code de zones géographiques. Si vous insérez un
disque doté d’un code région différent de celui de votre lecteur, vous verrez apparaître un message sur
l’écran. Le disque ne pourra être lu et vous devrez le retirer.
& Ouverture du tiroir
Appuyez sur la touche EJECT (fl) située en
façade, à gauche du tiroir.
é Mise en place du disque
Positionnez le disque dans le tiroir, face
étiquette vers le dessus.
Assurez-vous qu’il est correctement en place
dans l’évidement prévu.
“ Fermeture du tiroir
Repoussez doucement le tiroir ou appuyez sur
la touche
EJECT (fl) située sur le côté pour
le refermer. La lecture du disque commence.
‘ Lecture automatique
A la fermeture du tiroir, la lecture commence
automatiquement. Une fenêtre d’état apparaît
à gauche de l’écran et indique l’opération en
cours, le type de disque et sa durée. Puis, le
contenu du disque est affiché.
PICTURE
Page 29

11
Lecture d’un DVD ou d’un CD vidéo
Lecture
Après que le disque ait été introduit et le tiroir refermé, la lecture
commence automatiquement.Vous pouvez sur certains disques être
invité à sélectionner une rubrique dans un menu. Utilisez selon le cas
les touches
09ou îÏ È¬ puis appuyez sur u.
Arrêt de la lecture
Appuyez sur la touche Ê pour arrêter la lecture du disque. L’écran par
défaut apparaît et donne des informations sur l’état du lecteur.
Reprise de la lecture (fonction “resume”)
Lorsque vous interrompez la lecture d’un disque (mise en veille ou
éjection du disque), il est possible de reprendre la lecture à l’endroit
exact ou vous l’avez arrêté. Il suffit d’appuyer sur la touche
Æ, puis
lorsque vous voyez apparaître l’indication
resume, d’appuyer à nouveau
sur
Æ (sinon la lecture redémarre au début du disque).
La fonction de reprise s’applique également aux 4 derniers disques lus.
Ralenti, avance et retour rapide
Pendant la lecture, appuyez sur la touche
Ï pour obtenir une
vitesse ralentie par 1/2, 1/4 ou 1/8.Appuyez sur la touche
È ou ¬
(ou ¢∫) pour obtenir une avance ou un retour rapide en vitesse
x4 ou x32.Appuyez sur
Æ pour revenir en vitesse normale.
Arrêt sur image
Appuyez sur
∆ (ou sur î) pour arrêter l’image.Appuyez de nouveau
sur
∆ pour passer à l’image suivante ou sur Æ pour revenir en lecture.
Chapitre suivant / précédent
Les disques DVD sont découpés en différents chapitres pour
permettre un accès direct à certaines scènes. Utilisez les touches
@P# pour accéder au chapitre précédent ou suivant.
Menu du disque DVD
Appuyez sur la touche
æ.Le menu du DVD apparaît. Son contenu est
fonction du DVD. Il permet d’accéder à différentes rubriques telles que
le choix du langage, l’accès direct à certaines scènes, des notes spéciales
de la production, des bandes annonces, ...Utilisez les touches
ȬîÏ pour sélectionner, u pour valider et æ pour quitter.
Menu du lecteur DVD
Appuyez sur la touche
d (SYSTEM MENU) pour appeler ou quitter
le menu du lecteur DVD (voir p. 13).
Langue de doublage
Appuyez sur la touche
e pour sélectionner les différentes langues
de doublage disponibles sur le disque. Le menu s’efface au bout de
quelques instants.
Langue de sous-titrage
Appuyez sur la touche
c pour choisir votre langue de sous-titrage
(choisissez
off pour le désactiver). Le menu s’efface au bout de quelques
instants.
Ejection du disque
Appuyez sur la touche
EJECT (fl) située en façade du téléviseur.
La lecture se fige, puis au bout de quelques secondes, le tiroir s’ouvre.
Choix du mode TV ou DVD
Appuyez sur la touche Æ de la télécommande pour commuter le
téléviseur en mode TV ou DVD.
ı
TV
ù
›
VCR
¢
∫
Ÿ
Ó
MODE
·
∆
Ê
TV / DVD
-
MENU
+ +
”
[
- -
%
∏
OK
12
564
879
Ø
0
.
SUBTITLEAUDIO
¤
SYSTEM MENU
Ë
Æ
SMARTSMART
ª
DVD
MENU
RADIO
3
Á
P
Page 30

12
Lecture d’un CD audio
Lecture d’un CD d’images
Lecture
Après que le disque ait été introduit
et le tiroir refermé,
la lecture
commence automatiquement. Un menu spécial s’affiche à l’écran et indique
le nombre de titres,le morceau et le temps courant.
Passage à un autre titre
Utilisez les touches
@ P # de la télécommande pour changer de
titre ou les touches
09 pour sélectionner le morceau de votre
choix.
Avance et retour rapide
Appuyez sur la touche
¢ ou ∫
pour obtenir une avance ou un
retour rapide en vitesse x4 ou x8. Appuyez sur
Æ pour revenir en
vitesse normale.
Pause / arrêt / éjection
Appuyez sur
∆ pour mettre sur pause et sur Æ pour reprendre la
lecture.Appuyez sur
Ê pour arrêter et sur la touche EJECT (fl)
situé en façade du téléviseur, pour éjecter le disque.
Programmation de la lecture
Cette fonction permet de programmer la lecture en mémorisant vos
morceaux préférés (voir page 14).
Lecture d’un CD audio MP3
Les CD MP3 permettent de stocker plusieurs albums sur un même
disque. Utilisez les touches
îÏ pour sélectionner les albums.
Appuyez sur
¬ pour accéder à la liste des différents morceaux.
Utilisez les touches
îÏ
ou
09
pour sélectionner les morceaux.
Utilisez la touche
È
pour revenir à la liste de sélection des albums.
Lecture et prévisualisation
Après l’introduction du disque,la lecture commence automatiquement.
Une prévisualisation des 4 premières images apparaît.Utilisez les touches
@ P #
pour passer à la page précédente ou suivante. Utilisez le curseur
îÏȬ pour sélectionner l’image désirée et appuyez sur u
pour l’afficher en plein écran.Appuyez sur la touche æ pour revenir à
la prévisualisation des images.
Diaporama
Appuyez sur la touche Æ pour démarrer le diaporama. Les images du
disque se succèdent automatiquement. Pour arrêter le diaporama,
appuyez sur
Ê.Pour modifier la durée d’affichage des images, voir le
menu
Barre outils (p.14).
Sélection directe d’une image ou d’un répertoire
Utilisez les touches
@ P #
pour passer à l’image précédente ou suivante
Les touches
09
permettent une sélection directe par le numéro d’image.
La liste des images s’affiche à l’écran. Utilisez les touches
îÏ
pour
naviguer dans la liste. Si votre disque comporte plusieurs répertoires, utilisez
la touche
È
pour remonter dans la liste de sélection des répertoires.
Sélectionnez le répertoire avec les touches
îÏ
puis appuyez sur
¬
pour revenir à la sélection des images.
Format d’image
La touche
p permet de modifier le format de l’image (voir p.9).
Image
1
2
3
4
.
ı
TV
VCR
MODE
·
-
MENU
SUBTITLEAUDIO
›
¤
ù
¢
∫
SYSTEM MENU
Ÿ
Ë
Ó
∆
Ê
Æ
SMARTSMART
TV / DVD
ª
DVD
MENU
++
”
--
%
∏
OK
12
Ø
P
[
RADIO
3
564
879
0
Á
Page 31

13
Menu Barre d’outils
Ce menu permet d’accéder à toutes les
fonctions de lecture du DVD.
Appuyez sur la touche
d (SYSTEM MENU)
Le menu
Barre d’outils s’affiche. Utilisez les
touches
Ȭ
pour sélectionner les
différents sous-menus :
Option Lecture
•
Navig. disque; pour accèder aux différentes
plages des CD audio et CD d’images.
•
Audio; pour sélectionner la langue de
doublage de la bande son des films DVD.
Vous obtenez un accès direct avec la touche
e.
•
Sous-titre; pour sélectionner
l
a langue d
e
sous-titrage
des films DVD.
Vous obtenez un accès direct avec la touche
c .
Diaporama
Ce menu permet de régler le diaporama des
CD d’images.
•
Durée image; pour ajuster le temps
d’affichage des images.
Visualiser
•
Angle; certains DVD comportent des
séquences enregistrés à partir de plusieurs
angles de caméra. Généralement une
indication spéciale apparaît. Utilisez les
touches
Ȭ pour sélectionner l’angle
souhaité.
•
Zoom;appuyez sur u pour activer le zoom
en coefficient 2 ou 4 puis revenir à l’échelle 1.
Utilisez les touches
ȬîÏ pour
vous déplacer dans l’image agrandie.
•
Prév. chapitre;pour activer ou désactiver la
prévisualisation des chapitres DVD.
•
Rotation; pour modifier l’orientation des
images pour les CD d’images.
Recherche
•
Durée; utilisez les touches 09 pour
sélectionner le moment exact de la séquence
souhaitée.Appuyez sur
u pour valider. La
lecture reprend au temps indiqué.
•
Accéléré;
utilisez les touches Ȭ pour
choisir la vitesse désirée.
• Ralenti;
utilisez les touches Ȭ pour
régler la vitesse de ralenti. Pour reprendre la
vitesse normale, appuyez sur
Æ.
• Image par image; utilisez les touches È ou
¬ pour obtenir un défilement image par
image avant ou arrière.Appuyez sur
Æ pour
reprendre la lecture normale.
Programme :
Pour programmer la lecture de vos morceaux
préférés, voir page 15.
Opt. Lecture Slide Show Visualiser
Barre d’outils
Préférences
Installation
Menu du lecteur DVD
Ce menu permet d’accéder à toutes les
fonctions particulières du lecteur de DVD.
Appuyez sur la touche
d (SYSTEM MENU).
Le menu s’affiche à l’écran. Utilisez les touches
ȬîÏ pour naviguer dans les
différents menus et régler.Appuyez de nouveau
sur
d (SYSTEM MENU) pour quitter.
Le texte est grisé lorsque la fonction n’est pas
disponible sur le disque en cours de lecture.
Lecture Slide Show Visualiser
Barre d’outils
Préférences
Installation
Page 32

14
Menu Préférences
Menu Installation
Ce menu permet de régler les préférences du
lecteur DVD.
Appuyez sur la touche
d (SYSTEM MENU)
pour afficher le menu du lecteur DVD.
Appuyez sur la touche
Ï pour sélectionner
Préférences et utilisez les touches
Ȭ
pour sélectionner les différents sous-menus :
Son :
•
Mode nuit; optimise la dynamique du son
pour une écoute à faible volume.
Fonctions :
• Assistance; pour afficher/effacer en bas de
l’écran une zone d’explication des réglages du
menu.
•
Fenêtre d’état; pour désactiver l’affichage de
la fenêtre d’état du lecteur.
Pour quitter le menu :
appuyez sur
d.
Ce menu permet d’effectuer les réglages par
défaut du lecteur DVD.
Appuyez sur la touche
d (SYSTEM MENU)
pour afficher le menu du lecteur DVD.Appuyez
2 fois sur
Ï pour sélectionner Installation et
utilisez les touches
Ȭ
pour sélectionner
les différents sous-menus :
Langue (disponible uniquement sur certaines versions) :
•
Langue doublage; pour définir la langue
préférentielle de la bande son des films DVD.
•
Langue sous-titrage; pour définir la langue
préférentielle pour les sous-titrages des films
DVD.
Si la langue préférentielle est disponible sur le
disque, elle sera sélectionnée par défaut. Sinon, la
première langue du disque sera activée.
TV :
• Système TV ; permet de choisir Auto
(détection automatique du standard de lecture)
ou standard
Pal
ou
NTSC
.
Menu audio :
• Sortie numérique ; permet de choisir :
toutes, PCM ou inactive.
Fonction :
• PBC ; pour activer/désactiver la fonction de
chapitrage disponible sur certains CD vidéo.
Accès :
voir page suivante
Pour quitter le menu :
appuyez sur
d.
Langue TV Menu audio
Installation
Installation
Préférences
Son Fonctions
Page 33

15
Contrôle d’accès et verrouillage
Programmation de lecture
Cette fonction permet de programmer la
lecture en mémorisant vos morceaux préférés.
& Appuyez sur
d (SYSTEM MENU) pour
afficher la
Barre outils.Avec la touche
¬
sélectionnez Programme et appuyez sur Ï
pour afficher le menu :
é Utilisez la touche
Ï pour sélectionner
Plages et appuyez sur ¬.
“ Utilisez les touches
îÏ ou 09 pour
choisir le numéro de titre et validez avec ¬.
‘
Sélectionnez de la même façon le chapitre désiré.
( Appuyez sur u pour le sélectionner.
§ Recommencez les opérations “ à ( autant
de fois qu’il y a de titres ou chapitres préférés
à sélectionner (au maximum 20 par disque).
Vous pouvez, si vous le souhaitez, répéter plusieurs
fois le même numéro.
è Appuyez sur
d pour quitter. La lecture des
plages préférées commence automatiquement.
Pour arrêter la lecture des plages préférées
Positionnez la ligne Programme sur Désactivé.
Pour consulter et modifier la liste
Sélectionnez
Liste programme et appuyer
sur
¬. La liste des plages préférées apparaît.
Pour effacer un titre, sélectionnez son numéro
avec les touches
îÏ et appuyez sur u.
Pour tout effacer
Sélectionnez
Effacer tout et appuyez sur ¬.
Pour quitter le menu :
appuyez sur
d.
Cette fonction permet d’accéder à différents
niveaux de verrouillage du lecteur.
& Appuyez sur
d. Utilisez la touche Ï pour
sélectionnez
Installation puis avec la touche
¬, sélectionnez Accès.
é Entrez le code d’accès de votre choix.
Vous devez le saisir une deuxième fois pour
confirmer.
“
Niveau parental : pour activer le niveau de
verrouillage de 0 (désactivé) à 8 (maximal).
Certains disques DVD comportent des niveaux de
verrouillages (1 à 8) avec parfois des scènes de
substitutions. Par exemple, si vous choisissez le
niveau 4, toutes les scènes de niveau 4 (et
inférieures) seront lues. Les scènes de niveau
supérieur ne seront pas lues ou remplacées par
des scènes de substitution. Si aucune scène de
substitution n’est prévus sur le disque, la lecture
s’arrête et vous devez entrer le code à 4 chiffres.
‘
Modifier le code; pour modifier le code
d’accès.Vous devez le saisir une deuxième fois
pour confirmer.
Si vous avez oublié votre code confidentiel, appuyez
4 fois sur la touche
Ê.
(
Verrouillage Disque : permet d’activer le
verrouillage des disques DVD et CD vidéo.
Lorsque vous insérez un disque dans le lecteur,
une zone de dialogue apparaît.Vous devez
entrer votre code secret :
- soit pour une
Lecture unique (le disque
pourra être lue tant qu’il n’est pas retiré du
lecteur et que le téléviseur reste en marche),
- soit pour une
Lecture toujours (lecture
autorisée en permanence).
Le lecteur peut mémoriser jusqu’à 50 disques.
Lorsque la liste est pleine et qu’un nouveau disque
est ajouté, le dernier disque de la liste est retiré.
Les disques DVD double face (ainsi que les CD
vidéo à plusieurs volumes) peuvent comporter un
code d’identification différent pour chaque face
(volume). Il faudra donc autoriser séparément
chaque face (volume).
§ Appuyez sur
d pour quitter.
Suppression de l’autorisation de lecture
• Insérez le disque dans le lecteur. La lecture
commence automatiquement.
• Lorsque le symbole
u apparaît, appuyez sur
Ê. Le symbole v s’affiche, l’autorisation de
lecture est supprimée pour ce disque.
Programme
Liste musicale
Barre d’outils
Préférences
Plage
Effacer tout
Titre
3
1
2
Verr.Disque
Installation
Modifiez le code
Niveau parental
Tapez code en v
****
Accès
Page 34

16
Raccordements
Effectuez les raccordements ci-contre.
Utilisez un cordon de liaison péritel de bonne qualité.
Si votre magnétoscope ne possède pas de prise péritel, seule la
liaison par le câble antenne est possible.Vous devez accorder le
programme numéro 0 du téléviseur sur le signal de test du
magnétoscope (voir mémo. manuelle p. 5). Ensuite pour
reproduire l’image du magnétoscope, appuyez sur
0.
Magnétoscope avec Décodeur
Connectez le décodeur sur la deuxième prise péritel du
magnétoscope.Vous pourrez ainsi enregistrer les émissions
cryptées.
Selon les versions, le téléviseur est équipé de 1 ou 2 prises péritel EXT1 et EXT2 situées à l’arrière.
La prise EXT1 possède les entrées/sorties audio vidéo et les entrées RVB.
La prise EXT2 (si disponible) possède les entrées/sorties audio vidéo et les entrées S-VHS.
Magnétoscope
Récepteur satellite, décodeur, DVD, jeux,...
Effectuez les raccordements ci-contre.Pour les téléviseurs
équipés de 2 prises péritel, connectez de préférence à EXT1
les équipements délivrant les signaux RVB (décodeur
numérique, lecteurs DVD,jeux, ...) et à EXT2 les équipements
délivrant les signaux S-VHS (magnétoscopes S-VHS et Hi-8, ...).
Pour le raccordement à une chaîne Hi-fi,utilisez un cordon
de liaison audio et connectez les sorties “L” et “R” du
téléviseur (disponible uniquement sur certaines versions) à une
entrée “AUDIO IN” “L” et “R” de la chaîne Hi-fi.
Utilisez un cordon de liaison audio numérique et
connectez la sortie “DIGITAL AUDIO OUT” du téléviseur
à une entrée “DIG IN” de l’amplificateur (amplificateur
avec entrée numérique coaxiale).
Autres appareils
Amplificateur
564
879
0
Á
Ø
Pour sélectionner les appareils connectés
Appuyez sur la touche npour sélectionner EXT1 et sur les versions à
2 prises péritel :
EXT2 et S-VHS2 (signaux S-VHS de la prise EXT2) et
AV pour les connections latérales (si disponible).
La plupart des appareils réalisent eux-mêmes la commutation (décodeur,
magnétoscope).
VCR
Page 35

17
Effectuez les raccordements ci-contre.
Avec la touche
n
, sélectionner AV.
Pour un appareil monophonique, connectez le signal son
sur l’entrée AUDIO L. Utilisez la touche e pour
reproduire le son sur les haut-parleurs gauche et droit du
téléviseur.
Casque
Lorsque le casque est connecté, le son du téléviseur
est coupé. Les touches
@ ” # permettent de
régler le volume.
L'impédance du casque doit être comprise entre 32 et
600 ohms.
Connexions latérales
Touche magnétoscope
La télécommande vous permet de piloter les fonctions principales du magnétoscope.
Appuyez sur la touche MODE pour sélectionner le mode désiré : VCR
(magnétoscope) ou TV. Le voyant de la télécommande s’allume pour
montrer le mode sélectionné. Il s’éteint automatiquement après
20 secondes sans action (retour au mode TV). En fonction de
l’équipement, les touches suivantes sont opérationnelles :
b veille,
· enregistrement,
¢ retour rapide,
∫ avance rapide,
∆ pause,
Ê stop,
Æ lecture,
% timer magnétoscope,
H appel menu,
curseur navigation et réglages,
u validation,
09 touches numériques,
@
P# sélection des programmes,
◊ fonction index
Certaines fonctions ne sont pas disponibles sur tous les magnétoscopes.
La télécommande est compatible avec tous les magnétoscopes utilisant le
standard RC5.
ı
TV
›
ù
VCR
¢
∫
Ÿ
MODE
Ó
∆
Ê
·
TV / DVD
-
MENU
+ +
”
[
- -
%
∏
OK
12
564
879
Ø
0
.
SUBTITLEAUDIO
¤
SYSTEM MENU
Ë
Æ
SMARTSMART
ª
DVD
MENU
RADIO
3
Á
P
Page 36

18
Conseils
Glossaire
Mauvaise réception
La proximité de montagnes ou de hauts
immeubles peut être la cause d'image
dédoublée, d'écho ou d'ombres. Dans ce cas,
essayez d’ajuster manuellement l’accord de
l’image: voir
Ajust. Fin (p. 5) ou modifiez
l'orientation de l'antenne extérieure.
Vérifiez également que votre antenne permet
de recevoir les émissions dans cette bande de
fréquences (bande UHF ou VHF) ?
En cas de réception difficile (image neigeuse),
positionnez le réglage
Reduct. Bruit du menu
Options sur Marche (p. 6).
Absence d'image
Si le téléviseur ne s’allume pas, appuyez 2 fois
sur la touche b située sur la télécommande.
Avez-vous bien branché l'antenne ?
Avez-vous choisi le bon système ? (p.5)
Le contraste ou la lumière est déréglé ?
Appuyez sur la touche
≈ et reprenez les
réglages du menu
Image.
Une prise péritel ou une prise d'antenne mal
connectée est souvent la cause de problèmes
d'image ou de son (il arrive que les prises se
déconnectent légèrement lorsque l'on déplace
ou que l'on tourne le téléviseur).Vérifiez
toutes les connexions.
L’équipement périphérique délivre une
image en noir et blanc
Pour la lecture d’une cassette vidéo, vérifiez
qu’elle est enregistré au même standard (PAL,
SECAM, NTSC) que ce que peut lire le
magnétoscope.
Absence de son
Si certains programmes sont dépourvus de son,
mais pas d’image, c’est que vous n’avez pas le bon
système TV. Modifiez le réglage
Système (p. 5).
Télétexte
Certains caractères ne s’affichent pas
correctement ? Vérifiez que le réglage du
pays est correctement positionné (p. 5).
Le lecteur de DVD ne fonctionne plus ?
Vérifiez que le disque ne comporte pas de
traces de doigts. Nettoyez le avec un chiffon
doux en partant du centre vers l’extérieur.
La télécommande ne fonctionne plus ?
Le voyant du téléviseur ne clignote plus
lorsque vous utilisez la télécommande ?
Remplacez les piles.
Veille
Lorsque vous allumez le téléviseur, il reste en
veille et l’indication
Verrouillé s'affiche dès
que vous utilisez les touches du téléviseur ?
La fonction
Verrou enfant est en service (p.7).
Si le téléviseur ne reçoit pas de signal pendant
15 mn, il passe automatiquement en veille.
Pour faire des économies d’énergie, votre
téléviseur est équipé de composants
permettant une très faible consommation en
veille (inférieure à 3 W).
Toujours pas de résultats ?
En cas de panne, n’essayez jamais de réparer
vous même le téléviseur, mais consultez le
service après vente.
Nettoyage du téléviseur
Le nettoyage de l’écran et du coffret doit être
effectué uniquement avec un chiffon propre,
doux et non pelucheux. Ne pas utiliser de
produit à base d’alcool ou de solvant.
Signaux RVB:
Il s’agit de 3 signaux vidéo Rouge,Vert, Bleu qui viennent directement piloter les
3 canons rouge, vert , bleu du tube cathodique. L’utilisation de ces signaux permet d’obtenir une
meilleure qualité d’image.
Son NICAM:
Procédé permettant de transmettre le son en qualité numérique.
Système:
La transmission des images n’est pas faite de la même façon dans tous les pays.Il existe
différentes normes : BG, DK, I, et L L’. Le réglage
Système (p. 5) permet de sélectionner ces différentes
normes. Ne pas confondre avec le codage couleur PAL ou SECAM. Le Pal est utilisé dans la plupart
des pays d’Europe,le Secam en France, en Russie et dans la plupart des pays d’Afrique.
Les États Unis et le Japon utilisent un autre système appelé NTSC.
16:9:
Désigne les proportions largeur / hauteur de l’écran. Les téléviseurs à écran large ont des
proportions 16/9 et les écrans traditionnels: 4/3.
Page 37

1
Bevezetés
Ta r talomjegyzék
Új televíziót vásárolt.Köszönjük a márkánk iránti bizalmát.
Kérjük,a készülék által nyújtott szolgáltatások megismerése érdekében
figyelmesen olvassa el a használati útmutatót.
Üzembehelyezés
A televízió üzembe helyezése . . . . . . . . . . . . . . . . . . . . . . . . . . . . . . . . . . . . . . . . .2
A televízió nyomógombjai . . . . . . . . . . . . . . . . . . . . . . . . . . . . . . . . . . . . . . . . . . .2
A távirányító gombjai . . . . . . . . . . . . . . . . . . . . . . . . . . . . . . . . . . . . . . . . . . . . . . .3
Gyors indítás . . . . . . . . . . . . . . . . . . . . . . . . . . . . . . . . . . . . . . . . . . . . . . . . . . . . . .4
Programok osztályozása . . . . . . . . . . . . . . . . . . . . . . . . . . . . . . . . . . . . . . . . . . . . .4
Programnév . . . . . . . . . . . . . . . . . . . . . . . . . . . . . . . . . . . . . . . . . . . . . . . . . . . . . . .4
Kézi tárolás . . . . . . . . . . . . . . . . . . . . . . . . . . . . . . . . . . . . . . . . . . . . . . . . . . . . . . .5
Egyéb szabályozások az Indítás menüpontban . . . . . . . . . . . . . . . . . . . . . . . . . . . .5
Használat
A rádió használata . . . . . . . . . . . . . . . . . . . . . . . . . . . . . . . . . . . . . . . . . . . . . . . . . .5
Képbeállítás . . . . . . . . . . . . . . . . . . . . . . . . . . . . . . . . . . . . . . . . . . . . . . . . . . . . . . .6
Hangbeállítás . . . . . . . . . . . . . . . . . . . . . . . . . . . . . . . . . . . . . . . . . . . . . . . . . . . . . .6
Az funkciók beállítása . . . . . . . . . . . . . . . . . . . . . . . . . . . . . . . . . . . . . . . . . . . . . . .6
Ébresztés funkció . . . . . . . . . . . . . . . . . . . . . . . . . . . . . . . . . . . . . . . . . . . . . . . . . .7
Té v ézár . . . . . . . . . . . . . . . . . . . . . . . . . . . . . . . . . . . . . . . . . . . . . . . . . . . . . . . . . .7
Teletext . . . . . . . . . . . . . . . . . . . . . . . . . . . . . . . . . . . . . . . . . . . . . . . . . . . . . . . . . .8
16/9-es formátum . . . . . . . . . . . . . . . . . . . . . . . . . . . . . . . . . . . . . . . . . . . . . . . . . .9
Beépített DVD-lejátszó használata
A lemez behelyezése . . . . . . . . . . . . . . . . . . . . . . . . . . . . . . . . . . . . . . . . . . . . . . .10
DVD- vagy video-CD lejátszása . . . . . . . . . . . . . . . . . . . . . . . . . . . . . . . . . . . . . .11
Audio-CD lejátszása . . . . . . . . . . . . . . . . . . . . . . . . . . . . . . . . . . . . . . . . . . . . . . .12
Képanyagot tartalmazó CD lejátszása . . . . . . . . . . . . . . . . . . . . . . . . . . . . . . . . .12
A DVD-lejátszó menüje . . . . . . . . . . . . . . . . . . . . . . . . . . . . . . . . . . . . . . . . . . . .13
Eszközsor menü . . . . . . . . . . . . . . . . . . . . . . . . . . . . . . . . . . . . . . . . . . . . . . . . . .13
Beállítások menü . . . . . . . . . . . . . . . . . . . . . . . . . . . . . . . . . . . . . . . . . . . . . . . . . .14
Beállítás menü . . . . . . . . . . . . . . . . . . . . . . . . . . . . . . . . . . . . . . . . . . . . . . . . . . . .14
A lejátszás programozása . . . . . . . . . . . . . . . . . . . . . . . . . . . . . . . . . . . . . . . . . . .15
Csatlakozások
Képmagnó . . . . . . . . . . . . . . . . . . . . . . . . . . . . . . . . . . . . . . . . . . . . . . . . . . . . . . .16
Más készülékek . . . . . . . . . . . . . . . . . . . . . . . . . . . . . . . . . . . . . . . . . . . . . . . . . . .16
A csatlakoztatott készülékek kiválasztása . . . . . . . . . . . . . . . . . . . . . . . . . . . . . . .16
A videomagnó gombjai . . . . . . . . . . . . . . . . . . . . . . . . . . . . . . . . . . . . . . . . . . . . .17
Hasznos tudnivalók
Tanácsok . . . . . . . . . . . . . . . . . . . . . . . . . . . . . . . . . . . . . . . . . . . . . . . . . . . . . . . .12
Szószedet . . . . . . . . . . . . . . . . . . . . . . . . . . . . . . . . . . . . . . . . . . . . . . . . . . . . . . .12
°
Újrafelhasználási irányelv
A televízió újrafelhasználható anyagokat tartalmaz,melyek újra feldolgozhatók.
A környezeti ártalmak minimumra csökkentése érdekében erre szakosodott
vállalatok összegyűjtik a használt készülékeket,szétszerelik őket és összegyűjtik
belőlük az újra felhasználható anyagokat (kérjen információt a kereskedőtől).
Magyar
Page 38

A televízió 4 nyomógombbal van felszerelve,
amelyek a modelltől függően vagy a készülék
elején, vagy annak tetején találhatók.
A VOLUME + - (-
” +) nyomógombok a
hangerő szabályozására szolgálnak.
A PROGRAM + - (- P +) nyomógombok a
programok kiválasztását teszik lehetővé.A menük
lehívásához tartsa nyomva a
”- és a ” +
gombokat.Ezt követően,a PROGRAM + nyomógombokkal kiválaszthatja a szabályozni kívánt
funkciót és a
”- + gombokkal elvégezheti a
beállítást.A menükből való kilépéshez tartsa
nyomva a
”- és a ” + gombokat.
Megjegyzés : Amikor a GYERMEKZÁR működésben
van, a nyomógombok nem működnek (7. oldal).
PROGRAMVOLUME
--
++
2
&
A televízió elhelyezése
Helyezzük a televíziót szilárd és stabil felületre
oly módon, hogy a készülék körül legalább 5 cm
szabad hely maradjon.A veszélyes helyzetek
elkerülése érdekében semmit se tegyünk rá,ami
lefedné azt (terítő), amiben folyadék van (váza)
vagy hőt bocsát ki (lámpa). Ezen kívül a
televízióra nem szabad vízsugarat irányítani.
é
Csatlakozások
• Illesszük be az antennadugót a készülék
hátoldalán található : csatlakozóba.
•
Dugja be a rádióantenna csatlakozódugóját az
FM ANT csatlakozóaljba a mellékelt adapterrel.
Belső antennával a vétel bizonyos körülmények
között nehéz lehet. Ezen a problémán az antenna
elforgatásával segíthet. Ha a vétel továbbra is
rossz marad, akkor külső antennát kell használni.
• Csatlakoztassuk a hálózati zsinórt a hálózatba
(220-240 V / 50 Hz).
“
A távirányító
Helyezzük be a mellékelt 2 db R6 típusú elemet
a + és – jeleknek megfelelően. Ellenőrizzük, hogy
az üzemmódválasztó TV állásban van-e.
A készülékkel szállított elemek nem tartalmaznak
sem higanyt, sem nikkel-kadmiumot a környezet
védelme érdekében. Ne dobjuk el a lemerült
elemeket, hanem vegyük igénybe a
rendelkezésünkre bocsátott újrafelhasználási
eszközöket (kérdezzük meg az eladót). Ha ki kell
cserélni, azonos típusú elemeket használjunk.
‘
Bekapcsolás
A televízió bekapcsolásához nyomjuk meg a
ki- bekapcsolás gombot. Kigyullad egy piros
fényjelző és a képernyő kivilágosodik.
Lapozzunk közvetlenül a következő oldalon
található gyors üzembe helyezési részhez.
Ha a televízió továbbra is készenléti állapotban
van, nyomjuk meg a távirányítón a P
# gombot.
A távirányító használata közben a fényjelző villog.
5 cm
5 cm
5 cm
A televízió üzembe helyezése
A televízió nyomógombjai
FM.
ANT.
Page 39

3
A távirányító gombjai
DVD:dabovací jazyk (str.11)
TV: režim zvuku
Umožňuje přepnout pořady vysílan
é ve Stereo a Nicam Stereo do
Mono nebo, u dvojjazyčných pořadů,
volit mezi Dual I nebo Dual II.
Átalakított adás esetén a Mono
kijelzése piros.
Seznam stanic (str.5)
Přepínač režimů (str.17)
DVD gombok (11.o.)
Videomagnó gombok (17. o.) és
Teletext gombok (8. o.).
A hang alapbeállítása
Egy egész sor alapbeállítást lehetővé
tesz: Beszéd, Zene,Színház és
visszatérés a Személyes-hez.
Menü
A menük megjelenítéséhez vagy
az onnan történő kilépéshez.
Hangerő
A hangerőszint beállításához
Kurzor
Ez a 4 gomb lehetővé teszi a
menüpontok közötti keresést.
Számjegy gombok
Közvetlen hozzáférés a
programokhoz. Kétszámjegyű
programok esetén a második
számjegyet addig kell megnyomni,
amíg a kötőjel el nem tűnik.
EXT csatlakoztatás kiválasztása
Az EXT1 és AV csatlakozóaljak
kiválasztásához nyomja meg
többször ezt a gombot (16. o.).
Készenléti üzemmód
Lehetővé teszi a tévékészülék
készenléti üzemmódba történő
átkapcsolását. Bekapcsoláskor
nyomja meg a P @#, b,0 - 9.
DVD:jazyk titulků (str.11)
TV:Teletext megjelenítés (8. o.)
DVD:menu OSD (str.13)
TV: Képernyő kijelzések /
folyamatosan látható n°
A program számának,nevének
(ha van neve),időpontjának,
hangmódjának és az elalváskapcsoló
szerint hátralevő idő megjelenítése
vagy eltüntetése.A programszám
folyamatos kijelzésének aktiválásához
tartsa benyomva 5 másodpercig.
TV/DVD üzemmód
Té vé vagy DVD üzemmódba
történő átkapcsoláshoz (11. o.).
Kép alapbeállítás
Különféle alapbeállításokat tesz
lehetővé: Intenzív, Természetes,
Lágy, Multimédia és visszatérés a
Személyes-hez.
Némító gomb
A hang ki- és visszakapcsolásához.
Potvrzení (DVD/VCR)
Képernyőformátumok 16:9 (9.o.)
Programok kiválasztása
Átkapcsolás az előző vagy a
következő programra.
Egyes programoknál az adás címe
megjelenik a képernyő alján.
Surround háttérhanghatás
Háttérhanghatás aktiválásához és
kikapcsolásához. Sztereó
lejátszásnál a hangfalak távolsága
nagyobbnak tűnik.A Virtual Dolby
Surround *-dal felszerelt
változatoknál a Dolby Surround Pro
Logic háttérhanghatást eredményez.
Mono lejátszásnál sztereóhoz
hasonló térhatást eredményez.
Předchozí program
Pro přepnutí na dříve zobrazený
program.
Menu DVD (str.11)
RÁDIÓ/TV üzemmód
Rádió vagy Tévé üzemmódba
történő átkapcsoláshoz (5. o.).
* A “Dolby”és a dupla D szimbólum a Dolby Laboratories márkanevei
A Dolby Laboratories engedélyével gyártva.
.
ı
TV
VCR
¢
MODE
Ó›ŸË
·
-
TV / DVD
MENU
SUBTITLEAUDIO
ù
SYSTEM MENU
∫
Ê∆ Æ
SMARTSMART
ª
MENU
¤
DVD
++
”
OK
[
--
%
∏
12
564
879
Ø
0
P
RADIO
3
Á
Page 40

4
Gyors indítás
Programok osztályozása
Programnév
A tévékészülék első bekapcsolásakor egy
menü jelenik meg a képernyőn. Ez a menü arra
szólítja Önt fel, hogy válassza ki a megfelelő
országot és nyelvet :
Ha a menü nem jelenik meg, tartsa benyomva
5 másodpercig a tévékészülék
”- és ”+
gombjait a megjelenítéséhez.
& A távirányító
îÏ gombjai segítségével
válassza ki az ön országát, majd nyomja meg az
¬ gombot.
Ha az Ön országa nem szerepel a listán, akkor
jelölje ki a “. . .” választást.
é
Ezután válassza ki az Ön nyelvét a îÏ gombok
segítségével,majd nyomja meg az
¬ gombot.
“ A keresés automatikusan elindul.Minden
hozzáférhető tévé- és rádióállomás a
memóriában van.A művelet néhány percig tart.
A kijelzés mutatja a keresés folyamatát és a
megtalált programok számát.A keresés
befejezésekor a kijelzés eltűnik.
Ha ki akar lépni vagy meg akarja szakítani a
keresést, nyomja meg a
H gombot. Ha egy
programot sem talált, olvassa el a 18. oldalon
található tanácsokat.
‘ Ha a tévéállomás vagy a kábelhálózat
továbbítja az automatikus besorolást,akkor a
programok számozása helyes lesz.Ekkor
befejeződik a beállítás.
( Ellenkező esetben,a
Fajta menüpont
segítségével újra kell a programokat számozni.
Egyes tévéállomások vagy kábelhálózatok a saját
osztályozási paramétereiket használják (régió,
nyelv...). Ebben az esetben a
îÏ gombok
segítségével választhatja ki a programokat,majd a
¬ gomb segítségével tárolhatja választását.
& Nyomja meg a H gombot. Ekkor a Főmenü
megjelenik a képernyőn.
é A kurzor segítségével válassza ki a
Indítás majd
a
Fajta menüpontot.
“ Válassza ki az átvinni kívánt programot a
îÏ gombok segítségével, majd tárolja a
¬ gomb megnyomásával.
‘ Ezután a
îÏ gombok segítségével válassza
ki az új programszámot, majd tárolja a
È
megnyomásával.
( A “ és ‘ műveletet annyiszor ismételje meg,
ahány programot újra akar számozni.
§ Ha ki akar lépni a menüből,nyomja meg a
d-t.
A programoknak és külső csatlakozásoknak
nevet is adhat.
Me
gjegyzés: beállításkor,az azonosítójel vételekor,
a programok automatikusan nevet kapnak.
& Nyomja meg a
H gombot.
é A kurzor segítségével jelölje ki először az
Indítás, majd a Névadás menüpontokat.
“ Az elnevezendő vagy módosítandó program
kiválasztásához használja a
îÏ gombokat.
‘ A kijelzett név mezejébe (5 leütés) való
belépéshez használja a
Ȭ,a karakterek
kiválasztásához pedig a
îÏ gombokat.
( A név beírása után a
È gomb
megnyomásával léphet ki.A név tárolva van.
§ A “ és ( műveletet annyiszor ismételje meg,
ahány programot akar elnevezni.
è Kilépéshez nyomja meg a
d gombot.
Select Country
Country
DK
E
F
FI
Æ GB
Language
Español
Svenska
English
Dansk
Nederlands
Fõ Menūe
• Kép
• Hang
• Funkciók
$ Indítás
Indítás
• Nyelv
• Ország
• Aut.Tárol.
• Kézi Tárol.
• Fajta
• Névadás
00
01 TF1
02 FR2
03ÆFR3
04 C +
05 ARTE
Page 41

5
Kézi tárolás
Egyéb szabályozások az Indítás menüpontban
Ez a menüpont lehetővé teszi a programhelyek
egyenként történő bevitelét a memóriába.
& Nyomja meg a
H gombot.
é A kurzor segítségével jelölje ki az
Indítás majd a
Kézi Tárol. menüpontokat:
“
Rendszer: jelölje ki (automata kereséssel*) Európát
vagy Nyugat-Európát (BG szabvány), Kelet-Európát
(DK szabvány),az Egyesült Királyságot (I szabvány)
vagy
Franciaországot (LL’ szabvány).
* Franciaországot kivéve (LL’szabvány), ahol a keresés
kizárólag
Franciaország kiválasztásával történik.
‘
Keresés: Nyomja meg a ¬ gombot.A keresés
elkezdődik.Minden egyes program megtalálásakor
a keresés leáll és megjelenik a program neve (ha
van ilyen).Folytassa a keresést.Ha ismeri a kívánt
műsor frekvenciáját,akkor üsse be közvetlenül a
számát a
0 és 9 gombok segítségével.
Ha egyetlen programot sem talál, akkor olvassa el
a18. oldalon található tanácsokat.
(
Prog.Szám: üsse be a kívánt számot a Ȭ
vagy 0 - 9 gombok segítségével .
§
Finomállítás: ha a vétel nem megfelelő,
szabályozza be a
Ȭ gombok segítségével.
è
Tá r olás: nyomja be a ¬ gombot.A program
tárolása megtörtént.
! A ‘ és è műveletet annyiszor ismételje meg,
ahány programot be akar vinni a memóriába.
Kilépéshez: nyomja meg a d gombot.
& Nyomja meg a H gombot és jelölje ki az
Indítás menüpontot:
é
Nyelv: ha meg akarja változtatni a menükijelzés
nyelvét.
“
Ország: ha ki akarja választani az Ön országát.
Ennek a szabályozásnak a keresésben, a programok
automatikus osztályozásában és a teletext
kijelzésében van szerepe. Ha az Ön országa nem
szerepel a listán, akkor jelölje ki a “. . .” választást.
‘
Aut.Tárol.: az Ön körzetében fogható
programhelyek automatikus keresése. Ha a
tévéállomás vagy a kábelhálózat továbbítja az
automatikus besorolást, akkor a programok
számozása helyes lesz. Ellenkező esetben, a
Fajta menüpont segítségével újra kell a
programokat számozni (4.0).
Egyes tévéállomások vagy kábelhálózatok a saját
osztályozási paramétereiket használják (régió,
nyelv...). Ebben az esetben a
îÏ gombok
segítségével választhatja ki a programokat,majd a
¬ gomb segítségével tárolhatja választását. Ha
ki akar lépni vagy meg akarja szakítani a keresést,
nyomja meg a
H gombot. Ha egy programot sem
talált, olvassa el a 18. oldalon található tanácsokat.
( Ha ki akar lépni a menüből, nyomja meg a
d
gombot.
A rádió használata
Té vé vagy rádió üzemmód választás
Nyomja meg a távirányító Â gombját a
tévékészülék tévé vagy rádió üzemmódba állítása
céljából. Rádió üzemmódban az állomás száma, neve
(ha van), frekvenciája és hangmódja megjelennek a
képernyőn. Az állomásnevek beviteléhez a memóriába
használja a
Névadás menüt (4.o.)
Programok kiválasztása
Az FM állomások (1-től 40-ig) kiválasztásához
használja a
09 vagy @ P # gombokat.
Rádióállomások listája
A rádióállomások listájának megjelenítéséhez
nyomja meg a ı gombot. Ha állomást akar
váltani, nyomja meg a
îÏ gombot,
kilépéshez pedig a
d gombot.
A rádiómenü pontok használata
Ha a rádióra vonatkozó beállításokat akar
végezni, használja a
H gombot.
Rádióállomások keresése
Ha Ön elvégezte a gyors beállítást, az azt jelenti,
hogy minden fogható FM állomás bevitele
megtörtént a memóriába. Új keresés indításához
használja a
Indítás
menüt:
Aut.Tárol.
(teljes
kereséshez) vagy Kézi Tárol. (állomásonként
végzett keresés).A
Fajta és Névadás menüpontok
lehetővé teszik a rádióállomások osztályozását és
elnevezését.Ezeknek a menüpontoknak a működése
azonos a tévé menüpontok működésével.
Képernyőkímélő
Használja a
c gombot a rádió hallgatás során a
képernyőkímélő ki- és bekapcsolásához.
Fõ Menūe
• Kép
• Hang
• Funkciók
$ Indítás
Kézi Tárol.
$
Rendszer Europe Æ
• Keresés
• Prog. Szám
• Finomállítás
• Tárolás
Page 42

6
Képbeállítás
Hangbeállítás
& Nyomja meg előbb a H, majd a ¬ gombot.
Az
Kép menüpont megjelenik:
é A
îÏ gombok megnyomásával válasszon
ki egy szabályozást, és a
Ȭ gombok
megnyomásával végezze el a szabályozást.
Me
gjegyzés: a képbeállítás alatt csak a választott
sor megjelenítése látható. Ha újra meg akarja
jeleníteni a menüt, nyomja meg a
îÏ gombot.
“ A beállítás elvégzése után, válassza a
Tá r olás
menüpontot, majd a tároláshoz nyomja meg a
¬ gombot. Ha ki akar lépni,nyomja meg a
d gombot.
A beállítások leírása:
•
Fényerő: a kép fényerejét szabályozza.
•
Szín: a szín telítettségét szabályozza.
•
Kontraszt: a világos és sötét tónusok közötti
különbséget szabályozza.
•
Képélesség: a kép tisztaságát szabályozza.
•
Telítettség: a színek árnyalatát szabályozza :
Hideg (kékebb), Normális (kiegyensúlyozott)
vagy
Meleg (pirosabb).
•
Tá r olás: a képbeállítás (valamint a menü
Funkciók-ban a Kontraszt+ és a NR
(Zajcsökkentés) memorizálása.
& Nyomja meg a H gombot, jelölje ki a Hang-ot
(
Ï) és nyomja meg a ¬ gombot.A Son
Hang menüpont megjelenik:
é A
îÏ gombok megnyomásával válasszon
ki egy szabályozást, és a
Ȭ gombok
megnyomásával végezze el a szabályozást.
“ A beállítás elvégzése után, válassza a
Tá r olás
menüpontot, majd a tároláshoz nyomja meg a
¬ gombot.
‘ Ha ki akar lépni a menüből, nyomja meg a
d
gombot.
A beállítások leírása:
•
Magas: a nagy frekvenciájú hangok beállítása.
•
Mély: az alacsony frekvenciájú hangok
beállítása.
•
Balansz: a bal és jobb oldali hangszórókból
jövő hang kiegyensúlyozása.
•
Deltahang: a különböző programok és EXT
csatlakozások közötti hangerő eltérések
kiegyenlítését teszi lehetővé. Ez a beállítás a
0-40 közötti programokra és az EXT
csatlakoztatásokra vonatkozik.
•
AVL * (Hanghatároló):automatikus hangerő
szabályozás, amely csökkenti a hangerő
növekedést,különösen egy másik programra
történő átkapcsoláskor vagy hirdetéseknél.
•
Memorizálás*: a hangbeállítások memorizálása.
* csak bizonyos típusoknál.
Az funkciók beállítása
& Nyomja meg a H gombot, jelölje ki a
Funkciók-at (Ï) és nyomja meg a ¬
gombot. Így a következőket állíthatja be:
é
Időzítő, Gyerekzár és Szülői Ell.: lásd a
következő oldalt.
“
Kontraszt +: a képkontraszt automatikus
beállítása, amely a kép sötét részét a még
sötétebbé teszi.
‘
NR (Zajcsökkentés):rossz vétel esetén
csökkenti a kép zajszintjét (hangyás kép).
Figyelem: a Kontraszt + és NR (Zajcsökkentés)
beállítások memorizálásához az Kép menüpontból
a Tárolás ]-t kell kijelölni.
(
Képtorzulás (csak nagyképernyőnél):a
nagyméretű képernyők érzékenyek a föld
mágneses terében bekövetkezett változásokra.
Ez a beállítás lehetővé teszi a mágneses hatás
ellensúlyozását, a képtorzulás kiküszöbölését.
§ Ha ki akar lépni, nyomja meg a
d gombot.
Fõ Menūe
$ Kép
• Hang
• Funkciók
• Indítás
Kép
$
Fényerõ --I------ 39
• Szín
• Kontraszt
• Képélesség
• Telíttség
• Tárolás
Fõ Menūe
• Kép
$ Hang
• Funkciók
• Indítás
Hang
$
Magas -----I--- 56
• Mély
• Balansz
• Daltahang
• Hanghatároló
• Tárolás
Page 43

7
Ébresztés funkció
Té v ézár
Ez a menüpont lehetővé teszi,hogy
tévékészülékét ébresztésre használja.
& Nyomja meg a
H gombot.
é Jelölje ki a kurzorral a menüben előbb az
Funkciók-at majd a Időzítő-t:
“
Elalváskapcs: Lehetővé teszi annak az
időtartamnak a beállítását, amelynek elteltével
a tévékészülék automatikusan készenléti
üzemmódba kapcsol át.
‘
Óra: állítsa be a pontos időt.
Megjegyzés: az óra automatikusan beállítódik a
kapcsológombbal történő bekapcsolás után.A
pontos időt az 1 programhelyre hangolt adás
teletextjéről tölti le. Ha ennek a programnak nincs
teletextje, akkor a beállítás nem történik meg.
(
Kezdés: állítsa be a kezdési időpontot.
§ Vége: állítsa be a készenléti üzemmódba való
átkapcsolás időpontját.
!
Prog.szám: állítsa be annak a programnak a számát,
amelyre ébredni szeretne.URH-adók a
Ȭ
gombok segítségével választhatók (a 09
gombok csupán a televízióadók kiválasztását teszik
lehetővé).DVD üzemmódban a lemez behelyezése
után kiválasztható a
Bookmark DVD lehetőség,
melynek segítségével beállítható az ébresztés a
DVD-ről választott résszel.A beállítást a
u
segítségével léptetheti érvénybe.
! Indít, amellyel a következőket lehet beállítani:
•
Egyszer egyszeri ébresztés,
•
Naponta minden nap,
•
Kikapcsolás törlés.
ç A
b gomb megnyomásával a beprogramozott
időpontban a tévékészüléket átkapcsolja
készenléti állapotba.Ha bekapcsolva hagyja a
tévékészüléket, akkor a megjelölt időpontban
csak programot fog váltani (és az
Vé ge után fog
készenléti állapotba átkapcsolni).
A
Té v ézár és a Időzítő funkciók kombinációja
korlátozza a tévékészülék használati idejét például
az ön gyermekei számára.
Segítségével egyes műsorokat letilthat vagy
teljesen meg is tilthatja a tévékészülék
használatát a gombok lezárásával.
Gyermekzár
& Nyomja meg a H gombot.
é A kurzorral jelölje ki az
Funkciók menüpontot
és állítsa a
Gyerekzár-at Be pozícióba.
“
Kapcsolja ki a tévékészüléket és rejtse el a
távirányítót.A tévékészülék ekkor
használhatatlan (csak a távirányítóval lehet újra
bekapcsolni).
‘ Ha meg akarja szüntetni a letiltást: állítsa a
Gyerekzár-at az Ki pozícióba.
Programzár
& Nyomja meg a H gombot, jelölje ki előbb az
Funkciók majd a Programzár menüpontokat:
é Be kell ütnie az ön titkos hozzáférési kódját.
Először üsse be kétszer a 0711 kódot,majd vigye
be az ön által választott kódot.Ekkor megjelenik a
menü.
“
Programzár:
a programok kiválasztásához
használja a
îÏ gombokat,majd nyugtázza a
¬ gomb megnyomásával.Azok előtt a
programok és csatlakozások előtt,amelyek le
vannak tiltva a
+ jel jelenik meg. Ha egy letiltott
programot meg akar nézni,akkor előbb be kell
ütnie a titkos kódját,különben a képernyő sötét
marad.
A
Indítás
menühöz való hozzáférés szintén le van
tiltva. Figyelem, azoknak a kódolt programoknak az
esetében, amelyekhez külső dekóderre van szükség,
a megfelelő EXT csatlakozóaljzatot is le kell zárni.
‘ Kódváltoztatás: lehetővé teszi egy új 4 jegyű
kód bevitelét.Az új kód tárolásához írja be a
kódot még egyszer.
Ha Ön elfelejtette a titkos kódját, írja be a 0711
általános kódot kétszer.
(
Mindent törölni: valamennyi programzárt töröl.
§
Mindent letilt: valamennyi tévéprogramot és
EXT csatlakozást letilt.
è Ha ki akar lépni, nyomja meg a
d gombot.
Fõ Menūe
• Kép
• Hang
$ Funkciók
• Indítás
Idõzítõ
• Elalváskapcs
$
Ideõzítés 10:56
• Kezdés
• Vége
• Prog. Szám
• Indít
Fõ Menūe
• Kép
• Hang
$ Funkciók
• Indítás
Funkciók
• Idõzítõ
$
Gyerekzár Ki
• Szülői Ell.
• Kontraszt
• NR
Page 44

8
Teletext
Nyomógomb:
Eredmény:
A teletext egy újsághoz hasonlatos információs rendszer, amelyet egyes csatornák sugároznak.
Segítségével a nagyothallók vagy az adás nyelvét nem ismerők feliratozva nézhetik a műsorokat
(a kábeltévé műsorát és a műholdas adásokat...).
A teletext
megjelenítése
Egy oldal
kiválasztása
Lehetővé teszi a teletext megjelenítését,a feliratos
üzemmódra való áttérést és az onnan történő kilépést.
A tartalomjegyzék az elérhető rovatoknak a listájával együtt
jelenik meg. Minden egyes rovatot egy 3 jegyű oldalszám jelöl.
Ha a választott csatorna nem rendelkezik teletext
szolgáltatással, a 100.szám jelenik meg, a képernyő pedig sötét
marad (ebben az esetben lépjen ki a teletextből és válasszon
egy másik csatornát).
Írja be a választott oldal számát a 0 - 9 vagy @ P #,
îÏ gombok segítségével.Például:a 120. oldalhoz üsse be a
120számokat.A szám megjelenik a bal felső sarokban, a
számláló lapoz, majd megjelenik a választott oldal. Ha egy
másik oldalt akar megjeleníteni, ismételje meg a műveletet.
Ha a számláló tovább folytatja a keresést,az azt jelenti, hogy az
adott oldal hiányzik.Válasszon egy másik oldalt.
Közvetlen
hozzáférés a
rovatokhoz
A képernyő alján színes sávok láthatók.A 4 színes gomb
segítségével hozzáférhetők a rovatok és a hozzájuk
tartozó oldalak.
Ha a rovat vagy az adott oldal még nem hozzáférhető,a
színes sávok villognak.
Ta r talomjegyzék
Ha vissza akar térni a tartalomjegyzékhez (általában a100. oldal).
Az oldal
felnagyítása
Az aloldalak
lapozásának
leállítása
Ha meg akarja jeleníteni az oldal felső vagy alsó részét,
majd vissza akar térni a normális mérethez.
Egyes oldalak aloldalakat tartalmaznak, amelyek
automatikusan követik egymást.Ennek a gombnak a
segítségével az aloldalak lapozását meg lehet állítani vagy újra
lehet indítani.A _ jel megjelenik a bal felső sarokban.
Rejtett
információk
Kedvenc
oldalak
Ha meg akarja jeleníteni vagy el akarja tüntetni a rejtett
információkat (pl. megfejtéseket).
A 0 – 40 teletext program közül Ön kiválaszthat
4 kedvenc oldalt,amelyek ezután közvetlenül
hozzáférhetők lesznek a színes gombok segítségével
(piros, zöld, sárga,kék).
& Ha meg akarja tekinteni kedvenc oldalait,nyomja meg
a H gombot.
é Jelenítse meg azt a teletext oldalt, amelyet
memorizálni akar.
“ Ezután 3 másodpercig tartsa benyomva a választott
színes gombot. Ezzel az oldal memorizálva van.
‘ Ismételje meg ezt a műveletet a többi színes gombbal
is.
( Ettől kezdve amikor a teletextet megtekinti, kedvenc
oldalai színesben megjelennek a képernyő alján.A
többi rovat megtekintéséhez nyomja meg a H
gombot.
Ha mindent törölni akar, tartsa benyomva a d gombot 5
másodpercig.
ı
TV
›
VCR
¢
MODE
Ó
TV / DVD
-
MENU
+ +
”
[
- -
%
∏
OK
12
564
879
Ø
0
ù
∫
Ÿ
.
SUBTITLEAUDIO
¤
SYSTEM MENU
Ë
SMARTSMART
ª
DVD
MENU
RADIO
3
Á
¤
0 9
P
-
+
P
Ë
›
Ó
Ÿ
MENU
Ë
Page 45

9
16/9-es formátum
A kép sugárzása 16:9 formátumban (széles képernyő) vagy 4:3 (hagyományos képernyő) történhet.
A 4:3-as kép alsó és felső részén néha fekete csík látható (széles formátum).
Ez a fukció eltünteti a fekete csíkokat és lehetővé teszi a legmegfelelőbb kép ábrázolását.
Abban az esetben, ha aTV 4:3 képernyővel rendelkezik.
Abban az esetben, ha aTV 16:9 képernyővel rendelkezik.
A p gombot lenyomásával a következő formátumot választhatja ki:
A televízió automatikus átkapcsolóval van felszerelve. Ez dekódolja egyes programok
különleges szignálját és kiválasztja a képernyő helyes formátumát.
4:3
A kép 4:3 formátumban reprodukálódik, a képernyő két oldalán fekete csík látható.
A
îÏ gombok megnyomásával a kép megnagyobbodik.
Nagyít 14:9
A kép 14:9 formátumban reprodukálódik, a két oldalon nem túl széles fekete csík
marad.A
îÏ gombok segítségével függőleges irányban el lehet mozgatni a
képet, hogy láthatóvá váljanak az alcímek.
Nagyít 16:9
A kép 16:9 formátumban reprodukálódik. Ez a beállítás akkor használandó, ha a
széles formátumban sugárzott képet akarunk nézni.A feliratokat
îÏ gombok
használatával láthatóvá tesszük.
Nagy Felirat
A kép 4:3 formátumban reprodukálódik a képernyő egész felületén és a feliratok
láthatóak maradnak;
A
îÏ gombok segítségével a kép alsó széle kiemelkedik vagy süllyed.
Szuperszéles
A kép 4:3 formátumban reprodukálódik a képernyő egész felületén.A feliratokat
îÏ gombok használatával láthatóvá tesszük.
Szélesvásznú
A 16:9 formátumban reprodukált kép megfelelő méretekben jelenik meg a képernyő
egész felületén.
Me
gjegyzés : amikor DVD-t néz, csak a îÏ gombokat használhatja miközben a
képernyőformátum megjelenik a képernyőn (különben a DVD szolgáltatásokat éri el).
A
p gombot lenyomásával a következő formátumot választhatja ki:
4:3
A képet 4:3 formátumban láthatja.
Átvált 4:3
A képet függőlegesen nyújtott.Ezzel eltünteti a fekete sávokat,amelyek a
Letterbox formátumban történő használat során jelentkeznek.
Átvált 16:9
A képet függőlegesen összetömöríti 16 :9 formátumba.
Page 46

10
Beépített DVD-lejátszó használata
A lemez behelyezése
A beépített DVD-lejátszó lehetővé teszi DVD videolemezek valamint videó-,audió- és képanyagot
(jpeg formátumban) tartalmazó CD-k lejátszását (beleértve a véglegesített CD-R, CD-RW és CD
MP3 lemezeket is).A lemezek a csomagolásukon feltüntetett logó alapján különböztethetők meg.
Me
gjegyzés: Általában a DVD-filmek nem egyszerre kerülnek piacra a világ különböző pontjain. Ezért aztán a
DVD-lejátszók földrajzi zónák szerint kóddal vannak ellátva. Ha ön olyan lemezt tesz be a lejátszóba,
amelynek a régiókódja különbözik a lejátszó kódjától, akkor egy üzenet jelenik meg a képernyőn. Ebben az
esetben a lemezt nem lehet lejátszani, és ki kell venni a készülékből.
&
A lemeztartó tálca nyitása
Nyomja le az előlapon, a lemeztartó tálcától
balra található
EJECT (fl) gombot.
é
A lemez behelyezése
Te gye be a lemezt, címkével felfelé, a
lemeztartó tálcába. Győződjön meg róla,hogy
jól illeszkedik-e a mélyedésbe.
"
A lemeztartó tálca zárása
Tolja vissza a helyére lassan a lemeztartó tálcát
vagy nyomja meg újra a lemeztartó tálca
mellett található
EJECT gombot a lemeztartó
tálca zárásához. Ezzel elkezdődik a lemez
lejátszása.
‘
Automatikus lejátszás
A lemeztartó tálca zárása után a lejátszás
automatikusan elkezdődik. Ekkor a képernyőtől
balra egy kijelző ablak jelenik meg, amely
mutatja a folyamatban levő műveletet, a lemez
típusát és játékidejét, majd megjelenik a lemez
tartalma.
PICTURE
Page 47

11
DVD- vagy video-CD lejátszása
Lejátszás
A lemez elhelyezése és a lemeztartó tálca zárása után a lejátszás
automatikusan elkezdődik. Egyes lemezeknél önnek választania kell egy
menüpontot a menüben. Ebben az esetben használja a
09 vagy
îÏ È¬ gombokat, majd nyomja meg az
u
.
A lejátszás leállítása
A lemez lejátszásának a leállításához nyomja meg a
Ê gombot. Ekkor
megjelenik a képernyőkijelzés és informál a lejátszó állapotáról.
A lejátszás folytatása (“resume” funkció)
Ha ön leállította egy lemez lejátszását (készenléti üzemmódba tette vagy a
DVD lemezt kivette), később a leállítás helyétől folytathatja a lejátszást.
Csak meg kell nyomnia a
Æ gombot, majd a jel resume megjelenése után
nyomja meg újra a
Æ gombot (különben a lejátszás újrakezdődik a lemez
elejéről).
A lejátszás folytatása funkció a 4 utolsó lemezre is vonatkozik.
Lassítás, gyors előrecsévélés és visszacsévélés
Ha lejátszás közben 1/2,1/4 vagy 1/8 lassított sebességet akar elérni, akkor
nyomja meg a
Ï gombot.Gyors, x4 vagy x32, előrecsévéléshez vagy
visszacsévéléshez nyomja meg a
¢ vagy ∫ (vagy a Ȭ) gombot.Ha
vissza akar térni a normál sebességhez, akkor nyomja meg a
Æ gombot.
Állókép
A kép leállításához nyomja meg a
∆ (vagy î) gombot.Ha tovább akar
lépni a következő képre,nyomja meg újra a
∆ gombot, vagy, ha folytatni
akarja a lejátszást, a
Æ gombot.
Következő / előző fejezet
A DVD-lemezek különböző fejezetekre vannak felosztva, amelyek
lehetővé teszik, hogy az egyes jelenetekhez közvetlenül hozzá lehessen
férni. Ha a következő vagy az előző fejezetekhez hozzá akar férni,akkor
használja a
@ P # gombokat.
DVD-menü
Nyomja meg a æ gombot. Ekkor megjelenik a DVD-menü.A tartalom a
DVD-től függ.Lehetővé teszi a hozzáférést a különböző menüpontokhoz,
mint pl. a nyelvválasztás,az egyes jelenetekhez való közvetlen hozzáférés,
speciális termékinformáció,közlemények... Kiválasztáshoz használja a
Ȭ îÏ,rögzítéshez a
u
, és kilépéshez a æ gombokat.
A DVD-lejátszó menüje
A DVD-lejátszó menüje a
d gomb (SYSTEM MENU) segítségével
jeleníthető meg vagy rejthető el (lásd a 13. oldalt).
Szinkronnyelv
A lemezen rendelkezésre álló szinkronnyelvek kiválasztásához nyomja
meg a
e gombot. Néhány másodperc múlva a menü eltűnik.
A feliratozás nyelve
Nyomja meg a
c gombot a feliratozás nyelvének kiválasztásához
(kikapcsolásukhoz használja az off gombot). Néhány másodperc múlva a
menü eltűnik.
A lemez kitolása
Nyomja meg a tévékészülék előlapján található EJECT (fl) gombot.A
lejátszás leáll, majd néhány másodperc múlva kinyílik a lemeztartó tálca.
Té vé vagy DVD üzemmód választás
Nyomja meg a távirányító Æ gombját a tévékészülék Tévé vagy DVD
üzemmódba állítása céljából.
ı
TV
ù
›
VCR
¢
∫
Ÿ
Ó
MODE
·
∆
Ê
TV / DVD
-
MENU
+ +
”
[
- -
%
∏
OK
12
564
879
Ø
0
.
SUBTITLEAUDIO
¤
SYSTEM MENU
Ë
Æ
SMARTSMART
ª
DVD
MENU
RADIO
3
Á
P
Page 48

12
Audio-CD lejátszása
Képanyagot tartalmazó CD lejátszása
A lemez elhelyezése és a lemeztartó tálca zárása után a lejátszás
automatikusan elkezdődik.A képernyőn megjelenik egy speciális
menü, és jelzi a címek számát, az adott darab címét és időtartamát.
Átkapcsolás másik számra
Ha egy másik számra akar átkapcsolni, akkor használja a távirányító
@ P # gombjait, ha ki akar választani egy tetszés szerinti számot,
akkor pedig a
09 gombokat.
Gyors előrecsévélés és visszacsévélés
Gyors, x4 vagy x8, előrecsévéléshez vagy visszacsévéléshez nyomja
meg a
¢ vagy ∫ gombot. Ha vissza akar térni a normál
sebességhez, akkor nyomja meg a
Æ gombot.
Megjegyzés: ez a funkció MP3 audio CD lemezek esetében nem elérhető
Szünet / leállítás / kitolás
Szüneteltetéshez nyomja le a ∆ gombot, a lejátszás folytatásához pedig a
Æ gombot.A lejátszás leállításához nyomja meg a Ê gombot, a lemez
kitolásához pedig a tévékészülék előlapján levő EJECT (fl) gombot.
A lejátszás beprogramozása
Ez a funkció az ön kedvenc számainak a tárolásával lehetővé teszi a
lejátszás beprogramozását (14. oldal).
MP3 audio CD lemezek lejátszása
Egy-egy MP3 CD lemezen több album is tárolható.Az albumokat a
îÏ gombok segítségével választhatja ki.A ¬ gomb segítségével
mozoghat az egyes számok között.A számokat a
îÏ vagy a
09 gombokkal választhatja ki.A È gomb lenyomásával az
albumválasztás menüpontra tér vissza.
Lejátszás és megtekintés
A lemez behelyezésével automatikusan elindul a lejátszás.Megjelenik az
első négy kép előnézete.A következő vagy az előző oldalra a
@ P #
gombokkal léphet.A kívánt képet a îÏȬ kurzor segítségével
választhatja ki, majd a
u gomb lenyomásával megjelenítheti a teljes
képernyőn.A megtekintés menübe a
æ gomb alkalmazásával kerülhet
vissza.
Diavetítés
A diavetítést a Æ gombbal indíthatja el.Automatikusan, sorban egymás
után megjelennek a lemezen tárolt képek.A diavetítés a
Ê gombbal
állítható le.A képek megjelenítési időtartamát az
Eszközsor menü
segítségével módosíthatja (13.oldal).
Egy kép vagy könyvtár közvetlen kiválasztása
A következő vagy az előző képre a
@ P # gombokkal léphet.
A
09 gombok lehetővé teszik a kép közvetlen kiválasztását annak
száma alapján.A képernyőn megjelenik a képek listája, melyen a
îÏ
gombok segítségével mozoghat.Ha a lemez több könyvtárat is
tartalmaz, a
È gomb segítségével beléphet a könyvtárlistába.
A
îÏ gombokkal kiválaszthat egy könyvtárat, majd a ¬
alkalmazásával visszatérhet a képválasztáshoz.
A kép formátuma
A
p gomb segítségével megváltoztatható a kép formátuma (lásd a 9.
oldalt).
kép
1
2
3
4
.
ı
SUBTITLEAUDIO
›
¢
Ó
¤
ù
∫
SYSTEM MENU
Ÿ
Ë
∆
Ê
Æ
SMARTSMART
TV / DVD
ª
DVD
MENU
MODE
MENU
TV
VCR
·
-
++
”
--
%
∏
OK
12
Ø
P
[
RADIO
3
564
879
0
Á
Page 49

13
A DVD-lejátszó menüje
Eszközsor menü
Ezzel a menüvel a DVD-lejátszó valamennyi
különleges funkciója aktiválható.
Nyomja meg a
d gombot (SYSTEM MENU).
A menü megjelenik a képernyőn.
A menüpontok közötti mozgást és a
beállítások módosítását a
îÏȬ
gombok teszik lehetővé.A d gomb
(
SYSTEM MENU) újbóli megnyomásával
kiléphet a menüből.
A szürkével megjelenített beállítások az adott
leolvasás során nem állnak rendelkezésre.
Ezzel a menüvel a DVD-lejátszó valamennyi
funkciója aktiválható.
A
d gomb (SYSTEM MENU) lenyomásával
előhívható az Eszközsor menü.Az almenük
között a
Ȭ gombokat használva
válogathat:
Lejátszási lehetőség
• Lemeznavigáció;az audio- vagy képanyagot
tartalmazó CD-k egyes műsorszámainak
(képeinek) elérése.
•
Audió; kiválasztható a DVD-filmek
szinkronhangjának nyelve.
Közvetlen hozzáférést biztosít a
e gomb.
•
Felirat; kiválasztható a DVD-filmek
feliratozásának nyelve.
Közvetlen hozzáférést biztosít a c gomb.
Slide Show (diavetítés)
Ez a menü a CD-ről történő diavetítés
szabályozását teszi lehetővé.
•
Pic Time; az egyes képek megjelenítési
idejének beállítása.
Nézet
•
Szög;egyes DVD-k több kameraállásból
készült felvételeket is tartalmaznak. Ilyenkor
általában megjelenik egy speciális ablak.
A kívánt nézőpont a
Ȭ gombok
segítségével állítható be.
•
Képméretezés;a u gombbal aktiválható a
2- vagy 4-szeres nagyítás, illetve
visszaállítható az 1-szeres méret.
A
ȬîÏ gombok használatával
változtatható a megjelenített felnagyított
rész.
•
Fejezet előnézete;a DVD-n található
fejezetek előnézetének be- vagy kikapcsolása.
•
Forgatás;a CD lemez képeinek elforgatása.
Keresés
•
Idő;a keresett jelenet kezdetének pontos
időpontja a
09 gombok segítségével
adható meg.Az érvényesítéshez nyomja meg
a
u gombot.A lejátszás a kiválasztott
időpontban elindul.
•
Gyors;a kívánt gyorsítás a Ȭ gombok
segítségével állítható be.
•
Lassú;a kívánt lassítás a Ȭ gombok
segítségével állítható be.A normál
sebességhez a
Æ gomb megnyomásával térhet
vissza.
•
Képkockánként; ha a képeket egyenként
előre vagy hátra kívánja léptetni, a
È vagy
¬ gombot használja.A normál lejátszáshoz
a
Æ gomb megnyomásával térhet vissza.
Program:
A kedvenc részek lejátszásának programozása
(lásd a 15. oldalt).
Lejátszási lehetöség Slide Show Nézet
Eszközsor
Beállitások
Beállitás
Lejátszási lehetöség Slide Show Nézet
Eszközsor
Beállitások
Beállitás
Page 50

14
Beállítások menü
Ebben a menüben módosíthatók a DVDlejátszó beállításai.
A DVD-lejátszó menüje a
d (SYSTEM
MENU) gomb segítségével jeleníthető meg.
A
Ï gombbal előhívható a Beállítások menü,
a
Ȭ gombok alkalmazásával pedig a
különböző almenük között válogathat:
Hang:
•
Éjszakai üzemmód;a hang dinamikáját
optimálisra állítja halk hallgatáshoz.
Funkciók:
• Segélyvonal;a képernyő alján látható
menüpont-magyarázatok
megjelenítése/elrejtése.
•
Állapotablak;a lejátszó állapotát megjelenítő
kijelzőablak kikapcsolása.
Kilépés a menüből: nyomja meg a
d
gombot.
Beállítás menü
Ebben a menüben adhatók meg a DVDlejátszó lehetőségeinek beállításai.
A DVD-lejátszó menüje a
d (SYSTEM
MENU) gomb segítségével jeleníthető meg.
A
Ï gomb kétszeri lenyomásával előhívható
a Beállítás menü, a
Ȭ gombok
alkalmazásával pedig a különböző almenük
között válogathat:
Nyelv:
•
Alapértelmezett audió;a DVD-filmek
szinkronnyelvének kiválasztása.
•
Alapértelmezett felirat;a DVD-filmek
feliratozási nyelvének kiválasztása.
Ha a választott nyelv szerepel a lemezen, akkor
ez lesz az aktív. Ellenkező esetben a lemezen
szereplő első nyelv lesz aktiválva.
TV:
(csak bizonyos típusoknál)
•
TV-rendszer; lehetővé teszi az automatikus
üzemmód (automatikus felismerés), illetve a
Pal vagy NTSC szabvány kiválasztását.
Audió menü:
•
Digitális kimenet; a következő választási
lehetőségeket kínálja:
minden, PCM vagy
inaktív.
Funkció:
•
PBC; az egyes video CD-knél rendelkezésre
álló fejezetrendező funkció be- vagy
kikapcsolása.
Hozzáférés:lásd a következŒ oldalt.
Kilépés a menüből: nyomja meg a
d
gombot.
Beállitás
Beállitások
Hang Funkciók
Nyelv TV Audió menü
Beállitás
Page 51

15
A lejátszás programozása
Ez a funkció a kedvenc műsorszámok megadásával
lehetővé teszi a lejátszás beprogramozását.
&
Az Eszközsor menü megjelenítéséhez nyomja le
a
d gombot (SYSTEM MENU).A ¬ gomb
segítségével válassza ki a Program pontot,majd
alkalmazásával jelenítse meg a menüt:
é A Ï gombbal válassza ki a Műsorszámok
pontot; választását a
¬ gombbal léptesse
érvénybe.
“ A
îÏ vagy a 09 gombokkal adja meg a
lejátszani kívánt szám sorszámát; érvényesítse a
¬ gombbal.
‘ Hasonló módon választhatók ki a kívánt fejezetek is.
( A kiválasztáshoz nyomja meg a u gombot.
§ A “ és ( műveletet annyiszor ismételje meg,
ahány műsorszámot ki szeretne választani
(lemezenként maximum 20-at lehetséges).
Kívánság szerint ugyanazt a számot többször is
meg lehet ismételni.
è Kilépéshez nyomja meg a
d gombot.A
kiválasztott számok lejátszása ekkor
automatikusan elkezdődik.
A kiválasztott számok lejátszásának leállítása:
Allítsa a Program sort Ki értékre.
A lista megjelenítése és módosítása:
Válassza a
Lejátszási lista pontot, majd nyomja
meg a
¬ gombot. Megjelenik a kedvenc
műsorszámok listája. Ha egy műsorszámot
törölni szeretne, válassza ki sorszámát a
îÏ gombokkal, majd a u segítségével
érvényesítse választását.
Ha mindent törölni szeretne:
Válassza a Mindent töröl pontot , majd nyomja
meg a
¬ gombot.
Kilépés a menüből: nyomja meg a
d
gombot.
Hozzáférés ellenőrzése és zárolás
Ez a funkció lehetővé teszi a lejátszó
különböző fokú zárolását.
& Nyomja le a d gombot.A
Ï gomb
segítségével lépjen a
Beállítás menübe, majd a
¬ gombbal válassza ki a Hozzáférés pontot.
é Adja be a választott kódot.A rögzítéshez még
egyszer be kell ütni a kódot.
“
Szülői szint:a zárolás szintjének az aktiválása
0-tól (nem aktív) 8-ig (maximális).
Bizonyos DVD-lemezek 1-től 8-ig terjedő zárolási
szintekkel vannak ellátva, néha helyettesítő
jelenetekkel. Például,ha a 4. szintet választja,minden
4. (és 4. alatti) szint lejátszásra kerül.Az ennél
magasabb szintű jeleneteket a készülék nem játssza
le, vagy helyettesítő jeleneteket játszik le helyettük. Ha
a lemezen nincs helyettesítő jelenet, akkor a lejátszás
leáll, s be kell adni a 4 jegyű kódot.
‘ PIN-kód módosítása;a hozzáférési kód
módosítása.A rögzítéshez még egyszer be kell
vinni a kódot.
Ha elfelejtette biztonsági kódját, nyomja le
négyszer a
Ê gombot.
(
Lemez zárolása: lehetővé teszi a DVD és video
CD lemezek lezárását. Miután a lemezt a
lejátszóba helyezi, megjelenik a kódkérő
párbeszédablak.Adja be biztonsági kódját:
-
Lejátszás egyszer (a lemezt csak addig lehet
lejátszani, amíg a lejátszóban van, s amíg a
tévékészülék be van kapcsolva),
- vagy
Lejátszás mindig (állandó engedélyezés).
A lejátszó memóriája 50 lemezt képes tárolni. Ha
a betelt listára újabb lemez kerül, akkor a lista
utolsó lemeze törlődik.A kétoldalas DVD-lemezek
(valamint a többrészes video CD lemezek) minden
oldalának, illetve minden részének külön
azonosítási kódja lehet. Minden oldalt, illetve részt
külön kell tehát ellenőrizni.
§ Kilépéshez nyomja meg a
d gombot.
A lejátszás engedélyezésének visszavonása:
• Helyezze a lemezt a lejátszóba.A lejátszás
automatikusan elindul.
• Amikor a
u jel megjelenik, nyomja meg a Ê
gombot. Ekkor a v jel jelenik meg a kijelzőn,
és az adott lemez lejátszására vonatkozó
engedély törlődik.
Program
Lejátszási lista
Eszközsor
Program
Müsorszám
Mindent töröl
Müsorszám
3
1
2
Lemez zárolása
Beállitás
PIN kód módosítása
Szülöi szint
PIN kód megadása
****
Hozzáférés
Page 52

16
Egyéb készülékek csatlakoztatása
A mellékelt ábra szerint kösse össze a képmagnót a
televízióval. Használjon jó minőségű EUROcsatlakozózsinórt.
Ha a képmagnón nincs EURO-csatlakozó, a televízióval való
összeköttetés csak az antennazsinóron keresztül valósítható
meg.A televízió 0-ás programját a képmagnó tesztjelére kell
hangolni (lásd a TÁROLÁS fejezetet, 6. old.).A képmagnó
képének megjelenítéséhez nyomja meg a
0 gombot.
Képmagnó és Dekóder
A képmagnó második EURO-csatlakozójára kösse a
dekódert. Ezáltal a kódolt adásokat is felveheti.
Képmagnó
Műhold antenna, dekóder, DVD, játékok...
A 2 csatlakozóaljjal felszerelt tévékészülékeknél az RVB
jeleket kibocsátó készülékeket (numerikus dekóder, DVD
lejátszó, játékok…) lehetőség szerint az EXT1-re kösse rá ,
míg az S-VHS jeleket kibocsátó készülékeket (S-VHS és
Hi-8 videomagnó, …) az EXT2-re.
Hifi-toronyhoz történő összekapcsolás esetén használjon
audio csatlakozó zsinórt.A televízió "L" és "R" kimenetét
kösse össze a hifi-torony (csak egyes modellekben érhető el)
"AUDIO IN" "L" és "R" bemenetével.
Használjon digitális audio csatlakozókábelt, és kösse össze a
tévékészülék “DIGITAL AUDIO OUT” kimenetét az
erősítő “DIG IN” bemenetével (erősítő digitális koaxiális
bemenettel).
Más készülékek
Erősítő
564
879
0
Á
Ø
A csatlakoztatott készülékek kiválasztása
A n gomb megnyomásával válassza az EXT1 csatlakozóaljat a 2
csatlakozóaljjal szerelt változatoknál pedig az EXT2 és S-VHS2 (S-VHS jelhez
EXT2 csatlakozóalj ) és az AV-t a csatlakozásokhoz az oldallapon (ha van
ilyen).
A legtöbb készülék saját maga vezérli az egyik csatlakozóról a másikra történő átváltást.
Típustól függően a tévékészülék 1 vagy 2 EXT1 és EXT2 csatlakozóaljjal van felszerelve,melyek a
hátoldalán találhatók.
Az EXT1 csatlakozóalj audio video bemenetekkel és kimenetekkel valamint RVB bemenetekkel rendelkezik.
Az EXT2 (ha van ilyen) audio video bemenetekkel és kimenetekkel valamint S-VHS bemenetekkel rendelkezik.
VCR
Page 53

17
Végezze el az itt látható csatlakoztatásokat.
A
n gomb segítségével válassza az AV -t.
Mono készülék esetén kösse rá a hangjelet az AUDIO L
bemenetre. Ha a tévékészülék jobb- és baloldali
hangszóróin reprodukálni akarja a hangot, használja a
e
gombot.
Fejhallgató
Fejhallgató csatlakoztatása esetén a tévékészülék
hangja ki van kapcsolva.A hangerősséget a
@”#gombok segítségével lehet szabályozni.
A fejhallgató ellenállásának 32 és 600 ohm között kell
lenni.
Csatlakozások az oldallapon
A videomagnó gombjai
A videomagnó alapfunkcióit a távirányító segítségével irányíthatja.
Nyomja meg a MODE gombot a kívánt üzemmód kiválasztásához: VCR
(videomagnetofon) vagy TV.A távirányító fényjelzőjének a világítása jelzi
a választott üzemmódot. Ha a választott üzemmód aktiválása elmarad,
akkor a fényjelző 20 másodperc múlva automatikusan kikapcsol
(visszakapcsol TV üzemmódba).
Berendezéstől függően a következő gombokkal rendelkezik:
b készenléti üzemmód,
¢ gyors visszacsévélés
∫ gyors előrecsévélés,
· felvétel,
∆ szünet
Ê leállítás,
Æ lejátszás,
H menü megjelenítés,
% Videomagnó idõzítés,
kereső és beállító kurzor,
u választás,
09 digitális gombok,
@ P # műsorválasztás,
◊ index funkció.
* Egyes funkciókkal nem minden videomagnó rendelkezik.
A távirányító minden olyan videomagnóval kompatibilis, amely az RC5
szabvány szerint készült.
ı
TV
›
ù
VCR
¢
∫
Ÿ
MODE
Ó
∆
Ê
·
TV / DVD
-
MENU
+ +
”
[
- -
%
∏
OK
12
564
879
Ø
0
.
SUBTITLEAUDIO
¤
SYSTEM MENU
Ë
Æ
SMARTSMART
ª
DVD
MENU
RADIO
3
Á
P
Page 54

18
Tanácsok
Szószedet
Rossz az adás vétele
Közeli hegyek vagy magas épületek kettős
képet, árnyékot vagy visszhangot okozhatnak.
Ebben az esetben próbálja manuálisan
beállítani a képet :
Finom beállítások (5. old.)
vagy módosítsa a külső antenna
iránybeállítását. Ellenőrizze azt is, hogy az
antenna képes-e adást fogni ezen a
frekvenciasávon (UHF vagy VHF sáv).
Rossz vétel (havazás) esetébe n állítsa az
Funkciók menü a NR -t BE -re (6. oldal).
Nincs kép
Amennyiben a televízió nem kapcsol be
nyomja meg kétszer a távirányítón lévõ
kikapcsolás gombot.
Kellőképpen csatlakoztatta-e az antennát?
A megfelelő rendszert vállasztotta-e ki?
(5. old.).A rosszul csatlakoztatott zsinórok
(pl. antennacsatlakozó) gyakran okoznak képvagy hangproblémát (amikor a készüléket
elmozdítják, előfordulhat,hogy bizonyos
csatlakozódugók elmozdulnak a helyükről).
Ellenőrizze az összes csatlakozást.
A csatlakoztatott készülék fekete-fehér
képet ad
A videókazetták lejátszásához ellenőrizze,
hogy a felvétel ugyan olyan standard-ben
készült-e (PAL, SECAM, NTSC), mint amilyet a
képmagnó le tud játszani.
Nincs hang
Ha bizonyos programokat a készülék hang
nélkül sugároz, akkor nem a megfelelő TVrendszert vállasztotta ki. Módosítsa a
Rendszer beállítását (5. old.).
Teletext
Egyes betűk rosszul látszanak? Ellenőrizze,
hogy a
Ország helyesen van-e beállítva (5.o.).
Ha nem működik a DVD-lejátszó?
Ellenőrizze, hogy nincsenek-e a lemezen
ujjnyomok.Törölje le egy puha ronggyal a
közepétől a széle felé haladva.
Nem működik a távirányító?
Ellenőrizzük a távirányító oldalán kiválasztott
üzemmódot, és hogy a TV felé irányítjuk-e.
Ha a távirányító használata közben a televízió
fényjelzője nem villog, cserélje ki az elemeket.
Készenléti helyzet
Ha a készülék bekapcsolásakor az készenléti
helyzetben marad és a
Zárva jelzés jelenik
meg, mikor a televízió nyomógombjait
használja, akkor a
Gyerekzár funkció nincs
kiiktatva (lásd 7. old.). Ha a televízió nem kap
új jelzést 15 percig ? keresztül, akkor
automatikusan készenléti helyzetre kapcsol át.
Az energiatakarékosság érdekében a televízió
olyan alkotórészeket tartalmaz, amelyek
készenléti állapotban nagyon kevés energiát
fogyasztanak (3 W alatt).
Még mindig nem jól működik a készülék?
Meghibásodás esetén ne próblja sajátkezűleg
megjavítani a készüléket, hanem forduljon a
szervizhez.
A televízió tisztítása
A képernyőt és a burkolatot kizárólag tiszta,
puha és nem bolyhosodó ruhával lehet
tisztítani. Ne használjunk olyan termékeket,
amelyekben alkohol vagy oldószer van.
RVB jelek: Három videojelről van szó (piros,zöld és kék), melyek közvetlenül a katódcső piros,zöld
és kék ágyúit vezérlik. Ezen jelek használata jobb minőségű képet biztosít.
NICAM hang: Olyan eljárás, amely a hang digitális minőségben való átvitelét biztosítja.
Rendszer: A televíziós műsorok sugárzása nem minden országban történik ugyanolyan módon.
Különböző szabványok léteznek : BG, DK, I és LL'.A
Rendszer beállítás lehetővé teszi ezeknek a
szabványoknak a kiválasztását.Ne keverje össze az utóbbi szabványokat a színszabvánnyal, mely
PAL vagy SECAM lehet. Európa legtöbb országában a Pal rendszert használják, míg
Franciaországban, Oroszországban és a legtöbb afrikai országban a Secam rendszert.Az Egyesült
Államokban és Japánban az NTSC nevű rendszert használják.
16/9: A képernyő szélesség / magasság arányára vonatkozik.A széles képernyőjü televíziók aránya 16/9,
a hagyományos képernyőnél 4:3.
Page 55

1
ǂ‰ÂÌËÂ
й„О‡‚ОВМЛВ
З˚ ФЛУ·ВОЛ ˝ЪУЪ ЪВОВ‚ЛБУ, ТФ‡ТЛ·У Б‡ ‚‡¯В ‰У‚ВЛВ.
щЪУ ЫНУ‚У‰ТЪ‚У ФВ‰М‡БМ‡˜ВМУ ‰Оfl ЪУ„У, ˜ЪУ·˚ ФУПУ˜¸ ‚‡П ЫТЪ‡МУ‚ЛЪ¸
Л ФУО¸БУ‚‡Ъ¸Тfl ‚‡¯ЛП ЪВОВ‚ЛБУУП.
е˚ ТУ‚ВЪЫВП ‚‡П ‚МЛП‡ЪВО¸МУ ФУ˜ЛЪ‡Ъ¸ Лı.
ìÒÚ‡Ìӂ͇
ìÒÚ‡Ìӂ͇ ÚÂ΂ËÁÓ‡ . . . . . . . . . . . . . . . . . . . . . . . . . . . . . . . . . . . . . . . . . .2
ä·‚Ë¯Ë ÚÂ΂ËÁÓ‡ . . . . . . . . . . . . . . . . . . . . . . . . . . . . . . . . . . . . . . . . . . .2
дМУФНЛ ФЫО¸Ъ‡ ‰ЛТЪ‡МˆЛУММУ„У ЫФ‡‚ОВМЛfl . . . . . . . . . . . . . . . . . . . . . . . .3
Å˚ÒÚ‡fl ̇ÒÚÓÈ͇ . . . . . . . . . . . . . . . . . . . . . . . . . . . . . . . . . . . . . . . . . . . . .4
ëÓÚËӂ͇ ͇̇ÎÓ‚ . . . . . . . . . . . . . . . . . . . . . . . . . . . . . . . . . . . . . . . . . . . .4
àÏfl ͇̇· . . . . . . . . . . . . . . . . . . . . . . . . . . . . . . . . . . . . . . . . . . . . . . . . . . .4
б‡ФУПМЛЪ¸ кЫ˜М. . . . . . . . . . . . . . . . . . . . . . . . . . . . . . . . . . . . . . . . . . . . . . .5
иУ˜ЛВ ФЫМНЪ˚ М‡ТЪУИНЛ ПВМ˛ мТЪ‡МУ‚ЛЪ¸ . . . . . . . . . . . . . . . . . . . . . . . .5
èÓθÁÓ‚‡ÌËÂ
аТФУО¸БУ‚‡МЛВ ‡‰ЛУФЛВПМЛН‡ . . . . . . . . . . . . . . . . . . . . . . . . . . . . . . . . .5
ç‡ÒÚÓÈ͇ ËÁÓ·‡ÊÂÌËfl . . . . . . . . . . . . . . . . . . . . . . . . . . . . . . . . . . . . . . . .6
ç‡ÒÚÓÈ͇ Á‚Û͇ . . . . . . . . . . . . . . . . . . . . . . . . . . . . . . . . . . . . . . . . . . . . . . .6
з‡ТЪУИН‡ ı‡‡НЪВЛТЪЛН . . . . . . . . . . . . . . . . . . . . . . . . . . . . . . . . . . . . . . .6
îÛÌ͈Ëfl ·Û‰ËθÌË͇ . . . . . . . . . . . . . . . . . . . . . . . . . . . . . . . . . . . . . . . . . . .7
ЕОУНЛУ‚Н‡ ЪВОВ‚ЛБУ‡ . . . . . . . . . . . . . . . . . . . . . . . . . . . . . . . . . . . . . . . . .7
нВОВЪВНТЪ . . . . . . . . . . . . . . . . . . . . . . . . . . . . . . . . . . . . . . . . . . . . . . . . . . . .8
îÛÌ͈Ëfl 16/9 . . . . . . . . . . . . . . . . . . . . . . . . . . . . . . . . . . . . . . . . . . . . . . . . . .9
аТФУО¸БУ‚‡МЛВ ‚ТЪУВММУ„У ФОВВ‡ DVD
ìÒÚ‡Ìӂ͇ ‰ËÒ͇ . . . . . . . . . . . . . . . . . . . . . . . . . . . . . . . . . . . . . . . . . . . . . .10
ÇÓÒÔÓËÁ‚‰ÂÌË ‚ˉÂÓ‰ËÒÍÓ‚ DVD ËÎË CD . . . . . . . . . . . . . . . . . . . . . . .11
ÇÓÒÔÓËÁ‚‰ÂÌË ‡Û‰ËÓ‰ËÒ͇ CD . . . . . . . . . . . . . . . . . . . . . . . . . . . . . . . .12
ÇÓÒÔÓËÁ‚‰ÂÌË ‰ËÒ͇ CD Ò ËÁÓ·‡ÊÂÌËflÏË . . . . . . . . . . . . . . . . . . . . .12
åÂÌ˛ Ô· DVD . . . . . . . . . . . . . . . . . . . . . . . . . . . . . . . . . . . . . . . . . . . .13
еВМ˛ Toolbar (и‡МВО¸ ЛМТЪЫПВМЪУ‚) . . . . . . . . . . . . . . . . . . . . . . . . . . . .13
åÂÌ˛ Preferences (èÂÒÓ̇θÌ˚ ̇ÒÚÓÈÍË) . . . . . . . . . . . . . . . . . . . . .14
åÂÌ˛ Setup (ìÒÚ‡ÌÓ‚ËÚ¸) . . . . . . . . . . . . . . . . . . . . . . . . . . . . . . . . . . . . . . .14
èÓ„‡ÏÏËÓ‚‡ÌË ‚ÓÒÔÓËÁ‚‰ÂÌËfl . . . . . . . . . . . . . . . . . . . . . . . . . . . .15
дУМЪУО¸ ‰УТЪЫФ‡ Л ·ОУНЛУ‚Н‡ . . . . . . . . . . . . . . . . . . . . . . . . . . . . . . . . .15
èÂËÙÂËÈ̇fl ‡ÔÔ‡‡ÚÛ‡
ЗЛ‰ВУП‡„МЛЪУЩУМ . . . . . . . . . . . . . . . . . . . . . . . . . . . . . . . . . . . . . . . . . . . .16
ÑÛ„‡fl ‡ÔÔ‡‡ÚÛ‡ . . . . . . . . . . . . . . . . . . . . . . . . . . . . . . . . . . . . . . . . . . . .16
ÑÎfl ‚˚·Ó‡ ÔÓ‰Íβ˜ÂÌÌ˚ı ‡ÔÔ‡‡ÚÓ‚ . . . . . . . . . . . . . . . . . . . . . . . . . . . .16
дМУФН‡ ‚Л‰ВУП‡„МЛЪУЩУМ‡ . . . . . . . . . . . . . . . . . . . . . . . . . . . . . . . . . . . . .17
è‡ÍÚ˘ÂÒ͇fl ËÌÙÓχˆËfl
ëÓ‚ÂÚ˚ . . . . . . . . . . . . . . . . . . . . . . . . . . . . . . . . . . . . . . . . . . . . . . . . . . . . . .18
ëÎÓ‚‡¸ . . . . . . . . . . . . . . . . . . . . . . . . . . . . . . . . . . . . . . . . . . . . . . . . . . . . .18
°
мН‡Б‡МЛfl ФУ ЫЪЛОЛБ‡ˆЛЛ
З‡¯ ЪВОВ‚ЛБУ ТУ‰ВКЛЪ П‡ЪВЛ‡О˚, ФУ‰ОВК‡˘ЛВ ФУ‚ЪУМУПЫ ЛТФУО¸БУ‚‡МЛ˛
ЛОЛ ЫЪЛОЛБ‡ˆЛЛ. СОfl ПЛМЛПЛБ‡ˆЛЛ ‚˚·УТУ‚ ‚ УНЫК‡˛˘Ы˛ ТВ‰Ы
ТФВˆЛ‡ОЛБЛУ‚‡ММ˚В ФВ‰ФЛflЪЛfl ТУ·Л‡˛Ъ ‚˚¯В‰¯ЛВ ЛБ ЫФУЪВ·ОВМЛfl
ЪВОВ‚ЛБУ˚, ˜ЪУ·˚ ‰ВПУМЪЛУ‚‡Ъ¸ Лı Л ТУı‡МЛЪ¸ П‡ЪВЛ‡О˚, ФЛ„У‰М˚В ‰Оfl
ФУ‚ЪУМУ„У ЛТФУО¸БУ‚‡МЛfl (УТ‚В‰УПЛЪ¸Тfl Ы ‚‡¯В„У ФУ‰‡‚ˆ‡).
PyccÍËÈ
Page 56

нВОВ‚ЛБУ ЛПВВЪ 4 НО‡‚Л¯Л, НУЪУ˚В
М‡ıУ‰flЪТfl ОЛ·У М‡ ФВВ‰МВИ ТЪВМНВ, ОЛ·У
М‡ ‚ВıМВИ ФУ‚ВıМУТЪЛ, ‚ Б‡‚ЛТЛПУТЪЛ УЪ
ПУ‰ВОВИ. дО‡‚Л¯Л VOLUME - + (-
” +)
ФУБ‚УОfl˛Ъ В„ЫОЛУ‚‡Ъ¸ ЫУ‚ВМ¸ Б‚ЫН‡.
дО‡‚Л¯Л PROGRAM - + (- P +) ФУБ‚УОfl˛Ъ
‚˚·Л‡Ъ¸ ФУ„‡ПП˚. СОfl ‰УТЪЫФ‡ Н ПВМ˛
‰ВК‡Ъ¸ М‡К‡Ъ˚ПЛ НО‡‚Л¯Л
” - Ë ” +.
á‡ÚÂÏ Í·‚Ë¯Ë PROGRAM - + ÔÓÁ‚ÓÎfl˛Ú
‚˚·‡Ú¸ ̇ÒÚÓÈÍÛ, ‡ Í·‚˯Ë
” - +
ÔÓËÁ‚ÂÒÚË Ì‡ÒÚÓÈÍÛ. ÑÎfl ‚˚ıÓ‰‡ ËÁ ÏÂÌ˛
‰Âʇڸ ̇ʇÚ˚ÏË Í·‚˯Ë
” - Ë ” +.
иЛПВ˜‡МЛВ: ВТОЛ ЩЫМНˆЛfl ЕгйдакйЗдД
‡НЪЛ‚ЛУ‚‡М‡, ˝ЪЛ НО‡‚Л¯Л МВ ‰ВИТЪ‚Ы˛Ъ
(ТП. ТЪ. 7).
PROGRAMVOLUME
--
++
2
&
ê‡ÁÏ¢ÂÌË ÚÂ΂ËÁÓ‡
мТЪ‡МУ‚ЛЪ¸ ЪВОВ‚ЛБУ М‡ ФУ˜МЫ˛ Л
ЫТЪУИ˜Л‚Ы˛ ФУ‚ВıМУТЪ¸, ФВ‰ЫТПУЪВ‚
Т‚У·У‰МУВ ФУТЪ‡МТЪ‚У МВ ПВМВВ 5 ТП ‚УНЫ„
ЪВОВ‚ЛБУ‡. зВ М‡Н˚‚‡Ъ¸ В„У (Т‡ОЩВЪНУИ,
ТН‡ЪВЪ¸˛ Л Ъ. Ф.), МВ ТЪ‡‚ЛЪ¸ М‡ МВ„У
ФВ‰ПВЪ˚, М‡ФУОМВММ˚В КЛ‰НУТЪ¸˛ (‚‡Б˚) ЛОЛ
‚˚‰ВОfl˛˘ЛВ ЪВФОУ (О‡ПФ˚), ˜ЪУ·˚ ЛБ·ВК‡Ъ¸
УФ‡ТМУТЪВИ ЛОЛ ФУ‚ВК‰ВМЛИ. зВ ‰УФЫТН‡Ъ¸
ФУФ‡‰‡МЛfl ·˚Б„У‚ ‚У‰˚ М‡ ЪВОВ‚ЛБУ.
é
èÓ‰Íβ˜ÂÌËÂ
•
ЗТЪ‡‚ЛЪ¸ ЩЛ¯НЫ ‡МЪВММ˚ ‚ ‡Б˙ВП :,
‡ТФУОУКВММ˚И Т Б‡‰МВИ ТЪУУМ˚ ЪВОВ‚ЛБУ‡.
•
ЗТЪ‡‚¸ЪВ ¯Ъ˚¸ ‡МЪВММ˚ ‡‰ЛУФЛВПМЛН‡ ‚
„МВБ‰У FM ANT, ЛТФУО¸БЫfl ‰Оfl ˝ЪУ„У
ФЛО‡„‡ВП˚И ФВВıУ‰МЛН.
иЛ ЛТФУО¸БУ‚‡МЛЛ
‚МЫЪВММВИ ‡МЪВММ˚ ФЛВП, ‚ МВНУЪУ˚ı
ТОЫ˜‡flı, ПУКВЪ ·˚Ъ¸ Б‡ЪЫ‰МВМ. З˚ ПУКВЪВ
ЫОЫ˜¯ЛЪ¸ В„У, ‚‡˘‡fl ‡МЪВММЫ. ЦТОЛ Н‡˜ВТЪ‚У
ФЛВП‡ МВ ЫОЫ˜¯ЛЪТfl, МВУ·ıУ‰ЛПУ ФВВИЪЛ М‡
М‡ЫКМЫ˛ ‡МЪВММЫ.
• ÇÍβ˜ËÚ ¯ÌÛ ÔËÚ‡ÌËfl ‚ ÒÂÚ¸ (220-240 V
/ 50 Hz).
“
иЫО¸Ъ ‰ЛТЪ‡МˆЛУММУ„У
ЫФ‡‚ОВМЛfl
ÇÒÚ‡‚ËÚ¸ Ó·Â ÔÓÒÚ‡‚ÎflÂÏ˚Â Ò ‡ÔÔ‡‡ÚÓÏ
·‡Ъ‡ВИНЛ ЪЛФ‡ R6, ‚ ТУУЪ‚ВЪТЪ‚ЛЛ Т
ЫН‡Б‡ММ˚П М‡Ф‡‚ОВМЛВП ЫТЪ‡МУ‚НЛ.
м‰УТЪУ‚В¸ЪВТ¸, ˜ЪУ ТВОВНЪУ ВКЛП‡
ЫТЪ‡МУ‚ОВМ ‚ ФУОУКВМЛВ TV.
Е‡Ъ‡ВИНЛ, ФУТЪ‡‚ОВММ˚В ‚ПВТЪВ Т ‡ФФ‡‡ЪУП,
МВ ТУ‰ВК‡Ъ МЛ ЪЫЪЛ, МЛ Н‡‰ПЛfl, МЛ МЛНВОfl ‚
Б‡·УЪВ У· Уı‡МВ УНЫК‡˛˘ВИ ТВ‰˚. иУТ¸·‡
МВ ‚˚·‡Т˚‚‡Ъ¸ УЪ‡·УЪ‡‚¯ЛВ ·‡Ъ‡ВИНЛ, ‡
ЛТФУО¸БУ‚‡Ъ¸ ЛПВ˛˘ЛВТfl ‚ ‚‡¯ВП
‡ТФУflКВМЛЛ ТВ‰ТЪ‚‡ Лı Т·У‡ ‰Оfl
ЫЪЛОЛБ‡ˆЛЛ (У·‡ЪЛЪ¸Тfl Н ‚‡¯ВПЫ ФУ‰‡‚ˆЫ).
‘
ÇÍβ˜ÂÌËÂ
з‡К‡Ъ¸ М‡ НО‡‚Л¯Ы ‚НО./‚˚НО. ‰Оfl
‚НО˛˜ВМЛfl ЪВОВ‚ЛБУ‡. ᇄӇВЪТfl
Н‡ТМ˚И Т‚ВЪУ‚УИ ЛМ‰ЛН‡ЪУ, Л ˝Н‡М
Б‡КЛ„‡ВЪТfl. й·‡ЪЛЪВТ¸ МВФУТВ‰ТЪ‚ВММУ
Н „О‡‚В ·˚ТЪУИ ЫТЪ‡МУ‚НЛ М‡ ТОВ‰Ы˛˘ВИ
ТЪ‡МЛˆВ. ЦТОЛ ЪВОВ‚ЛБУ М‡ıУ‰ЛЪТfl ‚
‰ВКЫМУП ТУТЪУflМЛЛ, М‡К‡Ъ¸ М‡ НО‡‚Л¯Ы
к
# ФЫО¸Ъ‡ ‰ЛТЪ‡МˆЛУММУ„У ЫФ‡‚ОВМЛfl.
иЛ ЛТФУО¸БУ‚‡МЛЛ ФЫО¸Ъ‡ ‰ЛТЪ‡МˆЛУММУ„У
ЫФ‡‚ОВМЛfl Т‚ВЪУ‚УИ ЛМ‰ЛН‡ЪУ ПЛ„‡ВЪ.
5 cm
5 cm
5 cm
ìÒÚ‡Ìӂ͇ ÚÂ΂ËÁÓ‡
ä·‚Ë¯Ë ÚÂ΂ËÁÓ‡
FM.
ANT.
Page 57

3
дМУФНЛ ФЫО¸Ъ‡ ‰ЛТЪ‡МˆЛУММУ„У ЫФ‡‚ОВМЛfl
DVD: üÁ˚Í ‰Û·ÎËÓ‚‡ÌËfl (ÒÚ. 11)
TV: кВКЛП Б‚ЫНУ‚У„У ТУФУ‚УК‰ВМЛfl
иУБ‚УОflВЪ ЫТЛОЛЪ¸ Б‚ЫН
ТЪВВУЩУМЛ˜ВТНЛı ФВВ‰‡˜ Stereo
Ë Nicam Stereo ‚ ВКЛПВ Mono, ЛОЛ
ÔÓÁ‚ÓÎflÂÚ ‚˚·‡Ú¸ ÂÊËÏ Dual I
ËÎË Dual II ÔË ÔËÂÏ Ô‰‡˜,
Ú‡ÌÒÎflˆËfl ÍÓÚÓ˚ı
ÓÒÛ˘ÂÒÚ‚ÎflÂÚÒfl ̇ ‰‚Ûı flÁ˚͇ı.
燉ÔËÒ¸ Mono (åÓÌÓ) ÏÂÌflÂÚ ˆ‚ÂÚ Ì‡
Н‡ТМ˚И ‚ ВКЛПВ ЫТЛОВММУ„У Б‚ЫН‡.
è˜Â̸ ‡‰ËÓÒڇ̈ËÈ (ÒÚ. 5)
лВОВНЪУ ВКЛП‡ (ТЪ. 17)
дМУФНЛ DVD (ТЪ. 11)
дМУФНЛ ‚Л‰ВУП‡„МЛЪУЩУМ‡ (ТЪ.17)
Л НМУФНЛ ЪВОВЪВНТЪ‡ (ТЪ. 8).
艂‡ËÚÂθ̇fl ̇ÒÚÓÈ͇ Á‚Û͇
иУБ‚УОflВЪ ФУОЫ˜ЛЪ¸ ‰УТЪЫФ Н ВКЛПЫ
Ô‰‚‡ËÚÂθÌÓÈ Ì‡ÒÚÓÈÍË
МВТНУО¸НЛı Ф‡‡ПВЪУ‚ Б‚ЫН‡: ꘸,
åÛÁ˚͇, íÂ‡Ú Ë ‚ÂÌÛÚ¸Òfl ‚ ÂÊËÏ
èÂÒÓ̇θ̇fl ̇ÒÚÓÈ͇.
åÂÌ˛ íV : лОЫКЛЪ ‰Оfl ‚˚БУ‚‡
ÏÂÌ˛ ËÎË ‚˚ıÓ‰‡ ËÁ ÏÂÌ˛.
ЙУПНУТЪ¸
лОЫКЛЪ ‰Оfl М‡ТЪУИНЛ ЫУ‚Мfl Б‚ЫН‡.
äÛÒÓ
: щЪЛ 4 НМУФНЛ ФУБ‚УОfl˛Ъ
ÓÒÛ˘ÂÒÚ‚ÎflÚ¸ ÔÂÂıÓ‰ ÏÂʉÛ
‡Á΢Ì˚ÏË ÏÂÌ˛.
сЛЩУ‚˚В НМУФНЛ
лОЫК‡Ъ ‰Оfl МВФУТВ‰ТЪ‚ВММУ„У
‚Íβ˜ÂÌËfl ͇̇ÎÓ‚. ÑÎfl
‚Íβ˜ÂÌËfl ͇̇·, ÌÓÏÂ
НУЪУУ„У ТУТЪУЛЪ ЛБ ‰‚Ыı ˆЛЩ,
ÌÂÓ·ıÓ‰ËÏÓ ‰Ó·‡‚ËÚ¸ ‚ÚÓÛ˛
ˆËÙÛ ‰Ó ËÒ˜ÂÁÌÓ‚ÂÌËfl ˜ÂÚ˚.
Ç˚·Ó ‚̯ÌËı ÛÒÚÓÈÒÚ‚ EXT
(ЗзЦтз.)
: ç‡ÊËχÈÚÂ
ПМУ„УН‡ЪМУ М‡ ˝ЪЫ НМУФНЫ
‰Îfl ‚˚·Ó‡ EXT1 Ë AV
(ÒÚ.16)
.
кВКЛП УКЛ‰‡МЛfl
иУБ‚УОflВЪ ФВВ‚У‰ЛЪ¸
ЪВОВ‚ЛБУ ‚ ВКЛП УКЛ‰‡МЛfl.
СОfl ‚НО˛˜ВМЛfl ЪВОВ‚ЛБУ‡ ЛБ
ВКЛП‡ УКЛ‰‡МЛfl М‡КПЛЪВ М‡
P @#, b, 0 - 9.
DVD: üÁ˚Í ÒÛ·ÚËÚÓ‚ (ÒÚ. 11)
TV: З˚БУ‚ ЪВОВЪВНТЪ‡ (ÒÚ. 8)
DVD: åÂÌ˛ OSD (ÒÚ. 13)
TV:
àÌÙÓχˆËfl, ‚˚‚Ó‰Ëχfl ̇
˝Н‡М / ФУТЪУflММ˚И n°
: лОЫКЛЪ ‰Оfl
ЛМ‰ЛН‡ˆЛЛ / Т·УТ‡ ЛМ‰ЛН‡ˆЛЛ МУПВ‡
Н‡М‡О‡, В„У ЛПВМЛ (ВТОЛ УМУ ЛПВВЪТfl),
‚ВПВМЛ, ВКЛП‡ Б‚ЫН‡ Л УТЪ‡ЪН‡
‚ВПВМЛ ФУ Ъ‡ИПВЫ. з‡КПЛЪВ Л
Ы‰ВКЛ‚‡ИЪВ М‡К‡ЪУИ НМУФНЫ ‚
ЪВ˜ВМЛВ 5 ТВНЫМ‰ ‰Оfl ‚НО˛˜ВМЛfl
ФУТЪУflММУИ ЛМ‰ЛН‡ˆЛЛ МУПВ‡.
кВКЛП TV / DVD
èÓÁ‚ÓÎflÂÚ ÔÂÂÍβ˜‡Ú¸ ÚÂ΂ËÁÓ
ÏÂÊ‰Û ÂÊËχÏË TV Ë DVD
(ÒÚ.11)
.
艂‡ËÚÂθ̇fl ̇ÒÚÓÈ͇
ËÁÓ·‡ÊÂÌËfl
иУБ‚УОflВЪ ФУОЫ˜ЛЪ¸ ‰УТЪЫФ Н
МВТНУО¸НЛП ФВ‰‚‡ЛЪВО¸МУ
ЫТЪ‡МУ‚ОВММ˚П Ф‡‡ПВЪ‡П
ЛБУ·‡КВМЛfl: з‡Т˚˘ВММУВ,
ЦТЪВТЪ‚ВММУВ, еfl„НУВ,
еЫО¸ЪЛПВ‰Л‡ Л ‚ВМЫЪ¸Тfl ‚ ВКЛП
иВТУМ‡О¸М‡fl М‡ТЪУИН‡.
éÚÍβ˜ÂÌË Á‚Û͇
лОЫКЛЪ ‰Оfl УЪНО˛˜ВМЛfl ЛОЛ
‚Íβ˜ÂÌËfl Á‚Û͇
ÔÓ‰Ú‚ÂʉÂÌË ‚˚·Ó‡ (DVD/VCR)
кВКЛП˚ 16:9 (ТЪ. 9)
Ç˚·Ó ͇̇ÎÓ‚
лОЫКЛЪ ‰Оfl ФВВıУ‰‡ Н ФВ‰˚‰Ы˘ВПЫ
ЛОЛ ТОВ‰Ы˛˘ВПЫ Н‡М‡ОЫ.
СОfl МВНУЪУ˚ı Н‡М‡ОУ‚ М‡Б‚‡МЛВ ФВВ‰‡˜Л
ФУfl‚ОflВЪТfl ‚ МЛКМВИ ˜‡ТЪЛ ˝Н‡М‡.
éÍÛʇ˛˘ËÈ Ó·˙ÂÏÌ˚È Á‚ÛÍ
СОfl ‚НО˛˜ВМЛfl / УЪНО˛˜ВМЛfl ˝ЩЩВНЪ‡
УНЫК‡˛˘В„У У·˙ВПМУ„У Б‚Ы˜‡МЛfl.
З ТЪВВУЩУМЛ˜ВТНУП ВКЛПВ ТУБ‰‡ВЪТfl
‚ФВ˜‡ЪОВМЛВ, ˜ЪУ „УПНУ„У‚УЛЪВОЛ
‡ТФУОУКВМ˚ ‰Ы„ УЪ ‰Ы„‡ М‡ ·УО¸¯Лı
‡ТТЪУflМЛflı ˜ВП М‡ Т‡ПУП ‰ВОВ. З ПУ‰ВОflı,
ЛПВ˛˘Лı ЩЫМНˆЛ˛ Virtual Dolby Surround *,
ТУБ‰‡ВЪТfl ˝ЩЩВНЪ Ъ˚ОУ‚˚ı
„УПНУ„У‚УЛЪВОВИ ТЛТЪВП˚ Dolby
Surround Pro Logic. З ТЪВВУЩУМЛ˜ВТНУП
ВКЛПВ ТУБ‰‡ВЪТfl ФТВ‚‰У˝ЩЩВНЪ
У·˙ВПМУ„У ТЪВВУЩУМЛ˜ВТНУ„У Б‚Ы˜‡МЛfl.
è‰˚‰Û˘ËÈ Í‡Ì‡Î
ÑÎfl ÔÂÂÍβ˜ÂÌËfl ̇ ͇̇Î,
ÍÓÚÓ˚È ‚ÓÒÔÓËÁ‚Ó‰ËÎÒfl ‰Ó ˝ÚÓ„Ó.
åÂÌ˛ DVD (ÒÚ. 11)
кВКЛП ‡‰ЛУ (MENU) / нV
èÓÁ‚ÓÎflÂÚ ÔÂÂÍβ˜‡Ú¸ ÚÂ΂ËÁÓ
ÏÂÊ‰Û ÂÊËχÏË ‡‰ËÓ Ë íV
(ÒÚ.5)
.
* “Dolby” Ë ÒËÏ‚ÓÎ ‰‚ÓÈÌÓ„Ó -D - ˝ÚÓ ÚÓ‚‡Ì˚ Á̇ÍË ÍÓÏÔ‡ÌËË Dolby Laboratories.
аБ„УЪУ‚ОВМУ ФУ ОЛˆВМБЛЛ НУПФ‡МЛЛ Dolby Laboratories.
ı
TV
VCR
¢
MODE
Ó›ŸË
·
-
TV / DVD
MENU
.
SUBTITLEAUDIO
ù
SYSTEM MENU
∫
Ê∆ Æ
SMARTSMART
ª
MENU
DVD
¤
++
”
OK
[
--
%
∏
12
P
RADIO
3
564
879
Ø
Á
0
Page 58

4
Å˚ÒÚ‡fl ̇ÒÚÓÈ͇
ëÓÚËӂ͇ ͇̇ÎÓ‚
àÏfl ͇̇·
иЛ ФВ‚УП ‚НО˛˜ВМЛЛ ЪВОВ‚ЛБУ‡ М‡ ˝Н‡МВ
ФУfl‚ОflВЪТfl ПВМ˛. З‡П ·Ы‰ВЪ ФВ‰ОУКВМУ
‚˚·‡Ъ¸ ТЪ‡МЫ, ‡ Ъ‡НКВ flБ˚Н ПВМ˛.
ЦТОЛ ПВМ˛ МВ ФУfl‚ЛОУТ¸, М‡КПЛЪВ НМУФНЛ
”- Ë ”+ ̇ ÚÂ΂ËÁÓÂ Ë Û‰ÂÊË‚‡ÈÚÂ
Лı ‚ М‡К‡ЪУП ФУОУКВМЛЛ ‚ ЪВ˜ВМЛВ 5 ТВНЫМ‰
‰Оfl ‚˚БУ‚‡ ПВМ˛.
& аТФУО¸БЫИЪВ НМУФНЛ îÏ ÔÛθڇ
‰ЛТЪ‡МˆЛУММУ„У ЫФ‡‚ОВМЛfl ‰Оfl ‚˚·У‡
‚‡¯ВИ ТЪ‡М˚, ‡ Б‡ЪВП ФУ‰Ъ‚В‰ЛЪВ
Т‰ВО‡ММ˚И ‚˚·У Т ФУПУ˘¸˛ НМУФНЛ
¬.
ЦТОЛ М‡Б‚‡МЛВ ‚‡¯ВИ ТЪ‡М˚ УЪТЫЪТЪ‚ЫВЪ ‚
ФВ‰О‡„‡ВПУП ФВВ˜МВ, ‚˚·ВЛЪВ ФЫМНЪ “. . .”
é á‡ÚÂÏ ‚˚·ÂËÚ flÁ˚Í ÏÂÌ˛ Ò ÔÓÏÓ˘¸˛
НМУФУН
îÏ Ë ÔӉڂ‰ËÚ ҉·ÌÌ˚È
‚˚·У НМУФНУИ
¬.
“ иУТОВ ˝ЪУ„У М‡˜МВЪТfl ‡‚ЪУП‡ЪЛ˜ВТНЛИ
ФУЛТН Н‡М‡ОУ‚. ЗТВ ‰УТЪЫФМ˚В ЪВОВН‡М‡О˚
Л ‡‰ЛУТЪ‡МˆЛЛ Б‡ФЛТ˚‚‡˛ЪТfl ‚ Ф‡ПflЪ¸.
ЗТfl УФВ‡ˆЛfl Б‡МЛП‡ВЪ МВТНУО¸НУ ПЛМЫЪ.
з‡ ˝Н‡МВ ·Ы‰ВЪ УЪУ·‡К‡Ъ¸Тfl ıУ‰ ФУЛТН‡
Л НУОЛ˜ВТЪ‚У М‡И‰ВММ˚ı Н‡М‡ОУ‚.
иУ Б‡‚В¯ВМЛЛ М‡ТЪУИНЛ ПВМ˛ ЛТ˜ВБМВЪ.
СОfl ‚˚ıУ‰‡ ЛБ ВКЛП‡ ФУЛТН‡ ЛОЛ В„У
УТЪ‡МУ‚НЛ М‡КПЛЪВ НМУФНЫ H. ЦТОЛ МЛ У‰ЛМ
Н‡М‡О МВ ·Ы‰ВЪ У·М‡ЫКВМ, У·‡ЪЛЪВТ¸ Н
„О‡‚В «лУ‚ВЪ˚» М‡ ТЪ. 18.
‘
ЦТОЛ ФВВ‰‡˛˘‡fl ТЪ‡МˆЛfl ЛОЛ Н‡·ВО¸М‡fl
ТВЪ¸ ФВВ‰‡˛Ъ ТЛ„М‡О ‡‚ЪУП‡ЪЛ˜ВТНУИ
ТУЪЛУ‚НЛ, Н‡М‡О˚ ·Ы‰ЫЪ ФУМЫПВУ‚‡М˚
Ф‡‚ЛО¸МУ. з‡ ˝ЪУП М‡ТЪУИН‡ Б‡‚В¯‡ВЪТfl.
( Ç ÔÓÚË‚ÌÓÏ ÒÎÛ˜‡Â ‚˚ ‰ÓÎÊÌ˚
ЛТФУО¸БУ‚‡Ъ¸ ПВМ˛
ëÓÚËӂ͇ ‰Îfl
ËÒÔ‡‚ÎÂÌËfl ÌÛχˆËË Í‡Ì‡ÎÓ‚.
зВНУЪУ˚В ‚В˘‡ЪВО¸М˚В ТЪ‡МˆЛЛ ЛОЛ
Н‡·ВО¸М˚В ТВЪЛ ФВВ‰‡˛Ъ Т‚УЛ ТУ·ТЪ‚ВММ˚В
Ф‡‡ПВЪ˚ ‰Оfl ТУЪЛУ‚НЛ (ФУ В„ЛУМЫ, flБ˚НЫ
Л Ф.). З ˝ЪУП ТОЫ˜‡В ‚˚ ‰УОКМ˚ ‚˚‰ВОЛЪ¸
‚˚·‡ММ˚В УФˆЛЛ Т ФУПУ˘¸˛ НМУФУН îÏ,
‡ Б‡ЪВП ФУ‰Ъ‚В‰ЛЪ¸ ‚˚·У НМУФНУИ ¬.
& з‡КПЛЪВ НМУФНЫ H. ç‡ ˝Í‡Ì ÔÓfl‚ËÚÒfl
Ë̉Ë͇ˆËfl
éÒÌÓ‚ÌÓ ÏÂÌ˛.
é З˚‰ВОЛЪВ Т ФУПУ˘¸˛ НЫТУ‡ ПВМ˛
ìÒÚ‡ÌÓ‚ËÚ¸, ‡ Á‡ÚÂÏ ÏÂÌ˛ ëÓÚËӂ͇.
“ Ç˚·ÂËÚ ͇̇Î, ÌÓÏ ÍÓÚÓÓ„Ó ‚˚
КВО‡ВЪВ ЛБПВМЛЪ¸, НМУФН‡ПЛ
îÏ Ë
М‡КПЛЪВ НМУФНЫ
¬.
‘ аТФУО¸БЫИЪВ Б‡ЪВП НМУФНЛ îÏ ‰Îfl
ФЛТ‚УВМЛfl Н‡М‡ОЫ МУ‚У„У МУПВ‡ Л
ФУ‰Ъ‚В‰ЛЪВ ‚˚·У НМУФНУИ
È.
( èÓ‚ÚÓËÚ ˝Ú‡Ô˚ “ Ë ‘ ÒÚÓθÍÓ ‡Á,
ТНУО¸НУ ЛПВВЪТfl Н‡М‡ОУ‚, МУПВ‡ НУЪУ˚ı
‚‡П МВУ·ıУ‰ЛПУ ЛБПВМЛЪ¸.
§ СОfl ‚˚ıУ‰‡ ЛБ ПВМ˛ М‡КПЛЪВ НМУФНЫ d.
З˚ ПУКВЪВ, ВТОЛ ФУКВО‡ВЪВ, ФЛТ‚УЛЪ¸
ЛПfl Н‡К‰УПЫ Н‡М‡ОЫ Л ‚МВ¯МВПЫ
ЫТЪУИТЪ‚Ы.
иЛПВ˜‡МЛВ: ФЛ ЫТЪ‡МУ‚НВ Н‡М‡ОУ‚ ЛП
‡‚ЪУП‡ЪЛ˜ВТНЛ ФЛТ‚‡Л‚‡˛ЪТfl ЛПВМ‡, ВТОЛ
ТЪ‡МˆЛfl ФВВ‰‡ВЪ Л‰ВМЪЛЩЛН‡ˆЛУММ˚И
ТЛ„М‡О.
& з‡КПЛЪВ НМУФНЫ H.
é З˚‰ВОЛЪВ Т ФУПУ˘¸˛ НЫТУ‡ ПВМ˛
ìÒÚ‡ÌÓ‚ËÚ¸, ‡ Á‡ÚÂÏ ÏÂÌ˛ àÏfl ͇̇·.
“ аТФУО¸БЫИЪВ НМУФНЛ îÏ ‰Îfl ‚˚·Ó‡
͇̇·, ÍÓÚÓÓÏÛ ‚˚ Ê·ÂÚ ÔËÒ‚ÓËÚ¸
ЛПfl ЛОЛ ЛБПВМЛЪ¸ В„У.
‘ аТФУО¸БЫИЪВ НМУФНЛ È¬ ‰Îfl
ФВВПВ˘ВМЛfl ‚МЫЪЛ У·О‡ТЪЛ ЛМ‰ЛН‡ˆЛЛ
ЛПВМЛ (5 ТЛП‚УОУ‚) Л НМУФНЛ
îÏ ‰Îfl
‚˚·Ó‡ ÒËÏ‚ÓÎÓ‚.
( иУТОВ ‚‚У‰‡ М‡Б‚‡МЛfl ЛТФУО¸БЫИЪВ
НМУФНЫ
È ‰Îfl ‚˚ıÓ‰‡ ËÁ ÏÂÌ˛. àÏfl
͇̇· ÒÓı‡ÌflÂÚÒfl ‚ Ô‡ÏflÚË.
§ èÓ‚ÚÓËÚ ˝Ú‡Ô˚ “ Ë ( ‰Îfl ÔËÒ‚ÓÂÌËfl
ЛПВМЛ Н‡К‰УПЫ Н‡М‡ОЫ.
è СОfl ‚˚ıУ‰‡ ЛБ ПВМ˛ М‡КПЛЪВ НМУФНЫ d.
Select Country
Country
DK
E
F
FI
Æ GB
Language
Español
Svenska
English
Dansk
Nederlands
Осоо
- об
- ук
- кс.
$ Усо
Усо
- к
- С
- осок
- у. с
$
Соок
-
00
01 TF1
02 FR2
03ÆFR3
04 C +
05 ARTE
Page 59

5
б‡ФУПМЛЪ¸ кЫ˜М.
иУ˜ЛВ ФЫМНЪ˚ М‡ТЪУИНЛ ПВМ˛ мТЪ‡МУ‚ЛЪ¸
ùÚÓ ÏÂÌ˛ ÔÓÁ‚ÓÎflÂÚ ‚‚Ó‰ËÚ¸ ‚ Ô‡ÏflÚ¸
͇ʉ˚È Í‡Ì‡Î ÓÚ‰ÂθÌÓ.
& з‡КПЛЪВ НМУФНЫ H.
é З˚‰ВОЛЪВ Т ФУПУ˘¸˛ НЫТУ‡ ПВМ˛
ìÒÚ‡ÌÓ‚ËÚ¸, ‡ Á‡ÚÂÏ ÏÂÌ˛ б‡ФУПМЛЪ¸ кЫ˜М.:
“ лЛТЪВП‡: ‚˚·ÂËÚ ւÓÔ‡ (‡‚ЪУП‡ЪЛ˜ВТНУВ
У·М‡ЫКВМЛВ*) ЛОЛ
á‡Ô‡‰Ì‡fl Ö‚ÓÔ‡
(Òڇ̉‡Ú BG), ЗУТЪУ˜М‡fl Ц‚УФ‡ (Òڇ̉‡Ú
DK),
лУВ‰ЛМВММУВ дУУОВ‚ТЪ‚У (Òڇ̉‡Ú I)
ËÎË
î‡ÌˆËfl (Òڇ̉‡Ú LL’).
* äÓÏ î‡ÌˆËË (Òڇ̉‡Ú LL’), „‰Â
ÌÂÓ·ıÓ‰ËÏÓ ‚˚·‡Ú¸ ÓÔˆË˛ î‡ÌˆËfl.
‘
иУЛТН: М‡КПЛЪВ НМУФНЫ ¬: ‚Íβ˜ËÚÒfl ÂÊËÏ
ФУЛТН‡. иУТОВ У·М‡ЫКВМЛfl Н‡НУ„У-ОЛ·У
Н‡М‡О‡ ФУЛТН ФВН‡˘‡ВЪТfl Л ФУfl‚ОflВЪТfl
ЛМ‰ЛН‡ˆЛfl ЛПВМЛ (ВТОЛ Ъ‡НУ‚УВ ЛПВВЪТfl)
Н‡М‡О‡. иВВıУ‰ЛЪВ Н ТОВ‰Ы˛˘ВПЫ ˝Ъ‡ФЫ.
ЦТОЛ ‚˚ БМ‡ВЪВ ˜‡ТЪУЪЫ КВО‡ВПУ„У Н‡М‡О‡,
М‡·ВЛЪВ ВВ МВФУТВ‰ТЪ‚ВММУ Т ФУПУ˘¸˛
НМУФУН
0 - 9.
ЦТОЛ МЛН‡НУ„У ЛБУ·‡КВМЛfl
МВ ·Ы‰ВЪ У·М‡ЫКВМУ, У·‡ЪЛЪВТ¸ Н „О‡‚В
«лУ‚ВЪ˚» (ТЪ. 18).
( çÓÏ ͇̇·: ‚‚‰ËÚ ÌÓÏÂ, ÍÓÚÓ˚È ‚˚
КВО‡ВЪВ ФЛТ‚УЛЪ¸ Н‡М‡ОЫ, Т ФУПУ˘¸˛
НМУФУН
Ȭ ËÎË 0 - 9.
§ íÓ˜Ì. ̇ÒÚ.: ÂÒÎË Í‡˜ÂÒÚ‚Ó ÔËÂχ
МВЫ‰У‚ОВЪ‚УЛЪВО¸МУ, М‡ТЪУИЪВ В„У Т
ФУПУ˘¸˛ НМУФУН
Ȭ.
è б‡ФУПМЛЪ¸: М‡КПЛЪВ НМУФНЫ ¬: ͇̇Î
‚‚‰ÂÌ ‚ Ô‡ÏflÚ¸.
!
èÓ‚ÚÓËÚ ˝Ú‡Ô˚ ‘ – è ÒÚÓθÍÓ ‡Á, ÒÍÓθÍÓ
͇̇ÎÓ‚ ‚‡Ï ÌÂÓ·ıÓ‰ËÏÓ ‚‚ÂÒÚË ‚ Ô‡ÏflÚ¸.
ÑÎfl ‚˚ıÓ‰‡ ËÁ ÂÊËχ ̇ÒÚÓÈÍË: М‡КПЛЪВ НМУФНЫ d.
& з‡КПЛЪВ НМУФНЫ H Ë ‚˚·ÂËÚ ÏÂÌ˛
ìÒÚ‡ÌÓ‚ËÚ¸:
é üÁ˚Í: ТОЫКЛЪ ‰Оfl ЛБПВМВМЛfl flБ˚Н‡
Ë̉Ë͇ˆËË ÏÂÌ˛.
“
ëڇ̇: ТОЫКЛЪ ‰Оfl ‚˚·У‡ М‡Б‚‡МЛfl ТЪ‡М˚.
щЪ‡ М‡ТЪУИН‡ ФЛПВМflВЪТfl ‚ ВКЛПВ ФУЛТН‡,
‡‚ЪУП‡ЪЛ˜ВТНУИ ТУЪЛУ‚НЛ Л ‚˚‚У‰‡ М‡
˝Н‡М ЪВОВЪВНТЪ‡. ЦТОЛ ЛПfl ‚‡¯ВИ ТЪ‡М˚
УЪТЫЪТЪ‚ЫВЪ ‚ ФВ‰О‡„‡ВПУП ФВВ˜МВ,
‚˚·ВЛЪВ ФЫМНЪ “. . .”
‘ б‡ФУПМЛЪ¸ Д‚ЪУ: ТОЫКЛЪ ‰Оfl ‚НО˛˜ВМЛfl ВКЛП‡
‡‚ЪУП‡ЪЛ˜ВТНУ„У ФУЛТН‡ ‚ТВı Н‡М‡ОУ‚,
ЛПВ˛˘ЛıТfl ‚ ‚‡¯ВП В„ЛУМВ. ЦТОЛ ФВВ‰‡˛˘‡fl
ТЪ‡МˆЛfl ЛОЛ Н‡·ВО¸М‡fl ТВЪ¸ ФВВ‰‡˛Ъ ТЛ„М‡О
‡‚ЪУП‡ЪЛ˜ВТНУИ ТУЪЛУ‚НЛ, Н‡М‡О˚ ·Ы‰ЫЪ
ФУМЫПВУ‚‡М˚ Ф‡‚ЛО¸МУ. З ФУЪЛ‚МУП ТОЫ˜‡В
‚˚ ‰УОКМ˚ ЛТФУО¸БУ‚‡Ъ¸ ПВМ˛
ëÓÚËӂ͇
‰Îfl
ËÒÔ‡‚ÎÂÌËfl ÌÛχˆËË Í‡Ì‡ÎÓ‚ (ÒÏ. ÒÚ. 4).
зВНУЪУ˚В ФВВ‰‡˛˘ЛВ ТЪ‡МˆЛЛ ЛОЛ Н‡·ВО¸М˚В
ТВЪЛ ФВВ‰‡˛Ъ Т‚УЛ ТУ·ТЪ‚ВММ˚В Ф‡‡ПВЪ˚ ‰Оfl
ТУЪЛУ‚НЛ (ФУ В„ЛУМЫ, flБ˚НЫ Л Ф.). З ˝ЪУП
ТОЫ˜‡В ‚˚ ‰УОКМ˚ ‚˚‰ВОЛЪ¸ ‚˚·‡ММ˚В УФˆЛЛ Т
ФУПУ˘¸˛ НМУФУН îÏ, ‡ Б‡ЪВП ФУ‰Ъ‚В‰ЛЪ¸
Т‰ВО‡ММ˚И ‚˚·У НМУФНУИ ¬. ÑÎfl ‚˚ıÓ‰‡ ËÁ
ВКЛП‡ ФУЛТН‡ ЛОЛ В„У УТЪ‡МУ‚НЛ М‡КПЛЪВ НМУФНЫ
H. ÖÒÎË ÌË͇ÍÓ„Ó ËÁÓ·‡ÊÂÌËfl Ì ·Û‰ÂÚ
У·М‡ЫКВМУ, У·‡ЪЛЪВТ¸ Н „О‡‚В «лУ‚ВЪ˚» (ТЪ. 18).
( СОfl ‚˚ıУ‰‡ ЛБ ПВМ˛ М‡КПЛЪВ НМУФНЫ d.
аТФУО¸БУ‚‡МЛВ ‡‰ЛУФЛВПМЛН‡
Ç˚·Ó ÂÊËχ íÇ ËÎË ‡‰ËÓ
з‡КПЛЪВ НМУФНЫ Â ФЫО¸Ъ‡ ‰ЛТЪ‡МˆЛУММУ„У
ЫФ‡‚ОВМЛfl ‰Оfl ‚НО˛˜ВМЛfl ЪВОВ‚ЛБУ‡ ‚
ВКЛП нЗ ЛОЛ ‡‰ЛУ. З ВКЛПВ ‡‰ЛУ М‡
˝Н‡МВ ФУfl‚ОflВЪТfl ЛМ‰ЛН‡ˆЛfl МУПВ‡, ЛПВМЛ
ТЪ‡МˆЛЛ (ВТОЛ Ъ‡НУ‚УВ ЛПВВЪТfl), ВВ ˜‡ТЪУЪ˚
Л ВКЛП‡ Б‚ЫН‡.
СОfl ‚‚У‰‡ ЛПВМЛ ‡‰ЛУТЪ‡МˆЛИ ЛТФУО¸БЫИЪВ
ПВМ˛ NàÏfl ͇̇· (ÒÚ. 4)
Ç˚·Ó ͇̇ÎÓ‚
аТФУО¸БЫИЪВ НМУФНЛ
09 ËÎË @ P # ‰Îfl
‚˚·Ó‡ Òڇ̈ËÈ ‰Ë‡Ô‡ÁÓ̇ FM (ÓÚ 1 ‰Ó 40).
è˜Â̸ ‡‰ËÓÒڇ̈ËÈ
з‡КПЛЪВ НМУФНЫ
ı ‰Îfl Ë̉Ë͇ˆËË
ФВВ˜Мfl ‡‰ЛУТЪ‡МˆЛИ. аТФУО¸БЫИЪВ
НМУФНЛ
îÏ ‰Îfl ÒÏÂÌ˚ ‡‰ËÓÒڇ̈ËË Ë
НМУФНЫ
d ‰Îfl ‚˚ıÓ‰‡ ËÁ ÏÂÌ˛.
аТФУО¸БУ‚‡МЛВ ПВМ˛ М‡ТЪУИНЛ
‡‰ЛУФЛВПМЛН‡
аТФУО¸БЫИЪВ НМУФНЫ
H ‰Îfl ÔÓÎÛ˜ÂÌËfl
‰УТЪЫФ‡ Н М‡ТЪУИН‡П ‡‰ЛУФЛВПМЛН‡.
иУЛТН ‡‰ЛУТЪ‡МˆЛИ
ЦТОЛ ‚˚ ЛТФУО¸БУ‚‡ОЛ ВКЛП ·˚ТЪУИ
ЫТЪ‡МУ‚НЛ, ‚ТВ ЛПВ˛˘ЛВТfl ‡‰ЛУТЪ‡МˆЛЛ
‰Л‡Ф‡БУМ‡ FM ·˚ОЛ ‚‚В‰ВМ˚ ‚ Ф‡ПflЪ¸. СОfl
‚НО˛˜ВМЛfl МУ‚У„У ФУЛТН‡ ЛТФУО¸БЫИЪВ ПВМ˛
мТЪ‡МУ‚ЛЪ¸: б‡ФУПМЛЪ¸ Д‚ЪУ (‰Оfl ФУОМУ„У ФУЛТН‡)
ËÎË
б‡ФУПМЛЪ¸ кЫ˜М. (‰Оfl УЪ‰ВО¸МУ„У ФУЛТН‡
͇ʉÓÈ Òڇ̈ËË).
ëÓÚËӂ͇ Ë àÏfl ä‡Ì‡Î‡
ФУБ‚УОЛЪ ‚‡П ФУЛБ‚ВТЪЛ ТУЪЛУ‚НЫ ЛОЛ
ФЛТ‚УЛЪ¸ ЛПfl ‡‰ЛУТЪ‡МˆЛflП. щЪЛ ПВМ˛
ЛТФУО¸БЫ˛ЪТfl Ъ‡Н КВ, Н‡Н Л ПВМ˛ ЪВОВ‚ЛБУ‡.
Sceensaver
иУО¸БЫИЪВТ¸ НО‡‚Л¯ВИ
c ‰Îfl ‚Íβ˜ÂÌËfl/
‚˚НО˛˜ВМЛfl ‡‰ЛУ ı‡МЛЪВОfl БН‡М‡.
Осоо
- об
- ук
- кс.
$ Усо
у. с
$
Сс о Æ
- оск
- о Кл
- о. с
- о
Page 60

6
ç‡ÒÚÓÈ͇ ËÁÓ·‡ÊÂÌËfl
ç‡ÒÚÓÈ͇ Á‚Û͇
& з‡КПЛЪВ НМУФНЫ H, ‡ Б‡ЪВП НМУФНЫ ¬:
̇ ˝Í‡Ì ÔÓfl‚ËÚÒfl ÏÂÌ˛
аБУ·‡КВМЛВ:
é аТФУО¸БЫИЪВ НМУФНЛ îÏ ‰Îfl ‚˚·Ó‡
М‡ТЪУИНЛ Л НМУФНЛ
Ȭ ‰Îfl
‚˚ФУОМВМЛfl М‡ТЪУИНЛ.
иЛПВ˜‡МЛВ: ‚У ‚ВПfl М‡ТЪУИНЛ
ЛБУ·‡КВМЛfl М‡ ˝Н‡МВ ТУı‡МflВЪТfl
ЛМ‰ЛН‡ˆЛfl ЪУО¸НУ ‚˚·‡ММУИ ТЪУНЛ.
з‡КПЛЪВ НМУФНЫ îÏ ‰Îfl Ë̉Ë͇ˆËË
‚ÒÂ„Ó ÏÂÌ˛.
“ иУТОВ ‚˚ФУОМВМЛfl М‡ТЪУВН ‚˚‰ВОЛЪВ
ФЫМНЪ
б‡ФУПМЛЪ¸ Л М‡КПЛЪВ НМУФНЫ ¬ ‰Îfl
ФУ‰Ъ‚ВК‰ВМЛfl.
з‡КПЛЪВ НМУФНЫ
d ‰Îfl ‚˚ıÓ‰‡ ËÁ ÏÂÌ˛.
éÔËÒ‡ÌË ̇ÒÚÓÂÍ :
•
üÍÓÒÚ¸: „ÛÎËÛÂÚ flÍÓÒÚ¸ ËÁÓ·‡ÊÂÌËfl.
• ñ‚ÂÚ: В„ЫОЛЫВЪ М‡Т˚˘ВММУТЪ¸ ˆ‚ВЪ‡.
•
äÓÌÚ‡ÒÚ: В„ЫОЛЫВЪ ТУУЪМУ¯ВМЛВ
ÏÂÊ‰Û Ò‚ÂÚÎ˚ÏË Ë ÚÂÏÌ˚ÏË ÚÓ̇ÏË.
•
уВЪНУТЪ¸: В„ЫОЛЫВЪ ˜ВЪНУТЪ¸ ЛБУ·‡КВМЛfl.
• с‚ВЪУЪВФО.: „ÛÎËÛÂÚ ˆ‚ÂÚÓ‚Û˛
Ô‰‡˜Û :
ïÓÎÓ‰Ì˚È (ÔÂӷ·‰‡ÂÚ
„ÓÎÛ·ÓÈ ÚÓÌ),
çÓχθÌ˚È
(Ò·‡Î‡ÌÒËÓ‚‡ÌÌ˚È) ËÎË ÉÓfl˜ËÈ
(ÔÂӷ·‰‡ÂÚ Í‡ÒÌ˚È ÚÓÌ).
•
б‡ФУПМЛЪ¸: ТОЫКЛЪ ‰Оfl ТУı‡МВМЛfl ‚
Ô‡ÏflÚË Ì‡ÒÚÓÂÍ ËÁÓ·‡ÊÂÌËfl (‡ Ú‡ÍÊÂ
̇ÒÚÓÂÍ
äÓÌÚ‡ÒÚ + Ë иУПВıУФУ‰‡‚ОВМЛВ,
̇ıÓ‰fl˘ËÂÒfl ‚ ÏÂÌ˛
ÍÚÂËÒÚ..
& з‡КПЛЪВ НМУФНЫ H, ‚˚·ВЛЪВ ФЫМНЪ á‚ÛÍ
(Ï) Л М‡КПЛЪВ НМУФНЫ ¬: ̇ ˝Í‡ÌÂ
ÔÓfl‚ËÚÒfl ÏÂÌ˛
á‚ÛÍ :
é аТФУО¸БЫИЪВ НМУФНЛ îÏ ‰Îfl ‚˚·Ó‡
М‡ТЪУИНЛ Л НМУФНЛ
Ȭ ‰Îfl
‚˚ФУОМВМЛfl М‡ТЪУИНЛ.
“ иУТОВ ‚˚ФУОМВМЛfl М‡ТЪУВН ‚˚‰ВОЛЪВ
ФЫМНЪ
б‡ФУПМЛЪ¸ Л М‡КПЛЪВ НМУФНЫ ¬ ‰Îfl
ÔÓ‰Ú‚ÂʉÂÌËfl.
‘ з‡КПЛЪВ НМУФНЫ d ‰Îfl ‚˚ıÓ‰‡ ËÁ ÏÂÌ˛.
éÔËÒ‡ÌË ̇ÒÚÓÂÍ :
•
Ç˚ÒÓÍ.: В„ЫОЛЫВЪ ‚˚ТУНЛВ ˜‡ТЪУЪ˚ Б‚ЫН‡.
• çËÁÍ.: В„ЫОЛЫВЪ МЛБНЛВ ˜‡ТЪУЪ˚ Б‚ЫН‡.
•
Ň·ÌÒ: ТОЫКЛЪ ‰Оfl М‡ТЪУИНЛ ·‡О‡МТ‡
Á‚Û͇ ÏÂÊ‰Û Î‚˚Ï Ë Ô‡‚˚Ï ‰Ë̇ÏË͇ÏË.
•
ê‡ÁÌ. ÉÓÏ.*: ФУБ‚УОflВЪ ТНУПФВМТЛУ‚‡Ъ¸
‡БОЛ˜Лfl ‚ „УПНУТЪЛ ПВК‰Ы ‡БМ˚ПЛ
Н‡М‡О‡ПЛ ЛОЛ Б‚ЫНУ‚˚ПЛ ТЛ„М‡О‡ПЛ,
ФУТЪЫФ‡˛˘ЛПЛ Т ‡БМ˚ı ‚МВ¯МЛı ЫТЪУИТЪ‚
EXT. щЪ‡ ЩЫМНˆЛfl М‡ТЪУИНЛ ‰УТЪЫФМ‡ ‰Оfl
Н‡М‡ОУ‚ 0-40 Л ‚МВ¯МЛı ЫТЪУИТЪ‚ EXT.
• AVL * (Д‚ЪУП‡ЪЛ˜ВТНЛИ В„ЫОflЪУ
„УПНУТЪЛ): ЩЫМНˆЛfl ‡‚ЪУП‡ЪЛ˜ВТНУИ
В„ЫОЛУ‚НЛ „УПНУТЪЛ, ФУБ‚УОfl˛˘‡fl
ФУ‰‡‚ОflЪ¸ ‚МВБ‡ФМУВ Ы‚ВОЛ˜ВМЛВ
„УПНУТЪЛ, УТУ·ВММУ ФЛ ТПВМВ Н‡М‡ОУ‚
ЛОЛ Ъ‡МТОflˆЛЛ ВНО‡П˚.
•
б‡ФУПМЛЪ¸: ТОЫКЛЪ ‰Оfl ТУı‡МВМЛfl ‚
Ô‡ÏflÚË Ì‡ÒÚÓÈÍË Á‚Û͇.
*
ЛПВВЪТfl ЪУО¸НУ М‡ МВНУЪУ˚ı ПУ‰ВОflı
з‡ТЪУИН‡ ı‡‡НЪВЛТЪЛН
& з‡КПЛЪВ НМУФНЫ H, ‚˚·ВЛЪВ ФЫМНЪ
ÏÂÌ˛
ÍÚÂËÒÚ. (Ï) Л М‡КПЛЪВ НМУФНЫ
¬. З˚ ТПУКВЪВ ФУЛБ‚ВТЪЛ М‡ТЪУИНЫ :
é í‡ÈÏÂ, á‡ÏÓÍ ÓÚ ‰ÂÚÂÈ Ë á‡˘. ÓÚ ‰ÂÚÂÈ: ÒÏ.
ÒÎÂ‰Û˛˘Û˛ ÒÚ‡ÌˈÛ.
“ äÓÌÚ‡ÒÚ +: ‡‚ÚÓχÚ˘ÂÒ͇fl „ÛÎËӂ͇
ÍÓÌÚ‡ÒÚ‡ ËÁÓ·‡ÊÂÌËfl, ·Î‡„Ó‰‡fl
ÍÓÚÓÓÈ Ò‡Ï‡fl ÚÂÏ̇fl ӷ·ÒÚ¸
ËÁÓ·‡ÊÂÌËfl ‚Ò„‰‡ ÓÚÓ·‡Ê‡ÂÚÒfl
˜ÂÌ˚Ï ˆ‚ÂÚÓÏ.
‘ иУПВıУФУ‰‡‚ОВМЛВ: ÔÓ‰‡‚ÎflÂÚ ÔÓÏÂıË
(‚ ‚ˉ «ÒÌ„‡»), ÒÌËʇ˛˘Ë ͇˜ÂÒÚ‚Ó
ËÁÓ·‡ÊÂÌËfl ÔË ÌÂÛ‰Ó‚ÎÂÚ‚ÓËÚÂθÌÓÏ
ÔËÂÏ Ò˄̇·.
ÇÌËχÌËÂ:
‰Îfl ÒÓı‡ÌÂÌËfl ‚ Ô‡ÏflÚË Ì‡ÒÚÓÂÍ
äÓÌÚ‡ÒÚ + Ë иУПВıУФУ‰‡‚ОВМЛВ ÌÂÓ·ıÓ‰ËÏÓ
ЛТФУО¸БУ‚‡Ъ¸ ЩЫМНˆЛ˛ б‡ФУПМЛЪ¸ ÏÂÌ˛
аБУ·‡КВМЛВ.
( ëÏ¢ÂÌË ËÁÓ·. (ЛПВВЪТfl ЪУО¸НУ ‚
ÚÂ΂ËÁÓ‡ı Ò ·Óθ¯ËÏ ˝Í‡ÌÓÏ) : ·Óθ¯ËÂ
˝Н‡М˚ ˜Ы‚ТЪ‚ЛЪВО¸М˚ Н ЛБПВМВМЛflП
П‡„МЛЪМУ„У ФУОfl бВПОЛ. щЪ‡ М‡ТЪУИН‡
ФУБ‚УОflВЪ НУПФВМТЛУ‚‡Ъ¸ В„У ‚ОЛflМЛВ
ФЫЪВП ЛБПВМВМЛfl М‡НОУМ‡ ЛБУ·‡КВМЛfl.
§ СОfl ‚˚ıУ‰‡ ЛБ ПВМ˛ М‡КПЛЪВ НМУФНЫ d.
Осоо
$ об
- ук
- кс.
- Усо
об
$
кос -------- 39
-
- Кос
- кос
- ол.
- о
Осоо
- об
$ ук
- кс.
- Усо
ук
$
. Го. -------- 56
- к.
- Блс
- . Го
- Ог. ук
- о
Page 61

7
îÛÌ͈Ëfl ·Û‰ËθÌË͇
ЕОУНЛУ‚Н‡ ЪВОВ‚ЛБУ‡
щЪУ ПВМ˛ ФУБ‚УОflВЪ ЛТФУО¸БУ‚‡Ъ¸
ЪВОВ‚ЛБУ ‚ Н‡˜ВТЪ‚В ·Ы‰ЛО¸МЛН‡.
& з‡КПЛЪВ НМУФНЫ H.
é З˚‰ВОЛЪВ Т ФУПУ˘¸˛ НЫТУ‡ ПВМ˛
ÍÚÂËÒÚ., ‡ Á‡ÚÂÏ ÏÂÌ˛ í‡ÈÏÂ:
“
ëÔ‡Ú¸: ТОЫКЛЪ ‰Оfl ‚˚·У‡ ФВЛУ‰‡ ‚ВПВМЛ, ФУ
ËÒÚ˜ÂÌËË ÍÓÚÓÓ„Ó ÚÂ΂ËÁÓ ‡‚ÚÓχÚ˘ÂÒÍË
ÔÂÂıÓ‰ËÚ ‚ ÂÊËÏ ÓÊˉ‡ÌËfl.
‘ ÇÂÏfl: ‚‚‰ËÚ ÚÂÍÛ˘Â ‚ÂÏfl.
иЛПВ˜‡МЛВ : ‚ВПfl У·МУ‚ОflВЪТfl ‡‚ЪУП‡ЪЛ˜ВТНЛ
ФУТОВ ‚НО˛˜ВМЛfl ТВЪВ‚˚П ‚˚НО˛˜‡ЪВОВП
ФУТВ‰ТЪ‚УП ЪВОВЪВНТЪ‡ ФУ„‡ПП˚ 1. ЦТОЛ
ВКЛП ЪВОВЪВНТЪ‡ ‚ ˝ЪУП Н‡М‡ОВ МВ ЫТЪ‡МУ‚ОВМ,
ЪУ˜МУВ ‚ВПfl ‚˚ТЪ‡‚ОflЪ¸Тfl МВ ·Ы‰ВЪ.
( ÇÂÏfl ̇˜.: ‚‚‰ËÚ ‚ÂÏfl ̇˜‡Î‡.
§ ÇÂÏfl ÓÍÓ̘.: ‚‚‰ËÚ ‚ÂÏfl ÔÂÂıÓ‰‡ ‚
ÂÊËÏ ÓÊˉ‡ÌËfl.
è
зУПВ Н‡М‡О‡: ‚‚В‰ЛЪВ МУПВ Н‡М‡О‡, НУЪУ˚И ‚˚
КВО‡ВЪВ ЛТФУО¸БУ‚‡Ъ¸ ‚ Н‡˜ВТЪ‚В ·Ы‰ЛО¸МЛН‡.
уЪУ·˚ ‚˚·‡Ъ¸ ‡‰ЛУ‰Л‡Ф‡БУМ FM, ЛТФУО¸БЫИЪВ
НО‡‚Л¯Л
Ȭ
(Ò ÔÓÏÓ˘¸˛ Í·‚˯
09
ПУКМУ
‚˚·Л‡Ъ¸ ЪУО¸НУ ЪВОВФУ„‡ПП˚). З ВКЛПВ DVD
‚У ‚ВПfl ‚УТФУЛБ‚В‰ВМЛfl ‰ЛТН‡ ПУКМУ ‚˚·‡Ъ¸
Ф‡‡ПВЪ
Bookmark DVD
(мТЪ‡МУ‚ЛЪ¸ Б‡НО‡‰НЫ ‰Оfl
DVD), ВТОЛ З˚ Б‡ıУЪЛЪВ ФУТМЫЪ¸Тfl ФУ‰
УФВ‰ВОВММУВ ПВТЪУ М‡ ‰ЛТНВ. з‡КПЛЪВ
u
,
˜ÚÓ·˚ ÔӉڂ‰ËÚ¸ ‚˚·Ó ÏÂÒÚ‡ ̇˜‡Î‡.
! ÄÍÚË‚ËÁË.: ‚˚ ПУКВЪВ ЫТЪ‡МУ‚ЛЪ¸:
•
é‰ÌÓ͇ÚÌÓ ‰Îfl Ó‰ÌÓ͇ÚÌÓ„Ó ‚Íβ˜ÂÌËfl
·Û‰ËθÌË͇,
•
Öʉ̂ÌÓ ‰Îfl Âʉ̂ÌÓ„Ó ‚Íβ˜ÂÌËfl
·Û‰ËθÌË͇,
•
éÚÍÎ. ‰Îfl ÓÚÍβ˜ÂÌËfl ·Û‰ËθÌË͇.
ç з‡КПЛЪВ М‡ b ‰Îfl Ô‚Ӊ‡ ÚÂ΂ËÁÓ‡ ‚
ВКЛП УКЛ‰‡МЛfl. йМ ‚НО˛˜ЛЪТfl
‡‚ЪУП‡ЪЛ˜ВТНЛ ‚ Б‡ФУ„‡ППЛУ‚‡ММУВ
‚ВПfl. ЦТОЛ ‚˚ УТЪ‡‚ЛЪВ ЪВОВ‚ЛБУ
‚НО˛˜ВММ˚П, УМ ФУТЪУ ФВВНО˛˜ЛЪТfl М‡
‰Ы„Ы˛ ФУ„‡ППЫ ‚ ЫТЪ‡МУ‚ОВММУВ ‚ВПfl (Л
ФВВИ‰ВЪ ‚ ВКЛП УКЛ‰‡МЛfl ФЛ М‡ТЪЫФОВМЛЛ
‚ВПВМЛ, ЫН‡Б‡ММУ„У ‚ ТЪУНВ
ÇÂÏfl ÓÍÓ̘.
äÓÏ·Ë̇ˆËfl ÙÛÌ͈ËÈ á‡ÏÓÍ ÓÚ ‰ÂÚÂÈ Ë í‡ÈÏÂ
ФУБ‚УОflВЪ У„‡МЛ˜ЛЪ¸ ‚ВПfl ФУТПУЪ‡
ЪВОВ‚ЛБУ‡, М‡ФЛПВ, ‚‡¯ЛПЛ ‰ВЪ¸ПЛ.
З˚ ПУКВЪВ Б‡·ОУНЛУ‚‡Ъ¸ МВНУЪУ˚В
Н‡М‡О˚ ЛОЛ ФУОМУТЪ¸˛ Б‡ФВЪЛЪ¸
ЛТФУО¸БУ‚‡МЛВ ЪВОВ‚ЛБУ‡, Б‡·ОУНЛУ‚‡‚
НМУФНЛ ЫФ‡‚ОВМЛfl.
á‡ÏÓÍ ÓÚ ‰ÂÚÂÈ
& з‡КПЛЪВ НМУФНЫ H.
é З˚‰ВОЛЪВ Т ФУПУ˘¸˛ НЫТУ‡ ПВМ˛
ÍÚÂËÒÚ. Ë ÛÒÚ‡ÌÓ‚ËÚ ‚ ÒÚÓÍ á‡ÏÓÍ ÓÚ
‰ÂÚÂÈ
ФУОУКВМЛВ ÇÍÎ.
“
З˚НО˛˜ЛЪВ ЪВОВ‚ЛБУ Л Ы·ВЛЪВ ФЫО¸Ъ
‰ЛТЪ‡МˆЛУММУ„У ЫФ‡‚ОВМЛfl. аТФУО¸БУ‚‡МЛВ
ЪВОВ‚ЛБУ‡ ТЪ‡ОУ МВ‚УБПУКМ˚П (В„У ПУКМУ
‚НО˛˜ЛЪ¸ ЪУО¸НУ Т ФУПУ˘¸˛ ФЫО¸Ъ‡
‰ЛТЪ‡МˆЛУММУ„У ЫФ‡‚ОВМЛfl).
‘ ÑÎfl ÓÚÍβ˜ÂÌËfl ÙÛÌ͈ËË ·ÎÓÍËÓ‚ÍË ÛÒÚ‡ÌÓ‚ËÚÂ
‚ ÒÚÓÍÂ
á‡ÏÓÍ ÓÚ ‰ÂÚÂÈ
ФУОУКВМЛВ
éÚÍÎ.
ᇢËÚ‡ ÓÚ ‰ÂÚÂÈ
& з‡КПЛЪВ НМУФНЫ H, ‚˚‰ВОЛЪВ ПВМ˛
ÍÚÂËÒÚ., ‡ Á‡ÚÂÏ ÒÚÓÍÛ á‡˘. ÓÚ ‰ÂÚÂÈ:
é Ç˚ ‰ÓÎÊÌ˚ ‚‚ÂÒÚË ‚‡¯ ÒÂÍÂÚÌ˚È ÍÓ‰
‰УТЪЫФ‡. З ФВ‚˚И ‡Б ‚‚В‰ЛЪВ 2 ‡Б‡ НУ‰
0711, ‡ Б‡ЪВП ЛТФУО¸БЫИЪВ НУ‰ ФУ ‚‡¯ВПЫ
‚˚·УЫ: М‡ ˝Н‡МВ ФУfl‚ЛЪТfl ПВМ˛.
“
ᇢ. ÓÚ ‰ÂÚÂÈ: ЛТФУО¸БЫИЪВ НМУФНЛ îÏ ‰Îfl
‚˚·У‡ КВО‡ВПУ„У ЪВОВ‚ЛБЛУММУ„У Н‡М‡О‡ Л
ФУ‰Ъ‚В‰ЛЪВ Т‰ВО‡ММ˚И ‚˚·У НМУФНУИ
¬.
è‰ Á‡·ÎÓÍËÓ‚‡ÌÌ˚ÏË Í‡Ì‡Î‡ÏË ËÎË
‚̯ÌËÏË ÛÒÚÓÈÒÚ‚‡ÏË ÔÓfl‚ËÚÒfl ÒËÏ‚ÓÎ
+.
л ˝ЪУ„У ‚ВПВМЛ, ‰Оfl ЪУ„У ˜ЪУ·˚
ФУТПУЪВЪ¸ Б‡·ОУНЛУ‚‡ММ˚И Н‡М‡О, ‚‡П
МВУ·ıУ‰ЛПУ ·Ы‰ВЪ ‚‚ВТЪЛ ТВНВЪМ˚И НУ‰, ‚
ФУЪЛ‚МУП ТОЫ˜‡В Н‡М‡О МВ ‚НО˛˜ЛЪТfl.
СУТЪЫФ Н ПВМ˛ ìÒÚ‡ÌÓ‚ËÚ¸ Ъ‡НКВ Б‡·ОУНЛУ‚‡М.
ЗМЛП‡МЛВ, ФЛ М‡ОЛ˜ЛЛ НУ‰ЛУ‚‡ММ˚ı Н‡М‡ОУ‚,
ЛТФУО¸БЫ˛˘Лı ‚МВ¯МЛИ ‰ВНУ‰В, МВУ·ıУ‰ЛПУ
Б‡·ОУНЛУ‚‡Ъ¸ ТУУЪ‚ВЪТЪ‚Ы˛˘ВВ ‚МВ¯МВВ
ЫТЪУИТЪ‚У EXT.
‘ лПВМЛЪ¸ НУ‰: ÔÓÁ‚ÓÎflÂÚ ‚‚ÂÒÚË ÌÓ‚˚È 4-Á̇˜Ì˚È
ÍÓ‰. èӉڂ‰ËÚ ÍÓ‰, ̇·‡‚ Â„Ó Â˘Â ‡Á.
ÖÒÎË ‚˚ Á‡·˚ÎË ‚‡¯ ÒÂÍÂÚÌ˚È ÍÓ‰, ‚‚‰ËÚÂ
‰‚‡ ‡Á‡ ÛÌË‚Â҇θÌ˚È ÍÓ‰ 0711.
( ÇÒ ‚ÓÒÒÚ‡ÌÓ‚ËÚ¸: ÔÓÁ‚ÓÎflÂÚ ‚ÓÒÒÚ‡ÌÓ‚ËÚ¸
‚Ò Á‡·ÎÓÍËÓ‚‡ÌÌ˚ ÔÓ„‡ÏÏ˚.
§ ÇÒ Á‡·ÎÓÍËÓ‚‡Ú¸: ÔÓÁ‚ÓÎflÂÚ Á‡·ÎÓÍËÓ‚‡Ú¸
‚ТВ ЪВОВ‚ЛБЛУММ˚В Н‡М‡О˚ Л ‚МВ¯МЛВ
ЫТЪУИТЪ‚‡ EXT.
è з‡КПЛЪВ НМУФНЫ d ‰Îfl ‚˚ıÓ‰‡ ËÁ ÏÂÌ˛.
Осоо
- об
- ук
$ кс.
- Усо
- С
$
10:56
- .
- Око.
- о Кл
- к.
Осоо
- об
- ук
$ кс.
- Усо
кс.
-
$
ок О Д кл.
- . О Д
- Кос+
- о
Page 62

8
нВОВЪВНТЪ
з‡КПЛЪВ :
ÑÎfl ÔÓÎÛ˜ÂÌËfl :
нВОВЪВНТЪ ФВ‰ТЪ‡‚ОflВЪ ТУ·УИ ТЛТЪВПЫ ‡ТФУТЪ‡МВМЛfl ЛМЩУП‡ˆЛЛ, ФВВ‰‡‚‡ВПУИ ФУ
МВНУЪУ˚П Н‡М‡О‡П, НУЪУЫ˛ ПУКМУ ˜ЛЪ‡Ъ¸ Н‡Н „‡БВЪЫ. З ˝ЪУИ ТЛТЪВПВ ФВ‰ЫТПУЪВМ‡ Ъ‡НКВ
ЩЫМНˆЛfl ТЫ·ЪЛЪУ‚ ‰Оfl О˛‰ВИ, ЛПВ˛˘Лı ‰ВЩВНЪ˚ ТОЫı‡ ЛОЛ МВ БМ‡˛˘Лı flБ˚Н‡, М‡ НУЪУУП
‚В‰ВЪТfl ФВВ‰‡˜‡ (Н‡·ВО¸М˚В ТВЪЛ, Н‡М‡О˚ ТЛТЪВП˚ ТФЫЪМЛНУ‚У„У ЪВОВ‚В˘‡МЛfl Л Ъ.‰.).
ÇÍβ˜ÂÌËÂ
ЪВОВЪВНТЪ‡
Ç˚·Ó
ÒÚ‡Ìˈ˚
ЪВОВЪВНТЪ‡
щЪ‡ ЩЫМНˆЛfl ФВ‰М‡БМ‡˜ВМ‡ ‰Оfl ‚˚БУ‚‡ ЪВОВЪВНТЪ‡,
‚ıУ‰‡ ‚ ВКЛП М‡ОУКВМЛfl ЪВОВЪВНТЪ/ЛБУ·‡КВМЛВ, ‡
Б‡ЪВП ‚˚ıУ‰‡ ЛБ ВКЛП‡ ЪВОВЪВНТЪ‡. З У„О‡‚ОВМЛЛ,
НУЪУУВ ‚˚‚У‰ЛЪТfl М‡ ˝Н‡М, ФВВ˜ЛТОВМ˚ ‚ТВ
‰УТЪЫФМ˚В ‰Оfl БЛЪВОfl Ы·ЛНЛ. д‡К‰‡fl Ы·ЛН‡
У·УБМ‡˜ВМ‡ 3-БМ‡˜М˚П МУПВУП ТЪ‡МЛˆ˚.
ЦТОЛ ‚˚·‡ММ˚И Н‡М‡О МВ ФВВ‰‡ВЪ ЪВОВЪВНТЪ, М‡ ˝Н‡МВ
ФУfl‚ЛЪТfl ˜ЛТОУ 100 Л Н‡М‡О УТЪ‡МВЪТfl ФЫТЪ˚П (‚ ˝ЪУП ТОЫ˜‡В
‚˚И‰ЛЪВ ЛБ ВКЛП‡ ЪВОВЪВНТЪ‡ Л ‚˚·ВЛЪВ ‰Ы„УИ Н‡М‡О).
З‚В‰ЛЪВ ЪВ·ЫВП˚И МУПВ ТЪ‡МЛˆ˚ Т ФУПУ˘¸˛
НМУФУН 0 - 9 ËÎË @ P #, îÏ. ç‡ÔËÏÂ: ‰Îfl
ÒÚ‡Ìˈ˚ 120 ̇·ÂËÚ 123: МУПВ ФУfl‚ЛЪТfl ‚
ОВ‚УП ‚ВıМВП Ы„ОЫ ˝Н‡М‡, Т˜ВЪ˜ЛН ТЪ‡МЛˆ М‡˜МВЪ
ФУЛТН, Л ТЪ‡МЛˆ‡ УЪУ·‡БЛЪТfl М‡ ˝Н‡МВ. иУ‚ЪУЛЪВ
УФВ‡ˆЛ˛ ‰Оfl ‚˚БУ‚‡ ‰Ы„УИ ТЪ‡МЛˆ˚.
ЦТОЛ Т˜ВЪ˜ЛН ТЪ‡МЛˆ ФУ‰УОК‡ВЪ ‚˚ФУОМflЪ¸ ФУЛТН, ˝ЪУ
УБМ‡˜‡ВЪ, ˜ЪУ ‚˚·‡ММ‡fl ТЪ‡МЛˆ‡ МВ ФВВ‰‡ВЪТfl.
З˚·ВЛЪВ ‰Ы„УИ МУПВ ТЪ‡МЛˆ˚.
èflÏÓÈ
‰УТЪЫФ Н
Û·Ë͇Ï
З МЛКМВИ ˜‡ТЪЛ ˝Н‡М‡ УЪУ·‡К‡˛ЪТfl УН‡¯ВММ˚В БУМ˚.
СУТЪЫФ Н ТУУЪ‚ВЪТЪ‚Ы˛˘ЛП Ы·ЛН‡П ЛОЛ ТЪ‡МЛˆ‡П
УТЫ˘ВТЪ‚ОflВЪТfl ФЛ ФУПУ˘Л 4 ˆ‚ВЪМ˚ı НМУФУН.
é͇¯ÂÌÌ˚ ÁÓÌ˚ ÏË„‡˛Ú, ÔÓ͇ Û·Ë͇ ËÎË ÒÚ‡Ìˈ‡ ÌÂ
·Û‰ÛÚ ‚˚‚‰ÂÌ˚ ̇ ˝Í‡Ì.
й„О‡‚ОВМЛВ
иУБ‚УОflВЪ ‚ВМЫЪ¸Тfl ‚ У„О‡‚ОВМЛВ (У·˚˜МУ, ˝ЪУ
ТЪ‡МЛˆ‡ 100).
ì‚Â΢ÂÌËÂ
ÒÚ‡Ìˈ˚
éÒÚ‡Ìӂ͇
ÔÓÍۘ˂‡ÌËfl
ÔÓ‰ÒÚ‡Ìˈ
лОЫКЛЪ ‰Оfl ‚˚‚У‰‡ М‡ ˝Н‡М ‚ВıМВИ ЛОЛ МЛКМВИ ˜‡ТЪЛ
ЛБУ·‡КВМЛfl, ‡ Б‡ЪВП ‚УБ‚‡Ъ‡ Н МУП‡О¸МУПЫ ЛБУ·‡КВМЛ˛.
зВНУЪУ˚В ТЪ‡МЛˆ˚ ЛПВ˛Ъ Т‚УЛ ФУ‰ТЪ‡МЛˆ˚,
НУЪУ˚В М‡˜ЛМ‡˛Ъ ‡‚ЪУП‡ЪЛ˜ВТНЛ ТПВМflЪ¸ ‰Ы„
‰Ы„‡. щЪ‡ НМУФН‡ ФУБ‚УОflВЪ УТЪ‡МУ‚ЛЪ¸ ЛОЛ
‚УБУ·МУ‚ЛЪ¸ ФУНЫ˜Л‚‡МЛВ ФУ‰ТЪ‡МЛˆ. иЛ ˝ЪУП ‚
‚ВıМВИ ОВ‚УИ ˜‡ТЪЛ ФУfl‚ЛЪТfl ЛМ‰ЛН‡ˆЛfl _.
ëÍ˚Ú‡fl
ËÌÙÓχˆËfl
è‰ÔÓ˜ËÚ‡ÂÏ˚
 ÒÚ‡Ìˈ˚
лОЫКЛЪ ‰Оfl ЪУ„У, ˜ЪУ·˚ ТН˚Ъ‡fl ЛМЩУП‡ˆЛfl
ФУfl‚ЛО‡Т¸ ЛОЛ ЛТ˜ВБО‡ Т ˝Н‡М‡ (В¯ВМЛfl ‰Оfl Л„).
СОfl Н‡М‡ОУ‚, ФВВ‰‡˛˘Лı ЪВОВЪВНТЪ (0 – 40), ЛПВВЪТfl
‚УБПУКМУТЪ¸ ‚‚ВТЪЛ ‚ Ф‡ПflЪ¸ 4 ФВ‰ФУ˜ЛЪ‡ВП˚ı ‚‡ПЛ
ТЪ‡МЛˆ˚, Н НУЪУ˚П ПУКМУ ·Ы‰ВЪ У·‡˘‡Ъ¸Тfl
МВФУТВ‰ТЪ‚ВММУ Т ФУПУ˘¸˛ ˆ‚ВЪМ˚ı НО‡‚Л¯
(Н‡ТМУИ, БВОВМУИ, КВОЪУИ, ТЛМВИ).
& з‡К‡Ъ¸ М‡ НМУФНЫ H ‰Îfl ÔÂÂıÓ‰‡ ‚ ÂÊËÏ
Ô‰ÔÓ˜ËÚ‡ÂÏ˚ı ÒÚ‡Ìˈ.
é З˚‚ВТЪЛ М‡ ˝Н‡М ТЪ‡МЛˆЫ ЪВОВЪВНТЪ‡, НУЪУЫ˛
‚˚ Ê·ÂÚ ‚‚ÂÒÚË ‚ Ô‡ÏflÚ¸.
“ б‡ЪВП, М‡КПЛЪВ Л Ы‰ВКЛ‚‡ИЪВ ‚ ЪВ˜ВМЛВ
3 ТВНЫМ‰ ˆ‚ВЪМЫ˛ НО‡‚Л¯Ы, ТУУЪ‚ВЪТЪ‚Ы˛˘Ы˛
‚‡¯ВПЫ ‚˚·УЫ. лЪ‡МЛˆ‡ ‚‚В‰ВМ‡ ‚ Ф‡ПflЪ¸.
‘
иУ‚ЪУЛЪВ УФВ‡ˆЛ˛ ‰Оfl УТЪ‡О¸М˚ı ˆ‚ВЪМ˚ı НМУФУН.
( л ˝ЪУ„У ПУПВМЪ‡, Н‡Н ЪУО¸НУ ‚˚ У·‡ЪЛЪВТ¸ Н
ЪВОВЪВНТЪЫ, ‚‡¯Л ФВ‰ФУ˜ЛЪ‡ВП˚В ТЪ‡МЛˆ˚
ФУfl‚flЪТfl ‚ ˆ‚ВЪВ ‚ МЛКМВИ ˜‡ТЪЛ ˝Н‡М‡. СОfl ЪУ„У,
˜ЪУ·˚ М‡ИЪЛ У·˚˜М˚В Ы·ЛНЛ, М‡КПЛЪВ М‡ H.
СОfl ЪУ„У, ˜ЪУ·˚ ТЪВВЪ¸ ‚Т˛ ‚‚В‰ВММЫ˛ ЛМЩУП‡ˆЛ˛,
М‡КПЛЪВ М‡ НМУФНЫ
d Ë Û‰ÂÊË‚‡Èڠ ‚ Ú˜ÂÌËÂ
5 ТВНЫМ‰.
”
.
ı
TV
›
ù
VCR
¢
MODE
MENU
∫
Ÿ
Ó
TV / DVD
-
+ +
[
- -
%
∏
OK
12
564
879
Ø
0
SUBTITLEAUDIO
¤
SYSTEM MENU
Ë
SMARTSMART
ª
DVD
MENU
P
RADIO
3
Á
¤
0 9
P
-
+
Ë
›
Ó
Ÿ
MENU
Ë
Page 63

9
îÛÌ͈Ëfl 16/9
аБУ·‡КВМЛВ, НУЪУУВ ‚˚ ФУОЫ˜‡ВЪВ, ПУКВЪ ·˚Ъ¸ ФВВ‰‡МУ ‚ ЩУП‡ЪВ 16:9 (¯ЛУНЛИ
˝Н‡М) ЛОЛ 4:3 (Ъ‡‰ЛˆЛУММ˚И ˝Н‡М). иЛ ЛБУ·‡КВМЛЛ 4:3 М‡ ˝Н‡МВ ЛМУ„‰‡ ·˚‚‡˛Ъ
˜ВМ˚В ФУОУТ˚ ТМЛБЫ Л Т‚ВıЫ (ЩУП‡Ъ НЛМУ). щЪ‡ ЩЫМНˆЛfl ФУБ‚УОflВЪ ‚‡П ЫТЪ‡МЛЪ¸
˜ВМ˚В ФУОУТ˚ Л УФЪЛПЛБЛУ‚‡Ъ¸ ЛБУ·‡КВМЛВ М‡ ˝Н‡МВ.
ЦТОЛ ЪВОВ‚ЛБУp ЛПВВЪ ˝Нp‡М Т ТУУЪМУ¯ВМЛВП ТЪУpУМ 4:3.
ЦТОЛ ЪВОВ‚ЛБУp ЛПВВЪ ˝Нp‡М Т ТУУЪМУ¯ВМЛВП ТЪУpУМ 16:9.
ç‡Ê‡Ú¸ ̇ Í·‚Ë¯Ë p ‰Оfl ‚˚·У‡ ‡БОЛ˜М˚ı ВКЛПУ‚ :
нВОВ‚ЛБУ У·УЫ‰У‚‡М ТЛТЪВПУИ ‡‚ЪУП‡ЪЛ˜ВТНУИ НУППЫЪ‡ˆЛЛ,
‡Т¯ЛЩУ‚˚‚‡˛˘ВИ ТФВˆЛЩЛ˜ВТНЛИ ТЛ„М‡О, ФВВ‰‡‚‡ВП˚И МВНУЪУ˚ПЛ
ФУ„‡ПП‡ПЛ Л ‚˚·Л‡˛˘ВИ МЫКМ˚И ЩУП‡Ъ ˝Н‡М‡.
4:3
аБУ·‡КВМЛВ ‚УТФУЛБ‚В‰ВМУ ‚ ЩУП‡ЪВ 4:3, Т Н‡К‰УИ ТЪУУМ˚ ФУfl‚ОflВЪТfl
˜ВМ‡fl ФУОУТ‡. З˚ ПУКВЪВ ФУТЪВФВММУ Ы‚ВОЛ˜ЛЪ¸ ЛБУ·‡КВМЛВ Т ФУПУ˘¸˛
НО‡‚Л¯
îÏ.
ì‚Â΢ÂÌË 14:9
аБУ·‡КВМЛВ Ы‚ВОЛ˜ВМУ ‰У ЩУП‡Ъ‡ 14:9, МВ·УО¸¯‡fl ˜ВМ‡fl ФУОУТ‡
УТЪ‡ВЪТfl Т Н‡К‰УИ ТЪУУМ˚ ЛБУ·‡КВМЛfl. дО‡‚Л¯Л
îÏ ÔÓÁ‚ÓÎfl˛Ú
‚ÂÚË͇θÌÓ ÔÂÂÏ¢ÂÌË ËÁÓ·‡ÊÂÌËfl ‰Îfl ‚ËÁÛ‡ÎËÁ‡ˆËË ÒÛ·ÚËÚÓ‚.
ì‚Â΢ÂÌË 16:9
аБУ·‡КВМЛВ Ы‚ВОЛ˜ВМУ ‰У ЩУП‡Ъ‡ 16:9. щЪУЪ ВКЛП ВНУПВМ‰ЫВЪТfl ‰Оfl
ФУОЫ˜ВМЛfl ЛБУ·‡КВМЛfl Т ˜ВМ˚ПЛ ФУОУТ‡ПЛ ТМЛБЫ Л Т‚ВıЫ (ЩУП‡Ъ НЛМУ).
аТФУО¸БУ‚‡Ъ¸ НО‡‚Л¯Л
îÏ ‰Îfl ‚˚‚Ó‰‡ ̇ ˝Í‡Ì ÒÛ·ÚËÚÓ‚.
ì‚ÂÎ. ëÛ·ÚËÚ
щЪУЪ ВКЛП ФУБ‚УОflВЪ ‚˚‚ВТЪЛ ЛБУ·‡КВМЛВ 4:3 М‡ ‚ВТ¸ ˝Н‡М, ‚ПВТЪВ Т
ТЫ·ЪЛЪ‡ПЛ. аТФУО¸БУ‚‡Ъ¸ НО‡‚Л¯Л
îÏ ‰Îfl ÚÓ„Ó, ˜ÚÓ·˚ ÔÓ‰ÌflÚ¸ ËÎË
УФЫТЪЛЪ¸ МЛКМ˛˛ ˜‡ТЪ¸ ЛБУ·‡КВМЛfl.
ëÛÔÂ. òËÓÍËÈ
щЪУЪ ВКЛП ФУБ‚УОflВЪ ‚˚‚ВТЪЛ ЛБУ·‡КВМЛВ 4:3 М‡ ‚ВТ¸ ˝Н‡М, ‡Т¯Лflfl
В„У Т У·ВЛı ТЪУУМ. аТФУО¸БУ‚‡Ъ¸ НО‡‚Л¯Л
îÏ ‰Îfl ‚˚‚Ó‰‡ ̇ ˝Í‡Ì
ÒÛ·ÚËÚÓ‚.
тЛУНУЩУП‡ЪМ˚И
щЪУЪ ВКЛП ФУБ‚УОflВЪ ‚ВМЫЪ¸ МУП‡О¸М˚В ФУФУˆЛЛ ЛБУ·‡КВМЛfl,
ФВВ‰‡‚‡ВПУ„У ‚ ВКЛПВ 16:9, ‚˚‚У‰fl В„У М‡ ‚ВТ¸ ˝Н‡М.
èpËϘ‡ÌËÂ:
‚У ‚pВПfl ФpУТПУЪp‡ DVD ФОВВp‡ ‚˚ ПУКВЪВ ЛТФУО¸БУ‚‡Ъ¸ ЪУО¸НУ
Í·‚˯Ë
îÏ, ÔÓ͇ Ë̉Ë͇ˆËfl ÙÓpχڇ ‚˚‚‰Â̇ ̇ ˝Íp‡Ì ÚÂ΂ËÁÓp‡
(‚ ФpУЪЛ‚МУП ТОЫ˜‡В ‚˚ ФУОЫ˜‡ВЪВ ‰УТЪЫФ Н ЩЫМНˆЛflП DVD).
ç‡Ê‡Ú¸ ̇ Í·‚Ë¯Ë p ‰Оfl ‚˚·У‡ ‡БОЛ˜М˚ı ВКЛПУ‚ :
4:3
аБУ·p‡КВМЛВ ‚УТФpУЛБ‚У‰ЛЪТfl ‚ ЩУpП‡ЪВ 4:3.
ê‡Ò¯ËpÂÌÌ˚È 4:3
аБУ·p‡КВМЛВ Ы‚ВОЛ˜ВМУ ФУ ‚ВpЪЛН‡ОЛ. кВКЛП ЛТФУО¸БЫВЪТfl ‰Оfl ЫТЪp‡МВМЛfl
˜fipМ˚ı ФУОУТ ФpЛ ФpУТПУЪpВ ФpУ„p‡ПП ‚ ЩУpП‡ЪВ "ФУ˜ЪУ‚˚И fl˘ЛН".
ëʇ¸ 16:9
аБУ·p‡КВМЛВ ТК‡ЪУ ФУ ‚ВpЪЛН‡ОЛ ‰У ЩУpП‡Ъ‡ 16:9.
Page 64

10
аТФУО¸БУ‚‡МЛВ ‚ТЪУВММУ„У ФОВВ‡ DVD
ìÒÚ‡Ìӂ͇ ‰ËÒ͇
ЗТЪУВММ˚И ФОВВ DVD ФУБ‚УОflВЪ ‚УТФУЛБ‚У‰ЛЪ¸ ‚Л‰ВУ‰ЛТНЛ DVD, ‡ Ъ‡НКВ ‚Л‰ВУ‰ЛТНЛ
CD, ‰ЛТНЛ CD Т ЛБУ·‡КВМЛflПЛ (ЩУП‡Ъ‡ JPEG) Л ‡Ы‰ЛУ‰ЛТНЛ CD (‚НО˛˜‡fl Б‡Н˚Ъ˚В
‰ЛТНЛ CD-R, CD-RW Л ‰ЛТНЛ CD Т Щ‡ИО‡ПЛ MP3). оУП‡Ъ ‰ЛТН‡ ПУКМУ УФВ‰ВОЛЪ¸ ФУ
ОУ„УЪЛФЫ, ЛПВ˛˘ВПЫТfl М‡ ЫФ‡НУ‚НВ.
èËÏ. :
д‡Н Ф‡‚ЛОУ, ЩЛО¸П˚ ‚ ЩУП‡ЪВ DVD МВ ‚˚ФЫТН‡˛ЪТfl ‚ ФУ‰‡КЫ ‚ У‰МУ Л ЪУ КВ
‚ВПfl ‚ ‡БОЛ˜М˚ı В„ЛУМ‡ı ПЛ‡. З Т‚flБЛ Т ˝ЪЛП, ФОВВ˚ DVD ТМ‡·КВМ˚ НУ‰‡ПЛ
„ВУ„‡ЩЛ˜ВТНЛı БУМ. ЦТОЛ ‚˚ ‚ТЪ‡‚ЛЪВ ‰ЛТН Т НУ‰УП В„ЛУМ‡, УЪОЛ˜М˚П УЪ НУ‰‡ ‚‡¯В„У
ФОВВ‡, ЪУ М‡ ˝Н‡МВ ФУfl‚ЛЪТfl ТУУЪ‚ВЪТЪ‚Ы˛˘ВВ ФВ‰ЫФВК‰ВМЛВ, ФЛ ˝ЪУП
‚УТФУЛБ‚В‰ВМЛВ ‰ЛТН‡ ·Ы‰ВЪ МВ‚УБПУКМ˚П, Л ‚‡П МВУ·ıУ‰ЛПУ ·Ы‰ВЪ Ы·‡Ъ¸ В„У.
&
йЪН˚ЪЛВ ‚˚‰‚ЛКМУИ
НУМТУОЛ
з‡КПЛЪВ М‡ НО‡‚Л¯Ы EJECT (flfl) (ЗхЕкйл),
‡ТФУОУКВММЫ˛ М‡ ОЛˆВ‚УИ ТЪУУМВ ТОВ‚‡
УЪ ‚˚‰‚ЛКМУИ НУМТУОЛ.
é
ìÒÚ‡Ìӂ͇ ‰ËÒ͇
мТЪ‡МУ‚ЛЪВ ‰ЛТН ‚ НУМТУО¸ Ъ‡НЛП У·‡БУП,
˜ЪУ·˚ ˝ЪЛНВЪН‡ М‡ıУ‰ЛО‡Т¸ ‚‚ВıЫ.
м·В‰ЛЪВТ¸ ‚ ЪУП, ˜ЪУ ‰ЛТН Ф‡‚ЛО¸МУ
ЫТЪ‡МУ‚ОВМ ‚ Ы„ОЫ·ОВМЛЛ НУМТУОЛ.
"
б‡Н˚ЪЛВ ‚˚‰‚ЛКМУИ
НУМТУОЛ
нУОНМЛЪВ ТОВ„Н‡ ‚˚‰‚ЛКМЫ˛ НУМТУО¸ ЛОЛ
М‡КПЛЪВ М‡ НО‡‚Л¯Ы
EJECT (
flfl
) (ЗхЕкйл),
‡ТФУОУКВММЫ˛ Т·УНЫ ‰Оfl ЪУ„У, ˜ЪУ·˚
Б‡Н˚Ъ¸ НУМТУО¸. иЛ ˝ЪУП М‡˜МВЪТfl
‚УТФУЛБ‚В‰ВМЛВ ‰ЛТН‡.
‘
Д‚ЪУП‡ЪЛ˜ВТНУВ
‚УТФУЛБ‚В‰ВМЛВ
иЛ Б‡Н˚ЪЛЛ НУМТУОЛ М‡˜МВЪТfl
‡‚ЪУП‡ЪЛ˜ВТНУВ ‚УТФУЛБ‚В‰ВМЛВ ‰ЛТН‡. З
ОВ‚УИ ˜‡ТЪЛ ˝Н‡М‡ ФУfl‚ЛЪТfl УНУ¯НУ ЛМ‰ЛН‡ˆЛЛ
ТУТЪУflМЛfl Т ЛМЩУП‡ˆЛВИ У ЪВНЫ˘ВИ УФВ‡ˆЛЛ,
ЪЛФВ ‰ЛТН‡ Л В„У ‰ОЛЪВО¸МУТЪЛ. б‡ЪВП
ФУfl‚ЛЪТfl ЛМЩУП‡ˆЛfl У ТУ‰ВК‡МЛЛ ‰ЛТН‡.
PICTURE
Page 65

11
ÇÓÒÔÓËÁ‚‰ÂÌË ‚ˉÂÓ‰ËÒÍÓ‚ DVD ËÎË CD
ÇÓÒÔÓËÁ‚‰ÂÌËÂ
иУТОВ ЫТЪ‡МУ‚НЛ ‰ЛТН‡ М‡ ПВТЪУ Л Б‡Н˚ЪЛfl НУМТУОЛ ‚УТФУЛБ‚В‰ВМЛВ ‰ЛТН‡
М‡˜ЛМ‡ВЪТfl ‡‚ЪУП‡ЪЛ˜ВТНЛ. иЛ ЛТФУО¸БУ‚‡МЛЛ МВНУЪУ˚ı ‰ЛТНУ‚ ‚‡П ·Ы‰ВЪ
ФВ‰ОУКВМУ ‚˚·‡Ъ¸ Ы·ЛНЫ ‚ ПВМ˛. иЛ ˝ЪУП, ‚ Б‡‚ЛТЛПУТЪЛ УЪ ТЛЪЫ‡ˆЛЛ
ЛТФУО¸БЫИЪВ НО‡‚Л¯Л
09
ËÎË
îÏ È¬
, ‡ Б‡ЪВП М‡КПЛЪВ М‡ u.
éÒÚ‡Ìӂ͇ ‚ÓÒÔÓËÁ‚‰ÂÌËfl
з‡КПЛЪВ М‡ НО‡‚Л¯Ы Ê ‰Оfl ЪУ„У, ˜ЪУ·˚ УТЪ‡МУ‚ЛЪ¸
‚УТФУЛБ‚В‰ВМЛВ ‰ЛТН‡. иЛ ˝ЪУП ФУfl‚ЛЪТfl ЛМ‰ЛН‡ˆЛfl ФУ ЫПУО˜‡МЛ˛
Т ‚˚‚У‰УП ЛМЩУП‡ˆЛЛ У ТУТЪУflМЛЛ ФОВВ‡.
ЗУБ‚‡Ъ ‚ ВКЛП ‚УТФУЛБ‚В‰ВМЛfl (ЩЫМНˆЛfl “resume”
(‚УБУ·МУ‚ОВМЛВ)
дУ„‰‡ ‚˚ ФВ˚‚‡ВЪВ ‚УТФУЛБ‚В‰ВМЛВ ‰ЛТН‡ (ФВВıУ‰‡ ‚ ВКЛП
УКЛ‰‡МЛfl ЛОЛ ‚˚·УТ‡ ‰ЛТН‡), ЛПВВЪТfl ‚УБПУКМУТЪ¸ ‚УБУ·МУ‚ЛЪ¸
‚УТФУЛБ‚В‰ВМЛВ Т ЪУ„У ПВТЪ‡, ‚ НУЪУУП УМУ ·˚ОУ ФВ‚‡МУ.
СОfl ˝ЪУ„У ‰УТЪ‡ЪУ˜МУ М‡К‡Ъ¸ М‡ НО‡‚Л¯Ы
Æ, ‡ Á‡ÚÂÏ, ÍÓ„‰‡ ÔÓfl‚ËÚÒfl
ÒËÏ‚ÓÎ
resume, ÒÌÓ‚‡ ̇ʇڸ ̇ Í·‚Ë¯Û Æ (‚ ÔÓÚË‚ÌÓÏ ÒÎÛ˜‡Â
‚ÓÒÔÓËÁ‚‰ÂÌË ̇˜ÌÂÚÒfl Ò Ì‡˜‡Î‡ ‰ËÒ͇).
оЫМНˆЛfl ‚УБУ·МУ‚ОВМЛfl ФЛПВМflВЪТfl Ъ‡НКВ ФУ УЪМУ¯ВМЛ˛ Н 4
ФУТОВ‰МЛП Т˜ЛЪ‡ММ˚П ‰ЛТН‡П.
б‡ПВ‰ОВММУВ ‚УТФУЛБ‚В‰ВМЛВ, ЫТНУВММ˚И ФУЛТН ‚ФВВ‰ Л М‡Б‡‰
з‡КПЛЪВ М‡ НО‡‚Л¯Ы П‚ ФУˆВТТВ ‚УТФУЛБ‚В‰ВМЛfl ‰Оfl ЪУ„У,
˜ЪУ·˚ ТМЛБЛЪ¸ ТНУУТЪ¸ ‚УТФУЛБ‚В‰ВМЛfl М‡ 1/2, 1/4 ЛОЛ 1/8.
з‡КПЛЪВ М‡ НО‡‚Л¯Ы
¢ ËÎË ∫ (ËÎË È¬) ‰Îfl ÛÒÍÓÂÌÌÓ„Ó
ФУЛТН‡ ‚ФВВ‰ ЛОЛ М‡Б‡‰ ТУ ТНУУТЪ¸˛ x4 ЛОЛ x32. з‡КПЛЪВ М‡
НО‡‚Л¯Ы
Æ ‰Îfl ‚ÓÁ‚‡Ú‡ Í ÌÓχθÌÓÈ ÒÍÓÓÒÚË.
кВКЛП ТЪУФ-Н‡‰‡
з‡КПЛЪВ М‡ НО‡‚Л¯Ы ∆ (ËÎË î) ‰Оfl М‡ТЪУИНЛ ВКЛП‡ ТЪУФ-Н‡‰‡.
Ц˘В ‡Б М‡КПЛЪВ М‡ НО‡‚Л¯Ы
∆ ‰Îfl ÚÓ„Ó, ˜ÚÓ·˚ ÔÂÂÈÚË Í ÒÎÂ‰Û˛˘ÂÏÛ
͇‰Û ËÎË Ì‡ Í·‚˯Û
Æ ‰Îfl ‚ÓÁ‚‡Ú‡ ‚ ÂÊËÏ ‚ÓÒÔÓËÁ‚‰ÂÌËfl.
ëÎÂ‰Û˛˘ËÈ/Ô‰¯ÂÒÚ‚Û˛˘ËÈ ‡Á‰ÂÎ
СЛТНЛ DVD ‡Б·ЛЪ˚ М‡ МВТНУО¸НУ ‡Б‰ВОУ‚ ‰Оfl ЪУ„У, ˜ЪУ·˚
У·ВТФВ˜ЛЪ¸ МВФУТВ‰ТЪ‚ВММ˚И ‰УТЪЫФ Н МВНУЪУ˚П ТˆВМ‡П. СОfl
ЪУ„У, ˜ЪУ·˚ ФУОЫ˜ЛЪ¸ ‰УТЪЫФ Н ФВ‰¯ВТЪ‚Ы˛˘ВПЫ ЛОЛ ТОВ‰Ы˛˘ВПЫ
‡Б‰ВОЫ, ЛТФУО¸БЫИЪВ НО‡‚Л¯Л
@P#
.
åÂÌ˛ DVD
з‡КПЛЪВ М‡ НО‡‚Л¯Ы æ. иЛ ˝ЪУП ФУfl‚ЛЪТfl ПВМ˛ DVD. Ц„У
ТУ‰ВК‡МЛВ Б‡‚ЛТЛЪ УЪ ‰ЛТН‡ DVD. йМУ ФУБ‚УОflВЪ ФУОЫ˜ЛЪ¸ ‰УТЪЫФ Н
‡БОЛ˜М˚П Ы·ЛН‡П, Ъ‡НЛП Н‡Н ‚˚·У flБ˚Н‡, МВФУТВ‰ТЪ‚ВММ˚И
‰УТЪЫФ Н УФВ‰ВОВММ˚П Щ‡„ПВМЪ‡П, ТФВˆЛ‡О¸М˚П ТОЫКВ·М˚П
УЪПВЪН‡П, У·˙fl‚ОВМЛflП Л Ф. аТФУО¸БЫИЪВ ФЛ ˝ЪУП НО‡‚Л¯Л
Ȭ
îÏ
‰Îfl ‚˚·Ó‡, u‰Îfl ÔÓ‰Ú‚ÂʉÂÌËfl Ë æ‰Îfl ‚˚ıÓ‰‡ ËÁ ÏÂÌ˛.
åÂÌ˛ Ô· DVD
з‡КПЛЪВ М‡ НО‡‚Л¯Ы
d (SYSTEM MENU), ˜ÚÓ·˚ ‚˚Á‚‡Ú¸ ËÎË ‚˚ÈÚË ËÁ
ÏÂÌ˛ Ô· DVD (ÒÏ. ÒÚ. 13).
üÁ˚Í ‰Û·ÎËÓ‚‡ÌËfl
з‡КПЛЪВ М‡ НО‡‚Л¯Ы e ‰Оfl ‚˚·У‡ flБ˚Н‡ ‰Ы·ОЛУ‚‡МЛfl ТВ‰Л
МВТНУО¸НЛı flБ˚НУ‚, ЛПВ˛˘ЛıТfl М‡ ‰ЛТНВ.
еВМ˛ ЛТ˜ВБМВЪ ФУ ФУ¯ВТЪ‚ЛЛ
МВТНУО¸НЛı П„МУ‚ВМЛИ.
üÁ˚Í ÒÛ·ÚËÚÓ‚
з‡КПЛЪВ НО‡‚Л¯Ы c ‰Îfl ‚˚·Óp‡ flÁ˚͇ ÒÛ·ÚËÚpÓ‚ (‚˚·ÂËÚ off (‚˚НО.)
‰Оfl УЪНО˛˜ВМЛfl ПВМ˛). еВМ˛ ЛТ˜ВБМВЪ ФУ ФУ¯ВТЪ‚ЛЛ МВТНУО¸НЛı
П„МУ‚ВМЛИ.
Ç˚·ÓÒ ‰ËÒ͇
з‡КПЛЪВ М‡ НО‡‚Л¯Ы EJECT (flfl) (ЗхЕкйл), ‡ТФУОУКВММЫ˛ М‡
ОЛˆВ‚УИ ТЪУУМВ ЪВОВ‚ЛБУ‡. аБУ·‡КВМЛВ ТЪ‡МВЪ МВФУ‰‚ЛКМ˚П, Л
˜ВВБ МВТНУО¸НУ ТВНЫМ‰ НУМТУО¸ УЪНУВЪТfl.
Ç˚·Ó ÂÊËχ íV ËÎË DVD
з‡КПЛЪВ НМУФНЫ Æ ФЫО¸Ъ‡ ‰ЛТЪ‡МˆЛУММУ„У ЫФ‡‚ОВМЛfl ‰Оfl ‚НО˛˜ВМЛfl
ЪВОВ‚ЛБУ‡ ‚ ВКЛП нV ЛОЛ DVD.
ı
TV
ù
›
VCR
¢
∫
Ÿ
Ó
MODE
·
∆
Ê
TV / DVD
-
MENU
+ +
”
[
- -
%
∏
OK
12
564
879
Ø
0
.
SUBTITLEAUDIO
¤
SYSTEM MENU
Ë
Æ
SMARTSMART
ª
DVD
MENU
RADIO
3
Á
P
Page 66

12
ÇÓÒÔÓËÁ‚‰ÂÌË ‡Û‰ËÓ‰ËÒ͇ CD
ÇÓÒÔÓËÁ‚‰ÂÌË ‰ËÒ͇ CD Ò ËÁÓ·‡ÊÂÌËflÏË
ÇÓÒÔÓËÁ‚‰ÂÌËÂ
иУТОВ ЫТЪ‡МУ‚НЛ ‰ЛТН‡ М‡ ПВТЪУ Л Б‡Н˚ЪЛfl НУМТУОЛ ‚УТФУЛБ‚В‰ВМЛВ
‰ЛТН‡ М‡˜МВЪТfl ‡‚ЪУП‡ЪЛ˜ВТНЛ. з‡ ˝Н‡МВ ФУfl‚ЛЪТfl ТФВˆЛ‡О¸МУВ
ПВМ˛ Т ЛМЩУП‡ˆЛВИ У НУОЛ˜ВТЪ‚В М‡ЛПВМУ‚‡МЛИ Щ‡„ПВМЪУ‚,
ФУЛ„˚‚‡ВПУП Щ‡„ПВМЪВ Л ЪВНЫ˘ВП ‚ВПВМЛ.
èÂÂıÓ‰ Í ÒÎÂ‰Û˛˘ÂÈ Á‡ÔËÒË
аТФУО¸БЫИЪВ НО‡‚Л¯Л @ P # ФЫО¸Ъ‡ ‰ЛТЪ‡МˆЛУММУ„У
ЫФ‡‚ОВМЛfl ‰Оfl ТПВМ˚ ФУЛ„˚‚‡ВПУ„У Щ‡„ПВМЪ‡ ЛОЛ НО‡‚Л¯Л
09
‰Îfl ‚˚·Ó‡ Ê·ÂÏÓ„Ó Ù‡„ÏÂÌÚ‡.
мТНУВММ˚И ФУЛТН ‚ФВВ‰ Л М‡Б‡‰
з‡КПЛЪВ М‡ НО‡‚Л¯Ы ¢ ËÎË ∫ ‰Оfl ‚НО˛˜ВМЛfl ЫТНУВММУ„У ФУЛТН‡
‚ФВВ‰ ЛОЛ М‡Б‡‰ ТУ ТНУУТЪ¸˛ x4 ЛОЛ x8. з‡КПЛЪВ М‡ НО‡‚Л¯Ы
Æ ‰Îfl
‚ÓÁ‚‡Ú‡ Í ÌÓχθÌÓÈ ÒÍÓÓÒÚË. иЛПВ˜‡МЛВ : ˝Ъ‡ ЩЫМНˆЛfl МВ ПУКВЪ
‚˚ФУОМflЪ¸Тfl ‰Оfl ‡Ы‰ЛУ CD, Б‡ФЛТ‡ММ˚ı ‚ ЩУП‡ЪВ MP3.
è‡ÛÁ‡ / ÓÒÚ‡Ìӂ͇ / ‚˚·ÓÒ
з‡КПЛЪВ М‡ НО‡‚Л¯Ы ∆ ‰Îfl ÔÂÂıÓ‰‡ ‚ ÂÊËÏ Ô‡ÛÁ˚ Ë Ì‡ Í·‚Ë¯Û Æ
‰Оfl ‚УБ‚‡Ъ‡ ‚ ВКЛП ‚УТФУЛБ‚В‰ВМЛfl. з‡КПЛЪВ М‡ НО‡‚Л¯Ы Ê ‰Îfl
ÓÒÚ‡ÌÓ‚ÍË ‚ÓÒÔÓËÁ‚‰ÂÌËfl Ë Ì‡ Í·‚˯Û
EJECT (
flfl
) (ЗхЕкйл),
‡ТФУОУКВММУИ М‡ ОЛˆВ‚УИ ТЪУУМВ ЪВОВ‚ЛБУ‡, ‰Оfl ‚˚·УТ‡ ‰ЛТН‡.
èÓ„‡ÏÏËÓ‚‡ÌË ‚ÓÒÔÓËÁ‚‰ÂÌËfl
щЪ‡ ЩЫМНˆЛfl ФУБ‚УОflВЪ ФУ„‡ППЛУ‚‡Ъ¸ ‚УТФУЛБ‚В‰ВМЛВ
ФЫЪВП Б‡ФЛТЛ ‚ Ф‡ПflЪ¸ ЛБ·‡ММ˚ı Щ‡„ПВМЪУ‚
(ÒÏ. ÒÚ. 14).
ÇÓÒÔÓËÁ‚‰ÂÌË ‡Û‰ËÓ‰ËÒ͇ CD Ò Ù‡È·ÏË MP3
з‡ У‰МУП ‰ЛТНВ CD Т Щ‡ИО‡ПЛ MP3 ПУКВЪ ·˚Ъ¸ Б‡ФЛТ‡МУ МВТНУО¸НУ
ПЫБ˚Н‡О¸М˚ı ‡О¸·УПУ‚. аТФУО¸БЫИЪВ НО‡‚Л¯Л
îÏ ‰Îfl ‚˚·Ó‡
ÌÛÊÌ˚ı ‡Î¸·ÓÏÓ‚. ç‡ÊÏËÚe
¬ ‰Оfl ФУОЫ˜ВМЛfl ‰УТЪЫФ‡ Н ФВВ˜М˛
‡БОЛ˜М˚ı Щ‡„ПВМЪУ‚. аТФУО¸БЫИЪВ НО‡‚Л¯Л
îÏ ËÎË
09
‰Îfl
‚˚·У‡ МЫКМ˚ı Щ‡„ПВМЪУ‚. аТФУО¸БЫИЪВ НО‡‚Л¯Ы
È ‰Îfl ‚ÓÁ‚‡Ú‡
Í ÔÂÂ˜Ì˛ ‰Îfl ‚˚·Ó‡ ‡Î¸·ÓÏÓ‚.
ЗУТФУЛБ‚В‰ВМЛВ Л ФВ‰‚‡ЛЪВО¸М˚И ФУТПУЪ
иУТОВ ЫТЪ‡МУ‚НЛ ‰ЛТН‡ В„У ‚УТФУЛБ‚В‰ВМЛВ М‡˜ЛМ‡ВЪТfl
‡‚ЪУП‡ЪЛ˜ВТНЛ. йЪУ·‡БЛЪТfl ФВ‰‚‡ЛЪВО¸МУВ ЛБУ·‡КВМЛВ 4
ФВ‚˚ı ЛБУ·‡КВМЛИ. аТФУО¸БЫИЪВ НО‡‚Л¯Л
@ P # ‰Îfl ÔÂÂıÓ‰‡ Í
Ô‰˚‰Û˘ÂÈ ËÎË ÒÎÂ‰Û˛˘ÂÈ ÒÚ‡ÌˈÂ. ë ÔÓÏÓ˘¸˛ ÍÛÒÓ‡
îÏȬ ‚˚·ВЛЪВ МЫКМУВ ЛБУ·‡КВМЛВ Л М‡КПЛЪВ u, ˜ЪУ·˚
УЪУ·‡БЛЪ¸ В„У ‚У ‚ВТ¸ ˝Н‡М. з‡КПЛЪВ М‡ НО‡‚Л¯Ы
æ
, ˜ÚÓ·˚
‚ВМЫЪ¸Тfl ‚ ВКЛП ФВ‰‚‡ЛЪВО¸МУ„У ФУТПУЪ‡ ЛБУ·‡КВМЛИ.
ë·ȉ-¯ÓÛ
з‡КПЛЪВ М‡ НО‡‚Л¯Ы
Æ ‰Îfl Á‡ÔÛÒ͇ Ò·ȉ-¯ÓÛ. àÁÓ·‡ÊÂÌËfl,
ЛПВ˛˘ЛВТfl М‡ ‰ЛТНВ, ·Ы‰ЫЪ ‡‚ЪУП‡ЪЛ˜ВТНЛ ТПВМflЪ¸ ‰Ы„ ‰Ы„‡.
уЪУ·˚ УТЪ‡МУ‚ЛЪ¸ ФУН‡Б ТО‡И‰-¯УЫ, М‡КПЛЪВ М‡ НО‡‚Л¯Ы
Ê.
уЪУ·˚ ЛБПВМЛЪ¸ ФУ‰УОКЛЪВО¸МУТЪ¸ УЪУ·‡КВМЛfl ЛБУ·‡КВМЛИ,
ТП. ПВМ˛
Toolbar (и‡МВО¸ ЛМТЪЫПВМЪУ‚) (ТЪ. 13).
иflПУИ ‚˚·У ЛБУ·‡КВМЛfl ЛОЛ ТФЛТН‡
аТФУО¸БЫИЪВ НО‡‚Л¯Л @ P # ‰Îfl ÔÂÂıÓ‰‡ Í Ô‰˚‰Û˘ÂÏÛ ËÎË
ÒÎÂ‰Û˛˘ÂÏÛ ËÁÓ·‡ÊÂÌ˲. ë ÔÓÏÓ˘¸˛ Í·‚˯
09
ЛБУ·‡КВМЛВ
ПУКМУ ‚˚·‡Ъ¸ М‡ФflПЫ˛, ЫН‡Б‡‚ В„У МУПВ. иВВ˜ВМ¸ ЛБУ·‡КВМЛИ
УЪУ·‡БЛЪТfl М‡ ˝Н‡МВ. аТФУО¸БЫИЪВ НО‡‚Л¯Л
îÏ ‰Îfl
ФВВПВ˘ВМЛfl ФУ ФВВ˜М˛. ЦТОЛ М‡ ‰ЛТНВ ЛПВВЪТfl МВТНУО¸НУ ТФЛТНУ‚,
ЛТФУО¸БЫИЪВ НО‡‚Л¯Ы
È, ˜ÚÓ·˚ ÒÌÓ‚‡ ‚ÂÌÛÚ¸Òfl Í ÔÂÂ˜Ì˛ ‰Îfl
‚˚·У‡ ТФЛТНУ‚. З˚·ВЛЪВ ТФЛТУН Т ФУПУ˘¸˛ НО‡‚Л¯
îÏ
, Á‡ÚÂÏ
М‡КПЛЪВ М‡ НО‡‚Л¯y
¬ ‰Оfl ‚УБ‚‡Ъ‡ Н ‚˚·УЫ ЛБУ·‡КВМЛИ.
îÓÏ‡Ú ËÁÓ·‡ÊÂÌËfl
ë ÔÓÏÓ˘¸˛ Í·‚˯Ë
p ПУКМУ ЛБПВМЛЪ¸ ЩУП‡Ъ ЛБУ·‡КВМЛfl
(ÒÏ. ÒÚ. 9).
Picture
1
2
3
4
.
ı
SUBTITLEAUDIO
›
¢
Ó
∆
TV / DVD
ù
∫
Ÿ
Ê
¤
SYSTEM MENU
Ë
Æ
SMARTSMART
ª
DVD
MENU
MODE
MENU
TV
VCR
·
-
++
”
--
%
∏
OK
12
Ø
P
[
RADIO
3
564
879
0
Á
Page 67

13
åÂÌ˛ Ô· DVD
еВМ˛ Toolbar (и‡МВО¸ ЛМТЪЫПВМЪУ‚)
л ФУПУ˘¸˛ ˝ЪУ„У ПВМ˛ ПУКМУ ФУОЫ˜ЛЪ¸
‰УТЪЫФ НУ ‚ТВП ЩЫМНˆЛflП, ‰УТЪЫФМ˚П М‡
ФОВВВ DVD. з‡КПЛЪВ М‡ НО‡‚Л¯Ы
d
(SYSTEM MENU). еВМ˛ УЪУ·‡БЛЪТfl М‡ ˝Н‡МВ.
аТФУО¸БЫИЪВ НО‡‚Л¯Л
ȬîÏ ‰Îfl
ФВВıУ‰‡ ФУ ‡БОЛ˜М˚П ПВМ˛ Л ‚˚ФУОМВМЛfl
В„ЫОЛУ‚УН. Ц˘В ‡Б М‡КПЛЪВ М‡ НО‡‚Л¯Ы
d (SYSTEM MENU) ‰Îfl ‚˚ıÓ‰‡ ËÁ ÏÂÌ˛.
ЦТОЛ ЩЫМНˆЛfl ·Ы‰ВЪ МВ‰УТЪЫФМ‡ ‚У ‚ВПfl
‚УТФУЛБ‚В‰ВМЛfl ‰ЛТН‡, ЪВНТЪ ·Ы‰ВЪ
‚˚‰ВОВМ ТВ˚П ˆ‚ВЪУП.
л ФУПУ˘¸˛ ˝ЪУ„У ПВМ˛ ПУКМУ ФУОЫ˜ЛЪ¸
‰УТЪЫФ НУ ‚ТВП ЩЫМНˆЛflП ФОВВ‡ DVD.
з‡КПЛЪВ М‡ НО‡‚Л¯Ы
d (SYSTEM MENU).
éÚÓ·‡ÁËÚÒfl ÏÂÌ˛
Toolbar (è‡ÌÂθ
ЛМТЪЫПВМЪУ‚). аТФУО¸БЫИЪВ НО‡‚Л¯Л
Ȭ ‰Îfl ‚˚·Ó‡ ‡Á΢Ì˚ı ÔÓ‰ÏÂÌ˛:
Play Option (кВКЛП ‚УТФУЛБ‚В‰ВМЛfl)
•
Disc Navigation (èÂÂÏ¢ÂÌË ÔÓ ‰ËÒÍÛ): ‰Îfl
ÔÂÂıÓ‰‡ Í ‡Á΢Ì˚Ï Û˜‡ÒÚ͇Ï
‡Û‰ËÓ‰ËÒ͇ CD Ë ‰ËÒ͇ CD Ò
ËÁÓ·‡ÊÂÌËflÏË.
• Audio (á‚ÛÍ): ‰Îfl ‚˚·Ó‡ flÁ˚͇
‰Û·ÎËÓ‚‡ÌËfl ̇ Á‚ÛÍÓ‚ÓÈ ‰ÓÓÊÍÂ
ÙËθÏÓ‚ DVD.
иflПУИ ‰УТЪЫФ ПУКМУ
ÔÓÎÛ˜ËÚ¸ Ò ÔÓÏÓ˘¸˛ Í·‚Ë¯Ë e.
• Subtitle (ëÛ·ÚËÚ): ‰Îfl ‚˚·Ó‡ flÁ˚͇
ÒÛ·ÚËÚÓ‚ ‚ ÙËθχı DVD.
èflÏÓÈ
‰УТЪЫФ ПУКМУ ФУОЫ˜ЛЪ¸ Т ФУПУ˘¸˛
НО‡‚Л¯Л c.
Slide Show (ë·ȉ-¯ÓÛ)
л ФУПУ˘¸˛ ˝ЪУ„У ПВМ˛ ПУКМУ М‡ТЪУЛЪ¸
Ф‡‡ПВЪ˚ ФУН‡Б‡ ТО‡И‰-¯УЫ,
ТУТЪ‡‚ОВММУ„У ЛБ ЛБУ·‡КВМЛИ,
ЛПВ˛˘ЛıТfl М‡ ‰ЛТНВ CD.
•
Pic Time (ÇÂÏfl ÓÚÓ·‡ÊÂÌËfl): ‰Îfl
В„ЫОЛУ‚НЛ ФУ‰УОКЛЪВО¸МУТЪЛ
УЪУ·‡КВМЛfl ЛБУ·‡КВМЛИ.
View (Çˉ)
•
Angle (к‡НЫТ): М‡ МВНУЪУ˚ı ‰ЛТН‡ı DVD
ЛПВ˛ЪТfl ˝ФЛБУ‰˚, Б‡ФЛТ‡ММ˚В М‡ Н‡ПВЫ
Т ЛТФУО¸БУ‚‡МЛВП ‡БМ˚ı ‡НЫТУ‚.
З ˝ЪУП ТОЫ˜‡В, Н‡Н Ф‡‚ЛОУ,
УЪУ·‡К‡ВЪТfl ТФВˆЛ‡О¸М‡fl ЛНУМН‡.
аТФУО¸БЫИЪВ НО‡‚Л¯Л
Ȭ ‰Îfl
‚˚·У‡ МЫКМУ„У ‡НЫТ‡.
•
Zoom (з‡ВБ‰): ЛТФУО¸БЫИЪВ НО‡‚Л¯Ы u,
˜ЪУ·˚ ‚НО˛˜ЛЪ¸ ЩЫМНˆЛ˛ М‡ВБ‰‡ Т
НУ˝ЩЩЛˆЛВМЪУП Ы‚ВОЛ˜ВМЛfl 2 ЛОЛ 4, ‡
Б‡ЪВП ‚ВМЫЪ¸Тfl Н П‡Т¯Ъ‡·Ы 1.
аТФУО¸БЫИЪВ НО‡‚Л¯Л
ȬîÏ ‰Îfl
ФВВıУ‰‡ Н Ы‚ВОЛ˜ВММУПЫ ЛБУ·‡КВМЛ˛.
•
Chapter Preview (艂‡ËÚÂθÌ˚È
ФУТПУЪ ‡Б‰ВО‡): ‰Оfl ‚НО˛˜ВМЛfl ЛОЛ
УЪНО˛˜ВМЛfl ФВ‰‚‡ЛЪВО¸МУ„У
ФУТПУЪ‡ ‡Б‰ВОУ‚ М‡ ‰ЛТНВ DVD.
•
Rotate (иУ‚УУЪ): ‰Оfl ЛБПВМВМЛfl
УЛВМЪ‡ˆЛЛ ЛБУ·‡КВМЛИ, ЛПВ˛˘ЛıТfl
М‡ ‰ЛТНВ CD.
Search (иУЛТН)
•
Time (ЗВПfl): ЛТФУО¸БЫИЪВ НО‡‚Л¯Л
09 ‰Оfl ‚˚·У‡ ЪУ˜МУ„У ПУПВМЪ‡
‚ВПВМЛ ‚ МЫКМУП ˝ФЛБУ‰В. з‡КПЛЪВ u
‰Оfl ФУ‰Ъ‚ВК‰ВМЛfl М‡ТЪУИНЛ.
ЗУТФУЛБ‚В‰ВМЛВ ‚УБУ·МУ‚ЛЪТfl ‚
ЫН‡Б‡ММУВ ‚ВПfl.
•
Fast
(мТНУВММ˚И ФУТПУЪ): ЛТФУО¸БЫИЪВ
Í·‚˯Ë
Ȭ
‰Оfl ‚˚·У‡ МЫКМУИ
ÒÍÓÓÒÚË.
• Slow (б‡ПВ‰ОВММУВ ‚УТФУЛБ‚В‰ВМЛВ):
ЛТФУО¸БЫИЪВ НО‡‚Л¯Л È¬ ‰Оfl
В„ЫОЛУ‚НЛ ТНУУТЪЛ Б‡ПВ‰ОВММУ„У
‚УТФУЛБ‚В‰ВМЛfl. СОfl ‚УБ‚‡Ъ‡ Н
МУП‡О¸МУИ ТНУУТЪЛ М‡КПЛЪВ М‡
НО‡‚Л¯Ы
Æ.
• Frame by Frame (иУН‡‰У‚УВ
‚УТФУЛБ‚В‰ВМЛВ): ЛТФУО¸БЫИЪВ НО‡‚Л¯Л
È ¬ ËÎË ‰Îfl ÔÓÎÛ˜ÂÌËfl ÔÓ͇‰Ó‚Ó„Ó
ФВВПВ˘ВМЛfl ‚ФВВ‰ ЛОЛ М‡Б‡‰.
аТФУО¸БЫИЪВ НО‡‚Л¯Ы
Æ ‰Îfl ‚ÓÁ‚‡Ú‡ Í
ÌÓχθÌÓÏÛ ‚ÓÒÔÓËÁ‚‰ÂÌ˲.
Program (èÓ„‡Ïχ)
иУ„‡ППЛУ‚‡МЛВ ‚УТФУЛБ‚В‰ВМЛfl
ЛБ·‡ММ˚ı Щ‡„ПВМЪУ‚ (ТП. ТЪ. 15).
Play Option Slide Show View
TToooollbbaarr
Preferences
Setup
Play Option Slide Show View
TToooollbbaarr
Preferences
Setup
Page 68

14
åÂÌ˛ Preferences (èÂÒÓ̇θÌ˚ ̇ÒÚÓÈÍË)
л ФУПУ˘¸˛ ˝ЪУ„У ПВМ˛ ПУКМУ
В„ЫОЛУ‚‡Ъ¸ ФВТУМ‡О¸М˚В М‡ТЪУИНЛ
ФОВВ‡ DVD.
з‡КПЛЪВ М‡ НО‡‚Л¯Ы
d (SYSEM MENU) ‰Îfl
УЪУ·‡КВМЛfl ПВМ˛ ФОВВ‡ DVD.
з‡КПЛЪВ М‡ НО‡‚Л¯Ы
Ï, ˜ÚÓ·˚ ‚˚·‡Ú¸
Preferences (èÂÒÓ̇θÌ˚ ̇ÒÚÓÈÍË), Ë
ЛТФУО¸БЫИЪВ НО‡‚Л¯Л
Ȭ ‰Îfl ‚˚·Ó‡
‡Á΢Ì˚ı ÔÓ‰ÏÂÌ˛:
Sound (á‚ÛÍ)
•
Night mode (çÓ˜ÌÓÈ ÂÊËÏ): ‰Îfl
УФЪЛПЛБ‡ˆЛЛ ‰ЛМ‡ПЛ˜ВТНУ„У ‰Л‡Ф‡БУМ‡
Б‚ЫН‡ ФЛ ФУТОЫ¯Л‚‡МЛЛ ‚ ВКЛПВ
ФУМЛКВММУИ „УПНУТЪЛ.
Features (îÛÌ͈ËË)
•
Help line (ëÔ‡‚͇): ‰Îfl
УЪУ·‡КВМЛfl/ТН˚ЪЛfl ‚ МЛКМВИ ˜‡ТЪЛ
˝Н‡М‡ У·О‡ТЪЛ, ТУ‰ВК‡˘ВИ ФУflТМВМЛfl
ФУ М‡ТЪУИН‡П ПВМ˛.
•
Status window (йНМУ ТУТЪУflМЛfl): ‰Оfl
УЪНО˛˜ВМЛfl УЪУ·‡КВМЛfl УНМ‡ ТУТЪУflМЛfl
ФОВВ‡.
СОfl ‚˚ıУ‰‡ ЛБ ПВМ˛: М‡КПЛЪВ М‡ НО‡‚Л¯Ы d.
åÂÌ˛ Setup (ìÒÚ‡ÌÓ‚ËÚ¸)
л ФУПУ˘¸˛ ˝ЪУ„У ПВМ˛ ПУКМУ
‚УТТЪ‡МУ‚ЛЪ¸ М‡ТЪУИНЛ ФУ ЫПУО˜‡МЛ˛
‰Оfl ФОВВ‡ DVD.
з‡КПЛЪВ М‡ НО‡‚Л¯Ы
d (SYSTEM MENU)
‰Оfl УЪУ·‡КВМЛfl ПВМ˛ ФОВВ‡ DVD.
з‡КПЛЪВ 2 ‡Б‡ НО‡‚Л¯Ы
Ï, ˜ÚÓ·˚
‚˚·‡Ú¸
Setup (мТЪ‡МУ‚ЛЪ¸), Л ЛТФУО¸БЫИЪВ
Í·‚˯Ë
Ȭ ‰Îfl ‚˚·Ó‡ ‡Á΢Ì˚ı
ÔÓ‰ÏÂÌ˛:
Language (üÁ˚Í)
•
Default Audio (üÁ˚Í ‰Û·ÎËÓ‚‡ÌËfl): ‰Îfl
‚˚·У‡ МЫКМУ„У flБ˚Н‡ Б‚ЫНУ‚УИ ‰УУКНЛ
‰Оfl ЩЛО¸ПУ‚ DVD.
•
Default Subtitle (üÁ˚Í ÒÛ·ÚËÚÓ‚): ‰Îfl
‚˚·У‡ МЫКМУ„У flБ˚Н‡ ТЫ·ЪЛЪУ‚ ‰Оfl
ЩЛО¸ПУ‚ DVD.
ЦТОЛ МЫКМ˚И flБ˚Н ЛПВВЪТfl М‡ ‰ЛТНВ, УМ
·Û‰ÂÚ ‚˚·‡Ì ÔÓ ÛÏÓΘ‡Ì˲. Ç ÔÓÚË‚ÌÓÏ
ÒÎÛ˜‡Â ·Û‰ÂÚ ‚˚·‡Ì Ô‚˚È flÁ˚Í ‰ËÒ͇.
TV (íÂ΂ËÁÓ)
(ЛПВВЪТfl ЪУО¸НУ ‚ МВНУЪУ˚ı
ÏÓ‰ÂÎflı)
• TV System (лЛТЪВП‡ ЪВОВ‚Л‰ВМЛfl):
ФУБ‚УОflВЪ ‚˚·‡Ъ¸ Ф‡‡ПВЪ
Auto
(Д‚ЪУП‡ЪЛ˜ВТНЛ) (‡‚ЪУП‡ЪЛ˜ВТНУВ
УФВ‰ВОВМЛВ ТЪ‡М‰‡Ъ‡
‚УТФУЛБ‚В‰ВМЛfl) ОЛ·У ТЪ‡М‰‡Ъ
Pal ËÎË
NTSC.
Audio Menu (åÂÌ˛ Á‚Û͇)
•
Digital output (ñËÙÓ‚ÓÈ ‚˚ıÓ‰):
ÔÓÁ‚ÓÎflÂÚ ‚˚·‡Ú¸ ÒÎÂ‰Û˛˘ËÂ
Ô‡‡ÏÂÚ˚:
All (ÇÒÂ), PCM ËÎË Off
(éÚÍβ˜ÂÌÓ).
Feature (îÛÌ͈Ëfl)
•
PBC: ‚Íβ˜ÂÌËÂ/‚˚Íβ˜ÂÌË ÙÛÌ͈ËË
У„О‡‚ОВМЛfl, НУЪУ‡fl ПУКВЪ ЛПВЪ¸Тfl М‡
МВНУЪУ˚ı ‚Л‰ВУ‰ЛТН‡ı CD.
Access (СУТЪЫФ): ‰Оfl ФУТПУЪ‡ ТОВ‰Ы˛˘ВИ
ТЪ‡МЛˆ˚.
ÑÎfl ‚˚ıÓ‰‡ ËÁ ÏÂÌ˛: М‡КПЛЪВ М‡ НО‡‚Л¯Ы d.
Setup
PPrreeffeerreenncceess
Sound Features
Langue TV Menu audio
SSeettuupp
Page 69

15
èÓ„‡ÏÏËÓ‚‡ÌË ‚ÓÒÔÓËÁ‚‰ÂÌËfl
щЪ‡ ЩЫМНˆЛfl ФУБ‚УОflВЪ ФУ„‡ППЛУ‚‡Ъ¸
‚УТФУЛБ‚В‰ВМЛВ ФЫЪВП Б‡ФЛТЛ ‚ Ф‡ПflЪ¸
ЛБ·‡ММ˚ı Щ‡„ПВМЪУ‚.
& з‡КПЛЪВ М‡ НО‡‚Л¯Ы d (SYSTEM MENU)
‰Îfl ÓÚÓ·‡ÊÂÌËfl ÏÂÌ˛
Toolbar (è‡ÌÂθ
ЛМТЪЫПВМЪУ‚). л ФУПУ˘¸˛ НО‡‚Л¯Л
¬
‚˚·ÂËÚ Program (иУ„‡ПП‡) Л М‡КПЛЪВ
Ï ‰Îfl ÓÚÓ·‡ÊÂÌËfl ÏÂÌ˛:
é аТФУО¸БЫИЪВ НО‡‚Л¯Ы Ï ‰Îfl ‚˚·Ó‡
Tracks (ПВМЪ˚) Л М‡КПЛЪВ
¬.
“ аТФУО¸БЫИЪВ НО‡‚Л¯Л îÏ ËÎË 09 ‰Îfl
‚˚·Ó‡ ÌÓχ Ê·ÂÏÓ„Ó Ù‡„ÏÂÌÚ‡ Ë
ÔӉڂ‰ËÚ ‚˚·Ó, ̇ʇ‚
¬.
‘ í‡ÍËÏ Ê ӷ‡ÁÓÏ ‚˚·ÂËÚ ÌÛÊÌ˚È ‡Á‰ÂÎ.
( з‡КПЛЪВ М‡ НО‡‚Л¯Ы
u
‰Îfl
ÔÓ‰Ú‚ÂʉÂÌËfl ‚˚·Ó‡.
§
èÓËÁ‚Ó‰ËÚ ÓÔ‡ˆËË “- (ТЪУО¸НУ ‡Б, ТНУО¸НУ
ЛПВВЪТfl Щ‡„ПВМЪУ‚ ЛОЛ ‡Б‰ВОУ‚, НУЪУ˚В ‚˚
КВО‡ВЪВ ‚˚·‡Ъ¸ (МВ ·УОВВ 20 М‡ ‰ЛТН).
иУ КВО‡МЛ˛ ПУКМУ Б‡ФУ„‡ППЛУ‚‡Ъ¸
ПМУ„УН‡ЪМ˚И ФУ‚ЪУ У‰МУ„У Л ЪУ„У КВ
Щ‡„ПВМЪ‡ ЛОЛ ‡Б‰ВО‡.
è з‡КПЛЪВ М‡ НО‡‚Л¯Ы d ‰Îfl ‚˚ıÓ‰‡ ËÁ
ПВМ˛. ЗУТФУЛБ‚В‰ВМЛВ ‚˚·‡ММ˚ı
Щ‡„ПВМЪУ‚ М‡˜МВЪТfl ‡‚ЪУП‡ЪЛ˜ВТНЛ.
йТЪ‡МУ‚Н‡ ‚УТФУЛБ‚В‰ВМЛfl ‚˚·‡ММ˚ı
Щ‡„ПВМЪУ‚
ìÒÚ‡ÌÓ‚ËÚ ‚ ÒÚÓÍÂ
Program (èÓ„‡Ïχ)
Á̇˜ÂÌËÂ
Off (éÚÍβ˜ÂÌÓ).
З˚БУ‚ Л ЛБПВМВМЛВ ФВВ˜Мfl
З˚·ВЛЪВ Playlist (иВВ˜ВМ¸ ‚УТФУЛБ‚В‰ВМЛfl)
Л М‡КПЛЪВ
¬
. йЪУ·‡БЛЪТfl ФВВ˜ВМ¸
‚˚·‡ММ˚ı Щ‡„ПВМЪУ‚. уЪУ·˚ Ы‰‡ОЛЪ¸
‡Б‰ВО, ‚˚·ВЛЪВ В„У МУПВ Т ФУПУ˘¸˛
НО‡‚Л¯
îÏ
Л М‡КПЛЪВ u.
쉇ОВМЛВ ‚ТВı
Ç˚·ÂËÚ Clear all (쉇ОЛЪ¸ ‚ТВ) Л М‡КПЛЪВ ¬.
ÑÎfl ‚˚ıÓ‰‡ ËÁ ÏÂÌ˛: М‡КПЛЪВ М‡ НО‡‚Л¯Ы d.
дУМЪУО¸ ‰УТЪЫФ‡ Л ·ОУНЛУ‚Н‡
щЪ‡ ЩЫМНˆЛfl ФУБ‚УОflВЪ ФУОЫ˜ЛЪ¸ ‰УТЪЫФ Н
‡БОЛ˜М˚П ЫУ‚МflП ·ОУНЛУ‚НЛ ФОВВ‡.
&
з‡КПЛЪВ М‡ НО‡‚Л¯Ы d. аТФУО¸БЫИЪВ НО‡‚Л¯Ы
Ï ‰Îfl ‚˚·Ó‡ Setup (ìÒÚ‡ÌÓ‚ËÚ¸), ‡ Á‡ÚÂÏ
Í·‚˯Û
¬ ‰Îfl ‚˚·Ó‡ Access (СУТЪЫФ).
é
З‚В‰ЛЪВ ‚‡¯ НУ‰ ‰УТЪЫФ‡. З˚ ‰УОКМ˚ ·Ы‰ВЪВ
‚‚ÂÒÚË Â„Ó Â˘Â ‡Á ‰Îfl ÔÓ‰Ú‚ÂʉÂÌËfl ÍÓ‰‡.
“
Parental level (мУ‚ВМ¸ ФУ ЫТПУЪВМЛ˛
У‰ЛЪВОВИ): ‰Оfl ‚НО˛˜ВМЛfl ЫУ‚Мfl ·ОУНЛУ‚НЛ
УЪ 0 (УЪНО˛˜ВМУ) ‰У 8 (П‡НТЛП‡О¸М˚И).
зВНУЪУ˚В ‰ЛТНЛ DVD ЛПВ˛Ъ ЫУ‚МЛ ·ОУНЛУ‚УН (УЪ
1 ‰У 8) Т ‚ТЪ‡‚НУИ ‚ МВНУЪУ˚ı ТОЫ˜‡flı Б‡ПВ˘‡˛˘Лı
ТˆВМ. з‡ФЛПВ, ВТОЛ ‚˚ ‚˚·‡ОЛ ЫУ‚ВМ¸ 4, ЪУ
·Ы‰ЫЪ ‚УТФУЛБ‚У‰ЛЪ¸Тfl ‚ТВ ТˆВМ˚ ˝ЪУ„У ЫУ‚Мfl
(Л МЛКВ). лˆВМ˚ ‚˚Т¯В„У ЫУ‚Мfl МВ ·Ы‰ЫЪ
‚УТФУЛБ‚У‰ЛЪ¸Тfl ЛОЛ ·Ы‰ЫЪ Б‡ПВМВМ˚ ТˆВМ‡ПЛ
Б‡ПВ˘ВМЛfl. ЦТОЛ М‡ ‰ЛТНВ МВ ФВ‰ЫТПУЪВМ‡ МЛ
У‰М‡ ТˆВМ‡ Б‡ПВ˘ВМЛfl, ‚УТФУЛБ‚В‰ВМЛВ
УТЪ‡М‡‚ОЛ‚‡ВЪТfl Л ‚˚ ‰УОКМ˚ ‚‚ВТЪЛ 4-БМ‡˜М˚И НУ‰.
‘ Change code (лПВМЛЪ¸ НУ‰): ‰Оfl ТПВМ˚ НУ‰‡
‰УТЪЫФ‡. З˚ ‰УОКМ˚ ·Ы‰ВЪВ ‚‚ВТЪЛ В„У В˘В
‡Á ‰Îfl ÔÓ‰Ú‚ÂʉÂÌËfl ÍÓ‰‡.
ЦТОЛ ‚˚ Б‡·˚ОЛ ‚‡¯ НУМЩЛ‰ВМˆЛ‡О¸М˚И НУ‰,
М‡КПЛЪВ 4 ‡Б‡ НО‡‚Л¯Ы Ê.
(
Disc Lock (ЕОУНЛУ‚Н‡ ‰ЛТН‡): ФУБ‚УОflВЪ
‚НО˛˜ЛЪ¸ ·ОУНЛУ‚НЫ ‚Л‰ВУ‰ЛТНУ‚ DVD Л CD.
иУТОВ ЫТЪ‡МУ‚НЛ ‰ЛТН‡ ‚ ФОВВ УЪУ·‡БЛЪТfl
‰Л‡ОУ„У‚УВ УНМУ. З‡П МВУ·ıУ‰ЛПУ ‚‚ВТЪЛ ‚‡¯
ТВНВЪМ˚И НУ‰ ‰Оfl ВКЛП‡
Play once
(ЗВПВММ˚И ФУТПУЪ) (‚УТФУЛБ‚В‰ВМЛВ ‰ЛТН‡
‚УБПУКМУ, ВТОЛ УМ М‡ıУ‰ЛЪТfl ‚ ‰ЛТНУ‚У‰В, ‡
ЪВОВ‚ЛБУ ФУ‰УОК‡ВЪ ‡·УЪ‡Ъ¸) ЛОЛ ‰Оfl
ВКЛП‡
Play always (иУТЪУflММ˚И ФУТПУЪ)
(‚УТФУЛБ‚В‰ВМЛВ ‚УБПУКМУ ‚ТВ„‰‡).
З Ф‡ПflЪ¸ ФОВВ‡ ПУКМУ ‚‚ВТЪЛ ‰У 50 ‰ЛТНУ‚.
дУ„‰‡ ˝ЪУЪ ФВВ˜ВМ¸ Б‡ФУОМЛЪТfl Л Н МВПЫ
МВУ·ıУ‰ЛПУ ·Ы‰ВЪ ‰У·‡‚ЛЪ¸ МУ‚˚И ‰ЛТН,
ФУТОВ‰МЛИ ‰ЛТН ФВВ˜Мfl ТЪЛ‡ВЪТfl ЛБ Ф‡ПflЪЛ.
С‚ЫТЪУУММЛВ ‰ЛТНЛ DVD (‡ Ъ‡НКВ
ПМУ„УЪУПМ˚В ‚Л‰ВУ‰ЛТНЛ CD) ПУ„ЫЪ ЛПВЪ¸
‡БМ˚И Л‰ВМЪЛЩЛН‡ˆЛУММ˚И НУ‰ ‰Оfl Н‡К‰УИ
ТЪУУМ˚ (ЪУП‡). иУ˝ЪУПЫ МВУ·ıУ‰ЛПУ ·Ы‰ВЪ
‡БВ¯ЛЪ¸ ФУТПУЪ Н‡К‰УИ ТЪУУМ˚ (ЪУП‡).
§
з‡КПЛЪВ М‡ НО‡‚Л¯Ы d ‰Îfl ‚˚ıÓ‰‡ ËÁ ÏÂÌ˛.
йЪПВМ‡ ‡БВ¯ВМЛfl ‚УТФУЛБ‚В‰ВМЛfl
•
ìÒÚ‡ÌÓ‚ËÚ ‰ËÒÍ ‚ ÔÎÂÂ. ÇÓÒÔÓËÁ‚‰ÂÌËÂ
̇˜ÌÂÚÒfl ‡‚ÚÓχÚ˘ÂÒÍË.
•
иУТОВ ФУfl‚ОВМЛfl ТЛП‚УО‡ uМ‡КПЛЪВ М‡
НО‡‚Л¯Ы
Ê
. иУfl‚ЛЪТfl ТЛП‚УО v, ˜ЪУ ·Ы‰ВЪ
УБМ‡˜‡Ъ¸ УЪПВМЫ ‡БВ¯ВМЛfl ‚УТФУЛБ‚В‰ВМЛfl
‰Оfl ˝ЪУ„У ‰ЛТН‡.
PPrrooggrraamm
Playlist
TToooollbbaarr
Program
TTrraacckkss
Clear all
Track
3
1
2
Disclock
SSeettuupp
Change PIN
Parental level
Enter Current Pin
****
Access
Page 70

16
иУ‰НО˛˜ВМЛВ ФВЛЩВЛИМУИ ‡ФФ‡‡ЪЫ˚
йТЫ˘ВТЪ‚ЛЪВ ЫН‡Б‡ММ˚В М‡ ЛТЫМНВ ФУ‰НО˛˜ВМЛfl.
аТФУО¸БЫИЪВ ¯МЫ “ФВЛЪВО¸” ıУУ¯В„У Н‡˜ВТЪ‚‡.
ЦТОЛ Ы ‚‡¯В„У ‚Л‰ВУП‡„МЛЪУЩУМ‡ МВЪ ‡Б˙ВП‡
ФВЛЪВО¸ (ЛОЛ ВТОЛ ˝ЪУЪ ‡Б˙ВП ЫКВ Б‡МflЪ ‰Ы„УИ
‡ФФ‡‡ЪЫУИ), ЪУ ‚УБПУКМ‡ ОЛ¯¸ Т‚flБ¸ ˜ВВБ Н‡·ВО¸
‡МЪВММ˚.
З ˝ЪУП ТОЫ˜‡В ‚˚ ‰УОКМ˚ М‡ИЪЛ ЪВТЪ-ТЛ„М‡О ‚‡¯В„У
‚Л‰ВУП‡„МЛЪУЩУМ‡ Л ФЛТ‚УЛЪ¸ ВПЫ МУПВ ФУ„‡ПП˚ 0
(ТП. Ы˜МУВ Б‡ФУПЛМ‡МЛВ, ТЪ. 6).
СОfl ‚УТФУЛБ‚В‰ВМЛfl ЛБУ·‡КВМЛfl ‚Л‰ВУП‡„МЛЪУЩУМ‡
М‡К‡Ъ¸ М‡ НО‡‚Л¯Ы 0.
ЗЛ‰ВУП‡„МЛЪУЩУМ Л ‰ВНУ‰ЛЫ˛˘ВВ ЫТЪУИТЪ‚У
иУ‰НО˛˜ЛЪВ ‰ВНУ‰В Н ‚ЪУУПЫ ‡Б˙ВПЫ “ФВЛЪВО¸”
‚Л‰ВУП‡„МЛЪУЩУМ‡. З˚ ТПУКВЪВ Б‡ФЛТ˚‚‡Ъ¸
НУ‰ЛУ‚‡ММ˚В ФВВ‰‡˜Л.
ЗЛ‰ВУП‡„МЛЪУЩУМ
(ТФЫЪМЛНУ‚˚И ФЛВПМЛН, ‰ВНУ‰В, ‚Л‰ВУ‰ЛТН,
˝ОВНЪУММ˚В Л„˚...)
З ЪВОВ‚ЛБУ‡ı, У·УЫ‰У‚‡ММ˚ı 2 ‡Б˙ВП‡ПЛ ‰Оfl
‚МВ¯МЛı ЫТЪУИТЪ‚, ‡Б˙ВП EXT1 ФВ‰М‡БМ‡˜ВМ, Н‡Н
Ф‡‚ЛОУ, ‰Оfl ФУ‰НО˛˜ВМЛfl ЫТЪУИТЪ‚,
‚˚‡·‡Ъ˚‚‡˛˘Лı ТЛ„М‡О˚ RVB (ˆЛЩУ‚УИ ‰ВНУ‰В,
ФОВВ˚ DVD, Л„У‚˚В ФЛТЪ‡‚НЛ Л Ф.), ‡ ‡Б˙ВП˚
EXT2 ‰Оfl ФУ‰НО˛˜ВМЛfl ЫТЪУИТЪ‚, ‚˚‡·‡Ъ˚‚‡˛˘Лı
ТЛ„М‡О˚ S-VHS (‚Л‰ВУП‡„МЛЪУЩУМ˚ ЩУП‡ЪУ‚
S-VHS Л Hi-8 Л Ф.).
СОfl ФУ‰НО˛˜ВМЛfl ТЛТЪВП HiFi, ЛТФУО¸БУ‚‡Ъ¸
ТУВ‰ЛМЛЪВО¸М˚И ¯МЫ ‡Ы‰ЛУ Л ТУВ‰ЛМЛЪ¸ ‡Б˙ВП˚
"L" Л "R" ЪВОВ‚ЛБУ‡
(ЪУО¸НУ М‡ МВНУЪУ˚ı ПУ‰ВОflı) ÒÓ
‚ıУ‰‡ПЛ "AUDIO IN" "L" Л "R" ЫТЛОЛЪВОfl.
аТФУО¸БЫИЪВ ТУВ‰ЛМЛЪВО¸М˚И ‡Ы‰ЛУ¯МЫ ‰Оfl
ˆЛЩУ‚˚ı ЫТЪУИТЪ‚ Л ФУ‰НО˛˜ЛЪВ ‚˚ıУ‰ “DIGITAL
AUDIO OUT” ЪВОВ‚ЛБУ‡ НУ ‚ıУ‰Ы “DIG IN” ЫТЛОЛЪВОfl
(ЫТЛОЛЪВО¸ Т НУ‡НТЛ‡О¸М˚П ˆЛЩУ‚˚П ‚ıУ‰УП).
ÑÛ„‡fl ‡ÔÔ‡‡ÚÛ‡
мТЛОЛЪВО¸
564
879
0
Á
Ø
ÑÎfl ‚˚·Ó‡ ÔÓ‰Íβ˜ÂÌÌ˚ı ‡ÔÔ‡‡ÚÓ‚
з‡КПЛЪВ М‡ НМУФНЫ n ‰Îfl ‚˚·Ó‡ ‡Á˙Âχ EXT1, ‡ ̇ ÏÓ‰ÂÎflı Ò
2 ‡Á˙ÂχÏË ‰Îfl ‚̯ÌËı ÛÒÚÓÈÒÚ‚ :
EXT2 Ë S-VHS2 (Ò˄̇Î˚
S-VHS ‰Îfl ‡Á˙Âχ EXT2) Ë
AV ‰Îfl ‚˚·Ó‡ ‡Á˙ÂÏÓ‚,
‡ТФУОУКВММ˚ı Т·УНЫ (ВТОЛ УМЛ ЛПВ˛ЪТfl).
ÅÓθ¯ËÌÒÚ‚Ó ‡ÔÔ‡‡ÚÓ‚
Т‡ПЛ УТЫ˘ВТЪ‚Оfl˛Ъ НУППЫЪ‡ˆЛ˛ (‰ВНУ‰В, ‚Л‰ВУП‡„МЛЪУЩУМ).
З Б‡‚ЛТЛПУТЪЛ УЪ ПУ‰ВОВИ ЪВОВ‚ЛБУ У·УЫ‰У‚‡М 1 ЛОЛ 2 ‡Б˙ВП‡ПЛ ‰Оfl ‚МВ¯МЛı ЫТЪУИТЪ‚
EXT1 Л EXT2, ‡ТФУОУКВММ˚ı ТБ‡‰Л.
к‡Б˙ВП EXT1 ЛПВВЪ ‚ıУ‰˚/‚˚ıУ‰˚ ‡Ы‰ЛУ Л ‚Л‰ВУ, ‡ Ъ‡НКВ ‚ıУ‰˚ RVB.
к‡Б˙ВП EXT2 (ВТОЛ УМ ЛПВВЪТfl) ЛПВВЪ ‚ıУ‰˚/‚˚ıУ‰˚ ‡Ы‰ЛУ Л ‚Л‰ВУ, ‡ Ъ‡НКВ ‚ıУ‰˚ S-VHS.
VCR
Page 71

17
З˚ФУОМЛЪВ ФУ‰НО˛˜ВМЛfl, Н‡Н ФУН‡Б‡МУ М‡
ЛТЫМНВ.
З˚·ВЛЪВ ФУОУКВМЛВ
AV Т ФУПУ˘¸˛ НМУФНЛ n.
иЛ ЛТФУО¸БУ‚‡МЛЛ ПУМУЩУМЛ˜ВТНУ„У
ЫТЪУИТЪ‚‡, ФУ‰НО˛˜ЛЪВ Н‡·ВО¸ Б‚ЫНУ‚У„У
ТЛ„М‡О‡ Н ‡Б˙ВПЫ AUDIO L. аТФУО¸БЫИЪВ НМУФНЫ
e ‰Îfl ‚ÓÒÔÓËÁ‚‰ÂÌËfl Á‚Û͇ Ò ÔÓÏÓ˘¸˛ ΂ӄÓ
Л Ф‡‚У„У „УПНУ„У‚УЛЪВОВИ ЪВОВ‚ЛБУ‡.
ç‡Û¯ÌËÍË
иЛ ФУ‰НО˛˜ВММ˚ı М‡Ы¯МЛН‡ı Б‚ЫН ЪВОВ‚ЛБУ‡
УЪНО˛˜‡ВЪТfl. дМУФНЛ
@”#ÔÓÁ‚ÓÎfl˛Ú
УЪВ„ЫОЛУ‚‡Ъ¸ „УПНУТЪ¸ Б‚ЫН‡ ‚ М‡Ы¯МЛН‡ı.
иУОМУВ ТУФУЪЛ‚ОВМЛВ М‡Ы¯МЛНУ‚ ‰УОКМУ
ТУТЪ‡‚ОflЪ¸ УЪ 32 ‰У 600 УП.
èÓ‰Íβ˜ÂÌËfl Ò·ÓÍÛ
дМУФН‡ ‚Л‰ВУП‡„МЛЪУЩУМ‡
иЫО¸Ъ ‰ЛТЪ‡МˆЛУММУ„У ЫФ‡‚ОВМЛfl ФУБ‚УОflВЪ ЫФ‡‚ОflЪ¸ УТМУ‚М˚ПЛ ЩЫМНˆЛflПЛ ‚Л‰ВУП‡„МЛЪУЩУМ‡.
з‡КПЛЪВ НМУФНЫ MODE ‰Îfl ÚÓ„Ó ˜ÚÓ·˚ ‚˚·‡Ú¸ ÌÛÊÌ˚È ÂÊËÏ
‡·ÓÚ˚: VCR (‚Л‰ВУП‡„МЛЪУЩУМ) ЛОЛ TV (DVD-ФОВИВ ЛОЛ
ТФЫЪМЛНУ‚˚И ВТЛ‚В). з‡ ФЫО¸ЪВ ‰ЛТЪ‡МˆЛУММУ„У ЫФ‡‚ОВМЛfl
Б‡„У‡ВЪТfl Т‚ВЪУ‚УИ ЛМ‰ЛН‡ЪУ, НУЪУ˚И ФУН‡Б˚‚‡ВЪ ‚˚·‡ММ˚И
ВКЛП ‡·УЪ˚. ЦТОЛ ‚ ЪВ˜ВМЛВ 20 Т МВ М‡КЛП‡ВЪТfl МЛ У‰М‡ ЛБ
НМУФУН, ˝ЪУЪ Т‚ВЪУ‚УИ ЛМ‰ЛН‡ЪУ ‡‚ЪУП‡ЪЛ˜ВТНЛ „‡ТМВЪ (ФЫО¸Ъ
‰ЛТЪ‡МˆЛУММУ„У ЫФ‡‚ОВМЛfl ‚УБ‚‡˘‡ВЪТfl ‚ ВКЛП TV).
З Б‡‚ЛТЛПУТЪЛ УЪ ЪЛФ‡ ФУ‰НО˛˜ВММУ„У ‡ФФ‡‡Ъ‡ ‰ВИТЪ‚Ы˛Ъ
ТОВ‰Ы˛˘ЛВ НМУФНЛ :
b ÂÊËÏ ÓÊˉ‡ÌËfl,
¢ ·˚ТЪ‡fl ФВВПУЪН‡ М‡Б‡‰,
∫ ·˚ТЪ‡fl ФВВПУЪН‡ ‚ФВВ‰,
· Á‡ÔËÒ¸,
∆ Ô‡ÛÁ‡
Ê ÒÚÓÔ,
Æ ‚ÓÒÔÓËÁ‚‰ÂÌËÂ,
% н‡ИПВ ‚Л‰ВУП‡„МЛЪУЩУМ‡,
09 ˆЛЩУ‚˚В НУФНЛ,
@P# ‚˚·Ó ÔÓ„‡ÏÏ˚,
◊ ЩЫМНˆЛfl ЛМ‰ВНТ ‚Л‰ВУП‡„МЛЪУЩУМ‡,
H ‚˚ÁÓ‚ ÏÂÌ˛,
u ÔÓ‰Ú‚ÂʉÂÌË ‚˚·Ó‡,
ÔÂÂÏ¢ÂÌË ÍÛÒÓ‡ Ë Â„ÛÎËÓ‚ÍË.
* мФ‡‚ОВМЛВ МВНУЪУ˚ПЛ ЩЫМНˆЛflПЛ ‚УБПУКМУ ЪУО¸НУ Т
‚Л‰ВУП‡„МЛЪУЩУМ‡.
иЫО¸Ъ ‰ЛТЪ‡МˆЛУММУ„У ЫФ‡‚ОВМЛfl ТУ‚ПВТЪЛП ТУ ‚ТВПЛ
‚Л‰ВУП‡„МЛЪУЩУМ‡ПЛ, ЛТФУО¸БЫ˛˘ЛПЛ ТЪ‡М‰‡Ъ RC5.
ı
TV
›
ù
VCR
¢
∫
Ÿ
MODE
Ó
∆
Ê
·
TV / DVD
-
MENU
+ +
”
[
- -
%
∏
OK
12
564
879
Ø
0
.
SUBTITLEAUDIO
¤
SYSTEM MENU
Ë
Æ
SMARTSMART
ª
DVD
MENU
RADIO
3
Á
P
Page 72

18
ëÓ‚ÂÚ˚
ëÎÓ‚‡¸
èÎÓıÓ ͇˜ÂÒÚ‚Ó ËÁÓ·‡ÊÂÌËfl
ЕОЛБУТЪ¸ „У ЛОЛ ‚˚ТУНЛı Б‰‡МЛИ ПУКВЪ
·˚Ъ¸ ФЛ˜ЛМУИ ‡Б‰‚‡Л‚‡МЛfl ЛБУ·‡КВМЛfl,
УЪ‡КВММ˚ı ТЛ„М‡ОУ‚ ЛОЛ ЪВПМ˚ı Ы˜‡ТЪНУ‚
‚ ЛБУ·‡КВМЛЛ. З ˝ЪУП ТОЫ˜‡В МВУ·ıУ‰ЛПУ
ТНУВНЪЛУ‚‡Ъ¸ М‡ТЪУИНЫ ЛБУ·‡КВМЛfl:
ТП.
íÓÌ͇fl ̇ÒÚÓÈ͇ (ТЪ. 5) ЛОЛ ЛБПВМЛЪ¸
УЛВМЪ‡ˆЛ˛ М‡ЫКМУИ ‡МЪВММ˚. иУБ‚УОflВЪ
ОЛ ‚‡¯‡ ‡МЪВММ‡ ФЛМЛП‡Ъ¸ ФУ„‡ПП˚ ‚
˝ЪУИ ФУОУТВ ˜‡ТЪУЪ (UHF ЛОЛ VHF)?
З ТОЫ˜‡В ФОУıУ„У ФЛВП‡ ЛБУ·‡КВМЛfl
(«ТМВ„‡»), ЫТЪ‡МУ‚ЛЪ¸ М‡ТЪУИНЫ NR. ‚
ПВМ˛
ÍÚÂËÒÚ. ̇ ÇÍβ˜. (ÒÚ. 6).
йЪТЫЪТЪ‚ЛВ ЛБУ·‡КВМЛfl
ЦТОЛ ЪВОВ‚ЛБУ МВ ‚НО˛˜ЛОТfl, М‡КПЛЪВ
НМУФНЫ Standby (‚˚НО˛˜ВМЛВ),
‡ТФУОУКВММЫ˛ М‡ ФЫО¸ЪВ
‰ЛТЪ‡МˆЛУММУ„У ЫФ‡‚ОВМЛfl, ‰‚‡К‰˚.
зВ Б‡·˚ОЛ ОЛ ‚˚ ФУ‰НО˛˜ЛЪ¸ ‡МЪВММЫ?
臂ЛО¸МУ ОЛ ‚˚ ‚˚·‡ОЛ ТЛТЪВПЫ? (ТЪ. 5).
иОУıУИ НУМЪ‡НЪ ‚ ‡Б˙ВПВ ФВЛЪВО¸ ЛОЛ ‚
‡Б˙ВПВ ‡МЪВММ˚ ˜‡ТЪУ fl‚ОflВЪТfl ФЛ˜ЛМУИ
ФУ·ОВП Т ЛБУ·‡КВМЛВП Л Б‚ЫНУП (˜‡ТЪУ
‡Б˙ВП˚ ТОВ„Н‡ ‡Б˙В‰ЛМfl˛ЪТfl ФЛ
ФВВПВ˘ВМЛЛ ЪВОВ‚ЛБУ‡). иУ‚В¸ЪВ ‚ТВ
˝ЪЛ ТУВ‰ЛМВМЛfl.
èÂËÙÂËÈ̇fl ‡ÔÔ‡‡ÚÛ‡ ‰‡ÂÚ ˜ÂÌÓ-
·ВОУВ ЛБУ·‡КВМЛВ
СОfl ФУТПУЪ‡ ‚Л‰ВУН‡ТТВЪ˚,
Ы‰УТЪУ‚В¸ЪВТ¸, ˜ЪУ УМ‡ ·˚О‡ Б‡ФЛТ‡М‡ ‚
ТЪ‡М‰‡ЪВ, НУЪУ˚И ТУ‚ПВТЪЛП ТУ
ТЪ‡М‰‡ЪУП ‚‡¯В„У ‚Л‰ВУП‡„МЛЪУЩУМ‡.
йЪТЫЪТЪ‚ЛВ Б‚ЫН‡
ЦТОЛ МВНУЪУ˚В ФУ„‡ПП˚ Мe ЛПВ˛Ъ
Б‚ЫН‡, МУ ЛПВ˛Ъ ЛБУ·‡КВМЛВ, ˝ЪУ
БМ‡˜ЛЪ, ˜ЪУ ‚˚ МВ‚ВМУ ‚˚·‡ОЛ
ЪВОВ‚ЛБЛУММЫ˛ ТЛТЪВПЫ. аБПВМЛЪВ
М‡ТЪУИНЫ
лЛТЪВП‡ (ÒÚ. 5).
нВОВЪВНТЪ
зВНУЪУ˚В ТЛП‚УО˚ УЪУ·‡К‡˛ЪТfl
МВФ‡‚ЛО¸МУ ? м·В‰ЛЪВТ¸ ‚ Ф‡‚ЛО¸МУИ
М‡ТЪУИНВ ФЫМНЪ‡ ПВМ˛
ëڇ̇ (ÒÚ.5).
èΠDVD Ì ‡·ÓÚ‡ÂÚ ?
м·В‰ЛЪВТ¸ ‚ ЪУП, ˜ЪУ М‡ ‰ЛТНВ МВЪ ТОВ‰У‚
УЪ Ф‡О¸ˆВ‚. й˜ЛТЪЛЪВ В„У НЫТНУП Пfl„НУИ
ЪН‡МЛ УЪ ˆВМЪ‡ Н ФВЛЩВЛЛ.
иЫО¸Ъ ‰ЛТЪ‡МˆЛУММУ„У ЫФ‡‚ОВМЛfl МВ
‡·УЪ‡ВЪ?
аМ‰ЛН‡ЪУ ЪВОВ‚ЛБУ‡ МВ ПЛ„‡ВЪ ФЛ
ЛТФУО¸БУ‚‡МЛЛ ФЫО¸Ъ‡ ‰ЛТЪ‡МˆЛУММУ„У
ЫФ‡‚ОВМЛfl? б‡ПВМЛЪВ ·‡Ъ‡ВИНЛ.
СВКЫМУВ ТУТЪУflМЛВ
дУ„‰‡ ФЛ ‚НО˛˜ВМЛЛ ЪВОВ‚ЛБУ‡ УМ
УТЪ‡ВЪТfl ‚ ‰ВКЫМУП ТУТЪУflМЛЛ, Л М‡
˝Н‡МВ ФУfl‚ОflВЪТfl М‡‰ФЛТ¸
ᇢËÚ‡, ˝ÚÓ
ÓÁ̇˜‡ÂÚ, ˜ÚÓ ÙÛÌ͈Ëfl
б‡ПУН УЪ СВЪВИ
Б‡‰ВИТЪ‚У‚‡М‡ (ТЪ. 7). ЦТОЛ ЪВОВ‚ЛБУ
МВ ФУОЫ˜‡ВЪ ТЛ„М‡О‡ ‚ ЪВ˜ВМЛВ 15 ПЛМЫЪ,
УМ ‡‚ЪУП‡ЪЛ˜ВТНЛ ФВВıУ‰ЛЪ ‚ ‰ВКЫМУВ
ТУТЪУflМЛВ. л ˆВО¸˛ ˝НУМУПЛЛ
˝ОВНЪУ˝МВ„ЛЛ З‡¯ ЪВОВ‚ЛБУ
У·УЫ‰У‚‡М ‰ВЪ‡ОflПЛ, У·ВТФВ˜Л‚‡˛˘ЛПЛ
Н‡ИМВ МЛБНУВ ФУЪВ·ОВМЛВ ˝МВ„ЛЛ ‚
‰ВКЫМУП ТУТЪУflМЛЛ (ПВМВВ 3 З‡ЪЪ)
иУ-ФВКМВПЫ МВЪ ВБЫО¸Ъ‡ЪУ‚?
З ТОЫ˜‡В МВЛТФ‡‚МУТЪЛ, МЛНУ„‰‡ МВ
Ф˚Ъ‡ИЪВТ¸ УЪВПУМЪЛУ‚‡Ъ¸ ‚‡¯
ЪВОВ‚ЛБУ Т‡ПЛ: У·‡ЪЛЪВТ¸ ‚ ТОЫК·Ы
ФУТОВФУ‰‡КМУ„У У·ТОЫКЛ‚‡МЛfl.
ìıÓ‰ Á‡ ÚÂ΂ËÁÓÓÏ
СОfl ЫıУ‰‡ Б‡ ˝Н‡МУП Л НУФЫТУП
ЪВОВ‚ЛБУ‡ ВНУПВМ‰ЫВЪТfl ЛТФУО¸БУ‚‡Ъ¸
˜ЛТЪЫ˛, Пfl„НЫ˛ Л МВ‚УТЛТЪЫ˛ ЪflФУ˜НЫ.
зВ ЛТФУО¸БУ‚‡Ъ¸ ˜ЛТЪfl˘ЛВ ТВ‰ТЪ‚‡,
ТУ‰ВК‡˘ЛВ ТФЛЪ ЛОЛ ‡ТЪ‚УЛЪВОЛ.
ë˄̇Î˚ RGB : ˝ЪУ ЪЛ ‚Л‰ВУТЛ„М‡О‡ - д‡ТМ˚И, бВОВМ˚И Л ЙУОЫ·УИ, НУЪУ˚В
МВФУТВ‰ТЪ‚ВММУ ЫФ‡‚Оfl˛Ъ ЪВПfl ˝ОВНЪУММ˚ПЛ ОЫ˜‡ПЛ НЛМВТНУФ‡. аТФУО¸БУ‚‡МЛВ
˝ЪЛı ТЛ„М‡ОУ‚ У·ВТФВ˜Л‚‡ВЪ ·УОВВ ‚˚ТУНУВ Н‡˜ВТЪ‚У ЛБУ·‡КВМЛfl.
á‚ÛÍ NICAM : íÂıÌË͇, ÔÓÁ‚ÓÎfl˛˘‡fl Ô‰‡˜Û Á‚Û͇ ˆËÙÓ‚Ó„Ó Í‡˜ÂÒÚ‚‡.
лЛТЪВП‡ : нВОВ‚ЛБЛУММУВ ЛБУ·‡КВМЛВ ФВВ‰‡ВЪТfl ФУ-‡БМУПЫ ‚ ‡БМ˚ı ТЪ‡М‡ı.
лЫ˘ВТЪ‚ЫВЪ МВТНУО¸НУ ТЪ‡М‰‡ЪУ‚ : BG, DK, I Л L, L' кВ„ЫОЛУ‚Н‡
лЛТЪВП‡ (ÒÚ. 5)
ЛТФУО¸БЫВЪТfl ‰Оfl ‚˚·У‡ ‡БОЛ˜М˚ı ТЪ‡М‰‡ЪУ‚. зВУ·ıУ‰ЛПУ УЪОЛ˜‡Ъ¸ ВВ УЪ
НУ‰ЛУ‚‡МЛfl ˆ‚ВЪУ‚ PAL ЛОЛ SECAM. оУП‡Ъ PAL ЛТФУО¸БЫВЪТfl ‚ ·УО¸¯ЛМТЪ‚В ТЪ‡М
Ц‚УФ˚, SECAM ‚У о‡МˆЛЛ, ‚ кУТТЛЛ Л ‚ ·УО¸¯ЛМТЪ‚В ТЪ‡М ДЩЛНЛ. лтД Л ьФУМЛfl
ЛТФУО¸БЫ˛Ъ ‰Ы„Ы˛ ТЛТЪВПЫ ФУ‰ М‡Б‚‡МЛВП NTSC.
16:9 : щЪУ ТУУЪМУ¯ВМЛВ ПВК‰Ы ¯ЛЛМУИ Л ‚˚ТУЪУИ ˝Н‡М‡. нВОВ‚ЛБУ˚ Т ¯ЛУНЛП ˝Н‡МУП
ËÏÂ˛Ú ÔÓÔÓˆË˛ 16/9, ‡ Ò Ú‡‰ËˆËÓÌÌ˚Ï ˝Í‡ÌÓÏ - 4/3.
Page 73

1
Wstęp
Spis treści
Dziękujemy za zakup naszego odbiornika telewizyjnego.
Niniejsza instrukcja została opracowana aby ułatwić instalację i użytkowanie
Tw ojego odbiornika. Prosimy o szczegółowe zapoznanie się z instrukcją.
Mamy nadzieję, że nasza technologia spełnia Twoje oczekiwania.
Instalacja
Instalacja odbiornika . . . . . . . . . . . . . . . . . . . . . . . . . . . . . . . . . . . . . . . . . . . . . . . .2
Przyciski na odbiorniku . . . . . . . . . . . . . . . . . . . . . . . . . . . . . . . . . . . . . . . . . . . . . .2
Przyciski pilota . . . . . . . . . . . . . . . . . . . . . . . . . . . . . . . . . . . . . . . . . . . . . . . . . . . .3
Szybkie instalowanie . . . . . . . . . . . . . . . . . . . . . . . . . . . . . . . . . . . . . . . . . . . . . . . .4
Sortowanie programów . . . . . . . . . . . . . . . . . . . . . . . . . . . . . . . . . . . . . . . . . . . . .4
Nadawanie nazw programom . . . . . . . . . . . . . . . . . . . . . . . . . . . . . . . . . . . . . . . . .4
Strojenie ręczne . . . . . . . . . . . . . . . . . . . . . . . . . . . . . . . . . . . . . . . . . . . . . . . . . . .5
Inne ustawienia w menu Instalacja . . . . . . . . . . . . . . . . . . . . . . . . . . . . . . . . . . . . .5
Użytkowanie
Użytkowanie radia . . . . . . . . . . . . . . . . . . . . . . . . . . . . . . . . . . . . . . . . . . . . . . . . .5
Ustawienia obrazu . . . . . . . . . . . . . . . . . . . . . . . . . . . . . . . . . . . . . . . . . . . . . . . . . .6
Ustawienia dźwięku . . . . . . . . . . . . . . . . . . . . . . . . . . . . . . . . . . . . . . . . . . . . . . . .6
Ustawienia poszczególnych opcji . . . . . . . . . . . . . . . . . . . . . . . . . . . . . . . . . . . . . .6
Funkcja budzika . . . . . . . . . . . . . . . . . . . . . . . . . . . . . . . . . . . . . . . . . . . . . . . . . . . .7
Blokowanie odbiornika TV. . . . . . . . . . . . . . . . . . . . . . . . . . . . . . . . . . . . . . . . . . . .7
Teletekst . . . . . . . . . . . . . . . . . . . . . . . . . . . . . . . . . . . . . . . . . . . . . . . . . . . . . . . . .8
Formaty 16:9 . . . . . . . . . . . . . . . . . . . . . . . . . . . . . . . . . . . . . . . . . . . . . . . . . . . . . .9
Użytkowanie wbudowanego odtwarzacza DVD
Umieszczenie płyty w odtwarzaczu . . . . . . . . . . . . . . . . . . . . . . . . . . . . . . . . . . .10
Odtwarzanie płyty DVD lub CD video . . . . . . . . . . . . . . . . . . . . . . . . . . . . . . . .11
Odtwarzanie płyty CD audio . . . . . . . . . . . . . . . . . . . . . . . . . . . . . . . . . . . . . . . .12
Odtwarzanie płyty CD ze zdjęciami . . . . . . . . . . . . . . . . . . . . . . . . . . . . . . . . . . .12
Menu odtwarzacza DVD . . . . . . . . . . . . . . . . . . . . . . . . . . . . . . . . . . . . . . . . . . . .13
Pasek narzędzi . . . . . . . . . . . . . . . . . . . . . . . . . . . . . . . . . . . . . . . . . . . . . . . . . . . .13
Menu Preferencje . . . . . . . . . . . . . . . . . . . . . . . . . . . . . . . . . . . . . . . . . . . . . . . . .14
Menu Ustawienia . . . . . . . . . . . . . . . . . . . . . . . . . . . . . . . . . . . . . . . . . . . . . . . . . .14
Programowanie odtwarzania . . . . . . . . . . . . . . . . . . . . . . . . . . . . . . . . . . . . . . . .15
Kontrola dostępu i blokada . . . . . . . . . . . . . . . . . . . . . . . . . . . . . . . . . . . . . . . . .15
Urządzenia peryferyjne
Magnetowid . . . . . . . . . . . . . . . . . . . . . . . . . . . . . . . . . . . . . . . . . . . . . . . . . . . . . .16
Inny osprzęt . . . . . . . . . . . . . . . . . . . . . . . . . . . . . . . . . . . . . . . . . . . . . . . . . . . . . .16
Wybór podłączonego osprzętu . . . . . . . . . . . . . . . . . . . . . . . . . . . . . . . . . . . . . . .16
Przyciski odtwarzacza wideo . . . . . . . . . . . . . . . . . . . . . . . . . . . . . . . . . . . . . . . .17
Informacje praktyczne
Porady . . . . . . . . . . . . . . . . . . . . . . . . . . . . . . . . . . . . . . . . . . . . . . . . . . . . . . . . . .18
Słowniczek . . . . . . . . . . . . . . . . . . . . . . . . . . . . . . . . . . . . . . . . . . . . . . . . . . . . . .18
°
Wskazówki dotyczące utylizacji
Tw ój odbiornik wykonany jest z materiałów, które mogą być ponownie
wykorzystane lub poddane recyklingowi.W celu ograniczenia ilości odpadów w
środowisku naturalnym specjalne zakłady odbierają zużyte odbiorniki,
rozmontowują je na części i gromadzą materiały do ponownego wykorzystania
(informacji udzieli sprzedawca).
Polski
Page 74

Odbiornik telewizyjny posiada 4 przyciski
umieszczone z przodu lub na górze, w
zależności od modelu.
Przyciski VOLUME - + (-
” +) służą do
regulacji poziomu dźwięku odbiornika.
Przyciski PROGRAM - + (- P +) służą do
wybierania pożądanych programów.Aby
uzyskać dostęp do menu, należy równocześnie
nacisnąć przyciski
” - i ” +.Przyciski
PROGRAM - + służą wtedy do wyboru
zmienianej opcji, a przyciski
” - + do regulacji
tej opcji.Aby wyjść z menu, należy ponownie
nacisnąć równocześnie przyciski
” - i ” +.
Uw
aga: jeśli aktywna jest funkcja
Blokada Ogólna,
przyciski te nie są dostępne (strona 7).
PROGRAMVOLUME
--
++
2
&
Umiejscowienie odbiornika
Odbiornik należy umieścić na solidnej, stabilnej
podstawie, w odległości co najmniej 5 cm od
innych przedmiotów.W celu uniknięcia zagrożenia
lub uszkodzenia odbiornika nie wolno na nim
umieszczać żadnych przedmiotów, takich jak
serwetki, naczynia z płynami (wazony) lub
przedmioty wydzielające ciepło (lampy).Ponadto
odbiornik nie może być narażony na polanie wodą.
é
Podłączenie
• Podłącz wtyczkę antenową do gniazda : z
tyłu odbiornika.
•
Włóż wtyczkę anteny radiowej do gniazda FM ANT.
W przypadku korzystania z anten wewnętrznych
(przenośnych) odbiór w pewnych warunkach może być
utrudniony. Możesz poprawić jakość odbioru zmieniając
położenie anteny.Jeżeli odbiór jest nadal
niezadowalający,należy zastosować antenę zewnętrzną.
• Podłącz wtyczkę kabla zasilającego do gniazdka
w ścianie (220-240 V / 50 Hz).
“
Pilot
Włóż 2 załączone baterie R6, właściwie
ukierunkowując bieguny. Sprawdz, czy
przelacznik trybu jest ustawiony w pozycji TV.
Ze względu na ochronę środowiska naturalnego
baterie dostarczane wraz z odbiornikiem nie
zawierają rtęci, kadmu ani niklu. Prosimy, by nie
wyrzucać zużytych baterii, ale oddać je do recyklingu
(w tym celu skontaktuj się ze sprzedawcą). Zużyte
baterie należy zastąpić bateriami tego samego typu.
‘
Włączanie odbiornika
W celu włączenia odbiornika naciśnij przycisk
on/off. Zapali się czerwona dioda,a ekran się
rozjaśni. Przeczytaj teraz rodział dot. szybkiej
instalacji, znajdujący się na stronie 4.
Jeśli odbiornik pozostaje w stanie czuwania,
naciśnij przycisk P
# pilota.
Przy używaniu pilota mruga dioda kontrolna.
5 cm
5 cm
5 cm
Instalacja odbiornika
Przyciski na odbiorniku
FM.
ANT.
Page 75

3
Przyciski pilota
DVD:język ścieżki dźwiękowej (s.11)
TV: tryb odtwarzania dźwięku
Służy do przełączania programów z
Stereo (lub Nicam Stereo) na Mono
lub w przypadku programów
nadawanych w dwóch wersjach
językowych,do wybrania pomiędzy
trybem Dual I lub Dual II.
Wskaźnik Mono świeci się na czerwono
gdy ten tryb jest wybrany.
Lista stacji radiowych (s.5)
Przelacznik trybu (s. 17)
Przyciski DVD (strona 11),
Przyciski odtwarzacza wideo (s. 17)
oraz przyciski
teletekstu (s. 8).
Wstępna regulacja dźwięku
Służy do wybrania jednego z ustawionych
wstępnie trybów odtwarzania dźwięku:
Mowa,Muzyka, Scena oraz do
powrotu do trybu Osobiste.
Menu TV
Wywoływanie lub opuszczanie
poszczególnych menu.
Natężenie dźwięku
Służy do regulacji poziomu
natężenia dźwięku.
Kursor
Te 4 przyciski pozwalają poruszać
się w poszczególnych menu.
Przyciski cyfrowe
Służą do bezpośredniego
przełączania programów. Dla
programów o numerach
dwucyfrowych należy podać drugą
cyfrę zanim zniknie kreska.
Wybór gniazda
zewnętrznego EXT
Naciskaj kilkakrotnie przycisk, aby
wybrać EXT1 i AV (strona 16).
Czuwanie
Służy do ustawienia odbiornika
telewizyjnego w trybie czuwania.
Aby włączyć odbiornik naciśnij
przycisk P @#, b, 0 aż do 9.
DVD:język napisów dialogowych (s.11)
TV:Wyświetlanie teletekstu (s. 8)
DVD:menu OSD (s. 13)
TV:
Informacje na ekranie/
stały numer
Służy do wyświetlania / usuwania
numeru programu,jego nazwy (jeżeli
została nadana), godziny,trybu
dźwiękowego oraz czasu jaki pozostał
na wyłączniku czasowym.Aby uaktywnić
funkcję stałego wyświetlania numeru na
ekranie, naciśnij przycisk i przytrzymaj
wciśnięty przez 5 sekund.
Tr yb TV / DVD
Służy do przełączania odbiornika DVD
pomiędzy trybem Telewizyjnego (s. 11).
Wstępna regulacja obrazu
Pozwala wybrać jeden z ustawionych
wstępnie trybów odtwarzania obrazu:
Wzbogacony,Naturalny,
Stonowany,Multimedia oraz do
powrotu do trybu Osobiste.
Cisza
Powoduje wyłączenie lub
przywrócenie dźwięku.
Zatwierdzenie (DVD/VCR)
Tr yb 16:9 (strona 9)
Wybór programów
Służy do wybrania poprzedniego lub
następnego programu.
W przypadku niektórych programów
na dole ekranu pojawi się tytuł emisji.
Dźwięk Surround
Służy do uruchamiania lub wyłączania
efektu dźwięku otaczającego.W wersji
stereo pozwala to uzyskać wrażenie, że
głośniki są bardziej od siebie oddalone.
W wersjach wyposażonych w Virtual
Dolby Surround *,umożliwia uzyskanie
tylnych efektów dźwiękowych Dolby
Surround Pro Logic.W wersji mono
umożliwia symulowanie efektu
przestrzennego (stereo)
Poprzedni program
Służy do wybrania poprzedniego
programu.
Ikony menu DVD (s. 11)
Tr yb RADIOWY / TV
Służy do przełączania odbiornika
Telewizyjnego pomiędzy trybem
Radiowym i telewizyjnym (strona 5).
* “Dolby”i symbol podwójnego D są znakami Dolby Laboratories.
Wyprodukowano na licencji Dolby Laboratories.
.
ı
TV
VCR
¢
MODE
Ó›ŸË
·
-
TV / DVD
MENU
SUBTITLEAUDIO
ù
SYSTEM MENU
∫
Ê∆ Æ
SMARTSMART
ª
MENU
¤
DVD
++
”
OK
[
--
%
∏
12
564
879
Ø
0
P
RADIO
3
Á
Page 76

4
Szybkie instalowanie
Sortowanie programów
Nadawanie nazw programom
Podczas pierwszego uruchamiania odbiornika,
na ekranie pojawi się menu główne.Należy
wybrać w nim kraj oraz język wszystkich menu:
Gdy po włączeniu odbiornika nie wyświetli się
menu, naciśnij przyciski
”- i ”+ odbiornika i
przytrzymaj je wciśnięte przez 5 sekund.
& Wybierz kraj za pomocą przycisku
îÏ a
następnie potwierdź wybór przyciskiem
¬.
Jeżeli wybrany przez Ciebie kraj nie jest
wymieniony na liście, wybierz “...”
é Wybierz żądany język za pomocą przycisku
îÏ i potwierdź wybór przyciskiem ¬.
“ Automatycznie rozpocznie się dostrajanie
kanałów.Wszystkie dostępne programy
telewizyjne oraz stacje radiowe zostaną
zapamiętane. Operacja trwa kilka minut.
Wyświetlany jest stan wyszukiwania i ilość
znalezionych programów. Po zakończeniu
dostrajania menu zniknie.
Aby opuścić menu lub przerwać dostrajanie, naciśnij
H. Jeżeli żaden program nie został znaleziony,
przejdź do rozdziału “Dobre Rady” na stronie 18.
‘ Jeżeli nadajnik lub sieć kablowa nadaje sygnał
automatycznego sortowania, programy zostaną
ponumerowane w ustalonej kolejności.
Instalowanie jest zakończone.
( Jeżeli taki sygnał nie jest nadawany, musisz użyć
menu
Sortowanie aby ponumerować
programy.
Niektóre nadajniki lub sieci kablowe wysyłają swoje
własne parametry sortowania (według regionu,
języka...).W takim wypadku możesz dokonać
wyboru kryterium sortowania za pomocą przycisku
îÏ i potwierdzić wybór przyciskiem ¬.
& Naciśnij przycisk H. Na ekranie wyświetli się
Menu Główne.
é Za pomocą kursora wybierz menu
Instalacja a
następnie menu
Sortowanie.
“ Za pomocą przycisków
îÏ wybierz
program, którego numer chcesz zmienić i
potwierdź wybór przyciskiem
¬.
‘ Za pomocą przycisków
îÏ wybierz nowy
numer i potwierdź wybór przyciskiem
¬.
( Powtarzaj czynności “ i ‘ odpowiednią ilość
razy, aby dokonać zmiany numeracji wszystkich
programów.
§ Aby opuścić menu,naciśnij
d.
Jeżeli chcesz, możesz nadać nazwy programom
i gniazdom zewnętrznym.
Uw
aga: Podczas instalowania odbiornika, nazwy
programów nadawane są automatycznie, jeśli
stacja wysyła sygnał identyfikacyjny.
& Naciśnij przycisk
H.
é Za pomocą kursora wybierz menu Installation
(Instalacja), następnie Nom De Prog (Nazwa).
“ Za pomocą przycisku
îÏ wybierz
program, któremu chcesz nadać nazwę lub
którego nazwę chcesz zmienić.
‘ W polu, w którym wyświetlona jest nazwa
(5 znaków),poruszaj się za pomocą
przycisków
Ȭ.Wybieraj znaki naciskając
îÏ.
( Nazwa została wprowadzona.Wyjdź za
pomocą przycisku
È. Nazwa zostanie
zapisana w pamięci.
§ Powtórz czynności od “ do ( dla każdego
programu,któremu chcesz nadać nazwę.
è Aby opuścić menu naciśnij
d.
Select Country
Country
DK
E
F
FI
Æ GB
Language
EspaĖol
Svenska
English
Dansk
Nederlands
Menu Głównee
• Obraz
• Dźwięk
• Funkcje
$ Instalacja
Instalacja
• Język
• Kraj
• Stroj.Automat
• Stroj.Ręczne
$
Sortowanie
• Nazwa
00
01 TF1
02 FR2
03ÆFR3
04 C +
05 ARTE
Page 77

5
Strojenie ręczne
Inne ustawienia w menu Instalacja
To menu umożliwia zapisywanie w pamięci
poszczególnych programów pojedynczo, po kolei.
& Naciśnij przycisk H.
é Za pomocą kursora wybierz menu
Instalacja a
następnie
Stroj. ręczne:
“ Opcja
System: wybierz Europa (wykrywanie
automatyczne*) lub
Europa Zach. (standard
BG),
Europa Wsch. (standard DK), Wlk.Bryt.
(standard I) lub Francja (standard LL’).
*Za wyjątkiem Francji ( standard LL’), gdzie trzeba
bezwzględnie wybrać opcję France (Francja).
‘ Opcja
Szukanie: naciśnij ¬. Rozpocznie się
przeszukiwanie. Z chwilą odnalezienia
programu,przeszukiwanie zostaje zatrzymane.
Wyświetlona zostanie nazwa programu (jeśli
została nadana). Przejdź do następnego etapu.
Jeżeli znasz częstotliwość, na której nadawany
jest szukany program,po prostu wprowadź tę
liczbę przy pomocy przycisków
0 i 9.
Jeżeli nie został znaleziony żaden program, przejdź
do rozdziału “Dobre Rady” (strona 18).
( Opcja
Nr programu:wprowadź pożądany
numer programu za pomocą przycisków
Ȭ lub od 0 do 9.
§ Opcja
Dostrojenie :jeżeli jakość odbioru nie
jest zadowalająca, wyreguluj za pomocą
przycisków
Ȭ.
è Opcja
Zapisz : naciśnij ¬.Program został
zapisany w pamięci.
! Powtórz czynności od ‘ do ! odpowiednią
ilość razy, aby zapisać w pamięci ustawienia
wszystkich programów.
Aby opuścić menu, naciśnij
d.
&
Naciśnij przycisk H i wybierz menu Instalacja :
é Wybierz Język aby zmienić język
wyświetlanych menu.
“
Wybierz Kraj aby wybrać Twój kraj (F dla Francji).
To ustawienie odgrywa rolę w przeszukiwaniu,
automatycznym sortowaniu programów oraz
wyświetlaczu teletekstu. Jeżeli Twój kraj nie jest
wymieniony na liście, wybierz “...”
‘
Wybierz Stroj.automat. aby rozpocząć
automatyczne poszukiwanie wszystkich
programów dostępnych w twoim regionie.
Jeżeli nadajnik lub sieć kablowa nadaje sygnał
automatycznego sortowania, programy zostaną
odpowiednio uszeregowane w kolejności. Jeżeli
taki sygnał nie jest nadawany, w celu
uszeregowania programów w wybranej kolejności
skorzystaj z menu
Sortowanie (patrz strona 4).
Niektóre nadajniki oraz sieci kablowe nadają
własne parametry sortowania (według regionów,
języka,...).W takim przypadku możesz dokonać
wyboru kryterium sortowania za pomocą
przycisku
îÏ i potwierdzić wybór przyciskiem
¬.Aby wyjść lub przerwać przeszukiwanie,
naciśnij
H. Jeżeli nie ukaże się żaden obraz,
przejdź do rozdziału “Dobre Rady” (strona 18).
( Aby opuścić menu, naciśnij
d.
Użytkowanie radia
Wybór trybu radiowego lub telewizyjnego
Aby przełączyć odbiornik z trybu telewizyjnego na
tryb radiowy naciśnij przycisk
 znajdujący się
na pilocie.W wypadku przełączenia na tryb
radiowy,na ekranie wyświetlony zostanie numer
stacji radiowej,nazwa stacji (jeżeli została nadana),
jej częstotliwość nadawania oraz tryb dźwiękowy.
Aby wprowadzić nazwy stacji skorzystaj z menu
Nazwa. (Strona 4)
Wybór programów
Za pomocą przycisków 09 lub @ P #
wybierz stacje radiowe w paśmie FM (od 1 do 40).
Lista stacji radiowych
Aby wyświetlić listę stacji radiowych naciśnij
przycisk
ı. Za pomocą przycisku îÏ
zmień stację, naciśnij d aby wyjść z menu.
Korzystanie z menu radiowych
Aby wejść do ustawień specyficznych dla
programów radiowych,naciśnij
H.
Wyszukiwanie stacji radiowych
:Jeżeli skorzystałeś
z opcji szybkiego instalowania, wszystkie stacje
radiowe dostępne w paśmie FM zostały zapisane.
Aby rozpocząć ponowne wyszukiwanie,
skorzystaj z menu
Instalacja: Stroj.automat. lub
Stroj. ręczne (w celu wyszukiwania stacji
pojedynczo po kolei). Dzięki menu
Sortowanie
oraz menu Nazwa możesz uporządkować i
poszczególne stacje radiowe i nadać im własne
nazwy. Obydwa te menu działają identycznie jak
w przypadku menu odbiornika telewizyjnego.
Screensaver
: Naciśnij przycisk
c aby
włączyć/wyłączyć wygaszacz ekranu.
Menu Głównee
• Obraz
• Dźwięk
• Funkcje
$ Instalacja
Stroj.Ręczne
$
System Europa Æ
• Szukanie
• Nr Programu
• Dostrojenie
• Pamięć
Page 78

6
Ustawienia obrazu
Ustawienia dźwięku
& Naciśnij przycisk H a następnie ¬.
Wyświetli się menu Obraz:
é Za pomocą przycisków
îÏ wybierz
dowolne ustawienie,następnie wyreguluj
przyciskami
Ȭ.
Uwaga: Podczas regulowania ustawień,
wyświetlone jest tylko wybrane ustawienie.
Aby powrócić do menu, naciśnij
îÏ.
“ Po wyregulowaniu wybierz Zapisz i naciśnij
¬ aby zapisać ustawienia.
Naciśnij
d aby opuścić menu.
Opis poszczególnych ustawień:
•
Jasność: zmienia stopień jasności obrazu.
•
Kolor:zmienia intensywność barwy.
•
Kontrast:zmienia różnicę pomiędzy barwami
jasnymi i ciemnymi.
•
Ostrość: zmienia ostrość obrazu.
• Temp. barw: zmienia równowagę barw:
dostępne są opcje
Zimna – barwy niebieskawe),
Normalna – barwy zrównoważone) lub
Ciepła – barwy czerwonawe.
•
Zapisz:aby zapisać ustawienia obrazu
(jak również ustawienia
Kontrast+ i Red.
szumów znajdujące się w menu Opcje).
& Naciśnij H,wybierz Dźwięk (Ï) a następnie
naciśnij
¬.Wyświetli się menu Dźwięk:
é Za pomocą przycisków
îÏ wybierz
dowolne ustawienie,następnie wyreguluj
przyciskami
Ȭ.
“ Po wyregulowaniu wybierz
Zapisz i naciśnij
¬ aby zapisać ustawienia.
‘ Aby opuścić menu, naciśnij
d.
Opis poszczególnych ustawień
• Soprany: zmienia wysokie tony dźwięku.
•
Basy: zmienia niskie tony.
•
Balans: wyrównuje poziom dźwięku na
lewym i prawym głośniku.
•
Delta głosu*: umożliwia kompensowanie
różnic głośności pomiędzy poszczególnymi
programami lub gniazdami zewnętrznymi
EXT.Ta możliwość regulacji jest dostępna dla
programów od 0 do 40 oraz dla gniazd
zewnętrznych EXT.
•
Ogr. głośn.* (AVL – Automatyczne
Wyrównywanie Dźwięku): automatyczna
kontrola poziomu głośności stosowana w
celu wyeliminowania nagłych zmian natężenia
dźwięku, szczególnie podczas przełączania
programów lub przy włączaniu się reklam.
•
Zapisz:aby zapisać ustawienia dźwięku.
* Dostępne wyłącznie w niektórych wersjach
odbiorników
Ustawienia poszczególnych opcji
& Naciśnij H, wybierz Opcje (Ï) a następnie
naciśnij
¬.Teraz możesz ustawić:
é Timer,
Blok. rodzic.) – blokada przed dziećmi
oraz
Blok. progr.:patrz następna strona.
“
Kontrast+:automatyczne ustawienie kontrastu
obrazu tak, że najciemniejsza część obrazu
pozostaje zawsze czarna.
‘
Red. szumów: łagodzi zakłócenia obrazu
(śnieżenie obrazu).To ustawienie jest przydatne
w warunkach utrudnionego odbioru.
Uw
aga: aby zapamiętać ustawienia funkcji
Kontrast+ i Red. szumów, należy posłużyć się
funkcją
Zapisz z menu Image (Obraz).
(
Rotacja: (dostępne wyłącznie w przypadku
odbiorników wyposażonych w ekran o dużych
rozmiarach): ekrany o dużych rozmiarach są
wrażliwe na zmiany ziemskiego pola
magnetycznego.To ustawienie pozwala
zrównoważyć ten wpływ poprzez
odpowiednie pochylenie obrazu.
§ Aby opuścić menu,naciśnij
d.
Menu Głównee
$ Obraz
• Dźwięk
• Funkcje
• Instalacja
Obraz
$
Jasność --I------ 39
• Kolor
• Kontrast
• Ostrość
• Temp. Barw
• Pamięć
Menu Głównee
• Obraz
$ Dźwięk
• Funkcje
• Instalacja
Dźwięk
$
Soprany -----I--- 56
• Basy
• Balans
• Delta Głosu
• Ogr.Głośn.
• Pamięć
Page 79

7
Funkcja budzika
Blokowanie odbiornika TV
To menu umożliwia używanie odbiornika
telewizyjnego jako budzika.
& Naciśnij przycisk
H.
é Za pomocą kursora wybierz menu
Funkcje a
następnie Timer:
“
Drzemka; pozwala ustawić czas
automatycznego przełączania w stan czuwania.
‘
Godzina: wprowadź aktualny czas.
Uwaga: wskazanie czasu jest uaktualniane z
teletekstu programu zapamiętanego jako pierwszy,
po włączeniu telewizora włącznikiem sieciowym.
Jeżeli ta stacja nie nadaje sygnału teletekstu, to
nastawienie zegara nie będzie aktualizowane.
(
Początek:wprowadź porę włączenia odbiornika.
§ Koniec:wprowadź porę wyłączenia odbiornika
i przejścia w tryb czuwania.
è
Nr programu:
wprowadź numer programu,
którym ma obudzić Cię budzik.
Aby wybrać
radio FM, naciśnij przyciski
Ȭ (przyciski
09 pozwalają tylko wybierać programy
telewizyjne).W trybie DVD,podczas
odczytywania dysku, można wybrać funkcję
Bookmark DVD (Zakładka DVD), aby
uruchomić alarm w określonym miejscu dysku.
Zatwierdzenie miejsca startu płyty odbywa się
przez naciśnięcie przycisku
u
.
!
Aktywacja: możesz teraz ustawić:
•
Raz budzenie jednorazowe,
•
Codziennie budzenie codzienne,
•
Wyłączenie anulowanie funkcji budzenia.
ç
Naciśnij b aby przełączyć odbiornik w tryb
czuwania. Odbiornik włączy się automatycznie o
zaprogramowanej godzinie.Jeżeli odbiornik
będzie włączony, to o wskazanej godzinie po
prostu nastąpi uaktywnienie wybranego
programu (oraz przełączenie odbiornika w tryb
czuwania o zaprogramowanej porze
Koniec).
Połączenie funkcji Blokada TV oraz funkcji
Timer, pozwala ograniczyć czas użytkowania
odbiornika TV na przykład przez dzieci.
Ta funkcja umożliwia zablokowanie niektórych
programów lub całkowite ograniczenie
możliwości użytkowania odbiornika TV przez
zablokowanie przycisków.
Blokada przed dziećmi
(Blok. rodzic.)
& Naciśnij
H.
é Za pomocą kursora wybierz menu
Funkcje i
ustaw opcję
Blok. rodzic. w pozycji WŁ..
“ Wyłącz odbiornik i schowaj pilota.Od tej
chwili nie da się korzystać z odbiornika (można
go włączyć tylko za pomocą pilota).
‘ Anulowanie blokady: ustaw opcję
Blok. rodzic.
w pozycji WYŁ.
Blokada programów
(Blok. progr.)
& Naciśnij przycisk
H, wybierz menu Funkcje a
następnie opcję
Blok. progr.:
é
Wprowadź Twój tajny kod dostępu.Za pierwszym
razem wprowadź dwukrotnie kod 0711 a
następnie Twój własny kod.Wyświetli się menu.
“ Blok. progr.:za pomocą przycisków îÏ
wybierz żądany program TV i potwierdź
naciskając
¬.Przy numerach zablokowanych
programów oraz przy symbolach zablokowanych
gniazd zewnętrznych wyświetli się symbol
+.
Obejrzenie programu,który został zablokowany,
wymaga teraz wprowadzenia tajnego kodu.W
przeciwnym razie ekran pozostanie czarny.
Dostęp do menu Instalacja jest również zablokowany.
Uwaga, w przypadku programów kodowanych, do
których stosowany jest dekoder zewnętrzny, należy
zablokować odpowiednie gniazdo zewnętrzne EXT.
‘ Zmiana kodu:ta opcja umożliwia
wprowadzenie
nowego czterocyfrowego kodu. Potwierdź nowy
kod wprowadzając go ponownie.
Jeżeli nie pamiętasz Twojego tajnego kodu,
wprowadź dwukrotnie kod uniwersalny 0711.
(
Usuń wszystko: ta opcja umożliwia
odblokowanie wszystkich zablokowanych
programów.
§
Blokada ogólna: umożliwia zablokowanie
wszystkich programów TV oraz gniazd
zewnętrznych EXT.
è Aby opuścić menu naciśnij
d.
Menu Głównee
• Obraz
• Dźwięk
$ Funkcje
• Instalacja
Timer
• Drzemka
• Godzina 10:56
• Początek
• Koniec
• Nr Programu
• Aktywacja
Menu Głównee
• Obraz
• Dźwięk
$ Funkcje
• Instalacja
Funkcje
• Timer
$
Blok. Ogólna Wył.
• Blok. Rodzic.
• Rotacja
• Kontrast+
• NR
Page 80

8
Teletekst
Naciśnij przycisk:
Aby uzyskać:
Teletekst jest systemem informacyjnym nadawanym przez niektóre kanały telewizyjne.Wiadomości podawane
w teletekście odczytuje się podobnie jak gazetę. System ten umożliwia również odbieranie napisów
dialogowych u dołu ekranu,co jest pomocne dla osób z upośledzeniem słuchu lub osób nie znających języka,
w którym nadawany jest program (nadawanie w sieciach kablowych,w kanałach satelitarnych,...).
Wywołanie
teletekstu:
Wybór strony
teletekstu
Ta funkcja pozwala na przywołanie strony teletekstu,przejście
na tryb przezroczysty a następnie na opuszczenie teletekstu.
Najpierw pojawia się strona główna,zawierająca wykaz
dostępnych nagłówków tematycznych. Każda rubryka ma
przypisany trzycyfrowy numer strony, na której się znajduje.
Jeżeli na wybranym kanale nie jest nadawany sygnał teletekstu,
to wyświetla się numer 100 i ekran pozostaje czarny (w takiej
sytuacji należy opuścić tryb teletekstowy i wybrać inny kanał).
Za pomocą przycisków od 0 do 9 lub @ P #,îÏ
wprowadź numer żądanej strony. Na przykład aby przywołać
stronę 120,naciśnij kolejno 120. Numer strony wyświetla
się w lewym górnym rogu ekranu,licznik stron przeszukuje
strony, następnie żądana strona jest wyświetlana na ekranie.
Aby obejrzeć inną stronę,powtórz powyższe czynności.
Jeżeli licznik wielokrotnie przeszukuje strony w sposób ciągły,
oznacza to, że strona o wybranym numerze nie jest nadawana.
Wybierz inny numer.
Bezpośredni
dostęp do
nagłówków
tematycznych
U dołu ekranu wyświetlane są barwne paski. Cztery
kolorowe przyciski umożliwiają dostęp do odpowiadających
im tematów lub stron.Jeżeli temat lub strona nie są jeszcze
dostępne, barwne paski u dołu ekranu pulsują.
Strona główna
Służy do powrotu na stronę główną (zazwyczaj strona nr 100).
Powiększenie
strony
Zatrzymywani
e przełączania
się pod-stron
Służy do wyświetlenia kolejno najpierw górnej,potem
dolnej połowy strony, a następnie do powrotu do
normalnej wielkości strony.
Niektóre strony teletekstowe zawierają tzw. pod-strony, które
są automatycznie przełączane jedna po drugiej. Przy pomocy
tego klawisza można zatrzymać przełączanie kolejnych podstron.W lewym górnym rogu ekranu pojawia się _.
Informacje
ukryte
Służy do odsłonięcia lub schowania informacji ukrytych
(np. rozwiązania zagadek).
W ramach programów od 0 do 40,zawierających teletekst,
możesz zapisać 4 ulubione strony, do których będziesz
mieć bezpośredni dostęp za pomocą kolorowych
przycisków (czerwony, zielony,żółty, niebieski).
&
Naciśnij przycisk H aby przejść na tryb ulubionych stron.
é
Wyświetl stronę teletekstu, którą chcesz zapisać w
pamięci.
“
Naciśnij wybrany przez siebie kolorowy przycisk i
przytrzymaj wciśnięty przez 3 sekundy.Strona została
zapisana.
‘ Powtórz powyższe czynności dla pozostałych
kolorowych przycisków.
( Od tej chwili,gdy będziesz korzystać z teletekstu,Twoje
ulubione strony będą pojawiać się w kolorowych
paskach u dołu ekranu.Aby powrócić do zwykłych
nagłówków tematycznych,naciśnij H.
Aby usunąć te ustawienia, przytrzymaj przycisk d wciśnięty
przez 5 sekund.
Ulubione
strony
”
.
ı
TV
›
ù
VCR
¢
MODE
MENU
∫
Ÿ
Ó
TV / DVD
-
+ +
[
- -
%
∏
OK
12
564
879
Ø
0
SUBTITLEAUDIO
¤
SYSTEM MENU
Ë
SMARTSMART
ª
DVD
MENU
P
RADIO
3
Á
¤
0 9
P
-
Ë
›
Ó
Ÿ
MENU
Ë
+
Page 81

9
Formaty 16:9
Obraz może być odbierany w formacie 16:9 (szeroki ekran) lub 4:3 (ekran tradycyjny).
Obraz w formacie 4:3 ma czasami czarny pas na górze i na dole ekranu (format letterbox).
Funkcja 16:9 pozwala wyeliminować czarne pasy poprawiając wykorzystanie ekranu.
Jeżeli twój odbiornik posiada ekran 4:3.
Jeżeli twój odbiornik posiada ekran 16:9.
Nacisnąć przycisku p aby wybrać odpowiednią opcję:
Telewizor został wyposażony w funkcję automatycznego przełączanie formatu, która odkodowuje
specjalny sygnał emitowany przez niektóre stacje i dobiera odpowiedni format pracy odbiornika.
4:3
Obraz jest wyświctany w formacie 4:3 z czarnymi pasami po obu stronach.
Obraz może być powiększany przy pomocy przycisków
îÏ.
Zoom 14:9
Obraz jest powiększony do formatu 14:9,do obu stronach pozostają wąskię czarne
pasy. Przyciski
îÏ umożliwiają pionowe przesuwanie obrazy, aby umożliwić
wyświetlanie napisów.
Zoom 16:9
Obraz jest powiększony do formatu 16:9.Ta opcja jest zalecana przy obrazach z
czarnym pasem u góry i dołu ekranu (tzw.format panoramiczny). Użyć przycisków
îÏ aby odsłonić napisy do filmu.
Zoom Napisy
Opcja ta umożliwia oglądanie filmów o formacie 4:3 na całej powierzchni ekranu i
przy widocznych napisach do filmów. Użyć przycisków
îÏ aby opuścić lub
podnieść dół obrazu.
Super Superszeroki
Umożliwia oglądanie filmów o formacie 4:3 na całej powierzchni ekranu
rozszerzając boki obrazu.Użyć przycisków
îÏ aby odsłonić napisy do filmu.
Szeroki Ekran
Umożliwia przywrócenie odpowiednich proporcji filmów nadawanych w formacie
16:9 wyświetlając obraz na całym ekranie.
Uwaga: podczas oglądania DVD,przycisków îÏ możesz używać tylko gdy na ekranie
wyświetlany jest format obrazu (w przeciwnym wypadku wchodzisz w funkcje odtwarzacza DVD).
Nacisnąć przycisku p aby wybrać odpowiednią opcję:
4:3
Obraz jest wyświetlany w formacie 4:3
Powiększ 4:3
Obraz jest powiększany w pionie.Ten rodzaj pracy stosujemy aby wyeliminować
czarne pasy gdy program jest nadawany w formacie letterbox.
Kompres. 16:9
Obraz jest poddawany kompresji w pionie tak aby otrzymać format 16:9
Page 82

10
Użytkowanie wbudowanego odtwarzacza DVD
Umieszczenie płyty w odtwarzaczu
Wbudowany odtwarzacz DVD pozwala odtwarzać dyski wideo DVD, jak również dyski wideo CD,
dyski CD ze zdjęciami w formacie JPG oraz płyty audio CD (w tym także CD-R, CD-RW i CD
MP3). Poszczególne typy dysków dają się rozpoznać na podstawie oznaczenia umieszczonego na
opakowaniu.
Uw
aga: Zazwyczaj filmy na płytach DVD są wprowadzane na rynek w różnych częściach świata w tym
samym czasie. Z tego względu odtwarzacze DVD zaopatrzone zostały w kody odpowiadające regionom
geograficznym. Jeśli płyta z innym kodem niż kod twojego odtwarzacza zostanie w nim umieszczona, na
ekranie pojawi się komunikat. Odczytanie płyty nie będzie możliwe i trzeba będzie wyjąć ją z odtwarzacza.
&
Otwarcie szufladyna płyty
Naciśnij przycisk EJECT (fl) umieszczony na
panelu przednim odtwarzacza po lewej stronie.
é
Umieszczenie płyty w
odtwarzaczu
Umieść płytę w szufladzie, etykietą ku górze.
Upewnij się, że płyta została poprawnie
umieszczona w prowadnicy.
"
Zamknięcie szuflady z płytą
Aby zamknąć szufladkę, pchnij ją lekko lub
naciśnij przycisk
EJECT (fl) znajdujący się z
boku na panelu przednim. Po umieszczeniu
płyty w odtwarzaczu rozpocznie się jej
odtwarzanie.
‘
Automatyczne odtwarzanie
Odtwarzanie płyty rozpocznie się
automatycznie po zamknięciu szuflady. Z lewej
strony ekranu pojawi się okienko informujące
o wykonywanej aktualnie operacji,rodzaju
płyty oraz czasie trwania nagrania.
Następnie wyświetli się zawartość płyty.
PICTURE
Page 83

11
Odtwarzanie płyty DVD lub CD video
Odtwarzanie
Po umieszczeniu płyty w odtwarzaczu i zamknięciu szuflady,odtwarzanie
rozpoczyna się automatycznie.W przypadku niektórych płyt może pojawić się
polecenie wybrania jednej z rubryk menu.W zależności od potrzeby użyj
przycisków numerycznych
09 lub îÏ È¬,a następnie naciśnij u.
Zatrzymanie odtwarzania
Aby zatrzymać odtwarzanie płyty, naciśnij przycisk
Ê.Pojawi się ekran
domyślny informujący o stanie odtwarzacza.
Wznowienie odtwarzania (funkcja “resume”)
Po zatrzymaniu odtwarzania płyty (tryb obrazu zatrzymanego (stop-klatka) lub
otwarcie szuflady z płytą),możliwe jest wznowienie odtwarzania w miejscu, w którym
zostało ono zatrzymane.W tym celu wystarczy nacisnąć przycisk
Æ,a gdy pojawi się symbol
resume,należy ponownie nacisnąć Æ (w przeciwnym razie odtwarzanie płyty
rozpocznie się od jej początku). Funkcję wznowienia odtwarzania płyty od momentu, w
którym zostało ono zatrzymane, można ustawić dla 4 ostatnio odtwarzanych płyt.
Zwolnienie, przyspieszanie i cofanie
Podczas odtwarzania naciśnij przycisk
Ï aby otrzymać obraz w tempie
zwolnionym o 1/2,1/4 lub 1/8.Aby przyspieszyć odtwarzanie obrazu lub
uzyskać szybkie cofanie z prędkością 4-krotną lub 32-krotną, naciśnij przycisk
¢ lub ∫ (względnie È lub ¬).Normalne tempo odtwarzania można
przywrócić naciskając przycisk
Æ.
Zatrzymanie obrazu (stop-klatka)
Aby zatrzymać obraz (stop-klatka) naciśnij przycisk
∆.Aby przejść do
następnego kadru, naciśnij przycisk
∆. Normalne tempo odtwarzania można
przywrócić naciskając przycisk
Æ.
Poprzedni lub następny rozdział
Aby umożliwić bezpośrednie przechodzenie do wybranych scen,płyty DVD są
podzielone na oddzielne rozdziały. Za pomocą przycisków
@ P # można
przeskoczyć do poprzedniego lub następnego rozdziału.
Ikony menu DVD
Naciśnij przycisk æ.Na ekranie pojawi się menu DVD. Jego zawartość zależy od
typu odtwarzacza DVD. Dzięki ikonom menu możesz przechodzić do różnych
rubryk / funkcji, np. wybór języka ścieżki dźwiękowej, bezpośrednie przejście do
wybranych scen,specjalne uwagi dotyczące produkcji, częstotliwości nadawania itd.
Za pomocą przycisków
Ȭ îÏ wybierz odpowiednią funkcję. Potwierdź
wybór naciskając
u.Aby opuścić menu naciśnij przycisk æ.
Menu odtwarzacza DVD
Naciśnij przycisk
d (menu systemowe), aby przywołać lub zamknąć menu
czytnika DVD (patrz str. 13).
Język ścieżki dźwiękowej
Naciśnij eaby wybrać język ścieżki dźwiękowej spośród opcji dostępnych na
płycie.
Po chwili menu zniknie z ekranu.
Język napisów dialogowych
Naciśnij przycisk
c
aby wybrać język napisów (naciśnij off aby wyłączyć język
napisów). Po chwili menu zniknie z ekranu.
Wyjmowanie płyty z odtwarzacza
Aby wyjąć płytę z odtwarzacza naciśnij przycisk EJECT (fl), znajdujący się na
panelu przednim odbiornika TV. Odtwarzanie zostanie zatrzymane, a po kilku
sekundach szuflada z płytą otworzy się.
Wybór trybu DVD lub Telewizyjnego
Aby przełączyć odbiornik z trybu Telewizyjnego na tryb DVD naciśnij przycisk
Æ
znajdujący się na pilocie.
ı
TV
ù
›
VCR
¢
Ÿ
Ó
MODE
·
∆
TV / DVD
-
MENU
+ +
”
[
- -
%
∏
OK
12
564
879
Ø
0
∫
Ê
.
SUBTITLEAUDIO
¤
SYSTEM MENU
Ë
Æ
SMARTSMART
ª
DVD
MENU
RADIO
3
Á
P
Page 84

12
Odtwarzanie płyty CD audio
Odtwarzanie płyty CD ze zdjęciami
Odtwarzanie
Po wprowadzeniu płyty do odtwarzacza, odtwarzanie rozpoczyna się
automatycznie. Na ekranie pojawi się specjalne menu wskazujące ilość
tytułów,bieżący utwór i jego czas trwania.
Wybranie innego tytułu
Naciskając przyciski
@ P # znajdujące się na nadajniku zdalnego
sterowania można zmienić utwór.Aby wybrać dowolny żądany utwór,
użyj przycisków numerycznych
09.
Przyspieszanie i cofanie
Naciśnij przycisk
¢ lub ∫ jeśli chcesz przyspieszyć lub cofnąć
odtwarzanie utworu z prędkością 4-krotną lub 8-krotną.W celu
przywrócenia normalnej prędkości odtwarzania naciśnij przycisk
Æ.
Uwaga: funkcja nie jest dostępna dla płyt CD z muzyką w formacie MP3.
Pauza / zatrzymanie / wyjęcie płyty
Naciśnij przycisk ∆ aby włączyć funkcję pauzy i przycisk Æ w celu
wznowienia odtwarzania.Przycisk
Ê służy do zatrzymania płyty a klawisz
EJECT (fl),znajdujący się na panelu przednim odbiornika TV – do jej wyjęcia.
Programowanie odtwarzania
Ta funkcja pozwala na zaprogramowanie odtwarzania przy
jednoczesnym zapamiętaniu Twoich ulubionych utworów (strona 14).
Odtwarzanie płyt CD MP3
MP3 to format zapisu dźwięku pozwalający przechowywać większą
liczbę albumów na pojedynczym dysku CD. Do wybierania albumów
służą przyciski
îÏ. Naciśnij przycisk ¬,aby wyświetlić listę
utworów. Za pomocą przycisków
îÏ lub 09 można wybierać
utwory.Przycisk
È pozwala wrócić do listy wyboru albumów.
Odczyt i podgląd miniatur
Po włożeniu płyty jej odczyt rozpoczyna się automatycznie i
wyświetlany jest podgląd miniatur czterech pierwszych zdjęć.
Za pomocą przycisków
@ P # można przejść do następnej lub
poprzedniej strony. Po wybraniu zdjęcia kursorem
îÏȬ
można je wyświetlić na całym ekranie za pomocą przycisku u.
Przycisk
æ pozwala powrócić do podglądu miniatur.
Pokaz slajdów
Naciśnij przycisk
Æ,aby rozpocząć pokaz slajdów. Zdjęcia zawarte na
dysku będą wyświetlane automatycznie jedno po drugim.
Aby zatrzymać pokaz, naciśnij przycisk
Ê.Aby zmienić czas
wyświetlania pojedynczego zdjęcia, użyj paska narzędzi (str. 13).
Bezpośredni wybór zdjęcia lub katalogu
Za pomocą przycisków @ P # można przejść do poprzedniego lub
następnego zdjęcia. Przyciski
09 pozwalają bezpośrednio wybrać
zdjęcie o określonym numerze. Na ekranie wyświetlana jest lista zdjęć.
Poruszanie się w jej obrębie jest możliwe za pomocą przycisków
îÏ.Jeśli dysk zawiera większą liczbę katalogów,przycisk È
pozwala przejść do listy wyboru katalogów.Wybierz katalog przyciskami
îÏ i naciśnij przycisk ¬,aby powrócić do wyboru zdjęć.
Format obrazu
Przycisk
p pozwala zmienić format, w jakim zdjęcie jest wyświetlane
(patrz str. 9).
Obrazu
1
2
3
4
.
ı
SUBTITLEAUDIO
›
¢
Ó
¤
ù
∫
SYSTEM MENU
Ÿ
Ë
∆
Ê
Æ
SMARTSMART
TV / DVD
ª
DVD
MENU
MODE
MENU
TV
VCR
·
-
++
”
--
%
∏
OK
12
Ø
P
[
RADIO
3
564
879
0
Á
Page 85

13
Menu odtwarzacza DVD
Pasek narzędzi
To menu pozwala uzyskać dostęp do
wszystkich funkcji obsługi odtwarzacza DVD.
Naciśnij przycisk
d (menu systemowe).
Na ekranie pojawi się menu.Do poruszania się
po strukturze menu i wybierania ustawień
służą przyciski
ȬîÏ.Aby zamknąć
menu, naciśnij ponownie przycisk
d.
Jeśli dana funkcja nie jest dostępna w czasie
odczytywania płyty, odpowiadający jej tekst opcji
jest wygaszony.
To menu pozwala uzyskać dostęp do
wszystkich funkcji obsługi odtwarzacza DVD.
Naciśnij przycisk
d (menu systemowe).
Pojawi się pasek narzędzi.Użyj przycisków
Ȭ,aby wybrać odpowiednie podmenu:
Odtwarzanie
•
Nawigacja;pozwala odczytać poszczególne
ścieżki płyty CD z dźwiękiem lub ze zdjęciami.
•
Dialogi; pozwala wybrać język ścieżki
dźwiękowej filmu DVD.
Dostęp bezpośredni jest możliwy za pomocą
przycisku
e.
•
Napisy; pozwala wybrać język napisów do
filmu DVD.
Dostęp bezpośredni jest możliwy za pomocą
przycisku
c
.
Slide Show (Pokaz slajdów)
To menu pozwala sterować pokazem slajdów z
płyty CD zawierającej zdjęcia.
•
Pic Time (Czas zdjęcia); pozwala dobrać czas
wyświetlania każdego ze zdjęć.
Widok
•
Ujęcie; niektóre płyty DVD zawierają sceny
nakręcone z różnych punktów widzenia
kamery.Zwykle sygnalizowane jest to
obecnością specjalnej ikony. Do wybrania
ujęcia służą przyciski
Ȭ.
•
Powiększenie; naciskaj przycisk u,aby
cyklicznie przełączać między powiększeniem
2x, 4x lub obrazem zwykłym. Za pomocą
przycisków
ȬîÏ można się
poruszać w obrębie powiększonego obrazu.
•
Podgląd rozdziału; pozwala włączyć lub
wyłączyć podgląd rozdziałów płyty DVD.
•
Rotate (Obrót); pozwala zmienić orientację
zdjęć wyświetlanych z płyty CD.
Wyszukiwanie
• Czas; za pomocą przycisków 09 można
wybrać dokładny czas początku
poszukiwanej sekwencji. Zatwierdź
przyciskiem
u. Odtwarzanie rozpocznie się
od wskazanego momentu.
•
Przyspieszone; pożądaną prędkość można
wybrać przyciskami
Ȭ.
•
Zwolnione; stopień spowolnienia można
wybrać przyciskami
Ȭ.Aby powrócić
do normalnej prędkości,naciśnij przycisk
Æ.
•
Poklatkowe; za pomocą przycisków È i
¬ można przesuwać film klatka po klatce
do przodu lub do tyłu. Naciśnij przycisk
Æ,
aby powrócić do zwykłego trybu
odtwarzania.
Program:
Pozwala zaprogramować odtwarzanie
ulubionych fragmentów (patrz str. 15).
Odtwarzanie Slide Show Widok
Pasek
Preferencje
Ustawienia
Odtwarzanie Slide Show Widok
Pasek
Preferencje
Ustawienia
Page 86

14
Menu Preferencje
To menu pozwala ustawić preferencje
dotyczące działania odtwarzacza DVD.
Naciśnij przycisk
d (menu systemowe), aby
przywołać menu czytnika DVD.
Naciśnij przycisk
Ï,aby wybrać pozycję
Preferencje i wybieraj poszczególne podmenu
za pomocą przycisków
Ȭ:
Dźwięk:
•
Tr yb nocny; optymalizacja dynamiki dźwięku
z dostosowaniem do małej głośności.
Funkcje:
•
Wiersz pomocy; pozwala wyświetlić lub
ukryć umieszczony w dolnej części ekranu
opis pozycji menu.
•
Okno stanu; pozwala wyłączyć wyświetlanie
okna stanu odtwarzacza.
Aby zamknąć menu,naciśnij przycisk
d
.
Menu Ustawienia
To menu pozwala ustawić domyślne parametry
działania odtwarzacza DVD.
Naciśnij przycisk
d (menu systemowe), aby
wyświetlić menu odtwarzacza DVD. Naciśnij
dwukrotnie przycisk
Ï,aby wybrać menu
Ustawienia,a następnie użyj przycisków
Ȭ,aby wybrać odpowiednie podmenu:
Język:
•
Domyślne dialogi;pozwala wybrać
preferowany język ścieżki dźwiękowej filmów
DVD.
•
Domyślne napisy;pozwala wybrać
preferowany język napisów do filmów DVD.
Jeśli język wybrany jako domyślny jest dostępny na
płycie, będzie on wybierany automatycznie.
W przeciwnym razie uaktywniany będzie
podstawowy język płyty.
TV:
(dostępne wyłącznie w niektórych wersjach)
•
System TV; pozwala wybrać opcję
Automatycznie (automatyczne wykrywanie
standardu zapisu) lub standardowy format
PA L lub NTSC.
Menu Dźwięk:
•
Wyjście cyfrowe; pozwala wybrać jedną z
opcji:
Wszystkie, PCM lub Nieaktywne.
Funkcja:
•
PBC; pozwala włączyć lub wyłączyć funkcję
rozdziałów dostępną na niektórych
wizyjnych płytach CD.
Dostęp: patrz następna strona
Aby zamknąć menu,naciśnij przycisk
d
.
Ustawienia
Preferencje
Dźwięk Funkcje
Język TV M. Dźwięk
Ustawienia
Page 87

15
Programowanie odtwarzania
Ta funkcja pozwala zaprogramować odtwarzanie
przez zapamiętanie ulubionych fragmentów.
& Naciśnij przycisk d (menu systemowe), aby
wyświetlić pasek
narzędzi. Za pomocą
przycisku
¬ wybierz pozycję Program i
naciśnij przycisk
Ï,aby wyświetlić menu.
é Użyj przycisku
Ï,aby wybrać ścieżkę i
naciśnij przycisk
¬.
“ Wybierz numer ścieżki przyciskami
îÏ
lub 09 i zatwierdź przyciskiem ¬.
‘ Tą samą metodą wybierz rozdział.
( W celu dokonania wyboru naciśnij przycisk
u.
§ Powtórz czynności
“ do ( tyle razy, ile
chcesz zaprogramować rozdziałów lub ścieżek
(maksymalnie 20 na jednej płycie).
W razie potrzeby można powtarzać tę samą
ścieżkę dowolną liczbę razy.
è Naciśnij przycisk
d,aby zamknąć menu.
Odtwarzanie ulubionych ścieżek rozpocznie
się automatycznie.
Aby zatrzymać odtwarzanie ulubionych ścieżek
Ustaw opcję Program na Wyłączony.
Aby przejrzeć i zmodyfikować listę
Wybierz pozycję
Lista odtwarzania i naciśnij
przycisk
¬.Pojawi się lista ulubionych ścieżek.
Aby usunąć daną pozycję, zaznacz jej numer
przyciskami
îÏ i naciśnij przycisk u.
Aby usunąć wszystko
Wybierz pozycję
Usuń wszystko i naciśnij
przycisk
¬.
Aby zamknąć menu,naciśnij przycisk
d
.
Kontrola dostępu i blokada
Ta funkcja pozwala dobrać jeden z poziomów
blokowania funkcji odtwarzacza.
& Naciśnij przycisk
d. Użyj przycisku Ï,aby
wybrać pozycję
Ustawienia,a następnie
przyciskiem
¬ wybierz pozycję Dostęp.
é Wprowadź wymyślony przez siebie kod
dostępu. Kod należy wprowadzić dwukrotnie w
celu potwierdzenia.
“
Poziom zabezpieczeń:pozwala dobrać poziom
blokady od 0 (wyłączona) do 8 (maksymalna).
Niektóre płyty DVD obsługują różne poziomy
zabezpieczeń (w skali od 1 do 8), oferując czasami sceny
zastępcze. Na przykład wybranie poziomu 4 powoduje,że
odtwarzane będą wszystkie sceny poziomu 4 i
poniżej. Sceny, którym przypisano poziom wyższy, nie
będą odtwarzane wcale lub zostaną zastąpione
innymi. Jeśli płyta nie zawiera scen zastępczych,
odtwarzacz zostaje zatrzymany, a jego odblokowanie
następuje pod prowadzeniu czterocyfrowego kodu.
‘ Zmień PIN; pozwala zmienić kod dostępu.Kod
należy wprowadzić dwukrotnie w celu
potwierdzenia.
W przypadku zapomnienia kodu naciśnij
czterokrotnie przycisk
Ê.
(
Blokada płyty: pozwala uaktywnić blokadę płyt
DVD i wideo CD. Po włożeniu płyty do
odtwarzacza pojawia się pole dialogowe. Należy
w nim wprowadzić kod PIN,wybierając opcję
Odtwórz raz (odczyt płyty będzie możliwy do
czasu jej wyjęcia z odtwarzacza lub wyłączenia
telewizora) lub
Odtwarzaj zawsze
(odtwarzanie danej płyty będzie zawsze
dozwolone).
Odtwarzacz może zapamiętać do 50 płyt. Po
zapełnieniu listy nowo dodawane płyty będą
zastępować jej ostatnie pozycje. Dwustronne płyty
DVD (oraz filmy na kilku płytach CD) mogą
zawierać odmienny kod identyfikacyjny na
poszczególnych stronach lub płytach z zestawu.W
związku z tym niezbędne będzie wprowadzanie na
listę każdej strony lub woluminu osobno.
§ Naciśnij przycisk
d
,aby zamknąć menu.
Cofanie zezwolenia na odtwarzanie
• Włóż płytę do odtwarzacza. Odtwarzanie
rozpocznie się automatycznie.
• Po pojawieniu się symbolu
u naciśnij przycisk
Ê.Pojawi się symbol v. Oznacza on
wycofanie zezwolenia na odtwarzanie danej
płyty.
Program
Lista odtwarzania
Pasek
Program
Ściezka
Usuń wszystkie
Ściezka
3
1
2
Blokada płyty
Ustawienia
Zmień PIN
Poziom zabezp.
Wprowadź PIN
****
Dostęp
Page 88

16
Podłączanie urządzeń peryferyjnych
Podłączyć magnetowid wg schematu.Stosować kabel typu
Euro o dobrej jakości.
Jeśli Twój magnetowid nie posiada złącza Euro,jedynym
sposobem jego podłączenia jest gniazdo antenowe. Należy
wtedy dostroić odbiornik do sygnału kontrolnego magnetowidu i
przypisać mu program nr 0 (zob. ręczne ustawianie programów
na str. 6). Aby wyświetlić obraz pochodzący z magnetowidu,
należy nacisnąć przycisk
0.
Magnetowid z dekoderem
Aby nagrywać transmisje kodowane, należy podłączyć
dekoder do drugiego złącza Euro w magnetowidzie.
Magnetowid
Odbiornik satelitarny, dekoder,VideoCD,gry, itp.
W przypadku odbiorników wyposażonych w dwa gniazda,
najlepiej podłączyć urządzenia generujące sygnał RVB
(dekoder cyfrowy, odtwarzacz DVD, gry, ...) do gniazda
EXT1, zaś urządzenia generujące sygnał S-VHS
(odtwarzacze wideo
S-VHS i Hi-8, ...) – do gniazda EXT2.
Aby podłączyć odbiornik do systemu Hi-Fi, należy połączyć
kablem audio wyjścia odbiornika TV "L" (lewy kanał) i "R"
(prawy kanał) do wejścia audio we wzmacniaczu.
Za pomocą cyfrowego kabla audio połącz wyjście
“DIGITAL AUDIO OUT” odbiornika TV (dostepne tylko w
niektórych wersjach) z wejściem “AUDIO IN” na
wzmacniaczu (wzmacniacz z wejściem cyfrowym
koncentrycznym).
Inny osprzęt
Wzmacniacz
564
879
0
Á
Ø
Wybór podłączonego osprzętu
Naciśnij przycisk n aby wybrać EXT1 a w wersjach odbiornika z dwoma
gniazdami:
EXT2 i S-VHS2 (sygnały S-VHS z gniada EXT2) oraz AV dla
urządzeń peryferyjnych (o ile są one podłączone).
Większość sprzętu, jeśli jest podłączona kablem Euro (dekoder,magnetowid)
potrafi samoczynnie przełączyć odbiornik.
W zależności od wersji, odbiornik telewizyjny posiada 1 lub 2 gniazda XT1 i EXT2 umieszczone na tylnej
ściance obudowy. Gniazdo zewnętrzne EXT1 posiada wejścia/wyjścia audio video oraz wejścia RVB.
Gniazdo zewnętrzne EXT2 (jeżeli występuje) posiada wejścia/wyjścia audio video oraz wejścia S-VHS.
VCR
Page 89

17
Podłącz urządzenia w sposób pokazany na
schemacie.
Za pomocą przycisku
n, wybierz AV.
W przypadku urządzenia monofonicznego, podłącz
sygnał dźwiękowy do wyjścia AUDIO L.Aby dźwięk był
odtwarzany przez lewy i prawy głośnik odbiornika
telewizyjnego naciśnij przycisk
e.
Słuchawki
Podłączenie słuchawek powoduje odcięcie sygnału
dźwiękowego odbiornika telewizyjnego.Wyreguluj
głośność za pomocą przycisków
@”#.
Impedancja słuchawek musi mieścić się w zakresie od
32 do 600 ohm.
Podłączania urządzeń peryferyjnych
Przyciski odtwarzacza wideo
Za pomocą pilota możesz regulować główne funkcje odtwarzacza wideo.
Nacisnąć przycisk MODE w celu wybrania pożądanego trybu:
VCR (magnetowid) lub TV.Kontrolka na pilocie zapala się wskazując
wybrany tryb. Gaśnie automatycznie po 20 sekundach bezczynności
(powrót do trybu TV).
W zależności od wyposażenia, działają następujące przyciski:
b czuwanie,
¢ szybkie cofanie,
∫ szybkie odtwarzanie,
· nagrywanie,
∆ pauza
Ê stop,
Æ odtwarzanie,
H wywołanie menu,
% timer magnetowidu,
kursor nawigacja i ustawienia,
u zatwierdzenie,
09 przyciski cyfr,
@ P # wybór programu,
◊ funkcja Indeks w magnetowidzie.
*
Niektóre z powyższych funkcji nie są dostępne we wszystkich typach odtwarzaczy.
Pilot działa ze wszystkimi odtwarzaczami wideo, korzystającymi ze standardu
RC5.
ı
TV
›
ù
VCR
¢
∫
Ÿ
MODE
Ó
∆
Ê
·
TV / DVD
-
MENU
+ +
”
[
- -
%
∏
OK
12
564
879
Ø
0
.
SUBTITLEAUDIO
¤
SYSTEM MENU
Ë
Æ
SMARTSMART
ª
DVD
MENU
RADIO
3
Á
P
Page 90

18
Porady
Słowniczek
Zły odbiór
Bliskie sąsiedztwo gór lub wysokich budynków
może być przyczyną przebić obrazu, echa i odbić.
W takim przypadku spróbuj ręczenie dostroić
obraz za pomocą opcji
Dostrojenie (str. 5) lub
zmienić ustawienie anteny zewnętrznej.Należy
również sprawdzić, czy Twoja antena umożliwia
odbiór programów nadawanych w danym paśmie
częstotliwości (pasmo UHF lub VHF).W razie
utrudnionego odbioru (tzw.snieg), uruchomić
NR z menu
Funkcje
(str. 6).
Brak obrazu
Jeżeli telewizor się nie włączy, naciśnij dwa razy
przycisk standby
b znajdujący się na pilocie.
Sprawdź,czy:
• antena jest prawidłowo podłączona
• czy wybrałeś prawidłowy system nadawania
sygnału (str. 5)
• często przyczyną problemów z obrazem lub
dźwiękiem są źle podłączone przewody
anteny lub złącza Euro. Czasem wtyczki
częściowo wysuwają się z gniazda przy
przesuwaniu lub obracaniu odbiornika.
Obraz pochodzący z urządzeń
peryferyjnych jest czarno-biały
Przy odtwarzaniu taśmy wideo,upewnij się, że
jest ona nagrana w standardzie (PAL, SECAM,
NTSC), który jest rozpoznawany przez Twój
magnetowid.
Brak dźwięku
Jeśli na niektórych kanałach odbierasz dobry
obraz, ale brak jest dźwięku, oznacza to
nieprawidłowe dobranie systemu TV. Zmień
ustawienia w menu
System (str.5).
Teletekst
Niektóre czcionki są wyświetlane
niewłaściwie? Sprawdź czy funkcja
Kraj została
poprawnie ustawiona (strona 5).
Odtwarzacz DVD przestał działać?
Sprawdź czy na płycie nie ma odcisków
palców.Jeśli tak, przetrzyj płytę miękką
szmatką począwszy od środka płyty na
zewnątrz.
Pilot nie dziala?
SJeśli odbiornik nie reaguje na pilota lub
czerwona dioda nie miga prze użyciu pilota,
należy w nim wymienić baterie.
Stan czuwania
Włączasz odbiornik, a ten pozostaje w stanie
czuwania, zaś przy użyciu przycisków
sterujących odbiornika pojawia się na ekranie
komunikat
Blokady? Oznacza to,że w
odbiorniku aktywna jest funkcja
Blokada
Ogólna (str. 7).Jeśli odbiornik nie odbiera
sygnału przez 15 minut, automatycznie
przechodzi do stanu czuwania.Aby zaoszczędzić
energię elektryczną, odbiornik telewizyjny został
wyposażony w układy o niskim zużyciu energii
w czasie czuwania (poniżej 3W)
Brak rezultatów
Jeśli Twój odbiornik zepsuje się, nie próbuj
naprawiać go samodzielnie, lecz skontaktuj się
z serwisem swojego sprzedawcy.
Czyszczenie telewizora
Czyszczenie ekranu i obudowy należy
wyłącznie wykonywać przy pomocy czystej,
miękkiej ścierki, nie pozostawiającej włókien.
Nie stosować produktów na bazie alkoholu i
rozpuszczalników.
Sygnały RGB: Są to 3 sygnały wideo - czerwony, zielony i niebieski (Red,Green and Blue) - które
bezpośrednio zawiadują emiterami barwnymi katody kineskopu. Korzystanie z tego typu sygnału
zapewnia lepszą jakość obrazu.
Dźwięk NICAM: Proces, za pomocą którego przesyłany jest dźwięk w postaci cyfrowej.
System: Obraz telewizyjny nie jest przesyłany w ten sam sposób we wszystkich krajach.Istnieją różne
standardy: BG, DK, I oraz L L'. Ustawienie
System (str.5) stosowane jest do wyboru tych
standardów. Nie należy tego pojęcia mylić z systemem kodowania barw PAL lub SECAM. System
PAL jest używany w większości krajów Europy, a system Secam jest używany we Francji,w Rosji i
w większości krajów Afryki.
16:9: Odnosi się do stosunku pomiędzy długością i wysokości ekranu.Odbiorniki szerokoekranowe
mają stosunek 16:9, a ekrany tradycyjne:4:3.
Page 91

1
Úvodem
Obsah
Děkujeme vám, že jste si koupili náš televizor.
Tento návod k použití vám má pomoci televizní přijímač nainstalovat a ovládat.
Doporučujeme vám, abyste si jej nejprve důkladně pročetli.
Nastavení
Zapojení televizoru . . . . . . . . . . . . . . . . . . . . . . . . . . . . . . . . . . . . . . . . . . . . . . . . .2
Tlačítka na televizoru . . . . . . . . . . . . . . . . . . . . . . . . . . . . . . . . . . . . . . . . . . . . . . .2
Tlačítka dálkového ovládání . . . . . . . . . . . . . . . . . . . . . . . . . . . . . . . . . . . . . . . . . .3
Rychlé nastavení . . . . . . . . . . . . . . . . . . . . . . . . . . . . . . . . . . . . . . . . . . . . . . . . . . .4
Třídění programů . . . . . . . . . . . . . . . . . . . . . . . . . . . . . . . . . . . . . . . . . . . . . . . . . .4
Název programu . . . . . . . . . . . . . . . . . . . . . . . . . . . . . . . . . . . . . . . . . . . . . . . . . . .4
Ruční ladění . . . . . . . . . . . . . . . . . . . . . . . . . . . . . . . . . . . . . . . . . . . . . . . . . . . . . . .5
Další nastavení menu Nastavení . . . . . . . . . . . . . . . . . . . . . . . . . . . . . . . . . . . . . . .5
Ovládání
Používání rádia . . . . . . . . . . . . . . . . . . . . . . . . . . . . . . . . . . . . . . . . . . . . . . . . . . . .5
Nastavení obrazu . . . . . . . . . . . . . . . . . . . . . . . . . . . . . . . . . . . . . . . . . . . . . . . . . .6
Nastavení zvuku . . . . . . . . . . . . . . . . . . . . . . . . . . . . . . . . . . . . . . . . . . . . . . . . . . .6
Nastavení zvláštních funkcí . . . . . . . . . . . . . . . . . . . . . . . . . . . . . . . . . . . . . . . . . . .6
Budík . . . . . . . . . . . . . . . . . . . . . . . . . . . . . . . . . . . . . . . . . . . . . . . . . . . . . . . . . . . .7
Uzamčení televizoru . . . . . . . . . . . . . . . . . . . . . . . . . . . . . . . . . . . . . . . . . . . . . . . .7
Teletext . . . . . . . . . . . . . . . . . . . . . . . . . . . . . . . . . . . . . . . . . . . . . . . . . . . . . . . . . .8
Formát 16:9 . . . . . . . . . . . . . . . . . . . . . . . . . . . . . . . . . . . . . . . . . . . . . . . . . . . . . . .9
Používání integrovaného přehrávače DVD
Vložení disku . . . . . . . . . . . . . . . . . . . . . . . . . . . . . . . . . . . . . . . . . . . . . . . . . . . . .10
Přehrávání videodisku DVD nebo CD . . . . . . . . . . . . . . . . . . . . . . . . . . . . . . . . .11
Přehrávání CD audio . . . . . . . . . . . . . . . . . . . . . . . . . . . . . . . . . . . . . . . . . . . . . .12
Přehrávání disků CD s obrázky . . . . . . . . . . . . . . . . . . . . . . . . . . . . . . . . . . . . . .12
Menu přehrávače DVD . . . . . . . . . . . . . . . . . . . . . . . . . . . . . . . . . . . . . . . . . . . . .13
Menu Panel nástrojů . . . . . . . . . . . . . . . . . . . . . . . . . . . . . . . . . . . . . . . . . . . . . . .13
Menu Předvolby . . . . . . . . . . . . . . . . . . . . . . . . . . . . . . . . . . . . . . . . . . . . . . . . . .14
Menu Nastavení . . . . . . . . . . . . . . . . . . . . . . . . . . . . . . . . . . . . . . . . . . . . . . . . . .14
Programování přehrávače . . . . . . . . . . . . . . . . . . . . . . . . . . . . . . . . . . . . . . . . . . .15
Kontrola přístupu a blokování . . . . . . . . . . . . . . . . . . . . . . . . . . . . . . . . . . . . . . .15
Přídavná zařízení
Videorekordér . . . . . . . . . . . . . . . . . . . . . . . . . . . . . . . . . . . . . . . . . . . . . . . . . . .16
Další přístroje . . . . . . . . . . . . . . . . . . . . . . . . . . . . . . . . . . . . . . . . . . . . . . . . . . . .16
Volba připojeného přístroje . . . . . . . . . . . . . . . . . . . . . . . . . . . . . . . . . . . . . . . . . .16
Tlačítko videa . . . . . . . . . . . . . . . . . . . . . . . . . . . . . . . . . . . . . . . . . . . . . . . . . . . .17
Praktické informace
Než zavoláte technika . . . . . . . . . . . . . . . . . . . . . . . . . . . . . . . . . . . . . . . . . . . . . .18
Slovníček termínů . . . . . . . . . . . . . . . . . . . . . . . . . . . . . . . . . . . . . . . . . . . . . . . . .18
°
Pokyny k recyklaci
Ve Vašem televizoru je použito materiálů, které mohou být znovu využity nebo
recyklovány. Specializované podniky sbírají staré televizní přijímače a soustřeďují
z nich znovu použitelný materiál s cílem omezit množství odpadu (informujte se
u prodejce).
Čeština
Page 92

Televizor je vybaven 4 tlačítky, která jsou
umístěna buď na přední, nebo vrchní straně
televizoru, záleží na modelu.
Tlačítky HLASITOST - + (-
” +) se
nastavuje hlasitost zvuku.Tlačítky PROGRAM + (- P +) se volí požadovaný program.
Chcete-li získat přístup k menu, podržte obě
tlačítka
” - a ” + stisknutá.Tlačítky - P +
pak můžete volit požadované nastavení a
tlačítky -
” + toto nastavení provést.
Chcete-li menu opustit, podržte obě tlačítka ”
- a
” + stisknutá.
P
oznámka: pokud je aktivovaný Dětská Pojistka,
tlačítka nefungují
(viz menu ZVL. FUNKCE str. 7).
PROGRAMVOLUME
--
++
2
&
Umístění televizoru
Te levizor umístěte na pevnou a stabilní plochu a
kolem něj nechte alespoň 5 cm volného prostoru.
Na přístroj nestavte nic,co by jej překrývalo
(dečky), žádné předměty naplněné vodou (vázy), ani
vydávající teplo (lampy),předejdete tak vzniku
nebezpečných situací.Televizor rovněž nesmí být
vystaven stříkající vodě.
é
Připojení
• Zástrčku antény zasuňte do zdířky :
umístěné na zadní straně televizoru.
• Pomocí přiloženého adaptéru zasuňte kabel
radioantény do zdířky FM ANT.
Příjem pomocí vnitřní antény může být v
některých případech neuspokojivý. Můžete jej
zlepšit otáčením antény. Pokud se kvalita nezlepší,
je třeba použít vnitřní anténu.
•
Napájecí šňůru zapojte do sítě (220-240 V / 50 Hz).
“
Dálkové ovládání
Do ovladače vložte 2 přiložené baterie typu R6,
zachovejte polaritu. Zkontrolujte, zda je
přepínač režimů v poloze TV.
Z ekologických důvodů neobsahují baterie dodané s
přístrojem ani rtuť, ani nikl a kadmium.Použité baterie
nevyhazujte, využijte dostupných možností recyklace
(poraďte se s prodejcem).Až budete baterie vyměňovat,
nahraďte je bateriemi stejného typu.
‘
Zapnutí
Televizor zapnete stisknutím hlavního vypínače.
Rozsvítí se červená kontrolka a obrazovka se
rozzáří. Přejděte přímo ke kapitole rychlá
instalace na stránce 4.
Pokud se televizor nachází v pohotovostním
režimu, stiskněte tlačítko P
# na dálkovém
ovládání.
Při používání dálkového ovládání kontrolka bliká.
5 cm
5 cm
5 cm
Zapojení televizoru
Tlačítka na televizoru
FM.
ANT.
Page 93

3
Tlačítka dálkového ovládání
DVD:dabovací jazyk (str.11)
TV: režim zvuku
Umožňuje přepnout pořady vysílané
ve Stereo a Nicam Stereo do Mono
nebo, u dvojjazyčných pořadů, volit
mezi Dual I nebo Dual II.
Pokud byl zvuk do režimu mono převeden
uživatelem, svítí nápis Mono červeně.
Seznam stanic (str.5)
Přepínač režimů (str.17)
Tlačítka DVD (str. 11)
Tlačítka videa (str. 17) a tlačítka
teletextu (str. 8).
Přednastavení zvuku
Umožňuje přístup k řadě
přednastavení - Řeč,Hudba,
Divadlo - a návrat k Osobní.
Menu TV
Pro zobrazení nebo opuštění menu.
Hlasitost
Pro nastavení hlasitosti.
Kurzor
Pomocí těchto 4 tlačítek můžete
procházet menu.
Číselná tlačítka
Přímý přístup k programům.
U programů s dvoumístným
číslem je třeba zadat druhou
číslici dříve, než zmizí čárka.
Volba konektorů EXT
Několikrát stiskněte pro volbu
mezi EXT1 a AV (str. 16).
Pohotovostní režim
Umožňuje převedení televizoru do
pohotovostního režimu.
Pro jeho opětovné zapnutí
stiskněte P @#, b,0 až 9.
DVD:jazyk titulků (str.11)
TV:Vyvolání teletextu (str. 8)
DVD:menu OSD (str.13)
TV: Informace na obrazovce /
trvalé zobrazení čísla
Stisknutím zobrazíte/odstraníte číslo
programu,název (pokud existuje),
čas, zvukový režim a čas zbývající do
automatického vypnutí přístroje.
Držením po dobu 5 sekund
aktivujete trvalé zobrazení čísla.
Režim TV/DVD
Pro volbu mezi TV a DVD (str. 11).
Přednastavení obrazu
Pro přístup k řadě přednastavení -
Intenzivní, Přirozený, Jemný
Multimédia
a návrat k Osobní.
Vypnutí zvuku
Pro vypnutí/obnovení zvuku.
Potvrzení (DVD/VCR)
Režimy 16:9 (str. 9)
Vo lba programů
Pro přechod na program s nižším
nebo vyšším číslem.
U některých programů se ve spodní
části obrazovky zobrazí titul pořadu.
Zvuk Surround
Pro aktivování / zrušení efektu
rozšíření zvuku.Při stereo zvuku
dojde k rozšíření stereo báze.
U verzí vybavených Virtual Dolby
Surround * vzikne dojem
prostorového zvuku Dolby
Surround Pro Logic.Při mono
zvuku vznikne pseudo stereo efekt.
Předchozí program
Pro přepnutí na dříve zobrazený
program.
Menu DVD (str.11)
Režim RÁDIO/TV
Pro volbu mezi televizí a rádiem
(str. 11).
* ”Dolby”a symbol dvojitého D-D jsou značkami Dolby Laboratories.
Vyrobeno v licenci Dolby Laboratories.
.
ı
TV
VCR
¢
MODE
Ó›ŸË
·
-
TV / DVD
MENU
SUBTITLEAUDIO
ù
SYSTEM MENU
∫
Ê∆ Æ
SMARTSMART
ª
MENU
¤
DVD
++
”
OK
[
--
%
∏
12
564
879
Ø
0
P
RADIO
3
Á
Page 94

4
Rychlé nastavení
Třídění programů
Název programu
Když poprvé zapnete televizor, objeví se na
obrazovce menu pro výběr země a jazyka
všech menu.
Pokud se menu neobjeví, držte pro jeho vyvolání po
dobu 5 sekund stisknutá tlačítka
”+ a ”- na
televizoru.
&
Použijte tlačítka îÏ na dálkovém ovládání pro
volbu vaší země,poté potvrďte tlačítkem
¬.
Pokud se vaše země neobjeví v nabídce, zvolte “...”
é Pomocí tlačítek
îÏ dále zvolte svůj jazyk;
výběr potvrďte tlačítkem
¬.
“ Automaticky se zahájí ladění.Všechny
dostupné televizní a rozhlasové kanály jsou
ukládány do paměti.Tato operace trvá několik
minut. Na obrazovce je zobrazen postup
ladění a počet nalezených programů.Nakonec
menu zmizí.
Pro ukončení nebo přerušení ladění stiskněte
H.
Není-li nalezen žádný program, prostudujte
kapitolu Rady na straně 18.
‘ Pokud vysílač nebo kabelová síť přenáší signál
automatického třídění, budou programy
správně očíslovány. Nastavení je v takovém
případě ukončeno.
( Není-li tomu tak, musíte pro přečíslování
programů použít menu
Třídění.
Některé vysílače nebo kabelové sítě přenášejí
vlastní třídící parametry (oblast, jazyk...).V takovém
případě musíte provést volbu tlačítky
îÏ a
potvrdit ji tlačítkem
¬.
& Stiskněte tlačítko H.Na obrazovce se objeví
Hlavní menu.
é Kurzorem vyberte menu
Nastavení,poté menu
Třídění.
“ Pomocí tlačítek
îÏ zvolte program, který
chcete přesunout, a stiskněte
¬.
‘ Tlačítky
îÏ poté zvolte nové číslo; volbu
potvrďte stisknutím
È.
( Opakováním kroků “ a ‘ přečíslujete příslušné
programy.
§ Menu opustíte stisknutím
d.
Chcete-li, můžete pojmenovat jednotlivé
programy a externí konektory.
P
oznámka: pokud je přenášen identifikační signál,
jsou při instalaci programy pojmenovány
automaticky.
& Stiskněte tlačítko
H.
é Kurzorem zvolte menu
Nastavení,poté Název.
“ Tlačítky
îÏ zvolte program, který chcete
pojmenovat/přejmenovat.
‘ Tlačítky
Ȭ se můžete přesunovat v
oblasti zobrazení jména (5 znaků), tlačítky
îÏ volíte jednotlivé znaky.
( Když je název zadán, stisknutím tlačítka
È se
vraťte. Název je uložen do paměti.
§ Kroky “ až ( opakujte pro každý program,
který chcete pojmenovat.
è Menu opustíte stisknutím
d.
Select Country
Country
DK
E
F
FI
Æ GB
Language
Español
Svenska
English
Dansk
Nederlands
Hlavní Menue
• Obraz
• Zvuk
• Zvl. Funkce
$ Nastavení
Nastavení
• Jazyk
• Země
• Aut. Ladění
• Ruční Ladění
$
Třídění
• Název
00
01 TF1
02 FR2
03ÆFR3
04 C +
05 ARTE
Page 95

5
Ruční ladění
Další nastavení menu Nastavení
Toto menu umožňuje ukládat programy po
jednom do paměti.
& Stiskněte tlačítko
H.
é Kurzorem vyberte menu
Nastavení,poté Ruční
ladění
:
“
TV Systém: zvolte Evropa (automatické
určení*) nebo
Evropa -Západ (norma BG),
Evropa - Východ (norma DK),Velká Británie
(norma I) či Francie (norma LL’).
* Kromě Francie, kde je nezbytně nutné zvolit France.
‘ Hledání: stiskněte ¬. Začne vyhledávání.
Jakmile je nalezen program, vyhledávání se
zastaví a zobrazí se název programu (je-li
dostupný). Přejděte k následujícímu kroku.
Pokud znáte frekvenci žádaného programu,
zadejte ji přímo pomocí tlačítek
0 až 9.
Pokud není nalezen žádný program,prostudujte
kapitolu Rady (str. 18).
(
Č. předvolby: zadat číslo tlačítky Ȭ nebo
0 až 9.
§
Doladění: není-li příjem uspokojivý,vylaďte ho
tlačítky
Ȭ.
è
Uložení: stiskněte ¬.Program je uložen.
! Opakujte kroky ‘ až è,dokud neuložíte
všechny programy.
Pro opuštění: stiskněte tlačítko d.
& Stiskněte tlačítko H a zvolte menu Nastavení:
é
Jazyk: Pro změnu jazyka, ve kterém jsou
zobrazována menu.
“
Země: pro volbu vaší země.
Toto nastavení ovlivňuje vyhledávání, automatické
třídění programů a zobrazování teletextu. Pokud
Vaše země není na seznamu, zvolte “...”
‘
Aut. ladění: pro zahájení automatického
vyladění všech programů dostupných v místě,
kde se nacházíte. Pokud vysílač nebo kabelová
síť přenáší signál automatického třídění,budou
programy správně očíslovány.Není-li tomu tak,
musíte pro přečíslování použít menu
Třídění
(viz str. 4).
Některé vysílače nebo kabelové sítě přenášejí
vlastní třídící parametry (oblast, jazyk...).V takovém
případě musíte provést volbu tlačítky îÏ a
potvrdit ji tlačítkem ¬. Pro ukončení nebo
přerušení vyhledávání stiskněte H. Není-li nalezen
žádný program, prostudujte kapitolu Rady (str.18).
( Pro opuštění menu stiskněte
d.
Používání rádia
Volba režimu TV/rádio
Stiskněte tlačítko
 na dálkovém ovládání pro
přechod mezi režimy TV a rádio.V režimu rádia
je na obrazovce zobrazeno číslo,název stanice
(pokud je dostupný), frekvence a zvukový režim.
Pro pojmenování stanic použijte menu
Název (str. 4).
Volba programů
Pomocí tlačítek
09 nebo @ P # volte
jednotlivé stanice FM (1 až 40).
Seznam stanic
Stisknutím tlačítka
ı vyvoláte na obrazovku
seznam rozhlasových stanic.Tlačítky
îÏ
můžete změnit stanici, tlačítkem d seznam
opustíte.
Používání menu rádia
Tlačítkem
H se dostanete ke zvláštním
nastavením rádia.
Vyhledávání stanic
Pokud jste použili rychlou instalaci, byly
všechny dostupné stanice FM uloženy do
paměti. Pro zahájení nového vyhledávání zvolte
v menu
Nastavení:Aut. ladění (pro kompletní
vyhledávání) nebo
Ruční ladění (pro vyhledávání
jednotlivých stanic). Menu
Třídění a Název vám
umožňují seřadit a pojmenovat všechny
rozhlasové stanice.Fungování těchto menu je
stejné jako v případě televizních programů.
Spořič obrazovky
Použijte tlačítko
c pro zapnutí/vypnutí funkce
spořič obrazovky.
Hlavní Menue
• Obraz
• Zvuk
• Zvl. Funkce
$ Nastavení
Ruční Ladění
$
TV Systém Europe Æ
• Hledání
• Č. Předvolby
• Doladění
• Uložění
Page 96

6
Nastavení obrazu
Nastavení zvuku
& Stiskněte tlačítko H a potom ¬. Objeví se
menu
Obraz:
é Použijte tlačítka
îÏ pro výběr příslušného
nastavení a tlačítka
Ȭ pro nastavení.
Poznámka: během nastavování obrazu zůstává na
obrazovce pouze zvolená řádka. Stisknutím
îÏ vyvoláte na obrazovku celé menu.
“ Po dokončení nastavení zvolte
Uložení a
potvrďte volbu stisknutím
¬.Tlačítkem d
opustíte menu.
Popis nastavení:
•
Jas: ovlivňuje jas obrazu.
•
Barva: ovlivňuje intenzitu barev.
•
Kontrast: ovlivňuje rozdíl mezi světlými a
tmavými odstíny.
•
Ostrost: ovlivňuje ostrost obrazu.
•
Teplota barev: ovlivňuje vzhled barev: Studené
(modřejší), Normální (vyvážené) nebo Teplé
(červenější).
•
Uložení: pro uložení nastavení obrazu
(a nastavení
Kontrast Plus a NR z menu Zvl.
Funkce
) do paměti.
& Stiskněte tlačítko H,zvolte Zvuk (Ï) a
stiskněte
¬. Objeví se menu Zvuk:
é Použijte tlačítka
îÏ pro výběr příslušného
nastavení a tlačítka
Ȭ pro nastavení.
“ Po dokončení nastavení zvolte
Uložení a
potvrďte volbu stisknutím
¬.
‘ Tlačítkem
d opustíte menu.
Popis nastavení:
• Výšky: ovlivňuje zvuky o vysoké frekvenci.
•
Hloubky: ovlivňuje zvuky o nízké frekvenci.
•
Vyvážení: pro rozdělení zvuku mezi levý a
pravý reproduktor.
•
Delta Hlas.*: umožňuje kompenzovat rozdíly
hlasitosti mezi jednotlivými programy nebo
konektory EXT.Toto nastavení funguje pro
programy 0 až 40 a konektory EXT.
•
AVL * (Omez. Hlas.): automatická kontrola
hlasitosti, která umožňuje omezení zvyšování
hlasitosti zejména při změně programů nebo
při reklamách.
•
Uložení: pro uložení nastavení zvuku do
paměti.
* Pouze u některých modelů.
Nastavení zvláštních funkcí
& Stiskněte H,zvolte Zvl. Funkce (Ï) a
stiskněte
¬. Můžete nastavit:
é
Časovač, Dětská Poj. a Rodič. zámek: viz
následující stranu.
“
Kontrast Plus:automatické nastavení kontrastu
obrazu, která nejtemnější místo obrazu trvale
převádí do černé barvy.
‘
NR: omezuje poruchy signálu (zrnění) v
případě slabého příjmu.
P
ozor: pro uložení nastavení Kontrast Plus a NR
do paměti musíte zvolit Uložení v menu Obraz.
(
Posun obrazu (pouze u velkých obrazovek):
velké obrazovky jsou citlivé na změny
zemského magnetického pole.Díky tomuto
nastavení můžete kompenzovat jeho vliv
změnou náklonu obrazu.
§ Stisknutím tlačítka
d opustíte menu.
Hlavní Menue
$ Obraz
• Zvuk
• Zvl. Funkce
• Nastavení
Obraz
$
Jas --I------ 39
• Barva
• Kontrast
• Ostrost
• Teplota Barev
• Uložení
Hlavní Menue
• Obraz
$ Zvuk
• Zvl. Funkce
• Nastavení
Zvuk
$
Výšky -----I--- 56
• Hloubky
• Vyvážení
• Delta Hlas.
• Omez. Hlas.
• Uložení
Page 97

7
Budík
Uzamčení televizoru
Toto menu vám umožňuje využít televizor jako
budík.
& Stiskněte tlačítko
H.
é Kurzorem vyberte menu
Zvl. Funkce, pak
Časovač:
“
Aut. vyp.:pro volbu doby,po níž se televizor
automaticky přepne do pohotovostního
režimu.
‘
Čas: zadejte běžný čas.
Poznámka: as se automaticky nastavuje podle
teletextové informace na programu č. 1 vždy po
zapnutí síťovým vypínačem. Pokud tento program
nemá teletext, k seřizování nedochází.
(
Čas Začátku: zadejte čas začátku buzení.
§ Čas Konce: Zadejte čas opětovného vypnutí
televizoru.
è
Č. předvolby:zadejte číslo programu,kterým si
přejete být buzeni. Pomocí tlačítek
Ȭ
můžete zvolit stanici FM (tlačítka 09
umožňují pouze výběr televizních programů).
V režimu DVD můžete po vložení disku vybrat
možnost
Bookmark DVD a nastavit tak buzení
pomocí určité skladby z disku.Nastavení
potvrďte pomocí volby
u.
!
Aktivace: můžete nastavit:
•
Jednou pro jediné buzení,
•
Každý den pro každodenní buzení,
•
Zrušit pro zrušení.
ç Stisknutím
H uvedete televizor do
pohotovostního režimu.V nastavený čas se
automaticky zapne. Pokud necháte televizor
zapnutý, pouze v nastavenou hodinu přepne
program (a vypne se v
Čas Konce).
Kombinace funkcí Uzamčení televizoru a
Časovač vám dává možnost omezit například
Vašim dětem dobu sledování televizoru.
Můžete uzamknout některé programy nebo
zcela znemožnit použití televizoru uzamčením
tlačítek.
Dětská pojistka
& Stiskněte H.
é Kurzorem zvolte menu
Zvl. Funkce a u
Dětská Poj. zvolte Zap.
“ Vypněte televizor a schovejte dálkové
ovládání.Televizor se tak stane nepoužitelným
(zapnout ho může jen dálkové ovládání).
‘ Pro zrušení: u
Dětská Poj. zvolte Vyp.
Rodičovský zámek
& Stiskněte tlačítko H,vyberte menu Zvl.
Funkce, pak Rodič.zámek:
é Musíte zadat svůj tajný přístupový kód.
Při prvním užití zadejte dvakrát kód 0711 a
poté zvolte kód podle svého výběru.Objeví se
menu.
“
Rodič. zámek: tlačítky îÏ zvolte televizní
program, který chcete uzamknout, a výběr
potvrďte stisknutím
¬.Před uzamčenými
programy nebo konektory se objeví symbol
+.Pro sledování uzamčeného programu
musíte zadat tajný kód,jinak zůstane
obrazovka černá.
Uzamčen je i přístup k menu
Nastavení.Pozor u
kódovaných programů s externím dekodérem - je
třeba uzamknout příslušný konektor EXT.
‘
Změna kódu
:
umožňuje zadání nového
čtyřmístného kódu. Druhým zadáním kód
potvrdíte.
Pokud jste svůj kód zapomněli, zadejte dvakrát
univerzální kód 0711.
(
Vše smazat: umožňuje smazání všech
uzamčených programů.
§
Vše uzamknout: umožňuje uzamčení všech
televizních programů a vnějších konektorů.
è Stisknutím tlačítka
d opustíte menu.
Hlavní Menue
• Obraz
• Zvuk
$ Zvl. Funkce
• Nastavení
Časovač
• Aut.Vyp.
• Čas 10:56
• Čas Začátku
• Čas Konce
• Č. Předvolby
• Aktivace
Hlavní Menue
• Obraz
• Zvuk
$ Zvl. Funkce
• Nastavení
Zvl. Funkce
• Časovač
$
Dětská Poj.Vyp.
• Rodic. Zámek
• Kontrast Plus
• NR
Page 98

8
Teletext
Stiskněte:
Výsledek:
Teletext je informační systém přenášený některými kanály, do něhož se nahlíží jako do novin.
Umožňuje rovněž přístup k titulkům pro sluchově postižené nebo osoby, které nerozumí jazyku
vysílání (kabelové sítě, satelitní programy…).
Vyvolání
teletextu
Volba stránky
Umožňuje vyvolání teletextu, přechod do průhledného
režimu a opuštění teletextu. Zobrazí se seznam
dostupných rubrik. Každá rubrika je označena třímístným
číslem stránky.
Pokud zvolený program nevysílá teletext, zobrazí se číslo 100 a
obrazovka zůstane černá (v tomto případě opusťte teletext a
zvolte jiný kanál).
Sestavte požadované číslo stránky pomocí tlačítek
0 až
9 nebo @ P #, b. Příklad:strana 120, zadejte
120. Číslo se zobrazí nahoře vlevo, počítadlo běží a
zobrazí se stránka. Opakováním postupu vyberete jinou
stránku.
Pokud počítadlo stále hledá, není stránka přenášena.
Zvolte jiné číslo.
Přímý
přístup k
rubrikám
Ve spodní části obrazovky jsou zobrazena barevná pole.
4 barevná tlačítka umožňují přímý přístup k příslušným
rubrikám nebo stránkám.
Pokud stránka nebo rubrika není ještě dostupná, příslušné
barevné pole bliká.
Seznam
Pro návrat k seznamu (obvykle číslo 100).
Zvětšení
stránky
Střídání
podstránek
Pro zobrazení horní části, dolní části a návrat k normální
velikosti.
Některé stránky obsahují podstránky, které se
automaticky střídají.Toto tlačítko umožňuje zastavit nebo
obnovit střídání podstránek. Nahoře vlevo se objeví
znak
_.
Skryté
informace
Oblíbené
stránky
Pro zobrazení/odstranění skrytých informací (řešení her).
Pro teletextové programy 0 až 40 můžete uložit do
paměti 4 oblíbené stránky,které budou následně přímo
dostupné prostřednictvím barevných tlačítek (červené,
zelené, žluté
a modré).
& S
tiskněte
H pro přechod do režimu oblíbených
stránek.
é Přejděte na teletextovou stránku,kterou chcete
uložit do paměti.
“ Poté držte po dobu 3 sekund některé z barevných
tlačítek. Stránka je uložena do paměti.
‘ Opakujte postup s ostatními barevnými tlačítky.
(
Když nyní přepnete na teletext,vaše oblíbené stránky
jsou zobrazeny v barevných polích ve spodní části
obrazovky. Pro návrat k obvyklým rubrikám
stiskněte H.
Pro smazání všech uložení držte d po dobu 5 sekund.
ı
TV
›
VCR
¢
MODE
Ó
TV / DVD
-
MENU
+ +
”
[
- -
%
∏
OK
12
564
879
Ø
0
ù
∫
Ÿ
.
SUBTITLEAUDIO
¤
SYSTEM MENU
Ë
SMARTSMART
ª
DVD
MENU
RADIO
3
Á
¤
0 9
-
P
+
P
Ë
›
Ó
Ÿ
MENU
Ë
Page 99

9
Formát 16:9
Váš obraz může být vysílán ve formátu 16:9 (široká obrazovka) nebo 4:3 (tradiční obrazovka).
Obraz v 4:3 může mít občas nahoře a dole černý pruh (širokoúhlý formát).
Tato funkce vám umožní zbavit se černých pruhů a vybrat optimální zobrazení obrazu.
Pokud je formát vašeho televizoru 4:3
Pokud je formát vašeho televizoru 16:9
Stisknutím tlačítka p volíte následující typy formátů:
Televizor je vybaven automatickým přepínačem, který zajišt’uje optimální zobrazení obrazu.
4:3
Obraz je reprodukován ve formátu 4:3,po stranách obrazu se objeví černý pruh.
Použitím tlačítek
îÏ můžete obraz postupně zvětšit.
Formát 14:9
Obraz je zvětšen na formát 14:9, po stranách obrazu zůstane nevelký černý pruh.
Tlačítka
îÏ vám umožní posunout spodní stranu obrazu nahoru či dolů tak,
abyste mohli sledovat titulky.
Formát 16:9
Obraz je zvětšen na formát 16:9.Tento formát je vhodný ke sledování obrazu s
černým pruhem nahoře a dole (širokoúhlý formát). Pokud chcete sledovat titulky,
použijte tlačítek
îÏ.
Obraz S Titulky
Toto nastavení vám umožní sledovat obraz formátu 4:3 na celé ploše obrazovky a
zároveň nechat titulky viditelné.Tlačítky
îÏ posunete spodní okraj obrazu
nahoru či dolů.
Super Široký
Toto nastavení vám umožní sledovat obraz formátu 4:3 na celé ploše obrazovky,
protože obraz rozšíří do stran.
Pokud chcete sledovat titulky, použijte tlačítek
îÏ.
Široký Obraz
Toto nastavení vám umožní obnovit správné rozměry obrazu vysílaného v 16:9 a
zobrazit ho na celé ploše obrazovky.
P
oznámka : při sledování DVD, pouze pokud je na obrazovce zobrazen formát obrazu
můžete použít tlačítka îÏ (jinak musíte vstoupit do menu s DVD funkcemi).
Stisknutím tlačítka
p volíte následující typy formátů:
4:3
Obraz je reprodukován ve formátu 4:3
Široký 4:3
Obraz je vertikálně zvětšen.Tento režim se používá pro zrušení černých pruhů při
sledování programu ve formátu letterbox (s černými pruhy nad a pod obrazem).
Stlačený 16:9
Obraz je vertikálně stlačený do formátu 16:9.
Page 100

10
Používání integrovaného přehrávače DVD
Vložení disku
Integrovaný přehrávač DVD umožňuje přehrávat video disky DVD i video CD, obrazové disky CD
(formát JPEG) a audio CD (včetně finalizovaných CD-R,CD-RW a CD MP3). Jednotlivé disky lze
poznat podle loga umístěného na obalu.
P
oznámka: Filmy DVD nebývají zpravidla na trhu ve stejnou dobu ve všech oblastech světa. Z tohoto důvodu
jsou přehrávače DVD vybaveny kódem zeměpisných zón. Jestliže vložíte disk vybavený oblastním kódem
odlišným od kódu vašeho přehrávače, objeví se na obrazovce upozornění. Disk nebude možno přehrávat a je
nutno jej vyjmout.
&
Otevření zásuvky
Stiskněte tlačítko EJECT (fl) umístěné na
přední straně vlevo od zásuvky.
é
Vložení disku
Položte disk do zásuvky tak, aby strana s
etiketou byla obrácena směrem vzhůru.
Přesvědčte se, zda je disk řádně usazen v
příslušném vybrání.
"
Uzavření zásuvky
Mírně zatlačte na zásuvku, nebo stiskněte
tlačítko
EJECT umístěné na straně a zásuvka se
uzavře.Disk se začne přehrávat.
‘
Automatické přehrávání
Po uzavření zásuvky se disk začne automaticky
přehrávat.Vlevo od obrazovky se objeví
stavové okénko udávající probíhající operaci,
typ disku a jeho délku.
Potom se zobrazí obsah disku.
PICTURE
 Loading...