

Page 1
1
Introduction
Ta b le of Contents
Thank you for purchasing this television set.
This handbook has been designed to help you install and operate your TV set.
We would strongly recommend that you read it thoroughly.
We hope our technology meets entirely with your satisfaction.
Installation
Presentation of the LCD Television . . . . . . . . . . . . . . . . . . . . . . . . . . . . . . . . . . . . .4
The remote control keys . . . . . . . . . . . . . . . . . . . . . . . . . . . . . . . . . . . . . . . . . . . .3
Installing your television set . . . . . . . . . . . . . . . . . . . . . . . . . . . . . . . . . . . . . . . . . .4
Quick installation . . . . . . . . . . . . . . . . . . . . . . . . . . . . . . . . . . . . . . . . . . . . . . . . . .5
Sorting programmes . . . . . . . . . . . . . . . . . . . . . . . . . . . . . . . . . . . . . . . . . . . . . . . .5
Choosing a language and country . . . . . . . . . . . . . . . . . . . . . . . . . . . . . . . . . . . . .6
Automatic tuning . . . . . . . . . . . . . . . . . . . . . . . . . . . . . . . . . . . . . . . . . . . . . . . . . .6
Programme name . . . . . . . . . . . . . . . . . . . . . . . . . . . . . . . . . . . . . . . . . . . . . . . . . .6
Manual tuning . . . . . . . . . . . . . . . . . . . . . . . . . . . . . . . . . . . . . . . . . . . . . . . . . . . . .7
Operation
Using the radio . . . . . . . . . . . . . . . . . . . . . . . . . . . . . . . . . . . . . . . . . . . . . . . . . . . . .7
Adjusting the picture . . . . . . . . . . . . . . . . . . . . . . . . . . . . . . . . . . . . . . . . . . . . . . .8
Adjusting the sound . . . . . . . . . . . . . . . . . . . . . . . . . . . . . . . . . . . . . . . . . . . . . . . .8
Feature settings . . . . . . . . . . . . . . . . . . . . . . . . . . . . . . . . . . . . . . . . . . . . . . . . . . . .8
Timer function . . . . . . . . . . . . . . . . . . . . . . . . . . . . . . . . . . . . . . . . . . . . . . . . . . . .9
Locking the set . . . . . . . . . . . . . . . . . . . . . . . . . . . . . . . . . . . . . . . . . . . . . . . . . . . .9
Teletext . . . . . . . . . . . . . . . . . . . . . . . . . . . . . . . . . . . . . . . . . . . . . . . . . . . . . . . . .10
Peripherals
Video recorder . . . . . . . . . . . . . . . . . . . . . . . . . . . . . . . . . . . . . . . . . . . . . . . . . . .11
Other equipment . . . . . . . . . . . . . . . . . . . . . . . . . . . . . . . . . . . . . . . . . . . . . . . . .11
Side connections . . . . . . . . . . . . . . . . . . . . . . . . . . . . . . . . . . . . . . . . . . . . . . . . .11
To select connected equipment . . . . . . . . . . . . . . . . . . . . . . . . . . . . . . . . . . . . .11
Tips . . . . . . . . . . . . . . . . . . . . . . . . . . . . . . . . . . . . . . . . . . . . . . . . . . . . . . . . . . .12
w
Cleaning the set
Only use a clean, soft and lint-free cloth to clean the screen and the casing of
your set.Do not use alcohol-based or solvent-based products.
EnglishFrançaisMagyarPyccÍËÈPolskiČeštinaSlovenčinaTürkçe
Page 2

2
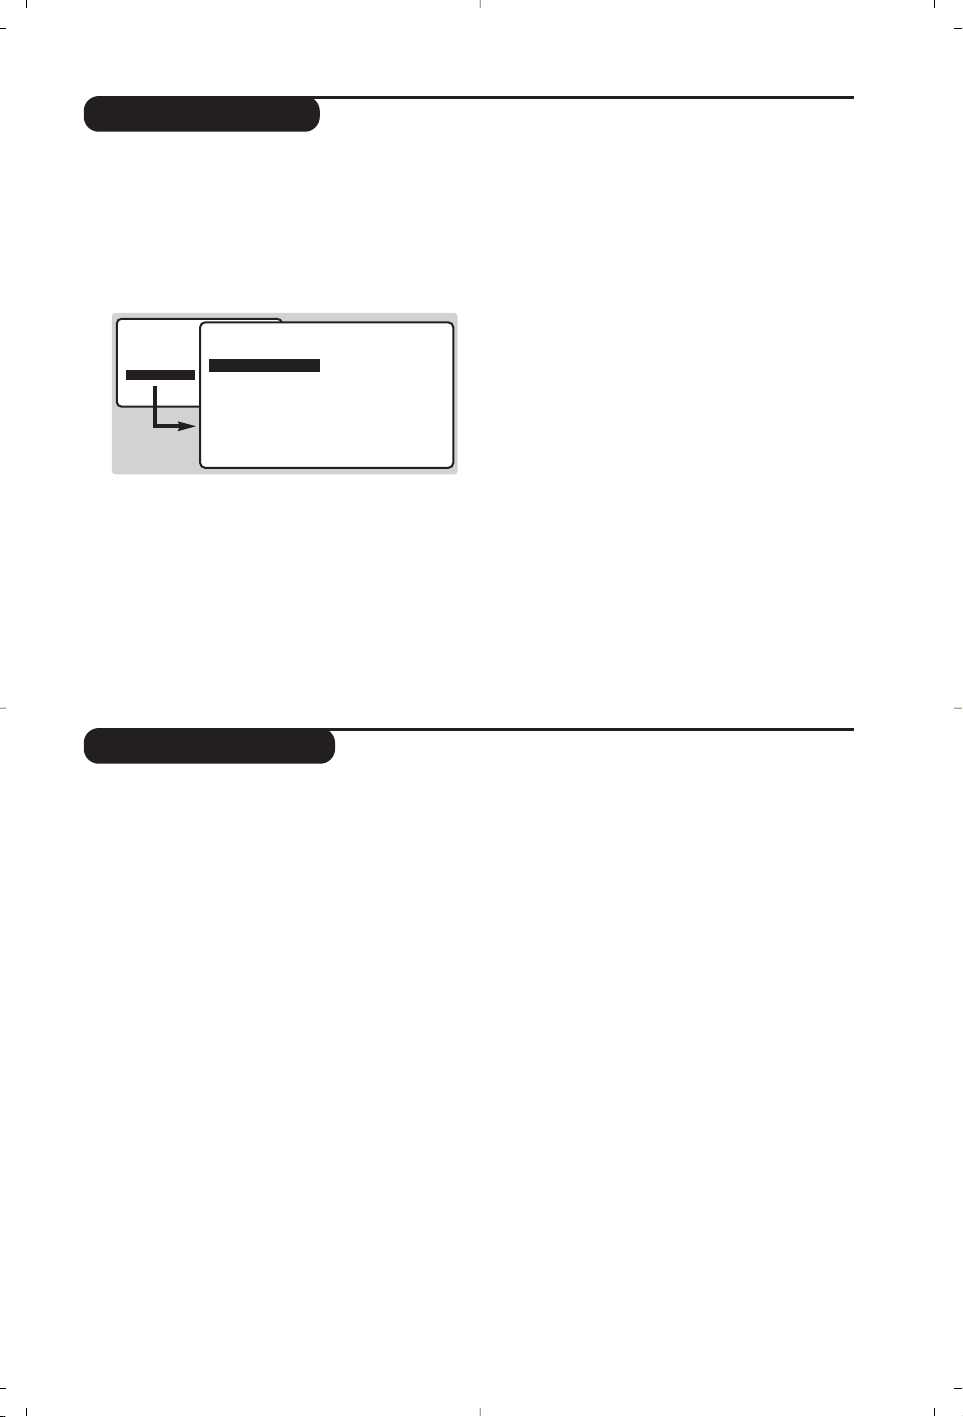
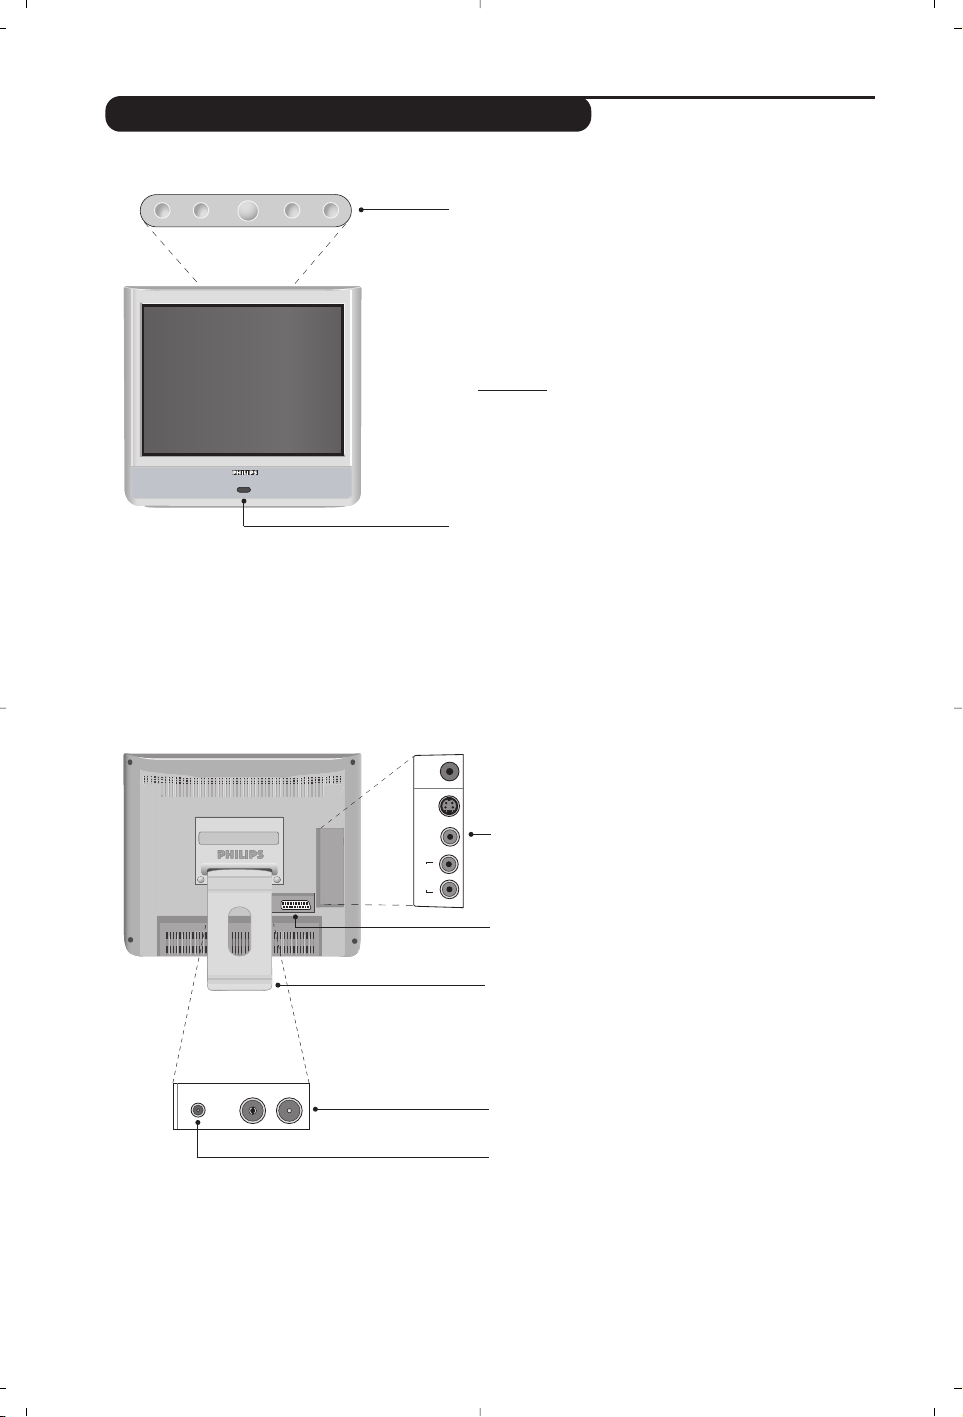
Presentation of the LCD Television
Television keys:
• .: to switch the TV on or off.
• - + : to adjust sound level.
• <> : to select programmes.
• MENU: to access or close menus,simultaneously
press the - and + keys. The <> keys can be used to
select an adjustment and the - + keys to make that
adjustment.
Note
: when the CHILD LOCK function is activated the
-+ and <> keys are unavailable (refer to FEATURES
menu on page 9).
On-light and infrared sensors.
Rear of set :
The main connections are made at the bottom of the television.
For more details on connections see page 12.
EXT1 socket
Side connections
Adjustable stand.
The stand can be removed and replaced with a
wall mounting kit available as an option (ask your
dealer).
TV and radio aerial sockets
DC supply socket
<
-
.
+
<
*
S
Video
EXT1
Video
Audio
in
L
in
R
:
DC in
FM ANT
Page 3
3
12
MENU
”
P
564
879
0
3
--
++
.
[
Ÿ
Á
-
ª
`
ù
SMART
SMART RADIO
Ë
¤
ı
Y
Ó
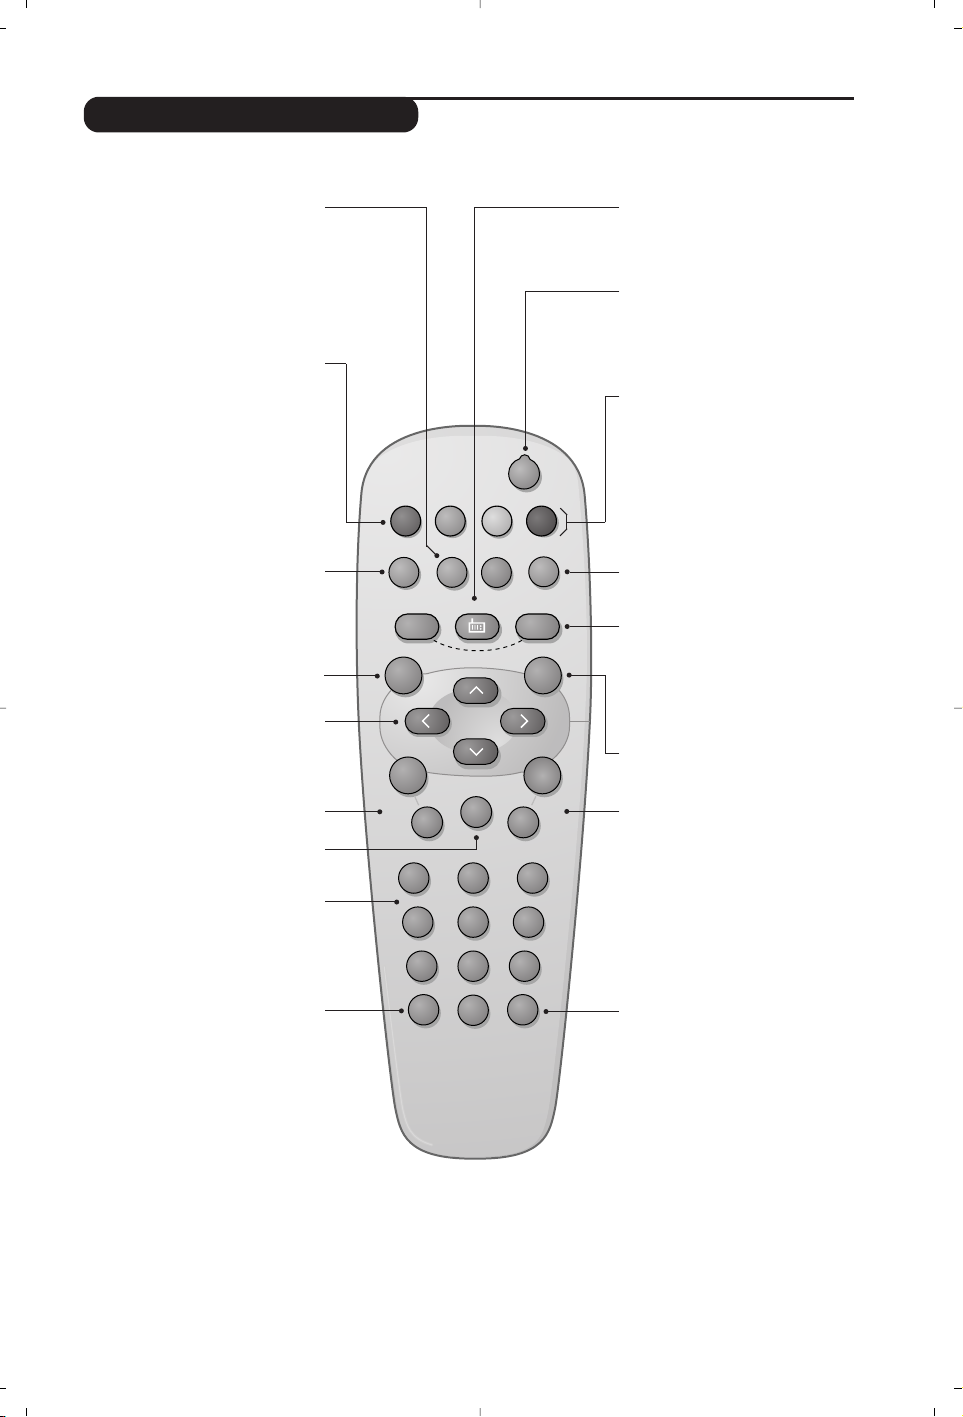
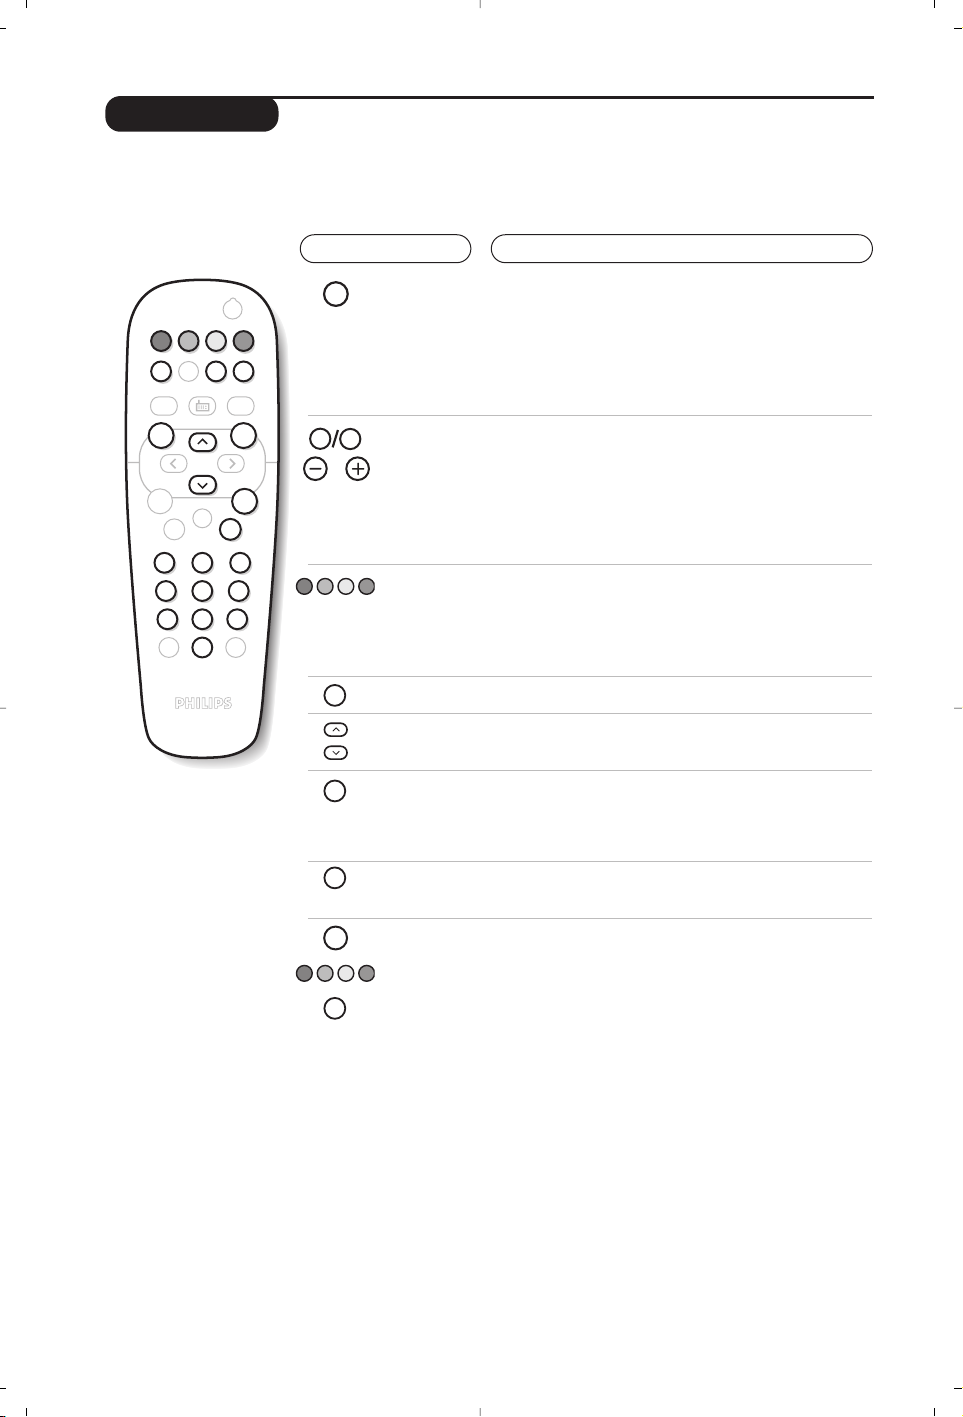
Remote control keys
ı List of programmes
To display/clear the list of programmes.
Use the keys îÏ to select a
programme and the key ¬to display it.
The symbol + is displayed alongside
all programmes which are locked (p.9) or
? if they are not locked.
Screen information
To display / remove the programme
number, the name (if it exists),the
time, the sound mode and the time
remaining on the timer. Hold down
for 5 seconds to permanently
display the programme number on
the screen.The volume level and the
smart control adjustments are then
displayed each time they are used.
Menu
To call up or exit the menus.
Sleeptimer
To select the length of time before
the set automatically switches to
standby (from 0 to 240 minutes).
Cursor / Format 16:9
These 4 keys are used to navigate
through the menus.The Ȭ
keys are used to enlarge or
compress the picture vertically.
Volume
To adjust the sound level.
Mute
To mute or restore the sound.
Select peripherals (p.11)
Press several times to select the
required EXT connector.
Numerical keys
For direct access to programmes.
For a 2 digit programme number,
the 2nddigit must be entered
before the dash disappears.
Standby
To set the TV to standby mode.
To switch the TV set on again,
press b,P @#or 09.
Radio / TV mode
To switch the TV set to radio or
TV mode .
Teletext (p. 10)
Teletext keys (p.10)
Smart picture and sound
Used to access a series of
predefined
picture and sound
settings.
The PERSONAL position relates to
settings selected from the menus.
Selecting TV programmes
To move up or down a programme.
The number, (the name) and the
sound
mode are displayed for a few
seconds.
For some TV programmes the title of
the programme appears at the
bottom of the screen.
Previous programme
To access the previously viewed
programme.
Sound mode
Used to force programmes in STEREO
and
NICAM STEREO to MONO or,
for bilingual programmes, to choose
between
DUAL I or DUAL II.
When the sound mode is switched to
MONO, the indication is displayed in red.
Page 4
4
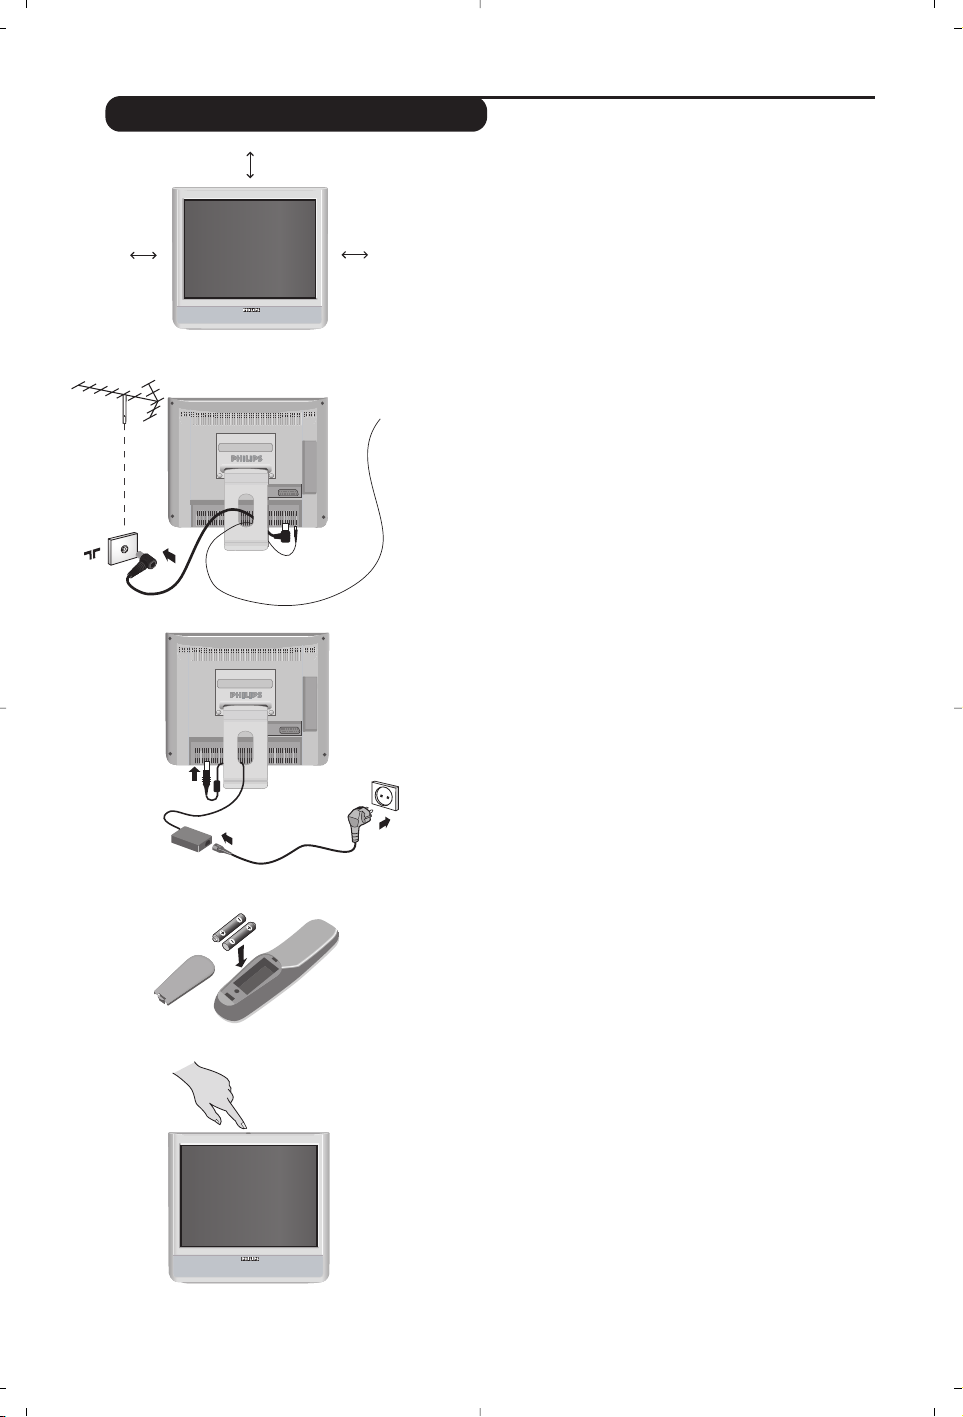
& Positioning the television set
Place your TV on a solid stable surface. To avoid
danger do not expose the TV to water,or a heat
source (e.g. lamp,candle, radiator). Do not obstruct
the ventilation grid at the rear.
é
Connecting the aerials
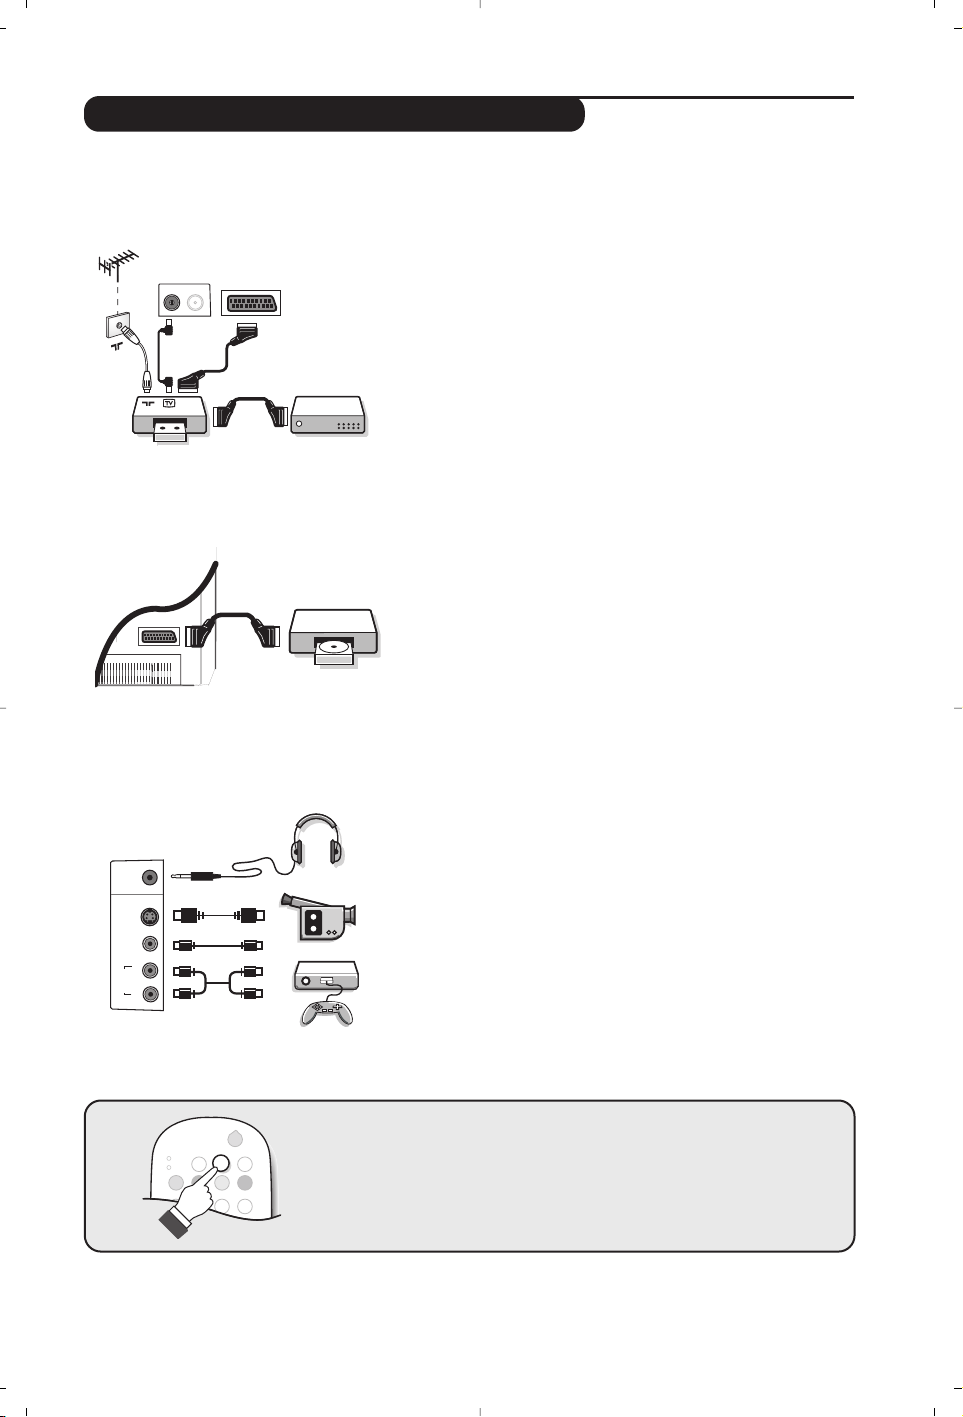
• Connect the : socket situated at the bottom
of the TV to your aerial socket.
• Insert the radio aerial lead supplied into the FM
ANT socket located at the bottom of the TV.
• Arrange the leads by passing them through the
television stand.
“
Power supply connections
The TV works with a DC supply (the voltage is
indicated on the label). Only use the AC-DC
adaptor supplied with the TV.
• Connect the DC plug of the adaptor to the TV DC
socket. Leave a space round the adaptor for
ventilation.
• Insert the adaptor power lead and insert the mains
plug into the wall socket.
For connecting other appliances see page p.12.
‘
Remote control
Insert the two R6-type batteries supplied, making
sure they are the right way round.
The batteries supplied with the appliance do not
contain mercury or nickel cadmium so as to protect
the environment. Please do not discard your used
batteries, but use the recycling methods available
(consult your distributor).
(
Switching on
To switch on the set, press the on/off key.
A green indicator comes on and the screen lights
up. Go straight to the Quick Installation chapter on
page 5. If the TV remains in standby mode (red
indicator), press the P
# key on the remote
control.
The indicator will flash when you use the remote control.
Installing your television set
5 cm
5 cm
5 cm
FM ANT.
Page 5
5
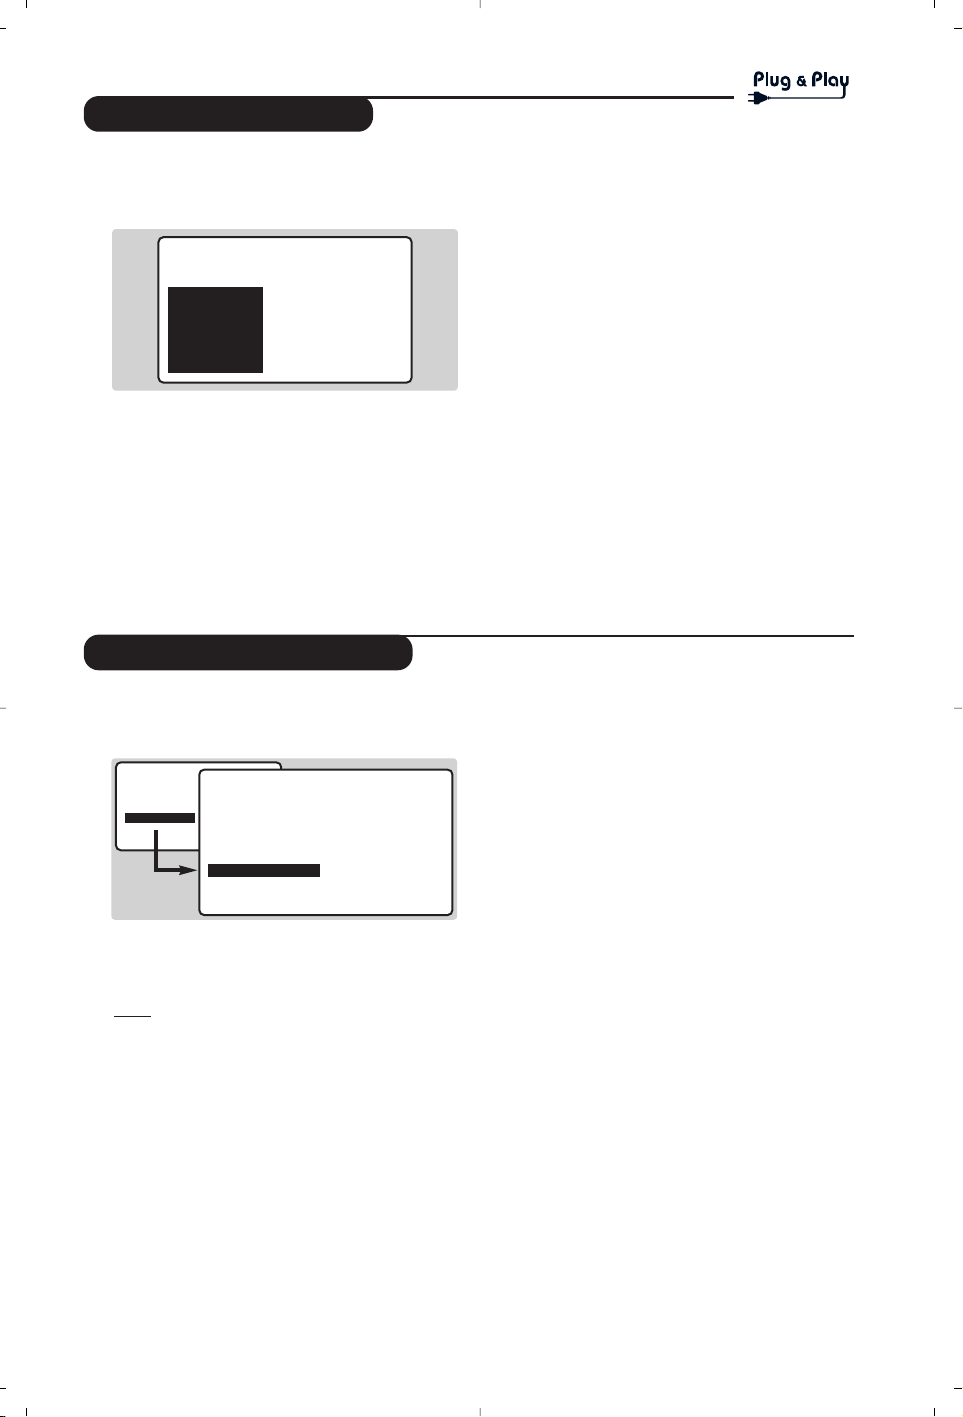
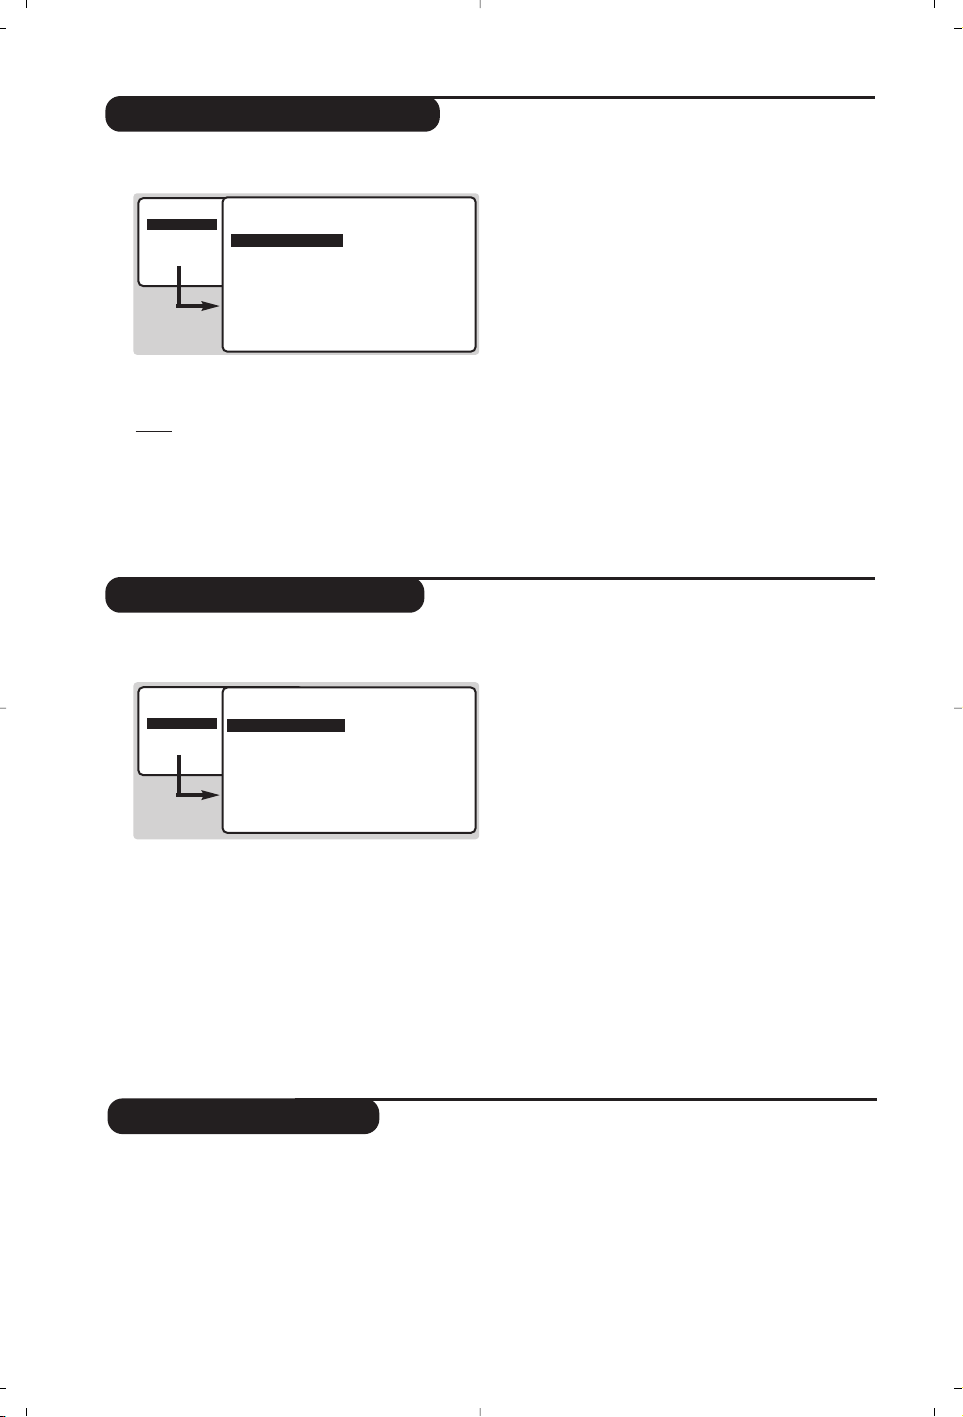
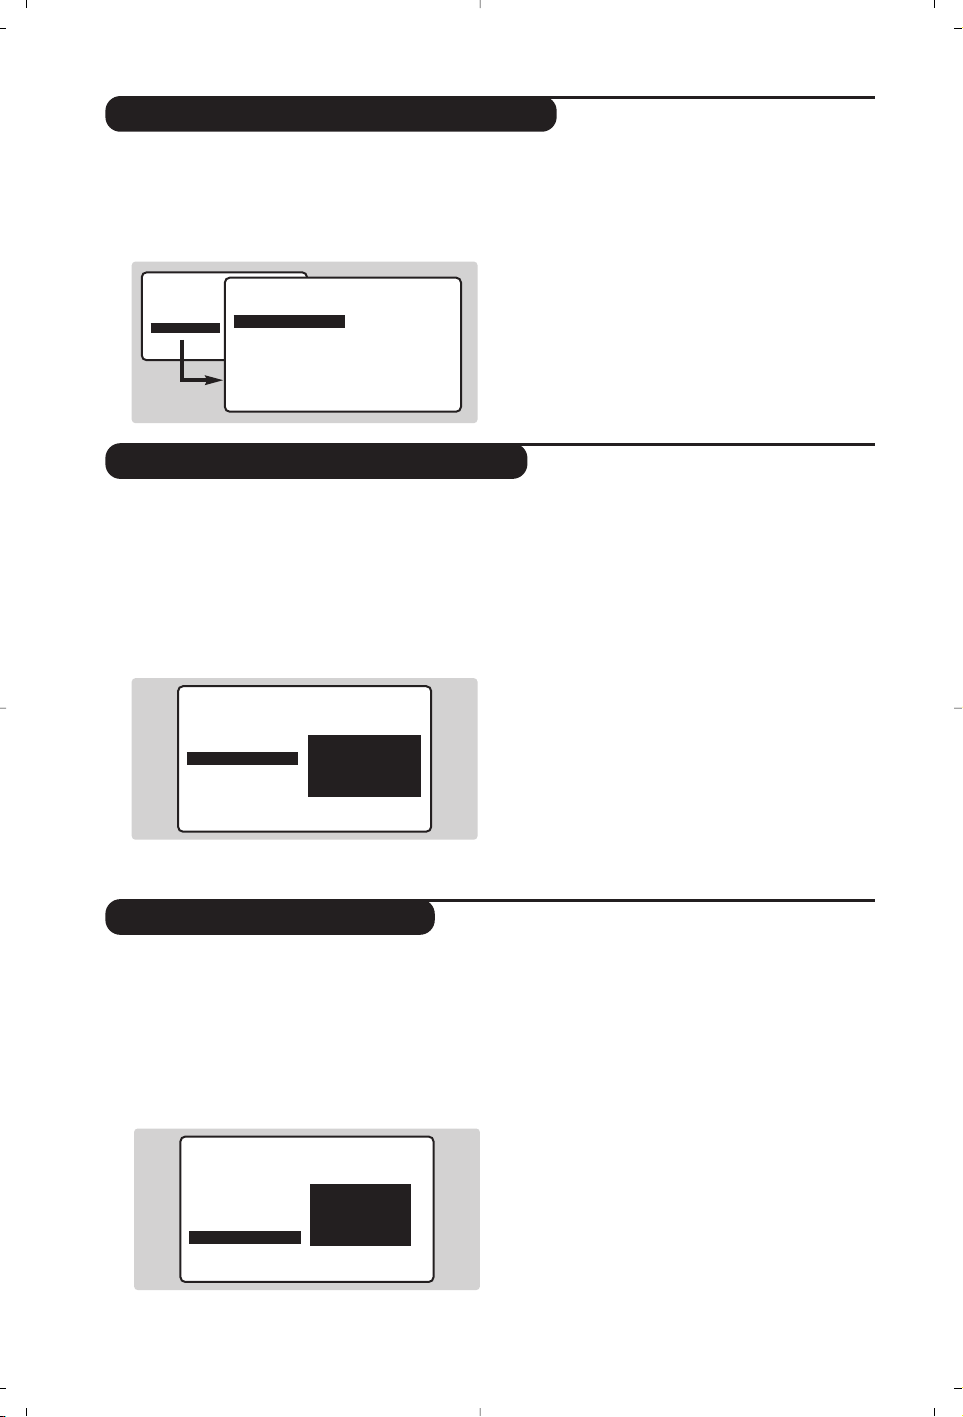
Quick installation
Sorting programmes
The first time you switch on the television,a
menu appears on the screen.This menu asks
you to choose the language of the menus :
If the menu does not appear, hold down the - and +
keys on the set for 8 seconds to bring it up.
& Use the îÏ keys on the remote control to
choose your language then confirm with
¬.
é Then select your country using the
îÏ
keys and confirm with ¬.
If your country does not appear in the list, select “. . .”
“ Tuning starts automatically.
The operation takes several minutes.
A display shows the search status and the
number of programmes found.When it has
finished the menu disappears.
To exit or interrupt the search, press the
H key.
If no programmes are found, refer to the chapter
entitled Tips on p. 12.
‘ If the transmitter or the cable network
broadcasts the automatic sort signal, the
programmes will be correctly numbered.
( If not, the programmes found will be numbered
in descending order starting at 99, 98, 97, etc.
Use the SORT menu to renumber them.
Some transmitters or cable networks broadcast
their own sort parameters (region, language,etc.).
Where this is the case, make your choice using the
îÏ keys and confirm with ¬.
& Press the H key.The main menu is displayed.
é Select INSTALL (
Ï), then press ¬.
The INSTALL menu appears.
“ Using the
Ï key, select SORT then press
¬.The SORT menu appears.The FROM
option is activated.
Note:
this menu works as follows:
• Change "FROM" (enter the current programme
number),
• "TO" (enter the new number),
• EXCHANGE numbers" (the operation is carried out).
‘ Select the programme you wish to renumber
using
Ȭ keys or 0 to 9.
Example: to renumber programme 78 as
2 press
78.
( Select TO (using
Ï key) and enter the new
number with
Ȭ keys or 0 to 9
(for the example given, enter 2).
§ Select EXCHANGE (
Ï key) and press ¬.
The message EXCHANGED appears, the
exchange takes place. In our example,
programme 78 is renumbered as 2
(and programme 2 as 78).
è Select the option FROM (
î key) and repeat
stages ‘ to § as many times as there are
programmes to renumber.
! To exit from the menus, press
d.
• PICTURE
• SOUND
• FEATURES
• INSTALL
INSTALL
• LANGUAGE
• COUNTRY
• AUTO STORE
• MANUAL STORE
• SORT
• NAME
FROM
TO
EXCHANGE
SELECT LANGUAGE
LANGUAGE
•
ENGLISH
DANSK
NEDERLANDS
FINNISH
FRANCAIS
COUNTRY
AUSTRIA
BELGIUM
SWITZERLAND
GERMANY
DENMARK
Page 6

6
Programme name
You may, if you wish,give a name to the first
40 programmes (from 1 to 40).
& Press
H
.
é Select INSTALL (
Ï), then press ¬.
The INSTALL menu appears.
“ Press
Ï 5 times to select NAME (concealed
at the bottom of the screen), then press
¬.
The menu appears :
‘ Select the programme you wish to name using
the keys
09or @ P #.
Note:
at the time of installation, the programmes
are automatically named when the identification
signal is transmitted.
( Use the keys
Ȭ to move within the
name display area (5 characters).
§ Use keys
îÏ to choose the characters.
è Press
H when the name has been entered.
The programme name is stored.
! Repeat steps ‘ to è for each programme to
be named.
ç To exit from the menus, press
d.
INSTALL
• LANGUAGE
• COUNTRY
• AUTO STORE
• MANUAL STORE
• SORT
•
NAME
BBC_1
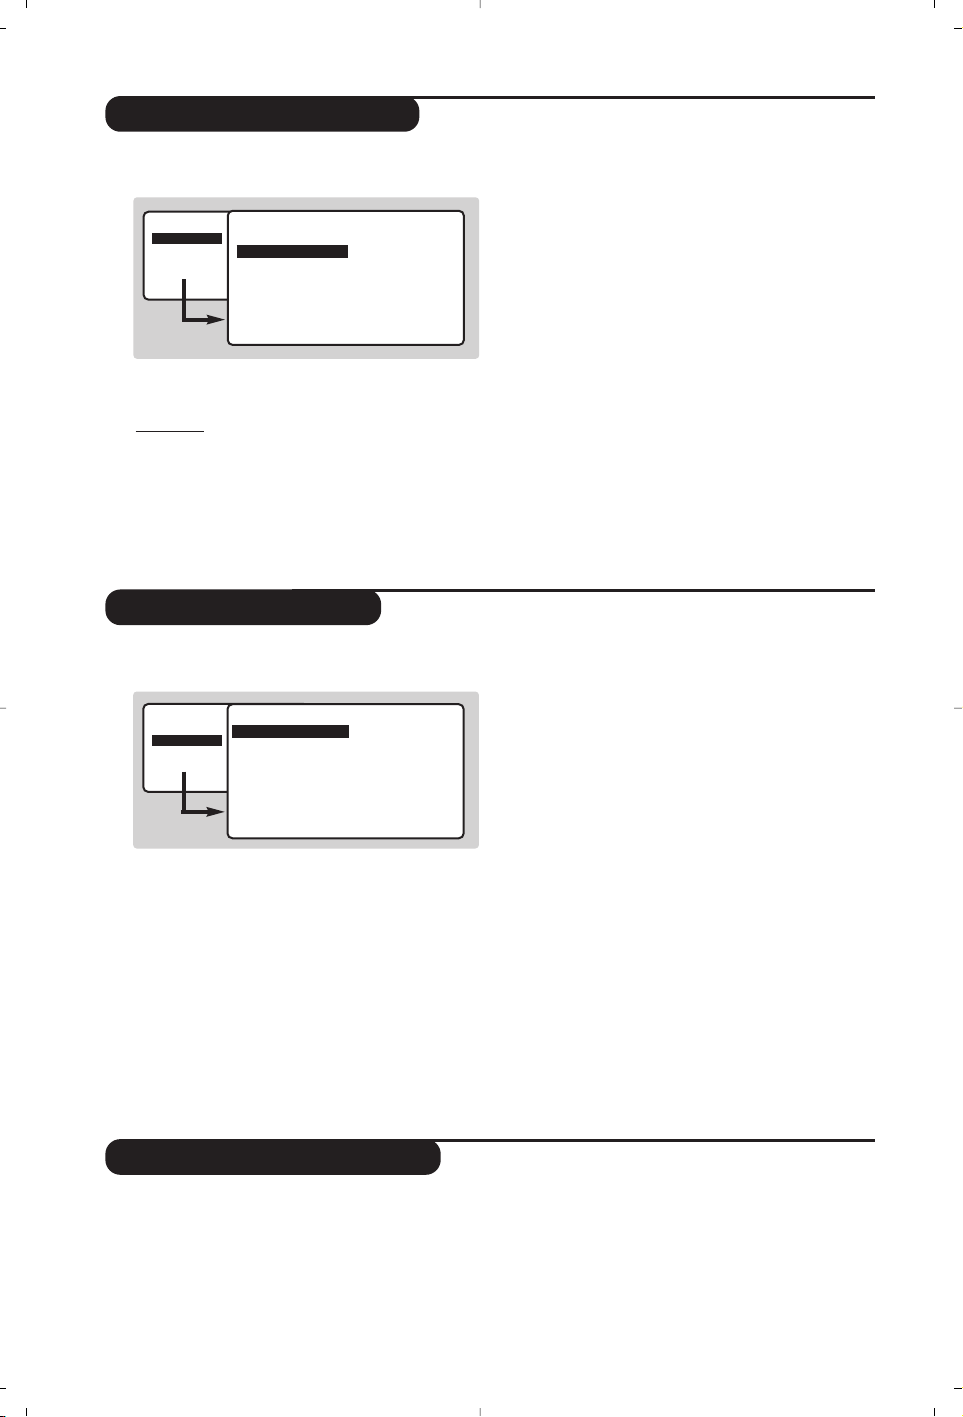
Choosing a language and country
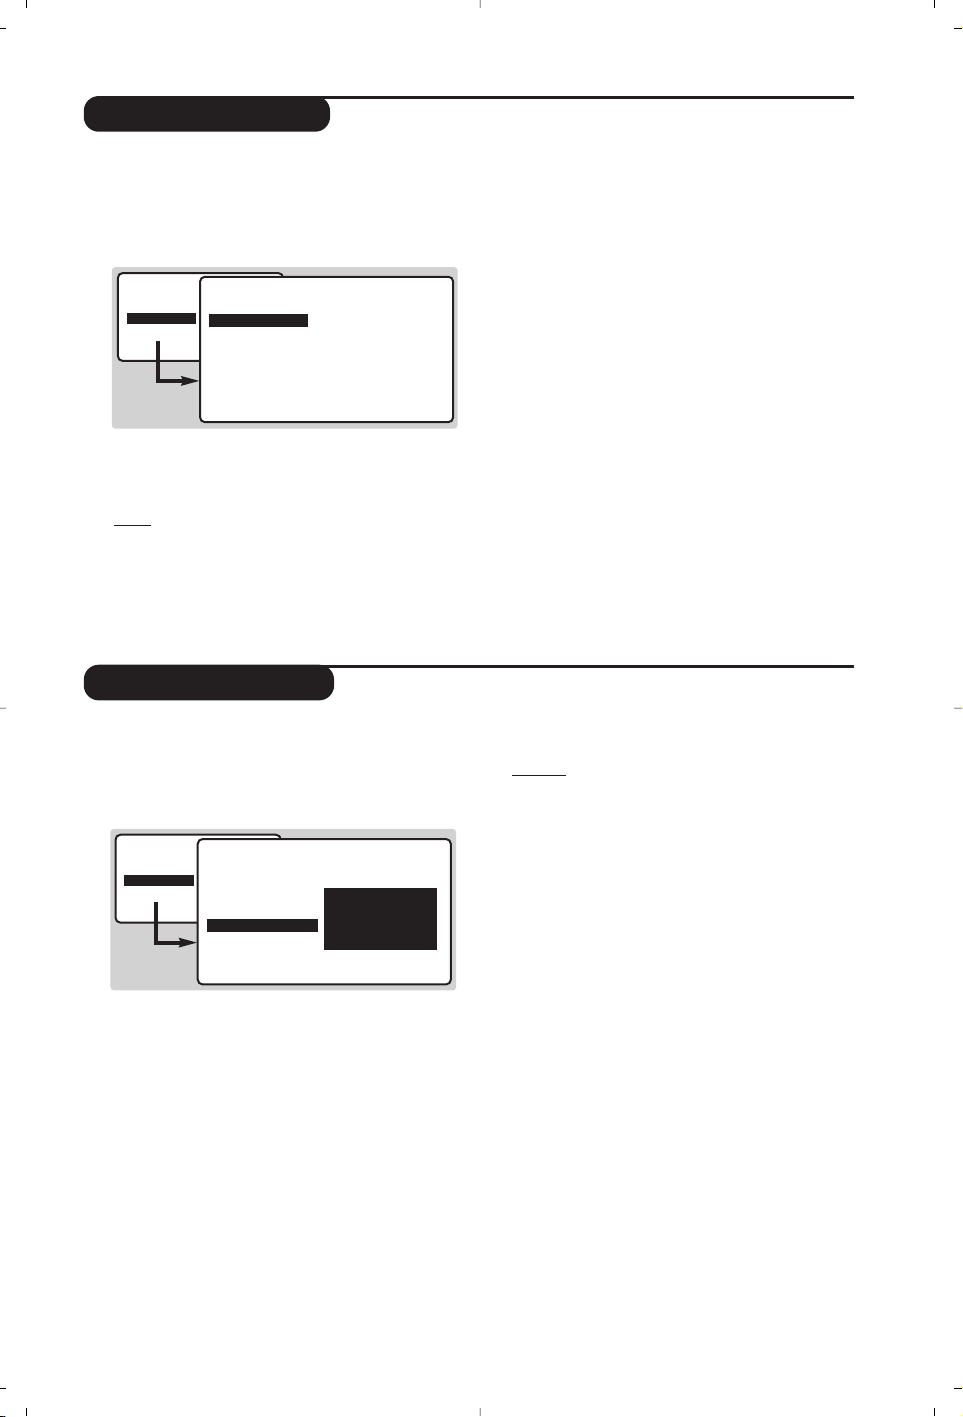
Automatic tuning
& Press the H key to display the main menu.
é Select INSTALL (
Ï), then press ¬.
The INSTALL menu appears.
The LANGUAGE option is activated.
“ Press
¬ to go into the LANGUAGE menu.
‘ Select your language with the
îÏ keys.
The menus will appear in the chosen language.
( Press
È to exit the LANGUAGE menu.
§ Select the option COUNTRY and press
¬.
è Select your country with
îÏ keys.
If your country does not appear in the list, select
OTHER.
! Press
È to exit the COUNTRY menu.
ç To exit from the menus, press
d.
This menu allows you to automatically search
for all the programmes available in your region
(or on your cable network).
& First carry out operations & to ! above, then:
é Press
Ï once to select AUTO STORE then
press
¬.The search begins.
After several minutes,the INSTALL menu
reappears automatically.
“ If the transmitter or the cable network
broadcasts the automatic sort signal, the
programmes will be correctly numbered.
‘ If not, the programmes found will be
numbered in descending order starting at 99,
98, 97, etc.
Use the SORT menu to renumber them.
Some transmitters or cable networks broadcast
their own sort parameters (region, language,etc.).
Where this is the case, make your choice using the
îÏ keys and confirm with ¬.
To exit or interrupt the search, press the
H key.
If no picture is found, refer to the chapter entitled
Tips on p. 12.
( To exit from the menus, press
d.
• PICTURE
• SOUND
• FEATURES
• INSTALL
INSTALL
• LANGUAGE
• COUNTRY
• AUTO STORE
• MANUAL STORE
• SORT
•
NAME
ENGLISH
DANSK
NEDERLANDS
INSTALL
• LANGUAGE
• COUNTRY
• AUTO STORE
• MANUAL STORE
• SORT
•
NAME
SEARCHING
PLEASE WAIT
PROG. NO. 2
215.18 MHZ
Page 7
7
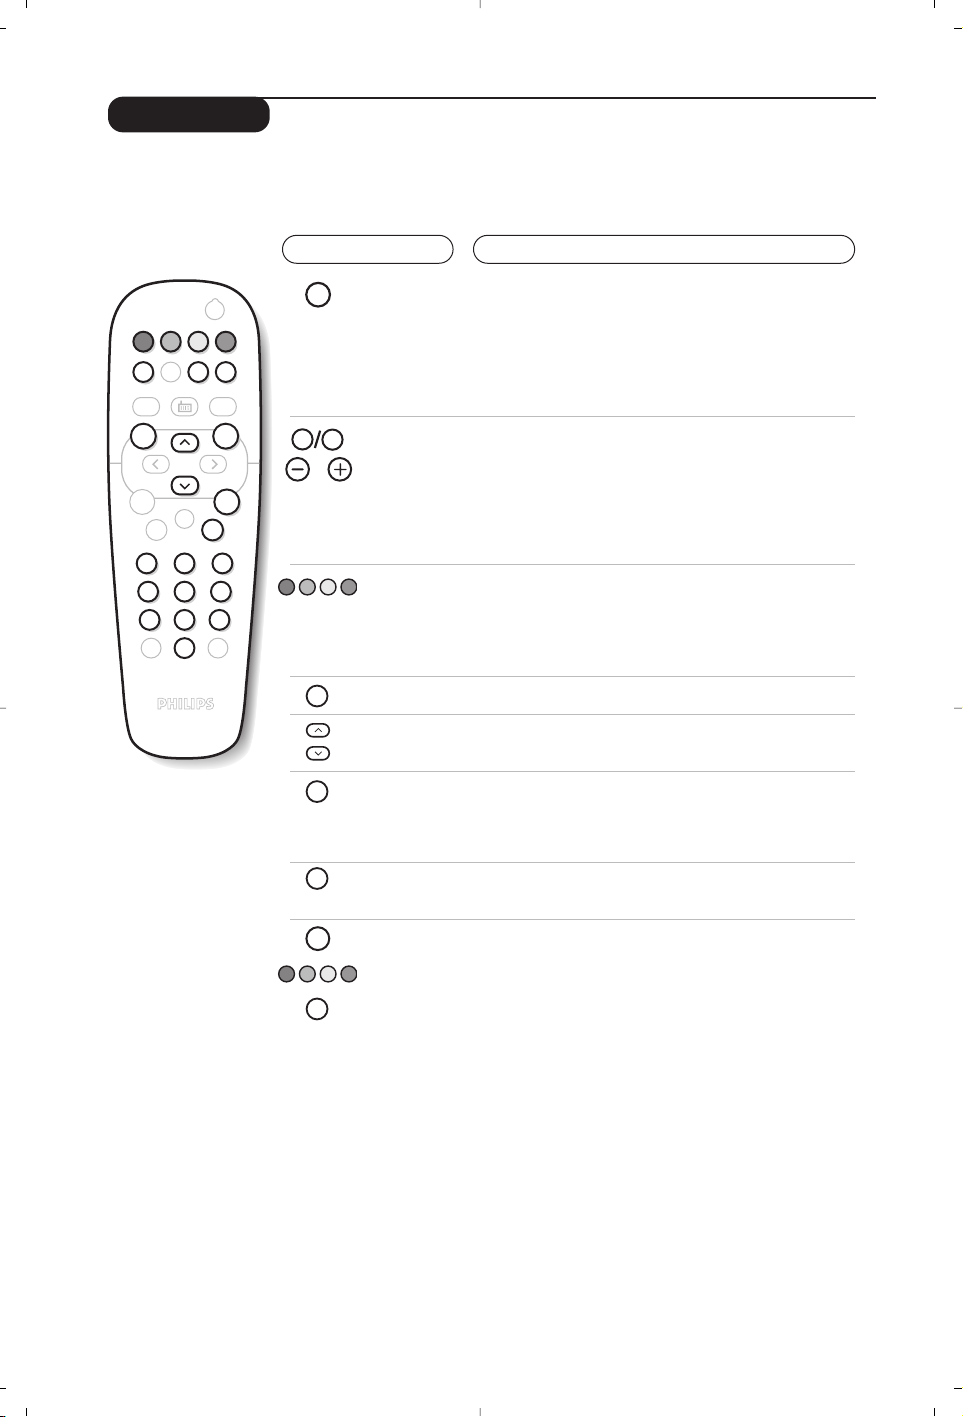
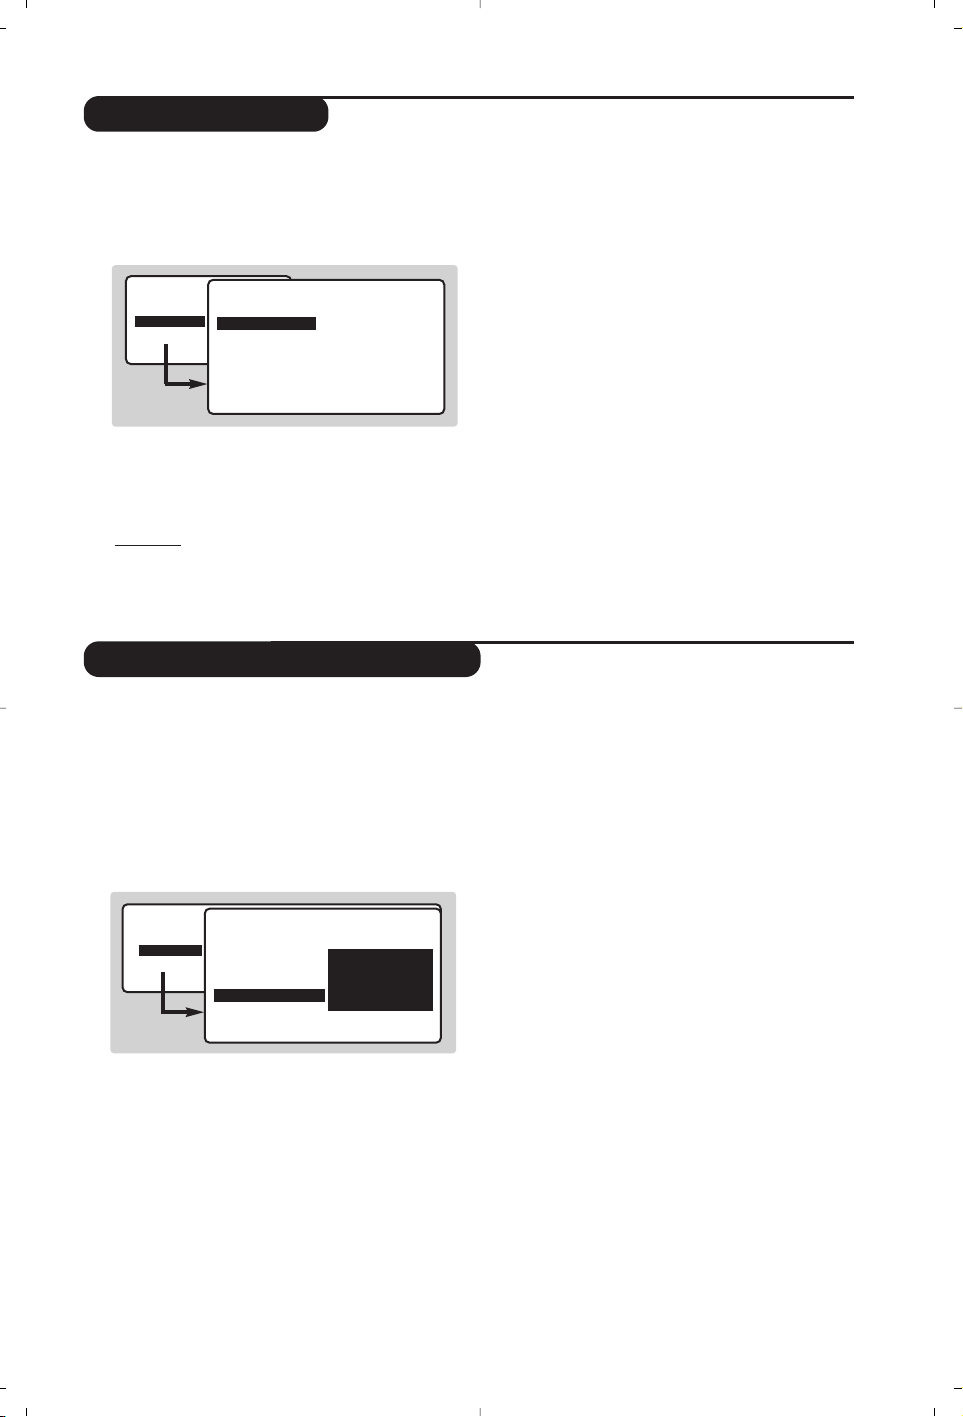
Manual tuning
This menu allows you to store the
programmes one by one.
& Press
H.
é Select INSTALL (
Ï), then press ¬.
The INSTALL menu appears.
“ Select MANUAL STORE (
Ï) then press ¬.
The menu appears :
‘ Press
¬ to go to the SYSTEM menu.
Use
îÏ to choose EUROPE (automatic
detection*) or manual detection with WEST
EUR (standard BG reception), EAST EUR
(standard DK reception), UK (standard I
reception) or FRANCE (standard LL').
Then press
È to exit from the menu.
* Except for France (standard LL'): select the
option FRANCE.
( Select SEARCH and press
¬.
The search begins.As soon as a programme is
found, the search will stop. If you know the
frequency of the programme required, enter
its number directly using the
09keys and
go to step è.
If no programme is found, refer to the Tips chapter
on page 12).
§ If reception is un-satisfactory, select FINE
TUNE and hold down
È or ¬ key.
è Select PROG. NO (programme number) and
use the
Ȭor 0 to 9 keys to enter
the desired number.
! Select STORE and press
¬.The message
STORED appears.The programme is stored.
ç Repeat steps ( to ! for each programme to
be stored.
To exit: press the
d key.
• PICTURE
• SOUND
• FEATURES
• INSTALL
INSTALL
MANUAL STORE
• SYSTEM
• SEARCH
• PROG. NO.
• FINE TUNE
• STORE
EUROPE
WEST EUR
EAST EUR
UK
FRANCE
Using the radio
Choosing radio mode
Press the
 key on the remote control to
switch the TV to radio mode.
In radio mode the number and name of the
station (if available), its frequency and the
sound mode are indicated on the screen.
To enter the name of the stations use the NAME
menu. (p. 7)
Selecting programmes
Use the
09or @ P # keys to select the
FM stations (from 1 to 40).
List of radio stations
Press the ıkey to display / hide the list of
radio stations.Then use the cursor to select a
station.
Using the radio menus
Use the
H key to access the specific radio
settings.
Searching radio stations
If you have used the quick installation all the
available FM stations will be stored.To start a
new search use the INSTALL menu :
AUTO STORE (for a complete search) or
MANUAL STORE (for a station by station
search).
The SORT and NAME menus let you classify
or name the radio stations.These menus work
in exactly the same way as the TV menus.
Screen saver
In the FEATURES menu you can activate /
close the screen saver.The time, the frequency
of the station and its name (if available) move
across the screen.
Page 8
8
Adjusting the picture
Adjusting the sound
& Press H then ¬.
The
PICTURE menu appears :
é Use
îÏ keys to select a setting and
Ȭ keys to adjust.
Note: the menu is a scroll-down menu.
Keep the key Ï held down to access the
settings hidden at the bottom of the screen.
“ Once the necessary adjustments have been
made, select the option
STORE and press ¬
to store them.
‘ To exit from the menus, press
d.
Description of the settings:
•
BRIGHTNESS: alters the brightness of the
image.
•
COLOUR: alters the colour intensity.
•
CONTRAST: alters the variation between
light and dark tones.
•
SHARPNESS
: alters the crispness of the image.
• STORE:stores the picture settings.
• NR: attenuates picture noise (snow) in
difficult reception conditions.
•
CONTRAST + :To activate / de-activate the
automatic contrast adjustment system
(the dark areas are made darker whilst
maintaining the detail).
& Press H, select the
SOUND option (
Ï) and
press
¬.The SOUND menu appears :
é Use
îÏ keys to select a setting and keys
Ȭ to adjust.
“ Once the necessary adjustments have been
made, select the option
STORE and press ¬
to store them.
‘ To exit from the menus, press
d.
Description of the settings:
•
EQUALIZER: to adjust the sound tone (from
bass: 120 Hz to treble:10 kHz).
•
BALANCE: to balance the sound between the
left and right speakers.
• DELTA VOLUME (volume difference):allows you
to compensate for the volume differences
between the different programmes or the
EXT sockets.This setting is available for
programmes 1 - 40 and the EXT sockets.
Use the
@ P # keys to compare the level
of different programmes.
•
STORE:stores the sound settings.
•
AVL : automatic volume control used to avoid
sudden increases in volume,particularly when
changing programmes or during advertisements.
• INCR. SURROUND:To activate / deactivate the
surround sound effect.In stereo, this gives the
impression that the speakers are further apart.
In mono,a stereo spatial effect is simulated.
• PICTURE
• SOUND
• FEATURES
• INSTALL
PICTURE
• BRIGHTNESS
• COLOUR
• CONTRAST
• SHARPNESS
• STORE
• NR
• CONTRAST+
--I------ 39
• PICTURE
• SOUND
• FEATURES
• INSTALL
SOUND
• EQUALIZER
•
BALANCE
• DELTA VOLUME
• STORE
• AVL
• INCR. SURROUND
120 HZ
500 HZ
1500 HZ
5 KHZ
10 KHZ
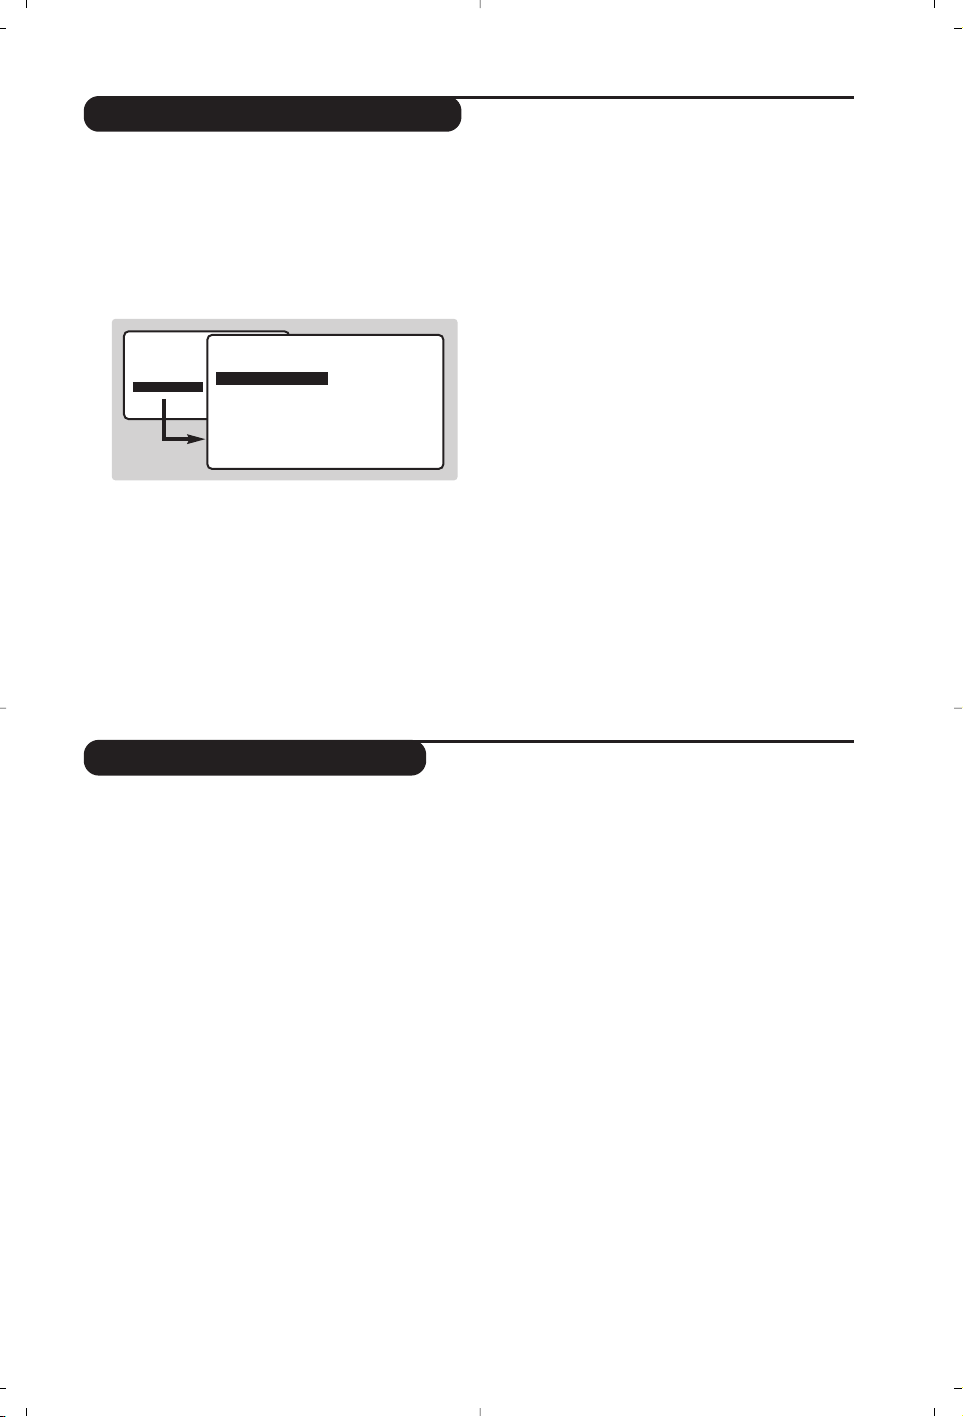
Feature settings
& Press H, select FEATURES (Ï) and press
¬.You can adjust:
é
TIMER, PARENTAL. CONT. and CHILD LOCK :
see next page
“
MODE SELECT.: to switch the TV in radio or
TV.
‘ To quit the menus, press
d.
Page 9
9
Timer function
Locking the set
This menu allows you to use your TV as an
alarm clock.
& Press
H.
é Select
FEATURES (
Ï) and press ¬ twice.
The
TIMER menu appears :
“ Press ¬ to enter and exit the sub-menus
and use keys
îÏ to adjust:
‘
TIME: enter current time.
Note: the time is updated automatically each time
the set is switched on using teletext information
taken from programme 1. If programme 1 does
not have teletext, the update will not take place.
(
START TIME
: enter the start time.
§
STOP TIME:enter the stop time.
è
PROG.NO.
: enter the number of the
programme for the wake-up alarm.For models
equipped with a radio, you can select an FM
station by using the
Ȭ keys (the 09
keys are only used to select TV programs).
!
ACTIVATE:you can set the alarm to be
activated:
•
ONCE ONLY for a one-off alarm,
•
DAILY for a daily alarm or
•
OFF
to cancel.
ç Press
b to set the TV to standby. It will
automatically switch on at the time
programmed. If you leave the TV switched on,
it will only change programme at the time
indicated.
The combination of the CHILD LOCK and TIMER
functions may be used to limit the length of time
your television is in use, for example, by your
children.
You can bar access to certain programmes or
completely lock the set by locking the keys.
Locking programmes
& Press H.
é Select (
Ï) and press ¬.
“ Select
PARENTAL. CONT. (Ï) and press ¬.
‘ Enter your confidential access code.The first
time, enter the code 0711 then confirm by
re-entering 0711.The menu appears.
( Press
¬ to go into the menu.
§ Use keys
îÏ to select the required
programme and confirm with
¬.The symbol
+ is displayed alongside the programmes or
sockets that have been locked.
è Press
d to exit.
To watch a programme which has been locked
you will now need to enter the confidential
code; otherwise the screen will remain blank.
The INSTALL menu access is also locked.
Caution:
in the case of encrypted programmes
which use an external decoder, it is necessary to
lock the corresponding EXT socket.
To unlock all programmes
Repeat stages & to ‘ above,then select
CLEAR ALL and press ¬.
To change the confidential code
Repeat stages & to ‘ above,then:
( Select CHANGE CODE and enter your own
4-digit number.
§ Confirm by entering it again.
Your new code will be stored.
è Press
d to exit from the menus.
If you have forgotten your confidential code, enter
the universal code 0711 twice.
Locking the keys
& Press H, select FEATURES (Ï) and press ¬.
é Select
CHILD LOCK (Ï) and press ¬ to set
the lock to
ON.
“ Switch off the set and put the remote control
out of sight.The set cannot be used (it can only
be switched on using the remote control).
‘ To cancel: switch
CHILD LOCK to OFF.
• PICTURE
• SOUND
• FEATURES
• INSTALL
FEATURES
TIMER
• TIME
• START TIME
• STOP TIME
• PROG; NO;
• ACTIVATE
10:56
• PICTURE
• SOUND
• FEATURES
• INSTALL
FEATURES
• TIMER
• MODE SELECT
• CHILD LOCK
• PARENTAL CONT
ACCES CODE
- - - -
Page 10
10
Teletext
Press :
You will obtain:
Teletext is an information system broadcast by certain channels which can be consulted like a
newspaper. It also offers access to subtitles for viewers with hearing problems or who are not familiar
with the transmission language (cable networks, satellite channels, etc.).
Teletext
on/off
Selecting
a page
This is used to call teletext, change to transparent mode and
then exit.The summary appears with a list of items that can be
accessed. Each item has a corresponding 3 digit page number.
If the channel selected does not broadcast teletext, the indication
100 will be displayed and the screen will remain blank (in this
case, exit teletext and select another channel).
Enter the number of the page required using the
0 to 9 or
@ P # keys. Example: page 120,enter 120.The
number is displayed top left,the counter turns and then the
page is displayed.Repeat this operation to view another page.
If the counter continues to search, this means that the page is not
transmitted. Select another number.
Contents
Direct
access to
the items
This returns you to the contents page (usually page 100).
Coloured areas are displayed at the bottom of the screen.
The 4 coloured keys are used to access the items or
corresponding pages.
The coloured areas flash when the item or the page is not yet
available.
Enlarge
a page
This allows you to display the top or bottom part of the
page and then return to normal size.
Stop sub-page
acquisition
Hidden
information
Certain pages contain sub-pages which are automatically
displayed successively.This key is used to stop or resume
sub-page acquisition.The indication _ appears top left.
To display or hide the concealed information (games
solutions).
Favourite
pages
Instead of the standard coloured areas displayed at the
bottom of the screen, you can store 4 favourite pages on the
first 40 channels which can then be accessed using the
coloured keys (red, green, yellow, blue). Once set, these
favourite pages will become the default every time tetetext is
selected.
& Press the
H
key to change to favourite pages mode.
é Display the teletext page that you want to store.
“ Press d then the coloured key of your choice.
The page is stored.
‘ Repeat steps é and “ for the other coloured keys.
( Now when you consult teletext,your favourite pages
will appear in colour at the bottom of the screen.
To temporaly retrieve the standard items,press
H.
To clear everything, and return the standard items as the
default, press dfor 5 seconds.
Ë
SMART RADIO SMART
MENU
+
[
”
-
123
4
56
789
Ø
0
.
¤
ŸÓù
ª-
¤
0
9
P
+
P
-
Á
Ë
Ó
Ÿ
MENU
Ë
Page 11
11
MODE
VCR
DVD
·¢Ê Æ
∫
Ó
ı
Ω∆
.
Z
¤
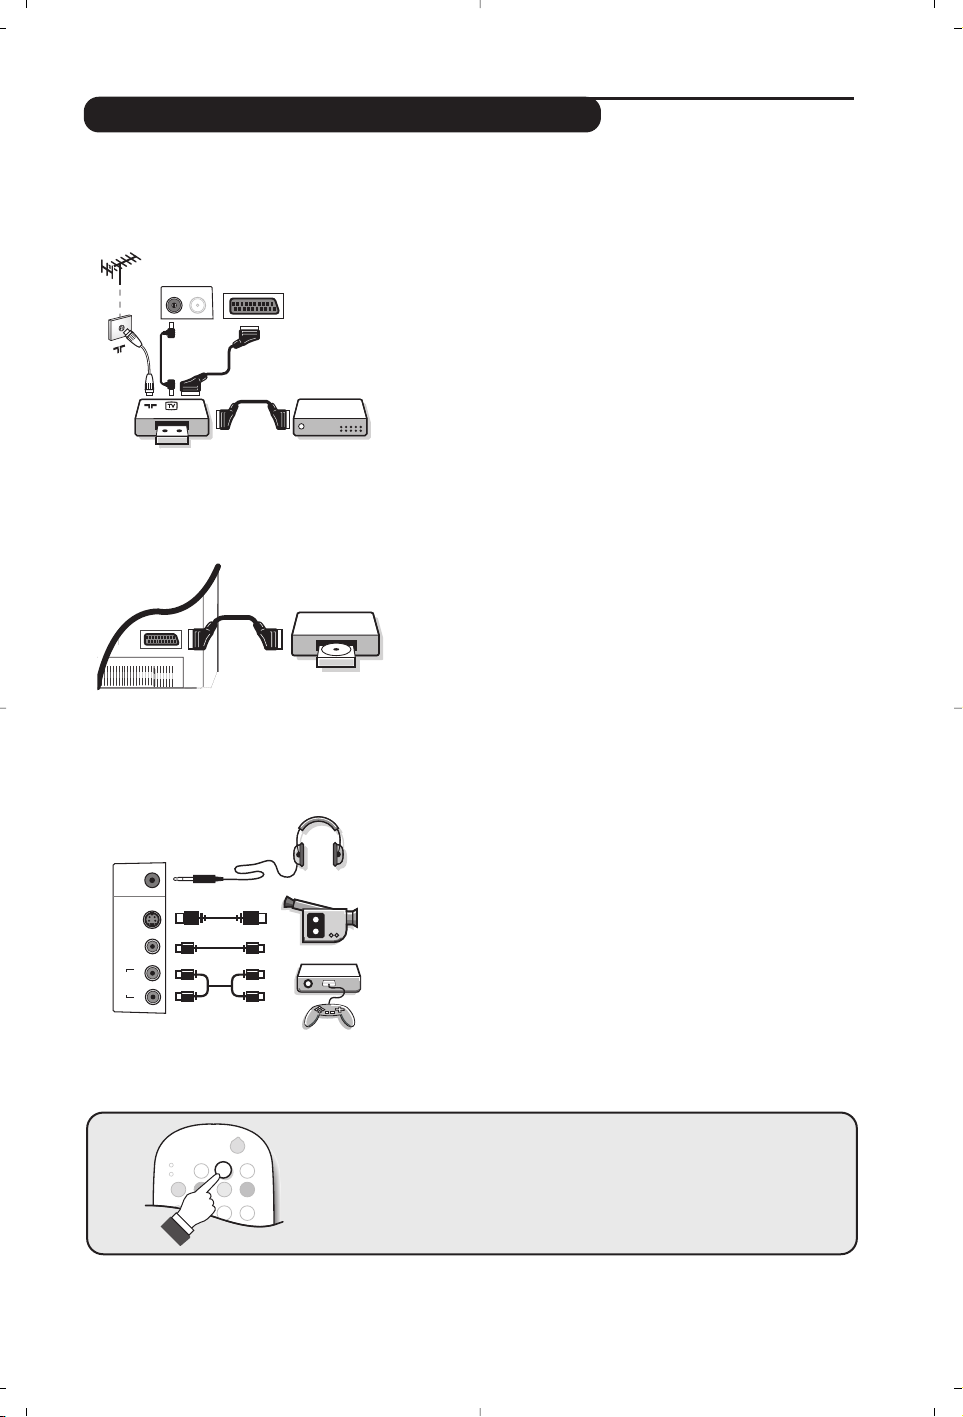
Make the connections as shown opposite.With the n key,
select
EXT2 or S-VHS2 (S-VHS signals from the EXT2 socket).
For a monophonic device, connect the audio signal to the AUDIO L
input.The sound automatically comes out of the left and right
speakers of the set.
Headphones
When headphones are connected, the sound on the TV set will
be cut.The
@ P # keys are used to adjust the volume level.
The headphone impedance must be between 32 and 600 Ohms.
Side connections
Connecting peripheral equipment
The EXT1 socket has audio, CVBS/RGB inputs and audio, CVBS outputs.
Video recorder (or DVD recorder)
Carry out the connections shown opposite, using a good
quality euroconnector cable.
If your video recorder does not have a euroconnector socket, the
only connection possible is via the aerial cable.You will therefore
need to tune in your video recorder's test signal and assign it
programme number 0 (refer to manual store, p. 7).
To reproduce the video recorder picture, press
0.
Video recorder with decoder
Connect the decoder to the second euroconnector socket of
the video recorder.You will then be able to record scrambled
transmissions.
Video recorder
Satellite receiver, decoder, DVD, games, etc.
Make the connections as shown opposite.
To select connected equipment
Press the n key to select EXT1 and EXT2 and S-VHS2 (S-VHS
signals from the EXT2 socket).
Most equipment (decoder, video recorder) carries out the switching itself.
Other equipment
FM ANT
EXT1
:
VCR
EXT1
*
Video
Video
Audio
S
in
L
in
R
Page 12

12
Tips
Poor reception
No picture
Peripheral
equipment gives a
black and white
picture
No sound
Remote control
Standby
Cleaning the set
Recycling
Still no results?
The proximity of mountains or high buildings may be responsible for ghost
pictures, echoing or shadows. In this case, try manually adjusting your picture:see
"fine tuning" (p.7) or modify the orientation of the outside aerial. Does your
antenna enable you to receive broadcasts in this frequency range (UHF or VHF
band)?
Have you connected the aerial socket properly? Have you chosen the right
system? (p. 7). Poorly connected euroconnector cables or aerial sockets are often
the cause of picture or sound problems (sometimes the connectors can become
half disconnected if the TV set is moved or turned). Check all connections.
To play a video cassette, check that it has been recorded under the same
standard (PAL, SECAM, NTSC) which can be replayed by the video recorder.
If on certain channels you receive a picture but no sound,this means that you do not have
the correct TV system. Modify the SYSTEM setting (p. 7).
The amplifier connected to the TV does not deliver any sound? Check that you
have not confused the audio output with the audio input.
The TV set does not react to the remote control; the indicator on the set no
longer flashes when you use the remote control? Replace the batteries.
When you switch the TV set on it remains in standby mode and the indication
LOCKED is displayed when you use the keys on the TV set?
The CHILD LOCK
function is switched on (p.9).
If the set receives no signal for 15 mins,it automatically goes into standby mode.
To save power, your set is fitted with components that give it a very low power
consumption when in standby mode (less than 1 W).
Only use a clean, soft and lint-free cloth to clean the screen and the casing of your
set. Do not use alcohol-based or solvent-based products.
The materials used in your set are either reusable or can be recycled.
To minimise environmental waste, specialist companies collect used appliances
and dismantle them after retrieving any materials that can be used again
(ask your dealer for further details).
Disconnect the mains plug of the TV for 30 seconds then reconnect it.
If your TV set breaks down, never attempt to repair it yourself: contact your
dealer's after-sales service.
Page 13

1
Introduction
Sommaire
Vous venez d’acquérir ce téléviseur,merci de votre confiance.
Nous vous conseillons de lire attentivement les instructions qui suivent pour
mieux comprendre les possibilités offertes par votre téléviseur.
Nous espérons que notre technologie vous donnera entière satisfaction.
Installation
Présentation du téléviseur LCD . . . . . . . . . . . . . . . . . . . . . . . . . . . . . . . . . . . . . . .2
Les touches de la télécommande . . . . . . . . . . . . . . . . . . . . . . . . . . . . . . . . . . . . . . 3
Installation du téléviseur . . . . . . . . . . . . . . . . . . . . . . . . . . . . . . . . . . . . . . . . . . . . . 4
Installation rapide des chaînes . . . . . . . . . . . . . . . . . . . . . . . . . . . . . . . . . . . . . . . . .5
Classement des programmes . . . . . . . . . . . . . . . . . . . . . . . . . . . . . . . . . . . . . . . . . 5
Choix de la langue et du pays . . . . . . . . . . . . . . . . . . . . . . . . . . . . . . . . . . . . . . . . .6
Mémorisation automatique . . . . . . . . . . . . . . . . . . . . . . . . . . . . . . . . . . . . . . . . . . 6
Nom de programme . . . . . . . . . . . . . . . . . . . . . . . . . . . . . . . . . . . . . . . . . . . . . . . .6
Mémorisation manuelle . . . . . . . . . . . . . . . . . . . . . . . . . . . . . . . . . . . . . . . . . . . . . 7
Utilisation
Utilisation de la radio . . . . . . . . . . . . . . . . . . . . . . . . . . . . . . . . . . . . . . . . . . . . . . . .7
Réglages de l’image . . . . . . . . . . . . . . . . . . . . . . . . . . . . . . . . . . . . . . . . . . . . . . . . .8
Réglages du son . . . . . . . . . . . . . . . . . . . . . . . . . . . . . . . . . . . . . . . . . . . . . . . . . . . .8
Réglage des options . . . . . . . . . . . . . . . . . . . . . . . . . . . . . . . . . . . . . . . . . . . . . . . . .8
Fonction réveil . . . . . . . . . . . . . . . . . . . . . . . . . . . . . . . . . . . . . . . . . . . . . . . . . . . . .9
Verrouillage du téléviseur . . . . . . . . . . . . . . . . . . . . . . . . . . . . . . . . . . . . . . . . . . . .9
Télétexte . . . . . . . . . . . . . . . . . . . . . . . . . . . . . . . . . . . . . . . . . . . . . . . . . . . . . . . .10
Raccordements
Magnétoscope . . . . . . . . . . . . . . . . . . . . . . . . . . . . . . . . . . . . . . . . . . . . . . . . . . . . 11
Autres appareils . . . . . . . . . . . . . . . . . . . . . . . . . . . . . . . . . . . . . . . . . . . . . . . . . . 11
Connexions latérales . . . . . . . . . . . . . . . . . . . . . . . . . . . . . . . . . . . . . . . . . . . . . . .11
Pour sélectionner les appareils connectés . . . . . . . . . . . . . . . . . . . . . . . . . . . . . .11
Conseils . . . . . . . . . . . . . . . . . . . . . . . . . . . . . . . . . . . . . . . . . . . . . . . . . . . . . . . 12
w
Nettoyage du téléviseur
Le nettoyage de l’écran et du coffret doit être effectué uniquement avec un
chiffon propre, doux et non pelucheux. Ne pas utiliser de produit à base
d’alcool ou de solvant.
Français
Page 14
2
Présentation du téléviseur LCD
Les touches du téléviseur :
• . : pour allumer ou éteindre le téléviseur.
•
- + :pour régler le niveau sonore.
• <> :pour sélectionner les programmes.
• MENU : pour appeler ou quitter les menus,appuyez
simultanément sur les 2 touches
-
et +.
Ensuite, les touches <> permettent de sélectionner
un réglage et les touches
- + de régler.
Remar
que: lorsque la fonction VERROU TV est en service,
les touches
- + et <> sont inactives (voir menu
OPTIONS, page 9).
Voyant de mise en marche et capteurs infrarouges.
Face arrière :
Les raccordements principaux s’effectuent par le dessous du téléviseur.
Pour plus de détails sur les raccordements, voir page 12.
Prise péritel EXT1
Connexions latérales
Pied inclinable.
Le pied peut être démonté et remplacé par un kit de
fixation mural disponible en option (renseignez-vous
auprès de votre revendeur).
Prises d’antennes TV et radio
Prise d’alimentation DC
<
-
.
+
<
*
S
Video
EXT1
Video
Audio
in
L
in
R
:
DC in
FM ANT
Page 15
3
12
MENU
”
P
564
879
0
3
--
++
.
[
Ÿ
Á
-
ª
`
ù
SMART
SMART RADIO
Ë
¤
ı
Y
Ó
Les touches de la télécommande
ı Liste des programmes
Pour afficher / effacer la liste des
programmes. Utilisez ensuite les
touches îÏ pour sélectionner
un programme et la touche
¬
pour l’afficher.
Le symbole + apparaît devant les
programmes qui sont verrouillés (p.9)
ou ? : s’ils sont déverrouillés.
Info.d’écran / n° permanent
Pour afficher / effacer le numéro
de programme, le nom (s’il existe),
l’heure, le mode son, et le temps
restant de la minuterie.Appuyez
pendant 5 secondes pour activer
l’affichage permanent du numéro.
Le niveau du volume et des
préréglages image et son
s’affiche
ensuite à chaque utilisation.
Menu
Pour appeler ou quitter les menus.
Minuterie
Pour sélectionner une durée de
mise en veille automatique
(de 0 à 240 minutes).
Curseur / Format 16:9
Ces 4 touches permettent de naviguer
dans les menus. Les touches Ȭ
permettent d’agrandir ou de
compresser l’image verticalement.
Volume
Pour ajuster le niveau sonore
Coupure son
Pour supprimer ou rétablir le son.
Sélection des prises EXT (p.11)
Appuyez plusieurs fois pour
sélectionner l’appareil connecté.
Touches numériques
Accès direct aux programmes.
Pour un programme à 2 chiffres,il
faut ajouter le 2ème chiffre avant
que le trait ne disparaisse.
Veille
Permet de mettre en veille le
téléviseur. Pour l’allumer,appuyez
sur b,P @#ou 09.
Mode radio / tv
Pour permuter le téléviseur en
mode radio ou tv.
Appel télétexte (p.10)
Touches télétexte (p. 10)
Préréglages image et son
Permet d’accéder à une série de
préréglages de l’image et du son.
La position PERSONNEL correspond
aux réglages effectués dans les menus.
Sélection des programmes
Pour accéder au programme
inférieur ou supérieur.
Le numéro,(le nom) et le mode
son s’affichent quelques instants.
Pour certains programmes le titre de
l’émission apparaît en bas de l’écran.
Programme précédent
Pour accéder au programme
précédemment visualisé.
Mode son
Permet de forcer les émissions
STÉRÉO
et NICAM STÉRÉO en
MONO ou pour les émissions
bilingues de choisir entre
DUAL I ou
DUAL II.
L’indication MONO est rouge lorsqu’il
s’agit d’une position forcée.
Page 16
4
& Positionnement du téléviseur
Placez votre téléviseur sur une surface solide et
stable. Pour prévenir toute situation dangereuse,ne
pas exposer le téléviseur à des projections d’eau, à
une source de chaleur (lampe, bougie, radiateur, ...)
et ne pas obstruer les grilles de ventilation situées à
l’arrière.
é Raccordements des antennes
• Introduisez la fiche d'antenne TV dans la prise :
située en dessous.
• Branchez le fil d'antenne radio fournie à la prise
FM ANT située en dessous du téléviseur.
• Rangez les fils en les passant à travers le pied du
téléviseur.
“ Raccordements de l’alimentation
Le téléviseur fonctionne à partir d’une alimentation
continue fournie (la valeur de la tension est indiquée
sur l’étiquette). Utilisez uniquement l’adaptateur ACDC livré avec le téléviseur.
• Raccordez la fiche DC de l’adaptateur à la fiche
DC du téléviseur. Laissez un espace libre autour de
l’adaptateur pour la ventilation.
• Branchez le cordon d’alimentation de l’adaptateur
et introduisez la prise de courant sur le secteur
(220-240 V / 50 Hz).
Pour le raccordement d’autres appareils, voir p.12.
‘ Télécommande
Introduisez les 2 piles de type R6 fournies en
respectant les polarités.
Les piles livrées avec l’appareil ne contiennent ni mercure ni
cadmium nickel, dans un souci de préserver
l’environnement.Veillez à ne pas jeter vos piles usagées
mais à utiliser les moyens de recyclage mis à votre
disposition (consultez votre revendeur).
( Mise en marche
Pour allumer le téléviseur, appuyez sur la touche
marche arrêt. Un voyant s’allume en vert et l’écran
s’illumine.Allez directement au chapitre
installation rapide, page 5.
Si le téléviseur reste en veille (voyant rouge),
appuyez sur la touche P
# de la télécommande.
Le voyant clignote lorsque vous utilisez la télécommande.
Installation du téléviseur
5 cm
5 cm
5 cm
FM ANT.
Page 17

5
Installation rapide des chaînes
Classement des programmes
La première fois que vous allumez le téléviseur,
un menu apparaît à l’écran.
Ce menu vous invite à choisir la langue des
menus :
Si le menu n’apparaît pas, maintenez appuyées
pendant 8 secondes les touches ”- et ”+ du
téléviseur, pour le faire apparaître.
& Utilisez les touches
îÏ de la
télécommande pour choisir votre langue, puis
validez avec
¬.
é Sélectionnez ensuite votre pays avec les
touches
îÏ puis validez avec ¬.
Si votre pays n’apparaît pas dans la liste,
sélectionnez le choix AUTRE.
“ La recherche démarre automatiquement.
Tous les programmes TV et stations radio
disponibles sont mémorisés. L’opération prend
quelques minutes. L’affichage montre la
progression de la recherche et le nombre de
programme trouvés. A la fin, le menu disparaît.
Pour sortir ou interrompre la recherche, appuyez
sur
H. Si aucun programme n’est trouvé, reportez
vous au chapitre conseils p. 12.
‘ Si l’émetteur ou le réseau câblé transmet le
signal de classement automatique, les
programmes seront correctement numérotés.
L’installation est alors terminée.
( En l’absence de signal de classement, les
programmes trouvés seront numérotés en ordre
décroissant à partir du numéro 99,98, 97,...
Vous devez utiliser le menu CLASSEMENT
pour les renuméroter.
Certains émetteurs ou réseaux câblés diffusent leurs
propres paramètres de classement (région, langage, ...).
Dans ce cas, vous devez indiquer votre choix avec les
touches îÏ puis valider avec ¬.
& Appuyez sur la touche H. Le menu principal
s’affiche à l’écran.
é Sélectionner INSTALLATION (
Ï) et
appuyez sur
¬. Le menu INSTALLATION
apparaît :
“ Sélectionner CLASSEMENT à l’aide de la
touche
Ï et appuyez sur ¬. Le menu
CLASSEMENT apparaît. Le choix DE est actif.
Remar
que: ce menu fonctionne selon la logique
suivante :
•“à partir DE” (entrez le n°du programme actuel),
•“pour aller A” (entrez le nouveau numéro),
•“ÉCHANGER les numéros” (l’opération est effectuée).
‘ Sélectionnez le programme que vous
souhaitez renuméroter en utilisant les touches
Ȭ ou 0 à 9.
Exemple: vous voulez faire un échange DE
programme 78 A programme 2: tapez
78.
( Sélectionnez A (touche
Ï) et entrez le
nouveau numéro souhaité avec les touches
Ȭ ou 0 à 9 (dans notre exemple
tapez
2).
§ Sélectionnez ÉCHANGE (touche
Ï) et
appuyez sur
¬.L’indication ÉCHANGÉ
apparaît, l’échange s’effectue. Dans notre
exemple le programme 78 est renuméroté en
n° 2 (et le n° 2 en 78).
è Sélectionnez DE (touche
î) et
recommencez les étapes ‘ à § autant de fois
qu’il y a de programmes à renuméroter.
! Pour quitter les menus, appuyez sur la
touche
d.
SELECT LANGAGE
LANGAGE
•
FRANÇAIS
DEUTSCH
E††HNIKA
ITALIA
NORSK
PAYS
ALLEMAGNE
DANEMARK
ESPAGNE
FINLANDE
FRANCE
• IMAGE
• SON
• OPTIONS
• INSTALLATION
INSTALLATION
• LANGAGE
• PAYS
• MÉMO. AUTO.
• MÉMO. MANUEL.
• CLASSEMENT
• NOM DU PROG.
DE
A
ECHANGER
Page 18
6
Nom de programme
Vous pouvez, si vous le souhaitez, donner un
nom aux 40 premiers programmes (de 1 à 40).
& Appuyez sur la touche
H.
é Sélectionner
INSTALLATION (Ï) et appuyez
sur
¬. Le menu INSTALLATION apparaît.
“ Appuyez 5 fois sur
Ï pour sélectionner
NOM DE PROG. (caché en bas de l’écran) et
appuyez sur
¬. Le menu apparaît :
‘ Sélectionnez le programme que vous
souhaitez nommer en utilisant les touches
09ou @ P #.
Remarque: lors de l’installation, les programmes
sont nommés automatiquement lorsque le signal
d’identification est transmis.
( Utilisez les touches
Ȭpour vous
déplacer dans la zone d’affichage du nom
(5 caractères).
§ Utilisez les touches
îÏpour choisir les
caractères.
è Appuyez sur
H lorsque le nom est entré.
Le nom de programme est mémorisé.
! Recommencez les étapes ‘ à è pour chaque
programme à nommer.
ç Pour quitter les menus, appuyez sur
d.
INSTALLATION
• LANGAGE
• PAYS
• MÉMO. AUTO.
• MÉMO. MANUEL.
• CLASSEMENT
• NOM DU PROG. TF1_
Choix de la langue et du pays
Mémorisation automatique
& Appuyez sur la touche H pour afficher le
menu principal.
é Sélectionner
INSTALLATION (Ï) et appuyez
sur
¬. Le menu INSTALLATION apparaît.
Le choix
LANGAGE est actif.
“ Appuyez sur
¬ pour entrer dans le menu
LANGAGE.
‘ Choisissez votre langue avec les touches îÏ.
Les menus apparaîtront dans la langue choisie.
( Appuyez sur
È pour sortir du menu
LANGAGE.
§ Sélectionner
PAYS (Ï) et appuyez sur ¬.
è Choisissez votre pays avec les touches
îÏ
Si votre pays n’apparaît pas dans la liste,
sélectionnez le choix AUTRE.
! Appuyez sur
È pour sortir du menu PAYS .
ç Pour quitter les menus, appuyez sur
d.
Ce menu permet de lancer une recherche
automatique de tous les programmes
disponibles dans votre région (ou sur votre
réseau câblé).
& Effectuez d’abord les opérations & à !
ci-dessus, puis :
é Sélectionner
MÉMO AUTO
(
Ï) et appuyez
sur
¬. La recherche commence.
Au bout de quelques minutes, le menu
INSTALLATION réapparaît automatiquement.
“ Si l’émetteur ou le réseau câblé transmet le
signal de classement automatique, les
programmes seront correctement numérotés.
L’installation est terminée.
‘ Si ce n’est pas le cas, les programmes trouvés
seront numérotés en ordre décroissant à
partir du numéro 99, 98, 97, ...Vous devez alors
utiliser le menu
CLASSEMENT
pour les
renuméroter (voir page 4).
Certains émetteurs ou réseaux câblés diffusent leurs
propres paramètres de classement (région, langage, ...).
Dans ce cas, vous devez indiquer votre choix avec les
touches
îÏ puis valider avec ¬.Pour sortir ou
interrompre la recherche, appuyez sur
H. Si aucune
image n’est trouvée, voir conseils (p. 12).
( Pour quitter les menus, appuyez sur d.
• IMAGE
• SON
• OPTIONS
• INSTALLATION
INSTALLATION
• LANGAGE
• PAYS
• MÉMO. AUTO.
• MÉMO. MANUEL.
• CLASSEMENT
•
NOM DU PROG.
FRANÇAIS
DEUTSCH
ITALIA
INSTALLATION
• LANGAGE
• PAYS
• MÉMO. AUTO.
• MÉMO. MANUEL.
• CLASSEMENT
• NOM DU PROG.
RECHERCHE
ATTENDEZ SVP
PROG. TROUVÉS 2
215.18 MHZ
Page 19
7
Mémorisation manuelle
Ce menu permet de mémoriser les
programmes un par un.
& Appuyez sur la touche
H.
é Sélectionner
INSTALLATION (Ï) et appuyez
sur
¬. Le menu INSTALLATION apparaît.
“ Sélectionner
MÉMO MANUELLE (Ï) et
appuyez sur
¬. Le menu apparaît :
‘ Appuyez sur
¬ pour entrer dans le menu
SYSTÈME. Utilisez îÏ pour choisir EUROPE
(détection automatique*) ou détection manuelle
avec :
WEST EUR (norme BG), EAST EUR (norme
DK), UK (norme I) ou
FRANCE (norme LL’).
Appuyez ensuite sur
È pour sortir du menu.
* Sauf pour la France (norme LL’), il faut
sélectionner impérativement le choix FRANCE.
( Sélectionnez
RECHERCHE et appuyez sur ¬.
La recherche commence. Dès qu’un
programme est trouvé,le défilement s’arrête.
Allez au chapitre è.
Si vous connaissez la fréquence du programme
désiré, composez directement son numéro
avec les touches
09.
Si aucune image n’est trouvée, voir conseils (p. 12).
§ Si la réception n’est pas satisfaisante,
sélectionnez
AJUST. FIN et maintenez appuyée
la touche
È ou ¬.
è Sélectionnez
NO DE PROG. et utilisez les
touches
Ȭou 0 à 9 pour entrer le
numéro souhaité.
! Sélectionnez
MÉMORISATION et appuyez sur
¬.L’indication MÉMORISÉ apparaît
brièvement. Le programme est mémorisé.
ç Répétez les chapitres ( à ! autant de fois
qu’il y a de programmes à mémoriser.
Pour quitter:appuyez sur la touche
d.
• IMAGE
• SON
• OPTIONS
• INSTALLATION
INSTALLATION
MÉMO. MANUEL.
• SYSTÈME
• RECHERCHE
• NO. DE PROG
• AJUST. FIN
• MÉMORISER
EUROPE
WEST EUR
EAST EUR
UK
FRANCE
Utilisation de la radio
Choix du mode radio
Appuyez sur la touche
 de la télécommande
pour commuter le téléviseur en mode radio.
En mode radio, le numéro, le nom de la station
(si disponible), sa fréquence et le mode son
s’affichent à l’écran.
Pour entrer le nom des stations utilisez le menu
NOM DU PROG. (p.7)
Sélection des programmes
Utilisez les touches
09ou @ P # pour
sélectionner les stations FM (de 1 à 40).
Liste des stations radio
Appuyez sur la touche ı pour afficher/effacer la
liste des stations radio.
Utilisez ensuite le
curseur pour sélectionner une station.
Utilisation des menus radio
Utilisez la touche
H pour accéder aux
réglages spécifiques à la radio.
Recherche des stations radio
Si vous avez utilisé l’installation rapide, toutes
les stations FM disponibles ont été mémorisées.
Pour lancer une nouvelle recherche, utilisez le
menu
INSTALLATION : MÉMO.AUTO (pour une
recherche complète) ou
MÉMO.MANUEL
(pour une recherche station par station).
Les menus
CLASSEMENT et NOM DE PROG.
vous permettront de classer ou nommer les
stations radio. Le fonctionnement de ces menus
est identique a celui des menus TV.
Économiseur d’écran
Dans le menu
OPTIONS vous pouvez
activer/désactiver l’économiseur d’écran.
L’heure, la fréquence de la station et le nom
(si disponible) défilent à l’écran.
Page 20
8
Réglages de l’image
Réglages du son
& Appuyez sur la touche H puis sur ¬.
Le menu
IMAGE apparaît :
é Utilisez les touches
îÏ pour sélectionner
un réglage et les touches
Ȭ pour régler.
Remarque : il s’agit d’un menu déroulant.
Maintenez appuyée la touche Ï pour accéder
aux réglages masqués en bas de l’écran.
“ Une fois les réglages effectués, sélectionnez le
choix
MÉMORISER et appuyer sur ¬ pour les
enregistrer.
‘ Pour quitter les menus, appuyez sur
d.
Description des réglages :
•
LUMIÈRE: agit sur la luminosité de l’image.
•
COULEUR: agit sur l’intensité de la couleur.
•
CONTRASTE: agit sur la différence entre les tons
clairs et les tons foncés.
•
DÉFINITION: agit sur la netteté de l’image.
•
MÉMORISER: pour mémoriser les réglages de
l’image.
•
RÉDUC. BRUIT: atténue le bruit de l’image
(la neige), en cas de réception difficile.
• CONTRASTE + : pour activer / désactiver les
circuits de réglage automatique du contraste de
l’image (ramène en permanence la partie la plus
sombre de l’image au noir).
• IMAGE
• SON
• OPTIONS
• INSTALLATION
IMAGE
• LUMIÈRE
• COULEUR
• CONTRASTE
• DÉFINITION
• MÉMORISER
• REDUC. BRUIT
• CONTRASTE+
--I------ 39
& Appuyez sur H, sélectionner SON (Ï) et
appuyez sur
¬. Le menu SON
apparaît :
é Utilisez les touches îÏ pour sélectionner
un réglage et les touches
Ȭ pour régler.
“ Une fois les réglages effectués, sélectionnez le
choix
MÉMORISER et appuyer sur ¬ pour les
enregistrer.
‘ Pour quitter les menus, appuyez sur
d.
Description des réglages:
•
EGALISEUR: pour régler la tonalité du son
(de grave:120 Hz à aigus: 10 kHz).
• BALANCE : pour équilibrer le son sur les haut-
parleurs gauche et droit.
• DELTA VOLUME (différence de volume):permet de
compenser les écarts de volume qui existent entre
les différents programmes ou les prises EXT. Ce
réglage est opérationnel pour les programmes 1 à
40 et les prises EXT. Utilisez les touches
@ P #
pour comparer le niveau des différents programmes.
• MÉMORISER: pour mémoriser les réglages du son
•
AVL (Automatic Volume Leveler): contrôle
automatique du volume qui permet de limiter les
augmentations du son, en particulier lors des
changements de programmes ou des publicités.
•
INCR. SURROUND:
pour activer / désactiver l’effet
d’élargissement du son. En stéréo,les haut-parleurs
paraissent plus espacés. En mono,on obtient un
effet spatial pseudo stéréo.
• IMAGE
• SON
• OPTIONS
• INSTALLATION
SON
• EGALISEUR
•
BALANCE
• DELTA VOLUME
• MÉMORISER
• AVL
• INCR. SURROUND
120 HZ
500 HZ
1500 HZ
5 KHZ
10 KHZ
Réglages des options
& Appuyez sur H, sélectionner OPTIONS (Ï)
et appuyez sur
¬.Vous pouvez régler :
é
TIMER, VERROU TV,VERROU ENFANT:voir page
suivante.
“
SELECT. MODE: pour commuter le téléviseur
en mode radio ou TV.
‘ Pour quitter les menus, appuyez sur
d.
Page 21
9
Fonction réveil
Verrouillage du téléviseur
Ce menu vous permet d’utiliser le téléviseur
comme un réveil.
& Appuyez sur la touche
H.
é Sélectionner
OPTIONS (Ï) et appuyez 2 fois
sur
¬. Le menu
TIMER apparaît :
“ Appuyez sur ¬ pour entrer et sortir de
chaque sous-menu et utilisez les touches
îÏ pour régler :
‘
HEURE
: entrez l’heure courante.
Remar
que : l’heure est mise à jour automatiquement,
à chaque mise en marche, à partir des informations
télétexte du programme n° 1. Si celui-ci n’a pas de
télétexte, la mise à jour n’aura pas lieu.
(
HEURE DÉBUT: entrez l’heure de début.
§
HEURE FIN: entrez l’heure de mise en veille.
è
NO.DE PROG:entrez le numéro du programme
désiré pour le réveil. Pour les modèles équipés
de la radio, vous pouvez sélectionner une
station FM en utilisant les touches
Ȭ
(les touches 09 permettent uniquement de
sélectionner les programmes tv).
!
PROG.ACTIVÉE
:vous pouvez régler :
•
UNE FOIS pour un réveil unique,
•
QUOTIDIEN
pour tous les jour,
•
ARRÊT pour annuler.
ç Appuyez sur
b pour mettre en veille le
téléviseur. Il s’allumera automatiquement à
l’heure programmée. Si vous laissez le
téléviseur allumé, il changera uniquement de
programme à l’heure indiquée (et se mettra en
veille à l’
HEURE
HEURE de FIN).
La combinaison des fonctions VERROU TV et
TIMER permet de limiter la durée d’utilisation du
téléviseur, à vos enfants par exemple.
Vous pouvez verrouiller certains programmes
ou interdire complètement l’utilisation du
téléviseur en verrouillant les touches.
Verrouillage des programmes
& Appuyez sur la touche H.
é Sélectionner OPTIONS (Ï) et appuyez sur ¬.
“ Sélectionner
VERROU ENFANT (
Ï) et
appuyez sur
¬.
‘ Vous devez entrer votre code confidentiel
d’accès. La première fois,tapez 2 fois le code
0711. Le menu apparaît.
( Appuyez sur
¬ pour entrer
dans le menu.
§
Utilisez les touches îÏ pour sélectionner le
programme souhaité et validez avec
¬
.
Le symbole
+ s’affiche devant les programmes
ou les prises qui sont verrouillés.
è Appuyez sur la touche d pour quitter.
Désormais, pour visualiser un programme
verrouillé, vous devez entrer le code
confidentiel, sinon l’écran restera noir.
L’accès au menu INSTALLATION est également
verrouillé. Attention, dans le cas des programmes
cryptés qui utilisent un décodeur extérieur, il faut
verrouiller la prise EXT correspondante.
Pour déverrouiller tous les programmes
Reproduisez les étapes & à ‘, puis sélectionnez
TOUT EFFACER et appuyez sur ¬.
Pour changer le code confidentiel
Reproduisez les étapes & à ‘,puis:
( Sélectionnez
CHANGER CODE et entrez votre
propre numéro à 4 chiffres.
§ Confirmez en le tapant une deuxième fois.
Votre nouveau code est mémorisé.
è Appuyez sur
d pour quitter les menus.
Si vous avez oublié votre code confidentiel, entrez
le code universel 0711 deux fois.
Verrouillage des touches
& Appuyez sur H, sélectionner OPTIONS (Ï)
et appuyez sur
¬.
é Sélectionner
VERROU TV (Ï) et appuyez
sur
¬ pour mettre sur MARCHE.
“ Éteignez le téléviseur et cachez la
télécommande. Le téléviseur devient inutilisable
(seule la télécommande permet de l’allumer).
‘ Pour annuler: positionnez VERROU TV sur ARRÊT.
• IMAGE
• SON
• OPTIONS
• INSTALLATION
OPTION
TIMER
• HEURE
• HEURE DÉBUT
• HEURE FIN
• NO. DE PROG
• PROG. ACTIVE
10:56
• IMAGE
• SON
• OPTION
• INSTALLATION
OPTION
• TIMER
• SELECT. MODE
• VERROU TV
• VERROU ENFANT
CODE D’ACCÈS
- - - -
Page 22
10
Télétexte
Appuyez sur :
Vous obtenez :
Le télétexte est un système d'informations, diffusé par certaines chaînes, qui se consulte comme un
journal. Il permet aussi d'accéder aux sous-titrages pour les personnes malentendantes ou peu
familiarisées avec la langue de transmission (réseaux câblés,chaînes satellites,...).
Marche/arrêt
télétexte
Sélection
d’une page
Permet d’appeler le télétexte, de passer en mode transparent
puis de quitter. La première fois, le sommaire apparaît avec la
liste des rubriques auxquelles vous pouvez accéder. Chaque
rubrique est repérée par un numéro de page à 3 chiffres.
Si la chaîne sélectionnée ne diffuse pas le télétexte, l'indication
100 s'affiche et l'écran reste noir (dans ce cas, quittez le
télétexte et choisissez une autre chaîne).
Composer le numéro de la page désiré avec les touches
0 à 9 ou @ P #.Exemple: page 120, tapez 120.
Le numéro s’affiche en haut à gauche, le compteur tourne,
puis la page est affichée. Renouvelez l'opération pour
consulter une autre page.
Si le compteur continue à chercher, c’est que la page n'est pas
transmise. Choisissez un autre numéro.
Sommaire
Accès
direct aux
rubriques
Pour revenir au sommaire (généralement la page 100).
Des zones colorées sont affichées en bas de l’écran.
Les 4 touches colorées permettent d’accéder aux
rubriques ou aux pages correspondantes.
Les zones colorées clignotent lorsque la rubrique ou la page
n’est pas encore disponible.
Agrandissement
d'une page
Pour afficher la partie supérieure, inférieure, puis revenir à
la dimension normale.
Arrêt de
l'alternance
des sous-pages
Informations
cachées
Certaines pages contiennent des sous-pages qui se
succèdent automatiquement. Cette touche permet
d’arrêter ou reprendre l'alternance des sous-pages.
L'indication _ apparaît en haut à gauche.
Pour faire apparaître ou disparaître les informations
cachées (solutions de jeux).
Pages
préférées
Pour les programmes télétexte 0 à 40,vous pouvez
mémoriser
4 pages préférées qui seront ensuite directement
accessibles avec les touches colorées (rouge,verte, jaune,
bleue).
& Appuyez sur la touche H pour passer en mode pages
préférées.
é Affichez la page télétexte que vous souhaitez mémoriser.
“ Appuyez sur la touche dpuis sur la touche colorée
de votre choix.La page est mémorisée.
‘ Renouvelez les étapes é et “ pour les autres
touches colorées.
( À présent, dès que vous consultez le télétexte, vos
pages préférées apparaissent en couleur en bas de
l’écran. Pour retrouver les rubriques habituelles,
appuyez sur
H.
Pour tout effacer, appuyez sur d pendant 5 secondes.
Ë
SMART RADIO SMART
MENU
+
[
”
-
123
4
56
789
Ø
0
.
¤
ŸÓù
ª-
¤
0
9
P
+
P
-
Á
Ë
Ó
Ÿ
MENU
Ë
Page 23
11
MODE
VCR
DVD
·¢Ê Æ
∫
Ó
ı
Ω∆
.
Z
¤
Effectuez les raccordements ci-contre.
Avec la touche
n
, sélectionner EXT2 ou S-VHS2 (signaux
S-VHS de la prise EXT2).
Pour un appareil monophonique, connectez le signal son sur l’entrée
AUDIO L. Le son est reproduit automatiquement sur les hautparleurs gauche et droit du téléviseur.
Casque
Lorsque le casque est connecté, le son du téléviseur est coupé.
Les touches @ ” # permettent de régler le volume.
L'impédance du casque doit être comprise entre 32 et 600 ohms.
Connexions latérales
Raccordement d’autres appareils
La prise EXT1 possède les entrées/sorties audio vidéo et les entrées RVB.
Magnétoscope (ou DVD enregistrable)
Effectuez les raccordements ci-contre. Utilisez un cordon de
liaison péritel de bonne qualité.
Si votre magnétoscope ne possède pas de prise péritel, seule la
liaison par le câble antenne est possible.Vous devez accorder le
programme numéro 0 du téléviseur sur le signal de test du
magnétoscope (voir mémo. manuelle p. 7). Ensuite pour reproduire
l’image du magnétoscope, appuyez sur
0
.
Magnétoscope avec Décodeur
Connectez le décodeur sur la deuxième prise péritel du
magnétoscope.Vous pourrez ainsi enregistrer les émissions
cryptées.
Magnétoscope
Récepteur satellite, décodeur, DVD, jeux,...
Effectuez les raccordements ci-contre.
Pour sélectionner les appareils connectés
Appuyez sur la touche npour sélectionner EXT1 et EXT2 et
S-VHS2 (signaux S-VHS de la prise EXT2).
La plupart des appareils réalisent eux-mêmes la commutation
(décodeur, magnétoscope, ...).
Autres appareils
FM ANT
EXT1
:
VCR
EXT1
*
Video
Video
Audio
S
in
L
in
R
Page 24

12
Conseils
Mauvaise réception
Absence d'image
L’équipement
périphérique
délivre une image
en noir et blanc
Absence de son
La télécommande
ne fonctionne plus ?
Veille
Nettoyage du
téléviseur
Directive pour le
recyclage
Toujours pas de
résultats ?
La proximité de montagnes ou de hauts immeubles peut être la cause d'image
dédoublée, d'écho ou d'ombres. Dans ce cas, essayez d’ajuster manuellement
l’accord de l’image: voir AJUST. FIN (p.7) ou modifiez l'orientation de l'antenne
extérieure.
Vérifiez également que votre antenne permet de recevoir les émissions dans
cette bande de fréquences (bande UHF ou VHF) ?
Avez-vous bien branché l'antenne ?
Avez-vous choisi le bon système ? (p.7)
Une prise péritel ou une prise d'antenne mal connectée est souvent la cause de
problèmes d'image ou de son (il arrive que les prises se déconnectent
légèrement lorsque l'on déplace ou que l'on tourne le téléviseur).Vérifiez toutes
les connexions.
Pour la lecture d’une cassette vidéo, vérifiez qu’elle est enregistré au même
standard (PAL, SECAM, NTSC) que ce que peut lire le magnétoscope.
Si certains programmes sont dépourvus de son, mais pas d’image, c’est que vous
n’avez pas le bon système TV. Modifiez le réglage SYSTÈME (p.7).
L’amplificateur connecté au téléviseur ne délivre pas de son ? Vérifiez que vous
n’avez pas confondu la sortie audio avec l’entrée audio.
Le voyant du téléviseur ne clignote plus lorsque vous utilisez la télécommande ?
Remplacez les piles.
Lorsque vous allumez le téléviseur, il reste en veille et l’indication VERROUILLÉ
s'affiche dès que vous utilisez les touches du téléviseur ? La fonction VERROU TV
est en service (p. 9).
Si le téléviseur ne reçoit pas de signal pendant 15 mn, il passe automatiquement
en veille.
Pour faire des économies d’énergie, votre téléviseur est équipé de composants
permettant une très faible consommation en veille (inférieure à 1 W).
Le nettoyage de l’écran et du coffret doit être effectué uniquement avec un
chiffon propre, doux et non pelucheux. Ne pas utiliser de produit à base d’alcool
ou de solvant.
Votre téléviseur utilise des matériaux réutilisables ou qui peuvent être recyclés.
Pour minimiser les déchets dans l'environnement,des entreprises spécialisées
récupèrent les appareils usagés pour les démonter et concentrer les matières
réutilisables (renseignez-vous auprès de votre revendeur).
Débranchez la prise secteur du téléviseur pendant 30 secondes puis rebranchez
la à nouveau.
En cas de panne, n’essayez jamais de réparer vous même le téléviseur, mais
consultez le service après vente.
Page 25

1
Bevezetés
Ta r talomjegyzék
Köszönjük új televíziót vásárlásánál márkánk iránt tanúsított bizalmát.
Kérjük,a készülék által nyújtott szolgáltatások megismerése érdekében
figyelmesen olvassa el a használati útmutatót.
Reméljük, hogy készülékünket teljes megelégedéssel fogja használni.
Üzembehelyezés
Az LCD televízió ismertetése . . . . . . . . . . . . . . . . . . . . . . . . . . . . . . . . . . . . . . . . .2
A távirányító nyomógombjai . . . . . . . . . . . . . . . . . . . . . . . . . . . . . . . . . . . . . . . . . .3
A televízió üzembe helyezése . . . . . . . . . . . . . . . . . . . . . . . . . . . . . . . . . . . . . . . . .4
A csatornák gyors beállítása . . . . . . . . . . . . . . . . . . . . . . . . . . . . . . . . . . . . . . . . . .5
Mód . . . . . . . . . . . . . . . . . . . . . . . . . . . . . . . . . . . . . . . . . . . . . . . . . . . . . . . . . . . . .5
A nyelv és az ország kiválasztása . . . . . . . . . . . . . . . . . . . . . . . . . . . . . . . . . . . . . .6
Automatikus programkeresés . . . . . . . . . . . . . . . . . . . . . . . . . . . . . . . . . . . . . . . . .6
A programok elnevezése . . . . . . . . . . . . . . . . . . . . . . . . . . . . . . . . . . . . . . . . . . . .6
Kézi programkeresés . . . . . . . . . . . . . . . . . . . . . . . . . . . . . . . . . . . . . . . . . . . . . . .7
Használat
A rádió használata . . . . . . . . . . . . . . . . . . . . . . . . . . . . . . . . . . . . . . . . . . . . . . . . . .7
A kép beállítása . . . . . . . . . . . . . . . . . . . . . . . . . . . . . . . . . . . . . . . . . . . . . . . . . . . .8
A hang beállítása . . . . . . . . . . . . . . . . . . . . . . . . . . . . . . . . . . . . . . . . . . . . . . . . . . .8
Az funkciók beállítása . . . . . . . . . . . . . . . . . . . . . . . . . . . . . . . . . . . . . . . . . . . . . . . .8
Az ébresztési funkció . . . . . . . . . . . . . . . . . . . . . . . . . . . . . . . . . . . . . . . . . . . . . . .9
A televízió lezárása . . . . . . . . . . . . . . . . . . . . . . . . . . . . . . . . . . . . . . . . . . . . . . . . .9
Teletext . . . . . . . . . . . . . . . . . . . . . . . . . . . . . . . . . . . . . . . . . . . . . . . . . . . . . . . . .10
Csatlakozások
Képmagnó . . . . . . . . . . . . . . . . . . . . . . . . . . . . . . . . . . . . . . . . . . . . . . . . . . . . . . .11
Más készülékek . . . . . . . . . . . . . . . . . . . . . . . . . . . . . . . . . . . . . . . . . . . . . . . . . . .11
Csatlakozások az oldallapon . . . . . . . . . . . . . . . . . . . . . . . . . . . . . . . . . . . . . . . . .11
A csatlakoztatott készülékek kiválasztása . . . . . . . . . . . . . . . . . . . . . . . . . . . . . . .11
Tanácsok . . . . . . . . . . . . . . . . . . . . . . . . . . . . . . . . . . . . . . . . . . . . . . . . . . . . . . .12
w
A televízió tisztítása
A képernyőt és a burkolatot kizárólag tiszta, puha és nem bolyhosodó ruhával
lehet tisztítani. Ne használjunk olyan termékeket, amelyekben alkohol vagy
oldószer van.
Magyar
Page 26

2
Az LCD televízió ismertetése
A készülék kezelőgombjai :
• . :a készülék be- vagy kikapcsolása.
• - + : a készülék hangerejének szabályozása.
• <> :a programhelyek kiválasztása.
• MENÜ : a különböző menüpontok ki- vagy
bekapcsolásához nyomja meg egyidejűleg a - és a +
gombot.A beállítást a
<>
gombok segítségével
kiválaszthatja, a - + gombbal pedig elvégezheti.
Megje
gyzés: amikor a GYEREKZÁR funkció működik, a
-+és <> gombok nem működnek (lásd a FUNKCIÓK
menüt a 9. oldalon).
Áramellátás jelzőfény és infravörös érzékelő.
Hátsó oldal :
A fő csatlakoztatásokat a televíziókészülék alsó részén kell elvégezni.
A csatlakozókról részletesebben lásd a 12. oldalt.
SCART EXT1 csatlakozó.
Csatlakozások az oldallapon
Dönthető állvány.
Az állvány leszerelhető, az opcióként megvásárolható
fali tartókészlettel helyettesíthető (tájékoztatásért
forduljon a kereskedőhöz).
TV és rádióantenna csatlakozók
Tá pbemenet (DC).
<
-
.
+
<
*
S
Video
EXT1
Video
Audio
in
L
in
R
:
DC in
FM ANT
Page 27
3
12
MENU
”
P
564
879
0
3
--
++
.
[
Ÿ
Á
-
ª
`
ù
SMART
SMART RADIO
Ë
¤
ı
Y
Ó
A távirányító nyomógombjai
ı A programok listája
A programok listájának
megjelenítésére / törlésére. Utána a
îÏ gombokkal válasszunk ki
egy programot, majd a ¬ gombbal
jelenítsük meg.
Megjelenik a + szimbólum a rögzített
programok előtt (9. old.), vagy a ? :
jelenik meg, ha töröltük a program
rögzítését.
Képernyő információk /
állandó számok
A programnév és szám (ha van),az
idő,a hangmód, az automatikus
kikapcsolásig hátramaradt idő
kijelzése vagy takarása.A szám
állandó kijelzéséhez 5 másodpercig
tartsa nyomva.
Menü :A menü lehívásához vagy a
menüből történő kilépéshez.
Automatikus kikapcsoló
Az automatikus kikapcsolás
időtartartam (0-tól 240 percig)
beállítása.
Kurzor / 16:9
képernyőformátum
Ezzel a 4 gombbal mozoghat a
menükben.A Ȭ gombok
segítségével függőleges irányban
nagyíthatja vagy kicsinyítheti a képet.
Hangerő
A hangerőszint beállításához
Némító
A hang ki- és visszakapcsolásához.
EXT csatlakoztatás kiválasztása
(11. o.)
A csatlakoztatott készülék
kiválasztásához nyomja meg
többször ezt a gombot.
Számgombok
A csatornák azonnali kiválasztása.
A két számjegyű programoknál a
második számjegyet a vonal
eltűnése elött kell hozzáadni.
Készenléti helyzet
A televízió készenléti helyzetbe
történő kapcsolása.Az újra
bekapcsoláshoz nyomja meg a b,
P @#vagy 0-9 gombot.
Rádió/tévé üzemmód
Rádió vagy tévé üzemmódba
történő átkapcsoláshoz .
Teletext megjelenítés (10. o.)
Teletext gomb (10. old.)
Hang és kép alapbeállítások
Lehetővé tesz egy sor kép és hang
alapbeállítást. A természetes
beállítás helyzet megfelel a menükben
elvégzett beállításoknak.
Programkiválasztás
Az alsó vagy a felső program lehívása.
Néhány másodpercre mejelenik a
program száma,(neve) és módja.
Egyes teletextet sugárzó csatornán, a
képernyő alsó részén megjelenik a
műsor címe.
Előző program
Az utoljára megjelenített program
visszahívása.
Hangmód
Lehetővé teszi a
STEREO (vagy
NICAM STEREO
) adások MONO-ba
történő átalakítását, vagy, a
kétnyelvű adások esetén a DUAL I
vagy
DUAL II
A kék színű MONO
jelzés azt jelenti hogy az adás más
hangszínben is fogható.
Page 28

4
&
A készülék elhelyezése
A készüléket stabil,szilárd felületre helyezze.
A biztonsági szempontokat figyelembe véve,a
készüléket ne tegye vízsugár, hőforrás (lámpa,
gyertya, radiátor stb.) közelébe és ne tömítse el a
készülék hátoldalán található szellőzőrácsokat.
é
Az antennák csatlakoztatása
• Illesszük be az antennadugót a készülék hátoldalán
található
: csatlakozóba.
• Csatlakoztassa a gyárilag mellékelt rádióantenna
kábelt a készülék alján található FM ANT
bemenethez.
• A kábeleket a készülék talpazatán átvezetve
rendezze el.
“
A hálózati kábel csatlakoztatása
A készülék a gyárilag mellékelt hálózati kábel
segítségével működtethető (a feszültség értéke a
címkén van feltüntetve).Kizárólag a készülék
tartozékát képező hálózati adaptert használja !
• Kapcsolja össze az adapter DC kimenetét a
tévékészülék DC bemenetével.A megfelelő szellőzés
biztosítása érdekében az adaptert ne fedje le.
• Csatlakoztassa az adapter hálózati kábelét,majd a
csatlakozót illessze a (220-240 V / 50 Hz) hálózati
aljzatba.
Egyéb készülékek csatlakoztatásához lásd a 12. oldalt.
‘
Tá vkapcsoló
Helyezze be a 2 darab mellékelt,R6 típusú elemet,
ügyeljen az elemek polaritására (+/-).
A környezet védelme érdekében a készülékhez mellékelt
szárazelemek nem tartalmaznak sem higanyt, sem
kadmium-nikkelt. Ügyeljen arra, hogy az elhasznált
elemeket ne dobja ki, hanem vegye igénybe a
rendelkezésére álló újrafelhasználási lehetőségeket
(érdeklődjön kereskedőjénél).
(
Üzembehelyezés
A televíziókészülék üzembe helyezéséhez nyomja
meg az áramellátás gombot. Egy zöld jelzőfény kezd
világítani, majd a képernyő bekapcsol. Ekkor keresse
meg a gyors telepítéssel foglalkozó fejezetet az 5.
oldalon. Ha a televíziókészülék készenléti állapotban
van (piros jelzőfény),nyomja meg a távirányító P
#
gombját.
A távirányító használata közben a jelzőfény villog.
A televízió üzembe helyezése
5 cm
5 cm
5 cm
FM ANT.
Page 29

5
A csatornák gyors beállítása
Mód
Az első alkalommal, amikor bekapcsoljuk a
televíziót, menü jelenik meg a képernyőn.
Ezzel kiválaszthatjuk a menük nyelvét.
Ha a menü nem jelenik meg, a megjelenítés
érdekében tartsuk 8 másodpercig lenyomva a
televízió - és + nyomógombjait.
& A nyelvet a távirányító
îÏ
nyomógombjaival választhatjuk ki, és a ¬
nyomógombbal tárolhatjuk.
é Most válasszuk ki az országunkat a
îÏ
nyomógombokkal, majd tároljuk a ¬
nyomógombbal.
Ha az Ön országa nem jelenik meg a listán,
válasszuk az “.. .” beállítást.
“ A keresés automatikusan elindul.
A folyamat eltart néhány percig.
A kijelző mutatja a keresés előrehaladását és a
talált programok számát.Végül megjelenik a
menü.A talált programok átszámozása
Ha abba akarja hagyni a keresést, nyomja meg a
H gombot. Ha a keresés semmilyen programot
sem talált, lapozzunk a 12. oldalon lévő hasznos
tudnivalókhoz.
‘ Ha az adó vagy a kábelhálózat automatikus
műsorrendszerező jelet ad le, a programok
automatikusan megfelelő számozást kapnak.
( Ellenkező esetben a talált programok csökkenő
sorrendű sorszámokat kapnak:99, 98,97 stb.
Átszámozáshoz használjuk a FAJTA menüt.
Egyes adók vagy kábelhálózatok saját osztályozási
paramétereket adnak (régió,nyelv stb).
Ebben az esetben választásunkat a î és a Ï
nyomógombokkal jelezhetjük és a ¬ -val
érvényesíthetjük.
& Nyomjuk le a H gombot.A főmenü
megjelenik a képernyőn.
é Nyomjuk le a
¬ gombot az INDÍTÁS (Ï)
kiválasztásához.Az INDÍTÁS menü megjelenik:
“ A
Ï nyomógomb segítségével válasszuk ki a
FAJTA beállítást, és nyomjuk le a
¬ gombot.
A TÓL lehetőség aktív.
Me
gjegyzés: ez a menü a következő logika szerint
működik:
•
TÓL alapján” (írjuk be a program aktuális számát)
• HOZ szerint” (írjuk be az új számot)
• a számok TÁROLÁSA” (a művelet végrehajtva).
‘ A
Ȭ vagy a 0-9 nyomógombokkal
válasszuk ki az átszámozni kívánt programot.
P
élda: a 78-as programot kívánjuk átszámozni
2-re: írjuk be: 78.
(
Válasszuk ki a HOZ lehetőséget (Ï
nyomógomb)
, és írjuk be a kívánt új számot a
Ȭ vagy a 0-9 nyomógombok
segítségével (példánkban írjuk be a
2-t).
§ Válasszuk ki a TÁROLÁS lehetőséget (
Ï
nyomógomb), és nyomjuk le a ¬ gombot.
A TÁROLVA felirat megjelenik, és a tárolás
végrehajtásra kerül.Példánkban a 78-as
program átszámozódott 2-re (és a 2-es 78-ra).
è Válasszuk ki a TÓL lehetőséget (
î
nyomógomb) és kezdjük újra a ‘ – §
lépéseket annyiszor, ahány programot át
kívánunk számozni.
! Ha ki akarunk lépni a menüből, nyomjuk le a
d
gombot.
ORSZÁG
CZECH KÖZTÁRS.
MAGYARORSZÁG
HORVÁTORSZÁG
LENGYELORSZÁG
ROMÁNIA
SELECT LANGUAGE
NYELV
• HUNGARIAN
POLISH
RUMANIAN
RUSSIAN
SERBIAN
• KÉP
• HANG
• FUNKCIÓK
• INDæTÁS
INDæTÁS
• NYELV
• ORSZÁG
• AUT. TÁROL.
• KÉZI TÁROL.
• FAJTA
• NÉVADÁS
TÓL
HOZ
ÁTVÁLT
Page 30

6
A programok elnevezése
Ha kívánjuk, nevet adhatunk az első
40 programnak. (1-től 40-ig).
& Nyomjuk le a
H gombot.
é Válasszuk ki a INDĺTÁS lehetőséget (
Ï), és
nyomjuk le a
¬ gombot.A INDĺTÁS menü
megjelenik.
“ Nyomjuk le ötször egymás után a
Ï gombot
a NÉVADÁS kiválasztásához (a képernyő alján
elrejtve),és nyomjuk le a
¬ gombot.
A menü megjelenik:
‘ A
0-9 vagy a @ P # gombokkal válasszuk
ki az elnevezni kívánt programot.
Me
gjegyzés: beállításkor a programok elnevezése
automatikusan megtörténik az azonosító jel
átvitelekor.
( A
Ȭ nyomógombok segítségével lépjünk
be a névbeírási mezőbe (5 karakter).
§ A betüket az
îÏ gombokkal választhatjuk
ki.
è Ha beírtuk a nevet,nyomjuk le a
H gombot.
A program neve tárolódik.
! Ismételjük meg a ‘ – è lépéseket minden
egyes elnevezni kívánt program esetében.
ç A menükből való kilépéshez nyomjuk le a
d
gombot.
INDæTÁS
• NYELV
• ORSZÁG
• AUT. TÁROL.
• KÉZI TÁROL.
• FAJTA
• NÉVADÁS BBC_1
A nyelv és az ország kiválasztása
Automatikus programkeresés
& Nyomjuk le a H gombot a főmenü
megjelenítéséhez.
é Válasszuk ki a INDĺTÁS lehetőséget (
Ï), és
nyomjuk le a
¬ gombot.A INDĺTÁS menü
megjelenik.A NYELV kiválasztása aktív
“ Nyomjuk le a
¬ gombot a NYELV menübe
való belépéshez.
‘ A
îÏ gombokkal válasszuk ki a nyelvet.
A menük a kiválasztott nyelven jelennek meg.
( A NYELV menüből való kilépéshez nyomjuk le a
È gombot.
§ Válasszuk ki az ORSZÁG lehetőséget (
Ï), és
nyomjuk le a
¬ gombot.
è A
îÏ gombokkal válasszuk ki az országot.
Haz az Ön országa nem jelenik meg a listán,
válassza az “Egyéb” beállítást.
! Az ORSZÁG menüből való kilépéshez nyomjuk
le a
È gombot.
ç A menükből való kilépéshez nyomjuk le a d gombot.
Ez a menü lehetővé teszi,hogy automatikusan
tároljuk a régiónkban (vagy kábeltévés
hálózatunkban) elérhető programokat.
& Először hajtsuk végre a fenti & – !
műveleteket, majd:
é Válasszuk ki az AUTÓ TÁROL lehetőséget
(
Ï), és nyomjuk le a ¬ gombot.A keresés
elindul. Néhány perc elteltével automatikusan
újra megjelenik a INDĺTÁS menü.
“ Ha az adó vagy a kábelhálózat automatikus
műsorrendszerező jelet ad le,a programok
automatikusan megfelelő számozást kapnak.
‘ Ellenkező esetben a talált programok csökkenő
sorrendű sorszámokat kapnak:99, 98,97 stb.
Átszámozáshoz használjuk a FAJTA menüt.
Egyes adók vagy kábelhálózatok saját osztályozási
paramétereket adnak (régió,nyelv stb). Ebben az
esetben választásunkat a
î és a Ï
nyomógombokkal jelezhetjük és a ¬ -val
érvényesíthetjük. Ha abba akarja hagyni a keresést,
nyomja meg a
H gombot. Ha egyetlen csatornát
sem talált, nézze át a Tanácsok című fejezetet (12.old.).
( A menükből való kilépéshez nyomjuk le a
d
gombot.
• KÉP
• HANG
• FUNKCIÓK
• INDæTÁS
INDæTÁS
• NYELV
• ORSZÁG
• AUT. TÁROL.
• KÉZI TÁROL.
• FAJTA
• NÉVADÁS
HUNGARIAN
POLISH
RUMANIAN
INDæTÁS
• NYELV
• ORSZÁG
• AUT. TÁROL.
• KÉZI TÁROL.
• FAJTA
• NÉVADÁS
KERESÉS
KÉREM VÁRJON
TALÁLT PROG. 2
215.18 MHZ
Page 31

7
Kézi programkeresés
Ezzel a menüvel egyenként tárolhatjuk a
programokat.
& Nyomjuk le a
H gombot.
é Válasszuk ki a INDĺTÁS lehetőséget (
Ï), és
nyomjuk le a
¬ gombot.A INDĺTÁS menü
megjelenik.
“ Válasszuk ki a KÉZI TÁROL lehetőséget (Ï), és
nyomjuk le a
¬ gombot.A menü megjelenik :
‘ A RENDSZER menübe való belépéshez
nyomjuk le a
¬ gombot.A îÏ
nyomógombokkal válasszuk ki az EURÓPA
lehetőséget (automatikus beállítás*), vagy a kézi
beállítással a WEST EUR (BG norma), EAST
EUR (DK norma), UK (I norma) vagy FRANCE
(LL’ norma) lehetőségeket.Ekkor a menüből
való kilépéshez nyomjuk le a
È gombot.
* Franciaország kivételével (LL’norma) válasszuk ki
a FRANCE lehetőséget).
( Válassza ki a KERESÉS címszót (
Ï) és
nyomja meg a
¬ gombot. Megkezdődik a
keresés.Amint a készülék tisztán fog egy adást,
a keresés abbamarad.Folytassa az è. ponttól.
Ha ismeri a keresett csatorna frekvenciáját,
akkor beütheti a számgombok (
0-9)
segítségével.
Ha egyetlen csatornát sem talált, nézze át a
Tanácsok című fejezetet (12. old.).
§ Ha a vétel minősége nem kielégítő, válassza ki
FINOM ÁLL. címszót (a képernyő alsó részén)
és tartsa nyomva a
È vagy a ¬ gombot.
è Válassza ki a PROG.SZÁM címszót és
használja a kívánt szám beviteléhez a
Ȭ
gombokat vagy a számgombokat (0-9).
! Válassza ki a TÁROLÁS címszót (
Ï) és
nyomja meg a
¬ gombot. Röviden
megjelenik a TÁROLVA jel.A csatorna állása
rögzítve van.
ç Ismételje meg a (-! müveleteket annyiszor,
ahány programot tárolni akar.
Kilépés : Nyomja meg a
d gombot.
• KÉP
• HANG
• FUNKCIÓK
• INDæTÁS
INDæTÁS
KÉZI TÁROL.
• RENDSZER
• KERESÉS
• PROG. SZÁM
• FINOMÁLLæTÁS
• TÁROLÁS
EUROPE
WEST EUR
EAST EUR
UK
FRANCE
A rádió használata
A rádió üzemmód kiválasztása
Nyomja meg a távirányító Â gombját,ezzel tud
váltani televízió üzemmódból rádió üzemmódba.
Rádió üzemmódban a rádióállomás száma és neve
(ha rendelkezésre áll),hullámhossza és a sáv
megjelenik a képernyőn.
A rádióállomások nevének beviteléhez használja a
NÉVADÁS menüt (7. old.)
Programok kiválasztása
Az FM állomásokat a
09vagy a @ P #
gombbal választhatja ki (1-től 40-ig).
Rádióállomások listája
Nyomja meg a
ı
gombot a rádióállomás-lista
megjelenítéséhez/eltüntetéséhez. Ezután
használja a kurzort az állomás kiválasztásához.
A rádió menük használata
A rádió különleges beállítási módjait a
H
gombbal érheti el.
Rádióállomások keresése
Ha a gyors telepítést használta, valamennyi
rendelkezésre álló
FM állomás bekerült a memóriába.
Új keresés elindításához használja az
INDÍTÁS :AUTÓ
TÁ ROL
menüt (teljes keresés érdekében) vagy a KÉZI
TÁ ROL
menüt (az állomások egyenkénti kereséséhez).
A FAJTA és NÉVADÁS menü lehetővé teszi a
rádióállomások csoportosítását, illetve elnevezését.
Ezek a menük ugyanúgy működnek,mint a
TV menük.
A képernyő takarékos üzemmódja
Az
FUNKCIÓK menüben aktiválhatja/kikapcsolhatja
a képernyő takarékos üzemmódját.A pontos idő, a
rádióadó hullámhossza és neve, (ha rendelkezésre
áll), ekkor sorban egymás után jelenik meg.
Page 32

8
A kép beállítása
A hang beállítása
& Nyomjuk le a H, majd az ¬ gombot.
Megjelenik a KÉP menü:
é Az
îÏ gombokkal választhatjuk ki a
beállítási lehetőségeket, a beállítást pedig a
Ȭ gombokkal végezhetjük el.
Megjegyzés: legördülő menü jelenik meg.A Ï
gomb folyamatos nyomva tartásával elérhetjük a
képernyő alján lévő, eltakart beállításokat is.
“ Ha végrehajtottuk a beállításokat, válasszuk ki
a TÁROLÁS lehetőséget, és nyomjuk le a
¬
gombot azok rögzítéséhez.
‘ A menükből való kilépéshez nyomjuk le a
d
gombot.
A beállítások leírása:
• FÉNYERŐ:a kép fényerejét szabályozza.
• SZÍN: a szín intenzitását szabályozza.
• KONTRASZT: a világos és a sötét árnyalatok
közötti különbséget szabályozza.
• TELÍTETTSÉG: a kép tisztaságát szabályozza.
• TÁROLÁS: tárolja a kép beállításait.
•
ZAJCSÖKKENTÉS
:rossz vétel esetén csökkenti
a kép zajszintjét (hangyás kép).
• KONTRASZT +:Az képkontraszt automatikus
szabályozó áramköreinek be- és kikapcsolásához
(a kép legsötétebb részeit tartósan feketén tartja)
& Nyomjuk le a H gombot, válasszuk ki a
HANG lehetőséget, és nyomjuk le a
¬
gombot. Megjelenik a HANG menü:
é Az
îÏ gombokkal választhatjuk ki a
beállítási lehetőségeket, a beállítást pedig a
Ȭ gombokkal végezhetjük el.
“ Ha végrehajtottuk a beállításokat, válasszuk ki
a TÁROLÁS lehetőséget, és nyomjuk le a
¬
gombot azok rögzítéséhez.
‘ A menükből való kilépéshez nyomjuk le a
d
gombot.
A beállítások leírása:
• EQUALIZER: a hangtónus beállítására
(mélyhangok:120 Hz-től magashangok: 10 kHz-ig).
• BALANSZ: a jobb és bal hangszórók hangját
egyensúlyozza ki.
• DELTAHANG (hangerőkülönbség):a
különböző programok vagy külső források
közötti hangerőkülönbség kompenzálására
szolgál.A beállítás az 1-40 közötti programok
és a külső forrás esetében működik.A
@ P
# gombokkal összehasonlíthatja az egyes
programok hangerő szintjét.
• TÁROLÁS: tárolja a hang beállításait.
• HANGERŐKIEGYENLÍTŐ: automatikus
hangerő-szabályozás,mely lehetővé teszi a
hangerő emelkedésének korlátozását,
különösen programváltáskor vagy reklámok
esetén.
• INCR. SURROUND:A térhangzás ki- és
bekapcsolása.A térhangzás sztereó
hangszínben azt az érzést kelti, hogy a
hangszórók nagyobb távolságra vannak
egymástól, mono hangszínben pedig ál-sztereó
hangzást eredményez
• KÉP
• HANG
• FUNKCIÓK
• INDæTÁS
KÉP
• FÉNYERÕ
• SZæN
• KONTRASZT
• KÉPÉLESSÉG
• TÁROLÁS
• ZAJCSÖKKENTÉS
• KONTRASZT+
--I------ 39
• KÉP
• HANG
• FUNKCIÓK
• INDæTÁS
HANG
• EQUALIZER
• BALANSZ
• DELTAHANG
• TÁROLÁS
• HANGERÃKIEGY
ENLÍTÃ
120 HZ
500 HZ
1500 HZ
5 KHZ
10 KHZ
Az funkciók beállítása
& Nyomja meg a H gombot, jelölje ki a
FUNKCIÓK-at (
Ï) és nyomja meg a ¬
gombot. Így a következőket állíthatja be:
é IDŐZÍTÉS, GYEREKZÁR és SZÜLŐI ELL
.: lásd
a következő oldalt.
“ ÜZEMMÓD VÁLAS.: a televízió átváltása Rádió
vagy TV.
‘ Ha ki akar lépni, nyomja meg a
d gombot.
Page 33

9
Az ébresztési funkció
A televízió lezárása
Ez a funkció lehetővé teszi, hogy a televíziót
ébresztőóraként használjuk.
& Nyomjuk le a
H gombot.
é Válasszuk ki a FUNKCIÓK lehetőséget (
Ï),
és nyomjuk le kétszer a
¬ gombot.
Megjelenik az IDŐZÍTÉS menü.
“ Az almenükbe való be- és kilépéshez nyomjuk
le az
¬ gombot, és az îÏ gombokkal
végezzük el a beállítást:
‘ ÓRA: írjuk be a jelenlegi időt.
Me
gjegyzés: az óra aktualizálása minden egyes
bekapcsoláskor automatikusan megtörténik az 1.
program teletextes információja alapján. Ha ezen
nincs teletext, az aktualizálás nem történik meg.
( KEZDÉSI IDŐ: írjuk be a kezdési időt.
§ BEFEJEZÉSI IDŐ: írjuk be az ébresztésre állítás
idejét.
è PROGRAM SZÁMA:
állítsa be annak a
programnak a számát,amelyre ébredni szeretne.
A rádióval felszerelt modelleknél a
Ȭ gombok
segítségével egy FM állomást is kiválaszthat (a
09
gombokkal csak tévéprogramot választhat ki).
! PROGRAM AKTIVÁLÁSA: a következőket
állíthatjuk be:
• EGYSZER: egyszeri ébresztéshez
• NAPONTA: naponta történő ébresztéshez
• TÖRÖL: a beállítás törléséhez
ç A készenléti helyzetbe kapcsoláshoz nyomja meg
a
b gombot.A televízió automatikusan be fog
kapcsolni a beprogramozott időpontban.Ha a
készüléket működésben hagyja, a kiválasztott
időpontban csak programot fog változtatni.
A GYEREKZÁR és az IDŐZÍTŐ közös használata
lehetővé teszi, hogy gyermekei csak az Ön által
meghatározott időben nézzék a televíziót.
Lezárhatunk egyes programokat, vagy a
nyomógombok lezárásával teljes mértékben
megtilthatjuk a televízió használatát.
A programok lezárása
& Nyomjuk le a H gombot.
é Válasszuk ki a FUNKCIÓK lehetőséget (
Ï),és
nyomjuk le a
¬ gombot.
“ Válasszuk ki a SZÜLŐI ELL.lehetőséget (
Ï),és
nyomjuk le a
¬ gombot.
‘ Most írjuk be a biztonsági hozzáférési kódot.
Első használat esetén írjuk be kétszer a 0711 kódot.
Megjelenik a menü.
( A menübe való belépéshez nyomjuk le a ¬ gombot.
§ Az îÏ nyomógombok segítségével
kiválaszthatjuk a kívánt programot,és a
¬
nyomógombbal érvényesíthetjük.A lezárt
programok vagy adások előtt megjelenik a
+ jel.
è A kilépéshez nyomjuk le a
d gombot.
Ezentúl a lezárt programok megtekintéséhez be kell
írni a biztonsági kódot,ellenkező esetben a
képernyő elsötétül.
Figyelem! A külső dekódert használó titkosított
programok esetében a megfelelő EXT adást kell lezárni.
Az összes program lezárása
Hajtsuk végre az & – ‘ lépéseket, majd
válasszuk ki az
ÖSSZES LEZÁR lehetőséget, és
nyomjuk le a
¬ gombot.
A biztonsági kód megváltoztatása
Hajtsuk végre az & – ‘ lépéseket,majd
( Válasszuk ki a KÓD VÁLT lehetőséget, és írjuk be a
négyjegyű számunkat.
§ Másodszori beírással erősítsük meg a kódot.
Az új kód most tárolásra került.
è A menükből való kilépéshez nyomjuk le a d gombot.
Ha elfelejtettük a biztonsági kódunkat, kétszer írjuk be
az univerzális 0711 kódot.
A nyomógombok lezárása
& Nyomjuk le a H gombot, válasszuk ki a FUNKCIÓK
lehetőséget (Ï),és nyomjuk le a ¬gombot.
é Válasszuk ki a GYEREKZÁR lehetőséget (Ï), és
nyomjuk le a
¬ gombot az INDÍTÁS érdekében.
“ Kapcsoljuk ki a televíziót, és rejtsük el a távirányítót.
A televízió most használhatatlan (csak a
távirányítóval lehet bekapcsolni).
‘ A törléshez állítsuk TÖRÖL helyzetbe a
GYEREKZÁR lehetőséget.
• KÉP
• HANG
• FUNKCIÓK
• INDæTÁS
FUNKCIÓK
IDÕZæTÕ
• IDÕZæTÉS
• KEZDÉS
• VÉGE
• PROG. SZÁM
• INDæT
10:56
• KÉP
• HANG
• FUNKCIÓK
• INDæTÁS
FUNKCIÓK
• IDÕZæTÕ
• ÜZEMMÓD VÁLAS.
• GYEREKZÁR
• SZÜLÃI ELL.
TITKOS KÓD
- - - -
Page 34

10
Teletext
Nyomógomb:
Eredmény:
A teletext egy újsághoz hasonlatos információs rendszer, amelyet egyes csatornák sugároznak.
Segítségével a nagyothallók vagy az adás nyelvét nem ismerők feliratozva nézhetik a műsorokat
(a kábeltévé műsorát és a műholdas adásokat...).
A teletext
megjelenítése
Egy oldal
kiválasztása
Lehetővé teszi a teletext megjelenítését,a feliratos üzemmódra
való áttérést és az onnan történő kilépést.A tartalomjegyzék az
elérhető rovatoknak a listájával együtt jelenik meg.Minden
egyes rovatot egy 3 jegyű oldalszám jelöl.
Ha a választott csatorna nem rendelkezik teletext szolgáltatással,
a 100. szám jelenik meg, a képernyő pedig sötét marad (ebben az
esetben lépjen ki a teletextből és válasszon egy másik csatornát).
Írja be a választott oldal számát a 0 - 9 vagy @ P #
gombok segítségével.Például: a 120.oldalhoz üsse be a 12
0
számokat.A szám megjelenik a bal felső sarokban, a
számláló lapoz, majd megjelenik a választott oldal. Ha egy
másik oldalt akar megjeleníteni, ismételje meg a műveletet.
Ha a számláló tovább folytatja a keresést,az azt jelenti, hogy az
adott oldal hiányzik.Válasszon egy másik oldalt.
Ta r talomjegyzék
Közvetlen
hozzáférés
a
rovatokhoz
Ha vissza akar térni a tartalomjegyzékhez (általában a100. oldal).
A képernyő alján színes sávok láthatók.A 4 színes gomb
segítségével hozzáférhetők a rovatok és a hozzájuk tartozó
oldalak.
Ha a rovat vagy az adott oldal még nem hozzáférhető,a színes
sávok villognak.
Az oldal
felnagyítása
Ha meg akarja jeleníteni az oldal felső vagy alsó részét, majd
vissza akar térni a normális mérethez.
Az aloldalak
lapozásának
leállítása
Rejtett
információk
Egyes oldalak aloldalakat tartalmaznak, amelyek
automatikusan követik egymást.Ennek a gombnak a
segítségével az aloldalak lapozását meg lehet állítani vagy újra
lehet indítani.A
_ jel megjelenik a bal felső sarokban.
Ha meg akarja jeleníteni vagy el akarja tüntetni a rejtett
információkat (pl. megfejtéseket).
Kedvenc
oldalak
A 0 – 40 teletext program közül Ön kiválaszthat 4 kedvenc
oldalt, amelyek ezután közvetlenül hozzáférhetők lesznek a
színes gombok segítségével (piros,zöld, sárga,kék).
& Ha meg akarja tekinteni kedvenc oldalait, nyomja meg a
H gombot.
é Jelenítse meg azt a teletext oldalt, amelyet memorizálni
akar.
“ Nyomjuk le az d nyomógombot, majd az általunk
kiválasztott. színes nyomógombot.Az oldal eltárolódik.
‘ A többi színes nyomógomb esetében újra hajtsuk végre a é
és “ lépéseket.
( Ettől kezdve amikor a teletextet megtekinti,kedvenc
oldalai színesben megjelennek a képernyő alján.A többi
rovat megtekintéséhez nyomja meg a Hgombot.
Ha mindent törölni akar,tartsa benyomva a dgombot
5 másodpercig.
Ë
SMART RADIO SMART
MENU
+
[
”
-
123
4
56
789
Ø
0
.
¤
ŸÓù
ª-
¤
0
9
P
+
P
-
Á
Ë
Ó
Ÿ
MENU
Ë
Page 35

11
MODE
VCR
DVD
·¢Ê Æ
∫
Ó
ı
Ω∆
.
Z
¤
A mellékelt ábra szerint kösse össze a képmagnót a televízióval.
A n gomb segítségével válassza az EXT2 vagy S-VHS2
(S-VHS jelhez EXT2 csatlakozóalj).
Mono készülék esetén kösse rá a hangjelet az AUDIO L bemenetre.
A hang automatikusan a televízió jobb és bal hangszórójából jön.
Fejhallgató
Fejhallgató csatlakoztatása esetén a tévékészülék hangja ki van
kapcsolva.A hangerősséget a
@”#gombok segítségével
lehet szabályozni.
A fejhallgató ellenállásának 32 és 600 ohm között kell lenni.
Csatlakozások az oldallapon
Egyéb készülékek csatlakoztatása
Az EXT1 csatlakozóalj audio video bemenetekkel és kimenetekkel valamint RVB bemenetekkel rendelkezik.
Videomagnó (vagy írható DVD)
A mellékelt ábra szerint kösse össze a képmagnót a televízióval.
Használjon jó minőségű EURO-csatlakozózsinórt.
Ha a képmagnón nincs EURO-csatlakozó,a televízióval való
összeköttetés csak az antennazsinóron keresztül valósítható meg.
A televízió 0-ás programját a képmagnó tesztjelére kell hangolni (lásd a
TÁROLÁS fejezetet, 7.old.). A képmagnó képének megjelenítéséhez
nyomja meg a
0 gombot.
Képmagnó és Dekóder
A képmagnó második EURO-csatlakozójára kösse a dekódert.
Ezáltal a kódolt adásokat is felveheti.
Képmagnó
Műhold antenna, dekóder, DVD, játékok...
A mellékelt ábra szerint kösse össze a képmagnót a televízióval.
A csatlakoztatott készülékek kiválasztása
A n gomb megnyomásával válassza az EXT1 és az EXT2 és
S-VHS2 (S-VHS jelhez EXT2 csatlakozóalj).
A legtöbb készülék saját maga vezérli az egyik csatlakozóról a másikra
történő átváltást.
Más készülékek
FM ANT
EXT1
:
VCR
EXT1
*
Video
Video
Audio
S
in
L
in
R
Page 36

12
Tanácsok
Rossz az adás
vétele
Nincs kép
A csatlakoztatott
készülék feketefehér képet ad
Nincs hang
Nem működik a
távirányító?
Készenléti helyzet
A televízió
tisztítása
Újrafelhasználási
irányelv
Még mindig nem
jól működik a
készülék?
Közeli hegyek vagy magas épületek kettős képet, árnyékot vagy visszhangot
okozhatnak. Ebben az esetben próbálja manuálisan beállítani a képet : "finom
beállítások" (7. old.) vagy módosítsa a külső antenna iránybeállítását. Ellenőrizze
azt is, hogy az antenna képes-e adást fogni ezen a frekvenciasávon (UHF vagy VHF
sáv).
Kellőképpen csatlakoztatta-e az antennát?
A megfelelő rendszert vállasztotta-e ki?
(7. old.).A rosszul csatlakoztatott zsinórok
(pl. antennacsatlakozó) gyakran okoznak kép- vagy hangproblémát (amikor a
készüléket elmozdítják,előfordulhat, hogy bizonyos csatlakozódugók elmozdulnak
a helyükről).Ellenőrizze az összes csatlakozást.
A videókazetták lejátszásához ellenőrizze, hogy a felvétel ugyan olyan standardben készült-e (PAL, SECAM, NTSC), mint amilyet a képmagnó le tud játszani.
Ha bizonyos programokat a készülék hang nélkül sugároz, akkor nem a megfelelő
TV-rendszert vállasztotta ki. Módosítsa a RENDSZER beállítását (7.old.).
A televíziókészülékhez csatlakoztatott hangerősítő nem ad ki hangot. Ellenőrizze,
hogy véletlenül nem cserélte-e fel az audio kimenetet a bemenettel.
Ha a távirányító használata közben a televízió fényjelzője nem villog,cserélje ki az
elemeket.
Ha a készülék bekapcsolásakor az készenléti helyzetben marad és a ZÁRVA jelzés
jelenik meg, mikor a televízió nyomógombjait használja,akkor a GYEREKZÁR
funkció nincs kiiktatva (lásd 9. old.).
Ha a televízió nem kap új jelzést 15 percig ? keresztül, akkor automatikusan
készenléti helyzetre kapcsol át.
Az energiatakarékosság érdekében a televízió olyan alkotórészeket tartalmaz,
amelyek készenléti állapotban nagyon kevés energiát fogyasztanak (1 W alatt).
A képernyőt és a burkolatot kizárólag tiszta, puha és nem bolyhosodó ruhával
lehet tisztítani. Ne használjunk olyan termékeket, amelyekben alkohol vagy
oldószer van.
A televízió újrafelhasználható anyagokat tartalmaz,melyek újra feldolgozhatók.
A környezeti ártalmak minimumra csökkentése érdekében erre szakosodott
vállalatok összegyűjtik a használt készülékeket,szétszerelik őket és összegyűjtik
belőlük az újra felhasználható anyagokat (kérjen információt a kereskedőtől).
Húzza ki a televíziókészülék hálózati kábelét a hálózati aljzatból 30 másodpercre,
majd ismét csatlakoztassa azt.
Meghibásodás esetén ne próblja sajátkezűleg megjavítani a készüléket,hanem
forduljon a szervizhez.
Page 37

1
ǂ‰ÂÌËÂ
й„О‡‚ОВМЛВ
З˚ ФЛУ·ВОЛ ˝ЪУЪ ЪВОВ‚ЛБУ, ТФ‡ТЛ·У Б‡ ‚‡¯В ‰У‚ВЛВ.
щЪУ ЫНУ‚У‰ТЪ‚У ФВ‰М‡БМ‡˜ВМУ ‰Оfl ЪУ„У, ˜ЪУ·˚ ФУПУ˜¸ ‚‡П ЫТЪ‡МУ‚ЛЪ¸
Л ФУО¸БУ‚‡Ъ¸Тfl ‚‡¯ЛП ЪВОВ‚ЛБУУП.
е˚ ТУ‚ВЪЫВП ‚‡П ‚МЛП‡ЪВО¸МУ ФУ˜ЛЪ‡Ъ¸ Лı.
е˚ М‡‰ВВПТfl, ˜ЪУ М‡¯‡ ЪВıМУОУ„Лfl ФУОМУТЪ¸˛ Ы‰У‚ОВЪ‚УЛЪ ‚‡Т.
ìÒÚ‡Ìӂ͇
бМ‡НУПТЪ‚У Т Ьд ЪВОВ‚ЛБУУП . . . . . . . . . . . . . . . . . . . . . . . . . . . . . . . . . . .2
дО‡‚Л¯Л ФЫО¸Ъ‡ ‰ЛТЪ‡МˆЛУММУ„У ЫФ‡‚ОВМЛfl . . . . . . . . . . . . . . . . . . . . . .3
ìÒÚ‡Ìӂ͇ ÚÂ΂ËÁÓ‡ . . . . . . . . . . . . . . . . . . . . . . . . . . . . . . . . . . . . . . . . . .4
Å˚ÒÚ‡fl ̇ÒÚÓÈ͇ ÔÓ„‡ÏÏ . . . . . . . . . . . . . . . . . . . . . . . . . . . . . . . . . . . .5
ëÓÚËӂ͇ ÔÓ„‡ÏÏ . . . . . . . . . . . . . . . . . . . . . . . . . . . . . . . . . . . . . . . . . .5
Ç˚·Ó flÁ˚͇ Ë ÒÚ‡Ì˚ . . . . . . . . . . . . . . . . . . . . . . . . . . . . . . . . . . . . . . . . . .6
Ä‚ÚÓχÚ˘ÂÒ͇fl ̇ÒÚÓÈ͇ . . . . . . . . . . . . . . . . . . . . . . . . . . . . . . . . . . . . . .6
ç‡Á‚‡ÌË ÔÓ„‡ÏÏ˚ . . . . . . . . . . . . . . . . . . . . . . . . . . . . . . . . . . . . . . . . . . .6
êۘ̇fl ̇ÒÚÓÈ͇ . . . . . . . . . . . . . . . . . . . . . . . . . . . . . . . . . . . . . . . . . . . . . .7
èÓθÁÓ‚‡ÌËÂ
аТФУО¸БУ‚‡МЛВ ‡‰ЛУ . . . . . . . . . . . . . . . . . . . . . . . . . . . . . . . . . . . . . . . . . . .7
ç‡ÒÚÓÈ͇ ËÁÓ·‡ÊÂÌËfl . . . . . . . . . . . . . . . . . . . . . . . . . . . . . . . . . . . . . . . .8
ç‡ÒÚÓÈ͇ Á‚Û͇ . . . . . . . . . . . . . . . . . . . . . . . . . . . . . . . . . . . . . . . . . . . . . . .8
з‡ТЪУИН‡ ı‡‡НЪВЛТЪЛН . . . . . . . . . . . . . . . . . . . . . . . . . . . . . . . . . . . . . . .8
îÛÌ͈Ëfl "í‡ÈÏÂ" . . . . . . . . . . . . . . . . . . . . . . . . . . . . . . . . . . . . . . . . . . . . . .9
ЕОУНЛУ‚Н‡ ЪВОВ‚ЛБУ‡ . . . . . . . . . . . . . . . . . . . . . . . . . . . . . . . . . . . . . . . . .9
нВОВЪВНТЪ . . . . . . . . . . . . . . . . . . . . . . . . . . . . . . . . . . . . . . . . . . . . . . . . . . .10
èÂËÙÂËÈ̇fl ‡ÔÔ‡‡ÚÛ‡
ЗЛ‰ВУП‡„МЛЪУЩУМ . . . . . . . . . . . . . . . . . . . . . . . . . . . . . . . . . . . . . . . . . . . .11
ÑÛ„‡fl ‡ÔÔ‡‡ÚÛ‡ . . . . . . . . . . . . . . . . . . . . . . . . . . . . . . . . . . . . . . . . . . . .11
èÓ‰Íβ˜ÂÌËfl Ò·ÓÍÛ. . . . . . . . . . . . . . . . . . . . . . . . . . . . . . . . . . . . . . . . . . . .11
ÑÎfl ‚˚·Ó‡ ÔÓ‰Íβ˜ÂÌÌ˚ı ‡ÔÔ‡‡ÚÓ‚ . . . . . . . . . . . . . . . . . . . . . . . . . . . .11
ëÓ‚ÂÚ˚ . . . . . . . . . . . . . . . . . . . . . . . . . . . . . . . . . . . . . . . . . . . . . . . . . . . . .12
w
ìıÓ‰ Á‡ ÚÂ΂ËÁÓÓÏ
СОfl ЫıУ‰‡ Б‡ ˝Н‡МУП Л НУФЫТУП ЪВОВ‚ЛБУ‡ ВНУПВМ‰ЫВЪТfl
ЛТФУО¸БУ‚‡Ъ¸ ˜ЛТЪЫ˛, Пfl„НЫ˛ Л МВ‚УТЛТЪЫ˛ ЪflФУ˜НЫ. зВ ЛТФУО¸БУ‚‡Ъ¸
˜ЛТЪfl˘ЛВ ТВ‰ТЪ‚‡, ТУ‰ВК‡˘ЛВ ТФЛЪ ЛОЛ ‡ТЪ‚УЛЪВОЛ.
PyccÍËÈ
Page 38

2
бМ‡НУПТЪ‚У Т Ьд ЪВОВ‚ЛБУУП
дМУФНЛ ЫФ‡‚ОВМЛfl М‡ ЪВОВ‚ЛБУВ
• .: ‚Íβ˜ÂÌË ËÎË ‚˚Íβ˜ÂÌË ÚÂ΂ËÁÓ‡.
• - + : В„ЫОЛУ‚Н‡ ЫУ‚Мfl „УПНУТЪЛ.
•
<> : ‚˚·Ó ÔÓ„‡ÏÏ.
• MENU: ‚˚БУ‚ ПВМ˛ Л ‚˚ıУ‰ ЛБ ПВМ˛; ТОВ‰ЫВЪ
М‡К‡Ъ¸ У‰МУ‚ВПВММУ 2 НМУФНЛ - Л +. б‡ЪВП Т
ФУПУ˘¸˛ НМУФУН
<> ПУКМУ ‚˚·‡Ъ¸
М‡ТЪ‡Л‚‡ВП˚И ˝ОВПВМЪ, ‡ Т ФУПУ˘¸˛ НМУФУН - +
ПУКМУ ‚˚ФУОМЛЪ¸ М‡ТЪУИНЫ.
èËϘ‡ÌËÂ.
дУ„‰‡ ЛТФУО¸БЫВЪТfl ЩЫМНˆЛfl
бДейд йн СЦнЦв, НМУФНЛ -+Ë <> fl‚Îfl˛ÚÒfl
̇ÍÚË‚Ì˚ÏË (ÒÏ. ÏÂÌ˛
XAPAKTEPàCT, ÒÚ. 9).
à̉Ë͇ÚÓ ‚Íβ˜ÂÌËfl Ë ËÌه͇ÒÌ˚ ‰‡Ú˜ËÍË.
èÓ‰ÒÚ‡‚͇ Ò Â„ÛÎËÛÂÏ˚Ï Û„ÎÓÏ Ì‡ÍÎÓ̇.
Çˉ ÒÁ‡‰Ë
йТМУ‚М˚В ФУ‰ТУВ‰ЛМВМЛfl ‚˚ФУОМfl˛ЪТfl М‡ МЛКМВИ Ф‡МВОЛ ЪВОВ‚ЛБУ‡.
ЕУОВВ ФУ‰У·МЫ˛ ЛМЩУП‡ˆЛ˛ У ‚˚ФУОМВМЛЛ ФУ‰ТУВ‰ЛМВМЛИ ТП. М‡ ТЪ. 12.
Ц‚УНУММВНЪУ EXT1.
èÓ‰Íβ˜ÂÌËfl Ò·ÓÍÛ.
щЪЫ ФУ‰ТЪ‡‚НЫ ПУКМУ ТМflЪ¸ Л ЫТЪ‡МУ‚ЛЪ¸
‚ПВТЪУ МВВ ФЛТФУТУ·ОВМЛВ ‰Оfl ПУМЪ‡К‡ М‡
ТЪВМЫ, ФУТЪ‡‚ОflВПУВ ФУ Б‡Н‡БЫ
(ФУЛМЩУПЛЫИЪВ У· ˝ЪУП Т‚УВ„У
ФУТЪ‡‚˘ЛН‡).
ЙМВБ‰‡ ЪВОВ‚ЛБЛУММУИ Л ‡‰ЛУ‡МЪВММ˚.
к‡Б˙ВП ФЛЪ‡МЛfl ФУТЪУflММУ„У ЪУН‡.
<
-
.
+
<
*
S
Video
Video
EXT1
Audio
in
L
in
R
:
DC in
FM ANT
Page 39

3
12
MENU
”
P
564
879
0
3
--
++
.
[
Ÿ
Á
-
ª
`
ù
SMART
SMART RADIO
Ë
¤
ı
Y
Ó
дО‡‚Л¯Л ФЫО¸Ъ‡ ‰ЛТЪ‡МˆЛУММУ„У ЫФ‡‚ОВМЛfl
ı лФЛТУН ФУ„‡ПП
СОfl ЪУ„У, ˜ЪУ·˚ ‚˚‚ВТЪЛ М‡ ˝Н‡М /
Ы·‡Ъ¸ Т ˝Н‡М‡ ТФЛТУН ФУ„‡ПП.
аТФУО¸БЫИЪВ Б‡ЪВП НО‡‚Л¯Л
îÏ
‰Îfl ‚˚·Ó‡ ÔÓ„‡ÏÏ˚ Ë Í·‚˯Û
L ‰Îfl ‚˚‚Ó‰‡  ̇ ˝Í‡Ì.
è‰ ÔÓ„‡ÏχÏË ÔÓfl‚ÎflÂÚÒfl
Á̇Í
+ (ÒÚ. 9), ÂÒÎË ÓÌË
Á‡·ÎÓÍËÓ‚‡Ì˚ ËÎË
? : , ÂÒÎË ÓÌË
‡Á·ÎÓÍËÓ‚‡Ì˚.
àÌÙÓχˆËfl ̇ ˝Í‡ÌÂ
СОfl Н‡ЪНУ‚ВПВММУ„У ‚˚‚У‰‡ М‡
˝Í‡Ì/Ò ˝Í‡Ì‡ ÌÓχ ËÎË
̇Á‚‡ÌËfl ÔÓ„‡ÏÏ˚ (ÂÒÎË ÓÌÓ
ТЫ˘ВТЪ‚ЫВЪ), ‚ВПВМЛ, Б‚ЫНУ‚У„У
ВКЛП‡ Л УЪТЪ‡˛˘В„УТfl ‚ВПВМЛ
Ú‡Èχ. ç‡ÊËχڸ ‚ Ú˜ÂÌË 5
ТВН. ‰Оfl ФУТЪУflММУ„У ‚˚‚У‰‡ М‡
˝Í‡Ì ÌÓχ ÔÓ„‡ÏÏ˚.
åÂÌ˛
ÑÎfl ‚˚ÁÓ‚‡ ÏÂÌ˛ ËÎË ‚˚ıÓ‰‡ ËÁ ÏÂÌ˛.
í‡ÈÏÂ
ÑÎfl ‚˚·Ó‡ ‰ÎËÌ˚ ÔÂËÓ‰‡
‰У ‡‚ЪУП‡ЪЛ˜ВТНУИ
ÛÒÚ‡ÌÓ‚ÍË ‚ ‰ÂÊÛÌÓÂ
ТУТЪУflМЛВ (УЪ 0 ‰У 240 ПЛМ.)
äÛÒÓ / îÓÏ‡Ú 16:9
щЪЛ 4 НМУФНЛ ФУБ‚УОfl˛Ъ
ÓÒÛ˘ÂÒÚ‚ÎflÚ¸ ÔÂÂıÓ‰ ÏÂʉÛ
‡БОЛ˜М˚ПЛ УФˆЛflПЛ ПВМ˛. дМУФНЛ
Ȭ ÔÓÁ‚ÓÎfl˛Ú ‡Ò¯ËflÚ¸ ËÎË
ТЫК‡Ъ¸ ЛБУ·‡КВМЛВ ФУ ‚ВЪЛН‡ОЛ.
ЙУПНУТЪ¸ : аТФУО¸БЫВЪТfl ‰Оfl
В„ЫОЛУ‚НЛ ЫУ‚Мfl „УПНУТЪЛ Б‚ЫН‡
éÚÍβ˜ÂÌË Á‚Û͇ : ÑÎfl
ÓÚÍβ˜ÂÌËfl Ë ‚Íβ˜ÂÌËfl Á‚ÛÍÓ‚Ó„Ó
ÒÓÔÓ‚ÓʉÂÌËfl.
Ç˚·Ó ‚̯ÌËı ÛÒÚÓÈÒÚ‚
(ÒÚ.11)
з‡КПЛЪВ МВТНУО¸НУ ‡Б ‰Оfl
‚˚·Ó‡ ÔÓ‰Íβ˜ÂÌÌÓ„Ó Í
ÚÂ΂ËÁÓÛ ‚̯ÌÂ„Ó ‡ÔÔ‡‡Ú‡.
ñËÙÓ‚˚ Í·‚˯Ë
СОfl ФflПУ„У ‰УТЪЫФ‡ Н
ÔÓ„‡ÏχÏ. ÑÎfl ‰‚ÛÁ̇˜Ì˚ı
ÌÓÏÂÓ‚ ÔÓ„‡ÏÏ, ‚‚ÂÒÚË ‚ÚÓÛ˛
ˆËÙÛ ‰Ó ËÒ˜ÂÁÌÓ‚ÂÌËfl ˜ÂÚÓ˜ÍË.
СВКЫМУВ ТУТЪУflМЛВ
иУБ‚УОflВЪ ФВВ‚ВТЪЛ ЪВОВ‚ЛБУ
‚ ‰ВКЫМУВ ТУТЪУflМЛВ. СОfl
‚НО˛˜ВМЛfl ЪВОВ‚ЛБУ‡ М‡К‡Ъ¸ М‡
НО‡‚Л¯Ы
b,P@#ËÎË 09.
кВКЛП ‡‰ЛУ / нЗ
èÓÁ‚ÓÎflÂÚ ÔÂÂÍβ˜‡Ú¸
ÚÂ΂ËÁÓ ÏÂÊ‰Û ÂÊËχÏË
‡‰ËÓ Ë íÇ.
З˚БУ‚ ЪВОВЪВНТЪ‡ (ТЪ. 10).
дМУФНЛ ЫФ‡‚ОВМЛfl
ЪВОВЪВНТЪУП (ÒÚ. 10)
è‰ÛÒÚ‡ÌÓ‚ÍË ËÁÓ·‡ÊÂÌËfl Ë Á‚Û͇
й·ВТФВ˜Л‚‡ВЪ ‰УТЪЫФ Н МВТНУО¸НЛП
ФВ‰‚‡ЛЪВО¸М˚П М‡ТЪУИН‡П
ЛБУ·‡КВМЛfl Л Б‚ЫНУ‚У„У
ТУФУ‚УК‰ВМЛfl. иЫМНЪ ПВМ˛
èEPCOHAã. ÒÓÓÚ‚ÂÚÒÚ‚ÛÂÚ
М‡ТЪУИН‡П, НУЪУ˚В ‚˚ФУОМВМ˚ Т
ФУПУ˘¸˛ ПВМ˛.
Ç˚·Ó ÔÓ„‡ÏÏ
СОfl ФВВıУ‰‡ Н ФВ‰˚‰Ы˘ВИ
ЛОЛ ФУТОВ‰Ы˛˘ВИ ФУ„‡ППВ.
зУПВ (М‡Б‚‡МЛВ) ФУ„‡ПП˚ Л
Б‚ЫНУ‚‡fl
̇ÒÚÓÈ͇ ‚˚‚Ó‰flÚÒfl ̇
˝Н‡М М‡ МВТНУО¸НУ
ТВНЫМ‰.
иЛ МВНУЪУ˚ı ФУ„‡ПП‡ı Т
ЪВОВЪВНТЪУП М‡Б‚‡МЛВ
ФУ„‡ПП˚ ФУfl‚ОflВЪТfl ‚
МЛКМВИ ˜‡ТЪЛ ˝Н‡М‡.
è‰˚‰Û˘‡fl ÔÓ„‡Ïχ
СОfl ‰УТЪЫФ‡ Н ФВ‰˚‰Ы˘ВИ
ФУ„‡ППВ.
кВКЛП Б‚ЫНУ‚У„У ТУФУ‚УК‰ВМЛfl
иУБ‚УОflВЪ ЫТЛОЛЪ¸ Б‚ЫН
ТЪВВУЩУМЛ˜ВТНЛı ФВВ‰‡˜
STEREO Ë NICAM MONO ‚
ВКЛПВ Mono, ЛОЛ ФУБ‚УОflВЪ
‚˚·‡Ú¸ ÂÊËÏ DUAL I ËÎË DUAL
II.иЛ ‚˚·УВ MONO ‚ ВКЛПВ
STERЦO ЛМ‰ЛН‡ЪУ ·Ы‰ВЪ ТЛМЛП.
Page 40

4
&
к‡ТФУОУКВМЛВ ЪВОВ‚ЛБУ‡
мТЪ‡МУ‚ЛЪВ ЪВОВ‚ЛБУ М‡ Ъ‚В‰УИ ЫТЪУИ˜Л‚УИ
ФУ‚ВıМУТЪЛ. ЗУ ЛБ·ВК‡МЛВ ‚УБМЛНМУ‚ВМЛfl
УФ‡ТМ˚ı ТЛЪЫ‡ˆЛИ МВ ‰УФЫТН‡ИЪВ ФУФ‡‰‡МЛfl М‡
ЪВОВ‚ЛБУ ‚У‰˚, ‚УБ‰ВИТЪ‚Лfl М‡ МВ„У ЛТЪУ˜МЛНУ‚
ЪВФО‡ (О‡ПФ, Т‚В˜ВИ, М‡„В‚‡ЪВО¸М˚ı ФЛ·УУ‚ Л
Ъ.‰.) Л МВ Б‡Н˚‚‡ИЪВ ‚ВМЪЛОflˆЛУММ˚В В¯ВЪНЛ,
‡ТФУОУКВММ˚В М‡ Б‡‰МВИ Ф‡МВОЛ.
é
иУ‰ТУВ‰ЛМВМЛВ ‡МЪВММ
•
ЗТЪ‡‚ЛЪ¸ ЩЛ¯НЫ ‡МЪВММ˚ ‚ ‡Б˙ВП :, ‡ТФУОУКВММ˚И
Т Б‡‰МВИ ТЪУУМ˚ ЪВОВ‚ЛБУ‡.
• ЗТЪ‡‚¸ЪВ ФУ‚У‰ ФЛО‡„‡ВПУИ ‡‰ЛУ‡МЪВММ˚ ‚ „МВБ‰У
FM ANT, ‡ТФУОУКВММУВ М‡ МЛКМВИ Ф‡МВОЛ ЪВОВ‚ЛБУ‡.
• к‡ТФУОУКЛЪВ ФУ‚У‰‡ Ъ‡Н, ˜ЪУ·˚ УМЛ ФУıУ‰ЛОЛ
˜ÂÂÁ ÓÚ‚ÂÒÚË ‚ ÔÓ‰ÒÚ‡‚Í ‰Îfl ÚÂ΂ËÁÓ‡.
“
èÓ‰Íβ˜ÂÌË ÔËÚ‡ÌËfl
нВОВ‚ЛБУ ‡·УЪ‡ВЪ УЪ ‚ıУ‰fl˘В„У ‚ НУПФОВНЪ
ФУТЪ‡‚НЛ ЛТЪУ˜МЛН‡ ·ВТФВВ·УИМУ„У ФЛЪ‡МЛfl
(БМ‡˜ВМЛВ М‡ФflКВМЛfl ЫН‡Б‡МУ М‡ ˝ЪЛНВЪНВ).
аТФУО¸БЫИЪВ ЪУО¸НУ ‡‰‡ФЪВ ФВВПВММУ„У ЪУН‡,
ФУТЪ‡‚ОflВП˚И Т ЪВОВ‚ЛБУУП.
• иУ‰ТУВ‰ЛМЛЪВ ‡Б˙ВП ФУТЪУflММУ„У ЪУН‡ ‡‰‡ФЪВ‡
Н ‡Б˙ВПЫ ФУТЪУflММУ„У ЪУН‡ ЪВОВ‚ЛБУ‡. йТЪ‡‚¸ЪВ
Т‚У·У‰МУВ ПВТЪУ ‚УНЫ„ ‡‰‡ФЪВ‡ ‰Оfl У·ВТФВ˜ВМЛfl
‚ВМЪЛОflˆЛЛ.
• иУ‰ТУВ‰ЛМЛЪВ Н‡·ВО¸ ФЛЪ‡МЛfl ‡‰‡ФЪВ‡ Л ‚ТЪ‡‚¸ЪВ
‚ЛОНЫ ‚ ТВЪВ‚Ы˛ УБВЪНЫ (220-240 З/ 50 Йˆ).
л‚В‰ВМЛfl ФУ ФУ‰ТУВ‰ЛМВМЛ˛ ‰Ы„Лı ЫТЪУИТЪ‚ ТП.
М‡ ТЪ. 12.
‘
иЫО¸Ъ ‰ЛТЪ‡МˆЛУММУ„У ЫФ‡‚ОВМЛfl
ÇÒÚ‡‚¸Ú ‰‚ ÔË·„‡ÂÏ˚ ·‡Ú‡ÂÈÍË ÚËÔ‡ R6,
Òӷ≇fl ̇‰ÎÂʇ˘Û˛ ÔÓÎflÌÓÒÚ¸.
З ˆВОflı Уı‡М˚ УНЫК‡˛˘ВИ ТВ‰˚ ·‡Ъ‡ВИНЛ,
ФУТЪ‡‚ОflВП˚В Т ˝ЪЛ ЫТЪУИТЪ‚УП, МВ ТУ‰ВК‡Ъ
ЪЫЪЛ, Н‡‰ПЛfl Л МЛНВОfl. зВ ‚˚·‡Т˚‚‡ИЪВ
ЛТФУО¸БУ‚‡ММ˚В ·‡Ъ‡ВИНЛ, ‡ ЛТФУО¸БЫИЪВ ‰Оfl Лı
ЫЪЛОЛБ‡ˆЛЛ ЛПВ˛˘ЛВТfl ‚ ‡ТФУflКВМЛЛ ТВ‰ТЪ‚‡
(У·‡ЪЛЪВТ¸ Н Т‚УВПЫ ФУТЪ‡‚˘ЛНЫ).
(
ÇÍβ˜ÂÌËÂ
уЪУ·˚ ‚НО˛˜ЛЪ¸ ЪВОВ‚ЛБУ, М‡КПЛЪВ НМУФНЫ
ФЛЪ‡МЛfl. аМ‰ЛН‡ЪУ Б‡„УЛЪТfl БВОВМ˚П, Л
‚НО˛˜ЛЪТfl ˝Н‡М. иВВИ‰ЛЪВ Н „О‡‚В Е˚ТЪ‡fl
ЫТЪ‡МУ‚Н‡ М‡ ТЪ. 5. ЦТОЛ ЪВОВ‚ЛБУ М‡ıУ‰ЛЪТfl ‚
ВКЛПВ УКЛ‰‡МЛfl (Н‡ТМ˚И ЛМ‰ЛН‡ЪУ), М‡КПЛЪВ
НМУФНЫ P
# М‡ ФЫО¸ЪВ ‰ЛТЪ‡МˆЛУММУ„У ЫФ‡‚ОВМЛfl.
иЛ ЛТФУО¸БУ‚‡МЛЛ ФЫО¸Ъ‡ ‰ЛТЪ‡МˆЛУММУ„У
ЫФ‡‚ОВМЛfl ЛМ‰ЛН‡ЪУ ·Ы‰ВЪ ПЛ„‡Ъ¸.
ìÒÚ‡Ìӂ͇ ÚÂ΂ËÁÓ‡
5 cm
5 cm
5 cm
FM ANT.
Page 41

5
Å˚ÒÚ‡fl ̇ÒÚÓÈ͇ ÔÓ„‡ÏÏ
ëÓÚËӂ͇ ÔÓ„‡ÏÏ
èË Ô‚ÓÏ ‚Íβ˜ÂÌËË ÚÂ΂ËÁÓ‡ ̇ ˝Í‡ÌÂ
ÔÓfl‚ÎflÂÚÒfl ÏÂÌ˛. Ç ˝ÚÓÏ ÏÂÌ˛ LJÏ
Ô‰·„‡ÂÚÒfl ‚˚·‡Ú¸ flÁ˚Í ÏÂÌ˛ :
ЦТОЛ ПВМ˛ МВ ФУfl‚ОflВЪТfl М‡ ˝Н‡МВ, М‡КПЛЪВ
Л ФЛ‰ВКЛЪВ ‚ ЪВ˜ВМЛВ 8 ТВНЫМ‰ НО‡‚Л¯Л
- Ë + ÚÂ΂ËÁÓ‡, ‰Îfl ‚˚‚Ó‰‡ Â„Ó Ì‡ ˝Í‡Ì.
& аТФУО¸БЫИЪВ НО‡‚Л¯Л îÏ ÔÛθڇ
‰ЛТЪ‡МˆЛУММУ„У ЫФ‡‚ОВМЛfl ‰Оfl ‚˚·У‡ flБ˚Н‡,
‡ Б‡ЪВП ФУ‰Ъ‚В‰ЛЪВ ‚˚·У М‡К‡ЪЛВП М‡
¬.
é á‡ÚÂÏ ‚˚·ÂËÚ LJ¯Û ÒÚ‡ÌÛ Ò ÔÓÏÓ˘¸˛
Í·‚˯ îÏ Ë ÔӉڂ‰ËÚ ̇ʇÚËÂÏ Ì‡ ¬.
ÖÒÎË Ç‡¯‡ Òڇ̇ Ì ÔÓfl‚ÎflÂÚÒfl ̇ ˝Í‡ÌÂ,
‚˚·ÂËÚÂ ". . ."
“ иУЛТН М‡˜ЛМ‡ВЪТfl ‡‚ЪУП‡ЪЛ˜ВТНЛ.
йФВ‡ˆЛfl Б‡МЛП‡ВЪ МВТНУО¸НУ ПЛМЫЪ.
з‡ ˝Н‡МВ УЪУ·‡К‡ВЪТfl ФУˆВТТ ФУЛТН‡ Л
НУОЛ˜ВТЪ‚У М‡И‰ВММ˚ı ФУ„‡ПП. иУ
УНУМ˜‡МЛЛ ФУЛТН‡ ПВМ˛ ЛТ˜ВБ‡ВЪ Т ˝Н‡М‡.
СОfl ‚˚ıУ‰‡ ЛБ ПВМ˛ ЛОЛ ФВН‡˘ВМЛfl ФУЛТН‡
М‡К‡Ъ¸ М‡
H ÖÒÎË ÌË Ó‰Ì‡ ÔÓ„‡Ïχ Ì ·˚·
̇ȉÂ̇, Ó·‡ÚËÚ¸Òfl Í „·‚ ëÓ‚ÂÚ˚ ̇ ÒÚ. 12.
‘ ÖÒÎË Ô‰‡Ú˜ËÍ ËÎË Í‡·Âθ̇fl ÒÂÚ¸
ФВВ‰‡ВЪ ТЛ„М‡О ‡‚ЪУП‡ЪЛ˜ВТНУИ
ТУЪЛУ‚НЛ, ФУ„‡ПП˚ ·Ы‰ЫЪ
ФУМЫПВУ‚‡М˚ Ф‡‚ЛО¸МУ.
( Ç ÔÓÚË‚ÌÓÏ ÒÎÛ˜‡Â, ̇ȉÂÌÌ˚ ÔÓ„‡ÏÏ˚
·Ы‰ЫЪ ФУМЫПВУ‚‡М˚ ‚ Ы·˚‚‡˛˘ВП ФУfl‰НВ,
М‡˜ЛМ‡fl Т МУПВ‡ 99, 98, 97... СОfl
ФВВМЫПВ‡ˆЛЛ ФУ„‡ПП ЛТФУО¸БУ‚‡Ъ¸ ПВМ˛
лйкнакйЗдД.
зВНУЪУ˚В Н‡·ВО¸М˚В ТВЪЛ ФВВ‰‡˛Ъ Т‚УЛ
ТУ·ТЪ‚ВММ˚В Ф‡‡ПВЪ˚ ТУЪЛУ‚НЛ (flБ˚Н,
ТЪ‡М‡, ...). З ˝ЪУП ТОЫ˜‡В, ‚˚ ‰УОКМ˚
Т‰ВО‡Ъ¸ ‚˚·У Т ФУПУ˘¸˛ НО‡‚Л¯
îÏ Ë
ÔӉڂ‰ËÚ¸ Ò ÔÓÏÓ˘¸˛
¬.
& з‡КПЛЪВ М‡ НО‡‚Л¯Ы H. ç‡ ˝Í‡ÌÂ
ÓÚÓ·‡Ê‡ÂÚÒfl „·‚ÌÓ ÏÂÌ˛.
é З˚·ВЛЪВ млнДзйЗдД (Ï) Л М‡КПЛЪВ М‡
¬. ç‡ ˝Í‡Ì ÔÓfl‚ÎflÂÚÒfl ÏÂÌ˛
млнДзйЗдД :
“ З˚·ВЛЪВ лйкнакйЗдД Т ФУПУ˘¸˛
Í·‚˯Ë
Ï Л М‡КПЛЪВ М‡ ¬. Ç˚·Ó éí
‡ÍÚË‚ËÁËÓ‚‡Ì.
èËϘ‡ÌË :
˝ÚÓ ÏÂÌ˛ ÙÛÌ͈ËÓÌËÛÂÚ
Òӄ·ÒÌÓ ÒÎÂ‰Û˛˘ÂÈ ÎÓ„ËÍ :
• "ë " (‚‚‰ËÚ ÌÓÏ ÚÂÍÛ˘ÂÈ ÔÓ„‡ÏÏ˚),
• "ˉÚË Ñé" (‚‚ÂÒÚË ÌÓ‚˚È ÌÓÏÂ),
• "ийеЦзьнъ МУПВ‡" (УФВ‡ˆЛfl ‚˚ФУОМВМ‡).
‘ З˚·ВЛЪВ ФУ„‡ППЫ, НУЪУЫ˛ З˚ ıУЪЛЪВ
ФВВМЫПВУ‚‡Ъ¸ Т ФУПУ˘¸˛ НО‡‚Л¯
Ȭ
ËÎË ÓÚ 0 ‰Ó 9.
èËÏ :
‚˚ ıУЪЛЪВ ЛБПВМЛЪ¸ МУПВ
ФУ„‡ПП˚ 78 ("л") М‡ 2 ("зД") : ‚‚В‰ЛЪВ
МУПВ
78.
( Ç˚·ÂËÚ çÄ (Í·‚˯‡ Ï) Ë ‚‚‰ËÚ ÌÓ‚˚È
ÌÓÏÂ Ò ÔÓÏÓ˘¸˛ Í·‚˯
Ȭ ËÎË ÓÚ 0
‰Ó 9 ( ‚ ̇¯ÂÏ ÔËÏ - 2).
§ З˚·ВЛЪВ бДеЦзД (НО‡‚Л¯‡ Ï) Л М‡КПЛЪВ
̇
¬. ç‡ ˝Í‡Ì ÔÓfl‚ÎflÂÚÒfl Û͇Á‡ÌËÂ
абеЦзЦзй Л Б‡ПВМ‡ ФУЛБ‚У‰ЛЪТfl.
З М‡¯ВП ФЛПВВ ФУ„‡ППВ 78
ФВВМЫПВУ‚‡М‡ М‡ 2, ‡ 2 - М‡ 78.
è Ç˚·ÂËÚ ë (Í·‚˯‡ î) Ë ÔӉ·ÈÚÂ
ÒÌÓ‚‡ ÓÔ‡ˆËË
‘-§ ÒÚÓθÍÓ ‡Á, ÒÍÓθÍÓ
ФУ„‡ПП З˚ КВО‡ВЪВ ФВВМЫПВУ‚‡Ъ¸.
! СОfl ‚˚ıУ‰‡ ЛБ ПВМ˛ М‡КПЛЪВ М‡ НО‡‚Л¯Ы d.
SELECT LANGUAGE
К
HUNGARIAN
POLISH
RUMANIAN
• УССК
SERBIAN
С
уЦпаь
ЗЦзЙкаь
пйкЗДнаь
ийгътД
кйллаь
ОБ
УК
КС.
УСО
УСО
• К
• С
•
ОСОК
• У. С.
• СООК
•
С
ДО
Page 42

6
ç‡Á‚‡ÌË ÔÓ„‡ÏÏ˚
З˚ ПУКВЪВ, ВТОЛ КВО‡ВЪВ, ФЛТ‚УЛЪ¸
М‡Б‚‡МЛfl 40 ФВ‚˚П ФУ„‡ПП‡П
(УЪ 1 ‰У 40).
& з‡КПЛЪВ М‡ НО‡‚Л¯Ы H.
é Ç˚·ÂËÚÂ млнДзйЗдД (Ï) Л М‡КПЛЪВ М‡
¬. ç‡ ˝Í‡Ì ÔÓfl‚ÎflÂÚÒfl ÏÂÌ˛
млнДзйЗдД.
“ з‡КПЛЪВ 5 ‡Б М‡ Ï ‰Îfl ‚˚·Ó‡ àåü
(‚ МЛКМВИ ˜‡ТЪЛ ˝Н‡М‡) Л М‡КПЛЪВ М‡
¬.
ç‡ ˝Í‡Ì ÔÓfl‚ÎflÂÚÒfl ÏÂÌ˛ :
‘ Ç˚·ÂËÚ ÔÓ„‡ÏÏÛ, ÍÓÚÓÓÈ Ç˚ Ê·ÂÚÂ
ÔËÒ‚ÓËÚ¸ ̇Á‚‡ÌËÂ Ò ÔÓÏÓ˘¸˛ Í·‚˯
0-9 ËÎË @ ê #.
иЛПВ˜‡МЛВ : ФЛ М‡ОЛ˜ЛЛ
Л‰ВМЪЛЩЛН‡ˆЛУММУ„У ТЛ„М‡О‡ М‡Б‚‡МЛВ
МВНУЪУ˚ı ФУ„‡ПП ФУfl‚ОflВЪТfl
‡‚ЪУП‡ЪЛ˜ВТНЛ ‚ ПУПВМЪ М‡ТЪУИНЛ.
( аТФУО¸БЫИЪВ НО‡‚Л¯Л È¬ ‰Îfl
ÔÂÂÏ¢ÂÌËfl ‚ ÁÓÌ ̇Á‚‡ÌËfl (5 Á̇ÍÓ‚).
§ аТФУО¸БЫИЪВ НО‡‚Л¯Л îÏ ‰Îfl ‚˚·Ó‡
Á̇ÍÓ‚.
è з‡КПЛЪВ М‡ H ФУТОВ ‚‚У‰‡ М‡Б‚‡МЛfl.
з‡Б‚‡МЛВ Б‡ФУПЛМ‡ВЪТfl.
! èÓ‚ÚÓËÚ ÓÔ‡ˆËË ‘-è ‰Îfl ͇ʉÓÈ
ÔÓ„‡ÏÏ˚, ÍÓÚÓÓÈ Ç˚ Ê·ÂÚ ÔËÒ‚ÓËÚ¸
̇Á‚‡ÌËÂ.
ç СОfl ‚˚ıУ‰‡ ЛБ ПВМ˛ М‡КПЛЪВ М‡ НО‡‚Л¯Ы d.
УСО
• К
• С
•
ОСОК
• У. С.
• СООК
•
BBC_1
Ç˚·Ó flÁ˚͇ Ë ÒÚ‡Ì˚
Ä‚ÚÓχÚ˘ÂÒ͇fl ̇ÒÚÓÈ͇
& з‡КПЛЪВ М‡ НО‡‚Л¯Ы H ‰Îfl ‚˚‚Ó‰‡ ̇
˝Í‡Ì „·‚ÌÓ„Ó ÏÂÌ˛.
é З˚·ВЛЪВ млнДзйЗдД (Ï) Л М‡КПЛЪВ М‡
¬. з‡ ˝Н‡МВ ФУfl‚ОflВЪТfl ПВМ˛ млнДзйЗдД.
Ç˚·Ó üáõä ‡ÍÚË‚ËÁËÓ‚‡Ì.
“ з‡КПЛЪВ М‡ ¬ ‰Îfl ‚ıÓ‰‡ ‚ ÏÂÌ˛ üáõä.
‘ Ç˚·ÂËÚ flÁ˚Í Ò ÔÓÏÓ˘¸˛ Í·‚˯ îÏ.
åÂÌ˛ ·Û‰ÛÚ Ô‰ÒÚ‡‚ÎÂÌ˚ ̇ ‚˚·‡ÌÌÓÏ
flÁ˚ÍÂ.
( з‡КПЛЪВ М‡ È ‰Îfl ‚˚ıÓ‰‡ ËÁ ÏÂÌ˛ üáõä.
§ З˚·ВЛЪВ лнкДзД (Ï) Л М‡КПЛЪВ М‡ ¬.
è Ç˚·ÂËÚ LJ¯Û ÒÚ‡ÌÛ Ò ÔÓÏÓ˘¸˛ Í·‚˯
îÏ.
ÖÒÎË Ç‡¯‡ Òڇ̇ Ì ÔÓfl‚ÎflÂÚÒfl ̇ ˝Í‡ÌÂ,
‚˚·ÂËÚÂ ". . ."
! з‡КПЛЪВ М‡ È ‰Оfl ‚˚ıУ‰‡ ЛБ ПВМ˛ лнкДзД.
ç СОfl ‚˚ıУ‰‡ ЛБ ПВМ˛ М‡КПЛЪВ М‡ НО‡‚Л¯Ы d.
щЪУ ПВМ˛ ФУБ‚УОflВЪ ‡‚ЪУП‡ЪЛ˜ВТНЛИ ФУЛТН
‚ТВı ФУ„‡ПП, ‰УТЪЫФМ˚ı ‚ З‡¯ВП В„ЛУМВ
(ЛОЛ М‡ З‡¯ВИ Н‡·ВО¸МУИ ТВЪЛ).
& иУ‰ВО‡ИЪВ ТМ‡˜‡О‡ МЛКВУФЛТ‡ММ˚В
ÓÔ‡ˆËË
&-!, ‡ Á‡ÚÂÏ :
é З˚·ВЛЪВ ДЗнйзДлнкйвдД (Ï) Ë
М‡КПЛЪВ М‡
¬. иУЛТН М‡˜ЛМ‡ВЪТfl.
иУ ЛТЪВ˜ВМЛЛ МВТНУО¸НЛı ПЛМЫЪ М‡ ˝Н‡МВ
ТМУ‚‡ ‡‚ЪУП‡ЪЛ˜ВТНЛ ФУfl‚ОflВЪТfl ПВМ˛
млнДзйЗдД.
“ ÖÒÎË Ô‰‡Ú˜ËÍ ËÎË Í‡·Âθ̇fl ÒÂÚ¸
ФВВ‰‡ВЪ ТЛ„М‡О ‡‚ЪУП‡ЪЛ˜ВТНУИ ТУЪЛУ‚НЛ,
ФУ„‡ПП˚ ·Ы‰ЫЪ ФУМЫПВУ‚‡М˚ Ф‡‚ЛО¸МУ.
‘ Ç ÔÓÚË‚ÌÓÏ ÒÎÛ˜‡Â, ̇ȉÂÌÌ˚ ÔÓ„‡ÏÏ˚
·Ы‰ЫЪ ФУМЫПВУ‚‡М˚ ‚ Ы·˚‚‡˛˘ВП
ФУfl‰НВ, М‡˜ЛМ‡fl Т МУПВ‡ 99, 98, 97...
СОfl ФВВМЫПВ‡ˆЛЛ ФУ„‡ПП
ЛТФУО¸БУ‚‡Ъ¸ ПВМ˛ лйкнакйЗдД.
зВНУЪУ˚В Н‡·ВО¸М˚В ТВЪЛ ФВВ‰‡˛Ъ Т‚УЛ
ТУ·ТЪ‚ВММ˚В Ф‡‡ПВЪ˚ ТУЪЛУ‚НЛ (flБ˚Н,
ТЪ‡М‡, ...). З ˝ЪУП ТОЫ˜‡В, ‚˚ ‰УОКМ˚
Т‰ВО‡Ъ¸ ‚˚·У Т ФУПУ˘¸˛ НО‡‚Л¯
îÏ Ë
ÔӉڂ‰ËÚ¸ Ò ÔÓÏÓ˘¸˛
¬.
СОfl ‚˚ıУ‰‡ ЛБ ПВМ˛ ЛОЛ ФВН‡˘ВМЛfl
ФУЛТН‡ М‡К‡Ъ¸ М‡
H. ÖÒÎË ÌË Ó‰Ì‡
ÔÓ„‡Ïχ Ì ·˚· ̇ȉÂ̇, Ó·‡ÚËÚ¸Òfl Í
„·‚ ëÓ‚ÂÚ˚ ̇ ÒÚ. 12.
( СОfl ‚˚ıУ‰‡ ЛБ ПВМ˛ М‡КПЛЪВ М‡ НО‡‚Л¯Ы d.
ОБ
УК
КС.
УСО
УСО
• К
• С
•
ОСОК
• У. С.
• СООК
•
УССК
SERBIAN
SLOVAK
УСО
• К
• С
•
ОСОК
• У. С.
• СООК
•
ОСК
ОЛ. ОДОД.
Д. ОГ.
2
215.18 MHZ
Page 43

7
êۘ̇fl ̇ÒÚÓÈ͇
ùÚÓ ÏÂÌ˛ ÔÓÁ‚ÓÎflÂÚ Û˜ÌÛ˛ ̇ÒÚÓÈÍÛ
ÔÓ„‡ÏÏ.
& з‡КПЛЪВ М‡ НО‡‚Л¯Ы H.
é
З˚·ВЛЪВ млнДзйЗдД (П) Л М‡КПЛЪВ М‡
¬. з‡ ˝Н‡МВ ФУfl‚ОflВЪТfl ПВМ˛ млнДзйЗдД.
“ З˚·ВЛЪВ кму. зДлнк. (Ï) Л М‡КПЛЪВ
̇
¬. ç‡ ˝Í‡Ì ÔÓfl‚ÎflÂÚÒfl ÏÂÌ˛ :
‘ з‡КПЛЪВ М‡ ¬ ‰Îfl ‚ıÓ‰‡ ‚ ÏÂÌ˛
лалнЦеД. аТФУО¸БЫИЪВ НО‡‚Л¯Л
îÏ
‰Оfl ‚˚·У‡ EUROPE (‡‚ЪУП‡ЪЛ˜ВТНУВ
М‡ıУК‰ВМЛВ*) ЛОЛ ‚˚·У‡ Ы˜МУИ
М‡ТЪУИНЛ : WEST EUR (ТЪ‡М‰‡Ъ BG),
EAST EUR (ТЪ‡М‰‡Ъ DK), UK (ТЪ‡М‰‡Ъ I)
ЛОЛ FRANCE (ТЪ‡М‰‡Ъ LL’). б‡ЪВП
М‡КПЛЪВ М‡
È ‰Îfl ‚˚ıÓ‰‡ ËÁ ÏÂÌ˛.
* б‡ ЛТНО˛˜ВМЛВП о‡МˆЛЛ (ТЪ‡М‰‡Ъ LL’);
‚˚·‡Ú¸ FRANCE.
( З˚·‡Ъ¸ ийалд Л М‡К‡Ъ¸ М‡ ¬.
иУЛТН М‡˜ЛМ‡ВЪТfl. д‡Н ЪУО¸НУ ФУ„‡ПП‡
М‡И‰ВМ‡, ФУНЫЪН‡ ФВН‡˘‡ВЪТfl.
иВВИЪЛ Н УФВ‡ˆЛЛ
è. ÖÒÎË ‚‡Ï
ЛБ‚ВТЪМ‡ ˜‡ТЪУЪ‡ КВО‡ВПУИ ФУ„‡ПП˚,
‚˚ ПУКВЪВ МВФУТВ‰ТЪ‚ВММУ М‡·‡Ъ¸ ВВ
МУПВ, Т ФУПУ˘¸˛ НО‡‚Л¯
09.
ЦТОЛ МЛ Н‡НУВ ЛБУ·‡КВМЛВ МВ М‡И‰ВМУ,
У·‡ЪЛЪВТ¸ Н „О‡‚В лУ‚ВЪ˚ (ТЪ. 12).
§ ÖÒÎË ÔËÂÏ ÔÓ„‡ÏÏ˚
МВЫ‰У‚ОВЪ‚УЛЪВОВМ, ‚˚·‡Ъ¸ ‚‡Л‡МЪ
нйздДь зДлнкйвдД Л М‡К‡Ъ¸ М‡
НО‡‚Л¯Л
È ËÎË ¬.
è З˚·‡Ъ¸ М‡ТЪУИНЫ ‹ икйЙкДеех Л
ЛТФУО¸БУ‚‡Ъ¸ НО‡‚Л¯Л
Ȭ ËÎË 09
‰Îfl ̇·Ó‡ Ê·ÂÏÓ„Ó ÌÓχ.
!
З˚·‡Ъ¸ бДийеазДзаЦ Л М‡К‡Ъ¸ М‡ ¬.
з‡ ˝Н‡МВ ФУfl‚ОflВЪТfl ТОУ‚У бДийезЦзй,
Л ФУ„‡ПП‡ Б‡ФУПЛМ‡ВЪТfl.
çç
èÓ‚ÚÓËÚ¸ ˝Ú‡Ô˚ ÓÚ ( ‰Ó ! ‰Îfl ͇ʉÓÈ
ÔÓ„‡ÏÏ˚, ÍÓÚÓÛ˛ ‚˚ Ê·ÂÚ ‚‚ÂÒÚË ‚
Ô‡ÏflÚ¸.
ÑÎfl ‚˚ıÓ‰‡: ̇ʇڸ ̇ Í·‚˯Û
d.
ОБ
УК
КС.
УСО
УСО
У. С.
• СС
• ОСК
• О КЛ
• О. С.
• О
EUROPE
WEST EUR
EAST EUR
UK
FRANCE
аТФУО¸БУ‚‡МЛВ ‡‰ЛУ
Ç˚·Ó ÂÊËχ ‡‰ËÓ
з‡КПЛЪВ НМУФНЫ ВМ‡ ФЫО¸ЪВ
‰ЛТЪ‡МˆЛУММУ„У ЫФ‡‚ОВМЛfl, ˜ЪУ·˚ ФВВ‚ВТЪЛ
ЪВОВ‚ЛБУ ‚ ВКЛП ‡‰ЛУ. З ВКЛПВ ‡‰ЛУ М‡
˝Н‡МВ УЪУ·‡К‡ВЪТfl МУПВ ТЪ‡МˆЛЛ, ВВ
М‡Б‚‡МЛВ (ВТОЛ ЛПВВЪТfl), ˜‡ТЪУЪ‡ Л ВКЛП
‡·УЪ˚.
СОfl ‚‚У‰‡ М‡Б‚‡МЛИ ТЪ‡МˆЛИ ЛТФУО¸БЫИЪВ ПВМ˛
àåü
(ÒÚ. 7).
Ç˚·Ó ÔÓ„‡ÏÏ
аТФУО¸БЫfl НМУФНЛ
09
ËÎË
@ P #
,
‚˚·ÂËÚ FM-Òڇ̈ËË (ÓÚ 1 ‰Ó 40).
лФЛТУН ‡‰ЛУТЪ‡МˆЛИ
з‡КПЛЪВ НМУФНЫ ı, ˜ЪУ·˚ УЪУ·‡БЛЪ¸/ТН˚Ъ¸
ТФЛТУН ‡‰ЛУТЪ‡МˆЛИ. б‡ЪВП ‚˚·ВЛЪВ
ТЪ‡МˆЛ˛ Т ФУПУ˘¸˛ НЫТУ‡.
аТФУО¸БУ‚‡МЛВ ПВМ˛ ‡‰ЛУ
аТФУО¸БЫИЪВ НМУФНЫ H, ˜ЪУ·˚ ФУОЫ˜ЛЪ¸
‰УТЪЫФ Н М‡ТЪУИН‡П, УЪМУТfl˘ЛПТfl Н ‡‰ЛУ.
иУЛТН ‡‰ЛУТЪ‡МˆЛИ
ЦТОЛ ‡МВВ ЛТФУО¸БУ‚‡О‡Т¸ ФУˆВ‰Ы‡ ·˚ТЪУИ
ЫТЪ‡МУ‚НЛ, ‚ТВ ТЪ‡МˆЛЛ, ЛПВ˛˘ЛВТfl ‚ ‰Л‡Ф‡БУМВ
FM, ЫКВ ·˚ОЛ Б‡МВТВМ˚ ‚ Ф‡ПflЪ¸. уЪУ·˚
‚˚ФУОМЛЪ¸ ФУЛТН Б‡МУ‚У, ЛТФУО¸БЫИЪВ ПВМ˛
млнДзйЗдД
:
ДЗнйзДлнкйвдД
(‰Îfl
‚˚ФУОМВМЛfl ФУОМУ„У ФУЛТН‡) ЛОЛ
млнДзйЗдД
(‰Оfl ФУЛТН‡ ТЪ‡МˆЛИ ФУ У‰МУИ). л ФУПУ˘¸˛ ПВМ˛
лйкнакйЗдДЛ аеь
ПУКМУ ЫФУfl‰У˜Л‚‡Ъ¸ ЛОЛ
ФЛТ‚‡Л‚‡Ъ¸ М‡Б‚‡МЛfl ‡‰ЛУТЪ‡МˆЛflП. щЪЛ ПВМ˛
‡·УЪ‡˛Ъ Ъ‡Н КВ, Н‡Н Л ПВМ˛ ЪВОВ‚ЛБУ‡.
ù͇Ì̇fl Á‡ÒÚ‡‚͇
Ç ÏÂÌ˛
XAPAKTEPàCT
ПУКМУ
‚НО˛˜‡Ъ¸/УЪНО˛˜‡Ъ¸ ˝Н‡ММЫ˛ Б‡ТЪ‡‚НЫ.
з‡ ˝Н‡МВ ФУТОВ‰У‚‡ЪВО¸МУ УЪУ·‡К‡ВЪТfl
‚ВПfl, ˜‡ТЪУЪ‡ ТЪ‡МˆЛЛ Л ВВ М‡Б‚‡МЛВ (ВТОЛ
ЛПВВЪТfl).
Page 44

8
ç‡ÒÚÓÈ͇ ËÁÓ·‡ÊÂÌËfl
ç‡ÒÚÓÈ͇ Á‚Û͇
&
з‡КПЛЪВ М‡ НО‡‚Л¯Ы H, ‡ Б‡ЪВП М‡ ¬.
з‡ ˝Н‡МВ ФУfl‚ОflВЪТfl ПВМ˛
абйЕкДЬЦзаЦ
.
é
аТФУО¸БЫИЪВ НО‡‚Л¯Л
îÏ
‰Îfl ‚˚·Ó‡
̇ÒÚÓÈÍË Ë Í·‚˯Ë
Ȭ
‰Îfl
„ÛÎËÓ‚ÍË.
èËϘ‡ÌË :
˝ÚÓ ‡Á‚ÂÚ˚‚‡˛˘ÂÂÒfl ÏÂÌ˛.
èˉÂÊËÚ Í·‚˯Û
Ï
‰Оfl ‰УТЪЫФ‡ Н
ТН˚Ъ˚П М‡ТЪУИН‡П ‚ МЛКМВИ ˜‡ТЪЛ ˝Н‡М‡.
“
иУТОВ В„ЫОЛУ‚НЛ ‚˚·ВЛЪВ бДийезанъ Л
М‡КПЛЪВ na
¬
‰Îfl ÔÓ‰Ú‚ÂʉÂÌËfl.
‘
СОfl ‚˚ıУ‰‡ ЛБ ПВМ˛ М‡КПЛЪВ М‡ НО‡‚Л¯Ы d.
éÔËÒ‡ÌË ̇ÒÚÓÂÍ :
• ькдйлнъ : ÔÓÁ‚ÓÎflÂÚ ÓÚ„ÛÎËÓ‚‡Ú¸ flÍÓÒÚ¸
ËÁÓ·‡ÊÂÌËfl
•
ñÇÖí : ÔÓÁ‚ÓÎflÂÚ ÓÚ„ÛÎËÓ‚‡Ú¸
ЛМЪВМТЛ‚МУТЪ¸ ˆ‚ВЪ‡
• дйзнкДлн : ÔÓÁ‚ÓÎflÂÚ ÓÚ„ÛÎËÓ‚‡Ú¸
‡ÁÌËˆÛ ÏÂÊ‰Û ÚÂÏÌ˚ÏË Ë Ò‚ÂÚÎ˚ÏË ÚÓ̇ÏË
•
кЦбдйлнъ : ÔÓÁ‚ÓÎflÂÚ ÓÚ„ÛÎËÓ‚‡Ú¸
˜ВЪНУТЪ¸ ЛБУ·‡КВМЛfl
•
бДийезанъ : ‚‚Ó‰ËÚ ‚ Ô‡ÏflÚ¸ ̇ÒÚÓÈÍÛ
ËÁÓ·‡ÊÂÌËfl
• è
éåÖXéèé
СДЗиЦза
Ö
: ÔÓ‰‡‚ÎflÂÚ ÔÓÏÂıË
(‚ ‚ˉ «ÒÌ„‡»), ÒÌËʇ˛˘Ë ͇˜ÂÒÚ‚Ó
ËÁÓ·‡ÊÂÌËfl ÔË ÌÂÛ‰Ó‚ÎÂÚ‚ÓËÚÂθÌÓÏ
ÔËÂÏ Ò˄̇·.
• дУМЪ‡ТЪ +: СОfl ‡НЪЛ‚‡ˆЛЛ/‰ВБ‡НЪЛ‚‡ˆЛЛ
‡‚ЪУП‡ЪЛ˜ВТНУИ В„ЫОЛУ‚НЛ НУМЪ‡ТЪМУТЪЛ
ЛБУ·‡КВМЛfl (М‡Л·УОВВ ЪВПМ‡fl ˜‡ТЪ¸
ЛБУ·‡КВМЛfl ФУТЪУflММУ ТЪ‡МУ‚ЛЪТfl ˜ВМУИ).
&
з‡КПЛЪВ М‡ НО‡‚Л¯Ы H‰Оfl ‚˚·У‡ ПВМ˛
бЗмд, ‡ Б‡ЪВП М‡
¬
. ç‡ ˝Í‡Ì ÔÓfl‚ÎflÂÚÒfl
ÏÂÌ˛ áÇìä.
é
аТФУО¸БЫИЪВ НО‡‚Л¯Л
îÏ
‰Îfl ‚˚·Ó‡
̇ÒÚÓÈÍË Ë Í·‚˯Ë
Ȭ
‰Îfl „ÛÎËÓ‚ÍË.
“
иУТОВ В„ЫОЛУ‚НЛ ‚˚·ВЛЪВ бДийезанъ Л
М‡КПЛЪВ na
¬
‰Îfl ÔÓ‰Ú‚ÂʉÂÌËfl.
‘
СОfl ‚˚ıУ‰‡ ЛБ ПВМ˛ М‡КПЛЪВ М‡ НО‡‚Л¯Ы d.
éÔËÒ‡ÌË ̇ÒÚÓÂÍ :
• щдЗДгДвбЦк: М‡ТЪУИН‡ ЪВП·‡ Б‚ЫН‡
(УЪ МЛБНЛı: 120 Йˆ ‰У ‚˚ТУНЛı: 10 НЙˆ).
• ЕДгДзл : ФУБ‚УОflВЪ УЪВ„ЫОЛУ‚‡Ъ¸ Б‚ЫН
ОВ‚У„У Л Ф‡‚У„У „УПНУ„У‚УЛЪВОВИ
• PAбH. ЙPOM (‡БМЛˆ‡ ‚ ЫУ‚МВ „УПНУТЪЛ) :
ФУБ‚УОflВЪ НУПФВМТЛУ‚‡Ъ¸ ‡БМЛˆЫ „УПНУТЪЛ
ПВК‰Ы ‡БОЛ˜М˚ПЛ ФУ„‡ПП‡ПЛ ЛОЛ
‡Б˙ВП‡ПЛ Цпн. щЪ‡ М‡ТЪУИН‡ ‰ВИТЪ‚ЫВЪ ‰Оfl
ФУ„‡ПП 1-40 Л ‰Оfl ‡Б˙ВПУ‚ Цпн.
СОfl ‚˚‡‚МЛ‚‡МЛfl ЫУ‚МВИ „УПНУТЪЛ
‡БМ˚ı Н‡М‡ОУ‚ ЛТФУО¸БЫИЪВ НМУФНЛ
@ P #.
• бДийезанъ : ‚‚У‰ЛЪ ‚ Ф‡ПflЪ¸ М‡ТЪУИНЫ Б‚ЫН‡
• ДкЙ (‡‚ЪУП‡ЪЛ˜ВТНУВ В„ЫОЛУ‚‡МЛВ
„УПНУТЪЛ): ЛТФУО¸БЫВЪТfl ‰Оfl
‡‚ЪУП‡ЪЛ˜ВТНУ„У НУМЪУОfl ЫУ‚Мfl „УПНУТЪЛ,
˜ЪУ·˚ ЛБ·ВК‡Ъ¸ ВБНУ„У ФУ‚˚¯ВМЛfl Б‚ЫН‡, ‚
˜‡ТЪМУТЪЛ ФЛ ФВВНО˛˜ВМЛЛ ФУ„‡ПП˚ ЛОЛ
‚У ‚ВПfl ВНО‡П˚).
• INCR.SURROUND: СОfl ‡НЪЛ‚‡ˆЛЛ /
‰ВБ‡НЪЛ‚‡ˆЛЛ ФУТЪ‡МТЪ‚ВММУ„У ˝ЩЩВНЪ‡.
З ВКЛПВ ТЪВВУ ˝Ъ‡ В„ЫОЛУ‚Н‡ ТУБ‰‡ВЪ
‚ФВ˜‡ЪОВМЛВ Ы‚ВОЛ˜ВМЛfl ‡ТТЪУflМЛfl ПВК‰Ы
„УПНУ„У‚УЛЪВОflПЛ. З ВКЛПВ ПУМУ
ТЛПЫОЛЫВЪТfl ФУТЪ‡МТЪ‚ВММ˚И
ТЪВВУ˝ЩЩВНЪ.
ОБ
УК
КС.
УСО
ОБ
• КОС
•
• КОС
• КОС
• О
• ОООДЛ
• КОС+
-------- 39
ОБ
УК
КС.
УСО
УК
• КЛ
• БЛС
• . ГО
• О
• Г
• INCR.SURROUND
120 HZ
500 HZ
1500 HZ
5 KHZ
10 KHZ
з‡ТЪУИН‡ ı‡‡НЪВЛТЪЛН
& з‡КПЛЪВ НМУФНЫ H, ‚˚·ВЛЪВ ФЫМНЪ ПВМ˛
XAPAKTEPàCT (Ï) Л М‡КПЛЪВ НМУФНЫ
¬. З˚ ТПУКВЪВ ФУЛБ‚ВТЪЛ М‡ТЪУИНЫ :
é нДвеЦк, бДейд йн СЦнЦв Л бДф йн
СЦнЦв : ТП. ТОВ‰Ы˛˘Ы˛ ТЪ‡МЛˆЫ.
“ BõÅOP PEÜàMA: Ô‚Ӊ ÚÂ΂ËÁÓ‡ ‚
ÂÊËÏ ‡‰ËÓ ËÎË ÚÂ΂ËÁÓ‡.
‘ СОfl ‚˚ıУ‰‡ ЛБ ПВМ˛ М‡КПЛЪВ НМУФНЫ d.
Page 45

9
îÛÌ͈Ëfl "í‡ÈÏÂ"
ЕОУНЛУ‚Н‡ ЪВОВ‚ЛБУ‡
щЪУ ПВМ˛ ФУБ‚УОflВЪ З‡П ЛТФУО¸БУ‚‡Ъ¸
ЪВОВ‚ЛБУ Н‡Н ·Ы‰ЛО¸МЛН.
& з‡КПЛЪВ М‡ НО‡‚Л¯Ы H.
é Ç˚·ÂËÚ ÏÂÌ˛ XAPAKTEPàCT (Ï), ‡
Б‡ЪВП М‡КПЛЪВ ‰‚‡К‰˚ М‡
¬. ç‡ ˝Í‡ÌÂ
ÔÓfl‚ÎflÂÚÒfl ÏÂÌ˛
нДвеЦк.
“ ç‡ÊËχÈÚ ̇ ¬ ‰Îfl ‚ıÓ‰‡ ËÎË ‚˚ıÓ‰‡ ËÁ
Н‡К‰У„У ФУ‰-ПВМ˛ Л ЛТФУО¸БЫИЪВ НО‡‚Л¯Л
îÏ ‰Îfl ̇ÒÚÓÈÍË :
‘ ЗкЦеь : ‚‚В‰ЛЪВ ЪВНЫ˘ВВ ‚ВПfl.
иЛПВ˜‡МЛВ : ‚ВПfl ЫТЪ‡М‡‚ОЛ‚‡ВЪТfl
ЪВОВ‚ЛБУУП ‡‚ЪУП‡ЪЛ˜ВТНЛ ФЛ Н‡К‰УП
‚НО˛˜ВМЛЛ, М‡ УТМУ‚В ЛМЩУП‡ˆЛЛ
ЪВОВЪВНТЪ‡ ФУ„‡ПП˚ NУ1. ЦОТЛ ˝Ъ‡
ФУ„‡ПП‡ МВ ФВВ‰‡ВЪ ЪВОВЪВНТЪ,
‡‚ЪУП‡ЪЛ˜ВТН‡fl ЫТЪ‡МУ‚Н‡ МВ ФУЛБ‚У‰ЛЪТfl.
( ЗкЦеь зДу. : ‚В‰ЛЪВ ‚ВПfl М‡˜‡О‡.
§ ЗкЦеь йдйзу. : ‚‚В‰ЛЪВ ‚ВПfl ФВВıУ‰‡
‚ ‰ВКЫМУВ ТУТЪУflМЛВ.
è NУ икйЙк. : ‚‚В‰ЛЪВ МУПВ Н‡М‡О‡, НУЪУ˚И
‚˚ КВО‡ВЪВ ЛТФУО¸БУ‚‡Ъ¸ ‚ Н‡˜ВТЪ‚В
·Û‰ËθÌË͇. ÑÎfl ÏÓ‰ÂÎÂÈ, Ó·ÓÛ‰Ó‚‡ÌÌ˚ı
‡‰ЛУФЛВПМЛНУП, ПУКМУ ‚˚·‡Ъ¸ ‰Оfl ˝ЪУИ
ˆВОЛ ТЪ‡МˆЛ˛ ‰Л‡Ф‡БУМ‡ FM, ЛТФУО¸БЫfl
НМУФНЛ
Ȭ (НМУФНЛ 09 ÔÓÁ‚ÓÎfl˛Ú
‚˚·‡Ъ¸ ЪУО¸НУ ЪВОВ‚ЛБЛУММ˚В Н‡М‡О˚).
!
ДднаЗабак. : З˚ ПУКВЪВ УЪВ„ЫОЛУ‚‡Ъ¸ :
• éÑàç êÄá : ‰Îfl Ó‰ÌÓ͇ÚÌÓ„Ó
ÙÛÌ͈ËÓÌËÓ‚‡ÌËfl,
• ЦЬЦСзЦЗзй : ‰Оfl ВКВ‰МВ‚МУ„У
ЩЫМНˆЛУМЛУ‚‡МЛfl,
• йлнДзйЗдД : ‰Оfl УЪПВМ˚.
ç ç‡Ê‡Ú¸ ̇ b ‰Îfl ÛÒÚ‡ÌÓ‚ÍË ÚÂ΂ËÁÓ‡ ‚
‰ВКЫМУВ ФУОУКВМЛВ. йМ ‡‚ЪУП‡ЪЛ˜ВТНЛ
‚НО˛˜ЛЪТfl ‚ Б‡ФУ„‡ППЛУ‚‡ММУВ ‚ВПfl. ЦТОЛ
ЪВОВ‚ЛБУ ‚НО˛˜ВМ, УМ ФВВНО˛˜ЛЪТfl М‡ МЫКМЫ˛
ФУ„‡ППЫ ‚ Б‡ФУ„‡ППЛУ‚‡ММУВ ‚ВПfl.
дУП·ЛМ‡ˆЛfl ЩЫМНˆЛИ бДфанД Л нДвеЦк
ПУКВЪ ЛТФУО¸БУ‚‡Ъ¸Тfl ‰Оfl У„‡МЛ˜ВМЛfl
‰ОЛЪВО¸МУТЪЛ ЛТФУО¸БУ‚‡МЛfl ЪВОВ‚ЛБУ‡,
М‡ФЛПВ, ‚‡¯ЛПЛ ‰ВЪ¸ПЛ.
З˚ ПУКВЪВ Б‡ФВЪЛЪ¸ ‰УТЪЫФ Н МВНУЪУ˚П
ФУ„‡ПП‡П ЛОЛ ФУОМУТЪ¸˛ Б‡ФВЪЛЪ¸
ФУО¸БУ‚‡МЛВ ЪВОВ‚ЛБУУП ФЫЪВП
·ÎÓÍËÓ‚ÍË Í·‚˯.
ЕОУНЛУ‚Н‡ ФУ„‡ПП
& з‡КПЛЪВ М‡ НО‡‚Л¯Ы
H
.
é Ç˚·ÂËÚ ÏÂÌ˛ XAPAKTEPàCT (Ï), ‡
Б‡ЪВП М‡КПЛЪВ М‡
¬.
“ З˚·ВЛЪВ бДф йн СЦнЦв (Ï) Л М‡КПЛЪВ
̇
¬.
‘ Ç˚ ‰ÓÎÊÌ˚ ‚‚ÂÒÚË Ç‡¯ ÒÂÍÂÚÌ˚È ÍÓ‰
‰УТЪЫФ‡. З ФВ‚˚И ‡Б, ‚‚В‰ЛЪВ ‰‚‡К‰˚
НУ‰ 0711. з‡ ˝Н‡МВ ФУfl‚ОflВЪТfl ПВМ˛.
( з‡КПЛЪВ М‡ ¬ ‰Îfl ‚ıÓ‰‡ ËÎË ‚ ÏÂÌ˛.
§ аТФУО¸БЫИЪВ НО‡‚Л¯Л îÏ ‰Îfl ‚˚·Ó‡
Ê·ÂÏÓÈ ÔÓ„‡ÏÏ˚ Ë ÔӉڂ‰ËÚÂ
̇ʇÚËÂÏ Ì‡
¬. è‰ ÔÓ„‡ÏÏÓÈ
ÔÓfl‚ÎflÂÚÒfl Á̇Í
+ ËÎË Á‡ÏÓÍ.
è
СОfl ‚˚ıУ‰‡ ЛБ ПВМ˛ М‡КПЛЪВ М‡ НО‡‚Л¯Ы d.
нВФВ¸ ‰Оfl ФУТПУЪ‡ Б‡·ОУНЛУ‚‡ММУИ
ФУ„‡ПП˚ З˚ ‰УОКМ˚ ‚‚ВТЪЛ НУ‰ ‰УТЪЫФ‡,
Ë̇˜Â ˝Í‡Ì ÓÒÚ‡ÂÚÒfl ÚÂÏÌ˚Ï.
ЗМЛП‡МЛВ! ‰Оfl ·ОУНЛУ‚НЛ НУ‰ЛУ‚‡ММ˚ı
ФУ„‡ПП Т ЛТФУО¸БУ‚‡МЛВП НУ‰ЛЫ˛˘В„У
ЫТЪУИТЪ‚‡ МВУ·ıУ‰ЛПУ Б‡·ОУНЛУ‚‡Ъ¸
ТУУЪ‚ВЪТЪ‚Ы˛˘ЛИ ‡Б˙ВП Цпн.
ÑÎfl ÚÓ„Ó, ˜ÚÓ·˚ ‡Á·ÎÓÍËÓ‚‡Ú¸ ‚Ò ÔÓ„‡ÏÏ˚
èӉ·ڸ ÓÔ‡ˆËË &-‘ ‡ Б‡ЪВП
‚˚·‡Ъ¸ ЗлЦ лнЦкЦнъ Л М‡К‡Ъ¸ М‡
¬.
СОfl ЛБПВМВМЛfl НУ‰‡ ‰УТЪЫФ‡
èӉ·ڸ ÓÔ‡ˆËË
&-‘, ‡ Á‡ÚÂÏ :
( З˚·‡Ъ¸ абеЦзанъ дйС Л ‚‚ВТЪЛ З‡¯
ÒÓ·ÒÚ‚ÂÌÌ˚È 4-Á̇˜Ì˚È ÍÓ‰.
§
燷‡Ú¸ ÍÓ‰ ‚ÚÓÓÈ ‡Á ‰Îfl ÔÓ‰Ú‚ÂʉÂÌËfl.
LJ¯ ÌÓ‚˚È ÍÓ‰ ‚‚‰ÂÌ ‚ Ô‡ÏflÚ¸.
è
СОfl ‚˚ıУ‰‡ ЛБ ПВМ˛ М‡КПЛЪВ М‡ НО‡‚Л¯Ы d.
ТОЛ З˚ Б‡·˚ОЛ З‡¯ НУМЩЛ‰ВМˆЛ‡О¸М˚И НУ‰,
‚‚В‰ЛЪВ ‰‚‡К‰˚ ЫМЛ‚ВТ‡О¸М˚И НУ‰ 0711.
ЕОУНЛУ‚Н‡ НО‡‚Л¯
& з‡КПЛЪВ М‡ НО‡‚Л¯Ы ç, ‚˚·ÂËÚ ÏÂÌ˛
XAPAKTEPàCT
(Ï), ‡ Б‡ЪВП М‡КПЛЪВ М‡ ¬.
é
Ç˚·ÂËÚÂ
бДейд йн СЦнЦв
(Ï) Ë
М‡КПЛЪВ М‡
¬
‰Îfl ‚˚·Ó‡ Çäã
.
“
З˚НО˛˜ЛЪВ ЪВОВ‚ЛБУ Л ТФfl˜¸ЪВ ФЫО¸Ъ
‰ЛТЪ‡МˆЛУММУ„У ЫФ‡‚ОВМЛfl. иУО¸БУ‚‡МЛВ
ЪВОВ‚ЛБУУП ТЪ‡ОУ МВ‚УБПУКМ˚П (В„У
ПУКМУ ‚НО˛˜ЛЪ¸ ЪУО¸НУ Т ФУПУ˘¸˛ ФЫО¸Ъ‡
‰ЛТЪ‡МˆЛУММУ„У ЫФ‡‚ОВМЛfl).
‘ СОfl УЪПВМ˚ : ЫТЪ‡МУ‚ЛЪВ бДейд йн
СЦнЦв ‚ ФУОУКВМЛВ Çõäã.
ОБ
УК
КС.
УСО
КС.
•
• .
•
ОКО.
• ОГ.
• К.
10:56
ОБ
УК
КС.
УСО
КС.
•
• Б
О
•
ОК О Д
• . О Д
КОД ДОСУ
- - - -
Page 46

10
нВОВЪВНТЪ
з‡КПЛЪВ :
ÑÎfl ÔÓÎÛ˜ÂÌËfl :
нВОВЪВНТЪ ФВ‰ТЪ‡‚ОflВЪ ТУ·УИ ТЛТЪВПЫ ‡ТФУТЪ‡МВМЛfl ЛМЩУП‡ˆЛЛ, ФВВ‰‡‚‡ВПУИ ФУ
МВНУЪУ˚П Н‡М‡О‡П, НУЪУЫ˛ ПУКМУ ˜ЛЪ‡Ъ¸ Н‡Н „‡БВЪЫ. З ˝ЪУИ ТЛТЪВПВ ФВ‰ЫТПУЪВМ‡ Ъ‡НКВ
ЩЫМНˆЛfl ТЫ·ЪЛЪУ‚ ‰Оfl О˛‰ВИ, ЛПВ˛˘Лı ‰ВЩВНЪ˚ ТОЫı‡ ЛОЛ МВ БМ‡˛˘Лı flБ˚Н‡, М‡ НУЪУУП
‚В‰ВЪТfl ФВВ‰‡˜‡ (Н‡·ВО¸М˚В ТВЪЛ, Н‡М‡О˚ ТЛТЪВП˚ ТФЫЪМЛНУ‚У„У ЪВОВ‚В˘‡МЛfl Л Ъ.‰.).
ÇÍβ˜ÂÌËÂ
ЪВОВЪВНТЪ‡
Ç˚·Ó
ÒÚ‡Ìˈ˚
ЪВОВЪВНТЪ‡
щЪ‡ ЩЫМНˆЛfl ФВ‰М‡БМ‡˜ВМ‡ ‰Оfl ‚˚БУ‚‡ ЪВОВЪВНТЪ‡, ‚ıУ‰‡ ‚
ВКЛП М‡ОУКВМЛfl ЪВОВЪВНТЪ/ЛБУ·‡КВМЛВ, ‡ Б‡ЪВП ‚˚ıУ‰‡ ЛБ
ВКЛП‡ ЪВОВЪВНТЪ‡. З У„О‡‚ОВМЛЛ, НУЪУУВ ‚˚‚У‰ЛЪТfl М‡
˝Н‡М, ФВВ˜ЛТОВМ˚ ‚ТВ ‰УТЪЫФМ˚В ‰Оfl БЛЪВОfl Ы·ЛНЛ.
д‡К‰‡fl Ы·ЛН‡ У·УБМ‡˜ВМ‡ 3-БМ‡˜М˚П МУПВУП ТЪ‡МЛˆ˚.
ЦТОЛ ‚˚·‡ММ˚И Н‡М‡О МВ ФВВ‰‡ВЪ ЪВОВЪВНТЪ, М‡ ˝Н‡МВ
ФУfl‚ЛЪТfl ˜ЛТОУ 100 Л Н‡М‡О УТЪ‡МВЪТfl ФЫТЪ˚П (‚ ˝ЪУП ТОЫ˜‡В
‚˚И‰ЛЪВ ЛБ ВКЛП‡ ЪВОВЪВНТЪ‡ Л ‚˚·ВЛЪВ ‰Ы„УИ Н‡М‡О).
З‚В‰ЛЪВ ЪВ·ЫВП˚И МУПВ ТЪ‡МЛˆ˚ Т ФУПУ˘¸˛ НМУФУН
0- 9
ËÎË @P #. ç‡ÔËÏÂ: ‰Îfl ÒÚ‡Ìˈ˚ 120 ̇·ÂËÚÂ
123
:
МУПВ ФУfl‚ЛЪТfl ‚ ОВ‚УП ‚ВıМВП Ы„ОЫ ˝Н‡М‡, Т˜ВЪ˜ЛН ТЪ‡МЛˆ
М‡˜МВЪ ФУЛТН, Л ТЪ‡МЛˆ‡ УЪУ·‡БЛЪТfl М‡ ˝Н‡МВ. иУ‚ЪУЛЪВ
УФВ‡ˆЛ˛ ‰Оfl ‚˚БУ‚‡ ‰Ы„УИ ТЪ‡МЛˆ˚. ÖÒÎË Ò˜ÂÚ˜ËÍ ÒÚ‡Ìˈ
ФУ‰УОК‡ВЪ ‚˚ФУОМflЪ¸ ФУЛТН, ˝ЪУ УБМ‡˜‡ВЪ, ˜ЪУ ‚˚·‡ММ‡fl
ТЪ‡МЛˆ‡ МВ ФВВ‰‡ВЪТfl. З˚·ВЛЪВ ‰Ы„УИ МУПВ ТЪ‡МЛˆ˚.
й„О‡‚ОВМЛВ
èflÏÓÈ
‰УТЪЫФ Н
Û·Ë͇Ï
иУБ‚УОflВЪ ‚ВМЫЪ¸Тfl ‚ У„О‡‚ОВМЛВ (У·˚˜МУ, ˝ЪУ ТЪ‡МЛˆ‡ 100).
З МЛКМВИ ˜‡ТЪЛ ˝Н‡М‡ УЪУ·‡К‡˛ЪТfl УН‡¯ВММ˚В БУМ˚.
СУТЪЫФ
Í ÒÓÓÚ‚ÂÚÒÚ‚Û˛˘ËÏ Û·ËÍ‡Ï ËÎË ÒÚ‡Ìˈ‡Ï
УТЫ˘ВТЪ‚ОflВЪТfl ФЛ ФУПУ˘Л 4 ˆ‚ВЪМ˚ı НМУФУН.
é͇¯ÂÌÌ˚ ÁÓÌ˚ ÏË„‡˛Ú, ÔÓ͇ Û·Ë͇ ËÎË ÒÚ‡Ìˈ‡ ÌÂ
·Û‰ÛÚ ‚˚‚‰ÂÌ˚ ̇ ˝Í‡Ì.
ì‚Â΢ÂÌËÂ
ÒÚ‡Ìˈ˚
лОЫКЛЪ ‰Оfl ‚˚‚У‰‡ М‡ ˝Н‡М ‚ВıМВИ ЛОЛ МЛКМВИ ˜‡ТЪЛ
ЛБУ·‡КВМЛfl, ‡ Б‡ЪВП ‚УБ‚‡Ъ‡ Н МУП‡О¸МУПЫ ЛБУ·‡КВМЛ˛.
éÒÚ‡Ìӂ͇
ÔÓÍۘ˂‡ÌË
fl ÔÓ‰ÒÚ‡Ìˈ
ëÍ˚Ú‡fl
ËÌÙÓχˆËfl
зВНУЪУ˚В ТЪ‡МЛˆ˚ ЛПВ˛Ъ Т‚УЛ ФУ‰ТЪ‡МЛˆ˚, НУЪУ˚В М‡˜ЛМ‡˛Ъ
‡‚ЪУП‡ЪЛ˜ВТНЛ ТПВМflЪ¸ ‰Ы„ ‰Ы„‡. щЪ‡ НМУФН‡ ФУБ‚УОflВЪ
УТЪ‡МУ‚ЛЪ¸ ЛОЛ ‚УБУ·МУ‚ЛЪ¸ ФУНЫ˜Л‚‡МЛВ ФУ‰ТЪ‡МЛˆ. иЛ ˝ЪУП
‚ ‚ВıМВИ ОВ‚УИ ˜‡ТЪЛ ФУfl‚ЛЪТfl ЛМ‰ЛН‡ˆЛfl
_.
лОЫКЛЪ ‰Оfl ЪУ„У, ˜ЪУ·˚ ТН˚Ъ‡fl ЛМЩУП‡ˆЛfl ФУfl‚ЛО‡Т¸
ЛОЛ ЛТ˜ВБО‡ Т ˝Н‡М‡ (В¯ВМЛfl ‰Оfl Л„).
è‰ÔÓ˜ËÚ‡Â
Ï˚Â
ÒÚ‡Ìˈ˚
СОfl Н‡М‡ОУ‚, ФВВ‰‡˛˘Лı ЪВОВЪВНТЪ (0 – 40), ЛПВВЪТfl
‚УБПУКМУТЪ¸ ‚‚ВТЪЛ ‚ Ф‡ПflЪ¸ 4 ФВ‰ФУ˜ЛЪ‡ВП˚ı ‚‡ПЛ
ТЪ‡МЛˆ˚, Н НУЪУ˚П ПУКМУ ·Ы‰ВЪ У·‡˘‡Ъ¸Тfl
МВФУТВ‰ТЪ‚ВММУ Т ФУПУ˘¸˛ ˆ‚ВЪМ˚ı НО‡‚Л¯ (Н‡ТМУИ,
БВОВМУИ, КВОЪУИ, ТЛМВИ).
& з‡К‡Ъ¸ М‡ НМУФНЫ
H
‰Îfl ÔÂÂıÓ‰‡ ‚ ÂÊËÏ
Ô‰ÔÓ˜ËÚ‡ÂÏ˚ı ÒÚ‡Ìˈ.
é З˚‚ВТЪЛ М‡ ˝Н‡М ТЪ‡МЛˆЫ ЪВОВЪВНТЪ‡, НУЪУЫ˛ ‚˚
Ê·ÂÚ ‚‚ÂÒÚË ‚ Ô‡ÏflÚ¸.
“ ç‡Ê‡Ú¸ ̇ Í·‚˯Û
d
, ‡ Á‡ÚÂÏ Ì‡ ÒÓÓÚ‚ÂÚÒÚ‚Û˛˘Û˛
ˆ‚ÂÚÌÛ˛ Í·‚˯Û. ëÚ‡Ìˈ‡ ‚‚‰Â̇ ‚ Ô‡ÏflÚ¸.
‘ ÇÓÁÓ·ÌÓ‚ËÚ¸ ˝Ú‡Ô˚ é Ë “ ‰Îfl ÓÒڇθÌ˚ı ˆ‚ÂÚÌ˚ı
Í·‚˯.
( л ˝ЪУ„У ПУПВМЪ‡, Н‡Н ЪУО¸НУ ‚˚ У·‡ЪЛЪВТ¸ Н
ЪВОВЪВНТЪЫ, ‚‡¯Л ФВ‰ФУ˜ЛЪ‡ВП˚В ТЪ‡МЛˆ˚ ФУfl‚flЪТfl ‚
ˆ‚ВЪВ ‚ МЛКМВИ ˜‡ТЪЛ ˝Н‡М‡. СОfl ЪУ„У, ˜ЪУ·˚ М‡ИЪЛ
У·˚˜М˚В Ы·ЛНЛ, М‡КПЛЪВ М‡ H.
СОfl ЪУ„У, ˜ЪУ·˚ ТЪВВЪ¸ ‚Т˛ ‚‚В‰ВММЫ˛ ЛМЩУП‡ˆЛ˛,
М‡КПЛЪВ М‡ НМУФНЫ
d
Ë Û‰ÂÊË‚‡Èڠ ‚ Ú˜ÂÌËÂ
5 ТВНЫМ‰.
Ë
SMART RADIO SMART
MENU
+
[
”
-
123
4
56
789
Ø
0
.
¤
ŸÓù
ª-
¤
0
9
P
+
P
-
Á
Ë
Ó
Ÿ
MENU
Ë
Page 47

11
MODE
VCR
DVD
·¢Ê Æ
∫
Ó
ı
Ω∆
.
Z
¤
З˚ФУОМЛЪВ ФУ‰НО˛˜ВМЛfl, Н‡Н ФУН‡Б‡МУ М‡ ЛТЫМНВ.
З˚·ВЛЪВ ФУОУКВМЛВ
EXT2 ËÎË S-VHS2 (Ò˄̇Î˚ S-VHS
‰Оfl ‡Б˙ВП‡ EXT2) Т ФУПУ˘¸˛ НМУФНЛ
n.
иЛ ЛТФУО¸БУ‚‡МЛЛ ПУМУЩУМЛ˜ВТНУ„У ЫТЪУИТЪ‚‡,
ФУ‰НО˛˜ЛЪВ Н‡·ВО¸ Б‚ЫНУ‚У„У ТЛ„М‡О‡ Н ‡Б˙ВПЫ AUDIO L.
б‚ЫН ‡‚ЪУП‡ЪЛ˜ВТНЛ ‚УТФУЛБ‚У‰ЛЪТfl ОВ‚˚П Л Ф‡‚˚П
„УПНУ„У‚УЛЪВОflПЛ ЪВОВ‚ЛБУ‡.
ç‡Û¯ÌËÍË
иЛ ФУ‰НО˛˜ВММ˚ı М‡Ы¯МЛН‡ı Б‚ЫН ЪВОВ‚ЛБУ‡
УЪНО˛˜‡ВЪТfl. дМУФНЛ
@”#ÔÓÁ‚ÓÎfl˛Ú
УЪВ„ЫОЛУ‚‡Ъ¸ „УПНУТЪ¸ Б‚ЫН‡ ‚ М‡Ы¯МЛН‡ı.
иУОМУВ ТУФУЪЛ‚ОВМЛВ М‡Ы¯МЛНУ‚ ‰УОКМУ ТУТЪ‡‚ОflЪ¸ УЪ 32
‰У 600 УП.
èÓ‰Íβ˜ÂÌËfl Ò·ÓÍÛ
иУ‰НО˛˜ВМЛВ ФВЛЩВЛИМУИ ‡ФФ‡‡ЪЫ˚
к‡Б˙ВП EXT1 ЛПВВЪ ‚ıУ‰˚/‚˚ıУ‰˚ ‡Ы‰ЛУ Л ‚Л‰ВУ, ‡ Ъ‡НКВ ‚ıУ‰˚ RVB.
ЗЛ‰ВУП‡„МЛЪУЩУМ
(ЛОЛ Б‡ФЛТ˚‚‡˛˘ЛИ DVD-ФУЛ„˚‚‡ЪВО¸)
йТЫ˘ВТЪ‚ЛЪВ ЫН‡Б‡ММ˚В М‡ ЛТЫМНВ ФУ‰НО˛˜ВМЛfl.
аТФУО¸БЫИЪВ ¯МЫ
иЦканЦгъ (SCART) ıÓÓ¯Â„Ó Í‡˜ÂÒÚ‚‡.
ЦТОЛ Ы ‚‡¯В„У ‚Л‰ВУП‡„МЛЪУЩУМ‡ МВЪ ‡Б˙ВП‡ ФВЛЪВО¸
(ЛОЛ ВТОЛ ˝ЪУЪ ‡Б˙ВП ЫКВ Б‡МflЪ ‰Ы„УИ ‡ФФ‡‡ЪЫУИ), ЪУ
‚УБПУКМ‡ ОЛ¯¸ Т‚flБ¸ ˜ВВБ Н‡·ВО¸ ‡МЪВММ˚. З ˝ЪУП
ТОЫ˜‡В ‚˚ ‰УОКМ˚ М‡ИЪЛ ЪВТЪ-ТЛ„М‡О ‚‡¯В„У
‚Л‰ВУП‡„МЛЪУЩУМ‡ Л ФЛТ‚УЛЪ¸ ВПЫ МУПВ ФУ„‡ПП˚ 0
(ТП. Ы˜МУВ Б‡ФУПЛМ‡МЛВ, ТЪ. 6). СОfl ‚УТФУЛБ‚В‰ВМЛfl
ЛБУ·‡КВМЛfl ‚Л‰ВУП‡„МЛЪУЩУМ‡ М‡К‡Ъ¸ М‡ НО‡‚Л¯Ы
0.
ЗЛ‰ВУП‡„МЛЪУЩУМ Л ‰ВНУ‰ЛЫ˛˘ВВ ЫТЪУИТЪ‚У
иУ‰НО˛˜ЛЪВ ‰ВНУ‰В Н ‚ЪУУПЫ ‡Б˙ВПЫ “ФВЛЪВО¸”
‚Л‰ВУП‡„МЛЪУЩУМ‡. З˚ ТПУКВЪВ Б‡ФЛТ˚‚‡Ъ¸
НУ‰ЛУ‚‡ММ˚В ФВВ‰‡˜Л.
ЗЛ‰ВУП‡„МЛЪУЩУМ
йТЫ˘ВТЪ‚ЛЪВ ЫН‡Б‡ММ˚В М‡ ЛТЫМНВ ФУ‰НО˛˜ВМЛfl.
ÑÎfl ‚˚·Ó‡ ÔÓ‰Íβ˜ÂÌÌ˚ı ‡ÔÔ‡‡ÚÓ‚
з‡КПЛЪВ М‡ НМУФНЫ n‰Оfl ‚˚·У‡ ‡Б˙ВП‡ EXT1 Ë EXT2 Ë
S-VHS2 (Ò˄̇Î˚ S-VHS ‰Îfl ‡Á˙Âχ EXT2).
ЕУО¸¯ЛМТЪ‚У ‡ФФ‡‡ЪУ‚ Т‡ПЛ УТЫ˘ВТЪ‚Оfl˛Ъ НУППЫЪ‡ˆЛ˛
(‰ВНУ‰В, ‚Л‰ВУП‡„МЛЪУЩУМ).
ÑÛ„‡fl ‡ÔÔ‡‡ÚÛ‡
(ТФЫЪМЛНУ‚˚И ФЛВПМЛН, ‰ВНУ‰В, ‚Л‰ВУ‰ЛТН, ˝ОВНЪУММ˚В Л„˚...)
FM ANT
EXT1
:
VCR
EXT1
*
Video
Video
Audio
S
in
L
in
R
Page 48

12
ëÓ‚ÂÚ˚
èÎÓıÓ ͇˜ÂÒÚ‚Ó
ËÁÓ·‡ÊÂÌËfl
йЪТЫЪТЪ‚ЛВ
ЛБУ·‡КВМЛfl
иВЛЩВЛИМ‡fl
‡ФФ‡‡ЪЫ‡ ‰‡ВЪ
˜ВМУ-·ВОУВ
ЛБУ·‡КВМЛВ
йЪТЫЪТЪ‚ЛВ Б‚ЫН‡
иЫО¸Ъ
‰ЛТЪ‡МˆЛУММУ„У
ЫФ‡‚ОВМЛfl МВ
‡·УЪ‡ВЪ?
СВКЫМУВ
ТУТЪУflМЛВ
ìıÓ‰ Á‡
ÚÂ΂ËÁÓÓÏ
мН‡Б‡МЛfl ФУ
ЫЪЛОЛБ‡ˆЛЛ
иУ-ФВКМВПЫ МВЪ
ВБЫО¸Ъ‡ЪУ‚?
ЕОЛБУТЪ¸ „У ЛОЛ ‚˚ТУНЛı Б‰‡МЛИ ПУКВЪ ·˚Ъ¸ ФЛ˜ЛМУИ ‡Б‰‚‡Л‚‡МЛfl
ЛБУ·‡КВМЛfl, УЪ‡КВММ˚ı ТЛ„М‡ОУ‚ ЛОЛ ЪВПМ˚ı Ы˜‡ТЪНУ‚ ‚
ЛБУ·‡КВМЛЛ. З ˝ЪУП ТОЫ˜‡В МВУ·ıУ‰ЛПУ ТНУВНЪЛУ‚‡Ъ¸ М‡ТЪУИНЫ
ЛБУ·‡КВМЛfl: ТП. "нУМН‡fl М‡ТЪУИН‡" (ТЪ. 7) ЛОЛ ЛБПВМЛЪ¸ УЛВМЪ‡ˆЛ˛
М‡ЫКМУИ ‡МЪВММ˚. иУБ‚УОflВЪ ОЛ ‚‡¯‡ ‡МЪВММ‡ ФЛМЛП‡Ъ¸ ФУ„‡ПП˚ ‚
˝ЪУИ ФУОУТВ ˜‡ТЪУЪ (UHF ЛОЛ VHF)?
зВ Б‡·˚ОЛ ОЛ ‚˚ ФУ‰НО˛˜ЛЪ¸ ‡МЪВММЫ? 臂ЛО¸МУ ОЛ ‚˚ ‚˚·‡ОЛ
ТЛТЪВПЫ? (ТЪ. 7). иОУıУИ НУМЪ‡НЪ ‚ ‡Б˙ВПВ ФВЛЪВО¸ ЛОЛ ‚ ‡Б˙ВПВ
‡МЪВММ˚ ˜‡ТЪУ fl‚ОflВЪТfl ФЛ˜ЛМУИ ФУ·ОВП Т ЛБУ·‡КВМЛВП Л Б‚ЫНУП
(˜‡ТЪУ ‡Б˙ВП˚ ТОВ„Н‡ ‡Б˙В‰ЛМfl˛ЪТfl ФЛ ФВВПВ˘ВМЛЛ ЪВОВ‚ЛБУ‡).
иУ‚В¸ЪВ ‚ТВ ˝ЪЛ ТУВ‰ЛМВМЛfl.
СОfl ФУТПУЪ‡ ‚Л‰ВУН‡ТТВЪ˚, Ы‰УТЪУ‚В¸ЪВТ¸, ˜ЪУ УМ‡ ·˚О‡ Б‡ФЛТ‡М‡ ‚
ТЪ‡М‰‡ЪВ, НУЪУ˚И ТУ‚ПВТЪЛП ТУ ТЪ‡М‰‡ЪУП ‚‡¯В„У
‚Л‰ВУП‡„МЛЪУЩУМ‡.
ЦТОЛ МВНУЪУ˚В ФУ„‡ПП˚ Мe ЛПВ˛Ъ Б‚ЫН‡, МУ ЛПВ˛Ъ ЛБУ·‡КВМЛВ, ˝ЪУ
БМ‡˜ЛЪ, ˜ЪУ ‚˚ МВ‚ВМУ ‚˚·‡ОЛ ЪВОВ‚ЛБЛУММЫ˛ ТЛТЪВПЫ. аБПВМЛЪВ
М‡ТЪУИНЫ лалнЦеД (ТЪ. 7).
уВВБ ЫТЛОЛЪВО¸, ФУ‰ТУВ‰ЛМВММ˚И Н ЪВОВ‚ЛБУЫ, МВ ‚˚‚У‰ЛЪТfl Б‚ЫН?
иУ‚В¸ЪВ, ˜ЪУ ‚˚ıУ‰МУИ ‡Ы‰ЛУ‡Б˙ВП МВ ФВВФЫЪ‡М Т ‚ıУ‰М˚П.
ЛМ‰ЛН‡ЪУ ЪВОВ‚ЛБУ‡ МВ ПЛ„‡ВЪ ФЛ ЛТФУО¸БУ‚‡МЛЛ ФЫО¸Ъ‡
‰ЛТЪ‡МˆЛУММУ„У ЫФ‡‚ОВМЛfl? б‡ПВМЛЪВ ·‡Ъ‡ВИНЛ.
дУ„‰‡ ФЛ ‚НО˛˜ВМЛЛ ЪВОВ‚ЛБУ‡ УМ УТЪ‡ВЪТfl ‚ ‰ВКЫМУП ТУТЪУflМЛЛ, Л
М‡ ˝Н‡МВ ФУfl‚ОflВЪТfl М‡‰ФЛТ¸ бДфанД, ˝ЪУ УБМ‡˜‡ВЪ, ˜ЪУ ЩЫМНˆЛfl
бДейд йн СЦнЦв Б‡‰ВИТЪ‚У‚‡М‡ (ТЪ. 9). ЦТОЛ ЪВОВ‚ЛБУ МВ ФУОЫ˜‡ВЪ
ТЛ„М‡О‡ ‚ ЪВ˜ВМЛВ 15 ПЛМЫЪ, УМ ‡‚ЪУП‡ЪЛ˜ВТНЛ ФВВıУ‰ЛЪ ‚ ‰ВКЫМУВ
ТУТЪУflМЛВ. л ˆВО¸˛ ˝НУМУПЛЛ ˝ОВНЪУ˝МВ„ЛЛ З‡¯ ЪВОВ‚ЛБУ
У·УЫ‰У‚‡М ‰ВЪ‡ОflПЛ, У·ВТФВ˜Л‚‡˛˘ЛПЛ Н‡ИМВ МЛБНУВ ФУЪВ·ОВМЛВ
˝МВ„ЛЛ ‚ ‰ВКЫМУП ТУТЪУflМЛЛ (ПВМВВ 1 З‡ЪЪ)
СОfl ЫıУ‰‡ Б‡ ˝Н‡МУП Л НУФЫТУП ЪВОВ‚ЛБУ‡ ВНУПВМ‰ЫВЪТfl
ЛТФУО¸БУ‚‡Ъ¸ ˜ЛТЪЫ˛, Пfl„НЫ˛ Л МВ‚УТЛТЪЫ˛ ЪflФУ˜НЫ. зВ ЛТФУО¸БУ‚‡Ъ¸
˜ЛТЪfl˘ЛВ ТВ‰ТЪ‚‡, ТУ‰ВК‡˘ЛВ ТФЛЪ ЛОЛ ‡ТЪ‚УЛЪВОЛ.
З‡¯ ЪВОВ‚ЛБУ ТУ‰ВКЛЪ П‡ЪВЛ‡О˚, ФУ‰ОВК‡˘ЛВ ФУ‚ЪУМУПЫ
ЛТФУО¸БУ‚‡МЛ˛ ЛОЛ ЫЪЛОЛБ‡ˆЛЛ. СОfl ПЛМЛПЛБ‡ˆЛЛ ‚˚·УТУ‚ ‚
УНЫК‡˛˘Ы˛ ТВ‰Ы ТФВˆЛ‡ОЛБЛУ‚‡ММ˚В ФВ‰ФЛflЪЛfl ТУ·Л‡˛Ъ
‚˚¯В‰¯ЛВ ЛБ ЫФУЪВ·ОВМЛfl ЪВОВ‚ЛБУ˚, ˜ЪУ·˚ ‰ВПУМЪЛУ‚‡Ъ¸ Лı Л
ТУı‡МЛЪ¸ П‡ЪВЛ‡О˚, ФЛ„У‰М˚В ‰Оfl ФУ‚ЪУМУ„У ЛТФУО¸БУ‚‡МЛfl
(УТ‚В‰УПЛЪ¸Тfl Ы ‚‡¯В„У ФУ‰‡‚ˆ‡).
З˚НО˛˜ЛЪВ ¯ЪВФТВО¸МЫ˛ ‚ЛОНЫ ЪВОВ‚ЛБУ‡ ЛБ УБВЪНЛ М‡ 30 ТВНЫМ‰, ‡
Б‡ЪВП ТМУ‚‡ ‚НО˛˜ЛЪВ ВВ.
З ТОЫ˜‡В МВЛТФ‡‚МУТЪЛ, МЛНУ„‰‡ МВ Ф˚Ъ‡ИЪВТ¸ УЪВПУМЪЛУ‚‡Ъ¸ ‚‡¯
ЪВОВ‚ЛБУ Т‡ПЛ: У·‡ЪЛЪВТ¸ ‚ ТОЫК·Ы ФУТОВФУ‰‡КМУ„У У·ТОЫКЛ‚‡МЛfl.
Page 49

1
Wstęp
Spis treści
Dziękujemy za zakup naszego odbiornika telewizyjnego.
Niniejsza instrukcja została opracowana aby ułatwić instalację i użytkowanie
Tw ojego odbiornika.
Prosimy o szczegółowe zapoznanie się z instrukcją.
Mamy nadzieję, że nasza technologia spełnia Twoje oczekiwania.
Instalacja
Opis telewizora LCD . . . . . . . . . . . . . . . . . . . . . . . . . . . . . . . . . . . . . . . . . . . . . . . .2
Przyciski pilota . . . . . . . . . . . . . . . . . . . . . . . . . . . . . . . . . . . . . . . . . . . . . . . . . . . .3
Instalacja odbiornika . . . . . . . . . . . . . . . . . . . . . . . . . . . . . . . . . . . . . . . . . . . . . . . .4
Szybka instalacja kanalów telewizyjnych . . . . . . . . . . . . . . . . . . . . . . . . . . . . . . . . .5
Sortowanie . . . . . . . . . . . . . . . . . . . . . . . . . . . . . . . . . . . . . . . . . . . . . . . . . . . . . . .5
Wybór jezyka i kraju . . . . . . . . . . . . . . . . . . . . . . . . . . . . . . . . . . . . . . . . . . . . . . . .6
Programowanie automatyczne . . . . . . . . . . . . . . . . . . . . . . . . . . . . . . . . . . . . . . . .6
Nazwa programu . . . . . . . . . . . . . . . . . . . . . . . . . . . . . . . . . . . . . . . . . . . . . . . . . .6
Programowanie reczne . . . . . . . . . . . . . . . . . . . . . . . . . . . . . . . . . . . . . . . . . . . . . .7
Użytkowanie
Używanie radia . . . . . . . . . . . . . . . . . . . . . . . . . . . . . . . . . . . . . . . . . . . . . . . . . . . . .7
Ustawianie obrazu. . . . . . . . . . . . . . . . . . . . . . . . . . . . . . . . . . . . . . . . . . . . . . . . . .8
Ustawianie dzwieku . . . . . . . . . . . . . . . . . . . . . . . . . . . . . . . . . . . . . . . . . . . . . . . .8
Ustawienia poszczególnych opcji . . . . . . . . . . . . . . . . . . . . . . . . . . . . . . . . . . . . . . .8
Funkcja budzika . . . . . . . . . . . . . . . . . . . . . . . . . . . . . . . . . . . . . . . . . . . . . . . . . . . .9
Blokada odbiornika . . . . . . . . . . . . . . . . . . . . . . . . . . . . . . . . . . . . . . . . . . . . . . . . .9
Telegazeta . . . . . . . . . . . . . . . . . . . . . . . . . . . . . . . . . . . . . . . . . . . . . . . . . . . . . . .10
Urządzenia peryferyjne
Magnetowid . . . . . . . . . . . . . . . . . . . . . . . . . . . . . . . . . . . . . . . . . . . . . . . . . . . . . .11
Inny osprzęt . . . . . . . . . . . . . . . . . . . . . . . . . . . . . . . . . . . . . . . . . . . . . . . . . . . . .11
Podłączania urządzeń peryferyjnych . . . . . . . . . . . . . . . . . . . . . . . . . . . . . . . . . . .11
Wybór podłączonego osprzętu . . . . . . . . . . . . . . . . . . . . . . . . . . . . . . . . . . . . . .11
Porady . . . . . . . . . . . . . . . . . . . . . . . . . . . . . . . . . . . . . . . . . . . . . . . . . . . . . . . . .12
w
Czyszczenie telewizora
Czyszczenie ekranu i obudowy należy wyłącznie wykonywać przy pomocy
czystej, miękkiej ścierki, nie pozostawiającej włókien. Nie stosować produktów
na bazie alkoholu i rozpuszczalników.
Polski
Page 50

2
Opis telewizora LCD
Przyciski telewizora:
• .: służy do włączania i wyłączenia telewizora.
• - + : służy do regulacji poziomu głośności.
• <> : służy do wyboru programów.
• MENU: aby wywołać lub opuścić menu,należy
równocześnie nacisnąć oba przyciski: - i +.
Przyciski <> umożliwiają wybór pożądanego
ustawienia,a przyciski - + dokonanie regulacji.
Uw
aga: Kiedy aktywna jest funkcja BLOKADA OGÓLNA,
przyciski - + i <> nie działają (patrz menu FUNKCJE,
strona 9).
Lampka sygnalizująca włączenie oraz czujniki na
podczerwień.
Ścianka tylna:
Podstawowe podłączenia wykonywane są od spodu telewizora.
Więcej informacji na temat podłączeń - patrz strona 12.
Gniazdo SCART EXT1.
Podłączania urządzeń peryferyjnych.
Noga pochylna.
Noga może zostać zdemontowana i zastąpiona
zestawem do montażu na ścianie (więcej informacji
otrzymać można w punkcie sprzedaży).
Gniazda anten: telewizyjnej i radiowej.
Gniazdo zasilania DC.
<
-
.
+
<
*
S
Video
EXT1
Video
Audio
in
L
in
R
:
DC in
FM ANT
Page 51

3
12
MENU
”
P
564
879
0
3
--
++
.
[
Ÿ
Á
-
ª
`
ù
SMART
SMART RADIO
Ë
¤
ı
Y
Ó
Przyciski pilota
ı Lista programów
Wyświetlanie / usuwanie listy
programów. Naciśnij przyciski
îÏ,aby wybrać program i
naciśnij przycisk ¬,aby go
wyświetlić.
Symbol + pojawia się przy
programach zablokowanych (s.9) lub
? : przy programach odblokowanych.
Informacja na ekranie
Stosowany do wyświetlania/usuwania
numeru i nazwy programu (jeśli jest
nadana), czasu, trybu dźwięku i
ustawień wyłącznika czasowego.
Przytrzymać przez 5 sekund dla
stałego wyświetlania numeru
programu na ekranie.
Menu
Wyświetlanie lub wyłączanie menu.
Wyłącznik czasowy
Do wybierania odstępu czasu, po
którym odbiornik wyłączy się
automatycznie (od 0 do 240 minut).
Kursor / Format 16:9
Dzięki tym czterem przyciskom
możesz poruszać się po
poszczególnych menu.Przyciski Ȭ
umożliwiają powiększenie lub
pomniejszenie pionowe obrazu.
Siła głosu
Ustawianie natężenia dźwięku
Wyłączenie dźwięku
Wyłączanie lub włączanie dźwięku.
Wybór gniazda zewnętrznego
EXT (str.11)
Nacisnąć kilka razy przed wybraniem
podłączonego urządzenia.
Klawiatura numeryczna
Do bezpośredniego wyboru
programów. Dla dwucyfrowych
numerów programów, drugi przycisk
musi być naciśnięty przed
zniknięciem kreski na ekranie.
Tr yb czuwania
Przełączanie odbiornika w tryb
czuwania.Aby ponownie włączyć
odbiornik, należy nacisnąć przycisk
b,P@#delete lub 09albo
przycisk klawiatury numerycznej.
Tr yb radiowy / telewizyjny
Służy do przełączania odbiornika
telewizyjnego pomiędzy trybem
radiowym i telewizyjnym .
Wyświetlanie teletekstu
(strona 10)
Przyciski telegazety (str.. 10)
Wstępna regulacja obrazu i dźwięku
Służy do wybrania jednego z ustawionych
wstępnie trybów odtwarzania dźwięku
lub wyświetlania obrazu. Pozycja
OSOBISTE odpowiada ustawieniom
wybranym w menu.
Wybór programów TV
Przemieszczanie się pomiędzy
programami. Przez kilka sekund
wyświetlane są: numer programu,
nazwa i tryb dźwięku.
Dla programów wyposażonych w
telegazetę, tytuł; programu pojawia
się w dolnej części ekranu.
Poprzedni program
Dostęp do poprzednio oglądanego
programu.
Tr yb odtwarzania dźwięku
Służy do przełączania programów z
STEREO (lub NICAM STEREO) na
MONO
lub w przypadku
programów nadawanych w dwóch
wersjach językowych,do wybrania
pomiędzy trybem
DŹWIĘK I lub
DŹWIĘK II
. Wskaźnik MONO na
ekranie jest czerwony,w przypadku
wymuszenia tego trybu.
Page 52

4
&
Ustawienie telewizora
Telewizor powinien zostać ustawiony na równej,
stabilnej powierzchni.Aby uniknąć jakiegokolwiek
niebezpieczeństwa, należy chronić telewizor przed
działaniem wody, źródeł ciepła (lampa,świeca,
kaloryfer, ...) i nie zasłaniać kratek wentylacyjnych
znajdujących się z tyłu telewizora.
é
Podłączenie anten
• Podłącz wtyczkę antenową do gniazda : z tyłu
odbiornika.
• Dostarczony przewód anteny radiowej należy
połączyć z gniazdem FM ANT znajdującym się od
spodu telewizora.
• Przeprowadzić przewody antenowe przez nogę
telewizora.
“
Podłączenie zasilania
Telewizor zasilany jest prądem stałym (wartość
napięcia jest podana na etykiecie). Należy używać
tylko i wyłącznie zasilacza AC-DC dostarczanego
wraz z telewizorem.
• Podłączyć wtyk zasilacza DC do gniazda DC
telewizora. Obok zasilacza należy pozostawić nieco
wolnego miejsca,aby zapewnić właściwą wentylację.
• Podłączyć kabel zasilający do sieci (220-240 V / 50 Hz).
Podłączenie innych urządzeń - patrz str. 12.
‘
Pilot
Włożyć 2 dostarczone baterie R6, zachowując
właściwą polaryzację.
Z myślą o ochronie środowiska naturalnego, baterie
dostarczane z urządzeniem nie zawierają rtęci, kadmu
ani niklu. Zużytych baterii nie należy wyrzucać, lecz
przeznaczyć do ponownego wykorzystania (recyklingu)
zgodnie z obowiązującymi przepisami.
(
Włączanie
Aby włączyć telewizor, należy nacisnąć przycisk
włączania/wyłączania. Zapala się zielona lampka oraz
ekran. Instrukcje dotyczące
szybkiej instalacji - patrz
str. 5.Jeżeli telewizor pozostaje w stanie czuwania
(pali się czerwona lampka), wystarczy nacisnąć
przycisk P
# pilota.
Przy każdym użyciu pilota lampka migoce.
Instalacja odbiornika
5 cm
5 cm
5 cm
FM ANT.
Page 53

5
Szybka instalacja kanalów telewizyjnych
Sortowanie
Kiedy po raz pierwszy włączysz odbiornik, na
ekranie pojawi się menu.
Menu proponuje wybór języka,jakim będziesz
się posługiwać w menu.
Jeśli menu się nie pojawi przytrzymaj przez
8 sekund przyciski - i + odbiornika, aby pojawiło
się ono ponownie.
& Użyj przycisków
îÏ na pilocie do
wybrania języka, następnie zatwierdź przy
pomocy
¬.
é Następnie wybierz swój kraj przyciskami
îÏ i zatwierdź przy pomocy ¬.
Jeżeli Twój kraj nie jest wyświetlany wybierz “. . .”.
“ Wyszukiwanie kanałów rozpoczyna się
automatycznie. Operacja trwa kilka minut.
Ekran wyświetla stan poszukiwań i liczbę
odnalezionych programów. Na zakończenie
menu znika.
Aby opuścić lub przerwać wyszukiwanie, należy
nacisnąć klawisz
H.Jeśli brak jest obrazu, zob.
rozdział Porady na str. 12.
‘ Jeśli nadajnik lub sieć kablowa nadaje sygnał
automatycznego sortowania, programy zostaną
ponumerowane prawidłowo.
( W pozostałych przypadkach programy
numerowane są w dół począwszy od 99, 98,
97, itd. (lub 79, 78, itd.).
Chcąc zmienić numerację programów należy
skorzystać z menu SORTOWANIE.
Niektóre nadajniki lub sieci kablowe nadają własne
parametry sortowania (region, język, itd.).Wówczas
należy wskazać swój wybór za pomocą przycisków
îÏ,a następnie potwierdzić przyciskiem ¬.
& Naciśnij przycisk H. Na ekranie pojawia się
menu podstawowe.
é Wybierz INSTALACJĘ (
Ï), a następnie
naciśnij
¬.Pojawia sie menu INSTALACJA.
“ Wybierz SORTOWANIE przy pomocy
przycisku
Ï,a następnie naciśnij ¬.
Pojawia się menu SORTOWANIE. Pozycja OD
jest aktywna.
Uw
aga: menu funkcjonuje według następującej
zasady
• ”OD” (wprowadź numer bieżącego programu)
• ”DO” (wprowadź nowy numer)
• ”ZAMIANA numerów” (wykonanie operacji)
‘
Za pomocą przycisków Ȭ lub 0 do 9
wybierz program,którego numer chcesz zmienić.
Przykład: chcesz zmienić numerację programu 78
na 2: naciśnij
78.
( Wybierz DO (przycisk
Ï) i wpisz nowy
numer za pomocą przycisków
Ȭ lub 0
do 9 (w naszym przykładzie naciśnij 2)
§ Wybierz ZAMIANA (przycisk
Ï) i naciśnij
¬.Pojawia się komunikat ZAMIENIONO,
odbywa się zamiana.W naszym przykładzie
program 78 otrzymuje numer 2 (zaś program
2 numer 78).
è Wybierz OD (przycisk
î) i powtórz kroki
od ‘ do § dla wszystkich programów,
których numery chcesz zmienić.
! Chcąc wyjść z menu, naciśnij przycisk
d.
• OBRAZ
• DèWI¢K
• FUNKCJE
• INSTALACJA
INSTALACJA
• J¢ZYK
• KRAJ
• STROJ.AUTOMAT
• STROJ.R¢CZNE
• SORTOWANIE
• NAZWA
OD
DO
ZAMIANA
SELECT LANGUAGE
J¢ZYK
HUNGARIAN
• POLISH
RUMANIAN
RUSSIAN
SERBIAN
KRAJ
CZECH
HUNGARY
CROATIA
POLSKA
ROUMANIA
Page 54

6
Nazwa programu
Zgodnie z własną wola, można nadać nazwy
pierwszym 40 programom (1 do 40).
& Naciśnij przycisk
H.
é Wybierz INSTALACJĘ (
Ï) i naciśnij ¬.
Pojawia się menu INSTALACJA.
“ Naciśnij 5 razy (
Ï), aby wybrać NAZWA
(ukryty w dole ekranu) i naciśnij
¬.
Pojawia się menu:
‘ Wybierz program, który nazwać przy pomocy
przycisków
09lub @ P #.
Uwaga: podczas instalacji, programy są nazywane
automatycznie, jeżeli jest nadawany sygnał
identyfikacyjny.
( Użyj przycisków
Ȭ do przemieszczania
się w polu wyświetlania nazwy (5 znaków).
§ Użyj przycisków
îÏ do wybrania liter.
è Naciśnij
H po wprowadzeniu nazwy.
Nazwa programu jest zapamiętana.
! Powtórz czynności ‘ do è dla każdego
nazywanego programu.
ç Aby opuścić menu naciśnij
d.
INSTALACJA
• J¢ZYK
• KRAJ
• STROJ.AUTOMAT
• STROJ.R¢CZNE
• SORTOWANIE
• NAZWA BBC_1
Wybór jezyka i kraju
Programowanie automatyczne
& Naciśnij przycisk H,aby wyświetlić menu
podstawowe.
é Wybierz INSTALACJĘ (
Ï) i naciśnij ¬.
Pojawia się menu INSTALACJA.
Opcja JĘZYK jest aktywna.
“ Naciśnij
¬,aby wejść do menu JĘZYK.
‘
Wybierz swój język przy pomocy przycisków
îÏ.
Menu bedą wyświetlane w wybranym języku.
( Naciśnij
È,aby opuścić menu JĘZYK.
§ Wybierz KRAJ (
Ï) i naciśnij ¬.
è Wybierz swój kraj przyciskami
îÏ
(F dla Francji).
Jeżeli Twój kraj nie jest wyświetlany wybierz “. . .”.
! Naciśnij
È,aby opuścić menu KRAJ.
ç Aby zakończyć wyświetlanie menu, naciśnij
d.
To menu umo
ż
liwia uruchomienie automatycznego
wyszukiwania wszystkich programów dost
ę
pnych w
regionie (lub sieci kablowej).
& Wykonaj najpierw operację od & do !
opisane powyżej, następnie:
é Wybierz STROJ.AUTOMAT (
Ï) i naciśnij ¬.
Wyszukiwanie zostało uruchomione.
Po kilku minutach menu INSTALACJA pojawia
się automatycznie.
“ Jeśli nadajnik lub sieć kablowa nadaje sygnał
automatycznego sortowania, programy zostaną
ponumerowane prawidłowo.
‘
W pozostałych przypadkach programy
numerowane są w dół począwszy od 99,98, 97,itd.
Chcąc zmienić numerację programów należy
skorzystać z menu SORTOWANIE.
Niektóre nadajniki lub sieci kablowe nadają własne
parametry sortowania (region, język, itd.).Wówczas
należy wskazać swój wybór za pomocą przycisków
îÏ,a następnie potwierdzić przyciskiem ¬.
Aby opuścić lub przerwać wyszukiwanie, należy
nacisnąć klawisz
H.Jeśli brak jest obrazu, zob.
rozdział Porady na str. 12.
( Aby zakonczyć wyświetlanie menu, naciśnij
d.
• OBRAZ
• DèWI¢K
• FUNKCJE
• INSTALACJA
INSTALACJA
• J¢ZYK
• KRAJ
• STROJ.AUTOMAT
• STROJ.R¢CZNE
• SORTOWANIE
• NAZWA
POLISH
RUMANIAN
RUSSIAN
INSTALACJA
• J¢ZYK
• KRAJ
• STROJ.AUTOMAT
• STROJ.R¢CZNE
• SORTOWANIE
• NAZWA
SZUKANIE
PROSZ¢ CZEKAå
ZNALEZIONO: 2
215.18 MHZ
Page 55

7
Programowanie ręczne
To menu umożliwia ustawianie każdego
programu z osobna.
& Naciśnij przycisk
H.
é Wybierz INSTALACJĘ (
Ï) i naciśnij ¬.
Pojawia się menu INSTALACJA.
“ Wybierz STROJ.RĘCZNE (
Ï) i naciśnij ¬.
Pojawia się menu STROJ.RĘCZNE.
‘ Wybierz SYSTEM. Za pomocą przycisków
îÏ wybierz odbiór EUROPE (odbiór
automatyczny*) lub odbiór ręczny z:
WEST-EUR (BG), EAST EUR (standard DK)
UK (standard I) lub FRANCE (standard LL’).
Następnie naciśnij K, aby opuścić menu.
*Z wyjątkiem Francji (standard LL’), wybierz
FRANCE
( Wybierz SZUKANIE i naciśnij
¬ -
rozpoczyna się wyszukiwanie.Wyszukiwanie
zatrzymuje się po znalezieniu programu.
Przejdź do kroku è.Jeśli znasz częstotliwość
pożądanego programu,możesz ją wprowadzić
bezpośrednio za pomocą klawiszy
numerycznych (
09).
Jeśli odbiornik nie znajduje żadnego programu, zob.
rozdział Porady na stronie 12.
§ Jeśli odbiór nie jest zadowalający, wybierz
DOSTROJ.i naciśnij klawisz
È lub ¬.
è Wybierz NR PROGR i za pomocą klawiszy
Ȭ lub klawiszy numerycznych wprowadź
pożądany numer.
! Wybierz PAMIĘĆ i naciśnij
¬.Pojawia się
komunikat ZACHOWANO (STORED).
ç Powtórz kroki ( do ! dla każdego
programu.
Aby opuścić menu: naciśnij klawisz
d.
• OBRAZ
• DèWI¢K
• FUNKCJE
• INSTALACJA
INSTALACJA
STROJ.R¢CZNE
• SYSTEM
• SZUKANIE
• NR PROGRAMU
• DOSTROJENIE
• PAMI¢å
EUROPE
WEST EUR
EAST EUR
UK
FRANCE
Używanie radia
Wybieranie trybu radia
Naciśnięcie przycisku  pilota powoduje
przejście do trybu radio.
W trybie radio, na ekranie pojawia się numer
programu,nazwa stacji (jeżeli jest dostępna),
częstotliwość fali i tryb głosu.
Nazwy stacji można wprowadzić używając menu
NAZWA (str. 7)
Wybór programów
Aby wybrać stacje UKF, należy posługiwać się
przyciskami
09
lub @P#(od 1 do 40).
Lista stacji radiowych
Naciśnięcie przycisku ı powoduje wyświetlenie
/usunięcie listy stacji radiowych. Następnie należy
wybrać stację posługując się kursorem.
Menu trybu radio
Naciśnięcie przycisku
H powoduje przejście
do regulacji odbioru radiowego.
Wyszukiwanie stacji radiowych
Jeżeli wykorzystana została funkcja szybkiej
instalacji, wszystkie dostępne stacje UKF zostały
zapamiętane.Aby uruchomić nowe
wyszukiwanie, należy przejść do menu
INSTALACJA:STROJ.AUTOMAT Wyszukiwanie
może być automatyczne (
AUTO - pełne
wyszukiwanie) lub ręczne (
STROJ.RĘCZNE -
wyszukiwanie stacji po stacji). Menu
SORTOWANIE i NAZWA umożliwiają zmianę
kolejności i nazw programów radiowych. Menu
te funkcjonują identycznie, jak menu telewizyjne
Wygaszacz ekranu
W menu
FUNKCJE
możliwe jest aktywowanie /
dezaktywowanie wygaszacza ekranu.
Na ekranie pojawia się jedynie godzina,
częstotliwość oraz nazwa stacji (jeżeli jest
dostępna).
Page 56

8
Ustawianie obrazu.
Ustawianie dźwięku
& Naciśnij przycisk H,następnie ¬.
Pojawia się menu OBRAZ.
é Użyj przycisków
îÏ do wybrania ustawienia
i przycisków
Ȭ do zmiany ustawień.
Uwaga: menu są przewijane.
Przytrzymaj przycisk Ï,aby przejść do
niewidocznych menu w dole ekranu.
“ Po wykonaniu ustawień wybierz PAMIĘĆ i
naciśnij
¬,aby zachować ustawienia.
‘ Aby opuścić menu naciśnij
d.
Opis ustawień:
• JASNOŚĆ: wpływa na jasność obrazu.
• KOLOR: wpływa na natężenie kolorów.
• KONTRAST: wpływa na różnicę między jasnymi i
ciemnymi odcieniami.
• OSTROŚĆ:wpływa na czystość obrazu.
• PAMIĘĆ: umożliwia zachowanie ustawień.
• RED.SZUMÓW: łagodzi zakłócenia obrazu
(śnieżenie obrazu).
• KONTRAST +: Do włączania / wyłączania
automatycznej regulacji kontrastu obrazu (stała
korekta najciemniejszych partii obrazu do czerni).
& Naciśnij H, wybierz DŹWIĘK (Ï) i naciśnij
¬.Pojawia się menu DŹWIĘK:
é Użyj przycisków
îÏ do wybrania
ustawienia i przycisków
Ȭ do zmiany
ustawień.
“ Po wykonaniu ustawień wybierz PAMIĘĆ i
naciśnij
¬,aby zachować ustawienia.
‘ Aby opuścić menu naciśnij
d
.
Opis ustawień.
• KOREKTOR:do regulacji tonu (od niskiego:
120 Hz do wysokiego: 10 kHz)
• BALANS: umożliwia wyrównanie dźwięku z
głośników z lewej i prawej strony
• DELTA GŁOSU.(różnica głośności): pozwala na
usunięcie różnic głośności pomiędzy różnymi
programami lub wejściami EXT. Ustawienie
działa dla programów 1 do 40 i wejść EXT.
Następnie użyj przycisków
@ P #,aby
porównać siłę głosu na różnych programach.
• PAMIĘĆ: umożliwia zachowanie ustawień
dźwięku
• AVL: automatyczna kontrola głośności
pozwalająca na ograniczenie nagłej zmiany
dźwięku, szczególnie przy zmienianiu
programów lub w trakcie reklam.
• INCR. SURROUND:Aktywacja i deaktywacja
efektu surround.W trybie stereo daje
wrażenie większego rozsunięcia głośników.
W trybie mono symuluje przestrzenny efekt
stereo.
• OBRAZ
• DèWI¢K
• FUNKCJE
• INSTALACJA
OBRAZ
• JANOÂå
• KOLOR
• KONTRAST
• OSTROÂå
• PAMI¢å
• RED. SZUMÓW
• KONTRAST+
--I------ 39
• OBRAZ
• DèWI¢K
• FUNKCJE
• INSTALACJA
DèWI¢K
• KOREKTOR
• BALANS
• DELTA G¸OSU
• PAMI¢å
• AVL
• INCR.SURROUND
120 HZ
500 HZ
1500 HZ
5 KHZ
10 KHZ
Ustawienia poszczególnych opcji
& Naciśnij H, wybierz
FUNKCJE
(Ï) a
następnie naciśnij
¬.Teraz możesz ustawić:
é TIMER, BLOK.RODZIC
., BLOKADA
OGÓLNA : patrz następna strona.
“ WYBÓR TRYBU: umożliwia przełączanie
pomiędzy trybami: radio i TV.
‘ Aby opuścić menu, naciśnij
d.
Page 57

9
Funkcja budzika
Blokada odbiornika
Funkcja pozwala na wykorzystanie odbiornika
do budzenia.
& Naciśnij przycisk
H.
é
Wybierz FUNKCJE (Ï) i naci
ś
nij dwa razy
¬.
Pojawia się menu TIMER.
“ Naciskaj
¬,aby wejść lub opuścić każde
podmenu i używaj przycisków
îÏ lub
09 do wykonania ustawień.
‘ GODZINA: wprowadź bieżącą godzinę.
Uw
aga: Za każdym razem przy włączeniu
odbiornika czas uaktualniany jest automatycznie na
podstawie telegazety programu nr 1. Jeśli nie ma on
telegazety,uaktualnienie takie nie następuje.
( POCZĄTEK:wprowadź porę uruchomienia
odbiornika.
§
KONIEC: wprowadźporęwyłączenia odbiornika.
è NR PROGRAMU:
wprowadź numer programu,
którym ma obudzić Cię budzik.W przypadku
odbiornika wyposażonego w radio,możesz – za
pomocą przycisków
Ȭ – wybrać stację
radiową z pasma FM (przyciski
09 pozwalają
wybierać wyłącznie stacje telewizyjne).
! AKTYWACJA:umożliwia ustawienie:
• RAZ: jedno budzenie
• CODZIENNIE: dla każdego dnia
• WYŁĄCZENIE: anulowanie
ç Naciśnij Z aby wprowadzić odbiornik w stan
czuwania. Odbiornik włączy się automatycznie
o ustawionym czasie.Jeśli odbiornik jest
pozostaje włączony, o oznaczonym czasie
zostanie uaktywniony ustawiony program.
Połączenie opcji blokowania BLOKADA i
wyłącznika czasowego TIMER może służyć do
ograniczania czasu działania odbiornika i w ten
sposób np. użytkowania go przez dzieci.
Niektóre programy można zablokować lub
zablokować całkowicie odbiornik przez
zablokowanie przycisków.
Blokowanie programów
& Naciśnij przycisk H.
é Wybierz FUNKCJE (
Ï) i naciśnij ¬.
“ Wybierz BLOK.RODZIC.(
Ï) i naciśnij ¬.
‘ Następnie wpisz swój kod dostępu. Używając
blokady po raz pierwszy wpisz dwa razy kod
0711. Pojawia się menu.
( Naciśnij
¬,aby wejść do menu.
§ Użyj przycisków
îÏ do wybrania programu
i zatwierdź przyciskiem
¬.Przy zablokowanych
programach lub gniazdkach pojawia się
+.
è Naciśnij przycisk
d,aby opuścić menu.
Od tej chwili oglądanie zablokowanego programu
jest możliwe po wpisaniu kodu dostępu,w
przeciwnym razie ekran pozostanie czarny.
Uwaga: w przypadku programów kodowanych,
wykorzystujących zewnętrzny dekoder,należy
zablokować odpowiednie wejście EXT.
Zablokowanie wszystkich programów.
Powtórz czynności & do ‘,następnie wybierz
CAŁOŚĆ. i naciśnij ¬.
Zmiana kodu dostępu.
Powtórz czynności & do ‘,następnie:
( Wybierz ZMIANA KODU i wprowadź własny
numer czterocyfrowy.
§ Potwierdź wpisując go jeszcze raz.
Nowy kod jest zapamiętany.
è Naciśnij
d,aby opuścić menu.
Jeśli zapomnisz swój kod dostępu, wpisz dwukrotnie
kod uniwersalny 0711.
Blokowanie przycisków
& Naciśnij H,wybierz FUNKCJE (Ï) i naciśnij ¬.
é Wybierz BLOKADA OGÓLNA (Ï) i naciśnij
¬,aby uaktywnić.
“ Wyłącz telewizor i ukryj pilota.Telewizor jest
zablokowany (można go włączyć tylko przy
pomocy pilota).
‘ Aby anulować: wybierz BLOKADA OGÓLNA i
ustaw STOP.
• OBRAZ
• DèWI¢K
• FUNKCJE
• INSTALACJA
FUNKCJE
TIMER
• GODZINA
• POCZÑTEK
• KONIEC
• NR PROGRAMU
• AKTYWACJA
10:56
• OBRAZ
• DèWI¢K
• FUNKCJE
• INSTALACJA
FUNKCJE
• TIMER
• WYBÓR TRYBU
• BLOK. OGÓLNA
• BLOK. RODZIC.
KOD DOST¢PU
- - - -
Page 58

10
Teletekst
Naciśnij przycisk:
Aby uzyskać:
Teletekst jest systemem informacyjnym nadawanym przez niektóre kanały telewizyjne.Wiadomości podawane w
teletekście odczytuje się podobnie jak gazetę. System ten umożliwia również odbieranie napisów dialogowych u
dołu ekranu, co jest pomocne dla osób z upośledzeniem słuchu lub osób nie znających języka, w którym
nadawany jest program (nadawanie w sieciach kablowych,w kanałach satelitarnych,...).
Wywołanie
teletekstu:
Wybór
strony
teletekstu
Ta funkcja pozwala na przywołanie strony teletekstu,przejście na tryb
przezroczysty a następnie na opuszczenie teletekstu.Najpierw pojawia
się strona główna,zawierająca wykaz dostępnych nagłówków
tematycznych.Każda rubryka ma przypisany trzycyfrowy numer
strony, na której się znajduje.Jeżeli na wybranym kanale nie jest nadawany
sygnał teletekstu, to wyświetla się numer 100 i ekran pozostaje czarny
(w takiej sytuacji należy opuścić tryb teletekstowy i wybrać inny kanał).
Za pomocą przycisków od 0 do 9 lub @ P # wprowadź numer
żądanej strony. Na przykład aby przywołać stronę 120,naciśnij kolejno 1
20. Numer strony wyświetla się w lewym górnym rogu ekranu,licznik
stron przeszukuje strony, następnie żądana strona jest wyświetlana na
ekranie.Aby obejrzeć inną stronę, powtórz powyższe czynności. Jeżeli
licznik wielokrotnie przeszukuje strony w sposób ciągły, oznacza to, że strona
o wybranym numerze nie jest nadawana.Wybierz inny numer.
Strona główna
Bezpośredni
dostęp do
nagłówków
tematycznych
Służy do powrotu na stronę główną (zazwyczaj strona nr 100).
U dołu ekranu wyświetlane są barwne paski.Cztery kolorowe
przyciski umożliwiają dostęp do odpowiadających im
tematów lub stron.
Jeżeli temat lub strona nie są jeszcze dostępne, barwne paski u
dołu ekranu pulsują.
Powiększenie
strony
Służy do wyświetlenia kolejno najpierw górnej,potem dolnej połowy
strony, a następnie do powrotu do normalnej wielkości strony.
Zatrzymywani
e przełączania
się pod-stron
Informacje
ukryte
Niektóre strony teletekstowe zawierają tzw. pod-strony, które
są automatycznie przełączane jedna po drugiej. Przy pomocy
tego klawisza można zatrzymać przełączanie kolejnych
pod-stron.W lewym górnym rogu ekranu pojawia się
_
.
Służy do odsłonięcia lub schowania informacji ukrytych
(np. rozwiązania zagadek).
Ulubione
strony
W ramach programów od 0 do 40,zawierających teletekst,
możesz
zapisać 4 ulubione strony, do których będziesz mieć
bezpośredni dostęp
za pomocą kolorowych przycisków
(czerwony,zielony, żółty, niebieski).
& Naciśnij przycisk
H
aby przejść na tryb ulubionych
stron.
éWyświetl stronę teletekstu, którą chcesz zapisać w
pamięci.
“ Naciśnij przycisk d,a następnie kolorowy przycisk
według Twojego wyboru. Strona została zapamiętana.
‘ Powtórz czynności é i “ dla pozostałych kolorowych
przycisków.
( Od tej chwili,gdy będziesz korzystać z teletekstu,Twoje
ulubione strony będą pojawiać się w kolorowych paskach u
dołu ekranu.Aby powrócić do zwykłych nagłówków
tematycznych,naciśnij H.
Aby usunąć te ustawienia, przytrzymaj przycisk dwciśnięty przez
5 sekund.
Ë
SMART RADIO SMART
MENU
+
[
”
-
123
4
56
789
Ø
0
.
¤
ŸÓù
ª-
¤
0
9
P
+
P
-
Á
Ë
Ó
Ÿ
MENU
Ë
Page 59

11
MODE
VCR
DVD
·¢Ê Æ
∫
Ó
ı
Ω∆
.
Z
¤
Podłącz urządzenia w sposób pokazany na schemacie.
Za pomocą przycisku
n, wybierz EXT2 lub S-
VHS2(sygnały S-Video z gniazda EXT2).
W przypadku urządzenia monofonicznego, podłącz sygnał
dźwiękowy do wejścia AUDIO L. Dźwięk jest automatycznie
rozdzielany do lewego i prawego głośnika telewizora.
Słuchawki
Podłączenie słuchawek powoduje automatyczne wyłączenie
dźwięku w głośnikach odbiornika telewizyjnego.Wyreguluj
głośność za pomocą przycisków
@
”
#
.
Impedancja słuchawek musi mieścić się w zakresie od 32 do 600
ohm.
Podłączania urządzeń peryferyjnych
Podłączanie urządzeń peryferyjnych
Gniazdo EXT1 ma wejście i wyjście audio, wejście i wyjście video oraz wejście RGB.
Magnetowid (lub DVD z funkcją zapisu)
Podłączyć magnetowid wg schematu.Stosować kabel typu
Euro o dobrej jakości.
Jeśli Twój magnetowid nie posiada złącza Euro,jedynym sposobem
jego podłączenia jest gniazdo antenowe. Należy wtedy dostroić
odbiornik do sygnału kontrolnego magnetowidu i przypisać mu
program nr 0 (zob. ręczne ustawianie programów na str. 7).
Aby wyświetlić obraz pochodzący z magnetowidu, należy nacisnąć
przycisk
0.
Magnetowid z dekoderem
Aby nagrywać transmisje kodowane, należy podłączyć dekoder
do drugiego złącza Euro w magnetowidzie (patrz instrukcja
obsługi magnetowidu).
Magnetowid
Odbiornik satelitarny, dekoder, DVD, gry, itp.
Podłączyć magnetowid wg schematu.
Wybór podłączonego osprzętu
Naciśnij przycisk n aby wybrać EXT1 oraz EXT2 lub S-VHS2
(sygnały S-Video z gniazda EXT2).
Większość sprzętu, jeśli jest podłączona kablem Euro (dekoder,
magnetowid) potrafi samoczynnie przełączyć odbiornik.
Inny osprzęt
FM ANT
EXT1
:
VCR
EXT1
*
Video
Video
Audio
S
in
L
in
R
Page 60

12
Porady
Zły odbiór
Brak obrazu
Obraz pochodzący
z urządzeń
peryferyjnych jest
czarno-biały
Brak dźwięku
Pilot nie dziala?
Stan czuwania
Czyszczenie
telewizora
Wskazówki
dotyczące utylizacji
Brak rezultatów
Bliskie sąsiedztwo gór lub wysokich budynków może być przyczyną przebić
obrazu, echa i odbić.W takim przypadku spróbuj ręczenie dostroić obraz za
pomocą opcji DOSTROJENIE (str. 7) lub zmienić ustawienie anteny zewnętrznej.
Należy również sprawdzić,czy Twoja antena umożliwia odbiór programów
nadawanych w danym paśmie częstotliwości (pasmo UHF lub VHF).
Sprawdź,czy:
• antena jest prawidłowo podłączona
• czy wybrałeś prawidłowy system nadawania sygnału (str. 7)
• często przyczyną problemów z obrazem lub dźwiękiem są źle podłączone
przewody anteny lub złącza Euro.Czasem wtyczki częściowo wysuwają się z
gniazda przy przesuwaniu lub obracaniu odbiornika.
Przy odtwarzaniu taśmy wideo,upewnij się, że jest ona nagrana w standardzie
(PAL, SECAM, NTSC), który jest rozpoznawany przez Twój magnetowid.
Jeśli na niektórych kanałach odbierasz dobry obraz, ale brak jest dźwięku,oznacza
to nieprawidłowe dobranie systemu TV. Zmień ustawienia w menu SYSTEM (str. 7).
Nie ma dźwięku z podłączonego wzmacniacza? Należy sprawdzić, czy nie zostały
pomylone wyjścia i wejścia audio.
Jeśli odbiornik nie reaguje na pilota lub czerwona dioda nie miga prze użyciu
pilota, należy w nim wymienić baterie.
Włączasz odbiornik, a ten pozostaje w stanie czuwania, zaś przy użyciu przycisków
sterujących odbiornika pojawia się na ekranie komunikat BLOKADY? Oznacza to,
że w odbiorniku aktywna jest funkcja BLOKADA OGÓLNA (str. 9). Jeśli odbiornik
nie odbiera sygnału przez 15 minut, automatycznie przechodzi do stanu czuwania.
Aby zaoszczędzić energię elektryczną, odbiornik telewizyjny został wyposażony w
układy o niskim zużyciu energii w czasie czuwania (poniżej 1W)
Czyszczenie ekranu i obudowy należy wyłącznie wykonywać przy pomocy
czystej, miękkiej ścierki, nie pozostawiającej włókien. Nie stosować produktów na
bazie alkoholu i rozpuszczalników.
Tw ój odbiornik wykonany jest z materiałów, które mogą być ponownie
wykorzystane lub poddane recyklingowi.W celu ograniczenia ilości odpadów w
środowisku naturalnym specjalne zakłady odbierają zużyte odbiorniki,
rozmontowują je na części i gromadzą materiały do ponownego wykorzystania
(informacji udzieli sprzedawca).
Wyłączyć telewizor z sieci na 30 sekund,po czym uruchom go ponownie.
Jeśli Twój odbiornik zepsuje się, nie próbuj naprawiać go samodzielnie,lecz
skontaktuj się z serwisem swojego sprzedawcy.
Page 61

1
Úvodem
Obsah
Děkujeme vám, že jste si koupili náš televizor.
Tento návod k použití vám má pomoci televizní přijímač nainstalovat a ovládat.
Doporučujeme vám, abyste si jej nejprve důkladně pročetli.
Věříme, že s naším výrobkem budete bezvýhradně spokojeni.
Nastavení
Seznámení s televizorem LCD . . . . . . . . . . . . . . . . . . . . . . . . . . . . . . . . . . . . . . . . .2
Tlačítka dálkového ovládání . . . . . . . . . . . . . . . . . . . . . . . . . . . . . . . . . . . . . . . . . .3
Zapojení televizoru . . . . . . . . . . . . . . . . . . . . . . . . . . . . . . . . . . . . . . . . . . . . . . . . .4
Rychlé ladění programů . . . . . . . . . . . . . . . . . . . . . . . . . . . . . . . . . . . . . . . . . . . . .5
Třídění programů . . . . . . . . . . . . . . . . . . . . . . . . . . . . . . . . . . . . . . . . . . . . . . . . . .5
Volba jazyka a země . . . . . . . . . . . . . . . . . . . . . . . . . . . . . . . . . . . . . . . . . . . . . . . .6
Automatické ladění . . . . . . . . . . . . . . . . . . . . . . . . . . . . . . . . . . . . . . . . . . . . . . . . .6
Název programu . . . . . . . . . . . . . . . . . . . . . . . . . . . . . . . . . . . . . . . . . . . . . . . . . . .6
Ruční ladění . . . . . . . . . . . . . . . . . . . . . . . . . . . . . . . . . . . . . . . . . . . . . . . . . . . . . . .7
Ovládání
Použití rádia . . . . . . . . . . . . . . . . . . . . . . . . . . . . . . . . . . . . . . . . . . . . . . . . . . . . . . .7
Nastavení obrazu . . . . . . . . . . . . . . . . . . . . . . . . . . . . . . . . . . . . . . . . . . . . . . . . . .8
Nastavení zvuku . . . . . . . . . . . . . . . . . . . . . . . . . . . . . . . . . . . . . . . . . . . . . . . . . . .8
Nastavení zvláštních funkcí . . . . . . . . . . . . . . . . . . . . . . . . . . . . . . . . . . . . . . . . . . .8
Funkce buzení . . . . . . . . . . . . . . . . . . . . . . . . . . . . . . . . . . . . . . . . . . . . . . . . . . . . .9
Zablokování televizoru . . . . . . . . . . . . . . . . . . . . . . . . . . . . . . . . . . . . . . . . . . . . . .9
Teletext . . . . . . . . . . . . . . . . . . . . . . . . . . . . . . . . . . . . . . . . . . . . . . . . . . . . . . . . .10
Přídavná zařízení
Videorekordér . . . . . . . . . . . . . . . . . . . . . . . . . . . . . . . . . . . . . . . . . . . . . . . . . . .11
Další přístroje . . . . . . . . . . . . . . . . . . . . . . . . . . . . . . . . . . . . . . . . . . . . . . . . . . . .11
Pobočná připojení . . . . . . . . . . . . . . . . . . . . . . . . . . . . . . . . . . . . . . . . . . . . . . . . .11
Volba připojeného přístroje . . . . . . . . . . . . . . . . . . . . . . . . . . . . . . . . . . . . . . . . .11
Než zavoláte . . . . . . . . . . . . . . . . . . . . . . . . . . . . . . . . . . . . . . . . . . . . . . . . . . .12
w
Čistění televizoru
Obrazovku a stěny televizoru můžete čistit pouze čistým,jemný a
neplstnatým hadříkem. Nepoužívejte čistící prostředky obsahující alkohol či
ředidla.
Čeština
Page 62

2
Seznámení s televizorem LCD
Ovládací prvky televizoru :
• . :pro zapínání a vypínání televizoru.
• - + : pro regulaci úrovně hlasitosti.
• <> :pro volbu programů.
• NABÍDKA : chcete-li vyvolat nebo opustit nabídky,
stiskněte současně 2 tlačítka - a +.
Pak tlačítka <> umožňující zvolit nastavení a tlačítka
- + nastavit.
P
oznámka: je-li zapnutá funkce DĚTSKÁ POJISTKA,
tlačítka -+a <>
nejsou aktivní (viz nabídku
ZVL. FUNKCE
,
strana 9).
Kontrolka sitě a infračervené čidlo dálkového ovladače.
Zadní strana :
Základní připojení se provádějí ze spodní strany televizoru.
Bližší podrobnosti o zapojení viz na straně 12.
Eurokonektor EXT1.
Pobočná připojení.
Sklopný stojan.
Stojan je možno demontovat a nahradit volitelnou
soupravou pro upevnění na stěnu (informujte se u
svého prodejce).
Zásuvky pro antény TV a rádia.
Zásuvka napájení DC.
<
-
.
+
<
*
S
Video
EXT1
Video
Audio
in
L
in
R
:
DC in
FM ANT
Page 63

3
12
MENU
”
P
564
879
0
3
--
++
.
[
Ÿ
Á
-
ª
`
ù
SMART
SMART RADIO
Ë
¤
ı
Y
Ó
Tlačítka dálkového ovladače
ı Seznam programů
Umožňuje zapnout/zrušit
zobrazení seznamu programů.
Pomocí tlačítek îÏ zvolíte
program a tlačítkem ¬ jej
zobrazíte.
Před programy,které jsou zablokovány,
se objeví symbol + (str. 9), nebo symbol
?, pokud jsou odblokovány
Informace na obrazovce
Zobrazení/odvolání čísla programu,
jména (je-li nastavené),hodin,
zvukového režimu a zbývajícího
času u časovače. Číslo programu
na obrazovce nastálo zobrazíte,
podržíte-li tlačítko stisknuté
5 sekund.
Menu
Pro vyvolání nebo opuštění menu.
Časovač automatického vypnutí
Tímto tlačítkem se volí doba,po
jejímž uplynutí se televizor
automaticky přepne do pohoto-
vostního režimu (0 až 240 minut).
Kurzor/Formát 16:9
Tato čtyři tlačítka umožňují
procházení menu.Tlačítka Ȭ
umožňují vertikální zvětšení nebo
zmenšení obrazu.
Hlasitost
Pro nastavení hladiny zvuku.
Vypnutí zvuku
Pro vypnutí nebo obnovení zvuku.
Volba vstupů EXT (str.11)
Pro výběr připojeného přístroje
stiskněte několikrát.
Číselná tlačítka
Přímý přístup k programům.
U programu s dvojmístným číslem
musíte druhou číslici stisknout
dříve, než čárka zmizí.
Pohotovostní režim
Přepnutí televizoru do
pohotovostní ho režimu.Televizor
pak opět zapnete stisknutím b,
P @#nebo 09.
Režim rádio/TV
Pro volbu mezi televizí a rádiem.
Vyvolání teletextu (str. 10)
Tlačítka pro teletext (s.10)
Přednastavení obrazu a zvuku
Umožňuje přístup ke skupině
přednastavení obrazu a zvuku.
Možnost OSOBNÍ odpovídá
nastavením uskutečněným v menu.
Volba televizních programů
Listování programovou nabídkou.
Na několik sekund se vždy zobrazí
číslo (jméno) programu a zvukový
režim.
U některých programů s teletextem
se název programu zobrazí v dolní
části obrazovky.
Předchozí program
Přístup k předchozímu
sledovanému programu.
Režim zvuku
Umožňuje přepnout pořady vysílané
ve STEREO a NICAM STEREO do
MONO nebo, u dvojjazyčných
pořadů, volit mezi DUAL I nebo
DUAL II. Označení MONO je v případě
nuceného přepnutí do režimu mono
zobrazeno modře.
Page 64

4
&
Umístění televizoru
Umístěte televizor na pevnou a stabilní plochu.
Abyste předešli všem nebezpečným situacím,
nevystavujte televizor proudu vody, zdroji tepla
(lampa, svíčka, radiátor, ...) a nezakrývejte ventilační
mřížky umístěné vzadu.
é
Připojení antén
• Zástrčku antény zasuňte do zdířky : umístěné
na zadní straně televizoru.
• Zapojte kabel dodané rádiové antény do zdířky FM
ANT umístěné na spodku televizoru.
• Uspořádejte kabely tím, že je vedete otvorem
stojanu televizoru.
“
Připojte napájení ze
systémového zdroje
Televizor funguje jakmile je trvale dodáván proud
(hodnota napětí je uvedena na štítku). Používejte
výhradně adaptéru AC-DC dodaného s televizorem.
• Spojte kolík DC adaptéru s kolíkem DC televizoru.
Ponechte kolem adaptéru volný prostor kvůli větrání.
• Připojte napájecí kabel adaptéru k siťové zásuvce
(220-240 V / 50 Hz).
Připojení dalších přístrojů viz s. 12.
‘
Dálkové ovládání
Vložte dvě přiložené baterie R6, dbejte přitom na
správnou polaritu.
Baterie dodané s přístrojem neobsahují ani rtuť ani
kadmium, neboť dbáme na ochranu životního prostředí.
Vybité baterie neodhazujte do odpadu, ale využijte
dostupné prostředky recyklace (poraďte se se svým
prodejcem).
(
Uvedení do provozu
Televizi zapnete stisknutím tlačítka pro zapnutí a
vypnutí. Rozsvítí se zelená kontrolka a rozjasní se
obrazovka. Přejděte nyní ke kapitole popisující
rychlou instalaci, strana 5.Zůstane-li televizor v
pohotovosti (červená kontrolka), stiskněte tlačítko
P
# dálkového ovládače.
Při použití dálkového ovládače kontrolka bliká a tím
indikuje příjem.
Zapojení televizoru
5 cm
5 cm
5 cm
FM ANT.
Page 65

5
Rychlé ladění programů
Třídění programů
Při prvním zapnutí televizoru se na obrazovce
objeví menu.
Nabídne vám volbu jazyka, ve kterém se
budou nabídky zobrazovat:
Pokud se menu neobjeví, zobrazíte ho tak, že na
8 sekund stisknete tlačítka - a + na televizoru.
& Tlačítky
îÏ na dálkovém ovládání si
vyberete svůj jazyk a volbu potvrdíte tlačítkem
¬.
é Poté si svou zemi zvolte tlačítky
îÏ a
volbu potvrďte tlačítkem
¬.
Pokud na seznamu svou zemi nenajdete,zvolte “. . .”
“ Ladění se spustí automaticky.
Celá operace trvá několik minut.
Postup vyhledávání a počet nalezených
programů je znázorněn na obrazovce.
Nakonec menu zmizí.
Vyhledávání přerušíte nebo skončíte tlačítkem
H.
Pokud by nebyl nalezen žádný program, přečtěte si
kapitolu, než zavoláte technika, strana 12.
‘ Pokud vysílač nebo kabelová síť vysílá
automatický třídící signál, budou nalezené
programy očíslovány podle vysílaného pořadí.
(
Pokud signál nevysílá,budou programy očíslovány
v sestupném pořadí od čísla 99, 98, 97.
K jejich přečíslování je třeba použít menu
TŘÍDĚNÍ.
Některé vysílače či kabelové stanice vysílají vlastní
třídící parametry (region, jazyk, ...).V tomto případě
musíte označit svou volbu tlačítky
îÏ a
potvrdit tlačítkem ¬.
& Stiskněte tlačítko H. Zobrazí se hlavní menu.
é Zvolte NASTAVENÍ (
Ï) a stiskněte ¬.
Zobrazí se menu NASTAVENÍ:
“ Tlačítkem
Ï zvolte TŘÍDĚNÍ a stiskněte ¬.
Zobrazí se menu TŘÍDĚNÍ.Volba Z je aktivní.
P
oznámka: toto menu funguje na následujícím
principu:
• přečíslování Z (zadejte číslo aktuálního
programu),
• přečíslovaní NA (zadejte nové číslo)
• ZAMĚNIT čísla (proběhne záměna)
‘ Tlačítky
Ȭ nebo 0 až 9 zvolte
program, který chcete přečíslovat.
Příklad:
chcete-li změnit číslo programu Z čísla 78
NA číslo 2: zadejte
78.
( Zvolte NA (tlačítko
Ï) a tlačítky Ȭ
nebo 0 až 9 zadejte požadované nové číslo
(v našem případě zadejte
2).
§ Zvolte ZAMĚNIT (
Ï) a stiskněte ¬.
Záměna proběhne a objeví se údaj
ZAMĚNĚNO.V našem případě byl program 78
přečíslován na 2 (a program 2 na 78).
è Zvolte znovu Z (tlačítko
î) a opakujte
postup od bodu ‘ do bodu § tolikrát, kolik
programů chcete přečíslovat.
! Menu opustíte stisknutím tlačítka
d.
SELECT LANGUAGE
JAZYK
ENGLISH
CROATIAN
• CZECH
FRENCH
GERMAN
ZEMù
âESKÁ REP.
MAëARSKO
CHORVATSKO
POLSKO
RUMUNSKO
• OBRAZ
• ZVUK
• ZVL. FUNKCE
• NASTAVENæ
NASTAVENæ
• JAZYK
• ZEMù
• AUT. LADùNæ
• RUâNæ LADùNæ
• T¤æDùNæ
• NÁZEV
Z
NA
ZAMùNIT
Page 66

6
Název programu
Pokud budete chtít, můžete prvním
40 programům (od 1 do 40) zadat jméno.
& Stiskněte tlačítko
H.
é Zvolte NASTAVENÍ (
Ï) a stiskněte ¬.
Zobrazí se menu NASTAVENÍ.
“ Stiskněte pětkrát za sebou tlačítko
Ï,zvolíte
NÁZEV (skryto v dolní části obrazovky) a
stiskněte
¬. Zobrazí se příslušné menu:
‘ Tlačítky
09nebo @ P # zvolte program,
který chcete pojmenovat.
P
oznámka: Pokud je vysílán příslušný signál je
přiřazen název automaticky již při instalaci.
( Tlačítky
Ȭ se můžete pohybovat v poli
názvu programu (5 písmen).
§ Tlačítka
îÏ slouží k výběru písmen.
è Až název zadáte, stiskněte
H.
Název programu se uloží do paměti.
! Opakujte postup od bodu ‘ do bodu è
tolikrát, kolik programů potřebujete
pojmenovat.
ç Menu opustíte stisknutím tlačítka
d.
NASTAVENæ
• JAZYK
• ZEMù
• AUT. LADùNæ
• RUâNæ LADùNæ
• T¤æDùNæ
• NÁZEV BBC_1
Volba jazyka a země
Automatické ladění
& Stisknutím tlačítka H zobrazíte hlavní menu.
é Zvolte NASTAVENÍ (
Ï) a stiskněte ¬.
Zobrazí se menu NASTAVENÍ.
Volba JAZYK je aktivní.
“ Stisknutím
¬ se dostanete do menu JAZYK.
‘ Tlačítky
îÏ si vyberte svůj jazyk.
Menu se pak zobrazí v jazyce, který jste si
vybrali.
( Stisknutím tlačítka
È menu JAZYK opustíte.
§ Zvolte ZEMĚ (
Ï) a stiskněte tlačítko ¬.
è Tlačítky
îÏ si vyberte svou zemi.
Pokud na seznamu svou zemi nenajdete,zvolte “. . .”
! Stisknutím tlačítka È menu ZEMĚ opustíte.
ç Menu opustíte stisknutím tlačítka
R.
Toto menu umožňuje automatické vyhledání
všech programů, které jsou ve vaší oblasti
(nebo na kabelové síti) k dispozici.
& Nejprve vykonejte všechny operace uvedené v
bodech & až ! viz výše a poté:
é Zvolte AUT.LADĚNÍ (
Ï) a stiskněte ¬.
Začne vyhledávání.Po několika minutách se
automaticky zobrazí menu NASTAVENÍ.
“ Pokud vysílač nebo kabelová síť vysílá
automatický třídící signál, budou nalezené
programy očíslovány podle vysílaného pořadí.
‘
Pokud signál nevysílá,budou programy očíslovány
v sestupném pořadí od čísla 99, 98, 97.
K jejich přečíslování je třeba použít menu
TŘÍDĚNÍ.
Některé vysílače či kabelové stanice vysílají vlastní
třídící parametry (region, jazyk, ...).V tomto případě
musíte označit svou volbu tlačítky
îÏ a
potvrdit tlačítkem
¬.
Vyhledávání přerušíte nebo skončíte tlačítkem
H.
Pokud nebyl nalezen žádný program, přečtěte si
kapitolu Doporučení na str. 12.
( Menu opustíte stisknutím tlačítka
R.
• OBRAZ
• ZVUK
• ZVL. FUNKCE
• NASTAVENæ
NASTAVENæ
• JAZYK
• ZEMù
• AUT. LADùNæ
• RUâNæ LADùNæ
• T¤æDùNæ
• NÁZEV
CZECH
FRENCH
GERMAN
NASTAVENæ
• JAZYK
• ZEMù
• AUT. LADùNæ
• RUâNæ LADùNæ
• T¤æDùNæ
• NÁZEV
VYHLEDÁVÁNæ
PROSæM âEKAT
PROG. NALEZEN 2
215.18 MHZ
Page 67

7
Ruční ladění
Toto menu umožňuje ladit programy postupně.
& Stiskněte tlačítko
H.
é Zvolte NASTAVENÍ (
Ï) a stiskněte ¬.
Zobrazí se menu NASTAVENÍ.
“ Zvolte RUČNÍ LADĚNÍ (
Ï) a stiskněte ¬.
Zobrazí se požadované menu:
‘ Stisknutím ¬ se dostanete do menu TV
SYSTÉM.Tlačítky
îÏ zvolte EUROPE
(automatický příjem*) nebo ruční nastavení na
WEST EUR (standard BG), EAST EUR
(standard DK) , UK (standard I) nebo FRANCE
(standard LĽ). Stisknutím
È menu opustíte.
* S výjimkou Francie (standard LĽ), zvolte vždy
FRANCE.
( Zadejte HLEDÁNÍ a stiskněte
¬.
Vyhledávání začíná.Jakmile bude nějaký
program nalezen, vyhledávání se zastaví.
Přejděte k bodu è.Pokud znáte frekvenci
požadovaného programu,můžete ji zadat
přímo tlačítky od 0 do 9.
Pokud nebude nalezen žádný program,přečtěte si
kapitolu než zavoláte technika, strana 12.
§ Pokud není příjem uspokojivý, zvolte DOLADĚNÍ
a podržte stisknuté tlačítko
È či ¬.
è Zvolte Č. PŘEDVOLBY a tlačítky Ȭ nebo
od
0 do 9 zadejte požadované číslo
programu.
! Zvolte ULOŽENÍ a stiskněte
¬.
Program je uložen, zobrazí se ULOŽENO.
ç Opakujte celý postup od bodu ( do ! pro
každý program, který chcete uložit.
Menu opustíte stisknutím
d.
• OBRAZ
• ZVUK
• ZVL. FUNKCE
• NASTAVENæ
NASTAVENæ
MANUAL STORE
• TV SYSTÉM
• HLEDÁNæ
• â. P¤EDVOLBY
• DOLADùNæ
• ULOÎENæ
EUROPE
WEST EUR
EAST EUR
UK
FRANCE
Použití rádia
Volba režimu rádia
Chcete-li přepnout televizor do režimu rádio,
stiskněte tlačítko
 dálkového ovládání.
V režimu rádio se na obrazovce objeví číslo,
název stanice (je li k dispozici), její frekvence a
režim.
Pro zadání názvu stanice použijte nabídku
NÁZEV PROGRAMU.(s.7)
Volba programů
Použijte tlačítka
09nebo @ P #,
chcete-li zvolit stanice FM (1 až 40).
Seznam rádiových stanic
Stiskněte tlačítko
ı
, chcete-li vyvolat/zrušit
seznam rádiových stanic. Pro volbu stanice pak
použijte kurzor.
Použití nabídek rádia
Použijte tlačítko
H k provedení specifických
nastavení rádia.
Vyhledávání rádiových stanic
V případě, že jste použili rychlé nastavení,
uložily se do paměti všechny stanice FM, které
jsou k dispozici. Chcete-li zahájit nové hledání,
použijte nabídka
NASTAVENÍ
: AUT.LADĚNÍ
nebo RUČNÍ LADĚNÍ (pro postupné
vyhledávání jednotlivých stanic).
Nabídky
TŘÍDĚNÍ a NÁZEV PROGRAMU vám
umožňují třídit a pojmenovávat rádiové
stanice. Tyto nabídky se ovládají stejně jako
nabídky TV.
Spořič obrazovky
V nabídce
ZVLÁŠTNÍ FUNKCE můžete
aktivovat/deaktivovat spořič obrazovky.
Na obrazovce se objeví frekvence,stanice a
název (je-li k dispozic).
Page 68

8
Nastavení obrazu
Nastavení zvuku
& Stiskněte tlačítko H a poté ¬.
Zobrazí se menu OBRAZ:
é Tlačítky
îÏ volíte položku,tlačítky
Ȭ provádíte nastavení.
Poznámka:
Menu je rolovací.
K položkám skrytým ve spodní části obrazovky se
dostanete, když podržíte tlačítko
Ï stisknuté.
“ Jakmile nastavení provedete, zvolte ULOŽENÍ
a stisknutím
¬ nastavení uložte.
‘ Menu opustíte stisknutím tlačítka
d.
Ty py nastavení:
• JAS: působí na jasnost obrazu
• BARVA: působí na intenzitu barev
• KONTRAST: působí na rozdíl mezi světlými a
tmavými plochami
• OSTROST: působí na zřetelnost obrazu
•
ULOŽENÍ: uložení nastavení obrazu do paměti
• NR: omezuje poruchy signálu (zrnění) v
případě slabého příjmu.
• KONTRAST +:Aktivace/vypnutí automatické
regulace kontrastu obrazu (tmavé oblasti se
stávají tmavšími,současně se zvýrazněním
detailů).
& Stiskněte tlačítko H,zvolte ZVUK (Ï) a
pak stiskněte
¬. Zobrazí se menu ZVUK:
é Tlačítky
îÏ volíte položku,tlačítky
Ȭ provádíte nastavení.
“ Jakmile nastavení provedete, zvolte ULOŽENÍ
a stisknutím
¬ nastavení uložte.
‘ Menu opustíte stisknutím tlačítka
d.
Ty py nastavení:
• EKVALIZÉR: seřízení barvy zvuku (od hloubek:
120 Hz po výsky: 10 kHz).
• VYVÁŽENÍ:vyrovnání hlasitosti pravého a
levého reproduktoru
• ZVUK +/- (rozdíly hlasitosti):umožňuje
vyrovnat rozdíly hlasitosti mezi jednotlivými
programy nebo konektory EXT.Toto nastavení
funguje u programů 1 až 40 a konektorů EXT.
Pro srovnání úrovně hlasitosti jednotlivých
programů použijte tlačítka
@ P #.
• ULOŽENÍ: uložení nastavené hodnoty do
paměti.
• OMEZENÍ HLASITOSTI:automatické řízení
hlasitosti, omezuje zvyšování hlasitosti, při
změně programu nebo při reklamním vstupu.
• INCR. SURROUND: Zapnutí/vypnutí efektu
prostorového zvuku.V režimu stereo
vyvolává tato funkce dojem,že reproduktory
jsou umístěny dále od sebe.V režimu mono
simuluje efekt stereo.
• OBRAZ
• ZVUK
• ZVL. FUNKCE
• NASTAVENæ
OBRAZ
• JAS
• BARVA
• KONTRAST
• OSTROST
• ULOÎENæ
• NR
• KONTRAST+
--I------ 39
• OBRAZ
• ZVUK
• ZVL. FUNKCE
• NASTAVENæ
ZVUK
• EKVALIZER
• VYVÁÎENæ
• DELTA HLAS.
• ULOÎENæ
• OMEZENÍ
HLASITOSTI
• INCR.SURROUND
120 HZ
500 HZ
1500 HZ
5 KHZ
10 KHZ
Nastavení zvláštních funkcí
& Stiskněte H,zvolte ZVLÁŠTNÍ FUNKCE
(
Ï) a stiskněte ¬. Můžete nastavit:
é ČASOVAČ,DĚTSKÁ POJISTKA
. a
RODIČOVSKÝ ZÁMEK
: viz následující stranu.
“ ZVOLTE. REŽIM : pro přepnutí televizoru do
režimu rádio nebo TV.
‘ Stisknutím tlačítka
d opustíte menu.
Page 69

9
Funkce buzení
Zablokování televizoru
Tato funkce vám umožní používat televizor
jako budík.
& Stiskněte tlačítko
H.
é Zvolte ZVLÁŠTNÍ FUNKCE (
Ï) a dvakrát
stiskněte
¬. Zobrazí se menu ČASOVAČ:
“ Tlačítkem ¬ budete vstupovat do a
vystupovat z jednotlivých podmenu, tlačítka
îÏ použijete k nastavení.
‘ ČAS: zadejte přesný čas.
P
oznámka: Čas se při každém zapnutí televizoru
automaticky aktualizuje podle informací z
teletextu na programu č.1. Pokud na něm teletext
není, k aktualizaci nedojde.
( ČAS ZAČÁTKU: zadejte čas začátku
§ ČAS KONCE:zadejte čas, kdy chcete,aby se
televizor vypnul.
è ČÍSLO PŘEDVOLBY:zadejte číslo programu,
kterým si přejete být buzeni. U modelů
vybavených rádiem můžete zvolit stanici FM
prostřednictvím tlačítek
Ȭ (tlačítka 09
umožňují pouze výběr televizních programů).
! AKTIVACE:zde můžete nastavit:
• JEDENKRÁT : jediné buzení
• KAŽDODENNĚ: buzení každý den
• ZRUŠIT:nastavení zrušíte
ç Tlačítkem
b uvedete televizor do
pohotovostního režimu.V naprogramovanou
hodinu se automaticky zapne. Pokud zůstane
televize zapnutá,v uvedenou hodinu se pouze
změní program.
Kombinováním funkcí DĚTSKÝ ZÁMEK a
ČASOVAČ lze omezit dobu, po kterou je televizor
zapnutý, např. kvůli dětem.
Umožňuje znepřístupnit některé programy
nebo používání televizoru úplně znemožnit
zablokováním tlačítek.
Znepřístupnění programů
& Stiskněte tlačítko H.
é Zvolte ZVLÁŠTNÍ FUNKCE (
Ï) a poté
stiskněte
¬.
“ Zvolte RODIČOVSKÝ ZÁMEK (
Ï) a
stiskněte
¬.
‘ Zde musí zadat svůj tajný přístupový kód.
Napoprvé zadejte dvakrát po sobě kód 0711.
Zobrazí se menu:
( Do menu vstoupíte tlačítkem
¬.
§ Tlačítky
îÏ vyberte požadovaný program a
volbu potvrďte tlačítkem
¬.U příslušného
programu nebo konektoru se objeví značka
+.
è Stisknutím
d menu opustíte.
Pokud teď budete chtít sledovat zablokovaný
program, musíte zadat svůj tajný kód, jinak
zůstane obrazovka vypnutá.
Pozor, u kódovaných programů, které vyžadují
externí dekodér, musíte zablokovat příslušný
konektor EXT.
Všechny programy odblokujete následovně:
Opakujte předcházející postup od bodu & do
bodu ‘,pak zvolte ZRUŠIT VŠE a stiskněte
¬.
Změna tajného kódu:
Opakujte předcházející postup od bodu & do
bodu ‘, pak:
( Zvolte ZMĚNIT KÓD a zadejte vlastní
čtyřmístné číslo.
§ Číslo potvrďte jeho opakovaným zadáním.
Nový kód se uložil do paměti.
è Menu opustíte stisknutím tlačítka
d.
Pokud jste svůj tajný kód zapomněli, zadejte
dvakrát po sobě univerzální kód 0711.
Zablokování tlačítek
& Stiskněte H,zvolte ZVLÁŠTNÍ FUNKCE
(
Ï) a stiskněte ¬.
é Zvolte DĚTSKÁ POJISTKA (
Ï).
“ Stisknutím
¬ přepněte na ZAPNUTO.
‘ Vypněte televizor a ukryjte dálkové ovládání.
Televizor se stal neovladatelný (zapnout jej lze
pouze dálkovým ovládáním.)
( Odblokování: nastavte funkci DĚTSKÁ
POJISTKA na VYPNUTO.
• OBRAZ
• ZVUK
• ZVL. FUNKCE
• NASTAVENæ
ZVL. FUNKCE
âASOVAâ
• âAS
• âAS ZAâÁTKU
• âAS KONCE
• â. P¤EDVOLBY
• AKTIVACE
10:56
• OBRAZ
• ZVUK
• ZVL. FUNKCE
• NASTAVENæ
ZVL. FUNKCE
• âASOVAâ
• ZVOLTE.REÎIM
• DùTSKÁ POJ.
• RODIC. ZÁMEK
P¤æSTUP. KÓD
- - - -
Page 70

10
Teletext
Stiskněte:
Výsledek:
Teletext je informační systém přenášený některými kanály, do něhož se nahlíží jako do novin.
Umožňuje rovněž přístup k titulkům pro sluchově postižené nebo osoby, které nerozumí jazyku
vysílání (kabelové sítě, satelitní programy…).
Vyvolání
teletextu
Volba
stránky
Umožňuje vyvolání teletextu, přechod do průhledného
režimu a opuštění teletextu. Zobrazí se seznam dostupných
rubrik. Každá rubrika je označena třímístným číslem stránky.
Pokud zvolený program nevysílá teletext, zobrazí se číslo 100 a
obrazovka zůstane černá (v tomto případě opusťte teletext a
zvolte jiný kanál).
Vložte požadované číslo stránky pomocí tlačítek 0 až 9
nebo @ P #.Příklad: strana 120, zadejte 120.Číslo
se zobrazí nahoře vlevo, počítadlo běží a zobrazí se stránka.
Opakováním postupu vyberete jinou stránku.
Pokud počítadlo stále hledá, není stránka přenášena.
Zvolte jiné číslo.
Seznam
Přímý
přístup k
rubrikám
Pro návrat k seznamu (obvykle číslo 100).
Ve spodní části obrazovky jsou zobrazena barevná pole.
4 barevná tlačítka umožňují přímý přístup k příslušným
rubrikám nebo stránkám.
Pokud stránka nebo rubrika není ještě dostupná, příslušné
barevné pole bliká.
Zvětšení
stránky
Pro zobrazení horní části, dolní části a návrat k normální
velikosti.
Střídání
podstránek
Skryté
informace
Některé stránky obsahují podstránky, které se automaticky
střídají.Toto tlačítko umožňuje zastavit nebo obnovit střídání
podstránek. Nahoře vlevo se objeví znak
_.
Pro zobrazení/odstranění skrytých informací (řešení her).
Oblíbené
stránky
Pro teletextové programy 0 až 40 můžete uložit do paměti
4 oblíbené stránky,které budou následně přímo dostupné
prostřednictvím barevných tlačítek (červené, zelené, žluté a
modré).
& S
tiskněte H pro přechod do režimu oblíbených
stránek.
é Přejděte na teletextovou stránku, kterou chcete uložit
do paměti.
“ Stiskněte tlačítko
d a pak barevné tlačítko podle
vlastní volby. Stránka je uložena.
‘ Opakujte postup v bodech é a “ pro všechna
barevná tlačítka.
(
Když nyní přepnete na teletext,vaše oblíbené stránky
jsou zobrazeny v barevných polích ve spodní části
obrazovky. Pro návrat k obvyklým rubrikám stiskněte
H.
Pro smazání všech uložení držte dpo dobu 5 sekund.
Ë
SMART RADIO SMART
MENU
+
[
”
-
123
4
56
789
Ø
0
.
¤
ŸÓù
ª-
¤
0
9
P
+
P
-
Á
Ë
Ó
Ÿ
MENU
Ë
Page 71

11
MODE
VCR
DVD
·¢Ê Æ
∫
Ó
ı
Ω∆
.
Z
¤
Proveďte připojení zobrazená na protější stránce.
Tlačítkem
n zvolte EXT2 až S-VHS2 (signály S-VHS z
konektoru EXT2).
U monofonních přístrojů připojte zvukový signál na vstup AUDIO L.
Zvuk bude automaticky reprodukován na pravém i levém
reproduktoru televizoru.
Sluchátka
Pokud jsou sluchátka zapojena,je zvuk televizoru vypnut.
Tlačítka
@”#umožňují nastavení hlasitosti.
Impedance sluchátek musí být mezi 32 a 600 ohmy.
Pobočná připojení
Připojení jiných přístrojů
Konektor EXT1 je osazen vstupy/výstupy AV a vstupy RGB.
Videorekordér (nebo DVD rekordér)
Proveďte zapojení znázorněné na obrázku.Použijte kvalitní
kabel SCART.
Pokud na vašem videorekordéru nemáte výstupy např. SCART nebo
CINCH je jediné možné propojení pouze pomocí anténiho kabelu .
V tom případě musíte na televizoru naladit testovací signál
videorekordéru a přiřadit mu programové číslo 0 (viz ruční ladění str. 7).
Chcete-li sledovat videorekordér,stiskněte
0.
Videorekordér s dekodérem
Dekodér připojte na druhý SCART videorekordéru.
Nyní můžete nahrávat kódované přenosy.
Videorekordér
Satelitní přijímač, dekodér, DVD,hry atd.
Proveďte zapojení znázorněné na obrázku.
Volba připojeného přístroje
Stiskněte tlačítko n pro volbu EXT1 a EXT2 a S-VHS2 (signály
S-VHS z konektoru EXT2).
Většina přístrojů (dekodéry, videorekordéry) provádí přepínaní
automaticky sama, pokud jsou vybaveny konektory SCART.
Další přístroje
FM ANT
EXT1
:
VCR
EXT1
*
Video
Video
Audio
S
in
L
in
R
Page 72

12
Než zavoláte technika
Špatný příjem
Chybí obraz
Televizor ukazuje
černobílý obraz z
připojených
přístrojů
Chybí zvuk
Dálkové ovládání
nefunguje?
Pohotovostní režim
Pokyny k recyklaci
Stále bez výsledků?
Zdvojený nebo vícenásobný obraz či stíny mohou být zapříčiněny blízkostí hor
nebo vysokých budov.V tom případě se nejedná o závadu můžete se pokusit
doladit obraz ručně viz “doladění” (str.7) nebo změňte nastavení venkovní antény.
Ověřte si, že vaše anténa umožňuje přijímat vysílání v tomto kmitočtovém pásmu
(v pásmu UHF nebo VHF).
Zapojili jste správně anténu? Zvolili jste správný systém?(str.7).Špatně připojené
eurokonektory či kabel antény jsou častou příčinou problémů s obrazem a zvukem
(může se stát, že se konektory částečně odpojí, když televizor přemisťujeme či
otáčíme). Zkontrolujte všechna připojení.
U videorekordéru zkontrolujte, zda kazeta byla nahrána v takovém systému
(PAL, SECAM, NTSC), že váš videorekordér umí přehrát.
Pokud u některých programů chybí zvuk,ale ne obraz, tak to znamená,že
televizor je přepnut na špatný systém.Upravte nastavení TV SYSTÉM (str.7).
Zesilovač připojený k televizoru nevydává zvuk ? Zkontrolujte, že jste nezaměnili
výstup pro audio se vstupem pro audio.
Kontrolka na televizoru nebliká, když používáte dálkového ovládání?
Vyměňte baterie. Zkontrolujte, že na dálkovém ovladači je navolen režim TV.
Když televizor zapnete, je v pohotovostním režimu a po stisknutí tlačítka na
televizoru se objeví hlášení DĚTSKÁ POJISTKA? To znamená že funkce zablokování
je zapnutá (str. 9).
Pokud televizor během 15 min nepřijímá žádný signál,přepne se automaticky do
pohotovostního režimu.Z důvodů úspory elektrické energie je televizor navržen tak,
aby měl jen velmi nízkou spotřebu energie v pohotovostním režimu (méně než 1 W).
Ve V ašem televizoru je použito materiálů, které mohou být znovu využity nebo
recyklovány. Specializované podniky sbírají staré televizní přijímače a soustřeďují z nich
znovu použitelný materiál s cílem omezit množství odpadu (informujte se u prodejce).
Odpojte síťový přivod televizoru na 30 vteřin a pak ji znovu zapněte.
V případě poruchy se nikdy nesnažte opravit televizor sami, obraťte se na servis.
EasyLink
Videorekordér připojený se systémem EasyLink má černobílý obraz nebo nemá
zvuk. Jde od nesprávný přenos dat, zrušte funkci EasyLink v menu (viz str. 9)
Nesprávné načitáni
data a času
Chybí nebo je nekvalitní signál teletextu na první předvolbě.
Nalaďte na první předvolbu stanici s kvalitním příjmem teletextu.
Page 73

1
Úvod
Obsah
Ďakujeme Vám,že ste si kúpili tento televízny prijímač.
Táto príručka bola zostavená s cieľom pomôcť Vám pri zapojení a ovládaní Vášho
televízneho prijímača.
Odporúčame Vám aby ste si príručku dôkladne prečítali.
Dúfame, že naša technológia zabezpečí Vašu spokojnosť.
Inštalácia
Popis televízora LCD . . . . . . . . . . . . . . . . . . . . . . . . . . . . . . . . . . . . . . . . . . . . . . . .2
Tlačidlá na diaľkovom ovládači . . . . . . . . . . . . . . . . . . . . . . . . . . . . . . . . . . . . . . . .3
Inštalácia televízneho prijímača . . . . . . . . . . . . . . . . . . . . . . . . . . . . . . . . . . . . . . . .4
Rýchla inštalácia kanálov . . . . . . . . . . . . . . . . . . . . . . . . . . . . . . . . . . . . . . . . . . . . .5
Triedenie programov . . . . . . . . . . . . . . . . . . . . . . . . . . . . . . . . . . . . . . . . . . . . . . .5
Voľba jazyka a krajiny . . . . . . . . . . . . . . . . . . . . . . . . . . . . . . . . . . . . . . . . . . . . . . .6
Automatické uloženie . . . . . . . . . . . . . . . . . . . . . . . . . . . . . . . . . . . . . . . . . . . . . . .6
Názov programu . . . . . . . . . . . . . . . . . . . . . . . . . . . . . . . . . . . . . . . . . . . . . . . . . . .6
Manuálne uloženie . . . . . . . . . . . . . . . . . . . . . . . . . . . . . . . . . . . . . . . . . . . . . . . . .7
Ovládanie
Používanie rádia . . . . . . . . . . . . . . . . . . . . . . . . . . . . . . . . . . . . . . . . . . . . . . . . . . . .7
Nastavenie obrazu . . . . . . . . . . . . . . . . . . . . . . . . . . . . . . . . . . . . . . . . . . . . . . . . .8
Nastavenie zvuku . . . . . . . . . . . . . . . . . . . . . . . . . . . . . . . . . . . . . . . . . . . . . . . . . .8
Nastavenie volieb . . . . . . . . . . . . . . . . . . . . . . . . . . . . . . . . . . . . . . . . . . . . . . . . . . .8
Budenie . . . . . . . . . . . . . . . . . . . . . . . . . . . . . . . . . . . . . . . . . . . . . . . . . . . . . . . . . .9
Zámka televízora . . . . . . . . . . . . . . . . . . . . . . . . . . . . . . . . . . . . . . . . . . . . . . . . . .9
Teletext . . . . . . . . . . . . . . . . . . . . . . . . . . . . . . . . . . . . . . . . . . . . . . . . . . . . . . . . .10
Periférne zariadenia
Videorekordér . . . . . . . . . . . . . . . . . . . . . . . . . . . . . . . . . . . . . . . . . . . . . . . . . . .11
Ostatné zariadenia . . . . . . . . . . . . . . . . . . . . . . . . . . . . . . . . . . . . . . . . . . . . . . . .11
Bočné pripojenia. . . . . . . . . . . . . . . . . . . . . . . . . . . . . . . . . . . . . . . . . . . . . . . . . . .11
Navolenie pripojeného zariadenia . . . . . . . . . . . . . . . . . . . . . . . . . . . . . . . . . . . .11
Rady . . . . . . . . . . . . . . . . . . . . . . . . . . . . . . . . . . . . . . . . . . . . . . . . . . . . . . . . . . .12
w
Čistenie televízora
Obrazovka i skrinka televízora sa má čistiť jedine čistou mäkkou a
nechlpatejúcou handričkou.
Nepoužívať prípravky obsahujúce lieh či rozpúšťadlo.
Slovenčina
Page 74

2
Popis televízora LCD
Tlačidlá televízora:
• .:zapnutie a vypnutie televízora.
• - + : regulácia hladiny zvuku.
• <> : výber programov.
• MENU: na aktiváciu alebo deaktiváciu ponuky stlačte
súčasne obe tlačidlá - a +. Následne môžete tlačidlami
<> vybrať príslušné nastavenie a tlačidlami - +
vykonať nastavenie.
Poznámka: Keď je aktívna funkcia RODIČ. ZÁMKA, tlačidlá + a <> nie sú aktívne (pozrite si ponuku CHARAKT na
strane 9).
Kontrolný indikátor zapnutia a infračervené snímače.
Zadný panel:
Hlavné pripojenia sa vykonávajú zospodu televízora.
Podrobnejší popis pripojení je na strane 12.
Eurokonektor EXT1.
Bočné pripojenia.
Polohovateľný stojan.
Stojan je možné odmontovať a nahradiť montážnym
držiakom na stenu, ktorý je voliteľne k dispozícii
(informujte sa u vášho predajcu).
Anténové vývody pre televízor a rádio.
Napájací konektor DC.
<
-
.
+
<
*
S
Video
Video
in
L
Audio
EXT1
in
R
:
DC in
FM ANT
Page 75

3
12
MENU
”
P
564
879
0
3
--
++
.
[
Ÿ
Á
-
ª
`
ù
SMART
SMART RADIO
Ë
¤
ı
Y
Ó
Tlačidlá na diaľkovom ovládači
ı Zoznam programov
Zobraziť / vymazať zoznam
programov. Použite tlačidlá îÏ
pre voľbu programu a tlačidlo ¬
pre zobrazenie.
Symbol
+ sa objaví pred programami,
ktoré sú zamknuté (str. 9) lebo
?:ak
sú odomknuté.
Informácie na obrazovke
Zobrazenie/zrušenie zobrazenia
čísla programu,názvu (ak je
nastavený),času, zvukového režimu
a času zostávajúceho na časovači.
Ak tlačidlo podržíte po dobu
5 sekúnd na obrazovke sa bude
permanentne zobrazovať číslo
programu.
Menu
Pre vyvolanie alebo opustenie menu.
Časovač automatického vypnutia
Pre nastavenie času,ktorý uplynie
do automatického prepnutia do
pohotovostného režimu
(od 0 do 240 minút).
Kurzorové tlačidlá / Formát 19:9
Tieto 4 tlačidlá umožnia pohyb v
ponuke.Tlačidlá Ȭ umožňujú
zvisle zväčšovať alebo zmenšovať
obraz.
Hlasitosť
Na nastavenie úrovne zvuku.
Vypnutie zvuku
Na vypnutie alebo obnovenie zvuku.
Vo l’ba konektorov EXT (str. 11)
Pre výber pripojeného prístroja
stlačte niekol’kokrát.
Číselné klávesy
Pre priamy prístup k programom.
V prípade programov s dvojciferným
označením musíte druhú číslicu
vložiť kým nezmizne
Pohotovostný režim
Ak chcete nastaviť TV prijímač do
režimu standby. Ak chcete znovu
zapnúť TV prijímač stlačte b,
P @#alebo 09.
Volič režimu rozhlas/tv
Na umožnenie zmeny režimu
televízneho prijímača do režimu
rozhlasu alebo tv.
Teletextové funkcie (str. 10)
Tlačidlá teletextu (strana 10)
Predbežné nastavenie obrazu a
zvuku
Umožňuje prístup ku skupine
predbežného nastavenia obrazu a zvuku.
Poloha OSOB.NASTAV. zodpovedá
nastaveniam uskutočneným v menu.
Voľba TV programov
Presun na ďalší alebo
predchádzajúci program.
Číslo (názov) a zvukový režim sa
zobrazia na niekoľko sekúnd.
U niektorých programov vybavených
teletextov sa názov programu objaví
na spodnej časti obrazovky.
Predošlý program
Návrat na predtým sledovaný
program
Režim zvuku
Umožňuje prepnúť programy
vysielané v
STEREO a NICAM
STEREO
na
MONO alebo, pri
dvojjazyčných programoch,voliť
medzi
DUAL I
alebo DUAL II.
Symbol
MONO
je v prípade núteného
prepnutia do režimu mono zobrazený
modro.
Page 76

4
&
Umiestnenie televízora
Televízor umiestnite na pevnú a stabilnú plochu.
Aby sa zabránilo možným nebezpečným situáciám,
televízor neumiestňujte do blízkosti striekajúcej vody,
k zdroju tepla (lampa, sviečka, radiátor atď.) a
nezakrývajte vetracie mriežky umiestnené vzadu.
é
Pripojenie antén
• Konektor antény zasuňte do zdierky : na zadnej
strane prijímača
• Pripojte priložený kábel rádiovej antény so vstupom
FM ANT umiestneným v spodnej časti televízora.
• Usporiadajte káble ich pretiahnutím cez stojan
televízora.
“
Pripojenie k zdroju napájania
Televízor funguje na jednosmerné elektrické napätie
(hodnota napätia je vyznačená na štítku). Používajte
iba usmerňovací adaptér (AC-DC) dodávaný s
televízorom.
• Pripojte konektor DC adaptéra do konektora DC
televízora. Ponechajte voľnú plochu okolo adaptéra
kvôli ventilácii.
• Zapojte kábel adaptéra do sieťovej elektrickej
zásuvky (220-240 V / 50 Hz).
Ak chcete pripojiť ďalšie prístroje, pozrite si stranu 12.
‘
Diaľkové ovládanie
Vložte dve dodávané batérie typu R6,pričom dbajte
na ich polaritu.
Batérie dodávané s prístrojom neobsahujú ortuť ani nikel
kadmium, čo prispieva k ochrane životného prostredia.
Vybité batérie nezahadzujte, ale využite dostupné možnosti
recyklácie (informujte sa u vášho predajcu).
(
Uvedenie do prevádzky
Televízor zapnite stlačením vypínača. Kontrolný
indikátor zapnutia sa rozsvieti na zeleno a zapne sa
obrazovka. Prejdite priamo ku kapitole s informáciami
o rýchlej inštalácii na strane 5.
Ak televízor zostane v úspornom režime (červený
kontrolný indikátor), stlačte tlačidlo P
# na
diaľkovom ovládači.
Kontrolný indikátor pri používaní diaľkového ovládania
bliká.
Inštalácia televízneho prijímača
5 cm
5 cm
5 cm
FM ANT.
Page 77

5
Rýchla inštalácia kanálov
Triedenie programov
Keď prvý raz zapnete televízor, objaví sa na
obrazovke ponuka.Táto ponuka Vás vyzýva k
voľbe jazyka ponúk :
Ak sa ponuka neobjavuje, podržte klávesy televízora
- a + stlačené 8 sekúnd, aby sa objavila.
& Pre voľbu jazyka použite tlačidlá îÏ diaľkového
ovládania, potom potvrďte tlačidlom ¬.
é Potom vyberte Vašu krajinu tlačidlami îÏ
a potvrďte stlačením ¬.
Ak sa vaša krajina neobjaví v zozname, vyberte
voľbu “. . .”
“ Vyhľadávanie sa spustí automaticky.
Úkon potrvá niekoľko minút.Na obrazovke
vidíme postup Vyhľadávania a počet nájdených
programov. Nakoniec sa ponuka stratí.
Ak chcete ukončiť, alebo prerušiť vyhľadávanie,
stlačte klávesu
H.Ak ste nenašli žiaden program,
pozrite sa do kapitoly rád, str. 12.
‘ Ak vysielač alebo káblová sieť prenáša signál
automatického triedenia, programy budú
správne číslované.
(
Ak to tak nie je, nájdené programy budú
číslované zostupne od čísla 99, 98, 97,....
Pre očíslovanie musíte použiť ponuku TRIEDENIE.
Niektoré vysielače a káblové siete vysielajú vlastné
parametre triedenia (región, jazyk, ...).V tomto
prípade musíte označiť svoju voľbu tlačidlami
îÏ potom potvrdiť ¬.
& Stlačte tlačidlo H. Hlavné menu sa zobrazí na
obrazovke.
é Vyberte INŠTALÁCIU (Ï) a stlačte ¬.
Objaví sa ponuka INŠTALÁCIA :
“ Vyberte TRIEDENIE pomocou tlačidla
Ï a
stlačte
¬. Objaví sa ponuka TRIEDENIE.
Voľba Z je aktívna.
P
oznámka: táto ponuka funguje podľa
nasledujúcej logiky :
• “odísť Z” (zadajte č. aktuálneho programu,
• “dostať sa DO” (zadajte nové číslo)
• “VYMENIŤ čísla” (úkon je vykonaný).
‘ Vyberte program,ktorý si želáte prečíslovať
používaním tlačidiel
Ȭ lebo 0 až 9.
Príklad: chcete Z programu 78 DO programu 2:
vyťukajte
78.
( Vyberte DO (tlačidlo
Ï) a zadajte nové
želané číslo tlačidlami
Ȭ lebo 0 až 9
(v našom príklade stlačte 2).
§ Vyberte VYMENIŤ (tlačidlo
Ï) a stlačte
¬. Objaví sa označenie VÝMENA, výmena
prebieha.V našom príklade program 78 je
prečíslovaný na 2 (a č. 2 na 78).
è Vyberte Z (tlačidlo
î) a zopakujte body č.
‘ až § toľkokrát,koľko programov treba
prečíslovať.
! Ponuku opustíme stlačením tlačidla
d.
SELECT LANGUAGE
JAZYK
SLOVENIAN
• SLOVAK
TURKISH
ENGLISH
CROATIAN
KRAJINA
CZECH
HUNGARY
CROATIA
POLAND
ROUMANIA
• OBRAZ
• ZVUK
• CHARAKT.
• IN·TALÁCIA
IN·TALÁCIA
• JAZYK
• KRAJINA
• AUT. ULOÎENIE
• MAN. ULOÎENIE
• TRIEDENIE
• NÁZOV
Z
DO
VYMENIË
Page 78

6
Názov programu
Ak si prajete, môžete pomenovať prvých
40 programov (od 1 do 40).
& Stlačte
H.
é Vyberte INŠTALÁCIA (
Ï) a stlačte ¬.
Objaví sa ponuka INŠTALÁCIA.
“ Stlačte 5 krát
Ï,aby ste vybrali NÁZOV
(ukrytý v dolnej časti obrazovky) a stlačte
¬.
Objaví sa ponuka:
‘ Vyberte program,ktorý chcete pomenovať
používajúc tlačidlá
09alebo @ P #.
P
oznámka: v priebehu inštalácie sú programy
pomenované automaticky,keď sa vysiela
identifikačný signál.
( Pomocou kláves
Ȭ sa premiestnite do
pásma zobrazovania názvov (5 znakov).
§ Pomocou kláves
îÏ zvoľte znaky.
è Stlačte
H,keď je názov zadaný.
Názov programu je uložený.
! Zopakujte body ‘ až è pri každom
pomenovávanom programe.
ç Opustite ponuku stlačením
d.
IN·TALÁCIA
• JAZYK
• KRAJINA
• AUT. ULOÎENIE
• MAN. ULOÎENIE
• TRIEDENIE
• NÁZOV BBC_1
Voľba jazyka a krajiny
Automatické uloženie
& Stlačte tlačidlo H,aby sa zobrazila hlavná
ponuka.
é
Vyberte INŠTALÁCIA (Ï) stlačte ¬. Objaví
sa ponuka INŠTALÁCIA.Voľba JAZYK je aktívna.
“ Stlačte ¬,aby ste sa dostali do ponuky
JAZYK.
‘ Zvoľte Váš jazyk tlačidlami
îÏ.
Ponuky sa budú objavovať v zvolenom jazyku.
( Stlačte
È,aby ste sa dostali z ponuky
JAZYK.
§ Vyberte KRAJINA (
Ï) a stlačte ¬.
è Zvoľte Vašu krajinu tlačidlami
îÏ.
Ak sa vaša krajina neobjaví v zozname, vyberte
voľbu “. . .”
!
Stlačte È,aby ste sa dostali z ponuky KRAJINA.
ç Ponuku opustíme stlačením d.
Táto ponuka umožňuje spustiť automatické
vyhľadanie všetkých dostupných programov vo
vašej oblasti (alebo vo vašej káblovej sieti).
& Vykonajte najprv úkony & až ! uvedené
vyššie, potom :
é Vyberte AUT. ULOŽENIE (
Ï) a stlačte ¬.
Začína Vyhľadávanie.
Za niekoľko minút sa automaticky opäť objaví
ponuka INŠTALÁCIA.
“ Ak vysielač alebo káblová sieť prenáša signál
automatického triedenia, programy budú
správne číslované.
‘ Ak to tak nie je, nájdené programy budú
číslované zostupne od čísla 99, 98, 97, ....
Pre očíslovanie musíte použiť ponuku
TRIEDENIE.
Niektoré vysielače a káblové siete vysielajú vlastné
parametre triedenia (región, jazyk, ...).V tomto
prípade musíte označiť svoju voľbu tlačidlami
îÏ potom potvrdiť ¬.
Ak chcete ukončiť, alebo prerušiť vyhľadávanie,
stlačte klávesu H.
Ak vyhľadávaním nenájdete žiadny program,
obráťte sa na časť Rady na str.12.
( Ponuku opustíme stlačením
d.
• OBRAZ
• ZVUK
• CHARAKT.
• IN·TALÁCIA
IN·TALÁCIA
• JAZYK
• KRAJINA
• AUT. ULOÎENIE
• MAN. ULOÎENIE
• TRIEDENIE
• NÁZOV
SLOVAK
TURKISH
ENGLISH
IN·TALÁCIA
• JAZYK
• KRAJINA
• AUT. ULOÎENIE
• MAN. ULOÎENIE
• TRIEDENIE
• NÁZOV
HΩADANIE
âAKAË PROSæM
NÁJD. PROG. 2
215.18 MHZ
Page 79

7
Manuálne uloženie
Táto ponuka umožňuje ukladať programy po
jednom.
& Stlačte
H.
é Vyberte INŠTALÁCIA (
Ï) a stlačte ¬.
Objaví sa ponuka INŠTALÁCIA.
“ Vyberte MAN. ULOŽENIE (
Ï) a stlačte ¬.
Ponuka sa objaví.
‘ Stlačte
¬,aby ste sa dostali do ponuky TV
SYSTÉM. Použite
îÏ na voľbu EURÓPA
(automatickú detekciu*) alebo manuálnu
detekciu s :WEST EUR (norma BG), EAST
EUR (norma DK), UK (norma I) alebo
FRANCE (norma LĽ). Potom stlačte
È,aby
ste sa dostali z ponuky.
* Okrem Francúzska (norma LL’), tam vyberte
voľbu FRANCE.
( Zvoľte HĽADANIE a stlačte
¬. Začne sa
vyhľadávanie.Ak sa nájde nejaký program,
vyhľadávanie sa zastaví.Pokračujte v bode è.
Ak viete frekvenciu požadovaného programu,
môžete túto vložiť pomocou tlačidiel
0 - 9.
Ak nenájdete žiadny program, obráťte sa na časť
Rady na strane 12.
§ Ak je príjem nedostatočný,zvoľte
JEMN.DOLAĎ. a pridržte tlačidlo È alebo ¬.
è Zvoľte ČÍSLO PROG. a pomocou Ȭ
alebo 0 až 9 vložte príslušné číslo.
! Zvoľte ULOŽENIE a stlačte
¬. Objaví sa
správa ULOŽENÉ.Program je uložený.
ç Opakujte kroky ( až ! pre každý program,
ktorý chcete uložiť.
Ak chcete opustiť ponuku: stlačte tlačidlo d.
• OBRAZ
• ZVUK
• CHARAKT.
• IN·TALÁCIA
IN·TALÁCIA
MANUAL STORE
• TV SYSTÉM
• LADENIE
• âæSLO PROG.
• JEMNÉ DOLAë.
• ULOÎENIE
EUROPE
WEST EUR
EAST EUR
UK
FRANCE
Používanie rádia
Výber režimu rádia
Stlačením tlačidla  na diaľkovom ovládaní
prepnite televízor do režimu rádia.V režime
rádia sa číslo a názov stanice (ak sa vysiela), jej
frekvencia a nastavenie zobrazujú na obrazovke.
Na zadanie názvu stanice používajte ponuku
NÁZOV (strana 7).
Výber programov
Na výber staníc v pásme FM (od 1 po 40)
použite tlačidlá 09alebo @ P #.
Zoznam rozhlasových staníc
Stlačením tlačidla
ı
sa zobrazí alebo zruší
zoznam rozhlasových staníc. Následne
použitím kurzora vyberte stanicu.
Použitie ponuky rádio
Stlačením tlačidla
H získate prístup k
špecifickým nastaveniam rádia.
Vyhľadávanie rozhlasových staníc
Ak ste použili rýchlu inštaláciu, všetky
dostupné stanice v pásme FM boli uložené do
pamäte. Na opätovné vyhľadávanie staníc
použite ponuku INŠTALÁCIA: AUT. ULOŽENIE
(úplné vyhľadávanie) alebo MAN.ULOŽENIE
(postupné vyhľadávanie jednotlivých staníc).
Ponuky TRIEDENIE a NÁZOV umožňujú
zaradiť alebo pomenovať stanicu.
Používanie tejto ponuky je identické s
používaním ponuky TV.
Šetrič obrazovky
V ponuke CHARAKT. môžete aktivovať alebo
deaktivovať šetrič obrazovky. Hodina,
frekvencia a názov stanice (ak sa vysiela) sa
posúvajú po obrazovke.
Page 80

8
Nastavenie obrazu
Nastavenie zvuku
&
Stlačte H,potom ¬.Objaví sa ponuka OBRAZ :
é Použite tlačidlá îÏ na vybratie nastavenia
a tlačidlami
Ȭ nastavte.
P
oznámka: Jedná sa o rolovaciu sa ponuku.
Podržte tlačidlo
Ï stlačené, aby ste sa dostali k
nastaveniam ukrytým v dolnej časti obrazovky.
“ Akonáhle sú nastavenia vykonané,vyberte
voľbu ULOŽENIE a stlačte
¬,aby ste ich
uložili.
‘ Opustite ponuku stlačením
d.
Popis nastavení :
• JAS : pôsobí na svetelnosť obrazu.
• FARBA :pôsobí na intenzitu farby.
• KONTRAST : pôsobí na rozdiel medzi
svetlými a tmavými tónmi.
• OSTROSŤ :pôsobí na čistotu obrazu.
• ULOŽENIE : uloží nastavenie obrazu.
• ZNÍŽENIE ŠUMU : zmierňuje šum obrazu
(sneženie).
• KONTRAST +:
Na aktivovanie / deaktivovanie
automatického nastavenia kontrastu obrazu
(sústavne prevádza najtmavšiu časť obrazu na
čiernu).
& Stlačte H, vyberte ZVUK (Ï) a stlačte ¬.
Objaví sa ponuka ZVUK.
é Použite tlačidlá
îÏ na vybratie nastavenia
a tlačidlá
Ȭ na nastavenie.
“ Akonáhle budú nastavenia vykonané,vyberte
ULOŽENIE a stlačením
¬ ich uložte.
‘ Opustite ponuku stlačením
d.
Popis nastavení :
• EKVALIZÉR : na úpravu farby zvuku (od
hlbokého:120 Hz k prenikavému:10 kHz).
• VYVÁŽENIE : na vyváženie ľavého a pravého
reproduktora.
• DELTA HLASITOSŤ(rozdiel hlasitosti):
umožňuje vyrovnávať odchýlky hlasitosti
medzi rôznymi programami alebo vonkajšími
vstupmi.Toto nastavenie je aktívne pre
programy 1 až 40 a vonkajšie vstupy.
Pre vyrovnanie úrovne hlasitosti jednotlivých
programov použite tlačidlá
@ P #.
• ULOŽENIE : uložiť nastavenie zvuku.
• LIMIT HLASIT: automatická kontrola hlasitosti
umožňujúca obmedziť zvýšenie hlasitosti,
najmä pri zmenách programov a reklame.
• INCR. SURROUND: Pre aktiváciu/inaktiváciu
efektu surround sound.V režime stereo sa
takto získa dojem, že reproduktory sú ďalej
od seba.V režime mono sa simuluje stereo
priestorový efekt.
• OBRAZ
• ZVUK
• CHARAKT.
• IN·TALÁCIA
OBRAZ
• JAS
• FARBA
• KONTRAST
• OSTROSË
• ULOÎENIE
• ZNíÎENIZ ·UMU
• KONTRAST+
--I------ 39
• OBRAZ
• ZVUK
• CHARAKT.
• IN·TALÁCIA
ZVUK
• EKVALIZÉR
• VYVÁÎENIE
• DELTA HLAS.
• ULOÎENIE
• LIMIT HLASIT
• INCR.SURROUND
120 HZ
500 HZ
1500 HZ
5 KHZ
10 KHZ
Nastavenie volieb
& Stlačte H, vyberte CHARAKT. (Ï) a stlačte
¬. Môžete nastavovať.
é ČASOVAČ, RODIČ. ZÁMKA a ROD.
KONTROLA : viď nasledujúca strana
“ VÝBER MÓDU: prepnutie televízora do
režimu rádio alebo TV.
‘ Ponuku opustíte stlačením
d.
Page 81

9
Budenie
Zámka televízora
Táto ponuka Vám umožní použiť televízor ako budík.
& Stlačte klávesu H.
é Vyberte CHARAKT. (
Ï) a stlačte dvakrát
¬. Objaví sa ponuka ČASOVAČ.
“ Stlačte
¬ pre vstup a výstup do každej
podponuky a na nastavenie použite tlačidlá
îÏ.
‘ ČAS: zadajte aktuálny čas.
P
oznámka: čas sa aktualizuje automaticky, pri
každom zapnutí, podľa informácií teletextu
programu č. 1.Ak tento nemá teletext, čas sa
nebude aktualizovať.
( ČAS SPUST.: zadajte čas spustenia.
§ ČAS VYPNUT.: zadajte čas prechodu do
pohotovostného stavu.
è ČÍSLO PROG.: zadajte číslo programu
vybratého na prebudenie. Pri typoch
vybavených rozhlasom si môžte pomocou
tlačidiel
Ȭ zvoliť nejakú stanicu FM (len
tlačidlá
09 umožnia výber tv programov).
! AKTIVOVAŤ :môžete nastaviť :
• RAZ na jedno prebudenie,
• DENNE pre každodenné budenie,
• ZRUŠIŤ na zrušenie budenia.
ç
Stlačením b uveďte prijímač do
pohotovostného režimu.V naprogramovanom
čase sa prijímač automaticky zapne.Ak
ponecháte prijímač zapnutý, v naprogramovanom
čase dôjde iba k zmene kanála.
Kombinácia funkcií ROD.ZÁMKA a ČASOVAČ
umožňuje obmedziť čas, po ktorý je možné prijímač
používať, napríklad vašími deťmi.
Môžete zamknúť určité programy, alebo úplne
zakázať používanie televízora uzamknutím tlačidiel.
Zamknutie programov
& Stlačte tlačidlo H.
é Vyberte CHARAKT. (
Ï) a stlačte ¬.
“ Vyberte ROD. KONTROLA (Ï) a stlačte ¬.
‘ Musíte zadať Váš tajný prístupový kód.Prvý raz
vyťukajte dvakrát kód 0711. Objaví sa ponuka.
( Pre vstúpenie do ponuky stlačte
¬.
§ Použitím tlačidiel
îÏ vyberte želaný
program a potvrďte stlačením
¬.
Pred zamknutými vstupmi či programami sa
objaví symbol
+.
è Opustite stlačením tlačidla
d.
Odteraz môžete zobraziť zamknutý program
iba zadaním tajného kódu, ak nie obrazovka
zostane čierna.
Pozor, v prípade zakódovaných programov,ktoré
používajú vonkajší dekodér, treba zamknúť
príslušný vstup EXT.
Na odomknutie všetkých programov
zopakujte úkony & až ‘, potom zvoľte
ZRUŠIŤ VŠETKO a stlačte
¬.
Zmena kódu
Zopakujte úkony & až ‘, potom:
( Vyberte ZMENA KÓDU a zadajte Vaše vlastné
štvormiestne číslo.
§ Potvrďte ho vyťukaním po druhý raz.
Váš nový kód je uložený.
è Opustite stlačením d.
Ak ste Váš tajný kód zabudli, zadajte dvakrát
univerzálny kód 0711.
Zamknutie tlačidiel
& Stlačte H, vyberte CHARAKT. (Ï) a stlačte
¬.
é Vyberte RODIČ. ZÁMKA (
Ï) a stlačte ¬,
aby ste zadali CHOD.
“ Vypnite televízor a odložte diaľkové ovládanie.
Televízor sa stane nepoužiteľným (iba diaľkový
ovládač ho môže zapnúť).
‘ Zrušiť : umiestniť RODIČ. ZÁMKA na ZRUŠIŤ.
• OBRAZ
• ZVUK
• CHARAKT.
• IN·TALÁCIA
CHARAKT.
âASOVAâ
• âAS
• âAS SPUST.
• âAS VYPNUT.
• âæSLO PROG.
• AKTIVOVAË
10:56
• OBRAZ
• ZVUK
• CHARAKT.
• IN·TALÁCIA
CHARAKT.
• âASOVAâ
• V¯BER MÓDU
• RODIâ. ZÁMKA
• ROD. KONTROLA
PRæSTÚP. KÓD
- - - -
Page 82

10
Teletext
Stlačte :
Dostanete :
Teletext je informačný systém vysielaný určitými TV stanicami, ktorý môžete prezerať podobne ako
noviny.Taktiež poskytuje titulky pre sluchovo postihnutých ľudí, alebo tých, ktorí neovládajú jazyk, v
ktorom je príslušný program vysielaný (káblové vysielanie, satelitné kanály…).
Privolanie
teletextu
Výber
stránky
Umožní privolať teletext, prejsť do názorného režimu a
ukončiť prácu s teletextom. Objaví sa obsah so zoznamom
rubrík, ku ktorým máte prístup. Každá rubrika je označená
trojmiestnym číslom stránky.
Ak vybraná stanica teletext nevysiela, zobrazí sa označenie 100
a obrazovka zostane tmavá (v tom prípade vypnite teletext a
zvoľte iný kanál).
Vytvorte číslo želanej stránky tlačidlami 0 až 9 alebo @ P
#. Príklad: strana 120,vyťukajte 120. Číslo sa zobrazí
vľavo hore,počítadlo sa točí, potom sa zobrazí stránka.
Ak chcete prezerať inú stránku, opakujte tento postup.
Ak počítadlo pokračuje vo vyhľadávaní, táto stránka sa nevysiela.
Zvoľte iné číslo.
Obsah
Priamy
prístup k
rubrikám
Návrat k obsahu (obyčajne str.100).
V dolnej časti obrazovky sú zobrazené farebné pruhy.
Pomocou štyroch farebných tlačidiel môžete pristupovať
do príslušných rubrík či stránok.
Farebné pruhy blikajú, ak príslušná rubrika či stránka nie sú k
dispozícii.
Zväčšenie
stránky
Pre zobrazenie hornej a dolnej časti, potom návrat do
normálneho režimu.
Zastavenie
striedania
podstránok
Skryté
informácie
Niektoré stránky obsahujú podstránky, ktoré sa
automaticky striedajú. Toto tlačidlo umožňuje zastaviť
alebo striedať podstránky.Označenie
_ sa objaví vľavo
hore.
Pre odhalenie či skrytie skrytých informácií (riešenie hier).
Obľúbené
stránky
Z programov teletextu 0 až 40 môžete uložiť 4 obľúbené
stránky,ktoré budú potom priamo prístupné pomocou
farebných tlačidiel (červené, zelené, žlté, modré).
& Stlačením tlačidla
H
prejdete do režimu obľúbených
stránok
é Zadajte stránku teletextu, ktorú chcete uložiť.
“ Stlačte tlačidlo d potom farebné tlačidlo podľa
Vášho výberu.Stránka je uložená.
‘ Zopakujte úkony é a “ s ostatnými farebnými
tlačidlami.
( Teraz, akonáhle zapnete teletext sa Vaše obľúbené
stránky objavia vo farbe na spodnej časti obrazovky.
Pre znovunájdenie zvyčajných rubrík stlačte H.
Ak chcete všetko zrušiť stlačte na 5 sekúnd d.
Ë
SMART RADIO SMART
MENU
+
[
”
-
123
4
56
789
Ø
0
.
¤
ŸÓù
ª-
¤
0
9
P
+
P
-
Á
Ë
Ó
Ÿ
MENU
Ë
Page 83

11
MODE
VCR
DVD
·¢Ê Æ
∫
Ó
ı
Ω∆
.
Z
¤
Vykonajte zapojenia uvedené oproti.
Pomocou tlačidla
n zvoľte EXT2 alebo S-VHS2 (signály S-
VHS prípoja EXT2)
.
Pri monofónnom prístroji zapojte signál na vstup AUDIO L.
Zvuk bude automaticky reprodukovaný ľavým i pravým
reproduktorom televízora.
Slúchadlá
Akonáhle sú slúchadlá pripojené, preruší sa zvuk televízora.
Tlačidlá
@”#umožnia nastaviť hlasitosť zvuku.
Impedancia slúchadiel sa musí pohybovať od 32 do 600 ohmov.
Bočné pripojenia
Pripojenie periférnych zariadení
Konektor EXT1 má audio video vstupy/výstupy a vstupy RVB.
Videorekordér (alebo DVD rekordér)
Vykonajte zapojenia uvedené na strane oproti. Používajte
kvalitný eurokonektorový kábel.
Ak Váš videorekordér nie je vybavený eurokonektorom, jediný možný
spôsob pripojenia je pomocou anténového kábla.
Preto budete musieť naladiť prijímač na signál videorekordéra a
priradiť mu programové číslo 0 (pozri manuálne ukladanie, str. 7).
Ak chcete prehrávať obraz z videorekordéra,stlačte
0.
Videorekordér s dekodérom
Pripojte dekodér k druhej eurokonektorovej zástrčke
videorekordéra.Takto budete môcť nahrávať kódované
vysielanie.
Videorekordér
Vykonajte zapojenia uvedené na strane oproti.
Navolenie pripojeného zariadenia
Stlačením tlačidla n si vyberiete EXT1 a EXT2 a S-VHS2 (signály
S-VHS prípoja EXT2).
Väčšina zariadení (dekodér, videorekordér) zabezpečí prepnutie
automaticky.
Ostatné zariadenia
Satelitný prijímač, dekodér, DVD, hry atď.
FM ANT
EXT1
:
VCR
EXT1
*
Video
Video
Audio
S
in
L
in
R
Page 84

12
Rady
Slabý príjem
Ak nemáte žiadny
obraz
Periférne
zariadenie
prehráva
čiernobiely obraz
Žiadny zvuk
Nefunguje diaľkový
ovládač?
Pohotovostný
režim
Čistenie televízora
Smernica pre
recykláciu
Stále žiadny
výsledok?
Blízkosť vrchov alebo vyšších budov môže spôsobovať, echá alebo tiene.V takom
prípade sa pokúste o manuálne doladenie obrazu: pozri «jemné doladenie»
(str. 7),prípadne skúste upraviť vonkajšiu anténu. Skontrolujte či Vaša anténa
umožňuje príjem v tomto frekvenčnom rozsahu (UHF alebo VHF pásmo).
Pripojili ste anténu správne? Zvolili ste správny system ? (str.7).Nedokonale
zapojený eurokonektor alebo anténa sú často príčinou problémov s obrazom
alebo zvukom (niekedy sa môžu konektory uvoľniť pri hýbaní s TV príjímačom).
Skontrolujte všetky spoje.
Ak chcete sledovať videokazetu, skontrolujte, či bola nahraná v rovnakej norme
(PAL, SECAM, NTSC) v akej prehráva videorekordér.
Ak na niektorých kanáloch vidíte obraz avšak bez zvuku, znamená to,že nemáte
nastavený správny TV systém. Upravte parameter TV.SYSTÉM (str. 7).
Zosilňovač pripojený k televízoru nevydáva žiadne zvuky? Skontrolujte, či ste si
nepomýlili výstup audio so vstupom audio.
TV prijímač nereaguje na diaľkový ovládač.Kontrolka na prijímači pri použití d.o.
nebliká? Vymeňte batérie.
Ak prepnete TV prijímač do pohotovostného režimu,objaví sa po stlačení tlačidiel
na prijímači správa ZÁMKA? Zapli ste funkciu RODIČ. ZÁMKA (str. 9).
Ak prijímač nepríjme počas 15 minút žiadny signál, automaticky sa prepne do
pohotovostného režimu.
Kvôli úsporám energie je Váš televízor vybavený komponentmi, umožňujúcimi
veľmi nízku spotrebu v pohotovostnom režime (nižšia než 1 W).
Obrazovka i skrinka televízora sa má čistiť jedine čistou mäkkou a nechlpatejúcou
handričkou.
Nepoužívať prípravky obsahujúce lieh či rozpúšťadlo.
Váš televízny prijímač využíva znovu využiteľné alebo recyklovateľné materiály.
Aby sa minimalizovalo množstvo odpadu do prostredia, špecializované firmy sa
zaoberajú zberom opotrebovaných prijímačov,rozoberajú ich a zhromažďujú
použiteľné materiály (informujte sa u predajcu).
Odpojte sieťový kábel od televízora na 30 sekúnd, a potom ho znovu zapojte.
Ak sa Váš TV prijímač pokazí, nikdy sa nepokúšajte ho opraviť sami,kontaktujte
autorizované servisné stredisko Vášho predajcu.
Page 85

1
Girifl
‹çindekiler
Bu televizyon cihaz›n› seçti¤iniz için teflekkür ederiz. Bu elkitab› televizyon
cihaz›n›z› kurarken ve çal›flt›r›rken size yard›mc› olmak üzere düzenlenmifltir.
Bafl›ndan sonuna kadar okuman›z› önemle tavsiye ederiz.
Teknolojik seviyemizden memnun kalaca¤›n›z› ummaktay›z.
Kurulum
LCD televizyonun tan›t›m› . . . . . . . . . . . . . . . . . . . . . . . . . . . . . . . . . . . . . . . . . . . .2
Uzaktan Kumanda Tufllar› . . . . . . . . . . . . . . . . . . . . . . . . . . . . . . . . . . . . . . . . . . . .3
Televizyonun kurulmas› . . . . . . . . . . . . . . . . . . . . . . . . . . . . . . . . . . . . . . . . . . . . .4
Kanallar›n h›zl› ayarlanmas› . . . . . . . . . . . . . . . . . . . . . . . . . . . . . . . . . . . . . . . . . . .5
Programlar›n s›ralanmas› . . . . . . . . . . . . . . . . . . . . . . . . . . . . . . . . . . . . . . . . . . . . .5
Dil ve ülkenin seçimi . . . . . . . . . . . . . . . . . . . . . . . . . . . . . . . . . . . . . . . . . . . . . . . .6
Otomatik olarak haf›zaya alma . . . . . . . . . . . . . . . . . . . . . . . . . . . . . . . . . . . . . . . .6
Program ad› . . . . . . . . . . . . . . . . . . . . . . . . . . . . . . . . . . . . . . . . . . . . . . . . . . . . . . .6
El ile haf›zaya alma . . . . . . . . . . . . . . . . . . . . . . . . . . . . . . . . . . . . . . . . . . . . . . . . . .7
Çal›flt›rma
Radyo’nun kullan›lmas› . . . . . . . . . . . . . . . . . . . . . . . . . . . . . . . . . . . . . . . . . . . . . . .7
Resim ayarlar› . . . . . . . . . . . . . . . . . . . . . . . . . . . . . . . . . . . . . . . . . . . . . . . . . . . . .8
Ses ayarlar› . . . . . . . . . . . . . . . . . . . . . . . . . . . . . . . . . . . . . . . . . . . . . . . . . . . . . . .8
Opsiyonlar›n ayar› . . . . . . . . . . . . . . . . . . . . . . . . . . . . . . . . . . . . . . . . . . . . . . . . . .8
Zamanlay›c› fonksiyonu . . . . . . . . . . . . . . . . . . . . . . . . . . . . . . . . . . . . . . . . . . . . . .9
Televizyonun kilitlenmesi . . . . . . . . . . . . . . . . . . . . . . . . . . . . . . . . . . . . . . . . . . . .9
Teletekst . . . . . . . . . . . . . . . . . . . . . . . . . . . . . . . . . . . . . . . . . . . . . . . . . . . . . . . .10
Harici Cihazlar›n ba¤lanmas›
Video Kay›t Cihaz› . . . . . . . . . . . . . . . . . . . . . . . . . . . . . . . . . . . . . . . . . . . . . . . .11
Di¤er cihazlar . . . . . . . . . . . . . . . . . . . . . . . . . . . . . . . . . . . . . . . . . . . . . . . . . . . .11
Yan ba¤lant›lar . . . . . . . . . . . . . . . . . . . . . . . . . . . . . . . . . . . . . . . . . . . . . . . . . . . .11
Ba¤lanan cihazlar›n seçilmesi . . . . . . . . . . . . . . . . . . . . . . . . . . . . . . . . . . . . . . . . .11
Ipuçlar› . . . . . . . . . . . . . . . . . . . . . . . . . . . . . . . . . . . . . . . . . . . . . . . . . . . . . . . . .12
w
Televizyonun temizlenmesi
Ekran›n ve kasan›n temizlenmesi, sadece temiz, yumuflak ve tüylü olmayan bir
bezle gerçeklefltirilmelidir. Alkol ya da solvent kökenli bir ürün kullanmay›n›z.
Türkçe
Page 86

2
LCD televizyonun tan›t›m›
Televizyonun tufllar› :
• . : televizyonu açma kapama dü¤mesi.
• - + : ses seviyesini ayarlamak için.
• <> : programlar› seçmek için.
• MENU : menülere girmek ve ç›kmak için, elinizi
kald›rmadan flu 2 tuflun üzerine bas›n - et +.
Sonra da ayarlamay› seçmek için <> tufllar›na bas›n
ve son olarak ayar yapmak için - + tufllar›na bas›n.
Not: ÇOCUK K‹L‹D‹ çal›flt›¤› s›rada, -+ve <> tufllar› etkisiz
durumdad›r (ÖZELL‹KLER menüsüne bak›n, sayfa 9).
Ifl›kl› çal›flma göstergesi ve enfraruj sinyal al›c›s›.
Arka yüz :
Ana ba¤lant› yerleri televizyonun alt›nda bulunmaktad›r.
Daha fazla bilgi için ba¤lant›lar bölümü, sayfa 12’e bak›n›z.
EXT1 peritel prizi.
Yan ba¤lant›lar.
Oynak ayak sat›h›.
Ayak, ayr› olarak sat›lan, duvara monte edilen bir
sistem ile de kullan›labilir (sat›c›n›zdan bu konuda bilgi
isteyin).
TV ve radyo anten prizi.
DC elektrik prizi.
<
-
.
+
<
*
S
Video
Video
EXT1
Audio
in
L
in
R
:
DC in
FM ANT
Page 87

3
12
MENU
”
P
564
879
0
3
--
++
.
[
Ÿ
Á
-
ª
`
ù
SMART
SMART RADIO
Ë
¤
ı
Y
Ó
Uzaktan Kumanda Tufllar›
ı Programlar›n listesi
Programlar›n listesini göstermek /
silmek için. Bir program› seçmek için
daha îÏ tufllar›n› ve onu
göstermek
için de ¬ tuflunu
kullan›n›z.
Kilitli olan programlar›n önünde +
simgesi (S.9), e¤er aç›lm›fl iseler ?
simgesi gözükür.
Ekran Bilgileri
Program numaras›n›, program ad›n›
(e¤er varsa), saati ve zamanlay›c›
üzerinde kalan süreyi
göstermek/kald›rmak için kullan›l›r.
Program numaras›n›n ekranda devaml›
kalmas› için 5 saniye süreyle bas›n›z.
Menu
Menüyü açma ya da terketme tuflu.
Uyku Zamanlay›c›s›
Aç›k durumdaki cihaz›n otomatik
olarak
bekleme durumuna geçmeden
önce geçecek sürenin uzunlu¤unu (0
ile 240 dakika aras›nda) seçmek için
kullan›l›r.
Kürsör / 16 : 9 format›
Bu 4 tufl menüde gezinmenize olanak
verir.
Ȭ tuflu görüntüyü dikey
olarak geniflletmeye ve daraltmaya yarar.
Ses
Ses düzeyini ayarlar.
Ses kesme
Sesi tamamen keser ya da tekrar
eski düzeyine getirir.
EXT prizinin seçimi (s. 11)
Ba¤lanan aleti bulmak için birçok
kez basmal›s›n›z.
Say›sal Tufllar
Rakam tufllar› programlara
do¤rudan girmek için kullan›l›r.
‹ki rakaml› bir program numaras›
için 2. Rakam çizgi ortadan
kalkmadan girilmelidir.
Standby (Bekleme)
TV cihaz›n› bekleme durumuna
almak için kullan›l›r. TV cihaz›n›
tekrar açmak için b,P @#veya
09tufllar›na bas›n›z.
Radyo / tv ayar›
Televizyonu radyo ya da tv ayar›na
geçirmek için kullan›l›r.
Teletexte ça¤›rma (s.10)
Teletext tuflu (s. 10)
Resim ve sesin ön ayar›
Ses ve resim için bir seri ön ayar
yapmaya izin verir.
Tercihli pozisyon menülerde belirlenen
ayarlar ile sa¤lan›r.
TV Programlar›n›n Seçilmesi
Program dizisi içinde afla¤› veya
yukar› hareket etmek için kullan›l›r.
Program›n numaras›, varsa ad› ve
ses modu birkaç saniye süreyle
ekranda gösterilir.
Teletekstli baz› programlarda program›n
bafll›¤› ekran›n alt taraf›nda görüntülenir.
Bir önceki program
Daha önce izlenen programa
dönmek için kullan›l›r.
Ses konumu
Yay›nlar› STEREO ve NICAM
STEREO ya da Mono flekline sokar
veya iki dilden yay›nlanan
programlarda ÇIFT I ya da ÇIFT II.
MONO modu seçildi¤inde gösterge
k›rm›z› renktir.
Page 88

4
&
Televizyonun pozisyonu
Televizyonunuzu sa¤lam ve oynamayan bir yere koyun.
Tehlikeli durumlar› önlemek aç›s›ndan,
televizyonunuzu herhangi bir suyun s›çramayaca¤›, afl›r›
bir s›cakl›¤›n (lamba, mum, kalorifer, ...) bulunmayaca¤›
ve arkas›nda vantilatör gibi havaland›rma ›zgaralar›n›n
olmayaca¤› bir yere yerlefltirin.
é
Antenlerin ba¤lant›s›
•
Arkada bulunan :prizine anten fiflini sokunuz.
• Yine, verilmifl olan radyo anten kablosunu
televizyonun alt k›sm›nda bulunan FM ANT prizine
tak›n.
• Televizyonun aya¤›ndan geçen kablolar› toparlay›n.
“
Elektrik ba¤lant›s›
Televizyon beraberinde verilmifl olan elektrik kablosu
ile çal›flmaktad›r (ak›m düzeyi etiketin üzerinde
belirtilmifltir). Sadece televizyon ile verilmifl olan ACDC adaptörünü kullan›n.
• Adaptörünü DC fifli ile televizyonun DC fiflini
birbirine ba¤lay›n›z. Havaland›rma aç›s›ndan
adaptörün çevresinde bir alan› bofl b›rak›n.
• Adaptörün elektrik kordon ucunu ba¤lay›n›z ve fiflini
prize tak›n (220-240 V / 50 Hz).
Di¤er aletleri ba¤lamak için, s. 12’e bak›n.
‘
Uzaktan Kumanda
R6 tipindeki 2 pili kutuplar›na göre uzaktan kumandaya
tak›n. Alet ile verilen piller do¤an›n korunmas›na
yard›mc› olmak amac› ile ne merkür ne nikel ne de
kadmium içermektedir. Lütfen kullan›lm›fl pilleri
gelifligüzel atmayarak tekrar üretilmesine katk›da
bulunmak için belirlenen özel kullan›lm›fl pil kutular›na
at›n.
(
Çal›flt›rma
Televizyonunuzu açmak için açma kapama tufluna
bas›n. Açt›¤›n›zda yeflil ›fl›k yanacak ve ekran
ayd›nlanacakt›r. Direkt olarak sayfa 5’deki h›zl›
ayarlama bölümüne bak›n. E¤er televizyonunuz uyku
halinde duruyorsa (k›rm›z› ›fl›k), uzaktan kumandan›n
P
# tufluna bas›n.
Uzaktan kumanday› kulland›¤›n›z s›rada ›fl›kl› gösterge
düzenli olarak yan›p sönecektir.
Televizyonun kurulumu
5 cm
5 cm
5 cm
FM ANT.
Page 89

5
Kanallar›n h›zl› ayarlanmas›
Programlar›n s›ralanmas›
Televizyonunuzu ilk defa çal›flt›rd›¤›n›zda,
ekranda bir menü gözükür.
Bu menü sizi, mönülerin dilini seçmeye davet
eder :
E¤er menü gözükmezse, onu ortaya ç›karmak için
televizyonun - ve+ tufllar›n› 8 san›ye süre ile bas›l›
tutunuz.
& Dilinizi seçmek için uzaktan kumandan›n
îÏ tufllar›n› kullan›n›z, sonra ¬ tuflu ile
onaylay›n›z.
é Daha sonra,
îÏ tufllar› ile ülkenizi seçiniz,
sona
¬ tuflu ile onaylay›n›z.
E¤er listede ülkeniz gözükmezse, D‹⁄ER tercihini
seçiniz.
“ Arama otomatik olarak bafllar.
‹fllem birkaç dakika al›r.
Ekran üzeri gösterim, araman›n seyrini ve
bulunan program say›s›n› gösterir. En sonunda,
menü kaybolur.
Araflt›rmadan ç›kmak veya araflt›rmay› yar›da
kesmek için
H tufluna bas›n›z. E¤er hiçbir
program bulunamazsa, sayfa 12’daki ipuçlar›
bölümüne bak›n›z.
‘ E¤er verici ve kablolu tv flebekesi otomatik
s›ralama sinyali yay›nl›yorsa, programlar do¤ru
biçimde numaraland›r›l›rlar.
( E¤er bu sinyal yoksa, bulunmufl olan programlar
99, 98, 97, … ’ den (ya da 79, 78, ...) itibaren
azalan s›rayla numaraland›r›l›rlar.
Yeniden numaraland›rmak için SIRALAMA
menüsünü kullanmal›s›n›z.
Baz› vericiler ve kablolu flebekeler kendi özel
s›ralama parametrelerini (bölge, dil,…) yay›nlarlar.
Bu durumda, seçiminizi
îÏ tufllar›yla belirtip
¬ tuflu ile onaylaman›z gerekir.
&
H tufluna bas›n›z. Ana menü ekranda gösterilir.
é KURULUfi (Ï) seçiniz ve ¬'ye bas›n›z.
KURULUfi menüsü gözükür:
“
Ï tuflu yard›m›yla SIRALA'y› seçiniz ve
¬'ye bas›n›z. SIRALA menüsü gözükür.
KANALDAN tercihi etkin durumdad›r.
Dikkat:
bu menü afla¤›daki gibi çal›fl›r:
• "...KANALDAN" (halihaz›rdaki program›n no.sunu
giriniz)
• "KANALA gitmek için" (yeni numaray› giriniz)
• "NUMARALAR DE⁄‹ST‹” (ifllem yap›lm›fltir).
‘
Ȭ veya 0'dan 9'a kadar tufllar›
kullanarak yeniden numara vermek istedi¤inz
program› seçiniz.
Örnek:
Program 78'den program 2'ye bir
de¤ifltirme yapmak istiyorsunuz:
78'e bas›n›z.
( KANALA'y› (
Ï tuflu) seçiniz ve Ȭ veya
0-9 tufllar› ile, arzu edilen yeni numaray›
giriniz (örne¤imizde,
2'ye bas›n›z).
§ DE⁄‹fiT‹RME (
Ï tuflu)'yi seçiniz ve ¬'ye
bas›n›z. DE⁄‹fiT‹R‹LM‹fiT‹R bilgisi gözükür,
de¤ifltirme gerçekleflir. Örne¤imizde, 78 no.lu
program 2 numara fleklinde (2 numara ise 78
fleklinde) numaralan›r.
è KANALDAN'› (
î tuflu) seçiniz ve yeniden
numaraland›r›lacak program say›s› kadar,
‘'ten §'ya kadar olan kademeleri tekrar
ediniz.
! Menülerden ç›kmak için,
d tufluna bas›n›z.
SELECT LANGUAGE
L‹SAN SEÇ‹M‹
• TÜRK‹YE
RUSSIAN
SERBIAN
SLOVENIAN
SLOVAK
ÜLKE
ÇEK CUMHUR.
MACAR‹STAN
HIRVAT‹STAN
POLONYA
ROOMANYA
• GÖRÜNTÜ
• SES
• ÖZELL‹KLER
• KURULUfi
KURULUfi
• L‹SAN SEÇ‹M‹
• ÜLKE
• OTO. HAFIZA
• ELLE HAFIZA
• SIRALA
• ‹S‹M
KANALDAN
KANALA
DE⁄‹fiT‹R
Page 90

6
Program ad›
‹sterseniz, ilk 40 programa (1'den 40'a kadar)
bir ad verebilirsiniz.
&
H tufluna bas›n›z.
é KURULUfi (
Ï)'u seçiniz ve ¬'ye bas›n›z.
KURULUfi mönüsü gözükür.
“ (Ekran›n alt›nda sakl› olan) ISIM'› seçmek için
Ï'ye 5 defa bas›n›z ve ¬'ye bas›n›z.
Menü gözükür:
‘
09
tufllar›n› veya @ P # tufllar›n›
kullanarak, ad vermek istedi¤iniz program›
seçiniz.
Dikkat:
kurulufl s›ras›nda, tan›tma sinyali iletildi¤i
zaman, programlar otomatik olarak adland›r›l›r.
( ‹sim görüntüleme k›sm›nda (5 harf)
Ȭ
tufllar› ile yer de¤ifltiriniz.
§ Harfleri seçmek için
îÏ tufllar›n›
kullan›n›z.
è Isim girilince,
H'ye bas›n›z.
Program ad› haf›zaya al›nm›flt›r.
! Ad verilecek her program için ‘'ten è'e
kadar olan kademeleri tekrar ediniz.
ç Menülerden ç›kmak için,
d'ye bas›n›z.
KURULUfi
• L‹SAN SEÇ‹M‹
• ÜLKE
• OTO. HAFIZA
• ELLE HAFIZA
• SIRALA
• ‹S‹M
E
BBC_1
Lisan ve ülkenin seçimi
Otomatik olarak haf›zayaalma
& Ana menüyü görüntülemek için H tufluna
bas›n›z.
é KURULUfi (
Ï)'u seçiniz ve ¬'ye bas›n›z.
KURULUfi menüsü gözükür.
Lisan seçimi etkin durumdad›r.
“ D‹L menüsüne girmek için
¬'ye bas›n›z.
‘
îÏ tufllar› ile dilinizi seçiniz.
Menüler seçilen dilde gözükecektir.
( D‹L menüsünden ç›kmak için
È'ye bas›n›z.
§ ÜLKE (
Ï)'yi seçiniz ve ¬'ye bas›n›z.
è
îÏ tufllar› ile ülkenizi seçiniz.
E¤er ülkeniz listede gözükmezse, di¤er D‹⁄ER
tercihini seçiniz.
! ÜLKE menüsünden ç›kmak için
È'ye bas›n›z
ç Menülerden ç›kmak için
d'ye bas›n›z.
Bu menü bölgenizde (ya da kablolu flebekenizde)
mevcut bütün programlar›n otomatik
fl
ekilde
aranmas›n›n ba
fl
lat›lmas›n› sa¤lar.
& Önce yukar›daki &'den !'e kadar olan
ifllemleri yap›n›z, sonra:
é OTO HAFIZA (Ï)'y› seçiniz ve ¬'ye bas›n›z.
Arama bafllar. Birkaç dakika sonra, KURULUfi
menüsü yeniden otomatik olarak gözükür.
“ E¤er verici ve kablolu tv flebekesi otomatik
s›ralama sinyali yay›nl›yorsa, programlar do¤ru
biçimde numaraland›r›l›rlar.
‘ E¤er bu sinyal yoksa, bulunmufl olan programlar
99, 98, 97, … ’den itibaren azalan s›rayla
numaraland›r›l›rlar. Yeniden numaraland›rmak
için SIRALAMA menüsünü kullanmal›s›n›z.
Baz› vericiler ve kablolu flebekeler kendi özel
s›ralama parametrelerini (bölge, dil,…) yay›nlarlar.
Bu durumda, seçiminizi
îÏ tufllar›yla belirtip
¬ ile onaylaman›z gerekir. Araflt›rmadan ç›kmak
veya araflt›rmay› yar›da kesmek için
H tufluna
bas›n›z. E¤er ekrana görüntü gelmezse, sayfa 12’te
yeralan ipuçlar›’na bak›n›z.
( Menülerden ç›kmak için
d'ye bas›n›z.
• GÖRÜNTÜ
• SES
• ÖZELL‹KLER
• KURULUfi
KURULUfi
• L‹SAN SEÇ‹M‹
• ÜLKE
• OTO. HAFIZA
• ELLE HAFIZA
• SIRALA
• ‹S‹M
TURKISCH
ENGLISH
CROATIAN
KURULUfi
• L‹SAN SEÇ‹M‹
• ÜLKE
• OTO. HAFIZA
• ELLE HAFIZA
• SIRALA
• ‹S‹ME
ARIYOR
BEKLEY‹N‹N‹Z
KANAL BULUNDU 2
215.18 MHZ
Page 91

7
El ile haf›zaya alma
Bu menü programlar›n tek tek haf›zaya
al›nmas›n› sa¤lar.
&
H tufluna bas›n›z.
é KURULUfi (
Ï)'u seçiniz ve ¬'ye bas›n›z.
KURULUfi menüsü gözükür.
“ ELLE HAFIZA (
Ï)'y› seçiniz ve ¬'ye
bas›n›z. Menü gözükür:
‘ S‹STEM menüsüne girmek için
¬'ye bas›n›z.
EUROPE'› (otomatik alg›lama*) seçmek için
îÏ'yi kullan›n›z: WEST EUR (BG
standard›), EAST EUR (DK standard›), UK
(I standard›) veya FRANSA (LL' standard›) ile
elle bulgulama. Menüden ç›kmak için
È'ye
bas›n›z.
* Turk›ye için WEST EUR’› seçiniz.
( ARA seçene¤ini seçiniz ve
¬ tufluna bas›n›z.
Arama bafllayacakt›r. Bir kanal bulunur
bulunmaz arama durur. Ad›m è’e geçiniz.
E¤er kanal›n frekans›n› biliyorsan›z,
0
’dan
9
’a kadar olan tufllar› kullanarak do¤rudan
numaras›n› giriniz.
E¤er hiç bir kanal bulunamazsa, Sayfa 12’teki
ipuçlar›na bak›n›z.
§ E¤er al›fl kalitesi yetersiz ise, ‹NCE AYAR
seçene¤ini seçiniz ve
È tufluna veya ¬
tufluna bas›n›z.
è PROG. NO. (Program Numaras›) tuflunu
seçiniz ve
Ȭ tufllar›n› veya 0’dan 9’a
kadar olan rakam tufllar›n› kullanarak arzu
edilen numaray› giriniz.
! HAFIZAYA AL seçene¤ini seçiniz ve
¬
tufluna bas›n›z. SAKLAND‹ mesaj› ekrana
gelecektir. Program haf›zaya al›nm›flt›r.
ç(’ten !’e kadar olan ad›mlar› her bir kanal
için tekrarlay›n›z.
Ç›kmak için
d tufluna bas›n›z.
• GÖRÜNTÜ
• SES
• ÖZELL‹KLER
• KURULUfi
KURULUfi
ELLE HAFIZA
• SISTEM
• ARA
• PROG. NO.
• ‹NCE AYAR
• HAFIZAYA AL
EUROPE
WEST EUR
EAST EUR
UK
FRANCE
Radyo’nun kullan›lmas›
Radyo modunun seçilmesi
Televizyonun radyo modunu seçmek için
uzaktan kumandan›n
 tufluna bas›n.
Radyo modunda, ekranda numara, radyo
istasyonunun ad› (e¤er mevcut ise), frekans› ve
yay›n sistemi belirecektir.
‹stasyonlar›n ad›n› girmek için
‹S‹M
E
menüsünü
kullan›n. (s. 7)
Programlar›n seçilmesi
FM band›ndaki istasyonlar› seçmek için
09ya
da
@ P # tufllar›n› kullan›n (1 den 40 a kadar).
Radyo istasyonlar›n›n listesi
Radyo istasyonlar›n›n listesi görmek/silmek için
ı
tufluna bas›n. Daha sonra dört yöne bakan
oklar› kullanarak bir istasyonu seçin.
Radyo menülerinin kullan›lmas›
Radyonun özel ayarlar›na girmek için
H
tuflunu kullan›n.
Radyo istasyonlar›n› arama
E¤er h›zl› ayar menüsünü kulland›ysan›z mevcut
olan tüm FM istasyonlar› haf›zaya
kaydedilmifltir. Yeni bir arama yapmak için
KURULUfi menüsüne girmeniz gerekmektedir :
OTO HAFIZA (tam bir arama için) ya da ELLE
HAFIZA (her bir istasyonu tek tek aramak için).
SIRALA ve ‹S‹M
E
menüleri radyo istasyonlar›n›
s›n›fland›rma ve adland›rma için kullan›labilir.
Bu menülerin kullan›m› TV menülerindeki
gibidir.
Ekran tasarrufu
ÖZELL‹KLER menüsü ile ekran tasarrufunu
gerçeklefltirebilir/vazgeçebilirsiniz. Saat, frekans
ve istasyon ad› (mevcutsa) ekranda belirecektir.
Page 92

8
Görüntü ayarlar›
Ses ayarlar›
& Önce H, sonra ¬ tufluna bas›n›z.
GÖRÜNTÜ menüsü gözükür:
é Bir ayar› seçmek için
îÏ tufllar›n› ve
ayarlamak için
Ȭ tufllar›n› kullan›n›z.
Dikkat: çözülen bir menü söz konusudur. Ekran›n
alt›nda sakl› bulunan ayarlara eriflmek için Ï
tuflunu bas›l› tutunuz.
“ Ayarlar yap›ld›ktan sonra, HAFIZAYA AL
tercihini seçiniz ve onlar› kaydetmek için
¬'ye bas›n›z.
‘ Menülerden ç›kmak için
d'ye bas›n›z.
Ayarlar›n tan›t›m›:
• PARLAKLIK: resmin parlakl›¤›na etki eder.
• RENK: rengin fliddetine etki eder.
• KONTRAST: aç›k tonlar ile koyu tonlar
aras›ndaki farka etki eder.
• KESK‹NL‹K: resmin netli¤ine etki eder.
• HAFIZAYA AL: resim ayarlar›n› haf›zaya
almak için.
• PARAZITLERIN GIDERILMESI:
Zor al›nabilen bir yay›nda oluflabilecek
parazitleri (karlanma), c›z›rt›lar› giderir.
• KONTRAST + (Art› Kontrast):
Resim kontrast›n› otomatik ayarlama
devrelerini etkinlefltirmek/durdurmak için
(resmin en karanl›k k›sm›n› sürekli olarak
siyaha getir).
& H'ye bas›n›z, SES (Ï)'i seçiniz ve ¬'ye
bas›n›z. SES menüsü gözükür:
é Bir ayar seçmek için
îÏ tufllar›n›, ayar
yapmak için de
Ȭ tufllar›n› kullan›n›z.
“ Ayarlar yap›ld›ktan sonra, HAFIZAYA AL
tercihini seçiniz ve kaydetmek için
¬'ye
bas›n›z.
‘ Menülerden ç›kmak için
d'ye bas›n›z.
Ayarlar›n tan›t›m›:
• EKOLAYZIR : Sesin tonalitesini ayarlar
(bas : 120 Hz den tiz : 10 kHz’ye kadar).
• BALANS: sol ve sa¤ hoparlördeki sesi
dengelemek için.
• SES FARKI (ses fliddeti fark›). Farkl› programlar
veya harici (EXT) ba¤lant›lar (Video vb.)
aras›ndaki ses fliddeti farkl›l›klar›n› ayarlamay›
sa¤lar. Bu ayarlama 1’den 40’a kadar olan
programlarda ve harici (EXT) ba¤lant›larda
prizlerde çal›fl›r.
@ P # tufllar› ile çeflitli
programlar›n düzeylerini ayarlayabilirsiniz.
• HAFIZAYA AL: ses ayarlar›n› haf›zaya almak
için.
• SES S›N›R›: özellikle program de¤ifltirme veya
reklamlar s›ras›ndaki ani ses art›fl›n›
s›n›rlamay› sa¤layan otomatik ses fliddeti
kontrolu.
• INCR.SURROUND: Surround Ses etkisini
devreye sokmak/ç›karmak için kullan›l›r.
Stereo durumunda, bu efekt, hoparlörlerin
birbirinden daha ayr› oldu¤u izlemini
vermektedir. Mono durumunda, bir stereo
etkisi yarat›l›r.
• GÖRÜNTÜ
• SES
• ÖZELL‹KLER
• KURULUfi
GÖRÜNTÜ
• PARLAKLIK
• RENK
• KONTRAST
• KESK‹NL‹K
• HAFIZAYA AL
• PARAZITLERIN
• KONTRAST+
--I------ 39
• GÖRÜNTÜ
• SES
• ÖZELL‹KLER
• KURULUfi
SES
• EKOLAYZIR
• BALANS
• SES FARKI
• HAFIZAYA AL
• SES SINIRI
• INCR.SURROUND
120 HZ
500 HZ
1500 HZ
5 KHZ
10 KHZ
Opsiyonlar›n ayar›
& H tufluna basarak ÖZELL‹KLER (Ï) seçin
ve
¬ üzerine bas›n.
Ayar› flöyle gerçeklefltirebilirsiniz:
é ZAMANLAYICI, ÇOCUK K‹L‹D‹ , ELKTRK
K‹L‹T : bir sonraki sayfaya bak›n.
“ MOD SEÇ‹M‹: Radyo ya da TV.
‘ Menüden
d ile ç›kabilirsiniz.
Page 93

9
Zamanlay›c› fonksiyonu
Televizyonun kilitlenmesi
Bu menü, televizyonu bir çalar saat gibi
kullanman›z› sa¤lar.
&
H tufluna bas›nz›.
é ÖZELL‹KLER (
Ï)'i seçiniz ve ¬'ye 2 defa
bas›n›z. ZAMANLAYICI menüsü gözükür:
“ Her alt menüye girmek ve ç›kmak için
¬'ye
bas›n›z ve ayarlamak için
îÏ veya 00
tufllar›n› kullan›n›z:
‘ ZAMAN: o andaki saati giriniz.
Dikkat:
saat, 1 no.lu program›n (konal›n) teletekst
indeki saatin bilgilerinden hareketle, her
çal›flt›rmada güncellenir. E¤er bu program›n
teleteksti yoksa, güncelleme olmayacakt›r.
( BAfiLANGIÇ: bafllang›ç saatini giriniz.
§ B‹T‹fi: beklemeye alma (standby) saatini giriniz.
è PROG. NO.SU: Kapatmak için istedi¤iniz
program› seçin. Radyo donan›ml› modeller için
Ȭ tuflunu kullanarak (09 tuflu sadece
tv içindir) FM istasyonu seçebilirsiniz.
! ETK‹NLEfiT‹RME: fiu flekilde ayarlayabilirsiniz:
• B‹R DEFA, tek bir uyand›rma için,
• GÜNLÜK, her gün için,
• DURDURMA, iptal etmek için.
ç TV cihaz›n› beklemeye almak için
b tuflunu
kullan›n›z. Programlanm›fl olan saatte otomatik
olarak aç›lacakt›r. E¤er televizyonu aç›k
b›rak›rsan›z program› ancak belirtilen saatte
de¤ifltirecektir.
Televizyon kullan›m süresini s›n›rlamak için ÇOCUK
K‹L‹D‹ ve ZAMANLAMA. fonksiyonlar› birlikte
kullan›labilir.
Baz› programlar› kilitleyebilir ya da tufllar›
kilitleyerek televizyonun kullan›lmas›n›
tamamen yasaklayabilirsiniz.
Programlar›n kilitlenmesi
& H tufluna bas›n›z.
é ÖZELL‹KLER (
Ï)'i seçiniz ve ¬'ye bas›n›z.
“ ELKTRK K‹L‹T (Elektronik kilit) (
Ï)'ni
seçiniz ve
¬'ye bas›n›z.
‘ Girifl gizli kodunuzu girmeniz gerekiyor. ‹lk önce
0711 koduna 2 defa bas›n›z. Menü gözükür.
( Menüye girmek için
¬'ye bas›n›z.
§ Arzu edilen program› seçmek için
îÏ
tufllar›n› kullan›n›z ve ¬ ile geçerleyiniz.
Kilitlenen programlar›n ya da soketler›n
önünde
+ simgesi görüntülenir.
è Ç›kmak için
d tufluna bas›n›z.
Bundan böyle, kilitlenmifl bir program›
seyretmek için girifl gizli kodu girmeniz gerekir,
aksi halde ekran bofl kalacakt›r.
Dikkat, harici bir dekoder kullanan flifreli
programlar söz konusu olmas› halinde, ilgili HAR‹C‹
ba¤lant›y› kilitlemek gerekir.
Bütün programlar› açmak için
&'den ‘'e kadar olan kademeleri tekrar
ediniz, sonra HERfiEY‹ S‹LMEK'i seçiniz ve
¬'ye bas›n›z.
Gizli kodu de¤ifltirmek için
&'den ‘'e kadar kademeleri tekrar ediniz, sonra:
( KOD DE⁄‹fiT‹RMEK'i seçiniz ve 4 rakaml›
kendi numaran›z› giriniz.
§ Ona ikinci bir defa basarak teyit ediniz.
Yeni kodunuz haf›zaya al›nm›flt›r.
è Menülerden ç›kmak için
d'ye bas›n›z.
E¤er kiflisel flifrenizi unuttuysan›z, genel flifre 0711’i
iki kez giriniz.
Tufllar›n kilitlenmesi
& H'ye bas›n›z, ÖZELL‹KLER (Ï)'i seçiniz ve
¬'ye bas›n›z.
é ÇOCUK K‹L‹D‹ (
Ï)'ni seçiniz.
“ ÇALIfiTIRMA'ya koymak için
¬'ye bas›n›z.
‘ Televizyonu kapay›n›z ve uzaktan kumanday›
saklay›n›z. Televizyon kullan›lamaz hale gelir
(yaln›zca uzaktan kumanda televizyonun
çal›flt›r›lmas›n› sa¤lar).
( ‹ptal etmek için: ÇOCUK K‹L‹D‹'ni OFF
(Kapal›) üzerine konumlay›n›z.
• GÖRÜNTÜ
• SES
• ÖZELL‹KLER
• KURULUfi
ÖZELL‹KLER
ZAMANLAYICI
• ZAMAN
• BAfiLANGIÇ
• B‹T‹fi
• PROG. NO.
• GEÇERL‹
10:56
• GÖRÜNTÜ
• SES
• ÖZELL‹KLER
• KURULUfi
ÖZELL‹KLER
• ZAMANLAYICI
• ROTASYON
• ÇOCUK K‹L‹D‹
• ELKTRK K‹L‹T
G‹R‹fi KODU
- - - -
Page 94

10
Teletekst
Üzerine bas›n.
Elde edeceksiniz.
Teletekst baz› kanallar taraf›ndan yay›nlanan, gazete gibi izlenebilen haber ulaflt›rma sistemidir.
Sa¤›r ve duyma özürlü kifliler için alt yaz› sistemi olduu gibi, yay›n dilini de iyi anlayabilmek için alt yaz›
uygulamalar› vard›r (kablo flebekelerinde ve uydu yay›nlarda vs… geçerlidir).
Teletekst
ça¤›rma
Bir sayfan›n
seçilmesi
Teletekst’i ça¤›rmaya, fleffaf olarak göstermeye ve
terketmeye izin verir. Teletekst içinde gitmek istedi¤iniz
konular›n listesini verir. Her konu bafll›¤› (sayfa) 3 rakam ile
kodlanm›flt›r.
E¤er seçilen kanal teletekst yay›n› yapm›yorsa, sadece 100
rakam› belirecek ve ekran siyahlaflacakt›r (bu durumda
teletekst’ten ç›karak baflka bir kanala gidin).
‹stenen sayfan›n numaras›n›
09’dan ’ya da @ P # tufllar›
ile girin. Örnek : sayfa 120 için,
120tufllay›n. Numara
sol üst tarafta belirecektir, kontör dönecek sonra sayfa
belirecektir. Bir baflka sayfaya girmek için bu ifllemi
tekrarlay›n.
E¤er kontör sürekli dönerek ar›yorsa, sayfa yay›nda de¤il
demektir. Baflka bir numara seçin.
Genel tablo
Konulara
direkt girifl
Genel tabloya geri gelmek içindir (bu genelde sayfa 100’dür).
Renkli bölgeler ekran›n alt taraf›nda belirecektir. 4 renkli
tufl konulara ya da sayfalara direkt girifle imkan tan›r.
E¤er konu ya da sayfa henüz yay›na haz›r de¤ilse renkli tufl
yan›p sönecektir.
Bir sayfay›
büyütme
Sayfan›n üst ya da alt taraflar›n› geniflletmeye, sonra normal
boyuta almaya imkan verir.
Sayfalar›n
kendili¤inden
de¤iflmesini
önleme
Gizlenmifl
haberler
Baz› sayfalar kendili¤inden di¤er sayfalara geçerek haberi
devam ettirir. Bu tufl sayfay› sabitlemeye ya da di¤er
sayfaya manuel geçmeye olanak verir.
_ iflareti sol üstte
belirecektir.
Gizlenmifl haberleri göstermeye ya da saklamaya yarar
(özellikle oyunlarda).
Tercihli sayfa
0’dan 40’a kadar olan teletekst programlar› için renkli
tufllar (k›rm›z›, yeflil, sar›, mavi) ile direkt olarak
ulaflabilece¤iniz tercih etti¤iniz 4 sayfay› haf›zaya
alabilirsiniz.
& Tercihli sayfa ayar›na
H tufluna basarak geçin.
é Haf›zaya almak istedi¤iniz teletekst sayfas›n› aç›n.
“ Önce
d
tufluna, sonra iste¤inize göre renkli tufluna
bas›n›z. Sayfa belle¤e al›nm›flt›r.
‘ Di¤er renkli tufllar için é
’den “’e kadar olan ad›mlar›
tekrarlay›n›z.
( Bundan itibaren, teletekst’inizi kullan›rken ekran›n
alt›nda tercihli sayfalar›n›z›n renkleri belirecetir.
Al›flt›g›n›z konuyu bulmak için
H tufluna bas›n.
Tamamen iptal etmek için 5 saniye süre ile
d
tufluna bas›n.
Ë
SMART RADIO SMART
MENU
+
[
”
-
123
4
56
789
Ø
0
.
¤
ŸÓù
ª-
¤
0
9
P
+
P
-
Á
Ë
Ó
Ÿ
MENU
Ë
Page 95

11
MODE
VCR
DVD
·¢Ê Æ
∫
Ó
ı
Ω∆
.
Z
¤
Ba¤lant›lar› yandaki flekilde gösterildi¤i gibi yap›n.
n tuflu ile
EXT2 ’yi seçin, S-VHS 2 (EXT 2 soketinden S-VHS
sinyalleri).
Monofonik bir alet için, ses sinyalini AUDIO L girifline ba¤lay›n.
Ses, otomatik bir biçimde televizyonun sol ve sa¤ hoparlörlerinden
gelmeye bafllar.
Kulakl›k
Kulakl›k ba¤land›¤›nda televizyonun sesi kaybolur.
@”#tufllar› ses ayar›n› sa¤lar.
Kulakl›k 32 ile 600 ohm aras›nda bir güçte olmal›d›r.
Yan ba¤lant›lar
Harici Cihazlar›n ba¤lanmas›
EXT1 girifli audio video girifl/ç›k›fl› ve RVB giriflidir.
Video (ya da kay›t yapabilen DVD)
Karfl›s›nda gösterilen ba¤lant›lar› yap›n›z. ‹yi kaliteli bir scart
(euro konnektör) kablo kullan›n›z.
E¤er video kay›t cihaz›n›zda bir euro konnektör (scart) soketi mevcut
de¤ilse mümkün olan tek ba¤lant› anten kablosu üzerinden
olacakt›r. Bu nedenle, video kay›t cihaz›n›z›n test sinyaline ayar
yapman›z ve buna program numaras› 0’› teyit etmeniz gerekecektir.
(Elle haf›zaya alma, Sayfa 7’ya bak›n›z). Video kay›t cihaz›n›zdan
görüntü almak için
0 a bas›n›z.
Dekoderli kay›t cihaz›:
Dekoderi, video kay›t cihaz›n›n ikinci euro konnektör
(scart›na) ba¤lay›n›z. Böylece flifreli yay›nlar› kay›t edebilirsiniz.
Video Kay›t Cihaz›
Uydu al›c›s›, dekoder (flifre çözücü), DVD, oyunlar v.s.
Karfl›s›nda gösterilen ba¤lant›lar› yap›n›z.
Ba¤lanan cihazlar›n seçilmesi
EXT 1 veya ön paneldeki EXT 2, S-VHS 2 (EXT 2 soketinden
S-VHS sinyalleri) ba¤lant›lar›n› seçmek için
n tufluna bas›n›z.
Cihazlar›n Ço¤u (dekoder, video kay›t cihaz›) anahtarlamay› kendisi yapar.
Di¤er cihazlar
FM ANT
EXT1
:
VCR
EXT1
*
Video
Video
Audio
S
in
L
in
R
Page 96

12
LC03s - 3111 256 1427.2
Ipuçlar›
Zay›f Al›fl
Görüntü Yoksa
Siyah beyaz resim
veren d›fl ba¤lant›
cihazlar›
Ses Yoksa
Uzaktan kumanda
aleti art›k
çal›
fl
m›yor
Bekleme (standby)
Televizyonun
temizlenmesi
Dönüfltürülebilir
malzemelerle ilgili
talimat
Hala sonuç
alamad›n›z m›?
Hayalet resimlere, karl› görüntülere veya gölgelenmeye da¤lar›n veya yüksek
binalar›n yak›nl›¤› neden olabilir. Bu durumda resmi elle ayarlamay› deneyiniz:
(“ince ayar”, sayfa 7’ya bak›n›z) veya harici antenin yönünü de¤ifltiriniz. Anteniniz
bu frekans menzilindeki (UHF veya VHF band›) yay›nlar› almak için uygun mudur?
Anten soketini do¤ru takt›n›z m›? Do¤ru sistemi seçtiniz mi? (Sayfa 7).
Kötü ba¤lanm›fl euro konnektör kablolar› veya anten soketleri genellikle
GÖRÜNTÜ veya ses sorunlar› yarat›rlar. (Bazen TV cihaz› hareket ettirildi¤inde
veya döndürüldü¤ünde ba¤lant›lar gevflemektedir.)
Video kaseti oynatmak için video kay›t cihaz› taraf›ndan alg›lanabilen ayn›
standartta (PAL, SECAM, NTSC) kay›t edilmifl oldu¤unu kontrol ediniz.
E¤er baz› kanallarda GÖRÜNTÜ al›yor fakat ses alm›yorsan›z bunun anlam› do¤ru
TV sistemini seçmemifl olman›zd›r: SISTEM ayar›n› de¤ifltiriniz (sayfa 7).
Televizyona ba¤lanm›fl olan anfiden ses ç›km›yor mu ? Audio ç›k›fl› ile giriflini
kar›flt›rmad›¤›n›zdan emin olmak için kontrol edin.
TV cihaz› uzaktan kumandan›n komutlar›na yan›t vermiyor ve cihaz üzerindeki
gösterge uzaktan kumanda kullan›ld›¤›nda art›k yan›p sönmüyorsa; uzaktan
Kumandan›n pillerini de¤ifltiriniz.
TV cihaz›n› açt›¤›n›zda bekleme modunda kal›yor ve TV cihaz› üzerindeki tufllar›
kulland›¤›n›zda ekranda Kilitli ibaresi ç›k›yorsa ÇOCUK K‹L‹D‹ fonksiyonu
çal›flt›rm›fl demektir (Sayfa 9’e bak›n›z).
E¤er cihaz 15 dakika süreyle sinyal almazsa otomatik olarak bekleme moduna geçer.
Enerji tasarrufu yapmak için, televizyonunuz beklemede iken çok düflük bir tüketim
sa¤layan elemanlarla donat›lm›flt›r (1 W'tan daha az).
Ekran›n ve kasan›n temizlenmesi, sadece temiz, yumuflak ve tüylü olmayan bir
bezle gerçeklefltirilmelidir. Alkol ya da solvent kökenli bir ürün kullanmay›n›z.
Televizyonunuzda yeniden kullan›labilir veya dönüfltürülebilir malzemeler vard›r.
Çevredeki at›klar› en aza indirmek için, konusunda uzmanlaflm›fl flirketler, sökmek
ve yeniden kullan›labilir malzemeleri ay›rmak amac›yla kullan›lm›fl cihazlar›
toplarlar (sat›c›n›zdan bilgi al›n›z).
Televizyonun fiflini 30 saniye kadar prizden çekin ve sonra tekrar prize tak›n.
E¤er televizyonunuz ar›zalan›rsa asla kendiniz tamir etmeyi denemeyiniz. Yetkili
servisinize baflvurunuz.
Français
Magyar
English
PyccÍËÈPolskiČeština
SlovenčinaTürkçe
 Loading...