

Page 1

Page 2

Information for users in the UK (not applicable outside the UK)
Positioning the TV
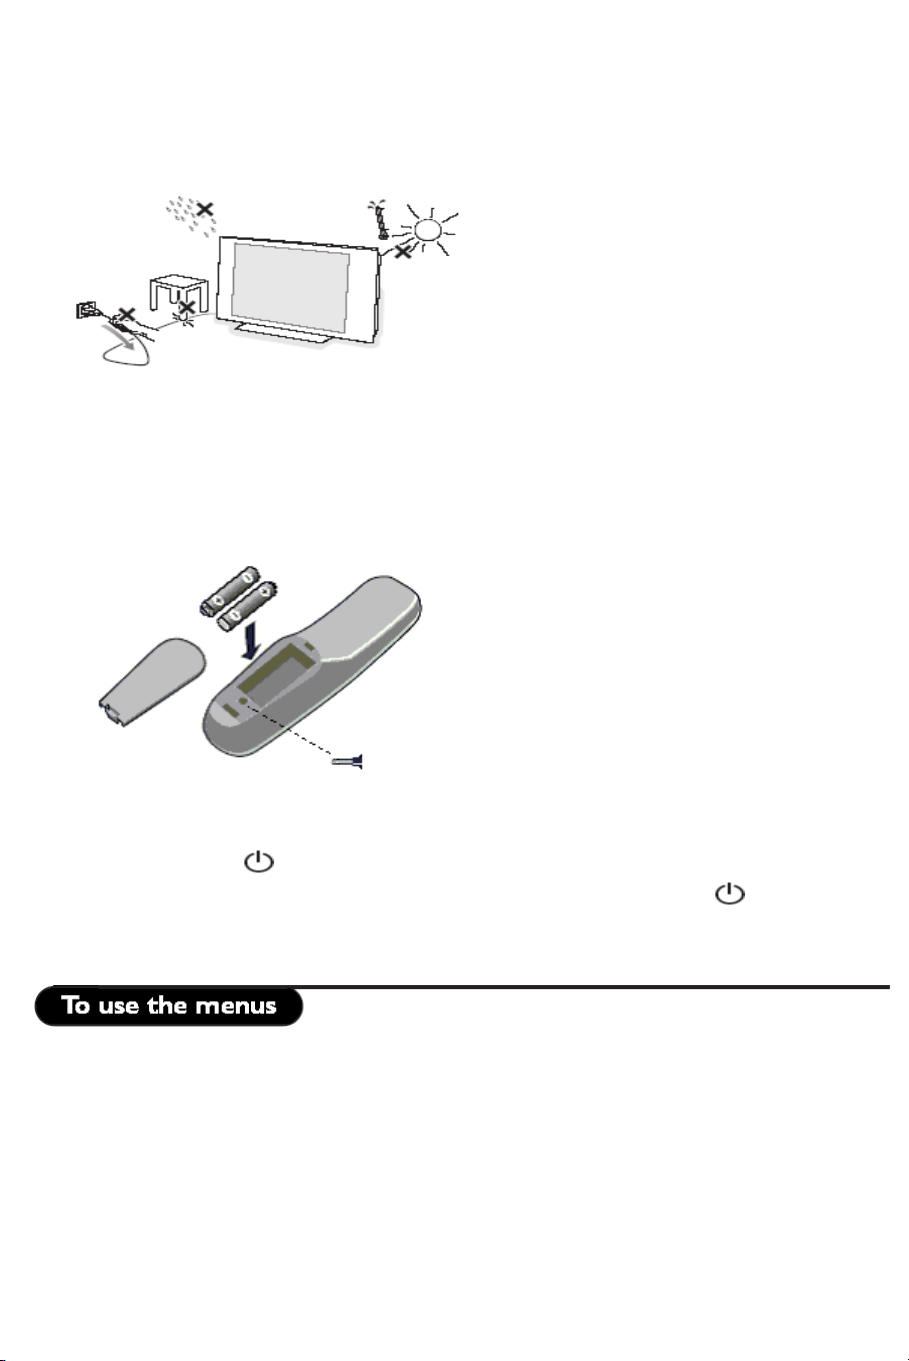
For the best results, choose a position where light does not fall directly on the screen, and at some
distance away from radiators or other sources of heat. Leave a space of at least 5 cm all around the
TV for ventilation, making sure that curtains, cupboards etc. cannot obstruct the air flow through the
ventilation apertures. The TV is intended for use in a domestic environment only and should never be
operated or stored in excessively hot or humid atmospheres.
Interference
The Department of Trade and Industry operates a Radio Interference Investigation Service to help
TV license holders improve reception of BBS and IBA programmes where they are being spoilt by
interference.
If your dealer cannot help, ask at a main Post Office for the booklet “How to Improve Television and
Radio Reception”.
Mains Connection
Before connecting the TV to the mains, check that the mains supply voltage corresponds to the
voltage printed on the type plate on the rear panel of the TV. If the mains voltage is different, consult
your dealer.
Important
Should it become necessary to replace the mains fuse, this must be replaced with a fuse of the same
value as indicated on the plug.
1. Remove fuse cover and fuse.
2. The replacement fuse must comply with BS 1362 and have the ASTA approval mark. If the
fuse is lost, make contact with your retailer in order to verify the correct type.
3. Refit the fuse cover
In order to maintain conformity to the EMC directive, the mains plug on this product must not be
removed.
Connecting the aerial
The aerial should be connected to the socket marked
likely to result in a poor, perhaps unstable picture with ghost images and lack of contrast. Make-shift
loft or set-top aerials are often inadequate. Your dealer will know from experience the most suitable
type for your locality.
Should you wish to use the set in conjunction with other equipment, which connects to the aerial
socket such as TV games, or a video camera it is recommended that these be connected via a
combiner unit to avoid repeated connection and disconnection of the aerial plug.
Fitting the stand (if provided)
Use only the stand provided with the set, making sure that the fixings are properly tightened. A
diagram showing how to assemble the stand is packed with the stand. Never use a make-shift stand,
or legs fixed with woodscrews.
at the back of the set. An inferior aerial is
- 2 -
Page 3

A
ccess Code / Code d'accès / Zugangkennziffer / Codice di accesso / Código de acceso
When the set is in the Standard Security Mode, the Set-up Menu may be accessed either with an
Institutional Set-up Remote Control, or with a guest remote control (like the RC2886) by pressing
the following Remote Control keys in sequence:
Care of the screen
Warning concerning stationary images on the TV screen (42” Plasma)
Warning concerning VGA/DVI display mode
Environmental
• Your television contains material that can be recycled and reused by specialized companies. Please
• Your television consumes energy in the stand-by mode. Energy consumption contributes to air
Do not touch, push or rub or strike the screen with anything hard as this may scratch, mar or
damage the screen permanently. Do not rub with dust clothes with chemical treatment. Do not
touch the surface with bare hands or greasy cloth (some cosmetics are detrimental to the screen).
Unplug the TV before cleaning the screen. When the surface becomes dusty, please wipe gently
with absorbent cotton or other soft materials like chamois soaks. Do not use acetone, toluene and
alcohol because they cause chemical damage.
Do not use liquid cleaners or aerosol cleaners. Wipe off saliva or water drops as soon as possible.
Their long time contact with the screen causes deformations and colour fading.
A characteristic of Plasma Display Panels is that displaying the same image for a long time can
cause a permanent after-image to remain on the screen. This is called phosphor burn in. Normal
use of the TV should involve the showing of pictures that contain constantly moving and
changing images that fill the screen.
As this product processes in VGA/DVI mode, some diagonal lines may be seen under
circumstances of environmental interference. This will not affect the computer signal
performance that displays in VGA/DVI mode.
find out about local regulations on the disposal of your old television set. Pay particular attention
to the disposal of exhausted batteries.
and water pollution. We advise you to switch off your television overnight instead of leaving it in
stand-by mode.
(consult Philips iTV)
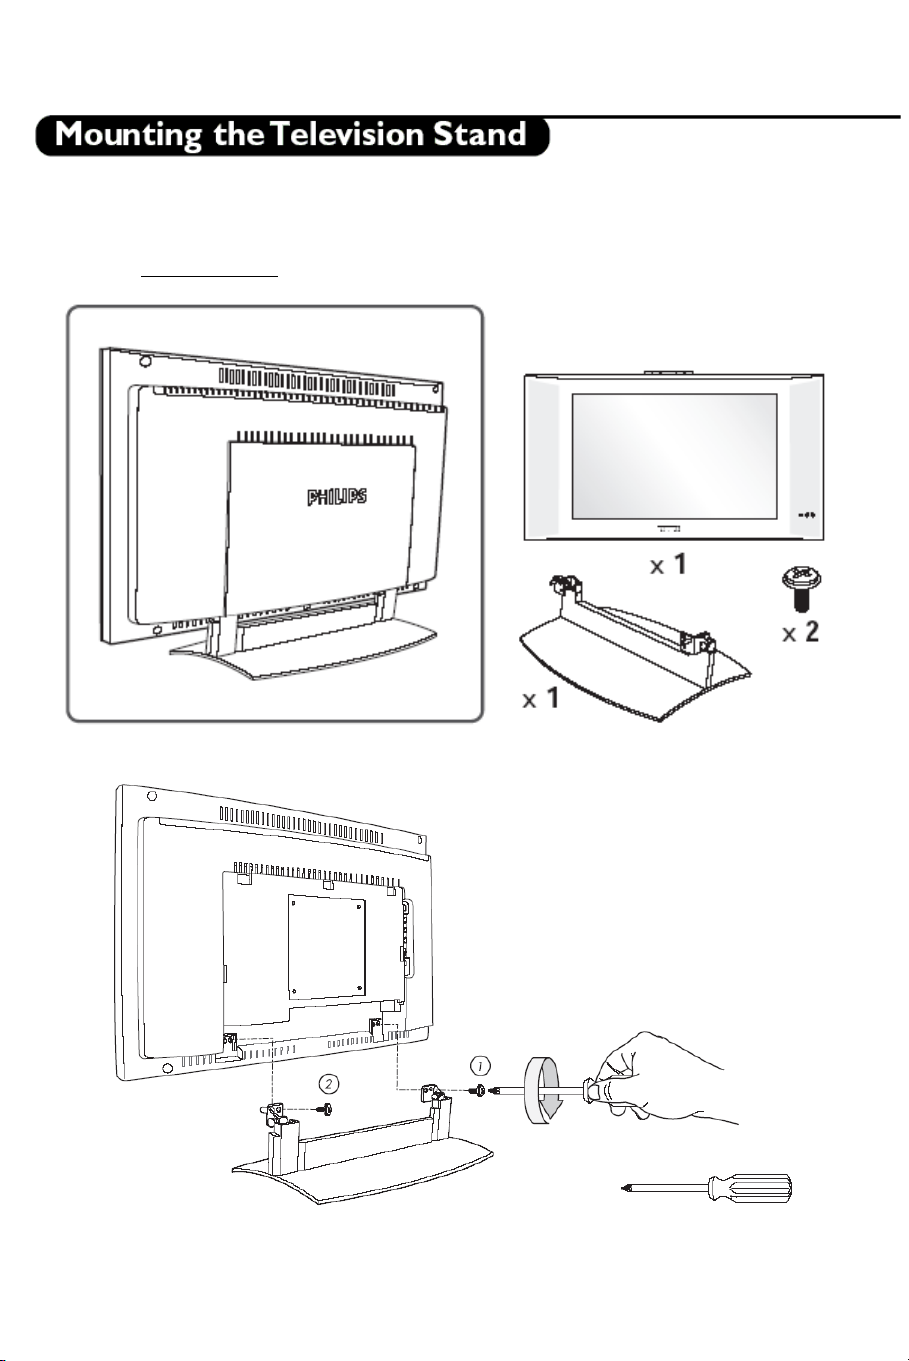
Wall mounting instructions/Table stand
According to the type of TV you’ve purchased a wall mount bracket and/or stand may be supplied.
To mount the supplied stand and/or wall mount bracket, refer to separate instructions. Make sure
that the wall mount is fixed securely so that it meets safety standards.
- 3 -
Page 4
Make sure that air can circulate freely through the ventilation slots
T
•
o prevent any unsafe situations, no naked flame
sources, such as lighted candles, should be placed
on or in the vicinity. Avoid heat, direct sunlight and
exposure to rain or water. The equipment shall not
be exposed to dripping or splashing and no objects
filled with liquids, such as vases, shall be placed on
it. Insert the aerial plug firmly into the aerial socket
at the bottom of the TV.
Connecting the Mains
Insert the mains plug into the wall socket and switch on. Please refer to the label on the back of the
television for the correct operating voltage.
Installing the remote control
Remove the cover at the back of the
remote control.
• Insert the correct type and size batteries
into the compartment making sure they
are the right way around.
• You can secure your batteries by
fastening an appropriate screw into the
hole of the battery cover.
Switch the TV on:
Press the power switch on the TV. An indicator on the front of the TV lights up and the screen
comes on. If the TV is in standby mode (red indicator), press the - TV+ keys or the
remote control.
Accessing the Set-up Menu
When the set is in the High Security Mode, the Setup menu can be accessed only with an Institutional
Set-up Remote Control (RG4172BK or RC2573).
When the set is in the Standard Security Mode, the Set-up Menu may be accessed either with an
Institutional Set-up Remote Control, or with a guest remote control (like the RC2886) using an
authorized access code.
- 4 -
key on the
Page 5

•
RG4172BK RC 2573
Navigation
The current menu item can be selected by means of the cursor up and cursor down keys.
Submenus can be accessed from menu items with a “>” symbol pressing the cursor right key.
To exit any menu press
“Menu” button
• Select “YES” to
activate/enable a setting,
“NO” to deactivate/disable.
• TELEVISION up/down,
INFO up/down, PAY-TV
up/down and RADIO
up/down are active in menu
mode and the television reacts
the same way as in TV mode.
- 5 -
Page 6

• Language: Select the language of the installation menu. Options are "ENGLISH",
"DEUTSCH", "FRANCAIS" and "ITALIANO".
• Communication: The Communication menu is required to enable interactive applications.
For more information, consult the respective application notes. For stand-alone applications
select “OFF”.
• No. of Programs: This sub menu allows setting the number of television, PAY-TV, Radio
and Info programs. The overall maximum number of programs is 125.
• Program Install: In the Program Install sub-menu, program settings can be set.
• Configuration: In the Configuration menu, various settings and features of the TV can be
adjusted.
• Clock Setup: The Clock set-up menu can be entered from this menu item.
- 6 -
Page 7

i
In the Program Installation sub-menu, program settings can be set. When this menu is open, all the
protections are inactive.
• Program No.: The program type can be selected with the cursor left/right buttons. These buttons
will toggle between all available types: "TV", "INFO", "PAYTV" and "RADIO".
If the program number of a certain type is 0, the corresponding type is not displayed. In order to
display a program number of the above-mentioned types, always enter two numbers, for example:
“01” for TV1 or digit “1” and up/down cursor.
• Input: The "Input" menu item selects the des
Possible values are Tuner, AV1, AV2, AV2YC, RADIO, VGA, and DVI. Some input sources may
not be available on certain sets (see accompanying table).
Model / Input AV1 AV2 AV2YC AV3 AV3YC VGA DVI 15HF8442 Scart1 Video in S-video in - - VGA - 20HF7462 Scart1 Video in S-video in - - - -
red input source that will be assigned to the program.
23/26HF9472 Scart1 Scart2 CVBS Scart2 YC - - VGA DVI
30HF9442 Scart1 Scart2 CVBS Scart2 YC Video in S-video in VGA -
42HF9442 Scart1 Scart2 CVBS Scart2 YC - - VGA -
Note: When a SmartCard XPress Box is used, it is usually connected to Scart1.
- 7 -
Page 8
• System: WEST EU (PAL/SECAM-BG), EAST EU (PAL/SECAM-DK), UK (PAL-I),
•
FRANCE (SECAM-L/L') and AUTO.
• Frequency: Digits can be entered for a frequency in MHz. Right cursor starts an auto search;
during frequency entry the digits not yet entered are displayed as dashes "-". Enter “0” for
frequencies below 100 MHz.
• Label: This menu item will be used to add a label/name for each program.
o Pressing the left/right buttons you may enter or exit the label field; pressing the
• Store: The present program information is stored after pressing the cursor left/right button.
Press Menu to exit without storing.
• Fine Tune: Using the "control left/right" commands starts fine-tuning.
• Mute: This item enables/disables picture and sound for the particular channel.
• Teletext Language: This menu enables the user to select the Teletext character set to be used
for the selected channel. With cursor left/right you can select a letter corresponding to the
different language clusters.
• Protection: This function indicates whether the selected program has a protection or not. With
the cursor left/right keys the protection can toggle between "YES" and "NO".
up/down cursor you may insert alphanumeric characters.
o Pressing M (Menu button) you may exit the Label Menu item.
o NONE: normal picture and sound enabled
o VIDEO: picture is blanked for this channel (e.g. radio channel)
o AUDIO: sound is muted for this channel (e.g. information channel)
o “WEST EU”: Pan European (Latin) / West option
o “EAST EU”: Pan European (Latin) / East option
o “GREEK”: Greek
o “CYRILLIC”: Cyrillic
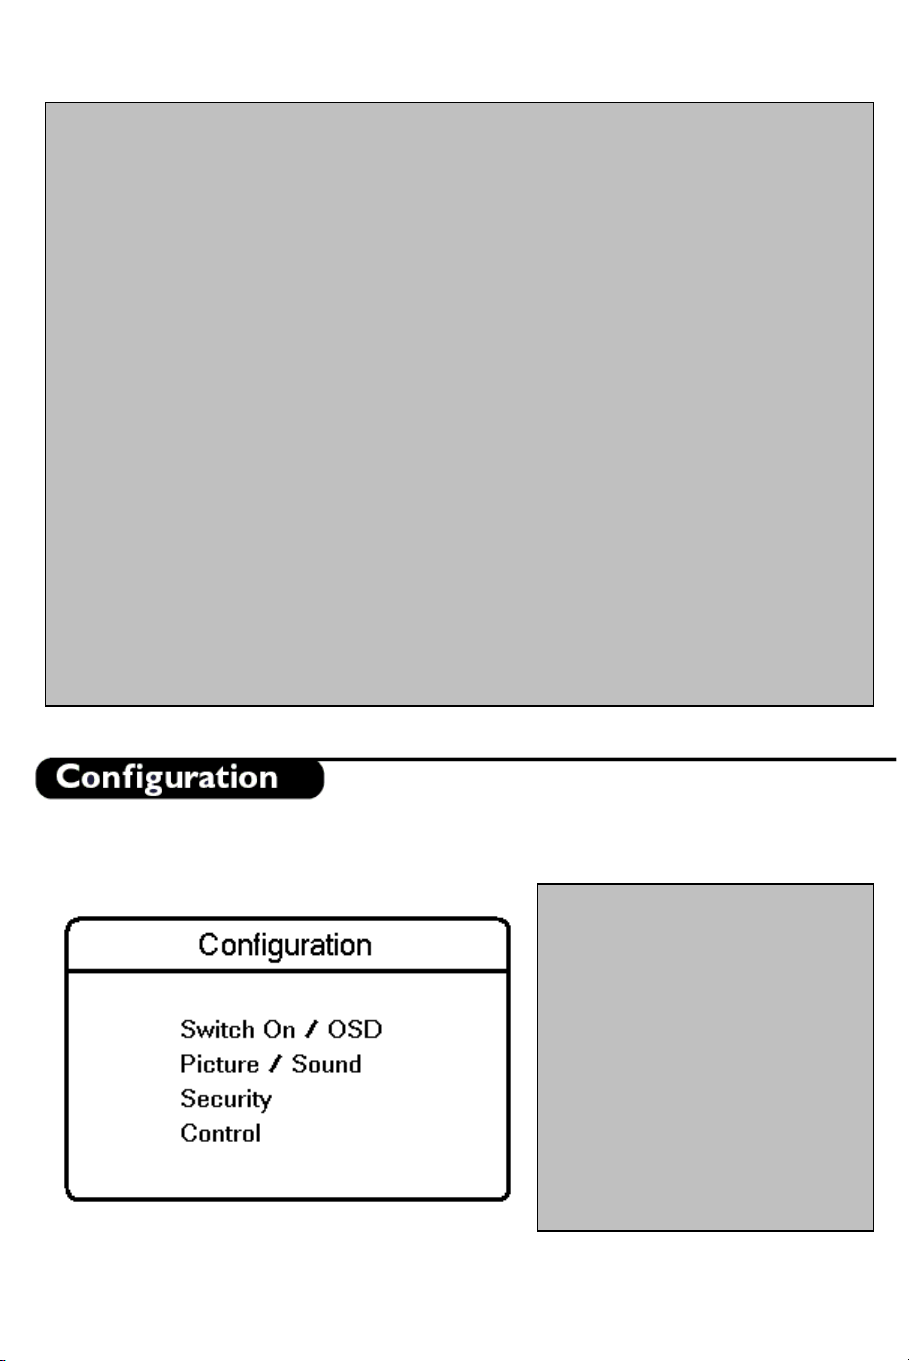
In the Configuration menu, various settings and features of the TV can be adjusted.
Switch On/OSD: In this submenu the behavior of the TV after
switching on and the behavior of
the On Screen Display can be
selected.
• Picture/Sound: In this sub-menu,
the Picture and Sound settings of
the TV can be selected.
• Security: In this sub-menu, the
Security settings of the TV can be
configured.
• Control: In this sub-menu, the
Control settings of the TV can be
configured.
- 8 -
Page 9
•
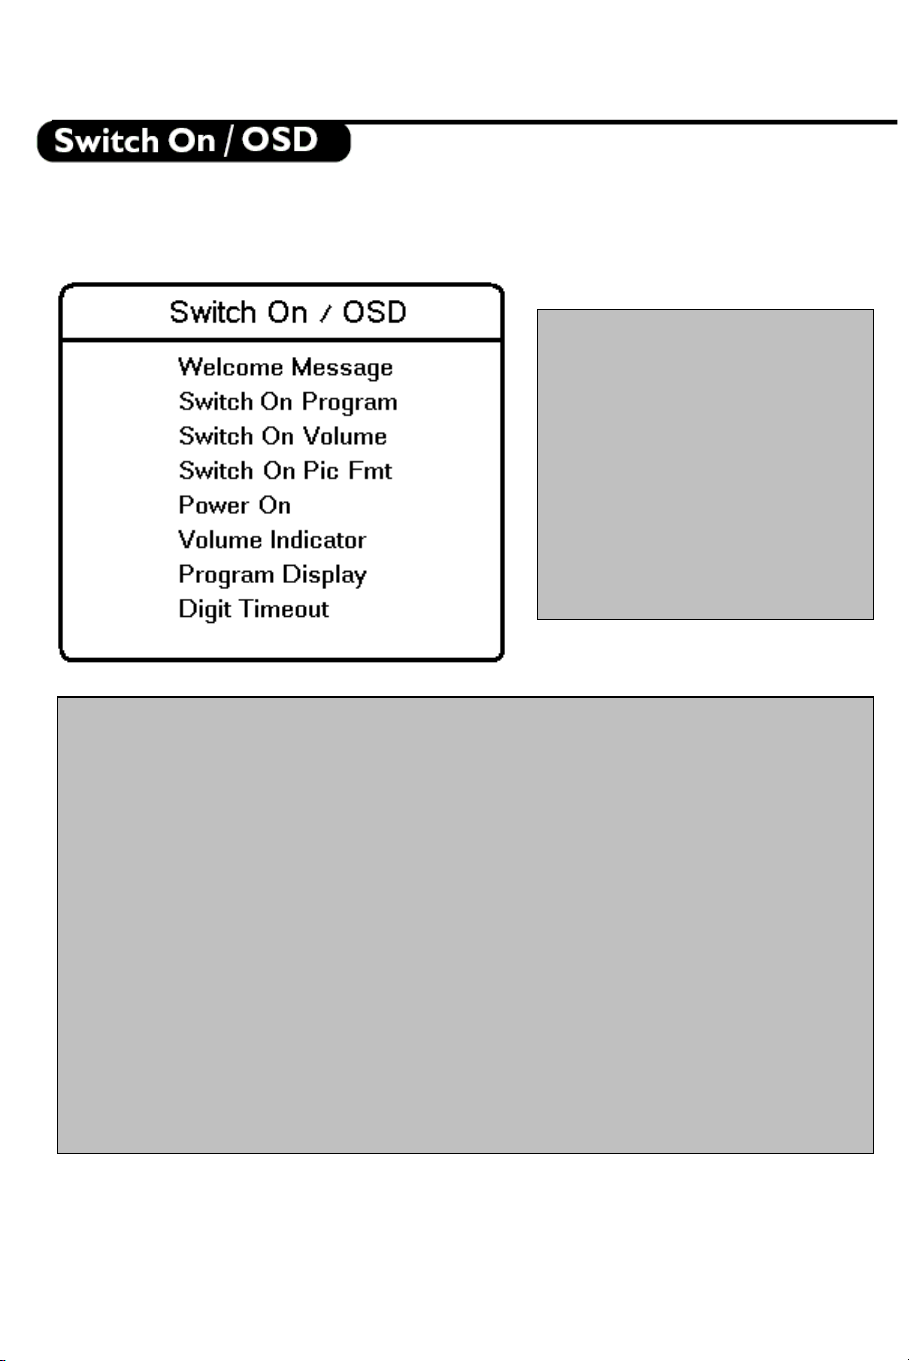
In this sub menu the behavior of the TV after switching on and the behavior of the On Screen
Display can be selected.
Welcome Message: Press Cursor
Left/Right to display Welcome
message entry menu:
o Welcome Message
o Line 1
o Line 2
o Clear
With the Cursor Up/Down you
can set the message characters.
• Switch On Program: This item
sets the television’s program at
switch on.
• Switch On Volume: This item sets the television’s volume at switch on. Use the
Right/Left Cursor buttons to adjust.
• Switch On Pic Fmt: This item sets the television’s Picture Format at switch on. Use the
Right/Left Cursor buttons to adjust.
• Power On: The Power On menu function defines the behavior of the television whenever
AC Power is applied. The valid states are "FORCED ON", "LAST STATUS" and
“STANDBY”.
o When “FORCED ON”, the television can only be switched OFF by means of the
main switch or a set-up remote control or by ESP function (Energy Saving
Programmability controls the maximum continuous viewing time allowed by the
control system).
o When “LAST STATUS”, the television switches on the previous status, ON or
Stand-by.
o When “STANDBY”, the television always switches on in Stand-by.
• Volume Indicator: To display volume indicator when adjusting volume, select "YES".
Select “NO” to hide the volume indicator.
• Program Display: Program Display values can be: Number, Label, All, None.
• Digit Timeout: This is the time-out to enter the second digit for TV program 10 onwards.
- 9 -
Page 10

In this sub menu, the Picture and Sound settings of the TV can be selected.
• Brightness: This changes picture brilliance.
• Colour: This changes the intensity of the colour.
• Contrast: This changes the difference between the light and dark tones.
• Sharpness: This changes the picture definition.
• Tint: Adjusts the picture to obtain natural skin tones.
• Active Control: Active Control optimises the quality of the picture according to the quality of
reception (this menu option is only available on certain LCD TV models).
• Treble/Bass: This adjusts the level of treble and bass effects on the TV’s sound output.
• Balance: This balances the sound on the left and right speakers.
• AVL (Automatic Volume Leveller): This is used to limit increases in sound, especially on
programme change or advertising slots.
- 10 -
Page 11

In this sub menu, the Security settings of the TV can be configured.
• Security Level: The menu function “SECURITY” allows the user to select one of two states
• Keyboard Lock: The Keyboard Lockout menu function disables the television’s local
• Video Out Mute: This option allows the user to mute Video outputs from the TV set, to
“HIGH” or “STANDARD”. The default is “STANDARD”.
o While the set is in the Security High Mode the Set-up menu can only be accessed with
an Institutional Set-up Remote Control.
o While the set is in the Security Standard Mode, the Set-up Menu may be accessed either
with an Institutional Set-up Remote Control, or with a guest remote control using an
authorized access code.
keyboard for volume and program control.
prevent unauthorized copying of Video content.
- 11 -
Page 12

In this sub menu, the Control settings of the TV can be configured.
• ESP: Energy Saving Programmability Mode (ESP) controls the maximum continuous
viewing time allowed by the control system. The ESP Menu function is shown as "ESP",
and its valid values are 00 - 99 (in hours). 00 value means OFF.
• Audio/Video Mute: The Audio/Video Mute function determines whether the video
should be blanked and the audio should be muted if the currently tuned channel has no
signal.
• Step Tuning: If YES, TV programs (1 to 9) are tuned immediately when a digit is pressed.
If NO, tuning is performed only after the dash disappears.
• Auto Scart: Enable/ disable automatic switching to external SCART source.
• Always RGB: This item allows RGB on the AV connectors to be enabled or disabled.
• Min Volume: This item sets the limit for minimum volume allowed for the television set.
Use right/left cursor to adjust.
• Max Volume: This item sets the limit for the maximum volume allowed for the television
set. Use right/left cursor to adjust.
• Audio Out Volume: Sets the volume of the external audio output (e.g. bathroom speaker).
This volume is independent of the main speaker volume level (this menu option is only available
on certain LCD TV models).
- 12 -
Page 13

T
The Clock set-up menu can be entered from this menu item.
• Display Standby: This menu item will be used to set the intensity of the clock display when
the television is in standby mode.
• Display On:
is in the ON mode.
• Time Setting: This menu item will be used to set the time for the clock.
• Teletext Time Download: This menu item is used to activate or deactivate the function for
automatic time downloading by means of Teletext.
• Download Program: This menu item is used to select the channel from which to retrieve
the correct time from the Teletext.
• Time Offset: This menu item is used to set the offset needed to adjust the time received
from the Teletext channel to represent the current time in the current location.
• Buzzer Volume: This item sets the volume of the alarm buzzer. Use the right/left cursor to
adjust.
his menu item will be used to set the intensity of the clock when the television
- 13 -
Page 14

A
T
A
T
A
larm On (for sets with Clock display)
A
ctivates the wake-up alarm. After a valid time
(0:00 to 23:59) is entered, the “Wake up Alarm”
icon on the clock display will be visible.
Standby
Press to switch
the TV off.
+ Pay TV -
To move up or down a
Pay TV channel.
larm Off (for sets with
Clock display)
Deactivates the wake-up alarm.
The “Wake-up Alarm” icon on
the clock display will disappear.
Menu
To call up or exit the menus.
+ Vol -
To adjust the volume.
Mute
Interrupt the sound or
restore it.
0/9 Digit keys
To select a TV channel. For a
two digit programme number,
enter the second digit before
the dash appears.
+ Info -
To move up or down
an Info channel.
+ Radio -
To move up or down
a Radio channel.
Smart Keys
o select predefined
picture and sound
settings.
Sleep
ctivates the sleep timer.
Press repeatedly to increment
the countdown time with 15
minutes.
+ TV –Channel Selection
To move up or down a TV
channel.
16:9 Formats
eletext
- 14 -
Page 15

Teletext is an information system broadcast by certain channels that can be consulted like a
newspaper. It also offers access to subtitles for viewers with hearing problems or who are not familiar
with the transmission language (cable networks, satellite channels, etc.).
Press:
To switch Teletext On/Off
In Teletext mode, press:
Go to a (3-digit) page number
Go to previous / next page
Go to previous / next page
Direct access to coloured page numbers
indicated at the bottom of the screen
- 15 -
Page 16
W
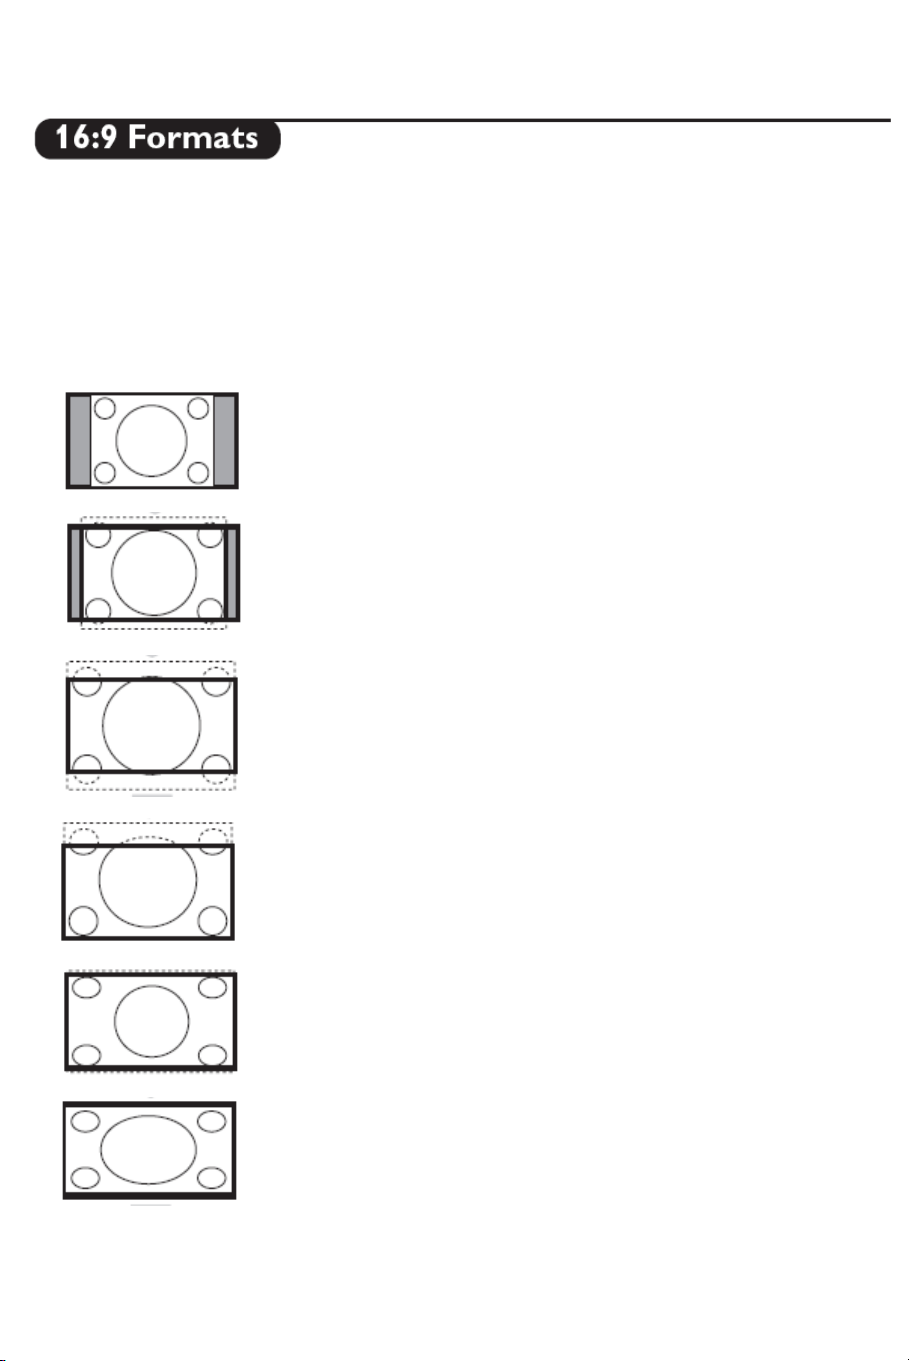
The pictures you receive may be transmitted in 16:9 format (wide screen) or 4:3 format (conventional
screen). 16:9 pictures sometimes have a black band at the top and bottom of the screen (letterbox
format). This function allows you to optimise the picture display on screen.
Using the different formats
Use the 16:9 Formats button on the Remote Control to select the different modes: Auto Format, 4:3,
Zoom 14:9, Zoom 16:9, Subtitle zoom, Super wide and Wide screen.
4:3
The picture is reproduced in 4:3 format and a black band is
displayed on either side of the picture.
Zoom 14:9
The picture is enlarged to 14:9 format, a thin black band remains
on both sides of the picture.
Zoom 16:9
The picture is enlarged to 16:9 format. This mode is
recommended when displaying pictures that have black bands at
the top and bottom (letterbox format).
Subtitle Zoom
This mode is used to display 4:3 pictures using the full surface of
the screen leaving the subtitles visible.
Super Wide
This mode is used to display 4:3 pictures using the full surface of
the screen by enlarging the sides of the picture
idescreen
This mode restores the correct proportions of pictures
transmitted in 16:9 using the full screen display.
- 16 -
Page 17

A
w
Fullscreen
This mode displays images in full screen.
uto Format
This TV set is equipped with automatic switching which
ill select the correct screen format, provided the specific
signals are transmitted with the programs.
Press the
If the word “LOW” appears instead of “OK”, the batteries are low and must be replaced.
key for approximately 5 seconds. The following text appears:
- 17 -
Page 18
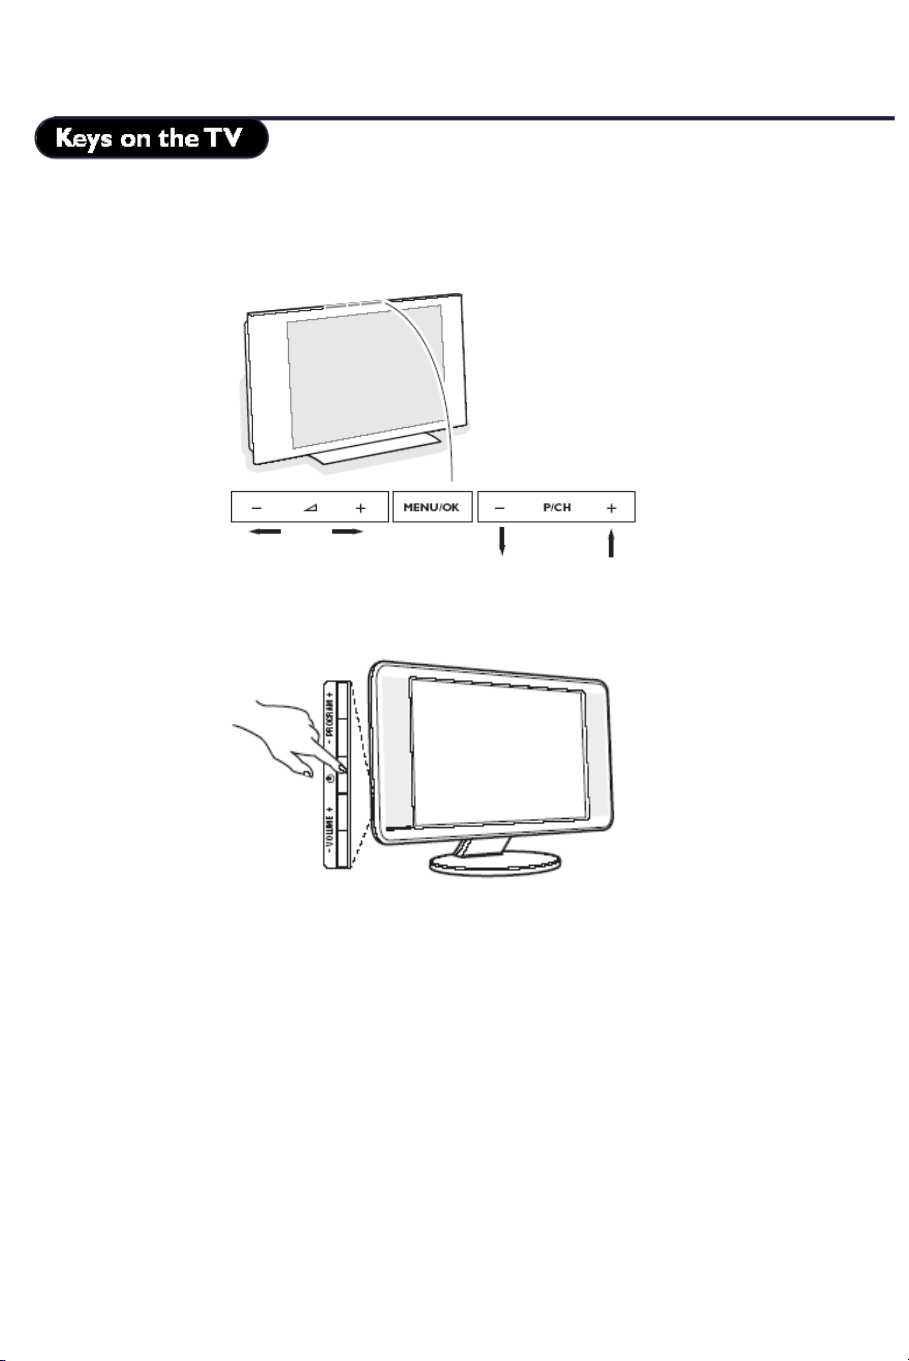
Should your remote be lost or broken you can still change some of the basic settings with the keys on
top/side of your TV.
Keys on top of TV
Keys on side of TV
Press:
• The – Vol + key to adjust the volume;
• The – P/CH+ key to select the TV channels or source
Press the MENU/OK key to summon the main menu without the remote control
(not available on all TVs). Use:
• The – Vol + key and the – P/CH+ key to select menu items in the
directions as shown;
• The MENU/OK key to remove the menu
- 18 -
Page 19
This section provides information on the connectivity available for different LCD Television sets.
Refer to the screen size that is relevant to your TV set.
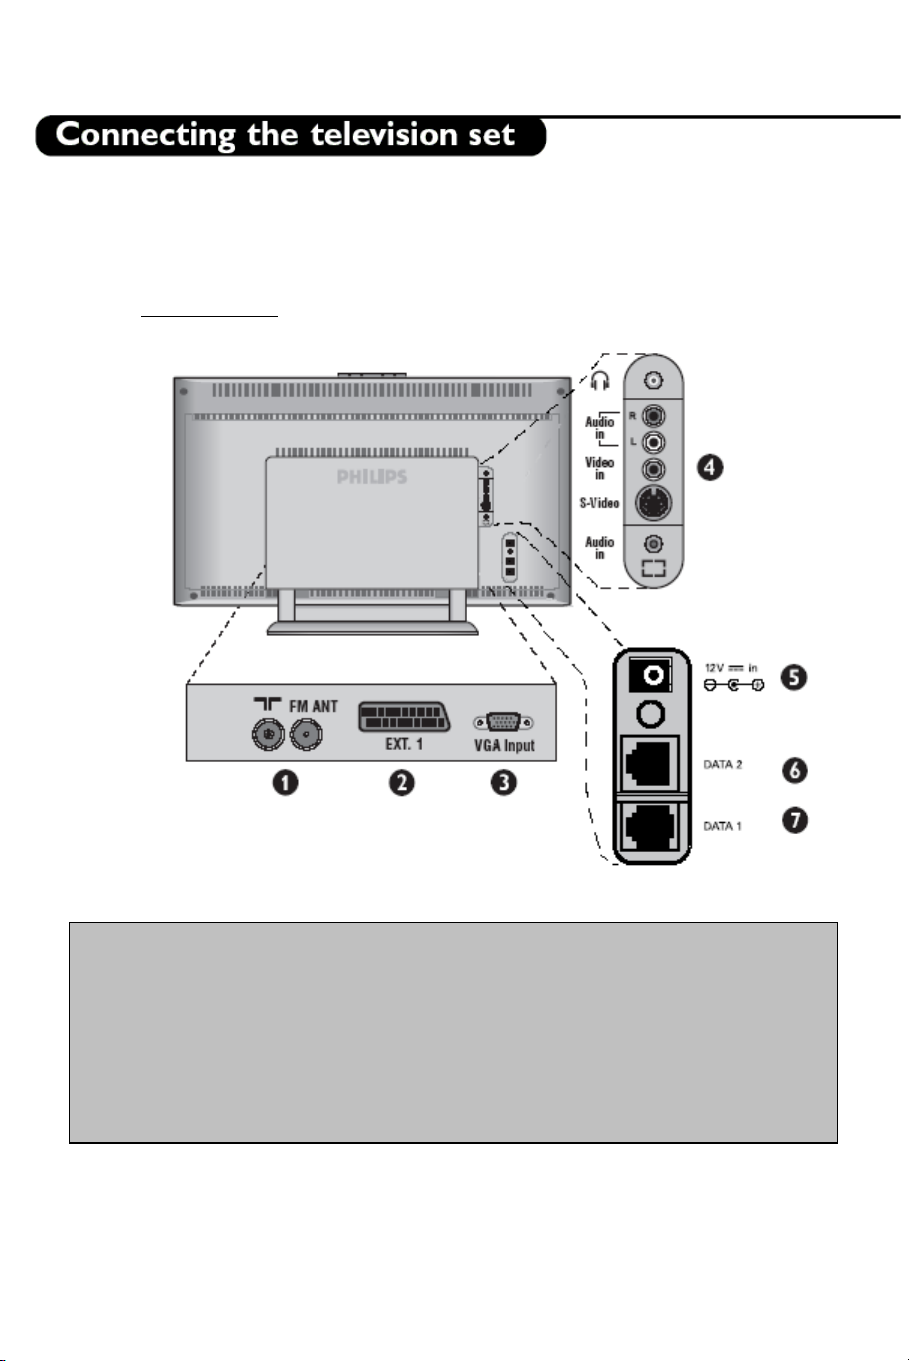
15” LCD TVs
Connectors on the 15” LCD TVs
1. TV and Radio aerial sockets
2. EXT1 socket
3. VGA input for connecting a computer
4. Side IO Connectors – Headphones, Audio-In, Video-In, S-Video, and PC Audio-In
5. 12V-In power DC jack
6. Data 2 (RJ45) jack – for interactive connectivity purposes
7. Data 1 (RJ12) jack - for interactive connectivity purposes
- 19 -
Page 20

20” LCD TVs
Connectors on the 20” LCD TVs
1. TV and Radio aerial sockets
2. EXT1 socket
3. Side IO Connectors – Headphones, Audio-In, Video-In, and S-Video
4. Data 2 (RJ45) jack – for interactive connectivity purposes
5. Data 1 (RJ12) jack – for interactive connectivity purposes
- 20 -
Page 21
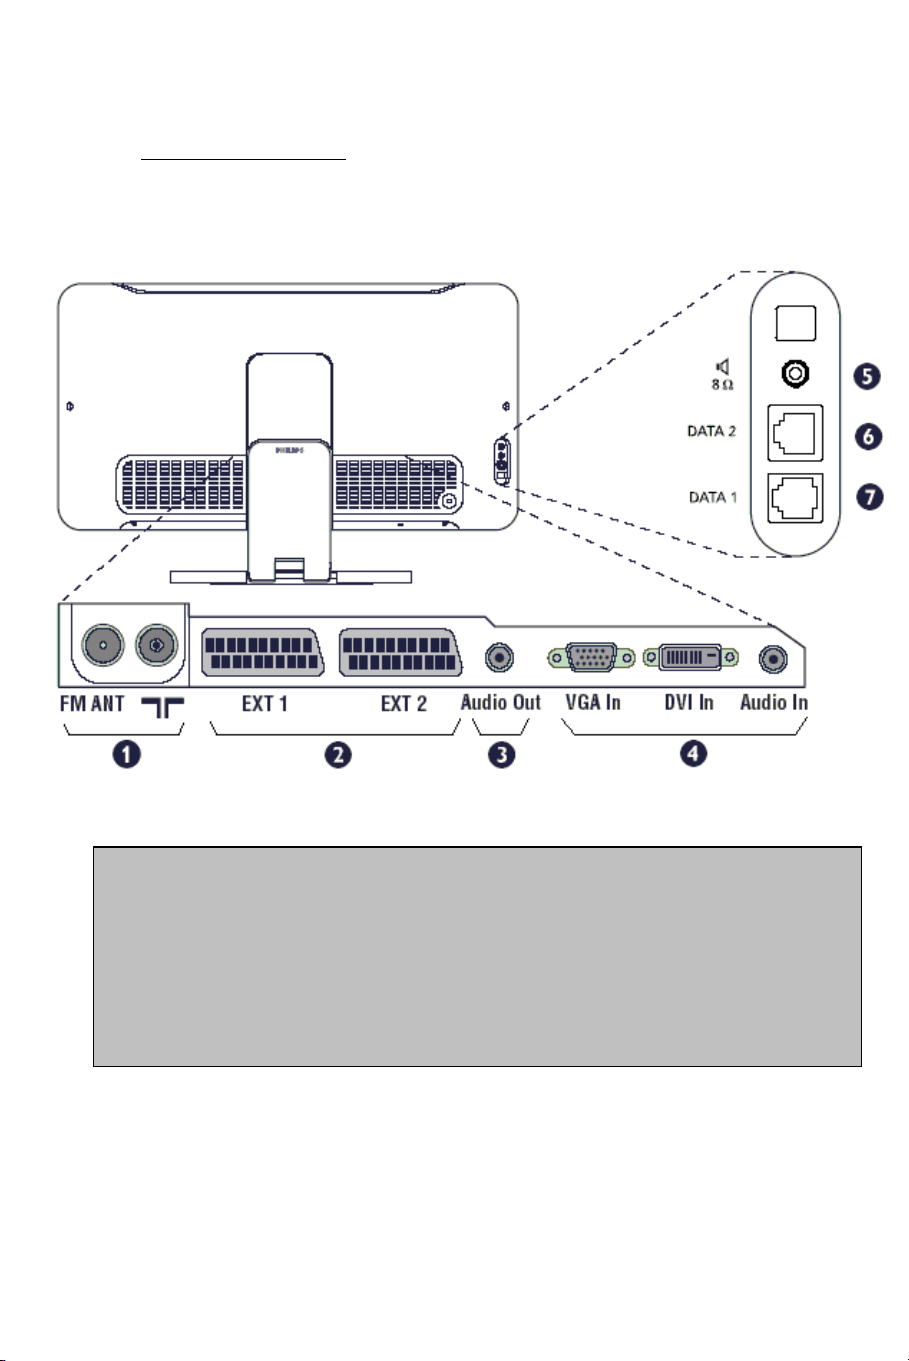
23” & 26” LCD TVs
Connectors on the 23” and 26” LCD TVs
1. TV and Radio aerial sockets
2. EXT1 and EXT2 sockets
3. Audio output for connecting an amplifier
4. VGA, DVI and audio input for connecting a computer
5. External Bathroom Speaker
6. Data 2 (RJ45) jack – for interactive connectivity purposes
7. Data 1 (RJ12) jack - for interactive connectivity purposes
- 21 -
Page 22

30” LCD TVs
Connectors on the 30” LCD TVs
1. Side IO Connectors – Headphones, Audio-In, Video-In, and S-Video
2. Data 1 (RJ12) jack - for interactive connectivity purposes
3. Data 2 (RJ45) jack – for interactive connectivity purposes
4. 12V-In power DC jack
5. VGA and audio input for connecting a computer
6. Audio output for connecting an amplifier
7. EXT1 and EXT2 sockets
8. TV aerial socket
- 22 -
Page 23

42” TVs
Connectors on the 42” TVs
1. Data 1 (RJ12) jack - for interactive connectivity purposes
2. Data 2 (RJ45) jack – for interactive connectivity purposes
3. 12V-In power DC jack
4. VGA and audio input for connecting a computer
5. Audio output for connecting an amplifier
6. EXT1 and EXT2 sockets
7. TV aerial socket
- 23 -
Page 24
This section provides information on the connectivity available for different LCD Television sets.
Refer to the screen size that is relevant to your TV set.
15” LCD TVs
- 24 -
Page 25

20” LCD TVs
- 25 -
Page 26

23 & 26” LCD TVs
- 26 -
Page 27

30” & 42” TVs
- 27 -
Page 28

- 28 -
Page 29

Pflege des Bildschirms
A
Bildschirm nicht mit bloßen Händen oder speckiger Kleidung berühren (einige
Schönheitsmittel sind für den Bildschirm schädlich). Bevor der Bildschirm gereinigt
wird, den Netzstecker ziehen.Wenn der Bildschirm staubig ist, bitte z.B. mit einem
Mikrofasertuch oder einem feuchten Ledertuch vorsichtig abreiben. Kein
ceton,Toluol oder Alkohol verwenden.Keine flüssigen Reinigungsmittel oder Sprays
verwenden. Wassertropfen und Speichel so schnell wie möglich abwischen; ihr
längerer Kontakt mit dem Bildschirm können Deformierungen und Farbfehler
verursachen.
Warnhinweise zu Standbildern auf dem Fernsehbildschirm (42")
Wird an einem Plasma-Bildschirm für längere Zeit ein Standbild angezeigt, so besteht
die Gefahr, dass ein permanentes Nachbild auf dem Bildschirm entsteht – ein Effekt,
der als Phosphor-Einbrennen bezeichnet wird. Bei normalem Gebrauch des
Fernsehers sollten daher ständig wechselnde, bewegte Bilder auf dem gesamten
Bildschirm angezeigt werden.
Hinweis bezüglich Darstellung im VGA- oder DVI-Modus
Da dieses Gerät im VGA- / DVI-Modus arbeitet, ist es unter Umständen möglich,
dass Störungen aus der Umgebung diagonale Linien auf dem Bildschirm hervorrufen.
Davon ausgeschlossen sind PC-Signale, die im VGA- oder DVI-Modus angezeigt
werden.
Umweltschutz
• Das Fernsehgerät besteht aus Teilen, die der Wiederverwertung zugeführt werden
können. Beachten Sie daher bitte die örtlichen Vorschriften zur Entsorgung. Dies gilt
auch für verbrauchte Batterien, die keinesfalls in den Hausmüll gehören..
Das Fernsehgerät verbraucht auch im Standby Modus Energie. Energieverbrauch ist
•
eine der Ursachen für Umweltbelastungen. Wenn weder Uhrenanzeige noch Wecker
benutzt werden, empfehlen wir das Fernsehgerät über Nacht mit dem Netzschalter
abzuschalten.
Hinweise zur Wandhalterung / zum Tischfuß
Abhängig vom Modell, das Sie gekauft haben, wird ein Wandbefestigungswinkel und/oder ein
Tischfuß mitgeliefert.Anweisungen für die Montage des mitgelieferten Standfußes und/oder
Wandbefestigungswinkels finden Sie in der separat mitgelieferten Anleitung. Sorgen Sie dafür, dass
der Winkel fest genug in der Wand verankert ist, so dass er den Sicherheitsnormen entspricht.
- 29 -
Page 30

Sorgen Sie dafür, daß die Luft frei durch die Lüftungsschlitze zirkulieren kann.
i
v
w
A
•
Anschluss
Bitte beachten Sie die Spezifikationen zur Stromversorgung an der Rückseite des Fernsehgeräts
bevor Sie den Netzstecker in die Steckdose stecken.
Bitte vermeiden Sie offenes Feuer oder Kerzen
n unmittelbarer Nähe des Geräts. Stellen Sie das
Fernsehgerät nicht in der Nähe einer Hitzequelle
oder an einem Platz in der prallen Sonne auf und
ermeiden Sie jeden direkten Kontakt mit Regen
oder Wasser. Die Anlage darf keinen tropfenden
oder spritzenden Flüssigkeiten ausgesetzt
erden und keine mit Wasser gefüllten
Gegenstände, wie z.B.Vasen, dürfen auf das
Gerät gestellt werden. Stecken Sie den
ntennenstecker fest in die Antennenbuchse an
der Unterseite des Fernsehgerätes..
Inbetriebnahme der Fernbedienung
Deckel an der Rückseite der
Fernbedienung entfernen.
• Geeignete Batterien einsetzen. Dabei auf
die richtige Polarität (+/-) achten.
• Den Batteriefachdeckel schließen und
ggfs. mit geeigneter Schraube gegen
Diebstahl sichern.
Fernsehgerät einschalten:
Drücken Sie den Netzschalter am Gerät. Ein Kontroll-Lämpchen am Gerät wird sichtbar.
Befindet sich das Gerät im Stand-by-Modus (rotes Kontroll-Lämpchen), drücken Sie die Kanal +/Taste oder eine Zifferntaste auf Ihrer Fernbedienung.
Installationsmenü aufrufen
Zum Aufrufen des Installationsmenü wird eine Philips Gastfernbedienung (z. B. RC 2886) benötigt.
Durch Eingabe eines Sicherheitscodes wird die normale Verriegelung aufgehoben.
In Ausnahmefällen, z.B. in Systemanwendungen kann das Gerät im Modus „Hohe Sicherheit“
verriegelt sein und für den Zugang zum Installationsmenü die Spezialfernbedienung RG4172BK
oder RC2573 (Sonderzubehör) erforderlich machen.
- 30 -
Page 31
RG4172BK RC 2573
•
Menüfunktionen abrufen
Menüfunktionen können über die Cursortasten ^ bzw. v angewählt werden, z.T.auch durch Scrollen.
Auf dahinterliegende Untermenüs wird mit > hingewiesen. Die rechte Cursortaste führt in das
jeweilige Untermenü. Darüber hinaus dient diese Taste auch zur Bestätigung von Einstellungen.
Die Taste „Menü“ führt zurück
zum Hauptmenü.
• Wählen Sie Ja (Yes) zur
Aktivierung eines Features bzw.
Nein (No) zur Deaktivierung
eines Features.
• Die Tasten TV +/-, INFO +/-,
PAY-TV +/- und RADIO +/sind auch im Menü-Mode aktiv
und das Fernsehgerät reagiert
wie im normalen TV-Betrieb.
- 31 -
Page 32

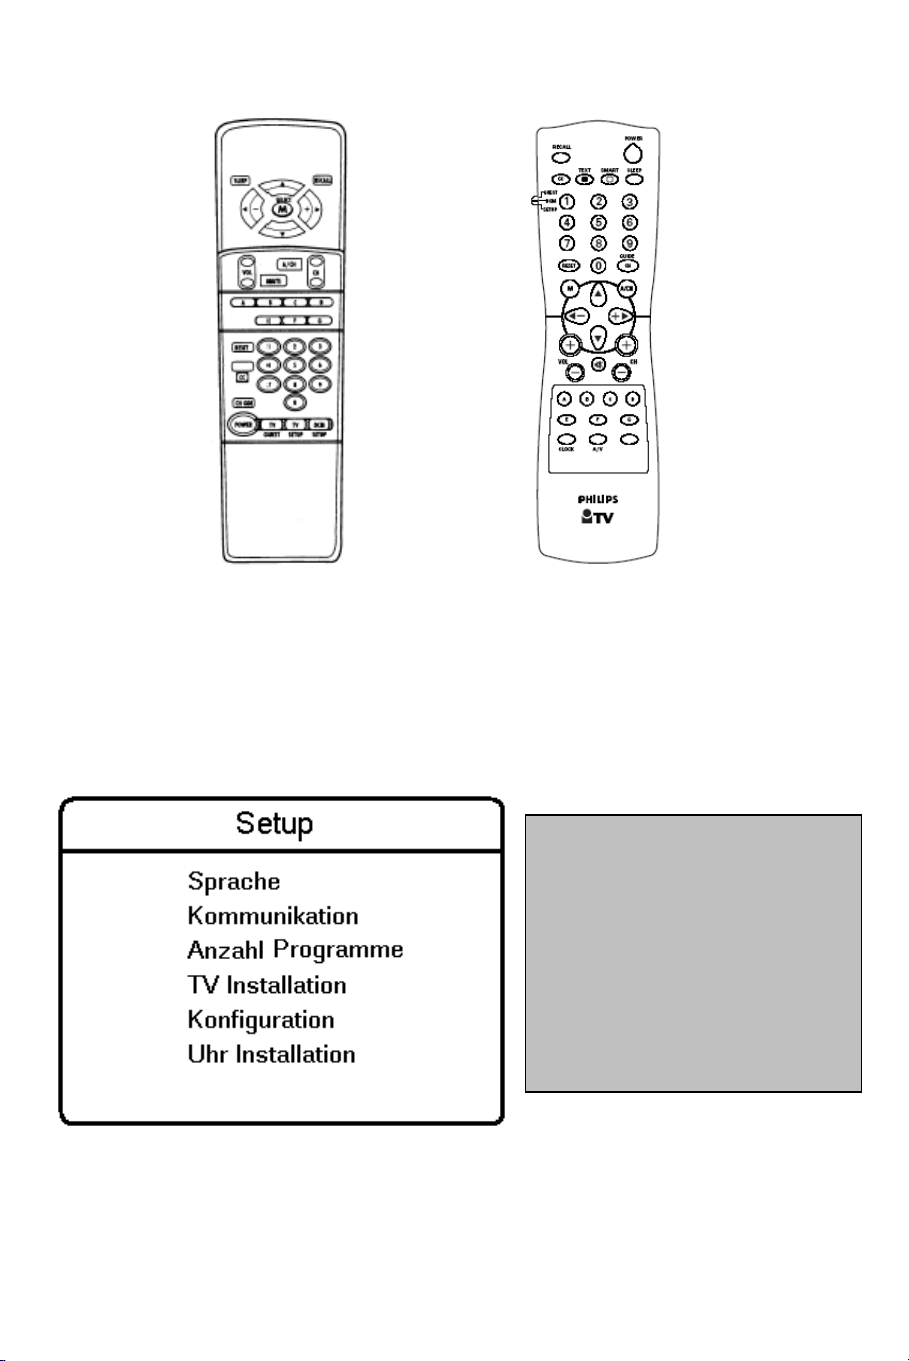
• Sprache: Die Sprache kann im Menü unter „LANGUAGE“ (SPRACHE) eingestellt
werden. Zur Wahl stehen die Sprachen: „ENGLISH“, „DEUTSCH“, „FRANCAIS“
und „ITALIANO“.
• Kommunikation: Aktivieren Sie diese Einstellung für Einsatzmöglichkeiten in
interaktiven Systemen. Weitere Informationen erhalten Sie im jeweiligen Handbuch des
Softwareanbieters. Für alleinstehende Geräte wählen Sie bitte "Aus" bzw. "Nein".
• Anzahl Programme: Hier kann die Anzahl der TV-, PAY-TV-, RADIO- und INFO-
Programme so eingestellt werden, daß keine nicht belegten Speicherplätze angewählt
werden können. Die maximale Programmanzahl beträgt insgesamt 125.
• TV Installation: In diesem Untermenü wird die Einstellung der Programme
vorgenommen.
• Konfiguration: Dieses Untermenü erlaubt die Auswahl verschiedener Einstellungen
und Features..
• Uhr Installation: Sämtliche Uhr-Einstellungen werden in diesem Untermnenü
getätigt.
- 32 -
Page 33

W
A
In diesem Untermenü werden die Programmeinstellungen getätigt. Während der Verwendung dieses
Menüs sind alle Verriegelungen deaktiviert.
• Programmnummer: Legen Sie zunächst die Art des abzuspeichernden Programms ( „TV“,
„INFO“, „PAYTV“ oder „RADIO“) durch Drücken der Cursor-Tasten „links“ bzw. „rechts“ fest.
enn die Anzahl Programme einer Programmkategorie 0 beträgt, steht hier diese Programm-Art nicht
zur Auswahl. Erhöhen Sie ggf. die für diese Programmkategorie vorgesehenen Speicherplätze unter
nzahl Programme. Geben Sie den Programmplatz durch Eingabe einer 2-stelligen Zahl ein.
• Eingang: Wählen Sie die Eingangsquelle für das Signal, dass Sie auf diesem Programmplatz
speichern wollen. Möglich sind: TV-Antenne, AV1, AV2, AV2YC, Radio-Antenne, VGA und DVI.
Die Anzahl der verfügbaren Eingangsquellen ist geräteabhängig (siehe auch beiliegende Tabelle).
Model / Input AV1 AV2 AV2YC AV3 AV3YC VGA DVI 15HF8442 Scart1 Video in S-video in - - VGA - 20HF7462 Scart1 Video in S-video in - - - -
23/26HF9472 Scart1 Scart2 CVBS Scart2 YC - - VGA DVI
30HF9442 Scart1 Scart2 CVBS Scart2 YC Video in S-video in VGA -
42HF9442 Scart1 Scart2 CVBS Scart2 YC - - VGA -
Hinweis: Bei Verwendung einer SmartCard Xpress Box ist normalerweise Eingang AV1 zu wählen.
- 33 -
Page 34

• System: WEST EU (PAL/SECAM-BG), EAST EU (PAL/SECAM-DK), UK (PAL-I),
•
FRANCE (SECAM-L/L') und AUTO.
• Frequenz: Mit der > Taste wird der Sender-Suchlauf aktiviert, der bei jedem nennenswerten
Signalpegel anhält, um die Festlegung des Programmspeicherplatzes, usw. zu ermöglichen. Es ist
ebenfalls eine direkte Frequenzeingabe in MHz möglich. Bei Frequenzen unter 100 MHz ist eine
führende „0“ einzugeben.
• Programm-Name: Mit dieser Funktion kann jedem Programm ein Name zugeteilt werden.
Die Cursor-Tasten < / > führen zu den Schreibstellen. Durch die Tasten ^ bzw. v kann das
Schriftzeichen ausgewählt werden. Mit der Taste „Menü“ wird diese Funktion verlassen.
• Speichern: Die Einstellungen für den Programmplatz werden durch die > Taste abgespeichert.
Diese Funktion kann, ohne zu speichern, über die Taste „Menü“ verlassen werden.
• Feinabstimmung: Durch die Cursor-Tasten < bzw. > kann eine Feinabstimmung des Senders
vorgenommen werden.
• Stummschaltung: Dieses Untermenü aktiviert / deaktiviert Bild und Ton für einzelne
Programme.
o KEINE: normale Bild- und Tonausgabe
o VIDEO: Das Bild wird für diesen Kanal ausgeblendet (z.B. für Radiokanäle)
o AUDIO: Der Ton wird für diesen Kanal ausgeblendet (z.B. für Informationskanäle)
• Sprache Videotext: Dieser Punkt dient zur Wahl des Zeichensatzes für die Darstellung des
Videotextes. Mit den Cursor-Tasten </> kann zwischen folgenden Regionen gewählt werden:
o “WEST EU”: für Westeuropa
o “EAST EU”: für Osteuropa
o “GREEK”: für Griechisch
o “CYRILLIC”: für Kyrillisch
• Ausblenden: Diese Einstellung kann verhindern, daß der Programmplatz durch „Zappen“ oder
Direktwahl erreicht wird. Mit den Tasten < / > kann von „JA” auf „NEIN” geändert werden.
Dieses Untermenü erlaubt die Auswahl verschiedener Einstellungen und Features.
Einschalt / OSD: In diesem
Untermenü (de)aktivieren Sie
sämtliche Funktionen, die sich auf
Einschalteinstellungen und das OSD
beziehen.
• Bild/Ton: Bild- und Ton-
einstellungen werden in diesem
Untermenü festgelegt.
• Hohe Sicherheit: Die
Sicherheitseinstel-lungen für das TVGerät. Achtung: die Einstellung
"Hoch" erfordert die Master-FB RC
2573 für den erneuten Zugang in das
Installationsmenü
• Kontrolle: In diesem Untermenü
werden diverse Bedienungseinstellungen vorgenommen.
- 34 -
Page 35

•
In diesem Untermenü aktivieren / deaktivieren Sie sämtliche Funktionen, die sich auf
Einschalteinstellungen und das On-Screen-Display (OSD) beziehen.
Willkommens-Gruss: Hier kann
Ihr Willkommens-Gruss
eingegeben werden, der nach Einschalten des Gerätes angezeigt
wird.
o Willkommens-Gruss
o Zeile 1
o Zeile 2
o Löschen
Die Cursor-Tasten < / > führen
zu den Schreibstellen, mit ^ / v
kann das Schriftzeichen gewählt
werden.
• Einschaltprogramm: Legt fest,
mit welchem Programm das Gerät
• Einschaltlautstaerke: Diese Funktion legt den Lautstärkewert fest, der mit dem
Einschalten des Fernsehgerätes gelten soll. Einstellung mit Cusor-Tasten < bzw. >.
• Einsch. – Bildf.: Diese Funktion bestimmt das Bildformat, das mit dem Einschalten des
Fernsehgerätes gelten soll. Einstellung mit Cusor-Tasten < bzw. >
• Power On: Diese Funktion legt fest, welchen Modus das TV-Gerät nach der Stromzufuhr
einnimmt. Sie können wählen zwischen "Ein", "Letzter Status" und "Stand-by".
o Wenn der Modus "Ein" gewählt wird, kann der TV nur über den Netzschalter,
einer Installationsfernbedienung oder die ESP-Funktion (ESP legt die maximale,
kontinuierliche Betriebszeit des TV-Geräts fest) ausgeschaltet werden.
o Wird "Letzter Status" gewählt, greift das Gerät auf den zuletzt eingestellten Modus
zurück (Ein oder Stand-by).
o Bei "Stand-by" stellt sich das TV-Gerät bei Stromzufuhr stets auf den Stand-by-
Modus.
• Lautstaerkebalken: Wählen Sie aus, ob der Lautstärkebalken bei Veränderung der
Lautstärke sichtbar sein soll oder nicht.
• Programmanzeige: Welche Programminformationen sollen auf dem Bildschirm
eingeblendet werden: „Speicherplatz-Nummer“, „Programm-Name“,
„Name+Nummer“ oder „keine Einblendung“?
• Verzoegerung: Bestimmt das Zeitfenster in Sekunden, nachdem das Gerät davon
ausgehen kann, daß keine 2. Ziffer zur Programmwahl folgt und die Umschaltung
vorgenommen werden kann.
nach dem Einschalten als
Standard startet, z.B. dem InfoKanal.
- 35 -
Page 36

Bild- und Toneinstellungen werden in diesem Untermenü festgelegt
• Helligkeit: Einstellung des gewünschten Helligkeitsgrades.
• Farbe: Einstellung der gewünschten Farbintensität.
• Kontrast: Einstellung des gewünschten Verhältnisses zwischen hellen und dunklen Tönen.
• Schaerfe: Anpassung der gewünschten Bildschärfe.
• Farbton: Stellt das Bild auf möglichst natürliche Hauttöne ein.
• Active Control: Stellt die Bildqualität je nach Empfangsniveau optimal ein (nur 23“, 26“, 30“ und
42“).
• Hoehen/Tiefen: Hiermit wird die Hochton- bzw. Tieftonwiedergabe eingestellt
• Balance: Dient zur Anpassung der Stereowiedergabe an die Hörposition, justierbar mit den
Cursor-Tasten <bzw.>
• AVL (Automatische Lautstärkenivellierung) „JA“ unterdrückt störende, vom Sender
verursachte starke Lautstärkesprünge (z.B. bei Werbeblöcken). In Stellung „NEIN“ wird das
Originalsignal nicht verändert.
- 36 -
Page 37

In diesem Untermenü werden die Sicherheitseinstellungen für das TV-Gerät konfiguriert.
• Sicherheitslevel: Diese Funktion erlaubt es dem Nutzer, zwischen einem hohen und einem
• Nahbedienung Aus: Zum Schutz gegen unbefugte Bedienung, sind die Tasten an der Front des
• Video Aus Stumm: Erlaubt es dem Nutzer alle oder einige AV-Ausgänge zu deaktvieren, um
niedrigem Sicherheitslevel zu wählen. Voreingestellt ist hierbei "NIEDRIG".
o Wenn das TV-Gerät auf Sicherheit „HOCH“ geschaltet ist, kann das Installationsmenü nur
über eine RG 4172BK or RC2573 Fernbedienung erreicht werden.
o Die Werkseinstellung ist „NIEDRIG“, wodurch das Installationsmenü mit der normalen
Gastfernbedienung und der Eingabe des Sicherheitscodes erreicht werden kann.
Gerätegehäuses abschaltbar. Bei „JA“ können Einstellungen nur mittels Fernbedienung verändert
werden.
illegales Kopieren von Inhalten zu unterbinden.
- 37 -
Page 38

In diesem Untermenü werden diverse Bedienungseinstellungen vorgenommen.
• ESP: Die Funktion dient zur Einsparung von Energie, indem ein Zeitfenster (zwischen 00 und
99 Std.) für den ununterbrochenen Betrieb definiert wird. Danach schaltet sich das Gerät
automatisch ab.
• Audio/Video Stumm: Für den Fall, daß keine verwertbaren Signale empfangen werden, kann
bestimmt werden, ob Ton und Bild entweder „stumm“ geschaltet oder abgeschaltet (ein
schwarzer Bildschirm erscheint) werden.
• Sofort Umschalten In Stellung „NEIN“ wartet das Gerät nach Eingabe der 1. Ziffer auf die
Eingabe einer 2. Ziffer, bis zum Ablauf der unter „Verzögerung“ eingestellten Zeit. Bei „JA“
wird sofort auf Programme 1-9 umgeschaltet.
• Auto Scart: Soll bei Anliegen eines Signals an der Euro-AVBuchse automatisch auf diese
umgeschaltet werden?
• RGB-Signal: Aktivieren oder Deaktivieren des RGB-Signals an der AV-Buchse.
• Min Lautstaerke: Damit das Abschalten des Gerätes nicht vergessen wird, kann hier ein
Mindestpegel für die Lautstärke festgelegt werden. Dazu die Cursortasten < bzw. > verwenden.
• Max Lautstaerke Hier kann die Lautstärke so begrenzt werden, daß kein Nachbar gestört
werden kann. Einstellung mit Cursor-Tasten < bzw. >.
• Ausgangs-Lautstaerke: Bestimmen Sie den Lautstärkepegel des Audioausgangs (z.B. für einen
Bad-Lautsprecher). Diese Lautstärke wird nicht durch die Hauptlautsprecher beeinflusst. (nur
23“ und 26“).
- 38 -
Page 39
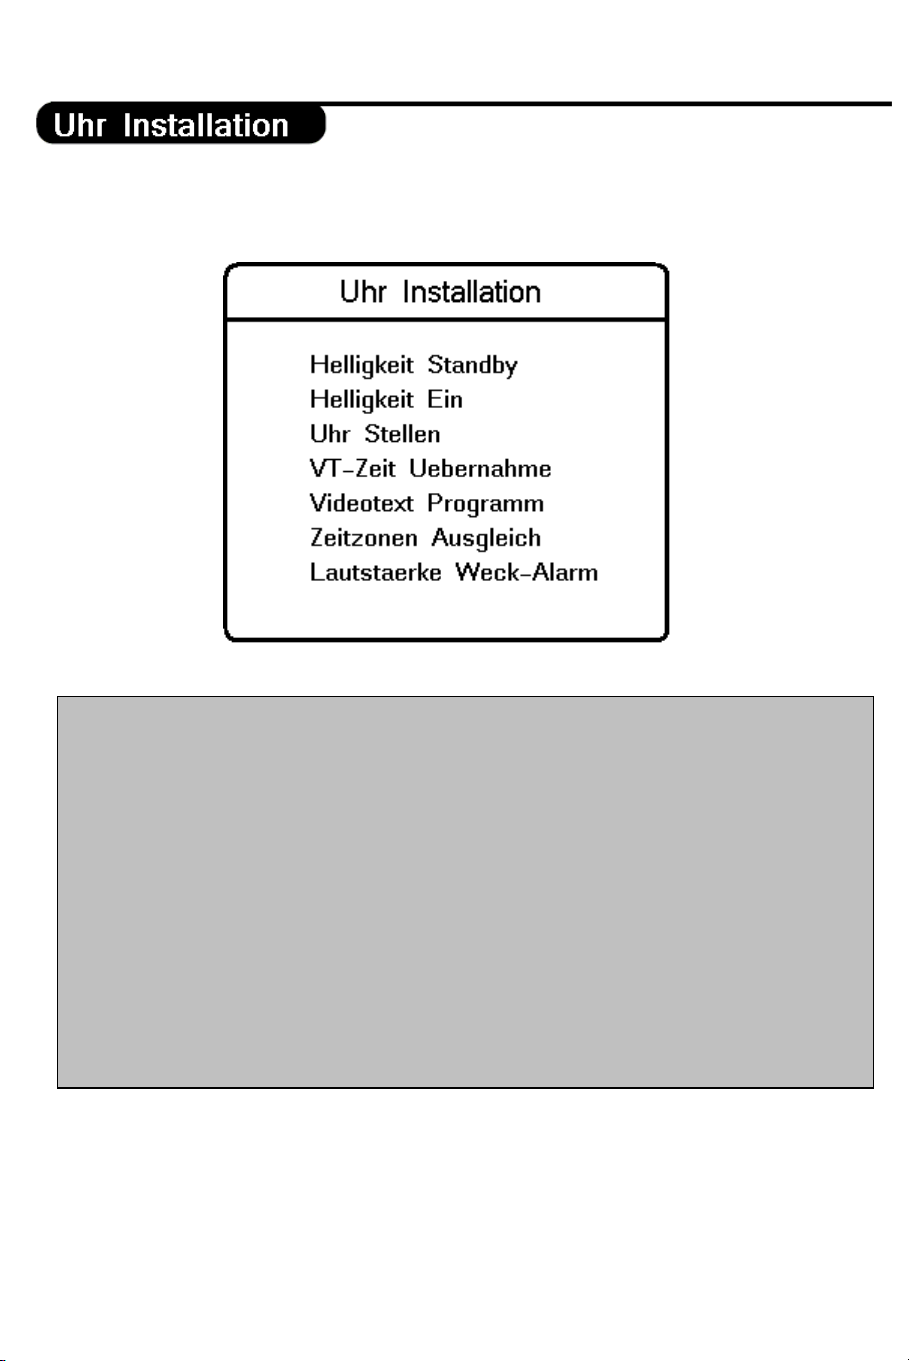
Sämtliche Uhr-Einstellungen werden in diesem Untermnenü getätigt (nur für Geräte mit Uhrendisplay).
• Helligkeit Standby: Hier kann die Intensität eingestellt werden, mit der die Uhr im Standby-
• Helligkeit Ein: Einstellung der Helligkeit bei eingeschaltetem Gerät.
• Uhr Stellen: Mit Hilfe der Zifferntastatur der Fernbedienung kann die aktuelle Uhrzeit eingestellt
• VT-Zeit Uebernahme: Bei der Einstellung „JA“ wird die aktuelle Uhrzeit aus dem Videotext
• Videotext Programm: Bestimmt, aus welchem TV-Programm die Videotext-Zeit für die
• Zeitzonen Ausgleich: Findet sich über Videotext keine lokal gültige Uhrzeit, ist hier die
• Lautstaerke Weck-Alarm: Bestimmt die Lautstärke des Weckersignals. Einstellung mit Cusor-
Mode angezeigt werden soll.
werden.
übernommen, sobald das Gerät mit dem Netzschalter eingeschaltet wird, z.B.. für die autom.
Umstellung von Sommer auf Winterzeit.
Aktualisierung der Uhr bezogen werden soll. Das gewählte Programm muß über Videotext
verfügen.
Anpassung einer empfangbaren Zeitinformation auf die lokale Zeitzone möglich.
Tasten < bzw. >.
- 39 -
Page 40

W
A
A
A
W
A
v
A
,
–
A
A
p
V
A
W
larm ON (für Geräte mit Uhrendisplay): Aktiviert die
eckfunktion. Nach der Eingabe einer korrekten Zeit (00:00 bis
23:59) wird ein Symbol für "Weckfunktion" im Uhrendisplay sichtbar
+ Pay TV - : Auswahl eines
höher oder niedriger
abgespeichterten Pay TVKanals.
larm OFF (für Geräte mit
Uhrendisplay): Deaktiviert die
eckfunktion. Das Symbol für
"Weckfunktion" im
Uhrendisplay verschwindet.
Menu
ufrufen oder Verlassen des
Menüs
+ Vol -
Regelung der Lautstärke.
Mute
Schaltet den Ton
stumm oder schaltet
ihn wieder ein..
er Tastendruck.
Standby
echseln in den
.
Stand-by-Modus
per Tastendruck.
+ Info -
uswahl eines höher
oder niedriger
abgespeichterten InfoKanals.
+ Radio -
uswahl eines höher
oder niedriger
abgespeichterten
Radio- Kanals.
Smart Tasten:
nwahl
orprogrammierter
Bild- und
Toneinstellungen.
Sleep
ktiviert den Sleep-Timer.
Drücken Sie diese Taste so
oft, bis die Zeit, die das Gerät
noch vor Abschaltung laufen
soll
erscheint.
0/9 Zifferntasten:
Direkteingabe des gewünschten
Kanals. Bei einer zweistelligen
Programmnummer ist die
zweite Ziffer einzugeben, bevor
der Strich verschwindet.
ideotext
- 40 -
+ TV
Fernsehsender wählen:
uswahl einer höher oder
niedriger abgespeicherten
Fernsehkanals.
Bildformate 16:9
Page 41

W
W
W
A
Videotext ist ein Informationssystem, das von den meisten Sendern ausgestrahlt wird und wie eine
Zeitung gelesen werden kann. Dieses System ermöglicht auch den Zugang zu Untertiteln für
Schwerhörige oder Personen, die mit der Sprache des übertragenen Programms (über Kabel, Satellit
usw.) nur wenig vertraut sind.
Drücken Sie:
Aufrufen bzw. Verlassen des Videotextes
In Videotext mode:
Seitennummer
nachfolgenden Seite
nachfolgenden Seite
farbige Bereiche angezeigt. Mit den 4
farbigen Tasten können Sie die
entsprechende Themen bzw. Seiten
aufrufen.
echseln zu einer (dreistelligen)
echseln zur vorherigen /
echseln zur vorherigen /
m unteren Bildschirmrand werden
- 41 -
Page 42

j
v
w
A
Die Bilder, die Sie empfangen, können im Bildformat 16:9 (Kinoformat) oder 4:3 (konventioneller
Bildschirm) übertragen werden. Bilder im Format 4:3 besitzen mitunter am oberen und unteren
Bildrand einen schwarzen Streifen (Letterboxformat). Mit dieser Funktion können die schwarzen
Streifen entfernt und die Darstellung der Bilder auf dem Bildschirm optimiert werden.
Benutzung der verschiedenen Bildschirmformate
Benutzen Sie die Bildformat 16:9-Taste, um die verschiedenen Funktionsarten zu wählen: 4:3, Zoom
14:9, Zoom 16:9, 16:9 Untertitel, Super Zoom, Breitbild und Fullscreen.
4:3
4:3 Das Bild wird im Format 4:3 wiedergegeben, ein schwarzer Streifen
erscheint an
Zoom 14:9
Das Bild ist auf das Format 14:9 vergrößert, ein kleiner schwarzer Streifen
erbleibt am oberen und unteren Bildrand.
Zoom 16:9
Das Bild ist auf das Format 16:9 vergrößert. Diese Funktionsart wird
empfohlen, um ein Letterboxbild im Vollformat zu zeigen.
Untertitel Zoom
Mit dieser Funktionsart können die Bilder im Format 4:3 auf der ganzen
Bildschirmfläche gesehen werden, indem die Untertitel sichtbar bleiben.
Super Wide
Mit dieser Funktionsart können die Bilder im Format 4:3 auf der ganzen
Bildschirmfläche gesehen werden, indem beide Seiten des Bildes verbreitert werden.
Breitbild
Mit dieser Funktionsart kann das richtige Bildformat, das in 16:9 übertragen
ird, wieder hergestellt werden, indem es voll im Bildschirm angezeigt wird.
eder Seite des Bildes.
Fullscreen
In diesem Modus wird das Bild auf dem kompletten Bildschirm angezeigt.
uto Modus
Der Fernseher ist mit einer automatischen Umschaltung ausgestattet, die
das von einigen Programmen gesendete Kenn-Signal dekodiert und das
richtige Bildschirmformat wählt (nur in Auto Modus).
- 42 -
Page 43

Durch Drücken der Taste für ca. 5 Sekunden erscheint auf dem Bildschirm ein "OK", sofern
die Batterien der Fernbedienung voll funktionsfähig sind.
Erscheint ein "NIEDRIG", sollten die schwachen Batterien gewechselt werden.
Falls Ihre Fernbedienung unauffindbar ist oder nicht funktioniert, können Sie trotzdem einige
Einstellungen mit den Tasten direkt am Fernsehgerät ändern, sofern keine Sperrung der
Nahbedienungstasten vorgenommen wurde (siehe auch Menü Sicherheitseinstellungen).
Drücken Sie:
• Die - V + Taste, um die Lautstärke zu regulieren.
• Die Tasten -P/CH+, um die entsprechenden Fernsehsender oder
Quellen auszuwählen.
Die Taste MENU/OK kann dazu verwendet werden, das Hauptmenü ohne die Fernbedienung
abzurufen.
• Die Taste - V + sowie die Tasten - P/CH +, um die Menüpunkte in den
angegebenen Richtungen auszuwählen.
• Die MENU/OK-Taste um das Menü zu entfernen.
- 43 -
Page 44
A
A
A
Dieser Abschnitt enthält Informationen über die Anschlussmöglichkeiten der verschiedenen LCD
TV-Geräte. Beachten Sie die Zollgröße, die auf Ihr TV-Gerät zutrifft.
15” LCD TVs
nschlüsse bei 15" LCD-TV-Geräten
1. TV- und Radioantenneneingang
2. EXT1-Anschluss
3. VGA-Eingang für die Verbindung mit einem PC
4. Seitliche Ein- und Ausgänge - Kopfhöreranschluss, Audio-Eingang, Video-Eingang,
S-Video und PC Audio-Eingang
5. 12V-Stromversorgung
6. Datenbuchse 2 (RJ48) - zum Gebrauch interaktiver Verbindungen
7. Datenbuchse 1 (RJ12) - zum Gebrauch interaktiver Verbindungen
20” LCD TVs
nschlüsse bei 20" LCD-TV-Geräten
1. TV- und Radioantenneneingang
2. EXT1-Anschluss
3. Seitliche Ein- und Ausgänge - Kopfhöreranschluss, Audio-Eingang, Video-Eingang
und S-Video
4. Datenbuchse 2 (RJ48) - zum Gebrauch interaktiver Verbindungen
5. Datenbuchse 1 (RJ12) - zum Gebrauch interaktiver Verbindungen
23” & 26” LCD TVs
nschlüsse bei 23" und 26“ LCD-TV-Geräten
1. TV- und Radioantenneneingang
2. EXT1- und EXT2-Anschluss
3. Audio-Ausgang zum Anschluss eines Verstärkers
4. VGA-, DVI- und Audio-Eingang für die Verbindung mit einem PC
5. Externer (Bad)lautsprecher
6. Datenbuchse 2 (RJ48) - zum Gebrauch interaktiver Verbindungen
7. Datenbuchse 1 (RJ12) - zum Gebrauch interaktiver Verbindungen
- 44 -
Page 45

A
A
30” LCD TVs
nschlüsse bei 30" LCD-TV-Geräten
1. Seitliche Ein- und Ausgänge - Kopfhöreranschluss, Audio-Eingang, Video-Eingang
und S-Video
2. Datenbuchse 2 (RJ48) - zum Gebrauch interaktiver Verbindungen
3. Datenbuchse 1 (RJ12) - zum Gebrauch interaktiver Verbindungen
4. 12V-Stromversorgung
5. VGA-Eingang für die Verbindung mit einem PC
6. Audio-Ausgang zum Anschluss eines Verstärkers
7. EXT1- und EXT2-Anschluss
8. TV-Antenneneingang
42” TVs
nschlüsse bei 42" Plasma-TV-Geräten
1. Datenbuchse 2 (RJ48) - zum Gebrauch interaktiver Verbindungen
2. Datenbuchse 1 (RJ12) - zum Gebrauch interaktiver Verbindungen
3. 12V-Stromversorgung
4. VGA-Eingang für die Verbindung mit einem PC
5. Audio-Ausgang zum Anschluss eines Verstärkers
6. EXT1- und EXT2-Anschluss
7. TV-Antenneneingang
- 45 -
Page 46

- 46 -
Page 47

Entretien de l’écran
A
A
L’écran ne doit pas être touché, poussé, frotté ou frappé avec quoi que ce soit de dur. Il
pourrait en effet être rayé, abîmé ou endommagé de manière permanente. Ne le frottez
pas avec un chiffon enduit de produit chimique. Ne touchez pas la surface avec les mains
nues ou avec un tissu graisseux (certains produits cosmétiques peuvent endommager
l’écran). Débranchez la TV avant de nettoyer l’écran. Lorsque la surface devient
poussiéreuse, essuyez-la doucement avec un coton absorbant ou un autre matériau doux,
ainsi une peau de chamois. N’utilisez pas d’acétone, de toluène ou d’alcool, susceptibles
d’endommager chimiquement l’écran.
N'utilisez aucun produit nettoyant liquide ou en aérosol. Essuyez traces de salive et
gouttes d’eau dès que possible. Un contact prolongé avec l’écran est la cause de
déformations et de décolorations.
Environnemental
vertissement relatif aux images fixes sur l’écran TV (Plasma 42”)
L’une des caractéristiques des écrans d’affichage au plasma est que l’affichage prolongé de
la même image peut provoquer une image rémanente, affichée en permanence à l’écran.
L’utilisation normale de la TV devrait impliquer l’affichage d’images en mouvement
constant voire d’images constamment changeantes et emplissant l’écran.
vertissement concernant le mode d’affichage VGA/DVI.
Ce produit fonctionnant en mode VGA/DVI, certaines diagonales peuvent s’afficher en
cas d’interférences environnementales. Les performances du signal informatique affiché en
mode VGA/DVI ne devraient pas s'en voir affectées.
• Votre téléviseur contient des matériaux susceptibles d’être recyclés et réutilisés par des
sociétés spécialisées. Veuillez vous renseigner sur les réglementations locales relatives à la
mise au rebut de votre ancien téléviseur. Prêtez une attention toute particulière à la mise
au rebut des batteries ou piles.
Votre téléviseur consomme de l’énergie en mode Stand-by (Veille). La consommation
•
d’énergie contribue à la pollution de l’air et de l’eau. Nous vous conseillons de couper
votre téléviseur la nuit au lieu de le laisser en mode Stand-by.
Instructions de montage au mur /Présentoir
Selon le type de TV que vous avez acquis, un support de montage au mur ou un présentoir peuvent
être fournis. Pour monter le présentoir ou le support mural, reportez-vous aux instructions fournies.
Assurez-vous que le support mural est correctement fixé afin de respecter les impératifs de sécurité.
- 47 -
Page 48

Assurez-vous que l’air circule librement via les fentes d’aération.
A
•
Branchement au secteur
Insérez la fiche de secteur dans la prise murale et mettez en marche. Veuillez vous rapporter à
l’étiquette à l’arrière du téléviseur pour la tension nominale correcte.
Installation de la télécommande
Mettez la TV en marche :
Appuyez sur le bouton de marche de la TV. Un indicateur à l’avant de la TV s’allume et l’écran
devient actif. Si la TV est en mode Stand-by (témoin rouge), appuyez sur les touches - TV+ ou sur la
touche
de la télécommande.
fin d’éviter toute situation de risque, il est interdit
de disposer ou d’approcher des sources de flamme
nue, ainsi des bougies. Évitez toute exposition à la
chaleur, à la lumière solaire directe voire à la pluie
ou à l’eau. L’appareil ne doit pas être exposé à
l’humidité – gouttes ou éclaboussures – et aucun
objet contenant un liquide, ainsi un vase, ne doit
être posé dessus. Insérez la fiche antenne
fermement dans la prise antenne au fond de la TV.
Retirez le cache à l’arrière de la
télécommande.
• Insérez les piles de taille et de type corrects
dans le compartiment en vous assurant
qu’elles sont dans le bon sens.
• Il est possible de fixer les piles en serrant la
vis appropriée dans l’orifice du cache du
compartiment.
Accès au menu Set-up
Lorsque l’appareil est en mode Sécurité Haute, le menu Setup est accessible uniquement avec une
Télécommande de configuration institutionnelle (RG4172BK ou RC2573).
Lorsque l’appareil est en mode Sécurité Standard, le menu Set-up est accessible soit avec une
Télécommande de configuration institutionnelle soit avec une télécommande invité (ainsi la RC2886)
disposant d’un code d’accès autorisé.
- 48 -
Page 49
RG4172BK RC 2573
•
Navigation
L’élément de menu actif est sélectionnable à l’aide des touches de curseur haut et bas.
Les sous-menus sont accessibles à partir des éléments de menu présentant le symbole « > », en
appuyant sur la touche de curseur droite.
Pour sortir d’un menu appuyez
sur le bouton « Menu »
• Sélectionnez « OUI » pour
activer un réglage et « NON »
pour le désactiver.
• Les touches haut/bas TV,
haut/bas INFO, haut/bas PAYTV et haut/bas RADIO sont
actives en mode Menu et la TV
réagit comme en mode TV.
- 49 -
Page 50

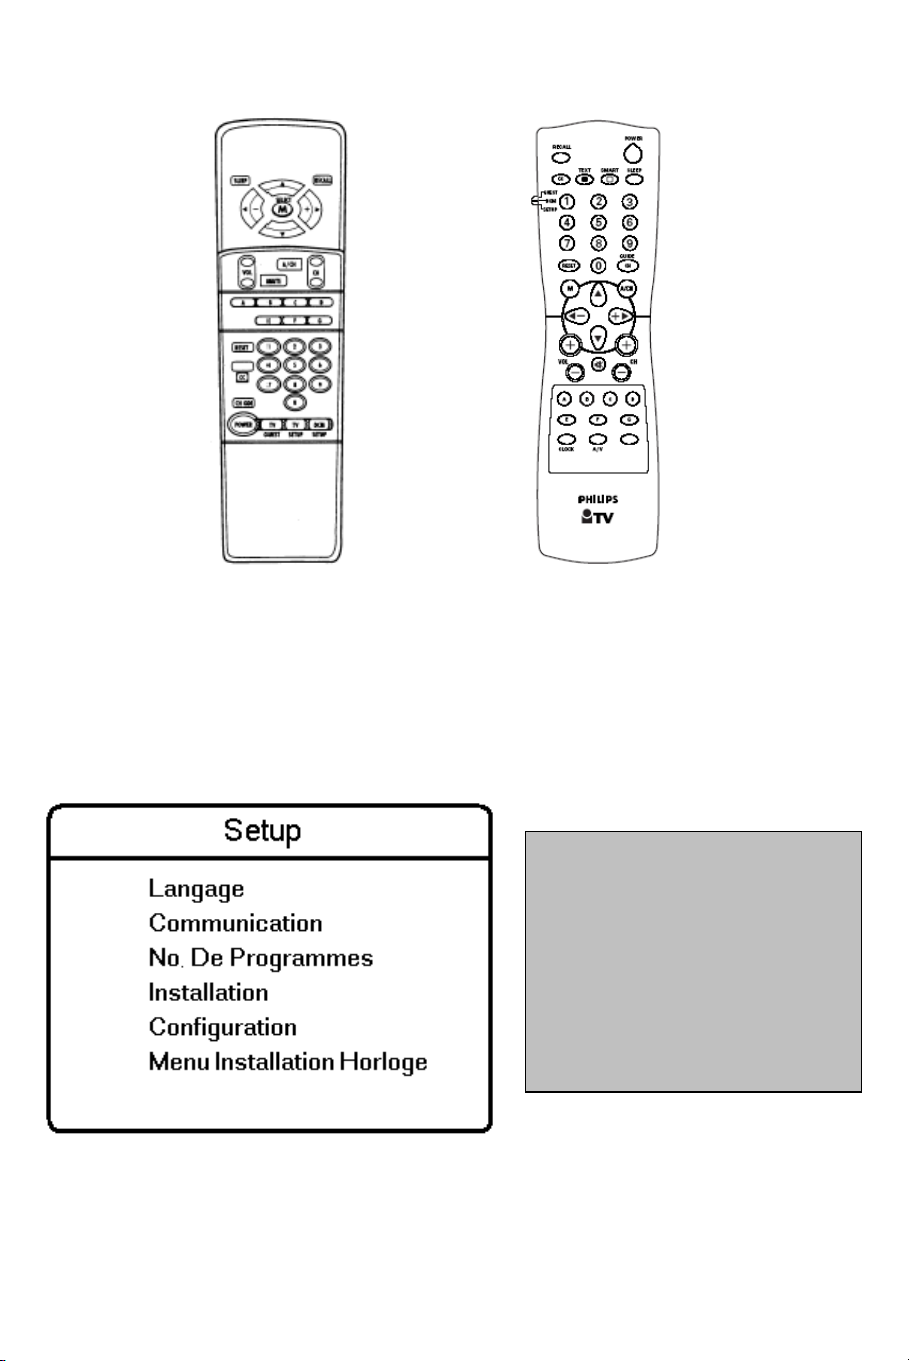
• Langage : sélectionnez la langue du menu d’installation. Les options sont « ENGLISH »,
« DEUTSCH », « FRANÇAIS » et « ITALIANO ».
Communication : le menu Communication permet l’activation des applications
•
interactives. Pour en savoir plus, veuillez consulter les notes des applications respectives.
Pour les applications autonomes, sélectionnez « OFF ».
No. de Programmes : ce sous-menu permet de régler les numéros des programmes de
•
Télévision, PAY-TV, Radio et Info. Le nombre global maximum de programmes est de 125.
Installation : le sous-menu Installation permet de régler les paramètres des programmes.
•
Configuration : Le menu Configuration permet de régler divers paramètres et
•
fonctionnalités de la TV.
Menu Installation Horloge : Cet élément de menu permet d’accéder au menu
•
d’installation de l’horloge.
- 50 -
Page 51

j
Le sous-menu Installation permet de régler les paramètres des programmes. Lorsque ce menu est
ouvert, toutes les protections sont désactivées.
• Num Program : le type de programme peut être sélectionné avec les boutons de curseur
• Entrée : l’élément de menu « Entrée » sélectionne la source d’entrée voulue affectée au
gauche/droite. Ces boutons font alterner les différents types disponibles : « TV », « INFO »,
« PAYTV » et « RADIO ».
o Si le numéro de programme d'un certain type est 0, le type correspondant n’est pas
affiché. Afin d’afficher un numéro de programme des types mentionnés auparavant,
saisissez toujours deux chiffres. Par exemple : « 01 » pour TV1 ou le chiffre « 1 » et le
curseur haut/bas.
programme. Les valeurs possibles sont Tuner, AV1, AV2, AV2YC, RADIO, VGA et DVI.
Certaines sources d’entrée peuvent ne pas être disponibles pour certains appareils (voir tableau
oint).
Modèle / Entrée
15HF8442 Scart1 Video in S-video in - - VGA - 20HF7462 Scart1 Video in S-video in - - - -
AV1 AV2 AV2YC AV3 AV3YC VGA DVI
23/26HF9472 Scart1 Scart2 CVBS Scart2 YC - - VGA DVI
30HF9442 Scart1 Scart2 CVBS Scart2 YC Video in S-video in VGA -
42HF9442 Scart1 Scart2 CVBS Scart2 YC - - VGA -
Remarque : la SmartCard XPress Box est normalement connectée à Scart1 pour son utilisation.
- 51 -
Page 52

•
• Système : WEST EU (PAL/SECAM-BG), EAST EU (PAL/SECAM-DK), UK (PAL-I),
FRANCE (SECAM-L/L') et AUTO.
Frequency : les chiffres de fréquence sont saisis en MHz. Le curseur droite lance une recherche
•
•
• Mémoriser : les informations relatives au programme actif sont mémorisées après avoir appuyé
•
•
• Langage Teletext : ce menu permet à l’utilisateur de sélectionner les caractères du Télétexte
• Protection : cette fonction indique si le programme sélectionné est protégé ou non. Il est possible
automatique. Pour une saisie de fréquence, les chiffres en attente de saisie sont affichés comme
des tirets « - ». Saisissez « 0 » pour les fréquences inférieures à 100 MHz.
Nom : cet élément de menu permet d’attribuer un nom à chaque programme.
o En appuyant sur les boutons gauche/droite, il est possible de saisir ou de quitter le
champ Nom. Les pressions successives sur le curseur haut/bas permettent d’insérer
des caractères alphanumériques.
o En appuyant sur M (bouton Menu), vous quittez l’élément de menu Nom.
sur le bouton gauche/droite. Appuyez sur Menu pour quitter sans mémoriser.
Régl. Fin : le réglage fin est activé par les boutons « contrôle gauche/droite ».
Mute : cet élément active/désactive les images et le son pour ce canal spécifique.
o
AUCUN : image et son normalement actifs
o
VIDÉO : image désactivée pour ce canal (par ex. canal radio)
o AUDIO : son désactivé pour ce canal (par ex. canal d’information)
utilisés pour le canal sélectionné. Le curseur gauche/droite permet de sélectionner une lettre
correspondant aux différents blocs de langages.
o
« WEST EU » : Option Pan Européen (Latin) / Ouest
« EAST EU » : Option Pan Européen (Latin) / Est
o
o
« GREEK » : Grec
« CYRILLIC » : Cyrillique
o
de faire alterner la protection entre « OUI » et « NON » avec les touches de curseur gauche/droite.
Le menu Configuration permet de régler divers paramètres et fonctionnalités de la TV.
Mode Début / OSD : ce sous-menu
permet de sélectionner le mode de la
TV après la mise en marche ainsi que
celui de l’Affichage à l’écran (OSD).
Image / Son : ce sous-menu permet
•
de sélectionner les paramètres
d’image et de son de la TV.
• Sécurité : ce sous-menu permet de
configurer les paramètres de Sécurité
de la TV.
Contrôle : ce sous-menu permet de
•
configurer les paramètres de Contrôle
- 52 -
Page 53

•
Ce sous-menu permet de sélectionner le mode de la TV après la mise en marche ainsi que celui de
l’Affichage à l’écran (OSD).
Message d’Accueil : appuyez sur les
touches de curseur gauche/droite
pour afficher le menu de saisie de
Message d’Accueil :
Message d’Accueil
Ligne 1
Ligne 2
Effacer
Vous pouvez définir les caractères
du message avec les touches de
curseur haut/bas.
• Activer Canal : l’élément définit le
programme du téléviseur à la mise
en marche.
• Activer Volume : l’élément définit le volume du téléviseur à la mise en marche. Les
réglages s’effectuent avec les boutons de curseur gauche/droite.
Fmt Image Init : l’élément définit le format d’image du téléviseur à la mise en marche. Les
•
réglages s’effectuent avec les boutons de curseur gauche/droite.
• Mise Sous Tension : la fonction de menu Mise Sous Tension définit le comportement du
téléviseur dès la mise sous tension. Les états valides sont « FORCÉ », « DERNIER ÉTAT »
et « STANDBY ».
o Pour « FORCÉ », le téléviseur peut être mis hors tension uniquement avec
l’interrupteur de mise en marche, ou avec une télécommande de configuration
voire grâce à la fonction ESP (l’Energy Saving Programmability – Capacité de
programmation d’économie d’énergie – commande la durée de visionnage continu
maximum permise par le système de contrôle).
o Pour « DERNIER ÉTAT », le téléviseur s’allume en respectant l’état précédent,
Marche ou Stand-by.
o Pour « STANDBY », le téléviseur s’allume toujours en Stand-by.
• Indication Volume : pour afficher l’indication de volume pendant le réglage du volume,
sélectionnez « OUI ». Sélectionnez « NON » pour occulter l’indication de volume.
Affichage De Canal : les valeurs d’Affichage de canal peuvent être : Numéro, Nom,
•
Tout, Aucun.
Délai Second Chiffre : c’est le délai affecté pour saisir le second chiffre du programme TV
•
à partir du canal 10.
- 53 -
Page 54

Ce sous-menu permet de sélectionner les paramètres d’image et de son de la TV.
• Lumière : modification de la brillance de l’image.
Couleur : modification de l’intensité de la couleur.
•
Contraste : modification de la différence entre les tons clairs et sombres.
•
• Définition : modification de la définition de l’image.
Teint : réglage de l’image pour obtenir des tons chair naturels.
•
Active Control : Active Control optimise la qualité de l’image selon la qualité de réception
•
(cette option de menu est disponible uniquement pour certains modèles LCD TV).
Aigus / Graves : réglage du niveau des effets d’aigus et de graves de la sortie son de la
•
TV.
Balance : balance du son des haut-parleurs gauche et droit.
•
AVL (Automatic Volume Leveller – Nivellement automatique du volume) : limite
•
les élévations du niveau sonore, spécialement lors des changements de canal ou pour les
encarts publicitaires.
- 54 -
Page 55

Ce sous-menu permet de configurer les paramètres de Sécurité de la TV.
• Sécurité : la fonction de menu « SÉCURITÉ » permet à l’utilisateur de sélectionner l’un
des états « HAUTE » ou « STANDARD ». La valeur par défaut est « STANDARD ».
o
Lorsque l’appareil est en mode de sécurité Haute, le menu Set-up est accessible
uniquement avec une Télécommande de configuration institutionnelle.
o Lorsque l’appareil est en mode Sécurité Standard, le menu Set-up est accessible soit
avec une Télécommande de configuration institutionnelle, soit avec une
télécommande invité disposant d’un code d’accès autorisé.
• Clavier Verrouillé : la fonction de menu Clavier Verrouillé désactive le clavier local du
téléviseur pour les commandes de volume et de canal.
Coupure Video Out : cette option permet à l’utilisateur de couper les sorties Vidéo de la
•
TV, pour éviter des copies de contenu vidéo sans autorisation.
- 55 -
Page 56

Ce sous-menu permet de configurer les paramètres de Contrôle de la TV.
• ESP : le mode ESP (Energy Saving Programmability – Capacité de programmation
d’économie d’énergie) commande la durée de visionnage continu maximum permise par le
système de contrôle. La fonction de menu ESP est affichée « ESP » et ses valeurs valides
s’échelonnent entre 00 et 99 (en heures). Une valeur de 00 signifie OFF.
Coupure Audio/Video : la fonction de menu Coupure Audio / Video définit si la vidéo
•
doit être occultée et si le son doit être coupé dans l’éventualité où le canal actif ne reçoit
aucun signal.
Syntonisation par étape : pour OUI, les canaux TV (1 à 9) sont activés immédiatement
•
si un chiffre est pressé sur la télécommande. Pour NON, le changement de canal
s’effectue uniquement lorsque le tiret s’affiche.
Peritel Automatique : active/désactive la commutation automatique à une source Peritel
•
externe.
Toujours RVB : cet élément permet d’activer/désactiver le mode RVB sur les
•
connecteurs AV.
• Volume Min : cet élément définit la limite de volume minimum pour le téléviseur.
Utilisez le curseur gauche/droite pour effectuer les réglages.
Volume Max : cet élément définit la limite de volume maximum pour le téléviseur.
•
Utilisez le curseur gauche/droite pour effectuer les réglages.
• Sortie Vol Audio : règle le volume de la sortie audio externe (par ex. le haut-parleur salle
de bains). Ce réglage de volume est indépendant de celui du volume principal des hautparleurs. (cette option de menu est disponible uniquement pour certains modèles LCD TV).
- 56 -
Page 57

Cet élément de menu permet d’accéder au menu d’installation de l’horloge.
• Afficheur Arrêt : cet élément de menu permet de régler l’intensité de l’affichage de l’horloge
lorsque le téléviseur est en mode Stand-by.
Afficheur Marche : cet élément de menu permet de régler l’intensité de l’affichage de
•
l’horloge lorsque le téléviseur est en mode Marche.
• Réglage Heure : cet élément de menu permet de régler l’heure de l’horloge.
Telecharg. Heure Txt : cet élément de menu permet d’activer/désactiver la fonction de
•
téléchargement automatique de l’heure via le Télétexte.
Telecharg. Programme : cet élément de menu permet de sélectionner le canal duquel
•
télécharger l’heure correcte via le Télétexte.
Réglage du Décalage : cet élément de menu permet de régler le décalage pour ajuster
•
l’heure reçue via le canal de Télétexte afin d’afficher l’heure locale réelle.
Volume Vibreur : cet élément de menu permet de régler le volume du vibreur d’alerte.
•
Utilisez le curseur gauche/droite pour effectuer les réglages.
- 57 -
Page 58

A
A
T
A
T
T
A
A
A
A
A
A
larm On (pour les TV avec affichage
d’horloge)
ctive l’alarme de réveil. Après la saisie d’une
durée valide (0:00 à 23:59), l’icône d’alarme de
réveil devient visible sur l’affichage
de l’horloge.
+ Pay TV -
lterne entre les canaux
de Pay TV (Télévision
payante).
larm Off (pour les TV avec
affichage d’horloge)
Désactive l’alarme de réveil.
L’icône d’alarme de réveil de
l’affichage d’horloge disparaît.
Menu
ppelle / quitte un menu.
+ Vol -
Règle le volume.
Standby
Standby
rrête la TV.
P
ress to switch
the TV off.
+ Info -
lterne entre les
canaux de Info.
+ Radio -
To move up or down
a Radio channel.
ouches
intelligentes :
Sélectionnent les
paramètres d’image et
de son prédéfinis.
Sleep
ctive la temporisation.
Chaque pression incrémente
le décompte de la minuterie
de 15 minutes.
Coupure
Interrompt / restaure le son.
ouches numériques 0/9
Sélectionnent les canaux TV.
Pour un canal à deux chiffres,
saisissez le second chiffre avant
l’affichage du tiret.
eletext
- 58 -
+ TV –Sélection de canal
lterne entre les canaux de TV.
16:9 Formats
Page 59

A
A
A
Le télétexte est un système d’information émis par certaines chaînes et susceptible d’être consulté
comme un journal. Il offre également un accès aux sous-titres pour les spectateurs présentant une
déficience auditive ou qui ne sont pas familiers avec la langue du programme (réseaux câblés, chaînes
par satellite, etc.).
ppuyez sur :
Pour activer/désactiver le Télétexte.
En mode Télétexte, appuyez sur :
tteindre le numéro de page (3
chiffres)
Page précédente/suivante
Page précédente/suivante
ccès direct aux numéros de page en
couleur indiqués en bas de l’écran.
- 59 -
Page 60

q
W
Les images reçues peuvent être émises au format 16:9 (écran élargi) ou 4:3 (écran conventionnel). Les
images 16:9 présentent parfois des bandeaux noirs en haut et en bas de l’écran (format letterbox –
boîte à lettre). Cette fonction vous permet d’optimiser l’affichage des images à l’écran.
Utilisation des différents formats
Utilisez le bouton Formats 16:9 de la télécommande pour sélectionner les différents modes : Auto
Format (Format automatique), 4:3, Zoom 14:9, Zoom 16:9, Subtitle zoom (Zoom sous-titres), Super
wide (Super large) et Wide screen (Grand écran).
4:3
L’image est reproduite au format 4:3 et une bande noire s’affiche de
cha
ue côté.
Zoom 14:9
L’image est élargie au format 14:9 et une bande fine demeure de chaque côté.
Zoom 16:9
L’image est élargie au format 16:9. Ce mode est recommandé pour afficher
des images présentant des bandes noires en bas et en haut (format letterbox).
Subtitle Zoom
Ce mode est recommandé pour afficher des images 4:3 utilisant toute la
surface de l’écran en laissant les sous-titres visibles.
Super Wide
Ce mode est recommandé pour afficher des images 4:3 utilisant toute la
surface de l’écran en élargissant les côtés de l’image.
idescreen
Ce mode restaure les proportions correctes des images transmises en 16:9
en utilisant tout l’écran.
Fullscreen
Ce mode affiche les images en plein écran.
- 60 -
Page 61

A
uto Format
Cette TV est équipée d’une commutation automatique sélectionnant le
format d’écran correct, dans la mesure où les signaux spécifiques sont
transmis avec les programmes.
Appuyez sur la touche environ 5 secondes. Le texte suivant s’affiche :
Si le mot « FAIBLE » s’affiche au lieu de « OK », les piles sont presque épuisées et doivent être
remplacées.
Si votre télécommande est cassée ou perdue, il demeure possible de modifier les paramètres de base
avec les touches au sommet et sur le côté de votre TV.
Appuyez sur :
Appuyez sur MENU/OK pour accéder au menu principal sans la télécommande (disponible
uniquement pour certaines TV). Utilisez :
• La touche – Vol + pour régler le volume ;
• La touche – P/CH+ pour sélectionner les canaux TV ou la source.
- 61 -
Page 62

• Les touches – Vol + et – P/CH+ pour sélectionner les éléments de menu
selon les directions indiquées ;
• La touche MENU/OK pour quitter le menu.
- 62 -
Page 63

Cette section présente les informations de connectivité disponible pour les différents téléviseurs LCD.
Reportez-vous à la taille d’écran relative à votre TV.
15” LCD TVs
Connecteurs des TV LCD 15”
1. Prises antenne TV et Radio
2. Prise EXT1
3. Entrée VGA pour connexion à un ordinateur
4. Connecteurs ES latéraux – Casque, Entrée audio, Entrée vidéo, S-Video et Entrée
audio PC
5. Jack CC d’alimentation 12V
6. Jack Données 2 (RJ45) – pour les connexions interactives
7. Jack Données 1 (RJ12) – pour les connexions interactives
20” LCD TVs
Connecteurs des TV LCD 20”
1. Prises antenne TV et Radio
2. Prise EXT1
3. Connecteurs ES latéraux – Casque, Entrée audio, Entrée vidéo et S-Video
4. Jack Données 2 (RJ45) – pour les connexions interactives
5. Jack Données 1 (RJ12) – pour les connexions interactives
23” & 26” LCD TVs
Connecteurs des TV LCD 23” et 26”
1. Prises antenne TV et Radio
2. Prises EXT1 et EXT2
3. Sortie audio pour connexion à un amplificateur
4. Entrée VGA, DVI et audio pour connexion à un ordinateur
5. Haut-parleur externe salle de bains
6. Jack Données 2 (RJ45) – pour les connexions interactives
7. Jack Données 1 (RJ12) – pour les connexions interactives
- 63 -
Page 64

30” LCD TVs
Connecteurs des TV LCD 30”
1. Connecteurs ES latéraux – Casque, Entrée audio, Entrée vidéo et S-Video
2. Jack Données 1 (RJ12) – pour les connexions interactives
3. Jack Données 2 (RJ45) – pour les connexions interactives
4. Jack CC d’alimentation 12V
5. Entrée VGA et audio pour connexion à un ordinateur
6. Sortie audio pour connexion à un amplificateur
7. Prises EXT1 et EXT2
8. Prise antenne TV
42” TVs
Connecteurs des TV 42”
1. Jack Données 1 (RJ12) – pour les connexions interactives
2. Jack Données 2 (RJ45) – pour les connexions interactives
3. Jack CC d’alimentation 12V
4. Entrée VGA et audio pour connexion à un ordinateur
5. Sortie audio pour connexion à un amplificateur
6. Prises EXT1 et EXT2
7. Prise antenne TV
- 64 -
Page 65

- 65 -
Page 66

Onderhoud van het scherm
Reinig of raak het scherm niet aan met een hard voorwerp want dit kan het scherm
onherroepelijk beschadigen of aantasten. En reinig het scherm aub niet met chemisch
behandelde stofdoeken. Raak de oppervlakte niet aan met blote handen of vettige doeken
(sommige cosmeticas zijn schadelijk voor het scherm).Trek de stekker uit het stopcontact
vooraleer het scherm te reinigen.Wanneer het scherm vuil wordt, reinig voorzichtig met
absorberende katoen of ander zacht materiaal zoals een zeemdoek. Gebruik geen acetone,
tolueen en alcohol omdat zij chemische schade veroorzaken. Gebruik geen vloeibare
reinigingsmiddels of spuitbussen. Verwijder speeksel of waterdruppels zo vlug mogelijk.
Hun langdurig contact met het scherm kan vervorming of kleurvermindering veroorzaken.
Waarschuwing met betrekking tot stilstaande beelden op het TV-scherm
Waarschuwing met betrekking tot VGA/DVI weergave mode
Milieu
Plasmaschermen hebben als kenmerk dat indien hetzelfde beeld gedurende lange tijd op
het scherm blijft, er een permanent nabeeld op het scherm ontstaat, dat ook
fosforinbranding wordt genoemd. Bij een normaal gebruik van de TV bewegen en
veranderen de beelden op het scherm voortdurend.
Bij weergave in VGA/DVI mode kunnen onder bepaalde omstandigheden van
interferentie diagonale lijnen zichtbaar zijn.
Dit TV-toestel bevat herbruikbaar materiaal dat door speciale bedrijven wordt gerecycled.
Verwijder een oud TV-toestel in overeenstemming met de plaatselijke voorschriften. Volg
ook de voorschriften voor de verwijdering van lege batterijen nauwgezet op.
Een TV-toestel verbruikt stroom in de stand-by stand. Dit stroomverbruik draagt bij aan
lucht- en waterverontreiniging. Daarom raden wij aan het TV-toestel 's nachts uit te
schakelen in plaats van het in stand-by te laten staan.
Instructies voor wandmontage/stand
Naargelang het type TV dat u hebt gekocht, wordt een muursteun en/of stand meegeleverd.
Instructies voor de montage van de stand en/of muursteun vindt u elders in deze handleiding. Zorg
ervoor dat de muursteun voldoende stevig verankerd is, zodat hij aan de veiligheidsnormen voldoet.
Zorg ervoor dat de lucht kan circuleren door de ventilatiegleuven.
Om gevaarlijke situaties te vermijden is het aan
te raden geen naakte vlammen, bv. brandende
kaarsen, op het toestel of in de buurt van het
toestel te plaatsen.Vermijd warmte en rechtstreeks
zonlicht en stel het televisietoestel niet
bloot aan regen of water. Het apparaat mag niet
aan druipen of spatten blootgesteld worden en
er mogen geen met water gevulde voorwerpen,
zoals vazen, op het apparaat geplaatst worden.
- 66 -
Page 67

Electrische aansluiting
•
Steek de stekker in een stopcontact en schakel het TV-toestel in. Zie het typeplaatje aan de achterkant
van het TV-toestel voor de goede voedingsspanning.
De afstandsbediening installeren
Verwijder het deksel van het batterijvak
aan de achterkant van de afstands–
bediening.
• Plaats batterijen van het goede type en
maat in het batterijvak en let erop dat u
de polen vande batterijen goed plaatst.
• U kunt het batterijvak vergrendelen door
de schroef in het gat van het deksel van
het batterijvak vast te draaien.
Inschakelen van de TV:
Druk op schakelaar op de TV. Een lampje vooraan op het televisietoestel en het scherm licht op.
Als de TV in de standby stand staat (rood lampje), druk dan op de -P+ toetsen of op de
de afstandsbediening.
toets op
Toegang tot het Setup menu
In de hoogste beveiligingsstand (Security "High") is het Set-up Menu alleen toegankelijk met een
afstandsbediening model (RG4172BK of RC2573) van de beheerder.
In de normale beveiligingsstand (Security "Standard") is het Set-up Menu ook toegankelijk met een
normale afstandsbediening van de gebruiker (bijv. model RC2886) , door het wachtwoord in te
toetsen.
- 67 -
Page 68

RG4172BK RC 2573
•
T
i
In de menu’s bladeren
Een menu item kan geselecteerd worden met behulp van de cursor omhoog of omlaag toets. Submenu’s zijn toegankelijk door bij menu items met een “>” symbool cursor rechts in te drukken.
Druk op de “Menu” toets om
een menu te verlaten
• Kies “YES” om een functie
te activeren en “NO” om een
functie uit te schakelen
• TV +/-, INFO +/-, PAY+/- en RADIO +/- werken
n menu mode hetzelfde als in
tv mode.
V
- 68 -
Page 69

• Language: Menutaal keuze van het installatie menu. Mogelijke opties zijn: "ENGLISH",
"DEUTSCH", "FRANCAIS" en "ITALIANO".
• Communication: Het Communicatie menu is uitsluitend noodzakelijk bij gebruik van
interactieve applicaties. Consulteer de appicatie instructies voor meer informatie. Kies “OFF”
voor normaal gebruik (geen interactieve applicatie).
• No. of Programs: In dit sub menu kunnen het aantal televisie, PAY-TV, radio en informatie
kanalen ingesteld worden. Het maximale aantal kanalen is 125.
• Program Install: In dit sub menu kunnen de programma instellingen worden ingesteld.
• Configuration: In het configuratie menu kunnen diverse instellingen van de tv worden
ingesteld.
• Clock Setup: In dit sub menu kan de klok worden ingesteld.
- 69 -
Page 70

In het Program Installation sub-menu, kunnen instellingen per programma (zender) worden
geconfigureerd. Wanneer dit sub menu geopend is, zijn de programma beveiligingen uitgeschakeld.
• Program No.: In dit sub menu kunt u het aantal TV-, PAYTV-, Radio- en Informatiekanalen
vastleggen. Het totale aantal kanalen bedraagt 125. Als het aantal “0” is, is het bewuste programma
type niet beschikbaar in andere menus. Gebruik altijd twee-cijferige programma ingave. Voorbeeld
toets “01” voor programma 1.
• Input: Met de "Input" (bron keuze) optie, kiest u de bron van het kanaal. U heeft de keuze uit
Tuner, AV1, AV2, AV2YC, RADIO, VGA, en DVI. De beschikbaarbaarheid van sommige
bronnen verschilt per tv type (zie onderstaande tabel).
Model / Input 15HF8442 Scart1 Video in S-video in - - VGA - 20HF7462 Scart1 Video in S-video in - - - -
AV1 AV2 AV2YC AV3 AV3YC VGA DVI
23/26HF9472 Scart1 Scart2 CVBS Scart2 YC - - VGA DVI
30HF9442 Scart1 Scart2 CVBS Scart2 YC Video in S-video in VGA -
42HF9442 Scart1 Scart2 CVBS Scart2 YC - - VGA -
Opmerking: SmartCard XPress box dient doorgaans op Scart 1 aangesloten te worden.
- 70 -
Page 71

• System: WEST EU (PAL/SECAM-BG), EAST EU (PAL/SECAM-DK), UK (PAL-I),
•
FRANCE (SECAM-L/L') en AUTO.
• Frequency: de frequentie (in MHz) kan met de numerieke toetsen ingegeven worden; start met
een “0” voor frequenties beneden de 100 MHz. Druk op “cursor rechts” om automatische te
zoeken naar de volgende zender.
• Label: Dit menu item maakt het mogelijk een programma naam in te geven voor elke zender.
o Open/sluit het menu met cursor rechts/links; selecteer karakters met cursor
• Store: De huidige programma instellingen worden opgeslagen met STORE. Kies cursor rechts /
links om op te slaan of druk op MENU om het menu te verlaten zonder op te slaan.
• Fine Tune: Gebruik cursor links of rechts voor fijnafstemming.
• Mute: Onderdrukt het beeld of geluid van de zender
• Teletext Language: Keuze voor de teletekst taal voor weergave van vreemde karakters
• Protection: Deze funktie maakt het mogelijk een zender te beschermen. Wanneer een zender
beschermd is, heeft de gebruiker geen toegang tot de zender.
omhoog/omlaag;
o Druk op M (Menu toets) om het menu te verlaten.
o NONE: normaal beeld en geluid
o VIDEO: beeld onderdrukt (bijv. bij radio kanalen)
o AUDIO: geluid onderdrukt (bijv. bij info kanalen)
o “WEST EU”: Pan Europees /West optie
o “EAST EU”: Pan Europees / Oost optie
o “GREEK”: Grieks
o “CYRILLIC”: Cyrillisch
In het Configuratie menu, kunnen diverse funkties van de tv ingesteld worden.
- 71 -
Switch On/OSD:
instellingen m.b.t. het
inschakelgedrag en scherm
menus’s.
• Picture/Sound: instellingen
m.b.t. beeld en geluid
• Security: instellingen m.b.t.
toegang- en beveiliging tot
funkties.
• Control: instellingen m.b.t.
controlle funkties van de tv
Page 72

•
In dit sub menu kan het gedrag van de tv m.b.t. inschakelgedrag en schermmenu’s ingesteld worden.
Welcome Message: instelling
van de welkomsboodschap
o Welcome Message
o Line 1
o Line 2
o Clear
Karakters (lijn 1 & 2) kunnen
met cursor omhoog / omlaag
ingesteld worden. “Clear” wist
de welkomsboodschap.
• Switch On Program: Na
inschakelen gaat de tv naar deze
zender.
• Switch On Volume: het volume niveau wanneer de tv inschakelt
• Switch On Pic Fmt: het beeldformaat wanneer de tv inschakelt
• Power On: het gedrag van de tv na onderbreking van de spanning; mogelijke opties zijn:
"FORCED ON", "LAST STATUS" en “STANDBY”.
o Bij “FORCED ON” gaat de tv automatisch aan na een stroomonderbreking. Tevens
kan de tv niet uitgeschakeld worden met de afstandsbediening (standby toets) of de
EPS schakelklok
o Bij “LAST STATUS” schakelt de tv automatisch naar de laatste situatie (standby of
aan)
o Bij “STANDBY” schakelt de tv automatisch naar standby na een
stroomonderbreking
• Volume Indicator: bepaalt of er een numerieke indicatie van het volumeniveau zichtbaar
is op het scherm (YES) of niet (NO) wanneer het volumeniveau aangepast wordt
• Program Display: bepaalt welke informatie op het scherm getoond worden na het
veranderen van zender: Number (zender nummer), Label (zender naam), All (beide),
None (geen).
• Digit Timeout: Tijdsinterval waarbinnen een eventuele 2e cijfer kan worden ingetoetst
voor zendersnummers hoger dan 9
- 72 -
Page 73

In dit sub menu kunnen de instellingen voor beeld en geluid worden ingesteld.
• Brightness: bepaalt de helderheid van het beeld
• Colour: bepaalt de kleurverzadiging van het beeld
• Contrast: bepaalt het contrast (verschil tussen licht en donker) van het beeld
• Sharpness: bepaalt de scherpte van het beel
• Tint: bepaalt de kleurtoon van met name huid
• Active Control: Active Control optimaliseert beeldinstellingen (zoals
ruisonderdrukking) op basis van analyse van het ingangssignaal en de
ontvangstkwaliteit (niet op alle tv modellen).
• Treble/Bass: bepaalt de hoeveelheid hoge en lage tonen in het geluid
• Balance: balans tussen linker en rechter kanaal
• AVL (Automatic Volume Leveller): automatisch aanpassing van variaties in volume
niveau (bijvoorbeeld bij zender wisseling)
- 73 -
Page 74
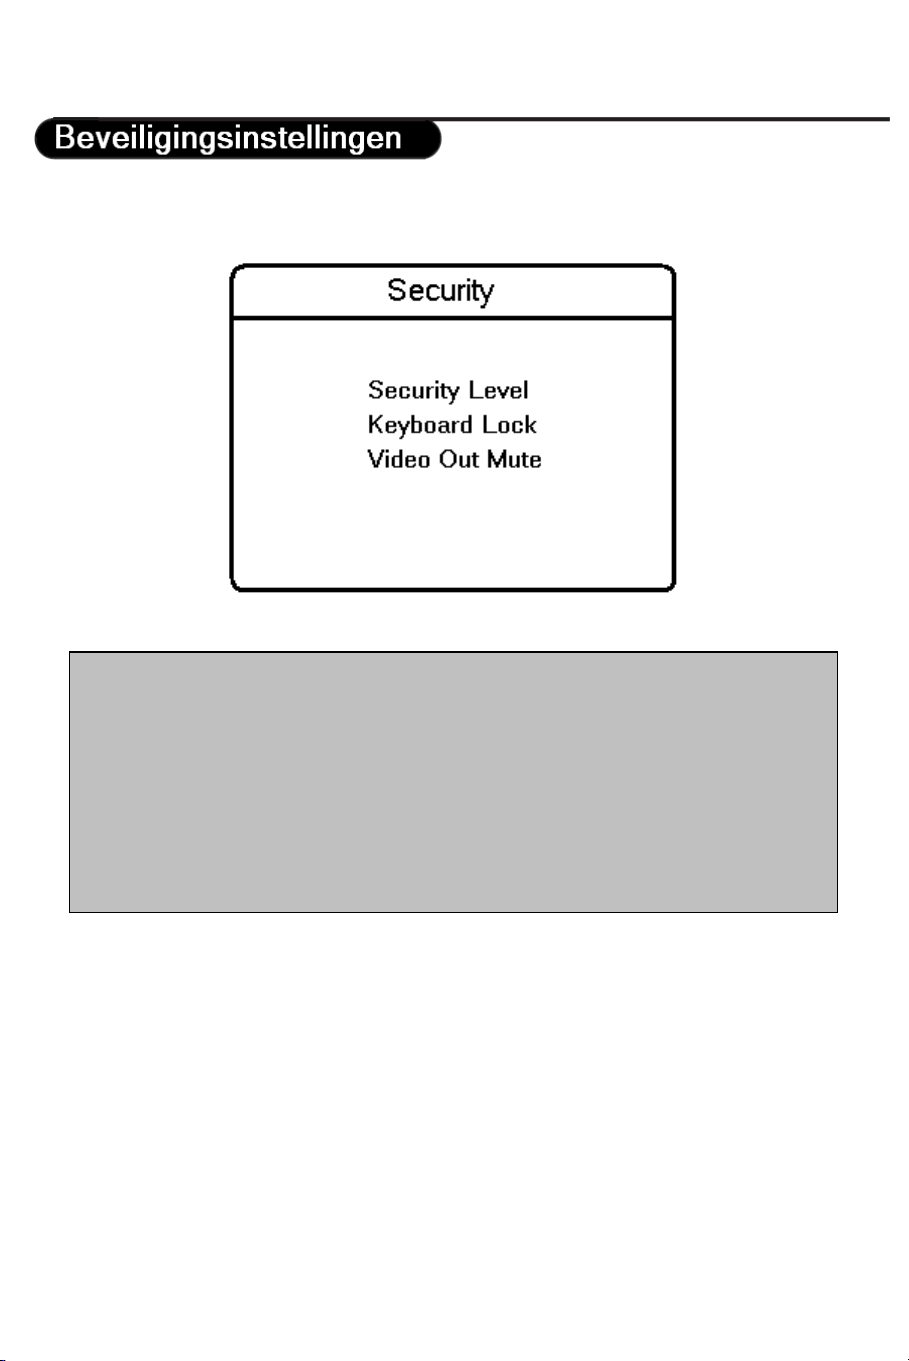
In dit sub menu kunnen de beveiligingsinstelling van de tv ingesteld worden.
• Security Level: deze instelling regelt de toegang tot het installatie menu
o Indien hoog (High) dan is het installatie menu uitsluitend toegankelijk m.b.v. een
installatie afstandsbediening (RC2886 of RG4174)
o Indien normaal (Standard) dan is het installatie menu ook toegankelijk met een
speciale code
• Keyboard Lock: met deze funktie kunnen de bedieningstoetsen op het tv toestel
uitgeschakeld worden. N.B. de aan/uitschakelaar blijft functioneren onafhankelijk van de
instelling deze funktie.
• Video Out Mute: Deze optie maakt het mogelijk het video uitgangssignaal te blokkeren
om ongeoorloofd kopieren te voorkomen.
- 74 -
Page 75

g
In dit sub menu kunnen diverse controlle funkties van en over de tv ingesteld worden.
• ESP: Energy Saving Programmability Mode (ESP) schakelt de tv automatisch uit na de
ingestelde tijdsduur (in uren). De waarde kan varieren van 01 tot 99 uur. Kies 00 om EPS
uit te schakelen
• Audio/Video Mute: bepaalt of audio en video onderdrukt worden indien er geen signal
wordt ontvanen
• Step Tuning: Indien geactiveerd (YES) dan schakelt de tv onmiddelijk na ontvangst van
een numerieke toets naar het bewuste kanaal. Indien niet geactiveerd (NO) dan wacht de
tv op een eventueel 2e nummer.
• Auto Scart: (de)activeert het automatisch omschakelen naar de Scart ingang
• Always RGB: (de)activeert de aanwezigheid van permanente RGB signalen
• Min Volume: minimale geluidsniveau van de tv
• Max Volume: maximale geluidsniveau van de tv
• Audio Out Volume: het geluidsniveau van de externe luidspreker aansluiting (niet aanwezi
op alle tv modellen)
- 75 -
Page 76
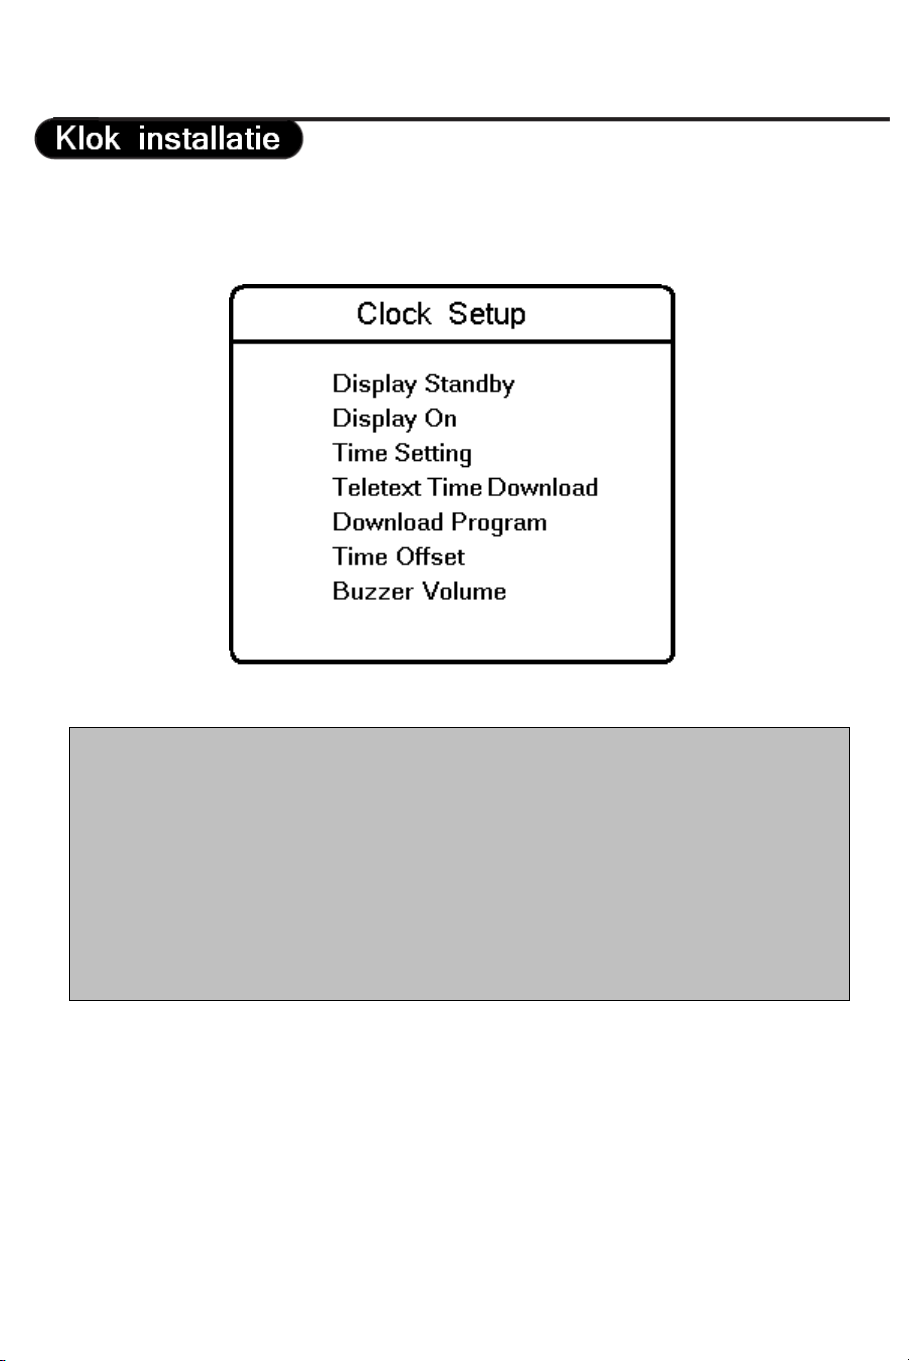
Het klok installatie menu bevat de volgende instellingen (uitsluitend voor modellen met klok):
• Display Standby: helderheidsniveau van de klok tijdens standby
• Display On: helderheidsniveau van de klok terwijl de tv aan is
• Time Setting: tijdsinstelling
• Teletext Time Download: (de)activeert de automatisch tijdssynchronisatie met de teletekst
klok van een willekeurige zender
• Download Program: zender met teletekstsignaal waarmee de klok automatisch
synchroniseerd
• Time Offset: eventueel positief of negatief tijdsverschil tussen de teletekst tijd en de
weergegeven tijd op de klok
• Buzzer Volume: volume niveau van het alarm
- 76 -
Page 77

V
V
A
V
v
i
A
v
v
V
V
–
V
T
V
A
larm Aan (alleen tvs met klok)
A
v
ctiveert het wekalarm. “Wek alarm” icoon
erschijnt in het klok scherm na ingave van
een geldige wek tijd (0:00 tot 23:59)
Standby
Om naar standby te
schakelen
+ Pay TV -
olgend / vorige Pay tv
zender
larm Uit (alleen tvs met klok)
Deactiveert the wek-alarm. Het
“Wek alarm” icoon verdwijnt uit
het klok scherm
Menu
Om menus op te roepen.
+ Vol -
olume regeling.
Mute
Geluidsonderbreking
+ Info -
olgend / vorige Info
zender
+ Radio -
olgend / vorige
Radio zender
Smart Toetsen
oor keuze van
oorgeprogrammeerde
beeld- of geluids-
nstellingen
Sleep
ctivateert de tijdklok voor
automatisch uitschakelen.
Meerdere malen indrukken
erhoogt de tijd in stappen
an een kwartier.
+ TV
olgende / vorige zender
0/9 Numerieke toetsen
oor tv-zender selektie.
eletekst
Breedbeeld
formaat
- 77 -
Page 78

Teletekst is een informatie systeem dat wordt uitgezonden op bepaalde zenders.
Druk op :
om teletekst in of uit te schakelen
In Teletekst mode, druk op:
Ga naar een (3-cijferig) pagina
nummer
Ga naar vorige / volgende pagina
Ga naar vorige / volgende pagina
Directe toegang tot gekleurde
pagina nummers aangegeven op de
onderzijde van de pagina
- 78 -
Page 79

W
De beelden die u ontvangt kunnen in het 16:9 (breedbeeld) of 4:3 (traditioneel beeld) formaat worden
uitgezonden. Soms hebben 4:3 beelden een zwarte balk boven en onder in het beeld letterbox
uitzendingen). Met deze toets kunt u de zwarte balken laten verdwijnen en de (letterbox) uitzending
beeldvullend weergeven.
Het gebruik van verschillende beeldformaten
Gebruik de cursortoetsen links/rechts om een ander beeldformaat te kiezen: 4:3, Zoom 14:9, Zoom
16:9, Ondertitel Zoom, Superzoom, Breedbeeld en Voll. scherm.
4:3
Het beeld wordt in het 4:3 formaat weergegeven, met brede zwarte stroken
links en rechts van het beeld.
Zoom 14:9
Het beeld wordt naar het 14:9 formaat vergroot, met dunne zwarte stroken
links en rechts van het beeld.
Zoom 16:9
Het beeld wordt naar het 16:9 formaat vergroot. Dit formaat is
geschikt voor letterbox-uitzendingen (met zwarte balken boven en onder in
het beeld).
Subtitle Zoom
In dit formaat worden 4:3 beelden horizontaal en verticaal vergroot zodat het
beeldvullend wordt weergegeven. Eventuele ondertitels blijven zichtbaar.
Super Wide
Met dit formaat worden 4:3 beelden beeldvullend weergegeven door het 4:3
beeld horizontaal te vergroten.
idescreen
In dit formaat wordt het beeld bij een 16:9 uitzending beeldvullend in de
juiste verhouding weergegeven.
Fullscreen
In dit formaat wordt het beeld op een volledig scherm weergegeven.
- 79 -
Page 80

A
uto Format
Het televisietoestel is voorzien van een automatische beeldformaatselectie.
Hierdoor wordt het door sommige zenders specifiek uitgezonden signaal
gedecodeerd en automatisch het juiste beeldformaat geselecteerd. U kunt
Houd de toets ingedrukt voor circa 5 seconden. De volgende tekst verschijnt::
het beeldformaat altijd handmatig wijzigen.
De batterijen dienen vervangen te worden indien het woord “LOW” verschijnt in plaats van “OK”
De basis functies van de tv kunnen ook bedient worden met de bedieningstoetsen on de boven- of
zijkant van het toestel.
Druk:
• De – Vol + toets om het volume aan te passen;
• De – P/CH+ toets om een tv kanaal of bron te selecteren
- 80 -
Page 81

In het installatie menu hebben de toetsen de volgende functies:
• De – Vol + toets en de – P/CH+ toets voor navigatie in de aangegeven richting
• De MENU/OK toets om het menu te verlaten
- 81 -
Page 82

Deze paragraaf beschrijft de aansluitmogelijkheden voor de diverse televisie modellen.
15” LCD TVs
Connectors op de 15” LCD TV
1. TV en Radio antenna aansluiting
2. EXT1 aansluiting
3. VGA (computer) aansluiting
4. Hoofdtelefoon, Audio-In, Video-In, S-Video, en PC Audio-In (zijkant)
5. 12V-In gelijkstroom voedingsaansluiting
6. Data 2 (RJ48) connector – voor interactieve applicaties
7. Data 1 (RJ12) connector – voor interactieve applicaties
20” LCD TVs
Connectors op de 20” LCD TV
1. TV en Radio antenna aansluiting
2. EXT1 aansluiting
3. Hoofdtelefoon, Audio-In, Video-In en S-Video (zijkant)
4. Data 2 (RJ48) connector – voor interactieve applicaties
5. Data 1 (RJ12) connector – voor interactieve applicaties
23” & 26” LCD TVs
Connectors op de 23” en 26” LCD TV
1. TV en Radio aansluiting
2. EXT1 en EXT2 aansluiting
3. Audio uitgang voor aansluiting op versterker
4. VGA, DVI en audio ingang voor aansluiting van een computer
5. Externe extra luidspreker
6. Data 2 (RJ48) connector – voor interactieve applicaties
7. Data 1 (RJ12) connector – voor interactieve applicaties
- 82 -
Page 83

30” LCD TVs
Connectors op de 30” LCD TV
1. Hoofdtelefoon, Audio-In, Video-In en S-Video (onderzijde)
2. Data 1 (RJ12) connector – voor interactieve applicaties
3. Data 2 (RJ48) connector – voor interactieve applicaties
4. 12V-In gelijkstroom voedingsaansluiting
5. VGA en audio ingang voor computer
6. Audio uitgang voor versterker
7. EXT1 en EXT2 connectoren
8. TV antenna aansluiting
42” TVs
Connectors op de 42” TV
1. Data 1 (RJ12) connector – voor interactieve applicaties
2. Data 2 (RJ48) connector – voor interactieve applicaties
3. 12V-In gelijkstroom voedingsaansluiting
4. VGA en audio ingang voor computer
5. Audio uitgang voor versterker
6. EXT1 en EXT2 connectoren
7. TV antenna aansluiting
- 83 -
Page 84

- 84 -
Page 85

Cura dello schermo
A
A
Non toccare, premere, strofinare o colpire lo schermo con oggetto solidi, perché possono
graffiarlo o danneggiarlo permanentemente. Non strofinare con panni per rimuovere la
polvere, trattati con sostanze chimiche. Non toccare la superficie con le mani nude o con
panni unti ( alcuni prodotti cosmetici possono danneggiare lo schermo). Scollegare il
televisore dalla rete elettrica prima di pulire lo schermo. Quando la superficie risulta
polverosa, strofinare delicatamente con cotone assorbente o altro materiale soffice come
pelle di camoscio inumidita. Non usare acetone, toluene o alcool perché possono causare
alterazioni chimiche.
Non utilizzare detergenti liquidi o spray. Rimuovere immediatamente eventuali tracce di
acqua o saliva. La permanenza di tracce d’acqua o saliva sulla superficie dello schermo può
causare deformazioni e indebolimento dei colori.
Problematiche ambientali
vvertenza relativa alle immagine fisse sullo schermo TV (schermo al plasma da 42”)
La generazione di immagini residue permanenti sullo schermo a causa della visualizzazione
di immagini fisse per lunghi periodi di tempo è una caratteristica tipica degli schermi TV al
plasma. Il normale utilizzo del televisore prevede la visualizzazione di immagini in costante
movimento o cambiamento su tutta la superficie dello schermo.
vvertenza relativa alla visualizzazione in modalità VGA/DVI.
Durante il funzionamento del prodotto in modalità VGA/DVI, possono comparire
alcune linee diagonali in particolari condizioni di interferenza ambientale. Ciò non influisce
sulle normali prestazioni del segnale del computer per la visualizzazione in modalità
VGA/DVI.
• Il vostro televisore contiene materiali che possono essere riciclati e riutilizzati da aziende
specializzate. Consultare le normative locali per lo smaltimento del vostro vecchio
televisore. Porre particolare attenzione nello smaltimento delle batterie scariche.
• Il vostro televisore consuma una certa quantità di energia quando si trova in modalità di
preaccensione (stand-by). Il consumo di energia contribuisce ad aumentare l’inquinamento
idrico ed atmosferico. Si consiglia di spegnere il proprio televisore durante la notte invece
di lasciarlo in preaccensione.
Istruzioni per l’installazione a parete / su piedistallo
A seconda del tipo di televisore acquistato possono essere forniti un supporto per l'installazione a
parete e/o un piedistallo. Per il montaggio del piedistallo e/o del supporto per installazione a parete
forniti in dotazione, fare riferimento alle relative istruzioni separate. Verificare che il supporto per
installazione a parete sia fissato saldamente in conformità agli standard di sicurezza.
- 85 -
Page 86

p
Verificare che vi sia una sufficiente circolazione d’aria attraverso le feritoie di
ventilazione.
Per prevenire eventuali condizioni di pericolo,
evitare di porre sorgenti di fiamme libere, come
ad esempio candele accese, in prossimità del
televisore. Evitare l’esposizione al calore, alla
luce solare diretta, alla pioggia o all’umidità.
L'apparecchio non deve essere esposto a
gocciolamento o getti d’acqua e non dovrà
esservi collocato sopra alcun oggetto contenente
liquidi. Inserire la spina dell’antenna esterna
saldamente nella presa d’antenna posta nella
Collegamento alla rete di alimentazione elettrica
Inserire la spina di alimentazione nella presa della rete elettrica a parete ed accendere l’apparecchio.
Fare riferimento alla targhetta posta sul retro del televisore per la corretta tensione di funzionamento.
Installazione del telecomando
• Rimuovere il coperchio sul retro del
telecomando.
• Inserire batterie di tipo e dimensioni corrette
nell'apposito scomparto verificando che siano
correttamente orientate.
• Le batterie possono essere bloccate in
posizione stringendo
sul co
erchio dello scomparto batterie.
la vite nel relativo foro
Accensione del televisore:
Premere l’interruttore di accensione sul televisore. Si illuminerà una spia sul frontale del televisore
e lo schermo si accenderà. Se il televisore si trova in modalità di preaccensione (spia luminosa rossa),
premere i pulsanti - TV+ o il pulsante di accensione
sul telecomando.
Accesso al menu Regolazioni
Quando l’apparecchio si trova in modalità di sicurezza elevata (High Security Mode), il menu
Regolazioni
(Institutional di tipo RG4172BK oppure RC2573).
Quando l’apparecchio si trova in modalità di sicurezza standard (Standard Security Mode), il menu
Regolazioni è accessibile con un telecomando specifico di configurazione (Institutional) oppure con
un telecomando ospite (come il tipo RC2886) utilizzando un codice d’accesso autorizzato.
è accessibile soltanto utilizzando un telecomando specifico di configurazione
- 86 -
Page 87

•
RG4172BK RC 2573
Navigazione
Le varie voci del menu correntemente visualizzato possono essere selezionate con i tasti cursore
“su” e “giù”. Dalle voci di menu contrassegnate con un simbolo “>” è possibile accedere ai relativi
sottomenu premendo il tasto cursore “destra”.
Per uscire da un qualsiasi menu
premere il pulsante “Menu”.
• Selezionare “SÌ” per
attivare/abilitare una
impostazione, “NO” per
disattivarla/disabilitarla.
• Ι pulsanti TV su/giù, INFO
su/giù, PAY-TV su/giù e
RADIO su/giù sono attivi in
modalità menu ed il televisore
reagirà come in modalità TV.
- 87 -
Page 88

g
• Lingua: permette di selezionare la lingua del menu d’installazione. Le varie opzioni sono
"ENGLISH", "DEUTSCH", "FRANCAIS" e "ITALIANO".
Comunicazione: il menu Comunicazione è necessario per abilitare particolari applicazioni
•
interattive. Per ulteriori informazioni, consultare le relative note applicative. Per applicazioni
isolate selezionare “OFF”.
N. / Tipo Programma: questo sottomenu permette di impostare il numero di programmi
•
televisivi, PAY-TV, Radio e Informazioni. Il numero massimo totale di programmi è 125.
Installazione Programma: Nel sottomenu Installazione Programma, è possibile impostare
•
vari parametri dei programmi.
Configurazione: Nel menu Configurazione, è possibile configurare numerosi parametri e
•
funzionalità del televisore.
• Installazione orologio: Da questa voce di menu è possibile accedere al menu Installazione
Orolo
io.
- 88 -
Page 89

(
Nel sottomenu Installazione Programma, è possibile impostare vari parametri dei programmi. Con
tale menu aperto, tutte le protezioni risultano disabilitate.
• N. / Tipo Programma: il tipo di programma può essere selezionato con i tasti cursore
sinistra/destra. Tali pulsanti permetteranno di alternare fra i vari tipi disponibili: "TV", "INFO",
"PAYTV" e "RADIO".
o Se il numero di programma per un particolare tipo è 0, il tipo corrispondente non verrà
• Ingresso: il menu "Ingresso" permette di selezionare la sorgente d’ingresso desiderata da
• Sistema: WEST EU (PAL/SECAM-BG), EAST EU (PAL/SECAM-DK), UK (PAL-I),
visualizzato. Per visualizzare il numero di programma per uno dei tipi suddetti inserire
sempre due cifre, ad esempio digitare “01” per TV1 oppure digitare “1” e premere i
pulsanti su/giù.
assegnare ad un programma. I possibili valori sono Sintonizzatore, AV1, AV2, AV2YC,
RADIO, VGA e DVI. Alcune sorgenti d’ingresso possono non essere disponibili su alcuni tipi
di apparecchi (vedere la seguente tabella).
FRANCE
SECAM-L/L') e AUTO.
Modello /
Tipo di ingresso
15HF8442 Scart1 Video in S-video in - - VGA -
20HF7462 Scart1 Video in S-video in - - - -
23/26HF9472 Scart1 Scart2 CVBS Scart2 YC - - VGA DVI
30HF9442 Scart1 Scart2 CVBS Scart2 YC Video in S-video in VGA -
42HF9442 Scart1 Scart2 CVBS Scart2 YC - - VGA -
Nota: Utilizzando un dispositivo di tipo SmartCard XPress Box, questo viene normalmente collegato alla presa Scart1.
AV1 AV2 AV2YC AV3 AV3YC VGA DVI
- 89 -
Page 90
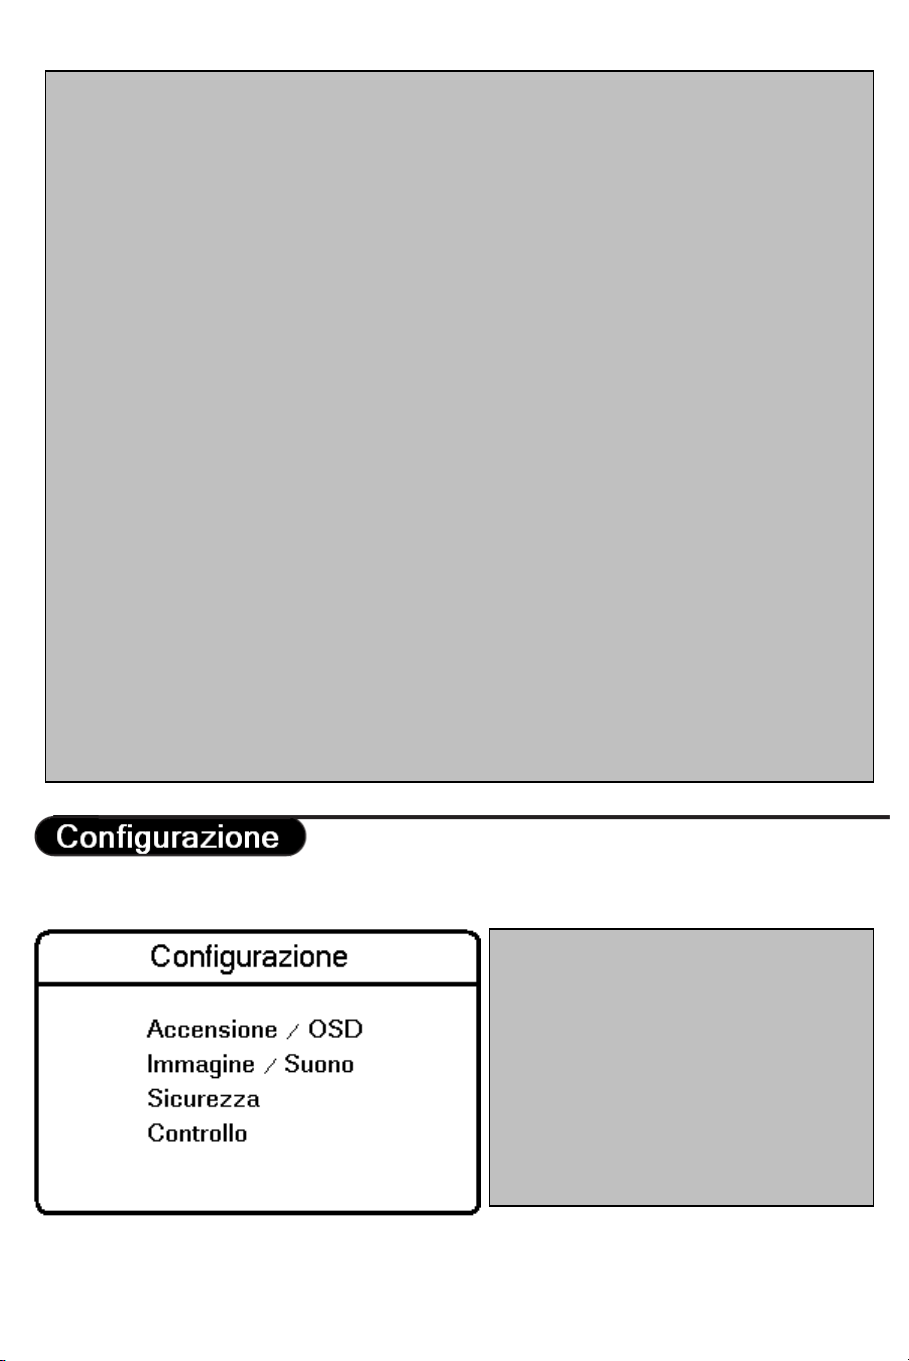
• Frequenza: è possibile inserire le cifre corrispondenti ad una frequenza in MHz. Il tasto cursore
p
•
“destra” avvia una sequenza di ricerca automatica. Durante l’inserimento dei valori di frequenza, le
cifre non ancora inserite verranno visualizzate come "-". Inserire “0” per i valori di frequenza
inferiori a 100 MHz.
Nome Progr.: questa voce di menu permette di associare una etichetta/nome a ciascun
•
programma.
o Premendo i pulsanti sinistra/destra è possibile entrare ed uscire nel campo etichetta.
o Premendo i pulsanti su/giù è possibile inserire dei caratteri alfanumerici.
o Premendo M (pulsante Menu) è possibile uscire dal sottomenu Nome Programma.
• Memorizza: permette di memorizzare le informazioni del programma corrente dopo la pressione
•
•
•
•
dei pulsanti sinistra/destra. Premere il pulsante Menu per uscire senza memorizzare.
Sintonia fine: utilizzando i pulsanti di comando “controllo sinistra/destra" viene attivata la
funzione di sintonia fine.
Muto: questa voce di menu permette di abilitare/disabilitare immagine e suono per un particolare
canale.
o
NESSUNO: immagini e suono sono normalmente abilitati
VIDEO: la visualizzazione di immagini è disabilitata per questo canale (es.: canale radio)
o
AUDIO: la riproduzione di suoni è disabilitata per questo canale (es.: canale informazioni)
o
Lingua Televideo: questa voce di menu permette di selezionare il set di caratteri desiderato per il
Televideo da utilizzare per il canale selezionato. Con i tasti cursore sinistra/destra è possibile
selezionare una lettera corrispondente ad un particolare set di caratteri per la lingua.
o
“WEST EU”: opzione per set Pan Europeo (Latino) / Ovest
“EAST EU”: opzione per set Pan Europeo (Latino) / Ovest
o
“GREEK”: Greco
o
o
“CYRILLIC”: Cirillico
Protezione: questa voce di menu permette di indicare se il programma selezionato ha o meno una
protezione. Con i tasti cursore sinistra/destra è possibile attivare/disattivare la protezione
alternando tra le o
zioni "SÌ" e "NO".
Nel menu Configurazione, è possibile configurare numerosi parametri e funzionalità del televisore.
Accensione /OSD: In questo sottomenu
è possibile selezionare la modalità di
funzionamento del televisore dopo
l’accensione e la modalità di
funzionamento del menu di
Visualizzazione su schermo (On Screen
Display).
• Immagine/Suono: Mediante questo
sottomenu è possibile impostare sul
televisore le modalità di visualizzazione
immagini e di riproduzione del suono.
- 90 -
Page 91

• Sicurezza: Mediante questo sottomenu è possibile configurare vari parametri relativi alla
•
sicurezza del televisore.
• Controllo: Mediante questo sottomenu è possibile configurare varie impostazioni di controllo del
televisore.
In questo sottomenu è possibile selezionare la modalità di funzionamento del televisore dopo
l’accensione e la modalità di funzionamento del menu di Visualizzazione su schermo (On Screen
Display).
Messaggio di Benvenuto: premere i
tasti cursore sinistra/destra per
visualizzare il menu di inserimento
del messaggio di benvenuto:
o Messaggio di Benvenuto
o Linea 1
o Linea 2
o Cancella
Con le frecce su/giù è possibile
selezionare i caratteri del messaggio.
• Programma Accensione: questa
voce imposta il programma TV
all’accensione.
• Volume all’accensione: questa voce imposta il volume del televisore all’accensione. Utilizzare i
•
•
tasti cursore sinistra/destra per la regolazione.
Switch On Pic Fmt: questa voce imposta il formato dell’immagine TV all’accensione. Utilizzare
i tasti cursore sinistra/destra per la regolazione.
Accensione: la funzione del menu Accensione definisce il comportamento del televisore al
collegamento del circuito di alimentazione CA. Gli stati validi sono "FISSO ON", "ULTIMO
STATO" e “PREACCENSIONE ”
o Quando è selezionato lo stato “FISSO ON”, è possibile spegnere il televisore solo
tramite il pulsante di accensione principale o tramite un telecomando di configurazione
oppure tramite la funzione ESP ( Energy Saving Programmability = Programmazione
per il risparmio energetico con controllo del tempo massimo di visualizzazione
continua consentito dal sistema di controllo).
o Quando è selezionato lo stato “ULTIMO STATO” il televisore passa allo stato
precedente, acceso (ON) oppure in preaccensione.
o Quando è selezionato lo stato “PREACCENSIONE”, il televisore si accende sempre
in modalità preaccensione.
• Indicatore di Volume : per visualizzare l’indicatore di volume durante la regolazione,
selezionare "SÌ". Per nasconderlo, selezionare “NO”.
- 91 -
Page 92

• Display Programma: le opzioni per Display Programma sono: Numero, Nom Progr.,
T
Nessuno.
Digit Timeout: imposta il time-out per inserire la seconda cifra dei programmi TV con numero
•
superiore a 10.
Mediante questo sottomenu è possibile impostare sul televisore le modalità di visualizzazione
immagini e di riproduzione del suono.
utto,
• Luminosità: con questa opzione si modifica la luminosità dell’immagine.
Colore: con questa opzione si modifica l’intensità del colore.
•
Contrasto: con questa opzione si modifica la differenza fra toni chiari e scuri.
•
Nitidezza: con questa opzione si modifica la definizione dell’immagine.
•
Tinta: con questa opzione si regola l’immagine per ottenere toni di pelle naturali.
•
Active Control: la modalità Active Control ottimizza la qualità dell’immagine in base alla
•
qualità della ricezione (questa opzione di menu è disponibile esclusivamente su alcuni modelli di televisori
LCD).
Toni alti/bassi: con questa opzione si regola il livello degli effetti di toni alti e bassi
•
sull’uscita audio del televisore.
Bilanciamento: con questa opzione si bilancia l’audio fra gli altoparlanti di destra e di
•
sinistra.
• AVL (Automatic Volume Leveller): questa opzione viene utilizzata per limitare l’aumento
dell’audio, in particolare per cambiare programma o durante le pubblicità.
- 92 -
Page 93

Mediante questo sottomenu è possibile configurare vari parametri relativi alla sicurezza del televisore.
• Sicurezza : la funzione di menu “SICUREZZA” consente all’utente di selezionare uno dei due
stati: “ELEVATA” o “STANDARD”. L’impostazione predefinita è “STANDARD”.
o
Quando l’apparecchio si trova in modalità di sicurezza Elevata, il menu Regolazioni è
accessibile soltanto utilizzando un telecomando specifico di configurazione
(Institutional Remote Control).
o Quando l’apparecchio si trova in modalità di sicurezza Standard, il menu
Regolazioni è accessibile con un telecomando specifico di configurazione (Institutional
Remote Control) oppure con un telecomando ospite utilizzando un codice d’accesso
autorizzato.
• Blocco tastiera: la funzione di menu Blocco tastiera disabilita la tastiera del televisore per le
regolazioni di programma e volume.
• Video Out Muto: questa opzione consente di disabilitare le uscite video del televisore, per
evitare copie non autorizzate dei video.
- 93 -
Page 94

Mediante questo sottomenu è possibile configurare varie impostazioni di controllo del televisore.
• ESP: la modalità ESP (Energy Saving Programmability) = Programmazione per il
risparmio energetico) con controllo del tempo massimo di visualizzazione continua
consentito dal sistema di controllo. La funzione di menu ESP viene visualizzata come
"ESP" e i valori validi sono 00 - 99 (in ore). 00 significa OFF.
Audio/Video Muto: la funzione di menu Audio/Video Muto stabilisce se il video deve
•
essere oscurato e l’audio disabilitato qualora il canale correntemente selezionato sia privo
di segnale.
• Sintonizzazione per passaggi: selezionando SÌ, i programmi TV (da 1 a 9) vengono
sintonizzati immediatamente premendo un tasto. Selezionando NO, la sintonizzazione
viene eseguita solo quando la lineetta scompare.
Auto Scart: abilita / disabilita il passaggio automatico alla sorgente esterna SCART.
•
Sempre RGB: questa opzione consente di abilitare o disabilitare la modalità RGB sui
•
connettori AV.
• Volume Min: questa opzione imposta il limite del volume minimo consentito per il
televisore. Utilizzare i tasti cursore sinistra/destra per la regolazione.
Volume Max: questa opzione imposta il limite del volume massimo consentito per il
•
televisore. Utilizzare i tasti cursore sinistra/destra per la regolazione.
Volume Audio Out: imposta il volume dell'uscita audio esterna (ad es. per l’altoparlante
•
nella stanza da bagno). Questa regolazione di volume è indipendente dal livello di
volume dell'altoparlante principale. (questa opzione di menu è disponibile esclusivamente su alcuni
modelli di televisori LCD).
- 94 -
Page 95

Da questa voce di menu è possibile accedere al menu Installazione Orologio.
• Display Standby: tramite questa voce di menu è possibile impostare l'intensità del display
dell'orologio sul televisore in modalità preaccensione.
• Display On: tramite questa voce di menu è possibile impostare l'intensità dell'orologio sul
televisore acceso (modalità ON).
Regolazione Orario: tramite questa voce di menu è possibile impostare l’orario
•
dell’orologio.
Scarico Ora Da Televideo: tramite questa voce di menu è possibile attivare o disattivare
•
la funzione di scarico automatico dell’orario tramite il televideo.
Scarico Programma: tramite questa voce di menu è possibile selezionare il canale da cui
•
impostare l’orario corretto tramite il televideo.
• Correzione Orario: tramite questa voce di menu è possibile selezionare la correzione per
l’orario ricevuto tramite il canale del televideo in modo da ottenere l’ora locale.
• Volume Suoneria: questa voce imposta il volume della suoneria del televisore. Utilizzare i
tasti cursore sinistra/destra per la regolazione.
- 95 -
Page 96

A
A
v
T
A
v
p
larm On (per apparecchi con la visualizzazione
dell’orologio)
ttiva l’allarme di sveglia. Dopo aver inserito un orario
alido (da 0:00 a 23:59), verrà visualizzata
l’icona dell’allarme di sveglia sul
display dell'orologio.
+ Pay TV -
Consente di spostarsi in
alto o in basso sui canali
della Pay TV.
Alarm Off (per apparecchi
con la visualizzazione dell’
orologio)
Disattiva l’allarme di sveglia.
L’icona di allarme di sveglia sul
display dell’orologio scompare.
Menu
Consente di richiamare o
uscire dai menu
+ Vol -
Consente di regolare il
olume.
Standby
Premere questo
Standby
pulsante per
ress to switch
P
spegnere il
e TV off.
th
televisore.
+ Info -
Consente di spostarsi
in alto o in basso sui
canali di informazioni.
+ Radio -
Consente di spostarsi
in alto o in basso sui
canali radio.
asti Smart:
Consentono la
selezione delle
impostazioni
predefinite per
immagini e suono.
Sleep
ttiva il timer sleep. Premere
ripetutamente per aumentare
il contatore ad intervalli di 15
minuti.
Muto
Disabilita l’audio o
ristina.
lo ri
Tasti numerici 0/9
Per selezionare un canale TV.
Per un numero a due cifre,
inserire la seconda cifra prima
che compaia la lineetta.
Televideo
- 96 -
+ TV –Selezione canali
Consente di spostarsi in alto o
in basso sui canali TV.
Formati 16:9
Page 97

A
Il televideo è un sistema informativo diffuso da alcuni canali consultabile come un giornale. Inoltre,
offre l’accesso ai sottotitoli per spettatori con problemi di udito o per coloro che non conoscono la
lingua in cui è trasmesso il programma (reti via cavo, canali via satellite, ecc.).
Press:
Per abilitare o disabilitare il televideo
In modalità televideo, premere:
Per passare ad un numero di pagina
(a 3 cifre)
Per passare alla pagina
precedente /successiva
Per passare alla pagina
precedente /successiva
ccesso diretto ai numeri di pagina a
colori indicati in basso sullo schermo
- 97 -
Page 98

v
Le immagini ricevute possono essere trasmesse in formato 16:9 (wide screen) o in formato 4:3 (schermo
convenzionale). Talvolta le immagini a 16:9 hanno una banda nera nella parte superiore e inferiore dello
schermo (formato letterbox). Questa funzione consente di ottimizzare l’immagine visualizzata a schermo.
Utilizzo dei vari formati
Utilizzare il pulsante Formati 16:9 del telecomando per selezionare le varie modalità: Auto Format,
4:3, Zoom 14:9, Zoom 16:9, Zoom con sottotitoli, Super wide e Wide screen.
4:3
L’immagine viene riprodotta in formato 4:3 con una banda nera
isualizzata su entrambi i lati dell’immagine.
Zoom 14:9
L’immagine viene ampliata in formato 14:9; rimane una banda nera sottile su
entrambi i lati dell’immagine.
Zoom 16:9
L’immagine viene ampliata in formato 16:9. Si consiglia l’uso di questa
modalità per visualizzare immagini con bande nere sulla parte inferiore e
superiore (formato letterbox).
Zoom con sottotitoli
Questa modalità viene utilizzata per visualizzare immagini 4:3 a tutto schermo,
lasciando visibili i sottotitoli.
Super Wide
Questa modalità viene utilizzata per visualizzare immagini 4:3 a tutto schermo,
ampliando l’immagine lateralmente.
Widescreen
Questa modalità ripristina le proporzioni corrette delle immagini trasmesse
in 16:9 utilizzando la visualizzazione a tutto schermo.
Fullscreen
In questa modalità le immagini vengono visualizzate a tutto schermo.
- 98 -
Page 99

Auto Format
Questo televisore è dotato di impostazione automatica per selezionare il
formato corretto dello schermo, quando i relativi segnali specifici vengono
trasmessi con i programmi.
Premere il pulsante per circa 5 secondi. Compare il seguente messaggio:
Se viene visualizzata la parola “SCARSO” anziché “OK”, le pile sono scariche e devono essere
sostituite.
In caso di perdita o rottura del telecomando, rimane possibile modificare alcune delle impostazioni di
base utilizzando i tasti posti in alto o di lato sul televisore.
Premere:
• il pulsante – Vol + per regolare il volume;
• il pulsante – P/CH+ per selezionare i canali o la sorgente TV.
- 99 -
Page 100

Premere il pulsante MENU/OK per richiamare il menu principale senza il telecomando (questo tasto
non è disponibile su tutti i modelli). Utilizzare:
• il pulsante – Vol + e il pulsante – P/CH+ per selezionare le voci di menu nelle
direzioni indicate;
• il pulsante MENU/OK per chiudere il menu
- 100 -
 Loading...