

Philips 15MF400T/37 Schematic

15” LCD TV Color Monitor Chassis Name: TP 1.1U-EA
Service
Service
Service
15MF400T/37
Horizontal Frequency
31.5-60 kHz
TABLE OF CONTENTS
Description Page Description Page
Important Safety Notice .......................................2 5.4 Key Board ...............................................................24
1.Specification For LCD TV.....................................3 5.5 Audio Board ..............................................................25
1.1 General Specification ........................................3
1.2 Use Of Remote Control ....................................4
1.3 OSD Instructions...............................................5
2. Precaution And Notices ....................................17
2.1 Assembly Precaution ......................................17
2.2 Operating Instruction ......................................17
2.3 Storage Precaution .......................................17
2.4 High Voltage Warning ...................................17
3. D-Sub Pin Description........................................18
3.1 D-Sub Connector.............................................18
3.2 Factory Reset Display Modes ......................19
4.Adjustment .........................................................20
Control knobs and port Functions .........................20
5. Repair Flow Chart. ........................................21
5.1 Main Board ...................................................21
5.2 Tuner Board ................................................23
5.3 Remote Control ...............................................24
ANY PERSON ATTEMPTING TO SERVICE THIS CHASSIS MUST FAMILIARIZE HIMSELF WITH THE CHASSIS AND BE AWARE OF THE
NECESSARY SAFETY PRECAUTIONS TO BE USED WHEN SERVICING ELECTRONIC EQUIPMENT CONTAINING HIGH VOLTAGES.
GB:3122 785 15840
CAUTION: USE A SEPARATE ISOLATION TRANSFOMER FOR THIS UNIT WHEN SERVICING Aug.10 2005
6.White Balance, Luminance Adjustment........................26
7.Exploded View ..............................................................28
8.Mechanical Instructions ................................................29
9.Spare Parts List ............................................................32
10. PCB Layout ...............................................................51
10.1 Main Board ................................................................51
10.2 Power Board .............................................................56
10.3 IR Board ....................................................................56
10.4 Key Board .................................................................57
11.Block Diagram ...............................................................58
11.1 Main Board .................................................................58
11.2 Power Board...............................................................59
12.Schematic Diagram ......................................................60
12.1 Main Board ............................................................... 61
12.2 Power Board ............................................................. 68
12.3 Tuner Board ..............................................................70
12.4 Audio Board ..............................................................72
SAFETY NOTICE

15" LCD-TV Color Monitor
15MF400T/37
Important Safety Notice
Proper service and repair is important to the safe, reliable operation of all Philips Company** Equipment. The service
procedures recommended by Philips and described in this service manual are effective methods of performing service
operations. Some of these service operations require the use of tools specially designed for the purpose. The special
tools should be used when and as recommended.
It is important to note that this manual contains various CAUTIONS and NOTICES which should be carefully read in
order to minimize the risk of personal injury to service personnel. The possibility exists that improper service methods
may damage the equipment. It is also important to understand that these CAUTIONS and NOTICES ARE NOT
EXHAUSTIVE. Philips could not possibly know, evaluate and advise the service trade of all conceivable ways in which
service might be done or of the possible hazardous consequences of each way. Consequently, Philips has not
undertaken any such broad evaluation. Accordingly, a servicer who uses a service procedure or tool which is not
recommended by Philips must first satisfy himself thoroughly that neither his safety nor the safe operation of the
equipment will be jeopardized by the service method selected.
* * Hereafter throughout this manual, Philips Company will be referred to as Philips.
WARNING
Use of substitute replacement parts, which do not have the same, specified safety characteristics may create shock, fire,
or other hazards.
Under no circumstances should the original design be modified or altered without written permission from Philips. Philips
assumes no liability, express or implied, arising out of any unauthorized modification of design.
Servicer assumes all liability.
FOR PRODUCTS CONTAINING LASER:
DANGER-Invisible laser radiation when open. AVOID DIRECT EXPOSURE TO BEAM.
CAUTION-Use of controls or adjustments or performance of procedures other than those specified herein may result in
hazardous radiation exposure.
CAUTION -The use of optical instruments with this product will increase eye hazard.
TO ENSURE THE CONTINUED RELIABILITY OF THIS PRODUCT, USE ONLY ORIGINAL MANUFACTURER'S
REPLACEMENT PARTS, WHICH ARE LISTED WITH THEIR PART NUMBERS IN THE PARTS LIST SECTION OF
THIS SERVICE MANUAL.
Take care during handling the LCD module with backlight unit
-Must mount the module using mounting holes arranged in four corners.
-Do not press on the panel, edge of the frame strongly or electric shock as this will result in damage to the screen.
-Do not scratch or press on the panel with any sharp objects, such as pencil or pen as this may result in damage to the
panel.
-Protect the module from the ESD as it may damage the electronic circuit (C-MOS).
-Make certain that treatment person’s body is grounded through wristband.
-Do not leave the module in high temperature and in areas of high humidity for a long time.
-Avoid contact with water as it may a short circuit within the module.
-If the surface of panel becomes dirty, please wipe it off with a soft material. (Cleaning with a dirty or rough cloth may
damage the panel.)
2
15" LCD-TV Color Monitor
15MF400T/37
1. Specification For LCD TV
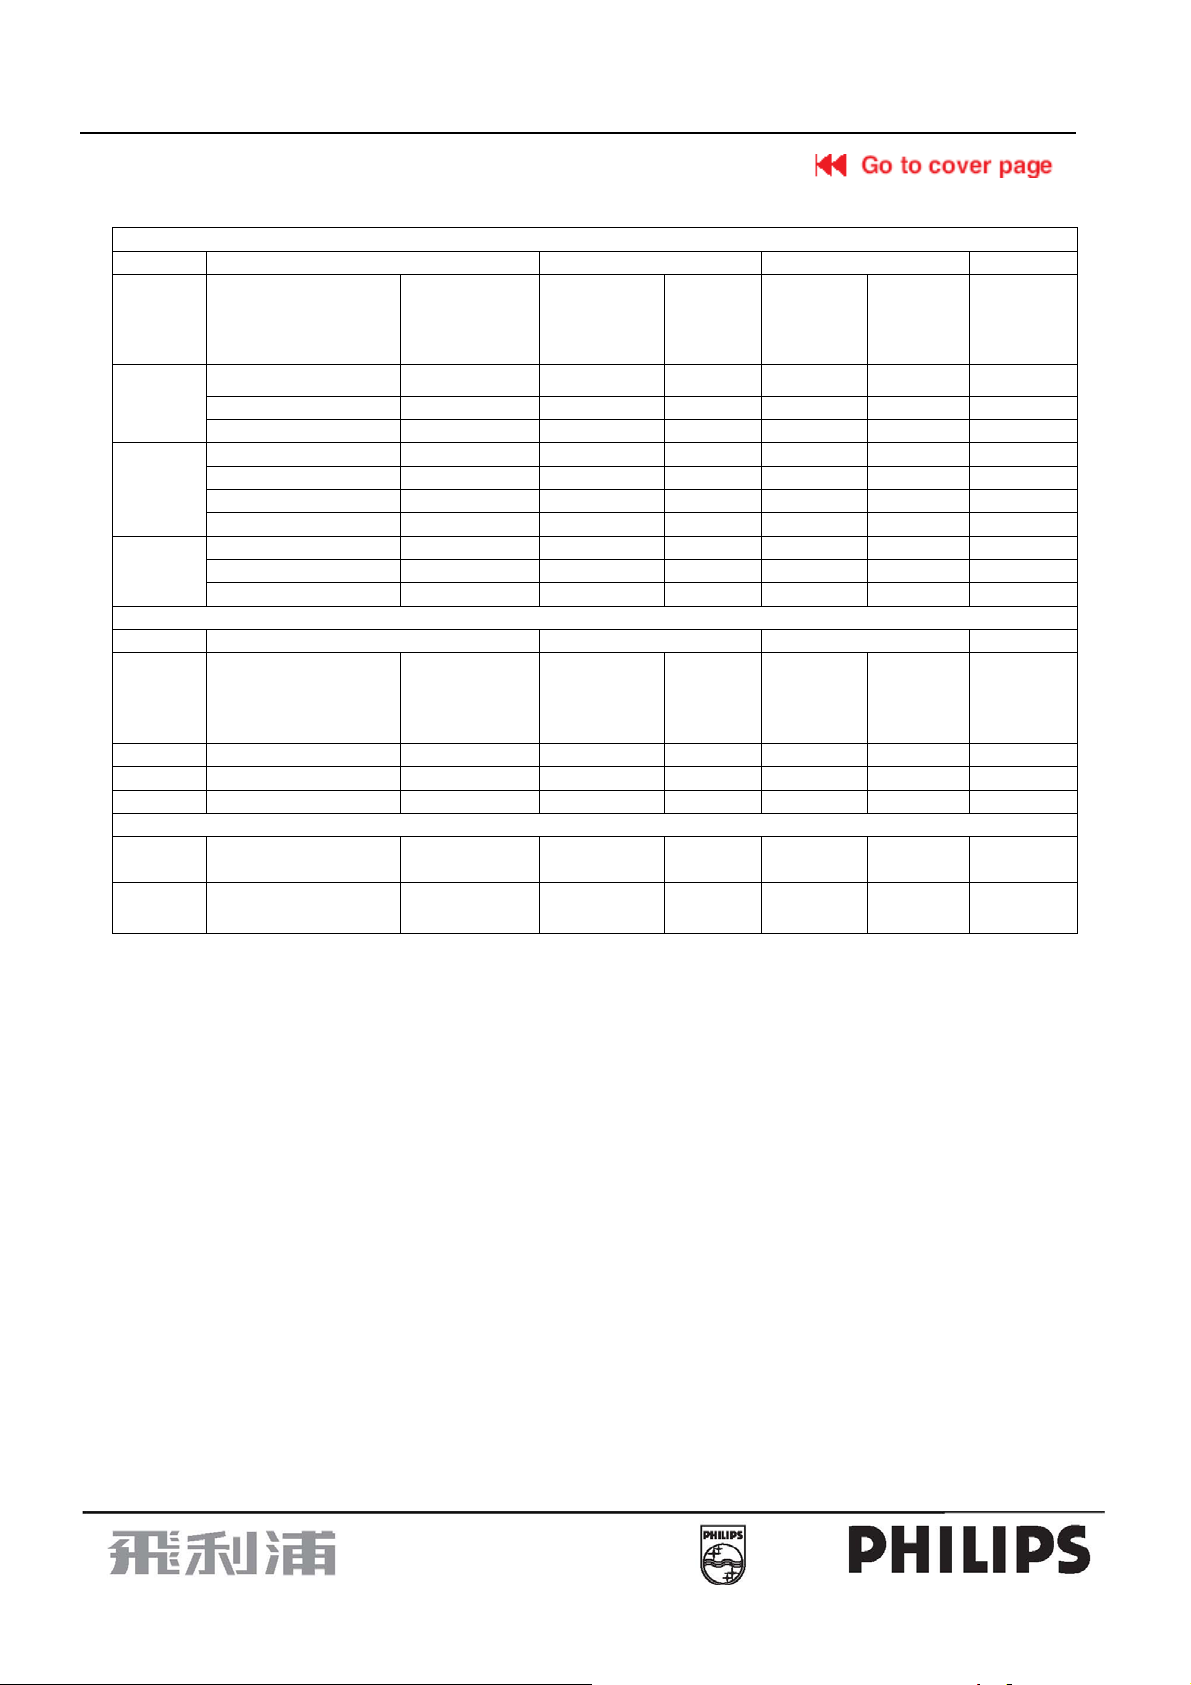
1.1 General Specifications
Item
Screen Size 15"
Aspect Ratio 4:3
Resolution 1024x768
Brightness 250cd/m² (typ.)
LCD Panel
TV Function
Video Input
PC Input
Audio Output
Power
Video Feature
Other Features
Dimension
Weight
Accessory
Contrast Ratio 400:1
Response Time 16ms
Viewing Angle
Display Colors 16.7M
TV Tuner NTSC M
Color System NTSC
Sound System MTS + SAP
Closed-Caption & V-chip Yes
Composite X1
S-Video X1
Closed-Caption & V-chip Yes
Color System NTSC/PAL
Signal Input Analog
Horizontal Frequency (kHz) 31.5~60
Vertical Frequency (Hz) 56~75
Max. Resolution 1024x768 @ 75Hz
Recommended Resolution 1024x768 @ 60Hz
Built-in Speakers 2 x 2W (L/R)
Headphone Output Yes (3.5mmφ)
Power Supply +12V DC Input
Adapter 100-240V AC, 50/60Hz
Power Consumption (Max.)
De-interlacer 2D de-interlacer
Comb Filter Adaptive 4H Y/C Separation
3-2 Pull Down Recovery Yes
Wall Mount VESA 100mm x 100mm
Multi-Function Remote Yes
Sleep Timer Yes
Tilt Angle (front/back) 5°/15°
OSD language English/French (Canadian type)/Spanish
With Stand (W x D x H) 371.6mm x 346 mm x 147.5mm
Without Stand (W x D x H) 371.6mm x 324mm x 47.5mm
Carton (W x D x H)) 434mm x 407mm x 192mm
Net, kg 3.5kg
Loose, including package 5.0kg
Remote controller, Batteriesx2, AC Power adapter, QSG, power cord
User manual<English/French (Canadian type)>
(Including Limited Warranty <English only>)
Specification
Left/right = 60°/60°
Up/down = 40°/60°
Power on〈50W,
Off mode〈2W
3

15" LCD-TV Color Monitor
V
r
15MF400T/37
1.2 Use Of Remote Control
POWER:
Press to turn on/off the TV. The TV is
never completely powered off
unless it is physically unplugged.
CH
Press ∧ or ∨ ( or ) to browse
through the TV channels, which are not
erased. To view a blocked channel, use
the digital buttons to access,the channel
and enter your access code.
VOL
Press + or – to adjust the volume.
PC
Select your input source to PC.
PRE-CH
To display the previously selected T
channel.
DISPLAY
Press this button to Display Channel
number on the right-top corner.
MUTE
Temporarily interrupt the sound o
restore it.
0~9/100 Digit buttons
To select a TV channel.
MENU
Press repeatedly to display main menu
Or display OSD menu.
TV/VIDEO
Select your input source: press
repeatedly to select TV, AV, S-VIDEO
SLEEP
With this key you can set a time period
after which the TV should switch itself to
standby. Press the key repeatedly to
select the number of minutes
number of minutes. The counter runs
from 30,60,90,120 minutes.
V-CHI P
Press this button to setup parental
control.
PIP/POP
Not Supported.
MTS /SAP
Press this key to activate Multi-channel
Television Sound, Stereo or Mono.
CAPTION
Press this button to turn Closed
Caption on. Be sure you have
selected Caption On in the Setup
menu.
SIZE/SWAP
Not Supported.
4

15" LCD-TV Color Monitor
15MF400T/37
1.3 OSD Instructions
OSD Setting
1. Press ’’MENU’’ key to open OSD menu
2. Press > or < key to select “OSD SETUP’’ option
3. Press
∧ or ∨ key to select submenu
OSD Setup
Remote Control
Language
1. Press“MENU’’ key to open OSD menu
2. Press > or < key to select “OSD SETUP’’ option
3. Press
4. Press > or < key to select language, there are three kinds of language to select: English、French、 and Spanish
5. After adjustment, press “MENU” key to exit or press
H_ Position
1. Press“MENU’’ key to open OSD menu
2. Press > or < key to select “OSD SETUP’’ option
3. Press
4. Press > or < key to adjust OSD horizontal position
5. After adjustment, press “MENU” key to exit or press
V_ Position
1. Press“MENU’’ key to open OSD menu
2. Press > or < key to select “OSD SETUP’’ option
3. Press
4. Press > or < key to adjust OSD vertical position
5. After adjustment, press “MENU” key to exit or press
Time-out
1. Press“MENU’’ key to open OSD menu
2. Press > or < key to select “OSD SETUP’’ option
3. Press
4. Press > or < key to adjust OSD display time
5. After adjustment, press “MENU” key to exit or press
∧ or ∨ key to select “Language” option
∧ or ∨ key to select “H Position” option
∧ or ∨ key to select “V Position” option
∧ or ∨ key to select “Time out ” option
∧ or ∨ key to adjust other options
∧ or ∨ key to adjust other options
∧ or ∨ key to adjust other options
∧ or ∨ key to adjust other options
5
15" LCD-TV Color Monitor
15MF400T/37
Background
1. Press ’’MENU’’ key to open OSD menu
2. Press > or < key to select “OSD SETUP’’ option
3. Press
4. Press > or < key to adjust OSD background
5. After adjustment, press “MENU” key to exit or press
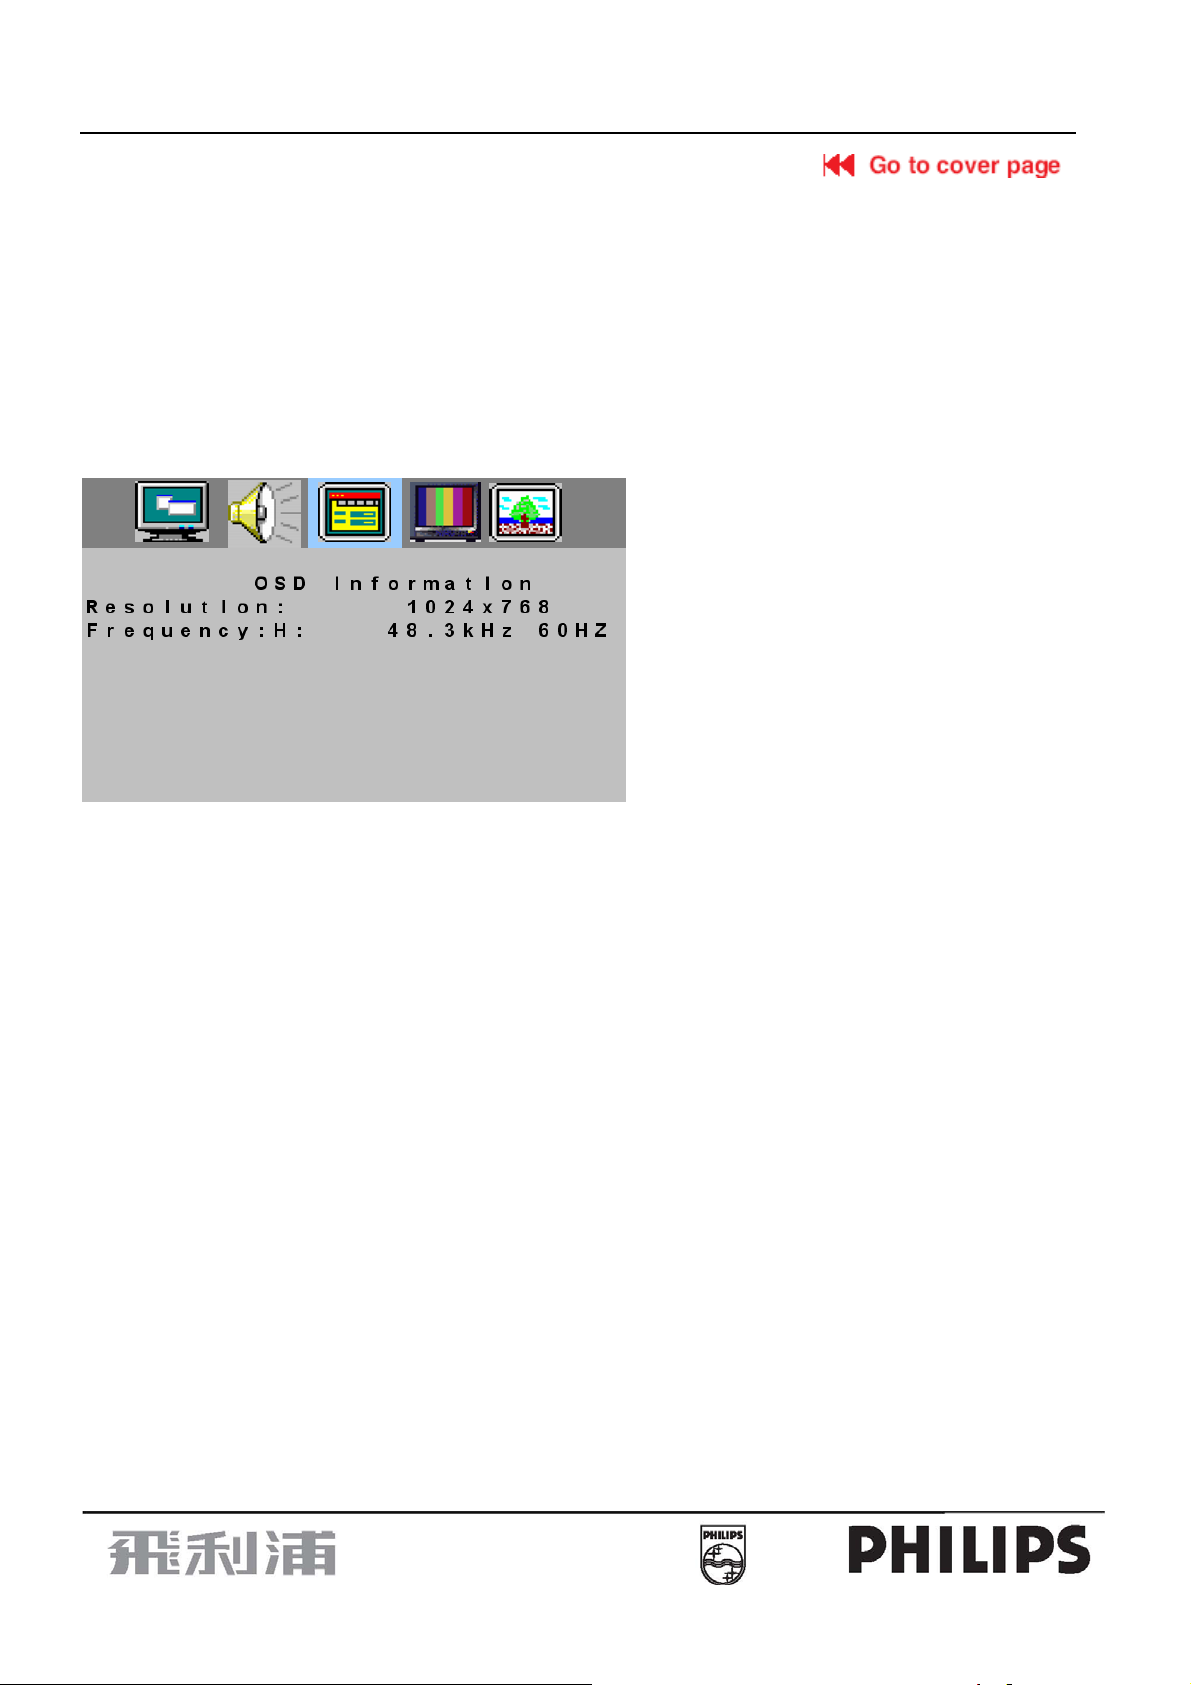
Information:This option can only be operated on PC signal source
1. Press“MENU’’ key to open OSD menu
2. Press > or < key to select “OSD SETUP’’ option
3. Press
4. Press > or < key then the screen will display the current input information
5. Press “MENU” key to exit information menu
∧ or ∨ key to select “Background ” option
∧ or ∨ key to adjust other options
∧ or ∨ key to select “Information” option
Video Recorder
How to connect
1. Connect the antenna to VCR RF input
2. Connect the other RF cable from VCR output to TV input, if you connect the VCR video frequency to TV’s AV input
connector, you will get the better quality of video and audio
3.TV’s AV input does not provide audio frequency, so you need to connect VCR audio frequency output to TV’s audio
frequency input
If your VCR is equipped with S-VHS video port:
For improved picture quality, connect a S-Video cable with the S-VIDEO input on the TV instead of connecting the
VCR to the VIDEO port.
S-Video does not provide audio, audio cables must still be connected to provide sound
Watching VCR
1. If you use TV connection, select the TV channel search.
2. If you use AV connection, select AV
3. If you use S-Video connection. Select s-video
4. Insert videotape in the VCR and press the PLAY button
Camera /Camcorder/ Video Game Set
1. Connect the video output port of Camera /Camcorder/ Video Game Set to the AV input of TV
2. Connect the left and right audio channels of Camera /Camcorder/ Video Game Set to the left and right channels of
audio input of TV
If your Camera /Camcorder/ Video Game Set are equipped with S-VHS video port:
For better quality picture, please connect the S-Video cable to the S-Video input of TV. Connect the left and right
channels of Camera /Camcorder/ Video Game Set to the left and right channels of audio input of TV
How to play
If you use AV connection, please select AV;
If you use S-Video connection, please select S-VIDEO;
6
15" LCD-TV Color Monitor
15MF400T/37
DVD Player
1. Connect the video output port of DVD player to the AV input port of TV
2. Connect the left and right audio channels of DVD to the left and right channels of audio input of TV
If your DVD player is equipped with S-VHS video port:
For better quality picture, please connect the S-Video cable to the S-Video input of TV. Connect the left and right
channels of DVD to the left and right channels of audio input of TV
How to play
If you use AV connection, please select AV;
If you use S-Video connection, please select S-VIDEO;
Digital Set Top Box
How to connect
1.Connect the video output port of Digital Set Top Box to the AV input of TV
2. Connect the left and right audio channels of Digital Set Top Box to the left and right channels of audio input of TV
How to use
1.Select AV.
2.Turn on the DTV Set Top Box set.
Warning: In case you notice scrolling images, wrong colors or no color, no picture or even combinations of these, on
your screen, check if the connections are done in the right way. Check if the cable colors match with the Input
connector colors.
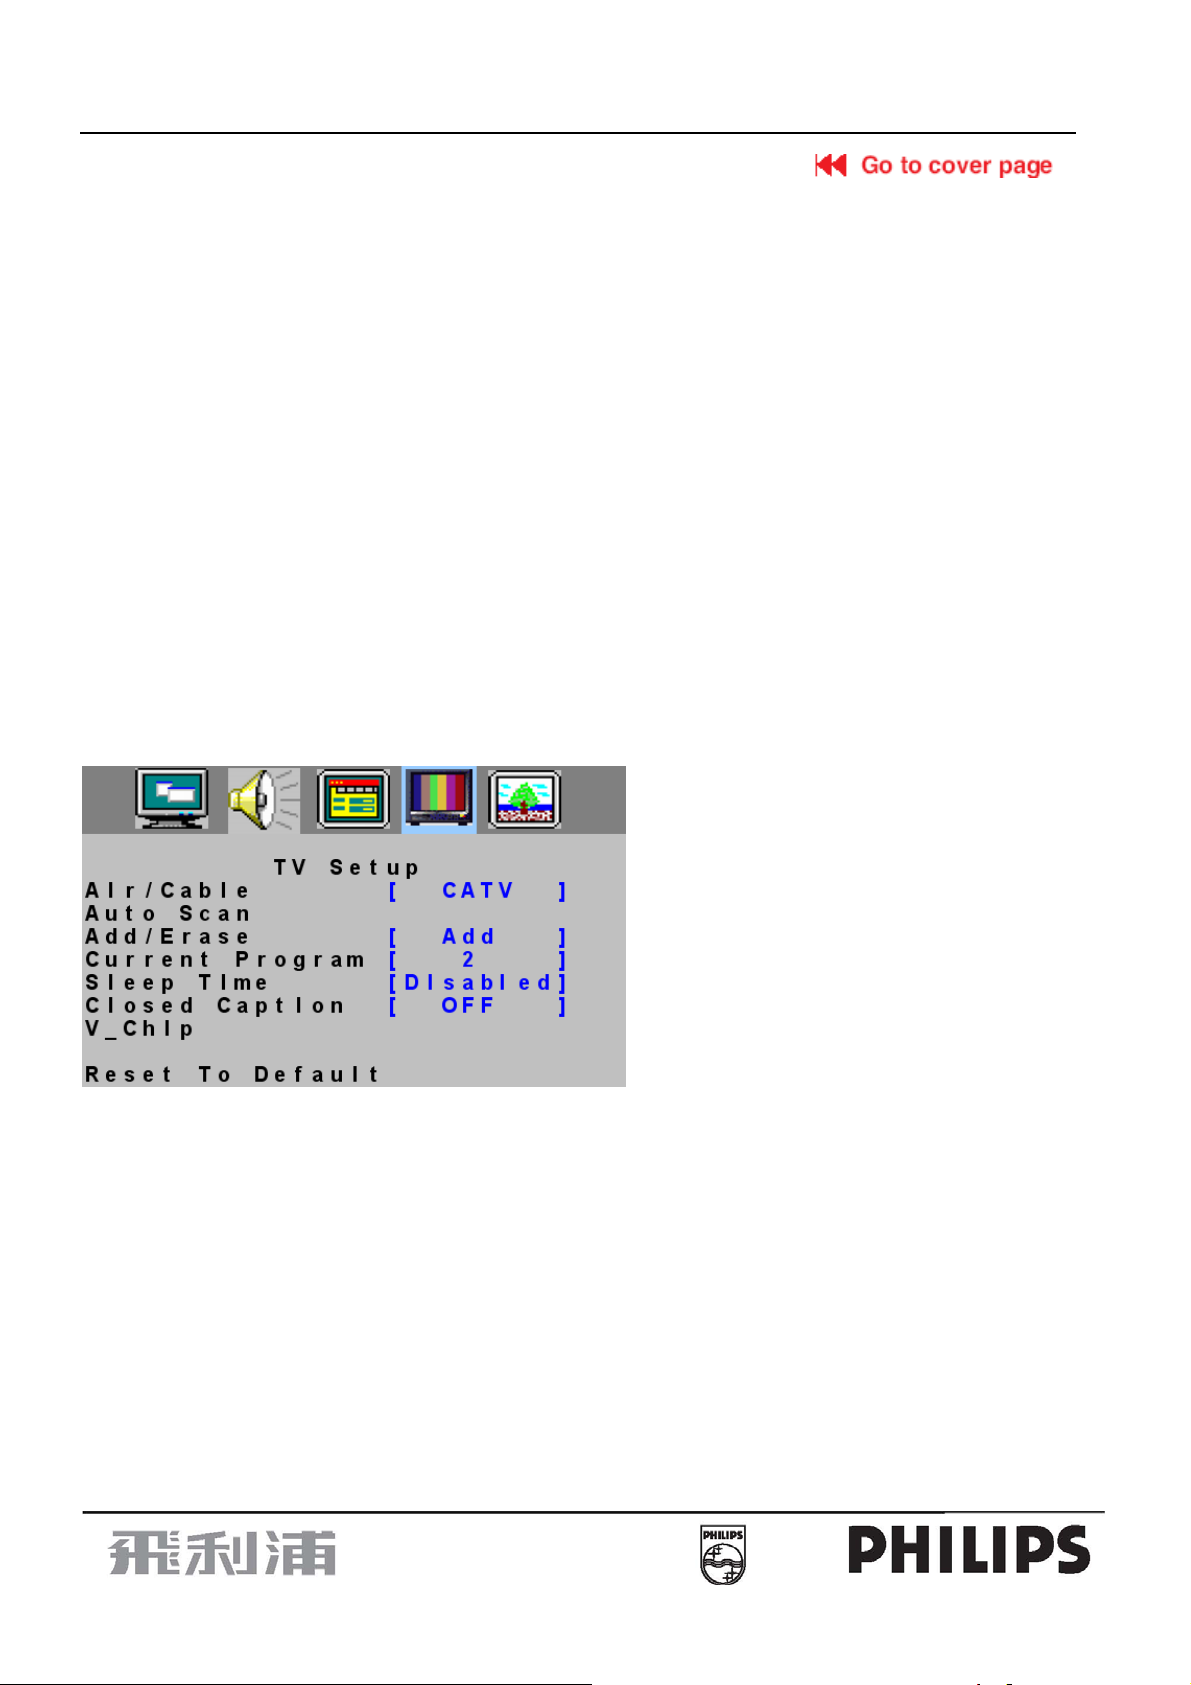
TV Setup Menu
Note: Air/Cable, Auto Scan, Current Program,Sleep Time option can only display on TV Source
1. Press ’’MENU’’ key to open OSD menu
2. Press > or < key to select “TV SETUP’’ option
3. Press
∧ or ∨ to select submenu
TV Channel Installation
AIR/CATV
1. Press“MENU’’ key to open OSD menu
2. Press > or < key to select “TV SETUP’’ option
3. Press
4. Press > or < key to select the automatic search system that your TV need, there are four options:
5. Press “MENU” key to exit AIR/CATV menu or press
Auto scans
Channel auto search and memorize all viewable channel.
1.Press“MENU’’ key to open OSD menu
2. Press > or < key to select “TV SETUP’’ option
3. Press
4. Press > or < key to select auto search.
Note: During the search, if you want to exit, you can press the ”MENU” key, other keys are not of function, except the
“MENU” key.
∧ or ∨ key to select “AIR/CATV” option
CATV, AIR, HRC, IRC.
∧ or ∨ key to adjust other options
∧ or ∨ key to select “Auto scan” option
7

15" LCD-TV Color Monitor
15MF400T/37
Channel Edit
1. Press“MENU’’ key to open OSD menu
2. Press > or < key to select “TV SETUP’’ option
3. Press
∧ or ∨ key to select “Add/Erase” option
4. Press > or < key to select Add or Erase.
5. Press “MENU” key to exit Add/Erase menu or press
∧ or ∨ key to adjust other options
Current Program
Current program is the channel set by the current TV, you can press “display” key to display the current channel on the
top right of the screen.
1. Press“MENU’’ key to open OSD menu
2. Press > or < key to select “TV SETUP’’ option
3.Press
∧ or ∨ key to select “Current program” option
4. Press > or < key to select the channel.
5.Press “MENU” key to exit Current Program menu or press
You can also press the digital keys 0-9/100 or channel
∧ or ∨ key to adjust other options
∧ or ∨ on the remote control to select channel
Sleep Time
1. Press“MENU’’ key to open OSD menu
2. Press > or < key to select “TV SETUP’’ option
3.Press
∧ or ∨ key to select “Sleep Time” option
4.Press > or < key to select the sleep time that you need to set, you can select 30/60/90/120 minutes sleep time.
5.Press “MENU” key to exit sleep time menu or press
∧ or ∨ key to adjust other options
You can also press, “SLEEP” on the remote control, the sleep time will display on the top right of the screen.
Channel Lock
Closed Caption
1. Press“MENU’’ key to open OSD menu
2. Press > or < key to select “TV SETUP’’ option
3. Press
∧ or ∨ key to select “Closed caption” option
4. Press > or < key to set CC1~CC4 and TT1 and TT4.
5.Press “MENU” key to exit Closed Caption menu or press
∧ or ∨ key to adjust other options
You can also press “Caption” on the remote control, enter Closed Caption menu directly, then press step 4 to adjust.
8

15" LCD-TV Color Monitor
15MF400T/37
Caption Mode: CC1~CC4
Dialogue (and descriptions) for the action on the captioned TV program shows on screen.
Text Mode: TT1~TT4
Often used for channel guide, schedules, bulletin board information for Closed Caption programs, news, weather
information or stock marker reports.
Not all Closed Caption modes are necessarily being use by a TV channel during the transmission of a Closed Caption
program.
V-Chip
It is the parental control function (V-chip). It is used to block program viewing based on the ratings by the broadcaster.
The default setting is to allow all programs to be viewed. Viewing can be blocked by the type of program and by the
categories chosen be blocked. It is also possible to block all program viewing for a time period.
1. Press“MENU’’ key to open OSD menu
2. Press > or < key to select “TV SETUP’’ option
3. Press
4. Press > or < key to enter V _Chip password validation menu.
∧ or ∨ key to select “V _Chip” option
You can press V-CHIP key on the remote control to enter the menu directly.
Press digital keys on the remote control; enter the password to go into V-CHIP control menu
(Default password is :0000), if your password is error, then the screen will display “PIN ERROR”.
9

15" LCD-TV Color Monitor
15MF400T/37
1. After enter the V-CHIP menu, press
the condition of “ON”.
①. Press > or < key to select “Status’’ option
②.Press > or < key to select “ON’’ or “OFF”
6. TV Guideline Setting
∧ or
①. Press
②. Press > or < key to enter “TV Guideline” menu
③. Press
④
. Press > or < key to select U or B, selecting U means “Unlock”, selecting B means “Block”.
⑤
. If the setting is OK, press “MENU” key to exit TV-Guideline menu.
key to select “TV Guideline” option
v
or ∨ key to select block item.
∧
∧ or ∨ key to select, if you want to set V-CHIP, you need to set the “status” on
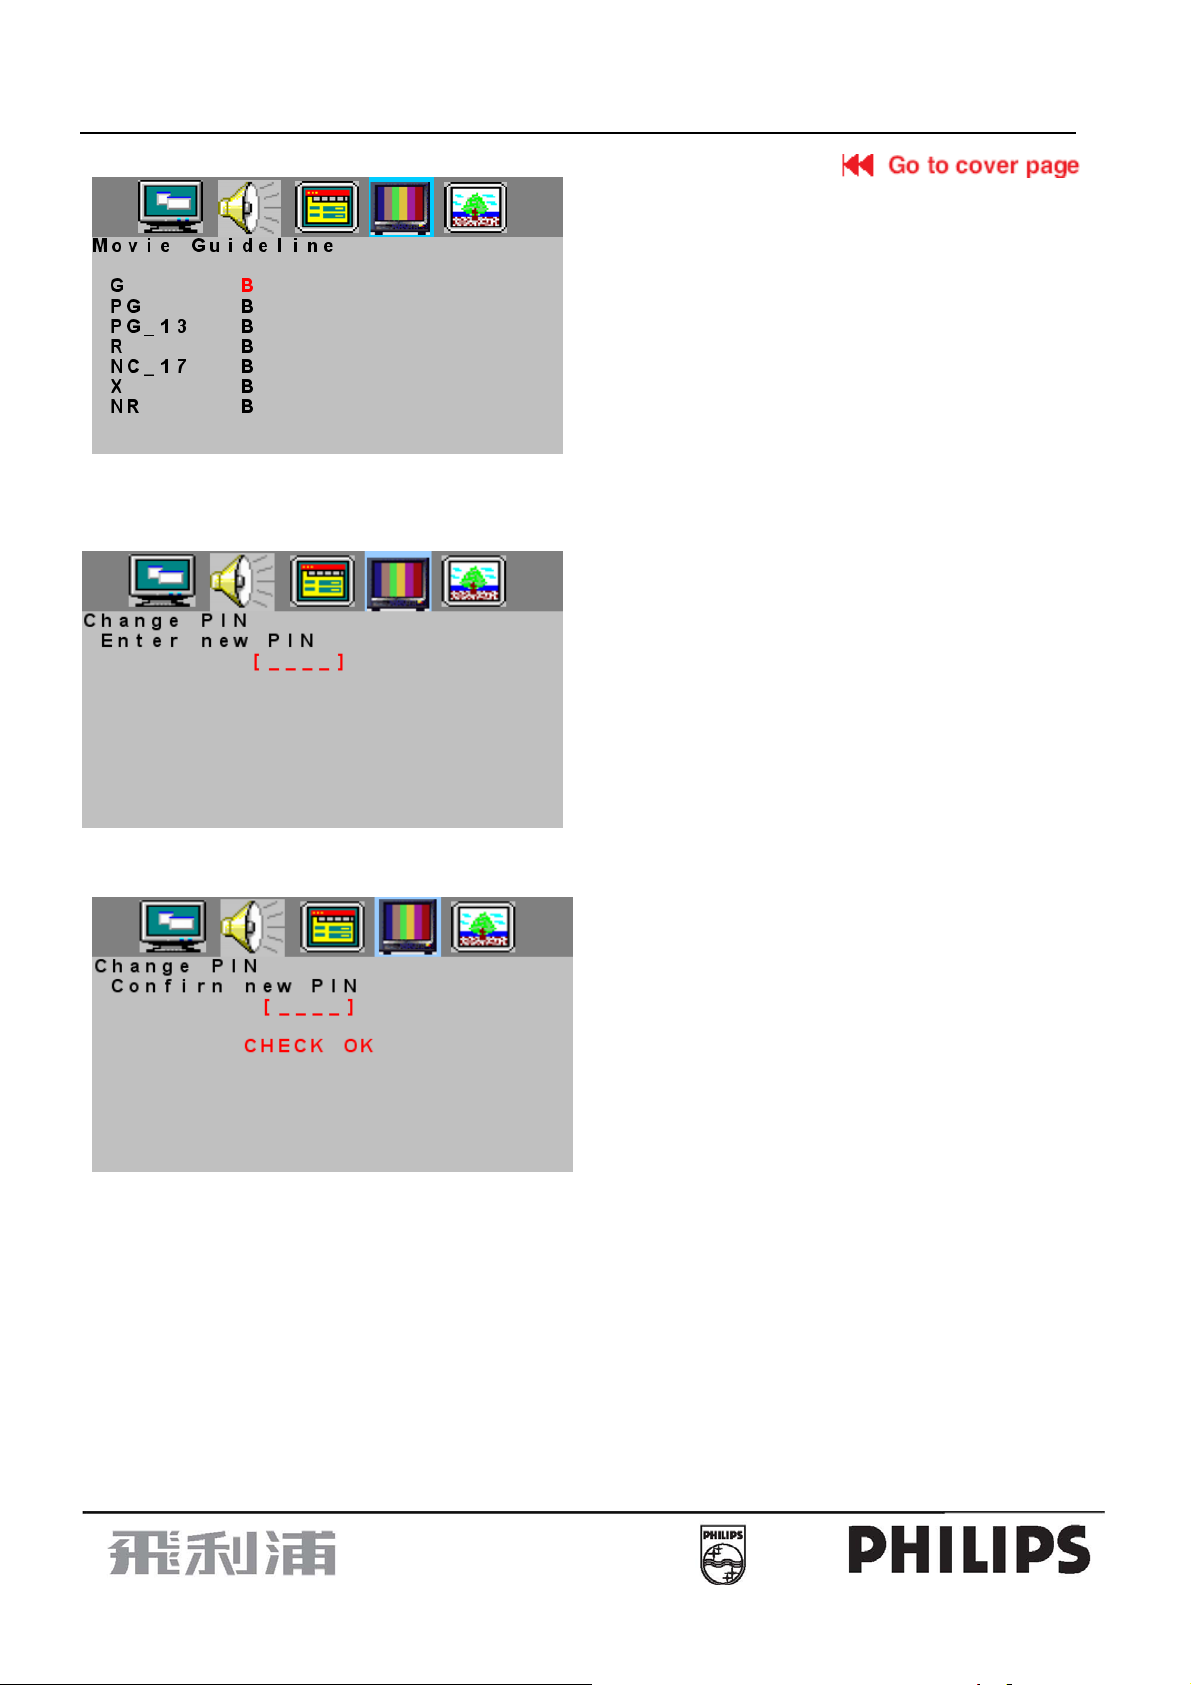
7. Movie Guideline Setting
①. Press
②. Press > or < key to enter Movie Guideline menu.
③. Press
④. Press > or < key to select U or B, selecting U means “Unlock”, selecting B means “Block”.
⑤. If the setting is OK, press “MENU” key to exit Movie Guideline menu.
∧ or v key to select “Movie Guideline” option.
∧ or ∨ key to select block item.
10
15" LCD-TV Color Monitor
15MF400T/37
8.Change PIN
①Press
②.Press > or < key to enter Change PIN menu.
③Press digital keys on the remote control , then enter the new password.
④Enter the new password again , if the setting is OK, the display information as below, then it will exit the Change PIN
menu automatically.
∧ or ∨ key to select “Change PIN” option
Reset to Default
1. Press “MENU” key to open OSD menu.
2. Press > or < key to select any Setup options
3. Press
4. Press > or < key to reset.
Reset to Default is convenient for all settings in the user OSD to recall to factory default data.
Note: The reset to default function in each function item is the same under the signal source of AV/TV/S-VIDEO.
When we select the Reset to Default in each function item under the PC signal source, it not only recalls all data
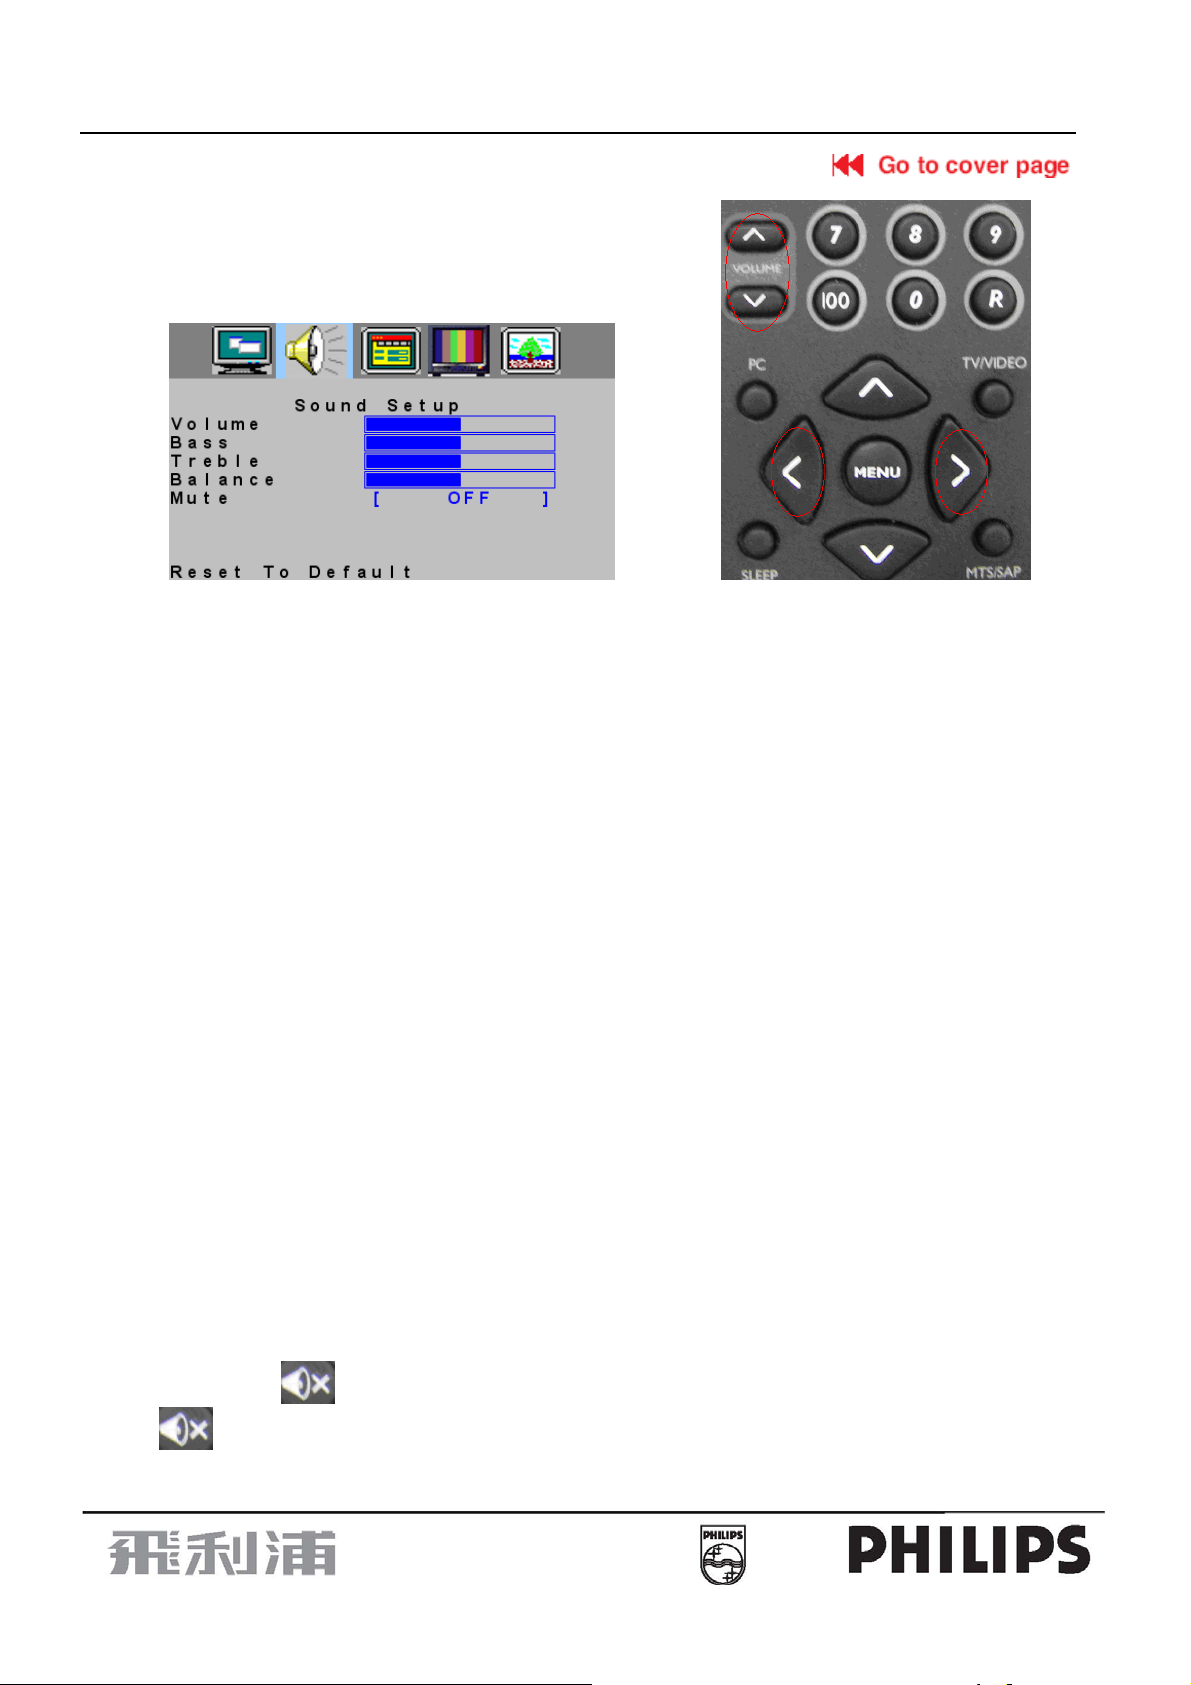
Sound Set Up Menu
1. Press “MENU” key to open OSD menu.
2. Press > or < key to select “Audio Setup” option
3. Press
∧ or ∨ key to select “Reset to Default” option.
to default data, but also have an adjustment automatically.
∧ or ∨ key to select submenu.
11
15" LCD-TV Color Monitor
15MF400T/37
Volume
1. Press “MENU” key to open OSD menu.
2. Press > or < key to select “Sound Setup” option.
3. Press
∧ or ∨ key to select “Volume” option
4. Press > or < key to adjust Volume data.
You can also press Volume
5. Press “MENU” to exit or press
∧ or ∨ key and > or < key on the remote control to adjust volume.
∧ or ∨ key to adjust others
Bass
1. Press “MENU” key to open OSD menu.
2. Press > or < key to select “Sound Setup” option
3. Press
∧ or ∨ key to select “Bass” option.
4. Press > or < key to adjust Bass data.
5. Press “MENU” to exit or press
∧ or ∨ key to adjust others.
Treble
1. Press “MENU” key to open OSD menu.
2. Press > or < key to select “Sound Setup” option
3. Press
∧ or ∨ key to select “Treble” option.
4. Press > or < key to adjust Treble data.
5. Press “MENU” to exit or press
∧ or ∨ key to adjust others.
Balance
1. Press “MENU” key to open OSD menu.
2. Press > or < key to select “Sound Setup” option
3. Press ∧ or ∨ key to adjust “Balance” option.
4. Press > or < key to adjust “Balance” data.
5. Press “MENU” to exit or press
∧ or ∨ key to adjust others.
Mute
1. Press “MENU” key to open OSD menu.
2. Press > or < key to select “Sound Setup” option
3. Press
∧ or ∨ key to select “Mute” option.
4. Press > or < key to select ON/OFF.
You can also press
press
to cancel the mute
key on remote control to select mute, after the selection you can adjust the volume or
5. Press “MENU” to exit or press
∧ or ∨ key to adjust others.
12
15" LCD-TV Color Monitor
15MF400T/37
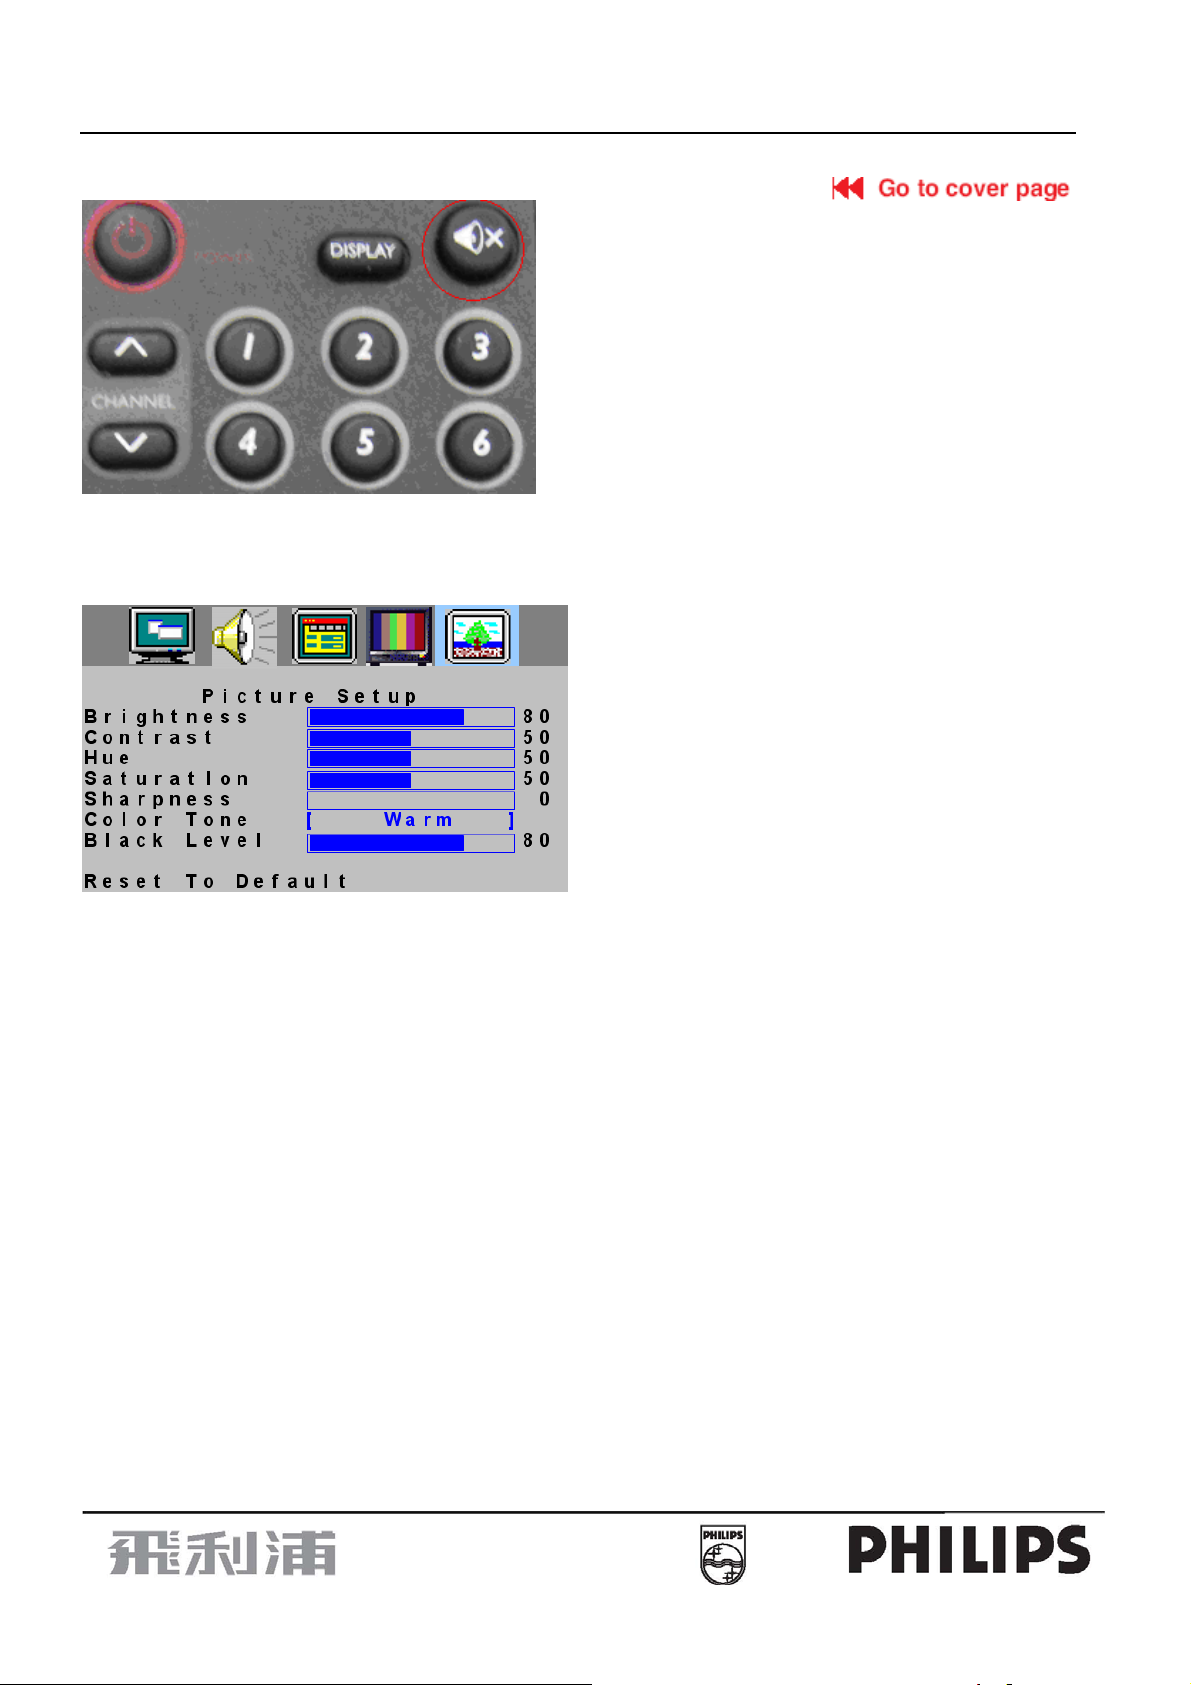
Picture Set Up Menu
1. Press “MENU” key to open OSD menu.
2. Press > or < key to select “ Pc Setup” option
3. Press
∧ or ∨ key to select submenu.
Note: Picture Setup menu can only be selected under the signal source of AV/TV/S-VIDEO.
Brightness
1. Press “MENU” key to open OSD menu.
2. Press > or < key to select “ Picture Setup” option
3. Press
∧ or ∨ key to select “Brightness” option.
4. Press > or < key to adjust Brightness data.
5. Press “MENU” to exit or press
∧ or ∨ key to adjust others
Contrast
1. Press “MENU” key to open OSD menu.
2. Press > or < key to select “ Picture Setup” option
3. Press
∧ or ∨ key to select “Contrast” option.
4. Press > or < key to adjust Contrast data.
5. Press “MENU” to exit or press
or ∨key to adjust others
∧
Hue
1. Press “MENU” key to open OSD menu.
2. Press > or < key to select “ Picture Setup” option
3. Press
∧ or ∨ key to select “Hue” option.
4. Press > or < key to adjust Hue data.
5. Press “MENU” to exit or press key to adjust others.
Saturation
1. Press “MENU” key to open OSD menu.
2. Press > or < key to select “ Picture Setup” option
3. Press
or ∨ key to select “Saturation” option.
∧
4. Press > or < key to adjust Saturation data.
5. Press “MENU” to exit or press
∧ or ∨ key to adjust others.
13
15" LCD-TV Color Monitor
15MF400T/37
Sharpness
1. Press “MENU” key to open OSD menu.
2. Press > or < key to select “ Picture Setup” option
3. Press
∧ or ∨ key to select “Sharpness” option.
4. Press > or < key to adjust sharpness data.
5. Press “MENU” to exit or Press key to adjust others.
Color Tone
1. Press “MENU” key to open OSD menu.
2. Press > or < key to select “ Picture Setup” option
3. Press
∧ or ∨ key to select “Color Tone” option.
4. Press > or < key to select warm or cool color
5. Press “MENU” to exit or press
∧ or ∨ key to adjust others.
Black Level
1. Press “MENU” key to open OSD menu.
2 Press > or < key to select “ Picture Setup” option
3. Press
∧ or ∨ key to select “Black Level” option.
4. Press > or < key to adjust Black level data.
5. Press “MENU” to exit or press
∧ or ∨ key to adjust others.
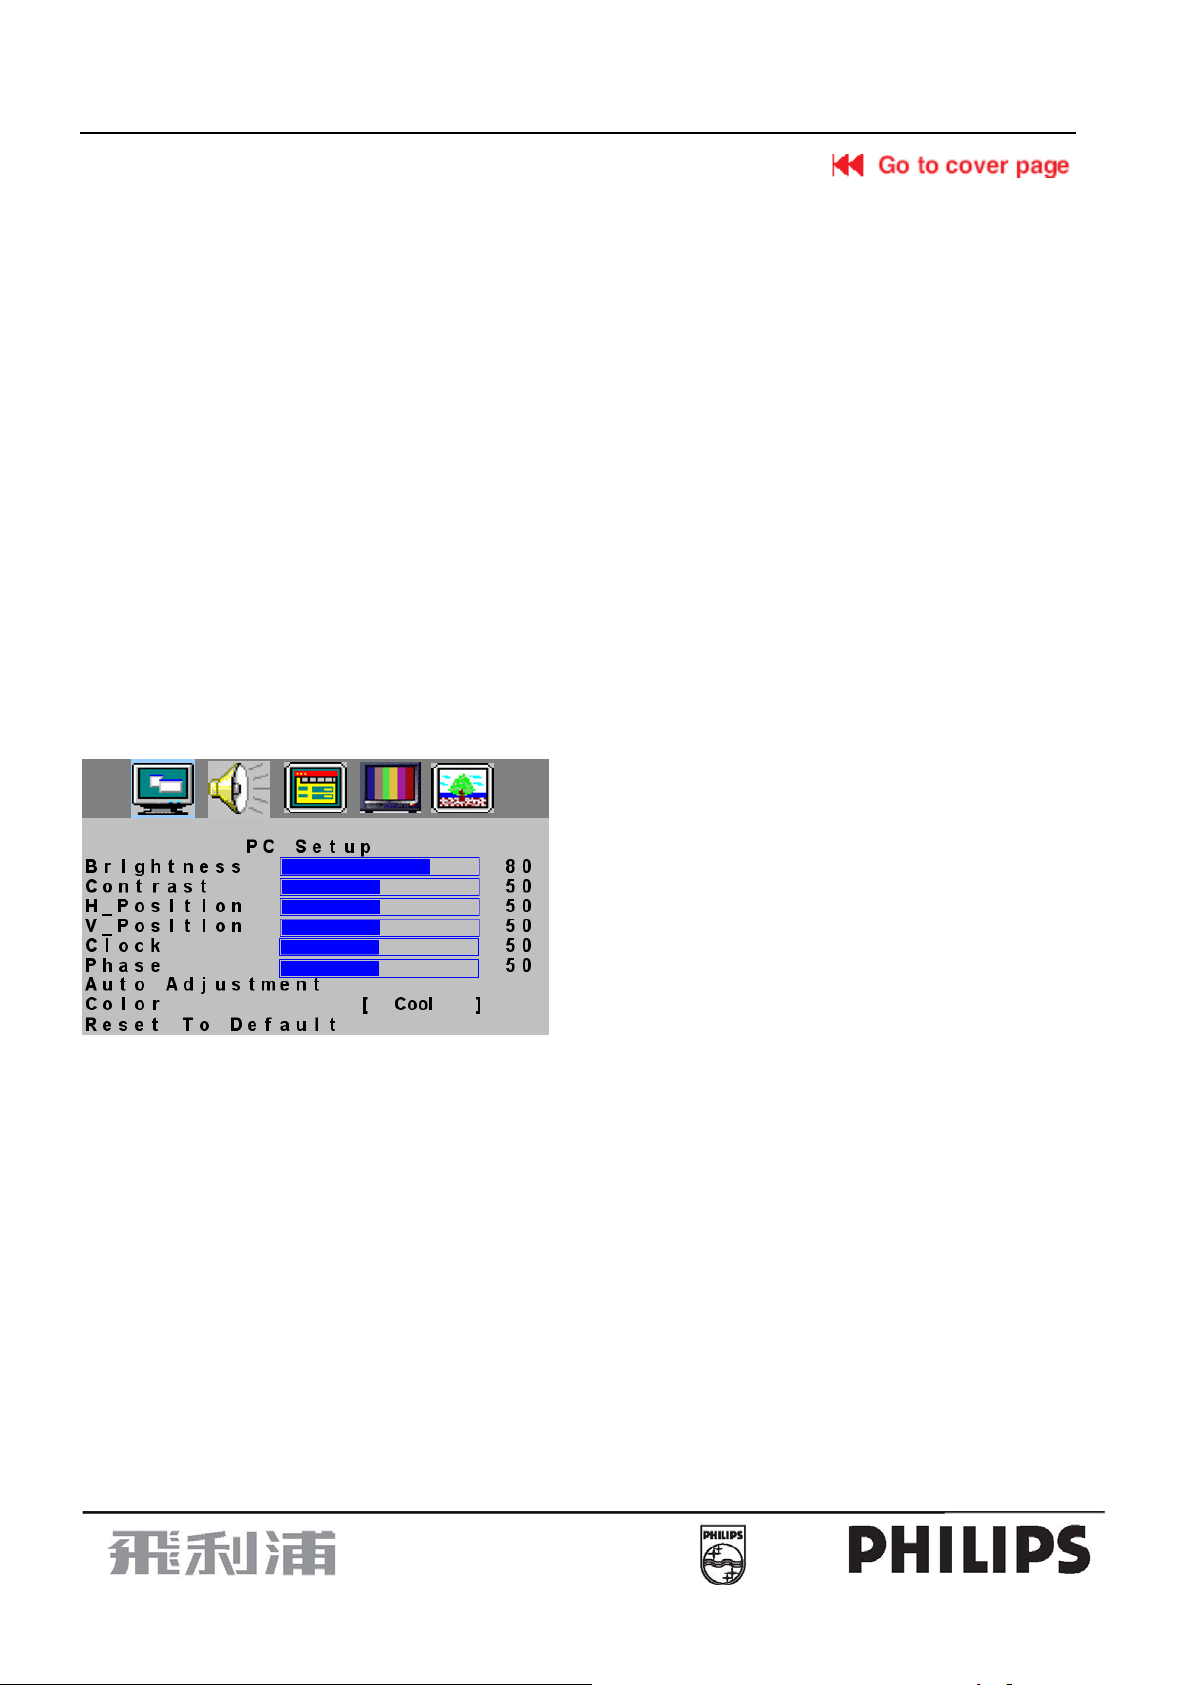
PC Set Up Menu
1. Press “MENU” key to open OSD menu.
2. Press > or < key to select “ Pc” option
3. Press
∧ or ∨ key to select submenu
Note: Pc Setup menu can only be selected under the PC signal source
Brightness
1. Press “MENU” key to open OSD menu.
2. Press > or < key to select “ Pc Setup ” option
3. Press
∧ or ∨ key to select “Brightness” option.
4. Press > or < key to adjust Brightness data.
5. Press “MENU” to exit or Press
∧ or ∨ key to adjust others.
Contrast
1. Press “MENU” key to open OSD menu.
2. Press > or < key to select “ Pc Setup” option
3. Press
∧ or ∨ key to select “Contrast” option.
4. Press > or < key to adjust contrast data.
5. Press “MENU” to exit or Press
∧ or ∨ key to adjust others.
H_ Position
1. Press “MENU” key to open OSD menu.
2. Press > or < key to select “ Pc Setup” option
3. Press
∧ or ∨ key to select “H_ Position” option.
4. Press > or < key to adjust H_ Position data.
5. Press “MENU” to exit or press
∧ or ∨ key to adjust others.
14
15" LCD-TV Color Monitor
15MF400T/37
V_ Position
1. Press “MENU” key to open OSD menu.
2. Press > or < key to select “ Pc Setup” option
3. Press
∧ or ∨ key to select “V_ Position” option.
4. Press > or < key to adjust “V_ Position” data
5. Press “MENU” to exit or press
∧ or ∨ key to adjust others.
Clock
1. Press “MENU” key to open OSD menu.
2. Press > or < key to select “ Pc Setup” option
3. Press
∧ or ∨ key to select “Clock” option.
4. Press > or < key to adjust Clock data
5.Press “MENU” to exit or press
∧ or ∨ key to adjust others.
Phase
1. Press “MENU” key to open OSD menu.
2. Press > or < key to select “ Pc Setup” option
3. Press
∧ or ∨ key to select “Phase” option.
4. Press > or < key to adjust Phase data
5. Press “MENU” to exit or press
∧ or ∨ key to adjust others.
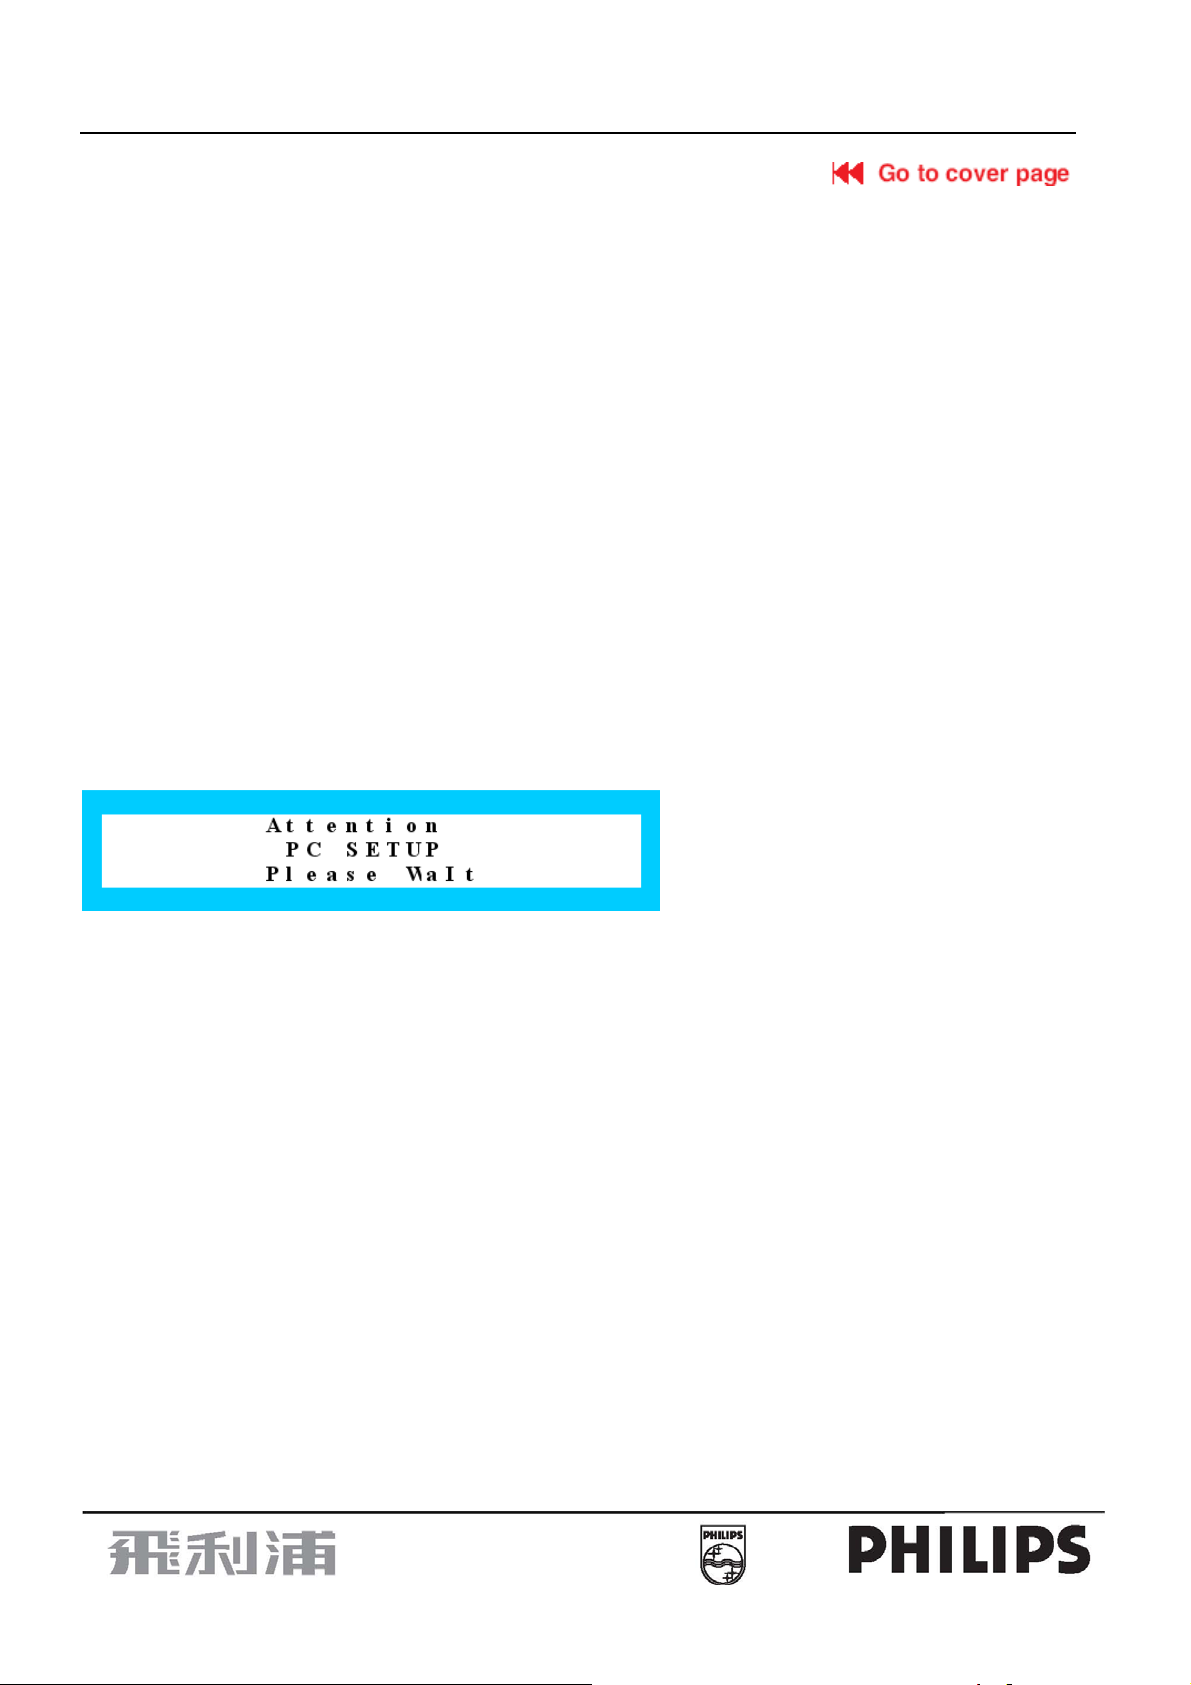
Auto Adjustment
1. Press “MENU” key to open OSD menu.
2. Press > or < key to select “ Pc Setup” option
3. Press
or ∨ key to select “Auto Adjustment” option.
∧
4. Press > or < key to conduct Auto Adjustment, then PC will adjust automatically, if the adjustment is OK, it will exit OSD
menu automatically
Color
1. Press “MENU” key to open OSD menu.
2. Press > or < key to select “ Pc Setup” option
3. Press
∧ or ∨ key to select “Color” option.
4. Press > or < key to select Color
If you choose Color as User, you can adjust R/G/B according to your need
①.Press “MENU” key to enter User Color menu.
②.Press
∧ or ∨ key to select Red/Green/Blue option.
③.Press > or < key to adjust Red/Green/Blue data
④.Press MENU TO exit to Color menu
5.Press
∧ or ∨ key to select other adjustment items, then press MENU to exit
15

15" LCD-TV Color Monitor
15MF400T/37
Tips I
P
S
Care of the screen
Do not rub or strike the screen with anything hard as this may scratch, mar, or damage the screen permanently.
Unplug the screen before cleaning the screen. Dust the TV by wiping the screen and the cabinet with a soft, clean cloth.
If the screen requires additional cleaning, use a clean, damp cloth. Do not use liquid cleaners or aerosol cleaners.
Mobile telephone warning
To avoid disturbances in picture and sound, malfunctioning of your TV or even damage to the TV, keep away your
mobile telephone from the TV.
End of life directives
We are paying a lot of attention to produce environmentally friendly in green focal areas. Your new receiver contains
materials that can be recycled and reused.
At the end of its life specialized companies can dismantle the discarded receiver to concentrate the reusable materials
and to minimize the amount of materials to be disposed of.
Please ensure you dispose of your old receiver according to local regulations.
16

15" LCD-TV Color Monitor
15MF400T/37
2. Precaution And Notices
2.1 Assembly Precaution
(1) Please do not press or scratch LCD panel surface with anything hard. And do not soil LCD panel surface by
touching with bare hands (Polarize film, surface of LCD panel is easy to be flawed)
In the LCD panel, the gap between two glass plates is kept perfectly even to maintain display characteristic
and reliability. If this panel is subject to hard pressing, the following occurs:
(a) Uniform color
(b) Orientation of liquid crystal becomes disorder
(2) Please wipe out LCD panel surface with absorbent cotton or soft cloth in case of it being soiled.
(3) Please wipe out drops of adhesive like saliva and water in LCD panel surface immediately.
They might damage to cause panel surface variation and color change.
(4) Do not apply any strong mechanical shock to the LCD panel.
2.2 Operating Precaution
(1) Please be sure to unplug the power cord before remove the back-cover. (Be sure the power is turn-off)
(2) Please do not change variable resistance settings in MAIN-BOARD; they are adjusted to the most suitable
value. If they are changed, it might happen LUMINANCE does not satisfy the white balance spec.
(3) Please consider that LCD backlight takes longer time to become stable of radiation characteristic in low
temperature than in room temperature.
(4) Please pay attention to displaying the same pattern for very long-time. Image might stick on LCD.
2.3 Storage Precaution
(1) When you store LCD for a long time, it is recommended to keep the temperature between 0°C -40°C without
the exposure of sunlight and to keep the humidity less than 85% RH.
(2) Please do not leave the LCD in the environment of high humidity and high temperature such as 60°C,
85%RH.
(3) Please do not leave the LCD in the environment of low temperature; below -25°C.
2.4 High Voltage Warning
The high voltage was only generated by INVERTER module on Power Board, if carelessly contacted the
transformer on this module, can cause a serious shock. (The lamp voltage after stable around 600V, with lamp
current around 8mA, and the lamp starting voltage was around 1500V, at Ta=25°C)
17

15" LCD-TV Color Monitor
15MF400T/37
3. D-SUB Pin Descriptions
3.1 D-SUB Connector
This procedure gives you instructions for installing and using the LCD TV display.
1. Position the display on the desired operation and plug the power cord into a convenient AC outlet.
Three-wire power cord must be shielded and is provided as a safety precaution as it connects the chassis
and cabinet to the electrical conduct ground. If the AC outlet in your location does not have provisions for
the grounded type plug, the installer should attach the proper adapter to ensure a safe ground potential.
2. Connect the 15-pin color display s hielded s ignal cab le to yo ur signal syste m devic e and loc k both s crews on
the connector to ensure firm grounding. The connector information is as follow:
15 - Pin Color Display Signal Cable
PIN NO. DESCRIPTION PIN NO. DESCRIPTION
1
6
11 15
5
10
1. Red Video 9. VGA_5V
2. Green Video 10. Sync Ground
3. Blue Video 11. RS-232 RX
4. RS-232 TX 12. Serial Data for DDC
5. GND 13. Horiz. Sync
6. Ground-R 14. Vert. Sync
7. Ground-G 15. Serial Clock for DDC
8. Ground-B
3. S-Video ( Y /C ): TV rear side : 4 pin Mini-DIN female
TV: TV rear side : IEC type female
Video: TV rear side : RCA female (Yellow )
Audio: TV rear side : RCA female (Red / White )
Audio Input for AV,S-Video, RCA female ( Red / White )
Headphone 3.5mm female
4. Apply power to the display by turning the power switch to the "ON" position and allow about ten secon ds for
Panel warm-up. The Power-On indicator lights "GREEN" when the display is on.
5. With proper signals feed to the display, a pattern or data should appear on the screen, adjust the brightness
and contrast to the most pleasing display, or press auto-adjust to get the best picture-quality.
6. This TV (with PC function) has power saving function following the VESA DPMS. Be sure to connect the
signal cable to the PC.
7. If your TV requires service, it must be returned with the power cord.
18
15" LCD-TV Color Monitor
15MF400T/37
3.2 Factory Preset Display Modes
Analog RGB Signal Timing
VESA MODES
Horizontal Vertical
Nominal
Mode Resolution Total
640x480@60Hz 800 x 525 31.469 N 59.940 N 25.175
VGA
SVGA
XGA
IBM MODES
Horizontal Vertical
Mode Resolution Total
DOS 720x400@70Hz 900 x 449 31.469 N 70.087 P 28.322
DOS 640x350@70Hz 800 x 449 31.469 P 70.087 N 25.175
GA 1024x768@72Hz 1304x798 57.515 P 72.100 P 75.000
MAC MODES
VGA
640x480@72Hz 832 x 520 37.861 N 72.809 N 31.500
640x480@75Hz 840 x 500 37.500 N 75.00 N 31.500
800x600@56Hz 1024 x 625 35.156 N/P 56.250 N/P 36.000
800x600@60Hz 1056 x 628 37.879 P 60.317 P 40.000
800x600@72Hz 1040 x 666 48.077 P 72.188 P 50.000
800x600@75Hz 1056x625 46.875 P 75.000 P 49.500
1024x768@60Hz 1344x806 48.363 N 60.004 N 65.000
1024x768@70Hz 1328x806 56.476 N 70.069 N 75.000
1024x768@75Hz 1312x800 60.023 P 75.029 P 78.750
640x480@67Hz 864x525 35.000 N 66.667 N 30.240
Frequency
+/- 0.5kHz
Nominal
Frequency
+/- 0.5kHz
Sync
Polarity
Sync
Polarity
Nominal
Freq.
+/- 1 Hz
Nominal
Freq.
+/- 1 Hz
Sync
Polarity
Sync
Polarity
Nominal
Pixel
Clock
(MHz)
Nominal
Pixel
Clock
(MHz)
XGA 1024x768@75Hz 1328x804 60.241 N 74.927 N 80.000
19
15" LCD-TV Color Monitor
15MF400T/37
4. Adjustment
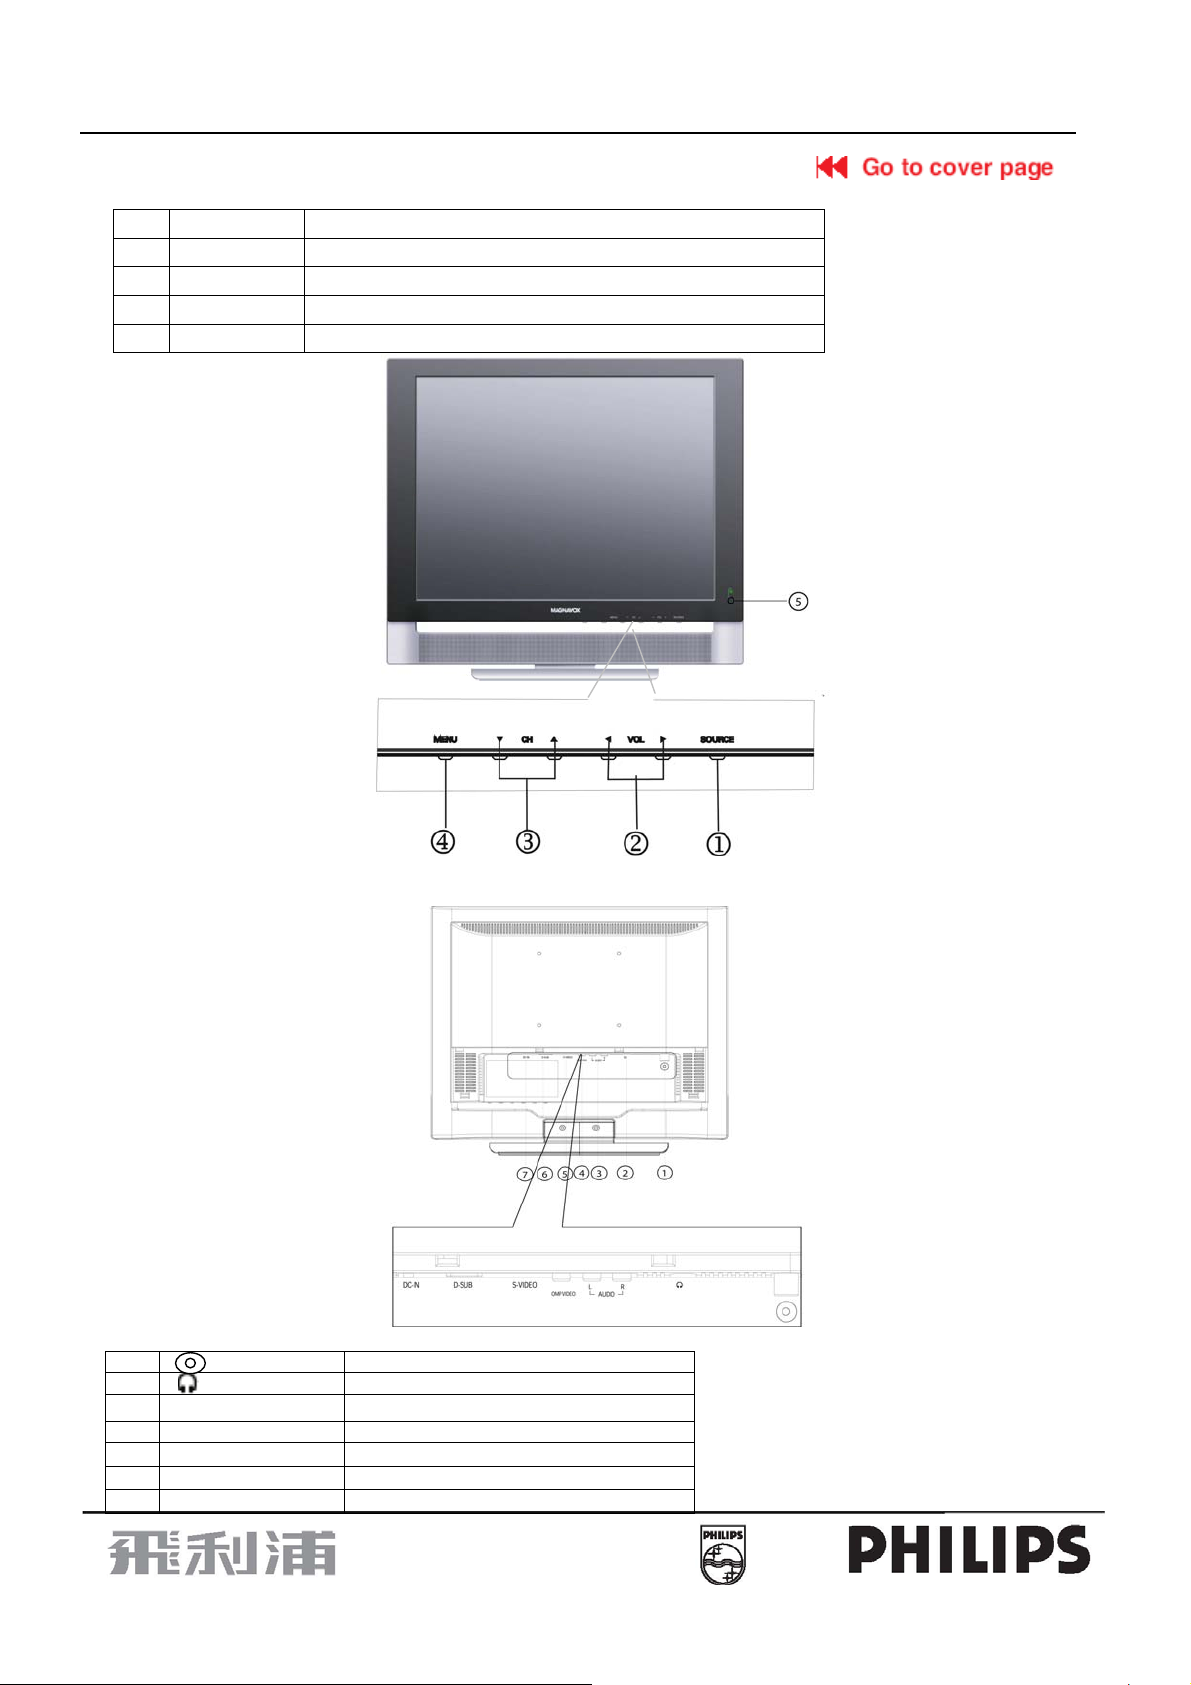
▪ Front Panel Control Knobs
① Source Key Press to select your input source.
②
③ ∧ or ∨ Key
④ MENU Key
⑤ Power Key Press to turn on or off the TV.
> or <
Key
Press to confirm your function selection and adjust the volume
Press to perform your function selection and adjust TV channel
Press to show the OSD menu and exit OSD menu at the TV.
▪ Preparation
Remove the back plate at the back of the TV as shown on the illustration opposite. Lay the LCD TV with the screen down on a table,
as it will be easier to connect your peripheral equipment. Please take precaution not to damage the screen.
①
②
③ Audio R/L
④ COMP VIDEO
⑤ S-VIDEO S-VIDEO Input
D-SUB
⑥
DC IN
⑦
TV input
Earphone jack
Audio Right /Left Channel input
AV Input
PC Input
12V DC Power Input
20

15" LCD-TV Color Monitor
V
15MF400T/37
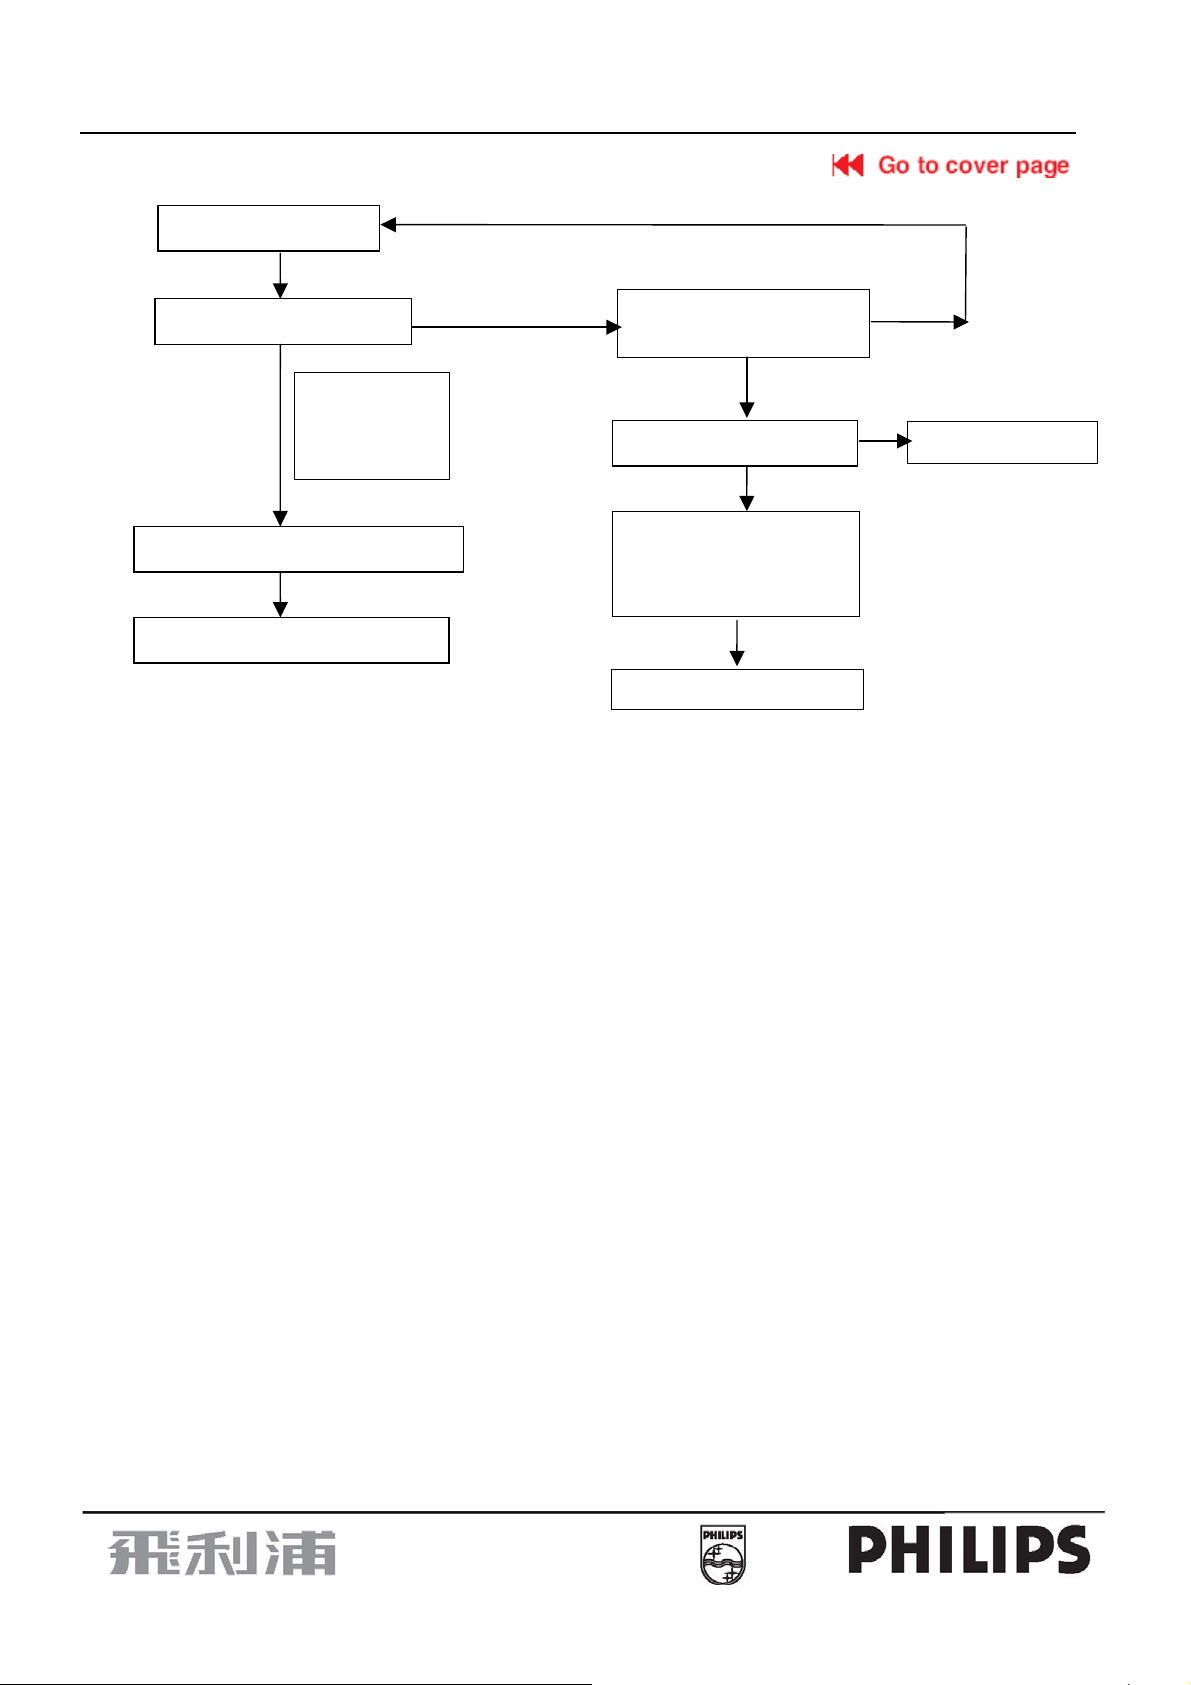
5.Repair Flow Chart
5.1. Main board
No Screen
No
Check U104 pin 1=12V
Yes
1、 Check U104 pin1 short?
2、 Check CN102 input=12 V
No
No
No
No
Replace U104
1、Check Power is shorted with ground
2、Replace U101/U102/U103
Check MCU
work status
Replace Q102
Check Q106 pin7, 8=3. 3 V
Check U402 pin37=3. 3 V
Yes
Check Q103 pin 1=0.6 V
Check Q104 pin 1=0.6 V
Yes
Check Q103 pin 3=0 V
Check Q104 pin 3=0 V
Check U104 pin2=5V?
Check U101、U102、U103
pin3=5V?
Check FB102=3.3V
Check FB103=1.8V
Check FB109=3.3V
Check panel Vcc Check U201 Decoder power Vcc
Check FB108=3. 3 V
Check U402 pin34=3.3V
Check Q102 pin1=0.6V
Check Q102 pin3=0V
Yes
Yes
Yes
Yes
Yes
Yes
No
No
Check MCU work
status
Replace Q103
Replace Q104
Check Q105 pin5~pin8=3.3
Replace Q105
Yes
Replace Q106
21
15" LCD-TV Color Monitor
c
15MF400T/37
Check power Vcc
Yes
Check Led work normal?
Press On/off
Yes
Check U402 Pin3 is high voltage
Yes
Check inverter is high voltage
key Led have
changed from
off to green
No
Check U201 Decoder Vc
Check V-chip U301 Vcc
Yes
Check tuner board is ok?
Yes
USE RS232
Check Decoder =1?
Scaler=1?
V-c hip=1 ?
If anyone =0, replace it
Yes
No
Check tuner board
22
 Loading...