

Page 1

OPERATING INSTRUCTIONS PHILIPS14PV172
Congratulations! You are now the owner of one
of the most sophisticated and simple-to-use TV
set/ video recorder combinations (TV Combi) on
the market. With this TV Combi you can watch
TV, as well as record and play VHS-standard
cassettes.
Naturally, you can't wait to use your it. But
before you do, it's worthwhile taking the time to
read through the whole of this operating manual. It will show you how to make the best use of
your equipment.
You can practise using the set without any
worries because, no matter which buttons you
press, you cannot damage it.
Safety instructions
• Danger - high voltage in this appliance! Do not
open! The set does not contain any parts that can
be repaired by the user. As long as the set is
connected to the mains there are parts of it still in
operation. To switch off the set completely you
must disconnect it from the mains.
• Please note that this equipment is designed for
use with a 220-240 volts/50 Hz power supply.
• Ensure that air can circulate freely through the
ventilation slots of the set. Do not place the set
on soft surfaces.
• Do not place the set close to a source of heat
(radiator etc).
• Ensure that no objects or liquids enter the set. If
liquid is spilt into it, disconnect the set immediately from the mains and call the After-Sales
Service for advice.
Contents Page
1. SUMMARY OF BUTTONS AND CONTROLS 2
The remote control 2
Front of the set 3
Back of the set 3
2. INSTALLATION. HOW DO I INSTALL THE TV
COMBI?
Connecting a decoder or other additional
equipment
Connecting to a satellite receiver 6
Emergency interrupt 6
Making standard settings 6
Setting the clock and date 7
3. STORING TV CHANNELS 8
4. THE TV SET FUNCTIONS 10
5. PLAYING A RECORDEDCASSETTE 11
Fast wind and rewind 11
Picture scanning 11
Continuous playback 12
Tape position. 12
Cleaning function 13
6. HOW DO I RECORDDIRECTLY? 14
7. HOW DO I PROGRAMME A RECORDING? 16
Programming with VIDEOPlus+ 16
TIMER Programming 17
8. SPECIALFEATURES ON YOUR TV COMBI 20
On Screen Display (OSD) 20
Sleep function (switch off) 21
Switch set on function 21
Child lock 21
Recording from another video appliance 22
9. BEFOREYOU CALL AN ENGINEER 23
10. NOTES 24
4
5
1
Page 2

1. SUMMARY OF BUTTONS AND CONTROLS
You will find detailed descriptions of the various functions in the relevant chapters.
The remote control
RECORD n
STANDBY m
TIMER k
CLEAR
0-9
H
I
STOP h
PLAY G
Sp
P p
MUTE y
MENU
OK
INDEX E
STILL R
Record
Standby switch
TIMER programming on the set
Reset/clear
Digit buttons 0-9
Rewind/Reverse scanning
Forward wind/ Forward scanning
Pause/Stop
Playback
Volume control
D
Menu left
C
Menu right
Programme number Plus/Minus
A
Menu Up
B
Menu Down
Mute sound
Call menu
Confirm button
Index search
Still picture
Buttons that are not described in the
list have no function.
2
Page 3
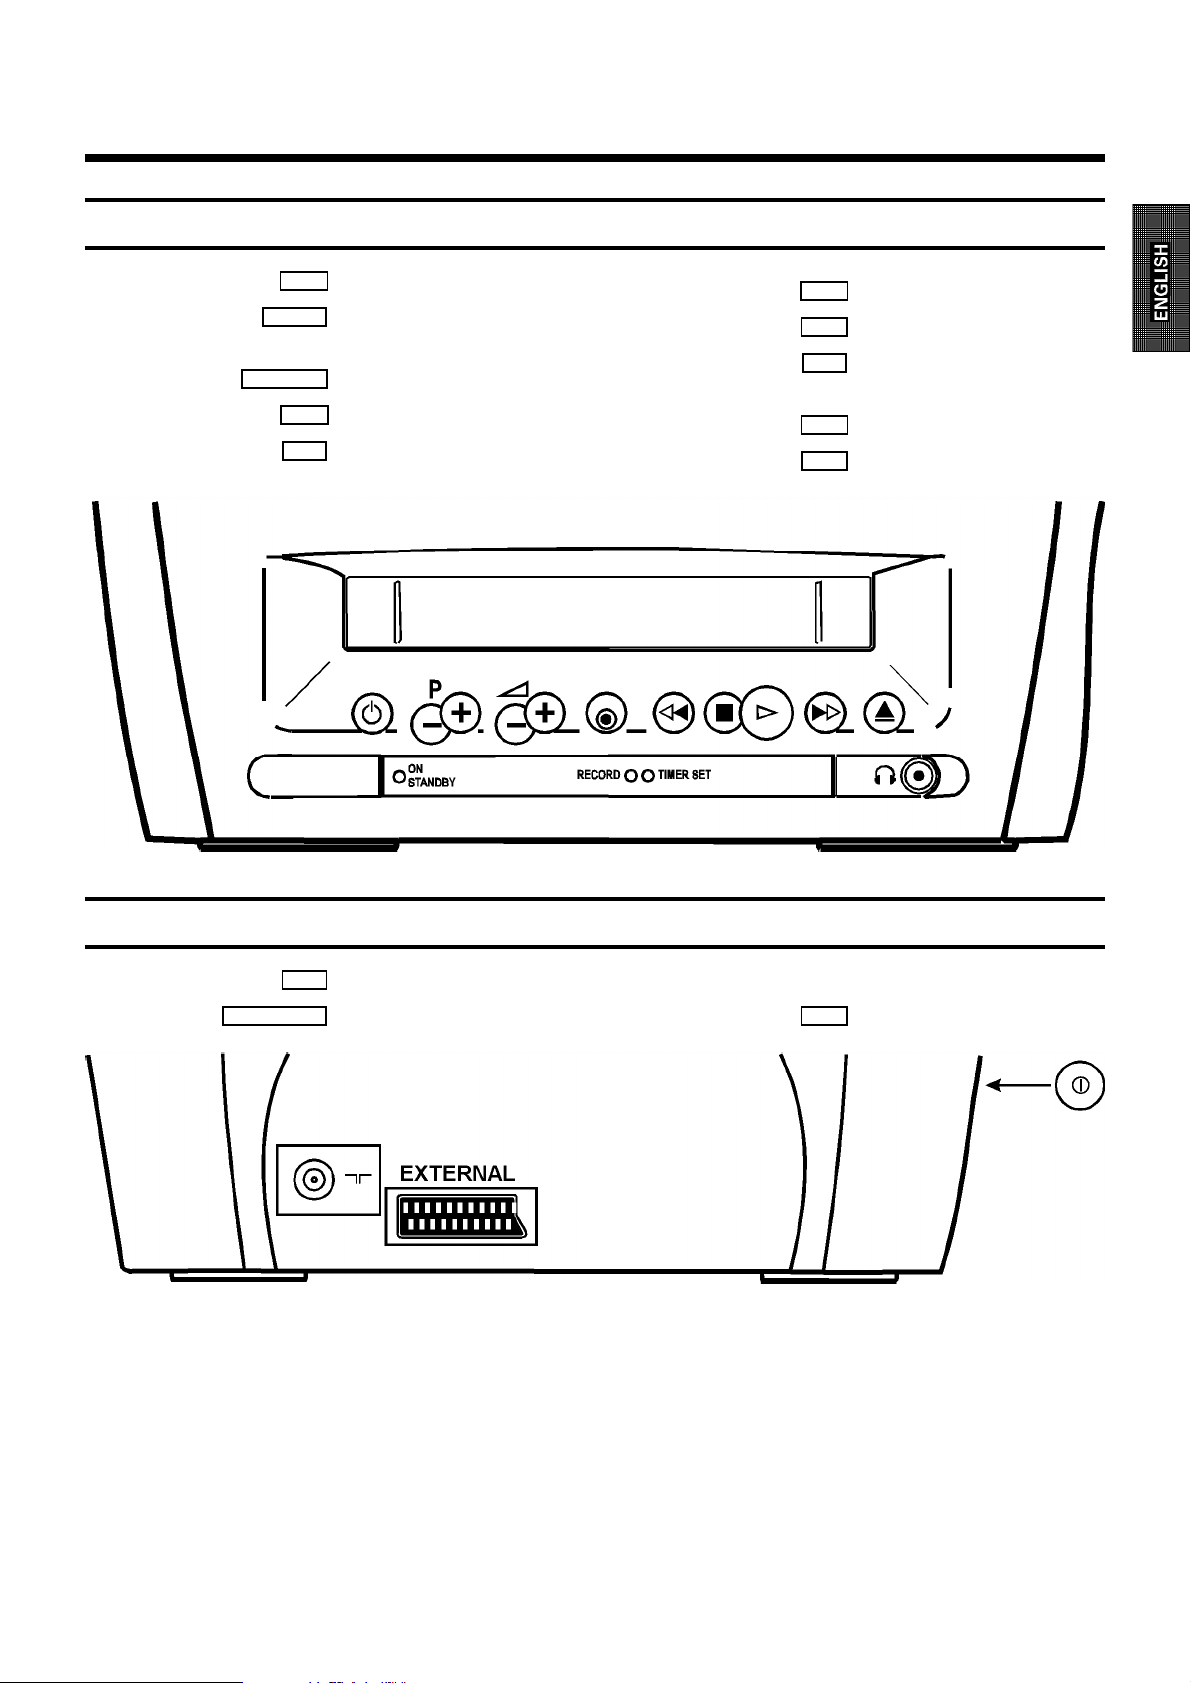
Front of the set
P p
Sp
m
Standby switch
Programme number
Plus/Minus
Volume control
n
Record
H
Rewind/Reverse scanning
h
Pause/Stop
G
Playback
I
Forward wind/ Forward
scanning
J
Cassette eject
w
Headphones socket
Back of the set
EXTERNAL
2
Aerial input socket
Scart (AV-Euro) socket
8
Power switch
3
Page 4

2. INSTALLATION. HOW DO I INSTALL THE TV COMBI?
Important for the United Kingdom
This apparatus is fitted with an approved moulded
13 Amp plug. To change a fuse in this type of plug
proceed as follows:
1 Remove fuse cover and fuse.
2 Fix new fuse which should be a BS1362 5A,
A.S.T.A. or BSI approved type.
3 Refit the fuse cover.
If the fitted plug is not suitable for your socket
outlets, it should be cut off and an appropriate plug
fitted in its place.
If the mains plug contains a fuse, this should have a
value of 5A. If a plug without a fuse is used, the fuse
at the distribution board should not be greater than
5A.
Note: * The severed plug must be destroyed to
avoid a possible shock hazard should it be
inserted into a 13A socket elsewhere.
How to insert the batteries into the
remote control
1 Remove the battery compartment from the back
of the remote control.
2 Insert the batteries as indicated into the battery
compartment.
How to connect a plug:
The wires in the mains lead are coloured in accordance with the following code:
BLUE - 'NEUTRAL' ('N')
BROWN - 'LIVE' ('L')
1 The BLUE wire must be connected to the termi-
nal which is marked with the letter 'N' or
coloured BLACK.
2 The BROWN wire must be connected to the
terminal which is marked with the letter 'L' or
coloured RED.
3 Do not connect either wires to the earth terminal
in the plug which is marked with the letter 'E' or
by the safety earth symbol
green or green-and-yellow.
Before replacing the plug cover, make certain that
the cord grip is clamped over the sheath of the lead not simply over the two wires.
\
or coloured
3 Close the battery compartment.
Note:
* For the remote control to function properly,
you must always point it directly at the set.
4
Page 5
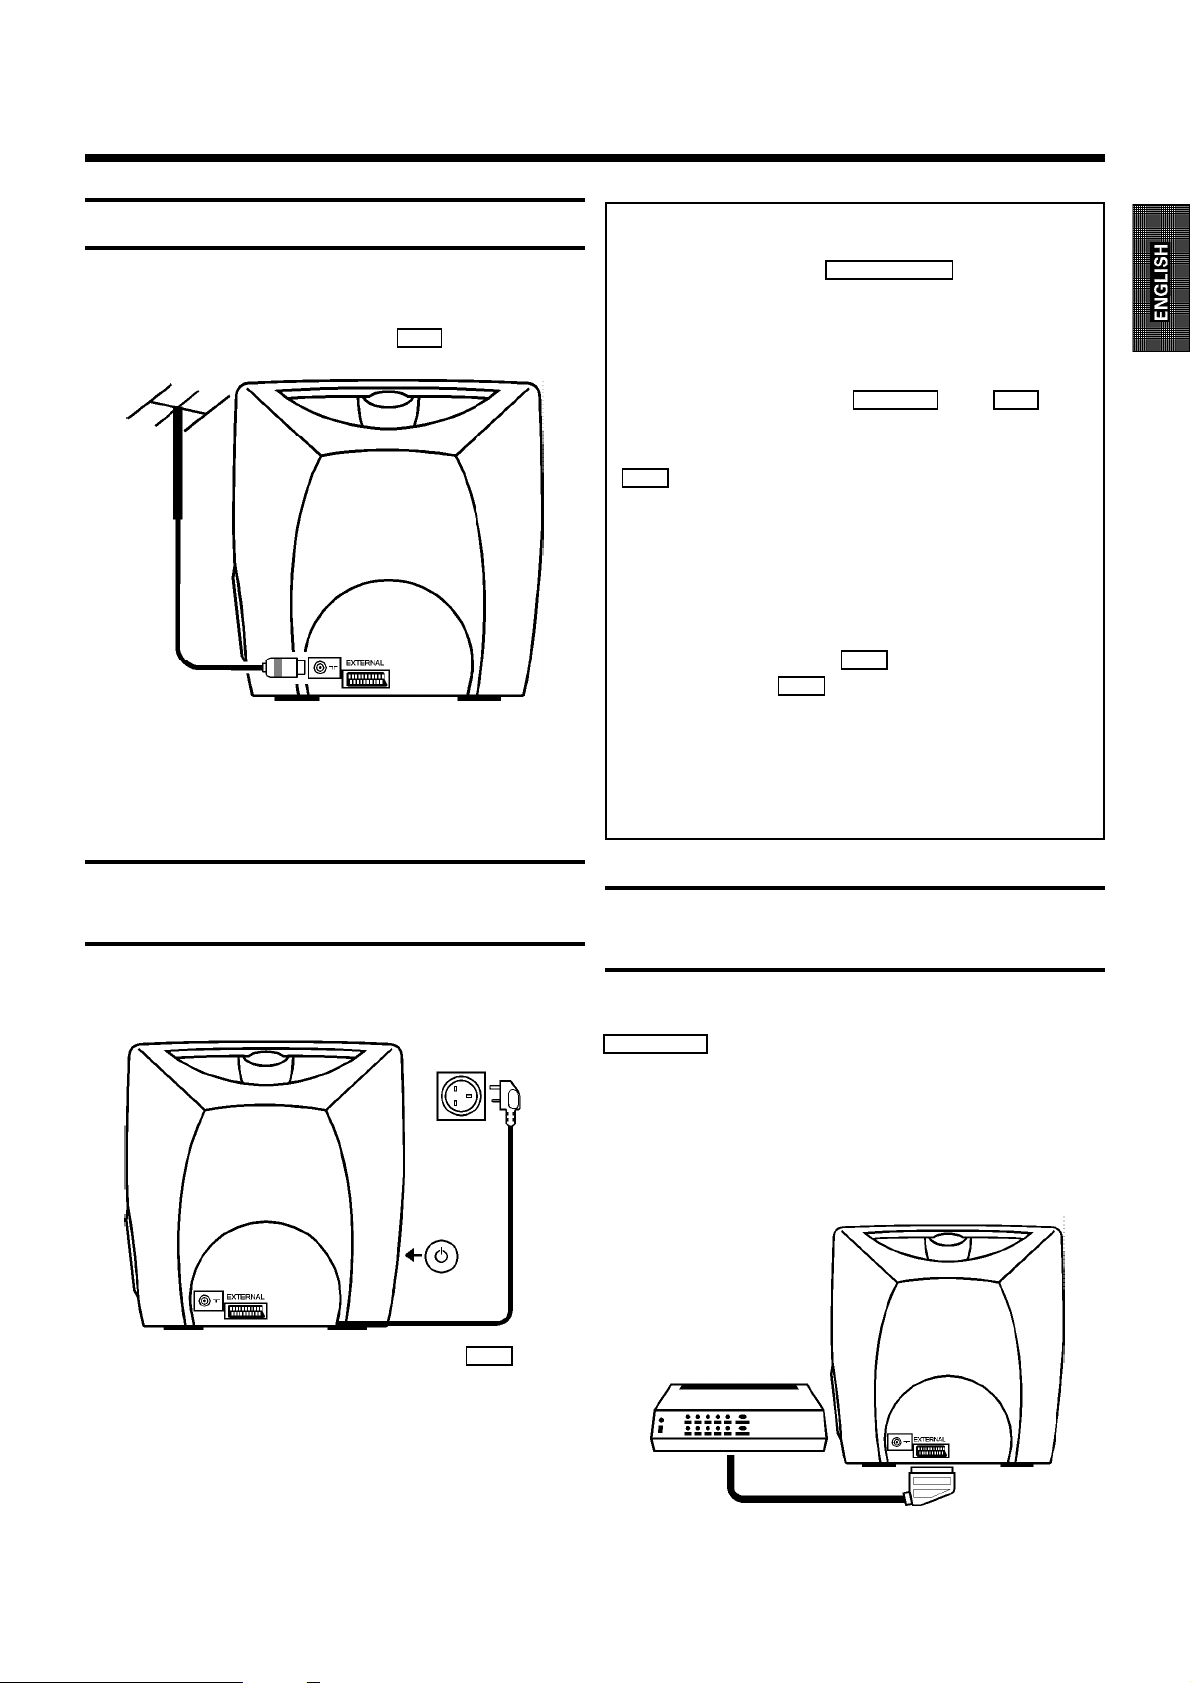
Connecting to the aerial
You can use the auxiliary aerial supplied or connect
the set to your aerial installation.
1 Insert the aerial plug into the
2 If you use the auxiliary aerial supplied, push the
aerial into the mounting on the back panel until it
snaps into place. Rotate the aerial until you have
got the best picture quality.
2
socket.
Note:
* We advise you, from now on, to switch the set
to standby using the
STANDBY m
button on
the front of the set or on the remote control.
When the set is in the standby mode, a small red
lamp on the left of the front of the set will be
alight.
You can switch on with
STOP h
, the
0-9
buttons or by inserting a cassette.
Attention: When you use the power switch
8
on the side panel, you have completely
switched off the set from the mains power
supply. No programmed recordings will then be
made. The red lamp on the left of the front of
the set will not be alight. After a few hours, the
date and clock settings will be lost.
Attention: Before you switch off the appliance
with the power switch
by pressing the
J
8
button.
, remove the tape
* Keep your TV Combi connected to the mains
and the power switch in on position at all times
to ensure that programmed recordings can be
made and that the television functions. The
power consumption required for this is very low.
Connecting to the mains power supply
1 Insert the plug of the mains cable into the wall
socket.
2 Switch the set on. The power switch
located on the left side panel of the set.
8
is
Connecting a decoder or other additional equipment
You can also connect additional equipment to the
EXTERNAL
(CD-i), satellite receiver or camcorder.
Some TV broadcasters transmit encoded television
programmes which you can only see with a
purchased or rented decoder. You can connect such
a decoder (descrambler) to this set.
socket, for instance, a CD-Interactive
5
Page 6
1 Connect the decoder to the set with a scart cable
EXTERNAL
(
socket).
You will find a description of how to combine the
storage of TV channels with the decoder in the
chapter 'Storing TV channels' in the section
'Manual channel search' .
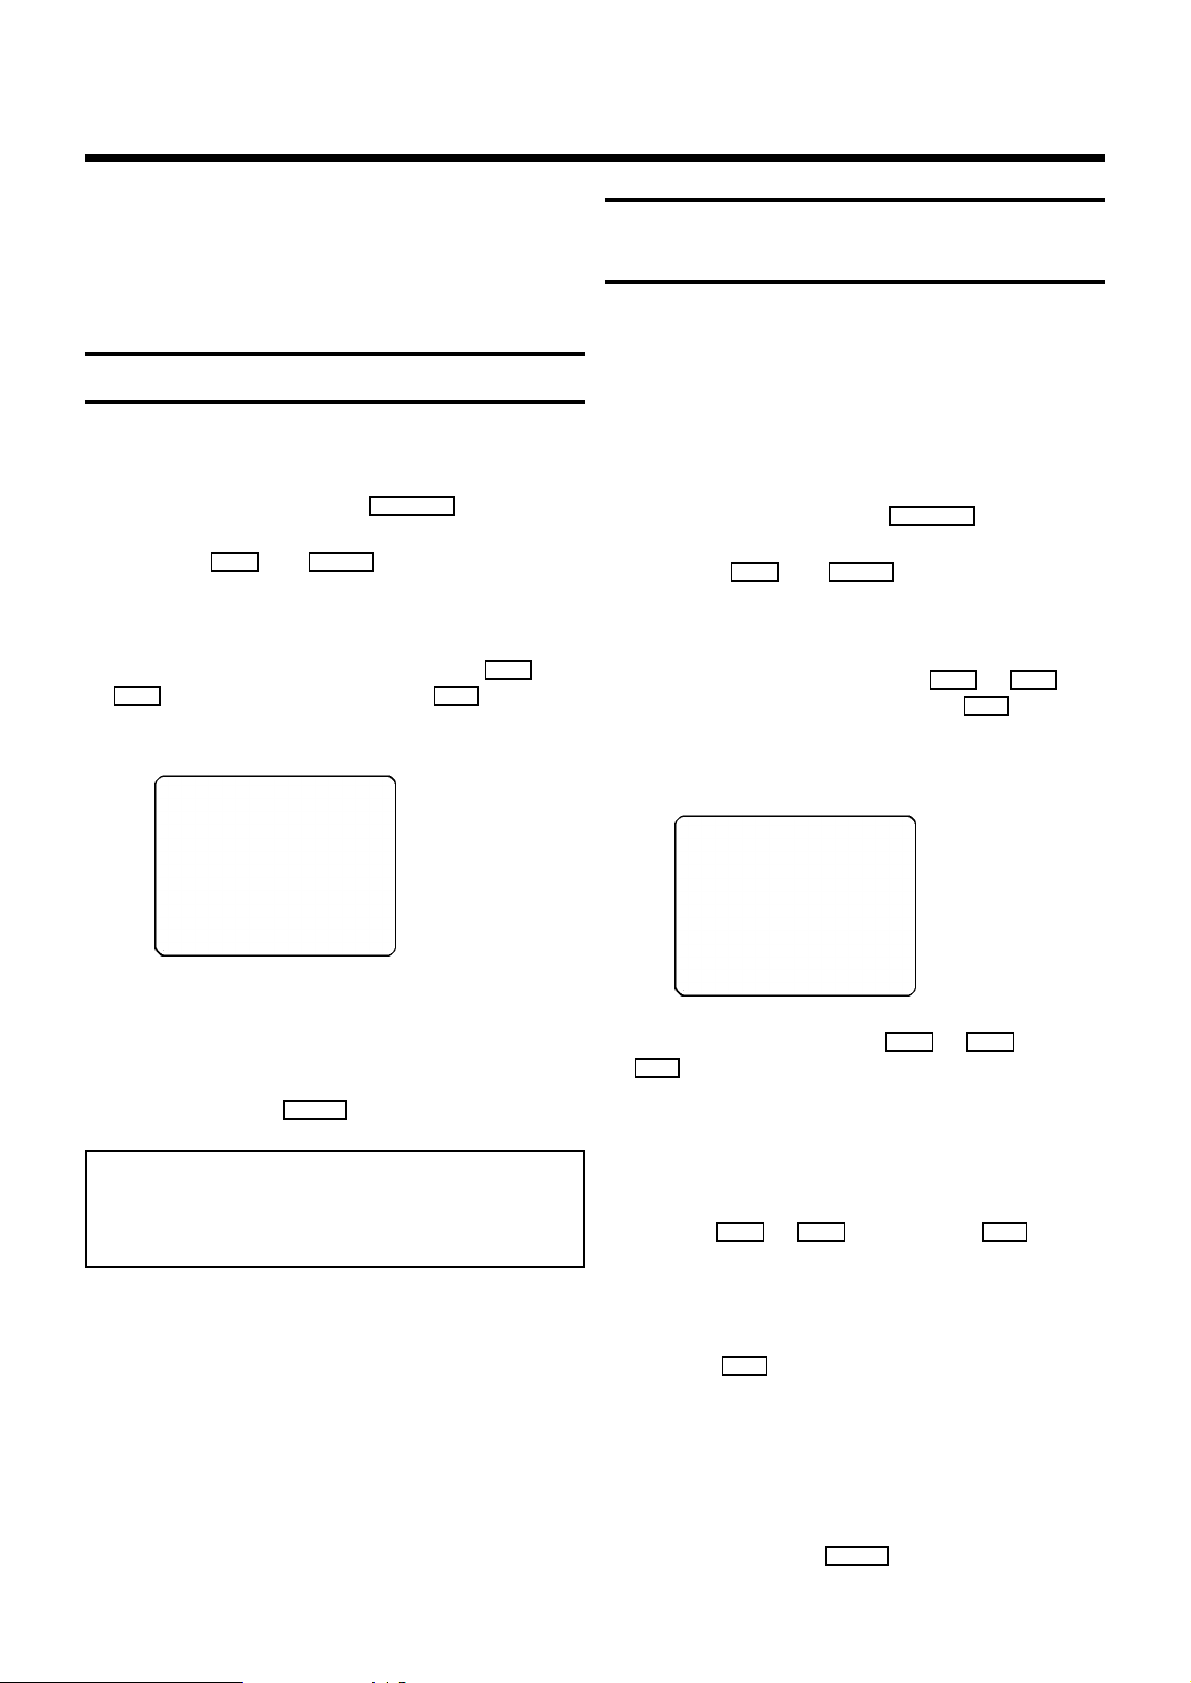
Making standard settings
You can make various standard settings here, e.g.
display language, country, frequency/channel number display.
Note:
* On your TV Combi select the programme
number that you allocated to the decoder function when storing the channel numbers. The TV
Combi will then automatically use the decoder.
Connecting to a satellite receiver
You can also connect a satellite receiver to this set.
1 Connect the receiver with a scart cable to the TV
Combi (socket
EXTERNAL
).
1 In order to start, press the
the
h
and
Sr
buttons on the set
STOP h
button. Press
simultaneously.
INSTALLATION vw
LANGUAGE EN
COUNTRY GB
AUTO STORE
MANUAL STORE
SORT
PP STORE
2 Choose the 'LANGUAGE' line using the
B
button.
3 Use the
D
or
C
menu button to select the
required display language, e.g.: 'EN' .
4 Select the 'COUNTRY' line with the
button.
5 Select your country with the
C
menu button, e.g. 'GB' .
D
-or
A
or
A
or
B
Emergency interrupt
Both the set and the remote control have an 'Emergency interrupt' button. You can use the
STANDBY m
Whenever you have operating problems you can
simply interrupt the function and start again.
You can practise operating your set without any
worries. No matter which buttons you press, you
cannot damage it.
6
button to interrupt any function.
6 Terminate by pressing the
MENU
button.
Page 7
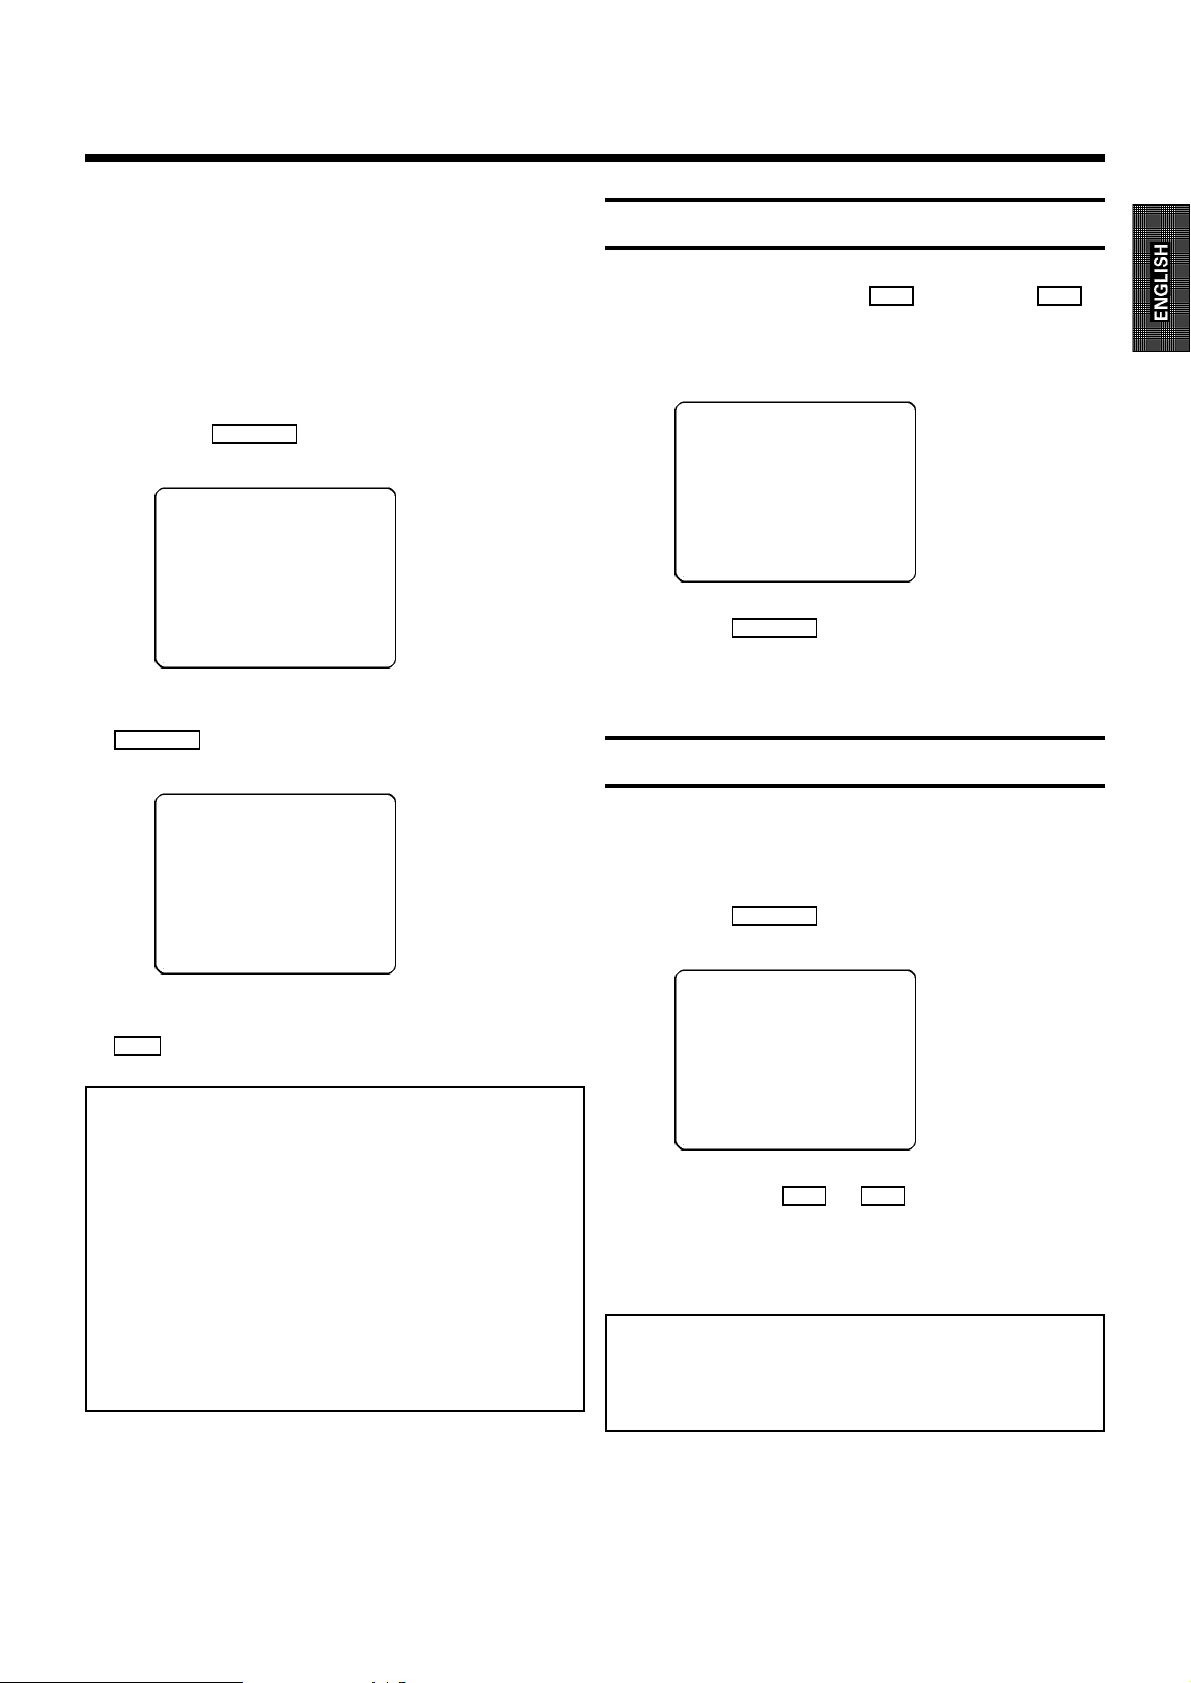
Setting the clock and date
In order to be able to programme recordings, you
must first ensure that the clock on the set is correctly
set.
1 In order to start, press the
2 Press the
MENU
button. The main menu appears
STOP h
on the TV screen.
MAIN MENU vw
PICTURE
FEATURES
SPECIAL
3 Select the line 'FEATURES' with the
B
menu buttons. Confirm it with the
button.
FEATURES vw
PP RECALL
ON TIMER
SLEEPTIMER 0
DISPLAY FULL
CHILD LOCK OFF
CLOCK
button.
A
OK
or
OK
A
button.
4 Select the line 'CLOCK' with the
buttons. Confirm it with the
CLOCK
TIME 20:00
YEAR 1997
MONTH 01
DATE 01
xy
5 Enter the time, year, month and date.
To do this, use the buttons
C
buttons.
Select the input line with the
0-9
A
or
and
buttons.
6 Terminate with the
MENU
button.
or
D
B
or
B
7
Page 8
3. STORING TV CHANNELS
To be able to watch and record TV programmes you
must first store all the TV channels (e.g.: 'BBC 1') in
the set.
You can store up to 69 TV channels.
Automatic Channel Search
The set will search for all TV channels.
1 Switch on the set with the
2 Press the
h
and
Sr
simultaniously. The installation menu appears on
the TV screen.
3 Select the line 'AUTO STORE' with the
B
buttons. Confirm it with the
The 'Automatic Channel Search' function starts.
STOP h
button.
buttons on the set
A
OK
button.
or
Allocating channel numbers (Programme Preset)
You can allocate any desired programme number to
the TV channels stored by the 'Automatic Channel
Search'.
Take care that the programme sequence for the first
four TV channels is as follows: BBC 1 = P 01, BBC 2 =
P 02, ITV = P 03, CH 4 = P 04.
1 Switch on the set with the
2 Press the
h
and
Sr
simultaneously. The installation menu appears
on the screen.
3 Select the line 'SORT' with the
menu buttons. Confirm it with the
4 Select the line 'FROM' .
STOP h
button.
buttons on the set
A
or
OK
B
button.
AUTO STORE
PRESS xyTO STOP
SEARCHING
PLEASE WAIT
CHANNELS FOUND: 1
aaabbbbbbbbbbbbbbbbb
4 The TV channel search will take a few minutes to
complete. Then all the TV channels will have
been stored.
5 To end press the
MENU
button.
Note:
* If the 'Automatic channel search' function is
activated, any previously programmed TIMER
blocks will be cleared.
SORT vw
FROM P01
TO P02
STORE
5 On the TV screen, use the
0-9
buttons to select the TV channel to which
C-21
D
or
C
or the
you want to allocate a programme number, e.g.:
'P01'.
6 Choose the 'TO' line.
7 Use the
D
or
C
button or the
0-9
button
to select the required programme number, e.g.:
'P02'.
8 Choose the 'STORE' line. Confirm the allocation
with the
OK
button.
The allocated TV channels will be exchanged.
9 Repeat steps 4to 8until you have allocated a
programme number to all the required TV channels.
0 To finish, press the
MENU
button twice.
8
Page 9

Manual channel search
In certain cases the Automatic Channel Search may
not be able to find all of the TV channels (e.g. coded
TV channels). You can then use this manual method
to set the channels.
1 Switch on the set with the
2 Press the
h
and the
simultaniously. The installation menu appears on
the screen.
3 Select the line 'MANUAL STORE' with the
B
or
menu buttons.
STOP h
Sr
buttons on the set
button.
A
Note:
If you want to allocate a decoder, switch the
decoder function on or off with the
C
button in the 'DECODER' line.
D
or
* If you want to change the automatic channel
setting, select the 'FINE TUNING' line.
With the
D
or
C
button you can vary the
automatic TV channel setting.
Important: This re-tuning is only necessary and
useful in special cases,e.g. when there are
stripes on the picture with cable-TV systems.
8 In the 'PROGRAMME NR.' line use the
P p
button to select the required programme
number, e.g.: '1'.
4 Confirm it with the
MANUAL STORE vw
CHANNEL/FREQ. C-CH.
SEARCH C-21
FINE TUNING
PROGRAMME NR 1
DECODER OFF
STORE
5 Select in the 'CHANNEL FREQ.' line, using the
D
or
C
buttons, the required describtion
OK
button.
(C-CH = Channel, FREQU = Frequency).
6 Select the 'SEARCH' line.
7 Press the
C
button as often as necessary,
until you have found the right TV channel. A
changing channel number will appear on the TV
screen.
If you know the frequency number or channel
number of a TV channel, you can also directly
enter it with the digit buttons
0-9
.
9 Select the 'STORE' line and confirm with the
OK
button.
0 If you want to search for further TV channels,
start again at step 5.
To finish, press the
MENU
button.
NOTE:
* With this set the reception of encoded
TV programmes isn't possible with certain cable
TV installations.
9
Page 10

4. THE TV SET FUNCTIONS
Selecting a TV channel
Select the required TV channel (= the programme
number) with the buttons
numbers
0-9
on the remote control.
P p
or the digit
The selected programme number (e.g.: '1') appears
in the upper right corner of the TV screen.
If this TV channel transmits a 'TV channel name'
(e.g.: 'BBC 1'), you will see this displayed next to the
programme number.
Volume control
You can control the volume level with the
button.
If you want to mute the sound temporarily (e.g.:
during a telephone call), press the
MUTE y
on the remote control. When you press it again, the
sound returns at the same volume level.
Sp
button
Picture control
You can control brightness, contrast, sharpness and
colour here.
1 Press the
on the TV screen.
2 Select the line 'PICTURE' with the
button and confirm with the
3 Select the required setting with the
button. Change the setting with the
C
MENU
PICTURE
BIRGHTNESS aaabbb
COLOUR aaabbb
CONTRAST aaabbb
SHARPNESS aaabbb
button. The main menu appears
vw
button.
OK
A
button.
A
D
or
or
or
B
B
4 Press the
MENU
button.
Note:
* In addition, you can adjust the tint for the
playback of cassettes in the NTSC standard.
10
Page 11
5. PLAYING A RECORDEDCASSETTE
In Chapter 2 you connected the TV Combi. Playing a
cassette is now very simple.
If you want to record something straight away, first
read Chapter 6.
1 Switch on the set or insert a cassette into the
cassette slot with the window facing upward.
2 Press the
PLAY
3 If you wish to interrupt playback, press the
STOP h
PLAY G
1245
button.
playback button.
20:00
Fast wind and rewind
1 Stop the tape. Press the
(Wind) button on your remote control. The tape is
wound at high speed.
WIND 1
1245
2 Press the
PLAY G
you have reached the required position on the
tape.
H
(Rewind) or
20:00
playback button as soon as
Picture scanning
I
PAUSE 1
20:00
1245
4 If you wish to remove the cassette, press the
J
button on the set.
Note:
* Some functions switch off automatically after a
while (e.g.: Pause, Still Picture, Scanning). This
helps to protect the cassette and prevent
unnecessary power consumption.
* With this set you can play back cassettes that
have been recorded on other videorecorder in
the NTSC standard.
* If you load a cassette with erase protection, the
TV combi starts the playback automatically.
* Remove the cassette before transporting the
TV Combi.
You can select from various speeds for scanning
backwards or forwards.
1 Press the
SCAN FORWARD 1
2 Now press the
PLAY G
1245
playback button.
20:00
H
or
I
button as often as
necessary until you have reached the desired
speed.
The TV screen will show e.g. 'SCAN FORWARD' .
Note:
* The picture quality is affected during scanning.
You will notice this particularly with long play
(LP) recordings. The sound is turned off.
11
Page 12

Still picture
1 Press the
remote control.
PLAY G
playback button on the
4 Select the 'REPEAT PLAY' line. Start the continu-
ous playback with the
D
or
C
menu
button.
5 Press the
MENU
button.
2 Press the
STILL R
button. The picture will
stand still.
Interference stripes will appear at the edge of the
picture.
Each time you press
STILL R
again the
picture will move on one step.
STILL
20:00
1245
3 Press the
PLAY G
button to continue playing
back at the normal speed.
Continuous playback
You can continuously repeat the replay of a cassette.
When the set recognizes that it has reached the end
of the tape or a blank, unrecorded area lasting at
least 30 seconds, it rewinds the tape to the start and
begins again.
6 Start the continuous playback with the
PLAY G
playback button.
7 If you want to cancel the function, stop the
continous playback with the
D
or
C
menu
button in the 'REPEAT PLAY' line.
Tape position.
How do I know where I am on the
tape?
If you press the
shown in the display as a continually changing
numeric indication during Wind, Rewind, Record,
Playback and Pause/Stop.
If you want to set the indicator to '0000', press the
CLEAR
button.
When you load a cassette again or rewind to the
start of the tape, the indicator is automatically reset
to '0000'.
OK
button the tape position will be
1 Insert a cassette.
2 Press the
MENU
button. The main menu appears
on the TV screen.
3 Select the 'SPECIAL' line and confirm it with
OK
.
SPECIAL vw
REPEAT PLAY OFF
TRACKING
CLEANING
12
Page 13

Searching for a tape position
Sometimes you may have recorded two or more
TV programmes on one cassette.
So that you do not have to spend time searching,
your set offers you an automatic search facility.
Every time you start to record, this TV Combi marks
the tape with a code mark. You can search for these
code marks on the tape or unrecorded areas lasting
at least 15 seconds using the
your remote control.
1 Press the
2 Press the
INDEX E
I
button.
button to select the next code
mark or unrecorded area or the
the previous code mark or unrecorded area.
3 Once the TV Combi finds the code mark or
unrecorded area it will automatically switch to
playback.
Note:
* When you press any tape transport button
(e.g.: the
H
or
I
function will be stopped.
* You cannot use this function with recordings
made on another TV Combi that does not have
this function.
INDEX E
button on
H
button for
button) this search
How do I eliminate picture interference?
Every time a cassette is loaded the TV Combi will
automatically set the correct tracking position.
For recordings made on another set you may be able
to improve on the automatic setting as follows:
1 During playback press the
MENU
button on your
remote control. The main menu appears on the
TV screen.
2 Select 'SPECIAL' and confirm with the
OK
button.
3 Select 'TRACKING' .
4 Press the
D
or
C
menu button until the
playback quality is at its best.
5 Press the
MENU
button. This setting will remain
until you remove the cassette.
Note:
* Some hired cassettes may have a poor picture/sound quality. This is not a fault in your set.
Cleaning function
When using your TV Combi for a longer period of
time, the videoheads may become dirty. During
playback horizontal lines appear on the screen, that
will not disappear when using the function as described in the previous paragraph.
1 Press the
MENU
button. The main menu appears
on the screen.
2 Select the 'SPECIAL' line and press the
OK
button
3 Select the 'CLEANING' line.
4 Press the
OK
button. A blue screen appears for
a few seconds.
5 Wait until the blue screen disappears and press
MENU
the
button.
13
Page 14

6. HOW DO I RECORDDIRECTLY?
The easiest way to record is to directly record a TV
programme that is currently being transmitted.
And this is how to go about it:
1 Insert a cassette.
2 Use the
P p
button to select the programme
number from which you wish to record, e.g.: '01'.
3 When you wish to start recording, press the
RECORD n
button.
A red light on the front of the set indicates that a
recording is in progress.
Recording with OTR
If you do not want to record to the end of the
cassette, you can change the end time of the recording in 30 minute intervals.
1 Whilst recording, press the
your remote control. The display shows at what
time the recording will stop.
2 With each subsequent press of the
C
menu buttons you can add 30 minutes to
this time.
3 If you wish to cancel the end time, press the
CLEAR
button.
As soon as the end time is reached, the set will
switch off automatically.
RECORD n
button on
D
or
4 Use the
5 If, whilst recording, you want to switch off the
TV screen, press the
STOP h
button to stop the recording.
STANDBY m
button once.
To switch the TV screen on again, press the
P p
button.
Some general notes:
* Programme number 'E1' is provided for recording from external sources (via the
EXTERNAL
scart socket).
* If you have forgotten to load a cassette, the
warning 'NO CASSETTE' will appear.
* If, when you want to make a recording, you
have accidentally loaded a cassette with erase
protection, the cassette will be automatically
ejected.
* If the end of the cassette is reached during
recording, the cassette will be automatically
ejected. The set will then switch to standby after
a few minutes.
* When you make a new recording on a video
cassette, it will automatically record over and
delete any recordings already on the cassette.
* Whilst a recording is being made you cannot
switch to another TV channel.
Erase protection
So that you don't accidentally delete an important
recording, you can remove the special tab (erase
protection) on the narrow side of the cassette with a
screwdriver or slide the special tab to the left.
Later, if you no longer want the cassette to be erase
protected, you can seal the gap again with adhesive
tape or slide the special tab to the right again.
14
Page 15

Auto-assembling
Long play function
You can use the auto-assembling function to join
individual recordings without any annoying flickering between the recordings.
1 Press the
PLAY G
playback button. Search for
the correct position on the tape and then stop the
playback by pressing the
STOP h
button.
'PAUSE' will appear in the display.
PAUSE 1
20:00
1245
2 Now start recording as usual by pressing the
n
button.
You can reduce the recording speed by half. This
makes it possible to record, for example, 8 hours
instead of 4 hours on an 'E240' cassette.
1 Before recording, press the
MENU
button. The
main menu appears on the screen.
2 Select the 'SPECIAL' line and confirm with the
OK
button.
3 Select the 'TAPE SPEED' line.
4 Select the 'LP' (= LongPlay) recording speed by
pressing the
D
and the
Stop by pressing the
MENU
C
menu buttons.
button. 'LP' will
appear on the screen.
5 During playback the TV Combi will automatically
select the correct playback speed.
Note:
* You will obtain the best picture quality by
recording at the standard speed ('SP').
15
Page 16

7. HOW DO I PROGRAMME A RECORDING?
In this chapter you will learn how to programme
your set. It switches itself on automatically, records
the TV programme you want and then automatically
switches to standby.
What information does the set need?
The set needs the following information for every
programmed recording:
* the date on which the recording is to be made
* the programme number for the TV channel
* the start time of the recording
* the stop time of the recording
If you use 'Programming with VIDEOPlus+', you only
need to enter the VIDEOPlus+ code. All the information required by the TV Combi is contained encoded
in this code.
Programming with VIDEOPlus+
With this method the programming will be as easy
as dialing a telephone number. You only have to
enter the 'VIDEOPlus+ code' (3 to 9 digits) printed in
your TV guide next to the start time of a TV programme. Make sure that a cassette without erase
protection has been loaded.
1 Press the
SV/V+
button on the remote control.
VIDEOPlu+
CODE --------DAILY/WEEKLY ONCE
The set stores all the information mentioned above
in what is known as a TIMER block. And it does that
for up to one month in advance.
Your set can store up to 6 of these TIMER blocks.
Please note that the timing of the TIMER blocks must
not overlap. The TV Combi must first finish one
TIMER block before starting the next block.
xy 0-9 OK
2 Enter the entire 'VIDEOPlus+ code' with the digit
buttons
0-9
. This code (3 to 9 digits) is found
next to the start time of a TV programme in your
TV guide.
If you entered an incorrect code number, clear it
with the
3 If you want to repeat programming at daily or
CLEAR
VIDEOPlu+
CODE 53124---DAILY/WEEKLY ONCE
PROGRAMME NR. 01
xy 0-9 OK
button.
weekly intervals, select the 'DAILY/WEEKLY' line
pressing the
A
and the
B
buttons.
'Daily' programming can only be used for
recordings to be made from Mondays to Fridays
inclusive.
16
Page 17

4 Press the
OK
button. The programmed code is
now decoded. If the set has decoded correctly,
the resultant data appears on the TV screen.
Note:
If you use VIDEOPlus+ for the first time, the
'PROGRAMME NR.' line appears when you enter
the VIDEOPlus code. Enter the programme number for this particular TV programme. This number will be stored automatically.
Press the
OK
button to confirm the data is
correct.
* Do you want to use programme number 'E1' in
order to record from an external source (e.g.
satellite tuner)? Confirm the 'E1' programme
number displayed in step 4with the
button. Press the
OK
button to confirm the
OK
data is correct.
DATE DW PR START END
01 01 17:15 18:45
TIMER Programming
You can enter and store data in the TV Combi for six
recordings.
You must now enter, step by step, all the data
necessary for the timed recording.
The TV screen will show all the data simultaneously.
1 Press the
A free TIMER block will appear on the TV screen.
TIMER k
DATE DW PR START END
01 01 17:15 18:45
vw xy 0-9 OK
button on the remote control.
vw xy 0-9 OK
5 If you want to correct the TIMER-block, you can
choose between setting the date, daily/weekly,
programme number, start time, stop time and
VPS with the
With the
0-9
6 Confirm with the
B
or the
digit buttons you select the data.
D
or the
OK
C
menu button.
A
button or with the
button.
Programming is now complete.
The data has been stored in a TIMER block.
7 Switch off with the
STANDBY m
button on the
remote control.
• With the
D
or the
C
menu button you
choose between setting the date, daily/weekly,
programme number, start time, stop time.
• With the
0-9
digit buttons you select the data.
• With the
B
or the
B
button you switch between
A
button or with the
'D' (daily) and 'W' (weekly).
Please note:
* It is possible to programme a recording 31
days (one month) in advance.
If, for example, today is the 02nd of March and
you programme the date as '01', the recording
will be made on the 01st of April.
For a TV programme starting at midnight, i.e. at
00:00, enter the date of the following day as the
recording date.
2 Have you set all the data correctly? Now press
TIMER k
the
3 Switch off with the
button on the remote control.
STANDBY m
button.
17
Page 18

The TIMER lamp on the front of the set lights up
when one or more of the TIMER blocks are occupied.
How do I record from a satellite
tuner?
You can also programme recordings from an external satellite tuner.
General programming notes
• During a TIMER recording you cannot switch to
another TV channel.
• The programmed recording will always be made
at the recording speed (SP/LP) that has already
been selected on the TV Combi.
• TIMER recording will only function when the set
is switched to standby with the
button. If the set is switched on before a
programmed recording is due to take place, the
TIMER lamp will flash before the start.
• Attention: If you have switched off with the power switch
cannot operate.
• If the end of the cassette is reached during a
programmed recording, the set automatically
ejects the cassette.
• Programme number 'E1' is provided for recording from external sources (via the
scart socket).
• If you have forgotten to load a cassette, the
warning 'NO CASSETTE' will appear.
• If, when you want to make a recording, you have
accidentally loaded a cassette with erase protection, the cassette will be automatically ejected.
• When you make a new recording on a video
cassette, it will automatically record over and
delete any recordings already on the cassette.
8
, the TIMER record function
STANDBY m
EXTERNAL
1 Connect the tuner to the
Make sure that the tuner is switched on and that
the correct SAT channel has been selected.
2 Use one of the available programming methods
to programme a TIMER block. Use programme
number 'E1' in the programming procedure for
this external recording source.
Note:
* If you use 'VIDEOPlus+ programming' for such
an 'external' satellite TV programme, the TV
Combi automatically selects 'E1'.
EXTERNAL
socket.
18
Page 19

How do I check or correct a TIMER
How do I clear a TIMER block or
block?
1 Press the
A survey of all the TIMER blocks will appear in
chronological order on the TV screen.
2 Select a TIMER line with the
button. Confirm it with the
3 With the
choose between setting the date, daily/weekly,
programme number, start time and stop time.
With the
0-9
select the data.
4 Finally, press the
made any changes, the data in the set will now
be up to date.
Note:
* 'Daily' programming can only be used for
recordings to be made from Mondays to Fridays
inclusive.
* With 'Daily/Weekly' programming, the first
recording must take place within a week.
TIMER k
D
A
button on the remote control.
A
or
C
button.
or the
or the
C
menu button you
B
button or with the
B
digit buttons on your remote control you
TIMER k
button. If you have
interrupt a TIMER recording?
1 Press the
A survey of all the TIMER blocks will appear in
chronological order on the TV screen.
2 Select the TIMER line that you want to delete
with the
3 Press the
cleared.
4 Press the
TIMER k
A
or
CLEAR
TIMER k
button on the remote control.
B
button.
button. The TIMER block will be
button.
19
Page 20

8. SPECIALFEATURESON YOUR TV COMBI
Apart from the functions that have already been
described, your set has other special functions and
extras designed to make the use of your set as
convenient as possible.
In this chapter you will find out more about them.
On Screen Display (OSD)
This function displays the operating mode selected
for your set on the TV screen.
1 Press the
on the TV screen.
2 Select the 'FEATURES' line and confirm it with
the
MENU
OK
button.
FEATURES vw
PP RECALL
ON TIMER
SLEEPTIMER 0
DISPLAY FULL
CHILD LOCK OFF
CLOCK
button. The main menu appears
Personal Preset
You can make your personal picture and volume
settings here. You can call up these setting and they
will be used automatically when you switch the set
on.
1 Choose your personal setting (see chapter 4,
'THE TV SET FUNCTIONS').
2 Press the
h
simultaniously. The Installation menu appears in
the display.
INSTALLATION vw
LANGUAGE EN
COUNTRY GB
AUTO STORE
MANUAL STORE
SORT
PP STORE
3 Select the 'PP STORE' line using the
B
button. Confirm with the
and
Sr
buttons on the set
OK
A
button.
or
3 Select the 'DISPLAY' line.
4 Select one of the options indicated. To do this,
use the
D
or
C
menu button.
'FULL': OSD appears for a few seconds each time
an operating mode is selected and then
disappears.
'OFF': OSD is switched off.
'PROG': only the programm number appears.
'COUNT': only the counter appears.
5 Confirm it with the
MENU
button.
Note:
* With the
OK
button you can superimpose
the actual status of the set on the TV screen.
4 To end press the
have been stored.
MENU
button. The settings
20
Page 21

How to call up your Personal Preset
1 Press the
in the display.
MENU
button. The main menu appears
4 With the
D
or
C
menu button you can
determine the minutes left until switch off in 15
minutes intervals.
When you set the time to '0' with the
CLEAR
button the sleep function is switched off.
MAIN MENU vw
PICTURE
FEATURES
SPECIAL
2 Select the 'FEATURES' line using the
B
button. Confirm with the
FEATURES vw
PP RECALL
ON TIMER
SLEEPTIMER 0
DISPLAY FULL
CHILD LOCK OFF
CLOCK
3 Select the 'PP RECALL' line and confirm with the
OK
button.
4 Press the
MENU
button. The set will use these
OK
A
button.
or
settings.
5 Press the
MENU
button.
Switch set on function
You can programme your set to switch on at a
predetermined time.
button.
MENU
D
MENU
button. The main menu appears
or
C
menu button, or
D
or
C
0-9
menu
button.
1 Press the
on the TV screen.
2 Select 'FEATURES' line and confirm with the
OK
3 Select 'ON TIMER' line.
4 Determine the time you wish the set to switch on.
Press the
digit buttons on the remote control.
5 Select the 'WAKE UP' line and switch the 'on-
timer' on or off with the
button.
6 Press the
Sleep function (switch off)
You can programme your set to switch off after a
predetermined period. This functions in all operating
modes except when the TV Combi is recording.
1 Press the
on the TV screen.
2 Select 'FEATURES' line and confirm with the
OK
3 Select 'SLEEPTIMER' line.
MENU
button. The main menu appears
button.
FEATURES vw
PP RECALL
ON TIMER
SLEEPTIMER 0
DISPLAY FULL
CHILD LOCK OFF
CLOCK
Child lock
This function prevents the unauthorized operation of
your TV Combi. All button functions are blocked. But
don't worry: programmed recordings are made despite the child lock and cannot be interrupted.
Keep the remote control in a safe place.
button.
MENU
D
MENU
button. The main menu appears
C
or
menu button you can
button.
1 Press the
on the TV screen.
2 Select the 'FEATURES' line and confirm with the
OK
3 Select the 'CHILD LOCK' line.
4 With the
switch the childlock on or off.
5 Press the
6 You can switch back in the same way.
21
Page 22

Recording from another video appliance
With this TV Combi you can record from an external
source, e.g.: a second TV Combi or a camcorder.
To do this you will need a scart cable for the
'EXTERNAL' input or a cinch cable for the
'Audio/Video' input at the front of the set.
1 Connect this TV Combi to the appliance from
which you want to record, e.g.: a second
TV Combi.
Plug the scart cable into the scart socket on each
appliance. This is the
TV Combi.
Note:
* In the following description, this TV Combi will
be the one used for recording and will be referred to as VCR B. The other appliance will be
used for playback and will be referred to as
VCR A.
EXTERNAL
socket on this
2 Insert the recorded cassette into VCR A and a free
cassette into VCR B.
3 Now select programme number 'E1' on VCR B for
'EXTERNAL'. This is found near to programme
number '1' (1 - 'E1' - 'AV'). To do this, use the
P p
4 To start recording, press the playback button
PLAY G
RECORD n
5 When you want to finish copying, press the stop
button
0-9
or
button.
on VCR A and the recording button
on VCR B.
STOP h
on both appliances.
22
Page 23

9. BEFOREYOU CALL AN ENGINEER
Problem Possiblecause
The set does not respond to any button being
pressed
Cassette jammed * Pull out the mains plug for a moment. Don't use force.
Remote control does not operate * Batteries are exhausted
No playback on TV Combi * No recording on the cassette
No TV reception * The aerial is not connected
Poor playback from TV Combi * Use the 'TRACKING' function with cassettes recorded
* No power supply
* A programmed recording is currently being made
* Technical disturbance: disconnect from the mains for 30
seconds, then re-connect.
* The power switch on the side panel is switched off
* Child lock is active
* Interference from fluorescent lights or bright sunlight
* No TV channels have been stored
on another set
* Cassette badly worn or of poor quality
* Video heads dirty. Activate the head cleaning function.
No recording possible * TV channel not stored or wrongly selected
* Cassette with erase protection has been loaded
Programmed recording does not function * Time data wrongly programmed
* TIMER not set properly
* A cassette with erase protection has been loaded
23
Page 24

10. NOTES
Precautions/Notes
• The set should not be used immediately after transportation from a cold to a hot area or vice versa, or in
conditions of extreme humidity.
After unpacking the set, it should be allowed to acclimatize for at least three hours before installation.
• Do not use the set in dusty places, near strong magnetic fields or where it may be subject to vibration.
• We recommend disconnecting the appliance from both
the mains and the aerial
thunderstorms.
• Do not put your fingers or any other foreign objects
into the cassette slot as this could damage the mechanism. Particular care should be taken when children
are present.
• This set employs the VHS cassette standard.
Only use cassettes of a well-known brand which display the VHS symbol. We recommend that you use
PHILIPS VHS video cassettes to ensure the best possible picture quality from your TV Combi.
• These operating instructions have been printed on
recycled paper. This is to help protect our environment.
• Used remote control batteries should not be thrown
away with ordinary domestic refuse. Deposit old batteries at the relevant collection points.
• Please make use of the facilities available in your
country for disposing of the packaging of the set in a
way that helps to protect the environment.
• This electronic equipment contains many materials
that can be recycled. Please inquire about the possibilities for recycling your old set.
2
during heavy
• VIDEOPlus+ and PlusCode are trademarks of Gemstar
Development Corp.. VIDEOPlus++ system is manufactured under licence from Gemstar Development Corporation.
Technical Data
• Mains voltage 220 to 240 V
• Mains frequency 48 - 52 Hz
• Power consumption typically 70 W (typically 10 W in
standby)
• Wind/rewind time typically 170 sec. for E-180
• Ambient temperature during operation +10 ÊCto
+35 ÊC
• Relative humidity 20% to 80%
• Position for use max. 15 Êinclination on all sides
• Dimensions 365 x 402 x 360 mm (incl. feet)
• Weight approx. 13 kg
• Video resolution VHS è240 lines
• Audio 80 Hz - 10 KHz ( ¡8 dB)
• Back-up power supply: TV channel storage - typically
1 year, Clock/Timer - typically 7 hours.
• This product complies with the requirements of the
Directive 73/23/EEC + 89/336/EEC.
List of accessories
• Operating instructions
• Remote control and batteries
• Auxiliary aerial
14PV172
INTERFERENCE:
The Department of Trade and Industry operates a
Radio Investigation Service to help TV licence holders
improve reception of BBC and FTC programmes
where these are being spoilt by interference.
If your dealer cannot help, ask at a Main Post Office
(WwnnNNNwwnwNNnwNwwnNwNnwNNnwwN)
for the booklet 'How to Improve Television and Radio
Reception'.
3103 166 18201
7091/003
24
In order to facilitate the identification of your set in
case of theft, enter the serial number (SER.NR.) in the
diagram. The serial number is printed on the type
plate fixed at the rear of the set. All enquires can be
handled more efficiently if accompanied by the identity card shown. This is provided for your reference
and should be kept in a safe place.
TYPE 14PV172
VN xx SER.NR. .....
 Loading...