

Register your product and get support at
www.philips.com/welcome
User manual
I4PT4525/V7
I4PT3525A/7
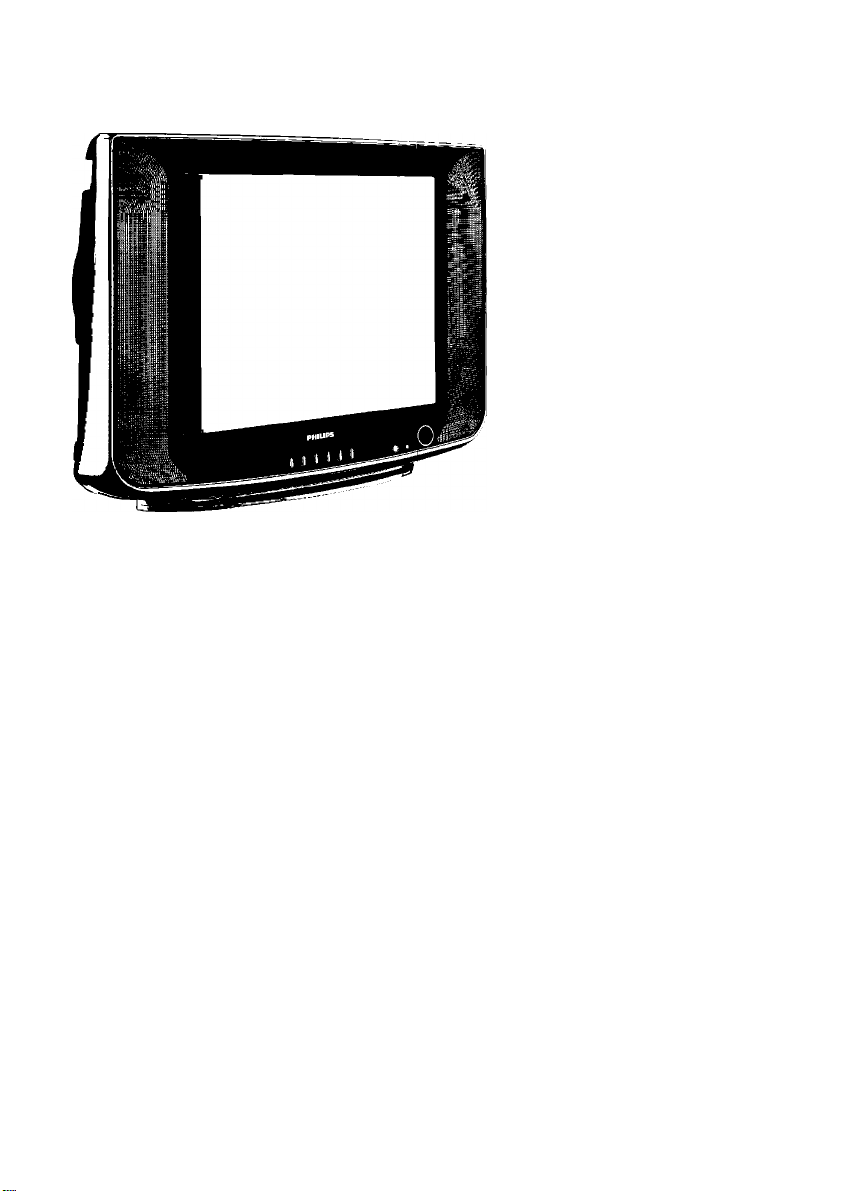
PHILIPS


CONTENTS
SAFETY
GENERAL........................................................................................................ 2
CARING AND CLEANING OF THE TV.................................................................... 2
BEFORE CALLING SERVICE
TV HOOKUP (BASIC CONNECTION)
REMOTE CONTROL CARE AND USE
LOCATION AND FUNCTION OF CONTROLS ON REMOTE HAND SET
.5-6
LOCATION AND FUNCTION OF CONTROLS ON TV SET
BASIC OPERATION
MENU OPERATION
......................
PICTURE MENU OPERATION...
SOUND MENU OPERATION
TIMER MENU OPERATION
...........
.............
SETTINGS MENU OPERATION.,
SEARCH MENU OPERATION
..........
DIRECT KEY FUNCTION
SPECIFICATIONS
Recycling Directive - To minimise harm to the environment, the batteries supplied
with the TV set do not contain mercury or nickel cadmium. If possible, when
disjrasing of batteries, use recycling means available to you.YourfV set uses materials which
are reusable or which can be recycled.To minimise the amount of waste in the environment,
specialist companies recover used sets for dismantling and collection of reusable materials
(contact your dealer).
......
8
.....
9
.....
9
.9-10
.....
10
....
11
.12-13
.14

SAFETY
General___________________________________________________________________________________
■ Two people are required to lift and carry aTV that weighs more than 25 kg. Improper handling
of the TV can cause serious injury.
> The surface on which the TV is placed has to be level and able to withstand its weight.
’ Air must be able to circulate freely through the ventilation slots. Do not place the TV in a
confined place.
’ Do not place naked flame sources such as lighted candles close to the TV.
’ Do notplaceavasefilled with water near the TV. Spills can results in electric shock. If water
gets into the TV, disconnect the TV from the mains and have it checked by a qualified technician.
■ Do not expose the TV or the batteries of the remote control to heat, direct sunlight, rain or
water.
’ During a thunder storm, do not touch any part of the TV, power cord or antenna cable.
’ Do not leave the TV In standby mode for an extended period of time. Instead disconnect it
from the mains.
’ Do not connect too much equipment to the same mains socket because it can result in fire or
electric shock.
Carii and cleaning of the TV
■ Disconnect the TV from the mains before you clean the TV. Use only a dry cloth.
’ Do not touch, push, rub or strike the screen with anything hard as this may scratch or damage
the screen permanently.
I

BEFORE CALLING SERVICE
Below is a list of frequently occurred symptoms. Before you call for service, make these simple
checks. Some of these symptoms can easily be rectified if you know what to do.
Symptoms What you should do
Colour patch
(uneveness)
No power • Check the TV’s AC power cord is plugged into the mains socket.
No picture • Check the antenna connection at the rear of the TV.
Good picture
but no sound
• Switch off the TV by the mains power button.Wait for 20
minutes before switching on again.
• Check the TV is not placed too near speakers or magnetic
objects.
If there is still no power, disconnect plug.Wait for 60 seconds
and re-insert plug. Switch on the TV again.
• Possible TV station problem.Try another channel.
• Try increasing the volume.
• Check that the sound is not muted. If it is muted, press the
Mute button on the remote control to restore sound.
Good sound but poor
colour or no picture
Snowy picture and
noise
Horizontal dotted lines * Possible electrical interference e.g. hairdryer, vacuum
Double images or
“Ghost” images
• Try increasing the contrast and brightness setting.
• Check antenna connection at the rear of the TV.
cleaner, etc. Switch off appliances.
* Possible poor positioning of antenna. Using a highly
directional antenna may improve reception.
TV not responding to
remote control
• Aim remote control directly at remote sensor lens on the front
panel of the TV.
Check life span of batteries of the remote control.
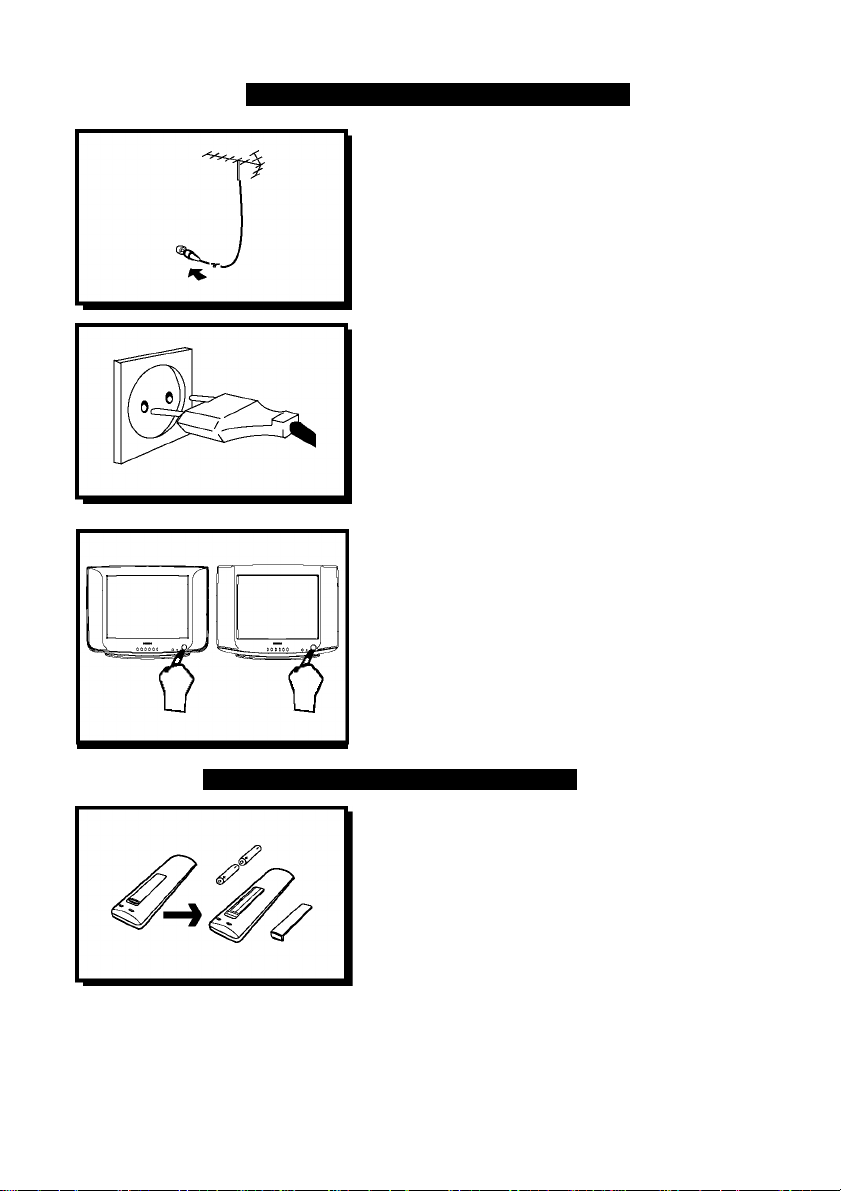
TV HOOKUP (BASIC CONNECTION)
Antenna connection
* Connect the aerial plug to the antenna socket
on the backcover.
* Insert the mains plug into the wall socket.
Mains connection
• For correct mains voltage, refer to type sticker
at the rear of the TV set
* Consuit your deaier if mains suppiy is different.
Note :This diagram is not representative of the
actuai piug and socket.
Switching on the set
• Press the main power button to switch on/
offtheTV.
« If the set is on standby (indicator is light),
press the Power button on the remote
controi to switch on set
REMOTE CONTROL CARE AND USE
• insert the correct type of batteries into the
compartment
■ Ensure the batteries are placed in the right
direction.
Operating instructions generally explains the operation of the TV set using the buttons on
the remote control unless otherwise stated. Please read the following instructions care
fully and follow the steps as shown to familiarise yourself with the installations and all
features available in your set.

LOCATION AND FUNCTION OF CONTROLS ON REMOTE HAND SET
Note Remote Control (Depending on the Models) and operation of remote control may be
affected by bright artificial light near to the TV.
1. POWER
Switches the set ON to
Standby or Standby to ON.
2. DIRECT PROGRAM NUMBER
SELECTION KEYS(0-9)
Select program number.
3.0-9,10-99,100-199
Selects Direct program number.
4. VOLUME UP/DOWN
Adjust the Volume & Menu settings.
5. MUTE
Switches sound ON/OFF.
6. SMART PICTURE (PICTURE)
Press the PICTURE button to cyclically select
STANDARD, DYNAMIC, PERSONAL, MILD.
7. MENU / OK
Select & deselects main menu.
8.INCRSURR
Note: Depending on the Model.
9. LOCK
Selects Lock menu.
lO.SOUND MENU (SOUND)
Selects sound menu.
Selectable sound(Option).
Note; Depending on the Model.
I2.SCAN
Press the SCAN button,the television will scan all
the program in memory once. Every program will
stay for about I second.
13. ZOOM
Press the button to cyclically select 4:3, y or
16:9 mode.
14. GAME
InTV mode, press the GAME key,game may
be appeared.
15. PROGRAM UP/DOWN
Selects program or Menu item.
Switches set ON from standby.
16. SLEEP (0)
Sets the sleep timer from 0 to 240 minutes.
17. DISPLAY ((H) )
To exit from any display.
Displays the current viewing program/status.
18. QUICK VIEW ( A/CH )
Returns to previous viewed program.
19. TV/AV(AV)
Selects TV or AV mode.
20. ©
Note: Depending on the Model.
21. CURSOR
These 4 keys are used to move around the menus.

LOCATION AND FUNCTION OF CONTROLS ON REMOTE HAND SET
ON AND OFF
1. Press the main power switch to switch
on the set.
2. If set in standby mode, press @ key,
or 0-9 button of remote controller to
switch on the set.
3. Pressing @ key on remote control
the set reverts to standby mode.
4. In case to switch Off the set again
press the main power switch.
NOTE:
While the set is switched on and main
power gets disconnected, the set will be
switched to standby mode after regaining
power.
PROGRAMME SELECTION
You can select a programme number
with @ A /@ ▼ key or by directly
pressing 0-9 keys from remote.
VOLUME ADJUSTMENT
Press key to adjust volume
level.
QUICK VIEW (A/CH)
Press the A/CH key to view the last
program.
MUTE FUNCTION
Press the key and the sound will be
switched off.
You can cancel it by pressing again or
by (§)► key.

LOCATION AND FUNCTION OF CONTROLS ON TV SET
Note : The Actual configuration or position of controls of your TV may be different depending
on TV model.
1. MAIN POWER SWITCH
Switches the set ON or OFF.
2. POWER INDICATOR
LED indication shows the standby
status of the set.
6. TV/ AV - Switch to TV/AVI/AV2
7. Video. Audio-L, Audio - R IN(AV2)
8. Video, Audio-L, Audio - R OUT
9. Video, Audio-L, Audio - R IN(AVi)
10. Cabie Socket
3. REMOTE CONTROL SENSOR
Receives remote instructions.
4. PROGRAM UP / DOWN
Switches set ON from standby.
Seiect program or Menu item.
VOLUME UP / DOWN
Adjust the voiume
Adjust Menu settings.
5. MENU
Selects or deselects Main Menu.
Note : You must connect the Audio/Video outputs of externai equipments by matching the
coiours of piug and socket.

BASIC OPERATION
MENU OPERATION
Press ‘MENU’ button on the TV set or on the remote control to select picture menu, sound
menu, timer menu, settings menu and search menu. Shown as below:
(PICTURE MENU)
(SETTINGS MENU)
(SOUND MENU)
(TIMER MENU)
TIMER
OFF
TV
1 ANRI lARF
fL
BLUE SCREEN ON
il
PICTURE ENHANCE OFF
CURTAIN OFF
□
EXCHANGE
GAME
ill
CALENDAR
SELECT OJADJUST EIexit
(SEARCH MENU)
SETTINGS
ENGLISH J
8^-»5
Note:
The Search menu will not be displayed when you press menu button if the TV is in theAV modes.
8

BASIC OPERATION
PICTURE MENU OPERATION
Press ‘MENU’ button on the TV set or on the remote
control to select the picture menu. Shown as right;
BRIGHTNESS ADJUSTMENT
1. Press ‘CH+/CH-’ button to select BRIGHTNESS item.
2. Press ‘VOL+/VOL-’ button in order to increase or decrease
brightness (0~I00).
CONTRAST ADJUSTMENT
1. Press ‘CH+/CH-’ button to select CONTRAST item. ^
2. Press ‘VOL+/VOL-’ button in order to increase or decrease contrast (0~I00).
COLOUR ADJUSTMENT
1. Press ‘CH+/CH-’ button to select COLOR item.
2. Press ‘VOL+/VOL-’ button in order to increase or decrease colour (0~ 100).
SHARPNESS ADJUSTMENT
1. Press ‘CH+/CH-’ button to select SHARPNESS item.
2. Press ‘VOL+/VOL-’ button in order to increase or decrease sharpness (0~I00).
TINT ADJUSTMENT
1. Press ‘CH+/CH-’ button to select TINT item.
2. Press ‘VOL+/VOL-’ button to increase or decrease tint (-50~0~+50).
Note: Tint control will be appeared only if a NTSC signal is being received.
TONE(FCC) ADJUSTMENT
1. Press ‘CH+/CH-’ button to select TONE item.
2. Press ‘VOL+/VOL-’ button to select NORMAL, COOL,WARM.
SOUND MENU OPERATION
Press ‘MENU’ button on theTV set or on the remote
control to select the sound menu. Shown as right:
VOLUME ADJUSTMENT
1. Press ‘CH+/CH-’ button to selectVOLUME item.
2. Press ‘CH+/CH-’ button in order to increase or decrease
volume (0~I00).
BALANCE
1. Press /VOL-’ to check Right side sound.
2. Press ‘►/VOL+’ to check Left side sound.
AVL SETTING
Use this function to automatically control the volume
(AudioVolume Limiting)
1. Press the CH+ or CH- button to select AVL item.
2. Press theVOL+ or VOL- button to select On or Off.
TIMER MENU OPERATION
Press ‘MENU’ button on theTV set or on the remote
control to select the timer menu. Shown as right
TIMER SETTING
1. Press ‘ CH+/CH- ’ button to select TIMER item.
2. Press ‘VOL+A'OL-’ button to ON or OFF.
PICTURE _
BRIGHTNESS ,75;
CONTRAST^
<1)
COLOR
SHARPNESS 50^^^='
0
TINT 0
TONE NORMAL
ill
SELECT ADJUST ID EXIT
CLOCK
OFF TIME
ON TIME
0
ON PROGRAM
ill
&
SELECT CD ADJUST El EXIT
75^^“=
____
---1--
TIMER
OFF_
■
5

BASIC OPERATION
24 HOUR CLOCK SETTING (The clock must be set before you select the other items)
1. Press 'CH+/CH-’ button to select CLOCK item.
2. Press 'VOL+/VOL-’ button to select the Hour or the Minute. Press ‘CH+/CH-’ button to set the
Hour (00~23) or the Minute (00~59).
ON TIME / OFF TIME SETTING
1. Press ‘CH+/CH-’ button to select ONTIME or OFFTIME item.
2. Press ‘VOL+/VOL-’ button to select the Hour or the Minute. Press ‘CH+/CH-’ button to set the
Hour(00~23) or the Minute (00-59).
Note: When On Time item is set, then press STAND-BY button on the remote control. Make
sure the TV set is under stand-by mode.
When OfFTime item is set, the SLEEP function is cancelled automatically.
ON PROGRAM
1. Press 'CH+/CH-’ button to select On PROGRAM item.
2. Press 'VOL+/VOL-’ or Numeric keys to select On-Program number.
On Program Operation:
For example, the Clock is 14:00, the position is at channel 5 at present If On Time is preset at 16:45
And On PROG is preset to channel 10. Make sure the TV set is under stand-by mode.The position
Will change to channel 10 automatically while the Clock is 16:45.
SETTINGS MENU OPERATION
Press ‘MENU’ button on theTV set or on the remote
control to select the settings menu. Shown as right:
LANGUAGE SETTING
1. Press ‘CH+/CH-’ button to select LANGUAGE item.
2. Press ‘VOL-H/VOL-’ button to select different languages.
BLUE SCREEN SETTING (Optional)
1. Press ‘CH+/CH-’ button to select BLUE SCREEN item.
2. Press ‘VOL+/VOL-’ button to select ON or OFF.
PICTURE ENHANCE / CURTAIN SETTING (Optional)
1. Press ‘CH+/CH-’ button to select PICTURE ENHANCE or CURTAIN item.
2. Press ‘VOL+/VOL-’ button to select ON or OFF.
EXCHANGE OPERATION
1. Press ‘CH+/CH-’ button to select EXCHANGE item.
2. Press Numeric buttons to select the targeted channel number.
3. Press ‘VOL+/VOL-’ button, exchange Is over.
GAME OPERATION
1. Press ‘CH+/CH-’ button to select GAME item,then press ‘VOL+/VOL-’ button,game may be
appeared. Press ‘VOL+/VOL-’ button, the snake may be turn on to right, left, up or down.
2. Press ‘ MENU ’ button, the game will restart
3. Press ‘ G±) ’ button to exit game.
CALENDAR OPERATION
1. Press ‘ CH+/CH- ’ button to select CALENDAR item.
2. Press ‘VOL+/VOL-’ button to enter the calendar setting
3. Press ‘CH+/CH-’ button to change the Year, press ‘VOL+/VOL-’ button to change the Month.
4. Press ‘MENU’ or ‘ O ’ button to exit the calendar setting.
10

BASIC OPERATION
SEARCH MENU OPERATION
Press ‘MENU’ button on the TV set or on the remote
control to select the Search menu. Shown as below:
AUTO SEARCH OPERATION
1. Press ‘CH+/CH-’ button to select AUTO SEARCH item.
2. Press ‘VOL+/VOL-’ button to begin searching.After searching
all wave band, auto search stop. In the course of the auto
Searching,press ‘MENU’ button to stop searching.After
auto search finished, the unit returns to the normal reception status.
COLOR SYSTEM AUTO
SOUND SYSTEM
SKIP OFF
BAND VHF-H
AUTO SEARCH
SEARCH
FINETUN.
SELECT ADJUST Hexit
lb
SEARCH
Note: The unit will automatically search all VHF-UVHF-H, UHF band and supplementary channel.
After searching finished, all fine tuned programs will be stored automatically.
When it is auto search, the amount of stored programs can be 200 (program number 0-199).
MANUAL SEARCH OPERATION
1. Press ‘CH+/CH-’ button to select SEARCH item.
2. Press ‘VOL+/VOL-’ button right or left to search the TV program you want. When find a
program, searching stops. In the course of the manual searching, press ‘ MENU ’ button to stop
searching.
FINE TUNE OPERATION (only in case of poor reception)
1. Press ‘CH+/CH-’ button to select FINETUN. Item.
2. Press ‘VOL+/VOL-’ button right or left to adjust the picture and sound.
BAND SETTING
1. Press ‘CH+/CH-’ button to select BAND item.
2. Press ‘VOL+AfOL-’ button to selectVHF-L,VHF-H, UHF.
B/G
COLOUR SYSTEM SETTING
1. Press ‘CH+/CH-’ button to select COLOR SYSTEM item.
2. Press ‘VOL+AfOL-’ button to select AUTO, PAL, NTSC3.58, NTSC4.43, SECAM.
SOUND SYSTEM SETTING
1. Press ‘CH+/CH-’ button to select SOUND SYSTEM item.
2. Press ‘VOL+/VOL-’ button to select D/K, M, B/G, I.
PROGRAM SELECTION
1. Press ‘CH+/CH-’ button to select PROGRAM item.
2. Press ‘VOL+/VOL-’ button or numeric keys to select Program Number.
SKIP SETTING
1. Press ‘CH+/CH-’ button to select SKIP item.
2. Press ‘VOL+/VOL-’ button to select ‘On’ (channel skipped) or ‘Off’ (channel not skipped).
Note: When Skip item is set to ‘On’ ,this position will be skipped while you use ‘CH+/CH-’
button to scan the stored channels.You can still use numeric keys to select the skipped
channels.
I I

DIRECT KEY FUNCTION
SELECTABLE PICTURE : You can select the type
of picture which best corresponds to your viewing
requirements in which picture settings like Contrast,
Brightness, Colour and Sharpness are adjusted to the levels
You prefer.There are 4 modes - Standard — Dynamic —
Personal - Mild of selectable picture can be accessed by
Direct key on the remote handset.
ZOOM : You can enjoy three levels of picture size.
Normal picture format is 4:3 of general TV.
You can access this feature by ZOOM key on the Remote.
The Wide feature is optional.
SCAN :To scan all the tunned programs, press the key
Marked SCAN on the remote handset. Press any key to
Discontinue the scanning.
CHANGE PIN
NEWPIlSU
s__________________
-----
LOCK: Press the button, ‘ ^—’ will appears on the
screen. Pressing the password the digits that you defined
yourself correctly, the lock menu may be effective.
A. Select each function using the CH+/CH- button.
B. Each value can be changed by theVOL+/VOL- button.
C. In the menu:
a) 'Lock' is general lock, only when this item is 'On',
'Parental Lock' and 'Hotel Mode' can be effective.
b) When 'Parental Lock' is effective, the screen is set black
and sound is muted.
C) When 'Hotel Mode' is effective, volume is limited due
to the value of 'Volume Limited'.
D. When you will change the password,you may be selected
'Change PIN' item, and press VOL+/VOL- button,the
'Change PIN' menu will appear.
* New Password: input 4 digits you like.
* Confirm: again input above new password 4 digits
dcorrectly.
E. Press the LOCK button, the lock menu will disappear.
12
* *

DIRECT KEY FUNCTION
Note:
* The search menu will not appear when any program would be
locked.
* The general lock is on searching menu, only the general lock
put on, the function of lock may be effective.
* If you forget the password for LOCK, then you can enter
common basic password ;4I00.
2009 6
SU MO TU WE TH FR SA
1 2 3 4 5 6
7 8 9 10 11 12 13
14 15 16 17 18 19 20
21 22 23 24 25 26 27
28 29 30
GAME:
GAME keygame will be appeared. PressVOL+/VOL- key,the
snake will be turn on to right, left, up or down. To restart the
game press MENU key. And exit the game by (13 key.
This is called SNAKE game, InTV mode, press the
NOTE: When snake mouth touches the border. Game will stop.
CALENDAR:
move the cursor to calendar option in features menu
and press VOL+/VOL- key to enter into calendar. You can view
The calendar for 200 years starting from 1900 to 2100.
UseVOL+/VOL-(P- / ◄) keys to change the MONTH.
Use CH+/CH-(A/T) keys to change the YEAR.
You can exit the calendar by DISPLAY key or CALENDAR
Key.
To access the calendar menu,
DISPLAY(g3):
current Program status. This also shows the personal preference
Mode of picture. And display also shows the timer display.
This display feature shows us
13

SPECIFICATIONS
Product type
I4PT4525/V7 I4PT3525/V7
Picture
Display screen type
Diagonal screen size
Visible diagonal screen
size
Aspect ratio 4:3
Picture enhancements
Ultra Slim Real Flat
37cm
34cm
Contrast +
Sound
Sound output I00W PMPO
Sound systems
Sound features
Convenience
Sleep timer, Auto Stoe, Smart Picture
AV stereo
Mute, Balance control,
Reception
TV system PAL /BG
Video Playback PAL ,NTSC
Connectivity
Rear
Side
AV In,Monitor Out; Antenna In (75 0)
AV In
General
Mains volt/freq
Power consumption
Net weight 8.8Kg
Gross weight
Set dimensions
(W X H X D) mm
Note; Specifications are subject to change without notice.
AC II0-240V~ 50/60 Hz
75W
I0.5Kg
440x325x295mm
14

Consumer Guidelines
1. Kindly ensure that the dealer fills up Warranty card correctly.
2. To avail the Warranty please register your product with the Philips -
• Logon to www.Philips.com
OR
• Contact Philips Consumer Care Centre
3. In the unlikely event of a defect developing in the TV set contact the Philips Customer
Care Centre for obtaining warranty service and inform of the defect observed in the
set, the type no.and serial no.of the set.
4. On your lodging a complaint, a trained technician will call on you promptly. In the
event of the technician deciding that set requires attention at the service station; kindly
arrange to deliver the set to the service station designated by technician for further
attention. "Home calls" by the technician would however be restricted within the
municipal limits of the city / town in which the set has been registered.
Type no.
Purchased By: Name_
Address:
Sold by: Name_
Address: _
Contact Customer Service Executive at:
Regd Office: PE Electronics Ltd,Auto Cars Compound, Adalat Road, Aurangabad, 43l005
______
______________
Serial No. D ate of Pu rchas e
PHILIPS
Model no.: l4PT4525/V7 & l4PT3525/V7
ll0-240V~ 50/60Hz 75W
Serial no.:
□
MADE IN PRC
l800-l02-2929(Toll free No.)
l860-l80-llll(Chargeable No.)
Sold by(User rubber stamp)
Tel. No.
Tel. No.

WARRANTY
This TV receive is covered under
warranty against any defect arising out
of faulty or defective material or workman
ship for a period of 12 months from the
date of purchase.
Should a defect develop in this set during
the period of warranty, PE Electronics
Limited undertakes to get the set repaired
free of charge either
From whom the set has been purchased or
through an Authorised Service Center for
warranty service. However, if the
purchaser has to shife his residence to
another town on account of transfer or
other reasons, the warranty benefit will be
available at the Authorised Service Center.
The warranty is not valid in case of any of
the following events:
• The TV set is not used according to instructions given in the 'Direction for use'
/ 'User Manual'.
• Defects are caused by improper or reckless use.
• Any repair work carried out by persons other than a Philips dealer or Authorised
Service Center.
• Any modification or alteration of any nature made in the electrical circuitry of the est.
• This Warranty Card is not completed and signed immediately on delivery of the set
by the Philips Dealer.
• Fading effects and/or Ghosts (Multiple Image) in picture, if any, arising due to location
/ signal reception.
• Defects due to causes beyond control like lightning, abnormal voltage. Acts of God or
while in transit to purchaser's residence.
(Refer Consumer Guidelines for further details)
PHILIPS


Be responsible
Respect copyrights
Specifications are subject to change without notice.
"PHILIPS and the PHILIPS' Shield Emblem are registered trademarks of
Koninklijke Philips Electronics N.V. And are used under license from
Koninklijke Philips Electronics N.V."
www.philips.com
 Loading...