

Page 1
PGP™ Command Line
User's Guide
10.3
Page 2

Page 3

The software described in this book is furnished under a license agreement and may be used only in accordance with the terms of the agreement.
Version 10.3.0. Last updated: January 2013.
Legal Notice
Copyright (c) 2013 Symantec Corporation. All rights reserved.
Symantec, the Symantec Logo, PGP, Pretty Good Privacy, and the PGP logo are trademarks or registered trademarks of Symantec Corporation or its
affiliates in the U.S. and other countries. Java is a registered trademark of Oracle and/or its affiliates. Other names may be trademarks of their
respective owners.
The product described in this document is distributed under licenses restricting its use, copying, distribution, and decompilation/reverse engineering.
No part of this document may be reproduced in any form by any means without prior written authorization of Symantec Corporation and its licensors, if
any.
THE DOCUMENTATION IS PROVIDED"AS IS"AND ALL EXPRESS OR IMPLIED CONDITIONS, REPRESENTATIONS AND WARRANTIES, INCLUDING
ANY IMPLIED WARRANTY OF MERCHANTABILITY, FITNESS FOR A PARTICULAR PURPOSE OR NON-INFRINGEMENT, ARE DISCLAIMED, EXCEPT
TO THE EXTENT THAT SUCH DISCLAIMERS ARE HELD TO BE LEGALLY INVALID. SYMANTEC CORPORATION SHALL NOT BE LIABLE FOR
INCIDENTAL OR CONSEQUENTIAL DAMAGES IN CONNECTION WITH THE FURNISHING, PERFORMANCE, OR USE OF THIS DOCUMENTATION.
THE INFORMATION CONTAINED IN THIS DOCUMENTATION IS SUBJECT TO CHANGE WITHOUT NOTICE.
The Licensed Software and Documentation are deemed to be commercial computer software as defined in FAR 12.212 and subject to restricted rights
as defined in FAR Section 52.227-19 "Commercial Computer Software - Restricted Rights" and DFARS 227.7202, et seq. “Commercial Computer
Software and Commercial Computer Software Documentation”, as applicable, and any successor regulations. Any use, modification, reproduction
release, performance, display or disclosure of the Licensed Software and Documentation by the U.S. Government shall be solely in accordance with
the terms of this Agreement.
Symantec Corporation
350 Ellis Street
Mountain View, CA 94043
Symantec Home Page (
Printed in the United States of America.
10 9 8 7 6 5 4 3 2 1
http://www.symantec.com)
Page 4

Page 5

Contents
About PGP Command Line
1
Important Concepts
Technical Support
Contacting Technical Support
Licensing and registration
Customer service
Support agreement resources
Installing
Install Location 5
Supported Platforms 6
System Requirements 6
Windows 7 and Vista 7
Windows Server 2008 and 2003 7
Windows XP 8
IBM AIX 9
HP-UX 11i 9
Solaris 9 and 10 9
Red Hat Enterprise Linux, SLES, and Fedora Core 10
Mac OS X 10
Installing on AIX 10
Installing on AIX 10
Changing the Home Directory on AIX 11
Uninstalling on AIX 12
Installing on HP-UX 12
Installing on HP-UX 12
Changing the Home Directory on HP-UX 13
Installing to a Non-Default Directory on HP-UX 13
Uninstalling on HP-UX 14
Installing on Mac OS X 14
Installing on Mac OS X 14
Changing the Home Directory on Mac OS X 15
Uninstalling on Mac OS X 15
Installing on Red Hat Enterprise Linux, SLES, or Fedora Core 15
Installing on Red Hat Enterprise Linux or Fedora Core 16
Changing the Home Directory on Linux or Fedora Core 17
Uninstalling on Linux or Fedora Core 17
Installing on Solaris 17
Installing on Solaris 17
Changing the Home Directory on Solaris 18
Uninstalling on Solaris 19
Installing on Windows 19
PGP Command Line for Windows and Symantec Encryption Desktop on the Same System 19
To Install on Windows 19
Changing the Home Directory on Windows 20
Uninstalling on Windows 21
Upgrading 21
Relocating 21
1
2
3
3
3
4
5
Page 6

ii Contents
Licensing 23
Overview
Using a License Number
Using a License Authorization
Re-Licensing
The Command-Line Interface
Overview 27
Flags and Arguments 28
Configuration File 32
Environment Variables 37
Standard Input, Output, and Error 38
Specifying a Key 39
'Secure' Options 40
First Steps 41
Overview 41
Creating Your Keypair 42
Protecting Your Private Key 44
Distributing Your Public Key 44
Getting the Public Keys of Others 46
Verifying Keys 48
23
24
24
25
27
Flags 29
Arguments 29
Keyserver Configuration File Settings 36
Redirecting an Existing File 38
Entering Data 38
Posting Your Public Key to a Keyserver 45
Exporting Your Public Key to a Text File 45
Finding a Public Key on a Keyserver 46
Importing a Public Key from a Keyserver 47
Cryptographic Operations 51
Overview 51
Commands 52
--armor (-a) 52
--clearsign 53
--decrypt 55
--detached (-b) 57
--dump-packets, --list-packets 58
--encrypt (-e) 59
--export-session-key 62
--list-sda 63
--list-archive 63
--sign (-s) 64
--symmetric (-c) 66
--verify 67
Page 7

iii Contents
Key Listings 69
Overview
Commands
Working with Keyservers
Overview
Commands
Managing Keys
--fingerprint
--fingerprint-details
--list-key-details
--list-keys (-l)
--list-keys-xml
--list-sig-details
--list-sigs
--list-userids
--keyserver-disable
--keyserver-recv
--keyserver-remove
--keyserver-search
--keyserver-send
--keyserver-update
69
69
70
70
72
73
74
74
75
75
77
77
77
77
78
79
80
81
81
83
Overview 85
Commands 85
--add-adk 85
--add-photoid 86
--add-preferred-cipher 86
--add-preferred-compression-algorithm 87
--add-preferred-email-encoding 87
--add-preferred-hash 88
--add-revoker 88
--add-userid 89
--cache-passphrase 89
--change-passphrase 90
--clear-key-flag 91
--disable 91
--enable 92
--export, --export-key-pair 92
--export-photoid 94
--gen-key 95
--gen-revocation 97
--gen-subkey 98
--get-email-encoding 98
--import 99
--join-key 100
--join-key-cache-only 103
--key-recon-send 104
Page 8

iv Contents
--key-recon-recv-questions 105
--key-recon-recv 106
--remove 107
--remove-adk 107
--remove-all-adks 108
--remove-all-photoids 108
--remove-all-revokers 108
--remove-expiration-date 109
--remove-key-pair 109
--remove-photoid 110
--remove-preferred-cipher 110
--remove-preferred-compression-algorithm 110
--remove-preferred-email-encoding 111
--remove-preferred-hash 111
--remove-preferred-keyserver 112
--remove-revoker 112
--remove-sig 113
--remove-subkey 113
--remove-userid 114
--revoke 114
--revoke-sig 115
--revoke-subkey 115
--send-shares 116
--set-expiration-date 116
--set-key-flag 117
--set-preferred-ciphers 117
--set-preferred-compression-algorithms 118
--set-preferred-email-encodings 118
--set-preferred-hashes 119
--set-preferred-keyserver 119
--set-primary-userid 120
--set-trust 120
--sign-key 121
--sign-userid 122
--split-key 123
Working with Email 127
Overview 127
Encrypt Email 128
Sign Email 129
Decrypt Email 130
Verify Email 130
Annotate Email 130
Working with a PGP Key Management Server 133
Overview 134
--decrypt 137
--encrypt (-e) 137
New Terms and Concepts 134
Relationship with a PGP KMS 135
Authentication for PGP KMS Operations 135
Page 9

v Contents
--create-mak
--export-mak
--export-mak-pair
--import-mak
--request-cert
--edit-mak
--search-mak
--delete-mak
--create-mek-series
--edit-mek-series
--search-mek-series
--delete-mek-series
--create-mek
--import-mek
--export-mek
--edit-mek
--search-mek
--create-msd
--export-msd
--edit-msd
--search-msd
--delete-msd
--create-consumer
--search-consumer
--check-certificate-validity
Export Format
138
138
139
140
141
142
142
143
144
145
145
146
147
148
148
149
149
150
151
152
152
153
154
155
155
156
Miscellaneous Commands
Overview
Commands
--agent
--create-keyrings
--help (-h)
--license-authorize
--purge-all-caches
--purge-keyring-cache
--purge-passphrase-cache
--speed-test
--version
--wipe
--check-sigs
--check-userids
Options
Using Options 165
Boolean Options 166
--alternate-format 166
--annotate 166
--archive 166
--banner 167
--biometric 168
159
159
160
160
160
161
161
161
161
162
162
162
163
163
164
165
Page 10

vi Contents
--buffered-stdio 168
--compress, --compression 168
--details 169
--email 169
--encrypt-to-self 169
--eyes-only 170
--fast-key-gen 170
--fips-mode, --fips 170
--force (-f) 171
--halt-on-error 171
--import-certificates 171
--keyring-cache 171
--large-keyrings 172
--license-recover 172
--marginal-as-valid 172
--master-key 173
--pass-through 173
--passphrase-cache 173
--photo 173
--quiet (-q) 173
--recursive 174
--reverse-sort, --reverse 174
--sda 174
--skep 175
--text-mode, --text (-t) 175
--truncate-passphrase 175
--verbose (-v) 175
--warn-adk 175
--wrapper-key 176
--xml 176
Integer Options 177
--3des 177
--aes128, --aes192, --aes256 177
--bits, --encryption-bits 178
--blowfish 178
--bzip2 178
--cast5 179
--creation-days 179
--expiration-days 179
--idea 180
--index 180
--keyring-cache-timeout 180
--keyserver-timeout 181
--md5 181
--passphrase-cache-timeout 181
--partitioned 182
--pgp-mime 182
--ripemd160 182
--sha, --sha256, --sha384, --sha512 183
--signing-bits 184
--skep-timeout 184
--threshold 185
--trust-depth 185
--twofish 185
Page 11

vii Contents
--wipe-input-passes 185
--wipe-overwrite-passes 186
--wipe-passes 186
--wipe-temp-passes 186
--zip 186
--zlib 187
Enumeration Options 187
--auto-import-keys 187
--cipher 187
--compression-algorithm 188
--compression-level 189
--email-encoding 189
--enforce-adk 189
--export-format 190
--hash 190
--import-format 191
--input-cleanup 192
--key-flag 192
--key-type 193
--manual-import-key-pairs 193
--manual-import-keys 193
--overwrite 194
--sig-type 194
--sort-order, --sort 194
--tar-cache-cleanup 195
--target-platform 195
--temp-cleanup 196
--trust 196
String Options 196
--auth-key 196
--auth-passphrase 197
--auth-username 197
--basic-constraint 197
--city, --common-name, --contact-email, --country 197
--comment 197
--creation-date 198
--default-key 198
--expiration-date 198
--export-passphrase 199
--extended-key-usage 199
--home-dir 199
--key-usage 199
--local-user (-u), --user 200
--license-name, --license-number, --license-organization, --license-email 200
--new-passphrase 201
--organization, --organizational-unit 201
--output (-o) 201
--output-file 202
--passphrase 202
--preferred-keyserver 202
--private-keyring 203
--proxy-passphrase, --proxy-server, --proxy-username 203
--public-keyring 203
--recon-server 204
Page 12

viii Contents
--regular-expression 204
--random-seed 204
--root-path 205
--share-server 205
--state 205
--status-file 205
--subject-alternative-name 206
--symmetric-passphrase 206
--temp-dir 206
List Options 207
File Descriptors 211
--additional-recipient 207
--adk 207
--input (-i) 207
--question / --answer 208
--keyserver 208
--recipient (-r) 209
--revoker 209
--share 210
--auth-passphrase-fd, auth-passphrase-fd8 211
--export-passphrase-fd, --export-passphrase-fd8 211
--new-passphrase-fd, --new-passphrase-fd8 211
--passphrase-fd 211
--proxy-passphrase-fd, --proxy-passphrase-fd8 212
--symmetric-passphrase-fd, --symmetric-passphrase-fd8 212
Lists 213
Basic Key List 213
The Default Key Column 214
The Algorithm Column 214
The Type Column 215
The Size/Type Column 215
The Flags Column 216
The Key ID Column 217
The User ID Column 217
Detailed Key List 218
Main Key Details 219
Subkey Details 225
ADK Details 227
Revoker Details 228
Key List in XML Format 228
Elements with fixed settings 232
X.509 Signatures 234
Detailed Signature List 235
Usage Scenarios 241
Secure Off-Site Backup 241
PGP Command Line and Symantec Encryption Desktop 241
Compression Saves Money 242
Surpasses Legal Requirements 243
Page 13

ix Contents
Searching for Data on a PGP KMS 245
Overview 245
Example Searches 248
More About Types 249
Operators 246
Types 246
Keyword Listing 246
For Linux and Mac OSX 248
For Windows 248
Time Fields 249
Boolean Values 249
Open PGP Algorithms 250
Open PGP Key Usage Flags 250
Key Modes 250
Creating a Certificate Signing Request 253
About CSRs 253
Creating a CSR using PGP Command Line 254
Codes and Messages 257
Messages Without Codes 257
Messages With Codes 258
Parser 258
Keyrings 259
Wipe 259
Encrypt 260
Sign 260
Decrypt 261
Speed Test 261
Key edit 262
Keyserver 266
Key Reconstruction 267
Licensing 268
Symantec Encryption Management Server 269
General 269
Exit Codes 277
Frequently Asked Questions 279
Key Used for Encryption 279
"Invalid" Keys 279
Maximum File Size 280
Programming and Scripting Languages 281
File Redirection 281
Protecting Passphrases 281
Page 14

x Contents
Quick Reference 283
Commands 283
Options 286
Environment Variables 290
Configuration File Variables 291
Index 295
Page 15

1
About PGP Command Line
PGP Command Line is a command line product for performing cryptography and key
management tasks. It operates as a stand-alone product that performs those tasks
locally. It can also operate as a client product that interacts with Symantec Encryption
Management Server to perform those tasks.
With PGP Command Line, you can write command line scripts that use Symantec
encryption technology to perform these tasks:
Encrypt, sign, and decrypt individual files or collections of files
Create and manage keys on a local keyring
Access keys on Symantec Encryption Management Server and other keyservers
Manage keys on Symantec Encryption Management Server
Create consumer (user) accounts on Symantec Encryption Management Server
Manage X.509 certificates, including requesting and validating a certificate
Encrypt, sign, and decrypt email
You can insert PGP Command Line commands into scripts for automating tasks. PGP
Command Line commands are easily added to shell scripts or scripts written with
scripting languages, such as Perl or Python.
For example, consider a company that regularly backs up a large sensitive database to
an off-site location. A script runs automatically to perform the backup. This company
can add PGP Command Line commands to that script to compress and encrypt the
database before transmitting it to the off-site location. It can also add commands to
decrypt and uncompress the database when it arrives at its destination.
In This Chapter
Important Concepts ........................................................................................................ 1
Technical Support ........................................................................................................... 2
Important Concepts
The following concepts are important for you to understand:
environment variables: Environment variables control various aspects of PGP
Command Line behavior; for example, the location of the PGP Command Line
home directory. Environment variables are established on the computer running
PGP Command Line.
Page 16

2 About PGP Command Line
Technical Support
configuration file variables: When PGP Command Line starts, it reads the
configuration file, which includes special configuration variables and values for
each variable. These settings affect how PGP Command Line operates.
Configuration file variables can be changed permanently by editing the
configuration file or overridden on a temporary basis by specifying a value for a
configuration file variable on the command line.
Self-Decrypting Archives (SDAs): PGP Command Line lets you create SDAs,
compressed and conventionally encrypted archives that require a passphrase to
decrypt. SDAs contain an executable for the target platform, which means the
recipient of an SDA does not need to have any Symantec encryption software
installed to open the archive. You can thus securely transfer data to recipients
with no Symantec encryption software installed. You will have to communicate
the passphrase of the SDA to the recipient, however.
Additional Decryption Key (ADK): PGP Command Line supports the use of an
ADK, which is an additional key to which files or messages are encrypted, thus
allowing the keeper of the ADK to retrieve data or messages as well as the
intended recipient. Use of an ADK ensures that your corporation has access to all
its proprietary information even if employee keys are lost or become unavailable.
PGP Zip archives: The PGP Zip feature lets you encrypt/sign groups of files or
entire directories into a single compressed archive file. The archive format is tar
and the supported compression formats are Zip, BZip2, and Zlib.
Technical Support
Symantec Technical Support maintains support centers globally. Technical Support’s
primary role is to respond to specific queries about product features and functionality.
The Technical Support group also creates content for our online Knowledge Base. The
Technical Support group works collaboratively with the other functional areas within
Symantec to answer your questions in a timely fashion. For example, the Technical
Support group works with Product Engineering and Symantec Security Response to
provide alerting services and virus definition updates.
Symantec’s support offerings include the following:
A range of support options that give you the flexibility to select the right amount
of service for any size organization
Telephone and/or Web-based support that provides rapid response and up-to-the-
minute information
Upgrade assurance that delivers software upgrades
Global support purchased on a regional business hours or 24 hours a day, 7 days a
week basis
Premium service offerings that include Account Management Services
For information about Symantec’s support offerings, you can visit our Web site at the
following URL:
www.symantec.com/business/support/
All support services will be delivered in accordance with your support agreement and
the then-current enterprise technical support policy.
Page 17

Contacting Technical Support
Customers with a current support agreement may access Technical Support
information at the following URL:
www.symantec.com/business/support/
Before contacting Technical Support, make sure you have satisfied the system
requirements that are listed in your product documentation. Also, you should be at the
computer on which the problem occurred, in case it is necessary to replicate the
problem.
When you contact Technical Support, please have the following information available:
Product release level
Hardware information
Available memory, disk space, and NIC information
Operating system
Version and patch level
Network topology
Router, gateway, and IP address information
Problem description:
Error messages and log files
Troubleshooting that was performed before contacting Symantec
Recent software configuration changes and network changes
Technical Support
3 About PGP Command Line
Licensing and registration
If your Symantec product requires registration or a license key, access our technical
support Web page at the following URL:
www.symantec.com/business/support/
Customer service
Customer service information is available at the following URL:
www.symantec.com/business/support/
Customer Service is available to assist with non-technical questions, such as the
following types of issues:
Questions regarding product licensing or serialization
Product registration updates, such as address or name changes
General product information (features, language availability, local dealers)
Latest information about product updates and upgrades
Information about upgrade assurance and support contracts
Page 18

4 About PGP Command Line
Technical Support
Information about the Symantec Buying Programs
Advice about Symantec's technical support options
Nontechnical presales questions
Issues that are related to CD-ROMs or manuals
Support agreement resources
If you want to contact Symantec regarding an existing support agreement, please
contact the support agreement administration team for your region as follows:
Asia-Pacific and Japan customercare_apac@symantec.com
Europe, Middle-East, Africa semea@symantec.com
North America, Latin America supportsolutions@symantec.com
Page 19

2
Installing
This chapter lists the system requirements for, and tells you how to install PGP
Command Line onto, the supported platforms: AIX, HP-UX, Mac OS X, Linux, Solaris,
and Windows. It also includes uninstall instructions.
In This Chapter
Install Location................................................................................................................5
Supported Platforms....................................................................................................... 6
System Requirements.....................................................................................................6
Installing on AIX............................................................................................................10
Installing on HP-UX......................................................................................................12
Installing on Mac OS X .................................................................................................14
Installing on Red Hat Enterprise Linux, SLES, or Fedora Core ..............................15
Installing on Solaris......................................................................................................17
Installing on Windows.................................................................................................. 19
Upgrading.......................................................................................................................21
Relocating.......................................................................................................................21
Install Location
PGP Command Line uses a specific directory for the application data such as the
configuration file, and a specific directory (called the home directory) for the files it
creates, such as keyring files.
On any UNIX system, the application data and the home directory are identical and
they are configured through the $HOME environment variable. For more information,
refer to the installation instructions for the specific UNIX platform.
On Windows, the application data directory is used to store data such as the
configuration file PGPprefs.xml. The home directory is called “My Documents” and
is used to store keys. These two directories can be named differently, depending on the
specific version on Windows. For more information, see To Install on Windows (on page
19).
Note: You can also use the --home-dir option on the command line to specify a
different home directory. Using this option affects only the command it is used in
and does not change the PGP_HOME_DIR environment variable.
Using --home-dir on the command line overrides the current setting of the
PGP_HOME_DIR environment variable.
Page 20

6 Installing
Supported Platforms
Supported Platforms
You can install PGP Command Line on these platforms:
Windows XP Professional 32-bit (including Service Pack 2 or 3), Windows XP
Professional 64-bit (including Service Pack 2 or 3), Windows Vista 32-bit and 64bit (including Service Pack 2), Windows 7 32-bit and 64-bit (including Service Pack
1), Windows Server 2003 32-bit and 64-bit (including Service Pack 1 or 2),
Windows Server 2008 32-bit (including Service Pack 1 and 2), Windows Server
2008 R2 64-bit
HP-UX 11i and above for PA-RISC (32-bit) as well as Itanium 2 and similar
processors (64-bit)
IBM AIX 5.3 (Technology Levels supported by IBM; as of July 2011, TL 11 and
greater) and 6.1 (TL 4 and greater) PowerPC
Red Hat Enterprise Linux 5.4 (x86 and x86_64), Red Hat Enterprise Linux 5.5 (x86
and x86_64), and Red Hat Enterprise Linux 6.0 (x86 and x86_64)
SLES (SUSE Linux Enterprise Server) 10 SP2 (x86)
Solaris 9 (SPARC, 32-bit), Solaris 10 (SPARC, 32-bit), Solaris 10 (x86), Solaris 10
(x86_64)
Apple Mac OS X 10.5.x (x86) and Mac OS X 10.6.x (x86)
Note: These platforms are no longer supported: Windows 2000, Red Hat Enterprise
Linux 5.0, SLES (SUSE Linux Enterprise Server) 9, Sun Solaris 9 (x86 and x86_64),
Fedora Core 6, AIX 5.2 and Mac OS X 10.4.
System Requirements
In general, system requirements for PGP Command Line are the same as the system
requirements for the host operating system.
In addition to the hard drive space required by the base operating system, PGP
Command Line requires additional space for both the data on which cryptographic
operations (such as encryption, decryption, signing, and verifying) will be applied and
temporary files created in the process of performing those operations.
For a given file being encrypted or decrypted, PGP Command Line can require several
times the size of the original file in free hard drive space (depending on how much the
file was compressed), enough to hold both the original file or files and the final file
resulting from the encryption or decryption operation.
In cases where PGP Zip functionality is used on a file, PGP Command Line may also
require several times the size of the original file or files in free hard drive space, enough
to hold the original file, a temporary file created when handling the archive, and the
final file resulting from the encryption or decryption operation. Make sure you have
adequate free hard drive space on your system before using PGP Command Line.
Page 21

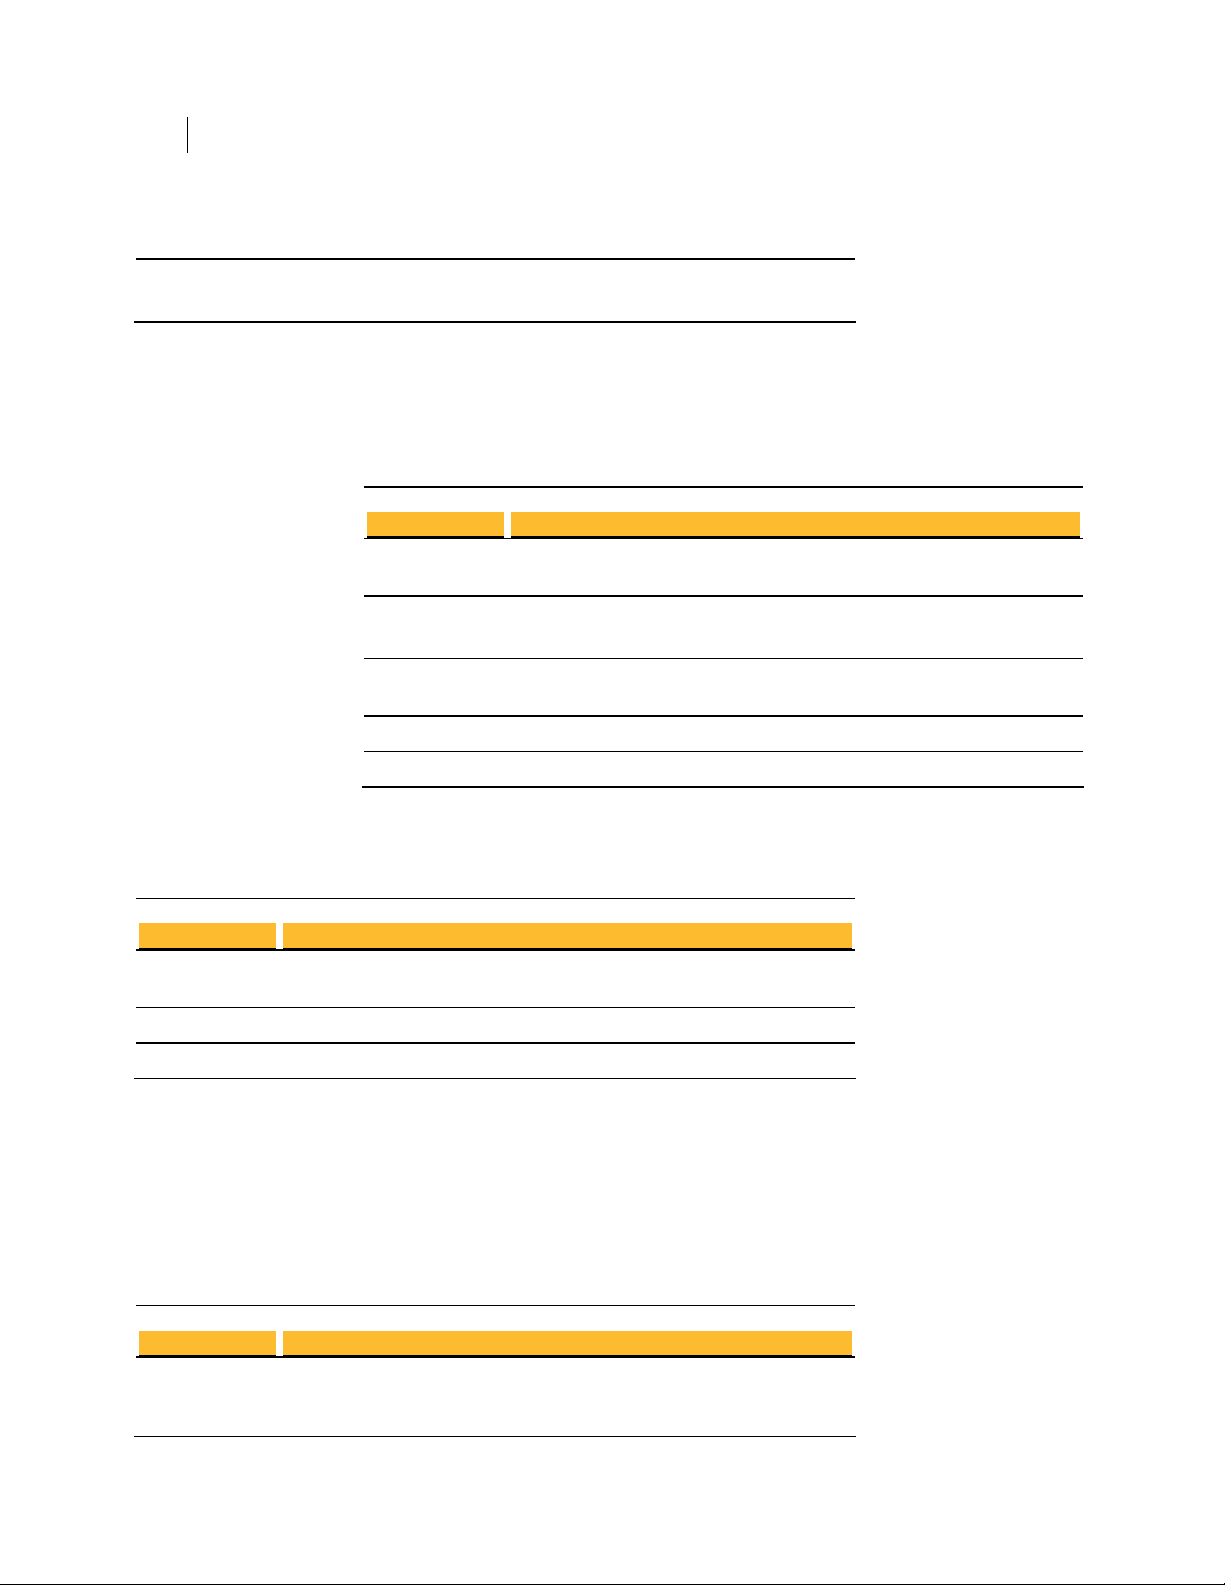
Windows 7 and Vista
System Requirements
7 Installing
Component
Computer and
processor
Memory 1 gigabyte (GB) of RAM or higher recommended (64 MB minimum supported;
Hard disk 15 GB of available space
Drive DVD-ROM drive
Display Support for DirectX 9 graphics with WDDM driver, 128 MB of graphics
Requirement
PC with 1 GHz 32-bit (x86) processor
may limit performance and some features)
memory (minimum), Pixel Shader 2.0 in hardware, 32 bits per pixel
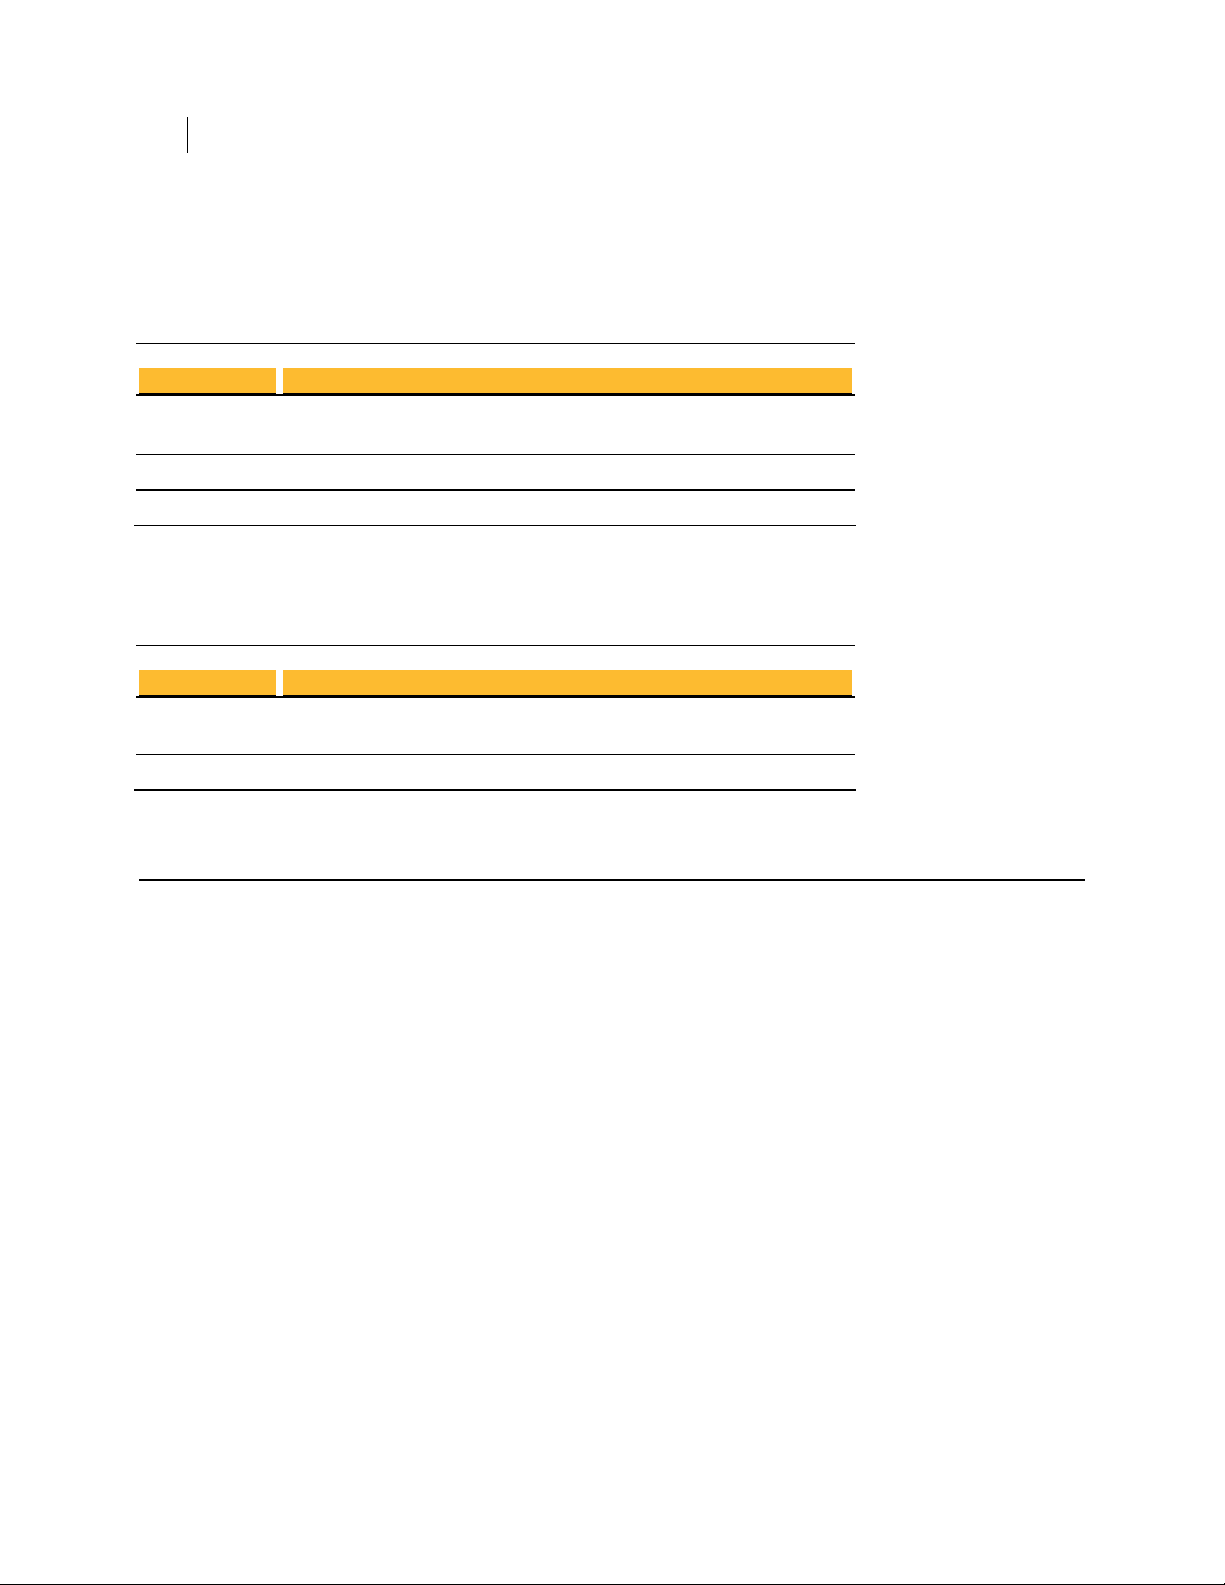
Windows Server 2008 and 2003
PGP Command Line supports four editions of Windows Server 2008 and 2003:
Standard, Datacenter, Enterprise, and Web.
Standard Edition
Component Requirement
Computer and PC with a 133-MHz processor required; 550-MHz or faster processor
processor recommended (Windows Server 2003 Standard Edition supports up to four
processors on one server)
Memory 128 MB of RAM required; 256 MB or more recommended; 4 GB maximum
Hard disk 1.25 to 2 GB of available hard-disk space
Drive CD-ROM or DVD-ROM drive
Display VGA or hardware that supports console redirection required; Super VGA
supporting 800 x 600 or higher-resolution monitor recommended
Datacenter Edition
Component Requirement
Computer and Minimum: 400 MHz processor for x86-based computers Recommended: 733
processor MHz processor
Memory Minimum: 512 MB of RAM
Recommended: 1 GB of RAM
Page 22
8 Installing
System Requirements
Hard disk 1.5 GB hard-disk space for x86-based computers
Other Minimum: 8-way capable multiprocessor machine required
Maximum: 64-way capable multiprocessor machine supported
Enterprise Edition
These system requirements apply only to the 32-bit version of Windows Server 2003
Enterprise Edition; 64-bit versions of Windows Server 2003 Enterprise Edition are not supported.
Component Requirement
Computer and 133-MHz or faster processor for x86-based PCs; up to eight processors
processor supported on either the 32-bit
Memory 128 MB of RAM minimum required
Maximum: 32 GB for x86-based PCs with the 32-bit version
Hard disk 1.5 GB of available hard-disk space for x86-based PCs; additional space is
required if installing over a network
Drive CD-ROM or DVD-ROM drive
Display VGA or hardware that supports console redirection required
Web Edition
Component Requirement
Computer and 133-MHz processor (550 MHz recommended)
processor
Memory 128 MB of RAM (256 MB recommended; 2 GB maximum)
Hard disk 1.5 GB of available hard-disk space
Windows XP
PGP Command Line supports the 32-bit and 64-bit versions of Windows XP.
32-bit Windows XP
Component Requirement
Computer and PC with 300 megahertz (MHz) or higher processor clock speed recommended;
processor 233-MHz minimum required; Intel Pentium/Celeron family, AMD
K6/Athlon/Duron family, or compatible processor recommended
Page 23

System Requirements
9 Installing
Memory 128 megabytes (MB) of RAM or higher recommended (64 MB minimum
Hard disk 1.5 gigabyte (GB) of available hard disk space
Drive CD-ROM or DVD-ROM drive
Display Super VGA (800 × 600) or higher resolution video adapter and monitor
supported; may limit performance and some features)
supporting 800 x 600 or higher-resolution monitor recommended
64-bit Windows XP
Component Requirement
Computer and PC with AMD Athlon 64, AMD Opteron, Intel Xeon with Intel EM64T support,
processor Intel Pentium 4 with Intel EM64T support
Memory 256 megabytes (MB) of RAM or higher recommended
Hard disk 1.5 gigabyte (GB) of available hard disk space
Drive CD-ROM or DVD-ROM drive
Display Super VGA (800 × 600) or higher resolution video adapter and monitor
supporting 800 x 600 or higher-resolution monitor recommended
IBM AIX
PGP Command Line runs on the range of IBM eServer p5, IBM eServer pSeries, IBM
eServer i5 and IBM RS/6000, as supported by IBM AIX 5.3 and 6.1.
HP-UX 11i
PGP Command Line runs on the list of PA-RISC workstation and servers supported by
HP-UX 11i, as specified at http://docs.hp.com/ http://docs.hp.com/en/5187-
2239/ch03s01.html.
Solaris 9 and 10
Component Requirement
Computer and SPARC (32- and 64-bit) platforms
processor
Memory 64 MB minimum (128 MB recommended)
Hard disk 600 MB for desktops; one GB for servers
Page 24
10 Installing
Installing on AIX
Red Hat Enterprise Linux, SLES, and Fedora Core
Component Requirement
Computer and x86 for Red Hat Enterprise Linux and SLES, x86_64 for Fedora Core; see Red
processor Hat or Fedora websites for hardware compatibility.
Memory 256 MB minimum
Hard disk 800 MB minimum
Mac OS X
Component Requirement
Computer and Macintosh computer, Intel-based system only
processor
Memory 128 MB of physical RAM
Installing on AIX
This section tells you how to install, change the home directory, and uninstall on AIX.
Installing on AIX
You need to have root or administrator privileges on the machine on which you are
installing PGP Command Line.
To install PGP Command Line on an AIX system:
1 If you have an existing version of PGP Command Line installed on the computer,
2 Download the installer application called PGPCommandLine[version]IX.tar to
3 Untar the package first. You will get the following file:
4 Type: rpm -ivh PGPCommandLine[version]IX.rpm
5 Press Enter.
uninstall it.
a known location on your system.
PGPCommandLine[version]AIX.rpm
Page 25

Installing on AIX
11 Installing
By default, the PGP Command Line application, pgp, is installed into the directory
/opt/pgp/bin. You need to add this directory to your PATH environment variable in
order for the application to be found.
For sh-based shells, use this syntax:
PATH=$PATH:/opt/pgp/bin
For csh-based shells, use this syntax:
set path = ($path /opt/pgp/bin)
Also, in order to access the PGP Command Line man page, you need to set the
MANPATH environment variable appropriately.
For sh-based shells, use this syntax:
MANPATH=$MANPATH:/opt/pgp/man; export MANPATH
For csh-based shells, use this syntax:
setenv MANPATH "/opt/pgp/man"
By adding the option --prefix to the rpm command, you can install PGP Command
Line to a location other than the default.
Type rpm --prefix=/usr/pgp -ivh PGPCommandLine[version]AIX.rpm and
press Enter.
This command installs the application binary in the directory /usr/pgp/bin/pgp,
libraries in /usr/pgp/lib, and so on.
You will need to edit the environmental variable LIBPATH to include the new library
path (/usr/pgp/lib) so that PGP Command Line can function in a location other than the
default.
By adding the option --prefix to the rpm command, you can install PGP Command
Line in a location other than the default:
1 If you have an existing version of PGP Command Line installed on the computer,
uninstall it.
2 Download the installer application called PGPCommandLine[version]AIX.tar
to a known location on your system.
3 Untar the package first. You will get the following file:
PGPCommandLine[version]AIX.rpm
4 Type: rpm --prefix=/opt -ivh PGPCommandLine[version]AIX.rpm
5 Press Enter.
This command will install the application binary, pgp, in the directory
/usr/pgp/bin/pgp, libraries in /usr/pgp/lib, and so on.
You will need to edit the environment variable LIBPATH to include the new library path
(/usr/pgp/lib), so that PGP Command Line can function in any location other than
the default.
Changing the Home Directory on AIX
The home directory is where PGP Command Line stores the files that it creates and
uses; for example, keyring files.
Page 26

12 Installing
Installing on HP-UX
Uninstalling on AIX
By default, the PGP Command Line installer for AIX creates the PGP Command Line
home directory at $HOME/.pgp. If this directory does not exist, it will be created. For
example, if the value of $HOME for user "alice"is /usr/home/alice, PGP Command
Line will attempt to create /usr/home/alice/.pgp.
The PGP Command Line installer will not try to create any other part of the directory
listed in the $HOME variable, only .pgp.
If you want the home directory changed on a permanent basis, you will need to create
the $PGP_HOME_DIR environment variable and specify the path of the desired home
directory.
Uninstalling PGP Command Line on AIX requires root privileges, either through su or
sudo.
To uninstall PGP Command Line on AIX
1 Type the following command and press Enter:
rpm -e pgpcmdln
2 PGP Command Line is uninstalled.
Installing on HP-UX
This section tells you how to install, change the home directory, and uninstall on HPUX.
Installing on HP-UX
You need to have root or administrator privileges on the machine on which you are
installing PGP Command Line.
To install PGP Command Line on an HP-UX system
1 If you have an existing version of PGP Command Line installed on the computer,
uninstall it.
2 Download the installer file called PGPCommandLine[version]HPUX.tar to a
known location on your system.
3 Untar the package first. You will get the following file:
PGPCommandLine[version]HPUX.depot
4 Type: swinstall -s
/absolute/path/to/PGPCommandLine[version]HPUX.depot
5 Press Enter.
Page 27

By default, the PGP Command Line application, pgp, is installed into the directory
/opt/pgp/bin. You need to add this directory to your PATH environment variable in
order for the application to be found.
For sh-based shells, use this syntax:
PATH=$PATH:/opt/pgp/bin
For csh-based shells, use this syntax:
set path = ($path /opt/pgp/bin)
Also, in order to access the PGP Command Line man page, you need to set the
MANPATH environment variable appropriately.
For sh-based shells, use this syntax:
MANPATH=$MANPATH:/opt/pgp/man; export MANPATH
For csh-based shells, use this syntax:
setenv MANPATH "/opt/pgp/man"
Note: You may encounter an issue generating 2048- or 4096-bit keys on HP-UX
systems running PGP Command Line if you have altered the maximum number of
shared memory segments that can be attached to one process, as configured by the
shmseg system parameter. if you encounter this issue, reset the shmseg system
parameter to its default value of 120. Consult your HP-UX documentation for
information about how to alter system parameters.
Installing on HP-UX
13 Installing
Changing the Home Directory on HP-UX
The home directory is where PGP Command Line stores the files that it creates and
uses; for example, keyring files.
By default, the PGP Command Line installer for HP-UX creates the PGP Command Line
home directory in $HOME/.pgp. If this directory does not exist, it will be created. For
example, if the value of $HOME for user "alice" is /usr/home/alice, PGP Command
Line will attempt to create /usr/home/alice/.pgp.
The PGP Command Line installer will not try to create any other part of the directory
listed in the $HOME variable, only .pgp.
If you want the PGP Command Line home directory changed on a permanent basis, you
can define the $PGP_HOME_DIR environment variable and specify the path of the
desired home directory.
Installing to a Non-Default Directory on HP-UX
This procedure describes how to install PGP Command Line for HP-UX into a nondefault directory. The information provided is in addition to the information provided
in Installing on HP-UX.
Note: This procedure uses /opt/pgp_alt as the non-default directory. Be sure to
substitute the desired directory in place of /opt/pgp_alt.
Page 28

14 Installing
Installing on Mac OS X
Uninstalling on HP-UX
To install PGP Command Line for HP-UX to a non-default directory
1 Add the following extra argument to the swinstall command:
swinstall -s /path/to/pgpcmdln.depot pgpcmdln,l=/opt/pgp_alt
2 Set all libraries to respect the SHLIB_PATH environment variable:
chatr +s enable /opt/pgp_alt/lib/*
3 Set the SHLIB_PATH environment variable to the new library directory when
starting PGP Command Line:
export SHLIB_PATH=/opt/pgp_alt/lib
Uninstalling PGP Command Line on HP-UX requires root privileges, either su or sudo.
To uninstall PGP Command Line on HP-UX:
1 Type the following command and press Enter:
swremove pgpcmdln
2 PGP Command Line is uninstalled.
Installing on Mac OS X
This section tells you how to install, change the home directory, and uninstall on Mac
OS X.
Installing on Mac OS X
To install PGP Command Line on a Mac OS X system:
1 Close all applications.
2 Download the installer application, PGPCommandLine[version]MacOSX.tgz,
to your desktop.
3 Double-click on the file PGPCommandLine[version]MacOSX.tgz.
4 If you have Stuffit Expander, it will automatically first uncompress this file into
PGPCommandLine[version]MacOSX.tar, and then untar it into
PGPCommandLine[version]MacOSX.pkg.
5 Double-click on the file PGPCommandLine[version]MacOSX.pkg.
6 Follow the on-screen instructions.
The Mac OS X PGP Command Line application, pgp, is installed into /usr/bin/.
Page 29

Installing on Red Hat Enterprise Linux, SLES, or Fedora Core
After you run PGP Command Line for the first time, its home directory will be created
automatically in the directory $HOME/Documents/PGP. This directory may already
exist if Symantec Encryption Desktop for Mac OS X is already installed on the system.
15 Installing
Changing the Home Directory on Mac OS X
The home directory is where PGP Command Line stores the files that it creates and
uses; for example, keyring files.
By default, the PGP Command Line installer for Mac OS X creates the PGP Command
Line home directory at $HOME/Documents/PGP. If this directory does not exist, it will
be created.
The PGP Command Line installer will not try to create any other part of directory listed
in the $HOME variable, only .pgp.
If you want the home directory changed permanently, you need to create the
$PGP_HOME_DIR environment variable and specify the path of the desired home
directory.
Uninstalling on Mac OS X
Uninstalling PGP Command Line on Mac OS X requires administrative privileges.
Caution: If you have Symantec Encryption Desktop for Mac OS X installed on the
same system with PGP Command Line, do not uninstall PGP Command Line unless
you also plan to uninstall Symantec Encryption Desktop. Uninstalling PGP
Command Line will delete files that Symantec Encryption Desktop requires to
operate; you will have to reinstall Symantec Encryption Desktop to return to normal
operation.
To uninstall PGP Command Line on Mac OS X:
1 Using the Terminal application, enter the following commands:
rm -rf /usr/bin/pgp
rm -rf /Library/Frameworks/PGP*
rm -rf /Library/Receipts/PGP*
2 PGP Command Line is uninstalled.
Preferences and keyrings are not removed when PGP Command Line is uninstalled.
Installing on Red Hat Enterprise Linux, SLES, or Fedora
Core
This section tells you how to install, change the home directory, and uninstall on a
Linux or Fedora Core system.
Page 30

16 Installing
Installing on Red Hat Enterprise Linux, SLES, or Fedora Core
Installing on Red Hat Enterprise Linux or Fedora Core
You need to have root or administrator privileges on the machine on which you are
installing PGP Command Line.
Linux installations now default to /opt/pgp, which matches the default installation
location on other UNIX platforms. To install PGP Command Line on Linux to the
previous installation location (/usr/bin/), use the "--prefix=/usr" option.
If you have an existing Linux installation of PGP Command Line and do not install the
new version using the "--prefix=/usr" option, you will need to update your path to
include /opt/pgp/bin and you will need to update any scripts accordingly.
Caution: If you want to use the XML key list functionality in PGP Command Line, you
need to upgrade libxml2 to Version 2.6.8; the default is Version 2.5.10. If you attempt
to use the XML key list functionality without upgrading, you will receive an error.
To install PGP Command Line on a Linux system:
1 If you have an existing version of PGP Command Line installed on the computer,
uninstall it.
2 Download the installer file called PGPCommandLine[version]Linux.tar to a
known location on your system.
3 Untar the package first. You will get the following file:
PGPCommandLine[version]Linux.rpm
4 Type: rpm -ivh PGPCommandLine[version]Linux.rpm
5 Press Enter.
The PGP Command Line application, pgp, is installed by default into /opt/pgp/.
By adding the option --prefix to the rpm command, you can install PGP Command
Line in a location other than the default.
To install PGP Command Line into a different directory:
1 If you have an existing version of PGP Command Line installed on the computer,
uninstall it.
2 Download the installer file called PGPCommandLine[version]Linux.tar to a
known location on your system.
3 Untar the package first. You will get the following file:
PGPCommandLine[version]Linux.rpm
4 Type: rpm --prefix=/opt -ivh PGPCommandLine[version]Linux.rpm
5 Press Enter.
This command will install the application binary in the directory /opt/bin/pgp,
libraries in /opt/lib, etc. You will need to edit the environment variable
LD_LIBRARY_PATH to include the new library path for the software to function in any
location other than the default.
Page 31

Changing the Home Directory on Linux or Fedora Core
The home directory is where PGP Command Line stores the files that it creates and
uses; for example, keyring files.
By default, the PGP Command Line installer for Linux creates the PGP Command Line
home directory at $HOME/.pgp. If this directory does not exist, it will be created. For
example, if the value of $HOME for user "alice" is /usr/home/alice, PGP Command
Line will attempt to create /usr/home/alice/.pgp.
The PGP Command Line installer will not try to create any other part of the directory
listed in the $HOME variable, only .pgp.
If you want the home directory changed on a permanent basis, you need to create the
$PGP_HOME_DIR environment variable and specify the path of the desired home
directory.
Uninstalling on Linux or Fedora Core
Uninstalling PGP Command Line on Linux requires root privileges, either su or sudo.
Installing on Solaris
17 Installing
To uninstall PGP Command Line on Linux or Fedora Core:
1 Type the following command and press Enter:
rpm -e pgpcmdln
2 PGP Command Line is uninstalled.
Installing on Solaris
This section tells you how to install, change the home directory, and uninstall on
Solaris.
Installing on Solaris
You need to have root or administrator privileges on the machine on which you are
installing PGP Command Line.
To install PGP Command Line onto a Solaris machine in the default directory:
1 If you have an existing version of PGP Command Line installed on the computer,
uninstall it.
2 Download the installer file called PGPCommandLine[version]Solaris.tar to
a known location on your system.
3 Untar the package first. You will get the following file:
PGPCommandLine[version]Solaris.pkg
4 Type pkgadd -d PGPCommandLine[version]Solaris.pkg and press Enter.
Page 32

18 Installing
Installing on Solaris
5 At the first prompt, enter "1" or "all" to install the package.
If the directories /usr/bin and /usr/lib are not owned by root:bin, the install
application pkgadd will ask if you want to change the ownership/group on these
directories. It is not necessary to change them, but as an admin you may do so if you
wish.
By default, the PGP Command Line application, pgp, is installed into the directory
/opt/pgp/bin. You need to add this directory to your PATH environment variable in
order for the application to be found.
For sh-based shells, use this syntax:
PATH=$PATH:/opt/pgp/bin
For csh-based shells, use this syntax:
set path = ($path /opt/pgp/bin)
Also, in order to access the PGP Command Line man page, you need to set the
MANPATH environment variable appropriately.
For sh-based shells, use this syntax:
MANPATH=$MANPATH:/opt/pgp/man; export MANPATH
For csh-based shells, use this syntax:
setenv MANPATH "/opt/pgp/man"
To install PGP Command Line onto a Solaris machine in another directory:
1 If you have an existing version of PGP Command Line installed on the computer,
uninstall it.
2 Download the installer application PGPCommandLine[version]Solaris.tar
to a known location on your system.
3 Untar the package first. You will get the following file:
PGPCommandLine[version]Solaris.pkg
4 Type: pkgadd -a none -d PGPCommandLine[version]Solaris.pkg
(This will force an interactive installation.)
5 Press Enter.
6 At the first prompt, enter “1” or “all” to install the package.
You will be asked to enter the path to the package’s base directory. If you enter
/usr/pgp, the binary will be installed to /usr/pgp/bin/pgp, libraries will be
installed to /usr/pgp/lib, and so on.
You need to edit the environment variable LD_LIBRARY_PATH to include the new
library path (/usr/pgp/lib) so that PGP Command Line can function in this location.
Changing the Home Directory on Solaris
The home directory is where PGP Command Line stores the files that it creates and
uses; for example, keyring files.
Page 33

By default, the PGP Command Line installer for Solaris creates the PGP Command Line
home directory in $HOME/.pgp. If this directory does not exist, it will be created. For
example, if the value of $HOME for user "alice" is /usr/home/alice, PGP Command
Line will attempt to create /usr/home/alice/.pgp.
The PGP Command Line installer will not try to create any other part of the directory
listed in the $HOME variable, only .pgp.
If you want the PGP Command Line home directory changed on a permanent basis, you
can define the $PGP_HOME_DIR environment variable and specify the path of the
desired home directory.
Uninstalling on Solaris
Uninstalling PGP Command Line on Solaris requires root privileges, either su or sudo.
To uninstall PGP Command Line on Solaris:
1 Type the following command and press Enter:
pkgrm PGPcmdln
Installing on Windows
19 Installing
To uninstall with no confirmation, use: pkgrm -n PGPcmdln
2 PGP Command Line is uninstalled.
Installing on Windows
This section tells you how to install, change the home directory, and uninstall on
Windows.
PGP Command Line for Windows and Symantec Encryption Desktop on the Same System
PGP Command Line and Symantec Encryption Desktop can be installed on the same
To Install on Windows
system at the same time.
To install PGP Command Line onto a Windows system:
1 Close all Windows applications.
2 Download the installer application, PGPCommandLine[version]Win.zip, to a
known location on your system.
3 Unzip the file PGPCommandLine[version]Win.zip. You will get the following
file: PGPCommandLine[version]Win.msi.
4 Double click on PGPCommandLine[version]Win.msi.
Page 34

20 Installing
Installing on Windows
5 Follow the on-screen instructions.
6 If prompted, restart your machine. A restart is needed only if other Symantec
encryption products are also installed on the same machine.
The Windows PGP Command Line application, pgp.exe, is installed into:
C:\Program Files\PGP Corporation\PGP Command Line\
After you run PGP Command Line for the first time, its home directory will be created
automatically in the user’s home directory:
C:\Documents and Settings\<user>\My Documents\PGP\
Application data is stored in the directory:
C:\Documents and Settings\<user>\Application Data\PGP
Corporation\PGP
Locations may be different for the different Windows versions.
Changing the Home Directory on Windows
The home directory is where PGP Command Line stores its keyring files. If a different
Symantec encryption product has already created this directory, PGP Command Line
will also use it (thus, PGP Command Line can automatically use existing PGP keys).
PGP Command Line data files, such as keys, are stored in the home directory:
C:\Documents and Settings\<user>\My Documents\PGP\
PGP Command Line application files, such as the configuration file PGPprefs.xml,
are stored in:
C:\Documents and Settings\<user>\Application Data\PGP
Corporation\PGP\
If you want the home directory changed on a permanent basis, you need to create the
PGP_HOME_DIR environment variable and specify the path of the desired home
directory.
To create the PGP_HOME_DIR environment variable on a Windows system:
1 Click Start, select Settings, select Control Panel, and then select System.
The System Properties dialog appears.
2 Select the Advanced tab, then click Environment Variables.
The Environment Variables screen appears.
3 In the User Variables section, click New.
The New User Variable dialog appears.
4 In the Variable name field, enter PGP_HOME_DIR. In the Variable value field,
enter the path of the home directory you want to use. For example:
C:\PGP\PGPhomedir\
5 Click OK.
The Environment Variables screen reappears. PGP_HOME_DIR appears in the list
of user variables.
Page 35

Uninstalling on Windows
To remove PGP Command Line from a Windows system:
1 Navigate to the Add or Remove Programs Control Panel.
2 Select PGP Command Line from the list of installed programs.
3 Click Remove, then follow the on-screen instructions.
Upgrading
When upgrading to a new version of PGP Command Line, in most cases you can install
the new version without uninstalling the older version of PGP Command Line. During
installation, the new version of PGP Command Line overwrites or updates any older
version files.
PGP Command Line is uninstalled.
Upgrading
21 Installing
Relocating
If your facility upgrades its computers, you may need to relocate an existing PGP
Command Line installation to another computer.
To relocate PGP Command Line to another computer
1 Install PGP Command Line on your new system.
2 License PGP Command Line on your new system.
3 Copy your keyring files (pubring.pkr, secring.skr) from your old system to the new
one. To locate the keyring files, use the pgp --version --verbose command.
4 If you have changed your preferences file PGPprefs.xml, re-apply those changes to
your new preferences file.
See also:
Licensing (on page 23)
Page 36

Page 37

3
Licensing
PGP Command Line requires a valid license to operate. This chapter describes how to
license your copy of PGP Command Line.
In This Chapter
Overview......................................................................................................................... 23
Using a License Number .............................................................................................. 24
Using a License Authorization.................................................................................... 24
Re-Licensing .................................................................................................................. 25
Overview
PGP Command Line requires a valid license to support full functionality. If you use PGP
Command Line without entering a license or after your license has expired, only basic
functionality will be available. You will only be able to get help and version information;
perform a speed test; list keys, user IDs, fingerprints, and signatures; export public keys
and keypairs; and license PGP Command Line.
Note: As PGP Command Line will not operate normally until licensed, you should
license it immediately after installation.
When your license gets within 60 days of expiration, PGP Command Line begins issuing
warnings that license expiration is nearing. There is no grace period once the license
expiration date has been reached.
PGP Command Line supports the following licensing scenarios:
Using a License Number (on page 24). This is the normal method to license PGP
Command Line. You must have your license number and a working connection to
the Internet.
Re-Licensing (on page 25). If you have already licensed PGP Command Line on a
system but want to re-license it with a new license number (to support additional
functionality, for example), use this method. You must have your new license
number and a working connection to the Internet.
Your license information is stored in a preferences file (for more information, see
Configuration File (on page
then you do not need to relicense PGP Command Line for any individual users on the
system.
If you have permissions to change the system-wide configuration file (typically
only super-user/administrator), then the system-wide configuration file is
changed to contain the license information. If no system configuration file exists,
one is created.
If you license PGP Command Line and you also have a user-level configuration file,
then that file is also changed to add the licensing information.
32)). If you license PGP Command Line as an administrator,
Page 38

24 Licensing
Using a License Number
If you do not have permissions to write/create a system configuration file, then
the user-level configuration file is updated (or created) with the licensing
information.
Using a License Number
If you have a license number and a working Internet connection, you can license your
copy of PGP Command Line.
Use --license-authorize to license PGP Command Line.
The following options are required:
--license-name <Name>
Where <Name> is your name or a descriptive name.
--license-organization <Org> Where <Org> is the name of your company.
--license-number <Number> Where <Number> is a valid license number.
The following option is not required but is recommended:
--license-email <EmailAddress>
Where <EmailAddress> is a valid email address, generally the email address of
the PGP Command Line administrator.
Before deciding not to enter a license email, be sure to refer to License Recovery. Not
entering a license email when you first license your copy of PGP Command Line negates
the license recovery feature for your PGP Command Line license. If you decide not to
enter a license email, you will see a warning message but your license will authorize.
For example:
pgp --license-authorize --license-name "Alice Cameron"
--license-organization "Example Corporation"
--license-number "aaaaa-bbbbb-ccccc-ddddd-eeeee-fff"
--license-email "acameron@example.com"
(When entering this text, it all goes on a single line.)
Using a License Authorization
If you have both a license number and a license authorization (a text file) from
Symantec Corporation instead of just a license number, you need to enter the name of
the license authorization file in the command.
You may need a license authorization if you are having problems authorizing your
license number or if the system hosting PGP Command Line is not connected to the
Internet.
Use --license-authorize to license PGP Command Line using a license
authorization.
The following options are required:
Page 39

--license-name <Name>
Where <Name> is your name or a descriptive name.
--license-organization <Org> Where <Org> is the name of your company.
--license-number <Number> Where <Number> is a valid license number.
The following option is not required but is recommended:
--license-email <EmailAddress>
Re-Licensing
25 Licensing
Re-Licensing
Where <EmailAddress> is a valid email address, generally the email address of
the PGP Command Line administrator.
Before deciding not to enter a license email, be sure to refer to License Recovery. Not
entering a license email when you first license your copy of PGP Command Line negates
the license recovery feature for your PGP Command Line license. If you decide not to
enter a license email, you will see a warning message but your license will authorize.
For example:
pgp --license-authorize --license-name "Alice Cameron"
--license-organization "Example Corporation"
--license-number "aaaaa-bbbbb-ccccc-ddddd-eeeee-fff"
license-auth.txt --license-email "acameron@example.com"
(When entering this text, it all goes on a single line.)
In this example, the text file "license-auth.txt" is shown after the license number.
If you have already licensed your copy of PGP Command Line on a system, but you need
to re-license it on the same system (if you have purchased a new license with additional
capabilities, for example), you must use the <force> option to override the existing
license.
You can use a license number or a license authorization when you are re-licensing.
Use --license-authorize to re-license PGP Command Line.
The following options are required:
--license-name <Name>
Where <Name> is your name or a descriptive name.
--license-organization <Org> Where <Org> is the name of your company.
--license-number <Number> Where <Number> is a valid license number.
--force The following option is not required but is recommended:
--license-email <EmailAddress>
Where <EmailAddress> is a valid email address, generally the email address of
the PGP Command Line administrator.
The following option is optional:
<LicenseAuthFilename>
Page 40

26 Licensing
Re-Licensing
Where <LicenseAuthFilename> is the name of the text file from Symantec
Corporation that includes license authorization information.
Before deciding not to enter a license email, be sure to refer to License Recovery. Not
entering a license email when you first license your copy of PGP Command Line negates
the license recovery feature for your PGP Command Line license. If you decide not to
enter a license email, you will see a warning message but your license will authorize.
For example:
pgp --license-authorize --license-name "Alice Cameron"
--license-organization "Example Corporation"
--license-number "aaaaa-bbbbb-ccccc-ddddd-eeeee-fff"
--license-email "acameron@example.com" --force
(When entering this text, it all goes on a single line.)
Page 41

4
The Command-Line Interface
This section describes the command-line interface of the PGP Command Line product.
In This Chapter
Overview......................................................................................................................... 27
Flags and Arguments.................................................................................................... 28
Configuration File ......................................................................................................... 32
Environment Variables ................................................................................................ 37
Standard Input, Output, and Error............................................................................. 38
Specifying a Key............................................................................................................ 39
'Secure' Options............................................................................................................. 40
Overview
PGP Command Line uses a command-line interface. You enter a valid command and
press Enter. PGP Command Line responds appropriately based on what you entered (if
you entered a valid command) or with an error message (if you entered an invalid or
incorrectly structured command).
All PGP Command Line commands have a long form: the text “pgp”, a space, two
hyphens "--", and then the command name. Some of the more common commands
have a short form: one hyphen and then a single letter that substitutes for the command
name.
The --version command, for example, tells you what version of PGP Command Line
you are using. It does not have a short form:
%pgp --version [Enter]
From here on, the command prompt (% in this example) and [Enter] will not be shown.
The response is:
PGP Command Line 10.3
Copyright (C) 2013 Symantec Corporation
All rights reserved.
The --help command tells you about the commands available in PGP Command Line.
The long form is:
pgp --help
The short form is:
pgp -h
Page 42

28 The Command-Line Interface
Flags and Arguments
The response to either version of the --help command is:
PGP Command Line 10.3
Copyright (C) 2013 Symantec Corporation
All rights reserved.
Commands:
Generic:
-h --help this help message and so on.
Some more examples of the command line:
1 pgp --encrypt report.doc --recipient Alice
report.doc:encrypt (0:output file report.doc.pgp)
Encrypts a file (the output filename will be report.doc.pgp) to the recipient
"Alice".
2 pgp -e report.doc -r Alice
report.doc:encrypt (0:output file report.doc.pgp)
Does the same as above, but using the short forms of the encrypt and the recipient
flags.
3 pgp -er Alice report.doc
report.doc:encrypt (0:output file report.doc.pgp)
Combines multiple command short forms. "Alice" must come after the "r" because
it is a required argument to --recipient.
4 pgp -er Alice report.doc --output NewReport.pgp
report.doc:encrypt (0:output file NewReport.pgp)
Changes the name of the file that is produced.
Flags and Arguments
PGP Command Line uses flags, commands, options, and arguments:
Flags come in two different types, commands and options. Commands are flags
that control what PGP Command Line does in its current invocation; they have no
effect on subsequent invocations of PGP Command Line. Options change the
behavior of the current command. Some options require an argument, described
below, while others do not. The order in which flags are listed on the command
line has no effect on their behavior.
Arguments are required as the next parameter when an option flag is used.
Arguments must immediately follow their flags. Where the flag/argument pair are
on the command line does not change what the flag/argument pair does. Except
when setting lists, in which case the command is read left to right; so when
searching keyservers, for example, the listed keyservers are searched in the order
in which they are provided on the command line.
Page 43

Flags
Flags and Arguments
Flags and arguments must be separated by a space on the command line. Extra spaces
are ignored. If a space between parts of an argument is required, the entire argument
must be between quotes.
In some cases, there can be multiple names for a single flag.
For example:
--textmode and --text (same flag with two names)
It is also possible to provide an option that has no effect on the current operation. Flags
that have no bearing on the current operation are ignored, unless they cause an error,
in which case the command returns an error.
For example:
--list-keys Alice with the option --encrypt-to-self
(the option --encrypt-to-self will be ignored)
29 The Command-Line Interface
Arguments
As noted above, flags have both long and short forms. To combine multiple long forms,
you simply write them out separated by a space. For example, to encrypt a file and
armor the output:
pgp --encrypt ... --armor
You can, however, combine multiple short forms into a single flag. For example, to
encrypt and sign at the same time:
pgp -es ...
When combining short forms, if at any time an option is used in the list that requires an
argument, the list must be terminated and followed by the argument. For example: ear recipient.
An argument is required as the next parameter when some option flags are used. There
are several kinds of arguments, differentiated by how they are structured or what kind
of information is provided.
The kinds of arguments are:
Booleans (on page 30)
Integers (on page 30)
Enumerations (on page 30)
Strings (page 30)
Lists (on page 32)
File descriptor (see "File descriptors" on page 32)
No parent (on page 32)
Page 44

30 The Command-Line Interface
Flags and Arguments
Booleans
Integers
Booleans are a special kind of argument. They never take a direct argument themselves.
Instead, the behavior changes by how the flag is specified. To disable a Boolean, specify
it with the prefix "--no-" instead of the normal "--".
When the short form is used for a Boolean flag, there is no way to specify the disabled
version of the flag.
For example:
--reverse-sort (activates reverse sorting)
--no-compress (deactivates compression, the reverse of --compress)
-t (activates text mode; to deactivate text mode, the long form must be used, --
no-text)
Integers are arguments that take a numeric value.
For example:
--wipe-passes 8 (sets the number of wipe passes to eight)
Enumerations
Strings
Enumerations are arguments that take a string, which is then converted to the correct
value by PGP Command Line. This string will be one of several possible for each flag.
For example:
--sort-order userid (sort by user ID)
--overwrite remove (sets the file overwrite behavior to remove files if they
exist)
Many PGP Command Line commands take strings as arguments. On Windows systems,
strings are read in as double-byte character strings and converted to UTF-8 for use by
the PGP SDK or for output. On all other platforms, UTF-8 is used.
For strings that include spaces, quotes, or other special characters, enclose the strings
in double quotes and use escape characters where needed. These rules apply to all
platforms:
Empty set. Type two double quotes.
Strings where the only special characters are spaces and non-quotes: Enclose the
string in double quotes.
Strings that include single-quotes: Enclose the string in double quotes.
Strings that include double quotes: Treatment depends on the type of command.
See Passphrases That Have Double Quotes (page
31) and Searches That Use Strings
(page 31).
Page 45

Flags and Arguments
31 The Command-Line Interface
In addition, these broader rules apply to Linux and Mac OSX:
Empty set. Type two double quotes or two single quotes.
Strings where the only special characters are spaces and non-quotes: Enclose the
string in double- or single-quotes.
Strings that include single-quotes: Enclose the string in double quotes. For
example, to specify this passphrase:
Don't even think about it
type this command
--passphrase "Don't even think about it"
Strings that include double quotes: Treatment depends on the type of command.
See Passphrases That Have Double Quotes (page
31) and Searches That Use Strings
(page 31).
These examples apply to all platforms:
--default-key 0x8885BE88 (sets the key with this key ID as the default key)
--output "New File.txt.pgp" (sets the output filename to a filename with a
space in it)
--passphrase "" (specifies a blank passphrase)
--expiration-date 2012-6-30 (specifies an expiration date of June 30, 2012)
For consistency, all example strings in this guide are shown in double quotation marks
("). Putting passphrases between double quotation marks ensures that reserved
characters and spaces are interpreted correctly.
Note: If you are having problems entering certain characters in your passphrases,
check the information about how to handle reserved characters for the operating
system or shell interpreter you are using.
Passphrases That Have Double Quotes
For passphrases that contain double quotes, precede the inner double quotes with an
escape character. For Linux, use a blackslash. For Windows, use a double quote. For
example, to specify this passphrase:
Thomas "Stonewall" Jackson
On Linux, type either of these commands:
--passphrase "Thomas \"Stonewall\" Jackson"
--passphrase 'Thomas \"Stonewall\" Jackson' On Windows, type this
command:
--passphrase "Thomas ""Stonewall"" Jackson"
Searches That Use QUOTED_STRING Types
String search commands that use QUOTED_STRING types may require escaping. See
Searching for Data on a PGP KMS (on page 245).
Page 46

32 The Command-Line Interface
Configuration File
Lists
List arguments are the same as string arguments except you can supply more than one
string.
For example:
--recipient bob --recipient bill (sets both Bob and Bill as recipients)
File descriptors
No parent
-r bob -r bill (same command using the short form of the flag)
File descriptor arguments behave like integer arguments, but instead of storing the
value of the descriptor, PGP Command Line reads a string value from the descriptor.
These string values always have a string type counterpart.
If you need to specify the data in UTF-8 format on a Windows system, use the "8"
versions of the file descriptor options.
For example:
--passphrase-fd 4 (read passphrase from fd 4 and use it as if --passphrase
had been supplied)
--passphrase-fd8 7 (read a UTF-8 passphrase from fd 7)
Arguments that have no parent flag behave like lists and follow the same rules. They
are used in different ways, depending on the operation being performed, but they can
occur anywhere in the command line except after a flag that has a required argument.
These arguments can represent users or represent files.
For example
--list-keys Alice Bob Bill (list all keys that match any one of these users)
--encrypt file1.txt file2.txt file3.txt (encrypt multiple files with
the same command)
Configuration File
Generally, the configuration file PGPprefs.xml cannot be changed by PGP Command
Line itself: any changes need to be edited manually.
Starting with the PGP Command Line version 9.0, there is one operation that will
change the configuration file: when you authorize a license, this information is saved in
the file PGPprefs.xml for future use.
The user-level configuration file, PGPprefs.xml is located in the "PGP home directory."
The PGP home directory is located in the following default locations:
$HOME/.pgp directory on any UNIX platform
Page 47

The exact location depends on the version of Windows, but it is always the
Configuration File
33 The Command-Line Interface
directory that holds the application data.
On Mac OS X, the configuration file is com.pgp.desktop.plist, located in /user’s
home directory/Library/Preferences/.
By changing some of the settings in the PGPprefs.xml file, you will change how PGP
Command Line works as long as this file is not replaced.
Note that those configuration file settings that do not begin with "CL" are shared among
all PGP applications on the system.
File paths in the prefs files are relative to the user's personal PGP home directory
(which has a default value, but can be changed through --home-dir and the
PGP_HOME_DIR environment variable. This means that although two users both read
the system-wide prefs file to get the location for their keyrings, they still end up using
different keyrings. For more information on environment variables, see Environment
Variables (on page
37).
Note: User-level prefs file are typically not needed, and should only be created in the
instances where they are required. Unless specific customizations have been made,
you may find it optimal to remove the user-level prefs files that have been created by
previous versions of PGP Command Line.
Like arguments, the configuration file settings come in different types: Boolean,
Integer, Enumeration, List, and String.
Boolean configuration file settings
ADK warning level (adkWarning). Enables warning messages for ADK actions
such as adding an ADK, skipping an ADK, or when an ADK is not found. Refer to --
warn-adk (on page 175) for more information.
Encrypt to self (encryptToSelf). When on, all files or messages you encrypt to
someone else are also encrypted to your key, which means you can decrypt those
encrypted files/messages at a later time, if you wish. The default is off. See --
encrypt-to-self (on page 169) for more information.
Fast keygen (fastKeyGen). Establishes the setting for fast key generation, on or
off. The default is on. See --fast-key-gen (on page 170) for more information.
Halt on error (CLhaltOnError). When on, causes PGP Command Line to halt
operations when an error occurs. Does not apply to all operations. The default is
off. See --halt-on-error (on page 171) for more information.
Keyring cache (CLkeyringCache). When on, stores keyrings in memory for each
access. The default is off. See --keyring-cache (on page 171) for more information.
Large Keyrings (CLlargeKeyrings). Checks keyring signatures only when
necessary. See --large-keyrings (on page 172) for more information.
Marginal is invalid (marginalIsInvalid). Establishes whether marginally
trusted keys are considered valid. The default is true, which means that
marginally valid keys are not valid. See --marginal-as-valid (on page 172) for more
information.
Passphrase cache (CLpassphraseCache). When on, automatically saves your
passphrase in memory until you log off or purge the passphrase cache. The default
is off. See --passphrase-cache (on page 173) for more information. Requires that
you have a long-running PGP process running, such as PGP Tray or have started
the pgp --agent process.
Page 48

34 The Command-Line Interface
Configuration File
Integer configuration file settings
Keyring cache timeout (CLkeyringCacheTimeout). Establishes the number of
seconds a keyring stays cached in memory. The default is 120 seconds. See --
keyring-cache-timeout (on page 180) for more information.
Keyserver timeout (CLkeyserverTimeout). Establishes the number of seconds
to wait before a keyserver operation times out. The default is 120 seconds. See --
KEYSERVER-TIMEOUT (SEE "INTEGER OPTIONS" ON PAGE 177) for more information.
Number of wipe input passes (CLfileWipeInputPasses). Establishes the
number of wipe passes for input files. The default is 3 passes. See --wipe-input-
passes (on page 185) for more information.
Number of wipe passes (fileWipePasses). Establishes the number of passes
used by the --wipe command. The default is 3 passes. See --wipe (on page 163) for
more information.
Number of wipe temp passes (CLfileWipeTempPasses). Establishes the number
of wipe passes for temporary files. The default is 3 passes. See --wipe-temp-passes
(on page 186) for more information.
Number of wipe overwrite passes (CLfileWipeOverwritePasses). Establishes
the number of wipe passes when overwriting an existing output file. The default is
3 passes. See --wipe-overwrite-passes (ON PAGE 186) for more information.
Passphrase cache timeout (CLpassphraseCacheTimeout). Establishes the
number of seconds a passphrase stays cached in memory. The default is 120
seconds. See --passphrase-cache-timeout (on page 181) for more information.
Requires that you have a long-running PGP process running, such as PGP Tray or
have started the pgp --agent process.
Enumeration configuration file settings
Automatic import of keys (CLautoImportKeys). Establishes behavior when keys
are found during non-import operations. The default is all. See --auto-import-keys
(on page 187) for more information.
Compression Level (CLcompressionLevel). Sets the compression level for the
current operation. The default is default. See --
more information.
Enforce ADK (CLenforceADK). Establishes the ADK enforcement policy. The
default is attempt. See --enforce-adk (on page
Input cleanup (CLinputCleanup). Establishes what to do with input files after
they have been used. The default is off. See --input-cleanup (on page 192) for more
information.
Manual import of keys (CLmanualImportKeys). Establishes behavior when keys
are found during an import. The default is all. See --manual-import-key-pairs (on
page 193) for more information.
Manual import of key pairs (CLmanualImportKeyPairs). Establishes behavior
when key pairs are found during import. The default is pair. Refer to --manual-
import-keys (on page 193) for more information.
Sort order (CLsortOrder). Changes the sort order for writing key lists. The
default is any. See --sort-order, --sort (on page 194) for more information.
COMPRESSION-LEVEL (on page 189) for
189) for more information.
Page 49

Overwrite (CLoverwrite). Establishes what to do when an operation tries to
create an output file but it already exists. The default is off. See --overwrite (on
page 194) for more information.
List configuration file settings
Always encrypt to keys (alwaysEncryptToKeys). Specifies additional recipients
for encryption. Use the 32- or 64-bit key ID to specify the key(s) to use. Refer to --
additional-recipient (on page 207) for more information.
Default keyserver names and associated values (keyservers). Specifies default
keyservers. The default is ldap://keyserver.pgp.com:389/. If you supply a
keyserver on the command line, those keyservers listed in the configuration file
are ignored.
String configuration file settings
Comment (commentString). Specifies a comment string to be used in armored
output blocks. The default is not set. Refer to --comment (on page 197) for more
information.
Default signing key (CLdefaultKey). Specifies a key to be used by default for
signing. The default is not set. See --default-key (on page 198) for more
information.
License Authorization (CLlicenseAuthorization). Specifies the license
authorization. The default is not set. See --license-name, --license-number, --
license-organization, --license-email (on page 200) for more information.
Configuration File
35 The Command-Line Interface
Caution: Because licensing information is stored somewhat differently, Symantec
Corporation recommends that you do not directly edit the license-related
configuration file settings; instead, use the license authorization commands
described in Licensing (on page 23).
License Name (CLlicenseName). Specifies the name of the licensee. The default
is not set. See --license-name, --license-number, --license-organization, --license-
email (on page 200) for more information.
License Number (CLlicenseNumber). Specifies the license number. The default
is not set. See --license-name, --license-number, --license-organization, --license-
email (on page 200) for more information.
License Organization (CLlicenseOrganization). Specifies the organization of
the licensee. The default is not set. See --license-name, --license-number, --license-
organization, --license-email (on page 200) for more information.
Output File (CLoutputFile). Specifies the output file (default is not set in the
configuration file; defaults to stdout). The output file is used for output messages.
See --output-file (on page 202) for more information.
Private keyring file (privateKeyringFile). The filename or path and filename
to the private keyring file. The default is secring.skr, located in the default PGP
Command Line home directory. See --private-keyring (on page 203) for more
information.
Public keyring file (publicKeyringFile). The filename or path and filename to
the public keyring file. The default is pubring.pkr, located in the default PGP
Command Line home directory. See --public-keyring (on page 203) for more
information.
Page 50

36 The Command-Line Interface
Configuration File
Random seed filename (rngSeedFile). Sets the location of the random seed file.
By default, the random seed file is located in the PGP Command Line data
directory. See --random-seed (on page 204) for more information.
Status File (CLstatusFile). Specifies the status file. The default is not set in the
configuration file; defaults to stderr. The status file is used for status messages,
using a file name (with or without the path information). See --status-file (on page
205) for more information.
Keyserver Configuration File Settings
Here is the keyserver section of the PGPprefs.xml file, with brief explanations of
specific settings:
<key>keyservers</key>
<array>
<dict>
<key>title</key>
<string>keyserver.example.com</string>(
<string></string>
<key>hostname</key>
<string>keyserver.example.com</string>
<key>domain</key>
<key>port</key>
(name of the keyserver)
(hostname of the keyserver)
<integer>389</integer> (keyserver port)
<key>protocol</key>
<integer>1</integer>(keyserver protocol: 1= LDAP, 2= HTTP,
3 = LDAPS and 4 = HTTPS (currently not supported)
<key>type</key>
<integer>1</integer>(keyserver type: 1 = HTTP, 2 = HTTPS
(currently not supported)
<key>keyserverType</key>
<integer>100</integer>(keyserver type: 100 = PGPLDAP, 101
= PGPLDAPS, 102 = PGPVKD, 103 = X509LDAP, 104 = X509LDAPS, 105
= PGPHTTP)
<key>baseDN</key>
<string></string>
<key>authKeyID</key>
<string></string> (not used)
<key>authAlgorithm</key>
<integer>0</integer> (not used)
<key>flags</key>
Page 51

<integer>0</integer> (not used)
Environment Variables
PGP Command Line behavior can be changed using environment variables. For
information about defining environment variables, refer to the section that describes
the platform you are using in Installation (see "Installing" on page 5).
Environment variables have the lowest priority compared to the command line and the
configuration file. Settings for either will override environment variables. However, if a
value for an item is not specified in either, the environment variable will be used.
Environment variables cannot be disabled; if they are present, they are implemented.
To disable an environment variable, remove it. Setting a Boolean environment variable
will activate it, regardless of the value to which it is set.
Environment variables that can be implemented for PGP Command Line are:
Usage: PGP_LOCAL_MODE=1
PGP_NO_BANNER. This is a Boolean environment variable that turns off the
banner when a command is run. The default is unset. See --banner (on page
for more information.
Usage: PGP_NO_BANNER=1
PGP_HOME_DIR. This is a string environment variable that overrides the default
home directory, pointing it to the path supplied in the variable. The default is
unset. See --home-dir (on page
Usage: PGP_HOME_DIR=/usr/bin/alice
PGP_PASSPHRASE. This is a string environment variable that lets you set your
passphrase. The default is unset. For more information, See --passphrase (on page
202) for more information.
Usage: PGP_PASSPHRASE="Now is the time for all good men"
PGP_NEW_PASSPHRASE. This is a string environment variable that lets you set
a new passphrase. The default is unset. See --new-passphrase (on page 201) for
more information.
Usage: PGP_NEW_PASSPHRASE="to come to the aid of their
country."
PGP_SYMMETRIC_PASSPHRASE. This is a string environment variable that lets
you set a passphrase for symmetric encryption. The default is unset. See -symmetric-passphrase (on page 206) for more information.
Usage: PGP_SYMMETRIC_PASSPHRASE="Now is the time"
PGP_EXPORT_PASSPHRASE. This is a string environment variable that lets you
set the export passphrase. The default is unset. See --export-passphrase (on page
199) for more information.
Usage: PGP_EXPORT_PASSPHRASE="For All Good Men"
Environment Variables
37 The Command-Line Interface
167)
199) for more information.
Page 52

38 The Command-Line Interface
Standard Input, Output, and Error
Standard Input, Output, and Error
PGP Command Line writes different data to several different places by default. Any
user output generated by PGP Command Line is written to standard output (stdout),
including version information, key list data, and so on. Any status information
generated by PGP Command Line is sent to standard error (stderr).
When encrypting and decrypting, PGP Command Line reads and writes files by default.
These files can be overridden with the special argument "-" to either --input or --
output. This behavior is set so that PGP Command Line does not have to wait for input
if you forget something: it will generate an error you can detect.
The behavior of PGP Command Line changes depending on the operating system you
are using, while the syntax changes depending on the shell.
When you work with PGP Command Line, you can use standard input (stdin) in two
ways: by redirecting an existing file, or by typing (pasting in) data.
Redirecting an Existing File
You can use your shell to redirect input to PGP Command Line from an existing file.
The command looks like:
pgp -er user -i - -o file.pgp<file.txt
Example:
pgp -er "bob@example.com" -i - -o newnote.pgp<newnote.txt
stdin:encrypt (0:output file newnote.pgp)
In this case, the file newnote.txt was encrypted with Bob’s key and saved as
newnote.pgp.
Entering Data
Instead of redirecting an existing file, you can also type (or paste in) the data that needs
to be encrypted. The command looks like:
pgp -er user -i - -o file.pgp
(type/paste in the data to be encrypted)
Example:
pgp -er "bob@example.com" -i - -o newnote.pgp
(This text is the file newnote.txt, which will be signed by Bob.)
^Z
stdin:encrypt (0:output file newnote.pgp)
In addition to specifying the end of file, you also need to specify an output file
name (such as "newnote.pgp"), since the input file name was not specified.
pgp --decrypt newnote.pgp --passphrase "B0bsm1t4"
Page 53

Specifying a Key
39 The Command-Line Interface
On platforms where buffered standard input/output (I/O) is disabled by default, you
cannot type or paste into stdin. Instead, you need to enable standard I/O using -buffered-stdio (see --buffered-stdio (on page
End-of-File
Depending on the shell you use, the end of file will be announced in different ways:
On Windows, enter ^Z (ctrl-z) on a separate line.
On UNIX, enter ^D (ctrl-d) anywhere in the text. The end of file character is
Specifying a Key
When you need to specify a key or keys as input for a PGP Command Line operation,
there are two methods you can use:
Match by user ID: To match by user ID, supply some of the text in the user ID(s)
Match by key ID: To match by key ID, supply the key ID of the specific key you
newnote.pgp:decrypt (0:output file newnote)
If you now decrypt newnote.pgp, the decrypted file newnote will not have an
extension since the input was not in a file format.
168) for details).
shell-dependent and will vary on different systems.
you want to match. A case insensitive search of the user IDs of the keys on the
local keyring is made. All keys that match the supplied text will be returned; for
example, searching on ’ex’ would return all keys on the local keyring from the
domain "example.com", as well as a key whose user ID was "
is a convenience feature that makes it easy for you to match multiple keys on the
local keyring.
dexter@pgp.com". This
Searching by user ID can return no keys, one key, or multiple keys, depending on
the supplied text and the user IDs of the keys on the local keyring. Matching by
user ID is best for operations where you want your search to return multiple keys;
for example, the list operations (--list-keys, --fingerprint, and so on).
Match by user ID can be used for operations that work only on a single key, but as
it may return multiple keys, match by user ID may not be the best choice for these
operations.
want used for the operation (0xABCD1234, for example). The key IDs of the keys
on the local keyring will be searched. If the key with the specified key ID is found
on the local keyring, it will be used for the operation; if not, the operation will
terminate.
Searching by key ID will return either no keys or one key. Matching by key ID is
best for those cases where the search must exactly match one key (--default-
key, for example) or where only a single key can be used for the operation; for
example, most of the key edit operations (--split-key, --revoke, and so on).
Page 54

40 The Command-Line Interface
'Secure' Options
'Secure' Options
The descriptions of some options in PGP Command Line mention that they are "secure,"
as in "This option is not secure" or "--auth-passphrase is secure".
In this context, "secure" means that the option’s argument is saved in non-pageable
memory (when that option is available to applications). Options that are not "secure"
are saved in normal system memory.
Page 55

5
First Steps
This section describes the steps you need to take to get up and running with
PGP Command Line.
In This Chapter
Overview......................................................................................................................... 41
Creating Your Keypair.................................................................................................. 42
Protecting Your Private Key........................................................................................ 44
Distributing Your Public Key ...................................................................................... 44
Getting the Public Keys of Others .............................................................................. 46
Verifying Keys ............................................................................................................... 48
Overview
The first steps for getting up and running with PGP Command Line are:
1 Install PGP Command Line.
Installation for all supported platforms is fully described in Installation (see
"Installing" on page 5).
2 License your copy of PGP Command Line.
Licensing is required for normal operation of PGP Command Line. Refer to
Licensing (on page 23) and --license-authorize (on page 161) for more information
about licensing PGP Command Line.
3 Create your key pair.
Most of the things you do with PGP Command Line require a key pair (a private
key and a public key). How to create your key pair is described later in this chapter
in Creating Your Keypair (on page 42).
4 Protect your private key.
No one but you should know the passphrase or have access to your private key.
How to protect your private key is described later in this chapter in Protecting
Your Private Key (on page 44).
5 Distribute your public key.
In order for others to verify your signature or encrypt data so that only you can
decrypt it, they will need your public key.
One way to distribute your public key is to post it to a keyserver so that others can
obtain it. The best way to do this is to post your public key to the PGP Global
Directory (keyserver.pgp.com), a free, public keyserver hosted by Symantec
Corporation. It provides quick and easy access to the universe of PGP keys.
Page 56

42 First Steps
Creating Your Keypair
You can also export your public key to a file, which you can then distribute in any
number of ways. For information about how to post your public key to a keyserver
and extract your public key to a file, refer to Distributing Your Public Key (on page
44).
6 Obtain the public keys of others.
You need someone’s public key to be able to encrypt data so that only they can
decrypt it. You can get public keys from a keyserver (as long as the key is posted,
of course). And if you receive someone’s public key in a file, you can import it. For
more information about how to get a public key from a keyserver and how to
import a key, refer to Getting the Public Keys of Others (on page 46).
7 Verifying the public keys you get.
It is important to make sure the public keys you get actually belong to the person
or organization they appear to be from. For instructions on how to verify a public
key, refer to Verifying Keys (on page 48).
8 Start securing your data.
Creating Your Keypair
The first thing you need to do after installing PGP Command Line is to make sure you
have a usable PGP key pair, as most PGP Command Line operations require a key pair.
A key pair consists of two keys:
Private key (stored in secring.skr) that only you have.
Public key (stored in pubring.pkr) that you can distribute freely to the people
you correspond with.
Keys are stored on keyrings. There’s one keyring for private keys (secring.skr), and one
keyring for public keys (pubring.pkr).
If you are using a Windows or Mac OS X system, you may already have a key pair
generated by Symantec Encryption Desktop. If you do have an existing key pair you
want to use with PGP Command Line and you distributed your public key to the people
who will be encrypting data to you, you need to make sure the environment variable
(PGP_HOME_DIR) is defined and points to the directory where your existing key pair is
located.
Note: If you have Symantec Encryption Desktop installed on the same Windows or
Mac OS X computer as PGP Command Line, and you installed Symantec Encryption
Desktop into the default directory, then PGP Command Line will automatically locate
and use your existing keyrings.
If you do not have a PGP key pair, you will need to create one for use with PGP
Command Line.
Use the --gen-key command to create a new key pair.
To create a key pair:
1 On the command line, enter:
Page 57

Creating Your Keypair
First Steps
43
pgp --gen-key <user> --key-type <type> --encryption-bits
<bits>
--passphrase <pass> [--signing-bits <bits>] [options]
where:
<user> is a user ID that people can use to locate your public key. A common user
ID is your name and email address in the format: "Alice Cameron
<alice@example.com>". If your user ID contains spaces, you must enclose it in
quotation marks.
<type> means you are creating either an RSA or a DH key.
<bits> is the number of bits of the key (usually 1024 to 4096). Per FIPS 186-3,
DSA keys can be 1024, 2048, or 3072 bits.
<passphrase> is a passphrase of your choice. If your passphrase includes spaces,
enclose it in quotation marks.
For more information, refer to --gen-key (on page
2
Press Enter when the command is complete.
PGP Command Line responds by generating your key pair.
95).
Note: The --gen-key command automatically creates your key pair and a public
and a private keyring in the home directory, then puts your new private and public
keys onto their respective keyrings. You can create empty keyring files without
generating a key pair at the same time using the --create-keyrings command.
An ECC key uses Elliptical Curve Cryptography to create the key. ECC keys are
generated using the key type ecc. The supported bit sizes are:
256, 384, and 521 (for P-256, P-384, P-521)
OpenPGP using ECC is documented in IETF standards. For more information, go to IETF
Website (
http://www.ietf.org) and search for "openPGP ECC".
To create a ECC key pair:
1 On the command line, enter:
pgp --gen-key "ecc key <user>" --key-type ecc --bits <bits> -passphrase <pass> [--signing-bits <bits>] [options]
where:
<user> is a user ID that people can use to locate your public key, for example,
ecc@example.com). If your user ID contains spaces, you must enclose it in quotation
marks.
<bits> is the number of bits of the key, 256, 384, and 521 (for P-256, P-384, P-
521).
<passphrase> is a passphrase of your choice. If your passphrase includes spaces,
enclose it in quotation marks.
2 Press Enter when the command is complete.
PGP Command Line responds by generating your key pair.
Page 58

44 First Steps
Protecting Your Private Key
Protecting Your Private Key
If someone gets your private key and manages to guess your passphrase or finds it
written on a Post-it® note, they can impersonate you. They can open messages
encrypted to you and they can sign messages, making them appear to be from you.
Warning: It is very important to protect your private key! Do not let anyone get a
copy of it and do not ever give anyone the passphrase.
By default, all generated keys (private and public) are stored in the directory to which
the environment variable points (which is PGP_HOME_DIR, if set).
Otherwise:
UNIX: $HOME/.pgp
Windows: C:\Documents and Settings\<current user>\My
Documents\PGP
Mac OS X: $HOME/Documents/PGP You can locate your keyrings using the --version
(-v) command. Once the keys are generated, you can store them in any location you
choose (provided you do not forget to adjust the environment variable to point to the
new location). Moving your keys to a different location is one way to protect them from
someone who might get access to your system.
It is also a good practice to make a backup copy of your keys. Make sure to be especially
careful with your private key, storing it on a machine only you can access and in a
directory that cannot be accessed via a network. You may also choose to implement
additional security precautions.
Distributing Your Public Key
People need your public key to encrypt information that only you can decrypt and to
verify your signature.
There are three main methods available to distribute your public key:
Post your public key to the PGP Global Directory. The PGP Global Directory is a
free, publicly available keyserver hosted by Symantec Corporation that provides
quick and easy access to the universe of PGP keys. If you are not in an email domain
protected by a Symantec Encryption Management Server, the PGP Global Directory is your
source for trusted keys.
Post your public key to another keyserver. Once posted, people can get a copy of
your public key and use it to encrypt data that only your private key can decrypt.
How to use PGP Command Line to post your public key to a keyserver is described
below.
Export your public key to a text file. Once exported to a text file, you can
distribute your public key however you like: attached to an email message, pasted
into the body of an email message, or copied to a CD.
How to use PGP Command Line to extract your public key to a text file is described
in Exporting Your Public Key to a Text File (on page 45).
Page 59

Posting Your Public Key to a Keyserver
You can post your public key to a private keyserver or a public keyserver; the procedure
is the same in both cases.
Use the --keyserver-send command to post your public key to a keyserver.
To post a public key to a keyserver:
1 On the command line, enter:
pgp --keyserver-send <input> --keyserver <ks>
where:
<input> is the user ID, portion of the user ID, or key ID of the public key you are
posting.
<ks> is the name of the keyserver to which you are posting.
For example:
pgp --keyserver-send
ldap://keyserver.example.com
If there are multiple keys with user IDs that match the input, all of them will be
posted. To make sure only a specific key is posted, use the key ID as the input.
pgp --keyserver-send 0x12345678 --keyserver
ldap://keyserver.pgp.com
Distributing Your Public Key
alice@example.com --keyserver
45 First Steps
Only the specified key will be posted to ldap://keyserver.pgp.com, a public
keyserver.
2 Press Enter when the command is complete.
PGP Command Line responds by posting the public key(s) to the specified
keyserver.
Once you have posted your public key to a keyserver, you should search the keyserver
for your public key to make sure it was correctly posted.
How to search for a key on a keyserver is described in Finding a Public Key on a
Keyserver (on page 46).
Exporting Your Public Key to a Text File
Once you have extracted your public key to a text file, it is easy to distribute. You can
attach it to an email message, paste it into the body of an email message, or copy it to a
CD.
Use the --export command to export your public key.
To export a public key:
1 On the command line, enter:
pgp --export <input>
where:
Page 60

46 First Steps
Getting the Public Keys of Others
<input> is the user ID, portion of the user ID, or the key ID of the key you want to
export.
By default, keys are exported as ASCII armor (.asc) files into the directory
currently active on the command line.
For example:
pgp --export example
All keys with the string "example" anywhere in them would be exported into
separate .asc files.
pgp --export "Alice C <
Only keys that exactly match this user ID would be exported. The filename would
be Alice C.asc.
2 Press Enter when the command is complete.
PGP Command Line responds by creating the .asc file(s) in the appropriate
acameron@example.com>"
directory.
Getting the Public Keys of Others
To encrypt data to a specific person, you need to encrypt it with their public key.
Naturally, you have to get their public key onto your keyring first.
To get a public key onto your keyring, you must first find the public key on a keyserver
and then import it from the keyserver onto your keyring.
Finding a Public Key on a Keyserver
In order to get a public key onto your keyring, you have to find the right key. In many
cases, you can get the key you need from a keyserver. You use the same procedure for a
public keyserver and a private keyserver.
PGP Command Line now searches additional LDAP attributes for a match when
performing a search against an LDAP X.509 directory. When searching against LDAP
X.509 keyservers, searches are performed against the following attributes:
cn
mail
displayname
proxyaddresses
Use the --keyserver-search command to search a keyserver for a key.
To search a keyserver for a key:
1 On the command line, enter:
pgp --keyserver-search <input> --keyserver <ks>
where:
<input> is the user ID, portion of the user ID, or the key ID of the key for which
you are searching.
Page 61

Getting the Public Keys of Others
47 First Steps
If you are searching by key ID, only an exact match will be found (you can find the
key ID of your key using the --list-keys (-l) (page 73) command). If you are
searching by user ID, any key whose user ID contains the user ID or portion of the
user ID you enter will be found. So a search by user ID could return many matches,
where a search by key ID will return only one key.
<ks> is the name of the keyserver you want to search.
You can enter more than one keyserver, separated by a space. Only results from
the first keyserver where there is a match will be returned.
For example:
pgp --keyserver-search example.com --keyserver
ldap://keyserver.pgp.com
This search would return keys that have "example.com" in the user ID and are on
keyserver.pgp.com, a public keyserver.
2 Press Enter when the command is complete.
PGP Command Line responds by listing the key or keys that match the search
criteria you specified in the following format:
Alg Type Size/Type Flags Key ID User ID
--- ---- --------- ----- --------- -------
DSS pub 2048/1024 [-----] 0x1234ABCD Alice C <
Importing a Public Key from a Keyserver
Once you have found the key you want on the keyserver, you need to get the key from
the keyserver onto your keyring.
Use the --keyserver-recv command to locate a key on a keyserver and import it
onto your keyring.
To import a key from a keyserver:
1 On the command line, enter:
pgp --keyserver-recv <input> --keyserver <ks>
where:
<input> is the user ID, portion of the user ID, or key ID of the key you want to get
onto your keyring.
To get a specific key, use the key ID. To get one or more keys, use the user ID or
portion of the user ID.
<ks> is the name of the keyserver you want to search.
You can enter more than one keyserver to search, separated by a space. Only
results from the first keyserver where there is a match will be returned.
For example:
pgp --keyserver-recv 0xABCD1234 --keyserver
ldap://keyserver.pgp.com
ac@example.com>
Page 62

48 First Steps
Verifying Keys
Verifying Keys
The key with the key ID shown would be imported if it were on the specified
keyserver.
2 Press Enter when the command is complete.
PGP Command Line responds by listing the key(s) it found on the specified
keyserver that matched the criteria you specified and that the key(s) was
imported:
pgp:keyserver receive (2504:successful search on
ldap://keyserver.pgp.com)
0xABCD1234:keyserver receive (0:key imported as Alice C
ac@example.com>.)
<
Note: If you want to make sure the key was imported onto your keyring, use the --
list-keys command (the short form is -l) to see what keys are currently on your
keyring.
If you have information you want to send to someone privately, and you are going to
the trouble to encrypt it so that it stays private, then it is probably also important that
you make sure the public key you have obtained and are going to use to encrypt your
important information is actually from the person or organization that you believe it to
be from.
One way to do this is to compare the fingerprint of the public key you have with the
fingerprint of the real key. You could, for example, call the person on the phone and ask
them to read the fingerprint of their key.
Some people also put the fingerprint of their PGP key on their Web site or on their
business card, making it easy to compare the fingerprint of the real key with the
fingerprint of the public key you have.
Use the --fingerprint command to see the fingerprint of any of the keys currently
on your keyring; refer to --fingerprint (page 70) for more information.
To view the fingerprint of a key:
1 On the command line, enter:
pgp --fingerprint <input>
where:
<input> is the user ID, portion of the user ID, or key ID of the key whose
fingerprint you want to see.
If you don’t enter any input, PGP Command Line will display the fingerprints of all
keys on your keyrings.
For example:
pgp --fingerprint 0xABCD1234
The user ID and the fingerprint of the key with the key ID shown would display if
it were on either keyring.
pgp --fingerprint
Page 63

First Steps
Verifying Keys
49
The user IDs and the fingerprints of all keys on both keyrings would display.
2
Press Enter when the command is complete.
PGP Command Line responds by listing the user ID of the key(s) it found that
matched the criteria you specified and the fingerprint of that key using the
following format:
Alice Cameron <alice@example.com>
896A 4A96 9C3A 3BEC C87C EA8B 2CDB B87B 2CEB 53CC
Page 64

Page 65

6
Cryptographic Operations
This chapter describes the commands used in PGP Command Line that relate to
cryptographic operations. These commands are:
--armor (-a) (page 52), which converts a file to ASCII armor format.
--clearsign (page 53), which creates a clear signature.
--decrypt (page 55), which decrypts encrypted data.
--detached (-b) (page 57), which creates a detached signature.
--dump-packets | --list-packets (see "--dump-packets, --list-
packets" on page 58), which dumps the packets in a PGP message.
--encrypt (-e) (page 59), which encrypts your data.
--export-session-key (page 62), which exports the session key that was used
to encrypt data to a separate file.
--list-sda (page 63), which lists the contents of an SDA.
Overview
--list-archive (page 63), which lists the contents of a PGP Zip archive.
--sign (-s) (page 64), which signs your data.
--symmetric (-c) (page 66), which encrypts data using a symmetric cipher.
--verify (page 67), which lets you verify data without creating any output.
In This Chapter
Overview ........................................................................................................................ 51
Commands ..................................................................................................................... 52
This chapter covers four of PGP Command Line’s most significant cryptographic
operations: encrypting, signing, decrypting, and verifying:
Encrypt: A method of scrambling information to render it unreadable to anyone
except the intended recipient, who must decrypt it to read it. You use PGP
Command Line to encrypt your important information so that if it is stolen from a
hard drive or intercepted while in transit, it is of no value to the person who has
taken it because they cannot decrypt it.
Sign: When you sign a message or file, PGP Command Line uses your private key to
create a digital code that is unique to both the contents of the message/file and
your private key. Only your public key can be used to verify your signature.
Page 66

52 Cryptographic Operations
Commands
Decrypt: When you receive decrypted data, it’s of no value until you decrypt it. To
Verify: In addition to decrypting your data so that you can use it, you should also
For more information about these cryptographic operations, refer to An Introduction to
Cryptography, which was installed with PGP Command Line.
Commands
The commands that relate to encrypting and signing are described in the following
sections.
--armor (-a)
do this, you need to use the private key of the key pair that includes the public key
that was used to encrypt the data.
verify the files you use with PGP Command Line, including data, signature, and
key files, to make sure they have not been tampered with.
Armors data, produces a PGP armored file, and changes the default file extension from
.pgp or .sig to .asc. The resulting ASCII armored data format is used with email
systems that only allow ASCII printable characters. It converts the plaintext by
expanding groups of three binary 8-bit bytes into four (4) printable ASCII characters,
and the resulting file expands in size by approximately 33 percent.
The usage format is:
pgp --armor <input> [<input2> ...] [options]
Where:
<input> is the file to be armored. It is either in the current directory, or its
location has to be defined using a relative or absolute path. Multiple files can be
armored.
[options] modify the command:
--comment. Saves a comment at the beginning of the file with the header tag
"Comment".
--compress. Compresses the output file.
--compression-algorithm. Sets the compression algorithm. The default for
this option is zip.
--eyes-only. Text inputs that are processed using this option can only be
decrypted to the screen.
--input-cleanup. This option will clean up the input file, depending on the
arguments you specify: off (default), remove, or wipe.
--output. Lets you specify a different name for the armored file.
--overwrite. Sets the overwrite behavior when PGP Command Line tries to
create an output file with the same name that already exists in the directory. This
option accepts the following arguments: off (default), remove, rename, or wipe.
--temp-cleanup. Cleans up the temporary file(s), depending on the arguments
you specify: off, remove, or wipe (default). For large encryption jobs, this option
should be set to remove to speed up the process.
Page 67

Commands
53 Cryptographic Operations
--text. Forces the input to canonical text mode. Do not use with binary files.
Automatic detection of file types is not supported.
-v|--verbose. Gives a verbose (detailed) report about the operation.
The option --compression-algorithm is allowed when --armor is the primary
operation (armor only). When --armor is combined with --sign or --encrypt
operations, check these operations for details about setting the compression algorithm.
Examples:
1 pgp --armor report.txt --overwrite remove
The ASCII armored output file "report.txt.asc" replaced the existing file with the
same name, which was removed by overwriting.
2 pgp -a report.txt --compression-algorithm zlib
The ASCII armored file "report.txt.asc" is compressed using the ZLIB compression
algorithm.
Using --armor as an option with other commands to armor a file:
The usage format is:
pgp command1 input command2 user [--passphrase] pass --armor
Examples:
1 pgp --sign report.txt --signer <alice@example.com> --passphrase
"cam3r0n" --armor
The output file is an armored file "report.txt.asc", which contains Alice’s
signature.
2 pgp -er "Bill Brown" report.txt --armor --comment "Urgent"
Creates the ASCII armored file "report.txt.asc," which is encrypted for Bill and has
the plaintext comment "Urgent" displayed on top of the encrypted file:
-----BEGIN PGP MESSAGE-----
Version: PGP Command Line v10.3 (OSX)
Comment: Urgent
qANQR1DBwEwDRB9gEpFtI3MBB/0UL7GQa1xr0LCp54FKg/FN4KZNlr+DrD3IGi
0P
e5xyNUQcYnQ2YqZYO2kDuFkOEJ1lE1HyixLs4m4ETYxhT3EH/VA+yIjqqBHOwl
6k
MXzGN9fNFcp8SoQZGVlOm6bLWOtRY/5W2E90B0iB+f3Pv/VHiN5gDO/FmvzREJ
ke
..
--clearsign
Causes the document to be wrapped in an ASCII-armored signature but otherwise does
not modify the document. The signed message can be verified to ensure that the
original document has not been changed. To verify the signed message, use --verify.
The usage format is:
Page 68

54 Cryptographic Operations
Commands
pgp --clearsign <input> [<input2> ...] --signer <user>
--passphrase <pass> [options]
Where:
<input> is the name of the file to be clear-signed. It is required. You can clearsign multiple files by listing them, separated by a space.
<user> is the user ID, portion of the user ID, or the key ID of the clearsigner. The
private key of the clear-signer must be on the keyring. If <user> is not specified,
the default key is used.
<pass> is the passphrase of the private key of the clear-signer. It is required.
[options] modify the command. Options are:
--comment saves a comment at the beginning of the file with the header tag
"Comment".
--input-cleanup cleans up the input file, depending on the arguments you
specify: off (default), remove, or wipe.
--overwrite sets the overwrite behavior when PGP Command Line tries to
create an output file with the same name that already exists in the directory. This
option accepts the following arguments: off (default), remove, rename, or wipe.
--temp-cleanup cleans up the temporary file(s) depending on the arguments
you specify: off, remove, or wipe (default). For large encryption jobs, this option
should be set to remove to speed up the process.
--text forces the input to canonical text mode. Do not use with binary files
(automatic detection of file types is not supported).
-v|--verbose gives a verbose (detailed) report about the operation.
Example:
pgp --clearsign newnote.txt --signer
passphrase "B0bsm1t4"
newnote.txt:sign (0:output file newnote.txt.asc)
bob@example.com --
The resulting file "newnote.txt.asc" will have the unchanged text, "wrapped"
between the header and the footer such as this:
-----BEGIN PGP SIGNED MESSAGE-----
Hash: SHA256
…
(the unchanged text in the file "new.note.asc")
-----BEGIN PGP SIGNATURE-----
Version: PGP Command Line v10.3 (Win32)
iQEVAwUBQZF+rbnA+IViRSc+AQiSpQgAnaGd+6/4iOoQ+bsawPB632cEE9Ypa6
wL
/9DeSFgn2mmFIIIOaHljBGheJpIhax4BBDut2ngpOxIUywMEpMuD3Zw05IUGD7
n
r/+YseC6Hteb/S3j9ib0JCd97IxE54MA5DvSX07xTqAjc1ddBqkP8tK28kTmlJ
GN
0QEFJ/zti/k6IYSKP8QSQ+x+aTto2pioibk6QXz4NDWttZ30g4BFefxQnwNwYP
f7
Page 69

--decrypt
Commands
+kbq2fY+VHn0nkIPPrN+8vHskNklO4rxEZccLKPFGdoRPWc9hEkIqDEBOXt7CW
Jf
016AaKwF7wWtz1yWAZJXzfr/EHXRqOBWZb9F/cMimqgnvCnQI/i9VA==
=GE1E
-----END PGP SIGNATURE-----
Decrypts encrypted files with local keys or keys on a PGP KMS server. If data being
decrypted is also signed, the signature is automatically verified during the decryption
process.
The usage format is:
pgp --decrypt <input> [<input2> ...] [<inputd>...] [options]
Where:
<input> (required). Space-separated names of the files to decrypt.
<inputd>. Additional detached signature target files. Note that PGP Command
Line does not write output when decrypting detached signature files.
[options] modify the command. Options are:
55 Cryptographic Operations
--annotate. Adds annotations (information that PGP Command Line processed
the data in a certain way) when processing email messages.
--archive. When you decrypt archives, note the following:
If you specify --archive, the contents of the archive are extracted.
If you do not specify --archive, only the .tar file is extracted.
--decrypt-with. Name of a MEK or GKM MAK on a PGP KMS server. For
documents that are encrypted with SKM or SCKM MAKs, omit this argument. PGP
Command Line finds the SKM/SCKM MAK on the indicated PGP KMS server. For
documents that are encrypted with CKM MAKs, obtain a local copy of the key and
then call --decrypt without specifying --usp-server. An error results if PGP
Command Line can match the identifier to more than one MAK or MEK on the PGP
KMS. See Key Modes (page
250).
--email. Processes input data as an RFC 822-encoded email message, which
means that MIME headers and CRLF line endings will be respected by PGP
Command Line.
--eyes-only. Text inputs that are processed using this option can only be
decrypted to the screen: the recipient must view the output on screen when
decrypting a message. The default is off.
When decrypting data that is marked for your eyes only, PGP Command Line
generates an error if the option --eyes-only is not specified.
--input-cleanup. Cleans up the input file, depending on the arguments you
specify: off (default), remove, or wipe.
--output. Specifies a different name for the decrypted file or a different output
directory.
Page 70

56 Cryptographic Operations
Commands
Examples:
Decrypt a file with a key on the keyring
Decrypt a file with a GKM key on a PGP KMS server
Decrypt a file with an SKM/SCKM MAK from a PGP KMS server
Decrypt a self-decrypting archive (SDA)
--overwrite. Sets the overwrite behavior when PGP Command Line creates an
output file that already exists. This option takes the following arguments: off
(default), remove, rename, or wipe.
--passphrase. Provides the password for [asymmetrically] encrypted files
--sda. Specifies the input files are self-decrypting archives. Supply either -symmetric-passphrase or --passphrase.
When decrypting SDAs or archives, files are automatically overwritten
regardless of the --overwrite option. To avoid overwriting files, use the --
output option to specify an output directory.
--symmetric-passphrase. Provides the password for symmetrically encrypted
files. If supplied, the string cannot be the empty string ("").
--temp-cleanup. Cleans up the temporary file(s), depending on the arguments
you specify: off, remove, or wipe (default). For large encryption jobs, use remove
to speed up the process.
--usp-server. Specifies the PGP KMS to search for MEKs or MAKs containing
SKM, SCKM, or GKM keys.
-v|--verbose. Produces a verbose (detailed) report about the operation.
pgp --decrypt note.txt.pgp --symmetric-passphrase "cam3r0n" -overwrite remove
This example decrypts the file to "note.txt" and removes the existing file with the
same name by overwriting it.
pgp --decrypt note.txt.pgp --decrypt-with alicesKey --uspserver universal.example.com --auth-username acameron --authpassphrase "cam3r0n"
pgp --decrypt note.txt.pgp --usp-server universal.example.com
--auth-username acameron --auth-passphrase "cam3r0n"
pgp --decrypt keyshares.exe --sda --symmetric-passphrase
"B0bsm1t4"
keyshares.exe:decrypt (0:directory created successfully)
keyshares.exe:decrypt (0:output file keyshares\Alice Cameron1-Bob Smith.shf)
keyshares.exe:decrypt (0:output file keyshares\Alice Cameron2-John Jones.shf)
keyshares.exe:decrypt (0:output file keyshares\Alice Cameron3-Bill Brown.shf)
keyshares.exe:decrypt (0:output file keyshares\pgp)
keyshares.exe:decrypt (0:SDA decoded successfully)
Page 71

Commands
57 Cryptographic Operations
What to avoid when decrypting an SDA pgp --decrypt keyshares.exe -symmetric-passphrase "B0bsm1t4" keyshares.exe:decrypt
(3031:input does not contain PGP data) If you do not enter the option -
-sda. PGP Command Line will not recognize the SDA you want to decrypt and
uncompress.
Decrypt an attached signature file pgp --decrypt note.txt.sig -passphrase "B0bsm1t4" note.txt:decrypt (1082:detached
signature target file) note.txt.sig:decrypt (3038:signing key
0x6245273E Bob Smith <bob@example.com>)
note.txt.sig:decrypt (3040:signature created 2005-1028T12:44:38-07:00)
note.txt.sig:decrypt (3035:good signature)
Decrypts the detached signature file "note.txt.sig". When decrypting detached
signature files, you will get only a status message as output.
Decrypt an archive file into a tar file pgp --decrypt bobsarchive.pgp -passphrase "B0bsm1t4" bobsarchive.pgp:decrypt (0:output file
bobsarchive.tar)
Decrypt an archive file
pgp --decrypt bobsarchive.pgp --passphrase "B0bsm1t4" -archive
bobsarchive.pgp:decrypt (0:output file .\note.txt)
bobsarchive.pgp:decrypt (0:output file .\report.doc)
--detached (-b)
Decrypts the archive file into the actual archived files "note.txt" and report.doc,
with their path information included.
Signs data and creates a detached signature. If you use this command to sign a
document, both the document and detached signature are needed to verify the
signature. To verify the signed message, use --verify.
The usage format is:
pgp --detached <input> [<input2> ...] --signer <user> -passphrase <pass> [options]
Where:
<input> is the name of the file for which the detached signature is being created.
It is required. You can create a detached signature for multiple files by listing
them, separated by a space.
<user> is the user ID, portion of the user ID, or the key ID of the signer. It is
required. The private key of the signer must be on the keyring.
<pass> is the passphrase of the private key of the signer. It is required.
[options] modifies the command. Options are:
--armor armors the data and changes the file extension from .sig to .asc.
--comment saves a comment at the beginning of the file with the header tag
"Comment". It works only if --armor is specified as well.
Page 72

58 Cryptographic Operations
Commands
Examples:
1 pgp -b note.txt --passphrase "B0bsm1t4" --signer "Bob Smith"
--input-cleanup cleans up the input file, depending on the arguments you
specify: off (default), remove, or wipe.
--output lets you specify a different name for the created file.
--overwrite sets the overwrite behavior when PGP Command Line tries to
create an output file that already exists. This option accepts the following
arguments: off (default), remove, rename, or wipe.
--temp-cleanup cleans up the temporary file(s), depending on the arguments
you specify: off, remove, or wipe (default). For large encryption jobs, this option
should be set to remove to speed up the process.
--text forces the input to canonical text mode. Do not use this option with binary
files (automatic detection of file types is not supported).
-v|--verbose gives a verbose (detailed) report about the operation.
note.txt:sign (0:output file note.txt.sig)
Output is the file note.txt.sig, which contains Bob’s detached signature.
2 pgp --verify note.txt.sig
note.txt:verify (1082:detached signature target file)
note.txt.sig:verify (3038:signing key 0x6245273E Bob Smith
<
bob@example.com>)
note.txt.sig:verify (3040:signature created 2005-1028T12:44:38-07:00)
note.txt.sig:verify (3035:good signature)
note.txt.sig:verify (0:verify complete)
The detached signature is verified.
--dump-packets, --list-packets
Dumps the packet information in a PGP message. Input is a list of files or standard
input; output is always a standard output.
This command uses the normal output format for data blocks and displays hexadecimal
values in the format "NN".
The usage format is:
pgp --dump-packets <input> [<input2> …] [options]
Where:
<input> is a list of files or standard input.
<input2> are additional files.
[options] modifies the command. Options are:
--buffered-stdio enables buffered stdio for stdin and stdout.
Example:
Page 73

Commands
59 Cryptographic Operations
--encrypt (-e)
pgp --dump-packets TrainingDetails.msg
Processing file TrainingDetails.msg
New: unknown(tag 16)(4049 bytes)
Old: Trust Packet(tag 12)(46 bytes)
Trust - 00 30 00 5f 00 30 00 30 00 36 00 34 00 30 00 30 00
31 00 45 00 00 00 00 00 00 00 00
00 00 00 00 00 00 00 00 00 00 00 00 00 00 00 00 00 2a
Old: Reserved(tag 0)(2 bytes)
File TrainingDetails.msg complete
Encrypts documents for specified recipients, where keys are on the local keyring or on a
PGP KMS server.
Note: The --encrypt command is not used for symmetric encryption; instead, use
the --symmetric command, described in --symmetric (-c) (page 66).
PGP Command Line uses the recipient's preferred cipher and compression algorithms.
If there are multiple recipients, PGP Command Line uses the most compatible
algorithm. Note that you cannot specify a one-time cipher or compression algorithm
with --encrypt.
The usage format is:
pgp --encrypt <input> [<input2> ...] --recipient <user or
keyID>
[-r <user2> ...] [options]
Where:
<input> (required). Space-separated names of the files encrypt. The default
output filename for an encrypted file is <input filename>.pgp. Note that
stdin can be used only by itself and cannot be combined with other inputs.
--recipient (required). Specifies the recipient for the encryption. Provide one -recipient option for each recipient. The --usp-server option affects --encrypt as
follows:
--usp-server is not provided. --recipient specifies the recipient's user ID,
portion of the user ID, or the key ID. PGP Command Line searches the local
keyring for the recipient key.
--usp-server is provided. --recipient specifies the UUID of the recipient's
MAK or MEK, or the recipient's user ID, portion of the user ID, or the key ID.
PGP Command Line searches the server for the recipient key. An error
results if PGP Command Line can match the identifier to multiple MAKs or
MEKs on the PGP KMS server.
[options] modifies the command. Options are:
--adk. Alternative decryption key. This option can be used only the option --sda.
Note that if any of the keys used with the option --adk have ADKs, they will also
be used.
Page 74

60 Cryptographic Operations
Commands
--anonymize. Hides the key IDs of recipients. Recipients of data encrypted with
this option are unable to identify other recipients of the data.
--archive. Saves the output as an archive. It cannot be used with the options -text-mode or --sda. When using --archive, directories can be in the input
file: without this option, the directories are skipped.
-a or --armor armors the encrypted file.
--cipher. If the option --cipher is used, the existing cipher will be forcefully
overridden and the key preferences and algorithm lists in the SDK will be ignored.
This can create messages that don’t comply with the OpenPGP standard. This
option must be used together with the option --force.
--comment saves a comment at the beginning of the file with the header tag
"Comment". It works only if --armor is specified as well.
--compress toggles compression. If enabled, the preferred compression
algorithm of the recipient is used.
--compression-algorithm. If the option --compression-algorithm is
used, the existing compression algorithm will be forcefully overridden and the key
preferences and algorithm lists in the SDK will be ignored. This can create
messages that do not comply with the OpenPGP standard. This option must be
used together with the option --force.
--email processes input data as an RFC 822-encoded email message, which
means that MIME headers and CRLF line endings will be respected by PGP
Command Line. The resulting file has a .pgp extension. Note that PGP Command
Line does not send the resulting encrypted message, it only creates it.
--encrypt-to-self. Encrypts to the default key in addition to any other
specified keys. The default is off.
--eyes-only. Text inputs that are processed using this option can only be
decrypted to the screen.
--force. Required to use --compression-algorithm and --cipher.
--input-cleanup. Cleans up the input file, depending on the arguments you
specify: off (default), remove, or wipe.
--output. Specify a different name for the encrypted file.
--overwrite. Sets the overwrite behavior when PGP Command Line tries to
create an output file that already exists. This option accepts the following
arguments: off (default), remove, rename, or wipe.
--root-path. Use this option with --sda or --archive.
--sda cannot be used together with the command --sign (such as -es). For
more information, refer to the option --sda.
--sign lets you sign the encrypted file.
--temp-cleanup cleans up the temporary file(s) depending on the arguments
you specify: off, remove, or wipe (default). For large encryption jobs, this option
should be set to remove to speed up the process.
--text forces the input to canonical text mode. Do not use with binary files
(automatic detection of file types is not supported).
--usp-server specifies the PGP KMS to search for MAKs or MEKs.
Page 75

Commands
61 Cryptographic Operations
-v |--verbose. Provides a verbose (detailed) report about the operation.
Refer to the descriptions of these options or to the man page for information about how
to use these options.
Examples:
Encrypt to multiple recipients where keys are on the local keyring
pgp --encrypt report.txt README.rtf -r "Bill Brown" -r "Mary
Smith" -r "Bob Smith"
The files "report.txt" and "README.rtf" are encrypted to multiple recipients.
Encrypt to recipients with keys on a PGP KMS server
pgp --encrypt report.txt README.rtf -r "Bill Brown" --uspserver universal.example.com --auth-username acameron --authpassphrase "cam3r0n"
The files "report.txt" and "README.rtf" are encrypted to multiple recipients.
Encrypt for recipient's "eyes-only" pgp -er "Bob Smith" report.txt -eyes-only
The output file "readme.txt.pgp" is encrypted for Bob’s "eyes only", which means
that he can read the file only on the screen.
Encrypt and show verbose results pgp -e report.doc -r "Bob Smith" -output newreport.pgp -v
The output file is "newreport.pgp", and the on-screen message contains the
following detailed information about the performed operation:
pgp:encrypt (3157:current local time 2005-11-05T12:13:0908:00)
/Users/bobsmith/.pgp/pubring.pkr:open keyrings (1006:public
keyring)
/Users/bobsmith/.pgp/secring.skr:open keyrings (1007:private
keyring)
0x4A8C54B8:encrypt (1030:key added to recipient list)
report.doc:encrypt (3048:data encrypted with cipher AES-128)
report.doc:encrypt (0:output file newreport.pgp)
Encrypt and store the results in a directory pgp -er "Bob Smith"
report.doc --output /Users report.doc:encrypt (0:output file
/Users/report.doc.pgp) You have encrypted the file report.doc to the
specified directory.
Use wildcards to specify the files to encrypt pgp -er "Bob Smith" *.doc
myreport.doc:encrypt (0:output file myreport.doc.pgp)
report.doc:encrypt (0:output file report.doc.pgp) Both files with
the extension .doc were encrypted for the user Bob.
Encrypt multiple files into an archive pgp -er "Bob Smith" *.doc -output archive.pgp
pgp:encrypt (3028:multiple inputs cannot be sent to a single
output file)
Nothing happened because archive mode was not enabled.
pgp -er "Bob Smith" *.doc --output archive.pgp --archive
Page 76

62 Cryptographic Operations
Commands
pgp00000.tmp:encrypt (3110:archive imported myreport.doc)
pgp00000.tmp:encrypt (3110:archive imported report.doc)
pgp00000.tmp:encrypt (0:output file archive.pgp)
With the option --archive added, the two doc files are encrypted into
archive.pgp.
Encrypt files from a folder
pgp -er "Bob Smith" /Users/note.txt
/Users/note.txt:encrypt (0:output file /Users/note.txt.pgp)
In this case, you have encrypted the file note.txt, which was located in another
directory.
pgp -er "Bob Smith" /Users/*.txt -o MyNewArchive.pgp --archive
pgp00000.tmp:encrypt (3110:archive imported /Users/note.txt)
pgp00000.tmp:encrypt (3110:archive imported /Users/note2.txt)
pgp00000.tmp:encrypt (0:output file MyNewArchive.pgp)
In this case, you have encrypted multiple text files located in another directory
into a new archive in your local directory.
pgp -er "Bob Smith" /Data/emailmessage.txt --email
In this case, you have encrypted the file emailmessage.txt, an RFC 822-encoded
email message. The encrypted file emailmessage.txt.pgp will result.
--export-session-key
Exports the session key of an encrypted message. This key is used to encrypt each set of
data on a transaction basis, and a different session key is used for each communication
session. Output of this command is a key file with the extension .key, which contains
the key fingerprint of the key used during the session that produced the encrypted file.
Using the session key, it is possible to decrypt a document without the recipient’s
private key and its passphrase. Therefore, it reveals only the content of a specific
message without compromising the private recipient’s key (which would reveal all
messages encrypted to that key). Note that a user cannot directly specify a session key
during encryption.
The usage format is:
pgp --export-session-key <input> [<input2> ...] --passphrase
<pass> [--output]
Where:
<input> is the encrypted file whose session key is to be exported to a separate
file. It is required. Multiple files can have their session key exported as well; each
encrypted file must be listed, separated by a space.
--passphrase is needed for encrypted files (--symmetric-passphrase is used
for conventionally encrypted files, but --passphrase will also work)
--output lets you specify a different filename for the resulting file.
Refer to the descriptions of these options for information about how to use them.
Example:
Page 77

--list-sda
Commands
1 pgp -e report.doc -r "Bob Smith" --output BobsReport.pgp
report.doc:encrypt (0:output file BobsReport.pgp)
First, the file report.doc was encrypted into BobsReport.pgp.
2 pgp --export-session-key BobsReport.pgp --passphrase
"B0bsm1t4"
BobsReport.pgp:export session key (0:output file report.doc.key)
Second, the key used for the encrypting session was exported into the file
report.doc.key, which contains the fingerprint of the key used for the session,
such as:
7:8F042E99E383FCD4921FD74A63C514D3
Lists the contents of a Self-Decrypting Archive (SDA). The entire SDA needs to be
decrypted in order to list its contents, which could take up to several minutes
(depending on the number and size of the files in the archive).
The usage format is:
pgp --list-sda <input> --passphrase <pass>
Where:
<input> is an SDA file, such as reports.exe. Output is always the standard output.
63 Cryptographic Operations
--list-archive
<pass> This is a passphrase or symmetric passphrase with which the SDA was
encrypted.
Example:
pgp --list-sda reports.exe --symmetric-passphrase "B0bsm1t4"
reports\
reports\README.rtf
reports\README.txt
reports\report.txt
reports.exe:list SDA (0:SDA decoded successfully)
The archive "reports.exe" was decrypted and listed.
Lists the contents of a PGP Zip archive, which lets you add any combination of files and
folders to an encrypted, compressed, portable archive.
A PGP Zip archive is an excellent way to distribute files and folders securely or back
them up. Refer to --archive for more information about PGP Zip archives.
The usage format is:
pgp --list-archive <input> [<input2> ...] --passphrase <pass>
Where:
Page 78

64 Cryptographic Operations
Commands
--sign (-s)
<input> is the PGP archive(s) whose files you want to list.
<pass> is the passphrase of the archive whose files you want to list.
Example:
pgp --list-archive archive.pgp --passphrase "B0bsm1t4"
In this case, the archive is located in the local directory and no directory path is
displayed.
report.txt
README.txt
Signs a document, without encrypting it. You can sign and encrypt a file at the same
time using the command -es. Input is a standard input or a list of files; output is a
standard output or a list of files.
To sign with a MAK on a PGP KMS, --signer, a MAK ID, and the PGP KMS must be
specified on the command line. The identifier can be either the name, prefix of a name,
or UUID of the MAK. An error results if PGP Command Line can match the identifier to
more than one MAK.
The usage format is:
pgp --sign <input> [<input2> ...] --passphrase <pass> [-signer <user>] [options]
Where:
<input> is the name of the file to be signed. It is required. You can sign multiple
files by listing them, separated by a space.
<pass> is the passphrase of the private key of the signer. It is required.
<user> is the user ID, portion of the user ID, or the key ID of the signer. The
private key of the signer must be on the keyring. If <user> is not specified, the
default key is used to sign.
[options] modifies the command. Options are:
--archive allows you to create an unencrypted signed tar file. You cannot use
this archive until it is decrypted (the signature is removed). Using the option -sign with --archive, you can create a signed tar file that anyone can open.
-a, --armor. Armors the signed file.
--comment saves a comment at the beginning of the file with the header tag
"Comment". It works only if --armor is specified as well.
--compress toggles compression.
--compression-algorithm. You can select the compression algorithm in case
you are creating an attached opaque signature only (that is not encrypted), or
when you are creating a conventionally encrypted and signed output.
--email processes input data as an RFC 822-encoded email message, which
means that MIME headers and CRLF line endings will be respected by PGP
Command Line.
Page 79

Commands
65 Cryptographic Operations
--eyes-only. Text inputs that are processed using this option can be decrypted
only to the screen.
--force. Required to use --hash.
--hash. If you use this option, the existing hash algorithm will be forcefully
overridden. Note that the key preferences and algorithm lists in the SDK will be
ignored, which can lead to the creation of messages that violate OpenPGP
standard. You must use the option --force with --hash.
--input-cleanup cleans up the input file, depending on the arguments you
specify: off (default), remove, or wipe.
--output lets you specify a different name for the signed file.
--overwrite sets the overwrite behavior when PGP Command Line tries to
create an output file that already exists. This option accepts the following
arguments: off (default), remove, rename, or wipe.
--signer is required to sign with a MAK (managed asymmetric key).
--temp-cleanup cleans up the temporary file(s) depending on the arguments
you specify: off, remove, or wipe (default). For large encryption jobs, this option
should be set to remove to speed up the process.
--text forces the input to canonical text mode. Do not use with binary files
(automatic detection of file types is not supported).
-v|--verbose gives a verbose (detailed) report about the operation.
Refer to the descriptions of these options or to the man page for information about how
to use these options.
Examples:
1 pgp -s report.txt --signer "Bob Smith" --passphrase "B0bsm1t4"
report.txt:sign (0:output file report.txt.pgp)
Output is "report.txt.pgp" signed by Bob.
2 pgp -es report.txt -r
bob@example.com --passphrase "cam3r0n"
This command produces "report.txt.pgp," which is encrypted for Bob and signed
by Alice using her passphrase (we assume that her key is the default signing key
and the option --signer is not used).
3 pgp -s report.txt --signer "Bob Smith" --passphrase "B0bsm1t4"
--compression-algorithm zip
report.txt:sign (0:output file report.txt.pgp)
The file "report.txt.pgp" was signed by Bob and compressed using the Zip
compression algorithm.
4 pgp -s report.doc note.txt --signer "Bob Smith" --passphrase
"B0bsm1t4" -o NewArchive.pgp --archive
pgp00001.tmp:sign (3110:archive imported report.doc)
pgp00001.tmp:sign (3110:archive imported note.txt)
pgp00001.tmp:sign (0:output file NewArchive.pgp)
First, both files are signed and saved as a tar file NewArchive.pgp. This file cannot
be used until the signature is removed by decrypting the file. This file is just
opaquely signed, and you do not need a passphrase to verify the signature:
Page 80

66 Cryptographic Operations
Commands
--symmetric (-c)
pgp --decrypt NewArchive.pgp
NewArchive.pgp:decrypt (3038:signing key 0x6245273E Bob Smith
<bob@example.com>)
NewArchive.pgp:decrypt (3040:signature created 2005-1111T16:40:42-08:00)
NewArchive.pgp:decrypt (3035:good signature)
NewArchive.pgp:decrypt (0:output file NewArchive.tar)
The resulting tar file can be uncompressed with utilities that are appropriate for
your platform.
Encrypts data using symmetric encryption, not public-key encryption.
The usage format is:
pgp --symmetric <input> [<input2> ...] --symmetric-passphrase
<pass> [options]
Where:
<input> is the name of the file to be symmetrically encrypted and it is required.
You can encrypt multiple files by listing them, separated by a space. The default
filename for an encrypted file is <input filename>.pgp. You can modify the
filename of the encrypted file using --output.
<pass> is the passphrase you want to use for the symmetrically encrypted file.
[options] modifies the command. Options are:
--output lets you specify a different filename for the encrypted file.
--sign lets you sign the encrypted file. If you use --sign with --symmetric,
you will need both --symmetric-passphrase for the encryption and -passphrase for the signature.
--armor armors the output file. File extension is changed to .asc.
--comment lets you specify a comment for armored data.
--text forces the <input> to supported.
--compress toggles compression.
--compression-algorithm specifies the compression algorithm to use for the
operation. The default is Zip.
--cipher specifies the cipher to use for the operation. The default is AES256.
--eyes-only prevents the decrypted output from being saved to disk; the
decrypted output can only be displayed on-screen.
--encrypt-to-self lets you encrypt to the default key.
--archive lets you combine multiple files into a single .pgp file.
--overwrite lets you specify what to do if a file of the same name as the output
filename already exists.
Page 81

--verify
Commands
--input-cleanup lets you specify what to do with <input> files when the
operation is done. The default is off (leave them alone).
--temp-cleanup lets you specify how to handle temporary files. The default is to
wipe them.
--verbose (-v) shows verbose results information.
Examples:
1 pgp --symmetric file.txt --symmetric-passphrase "Bilbo$Frodo"
Encrypts a file, which will be called file.txt.pgp, using the passphrase
"Bilbo$Frodo" without the quotes.
2 pgp -ec file.txt --symmetric-passphrase "Bilbo$Frodo"
Same as above, using the short forms.
The important information about --encrypt also applies to --symmetric.
Verifies that data was not tampered with and tests whether PGP Command Line can
process the entire file.
It verifies data, signatures, and key files and works on all PGP Command Line data
types. The command output describes what was verified.
To verify with a MAK (managed asymmetric key) on a PGP KMS, you must specify a
PGP KMS on the command line as well as follow --verify-with with a MAK
identifier: either the name, prefix of a name, or UUID of a MAK. For example: -verify-with MAKid --usp-server universal.example.com. An error results
if PGP Command Line can match the MAK identifier to more than one MAK.
The usage format is:
pgp --verify <input> [<input2> ...] [options]
Where:
<input> is the file to be verified. It is required.
67 Cryptographic Operations
[options] modifies the command. Options are:
--annotate adds annotations (information that PGP Command Line processed
the data in a certain way) when processing email messages.
--email processes input data as an RFC 822-encoded email message, which
means that MIME headers and CRLF line endings will be respected by PGP
Command Line.
--input-cleanup cleans up the input file, depending on the arguments you
specify: off (default), remove, or wipe.
--passphrase | --symmetric-passphrase. This is the passphrase that is
required for encrypted files.
--temp-cleanup cleans up the temporary file(s) depending on the arguments
you specify: off, remove, or wipe (default). For large encryption jobs, this option
should be set to remove to speed up the process.
-v | --verbose gives a verbose (detailed) report about the operation.
Page 82

68 Cryptographic Operations
Commands
Refer to the descriptions of these options for information about how to use them.
Example:
--verify-with is required to verify with a MAK (managed asymmetric key) on a
PGP KMS.
pgp --verify report.doc.pgp --passphrase "B0bsm1t4"
report.doc.pgp:verify (3111:data is a PGP archive)
report.doc.pgp:verify (3042:suggested output file name
report.doc.tar)
report.doc.pgp:verify (3038:signing key 0x6245273E Bob Smith
<
bob@example.com>)
report.doc.pgp:verify (3040:signature created 2005-1110T13:58:07-08:00)
report.doc.pgp:verify (3035:good signature)
report.doc.pgp:verify (0:verify complete)
The file report.doc.pgp is verified.
Page 83

7
Key Listings
This chapter describes the commands that list information about the PGP keys on
keyrings.
These commands are:
--fingerprint (page 70), which lists the fingerprints of keys on your keyring, in
hexadecimal numbers or biometric words.
--fingerprint-details (page
and their subkeys, in hexadecimal numbers or biometric words.
--list-key-details (page
detailed information about those keys.
--list-keys (page 73), which lists the keys on the keyring.
--list-keys-xml (page 74), which lists keys in XML format.
--list-sig-details (page 74), which provides detailed information about signatures
on a key.
--list-sigs (page 75), which lists the keys on the keyring and the user IDs and
signatures on those keys.
--list-userids (page 75), which lists the keys on the keyring and the user IDs on
those keys.
70), which lists the fingerprints of keys on your keyring
72), which lists the keys on the keyring and displays
Overview
Commands
In This Chapter
Overview ........................................................................................................................ 69
Commands ..................................................................................................................... 69
At some point, you are going to need to know about the keys on your keyrings. The key
listing commands provide those details. Using the commands in basic display mode
gives you summary information about the keys on a keyring. Detailed display mode
tells you everything there is to know about those keys.
Refer to Lists (on page 213) for more information about what the key and signature lists
show about a key.
The key listing commands are described in the following sections.
Page 84

70 Key Listings
Commands
--fingerprint
Lists the fingerprints of keys on your keyring that match the supplied criteria. If you
run the command with no user or key ID information, all key fingerprints will be
displayed. If you enter any user or key ID information, only key fingerprints that match
will be displayed.
The usage format is:
pgp --fingerprint [<user1> ...] [--biometric] [--verbose]
Where:
<user1> is the user ID, portion of a user ID, or the key ID of a key on your
keyring. If you don’t supply a user ID, all fingerprints will be listed.
--biometric displays biometric words instead of hexadecimal numbers.
--verbose shows the key IDs under the primary user ID for each fingerprint.
Examples:
pgp --fingerprint Alice
Displays the fingerprint in hexadecimal of any keys on the keyring that match
"Alice" using the format:
Alice Cameron <
896A 4A96 9C3A 3BEC C87C EA8B 2CDB B87B 2CEB 53CC
pgp --fingerprint 0x12345678 --biometric
Displays the fingerprint in biometric words of the key with the specified key ID
using the format:
Alice Cameron <alice@example.com>
aimless photograph goldfish yesteryear
beeswax corporate crackdown millionaire
indoors upcoming choking sardonic
reward underfoot eyeglass amulet
sawdust holiness glitter therapist
1 key found
alice@example.com>
--fingerprint-details
Lists the fingerprints and subkeys of keys on your keyring that match the supplied
criteria. If you run the command with no user or key ID information, all key
fingerprints will be displayed. If you enter any user or key ID information, only key
fingerprints that match will be displayed.
Subkey fingerprints are displayed if found on the specified key. Hash names are the
same as listed in the detailed key list mode.
Fingerprints are shown with one of the following prefixes:
Key Fingerprint indicates that the following fingerprint is for a master key.
Page 85

Subkey Fingerprint indicates that the following fingerprint is for a subkey.
X.509 <alg> Thumbprint indicates that the following thumbprint is for an X.509
Commands
71 Key Listings
certificate, where <alg> is replaced by the hash algorithm used to create the
thumbprint.
The usage format is:
pgp --fingerprint-details [<user1> ...] [--biometric]
Where:
<user1> is the user ID, portion of a user ID, or the key ID of a key on your
keyring. If you do not supply a user ID, all fingerprints and subkeys will be listed.
--biometric displays biometric words instead of hexadecimal numbers.
Examples:
1 pgp --fingerprint-details Alice
Displays the fingerprint in hexadecimal of any keys on the keyring that match
"Alice" using the format:
Alice Cameron <
alice@example.com>
Key Fingerprint: 0x6D2A476D (0x7B72AAE06D2A476D)
D2E0 23B2 53D0 49C9 6812 31AC 7B72 AAE0 6D2A 476D
Subkey Fingerprint: 0xB86FF2CF (0x0787EE48B86FF2CF)
DAB6 570B 9411 197D 5DDF A9B2 0787 EE48 B86F F2CF
2 pgp --fingerprint-details 0xF88C6910 --biometric
Displays the key and subkey fingerprints in biometric words of the key with the
specified key ID using the format:
Alice Cameron <alice@example.com>
Key Fingerprint: 0x6D2A476D (0x7B72AAE06D2A476D)
crucial performance ragtime adviser
robust molasses stairway sardonic
beehive quantity spindle gravity
reform monument artist supportive
Vulcan megaton gazelle autopsy
Subkey Fingerprint: 0xB86FF2CF (0x0787EE48B86FF2CF)
chatter decimal snowcap caravan
breadline caravan pupil decimal
beeswax Wilmington tunnel nebula
bombast outfielder endorse Jupiter
preclude Eskimo drainage sandalwood
Page 86

72 Key Listings
Commands
--list-key-details
Lists the keys on a keyring in detailed output mode. If you run the command with no
user or key ID information, all keys on the keyring will be displayed. If you enter any
user or key ID information, only keys that match will be displayed.
The usage format is:
pgp --list-key-details [<user1> ...]
Where:
<user1> is the user ID, portion of a user ID, or the key ID of a key on your
keyring.
Example:
pgp --list-key-details Alice
Lists all of the keys on your keyrings using the format:
Key Details: Alice Cameron <acameron@example.com>
Key ID: 0xB2726BDF (0xAAEB5E06B2726BDF)
Type: RSA (v4) key
Size: 2048
Validity: Complete
Trust: Implicit (Axiomatic)
Created: 2003-04-22
Expires: Never
Status: Active
Cipher: AES-192
Cipher: AES-128
Cipher: CAST5
Cipher: TripleDES
Cipher: Twofish-256
Hash: SHA
Compress: Zip (Default)
Photo: No
Revocable: No
Token: No
Keyserver: keyserver.pgp.com
Default: No
Prop Flags: Sign user IDs
Prop Flags: Sign messages
Ksrv Flags: None
Feat Flags: Modification detection
Page 87

Commands
73 Key Listings
Notations: 01 0x80000000 preferred-email-encoding@pgp.com:pgp-
mime
Subkey ID: 0x6F742FE6 (0x939BB8896F742FE6)
Type: ElGamal
Size: 2048
Created: 2003-04-22
Expires: Never
Status: Active
Revocable: No
Prop Flags: Encrypt communications
Prop Flags: Encrypt storage
ADK: None
Revoker: None
1 key found
--list-keys (-l)
Lists the keys on a keyring in basic output mode. If you run the command with no user
or key ID information, all keys on the keyring will be displayed. If you enter any user or
key ID information, only keys that match will be displayed.
The usage format is:
pgp --list-keys [<user1> ...]
Where:
<user1> is the user ID, portion of a user ID, or the key ID of a key on your
keyring.
Examples:
1 pgp --list-keys
Lists all of the keys on your keyrings using the format:
Alg Type Size/Type Flags Key ID User ID
--- ---- --------- ------- ---------- ------------------------
DSS pub 2048/1024 [-----] 0xABCD1234 Alice C <ac@example.com>
1 key found
2 pgp -l Alice Bob Jill
Uses the short form of the command; displays any key on the keyring with "Alice",
"Bob", or "Jill" in the user ID.
3 pgp -l 0x12345678
Lists only the key with the specified key ID, if it is on the keyring.
Page 88

74 Key Listings
Commands
--list-keys-xml
When you choose to list a key in XML format, PGP Command Line will display all
information including all user IDs and signatures. If you run the command with no user
or key ID information, all keys on the keyring will be displayed. If you enter any user or
key ID information, only keys that match will be displayed.
To list keys in XML format, you may use either the command --list-keys-xml, or a
key list operation with the added option --xml, such as --list-keys user1 --
xml, or --list-keys --xml.
The usage format is:
pgp --list-keys-xml [<user1> …]
Where:
<user1> is the name of the specific local user whose keys you want to check.
Example:
pgp --list-keys-xml "Jose Medina"
Here is an abbreviated key list in XML format.
<?xml version="1.0"?>
<keyList>
<key>
....
<signature>
...
<subkey>
...
<adk>
...
<revoker>
</key>
</keyList>
--list-sig-details
Lists keys with their user IDs and signatures in detailed output mode.
The usage format is:
pgp --list-sig-details <user> [<user2> ...]
Where:
<user> is the user ID, portion of a user ID, or the key ID of a key on your keyring.
You can list one or more users, with their names/IDs separated by a space. If you
don’t specify a user, you will get an error message ("too many keys found").
Page 89

Example:
pgp --list-sig-details Alice
Lists Alice’s key and shows details about her user IDs and signatures:
Signature Details: Alice Cameron <alice@example.com>
Signed Key ID: 0xB2726BDF (0xAAEB5E06B2726BDF)
Commands
75 Key Listings
--list-sigs
Signed User ID: Alice Cameron <
Signer Key ID: 0xB2726BDF (0xAAEB5E06B2726BDF)
Signer User ID: Alice Cameron <alice@example.com>
Type: DSA signature
Exportable: Yes
Status: Active
Created: 2005-04-22
Expires: Never
Trust Depth: 0
Domain: None
1 signature found
Lists keys with their user IDs and signatures in basic output mode. If you run the
command with no user or key ID information, all signatures on the keyring will be
displayed. If you enter any user or key ID information, only signatures that match will
be displayed.
The usage format is:
pgp --list-sigs [<user1> ...]
Where:
<user1> is the user ID, portion of a user ID, or the key ID of a key on the keyring.
Example:
pgp --list-sigs 0x12345678
Lists the user IDs and signatures on the key with the specified key ID, if it is on the
keyring.
alice@example.com>
--list-userids
Lists keys and their user IDs in basic output mode. The command --list-users is
the same as --list-userids.
The usage format is:
pgp --list-userids [<user1> ...]
Where:
Page 90

76 Key Listings
Commands
<user1> is the user ID, portion of a user ID, or the key ID of a key on your
keyring.
Examples:
1 pgp --list-userids
Lists all of the user IDs on the keys on your keyrings.
2 pgp --list-users
Same as the previous command, using the other form of the command.
3 pgp --list-userids Alice Bob Jill
Lists any key on the keyring with "Alice", "Bob", or "Jill" in the user ID.
Page 91

8
Working with Keyservers
Descriptions and Examples of Keyserver Commands
This chapter describes those commands that explain how PGP Command Line interacts
with keyservers.
--keyserver-disable (on page 77), which disables keys on a keyserver.
--keyserver-recv (on page 78), which gets keys from a keyserver and imports
them onto your keyring.
--keyserver-remove (on page 79), which removes keys from a keyserver.
--keyserver-search (on page 80), which searches a keyserver for keys but does
not import them.
--keyserver-send (on page 81), which sends keys to a keyserver.
--keyserver-update (on page 81), which updates keys on a keyserver.
Overview
Commands
--keyserver-disable
In This Chapter
Overview ........................................................................................................................ 77
Commands ..................................................................................................................... 77
PGP Command Line provides several commands that let you interact with keyservers.
These commands help you post keys to a keyserver, import keys from a keyserver, and
so on.
When using commands that require you to specify a keyserver, make sure to use the
full URL to the keyserver such as ldap://keyserver.pgp.com, and not just
keyserver.pgp.com.
Disables a key on a keyserver. This command only works with the legacy PGP Keyserver
product.
Requests for disabling a key must be signed. If no signer is supplied, the default signing
key is used. Key disable requires an exact match on the key to be removed.
Page 92

78 Working with Keyservers
Commands
If a keyserver is specified on the command line, any keyservers listed in the PGP
Command Line configuration file will not be used.
The usage format is:
pgp --keyserver-disable <input> [--keyserver <ks1> ...] [-signer <signer>] [--passphrase <pass>] [options]
Where:
<input> is the user ID, portion of the user ID, or key ID of the key you want
disabled on the keyserver. Key disable requires an exact match on the key to be
disabled.
<ks> is the name of the keyserver where the key to be disabled is located.
You can enter more than one keyserver, separated by a space.
[options] modifies the command.Options are:
--signer the user ID of the signer.
--passphrase the passphrase of the signer.
--keyserver-timeout sets the number of seconds until the keyserver operation
times out. The default setting is 120 seconds.
--halt-on-error stops if an error occurs, if more than one keyserver is
specified, or the operation stops.
Example:
pgp --keyserver-disable 0x12345678 --keyserver
ldap://keyserver.example.com --signer "Alice Cameron
<
alice@example.com>" --passphrase "Bilbo*Baggins"
The specified key is disabled on the specified keyserver.
--keyserver-recv
Finds keys on a keyserver and imports them onto your keyring. Keyservers are searched
in the order provided on the command line. As soon as a match is made on a keyserver,
the operation will finish and all other keyservers on the list will be ignored.
If a keyserver is specified on the command line, any keyservers listed in the PGP
Command Line configuration file will not be used. Preferred keyservers are not used.
Note that you cannot search for disabled or pending keys.
The usage format is:
pgp --keyserver-recv <input> [<input2> ...] --keyserver <ks>
[--keyserver <ks2> ...] [options]
Where:
<input> is the user ID, portion of the user ID, or key ID of the key you want to get
onto your keyring.
To get a specific key, use the key ID. To get one or more keys, use the user ID or
portion of the user ID.
<ks> is the name of the keyserver you want to search.
You can enter more than one keyserver to search, separated by a space. Only
results from the first keyserver where there is a match will be returned.
Page 93

--keyserver-remove
[options] modify the command. Options are:
--keyserver-timeout sets the number of seconds until the keyserver operation
times out. The default setting is 120 seconds.
--halt-on-error stops if an error occurs, if more than one keyserver is
specified, or the operation stops.
Examples:
1 pgp --keyserver-recv 0xABCD1234 --keyserver
ldap://keyserver.pgp.com
The key with the key ID shown would be imported if it were on the specified
keyserver.
2 pgp --keyserver-recv Jim --keyserver
http://keyserver.pgp.com
All keys that have "Jim" in their user IDs would be found and imported.
Commands
79 Working with Keyservers
Removes a key from a keyserver. This command only works with the legacy PGP Keyserver
product.
Requests for removal must be signed. If no signer is supplied, the default signing key is
used. Key removal requires an exact match on the key to be removed.
If a keyserver is specified on the command line, any keyservers listed in the PGP
Command Line configuration file will not be used.
The usage format is:
pgp --keyserver-remove <input> [--keyserver <ks1> ...] [-signer <signer>] [--passphrase <pass>] [options]
Where:
<input> is the user ID, portion of the user ID, or key ID of the key you want
removed from the keyserver. Key removal requires an exact match on the key to
be removed.
<ks> is the name of the keyserver from which you want the key removed.
You can enter more than one keyserver, separated by a space.
[options] modify the command. Options are:
--signer the user ID of the signer.
--passphrase the passphrase of the signer.
--keyserver-timeout sets the number of seconds until the keyserver operation
times out. The default setting is 120 seconds.
--halt-on-error stops if an error occurs, if more than one keyserver is
specified, or the operation stops.
Example:
pgp --keyserver-remove 0x12345678 --keyserver
ldap://keyserver.pgp.com --signer "
passphrase "B0bsm1t4"
bob@example.com" --
Page 94

80 Working with Keyservers
Commands
--keyserver-search
Removes the specified key from the specified keyserver.
Searches a keyserver for keys and lists those that it finds that match the criteria; it does
not import them.
Keyservers are searched in the order provided on the command line. As soon as a match
is made on a keyserver, the operation finishes; all other keyservers in the list after the
one that made the match will be ignored.
If a keyserver is specified on the command line, any keyservers listed in the PGP
Command Line configuration file will not be used. Preferred keyservers are not used.
You cannot search for disabled or pending keys.
The usage format is:
pgp --keyserver-search <input> [<input2> ...] --keyserver <ks>
[--keyserver <ks2> ...] [options]
Where:
<input> is the user ID, portion of the user ID, or key ID of the key for which you
are searching.
To find a specific key, use the key ID. To find one or more keys, use the user ID or
portion of the user ID.
<ks> is the name of the keyserver you want to search.
You can enter more than one keyserver to search, separated by a space. Only
results from the first keyserver where there is a match will be returned.
[options] modify the command. Options are:
--keyserver-timeout sets the number of seconds until the keyserver operation
times out. The default setting is 120 seconds.
--halt-on-error stops if an error occurs, if more than one keyserver is
specified, or the operation stops.
Example:
pgp --keyserver-search example.com --keyserver
ldap://keyserver.pgp.com
This search would return keys that have example.com in the user ID and are on
keyserver.pgp.com, a public keyserver.
PGP Command Line now searches for additional LDAP attributes when searching a
LDAP X.509 directory. The attribute list in which PGP Command Line now searches for
a substring match (*%s*) is now:
cn
mail
displayname
proxyaddresses
Page 95

--keyserver-send
Commands
Posts a public key to a keyserver. If multiple keyservers are specified, in most cases only
the first keyserver specified will be used. If a keyserver is specified on the command
line, any keyservers listed in the PGP Command Line configuration file will not be used.
Preferred keyservers are not used.
The usage format is:
pgp --keyserver-send <input> [<input2> ...] --keyserver <ks>
[--keyserver <ks2> ...] [options]
Where:
<input> is the user ID, portion of the user ID, or key ID of the public key you are
posting. You can list one or more users, with their names/IDs separated by a space.
<ks> is the name of the keyserver to which you are posting.
[options] modify the command. Options are:
--keyserver-timeout sets the number of seconds until the keyserver operation
times out. The default setting is 120 seconds.
--halt-on-error moves to the next keyserver if an error occurs, if more than
one keyserver is specified, or the operation stops.
Examples:
1 pgp --keyserver-send alice@example.com --keyserver
ldap://keyserver.example.com
If there are multiple keys on the keyring with user IDs that match the input, all of
them will be posted. To make sure only a specific key is posted, use the key ID as
the input.
2 pgp --keyserver-send 0x12345678 --keyserver
ldap://keyserver.pgp.com
Only the specified key (if it is on the keyring) will be posted to
ldap://keyserver.pgp.com, a public keyserver.
81 Working with Keyservers
--keyserver-update
Updates keys that have already been uploaded to a keyserver. This ensures that the
most up-to-date versions of the keys are on the keyserver.
An update consists of finding the key on the keyserver; merging that key onto the local
keyring; and sending the merged key back to the keyserver on which it was found. A key
must be on the local keyring to be updated.
If no keys are specified on the command line, all of the keys on the local keyring are
updated, one at a time. When multiple keys are specified, they are updated one key at a
time.
If a key has a preferred keyserver established, that keyserver is used for the update
(only RSA and DH/DSS v4 keys can have a preferred keyserver); keyservers specified on
the command line or in the configuration file are ignored. If the key being updated is
not found, it is sent to the preferred keyserver; if it is found, it is updated.
Page 96

82 Working with Keyservers
Commands
If a key does not have a valid preferred keyserver established, PGP Command Line will
search the keyserver specified on the command line, followed by keyservers specified in
the configuration file. If the key cannot be found, an error is returned; if it is found, it is
updated.
The usage format is:
pgp --keyserver-update <input> [<input2> ...] [--keyserver
<ks1> ...] [options]
Where:
<input> is the user ID, portion of the user ID, or key ID of the key for which you
are searching. To find a specific key, use the key ID. To find one or more keys, use
the user ID or portion of the user ID.
<ks> is the name of the keyserver you want to search. You can enter more than
one keyserver to search, separated by a space. Only results from the first
keyserver where there is a match will be returned.
--keyserver-timeout sets the number of seconds until the keyserver operation
times out. The default setting is 120 seconds.
--halt-on-error stops if an error occurs, if more than one keyserver is
specified, or the operation stops.
Examples:
1 pgp --keyserver-update 0x12345678 --keyserver
ldap://keyserver.pgp.com
Updates the key with key ID 0x12345678 on keyserver.pgp.com if that key is
on the local keyring and has already been uploaded to the keyserver. If either is
not true, the operation returns with an error.
2 pgp --keyserver-update 0x12345678
Key 0x12345678 has a preferred keyserver set, and that keyserver is used for the
update.
Page 97

9
Managing Keys
This chapter describes those commands used to manage keys with PGP Command Line.
These commands are:
--add-adk, which adds an ADK to a key.
--add-photoid, which adds a photo ID to a key.
--add-preferred-cipher, which adds the preferred cipher to a key.
--add-preferred-compression-algorithm, which adds the preferred
compression algorithms to a key.
--add-preferred-email-encoding, which adds a preferred email encoding to
a key.
--add-preferred-hash, which adds the preferred hash encryption algorithm to
a key.
--add-revoker, which adds a revoker to a key.
--add-userid, which adds a user ID to a key.
--cache-passphrase, which specifically caches a passphrase.
--change-passphrase, which changes the passphrase.
--clear-key-flag, which clears one of the preferences flags.
--disable, which disables a key.
--enable, which enables a key.
--export and --export-key-pair, which export keys or key pairs.
--export-photoid, which exports a photo ID to a file.
--gen-key, which generates a new key pair.
--gen-revocation, which generates a revoked version of a key without actually
revoking the key. The revoked version of the key is stored securely in the event the
passphrase is lost, so the key can still be revoked.
--gen-subkey, which generates a subkey.
--import, which imports keys.
--join-key, which reconstitutes a split key.
--join-key-cache-only, which temporarily joins a key on the local machine.
--key-recon-send, which sends PGP key reconstruction data to a Symantec
Encryption Management Server
--key-recon-recv-questions, which retrieves the PGP key reconstruction
questions for a specified key.
--key-recon-recv, which reconstructs a key
--remove, which removes a key.
--remove-adk, which removes an ADK from a key.
Page 98

84 Managing Keys
Commands
--remove-all-adks, which remove all ADKs from a key.
--remove-all-photoids, which removes all photo IDs
--remove-all-revokers, which removes all revokers.
--remove-expiration-date, which removes the expiration date from a key.
--remove-key-pair, which removes a key pair.
--remove-photoid, which removes a photo ID from a key.
--remove-preferred-cipher, which removes a preferred cipher from a key.
--remove-preferred-compression-algorithm, which removes a preferred
compression algorithm from a key.
--remove-preferred-email-encoding, which removes a preferred email
encoding from a key.
--remove-preferred-hash, which removes the preferred hash from a key.
--remove-preferred-keyserver, which removes a preferred keyserver from a
key.
--remove-revoker, which removes a revoker from a key.
--remove-sig, which removes a signature.
--remove-subkey, which removes a subkey.
--remove-userid, which removes a user ID from a key.
--revoke, which revokes a key pair.
--revoke-sig, which revokes a signature.
--revoke-subkey, which revokes a subkey.
--send-shares, which sends shares to the server joining a key.
--set-expiration-date, which sets the expiration date.
--set-key-flag, which sets one of the preference flags for a key.
--set-preferred-ciphers, which sets the list of preferred ciphers on a key.
--set-preferred-compression-algorithms, which sets the list of preferred
compression algorithms on a key.
--set-preferred-email-encodings, which sets preferred email encodings
for a key.
--set-preferred-hashes, which sets the entire list of hashes for a key.
--set-preferred-keyserver, which adds a preferred keyserver to a key.
--set-primary-userid, which sets a user ID as primary for a key.
--set-trust, which sets the trust on a key.
--sign-key, which signs all user IDs on a key.
--sign-userid, which signs a single user ID on a key.
--split-key, which splits a specified key into multiple shares.
Page 99

Overview
Overview
In This Chapter
Overview ........................................................................................................................ 85
Commands ..................................................................................................................... 85
The PGP keys you create and those you obtain from others are stored in digital
keyrings; private keys are stored on your private keyring in a file named secring.skr
and public keys are stored on your public keyring in a file called pubring.pkr.
Commands you can use to manage your keys are described in this chapter.
85 Managing Keys
Commands
--add-adk
Adds an ADK to a key. Keys can support multiple ADKs, if desired.
An Additional Decryption Key (ADK) is a key that allows an authorized person,
generally in an organization, to decrypt data this is from or was sent to someone in the
organization if that person is unable or unwilling to do it themselves.
Only RSA and DH/DSS v4 keys can have ADKs.
The usage format is:
pgp --add-adk <user> --adk <adk> --passphrase <pass>
Where:
<user> is the user ID, portion of the user ID, or the key ID of the key to which the
ADK is being added.
<adk> is the specific ADK to be added to the key.
<pass> is the passphrase of the key to which the ADK is being added.
Example:
pgp --add-adk "Bob Smith" --adk Alice --passphrase "B0bsm1t4"
0x6245273E:add ADK (0:ADKs successfully updated)
Adds the specified ADK to the specified key.
Page 100

86 Managing Keys
Commands
--add-photoid
Adds a photo ID to a key. You can add just one photo ID to a key using PGP Command
Line. Other programs that are compatible with PGP Command Line support allow more
than one photo ID added to a file; PGP Command Line can work with these extra photo
IDs.
Only JPEG files can be added. For maximum picture quality, crop the picture to 120 by
144 pixels before adding it.
The usage format is:
pgp --add-photoid <user> --image <photo.jpg> --passphrase
<pass>
Where:
<user> is the user ID, portion of the user ID, or the key ID of the key to which the
photo ID is being added.
<photo.jpg> is the filename of the image being added.
<pass> is the passphrase of the key to which the photo ID is being added.
Example:
pgp --add-photoid Alice --image alice.jpg --passphrase
"cam3r0n"
0x3E439B98:add photo ID (0:photo ID added successfully)
Adds the image alice.jpg to the specified key.
--add-preferred-cipher
Adds a preferred cipher to a key.
If the preferred cipher is already on the key, it is moved to the top of the list. Only RSA
v4 and DH/DSS v4 keys can have a preferred cipher.
The usage format is:
Where:
Example:
pgp --add-preferred-cipher <user> --cipher <cipher> -passphrase <pass>
<user> is the user ID, portion of the user ID, or the key ID of the key to which the
preferred cipher is being added.
<cipher> is the preferred cipher being added.
<pass> is the passphrase of the key.
pgp --add-preferred-cipher "Bob Smith" --cipher aes256 -passphrase "B0bsm1t4"
0x6245273E:add preferred cipher (0:preferred ciphers updated)
Adds the cipher AES256 to the specified key.
 Loading...