

Petsafe Staywell 900 Series, 900 Series Installation Manual

Please read this entire guide before beginning.
Veuillez lire ce manuel en entier avant de commencer.
Gelieve deze gids volledig door te lezen voordat u begint.
Por favor, lea detenidamente este manual antes de empezar.
Si prega di leggere attentamente la guida al uso prima di utilizzare il collare.
Bitte lesen Sie die gesamte Betriebsanleitung vor dem Train.
Installation Guide
Guide d’installation
Montagehandleiding
Manual de instalación
Manuale di installazione
Montageanleitung
900
Series
Série
Serie
Serie
Serie
Serie
Staywell® Classic Magnetic 4-Way Locking Cat Flap
Chatière Staywell
®
classique à fonctionnement magnétique et à 4 positions
Staywell
®
4 sluitposities klassiek magnetisch kattenluik
Puerta para gatos Staywell
®
clásica con sistema de cierre magnético y con 4 posiciones de cierre
Porta Staywell
®
classica per gatti con sistema di chiusura magnetica
con 4 modalità di bloccagio
Staywell
®
Klassische Magnetische Katzenklappe
mit vier Verschlussoptionen

When children are present in the home, it is important to
consider the pet door during child proofing activities, the pet
door may be misused by a child resulting in the child accessing potential hazards
that may be on the other side of the pet door. Purchasers/Homeowners with
swimming pools should ensure that the pet door is monitored at all times and that
the swimming pool has adequate barriers to entry. If a new hazard is created
inside or outside of your home, which may be accessed through the pet door,
Radio Systems Corporation recommends that you properly guard access to the
hazard or remove the pet door. The closing panel or lock, if applicable, is
provided for aesthetic and energy efficiency purposes and is not intended as a
security device. Radio Systems Corporation will not be liable for unintended use
and the purchaser of this product accepts full responsibility for oversight of the
opening it creates.
• It is extremely dangerous to bring a magnet near a person who has
a pacemaker or electrical medical device, or near any other electrical
medicaldevices.
• Magnets can be a choking hazard. Keep small magnets away from young
children and pets who might mistakenly or intentionally swallow them. When
more than one magnet is swallowed, the magnetic force can bring two pieces
of intestine tightly together, and make holes in the intestines. If swallowed,
immediately consult a doctor.
The user, prior to installation, must become familiar with all
building codes that may affect the installation of the pet door
and determine, along with a licensed contractor, its suitability in a given
installation. This pet door is not a fire door. It is important for the owner and
contractor to consider any risks that may be present inside or outside of the pet
door, and any risks that may be created by subsequent changes to your property
and how they may relate to the existence and use, including misuse of the
petdoor.
• The magnets included in this product can pose a pinch hazard due to their
attractive force on each other and to any object containing iron.
Keep these instructions with important papers; be sure to transfer
these instructions to the new owner of the property.
IMPORTANT SAFETY INFORMATION
Explanation of Attention Words and Symbols used in this guide
This is the safety alert symbol. It is used to alert
you to potential personal injury hazards. Obey all
safety messages that follow this symbol to avoid
possible injury or death.
WARNING indicates a hazardous situation
which, if not avoided, could result in death or
serious injury.
CAUTION, used with the safety alert symbol,
indicates a hazardous situation which, if not
avoided, could result in minor or moderate injury.
NOTICE is used to address practices not related
to personal injury.
Hereinafter Radio Systems Corporation, Radio Systems PetSafe
Europe Ltd., Radio Systems Australia Pty Ltd. and any other affiliate or Brand of
Radio Systems Corporation may be referred to collectively as “We” or “Us”.
2
www.petsafe.net
ENFRES
NL
IT
DE
Thank you for choosing the PetSafe® brand. You and your pet deserve
a companionship that includes memorable moments and a shared
understanding together. Our products and training tools enhance
the relationship between pets and their owners. If you have any
questions about our products or training your pet, please
visit our website at www.petsafe.net or contact our
Customer Care Centre. For a listing of Customer Care Centre
telephone numbers, visit our website atwww.petsafe.net.
To get the most protection out of your warranty, please register your
product within 30 days at www.petsafe.net. By registering and keeping
your receipt, you will enjoy the product’s full warranty and should you
ever need to call the Customer Care Centre, we will be able to help you
faster. Most importantly, your valuable information will never be given
or sold to anyone. Complete warranty information is available online
atwww.petsafe.net.
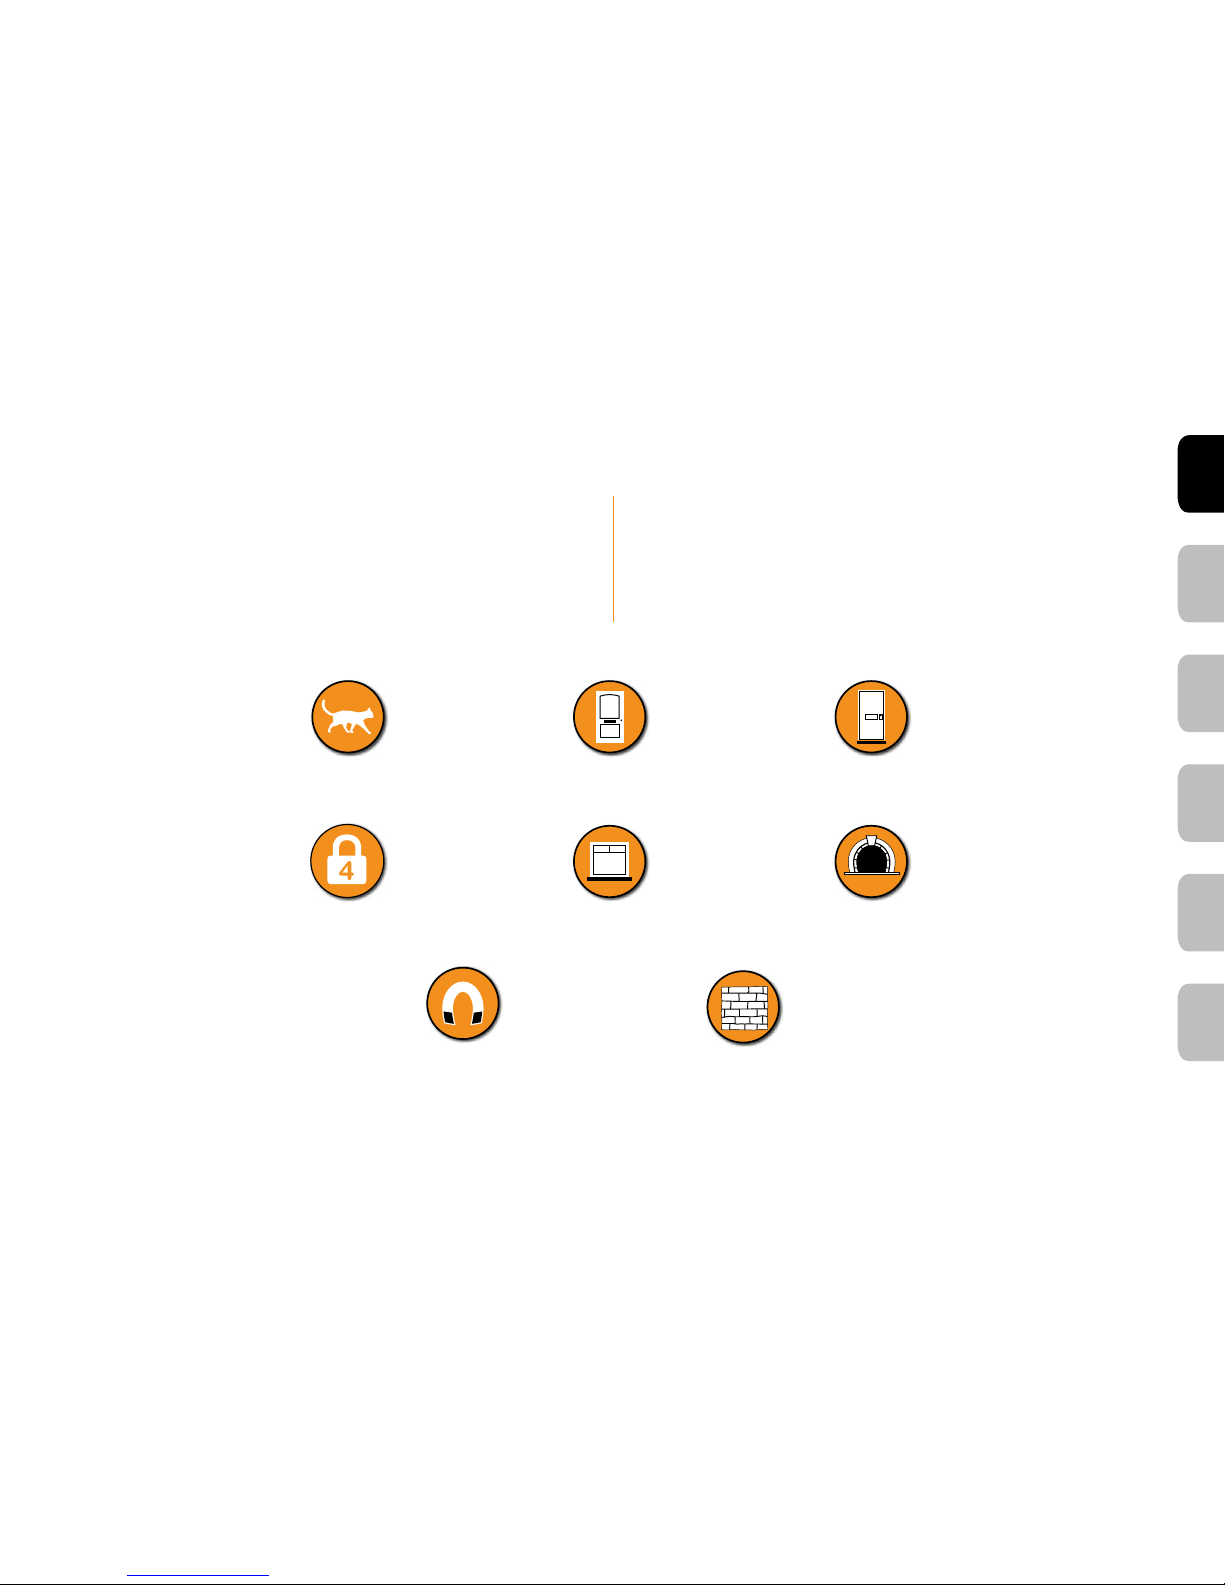
Your PetSafe® Cat Flap...
Fits glass windows & doors, single and
double glazed*
4-way locking system Fixed tunnel included is suitable for most
thickness of doors
Fits wooden doorsCat Fits PVC/uPVC/metal**
Magnetic Fits brick walls
* It is not possible to cut holes in toughened glass or double glazed units except at the time of manufacture. If fitting a Magnetic Cat Flap into double glazed glass a plastic spacer bar must be used. Please consult a glazier.
** Magnetic cat flaps will not work if installed directly into a surface containing metal. The unit must be isolated from these materials in a wooden frame (not provided).
3
DEITNL
ES
FR
EN
Replacement flaps available online

Before installing your cat flap
please read the following step-bystep instructions carefully.
Tools required
• Masking or
Painter’s Tape
• Level
• Pencil
• Ruler
• Jig or Keyhole Saw
• Drill
• 5 mm (
3
/16”) Drill Bit
• 13 mm (½”) Drill Bit
• Phillips Screwdriver
• Tape Measure
• Sand Paper
• Safety Equipment
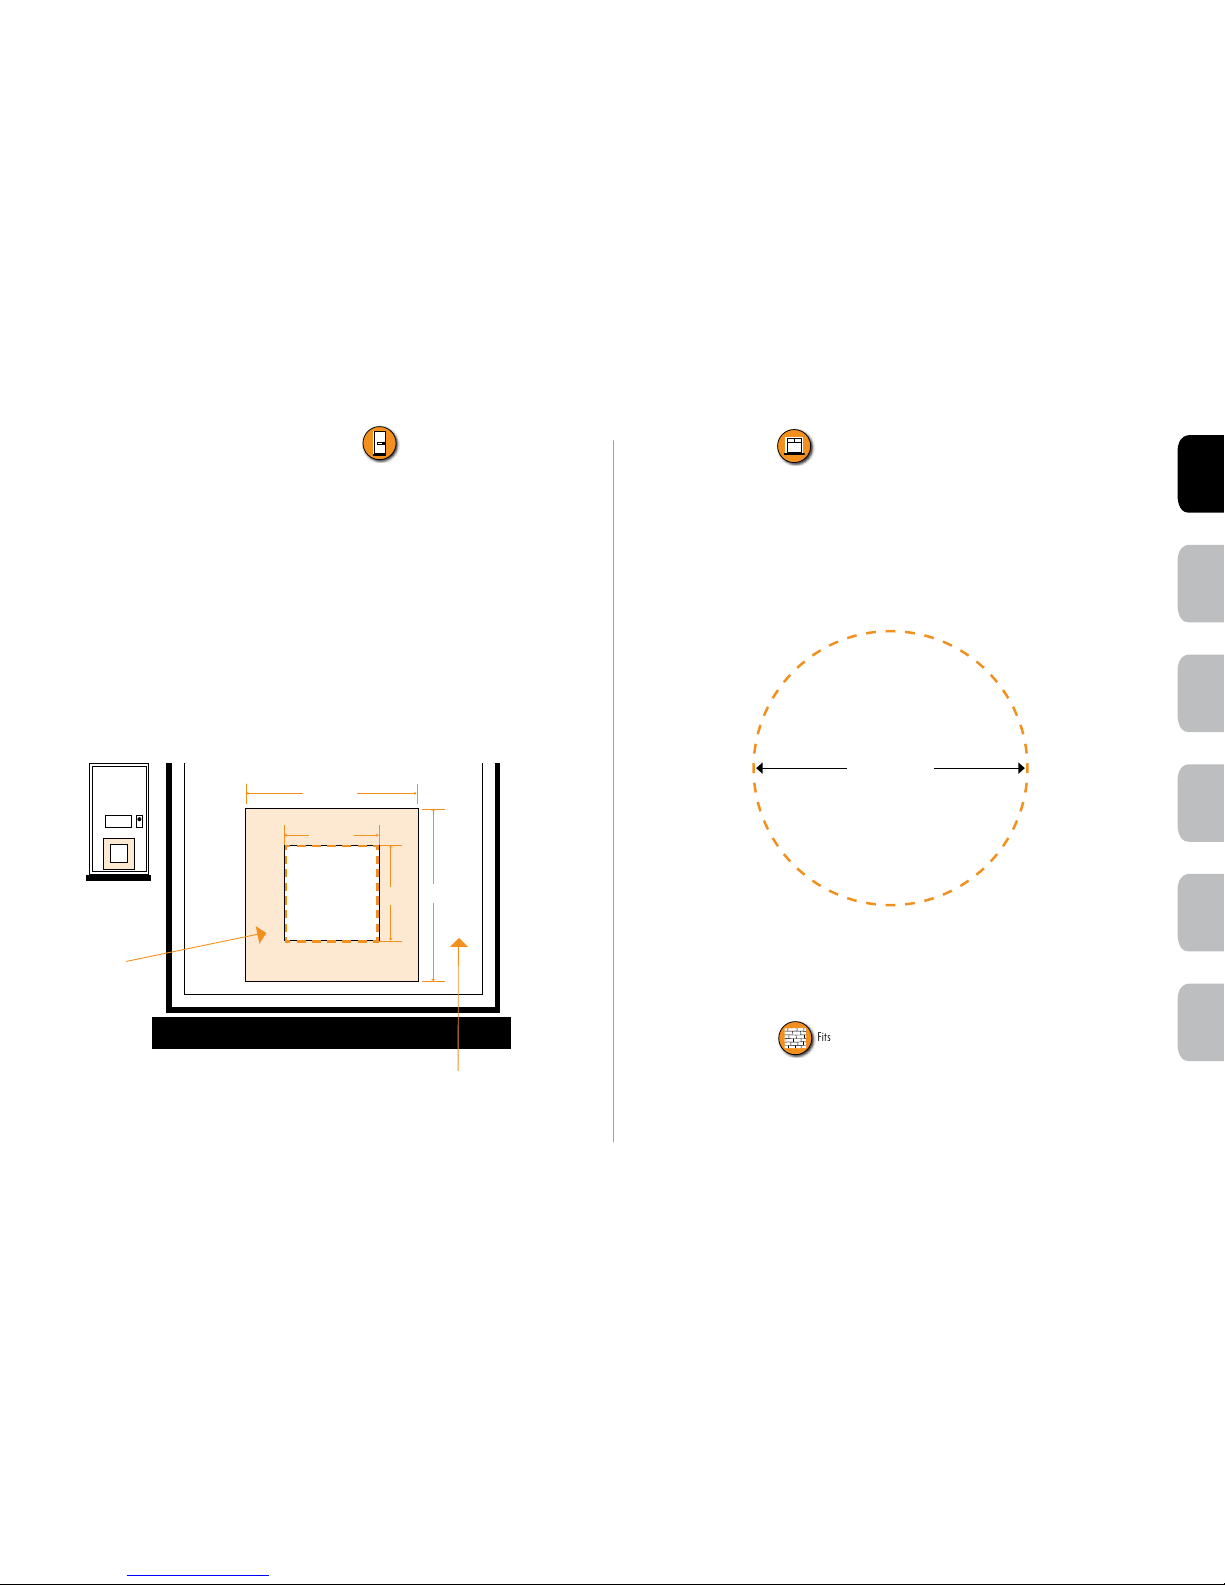
Measurement and marking
Measure the belly height of your cat. This is usually 100 mm to 150 mm (Fig. 1).
Mark this measurement on the outside of your door and draw a straight
horizontal line 169 mm (Fig. 2).
Usually this line will be the bottom of the hole you cut in your door
– the frame of the cat flap will be slightly lower. With Magnetic Cat
Flaps it is important that the cat is able to approach the cat flap without
obstacle. There should be a level area in front of the cat flap outside
which is sufficient for the cat to stand with all four paws on the
same level.
FIG.1 FIG.2
Cutting a hole for your cat flap
a) In Wood
The cat flap requires a square cut-out of 169 mm x 169 mm (Fig. 3).
Not to scale - for best results you should refer
to the enclosed cutting template.
(x)
(x)
Wooden doors
169 mm
169 mm
FIG.3
4
www.petsafe.net
ENFRES
NL
IT
DE
b) In PVC/uPVC/Metal
**Magnetic Cat Flaps will NOT WORK if installed directly into a
surface containing metal. The unit must be isolated from these materials
in a wooden frame (not provided).
Using the horizontal line as a base, draw a square with minimum
dimensions of 306 mm x 306 mm. (This will be the external dimensions of
your wooden frame).
Cut out the square with a jig or keyhole saw. Fit a wooden frame to the
hole with internal dimensions of 169 mm x 169 mm. The enclosed cutting
template can be used to ensure an accurate cut out.
It is within the wooden frame that your cat flap should be fitted to ensure
that is fully isolated from any metal (Fig. 4).
c) In Glass
* It is not possible to cut holes in toughened glass or double glazed
units except at the time of manufacture. If fitting a Magnetic Cat Flap
into double glazed glass a plastic spacer bar must be used. Please
consult a glazier.
The cat flap requires a circular hole with diameter of 210 mm (Fig. 5).
Not to scale - for best results you should refer
your glazier to the enclosed cutting template.
d) In Walls
Follow the instructions for “Wood”, by using the enclosed cutting
template. Please note that additional tools, materials and competent DIY
skills may be required.
210 mm
FIG.5
Glass windows & doors, single and double glazed*
PVC/uPVC/Metal door
FIG.4
Wooden
frame
169 mm
306 mm
306 mm
169 mm
PVC/uPVC/Metal**
Fits brick walls
5
DEITNL
ES
FR
EN
Replacement flaps available online
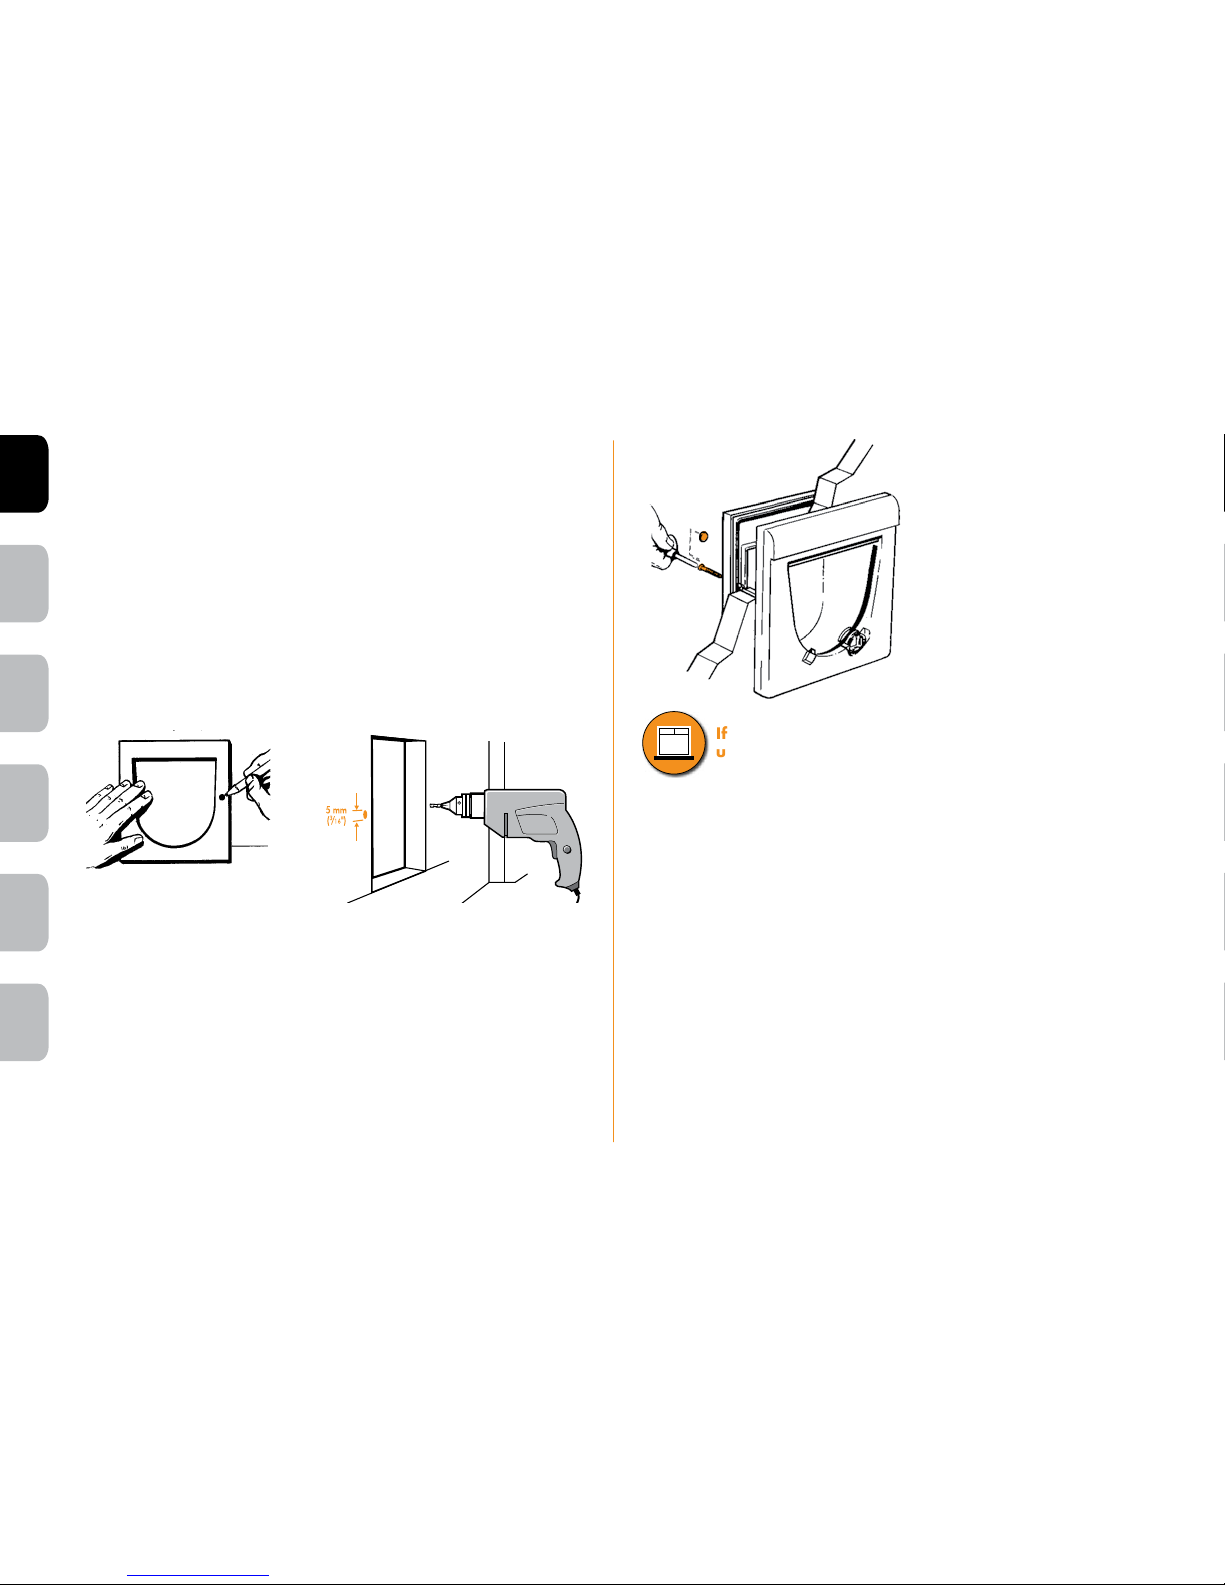
Fitting your cat flap
Your PetSafe® cat flap is fitted with the red 4-way lock on the
inside of your house.
a) In Doors and Walls Less Than 57 mm Thick
Temporarily place the cat flap in the hole and position the exterior frame
on the outside of the house. From the outside mark screw holes on the
door through the holes in the exterior frame (Fig. 6).
Remove the cat flap and drill the holes with a 5 mm (
3
/16”)
drill bit (Fig. 7).
FIG.6 FIG.7
Replace the cat flap in the hole and from the outside screw into place (Fig. 8).
If the screws are too long they may need to be cut down to match the
depth of your door. Using over long screws may damage the cat flap.
The screws should be removed from the cat flap before cutting. File down
to ensure there are no sharp edges.
Finally, cover the screw holes with the blanking plugs on the exterior
frame to ensure a neat finish (Fig. 8).
FIG.8
If fitting into glass, the cat flap is clamped to the glass
using two screws from the outside of the house.
6
www.petsafe.net
ENFRES
NL
IT
DE
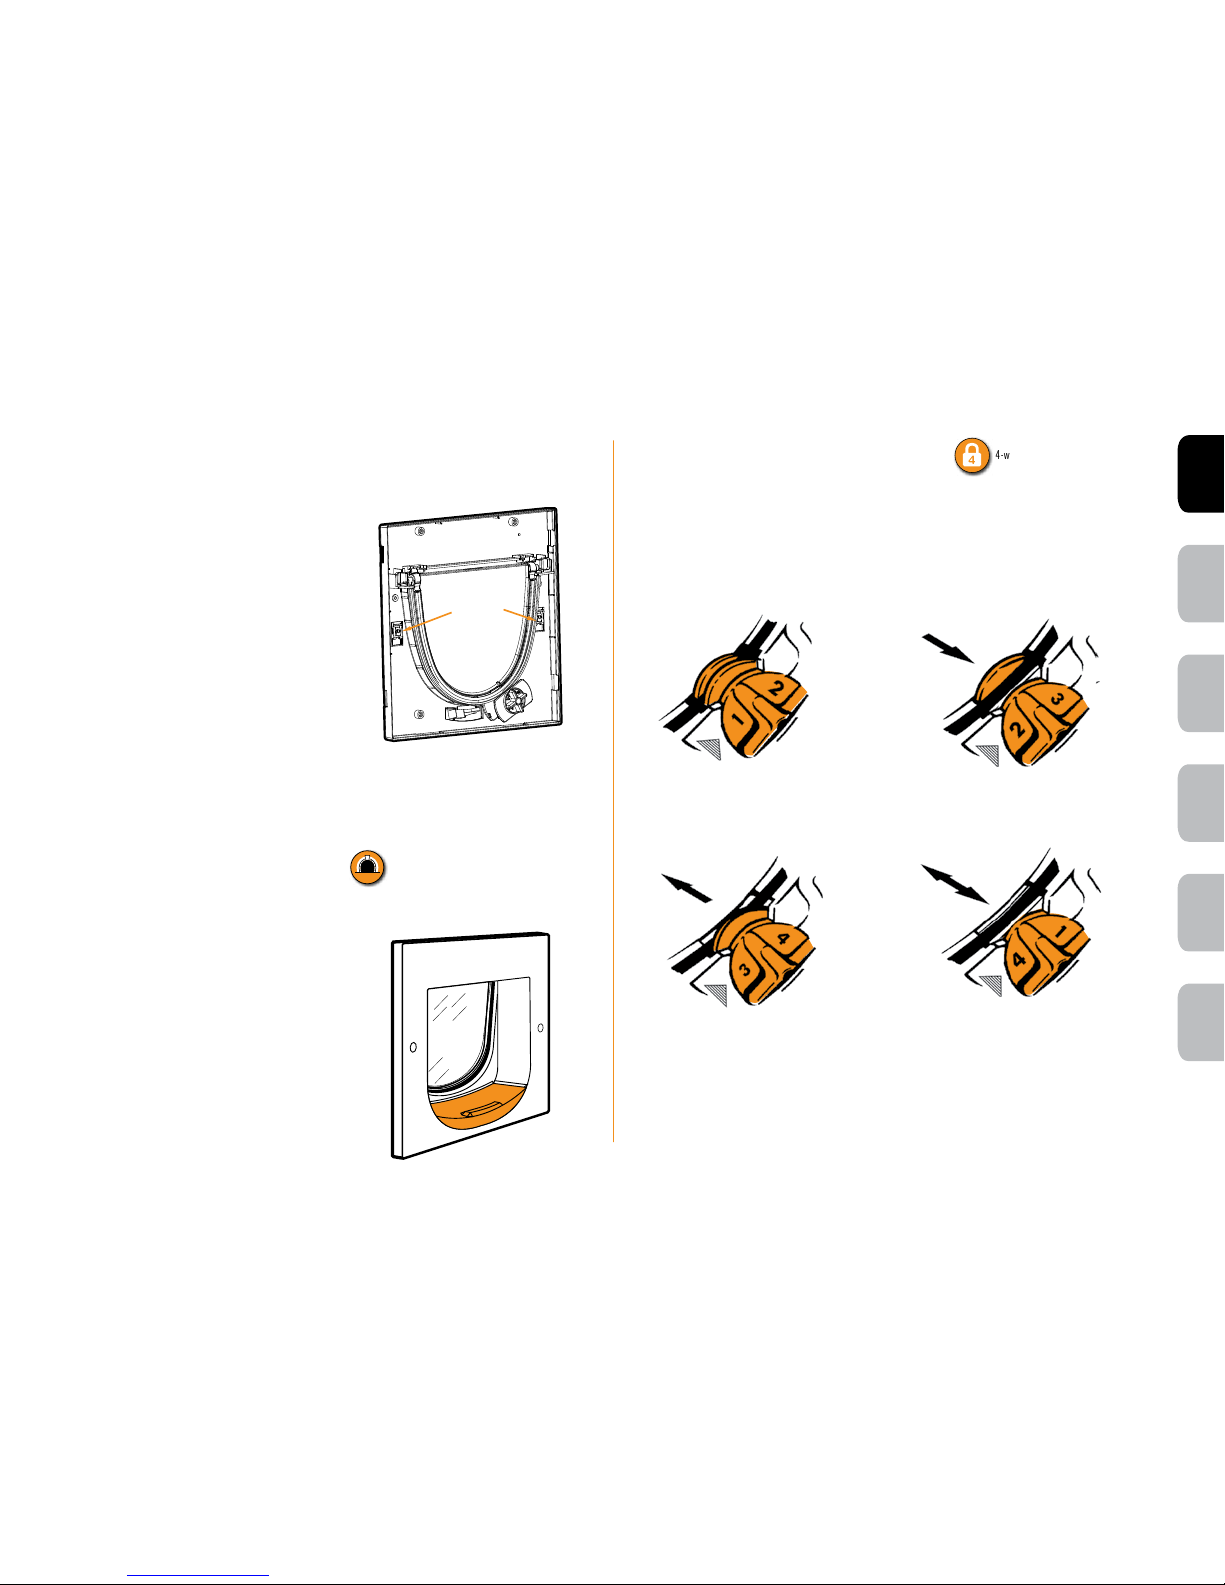
Magnetic tunnel
The fixed tunnel is an integral part of the mechanism and MUST
NOT be cut or damaged, as it will affect the operation of the latch
mechanism(Fig.10).
Operates by magnetism and requires
no batteries.
FIG.10
Fixed tunnel included
b) In Doors and Walls Greater Than
57 mm Thick
Remove the interior frame cover from
the interior frame by removing the
screws (these screws will not be used in
the wall installation) and unsnapping
the snaps, starting with the snaps
closest to the top on each side. You
may want to build your own tunnel
in the wall for your cat to go through.
Place interior frame in hole and attach
to wall through hole in metal screw
clips with appropriate fastener based
on the material of your wall (may
require fasteners not provided, Fig. 9).
Place collar key on centre of tunnel.
Reattach interior frame cover by snapping it in place. Insert the bottom
hooks of the frame cover first and then rotate it into place. Then attach
exterior frame with appropriate fastener based on the material of your
wall (may require fasteners notprovided).
FIG.9
Screw
Clips
Using the 4-way lock
The 4-way lock allows you to control your cat’s access in and out of
your home.
It is a good idea not to use the 4-way lock until your pet is thoroughly
familiar with using the door. Your pet may become confused as to why
you have installed it.
4-way locking s ystem
Your PetSafe® cat
flap is now ready
to use.
• 3: Out only
• 2: In only
• 4: In or Out
• 1: Fully locked
7
DEITNL
ES
FR
EN
Replacement flaps available online
 Loading...