

Petsafe Sport Dog Trainer Owner's Manual
Sport Dog Trainer Owner’s Guide
Amaestrador SportDog Guía para el dueño
dresseur SportDog Guide d’emploi

I. Introduction
Thank you for purchasing the Sport Dog Trainer. We at PetSafe
believe that you have just purchased one of the finest products for training
your dog. Be sure to read this entire guide and the Training Booklet
before you start working with your dog. If you have any questions
concerning this or any other trainer, please feel free to call our Customer
Service Department at 1-800-732-2677 (M – F 8AM – 7PM, Sat 9AM –
5PM & Sun 1AM – 5PM EST) or visit our website at www.petsafe.net.
The Sport Dog Trainer comes preset from the factory. Simply insert the
batteries in the transmitter and receiver and you are ready to begin training,
the PetSafe way.
Although the Sport Dog Trainer is preset, we at PetSafe understand that
each dog is different. This manual will help you customize the Sport
Dog Trainer to your specific needs. This is accomplished by making the
following simple adjustments:
1. Select the correct intensity level for your dog (preset to low intensity level).
2. Adjust your Sport Dog Trainer to a specific User Identification Code
to prevent outside interference.
II. Sport Dog Trainer Quick Guide
The Sport Dog Trainer is simple and easy to use. Follow these 4 easy
steps. Refer to the Table of Contents for a detailed discussion explaining
each of these steps.
Step 1 – Insert the batteries in the transmitter and receiver. With the
screwdriver provided in the Sport Dog Trainer kit, loosen the screws in
the battery door of the transmitter and cover of the receiver.
Insert two (2) 9 volt alkaline batteries in the transmitter and one (1) 9
volt alkaline battery in the receiver. Replace the battery door and cover,
and tighten the screws for both the transmitter and receiver.
Step 2 – Activate the receiver collar. Place the white dot on the transmitter
unit up against the white dot of the receiver unit, hold them together for
three (3) seconds, and separate to turn on the receiver collar. Upon separating,
the receiver’s speaker, located inside the receiver, will emit a short beep.
Also, the receiver’s LED will be solid green in color for three (3) seconds
and then begin blinking.
Step 3 – Install the transmitter and receiver antenna. Hand tighten the
short antenna to the antenna mount on top of the transmitter. Hand
tighten the longer, flexible antenna to the antenna mount located on the
side of the receiver.
Step 4 – Using the System. Pressing any of the buttons causes the receiver
to deliver a momentary or continuous stimulation. If any of the stimulation
buttons are pressed for less than two (2) seconds, the receiver will deliver
a momentary stimulation. Conversely, if a stimulation button is pressed
longer than two (2) seconds, the receiver will deliver a continuous stimulation
for as long as the button is held down.
1
ENGLISH
III. Set-up and Operation
1. Identifying the Components/Features
The Sport Dog Trainer kit contains the following components and features:
A. Receiver w/Collar
B. Transmitter
C. Holster
D. Test Light
E. Range
F. Battery Life
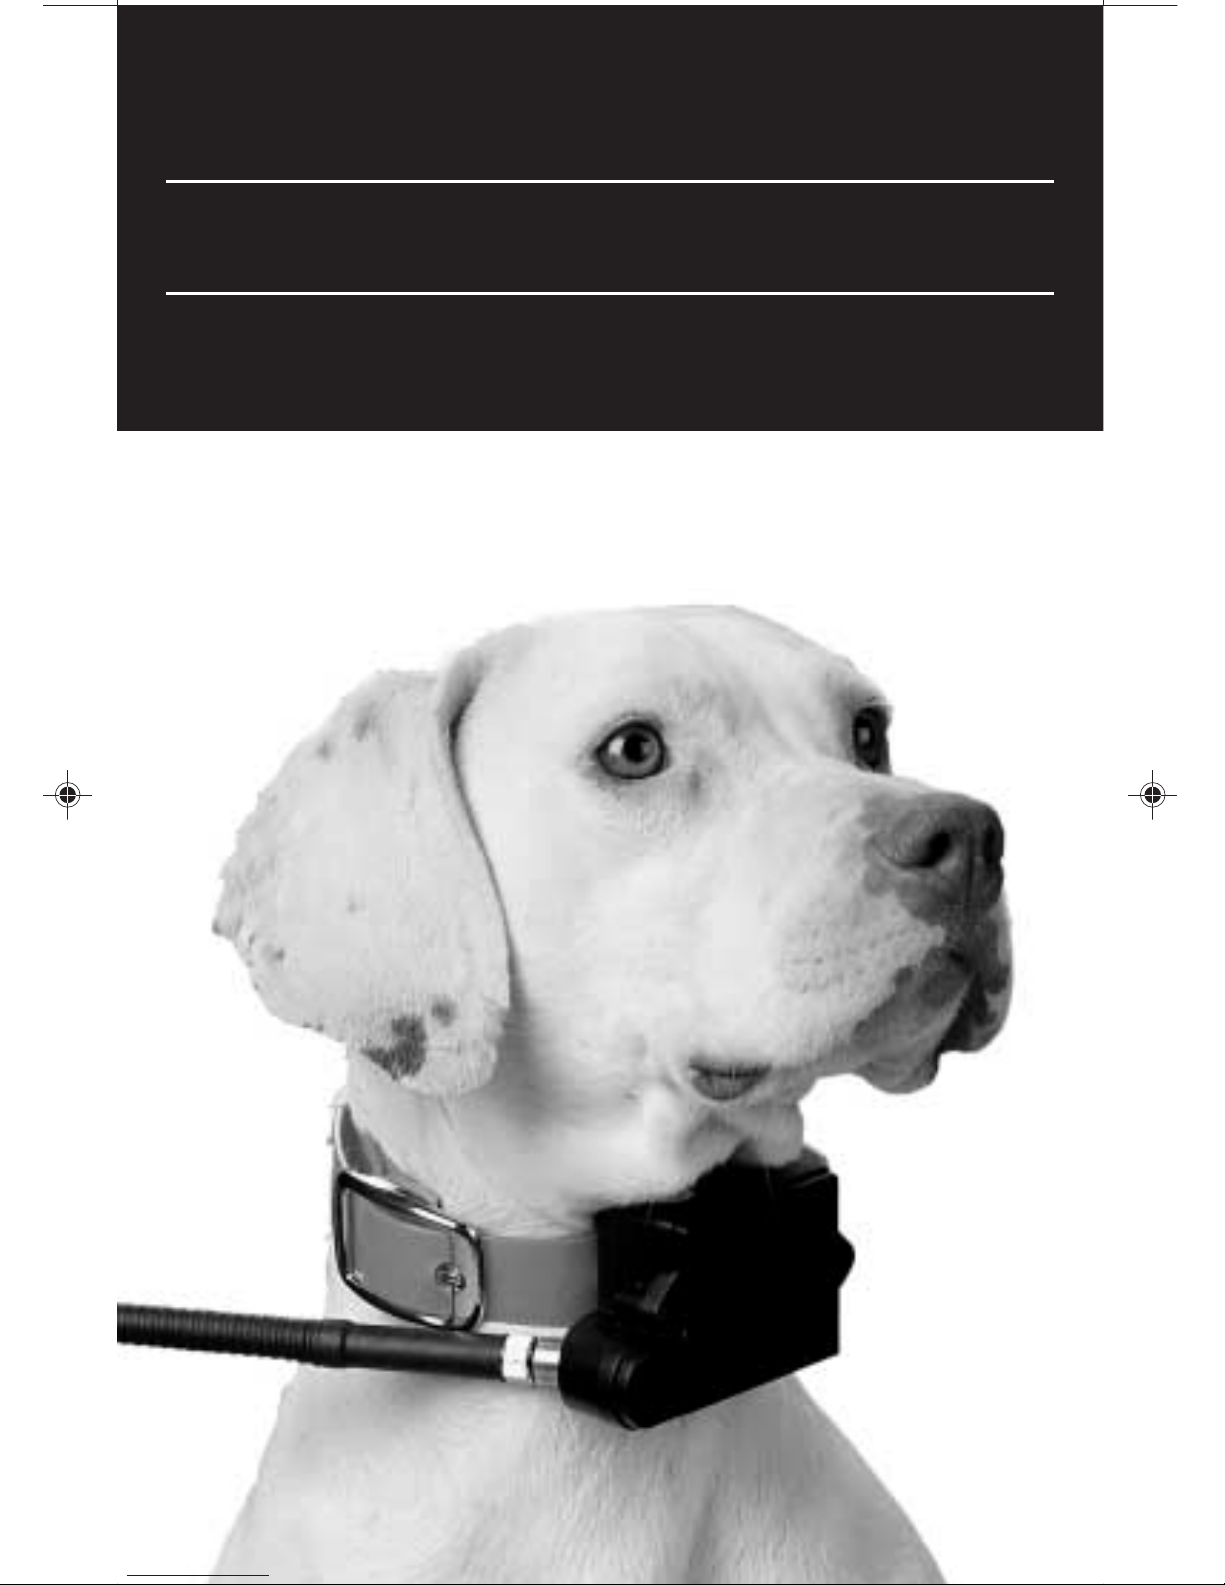
A. Receiver w/Collar
The Sport Dog Receiver contains electronics that receives radio signals
from the transmitter, translates them, and delivers an electrical stimulation
or tone as commanded. The electrical stimulation is delivered through two
contact posts that touch the dog’s neck.
There are two sets of contact probes, long and short, that can be used
on your dog to provide the stimulation. The long contact probes are used
on dogs with long hair, and the short probes for dogs with short hair.
The Sport Dog Receiver is enclosed in a waterproof case and is
mounted to a waterproof collar. The collar will fit a dog with a neck size
varying from 9 to 22 inches.
The receiver can be used without the enclosed external antenna.
However, the range will be decreased.
• Receiver LED
The Sport Dog Receiver contains a two-color (green and red) LED.
This LED is provided to allow the user to be aware of the following
functions: 1) when the receiver has been turned on/off, 2) when the
receiver is delivering an electrical stimulation, and 3) when the receiver
has a low battery.
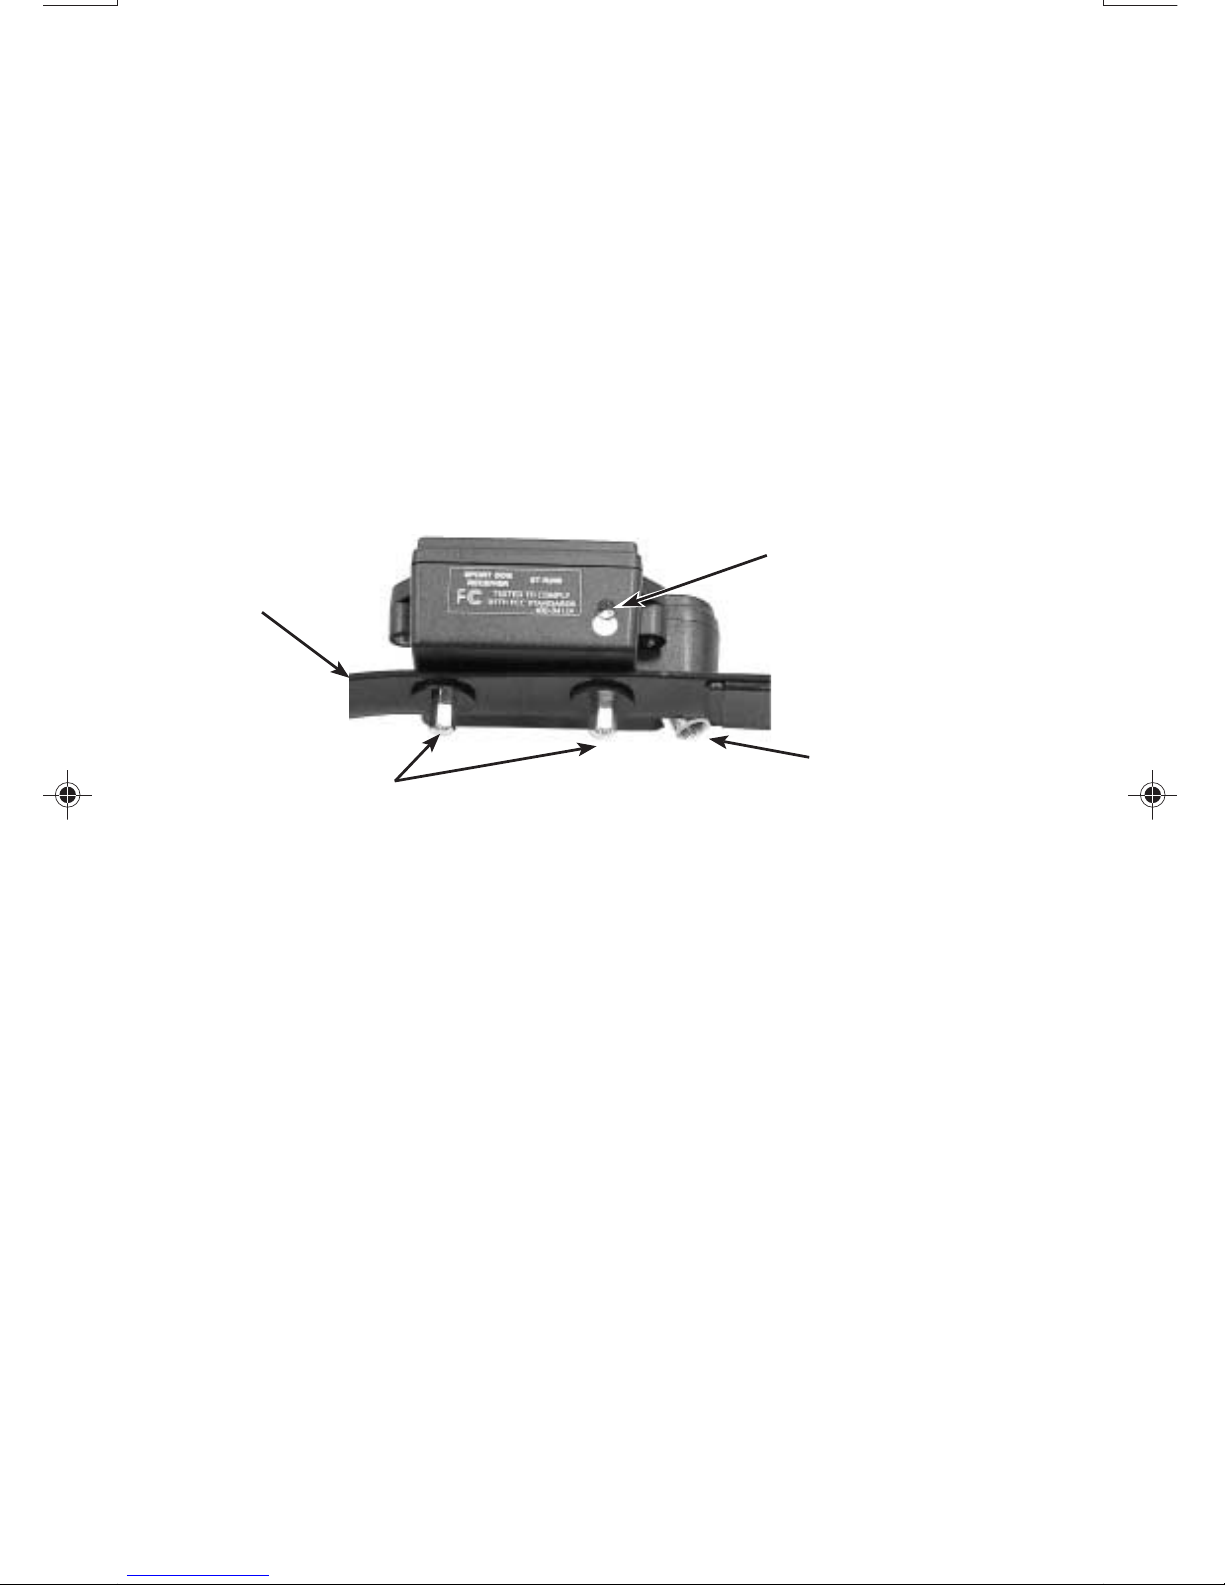
Contact Probes
Collar
Receiver LED
Antenna Mount
2
Receiver LED Function and Response
Receiver turned off
Receiver delivering
electrical stimulation
Transmitter Test button
is pressed
Receiver low battery
indication
Solid in color for 3 seconds,
then turns off
Solid in color every second
stimulation is delivered
Solid in color every second
"TEST" button is pressed if
the receiver has a good battery
Solid in color every second
"TEST" button is pressed if
the receiver has a low battery
Flashes every second unit is
operating with low battery
Solid in color for 3 seconds
and then flashes every second
Green
Red
Red
Green
Red
Red
Receiver turned on
Receiver LED Function LED Color LED Response
• Receiver Antenna
A black, flexible antenna is provided and screws into the antenna mount
located on the side of the receiver. The antenna is to be hand tightened.
• Antenna Stop
An antenna stop is provided for use when training in distances of 500 yards
or less. It is a small bolt with an o-ring that screws into the antenna mount.
It also can be used to keep dirt from getting in the antenna mount.
B. Transmitter
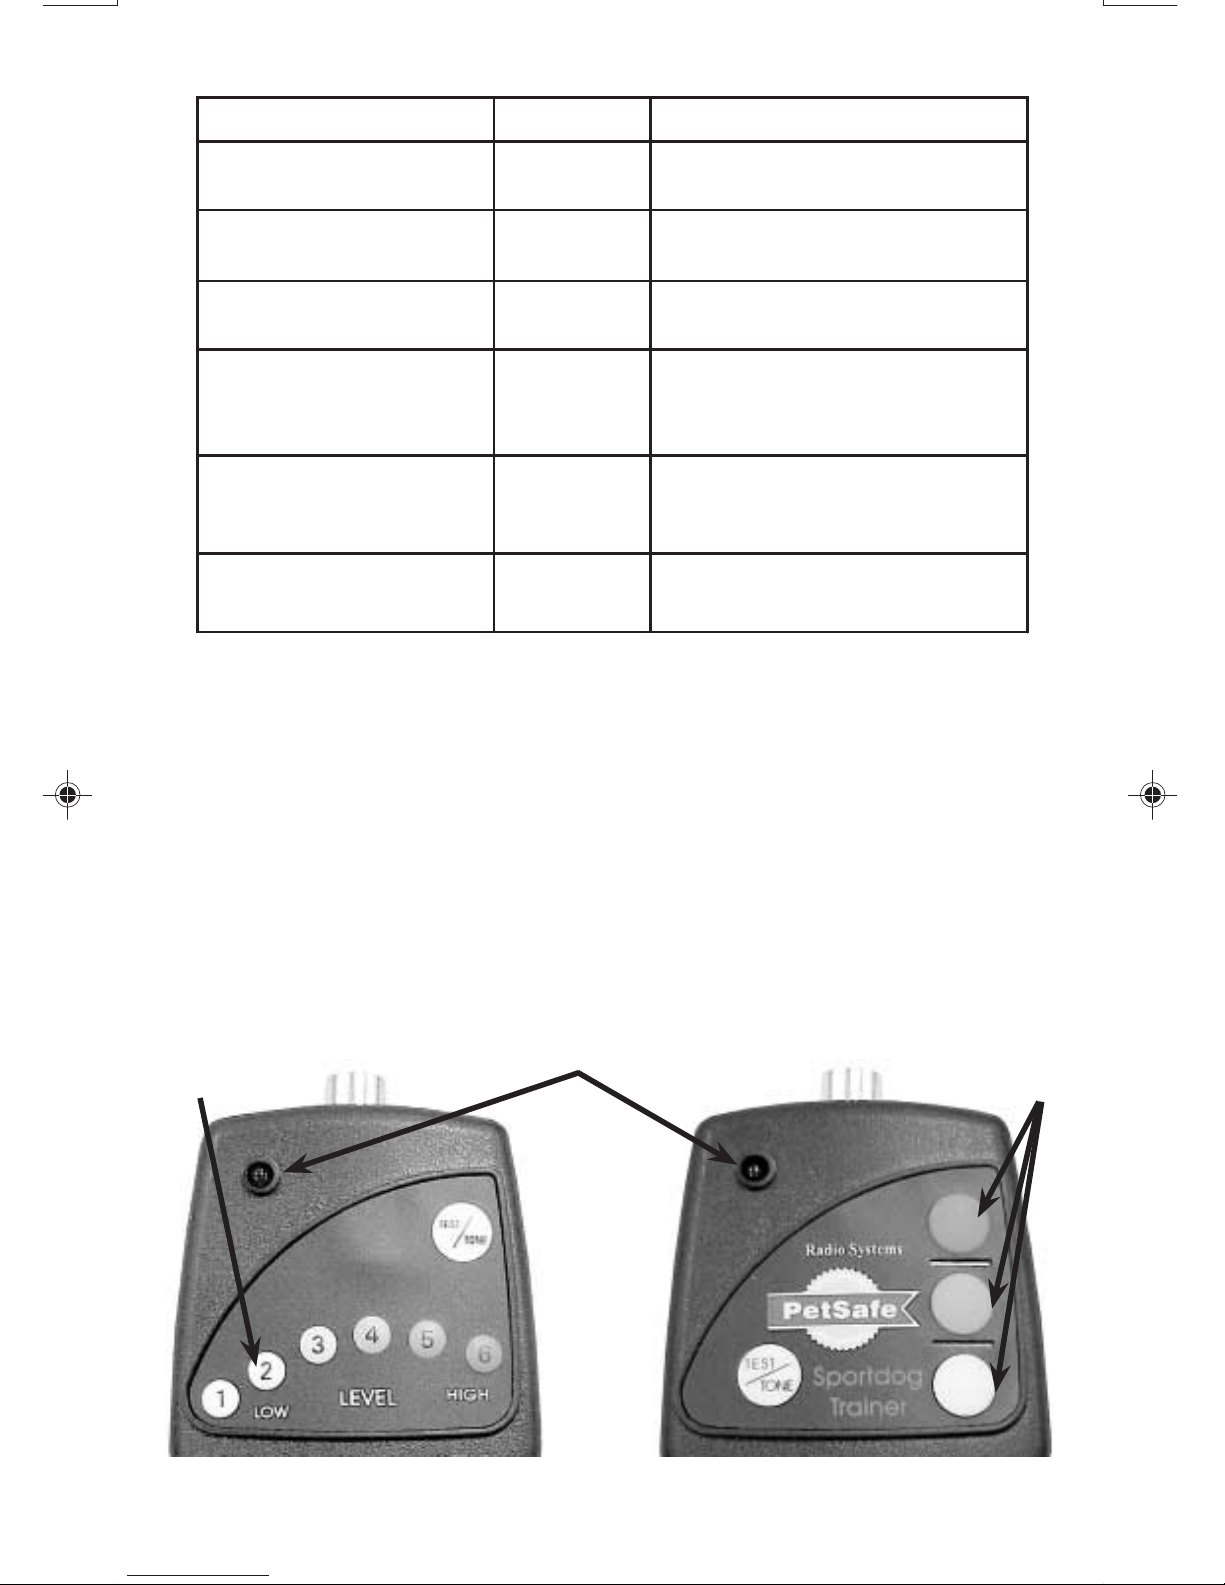
Transmitter LED
Sport Dog Retriever Trainer
ST-T120
Sport Dog Trainer
ST-T100
Stimulation
Buttons
Stimulation
Buttons
3
The remote radio transmitter has been ergonomically designed for the
ultimate in comfort and feel. It is water resistant and has the following
features:
• Variable Stimulation Buttons
You control the level of stimulation with the stimulation buttons. Each
one is color coded and varies in intensity. Refer to "Using the System"
(Page 9) for more details.
• Transmitter LED
A red LED is located in the upper left hand corner of the transmitter.
It indicates when the unit is transmitting and whether or not it has low
batteries.
Transmitter LED Function and Response
• Transmitter Antenna
A black, short antenna is provided and screws into the antenna mount
located on top of the transmitter. The antenna is to be hand tightened.
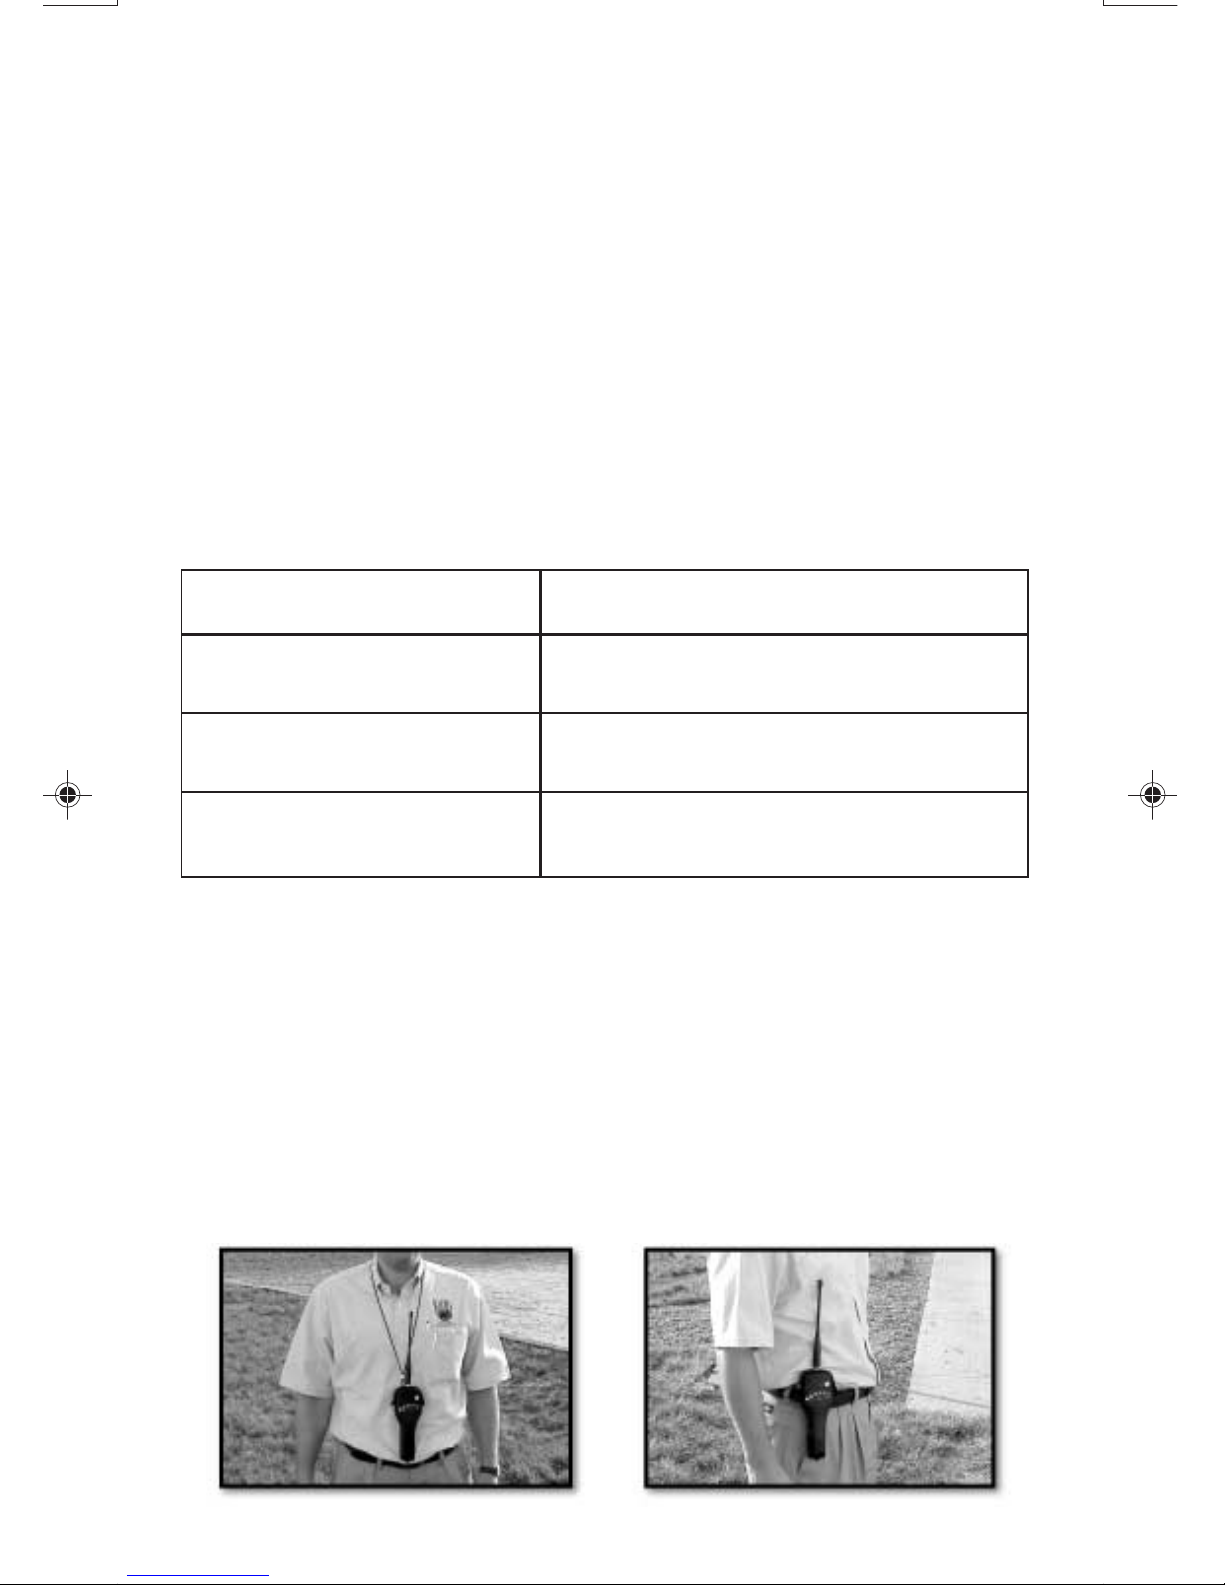
C. Holster
A black, removable holster has been provided and is placed over the
transmitter and can be used in one of three configurations: 1) around
your neck, 2) on your belt, 3) in your hand.
Transmitter Function LED Response
Stimulation button is
pressed/batteries are good
Test button is pressed/
batteries are good
Batteries are low
Flashes once per second for as long
as stimulation button is pressed
Solid in color for as long as "TEST"
button is pressed
No illumination for any buttons
being pressed
4

D. Test Light
A test light is provided to verify that the stimulation circuitry is functioning
properly. Refer to "Testing the System" (Page 9) for proper use of the test light.
E. Range
The Sport Dog Trainer has dependable operational range of up to two
miles. However, conditions such as weather, terrain, and other environmental
factors can affect and thus reduce the range.
To get the maximum range out of your Sport Dog Trainer, hold the
transmitter in a vertical position above your head. Also, make sure that
the antenna is located on the right side of the dog and is as upright as
possible. A plastic clip or cable tie has been provided in the Sport Dog
Trainer kit to allow the antenna to be kept near the collar.
F. Battery Life
The Sport Dog Receiver requires one (1) replaceable 9 volt alkaline battery.
You can expect to have approximately 40 hours of continuous training or five
(5) eight-hour training sessions. This estimate will vary depending on type
and frequency of use.
The Sport Dog Transmitter requires two (2) replaceable 9 volt alkaline batteries.
You can expect to have approximately 7 days or 108 hours of continuous
training. This estimate will vary depending on type and frequency of use.
It is recommended that spare 9 volt alkaline batteries be on hand in the
event that a low battery condition is indicated.
2. Operating the Sport Dog Trainer
A. Inserting the Battery in the Receiver Collar
The Sport Dog Receiver requires one (1) 9 volt alkaline battery. To
insert the 9 volt battery, please follow the instructions listed below.
• With the screwdriver provided in the Sport Dog Kit, loosen the two
screws located on both sides of the receiver.
• Take off the cover.
• Insert the 9 volt alkaline battery as shown in Figure 1.
• Before placing the cover back on the receiver, make sure the o-ring is
free of dirt or other foreign matter to ensure the unit will be waterproof.
Replace the cover and secure it with the two screws.
5
 Loading...