

Petsafe sportdog SportHUNTER Owner's Manual
SportHUNTER
TM
TM
OWNERS MANUAL

SPORTDOG™ SPORTHUNTER 1200 REMOTE TRAINER
INSTRUCTION MANUAL
Thank you for purchasing the SportHunter 1200 Remote Trainer, one of the nest
training systems available for training your dog. Three steps will prepare your system
for use.
Step I - Charge the Receiver
Step II - Insert Battery into Transmitter
Step III - Activate the Receiver Collar
Please remember to ll out your warranty card before continuing. Either mail the
enclosed card or register at www.sportdog.net.
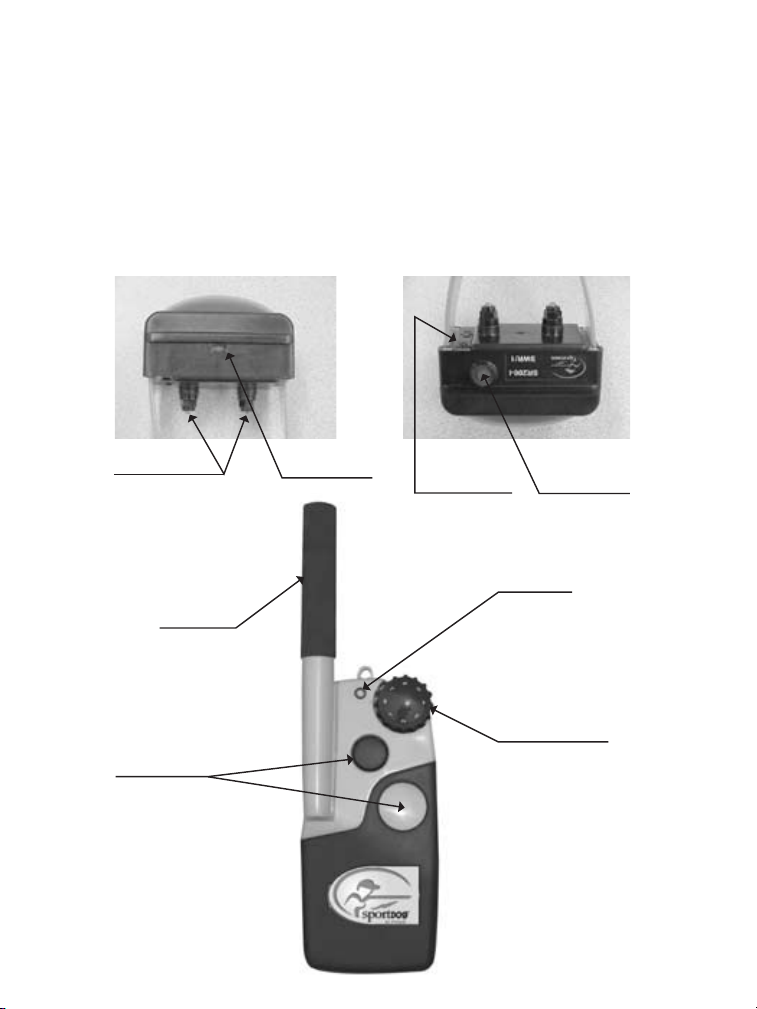
Contact Points
Transmitter
Antenna
Stimulation
Buttons
Receiver LED
Receiver
Charging Jack
With Cover
Transmitter
Level Adjustment
Activation
(On/Off)
Switch
LED
Instantaneous
2
INITIAL SET-UP
Step I - Charge the Receiver
Charger connector placed
in receiver charging jack
• Remove the rubber protection cap
covering the charging jack on the
SR-200I receiver.
• Plug the charger into a standard
120V AC wall outlet.
• Connect the charger connector into
the charging jack.
• Charge for 24 hrs. at room temperature.
Recharges take 12 hrs. Receiver
must be charged prior to rst use.
• Once charging is complete, replace the
rubber cap protecting the charging jack.
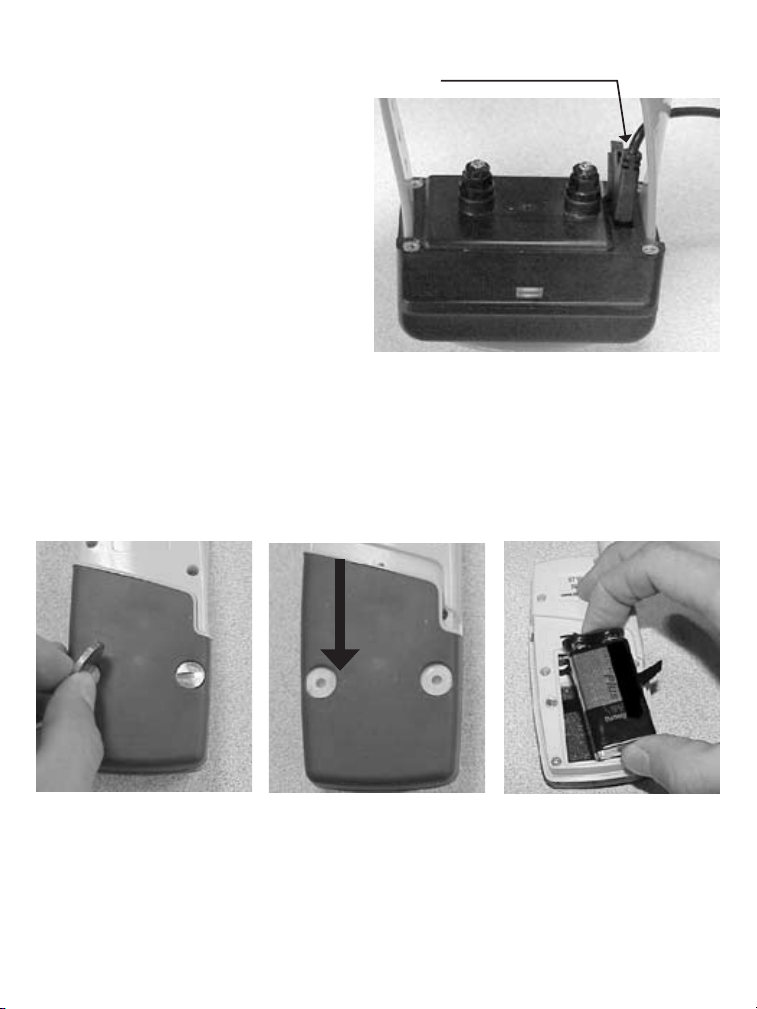
Step II - Insert Battery into Transmitter
• Using a screwdriver or coin, loosen the two screws covering the battery door located
on the back of the transmitter.
• Press downward on the battery door and slide open.
• Connect a 9 volt alkaline battery.
• Slide the battery door back onto the transmitter and securely tighten the two screws.
Step III - Activate the Receiver
• To activate the receiver after charging, rmly press and hold the receiver’s activation
switch for one second until the LED light shines red and the receiver beeps ve times.
• Release the activation switch. The receiver LED light will blink until the unit is turned
off.
• The receiver is now ready to receive signals.
3
 Loading...