

Page 1
OPERATING MANUAL
Congratulat ions on yo
ur purchasc of th c
PE
NTAX
ESPIO
928 and w cl
comc
to
thc
world of Pentax
zoom
com pact phorog
rap
hy!
Your comp ac t, li
ght
wc igh t ca mera is a gr eat
co rnp au ion
tu p rese rv e
your
favor ite mcrno r ies.
Its
bui
lt-in 28-90
mm
zoom
lens givcs yo u the
fre
ed
om
to f
rame
cvc ry rh ing
from
br ca th tak ing
l
and
sca pcs to fam ily
portra
its,
even derai
led clo-
se-ups .
Th
e b uil
t-in
auto n ash h elp s yo u ca p tu re
s
ubje
cts in dimly-lit
pla
ces or ph o
tograp
b
ind oor scenes with cla rity and bri lli
anc
e. Also
inclu
ded arc p anor ama / standar d format
mid-
roll switehing capability
and
a wi rc lcss rem e re
con trol
lca t urc. Silice
I110St
of t he op e rat ions -
inclu ding film loa d ing , film s
pc
cd se tting, wind-
ing/ rewinding, Iocus and exp osu rc
control-ar
c
autom a tic,
you
can Lakc
great
pic turcs ef-
fortlessly. T he DAT E mod cl rnake s il c asv to
re
mcmber th e dat es when you took p ictures.
• P lea se rcad
t his m anual ca refu lly
bef
ore
op e-
ra t ing the camera to help yo u
lake
cons i
sten
ly
superio r pi ctu res.
• P ay special a ttent ion to the
cau
tions an d notes
in th is
Op
cra tin g M a
nua
l, Pi
ctur
es an d illus-
tration, shown h erein may
difl cr from t he
ca rne ra 's act ua l a
pp
ea ran cc.
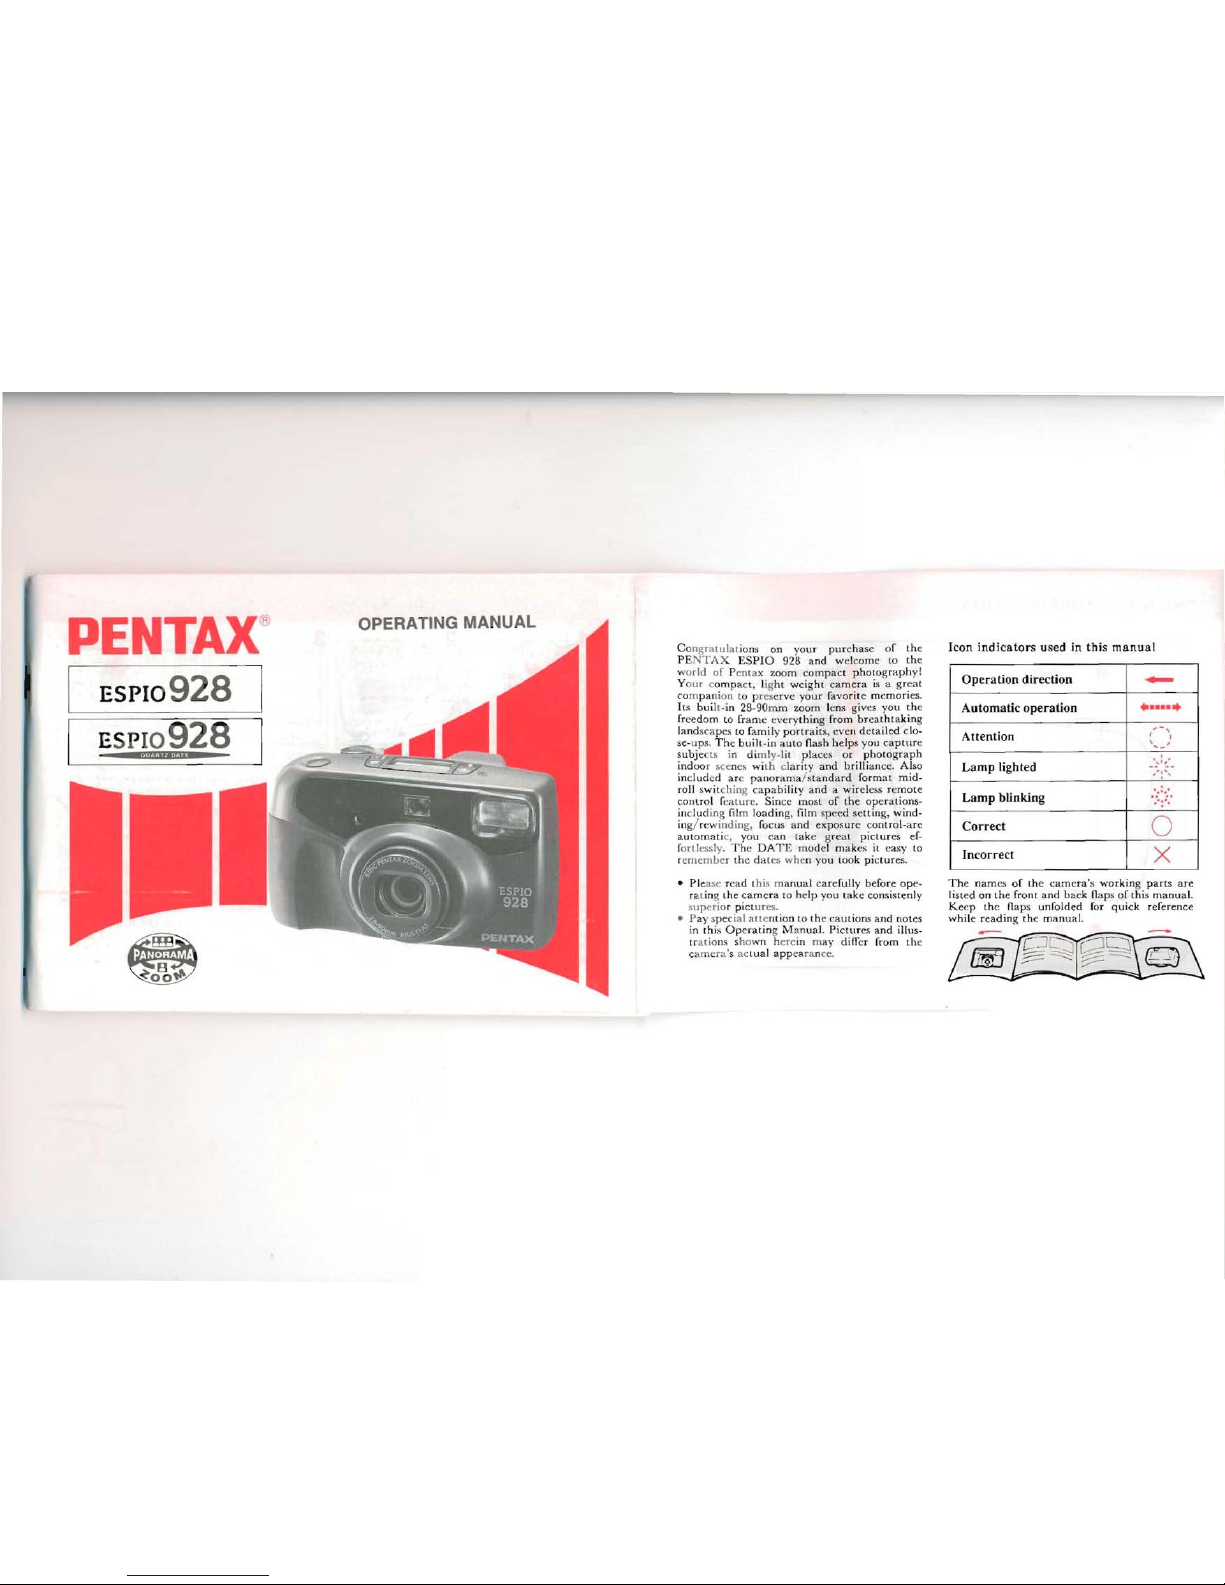
Icon
lnd lc
ator
s used in
this
rnanual
Operation direction
......
Autom atic operation
......
Attention
"
-,
1
'
...
_
....
Lamp lighted
' .. 1, '
-,-' :
':-
..-
Lamp blinking
..
:..:.
.-:-.
Corre ct
0
Incorre ct
X
T he
namcs of
the camer
a's
working
parts are
listed on the front a nd b ack flaps o f this man ual,
Keep th e flaps unfo
lded
for
quick
re fere
nce
w
hile
readi
ng th e
manu
a!.
Page 2
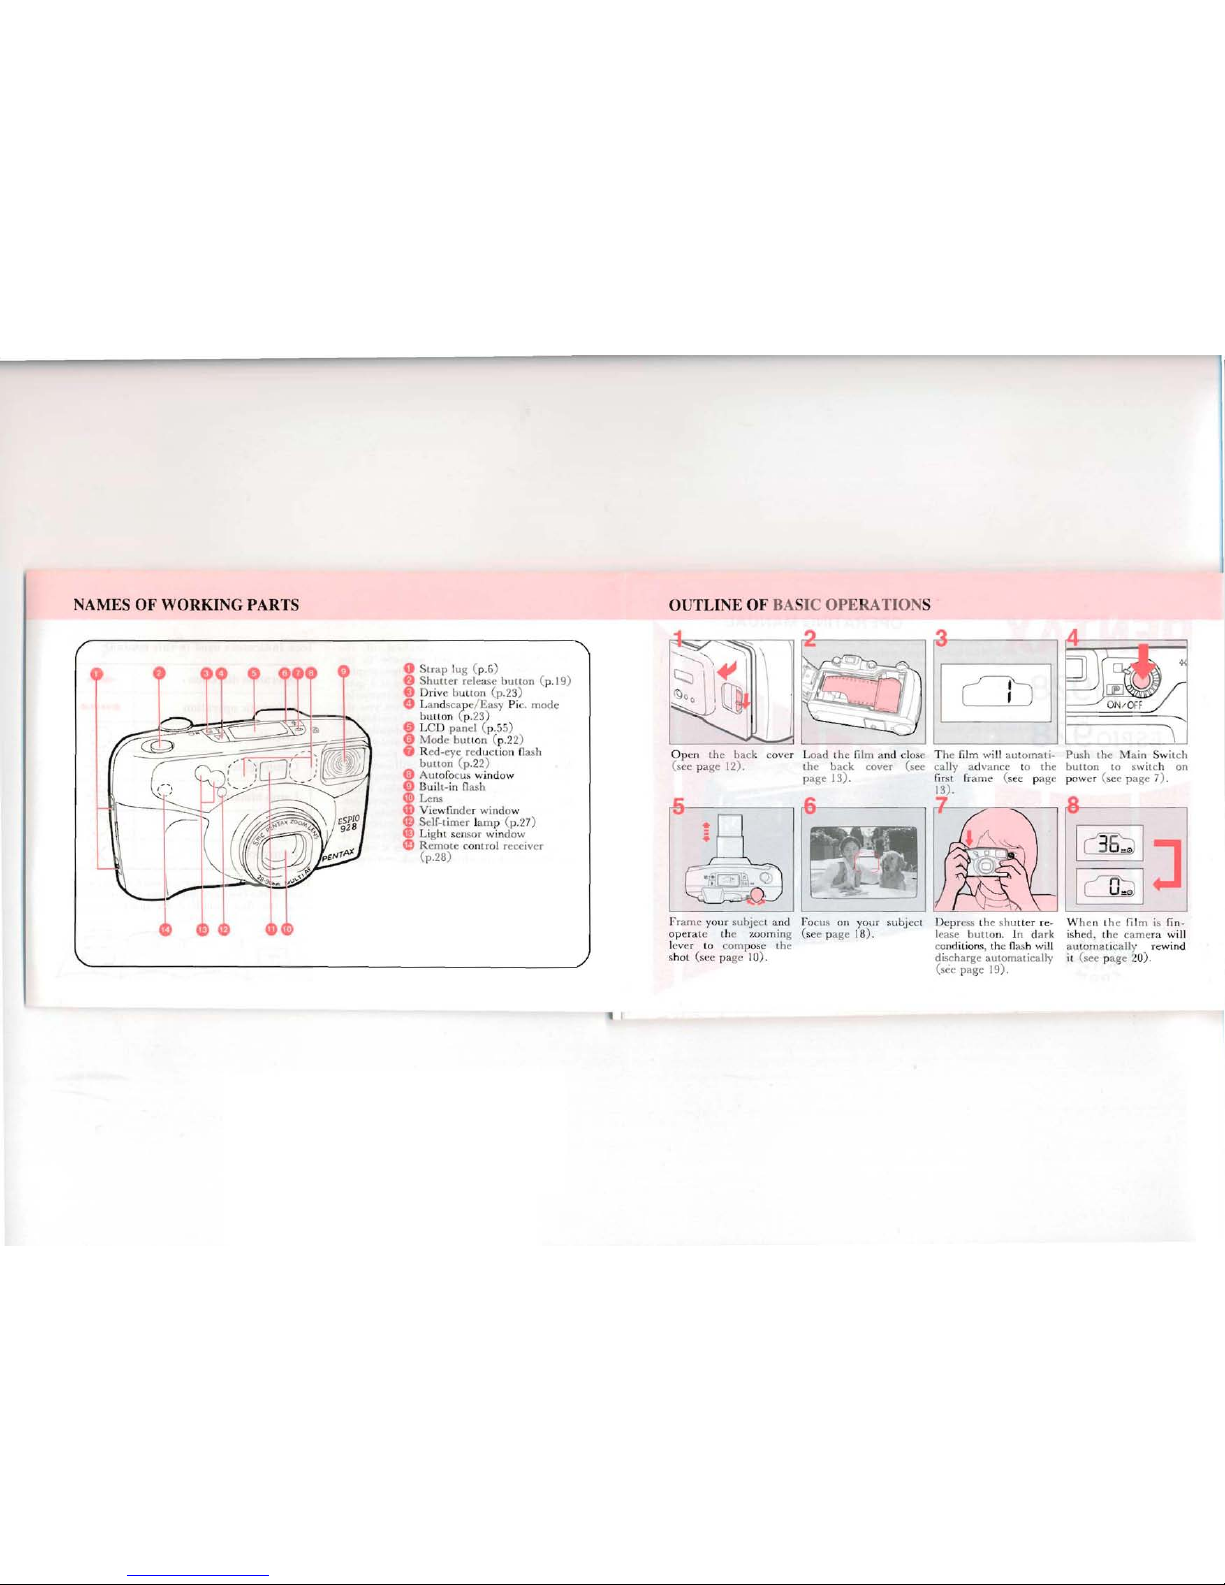
NAMES OF WORKING PARTS
o St ra p lug ( p.S)
e S
hutt
er rcl ease burton (p
.19)
e D rive bu tten (p.23)
o Landsc
ap
c/ E asy Pic . mo de
bur ton ( p.23)
o Le D p
anel
(p.;>;,)
Ci)
Mo
ùe
but ron (p.22)
8 Red- eve r ed uet ion flash
bu rton (p .22)
Cl)
Auto focu s wi nd ow
Ci)
Bu ilt- in flash
G!)
Lens
li)
Viewfinde r wi ndo w
Œ)
Self-rimer lu
mp
(p.n )
Œl
Light scnsor wind ow
œR emo te COI1l
ro
1 rece ive r
(p .28)
OUTLI NE OF BASIC OPE TION S
I
cnl
\
O pen t he haek covc r Load th e film ami close The film will a ut o
mat
i-
Pu
sh the Ma in Sw itc h
(sec p age
12). th e b ack ca ve r
(see
ea lly adva nee to the
bu
tto
n
ta
sw itc h o n
pa ge
13) . f
ir
st fra me (sec pa ge p ow er ( sec p a ge 7) .
13) .
,1 _ _ , ,
rf"8t---
- - - -
I
~
I
J
1
COd
1
Fram e y" ur subj ec t a nd FllCUS 01 1 yo ur subjcct
Dc p ress t he shu rter re-
W h en t hc fi l m is fi n -
operatc the w om in g (sec p age 18) .
lease
but
ton, I n d ark
ishcd, the came ra will
lever
III co m pose th e
cond it ions, the flash will
autom a tically rewind
shot (sec
pa
ge 10) .
di
schargc auto rnatically it
(sec
pa ge 2U) .
(sec
page 19) .
Page 3
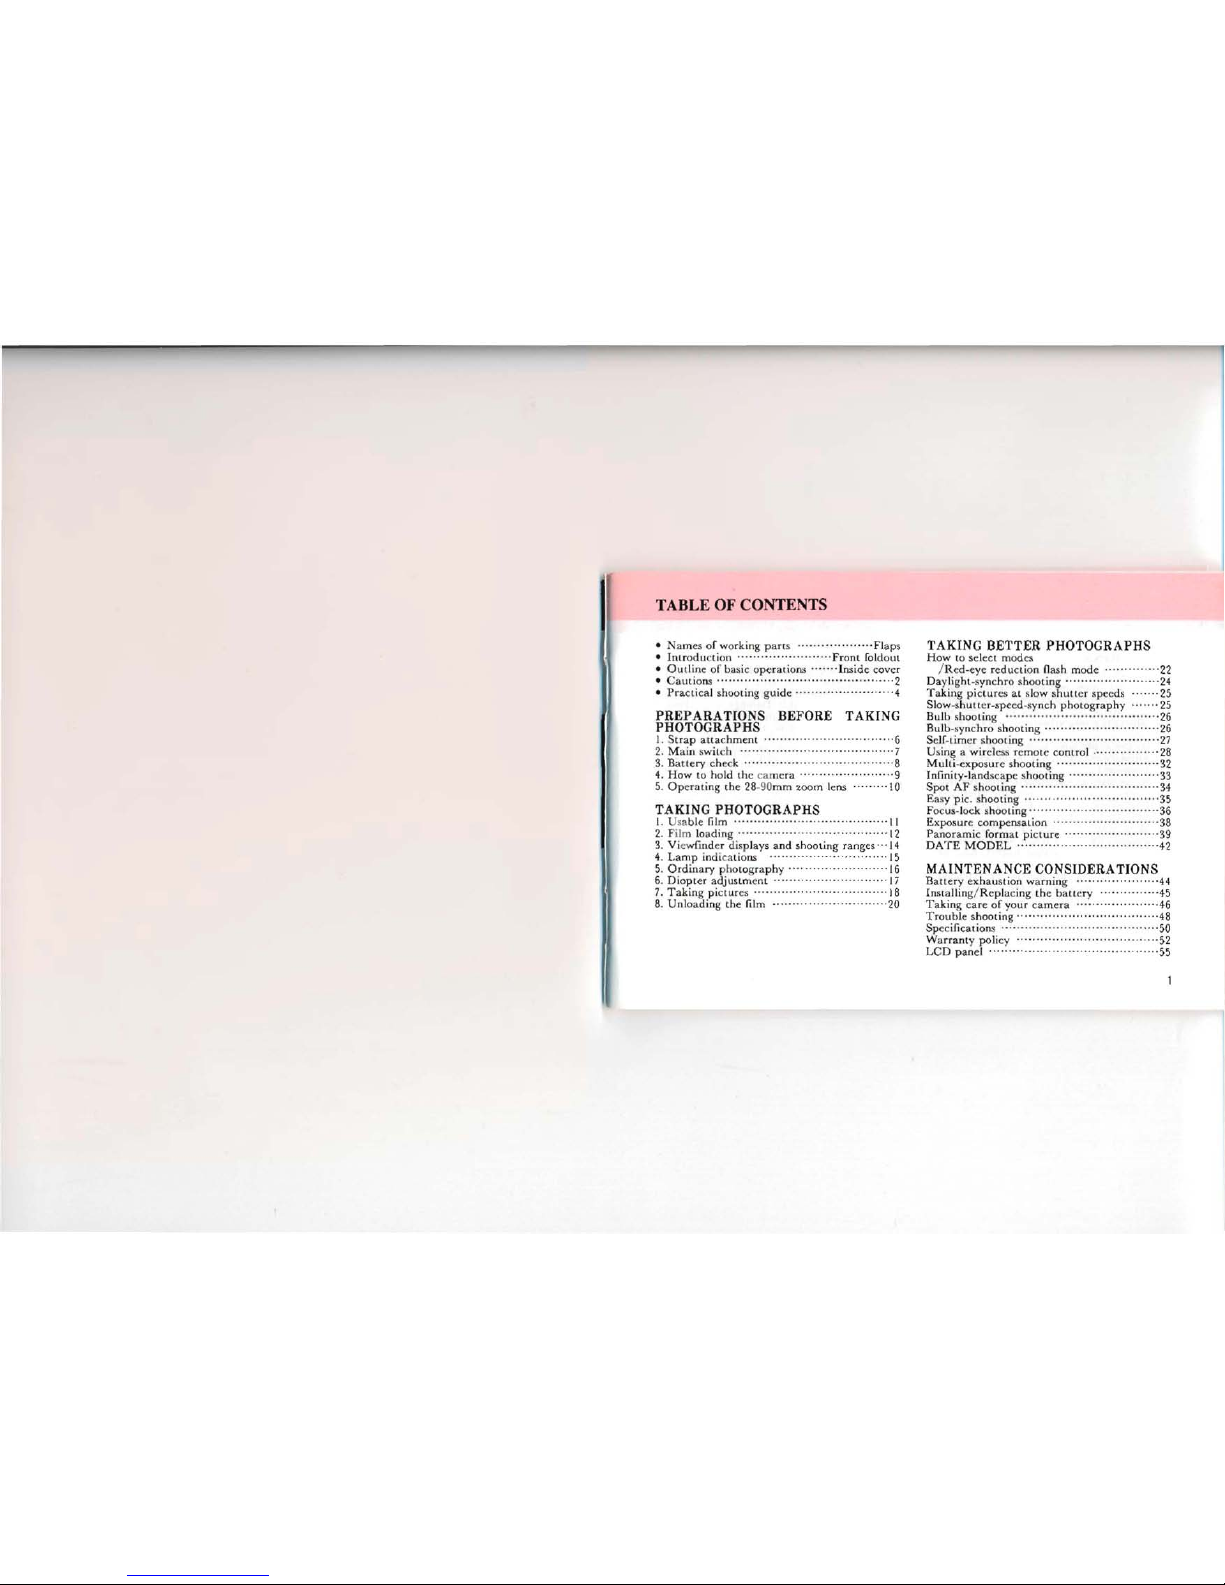
TABLE OF CONTENTS
•
Names
of working pans
Flaps
• Iru r
odu
ctiou ..
...
... ..•. .... .. ..•. ..F r
ont
Iold
out
• Outline of ba sic
opcra
tions . .. ."
'l
nsi
de
co
vcr
•
Cautions
········
·····
·· ·· ··· ·· · ····
····
···
······
····
·2
• Pra ctical shooring
guid e ········ ···
····
···· ·· · ···4
PREPARATIONS
BEFORE
TAKING
PHOTOGRAPHS
1. S t rap a
tta
chrne nt ··
········
·· ··· ·
···
·· 6
2. M a in switch ···· ··················· ···· ·· ········ ·· 7
3. Ba
tlery
che ck 8
4. How 10 hold t he c amera · ··.. ·· .. · ·9
5. Opcra ring th e 28-9
0mm
zoom lens . ... .. . ·· 10
TAKING PHOTOGRAPHS
1. Usab le lilm ' 11
2. Film lo
adin
g ' 12
3. Vicwfinder d isplays a nd shoo ting ra nge s" · 14
4. L
arnp
ind ications · ·· ··· ·· · · · ·15
5. O rdin
ary
pho togra p hy · · ·16
6. Di
opt
er a d
jus
trne ru
lï
7.
Taki
ng pict ur cs 18
8. U nlo
adin
g th e lilm 20
TAKING
BETTER
PHOTOGRAPHS
How
to se lec t
modes
/ R ed-eye r
edu
ction nash mod e ..· ··
···
·..·· ·22
Dayli
ght
-synchro shoo ti ng ·.. · · ·24
T ak ing pic tu rcs a l slow sh uttc r specds 25
Slow-shu tt cr -spccd -syn ch ph oro gr
aph
y · ····· · 25
Bulh shooting ···
···
·· ·· ·· ··· ·
···
·· · ··· ·· · ·
···
···.. · ·26
B
ulb
-synch ro shoo ring 26
Self-
rimer
shoo ting ··.. ·· ·· ··· .. ·· · · ·· 27
Using
a wi rcl ess
rumot
e
contro
l ··· ··· ·· ·28
M ult i-
cxpo
surc sho ot ing
···
··· ··· ··
···
·· ··
····
·..·32
Inlinit
y-Iandsca pc shoo tin g · ····· ··.. · ..·· .. ·· · .. ·33
Spot
AF
sho ot ing .. ·· ··· · ··· ··..·· · ·· · 34
Easy
pic. shooting " 35
Focus -Iock sh ootin g ·.. · ··.. · ··· ··· ·· · .. ·· 36
Ex
posur
e
comp
ensa
tion ·.. ·· · .. ·· · ··· ··· ··· ···· .. ·38
Pa noramic format pict ure .. · ··.. ·· · ·.. · · ·39
DATE MODEL
·········· · ·42
MAINTENANCE
CONSIDERA
TIONS
Batie ry ex ha ustion w
arn
ing ,, 44
Ins ral ling/Rcpl ac ing th e bat rcry ,45
T
aking care
of you r ca
mera
46
Tro
ub le shooting ·.. · 48
Specificat ions ·· ·· .. ·· .. ·· .. · ·.. ··· .. ·50
W
arrant
y pol icy · ·· ·· ·· .. · · · 52
L
eD panel '55
Page 4
2
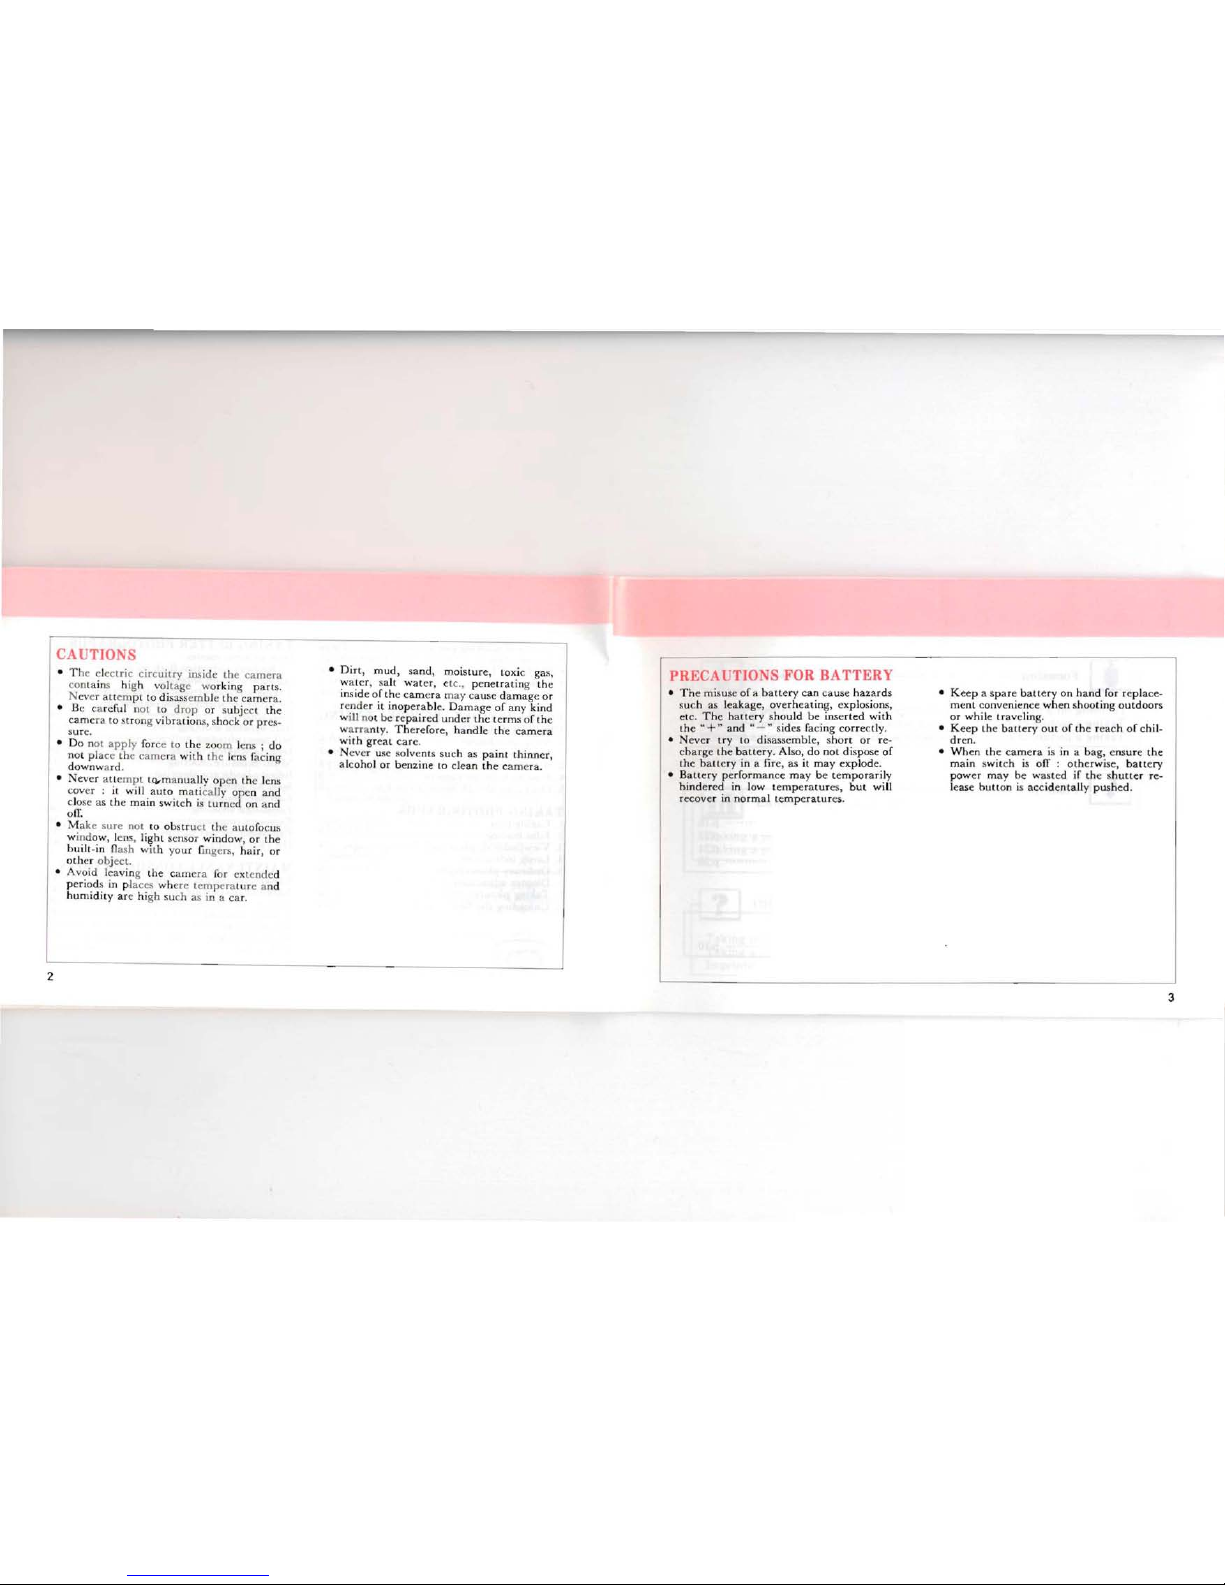
CAUTIONS
• T h e el ec tr ic circ uitry insid e th e ca m cra
con ta
in
s high volt age wor king pa rt s.
N over at tcmpt to di sussernbl e the ca mera.
• Be ca rcfu l not 10 d rop or subjcct th e
ca m
era
ta
srrang vibr
ati
ons, sho ck o r
pres
-
su re.
• Do oot ap p ly force la
the
zoom lens ; do
not p lace the camera w ith t he lens facing
dow
nwa rd.
•
Neve
r au em p t Iq, man
ually
ope
n th e lens
covc r : it will
aut
o matically
ope
n and
close as the main swit ch is lurn ed on an d
on;
• M ake sure not
ta
obstr uer th e a utofocus
window , le ns, light sc nsor
wind
ow, or th e
bu ilt -in flash with yo ur fing ers, h
air
, o r
oth
er a bject.
•
Avoid
lcav
ing the cam er a for ex tend cd
pcriods in p laces w hcre temperat ur e and
hurn
idiry ar c hi gh su ch as in a ca r.
• Dirt ,
mud
, sa nd, rn
oisture
, tax ie ga s,
wat cr , salt wat er , erc., p
enetrat
ing
the
insid e ofth e camera may ca use
dama
ge o r
ren der it inoper
abl
e. Da
mag
e of any kind
will not be r
cpair
ed under rh e terms of th e
wa rraru y, T he refo re, h
andlc
th e
camer
a
w
ith great
ca rc.
• Nover use solvc nts such as p
aint t hinncr,
alcoho l or benzine la c1ean
the
cam
era .
PRECAUTIONS
FOR
BATTERY
• The rnisusc of a b
art
ery
ean
cause
hazards
such as leak age , ov
erh
cat ing, explosions,
etc , The h
att
ery shou ld be
inserted
with
the
~
+,.
and"
-~ side s fa
eing
correcrly.
•
Nev
cr
try
10 disassernble, sho rt or re-
charge the
batt
er y. Also, do not dispose
of
the h
all
cry in a lire, as il
may
exp
Iode.
• B
alt
ery p
erf
orm
ance m ay b e l
emporarily
hind
ered in low t
emperatur
es,
but
will
recov er in
norm
al
temp
eratur
es.
• K eep a spa re
batt
er y On
hand
for r
epla
ce-
m
ent
convcnience wh en
shootlng
outdoors
or
whil
e tr avel ing.
• K eep the ba
llery
OU I
of
thc reach of ch il-
dr
en,
• Wh en the came ra is in a bag, ens ure
the
m
ain
switch is oIT :
othe
rwise, b
atr
ery
pow
er may be w ast cd if th e shu trer re -
lease button is
accid
entally push
ed .
3
Page 5
4
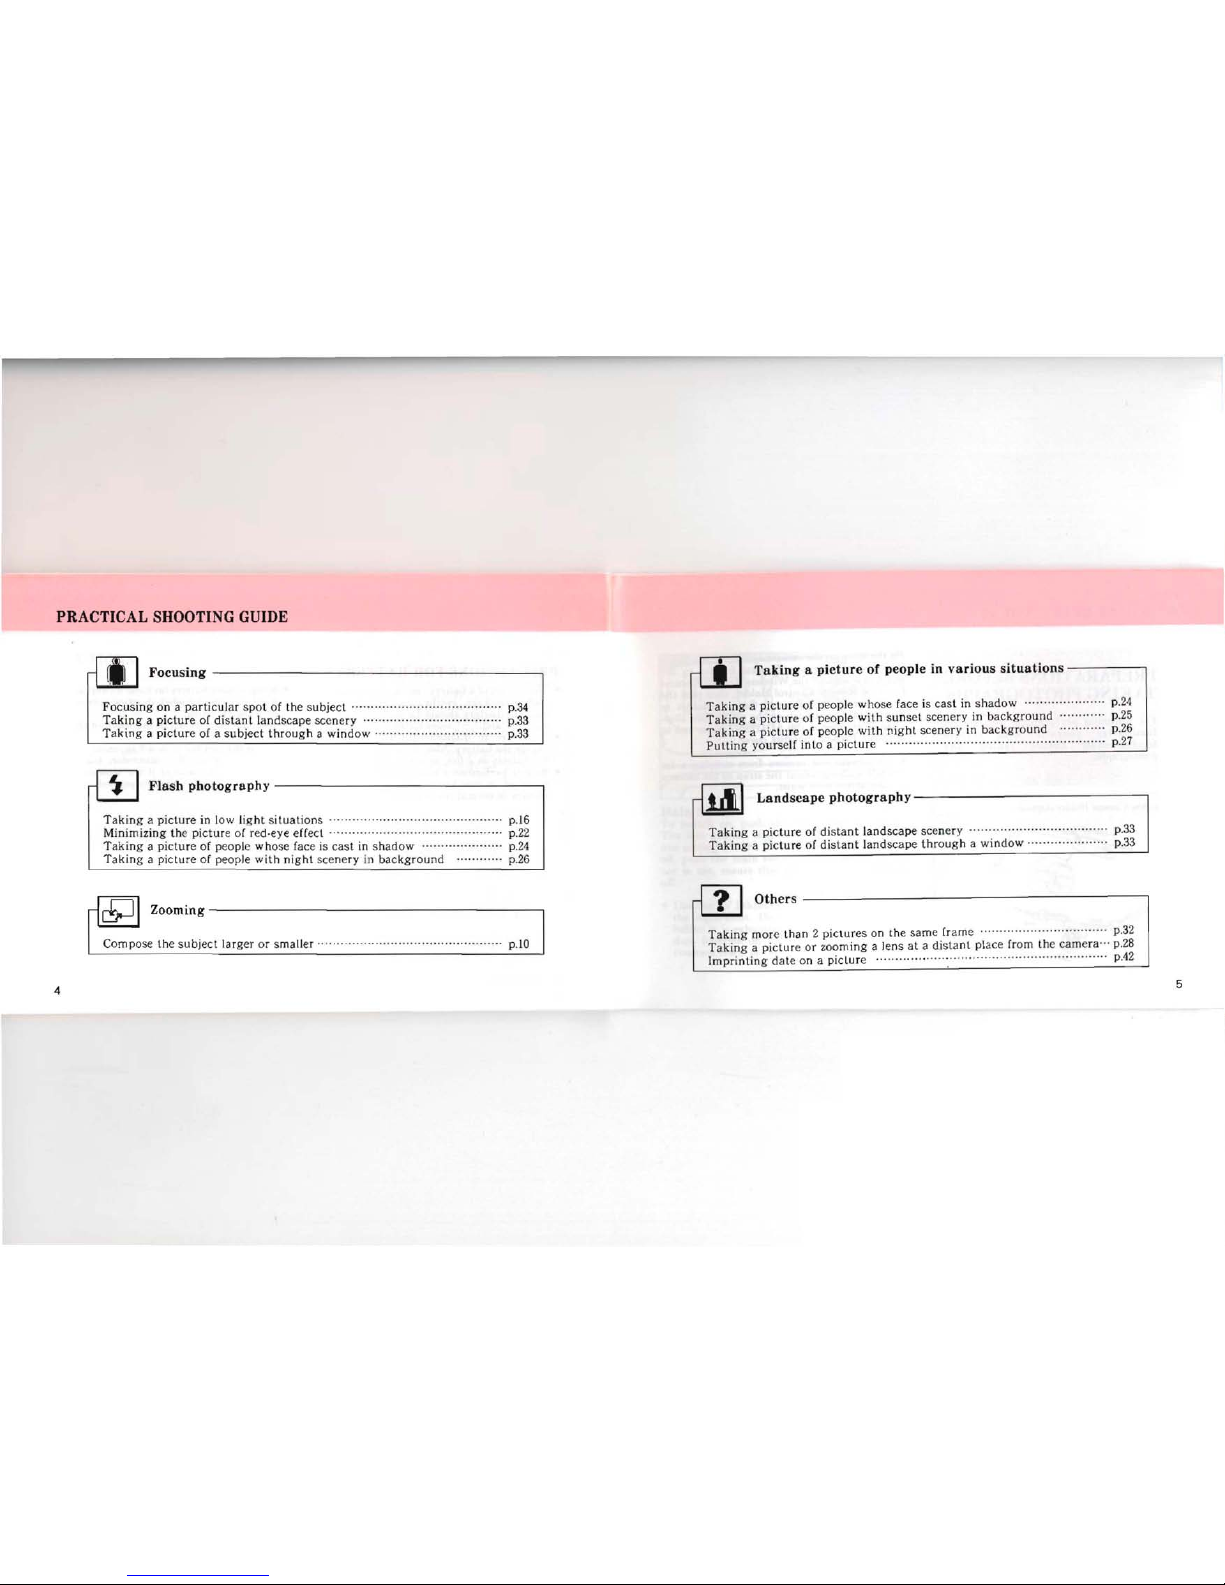
PRACTICAL
SHOOTING
GUIDE
Focusing - - - - - - - -
---
- - - -
---
- -
--,
Focu
sin g on a p
articul
ar spot of the su bject
p.34
T
akingapictur
e of distant lan dscape sc
ene
ry .
p.33
T
aki
ng a pi
ctur
e of a su biect
thr
ough
a win dow ..
p.33
Flash
photcg
raphy
-----
---
-
-------
Tak ing a pi
cture
in low light sit
uat
ions ..
p
.l6
Minimizing t he pic
tur
e of red-eve ef fect .
p.22
Taking a pict
ur
e of peopl e w hose face is
cast
in s
hado
w
Tak ing a pictu re of people
with night
scenery in back gr ou nd
............
~ :~~
Zooming
-------------------1'
Com pose the s ubjec t lal'gel' or srnaller ..
p.lO
Taking a
pieture
of people in various situations ,
p,24
T
akin
g a pi
ctur
e of people whose face is c
ast
in s
hado
w
Takin g a p
ictur
e of people with
sun
set scenery in bac
kgro
und
p.25
Ta king a pi
ctur
e of p
eop
le with ni
ght
scenery in backgrou nd
p.26
Pu tt ing yours elf into a pi
ctur
e .
p.27
Landscape
photography -----------
- -
--
Tak ing a pict ur e of di
st
ant
landscap
e scenery ..
p.33
Tak
ing a pi
ctur
e of
dista
nt landscape
thr
ough a
wind
ow ..
p.33
Others 1
Tak ing more
than
2 pict u
res
on the sarne (ram e p.32
Ta king a pic
tur
e or zoorning a lens at a distan t place fro m th e
cam
era -« p.28
Irnpr in ting da te o n a pi
ctur
e pA2
5
Page 6
6
STRAPATTACHMENT
PREPARATIONS BEFORE
TA
KING
PHOTOGRAPHS
For optimum
performance
you should
ramiliarize
yourself
with
certain
rundamentals
befor
e taking any
photographs.
Remote Co ntro l Holdcr (O ption)
.
~
"'
~
-..
~
Fit the stra p o n th e ca
me
ra as illus trar ed . \<\'hen
attac
hing
th e R em
ere Control H
el
der ta t he
stra p, fir st
rernove
th e W ir ele
s.s Remot
e C
ont
rol
from th e R em ot c
Co
nt ro l H
eld
er , rhen pass th e
str a p
thro
ugh th e
Remote
Cont
rol B older as
illuvt
rat
ed. Use th e rab on th e cl
amp
(see
illus -
tra
tio n) 10 d
epr
ess th e
ADJUST
burt
on and la
op en the
b
att
ery cha mber ca ve r.
•
Ta prev
ent
th e
camc
ra fr
om swayi
ng a lot
wh ile w alking, a dj ust th e
strap
sa th e
cam
era
rid es a bove
you
r waist.
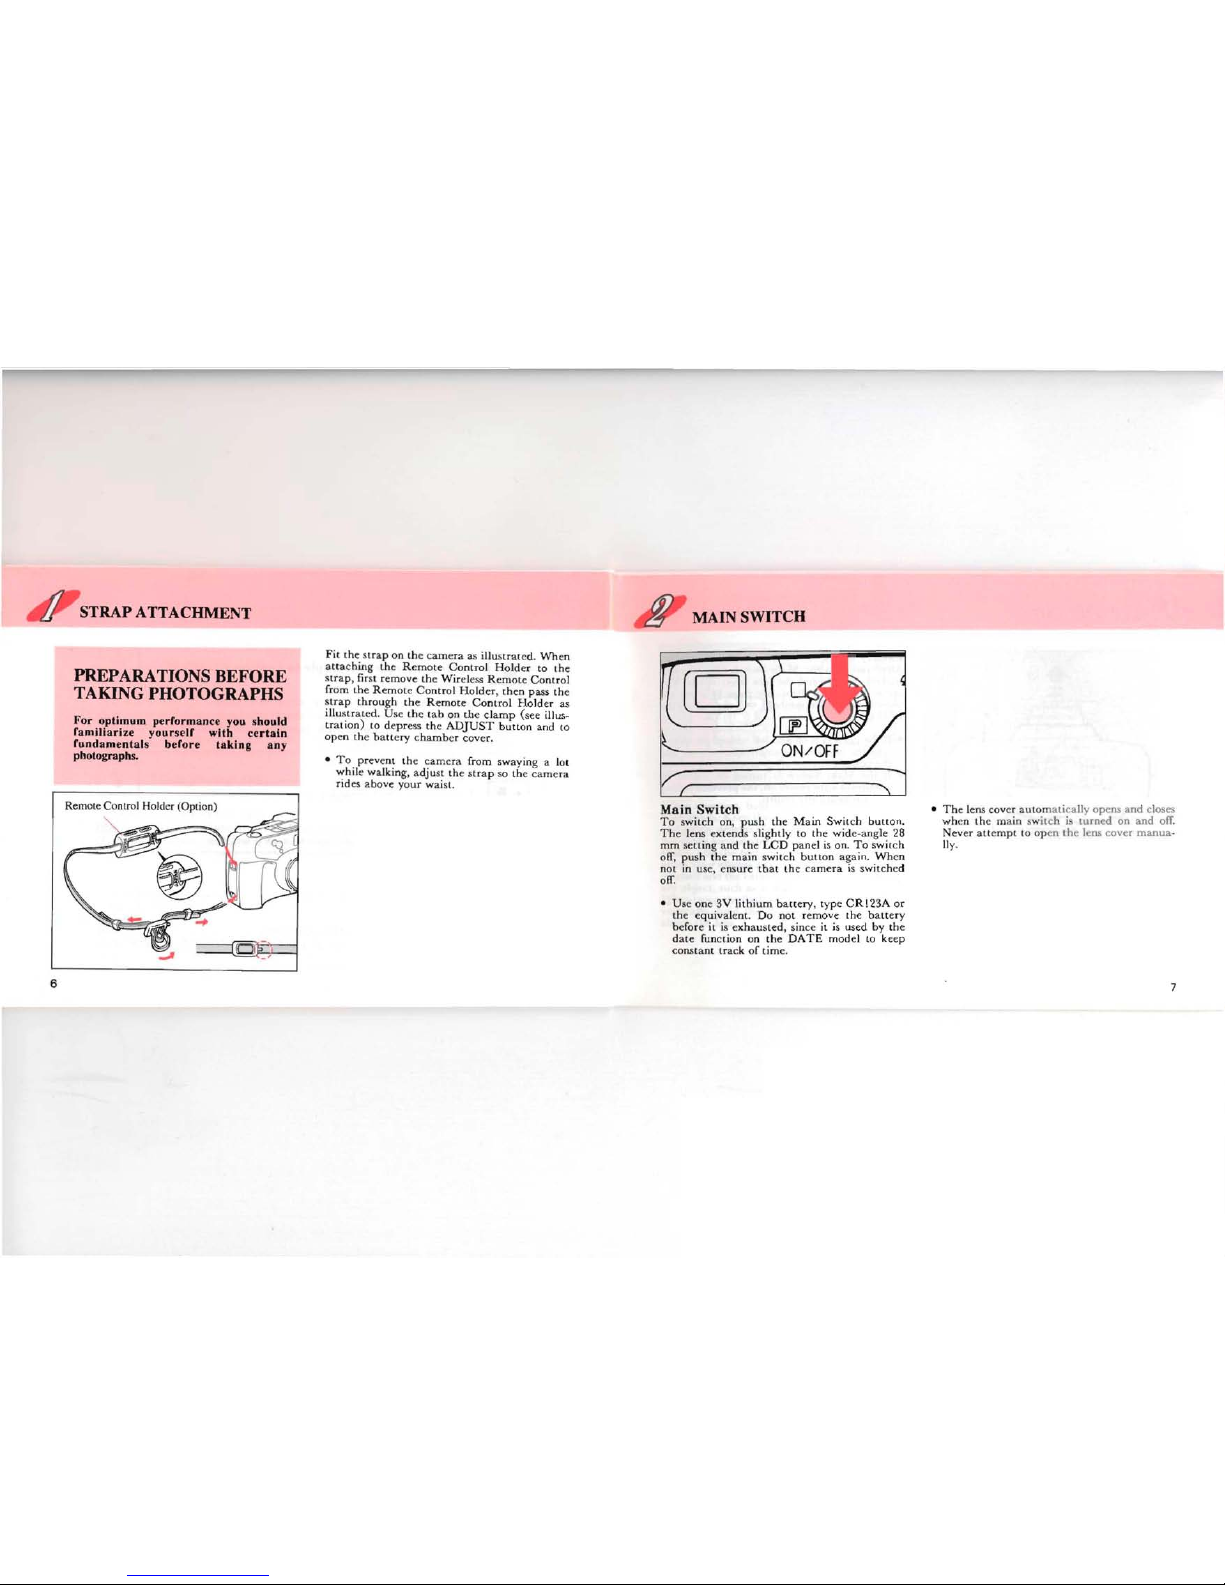
MAINSWITCH
Main
Switch
T o swi tch on,
pus
h th e M
ain
Swit
ch
burton
.
Th
e lens exten ds
sligh
tly la th e
wid
e-an gl e 28
mm
sett in g a nd th e
LC
D p
anel
is on .
To
swi tch
otf,
pu
sh the ma in switch b u
uon
aga
in. Whcn
not in use, c nsure tb at th e ca me r a is switc he d
o
iT.
•
Use
one 3V
lithi
um battery , t
ype CR123A or
th e e quiva le nt. D o no l rernove the b
atter
y
hefor e
il is ex
haus
ted, sin cc it is
used
by th e
d
ale
funcr ion on th e DATE
mo de l 10 keep
cons
ta nt tr ack of
lim
e.
• T he lens ca ver a utorna tica lly
opens
an d closes
wh
en the ma in swi rch is tu
rned
on
and
off.
Ne
ver
at r
crnp
t ID oJlen the lens co
ver
rnanua
-
lIy.
7
Page 7
8
HOW TO HOLD THE
CAMERA
BATTERY CHECK
•
-
-
Batt
ery check
Af
ter yo u turn the Main
Swit
ch O N, the lens
sfight ly extends and th e lens coye r
open
s. You
are now
rca
dy to shoot. Sce page 44 wh en
the
ba trery exhaust ion sym ho l (
c>o
) ap
pca
rs on th e
L
eD
pa nel.
• If the ca mera is on
and
left
unu
sed for ove r 3
m
inut
es, th e Jens
au
torna
tica
lly
retr
acts an d
the power swirches off to sa ve h
atterv
pow er.
•
If
th e M ain
Swit
ch is
turn
ed on w
ith
in 60
minut
es of auto-power off, the pr cv ious se lt ing
will a
utomatica
lly
return.
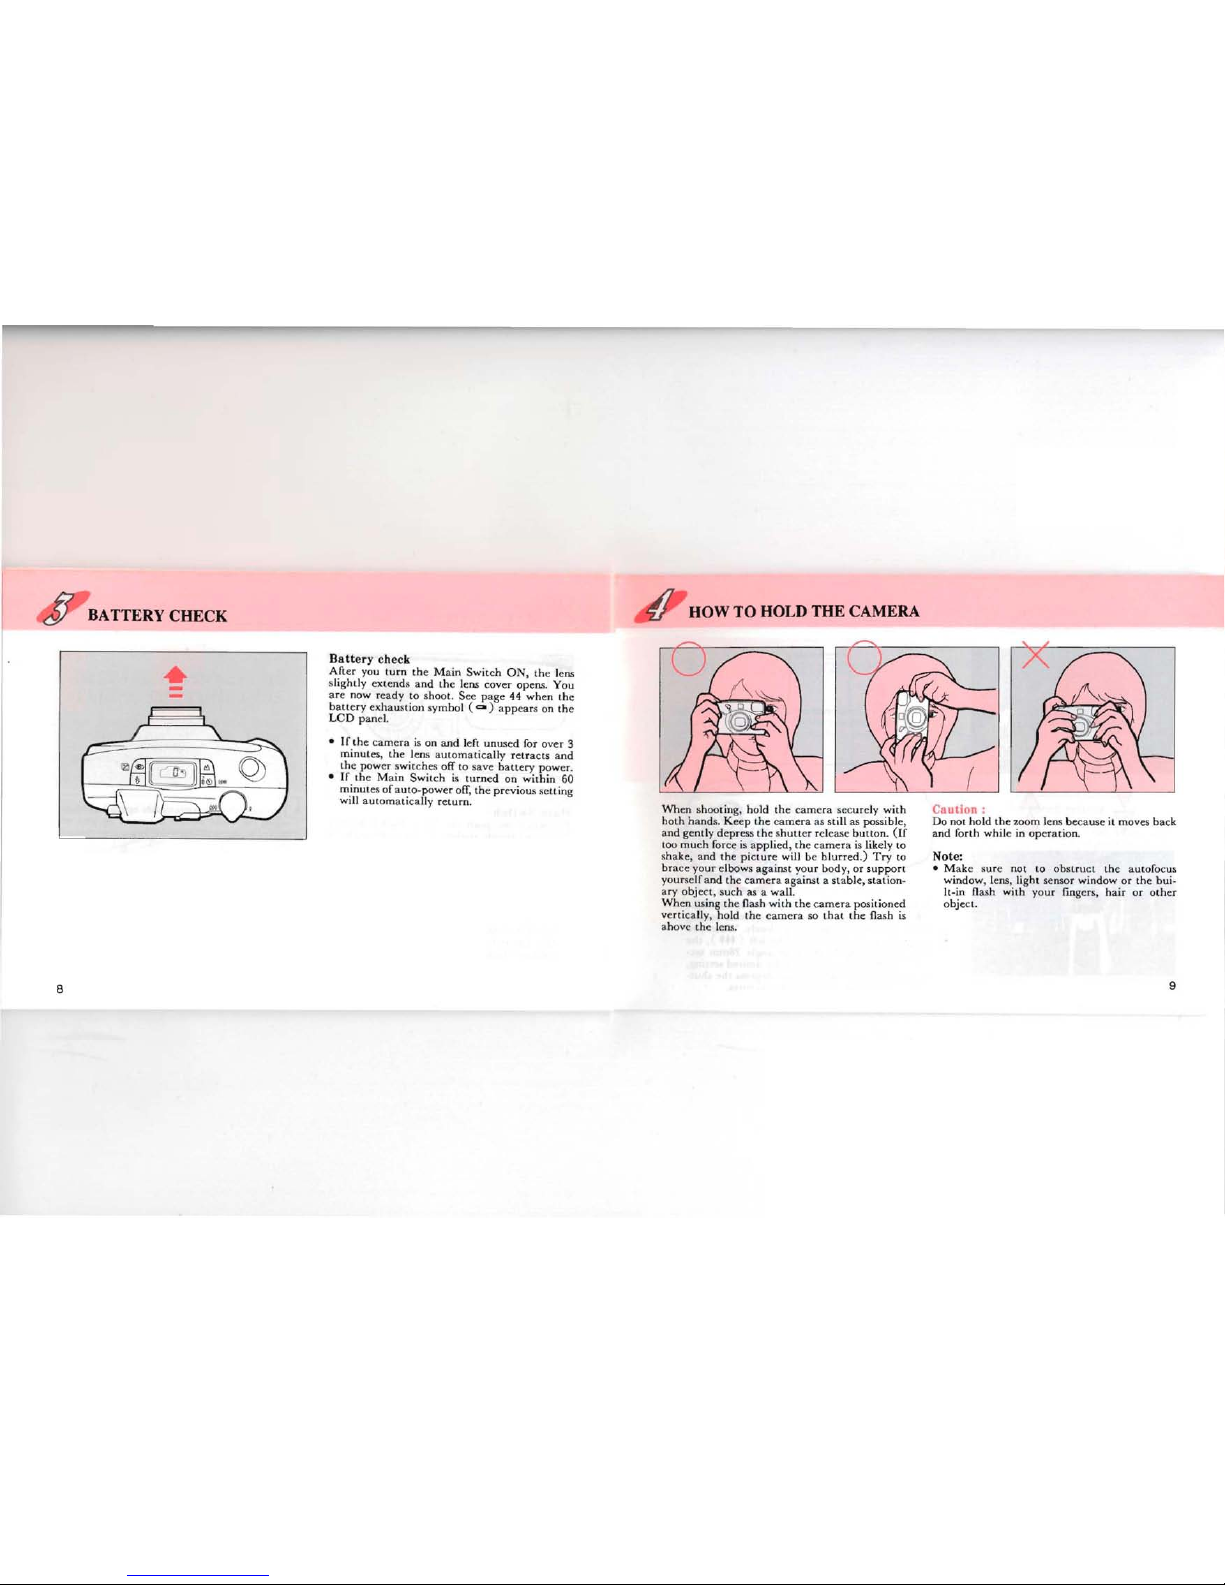
Wh
en shooriug,
hold
th e ca mera sccurcly w
ith
hoth hand
s. K eep th e
came
ra as s rill as possibl e,
and gently d epress th e sh utter rclcasc bu tton. (I f
too much force is app lied, the ca me ra is likel y to
s
ha
ke, a nd th e pi
ctur
e will be
hlurred
.)
Try
to
br ace yo ur clbows a gainst y
our body,
or
support
yoursel f and the c
ame
ra
against
a st
able,stati
onary object, such as a wall.
Wh
en using th e flash
wirh
th e camer a posit i
oned
v
erti
call y, hoId the
cam
era
50
th at
the
flash is
above t he lens.
Caution:
Do not ho Id th e zoom lens becaus e il rnoves back
and
forth wh ite in ope ra tio n.
Note:
• M
ake
sure not to obs truer th e a u tofocus
window
, lens, light se nsor
window
or
the bui-
Ir-in flash
with
your
fingcrs, h
air
or
other
object,
9
Page 8
10
OPERA TING 28-90mm
ZOOM
LENS
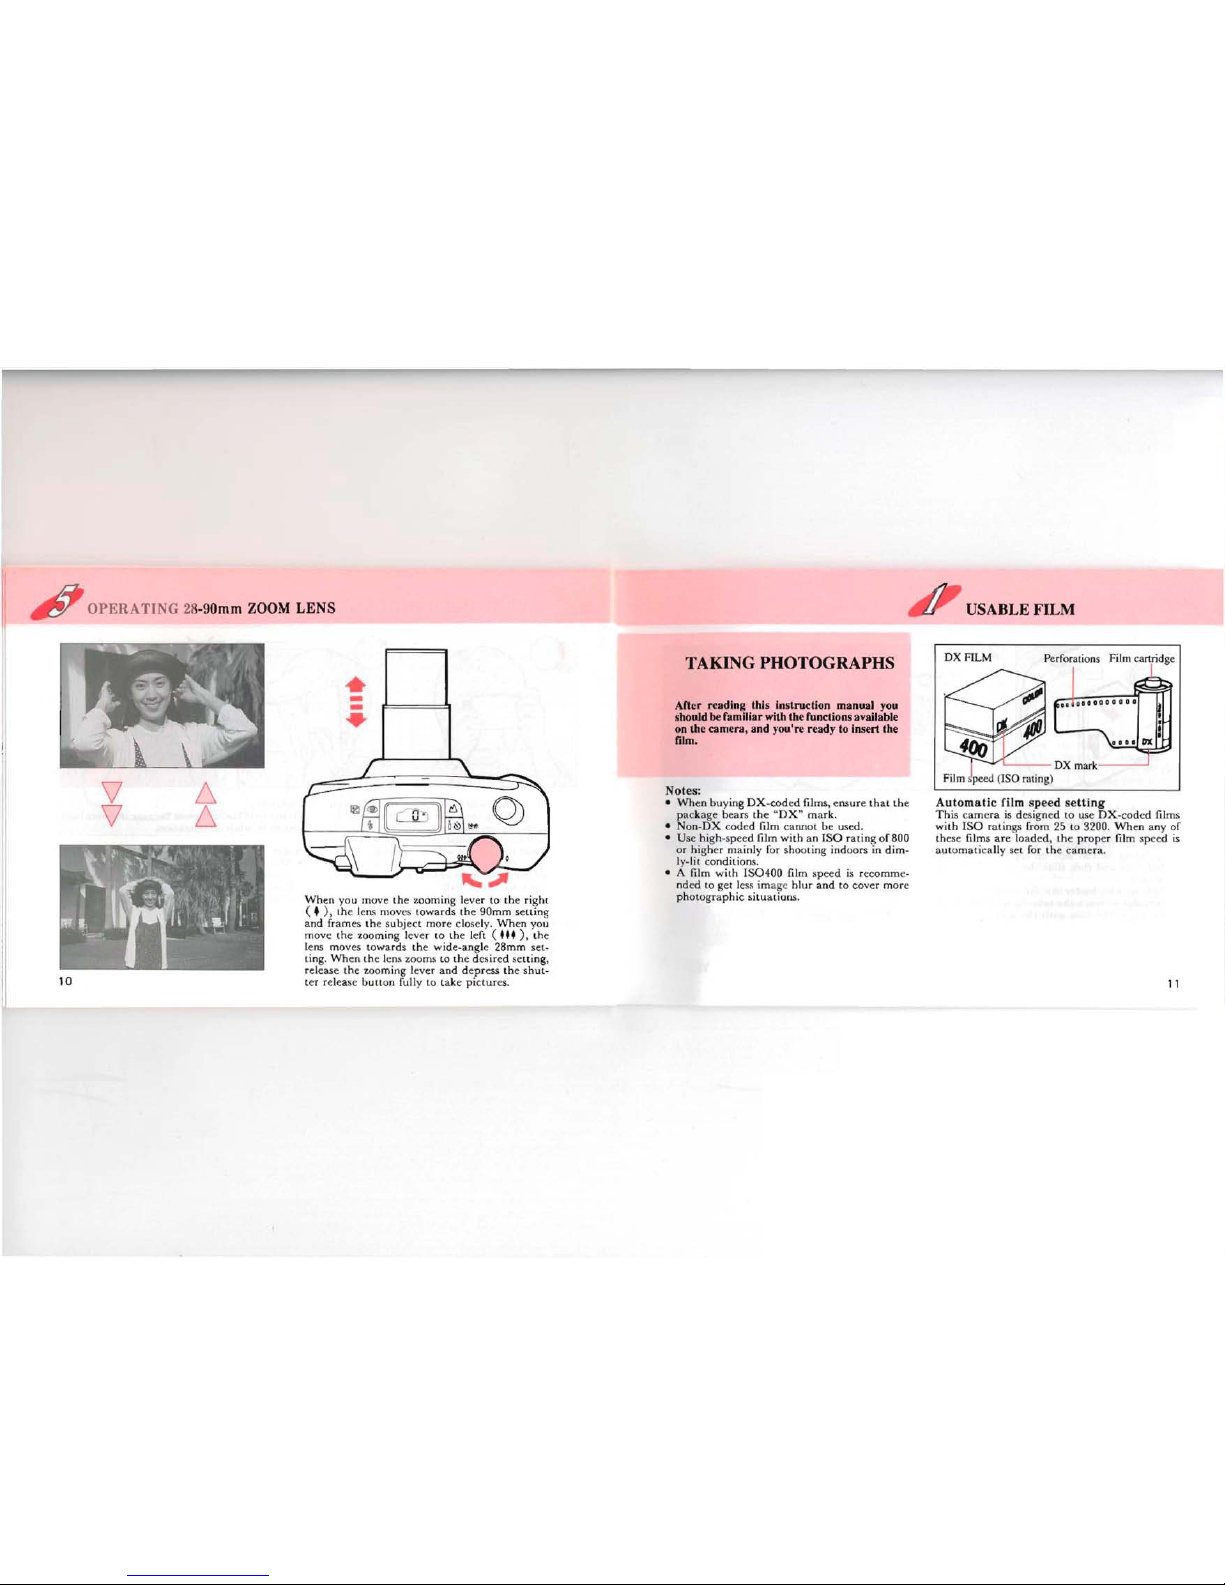
USABLEFILM
6,
6,
..
DX FILM
Perforations Film cartridge
TAKING PHOTOGRAPHS
•
Aller rcading this in
struction
manual
you
-
should be familiar with the functions available
on the camera, and you're ready to in
sert
the
-
film.
v
No
tes
:
• When
huyingDX-cod
ed films , ensu re
that
th e Aut
omatic
fil m speed se
ttin
g
V
pa ckage bears th e "DX " m
ark.
Th
is
came
ra is dcsigncd
ta
use DXc
cod
cd fil ms
•
Non
-DX
cou cd film ca
nne
t he used.
with
ISO
rar ings from 25 to 3200. When any of
• Use h igh -speed film with a n ISO
rat
ing of 800 rh ese film s are load ed , the properfilm s
pce
d is
or highcr maini)' for sh oot ing ind
oors
in dirn-
au to
rnat
ically set for th e ca me ra.
lv-lit co ndi tions.
• A film
with
IS
0400
film speed is recornm e-
ndcd
to l'et less image h
lur
and to c
aver
mor
e
photo
grap
hie situa
tiu ns.
Wh
en yo u move th e zoorning lever to th e right
( .
),
the lem ruoves
towards
the
90m
m seuing
and fram
es the su bject mo re closcly,
When
you
move th e zoom ing lever
ta
th e left (
...
) , the
lens m oves tow
ard
s th e wide
-ang
le 2
8mm
sel-
ling
. When th e le ns zoo ms to th e d csired sett ing,
release th e zoorning leve r a nd d ep ress th e
shut
-
ter rel ease bu rton full y io t ake pi c
tur
cs,
11
Page 9
FILM LOADING (Ensure the power is off before insertlng the film.)
Ch
I!
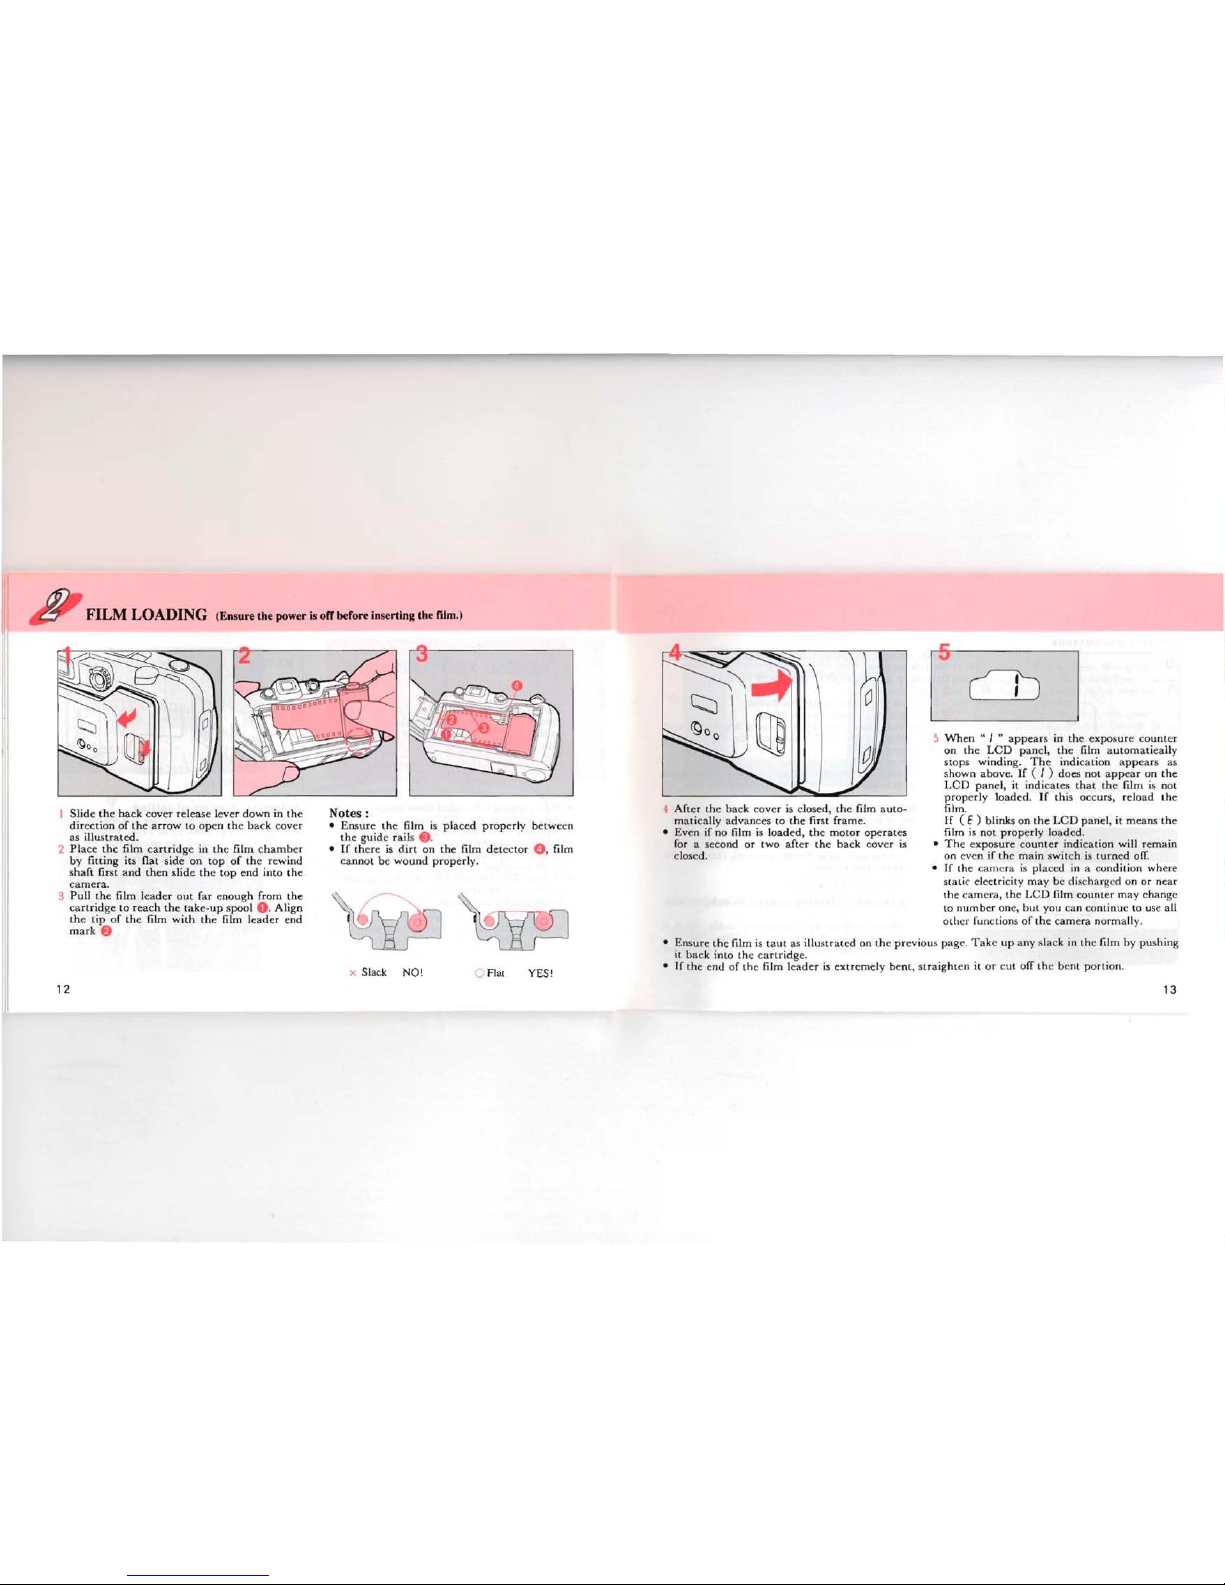
5 When .. 1 ..
app
ears in the exposure coun tcr
on th e
LCD pa nel ,
th
e film aut
ornar
iea lly
Il
s
top
s w
indin
g. The indi ca tion appea rs as
sha wn
above,
If
( 1) does nol ap pe a r on
the
LeD
panel, il
indi
car
es th a t t he film is n ol
prop
erl
y Ioad cd.
If
th is oc
curs
, reload th e
film .
Slidc the hack
cov
cr
rel ea se lever
down
in th e
If
( E)
blink
s on th e LCD panel, it m éans th e
dire
cti
on ofth e
arrowlaope n th e ba ck caver
film is nol
prop
erl y loadcd.
as illu
strat
ed.
•
Th
e expos ure count cr ind ica tion w ill r ernain
2 Pl ace th e film carrrid gc in th e film cha mber
on even if the main
switch is
lurn
ed off
by
fitting
ils Ilat
sid
e on
top
of th e r
ewind
• If th e ca me ra is pl accd in a co nd itio n where
sha fi firsl a nd th cn slidc
the
top
end
into
th e
ca mera .
sta tie eleetriciry m ay b e discha rgcd on or n c
ar
3
Pull
th e film le
ader
am
far enough fro m th e
the
ca m
era
, th e L
eD
lilm
cou rue r ma y cha nge
c
artrid
ge
ta
rea
ch th e
take-up
spool
O,
Al
ign la num ber one, h ut you ca n con tinue LO use ail
the
t ip of
the
film
with
th e film le
ader
end
ot
her
Iunc
tion
s of th e ca
me
ra norm ally.
ma rk
8
• Enm re the film is ra ut as illus t ra tcd on th c p
rcv
ious page .
Takeup
any slac k in t he film by pu sh ing
it back in to the
ca
rtri
dge .
•
If
the en d of the film lead er is
ext
rcrn ely b
eru
, srraig h ren il oreut air t he
ben
t por tion,
x Slack NO!
o n« YES!
12
13
Notes:
•
Ens
ure
the film is
pla
ced p
rop
erl y be
twc
cn
th
e gu ide ra ils
f)
.
• I f th er e is di rt on the film
det
ect
er
0 ,
film
ca nna t be w
ound
prop
erl y.
4
Afier
th e back ca ve r is closed, th e film a uto-
rnari c
all
y advances
ta
th e first frame.
• Even if no film
is lo
ad
ed, th e m
otor
operai
es
for a seco nd or IwO
aft
er th e back caver is
c loscd.
Page 10
14
LAMP INDICATIONS
VIEWFINDER DISPLAYS AND SHOOTING RANGES
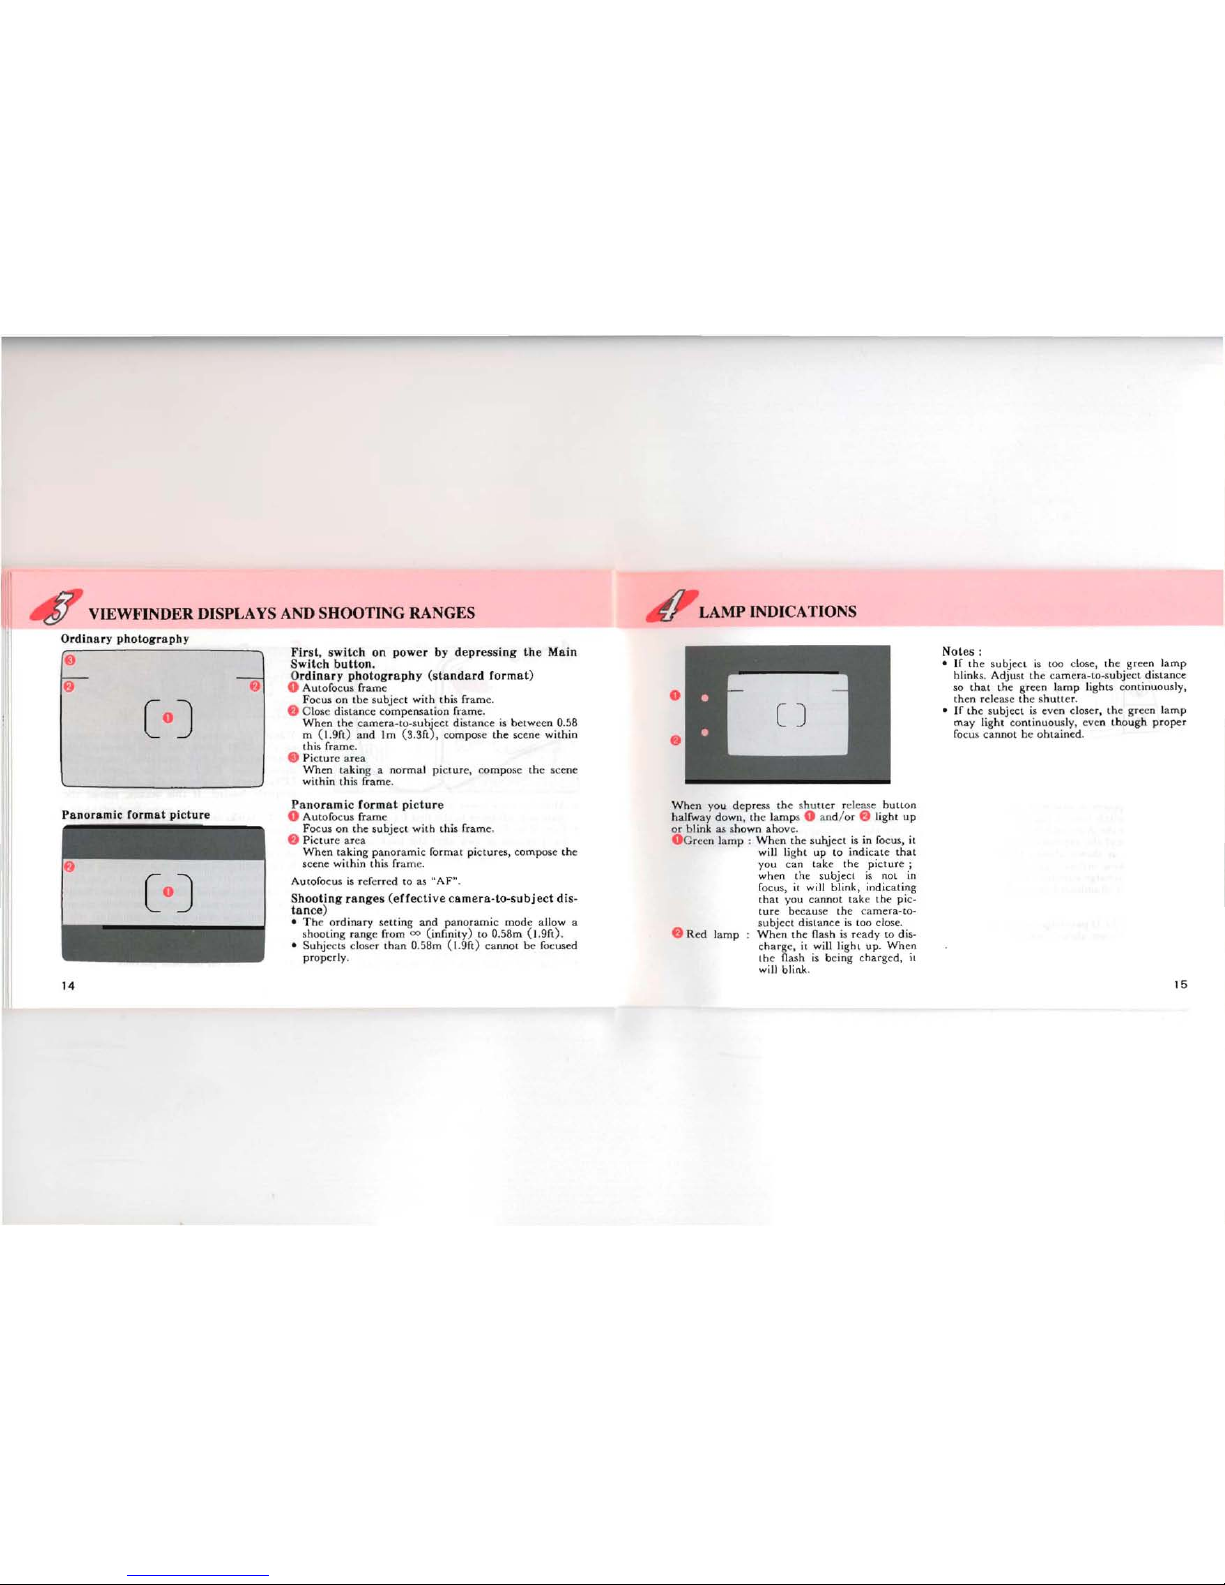
Ordinary
photography
First,
switch
on
power
by
depressing
the
Main
Notes
:
8
•
If the sub
jec
t is too close, th e g
reen lamp
Ord in ary
photography (standard
Iorrnat
)
Swit
ch
button.
hlinks.
Adju
st th e carnera-to-su bject dist an ce
~
~
o A utofocus fra me
so that th e gree n l
amp lights continuously,
Focus on tb e su
bject with
thi
s frame.
th en r clcase th e
shuuer,
e Close d isLan ce c
ompensati
on fr
ame
.
•
If
th e s
ubject
is
eve
n clos er, th e gr een l
amp
Wh
en th e
carne
ra-
to-s ub
jcc
t distance is
bet
wcc n 0.58
ma y li
ght
conrin uous ly, eve n th ou gh
proper
C
o]
focu s can na t he oh ta ine d.
th is fr
am
e.
Pic
tur
c a rea
Wh
en ta king a no rm al pi
ctur
e, com pose the scene
with in this
fram
e.
m
( 1.9fL) and 1
III
(s.
sm,
com p ose th e scc ne wi t
hin
Panoramic
Iormat picture
Wh
en you
de
press t
he
shuu cr relcase
hull
on
Panoramic
rormat picture
o
Autofocu s
frame
halfw ay
down
, the l
amp
s 0 an
d/
or e l
ight
up
Focu s on th e sub
ject
with
thi
s f
ram
e. or b link as shawn a hove.
e Pict ur c area O Gr cen lump :
Wh
en t he s u
hjeet
is in focus, it
Wh
en tak ing panor
ami
c for m at p i
ctur
es, co
mpo
se th e
will
li
ght
up to ind ica te
that
scene wirhi n th is fram e.
you can tak
e th e p
ictur
e ;
wh en the
subjec t is not in
Au tofocus is referre d to
as "AF" .
focus, il w ill bl ink ,
indic
ating
Shooting
ranges
(efIe
ctive
camera- to-su bject dis-
t
hal
yo u ca nnot Lake the pi c-
tance
)
tur
c b ecause th e ca m era-ta -
• The or d i
nary
s
ctt
ing
and
pan or
amic
mod e allo w a
subjc ct d ista
nce
is roo close.
shoo ring ran ge from
00
(infmi
ty)
to 0.58m ( i .sn).
e Red la
mp When th e fl
ash
is re
ady
to d is-
• Su hjecLs closer
than 0.58m (1.9ft) ca nnet be fo
cus
ed
c
harg
e, it will li
ght
up. When
pr
op
erly
.
t he flash is b
cin
g c ha
rge
d, il
will blink.
15
Page 11

DIOPTER
AD.JUSTMENT
ORDINARY
PHOTOGRAPHY
[Ch
L-.
1
Wh
en th e power is switchcd on h y d
epre
ssing
the
mai
n switc h buuon, th e cam era
autorn
ati-
ea lly selec ts th e Aut o and Sin gle-Frame Shooting modes and the cx
posur
c counrcr in dicat ion
remain s on as shawn a hove. T hese m od es ar e
uscd for t akin g
orùin
ary pi
ctur
ϥ. The bu ilt- in
flash will discha rge a
utomatieally
whe
n the sub-
je
ct is poorly iIluminat eù or in a backl igh t situ -
a tion.
•
Wh
en the L
eD
panel d isp lay is d iffer
ent
from
the one shown ahove (wh ich indica tes th ar
e the r
m odes are set) , swircbing powe r O FF
and then O N re
stor
es th e
Aut
o a nd Single-
Fram e Sbooting modes.
16
ON
•
Wh
en the built -in flash a u to
rna
rica lly dis-
Aim th e cam era tow ard a bri
ght
suhj
ect,
Wh
ilc
cha rge s, th e ca mera uses a
shutr
er spe ed in
looking through th e view fi
nder
, adjust th e diop-
the r
ang
e f
rom
a
~p rox
.
1/ 301h (28mm) 10 1/
ter by
turni
ng th e diopr cr aùjust ment d ial u nril
451h sec. (90
mm)
when
IS01
00 IiIm is used, the AF fram e ap
pea
rs clea rcst.
17
Page 12

18
11
TAKING PICTURES
Shooting
distance:
O.58m (1.9
rt)
.cx
'(i
nfi n ity)
1
Composing
the
scene
After zoom ing the lens an d co rnposing YO
Uf
scen c, focus on th e su bject with th e
autofo
cus
f
rame
in the ce nt er o f th e viewfin der.
•
Th
is cam era uses
rnulri-b
earn
AF
ta focus th e
lens on the
subj
cct . E
ven
if
th e s ub
jcct
is
slightly olT th c AF fra m e, th e
subj
ect will
cas ily be
brought
inta foeus.
• T a Iocus on a p
articul
ar
spot in
the
AF fram
e,
sele ct th e
AF
spot
mod
e. (See p ag e 34.)
ilili
•
Wh
en th e power is
turncd
on, th e
multib
ea rn
AF
mod
e is a uto rna ti
cally
sel.
2
Checking
the
lamp
indication
DClJreSS th e sh uu er rcl case
hut
ten
halfw
ay
down . Wh en th e s
ubj
cct is in focus, th e g reen
l
arnp
will li
ght
up. If th e subje ct is closer
than
0.58 rne ter ( 1.9
ft)
, th e gree n l
amp
will
blink
lU
warn
you . In th is case, extend th e ca m er
a-to-
su bjcct di st an ce un til
the
green larnp is lit con-
tinuou
sly.
•
Wh
en the
red lamp
ligh ts up, it indi cat es chat
th e
built-in
flash w ill discharge. Ensure th
ar
you ar e
wit h in th c Ilash e ffec
tive
ra nge before
shootin g.
(Se
c page 19.)
3
Shooting
D
epress th
e shu
rtc
r rel ca sc
buu
on full y,
and
th e
shutt
cr
will be reJ
eas
ed. Then,
the
film a utornat-
i
call
y ad
van
ces ta th e n cxt frame.
Notes :
• Wh en t.he
shut
tcr is relca sed, the self-r
ime
r
lamp
mumentaril
y li
ght
s up ta indi ca te th al a
pictur
e has bccn t aken.
• If
you
wish to focus on a no ther su
bjcc
r,
lif
t
your
linger from
the
sh u
tte
r rel ease
hutt
on
and d
epre
ss th e
shutt
er re1case
burt
on h aIf-
way
down aga
in.
•
Th
e shutte r can no t be rele ased whi 1c th e lens
is
zooming
.
Automatic
Fla
sh Emission
Wh
cn t
akin
g pict urcs in low ligh t or in a back-
li
ght
situ
ation, rh c flash will automatieally
dis-
charge.
Wh
en th e sh ut ter relca sc bu
tton
is de-
pre
sscd h
alfw
ay down in low ligh t,
the
red laml'
will li
ght up, ind iea t ing th e flash is r
eady
t.o
dis ch
ar
ge.
If
th e red
lamp
hlinks,
this
indi ca tes
thai
th e built -in llash is being cha
rged
and
the
shutt
er cal mol be released . T here fore, c
nsure
that
th e red lamp is lit eo
ntinuous
ly befo re
iak ing pi ct ures.
Red-oye
Shoot ing p
ortr
aits w it h the flash may
resu
lt in
"red -eve", th e red dot in
your subje
cr's
eye. T his
came ra in
clud
es a r ed -eye reduct ion flash fu ne-
t ion,
whi
eh redu ces the red-oye
phenomenon
by
using
pre
-flash. See page 22 an d 47 for
detai
ls.
Flash
effective
ra nges (Neg a-color film
used)
lens
ISO
100 20U
400
2
8mm
(U . )
O.58- 5.0m O.58- 7.0m
O.68
-9
.9m
90m m
(4 )
0.58- 2A m
O.58- 3.3m 0.58-
4.7m
19
Page 13

(Remove the film from the camera in the shade
or
use your body to
UNLOADING FILM
shade
the
camera
.)
...
~
.
.
-:
...
~
,..
.
"
cëtrJ
...
~
~ ..:
'1
1 Rew
ind
ing
the
film 2 Unlo
ading
the
fil m
Aft
er
you have
expo
sed
the
last f
rame orth
e roll,
Ta
un lo
ad
th e film, open th e
bac
k caver, a nd
1
the lens r
etr
acts
and
th e film re
win
ds au tomati-
rcm ov e the c
ar
tri dge fro m th e c ha m he r by pull-
ca
lly. T he n, t he
motor
sto ps, a
nd
(
0)
hl inks as ing the top o ut firs t with yom fing cr,
s
ha
wn ta i
ndica
te tha t the fil m has hecn re-
wo und.
Note
s :
• T he sh u tter
may
be relea sed a
frame
or two
• A 24-ex
po
sure ro ll
of
film t ak es ab out 20
even a û er
the spe
cificd number of f
ram
es h ave
seco nd s ta he rewo und. becn usc d u p as indica red hy th e nurnbcr of
111
1111
• D
ur
ing r ew in
din
g, the cxposure c
ount
er
shots
shawn
0 11 th e film can istc r, If this occ urs ,
counts f
ram
e nu rnbcrs in rever se.
th ese ex tra fra m es
may
he lost in th e
proce
ss-
•
The
ent ir e ro ll of film in
cluding
the film
ing.
lea d
er
is always r
ewound
into t he carr
ridg
e ta • Nevcr op en th e bac k cov cr unt il the whole
prevent any pa rt of the film being e
xpose
d LO
film ro ll is rc wound.
light.
l
20
~~g
,..
~
~~ ,~
.
~
...
Rewind
ing
a film in mid
-roll
If
yo u wis h ta unload a film be fore exp osing a Il
2
Whi
le de p rcssing t he d rive mod e b ur ton , de -
p ress t he sh u t rer re leas e bu
tton
. Film re
win
d-
t he fr
am
es.
helow ,
foll ow t he
pro
ced ures d escrih cd
ing s t
arts
. W hcn a ro ll of film is rc
wou
nd ta its
end , th e mo to r sto ps an d
(
0)
blink s, ind ica t-
ing t ha r t he ha ck cover ma y be o pe ne d sa fely.
Tur
n th e m a in sw itc h O N a nd h
old down
th e
d ri ve
bu
rt on for
more
th an 3 se co nds.
(
~
)
app
ear
s a nd ( ) st
art
s b link ing on th e
Le D pan el, ind ica ti ng t
ha
r th e m id -roll film
rew indi ng mod e has been se t.
21
Page 14

(HOW TO SELECT MODESIRED-EYE
TA
KING
BETTER PHOTOGRAPHS REI)UCTION FLASH MODE)
To
set
various
exposure
modes,
deprcss
the
Mode
Butto
n O.
To
set
various
shooting
modes,
depress
the
Drive
Button
e.
Auto Daylight- Slow-S huue r ••Slow -spccd - Bulb Bulb -sync
1
Syne speed sy ne
(l'lash-OFF) photography
l
QIT]-
1
~
r
CIJ
-1~ r
[il
~
LD--0 -
B-
Œ]-1
1
Si ng le
-l'
ram e Self-Timer
Remere contr ol M ul ti-Exposure
shoo ting shooting
shooting Shoo ting
• In a ny cxpos
ure
and/or s
hoot
ing mod e, ir the
burto
n 0 a nd e ar c d
cpr
cssed a ûer the
shutt
er
is
L I . T0.l.et variou s req u ired mod es,
depr
ess
the burton
0 , e
and
/
rele ased , th e A
uto
and Sin gle
-Fr
am e modes will r
etu
rn respe
ctiv
ely.
or U .
• H
olding down
the
Drive Butt
on e for m
ore
than
thr
ee seco nds se ts th e mid- roll rewinding
mod
e
• For
normal
use, set the Au to and Single
-Frame modes as sha wn
(See page 21.) .
on the lcfi . When the
power
is
switched
on, th e
Auto
and
•
Hold
ing
down
the Red-eve red u
ction
Oash
burto
n e for
more th
an two s
econds
sets
the
Exp
osur
e
Single- Fram e Sh ooting mo des a re au
toma
tically sel.
com pe
nsati
on m od e (See pa ge 38).
To
set
various
focusing modes.
depress
the
Landseape/Eas
y Pic. Mode
Button
e.
Red-Eye Reduction
Flash
Function
Toreducethe
red -eve ph
eno
rnenon in th e p i
ctu
rc, d ep ress the red-eve r
edu
cti on Oash
burton
(
<1»
With
tbi
s m
ode
, the flash discharges
two
consecu t ive times, re d uci ng th e ap pea ra nce or
the
red- eve
effecr, T o can cel the
mo
de,
depr
ess th e red-eve r
edu
cti on
butt
en again,
~
L
D-
0 -
B-
0
J
1
Autofocus
lnfinlty-
Spot A I'"
Easy Pic. shooting
shooling
landscape
shoo ung
shooti ng
23
22
I
I I
~
Page 15

DAYLIGHT-SYNCHRO SHOOTING
Depr ess the
Mode
Butt
on
unt
il th e
(
~
)
sym ho l app-
ears on th e L
CD
pa
nel. T he flash
a
~
~
will d isch ar ge in
=
both d
ark
and
bri
ght
con d itions. Whcn a p
ortr
ait
is t
aken
w
ith
the subj ect in a ba ckli
ght
sit
uat
ion, th e fron t of
the subj eet may be
cast
in shado w. In sueh a
case , use th e Dayli
ght-Syn
ch ro Sh o
otin
g mo de
(Flas h-ON
mod
e)
within
the flash -effect ive
range to tak e p ict
ur
es.
This
will e
nsure that a
picture is weil ex
pose
d wi t h
out
an y
sha
dow,
When
you wish to
discharge th e flash , use th is
mod e. In
this mod
e, th e flash will always di s-
cha rg e.
Notes :
•
Ensur
e th at the red larn p on the lef
t-h
and
side
of th e vicwfinder is lit whcn th e sh uu er rel
ease
burton
is d
epre
ssed
halfw
ay d
own
before
s
hoo
ting. A red la
mp
blinking indi cates that
the flash is be ing e ha rged.
•
Ensur
e y
ou'r
e wit hin th e flash effective r ange
even wh en yo u use the bu ilt -in flash as a lill-in
flash in
davli
ghr
, (S ee
pag
e 19
).
24
Wi th ou t D aylight-Sync
TAKING PICTURES
AT
A SLOW SHUTTER SPEED
~
i~
n[[t=1:J
J
Slow-SpeedSynchro
Shoot-
ing'
(Flash-ON)
D
cpr
ess the
M ode B
utt
on to
set the Slo w-
Spc
ed-
Synch ro
mod e
until
th e
(
~
!,J) sy mbol appcars on th e
LC D pan el. IL is poss ible to photog
raph
su b
jec
ts
and
bac
kgrou nd in a
ba
lan
ced
way (as show n in
the pho
to)
by using tbe bu ili-in flash 10 p ro p
erly
expose the foregr ou nd s
ubje
ci and a S low-
Shuu er-S pccd l O
expose
the luw light back-
gro und.
~
[tt=I:
J
1
Note:
• Wh en shooting in low li
ght,
the shut
tcr
spec
d
gets slower, a nd
cam
era sha
ke is likcly to
hlur
you r pi crure. Use of a tr ipod is recomrn errded .
25
Page 16

Il 1
BULB, BULB·SYNCHRO SHOOTING
SELF-TIMER PHOTOGRAPHY
o
Sclf·Timer
1
Bulb
mode(ci)8)
D
Use th e S
elf
.
1
Dcp ress
the
IJ
Timer
if you
Mode Burton
•
wish ta get in th e
unt
il ( ci) 8 )
• . J.
pieture. Use of a
syrn
bol
app
ca rs ."
""..
Il
i
tripod
is recorn -
on th e L
CD
mend
ed. Depress
pa nel. T he sh ut tcr roma ins open up to 10 min-
the
Dri
ve Bu rton
until
the
(
<::»
sy
mbo
l a p
pea
rs
ut es as long as t he shu trer release bu rton is he ld
on th e L
CD
pa nel.
_._ ',:."'
.' :
;.
~
..:./,';.
:<1
1~
1
duwn. Thi
s mode is usefu l fur long exposu res
.
~
1"
. " ;....;J~_.~ ~ i
~~
~ . ~,
~,J
.::..1
,~r
~~
r
~
~~~
-
rcqui rcd fur shooring Iircwor ks
and night
sccnes ,
~
.i
lo
'.. ••
•.
•
"-;",,," ~j.
.
~:'
•.
,. ..:-.
for instance.
Wh
en usi ng ib is mod e, the came ra
should be mo unted on a
t ripod so th at th e
camera will he
steady.
Bulb
mode,
approx.
5 se c. ( ISO 100)
1
Focus on th e subjects first by d
epr
essing th e
sh
uu
er rel ea sc b u rton halfway down , and rhen
1
r
depress the shu tre r release burton fully.
Th
e
s
huu
cr will be rclcased in
abuut
10 second s.
Wh
en th e Self.T imer is work ing, t he Self.Ti mer
1
~
Bulb-synchrn
sym bo l
(
<::»
blinks on the
LCD
pa nel, and the
<§)
1
: .~.rl.Î ~
mode
(
~
B )
S
elf-Ti
rner l
amp light
s up. T he l
amp star
ts bli.
••,_ _ 1J "' . Depr ess th e
Il
nkin g 3 seconds b efore th e shu tter is relcased,
ij
:
i~
Mode Butt on
l
ett
ing you knuw
when
ta smi le.
unt il
( ~8
)
syrnbol ap
pea
rs
(
1
on the LCD pa nel, this lets you use t he flash in
ad di
tion
tu
the
Bul b
mode
, so yo u can tak c a
port
rai
t ph ot ograph wit h a night sccnc in th e
backg
rou nd, for cxar np le.
26
27
-
~'
(
-~
1
,.,._....
/ __1
~
/
'D I
<, 1
1
/ 1 1
'" '.( !
~
- -
.-:::
-~ .-----:=:-:::.
<,or'
"
Page 17

Notes on
the
Self-Timer
shoot
ing
• K eep in mi nd th
at
when
starting th e
Self-
Tim
er wh iIc s
tan
ding in front
of the
ca
mera
, the
came
ra may
not
focus th e
subject .
• T o ca
ncel
th e
Self-Timer
at a ny
time
afrer ir's
bee
n ac tiva ted , p us h t he mai n
s
wite
h. In this
instance
, t
he
powe r w ill
not b e
turn
ed oIT.
•
Wh
en
you
wan
t to use th e flash w ith th e
Self- T im
er,
ens ure tha t t he re d lamp is
lit
indi
ca t ing the fla sh h as becn eh a
rge
d
be fore op cr at in g the S elf-T im er.
•
Wh
en
the
Bu lb mode is use d in eombi
na-
tian wir h
the
Sclf- T
ime
r, a shutte r
spcc
d
of
approx
, 1/ 2 sec. is au to
rnat
ica
lly selec-
red.
USING THE WIRELESS
REMOTE CONTROL (OPTION)
If
you
have
pur
ch ascd th e optional
wir
eless
rcmo
te cont ro l,
read
th is se
ction. The Wi rcl css
Rernot c
Con
tro
l a llows you
ta
a
djust th
e focal
len gt h in st eps
of
28, 90, 50, 28 and tr ip t
he
shu u er a t a di st ance.
• Us e a tripod whe n sh oo tin g w it h the
Wir
cless
Rcrnotc
Control.
• When
the
Remote Con
tro l is uscd ta t ak e
p
ictu
res, th e Single
-Frame mod
e ca n he usc d
in
cornhinat
ion with
any
of
th e ex posu re
m
od
es. T he Sel f-Time r sh oo ting a
nd
t he
Mul-
ti-Ex po
surc
modes
canne
t be used in thi s case .
•
Us
e the R eme re Cont rol ta take pi
ctur
es in
the Bu lb
mod
e ta
avo
id ca m era sh ak e. WhiIc
th
e R
emo
te C
ont
ro l's s
hurrerre
lease
burt
on is
hel
d d
own
, th e
shutrc
r re rn ains
ope
n.
Remote Control
Shooting
mode
D
epr
ess th e camera 's Drive Button unt il th e
(m:I.
J1)
syrnb ol ap
pears
on th e L
CD pan
el.
Removing
the
Wireless Remote Control
Remove the
Wir
d ess R em ote
Contro
l l'rom
the
Rem ot e
Con
tro l H
old
er in the di r e
cti
on
of
th e
ar row.
Name of
parts
Sh u tte r release bu
tton
28
29
R e
mer
e c
ontr
ol transm iner
Page 18

~
,
=
L
Blinking
Lamp
Wh
en t he R emot e Cont ro l Sho
oring mod
e is sel
on
th
e c ame ra , the S
elf
-Tim
er la
mp
on th e
front
of
th e ca m era
blinks
slowly, i
ndi
car in g t hat y ou
ca n
take pi
ctur
cs w
ith
th e a id
of
a Re
mer
e
Con trol.
Wh
en
th e eame ra is sel in th e R em otc Con trol
Shou
ring mode a nd left unu s
ed
for 10 minutes.
th e camera a u tomat ically switches itself off to
sav
e ba t te ry power.
Pus
h th e camer a's Main
Sw irch ag a in to t urn it On.
Taking
Pietures
Com
pose th e sccne and frame th e subj cc t with t he
AF frame. Aim the Rcrnotc Com rol Transmiu
cr
low
ard
s th e R crnore Control R ec eivcr on th e
camera, and then d
ep
rcss t he R ernot c
Con
tro l' s sh u r-
te r
rclc
ase bu rto n fully tu re le ase th e sh u u er ,
• T he Sclf-T imer lamp bli nks rapidly for 3 seconds
and
th en t
he shuu
er is rclea scd ,
If
th e sh u ttcr is
rel eased by th e ca
rncra
's rcl cas e b
uuu
n, p ic
tur
es
w ill
be Lak en in the ordinary s
hoc
ring mo de.
• Foeus canne t he lockcd when th e Rernotc Control
is in use .
• The subj cct framed in the AF frame will be in
focu s whcn th e R e me re Coru ru l's sh u t tc r r clease
bu rton
is d
epr
essc d.
Operating
Distance
of
the
Wireless
Remote Control
From
the
camera
's
front:
within
approx.
5
m str a ight in
front
of
the
camera
• The R
emot
e C ontro l may notwo rk in a back-
li
ght
sit uatio n.
In
Ibis case, use
the
carne
ra'
s
sh u
tte
r rel ease burt on in the Sel f-
Tim
er mo
de
to rake pi ctures,
• The Rem ere Cont ro l docs no t w
ork
whi le the
b
uil
t- in fl
ash
is be ing eharged.
Zooming
using
the
Remote Control
Wh
en th e Rcmorc Cont ro l T ra us m it te r is airned
tuw a rd s th e ca rnera's R emot e
Cont
ro l R ee eiver,
ea
ch
time y
ou
dcp rcss t hc zoum ing b u rton loc-
ared o n
th
e Rem ot e Cont ro l, th e lens zo om s and
stops at src ps
of
28,90,50 a nd 28mm fo
cal
lcn
gth
se
tri
ngs con rin ucu slv .
• Be fure using t he R e m ote Cont ro l to
zoom
the
l
en
s, frame th e sub
je
ci rhrough
the view
lind-
er, usin g the
90mm
sctt ing.
Oth
cr w ise, th e
s
ubject
ma y be out of the pi eture a rea when
the
lens is zou rned.
Batter
y Iife on
the
Remote Control
Ab
out
30,000 c
om
ma nda ea n be issued usi ng th e
R ern ot e Control with
a baucry inst a llcd,
Hav
e
ex
ha
usted b
att
cry rcp la ce d at yo
ur
local P
enr
ax
Service center
if
th e b attery is cxhausted ( rhe re
is a ch arge f
or
th is serv ice ) .
30
31
Page 19

32
MULTI-EXPOSURE
SHOOTING
Multi
-Exposure mo d e will disenga ge th e f
ilm
advance, le u ing you
superimp
ose images on a
single frame for f
ant
ast ic illusions .
Y
our imagin
ation
can produ
ee st riking c
rea
tive
cfle ct s,
l
ifJ
~
Procedure
1. D eprcss th e Drive
Butten
until
the sy rnbol
(~ )
a
ppea
rs on th e L
CD
pa nel.
2. D ep ress th e shut ter rclcase b u rton
1O sho ot a n
initi
al exposure. T
he
film
will
not adva
nce
,
th e f
ram
e COU m er
indication
an d
(
~)
hli nks
on
th
e LC D panel to in
dic
ate rh at you a re in
the M ult i-e x
posu
re mode.
S. R ec
ompos
e the frame, and depress the s
hutt
cr
release b
urt
on ta
shoo
t th e
seco
nd e
xpos
ure
.
Aft er the second shot , ih e film will
advanec
an d th e Single-F ra me shoo ring
mod
e w ill be
res to red .
Notes:
• T a expose or marc, d
epr
css th c drive h ut te n
unt
ill th e
(~ )
re rna ins lit afre r the srcp 2
ab
ove, an d the n dcp ress th e sh u trer rclease
bu u on ,
•
Th
e d at e will be ex
pose
d in step 3 above on
th e Dat e
mod
el.
• R
ep
cat ed mul t
iple
exposu res lend ta over ex-
pose a fra m e, sa
it is rccornrn
cnd
ed th ar
you
expose a fra me just tw ice or 3
tim
es al most.
•
Wh
en usin g M
ult
i-Exposur e mod e, you usual-
ly get th e best re su hs
with
dimly-li t back -
ground
, s uch as ni
ght
scenes.
INFINITY-LANDSCAPE SHOOTING
I~
~~
~
(O ·
.~ jl
'
~
;&
1- 1 ',_,
1---
11-,
-..:
~
When
you wish ta rak e a sh
arp picture of
a
dist
ant landscap
c or a dist
ant
subj
ect
rhr ou gh a
window
, th e infini ty-l
andscape mo
de a llows
you
ta
captur
e dist ant sccncry w
ith
clar ity.
Depr
ess the
Landscapc/E
asy
PIC
. Mod e
Burton
un til th e
(
~)
syrnbo l a p
pea
rs on th e L
CD
panel.
• Aft er th e pi ct ur e is tak en b y fully d
epr
essing
t he
shutt
er rcl casc but
ton,thi
s mode is eanc e-
led .
•
Th
e nash will
not
disch arge in i he Auto
expo-
su re mod e.
33
Page 20

34
SPOT AF
SHOOTING
~
[
C
45!
F
~
IA
\
'--
.
'-
,"-
~
IY
1~
Sele
ct
the
AF
spot
mode ta focus on a
partieular
spot
in
the
fram
e.
Switch to Spot AF mode
Depress the
Lands
cape/Easy
Pi c.
modc
button
sa
that
the
(SPOT
AF)
appears
on
the
LeD
panel
imli
cating
rhat
Vou arc in th e
spot
AI-'
mode
.
Focus on the
subject
F
ocus
on the s
ubje
ct w
ith
the
Spot
AF
frame
(
(J
) in th e c
enter
of th e vi
ewfind
er.
•
When
the main subj ect is
out ofthe
AF frame
in
th
e cent
er
of
the
viewfind
er
wh en co m
po
s-
ing your
picture,
use
the
focus-lock
technique
(S ec
page
36.) .
•
Th
e l
amp
indi
cations
and pi
cture
-taking
pro-
cedure are sim ila r as
explained
for
mult
i-
bearn
AF
.
EASY PIC. SHOOTING
~
[O)
~
~
~
'.-
i~
1--
)...:C-
W
ith
the "Easy Pic." shooti ng
mode
, foeus is
fixed at 2.9
meler
(9.5ft )
and
th e
focall
ength
of
the
Jens is also Iixcd a t the 28m m
wid
e-angle
posit
ion.
This provide
s gr ea te r d
cpt
h of field ,
and no ne cd to
worry ahout getting out offocus
pi
cturcs,
Please use th is
mode wh
en
you
ask
som eone ta
tak
e yo u r pi c t
urc, when
shoot
ing
quickly
, or wh en close-distanc e s hoot ing t hr-
ou gh a
wind
ow,
1, D
epres
s the
Landscap
e 1 Ea sv Pi c.
Mode
Button
un til th e
(~)
syrnbol
appears in
the
I.CD
pan
el.
ln
thi s
mod
e the 28rnm
wide-ang
le foc
allcngth
of
th e Jens is selec t ed
autom
at ic
allv. Vou
arc
not
able
ta change focal l
cngth with
th e
zooming
lever.
If
Vou
rnov
e th e zo
oming
lever wh ile in
thi s
mod
e,
the
(
~)
syrn ho l srar ts blink ing ta
warn you .
2,
Tak
e a
pict
ore by
dcpr
essing the shu tter
release
butten
.
This
mode
sels
the
lens focus ta cave r a
wide
range
of
approx
. 1.2
meter
(3.9ft) to
infinity
under
.bright
sun
light,
Even w
ith a dark
suhje
ct
vou
ca n still
obt
ain
proper
focus if
the
sub
ject
di
stan
ce is
between
approx,
l.8meter
(5 .9ft ) to 8
met
er
(26.
2ft).
If
you
take
a p
icrure
with
flash
please
make
sure
the su bject is
with
in
the
flash e ffect ive
shooting
distan
ce.
(Sec page
19)
Th
e flash eff
ective
range
of
thi s
mode with
ISO
100 to 400 film is
betwe
en
l.8m (5.9ft)
to 4
.6m
( is
.in
).
The
lens fo
cal
length
cannot
he
changed with
th e
zooming
buuon
on
the
Rernote
Control
when
vou
are in this
mode.
Ta
ca neel
this
mod e
depr
ess
Eas y Pi c. M od e
Butt
en aga in.
th
e
Lands
cape
/
35
Page 21

36
FOCUS-LOCK SHOOTING
,>- Ji
If
you s
hoot
with
ou t positioning the a
uto
focus
fr
am
e «
(J
) on th e m ain
subj
ect of th e illu
str
a-
tion as shown
abo
vc, on ly the ba c
kgrou
nd will
he in foc us.
Wh
en th e m ain suhjcct is off the
au tofocus fr
ame
in the center of th e
view
lind er ,
use the focus-Jock te
chn
iqu e.
(Focus lock is th e Iun ct ion to Jock Iocus.)
'
......
..,,
,.-.,
'~.[
J
Focu s on th e su h
je
ct
with
the a utofocus fra me
«(J). .
Wh
en you wish to focu s on the face, wh ich
ap pcars
very
sma ll in the vicwfinde r, focus on
Note:
the ch est inst ead to fill th e focus fr
ame
with
• You ca n release focus lock simp ly by lifting
mor e or th e s
ub
jcct.
your finger from the shu u er release
butten
.
2
Wh
en th e
shu
tte
r release burton is d
epr
essed
halfwa y down , th e grec n l
arnp
on the lefr-
h
and
side of the viewfinder li
ght
s up and th e
exposu
re and f
ocu
s are tem por arily lockcd,
3
Whil
e d
epr
essmg th e
shutt
er r elease b
urton
halfw ay, rc
-aim
th e camera or recompose the
pi
ctur
e, th en rclc ase the shu trer.
Hard
-to
-autofocus
subj
ects
Lik e
ma
ny e ther
autofocus ca me ras, th e
camcra's a uto focus system is hi
ghly
pre-
cise, but nut pe
rf
ect o Sorne subjects
may
not be focused as you wish. In suc h a case,
use the focu s-lock te
chn
iqu e on a su bject
near th e
act
ua l one
and
equidista n t
fram
the lens. Su bjects whieh ma y fool th e
syste m incl udc :
1. Bla ck ob
jcc
ts like
hair,
whi ch d on
't
re-
Ilcct rnu c h li
ght (and th ereforc d
on't
reflect
inf
rared aut ofocus beam s ),
2.
Wir
c n
ell
ing, la u icc
wor
k, ira n exe rcisc -
ba rs, etc .
3. Flieke rin g li
ght
sources suc h as neo n
signs, fluoresc
ent lamps
, TV images, sun-
light coming
through
trees, etc. a nd sub-
jecis illuminated by thesc light source s.
4. Glossy an d refl ccri ve surfaces lik e glass,
m
irr
ors, ca r bod ies, etc.
5. Fast-rn oving ob
jc
cts, likc trains o r auto-
m
obi
les in
moti
on.
6. W at cr jets, waler su rface, srno kc, flarn e,
. firew
ork
s, eic., which have no dis tin ct or
consistent form, or a suhjec t in rnist.
37
Page 22

38
EXPOSURE
COMPENSA
TION
Exposu
re
comp
ensa t ion is a n adjust rne nt to b ri-
ght
cn or d
ark
en th e whol e pi
ctur
e when ShOI in
hi
gh-contr
ast li
ght
ing co nd itions. U se th e " +
..
side
for sit ua tions w
ith
bri
ght
ba ckgr
oun
ds o r
th e "- " sid e for
situati
ons where th e ce nt ra l
su bjcct is
10
0
bri
ghtl
y lit fro m t he Iront . Ex po-
sur
e compensa tion is po ssihle in th e range from
+ 3E V to - 3E V in O.
5EV
stcp.
Thi
s co m pe nsa -
tion ca n be uscd in corn hi
nat
ion w
ith
th e varion s
cxposure set
ting
.
• E
xp
osur
e compensat ion do es not w
ork
in the
Bulb
or B
ulb-S
ynch mo de .
• C
onfirm the compe
nsa tion va lue,
hold
down
th e R
ed-
eve r
edu
ction butten
for approx. 2
seco nds.
•
On
ce the cxposur e
com
pensa tio n is set, th e
compensation valu
e will be storcd in m cm or y
until
th e film is
rcpla
ced. T o ca nce l exposurc
correct ion, resct th e co rr ec ted va lue to ± O.
Setting
the
exposure
compensation
H
old down
th e R
ed-ev
e r
edu
ct ion flash
burton
for about 2 se
conds
to
make the
exp osurc com-
pen sat ion
mark
(
lil
), (0 )
and
(
~)
blink
.
Whil
e h
oldi
ng
down
the Red-
eve
redu
ction flash
hu
tten
, rnov e t he zoo ming l
ever
to th e r
ight
or
th e left
unt
il the d esir ed
compensa
tion value
ap
pca
rs, H
olding
thc
zoorning
lever
fully to th e
ri
ght
or th e le fr will a dv an cc
the
digit cont inu-
ously, Aft er th e c
omp
ensation
valu
e has b een
cnrere
d, th e eo m pensa tio n m
ark
(Ir
) or ( ~ )
ap
pe
ars on th e
LeD
panel
eve n if th e lever is
releas
cd,
indicatin
g t
hat
th e exposure compen-
sa tion is ac tivar cd.
TAKING PANORAMIC FORMAT PICTURE
Vou ca n
swit
ch b
etw
een
the
pan
oramic
format
and standard
format pi
ctur
e taki ng mod e in th e
middl
e of the roll by m
ovin
g th e
panorama
mode swi tc h, T he p an or amic f
orm
at pic
tur
c
allows
hor
izornall y posit ion cd
dyn
arnie
pi
ctur
cs
10
be
tak
en ( 13X 36
mm
on film ) .
DI~[J
CJ
2
Taking a panoramic
format
picture
Co mpose th e sc enc
with
in the
panorami
c
f
ormat
fra m e, a nd rh en full y dcprcss the sh u t-
ter rele a se
butt
on to take a p
anor
ami
c format
pi
ctur
e,
•
When
th e carne
ra-
to-s ubject dist
anc
e is less
Switching
to
the
panoramic
format
pic-
[han 1rn,
pa
nor a mic fo rmat
photography
is
ture
not re
cornm
end
ed due to a sub stant ial
diff
er-
Move
the
panor ama mode seleetor
switeh
to
cnce
hct
wccn wh at you see
rhrou
gh th e view-
(p)
to selec t th e p an or
ami
c for mat
mode
.
finde r verses
the
image you will ob ta in th e
a
ctu
al pi ci ur e l
akin
g area ; o ther wise ko
own
• When the f
orm
at is sw itch ed tapanor
ama ,
the
as par allax.
vi
ewfind
er switches to
the hori
zontal pano
-
r
am
ie f
orm
at fra m e.
39
Page 23

40
Th
e m
ark
"_.,indi
eat
es th e position
wherethe
dat e
and
rime
ar c
imprim
cd.
The DATE
MaDEL
allows you to record
DATE
inf
ormation
in th e panoramie
mod
e in a
simi lar
manner
to th e sta ndard pic tu re t
akin
g
mod
e. Sec "DA T E
MaDEL
fl
on pag e 42 f
or
det
ail
s. The
dating
unit
autom
ati
eall y switches
the
DAT
E pos
ition betw
een the st
and
ard
and
panorama aeeording to
the form
at m ode selec-
ted.
NOTES ON
THE
DEVELOPMENT OF P AN-
ORAMIC FORMA T
PICTURES
•
When
dev el
oping the
film ,
if
you
hav
e tak en
on ly p
anoramie fo
rmat
pictures on
the
entir
e
roll of'filrn, tell th e clerk at th e
pro
cessing lab
to
develo
p th e film wi th onl y
the
panorami
e
form
at , Ifth ere arc
bothpanorami
c a nd sta-
ndardform
at p ho tog ra phs on th e film , ask th e
c1crk to dcvcl
op
the film
with
hoth
stan dard
and
panor
amie
form
at.
•
The developrn
ent
of panorami
e form
at piciur
es is a mo re tirne-c
onsuming and expensive process
than
that o f st
and
ard pictures,
Ple
ase co nsu lr
the
pro
cessin g lab for m
ore
det
ails.
•
Pan
oram
ie f
orm
at
pro
eessing faci litics difTer
dep
cnding on the area
and
requir
crnents. Y
our
local
film
pro
ccssor or ca me ra d eal er s will ad vise you on ail the
opti
ons a
vail
ahl
e to you .
•
With panor
ami
c for m at pict urcs, onl y
the
middl
e ar ca of the frame is
expos
ed, T he
nurnber
of
exposu res a va ila hle in the pan
orami
c f
ormat
is equivalent to th at of th e
stand
ard
phot
o size.
• Whcn the
pan
orarni c form at pic
ture
is
printedwith
a s
tandard size
format,
the
black
croppedareas
will
app
car on
the
top
and borrom
of th e pi
ctu
re.
41
Page 24

DATE MODEL
If
you
purchas
ed the
DATE
mod e l, r
ead
th is
sect ion.
The
DATE
model records
dat
es up ta
the year
2019 on pi
crures,
o
~
M
ode
butt
on
e 1 SELECTI
Sele
ct
burt
on
e IADJUSTI
Adjust
button
42
Switching
the
Mode
At
eae
h pr ess of the
Mode buu
on 0
with
your
fing
ern
ail, the m
ode
on
the
LCn
pan
el
switches
as s hown in
th e chart.
Notes:
" " ind i
cate
s no data will be irn-
pr
int ed.
•
::M
" on
}he
LCD
pan el
indicate
s
Month
.
• U se tb e st r
ap
cram p 's
protru
sion
to d
epress
the
Sele ct
and
Adj ust
buttons,
*
Tb
e d
ate
in
the
picture abo
vc is
sirnular
ed .
1Year
~t
~
Oay 1
t
[O~ v~ I,l~!~ 1
t
C=
I
t
1~~Y
e a
· 1
t
1
D
aY ~OI't"~;af
1
Correcting
the
date
l. D
epr
ess the Select
buu
on e to rnak e a difT
er-
eni ea t ego ry
of digits
on
the LCD
panel you
w
ant
ta
cha nge bl ink.
2.
Depres
s th e
Adjust
but
ton
e co ch
an
ge digits
of
th e s
peci
fied category you c
hose
with ihe
Sele ct
hutt
on e. Di git s in
creas
e by one
eac
h
cime yo u
de
press the
Adju
st
bu
rto n e.
Hold-
ing down th e
burton
will
advan
ee d igits co n-
ti
nuo
usly.
•
The blinkin
g " : .. all ow s precise
fine-tunin
g of
th e int
ern
aI clo ck
lU
the
beginning of a sp ec i-
fied m inute.
To
do so, d
epres
s th e Select
butten
e to rn ake th e " : "
blink
, and chen
d
epres
s t he
Adjust burt
on e in syn c w
ith
a
time
signa l.
3.
After
th e
data
has becn adjusted{
depr
ess
the
Select
burt
on. T he
bar
mark (-)
appcars on
th e
LC
D p
anel, indicating that
data irnprint-
ing c ho ices a re
po
ssible
.
•
If
you rcl easc the shutrer
whil
e th e
blinkin
g
dat a is b cing eo rrec te d , th e
data
can no t be
i
mpr
int ed .
•
Nu
meri cal indication
Y
ear
= 87-1 9 ( 1987-20 19)
Month
= 1
-12
Day = 1- 31
Tirn
e - 0
-2
3
Minut
e = 00-59
OPERATION
AL
PRECAUTIONS
The data
on
the
LCD
panel
is i
mprint
ed on ea ch
fr
ame
you
exp ose.
•
"Ycar-Month-Day" and
"Day- H our- M inu
te"
canne r be
imprintcd
at th e sa me
tim
e.
• As you release th e sh u
tte
r,
the
bar
( - )
mark
on
the
displ
ay blinks for a fcw
seco
nds , in-
dicaring th e
data ha
s been imp rinte d .
• M ov e
the panorama
mode
selec to r
lever
to
th e ri
ght
or Ieft to swirch the
impr
im
mod
e
bel ween
panorama
and
standard.
• The
dacing
unir
autom
atically
swit
ches
the
impr int mod e
betw
ecn
the standard
and pa n-
ora
ma accordin
g
[Q
the
format
mode
sele
cted.
• If there is a
white
or ycll ow a bject in
the
co
rne
r of
the
pi
cture where the
data
is irn -
printed
, th e d
ata may b e diffic
ult
to r
ead,
Wh
en co mposing you r photog ra phs, try to
avo id
brightIy-colored
subj
ect s in
that corn
er .
43
Page 25

BATTERY EXHAUSTION WARNING
<J)
...
[CM
J
(
CIl
~
i~
W hen
the bau
cry is nea rly ex
haustc
d, the b
al-
lery sy
mbo
l (
<=10)
a
ppe
ars on th e L
CD panel
to
wa rn
you
. Repl ace th e b a tt cry
a,
saon as po ssi-
ble.
Wh
en (
<=10)
starts b linki ng, no
ope
rat
ions
ean
be
perfo
rm ed.
Battery
lite
(using
24-exposure film rolls)
:
Appr
ox, 15
roll
, Us ing fla sh 50% of t he tim e
(us
ing
the
CR I23A b
att
ery
and
undc r Peruax
test in" condit ions)
(T
he
CR 123A
batt
cry
was
used
und
er P enrax
tcs
tin
g condi tio ns. A
ctu
al bart ery lif
e/p
erfo
rm-
an
ce ma y
vary
drasrically
de pendi ng on usage of
Auto-F
ocus, P ower Z oom, Flash , an d
ext
ernal
cond itions s
uch
as
temp
era
tur
e and Ire
shn
css
of
th e b
att
ery. )
Notes on
replacing
the
battery
:
• Ens u re
thatthe
re is no film loaded. Switch oIT
po
wer bef
ore
rep lacing the b
attcry.
•
If
th e h
atrery
is r
epla
eed w ith a film a
lrea
dy
lo
ad
ed,
the
ca mer a entc rs
the
start
ing mo de .
It w ill as
sum
e th e film h as j ust becn l
oad
ed
and will ad v
an
ce sevcr al frames. "1"
will
ap
pea
r on th e
LCD
pan
el.
• If th e b
attc
ry is r
cpl
ac cd at th e e nd of th e fil m
roll,
the came
ra may not d et ect
the
film
end
,
an
d the frame cuuntcr ind
ica
tio
n ma y not
ap p ea r on th e
LC\)
panel. F
ollow
thc proce-
dur
e for
rew
ind ing th e film in
mid
-roll to
r
ew
ind th e film, an d remove t he fil m.
•
Th
e b
atter
y is used by b
ath
th e
cam
era bod y
and
the
dat e funet ion on th e DA T E mode l ta
keep constant t raek of time. Aft er th e b
att
ery
is rc p
lacc
d, co r
rec
t th e
rim
e and
dat
e. (See
p
age
43.)
•
Wh
en th e ca mera is in a
earry
ing b ag, ens
ure
th e M a in
Swit
eh
i, oIT :
oth
erwi
se, ba tt ery
po
wer
ma y b e
wasr
cd if th e sh u tter rclcasc
burton
is a cc identa lly p ush ed ,
INSTALLINGIREPLACING BATTERY
Use.one 3V lithium battery (CR-123A or the
equiva lent)
Ens
ure
that
the
power
is oITbe forc replaeing th e
hat
ter y,
1.
Open
th e h
atter
y chamher ca ver hy
pullin
g
the
cover lock in the
dir
ect ion of th e a rrow
with th e stra p c
larnp
's
pro
trus
ion.
2. Inser t nne
lithium batt
ery
with
th e
plu
s/
minus
(+ / - ) side s
mat
chi ng
the
indi
cat
ions
in th e b
attery comp
artm
ent.
3. Close th e
hattcry charnbe r co
ver
. E nsu re t hat
th e ca ve r is l
ocked
with a cli ck.
• If th e
batt
cry
is co r
rec
tly load
ed,
th e zoom
lens mo ves slig htly an d th e m
otor
ope ra tcs for
a few
seco
nds.
•
On
the DATE MaDEL, the dat e is in-
irial ized ta 8 7/1 / 1 when th e b
att
ery c ha m be r
ca ver is
opcned
.
44
45
Page 26

46
TA
KING
CARE OF YOUR CAMERA
Your
Pentax c
amera
is a
sophisticated
,
high-pr
ecision ,
and
reHablc
mechanism.
Handle
it
with
great
care.
• Do no l use the ca
mera
in a p lace wher c th e
came ra m ay come in con tac t w
iih rain
or
water
bcca use
the
camera is not we
ath
er-
resista nt. Should
the came ra get wet rai n o r
splash ing walcr, wip c it off
irnm
cdiat cly
with
a
dry
soft clo th o
• Do n
ot
drop th e ca mera or a llow il to hi t a
solid abjec
t.
If
the cam er a sufTers a severe
sho ck or impact, t ake il la a P
ent
ax service
cente r for insp ecti on .
• Be car efu l nol la
subje
ct the
product ta strong
vib ra tio ns, shock or pres
sure
. Use a cushion la
pr
orect th e eamera wh en c ar ry ing it in a mo-
tor cycle, car , boat , etc.
• U se a hlower and lens
bru
sh
III
remove dust
accurnu lared o n th e Jens or v iewfin
der
.
• Do nol store the
cam
era in a closet w
ith
m
othb
alls or in a case
wher
e chemicals a re
han d led .
Stor
e it in a plac e w
ith
good a ir
circula tio n la pre
vent
fungu
s gr
owrh,
• Avoid leavin g th e camera for extende d pe ri ods in pl a ces whe re t
emperatur
e a nd
hurni
di -
ty are high, s uc h as in a car.
<,
I.J
f(
~!....-
/.
\2)/1
.
IT'"
• Conde nsa lion on
the
inlerior or th e ex re rior of
the
came
ra may h e extrc rnely har mful 10 th e
ca me ra mech an ism as it may cause ru st and/
or corrosion.
Furrh
crm
ore, if
the
came ra is
ta ken from wa
rm temperatur
e 10 a su bfreezing one or vi ce versa, the forma tio n of icc lcts
may ca use damage. In such a ca se, put th e
camera int o a case or plast ic b ag sa th ar any
changes in tem pe
rat
ure
will be as gr
adu
al as
possible.
Afi
er the te mpe ra ture di fference is
min
i mi zed, tak e it
OUl
of th e ba g.
• The temper at ure ran gc at which this came ra
f
unct
ion
prop
erl
y is so
oe
to - lO
OC
(1 22
°F
10
l'l OF) .
• E lectri cal
probl
ems m ay ofrcn be ca used by
wa ler,
dirt
or dust a l po ints of eleelri ea J COn-
tac
t. Aiso chec k for ba rrery lcakage, tr aces
of
dirt or grcas c, or
cor
rosio n duc la sa linity or
gas .
If
ynu canne t correct th e
problc
m, h ave
you r ca
mera
inspect ed a t a Penr ax servi ce
cente r. R cpa ir of d amage ofany kind a re nol
cove red und cr
the
terrns of th e w
arr
ant
y and
charges ma y be asscssed.
• Do
not
app ly force to th e
zoom
lens as
doin
g
so causes dam ag c ta th e ca me ra. Nev
er
place
the zoom Jens
with
the Iront sid e fac ing down -
w
ard
.
• R
egul
ar size color prints ma y eut ofT wh at
ap pcars on th e cxtr
cme
edg
es of the film
frame. Com
pose
your p ic
turcwith
a ma rgi n
of
safe ty a l t he e
dges
.
•
Ta rnainr
ain
op tim
um perf
orm
ance, a camera
wh ich has nol bccn uscd for an e
xte
nde d
peri
od,
or is be ing pr ep ared for an importan t
photographie session, il is rccommend
cd th at
you
hav e the ca me ra insp cctcd or te st
shoot
w
ith
it.
• Repairs ma de necess
ary duc 10 usage
of
this
prod uct in an indust rial or co mme rcial
appli
-
ca tion m ay not be cov ered under the term.s
of
the P
cnt
ax w
arr
anty.
Red-eye phenomen on in flash phot
ogra
-
ph y
Wh
en a pi
cture
is t ak en
using
a flash , a s uhj e
ct's
eyes m ay appear rcd in th e
prim. This phenorn-
cnon is
caus
ed by th e refle
ction
of
the
ele
ctr
onic
flash in t
he
ret ina.
It
ca n be re d uced wh en the
s
urroundings
of
the
subje
ct a re
brigh
ten
ed,
or
sho oti ng
distan
ce is sho rte ne d o r by em plo
ying
the red -eyc r
edu
crion flash fe
atur
e.
47
Page 27

TROUBLESHOOTING .
Sym pt oms
Causes
and
Remedie
s
L'Th e sh ut ter ca nna t h e relc ascd .
• Is t he
main
switc h
turn
ed oIT? If so ,
turn
it on. ( See pa ge 7.)
• Is the b
au
cry
exh
a us te d ? Repla ce: il or inser t ne w b auery ir il is
cx hausred. (Sc e
page
44.)
• Is (0) bl ink ing on t he
LeD
pan el ? [f '0, th e liJm
has
been used
up
. I nsert a new ro ll. ( Sec page 20. )
2
.My
pr inted p
ictures don't
look ve ry
• Di d Y
Oli
pos ition th e autofoc us fram e on yo ur subj ect ? (S ee pag e
clea r.
18.)
• D id
you
obStT UCI the au tofoc us
window
with
vour
fingers , ha ir no
otb
er a bject when you deprcssed the shu t ter re lease h
utte
n ? ( Sec
pa ge 9.)
3.Zoom lens r
etr
a ct cd a
urom
a ti
cally
• Did yoo lcav e th e cam era
unus
ed for over 3 minut es alte r th e ma in
(the
power is Lumed off a u toma tiea lly) .
swi tcb
was ru rne d on? Th e po we r is au tornati cally sw it
che
ù off
if
the camera is lcrt u nuse d for over 3 mi nut es. ( Sec page 8.)
•
V\Then
the cam era is on and left unused for more than 10 mi nu tes
in the R
emot
e Control shoc ring mode. t oc camera a urornat ica lly
swi
tches
itself
off to save batt ery po wer.
Pusb
the main sw itch
a gain LO
turn
il o n (See page 30.)
Whatappearstroubles
ome
may
be eas ily rem
edied.
Her
e ar e sorne
prohl
cms that
mayoccurand th cir
S
ymptoms
re m
edi
es.
-l
.The
R em ot e
Con
trol do cs no t
opc
ra re.
5. Zoo m lens does nol maye.
6. T he
(
H
)
or
(
U
)
mark is
d
ispla
yed on th e L
eD
panel.
Causes and Remedies
•
The ope
rable distance of t he Rem ot e C ontrol il' appr ox. Sm [rom
[he fron t, (See page 31.)
• The R
emot
e Control may not
ope
rate in a bac klight situation.
(Sec pag e 31.)
•
Th
e flash is being charged . Wai;
unril
it fully ch ar ges. (See pa ge
31.)
• Wilh Easy Pic. shoo tm g mode
unab
le to o pera te
zoomin
g by the
Rcmote Cont ro l.
(See pag
e 35.)
• With Easy Pic . shooring mode unable to
oper
are zon ming by the
zoomi ng lever. (See pa ge 35)
• If eithe r ma rk dis
app
car s whc n the zoom lever is rnoved, the
camera
i.s
ready for use. Th e Camera may be defe ct ive if eithe r
ma rk ap pe ar s
often,
Th
e correct ca mera -to-s ubj ect distan ces when sho orin g using flash
with
films oth e r th an
ISO
100
,200
or 400
are indica ted in the tab le bel ow.
Len s
ISO
25
50 1000
1600
3200
28m m
( "
t)
0.58·2 . 5m
0.58-3 . 5m 1:0" -16 . Sm
1.3"-2 1. 0m
1.8" ·30 . 0m
90m m ( . )
0.58-1 .2 m 0.58- 1. 7m 0.
58·8
. 0m
0.58 · JO. Om 0.6* -14 . 2m
*With
high spe ed lilm , ov ere xposure may oc cur at close ran ge due to the filrn's hig h s peed
49
48
Page 28

"
SPECIFICATIONS
Type:
Film:
Format:
Film
loading,
:
Film
win
ding
:
Film
rewinding
:
Frame
number
:
Lens:
Focusing
system
:
Zooming
:
Shutter:
Self
Umer
:
Viewfind
er
:
Exposure
control
:
3
5rnm
rully
aut
ornaric leaf-
shutter
cam er a with built-in zoo m lens an d a uto nash
AUlOfilm spe ed sc u ing wirh 3
Smm
perf
ora Led
DX-
euded film
wirh
ISO
rating
from
2:, 10 3200
(l
EV srcp). N
oo-DX
coded film s ar c
au
rom a iically sel to
150
2S
2~
X 36mm ( 13 X36 in pan
orami
c f
orm
at )
AUlO lilm load ing C losing tb c back cov er will
autornat
icall y
wind
the film l O firsi
cx posure
Auto
lilm
-winding
: singlc-Iraru c ad van ce mod e.
Auro
sta
n a l the end of roll.
Aut
o
stop
upon
eom pletion of rew indi ng. R
ewinding
lime : a p
pr
ox 20 sec,
with
H-exposur
e film, R
cwindin
g in
mid-
roll
provid
cd .
Aut
ornaric r
ead
ou t of suc cessi ve fra
me
nurnb
crs in a.scc nd ing order when sh ooring,
and
des
ccn
ding
ord
cr
when rewinding
.
P
crua
x power
<Do
m 28-90mm f/ 3. S.9 9 e lem en ts in 7 g roups, An gle o f v iew : 7So-
27
0
•
Peru
ax infr ar ed
acti
ve
Mult
i-hcarn au tofoc using
with
locus lock . Swir
chabl
c to
Spot AF made .
Ran
ge : 0.
58m
( 1.9[t) -in finu y
(Maximum
rnagnificauon
approx
.
I/ S.
8X
).
Inlin
ity
-Iandscap
e m od e (Ioc us is Iixed to
inûnii
v) , E asy Pi c. mode (ro cus
is Iixcd al 2.9m ) .
El c
ctr
onie zoo m
Pro
grarnm
ed AE e lcctronic
shutr
cr with s
pee
ds
appr
ox. 1
/400
sec. -I/S sec.
Bulb
:
1/ 2 sec.-JO min., Electrornag ne ric release
Elc
cir
oni c red larnp indi
cation
.
Appr
ox, 10· see. del a y
wit
h
LED
indicati
on.
Ca ncellat ion aû cr activa tion is po ssibl e.
Act ual im age zoom viewfinder : 83% field-o f-view
ratio, Magnificat ion :
approx.
0.32X ( 28m m) -0.94X ( 90mm),
Dioprer
: -2.5 -
+0.
5D, AF fram e,
Picture fram
e,
Close distanc e co
mpe
nsation fr
am
e, Panorami
c f
orm
at pictur
e a re a, Gre cn lamp
ligbring : in-locus signal, Gr ecn la rnp bl inking : close-dist ance
war
ning, R ed l
amp
li
ghlin
g : Flas
h-read
y si a tus, R ed lamp b linking : Flash being e harged .
Progr a
mme
d auro-cxp osur c co ntrol. Range : EV8 .6- 17 al 28m m , E V 11.6-17 al 90
mm in
Aut
o or D aylight-Syn
chr
o mode (ISO 100
),
EV
6.0-17 in 28 mm,
EV8.4-17
at 90m m in S lc w - Sh ut rc r-Spce
d mode.
Au
i o rna ti c exp o
su
rc
com pensatio n in a black lit s iu ia rio n,
Exposure
compen
sation:
+ / - :
mv
(0. 5EV sic p )
Exposure-meter
switch :The
exposurc meier
is t u rned un by ha lf d ep ress ion o r th e sh
uu
er rcl cas c burton.
flash:
Bu ili -in zo
om
flash
wit
h red-eve red uc tion mode,
Aut
ornari c flash em ission in
low-Iu minancc or a backli glu
~ i tua t ion,
Flash-O N = Dayli ght-Svn
chr
o / Slow-
Sh u rtc r-Sp ccd Svu
chr
o (up 10 1/ 5 sec.}, Flash-O FF = Flash ovcrridc,
Hulb
-Svnch r o
= 1
/2
sc c.c lf] m in.
Flash
effective
range:
0.58-:,.Om (2 8m m) ,O.:,8.2Am (90mm) ,CISO IOO lilm uscd )
Flash
r
ecvcling
time
:
Approx. :) sec, und
cr
Pcn tax i cst ing cond it inos
Remote
control:
Infrarcd
wirc lcss rcrno lc co nt rol , S tep z oo rnin g al 2Bmm, 9 0rnI n, 50m m and 2Buuu,
Eff
cc tivc rang e : :H
ll
Irorn th e front wh c n projeci cd [ TOI
ll
th e carnc ra's fron t.
Power
source
for
Remotc
control
; On e li
thium
battcry
CR 1620 ( rep laced by rh e P eru ax Service fa c ilir v)
Size & weight
[or
R
emote
Control:
23.S (
W)
X 68.5 ( L) X 15.U (
D),
0.9" X 2,7 ' X 0.6". 15g (0.5m )
Power
source
: Ooe 3V lithium hat tcrv (CR I 2:lA or th e eq u ivalen t)
Battery
life
:
App rox, 15 roll. 01'24 cxp o
sur
c lilm when :,0% of shooting uses flash ( undc r Pen
la>:
tcst in g cond it ions )
Battery
exhaustion
warnlng
: (
co
) ap pca rs on the LCD p anel ,
Shul
ter is lock cd wh en the ( <=JO ) is hlink ing
Data
mechanism
:
Crys ta l qu
art
z controllcd ; LCD w ith digital cloek, a uto calcnda r
Imprinting
mode
:
"Year, M
onth
and Dav", "
Day, Hour
and i\ linule " or blank
Size & weight
; 126.S (
w)
X 73 (H ) x·54.5 (D) ( S.O"X 2.9' X 2. ' " ) 305 grarn s, ( 10.80z.) ( wi i ho u r
ba u cr y)
DATE
model:
126.5 (W) X 73 (
H)
X 57.5 ( 0 ) (S.O" X 2.9" X 2.3
')
31S grams, ( 1I. Io z.) ( w it
ho
ui
baucry )
SPECIFICA
TIONS
ARE
SUBJECT
TO
CHANGE
AT
ANY
TIME
WITEO
UT
NOTIFICA
TION
OR AN Y
OBLIGATION
ON Tm;
PART
OF
THE
MANUI-'ACTURER
.
51
50
Page 29

52
WARRANTY POLICY
Ali Pcntax
ca m eras
pur
ch ascd rhrough
au-
rho rized
bona
fide
photo
graphie distributi
on
ch
ann
cls ar c g uaranre ed ag
ainstdefects
of mate-
rial
or
workmanship
for a per iod of twclv c
months
from
dat e
of
purchase.
Servi
ce wi ll be
rc
ndcred,
and defe
ctive parts
will
be replaccd
witbout
cost to
you
within
that period,
pro
vid ed
the
eq u ip
ment do
es nol show
evi
den
ce of
impact,
sand
or
liquid
dam
age, mi
shandlin
g,
l
amp
ering,
bau
cry or chemi cal co rr osion, ope r-
at ion
contrary
tu
operating
ins tru cti on s, or mod -
ificati on
by
an
una
urhorizcd
repair
shop
. T he
ma
nufa
ctur
er or its
au
t
hur
izcd r
epresent
ative
s
shall
not be
Iiable
for a ny r
epair
or
alter
ations
exc
cpt
those mad e wi th its wriu
cn consent arid
shall
not
be
liahlc
for d amag es
from
dela y
or
10"
of use o r from
eth
er
ind
irect or
cons
equ
ential
d
amag
es ofan y k
ind, whether
ca uscd by dcfec-
rive
materi
al
or
workmanship
or
orh
erwis
e ; and
it is expressly agree d th
at
the
lia bi lit y
of
th c
m
anufactur
er
or il s r
cpr
cscnt ativcs u
nder ail
guarant
ees
or
warrarui
es,
wh
crher
expressed
or
im
pli
ed , is strie tly li
mit
ed to th e r
epl
ace m ent
of
parts as
her
einb
efore
pro
vidcd.
No
rcfunds
will
be
mad
e o n repair
s p
erform
cd hy
non-
aut ho rized P
cruax
ser
vice
Iacilitics.
Procedure
During
12-month
Warrant
y
Period
Any
Pent ax
whi
ch
provos
dcf
ective
during the
12-m onth w a rr a nt )"p er io d s ho u ld be rc i u rnc d
tu
the dealer
from whom yo u
pur
ch ased th e
equip
-
m
ent
or t o th e m a nu fact ure r.
If ther
e is no
r
epresentative of
the man
ufactur
er in
your
co un-
try, send t he cquiprn cn t
tu
th e manufa
ctur
er,
with
post
ag e prc pa id . In
thi
s case, it will take a
conside rab le len
gth
of t im e
bcfore th e cquip-
m
ent
ca n be rct u
rncd
to you ow ing to 1he
corn
-
plicat
cd
customs proc
edur
es rcq
uir
ed .
If
th e
cq u ip rn cn t is co v
ere
d hy w a rr anty, rcpair
s w ill
be m
ad
e a nd parts r
epl
ac cd fr ee
of
ch arge,
and
th e cq u i
prn
ent
will be re t
urned
to you
up
on
com plc ti on ofserv icing.
If
t
he
eq u ipmcn t is not
covercd by w
arr
aru y, re gular c ha rges of th e
m
anufa
ct ur e r oro
fits repr
esent a
tive
s wi ll
apply.
Sh ip p ing c harges a r c to be b
orn
e by th e o
wnc
r,
If you r P
entax was pur
ch ased out side of the
co unt ry wher c you wish t o hav e it serv iccd
du
ring th e w
arr
ant
y pcriod, regul
ar
ha ndling
and se rv icing fees m ay be cha rg cd b y
the
ma
nufactur er 's r
epresent
atives in tha t count ry .
Not withsta
ndi
ng th is. yo u r P
ent
ax
rcturned
tu
th
e man ufac
tur
er w ill h e s
erv
iced frec of c h
arg
e
acco
rd ing ro this
procedur
e a nd w
arr
anty
poli e)".
ln
any
cas
e, how cver, sh ip p ing charges an d e us-
tom s c
learance
fees a re to b e
born
e by th e
sender . T o prove th e
da
te of
yourpur
ch ase when
rcquired , pl ease kee p
the
rece ip ts o r b ills en ver -
ing th e pur chase o
fyo
ur equip ment fo r a t least a
vear. Bcfore s
ending you
r eq u ip m ent fo r servie-
ing, plea se
ma
ke su re t hat yo u a rc sen d ing it
tu
the rna n u fac t ure 's a u th
oriz
ed represent
ative
s o r
t he ir ap p ro ved rcpa ir sh ops, u nlcss you
ar
c scnd-
ing it
directl
y to t he manufa cture r. Al ways
oh tain a q uotatio n for the service cha rge, a nd
on ly
afrer
yo u
aece
p t th e
quo
icd se rv ice c harge,
instr u ct the service s
ta
tion tu prn
cccd with
rhe
scr
vic in g.
This warr
ant y poliey
docs
not
app
ly to
Pcnt
ax p roduets pu r
eha
sed in
the
U.S.A.,
UR.
or
Can
ada.
The loca l
war
ra n ty polie-
ies
availa
blc from P
cnt
ax
distributors
in
thosc eou
ntr
ics supcrsede
thi
s w
arrant
y
poliey.
53
Page 30

54
NAMES OF WORKING PARTS
CL)
Diopt er adj ustrncnt dial
( p.17)
«il
Viewfinder
eye
piece
œPa no ra ma mode sc lec to r
switeh (p.39)
Œ)
Main swiich (p .7)
œZooming lever (p. lO)
~
Film infor ma tion window
œBack
CO
Ye r rc lcase lever
( p. 12)
~
Baek enver (p. 12)
el T ripod soe ket
œBa ttery cha rnhcr covcr
(p.45)
Page 31

LCDPANEL
Asahi O prical ce, Ud : 11-1. Na gata -che l -chorn e, Cht ycd e-k u, T
okyo
un JAI'AN
--
Pentax Europe n.v. I....iveld laa n 3-5. 1930Zavente m, BELGIUM
~
""nluGDlbH . [uhu s-cossele r-Srrasse. lM. D·22527
Hamburg
. G ERMA NY
Ali
ind ica t inns will nol
act
ua lly appca
rs sirnulta
ncously
as s
hown
.
f~
Pfn
Lt.x
U.K. Limlted. Pema x H ou se. Heron Dr ive, Langley. Slo ugh 5L'\ 8PN. U.K .
o Slow-Speed-Sh uti er ( p .25)
~
Pentax France S.A. Z .I. Arg enteuil. 12. rue
~mbro i se
Crolzat, 95 100
Argenteu
il. FRANCE
e Flash
OF
F (p.2:i)
Pen'" Beneh..
B.V. ( for Ne rher land s) 5pinveld 25. 4815 H R Bred a. NETH ERLANOS
e Flash O N ( p.24)
(for Belgium
& Luxem burg ) Weiveld laa n 3 · 5. 1930 Za ven tem, BELGIlJM
(»
Red-eve Reduct ion Flash mod e (p.22)
Pentax (Schweiz) AG lndu str iestrasse 2. 8305 Dicth kon , SWITZERLANO
Pentax Sca ndi navie A B Pal
hagsleden
57, 75127
Uppsala. SWJ::
DEN
o Exposure Com pe nsa tio n ( p.38)
~nu..x
Corp or...n
ee
35
Inverness
Drive East , Englewood . Co lorado 80 112. U.S .A.
Cl)
Exposure Co ur
uer
(p.1 3)
l'\>nw
Canad.
1Re.
3l3l
Um versa ! Drive , Mississ auga . O ntari o UX 2ES. CANA DA
& S hutrcr R clc asc hutt on
o Spot
AI'
mode ( p.34)
Ci) Infin ity-L andseape mo de (p .33)
CIl)
Film R ewinding mo
de
(p.20)
CD
Easy. P ic.
mod
e (p.35)
CD
Bau cry Ex
haus
tion W
arnin
g ( p.44)
œ
Zoom
ing lever (p.10)
œSe lf-T imor
mod
e ( p .27)
Œl
Rernorc
Con
trol S
hooti
ng mo d e ( p .28)
œM u lt i-E xpo su re
Shoo
ring
mod
e ( p. 32)
œBulb ( p,26)
LeD
(Liquid-cr ysta l display)
• When th e
LCD
is ex
pose
d
ta
high te mper a-
tu rc s ove r about
GO
ce,
il
may
b
lac
kcn,
but
wh
en t he
rernp
cr a
tur
e norrna ri zcs, il will
ret u rn to
nor
mal .
• Th" L
CD
may
also slow down in resp onst: to
lowe r re
mperarur
es,
hU
I
thi
s is a nor mal char-
a
cteris
tic of a n L
CD
.
55
AP01900 1iE NG -
((
The CE marking assures
that
this product com plies wit h
the requiremenls of the EC
directive for safety.
Copyright
(
~
Asahi Oplical Co.. L1d. 1994
03/98 Printed in Belg ium
 Loading...