


Pentair RACER Installation And User Manual
®
RACER
PRESSURE SIDE POOL CLEANER
ENGLISH 1 ESPAÑOL 17 FRANÇAIS 37
IMPORTANT SAFETY INSTRUCTIONS
READ AND FOLLOW ALL INSTRUCTIONS
SAVE THESE INSTRUCTIONS
INSTALLATION AND
USER’S GUIDE

i
CUSTOMER SERVICE / TECHNICAL SUPPORT
If you have questions about ordering Pentair Aquatic Systems™ replacement parts, and pool products, please contact:
Customer Service and Technical Support, USA
(8 A.M. to 5 P.M. — Eastern/Pacific Times)
Phone: (800) 831-7133
Fax: (800) 284-4151
Web site
Visit www.pentairpool.com or www.staritepool.com
TABLE OF CONTENTS
Important Warning and
Safety Instructions ..............................................
Important Information ..........................................
Cleaner Components
Overview
Installation ...........................................................
Booster Pump Installation
Installing the Wall Fitting and Adapter
Setting the Water Flow to Cleaner
Calculating Cleaner Speed/RPM
Adjusting the Hoses to Fit Pool
Assembling the Cleaner
Using the Cleaner
Cleaner Adjustments and Operation ..................
Cleaner Operation
Adjusting the Thrust Jet
Cleaning the Debris Bag
Adjusting the Sweep Hose Regulator
Sanford, North Carolina (8 A.M. to 5 P.M. ET)
Phone: (919) 566-8000
Fax: (919) 566-8920
Moorpark, California (8 A.M. to 5 P.M. PT)
Phone: (805) 553-5000 (Ext. 5591)
Fax: (805) 553-5515
Maintenance .........................................................
ii
1
1
1
2
2
2
2
3
4
6
Wall Fitting Screen
Tires
Roller Rings
Debris Bags
Sweep Hose
Backwashing the Pool Filter
Storage and Winterizing
Replacement Parts ..............................................
Parts List
Troubleshooting ....................................................
Steep Vinyl Liner Transitions
6
7
7
7
8
9
10
10
10
10
10
10
10
10
12
13
14
16
© 2015 Pentair Water Pool and Spa, Inc. All rights reserved.
This document is subject to change without notice.
1620 Hawkins Ave., Sanford, NC 27330 • (919) 566-8000
10951 West Los Angeles Ave., Moorpark, CA 93021 • (805) 553-5000
All Pentair trademarks and logos are owned by Pentair or one of its global affiliates. Pentair Aquatic Systems™, Night Cruize
and RACER® are trademarks and/or registered trademarks of Pentair Water Pool and Spa, Inc. and/or its affiliated companies
in the United States and/ or other countries. Unless expressly noted, names and brands of third parties that may be used in
this document are not used to indicate an affiliation or endorsement between the owners of these names and brands and
Pentair Water Pool and Spa, Inc. Those names and brands may be the trademarks or registered trademarks of those third
parties. Because we are continuously improving our products and services, Pentair reserves the right to change specifications
without prior notice. Pentair is an equal opportunity employer.
P/N 371004 Rev. C 2/12/15
RACER® Pressure Side Pool Cleaner Installation and User’s Guide
®
IMPORTANT WARNING AND SAFETY INSTRUCTIONS
ii
Important Notice:
Attention Installer: This guide contains important information about the
installation, operation and safe use of this product. This information should
be given to the owner and/or operator of this equipment after installation
of the pool cleaner.
Attention User: This manual contains important information that will help
you in operating and maintaining this pool cleaner. Please retain it for future
reference. Consult Pentair with any questions regarding this equipment.
Before installing this product, read and follow all
warning notices and instructions which are included.
Failure to follow safety warnings and instructions can result in severe
injury, death, or property damage. Call (800) 831-7133 for additional free
copies of these instructions.
Consumer Information and Safety
This pool cleaner is designed and manufactured to provide many years
of safe and reliable service when installed, operated and maintained
according to the information in this manual. Throughout the manual, safety
warnings and cautions are identified by the “ ” symbol. Be sure to read
and comply with all of the warnings and cautions.
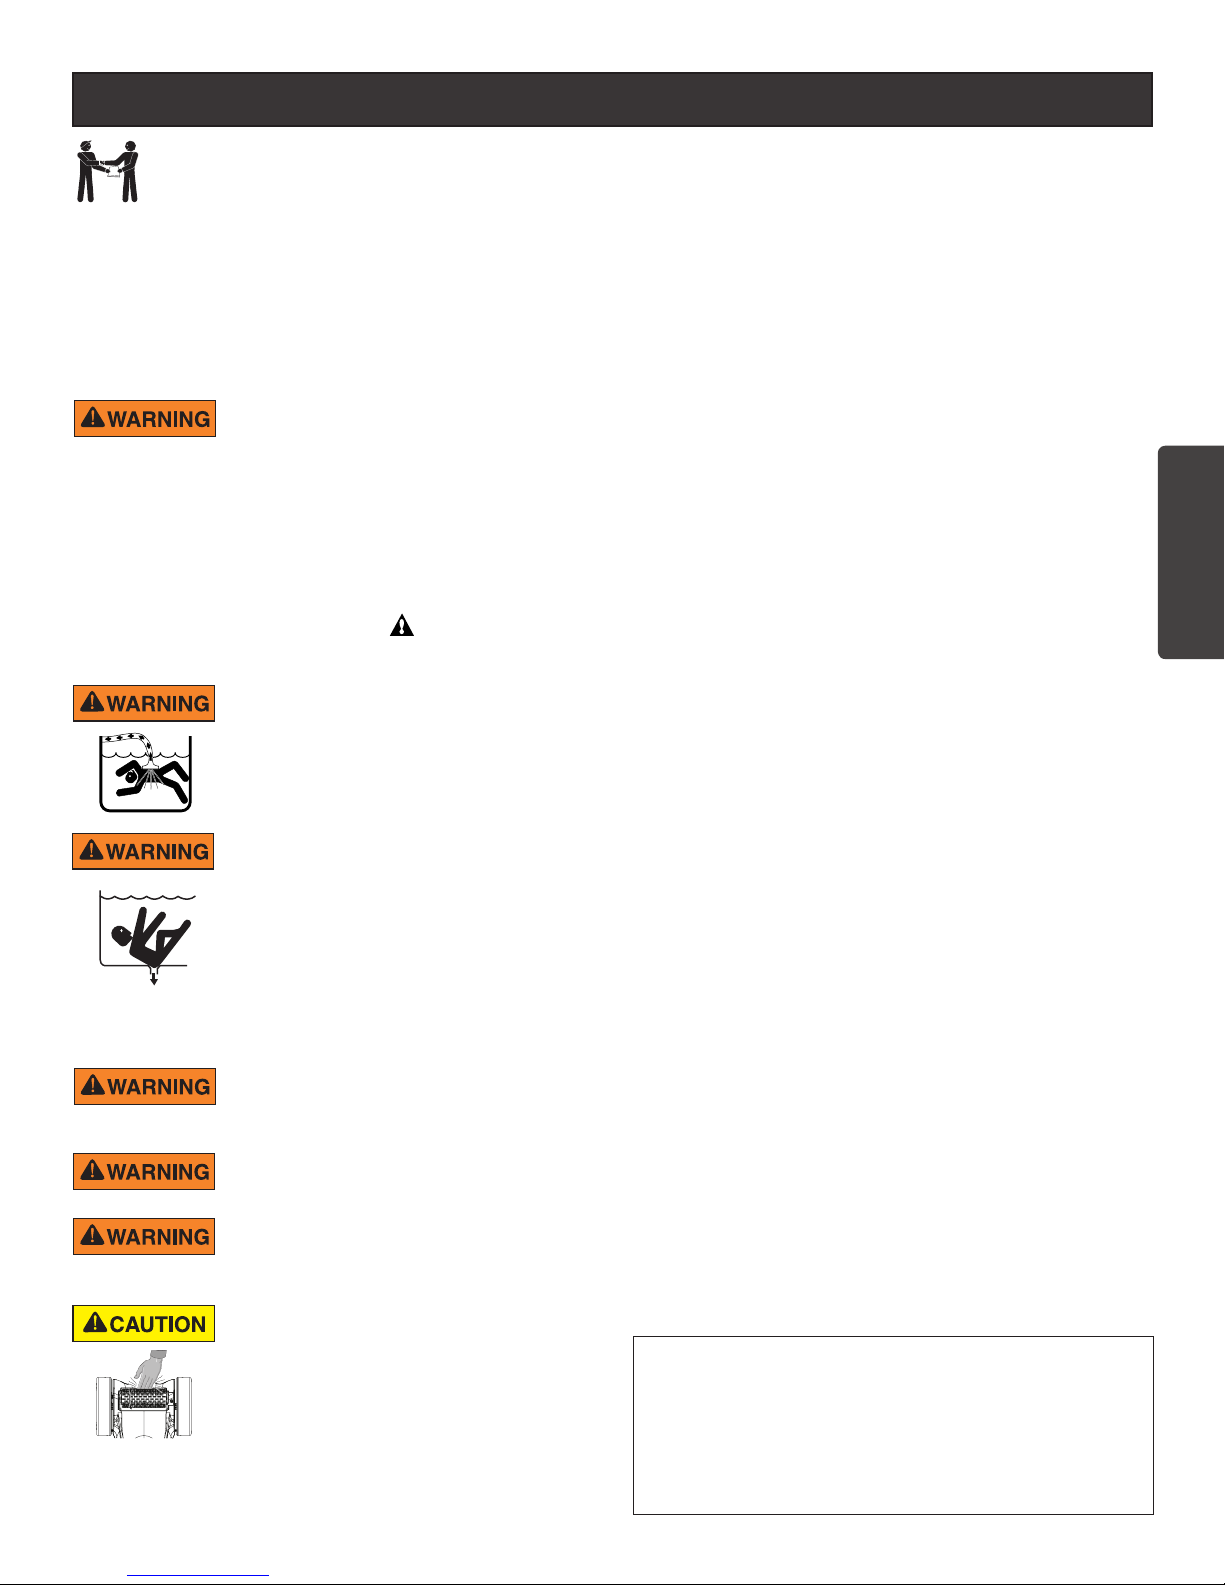
HAZARDOUS SUCTION.
Do not play with cleaner or hose or apply to body.
Can trap and tear hair or body parts. Hose can trip or
entangle swimmers which could result in drowning.
SUCTION ENTRAPMENT, INJURY, AND
DROWNING HAZARD. If your pool has a dedicated
suction port (“vac port”) for vacuuming or for an
automatic pool cleaner, it must be covered when
not in use. A spring loaded safety cover (a “vac port
fitting”) is included with your cleaner. Install it on the
suction port to prevent entrapment and injury. If the
cover provided does not fit, purchase one that does
from your local pool store and install it instead. The
cover should conform to IAPMO SPS4-99A.
Stop pump before attempting to clean unit. Do
not allow swimmers in pool while pool cleaner is
operating.
To reduce the risk of injury, do not let children use
or play with pool cleaner.
Do not allow swimmers in the pool while pool cleaner
is operating. Hose can trip or entangle
swimmers which could result in drowning.
Moving parts may injure hands or fingers. Stop pump
before attempting to clean out pool cleaner head.
General Installation Information
Pre-Installation Check List
Before installing your cleaner, review and understand all warnings and
safety information in this guide. Failure to follow these instructions or
improper installation of the cleaner can result in damage to the pool
finish or the vinyl liner. Most cleaners are not designed to traverse from
floor to wall when the pool cove is 90%. There may be other structures
installed in the pool that the cleaner cannot navigate, BE AWARE and
supervise the cleaner during unique conditions. Pentair Aquatic Systems
disclaims any liability for repairs or replacement to any of these structures
or components of the customer’s pool.
Before installing the cleaner in a vinyl liner pool:
Check liner closely for signs of deterioration or damage from age,
chemicals, pool wall damage, etc. If any damage is found, have a qualified
pool professional make all the necessary repairs. Also, if there are stones,
roots, etc., under the liner, remove them before installing the cleaner.
Before installing the cleaner in a gunite pool or a pool that is partially
or completely tiled:
Make sure pool finish is in proper condition as staining, etching, cracking
or delaminating may worsen.
Repair loose tiles and tighten any loose light rings.
Before installing the cleaner, clean your filter system:
Make sure you have cleaned the filter, including backwashing, rinsing,
and emptying all baskets. A clean system is necessary for proper cleaner
operation and coverage.
Before installing the cleaner, understand cleaner coverage:
The cleaner is designed to rid your pool of debris in approximately 4-6
hours. Less time could be needed, depending on the pool size. The cleaner
was not designed to automatically clean steps or swimouts, or to work
under a solar cover. The cleaner may get stuck in these areas which can
result in damage to the pool finish or vinyl liner. Pentair Aquatic Systems
disclaims any liability for repairs or replacement to any of these structures
or components of the consumer’s pool. It was also not designed to do
initial cleanup for a new pool or when opening your pool for the season.
AFTER installing the cleaner, make sure the cleaner is operating
correctly:
The cleaner may need some minor adjustments to make sure it is
operating properly so there is no damage to the pool finish. Certain
vinyl liner patterns are particularly susceptible to surface wear, pattern
removal, ink rubbing off of, or serious scratches to the pattern caused by
objects coming into contact with the vinyl surface, including automatic
pool cleaners. Pentair Aquatic Systems is not responsible for any pattern
removal, abrasions or markings on vinyl liners. Periodically inspect the
cleaner components and the cleaner performance to ensure it is operating
as designed. Replace and/or repair any worn or damages components.
Failure to follow instructions or improper installation of the cleaner may
result in damage to the cleaner, pool finish or the vinyl liner.
Warnings and safety instructions for Pentair Aquatic Systems
pumps and other related products are available at:
http://www.pentairpool.com/support/product-warnings.html or
call (800) 831-7133 for additional free copies of these instructions.
Please refer to http://www.pentairpool.com/support/product-
warnings.html for warning and safety instructions related to
this product.
ENGLISH
RACER® Pressure Side Pool Cleaner Installation and User’s Guide

iii
IMPORTANT WARNING AND SAFETY INSTRUCTIONS
Disclaimer of Liability
About your Pool and Pressure Side Pool Cleaner
There are a multitude of factors that contribute to the life of your pool. The
pool cleaner is a very passive product that will have no impact on pool life.
Please be aware that over time, deterioration, discoloration and brittleness
of any pool finish can be caused separately by, or in combination with,
age, an imbalance in pool water chemistry, improper installation and other
factors. Pressure side pool cleaners will not remove or cause wear on
“good” pool plaster. In fact, the opposite is true–pool plaster will eventually
cause wear on the cleaner.
The same situation holds true for vinyl-lined in-ground swimming pools,
because vinyl liners are also affected by the environment and factors such
as pool water chemistry, sunlight and the pool’s surroundings. Therefore
over time, vinyl can become brittle and weak. In addition, vinyl-lined pools
are affected by the workmanship, composition and installation of the
liner and the workmanship and quality of construction of the supporting
walls and pool base. These are all factors which can contribute to liner
failure. The existence of any of these type of conditions in your pool is
not caused by the use or operation of the pool cleaner. The manufacturer
disclaims any liability for repairs or replacement to any of these structures
or components of the customer’s pool.
The pool owner must assume all responsibility for the condition and
maintenance of the pool’s surface, water and deck.
Before the cleaner is installed, please take a moment to record the
serial number. This number is located on your warranty card and
on the back of the cleaner near the rear jets. You will be asked for
this number when you contact our Technical Support Department.
SERIAL #__________________________________
SAVE THESE INSTRUCTIONS
RACER® Pressure Side Pool Cleaner Installation and User’s Guide
1
OVERVIEW
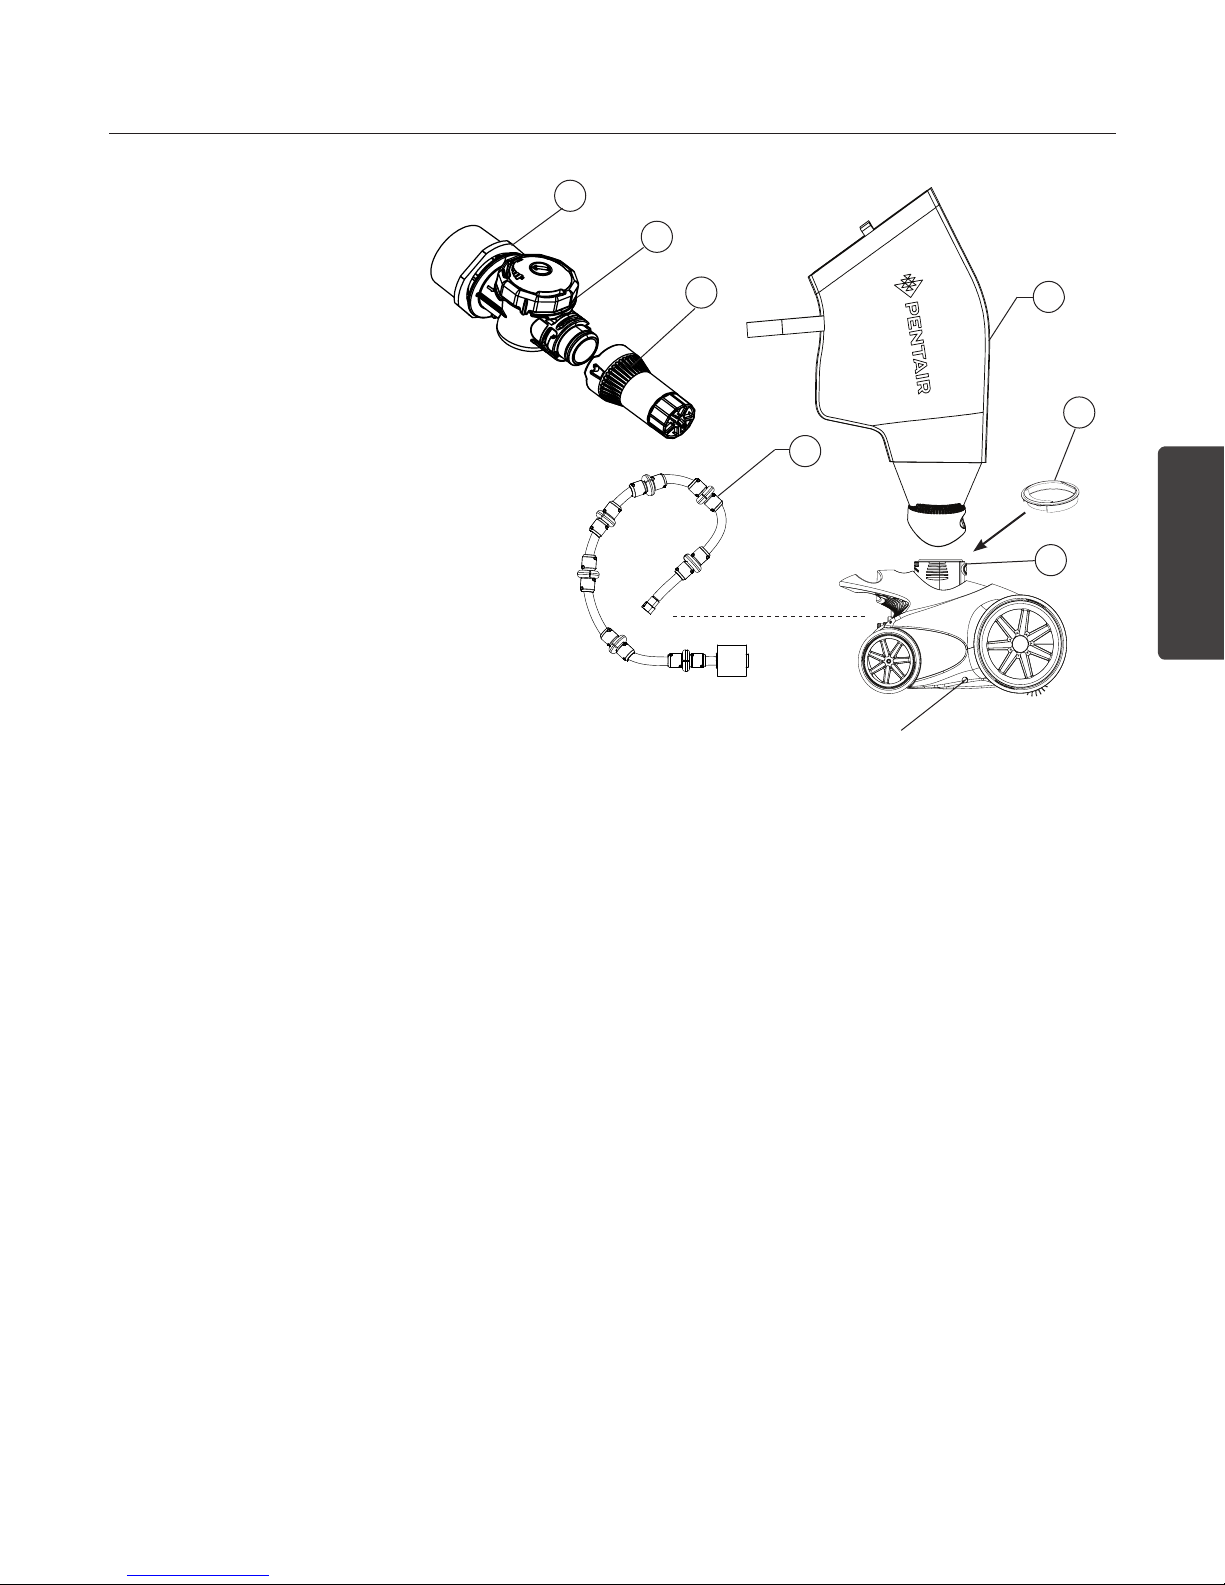
Cleaner Components
1. RACER Cleaner Head
2. Debris Bag
3. Sweep Hose (not needed in
most pools)
4. Feed Hose Assembly - Not
shown (3-10 ft. [3 m.] sections)
5. Wall Fitting
6. Wall Adapter
7. Debris Seal
Note: The cleaner system is delivered
with debris seal installed inside of
cleaner head.
8. Flow Gauge
Overview
The RACER® Pressure Side Pool Cleaner moves
through a sequence of straight, right and left turns
helping to increase pool coverage, vacuuming and
scrubbing your entire pool.
• For continuous uninterrupted cleaning, the cleaner
will go into reverse mode about every two minutes,
which allows it to efficiently clean the entire pool.
6
5
8
2
7
3
ENGLISH
1
Night Cruize ® LED
Note: Before you install and operate your cleaner,
read through these important guidelines:
1. Always disconnect the cleaner from the pool wall
when cleaning or back washing the pool filter.
2. After cleaning or back washing the filter, let the
filtration system run for at least five minutes before
reconnecting the cleaner.
3. New plumbing lines should be flushed out before
installing the cleaner.
4. The cleaner should not be used to remove plaster
dust in new pools.
5. Always remove the cleaner before swimmers enter
the pool.
6. Always handle the cleaner with care.
7. Always pick up the cleaner by the handle,
especially when lifting the unit out of the water.
8. Do not handle the cleaner while it is operating.
9. Always remove the cleaner from the pool before
chemical shock treatments (super chlorinate). As a
rule, any pool water that is unsafe for swimming is
unsafe for the cleaner.
10. Carefully cut the feed hose following the
instructions on page 4.
11. By following these simple guidelines, you can help
protect against injury and prolong the life of your
cleaner.
12. Refer to “Important Warning And Safety
Instructions” on pages ii - iii for additional
installation and safety information.
13. Before you install your RACER pool cleaner:
If there is a chlorinator, solar system, ozone
generator or air inducing equipment installed,
contact Technical Support at 1-800-831-7133.
RACER® Pressure Side Pool Cleaner Installation and User’s Guide
2
INSTALLATION
Booster Pump Installation
Please refer to the instructions included with your
booster pump for installation information.
Please follow these instructions carefully.
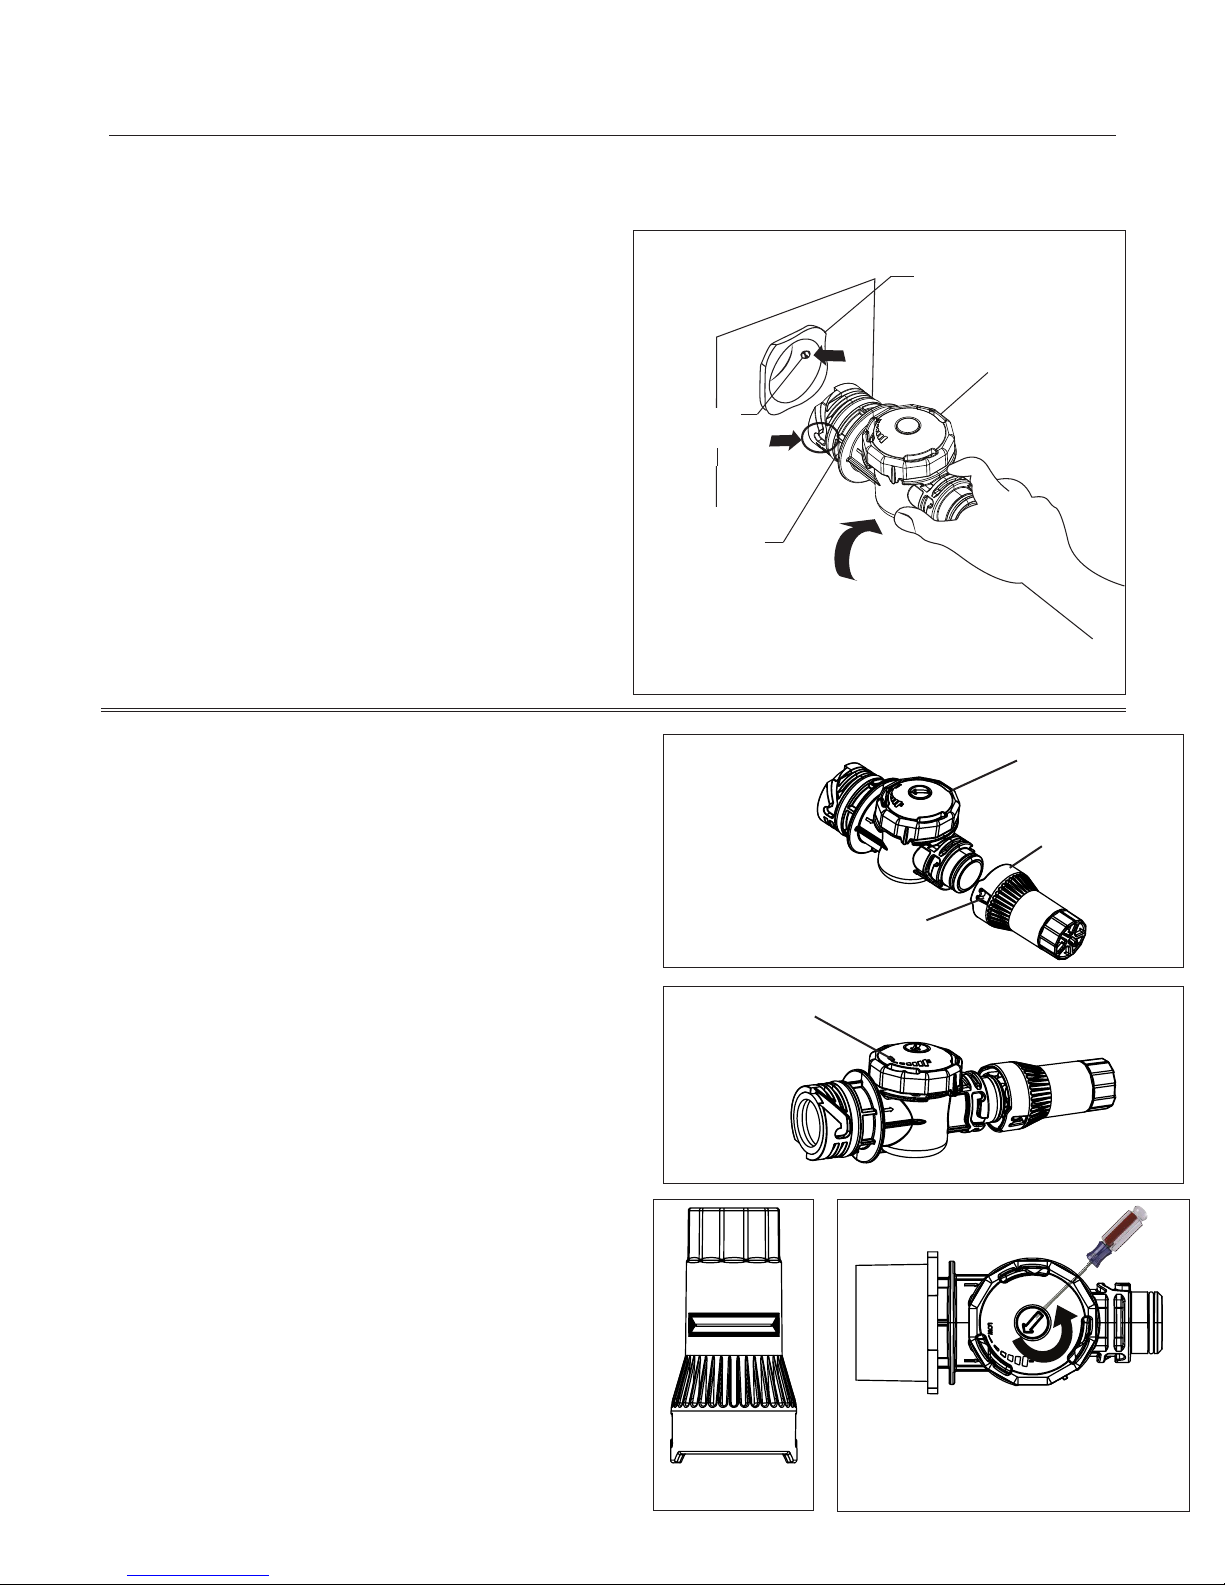
Installing the Wall Fitting and Wall Adapter
Wall Adapter
(Shown Installed)
1. Remove and disconnect any existing pool cleaner
and/or wall fitting.
2. Switch on the filtration pump and booster pump, to
flush out the plumbing line.
3. Switch off filter pump and booster pump.
4. Insert wall fitting adapter into the dedicated 1-1/2”
NPT threaded return line. Hand tighten until snug.
See figure 1.
5. Align wall fitting with the quick lock pegs inside the
wall adapter. Push the wall fitting into the wall adapter
until it bottoms out. Twist 1/4 turn clockwise to lock
the wall fitting. Pull gently outward to engage quick
lock pegs. See figure 1.
Setting the Water Flow to the Cleaner
IMPORTANT! Before starting this procedure
be sure to switch off the filter pump and
booster pump.
1. Attach the flow gauge to the wall fitting by aligning the two
tabs on the flow gauge with the grooves in the wall fitting.
See figure 2. Push and turn the flow gauge clockwise until
it stops, then slightly pull it out away from the wall. Be
sure the flow gauge is securely locked in place by turning
it counterclockwise while slightly pulling out on the flow
gauge. See figure 3.
Note: Flow gauge will not turn when locked in place.
2. Switch on the filter pump and then the booster pump.
3. Verify the white plunger (inside the flow gauge) is aligned
within the box on the flow gauge. See figure 4.
4. Adjust the valve on the wall fitting using a flathead screw
driver by turning the valve clockwise (to reduce flow) or
counter-clockwise (to increase flow) so that the white
plunger aligns with the arrows on the flow gauge markings.
See figure 5.
5. Switch off the booster pump and then the filter pump.
6. Remove the flow gauge from the wall fitting by pushing in
and turning counterclockwise and pulling the gauge out.
7. Attach the hose assembly to the wall fitting. Turn clockwise
then push in one quarter turn to secure in place (as
described in Step 1).
Quick
Lock Peg
Figure 1.
Figure 2.
Figure 3.
Wall Fitting
LOW
HI
O-Ring
Installing the Wall Fitting
Wall Fitting
Flow Gauge
Align Tabs
Wall Fitting
Max Flow
Min Flow
Turn counterclockwise
to OPEN
RACER® Pressure Side Pool Cleaner Installation and User’s Guide
Figure 4. Figure 5.