

Page 1
QuickStat-TC
INSTALLATION AND OPERATION MANUAL
F
A
2
APPROVALS
TECHNICAL DATA
Supply voltage 120 V, 208 V, 240 V, 60 Hz
Maximum switching current 15 A
GFCI Class A, 5 mA trip level
Ambient setpoint range 40°F to 86°F (5°C to 30°C)
(A/AF mode)
Floor setpoint range (F mode) 40°F to 104°F (5°C to 40°C)
Floor limit setpoint range 40°F to 104°F (5°C to 40°C)
(AF mode)
Operating temperature range 32°F to 120°F (0°C to 50°C)
Storage temperature range –4°F to 120°F (–20°C to 50°C)
GENERAL INFORMATION
Use of this Manual
This manual covers the installation and operation of the Raychem
QuickStat-TC thermostat and must be used with the following
document:
• QuickNet System Installation Manual (H57704)
Important: For the Pentair Thermal Management warranty and
agency approvals to apply, the instructions included in this manual
and product packages must be followed.
Features
The QuickStat-TC is an electronic thermostat that must be used
with the Raychem QuickNet floor heating mats.
QuickStat-TC provides the following features:
• Integrated Class A, Ground-Fault Circuit Interrupter (GFCI).
• Operates at 120 V, 208 V, 240 V, 60 Hz.
• Switches on your heating system at predetermined times on
different days of the week.
• Offers 4 periods each day that you can set at different
temperatures.
• Comes with a preprogrammed schedule that is suitable for most
installations. However, you can customize this program any time
you wish.
• Allows you to reset the thermostat to factory settings.
• Changes the start time of a heating period automatically so that
the desired temperature is reached at the time that you set.
• Multiple temperature control options so users can control the
system based on floor temperature (F), ambient air temperature
(A), or both (AF).
• On/Off switch to turn off thermostat during summer months.
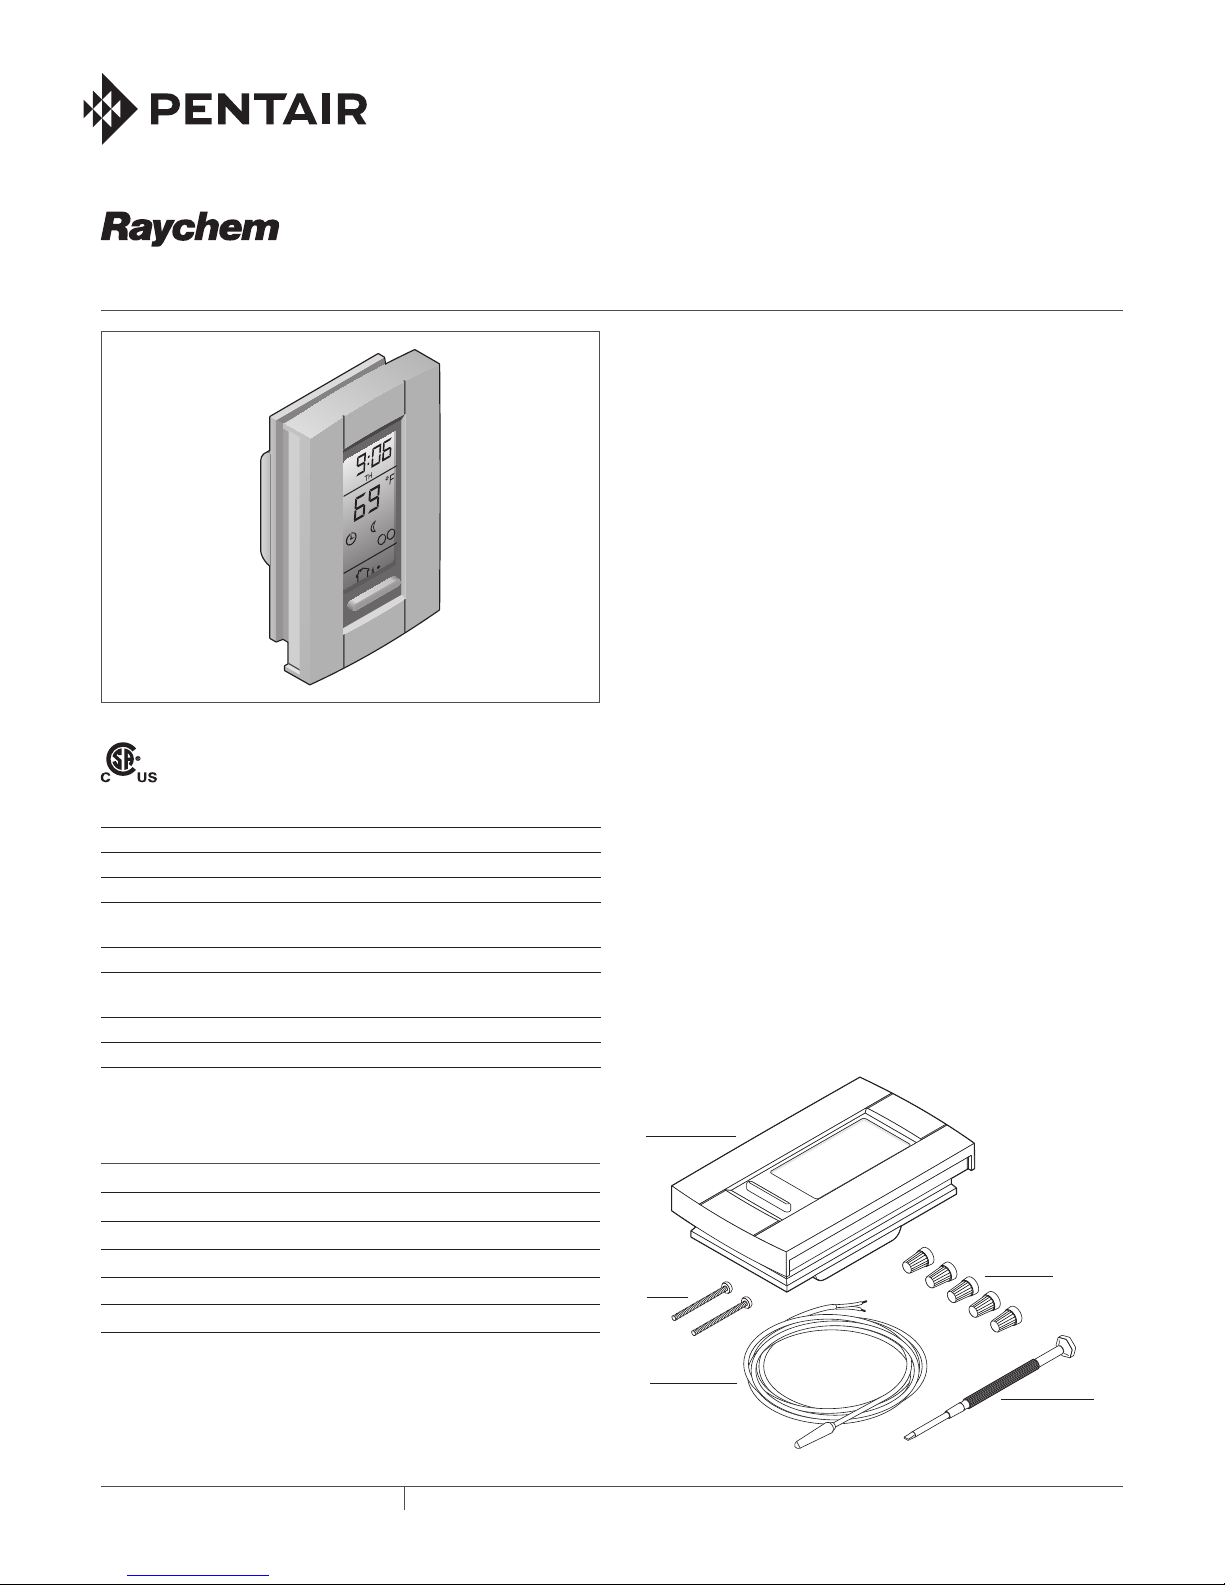
KIT CONTENTS
Item Qty Description
A 1 QuickStat-TC thermostat
B 2 Mounting screws
C 1 Floor temperature sensor 15 ft (4.6m)
D 5 Wire nuts
E 1 Screwdriver
THERMAL MANAGEMENT SOLUTIONS
A
B
C
ML-RaychemQuickStatTCthermostat-IM-H5851701/13
D
E
1 / 6
Page 2

Air
r
base
Power
Load / Floor heating mat
ead
Installation
Important: This thermostat must be installed according to all
national and local electrical codes. The installation must be
performed by qualified personnel.
Locating the floor temperature sensor
The floor temperature sensor is installed under the floor surface.
See the QuickNet System Installation Manual (H57704), Section
6, for more details. Perform the Sensor Resistance Test prior to
terminating the floor sensor to the thermostat. See the QuickNet
System Installation Manual (H57704), Section 7, for more details.
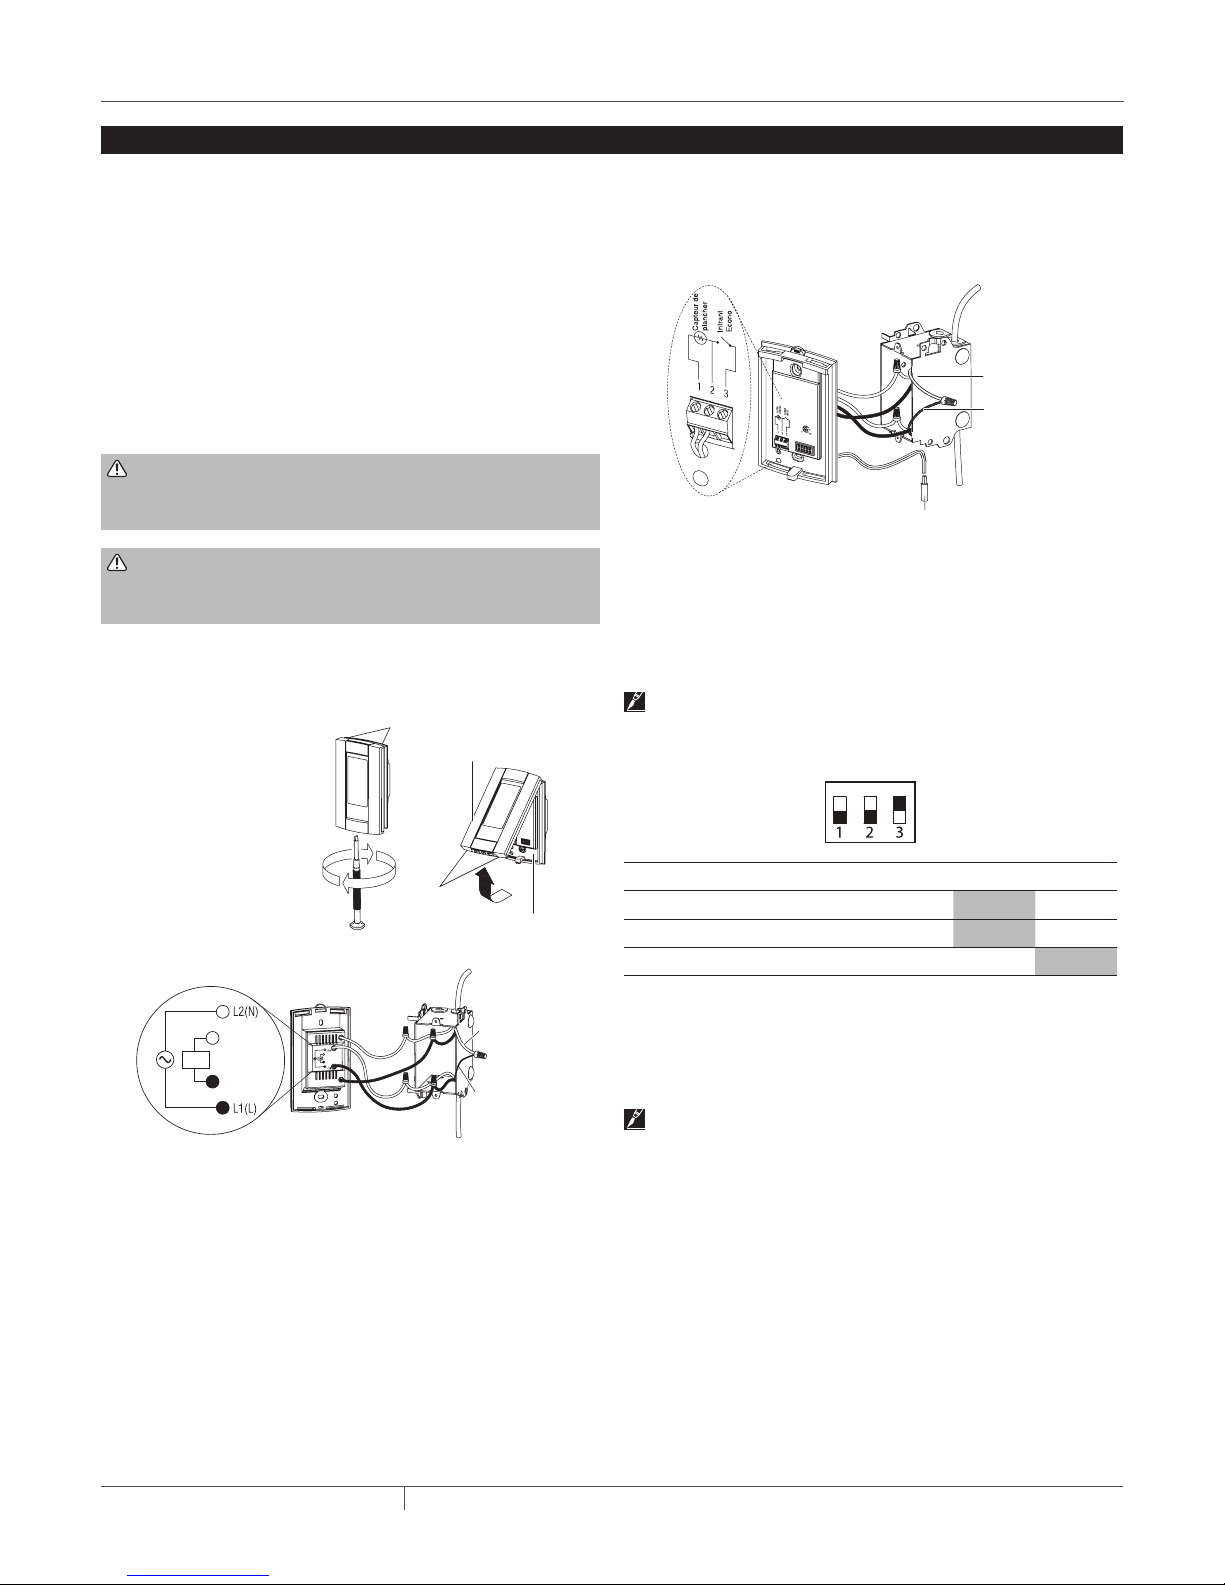
Wiring the thermostat
WARNING: Turn off the power to the circuit at the main
power panel to avoid electric shock.
WARNING: Shock hazard. To prevent shock, the QuickNet
floor heating mat must be connected to ground.
1. Remove the control module from the power base by loosening
the captive screw underneath the base.
2. Connect the floor heating cold leads to the load wires (two
inner wires) using the supplied wire nuts.
3. Connect the power supply
leads to the power base wires
vents
Control
module
(two outer wires) using the
supplied wire nuts.
4. Connect the floor heating cold
lead braid (ground) to the
supply ground in the electrical
junction box.
Air
vents
supply
Powe
Supply
ground
Floor
heating
cold l
ground
5. Insert the floor sensor cable through one of the two openings
on the power base and connect to terminals 1 and 2 (no polarity). Position the sensor cable such that it does not come in
contact with the floor heating wires.
Supply
ground
Floor
heating
cold lead
ground
Floor temperature sensor
6. Push the excess length of the wires back inside the electrical
junction box
7. Secure the power base to the electrical junction box using the
provided mounting screws
8. Verify the settings of the configuration switches on the back
of the control module. Default settings for the configuration
switches are highlighted below.
Important: If your system is installed underneath laminate
or engineered wood flooring, you MUST use AF mode with the
default settings. Note the factory default is AF mode.
No. Configuration Up Down
1 Display format °F/12 hr °C/24 hr
2 Early Start
1
3 Temperature control mode
1
Early Start can be used in Automatic mode only. When this
Enable Disable
2
F AF
function is enabled, the thermostat calculates the optimal time
to start heating in order to obtain the desired temperature by the
set time. The thermostat re-assesses the start time daily based
on the previous day’s results.
Note: If you wish to use only 2 periods, set periods “1 and 4”
or periods “2 and 3”. Early Start will not work if you set periods
“1 and 2” or periods “3 and 4”.
2
To select floor sensing mode, place the switch to the F position.
To select floor sensing and ambient sensing mode, place the
switch to the AF position and ensure that the remote temperature sensor is connected to the thermostat. To select the A
mode, place the switch in the AF position and ensure that the
remote temperature sensor is NOT connected to the thermostat.
9. Install the control module onto the power base.
THERMAL MANAGEMENT SOLUTIONS
ML-RaychemQuickStatTCthermostat-IM-H5851701/13
2 / 6
Page 3

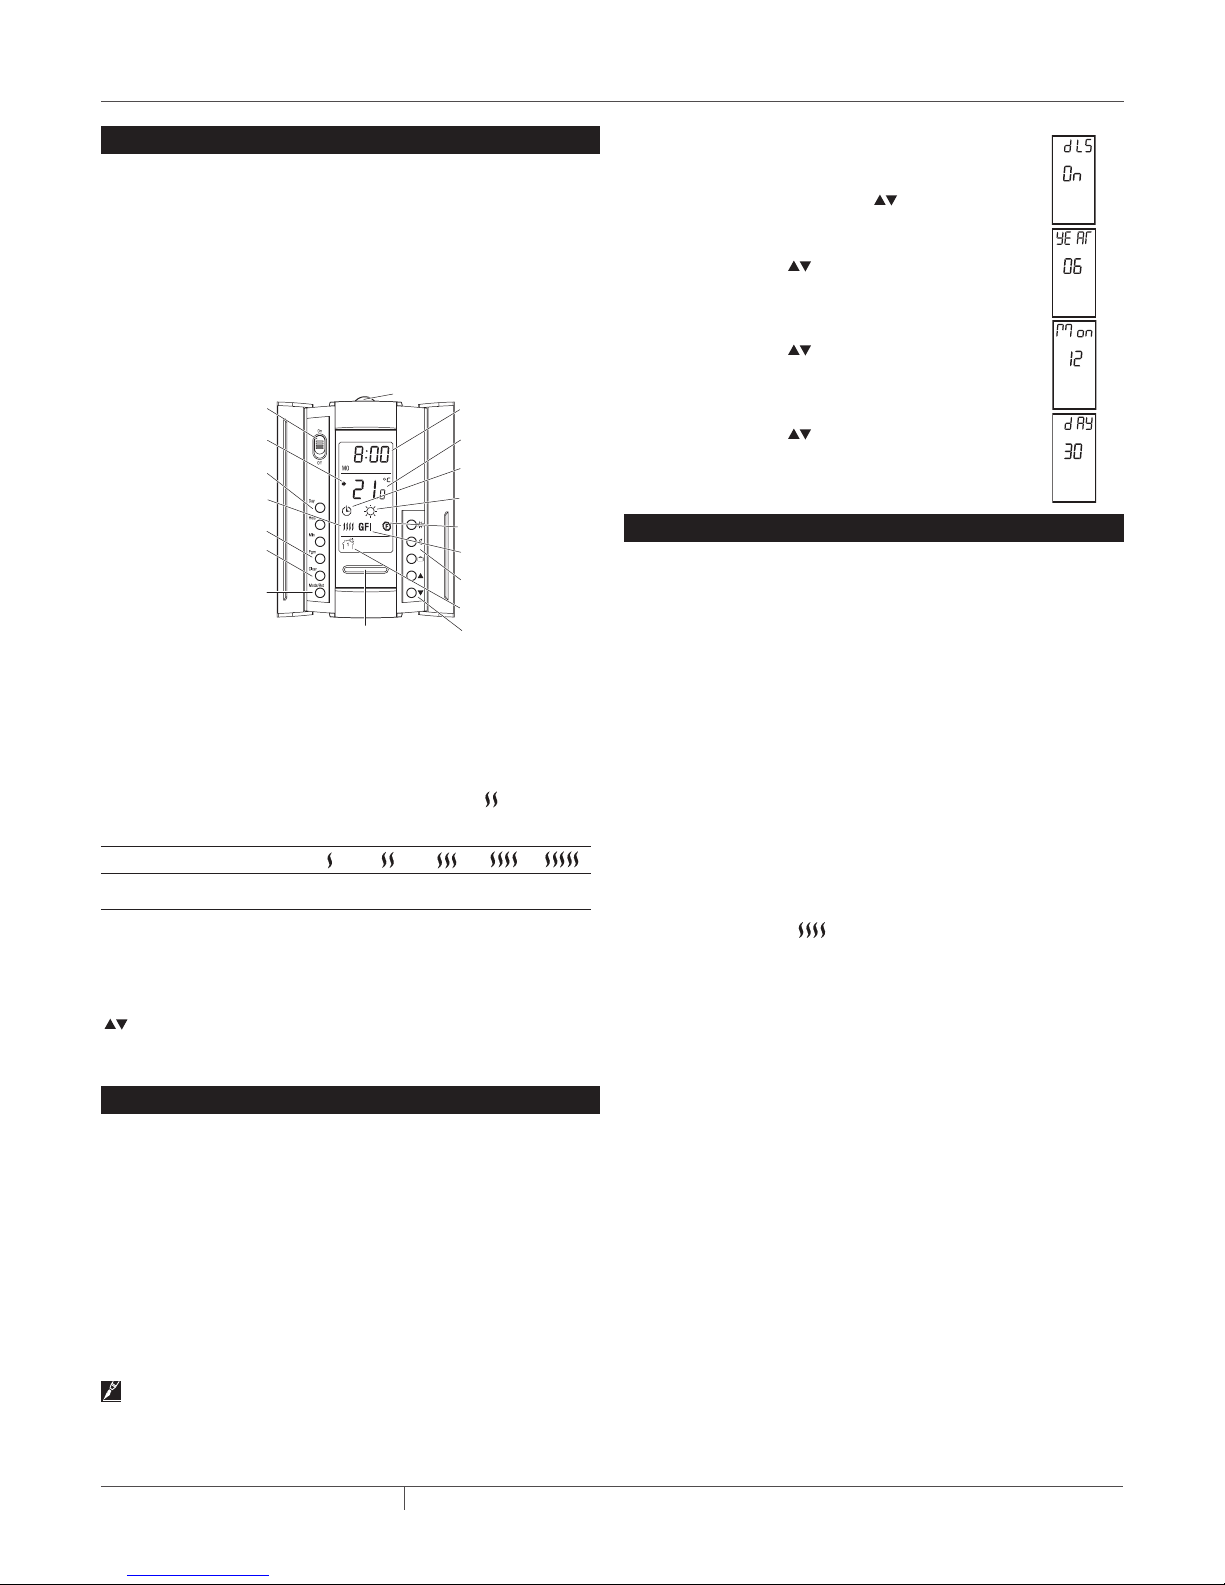
The following figure shows the thermostat controls. The thermo-
setpoint is displayed
GFCI test button
adjustment buttons
ol
stat has three temperature control modes:
• AF mode: (Default mode) Controls the system based on the
• F mode: Controls the floor temperature using an external floor
• A mode: Controls the system based on the ambient air temper-
1
not in use (e.g., in the summer). This will not affect the time and
temperaturesettings.
2
Standby and back to On.
3
to maintain the desired temperature. For example,
when heating is activated 40 percent of the time.
4
The display illuminates for 12 seconds when the backlight button
is pressed. When either of the
display also illuminates. The setpoint temperature appears for 5
seconds, then the actual measured temperature is displayed.
The first time you power up the thermostat, the time and date will
1. Press the Hour button to set the hour.
2. Press the Min button to set the minutes.
3. Press the Day button to set the day.
4. Press Mode/Ret to exit.
Daylight Savings Time
The QuickStat-TC can automatically adjust for Daylight Savings
Time. When this function is enabled, the thermostat switches to
Daylight Savings Time on the second Sunday of March and to normal time on the first Sunday of November.
Thermostat Controls and Display
ambient air temperature and ensures that the floor temperature does not exceed the desired limits using an external floor
temperature sensor
sensor
ature (does not use floor sensor)
settings
Program
1
2
3
Backlight button
Time and day
display
Temperature
display
Mode
display
Preset temperature
indicator
Temperature contr
mode indicator
Ground-fault
4
indicator
Temperature
preset buttons
Period display
Temperature
ON/OFF switch
and GFCI reset
Appears when the
Date and time
Percentage of
heating time
Program button
clear button
Mode selection
/ program exit
Place the switch in Standby to cut power to the heater when
To reset the ground-fault protection, switch the thermostat to
The thermostat displays the percentage of heating time required
is displayed
Display
% of heating time
1 to
24%
25 to
49%
50 to
74%
75 to
99%
100%
GFI appears when the ground-fault protection has tripped.
buttons are pressed, the
Date and Time Setting
flash and must be set.
Note: This function is disabled (default setting) when the
clock loses its setting
To enable Daylight Savings Time:
1. Press and hold the Day button for 3 sec-
onds until DLS appears on the screen.
2. Press the up/down
buttons to toggle
between On (enabled) and Off (disabled).
3. Press the Day button. The year setting is
displayed.
4. Use the up/down
buttons to set the
current year.
5. Press the Day button. The month setting is
displayed.
6. Use the up/down
buttons to set the
current month.
7. Press the Day button. The date setting is
displayed.
8. Use the up/down
buttons to set the
current date.
9. Press Mode/Ret to exit.
Ground-Fault Protection
The QuickStat-TC has a built-in GFCI (5 mA trip level). This
protects users against risks of electrocution by cutting off the
power to the floor heating system when the leakage current
exceeds 5 mA. If a ground-fault has occurred, the TEST light
on the top of the thermostat will illuminate red and GFI will
appear on the screen.
Testing the GFCI
Users should test the GFCI after the installation of the QuickNet
floor heating system is complete to ensure that the ground-fault
protection is in working order. Users should test the GFCI on a
monthly basis thereafter.
1. The GFCI can only be tested if the thermostat has a heating
demand. Increase the setpoint temperature above the current
measured temperature. Wait several seconds to allow the
thermostat to adjust to the new set point and the heating symbol
appears.
2. Press the TEST button.
The test is successful if the TEST light on top of the thermostat
illuminates red and GFI appears on the screen.
The test has failed if the TEST light on top of the thermostat does
not illuminate red. In this case, turn the power off to the floor
heating system and check the installation of the thermostat.
Resetting the GFCI
If the GFCI has tripped, reset it by switching the thermostat to
Standby and back to On. The TEST light on top of the thermostat
will go off.
If the GFCI trips in normal operation without pressing the TEST
button, there could be a ground-fault. To check whether it is a
ground-fault or nuisance tripping, reset the GFCI. If the GFCI does
not trip after the reset, it was nuisance tripping and the system is
functioning properly. If the GFCI trips again after the reset, there
is a ground-fault. The user should contact a qualified electrician to
troubleshoot the issue.
ML-RaychemQuickStatTCthermostat-IM-H5851701/13
3 / 6THERMAL MANAGEMENT SOLUTIONS
Page 4

Programming
The QuickStat-TC comes with a pre-programmed default
schedule. The schedule consists of 4 periods per day which
represents a typical week day.
Period Description Associated temperature setting
Wake-up
Away from home
Return home
Sleep
Default Programming
The following shows the pre-programmed default schedule in the
QuickStat-TC.
Period Setting
MO TU WE TH FR SA SU
6:00A 6:00A 6:00A 6:00A 6:00A 6:00A 6:00A
8:30A 8:30A 8:30A 8:30A 8:30A --:-- --:-5:00P 5:00P 5:00P 5:00P 5:00P --:-- --:--
11:00P 11:00P 11:00P 11:00P 11:00P 11:00P 11:00P
The Comfort ( ) temperature is used in periods 1 and 3 and
the Economy (
) temperature is used in periods 2 and 4. For
example, when the period changes from 1 to 2, the setpoint
automatically changes from Comfort (
Economy (
) temperature.
) temperature to
Preset Temperatures
The QuickStat-TC comes with 3 preset temperatures shown
as Comfort (
and Vacation (
) temperature, Economy ( ) temperature
) temperature. The following table shows the
intended use and the default setting of each preset temperature.
A/AF
Icon Intended use
Comfort
(when at home)
Economy
(when asleep or away from home)
Vacation
(during prolonged absence)
modes F mode
70°F
(21°C)
63°F
(17°C)
50°F
(10°C)
82°F
(28°C)
68°F
(20°C)
50°F
(10°C)
Users can also change a preset temperature by:
1. Set the desired temperature using the
2, Press and hold the corresponding preset button (
buttons.
, , or
) until the corresponding icon is displayed.
Floor Temperature Limit (AF Mode Only)
The default temperature limits are 41°F to 82°F (5°C to 28°C).
Important: If your system is installed underneath laminate
or engineered wood flooring, you MUST use AF mode with the
default settings. Note the factory default is AF mode.
Modifying the Schedule Programming
The user can change the programming to better meet their
lifestyle. To do so:
1. Press Pgm to access the programming mode. Period 1 will be
displayed.
2. Press Day to select the day to program for the selected peri-
od. To select the entire week, press and hold the Day button
for 3 seconds until all days are selected.
3. Press Hour and Min to set the start time of the selected
period, or press Clear if you want to skip the period (--:-- is
displayed).
Note: If you wish to use only 2 periods, set periods “1 and
4” or periods “2 and 3”. Early Start will not work if you set
periods “1 and 2” or periods “3 and 4”.
4. Press Pgm to select another period, or press Day to select
another day. They repeat step 3. Repeat steps 3 & 4 until programming is complete.
5. Press Mode/Ret to exit the programming mode.
Operating Modes
The QuickStat-TC has three operating modes:
Automatic Mode
In this mode, the QuickStat-TC follows the programmed schedule.
To place the QuickStat-TC in this mode:
1. Press the Mode/Ret button until the
icon appears on the
display.
2. To disable Automatic mode, press the Mode/Ret button to
change the mode to Manual mode
.
Temporary Manual Override (in Automatic Mode )
Users can temporarily override the scheduled programming of the
QuickStat-TC. The new temperature setpoint will be used until the
beginning of the next period. To temporarily override the
QuickStat-TC:
1. Press the
, or button, while the thermostat is in
the Automatic mode, to the new desired setpoint. Once the
new setpoint is accepted, the icon will begin to flash.
2. To cancel the temporary override, press the Mode/Ret button.
Manual Mode
In this mode, the programmed schedule is not used and the
setpoint temperature must be set manually. To place the
QuickStat-TC in this mode:
1. Press the Mode/Ret button until the
icon appears on the
display.
2. Set the temperature using the
, or button.
3. To disable Manual mode, press the Mode/Ret button to
change the mode to Automatic mode
.
THERMAL MANAGEMENT SOLUTIONS
ML-RaychemQuickStatTCthermostat-IM-H5851701/13
4 / 6
Page 5
Vacation Mode
In this mode, the QuickStat-TC is set to the Vacation setpoint
temperature and will override all programming until Vacation
mode is disabled. To place the QuickStat-TC in this mode:
1. Press the
button, and the icon appears on the display.
2. To disable Vacation mode, press the Mode/Ret button to
change the mode to Automatic
or Manual .
To reset the QuickStat-TC to factory default settings:
3. Turn the thermostat to Off.
4. Press the up button
and switch the thermostat On.
5. After the thermostat setup is completed, release the up
button
.
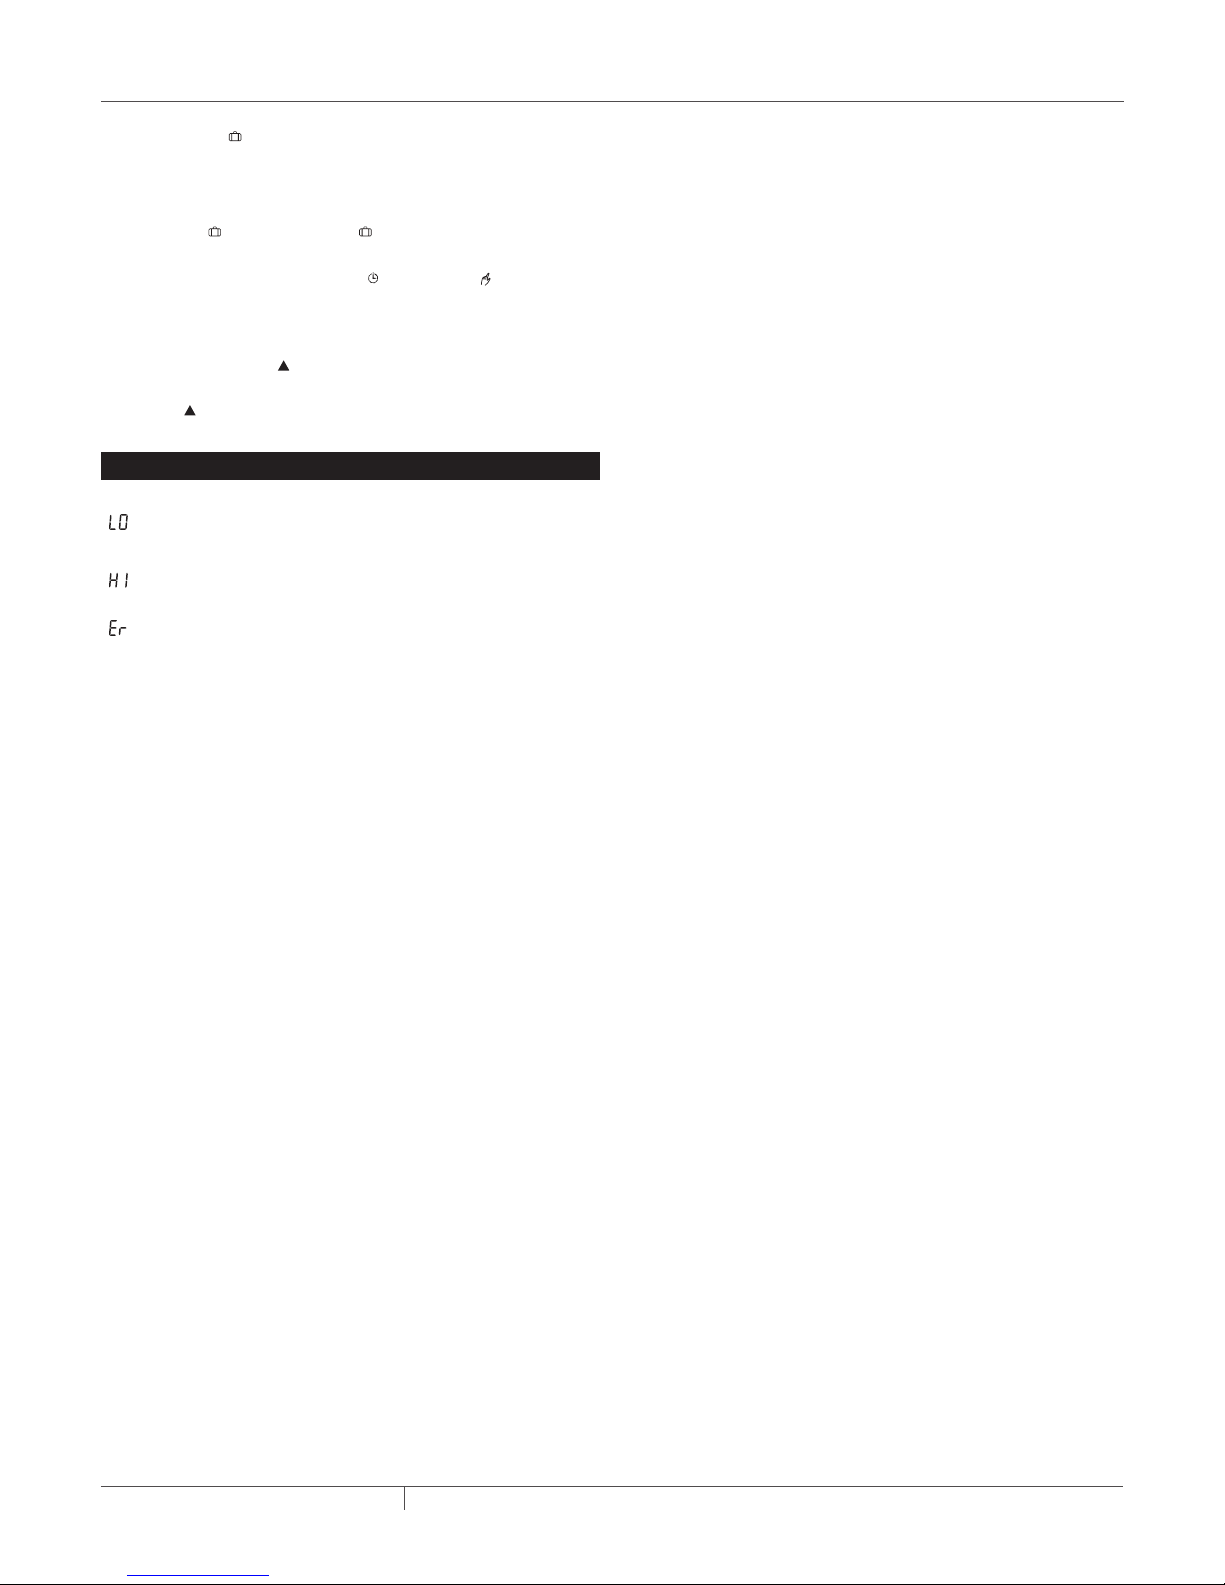
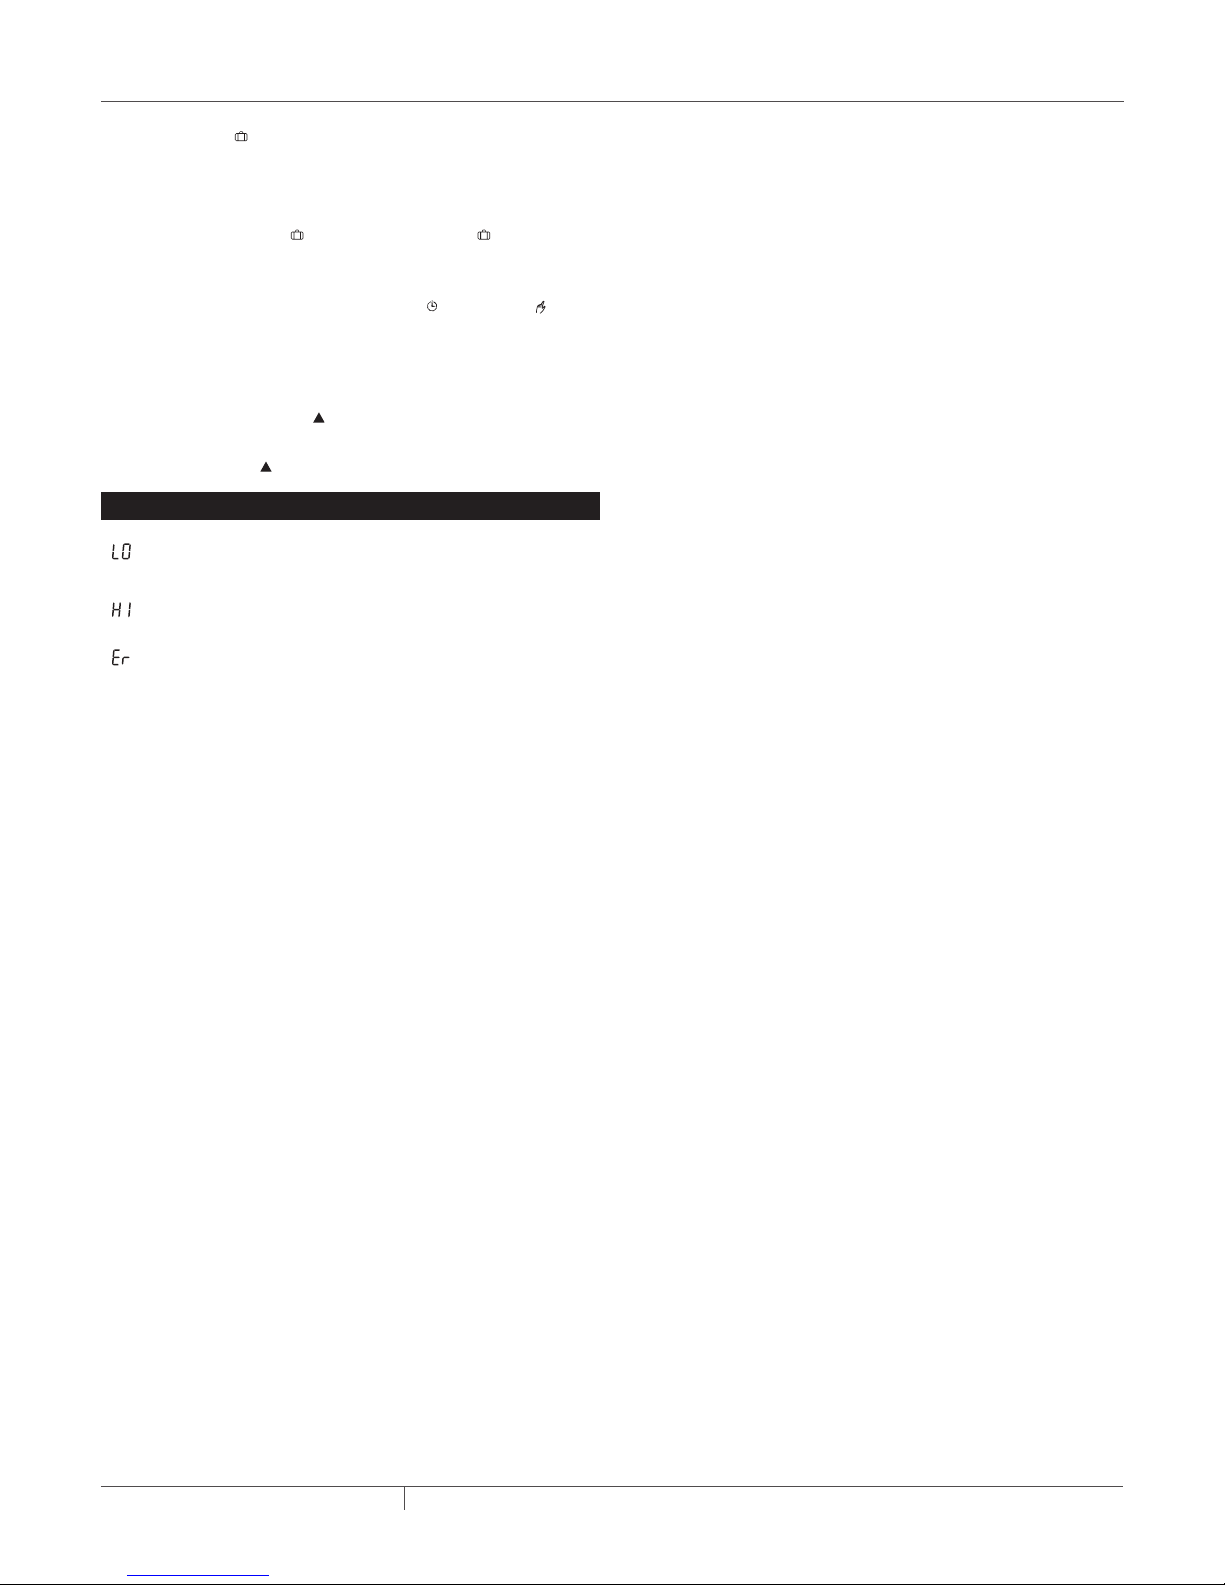
Error Message
The measured temperature is below the thermostat’s
display range. Heating is activated.
The measured temperature is above the thermostat’s
display range. Heating is deactivated.
Verify the floor sensor connection to the thermostat.
ML-RaychemQuickStatTCthermostat-IM-H5851701/13
5 / 6THERMAL MANAGEMENT SOLUTIONS
Page 6

WWW.THERMAL.PENTAIR.COM
NORTH AMERICA
Tel: +1.800.545.6258
Fax: +1.800.527.5703
Tel: +1.650.216.1526
Fax: +1.650.474.7711
thermal.info@pentair.com
Pentair, QuickNet and QuickStat are owned by Pentair or its global affiliates. All other trademarks are the property of their respective owners. Pentair
reserves the right to change specifications without prior notice.
© 2009-2013 Pentair. 400-115-052
EuROPE, MIddLE EAsT, AfRICA
Tel: +32.16.213.511
Fax: +32.16.213.603
thermal.info@pentair.com
AsIA PACIfIC
Tel: +86.21.2412.1688
Fax: +86.21.5426.2917
cn.thermal.info@pentair.com
ML-RaychemQuickStatTCthermostat-IM-H5851701/13
LATIN AMERICA
Tel: +55.11.2588.1400
Fax: +55.11.2588.1410
thermal.info@pentair.com
6 / 6THERMAL MANAGEMENT SOLUTIONS
Page 7

QuickStat-TC
INSTRUCTIONS D'INSTALLATION ET D'OPÉRATION
F
A
2
APPROBATIONS
DONNÉES TECHNIQUES
Tension d'alimentation 120 V, 208 V, 240 V, 60 Hz
Capacité maximum de
commutation
Disjoncteur différentiel Classe A, niveau de déclenchement 5 mA
Plage de valeur de consigne
ambiante
Plage de valeur de consigne
pour le plancher)
Plage de valeur de consigne
de limite de plancher
Plage de température de
fonctionnement
Plage de température
d'entreposage
15 A
5 °C à 30 °C (40 °F à 86 °F)
5 °C à 40 °C (40 °F à 104 °F)
5 °C à 40 °C (40 °F à 104 °F)
0 °C à 50 °C (32 °F à 120 °F)
–20 °C à 50 °C (–4 °F à 120 °F)
INFORMATION GÉNÉRALE
Utilisation de ce manuel
Le présent manuel contient les instructions d'installation et
d'opération du thermostat Raychem QuickStat-TC et il doit être utilisé
conjointement avec le document suivant :
• Manuel « Instructions d'installation du système QuickNet » (H57704)
Important : La garantie de Pentair Thermal Management et les
homologations ne sont valides que si les instructions figurant sur
l’emballage et dans le présent manuel sont respectées.
Caractéristiques
Le QuickStat-TC est un thermostat électronique qui doit être utilisé avec
les tapis chauffants par le plancher Raychem QuickNet.
Le QuickStat-TC comporte les caractéristiques suivantes :
• Disjoncteur différentiel intégré, classe A.
• Fonctionnement à 120 V, 208 V, 240 V, 60 Hz.
• Actionnement du système de chauffage à des heures
prédéterminées selon la journée de la semaine.
• Offre quatre (4) périodes chaque jour pour le réglage de différentes
températures.
• Livré avec un calendrier préprogrammé qui convient à la plupart
des installations. Il est cependant possible de personnaliser le
programme à tout moment.
• Vous permet de réinitialiser le thermostat aux réglages d'usine.
• Modification automatique de l'heure de début de la période de
chauffage pour que la température désirée soit atteinte à l'heure
programmée.
• Plusieurs options de contrôle de la température de façon à ce que
les utilisateurs puissent contrôler le système en fonction de la
température du plancher (F), de la température ambiante (A) ou des
deux (AF).
• Commutation sous tension/hors tension de façon à fermer le
thermostat durant les mois d'été.
A
CONTENU DE KIT
A 1 Thermostat QuickStat-TC
B 2 Vis de montage
C 1 Sonde de température de plancher 4,6 m (15 pi)
D 5 Capuchons de connexion
E 1 Tournevis
THERMAL MANAGEMENT SOLUTIONS
B
C
CF-RaychemQuickStatTCthermostat-IM-H5851701/13
D
E
1 / 6
Page 8
Prises d'air
Base alimentation
Alimentation
d
masse
Installation
Important : L'installation de ce thermostat doit être conforme
aux codes de l'électricité national et local. Elle doit être faite par
un électricien qualifié.
Position de la sonde de température (au plancher)
La sonde de température doit être installée sous la surface du
plancher. Voir le manuel d'installation du système QuickNet
(H57704), chapitre 6, pour plus de détails. Effectuer l'essai de
résistance de la sonde avant de brancher la sonde de température
au thermostat. Voir le manuel d'installation du système QuickNet
(H57704), chapitre 7, pour plus de détails.
Câblage du thermostat
MISE EN GARDE : Pour éviter les chocs électriques,
couper l'alimentation au circuit au niveau du tableau de
distribution principal.
MISE EN GARDE : Risque de Choc. Pour éviter tout risque
de choc électrique, le tapis de chauffage du sol doit être
relié à la terre.
1. Retirer le module de commande à partir de la base de
l'alimentation en desserrant la vis sous la base.
2. Brancher les fils froids du système de chauffage de plancher
aux bornes de charge
(deux fils intérieurs) en
utilisant les connecteurs
de fils fournis.
Module de
commande
3. Brancher les fils de
l'alimentation électrique
principale aux bornes de
la base (deux fils
extérieurs) en utilisant
Prises d'air
les connecteurs de fils
fournis.
5. Introduire le câble de la sonde à travers l'une des deux
ouvertures de la base de l'alimentation et raccorder les files
de la sonde aux bornes 1 et 2 (aucune polarité à respecter).
Placer le câble de la sonde de manière à ce qu'il ne soit pas en
contact avec un des câbles chauffants du plancher.
Masse
Plancher
chauffant
cordon froid
masse
Capteur de température du plancher
6. Pousser la partie non utilisée des fils dans la boîte électrique.
7. Fixer la base d'alimentation à la boîte de jonction électrique à
l'aide des vis de montage fournies.
8. Vérifier les réglages de la configuration des commutateurs à
l'arrière du module de contrôle. Les réglages par défaut de la
configuration sont présentés ci-dessous.
Important : Si le système est installé sous un plancher de bois
stratifié ou d'ingénierie, vous DEVEZ utiliser le mode AF avec les
réglages par défaut. Prendre note que le réglage par défaut de
l'usine est AF.
NoConfiguration Haut Bas
1 Afficher format °F/12 hres °C/24 hres
2 Démarrage anticipé
3 Mode de contrôle de la température
1
Activer Désactiver
2
F AF
Masse
Charge / Tapis chauffant
4. Brancher les fils tressés froids du système de chauffage de sol
(terre) à la mise à la terre de l'alimentation dans la boîte de
jonction électrique.
THERMAL MANAGEMENT SOLUTIONS
1
Masse
Plancher
chauffant
cordon froi
Le démarrage anticipé fonctionne en mode automatique uniquement.
Lorsque cette fonction est activée, le thermostat calcule le moment
idéal pour mettre en marche le chauffage afin d'obtenir la température désirée à l'heure réglée. Le thermostat réévalue quotidiennement
l'heure de démarrage en fonction du résultat obtenu la veille.
Remarque : Si vous ne désirez utiliser que 2 périodes, réglez les
périodes « 1 et 4 » ou les périodes « 2 et 3 ». Le démarrage anticipé
ne fonctionnera pas si vous réglez les périodes « 1 et 2 » ou les
périodes « 3 et 4 ».
2
Pour sélectionner le mode de détection au plancher, placer le commutateur à la position F. Pour choisir le mode de détection plancher
et le mode de détection ambiant, placer le commutateur en position
AF et s'assurer que la sonde de température distante est branchée au
thermostat. Pour choisir le mode A, placer le commutateur en position
AF et s'assurer que la sonde de température distante N'est PAS branchée au thermostat.
9. Installer le module de contrôle à l'alimentation de base.
CF-RaychemQuickStatTCthermostat-IM-H5851701/13
2 / 6
Page 9

Thermostat Controls and Display
Bouton d'essai DFT
de la température
églage
Réglages de la date et de l'heur
La figure ci-dessous illustre les commandes du thermostat. Le thermostat comporte trois modes de contrôle de la température :
• Mode AF : (mode par défaut) Contrôle la température de l'air
ambiant et maintient la température au plancher dans les limites
souhaitables à l'aide d'une sonde de température externe.
• Mode F : Régulation de la température au moyen d'une sonde de
température externe.
• Mode A : Régulation du système en fonction de la température de
l'air ambiant (n'utilise pas la sonde de température).
et réinitialisation DFT
consigne limite est indiquée
Bouton de programmation
Bouton de réinitialisation
1
Placer le commutateur en mode Veille pour mettre l'appareil de
chauffage hors tension lorsqu'il n'est pas utilisé (par exemple,
durant l'été). Cela ne modifiera pas les réglages de l'horloge et de la
température.
2
Pour réinitialiser la protection contre les fuites de terre, mettre le
thermostat en mode Veille et le remettre sous tension.
3
Le thermostat affiche le pourcentage d'utilisation du chauffage
requis pour maintenir la température souhaitée. Par exemple,
s'affiche lorsque le chauffage est activé 40 pour cent du temps.
Affichage
% d'utilisation du chauffage
4
GFI apparaît lorsque la protection contre les fuites de terre est
déclenchée.
L'écran s'illumine pendant 12 secondes quand on appuie sur le
bouton de rétroéclairage. Quand on appuie sur l'un des boutons
, l'affichage s'illumine également. La température de réglage apparaît
pendant 5 secondes, puis la température réelle mesurée est affichée.
Réglage de la date et de l'heure
a première fois que le thermostat est mis sous tension, la date et
L
l'heure clignotent et doivent être réglées.
1. Appuyer sur le bouton Heure pour régler l'heure.
2. Appuyer sur le bouton Min pour régler les minutes.
3. Appuyer sur le bouton Jour pour régler le jour.
4. Appuyer sur le bouton Mode/Ret pour quitter.
Heure avancée
Le QuickStat-TC peut s'ajuster automatiquement à l'heure avancée.
Lorsque cette fonction est activée, le thermostat passe à l'heure avancée le deuxième dimanche de mars et à l'heure normale le premier
dimanche de novembre.
Remarque : La fonction d'heure avancée est désactivée (réglage
par défaut) lorsque l'horloge perd son réglage.
Contacteur On/Off
S'affiche lorsque la
Pourcentage de
temps de chauffage
de programmation
Sélection de mode
/ sortie du programme
1
2
e
3
Bouton de rétroéclairage
1 à
24 %
25 à
49 %
Affichage de l'heure et
de la journée
Affichage de
la température
Affichage de
mode
Indicateur de prér
de température
Indicateur de mode
contrôle de température
Indicateur
4
DFT
Boutons préréglés
de température
Affichage de la période
Boutons de réglage
50 à
75 à
74 %
99 %
100 %
Pour activer l'heure avancée :
1. Appuyer sur le bouton Jour et le maintenir enfoncé
pendant 3 secondes jusqu'à ce que DLS apparaisse
à l'écran.
2. Appuyer sur les boutons haut/bas
pour passer
de On (activé) à Off (désactivé).
3. Appuyer sur le bouton Jour. L'année est affichée.
4. Utiliser les boutons haut/bas
pour régler
l'année.
5. Appuyer sur le bouton Jour. Le mois est affiché.
6. Utiliser les boutons haut/bas pour régler le
mois.
7. Appuyer sur le bouton Jour. La date est affichée.
8. Utiliser les boutons haut/bas
pour régler la
date.
9. Appuyer sur le bouton Mode/Ret pour quitter.
Protection contre les fuites à la terre
Le QuickStat-TC comporte un disjoncteur différentiel intégré (niveau
de déclenchement 5 mA). Cela protège l'utilisateur des électrocutions
en coupant l'alimentation du système de chauffage lorsque le courant
de fuite dépasse 5 mA. En cas de défaut de mise à la terre, la lumière
TEST en haut du thermostat va s'allumer en rouge et GFI apparaîtra
à l'écran.
Pour tester le disjoncteur différentiel
Les utilisateurs devraient tester le disjoncteur différentiel après
l'installation du système de plancher chauffant QuickNet pour
s'assurer que la protection de mise à la terre est fonctionnelle. Les
utilisateurs devraient tester le disjoncteur différentiel au moins une
fois par mois.
1. Le test ne peut se faire que si le thermostat détecte une demande
de chauffage. Régler le point de consigne au-delà de la température mesurée actuelle. Attendre plusieurs secondes pour
permettre au thermostat de s'ajuster à la nouvelle valeur puis le
symbole de chauffage
apparaît.
2. Appuyer sur le bouton TEST.
Le test est réussi si la lumière TEST dans le haut du thermostat
s'allume en rouge et que GFI apparaît à l'écran.
Le test échoue si la lumière rouge TEST dans le haut du thermostat ne
s'allume pas. Dans ce cas, éteindre le système de chauffage et vérifier
l'installation du thermostat.
Réinitialisation du disjoncteur différentiel
Si le disjoncteur différentiel s'est déclenché, le réinitialiser en faisant
passer le thermostat de la position Standby et retour à On. La lumière
TEST dans le haut du thermostat s'éteindra.
Si le disjoncteur différentiel se déclenche en fonctionnement normal
sans que vous ayez appuyé sur le bouton TEST, il peut y avoir fuite
à la terre. Pour déterminer s'il s'agit d'une fuite à la terre ou d'un
défaut du disjoncteur, réinitialiser le disjoncteur différentiel. Si le
disjoncteur différentiel ne se déclenche pas suite à la réinitialisation,
il s'agissait d'un défaut du disjoncteur et le système fonctionne
normalement. Si le disjoncteur différentiel se déclenche à nouveau
suite à la réinitialisation, il s'agit d'une fuite à la terre. L'utilisateur
doit contacter un électricien qualifié pour le dépannage du système.
CF-RaychemQuickStatTCthermostat-IM-H5851701/13
3 / 6THERMAL MANAGEMENT SOLUTIONS
Page 10
Programmation
e QuickStat-TC est livré avec un horaire préprogrammé par défaut.
L
L'horaire comprend 4 périodes par jour, ce qui représente une journée
type de la semaine.
Période Description Réglage connexe de la température
Réveil
Départ
Retour à la maison
Nuit
Programmation par défaut
Ce qui suit montre l'horaire préprogrammé par défaut pour le
QuickStat-TC.
Période Paramètre MO TU WE TH FR SA SU
6:00A 6:00A 6:00A 6:00A 6:00A 6:00A 6:00A
8:30A 8:30A 8:30A 8:30A 8:30A --:-- --:-5:00P 5:00P 5:00P 5:00P 5:00P --:-- --:--
11:00P 11:00P 11:00P 11:00P 11:00P 11:00P 11:00P
La température de Confort ( ) est utilisée lors des périodes 1 et 3
et la température Économie ( ) est utilisée lors des périodes 2 et
4. Par exemple, la température Confort ( ) passe à la température
Économie ( ) lorsque la période 1 passe à la période 2.
Préréglage de température
Le QuickStat-TC est livré avec 3 températures préréglées indiquées
comme Température de Confort ( ), de Température d'Économie (
) et de Température de Vacances ( ). Le tableau suivant montre
l'utilisation prévue et la valeur par défaut de chacun des préréglages
de température.
Modes A/
Icône Utilisation prévue
Confort
(lorsque l'occupant est à la maison)
Économie
(pendant la nuit ou lorsqu'il n'y a personne à la maison)
Vacances
(pendant une absence prolongée)
Les utilisateurs peuvent également changer une température
préréglée :
1. Régler la température désirée à l'aide des boutons
2. Appuyer sur le bouton de préréglage approprié (
et le maintenir enfoncé jusqu'à ce que l'icône correspondante soit
affichée.
AF Mode F
21 °C
(70 °F)
17 °C
(63 °F)
10 °C
(50 °F)
28 °C
(82 °F)
20 °C
(68 °F)
10 °C
(50 °F)
.
, ou )
Limites de température du plancher (mode AF seulement)
Les limites de température par défaut sont 5 °C à 28 °C (41 °F à 82 °F).
Important : Si le système est installé sous un plancher de bois stratifié ou d'ingénierie, vous DEVEZ utiliser le mode AF avec les réglages
par défaut. Prendre note que le réglage par défaut de l'usine est AF.
Modification de la programmation horaire
L'utilisateur peut changer la programmation pour l'adapter à son style
de vie. Pour ce faire :
1. Appuyer sur Pgm pour accéder au mode de programmation. La
Période 1 sera affichée.
2. Appuyer sur Jour pour sélectionner le jour à programmer pour la
période sélectionnée. Pour sélectionner toute la semaine, appuyer
sur le bouton Jour et le maintenir enfoncé pendant 3 secondes
jusqu'à ce que tous les jours soient sélectionnés.
3. Appuyer sur Heure et Min pour régler l'heure du début de la période
sélectionnée, ou appuyer sur Clear pour sauter la période (--:-- est
affiché).
Remarque : Si vous ne désirez utiliser que 2 périodes, réglez les
périodes « 1 et 4 » ou les périodes « 2 et 3 ». Le démarrage anticipé
ne fonctionnera pas si vous réglez les périodes « 1 et 2 » ou les
périodes « 3 et 4 ».
4. Appuyer sur Pgm pour sélectionner une autre période ou sur Jour
pour sélectionner un autre jour. Répéter ensuite l'étape 3. Répéter
les étapes 3 et 4 jusqu'à ce que la programmation soit terminée.
5. Appuyer sur Mode/Ret pour sortir du mode de programmation.
Modes de fonctionnement
Le QuickStat-TC a trois modes de fonctionnement :
Mode automatique
Dans ce mode, le QuickStat-TC suit l'horaire programmé. Pour placer
le QuickStat-TC dans ce mode :
1. Appuyer sur le bouton Mode/Ret jusqu'à ce que l'icône apparaisse sur l'affichage.
2. Pour désactiver le mode Automatique, appuyer sur le bouton
Mode/Ret pour changer le mode à Manuel .
Commande manuelle temporaire (en mode Automatique )
Les utilisateurs peuvent temporairement ignorer l'horaire programmé
du QuickStat-TC. La nouvelle température de réglage sera utilisée
jusqu'au début de la période suivante. Pour temporairement ignorer le
QuickStat-TC :
1. Appuyer sur le bouton , ou pendant que le thermostat
est en mode Automatique, au nouveau réglage désiré. Une fois le
nouveau réglage accepté, l'icône clignotera.
2. Pour annuler la commande temporaire, appuyer sur le bouton
Mode/Ret.
Mode manuel
Dans ce mode, l'horaire programmé n'est pas utilisé et la température
doit être choisir manuellement. Pour placer le QuickStat-TC dans ce
mode :
1. Appuyer sur le bouton Mode/Ret jusqu'à ce que l'icône apparaisse sur l'affichage.
2. Régler la température en utilisant le bouton , ou .
3. Pour désactiver le mode Manuel, appuyer sur le bouton Mode/Ret
pour changer le mode à Automatique .
THERMAL MANAGEMENT SOLUTIONS
CF-RaychemQuickStatTCthermostat-IM-H5851701/13
4 / 6
Page 11
Mode Vacances
Dans ce mode, le QuickStat-TC est à la température prédéfinie pour
Vacances et ignorera toutes les autres programmations jusqu'à ce que le
mode Vacances soit désactivé. Pour placer le QuickStat-TC dans ce mode :
1. Appuyer sur le bouton jusqu'à ce que l'icône apparaisse
sur l'affichage.
2. Pour désactiver le mode Vacances, appuyer sur le bouton Mode/
Ret pour changer le mode à Automatique ou Manuel .
Pour remettre le QuickStat-TC aux réglages d'usine :
3. Mettre le thermostat hors fonction (Off).
4. Appuyer sur le bouton UP et mettre le thermostat sous tension
(On).
5. Relâcher le bouton lorsque le réglage du thermostat est terminé.
Messages d'erreur
La température mesurée est inférieure à la plage d'affichage du
thermostat. Le chauffage est activé.
La température mesurée est supérieure à la plage d'affichage
du thermostat. Le chauffage est désactivé.
Vérifier la connexion de la sonde de température au thermostat.
CF-RaychemQuickStatTCthermostat-IM-H5851701/13
5 / 6THERMAL MANAGEMENT SOLUTIONS
Page 12

WWW.THERMAL.PENTAIR.COM
AMÉRIQUE DU NORD
Tel: +1.800.545.6258
Fax: +1.800.527.5703
Tel: +1.650.216.1526
Fax: +1.650.474.7711
thermal.info@pentair.com
Pentair, QuickNet et QuickStat sont la propriété de Pentair ou de ses filiales mondiales. Toutes les autres marques de commerce sont la propriété de leurs
propriétaires respectifs. Pentair se réserve le droit de changer les spécifications sans préavis.
© 2011-2013 Pentair. 400-115-052
EUROPE, MOYEN-ORIENT, AFRIQUE
Tel: +32.16.213.511
Fax: +32.16.213.603
thermal.info@pentair.com
ASIE-PACIFIQUE
Tel: +86.21.2412.1688
Fax: +86.21.5426.2917
cn.thermal.info@pentair.com
CF-RaychemQuickStatTCthermostat-IM-H5851701/13
AMÉRIQUE LATINE
Tel: +55.11.2588.1400
Fax: +55.11.2588.1410
thermal.info@pentair.com
6 / 6THERMAL MANAGEMENT SOLUTIONS
Page 13

QuickStat-TC
MANUAL DE INSTALACIÓN Y FUNCIONAMIENTO
F
A
2
APROBACIONES
DATOS TÉCNICOS
Voltaje de suministro 120 V, 208 V, 240 V, 60 Hz
Corriente de conmutación
máxima
GFCI Clase A, nivel de desconexión de 5 mA
Rango de referencia de tem-
peratura ambiental
Rango de referencia de tem-
peratura del suelo (modo F)
Rango de referencia de límite
de temperatura del suelo
Rango de temperatura
operativa
Rango de temperatura de
almacenamiento
15 A
5°C a 30°C (40°F a 86°F)
(Modo A/AF)
5°C a 40°C (40°F a 104°F)
5°C a 40°C (40°F a 104°F)
(Modo AF)
0°C a 50°C (32°F a 120°F)
–20°C a 50°C (–4°F a 120°F)
INFORMACIÓN GENERAL
Uso de este manual
Este manual trata sobre la instalación y el funcionamiento del
termostato Raychem QuickStat-TC y debe utilizarse junto con el
siguiente documento:
• Manual de instalación del Sistema QuickNet (H57704)
Importante: Para que se apliquen las garantías y aprobaciones de
agencia para Pentair Thermal Management, deben seguirse las
instrucciones incluidas en este manual y los empaques de producto.
Características
QuickStat-TC es un termostato electrónico que debe utilizarse con las
mallas para suelo radiante Raychem QuickNet.
QuickStat-TC cuenta con las siguientes características:
• Interruptor integrado de protección contra fallas de conexión a
tierra (GFCI, Ground-Fault Circuit Interrupter ) Clase A.
• Funciona a 120 V, 208 V, 240 V y 60 Hz.
• Activa el sistema de calefacción a las horas predeterminadas en
diferentes días de la semana.
• Ofrece 4 períodos cada día, que se pueden ajustar a distintas
temperaturas.
• Se suministra con un programa predeterminado adecuado para la
mayoría de las instalaciones. Sin embargo, es posible personalizarlo
cuando se desee.
• Permite restablecer en el termostato a los valores predeterminados
de fábrica.
• Cambia automáticamente la hora inicial del período de calefacción para
que se alcance la temperatura seleccionada a la hora definida.
• Ofrece múltiples opciones de control de temperatura, de manera que los
usuarios puedan controlar el sistema basándose en la temperatura del
suelo (F), la temperatura ambiental (A) o ambas (AF).
• Interruptor de encendido/apagado para desconectar el aparato
durante los meses de verano.
CONTENIDO DE LA CAJA
A 1 Termostato QuickStat-TC
B 2 Tornillos de montaje
C 1 Sensor de temperatura del suelo para 4,6 m (15 pies)
D 5 Conectores de cable
E 1 Destornillador
THERMAL MANAGEMENT SOLUTIONS
A
B
C
LS-RaychemQuickStatTCthermostat-IM-H5851701/13
D
E
1 / 6
Page 14

Ventilaciones
alimentación
Suministro
Malla de suelo radiante / carga
Instalación
Importante: Este termostato debe instalarse de conformidad
con toda la normativa nacional y local sobre electricidad. La
instalación debe estar a cargo de personal calificado.
Ubicación del sensor de temperatura del suelo
El sensor de temperatura del suelo se instala debajo de la superficie
del suelo. Para obtener más información, consulte la Sección 6 del
Manual de instalación de QuickNet System (H57704). Realice la
prueba de resistencia del sensor antes de unir el sensor de suelo al
termostato. Para obtener más información, consulte la Sección 7 del
Manual de instalación de QuickNet System (H57704).
Cableado del termostato
ADVERTENCIA: Para evitar descargas eléctricas, desconecte
la alimentación al circuito en el panel eléctrico principal.
ADVERTENCIA: Riesgo de Descarga Eléctrica. Para evitar
descargas eléctricas, la malla de suelo radiante quicknet
se debe conectar a tierra.
1. Afloje el tornillo prisionero situado debajo de la base para
retirar el módulo de control de la base de alimentación.
2. Conecte los conductores
fríos de suelo radiante a
los cables de carga (dos
cables internos) utilizando
los conectores de cable
de aire
Módulo de
control
suministrados.
3. Conecte los conductores
de alimentación a los
cables de la base de ali
mentación (dos cables
externos) utilizando los
conectores de cable sumi
-
Ventilaciones
de aire
Base de
-
nistrados.
de energía
Masa
Carga
Conexión a tierra
de conductor frío
de suelo radiante
4. Conecte la malla (tierra) del conductor frío de suelo radiante
a la masa de la caja de conexiones eléctricas.
5. Introduzca el cable del sensor de suelo por una de las dos
aberturas de la base de alimentación y conéctelo a los termi
nales 1 y 2 (sin polaridad). Coloque el cable del sensor de
manera que no toque los cables del suelo radiante.
Masa
Conexión a tierra
de conductor frío
de suelo radiante
Sensor de temperatura del suelo
6. Empuje el excedente de cables al interior de la caja de cone
-
xiones eléctricas.
7. Fije la base de alimentación a la caja de conexiones eléctricas
con los tornillos de montaje suministrados.
8. Compruebe los valores de los conmutadores de configuración
de la parte posterior del módulo de control. A continuación,
se indican los valores predeterminados de los conmutadores
de configuración.
Importante: Si su sistema está instalado debajo de un suelo de
madera laminada o manufacturada, DEBE usar el modo AF con los
valores predeterminados. Tenga en cuenta que el valor
predeterminado de fábrica es el modo AF.
Nº Configuración
1 Formato de pantalla
2 Encendido anticipado
3 Modo de control de temperatura
1
El encendido anticipado sólo funciona en el modo automático. Cuando dicha función está activada, el termostato calcula la hora óptima
para encender la calefacción y obtener la temperatura deseada a la
hora establecida. El termostato reevalúa a diario la hora del encendido
en función del resultado obtenido el día anterior.
Nota: si desea utilizar solamente 2 períodos, elija los períodos "1
y 4" o los períodos "2 y 3". El encendido anticipado no se activa si se
utilizan los períodos "1 y 2" o los períodos "3 y 4".
2
Para seleccionar el modo de detección de suelo, coloque el conmutador en la posición F. Para seleccionar el modo de detección de suelo
y de temperatura ambiente, sitúe el conmutador en la posición AF y
compruebe que el sensor remoto de temperatura esté conectado al
termostato. Para seleccionar el modo A, sitúe el conmutador en la
posición AF y compruebe que el sensor remoto de temperatura NO
esté conectado al termostato.
1
Arriba Abajo
°F/12 h °C/24 h
Activado Desactivado
2
F AF
9. Instale el módulo de control en la base de alimentación.
-
THERMAL MANAGEMENT SOLUTIONS
LS-RaychemQuickStatTCthermostat-IM-H5851701/13
2 / 6
Page 15
Apa
Botón de prueba de GFCI
temperatura
a
Controles y pantalla del termostato
En la figura siguiente se ilustran los controles del termostato. El termostato tiene tres modos de control de la temperatura:
• Modo AF: (modo predeterminado) controla el sistema basándose
en la temperatura ambiente y asegura que la temperatura del
suelo no exceda los límites establecidos mediante un sensor de
temperatura del suelo externo.
• Modo F: controla la temperatura del suelo mediante un sensor de
temperatura del suelo externo.
• Modo A: controla el sistema basándose en la temperatura
ambiente (no usa un sensor de temperatura del suelo)
Ajustes de
1
2
3
Botón de iluminación de fondo
Pantalla de
hora y día
Pantalla de
temperatura
Pantalla de
modo
Indicador de temperatur
predefinida
Indicador de modo de
control de temperatura
Indicador de falla
de conexión a tierra
Botones de preajuste
de temperatura
Pantalla de período
Botones de ajuste de
4
Interruptor ON/OFF
y restablecimiento de GFCI
rece cuando se muestra el
ajuste de referencia
fecha y hora
Porcentaje de
tiempo de calefacción
Botón de programa
Botón de borrado
del programa
Selección de modo
/ salir del programa
1
Coloque el conmutador en espera (Standby) para desconectar la
calefacción cuando no se utiliza (por ej., en verano). Esto no afecta a
los valores horarios ni de temperatura.
2
Para restablecer la protección contra fallas de conexión a tierra,
sitúe el termostato en espera y a continuación, vuelva a conectarlo.
3
El termostato indica el porcentaje de tiempo de calefacción necesario
para mantener la temperatura deseada. Por ejemplo, aparece
cuando la calefacción está activada el 40% del tiempo.
Pantalla
1 a
25 a
50 a
% de tiempo de calefacción
4
La indicación GFI aparece cuando está activada la protección contra
24%
49%
74%
75 a
99%
100%
fallas de conexión a tierra.
La pantalla se ilumina durante 12 segundos cuando se presiona el
botón de iluminación de fondo. Cuando se pulsa uno de los botones
, la pantalla también se ilumina. El ajuste de referencia de la
temperatura aparece durante 5 segundos y a continuación, se muestra
la medición de la temperatura real.
Ajuste de fecha y hora
L
a primera vez que se enciende el termostato, la hora y la fecha
parpadean y es necesario ajustarlas.
1. Pulse el botón Hour para ajustar la hora.
2. Pulse el botón Min para ajustar los minutos.
3. Pulse el botón Day para ajustar el día.
4. Pulse Mode/Ret para salir.
Horario de verano
QuickStat-TC puede ajustar automáticamente el horario de verano.
Cuando se activa dicha función, el termostato cambia al horario de
verano el segundo domingo de marzo y recupera el horario normal el
primer domingo de noviembre.
Nota: la función de horario de verano se desactiva (valor prede-
terminado) si el reloj pierde su ajuste.
Para activar el horario de verano:
1. Mantenga pulsado el botón Day durante 3 segundos, hasta que en la pantalla aparezca DLS.
2. Pulse los botones arriba/abajo
para cambiar
entre On (activación) y Off (desactivación).
3. Pulse el botón Day. Aparece el valor de año.
4. Utilice los botones arriba/abajo para ajustar
el año actual.
5. Pulse el botón Day. Aparece la configuración del
mes.
6. Utilice los botones arriba/abajo para ajustar
el mes actual.
7. Pulse el botón Day. Aparece la configuración de
fecha.
8. Utilice los botones arriba/abajo para ajustar
la fecha actual.
9. Pulse Mode/Ret para salir.
Protección contra falla en tierra
QuickStat-TC posee un interruptor de fallas de conexión a tierra
(GFCI, Ground-Fault Circuit Interrupter) incorporado (nivel de desconexión de 5 mA). Protege a los usuarios del riesgo de electrocución al
cortar el suministro eléctrico al sistema de suelo radiante cuando la
fuga de corriente supera los 5 mA. Si se produce una falla de conexión a tierra, se enciende en rojo el indicador luminoso TEST de la
parte superior del termostato y en la pantalla aparece GFI.
Prueba del interruptor de fallas de conexión a tierra
Los usuarios pueden probar el interruptor de fallas después de
realizar la instalación del sistema de suelo radiante QuickNet,
para comprobar que la protección contra fallas de conexión a
tierra funcione correctamente. A continuación, los usuarios deben
comprobar dicho sistema una vez al mes.
1 El interruptor de fallas de conexión a tierra sólo se puede com-
probar cuando el termostato recibe demanda de calefacción.
Aumente el ajuste de referencia de la temperatura por encima de
la temperatura actual medida. Espere unos segundos para permitir que el termostato se adapte al nuevo ajuste de referencia y
aparezca el símbolo .
2 Pulse el botón TEST.
La prueba ofrece un resultado correcto si el indicador TEST de la
parte superior del termostato se enciende de color rojo y en la pantalla aparece GFI.
El resultado es de falla si el indicador TEST de la parte superior del
termostato no se enciende de color rojo. En tal caso, desconecte el
sistema de suelo radiante y revise la instalación del termostato.
Restablecimiento del interruptor de fallas de conexión a tierra
Si el GFCI se ha activado, restablézcalo al cambiar el termostato a
Standby (espera) y de nuevo a On (activado). Se apagará el indicador
TEST de la parte superior del termostato.
Si el interruptor contra fallas de conexión a tierra se activa durante el
funcionamiento normal sin que se pulse el botón TEST, puede haber
una falla de conexión a tierra. Para comprobar si se trata de una falla
de conexión a tierra o de una activación accidental, restablezca el
interruptor GFCI. Si no se activa después del restablecimiento, se trató
de una activación accidental y el sistema funciona correctamente. Si el
interruptor GFCI vuelve a activarse tras el restablecimiento, existe una
falla de conexión a tierra. El usuario puede solicitar a un electricista
profesional que solucione el problema.
LS-RaychemQuickStatTCthermostat-IM-H5851701/13
3 / 6THERMAL MANAGEMENT SOLUTIONS
Page 16

Programación
QuickStat-TC se suministra con un plan programado de manera
predeterminada. El plan consta de 4 períodos por día que representan
un día de semana típico.
Período Descripción Valor de temperatura asociado
Despertar
Fuera de casa
Regreso a casa
Dormir
Programación predeterminada
A continuación, se muestra el plan predeterminado de QuickStat-TC.
LU
MA
MIE
JUE
VIE
SA
Período Valor
La temperatura de Confort (
la temperatura Económica ( ) se emplea en los períodos 2 y 4. Por
ejemplo, si el período cambia de 1 a 2, el ajuste de referencia cambia
automáticamente de la temperatura de Confort ( ) a la Económica (
).
(MO)
(TU)
(WE)
(TH)
(FR)
6:00A 6:00A 6:00A 6:00A 6:00A 6:00A 6:00A
8:30A 8:30A 8:30A 8:30A 8:30A --:-- --:-5:00P 5:00P 5:00P 5:00P 5:00P --:-- --:--
11:00P 11:00P 11:00P 11:00P 11:00P 11:00P 11:00P
) se utiliza para los períodos 1 y 3 y
(SA)
DO
(SU)
Temperaturas predefinidas
El QuickStat-TC viene con 3 temperaturas predefinidas que se
muestran como temperatura Comfort ( ), temperatura Económica (
) y temperatura Vacaciones ( ). En la tabla siguiente se muestra
el uso previsto y el valor predeterminado de cada temperatura
predefinida.
Icono Uso previsto Modos A/AF Modo F
Confort
(presente en casa)
Económica
(durmiendo o fuera de casa)
Vacaciones
(en ausencias prolongadas)
Los usuarios también pueden cambiar la temperatura predefinida.
Para ello:
1. Ajuste la temperatura que desea con los botones
2. Mantenga pulsado el botón de valor predefinido que desee ( ,
o ) hasta que el icono correspondiente aparezca en pan-
talla.
70°F
(21°C)
63°F
(17°C)
50°F
(10°C)
82°F
(28°C)
68°F
(20°C)
50°F
(10°C)
.
Límite de temperatura del suelo (sólo en modo AF)
Los límites de temperatura predeterminados son de 5 °C a 28 °C (41
°F a 82°F).
Importante: Si su sistema está instalado debajo de un suelo de
madera laminada o manufacturada, DEBE usar el modo AF con los
valores predeterminados. Tenga en cuenta que el ajuste predeter-
minado de fábrica es el modo AF.
Modificación de la programación del plan
El usuario puede cambiar la programación para adaptarla a su estilo
de vida. Para ello:
1. Pulse Pgm para acceder al modo de programación. Se muestra el
período 1.
2. Pulse Day para seleccionar el día que programará para el período
seleccionado. Para seleccionar toda la semana, mantenga pulsado
el botón Day durante 3 segundos, hasta que se seleccionen todos
los días.
3. Pulse Hour y Min para ajustar la hora inicial del período seleccio-
nado, o pulse Clear si desea omitir el período (se muestra --:--).
Nota: si desea utilizar solamente 2 períodos, elija los períodos "1 y 4" o los períodos "2 y 3". El encendido anticipado no se
activa si se utilizan los períodos "1 y 2" o los períodos "3 y 4".
4. Pulse Pgm para seleccionar otro período o pulse Day para seleccionar otro día. Se repite el paso 3. Repita los pasos 3 y 4 hasta
finalizar la programación.
5. Pulse Mode/Ret para salir del modo de programación.
Modos de funcionamiento
QuickStat-TC dispone de tres modos de funcionamiento:
Modo Automático
En este modo, QuickStat-TC sigue el plan programado. Para ajustar el
termostato QuickStat-TC en dicho modo:
1. Pulse el botón Mode/Ret para que en la pantalla aparezca el icono
.
2. Para desactivar el modo Automático, pulse el botón Mode/Ret y
así cambiar al modo Manual .
Anulación temporal del modo Manual (en el modo
Automático )
Los usuarios pueden anular temporalmente la programación del plan
de funcionamiento de QuickStat-TC. El nuevo ajuste de referencia de
la temperatura se utiliza hasta el inicio del siguiente período. Para
anular temporalmente QuickStat-TC:
1. Pulse el botón , o , con el termostato en modo
Automático, hasta llegar al nuevo ajuste de referencia que desee.
Una vez aceptado el nuevo ajuste de referencia, el icono
empieza a parpadear.
2. Para cancelar la anulación temporal, pulse el botón Mode/Ret.
Modo Manual
En este modo no se utiliza el plan programado y es necesario
introducir manualmente el ajuste de referencia de la temperatura.
Para ajustar el termostato QuickStat-TC en dicho modo:
1. Pulse el botón Mode/Ret para que en la pantalla aparezca el icono
.
2. Ajuste la temperatura usando el botón , o .
3. Para desactivar el modo Manual, pulse el botón Mode/Ret y así
cambiar al modo Automático .
THERMAL MANAGEMENT SOLUTIONS
LS-RaychemQuickStatTCthermostat-IM-H5851701/13
4 / 6
Page 17

Modo Vacaciones
En este modo, el QuickStat-TC se ajusta a la temperatura de
referencia para Vacaciones y se anula toda la programación hasta
que se desactive el modo Vacaciones. Para ajustar el termostato
QuickStat-TC en dicho modo:
1. Pulse el botón para que en la pantalla aparezca el icono .
2. Para desactivar el modo Vacaciones, pulse el botón Mode/Ret y
así cambiar al modo Automático o Manual .
Para restablecer los valores predeterminados en la fábrica en
QuickStat-TC:
3. Apague el termostato.
4. Pulse el botón y encienda el termostato.
5. Una vez concluida la configuración del termostato, suelte el botón
arriba .
Mensajes de error
La temperatura medida es inferior al rango que muestra el
termostato. La calefacción está activada.
La temperatura medida es mayor que el rango que muestra el
termostato. La calefacción está desactivada.
Compruebe la conexión del sensor de suelo con el termostato.
LS-RaychemQuickStatTCthermostat-IM-H5851701/13
5 / 6THERMAL MANAGEMENT SOLUTIONS
Page 18

WWW.THERMAL.PENTAIR.COM
NORTEAMÉRICA
Tel: +1.800.545.6258
Fax: +1.800.527.5703
Tel: +1.650.216.1526
Fax: +1.650.474.7711
thermal.info@pentair.com
Pentair, QuickNet y QuickStat son propiedad de Pentair o de sus empresas filiales internacionales. Todas las demás marcas comerciales son propiedad de
sus respectivos dueños. Pentair se reserva el derecho de cambiar las especificaciones sin aviso previo.
© 2011-2013 Pentair. 400-115-052
EUROPA, MEDIO ORIENTE Y ÁFRICA
Tel: +32.16.213.511
Fax: +32.16.213.603
thermal.info@pentair.com
ASIA PACÍFICO
Tel: +86.21.2412.1688
Fax: +86.21.5426.2917
cn.thermal.info@pentair.com
LS-RaychemQuickStatTCthermostat-IM-H5851701/13
AMÉRICA LATINA
Tel: +55.11.2588.1400
Fax: +55.11.2588.1410
thermal.info@pentair.com
6 / 6THERMAL MANAGEMENT SOLUTIONS
 Loading...