

Page 1
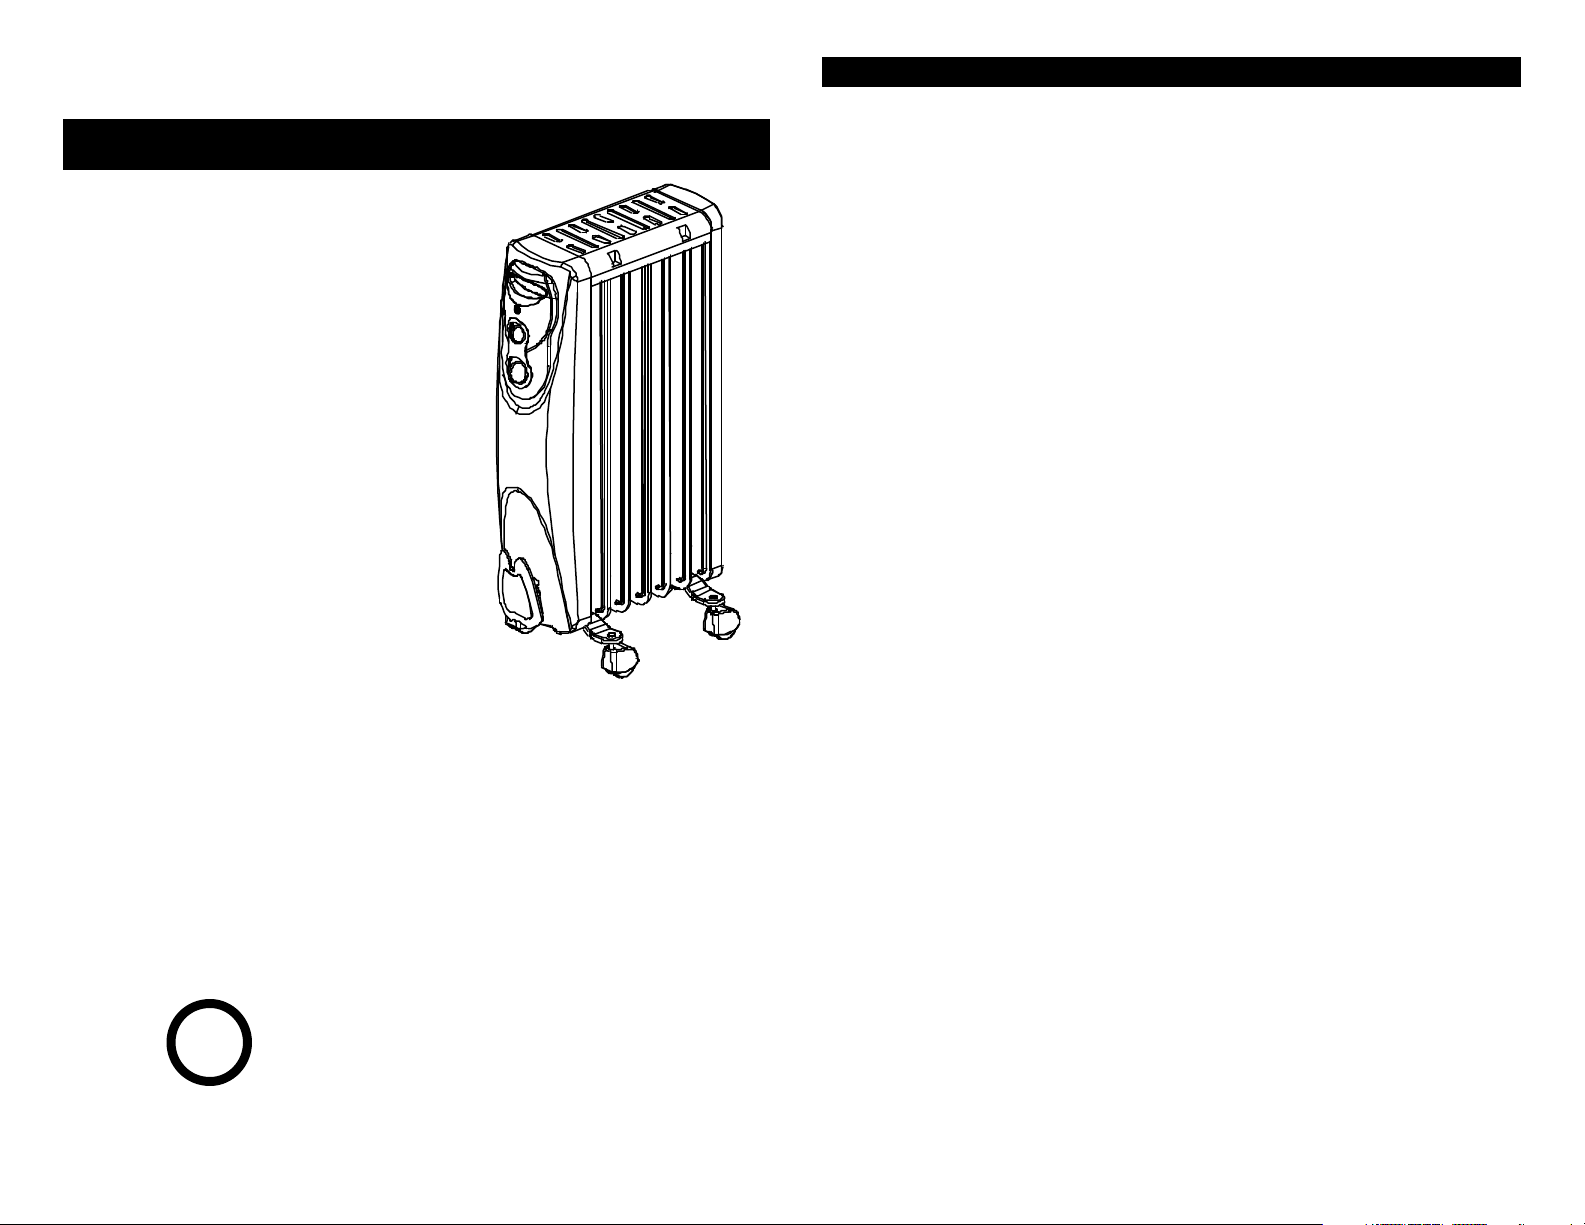
Radiator
IMPORTANT INSTRUCTIONS
materials, such as furniture, pillows, bedding, papers, clothes, and curtains at least
authorized service facility for examination, electrical or mechanical adjustment, or
oor
Do not insert or allow foreign objects to enter any ventilation or exhaust opening
Use this heater only as described in this manual. Any other use not recommended
erheat and
cause a risk of fire. However, if you have to use an extension cord, the cord shall
This heater draws 12.5 amps during operation. To prevent overloading a circuit, do
It is normal for the plug to feel warm to the touch; however, a loose fit between the
AC outlet (receptacle) and plug may cause overheating and distortion of the plug.
enough to burn exposed skin. Use of this heater is not recommended for persons
“SAVE THESE INSTRUCTIONS”
U L
Heater
PELONIS
OWNER’S MANUAL
Model HO-202C
PLEASE READ AND SAVE THESE INSTRUCTIONS
®
Oil Filled
Convection
PLEASE READ AND SAVE THESE IMPORTANT SAFETY INSTRUCTIONS
When using electrical appliances, basic precautions should always be followed to reduce the
risk of fire, electric shock, and injury to persons, including the following:
1. Read all instructions before using this heater.
2. This heater is hot when in use. To avoid burns, do not let bare skin touch hot
surfaces. If provided, use handles when moving this heater. Keep combustible
3 feet (0.9m) from the front of the heater and keep them away from the sides and
rear.
3. Extreme caution is necessary when any heater is used by or near children or
invalids and whenever the heater is left operating and unattended.
4. Always unplug heater when not in use.
5. Do not operate any heater with a damaged cord or plug or after the heater
malfunctions, has been dropped or damaged in any manner. Return heater to
repair.
6. Do not use outdoors.
7. This heater is not intended for use in bathrooms, laundry areas and similar ind
locations. Never locate heater where it may fall into bathtub or other water
container.
8. Do not run cord under carpeting. Do not cover cord with throw rugs, runners, or
similar coverings. Arrange cord away from traffic area and where it will not be
tripped over.
9. To disconnect heater, first turn controls to off, then remove plug from outlet.
10.
as this may cause an electric shock or fire, or damage the heater.
11. To prevent a possible fire, do not block air intakes or exhaust in any manner. Do
not use on soft surfaces, like a bed, where openings may become blocked.
12. A heater has hot and arcing or sparking parts inside. Do not use it in the areas
where gasoline, paint, or flammable liquids are used or stored.
13.
by the manufacturer may cause fire, electric shock, or injury to persons.
14. Avoid the use of an extension cord because the extension cord may ov
be No. 14 AWG minimum size and rated not less than 1875 watts.
15.
not plug the heater into a circuit that already has other appliances working.
16.
Contact a qualified electrician to replace loose or worn outlet.
17. The output of this heater may vary and its temperature may become intense
with reduced sensitivity to heat or an inability to react to avoid burns.
18.
Page 2
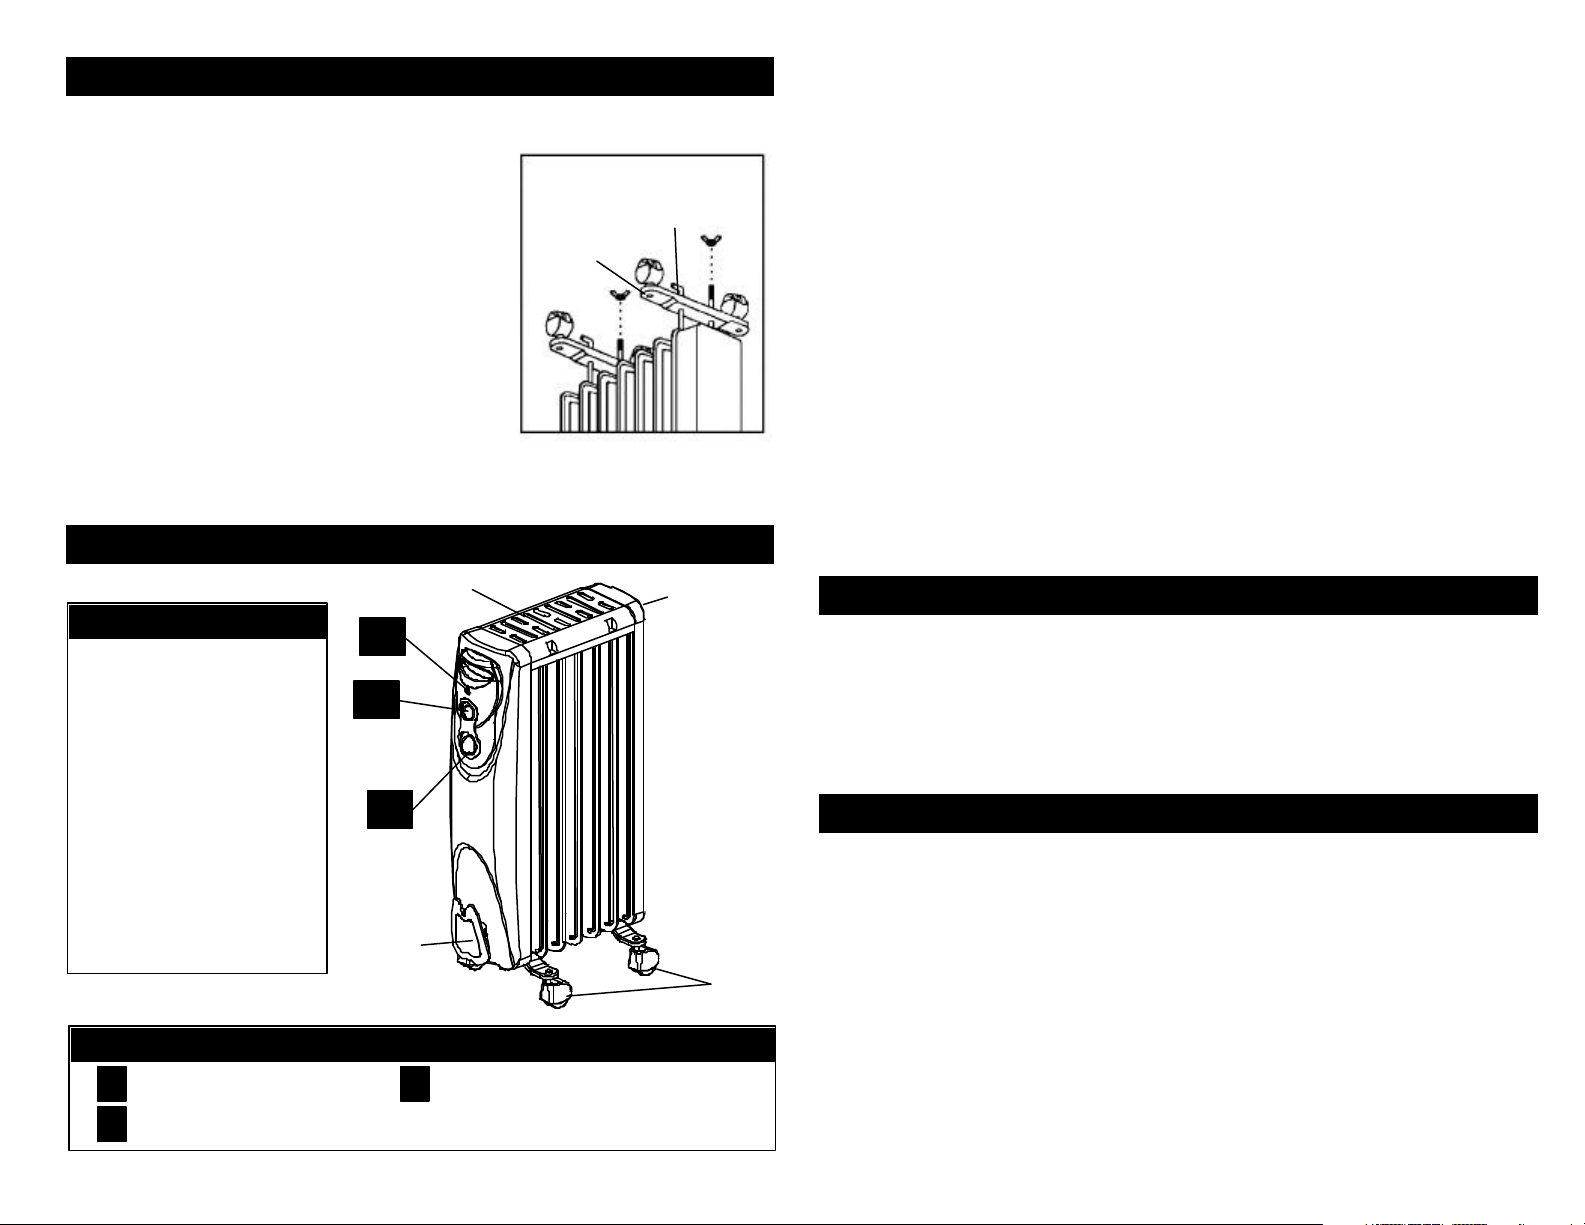
UNPACKING AND SET-UP INSTRUCTIONS
When the room reaches a comfortable temperature, slowly turn
Helps keep children or pets from touching the top hot surface of
Unplug the heater and wait a few minutes for it to cool down. Carefully remove
Built-in Handle
IMPORTANT!
B A
Control Panel Functions
B C
Wheel
holding
plateU-
shape
Cord
Caster
Unpack your heater and remove the wheel assemblies from the package. Refer to Fig. 1 below:
1. Make sure the heater is unplugged and in the
Your heater is now ready for use.
CAUTION: Risk of fire – Do not operate heater without wheel assemblies attached. Operate
heater in upright position only (wheels on bottom, controls on top). Any other position could
create a hazardous situation.
OPERATING INSTRUCTIONS
”OFF” position.
2. TURN THE HEATER UPSIDE DOWN.
3. Position the wheel base assemblies between
the end fins as shown.
4. Insert each U-shape screw into the holes of
each wheel holding plate.
5. Insert the butterfly nuts and screw them tightly.
6. Turn the heater upright.
Safety Cover
C
Your heater is equipped with a
polarized alternating current
line plug (a plug having one
blade wider than the other).
This plug will fit into the power
outlet only one way. This is a
safety feature. If you are
unable to insert the plug fully
into the outlet, try reversing the
plug. If the plug should still fail
to fit, contact your electrician
to replace your outlet. DO NOT
defeat the safety purpose of
the polarized plug.
Wrap
Fig. 1 - Upside down view
screw
(behind unit)
Wheels
Power and Setting Control Power Indicator Light
A
Thermostat Control
• Place the heater on a firm level surface free from obstructions, and at least 3 ft. away
from any wall and any other objects such as furniture, curtains, plants or combustible
material.
• With the Power and Setting Control “A” in the ”OFF” position, plug the heater into a
grounded 120V outlet.
• Turn the heater ”ON” by turning the Power and Setting Control “A” clockwise to your
desired power setting (LOW, MED, or HIGH). The Power Indicator Light “C” will
illuminate.
• Turn the Thermostat Control “B” to your desired setting from “MIN” to “MAX”.
Setting for Optimum Comfort:
the Thermostat Control “B” counter-clockwise until the heater turns off. This is the point at
which the thermostat setting equals the room temperature. At this setting, the thermostat will
automatically turn the heater on and off to maintain this selected temperature.
CAUTION: This heater includes an Overheat Protection System that shuts the unit off if it
overheats due to abnormal conditions. If this occurs, turn the heater ”OFF”, unplug it, and
inspect and remove any objects on or adjacent to the heater. Allow it to cool for a few
minutes, plug it back in, and resume normal operation.
ADDITIONAL FEATURES
This heater has additional features:
• Safety Cover -
the heater.
• Cord Wrap - Neatly stores power cord when the heater is not used.
• Convenient Carry Handle and Heavy-Duty Caster Wheels - Allow for easy
maneuvering from room to room.
TROUBLESHOOTING
If your heater fails to operate, please follow these instructions:
• Ensure that your circuit breaker or fuse is working properly.
• Be sure the heater is plugged in and that the electrical outlet is working properly.
• Check for any obstruction. If you find any obstruction, turn the heater “OFF”.
the obstruction. Plug the heater in and turn it on again by referring to the
OPERATING INSTRUCTIONS.
NOTE: IF YOU EXPERIENCE A PROBLEM WITH YOUR HEATER, PLEASE SEE THE
WARRANTY INFORMATION FOR INSTRUCTIONS. PLEASE DO NOT ATTEMPT TO OPEN
OR REPAIR THE HEATER YOURSELF. DOING SO MAY VOID THE WARRANTY AND COULD
CAUSE DAMAGE OR PERSONAL INJURY. IF THE PROBLEM STILL PERSISTS, PLEASE
CONTACT US BY REFERRING TO THE SERVICE & SUPPORT INFORMATION ON THE
FOLLOWING PAGE.
Page 3

CLEANING AND STORAGE
For usage tips about this heater, to register your heater online, or to obtain information
service is required for this heater, please contact
________________________________
________________________________
________________________________
NOTE: PROOF OF PURCHASE IS REQUIRED FOR ALL WARRANTY CLAIMS
urn the Warranty Registration card within fifteen (15) days from the
adiator heater, shall be
free of defects in material and workmanship for a period of one (1) year from the date of
original purchase. This one (1) year warranty is limited to the heating elements, motor,
malfunctions or failure of your Pelonis Oil Filled Radiator heater, simply
Damage caused by connection to an improper input voltage (see specification
rther warranties or representations, express or implied except
those contained herein. No representative or dealer is authorized to assume any other
particular purpose are limited in duration should the duration of the express warranty
grant it hereunder. Pelonis USA shall in no event be liable for direct, indirect, special or
Some states do not allow limitations on how long an implied warranty lasts, and/or the
above limitations or exclusion may not apply to you. This warranty gives you specific
It is recommended that the heater be cleaned at least one time during the operating
season in order to provide the optimum level of performance. ALWAYS TURN THE
POWER SWITCH OFF AND UNPLUG THE HEATER BEFORE CLEANING. Be sure to save
the box for off-season storage.
• Turn the heater “OFF”, unplug it and wait for the heater to cool down.
• Use a dry cloth to clean only external surfaces of the heater.
• Do not use any cleaning agents or detergents.
• Never immerse the heater in water.
• Pack the heater in the original carton and store it in a cool and dry place.
SPECIFICATIONS
Model No.: HO-202C
Voltage: 120V, 60Hz
Current: Maximum continuous draw: 12.5 Amps.
Output: 5200 BTUs
Power: LOW = 600 Watts, MED = 900 Watts, HIGH = 1500 Watts
Tolerances on all specifications: Approximately +5%, -10%.
SERVICE & SUPPORT
about other Pelonis USA products, please visit our website at www.pelonis.com
In the event of a warranty claim or if
us at the following:
Toll Free: 1-800-842-1289 or 1-610-695-8700 (M-F 9:00am to 5:00pm EST)
Email us at: service@pelonis.com
For questions or comments, please write to:
Pelonis USA, Ltd.
Att: Consumer Relations Department
P.O. Box 785
Malvern, PA 19355 USA
For your records, staple your sales receipt to this manual and record the following:
DATE OF PURCHASE: ________________________________
PLACE OF PURCHASE: ________________________________
SERIAL NUMBER: ________________________________
(STAPLE SALES RECEIPT HERE)
ONE (1) YEAR LIMITED WARRANTY
• Please read all instructions before attempting to use this product.
• Please ret
date of purchasing this product.
Pelonis USA, Ltd., referred to hereafter as Pelonis USA, warrants as limited herein to
the original purchaser of retail that each new Pelonis Oil Filled R
and electric control circuit board.
In the event of
deliver or send the heater, postage prepaid along with PROOF OF PURCHASE, within
the warranty period of one (1) year, to Pelonis USA. Pelonis USA reserves the right to
inspect the claimed defective part or parts to determine if the defect or malfunction
complaint is covered by this warranty. Pelonis USA shall, within sixty (60) days after
receipt of the product, at its option, repair and/or replace the defective part or parts
free of charge. This warranty shall only cover defects arising from normal usage.
Pelonis USA assumes no responsibility whatsoever if the Oil Filled Radiator heater
should fail during the warranty period by reason of:
• Misuse, negligence, physical damage or accidents.
• Lack of maintenance (see instructions for proper maintenance).
• Repair by any unauthorized party during the warranty period.
•
label on your heater).
Pelonis USA makes no fu
liability regarding the Oil Filled Radiator heater. The duration of the implied warranty
granted under State law, including warranties of merchantability and fitness for
consequential damages.
legal rights and you may have other rights which vary from state to state.
Should your Oil Filled Radiator heater fail to operate under the terms of this limited
warranty, contact Pelonis USA at 1-800-842-1289 or 1-610-695-8700 (M-F 9:00am to
5:00pm EST).
Page 4

Calentador de
Radiador
U L
INSTRUCCIONES IMPORTANTES
servicio autorizado para que sea examinado, o para que se le realicen adaptaciones o reparaciones
s de lavado y lugares similares de
alentamiento y distorsión del enchufe. Póngase en
calentador a personas con sensibilidad reducida al calor o con inhabilidad para reaccionar o evitar
PELONIS
MANUAL DEL USUARIO
con Aceite
Modelo HO-202C
POR FAVOR LEA Y GUARDE ESTAS INSTRUCCIONES
®
POR FAVOR LEA Y GUARDE ESTAS IMPORTANTES INSTRUCCIONES DE SEGURIDAD
Cuando se utilizan electrodomésticos, se deben seguir siempre ciertas precauciones básicas para
reducir el riesgo de incendio, descarga eléctrica y lesiones personales, incluyendo las siguientes:
1. Lea todas las instrucciones antes de utilizar este calentador.
2. Este calentador se calienta cuando se utiliza. Para evitar quemaduras, no deje que la piel entre en
contacto con las superficies calientes. Si el calentador tiene mangos, utilice los mismos para
moverlo. Mantenga los materiales combustibles, como muebles, almohadas, ropa de cama, papeles,
ropa y cortinas al menos a 3 pies (0.9 m.) del frente del calentador y manténgalos alejados de los
costados y la parte posterior.
3. Es necesario tener extrema precaución cuando se utilice cualquier calentador cerca de niños o
personas inválidas y siempre que el calentador se deje en funcionamiento sin supervisión.
4. Desconecte siempre el calentador cuando no esté en uso.
5. No utilice ningún calentador con un cable o enchufe dañado o luego de que el calentador funcione
mal, haya sido golpeado o dañado de cualquier manera. Devuelva el calentador a un centro de
eléctricas o mecánicas.
6. No lo utilice en exteriores.
7. Este calentador no fue diseñado para su utilización en baños, área
interiores. Nunca coloque el calentador en un lugar desde donde pueda caerse en una bañera u
otro recipiente con agua.
8. No coloque el cable debajo de alfombras. No cubra el cable con alfombras de área, tapetes, o
coberturas similares. Disponga el cable fuera del área de paso y donde no provoque tropiezos.
9. Para desconectar el calentador, primero coloque los controles en la posición de apagado y luego
retire el enchufe del tomacorriente.
10. No inserte o permita que objetos externos entren en ninguna ventilación o salida de ventilación ya
que esto puede causar una descarga eléctrica o incendio, o daños al calentador.
11. Para prevenir un posible incendio, no bloquee las entradas y salidas de aire de ninguna manera. No
lo utilice en superficies suaves, como una cama, donde las aperturas se pueden bloquear.
12. Un calentador contiene partes calientes y con chispas o un arco eléctrico. No lo utilice en áreas
donde se usa o se guarda gasolina, pintura o líquidos inflamables.
13. Utilice este calentador sólo de la manera que se describe en este manual. Cualquier otro uso no
recomendado por el fabricante puede causar fuego, descarga eléctrica o lesiones a personas.
14. Evite el uso de un cable de extensión ya que éste se puede sobrecalentar y causar riesgo de
incendio. Sin embargo, si debe utilizar un cable de extensión, el cable debe ser14 AWG como
mínimo y su capacidad nominal no debe ser inferior a 1875 vatios.
15. Este calentador consume 12.5 amperes durante su funcionamiento. Para prevenir sobrecargar un
circuito, no enchufe el calentador en un circuito que ya tenga otros electrodomésticos en
funcionamiento.
16. Es normal que el enchufe esté tibio al tacto; sin embargo, un encaje flojo entre el tomacorriente AC
(receptáculo) y el enchufe pueden causar sobrec
contacto con un electricista calificado para reemplazar el tomacorriente flojo o gastado.
17. El calor producido por este calentador puede variar y su temperatura se puede volver lo
suficientemente intensa como para quemar la piel expuesta. No se recomienda la utilización de este
quemaduras.
18.“GUARDE ESTAS INSTRUCCIONES”
Page 5

INSTRUCCIONES PAR
A DESEMPACAR Y CONFIGURAR
No utilice el calentador sin las ruedas ensambladas. Utilice el
Cuando el cuarto alcanza una temperatura cómoda, gire
que la posición del termostato es igual a
Verifique que no haya ninguna obstrucción. Si encuentra alguna obstrucción,
INSTRUCCIONES DE FUNCIONAMIENTO
.
Placa de
sujeción
para las
Tornillo
de U
¡IMPORTANTE!
Mango
Envoltu
ra para
el
Ruedas
B A
Funciones del Panel de Control
A B C
Desempaque su calentador y retire los dos ensamblajes de las ruedas del paquete. Consulte la
Fig.1 abajo:
7. Asegúrese que el calentador esté
desenchufado y en la posición “OFF”.
8. DE VUELTA AL CALENTADOR.
9. Coloque la base ensamblada con las ruedas
entre las aletas de los extremos como se
muestra.
10. Inserte cada tornillo con forma de U en los
agujeros de cada placa de sujeción de las
ruedas.
11. Inserte las tuercas mariposa y atorníllelas
firmemente.
12. De vuelta al calentador, para volverlo a su
posición normal.
Ahora su calentador está listo para usar.
PRECAUCIÓN: Riesgo de incendio calentador sólo en posición vertical (las ruedas en la parte inferior, los controles en la parte
superior). Cualquier otra posición puede crear una situación peligrosa.
INSTRUCCIONES DE FUNCIONAMIENTO
Su calentador está equipado con
un enchufe polarizado de corriente
alterna (una de las partes del
enchufe es más ancha que la otra).
Este enchufe sólo se puede
colocar en el tomacorriente de una
manera. Ésta es una característica
de seguridad. Si no puede insertar
el enchufe totalmente en el
tomacorriente, intente girando el
enchufe. Si siguiera sin poder
insertar el enchufe, póngase en
contacto con su electricista para
que reemplace el tomacorriente.
NO desactive esta medida de
seguridad del enchufe polarizado.
Cubierta de Seguridad
C
Cable
Cualquier otra posición
con forma
ruedas
Incorporado
(detrás de la
unidad)
de
Fundición
Control de Encendido y Posición Luz Indicadora de Encendido
Control del Termostato
• Ubique el calentador en una superficie nivelada y firme, libre de obstrucciones, y al
menos a 3 pies de distancia de cualquier pared u otros objetos como muebles,
cortinas, plantas o materiales combustibles.
• Con el Control de Encendido y Posición “A” en la posición ”OFF”, enchufe el
calentador en un tomacorriente con descarga a tierra de 120 Voltios.
• Coloque el calentador en la posición “ON” girando el Control de Encendido y
Configuración “A” en el sentido de las agujas del reloj a la posición de la potencia
deseada (LOW, MED o HIGH). La Luz Indicadora de Encendido “C” se iluminará.
• Gire el Control del Termostato “B” a la posición deseada desde “MIN” a “MAX”.
Posición para Óptima Comodidad:
lentamente el Control del Termostato “B” en sentido contrario a las agujas del reloj hasta
que el calentador se apague. Este es el punto en el
la temperatura ambiente. En esta posición, el termostato automáticamente encenderá y
apagará el calentador para mantener la temperatura seleccionada.
PRECAUCIÓN: Este calentador incluye un Sistema de Protección Térmica que apaga la
unidad si se sobrecalienta debido a condiciones anormales. Si esto ocurre, coloque el
calentador en la posición “OFF”, desenchúfelo e inspeccione y retire cualquier objeto en o
adyacente al calentador. Déjelo enfriar por unos minutos, vuelva a enchufarlo y vuelva a
hacerlo funcionar de forma normal.
CARACTERÍSTICAS ADICIONALES
Este calentador posee características adicionales:
• Cubierta de Seguridad - Ayuda a evitar que los niños o mascotas toquen la
superficie superior caliente del calentador.
• Envoltura para el Cable - Guarda con prolijidad el cable de alimentación
cuando el calentador no se encuentra en uso.
• Conveniente Mango de Traslado con Resistentes Ruedas de Fundición -
Permite un fácil transporte de cuarto a cuarto.
DIAGNÓSTICO DE AVERÍAS
Si su calentador no funciona, por favor siga estas instrucciones:
• Asegúrese de que su interruptor de circuito o fusible esté funcionando
adecuadamente.
• Asegúrese de que el calentador esté enchufado y el tomacorriente esté
funcionando adecuadamente.
•
coloque el calentador en la posición “OFF”. Desenchufe el calentador y
espere unos minutos hasta que se enfríe. Retire cuidadosamente la
obstrucción. Enchufe el calentador y enciéndalo otra vez consultando las
Page 6

LIMPIEZA Y ALMACENAMIENTO
________________________________
________________________________
________________________________
Por favor devuelva la Tarjeta de Registro de la Garantía dentro de los quince
como se explicita aquí, al comprador original que cada calentador Radiador Con Aceite
Pelonis nuevo, estará libre de defectos de materiales o mano de obra por el período de
En caso de mal funcionamiento o avería de su calentador Radiador Con Aceite Pelonis,
PRUEBA
Pelonis USA, a su elección, reparará y/o reemplazará la parte o partes defectuosas sin
ormal.
Pelonis USA no asume ninguna responsabilidad si el calentador Radiador Con Aceite
excepto las que se mencionan aquí. Ningún representante o vendedor está autorizado
Algunos estados no permiten limitaciones sobre la duración de una garantía implícita,
ted puede tener otros derechos,
Se recomienda limpiar el calentador al menos una vez durante la temporada de
utilización para proveer un óptimo nivel de desempeño. SIEMPRE APAGUE Y
DESENCHUFE EL CALENTADOR ANTES DE LIMPIARLO. Asegúrese de guardar la caja
para guardarlo en la estación en que no se utiliza.
• Coloque el calentador en la posición “OFF”, desenchúfelo y espere que el
ESPECIFICACIONES
Modelo Nº: HO-202C
Voltaje: 120V, 60Hz
Corriente: Consumo continuo máximo: 12.5 Amperes.
Calor producido: 5200 BTUs
Potencia: LOW = 600 Vatios, MED = 900 Vatios, HIGH = 1500 Vatios
Tolerancia en todas las especificaciones: Aproximadamente +5%, -10%.
calentador se enfríe.
• Utilice un paño seco para limpiar sólo las superficies externas del calentador.
• No utilice ningún agente de limpieza o detergentes.
• Nunca sumerja el calentador en agua.
• Empaque el calentador en su caja original y guárdelo en un lugar fresco y
seco.
SERVICIO Y SOPORTE
Para sugerencias sobre el uso de este calentador, para registrar su calentador por
medio de Internet, o para obtener información sobre otros productos de Pelonis USA,
por favor visite nuestro sitio Web en www.pelonis.com
En caso de reclamos de garantía o si se necesita servicio para este calentador, por
favor, póngase en contacto con nosotros a los siguientes números:
Gratis: 1-800-842-1289 ó 1-610-695-8700 (Lunes-Viernes de 9:00 a.m. a 5:00 p.m. EST).
Envíenos un mensaje de correo electrónico a: service@pelonis.com
Para preguntas o comentarios, por favor escriba a:
Pelonis USA, Ltd.
A: Consumer Relations Department
P.O. Box 785
Malvern, PA 19355 EE.UU.
Para su registro, engrape su recibo de compra a este manual y registre lo siguiente:
FECHA DE COMPRA:________________________________
LUGAR DE COMPRA:________________________________
NÚMERO DE SERIE: ________________________________
GARANTÍA LIMITADA DE UN (1) AÑO
• Por favor lea todas las instrucciones antes de intentar utilizar este producto.
•
(15) días desde la fecha de la compra de este producto.
Pelonis USA, Ltd., mencionada aquí como Pelonis USA, garantiza de forma limitada,
un (1) año desde la fecha de la compra original. Esta garantía de un (1) año está
limitada a los elementos de calefacción, motor y circuitos del control eléctrico.
simplemente lleve o envíe el calentador, con un envío prepago junto con una
DE COMPRA, dentro del período de la garantía de un (1) año, a Pelonis USA. Pelonis
USA se reserva el derecho de inspeccionar la parte o partes supuestamente
defectuosas para determinar si el reclamo por defecto o mal funcionamiento está
cubierto por esta garantía. Dentro de los sesenta (60) días de recibido el producto,
cargo alguno. Esta garantía sólo cubrirá defectos que surjan de una utilización n
se averiara durante el período de la garantía debido a:
• Mal uso, negligencia, daño físico o accidentes.
• Falta de mantenimiento (vea las instrucciones de mantenimiento adecuado).
• Reparación por alguna parte no autorizada durante el período de garantía.
• Daños causados por conexión a un voltaje inapropiado (vea la etiqueta de
especificación en su calentador).
Pelonis USA no otorga más garantías o representaciones, expresas o implícitas
a asumir cualquier otra responsabilidad relacionada con el calentador Radiador Con
Aceite. La duración de la garantía implícita otorgada bajo las leyes del Estado,
incluyendo garantías de comercialización y aptitud para un propósito en particular
están limitadas en duración si la duración de la garantía expresa lo otorgara a
continuación. Pelonis USA no será en ningún caso responsable por daños directos,
indirectos, especiales o consecuenciales.
y/o las limitaciones o exclusiones anteriores pueden no aplicarse a usted. Esta
garantía le ofrece derechos legales específicos y us
que varían de estado a estado.
Si su calentador Radiador Con Aceite se averiara bajo los términos de esta garantía
limitada, póngase en contacto con Pelonis USA al 1-800-842-1289 o al 1-610-695-8700
(Lunes-Viernes de 9:00 a.m. a 5:00 p.m. EST).
 Loading...