

Pella Rolscreen Service Instruction
!
Rolscreen® Retractable Screen Cartridge Dis-Assembly
and Assembly
Service Instruction
These instructions apply to:
Rolscreen Retractable Screen 2/2017-Current
CAUTION
injury and/or property damage, do not use any flammable substance on a retractable screen
Operating a retractable screen may result in a static discharge. A static discharge in the
presence of a flammable substance such as aerosol lubricant could cause ignition. To avoid
Tools Required:
• Flat blade screwdriver
• Drill/driver with #1 square drive bit
.
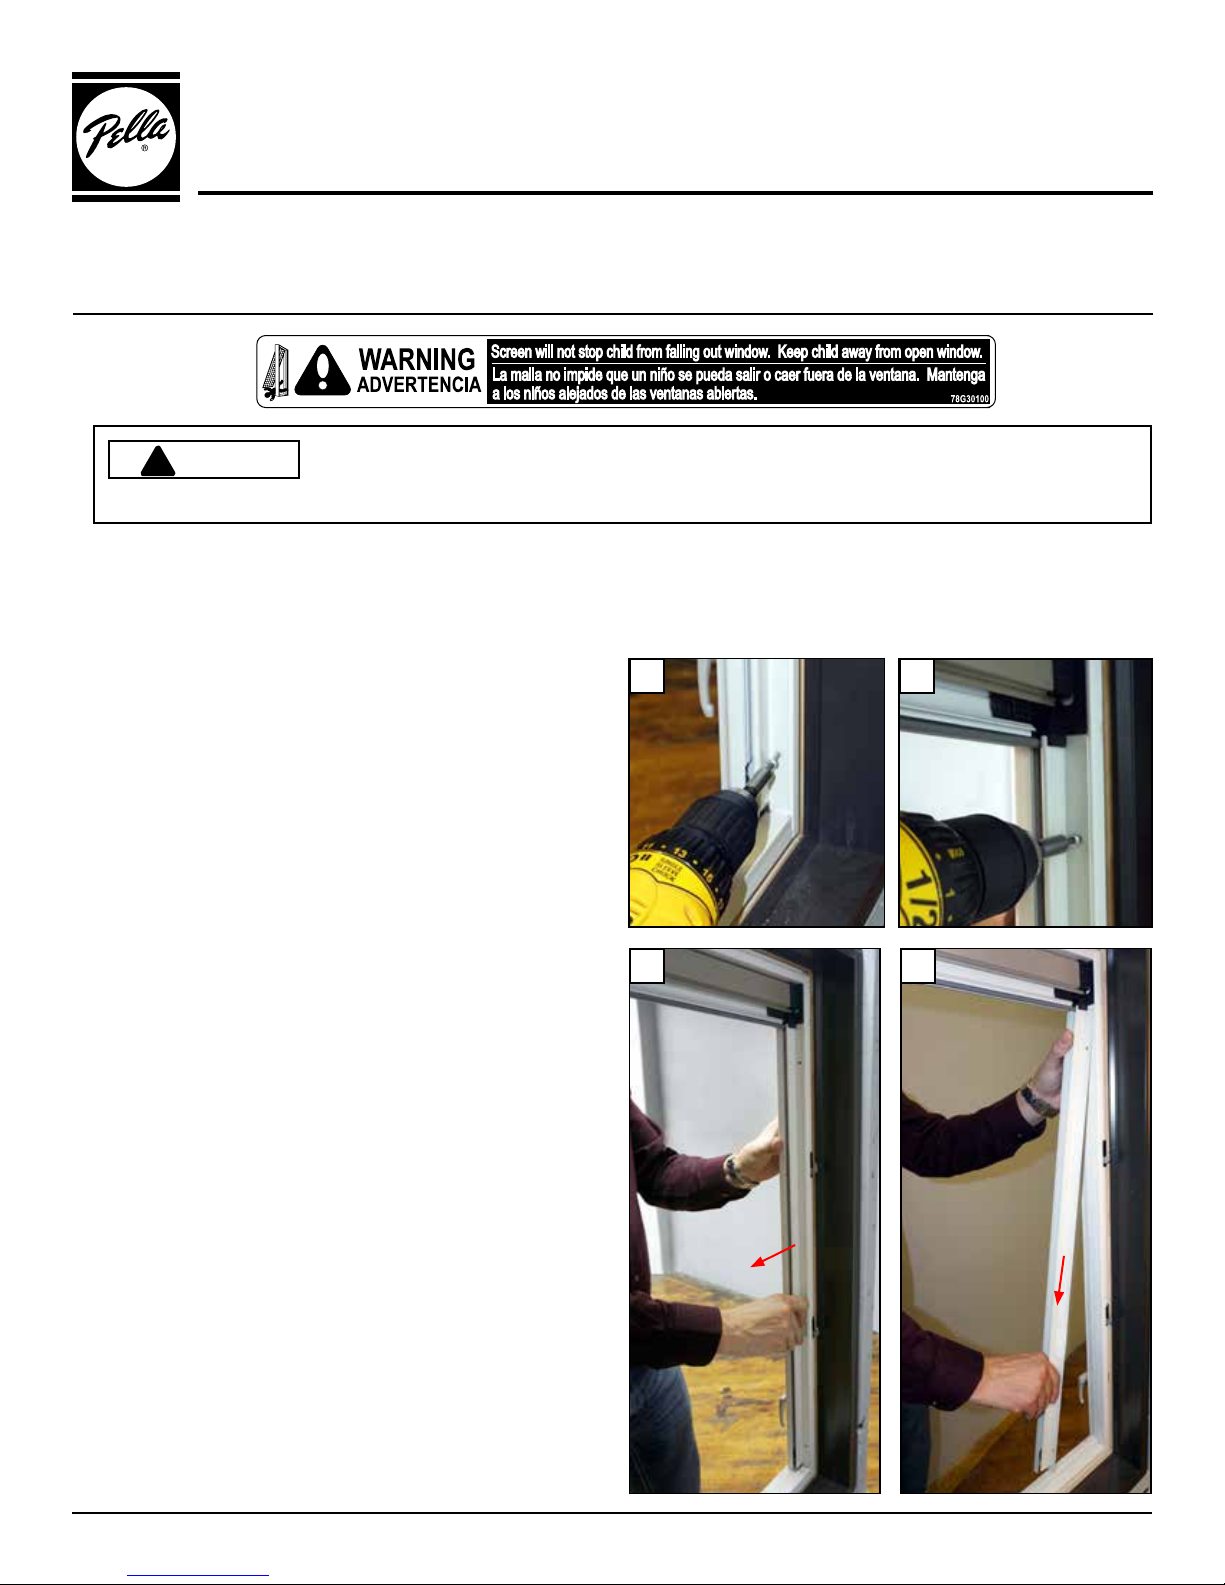
Rolscreen Cartridge Removal:
1
A. With the screen fully raised; Remove the screen guide attachment screws. Number of screws will vary
depending on window height.
1A 1A
B. Grasp the guide and pull it toward the center of the
window and then down to remove.
Repeat 1A-1B on other guide.
1B 1B
© 2016 Pella Corporation
Page 1 of 8
Rev. 10/17/2016
Part Number: 81XJ0000

Rolscreen Cartridge Removal (Continued):
1
C. Remove the Rolscreen cartridge attachment screw from each end cap. Be sure to hold the Rolscreen cartridge
when removing screws so it does not fall out of window.
1C 1C
D. Remove the Rolscreen cartridge and set on smooth flat work surface.
1D
Rolscreen Cartridge Disassembly:
2
A. Remove the head cover by pulling the bottom of the cover up and lift cover off the screen assembly.
1D
2A2A
Page 2 of 8
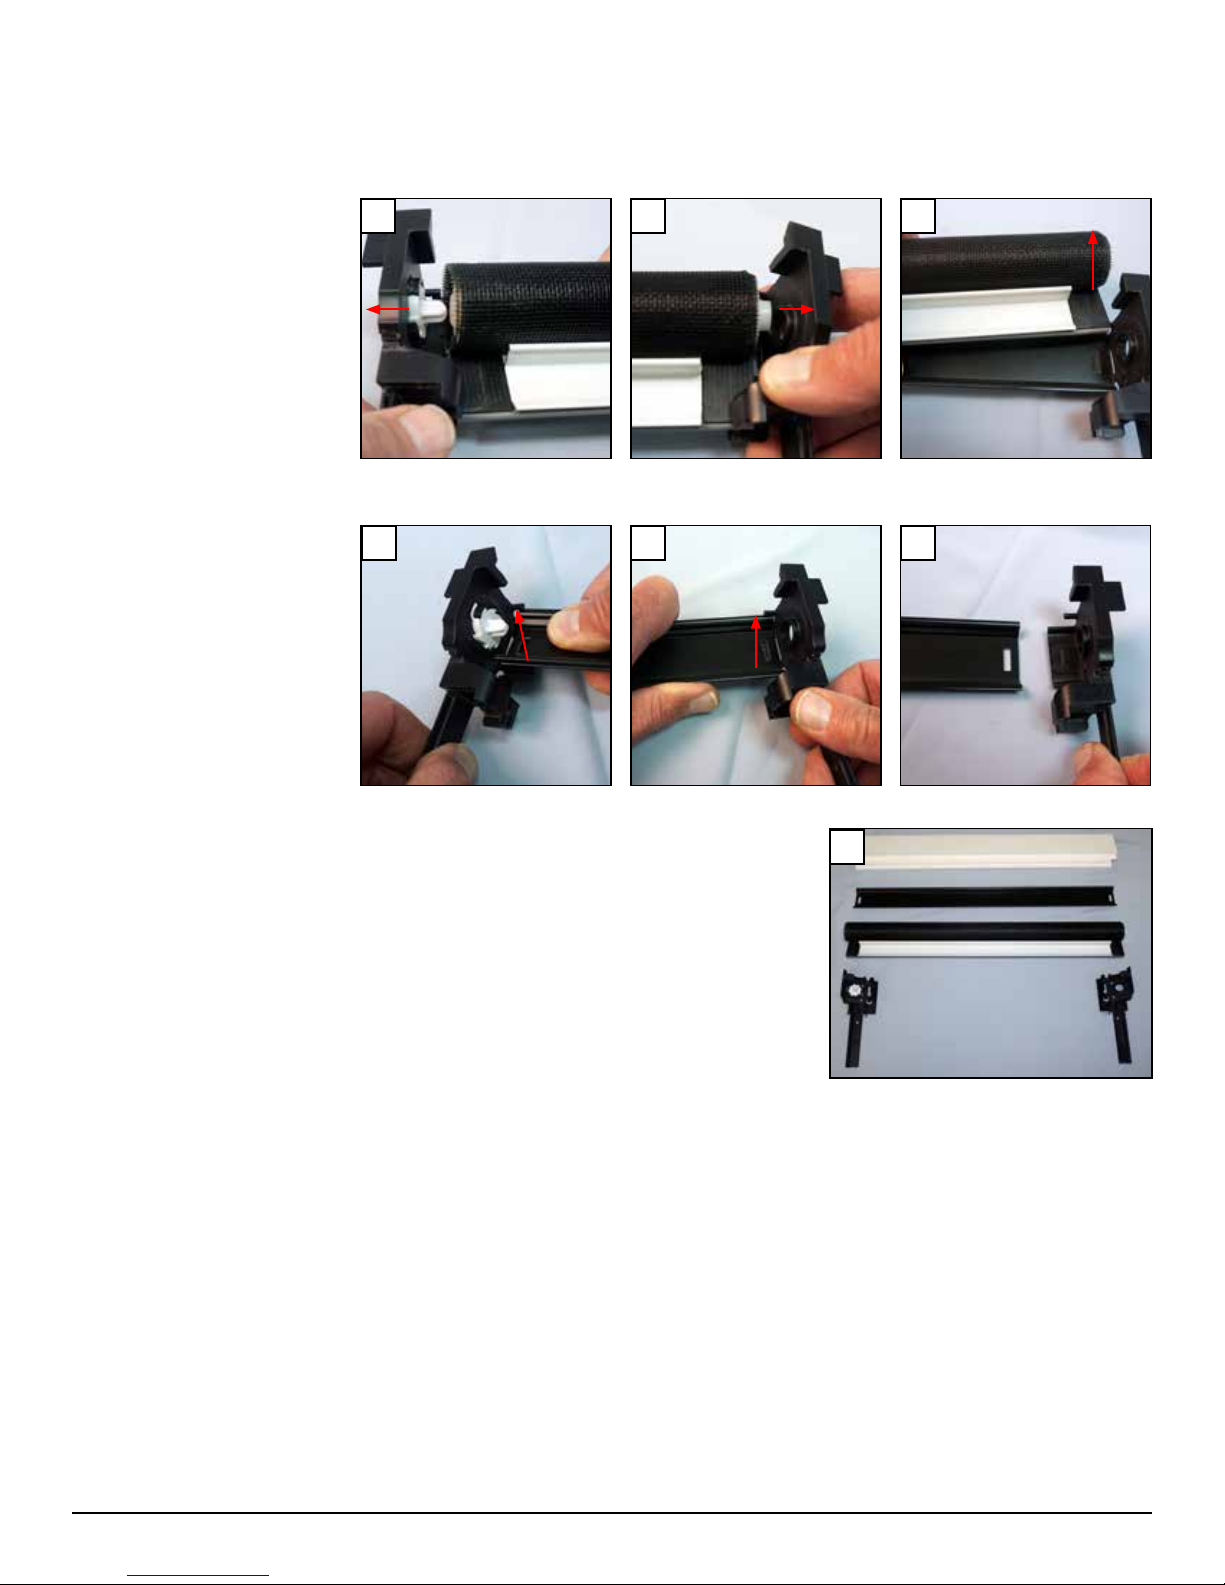
Rolscreen Cartridge Disassembly (Continued):
2
B. Push one end cap away from the screen roll, repeat on the other end and remove the screen roll.
2B
C. Grasp one of the end caps and the back cover and disconnect the cover from the end cap. Repeat on the
other end.
2C
2B
2C
2B
2C
D. A disassembled cartridge is shown here, it includes:
• 1 head cover
• 1 screen roll
• 1 back cover
• 2 mounting brackets/end caps (1 LH & 1 RH)
2D
Page 3 of 8
 Loading...