

Page 1

Pelco Ops Center Client /
iTrak Plug-in Guide
01 / 2016
Page 2

Contents
Contents
Overview of the iTrak Plug-in.......................................................................................................................................... 3
Installing the iTrak Plug-in................................................................................................................................................4
Configuring and Running the iTrak Plug-in..................................................................................................................7
Release Notes.....................................................................................................................................................................17
Appendix: Ops Center Client Plug-ins.........................................................................................................................18
2| Pelco Ops Center Client / iTrak Plug-in
Guide
Page 3
Overview of the iTrak Plug-in
Overview of the iTrak Plug-in
The iTrak plug-in for Ops Center Client (OCC) allows OCC operators to quickly create Incident File entries in iView System's iTrak
Incident Reporting & Risk Management system. Basic Incident File data is entered and relevant video clips can be exported and
linked to the Incident File within iTrak.
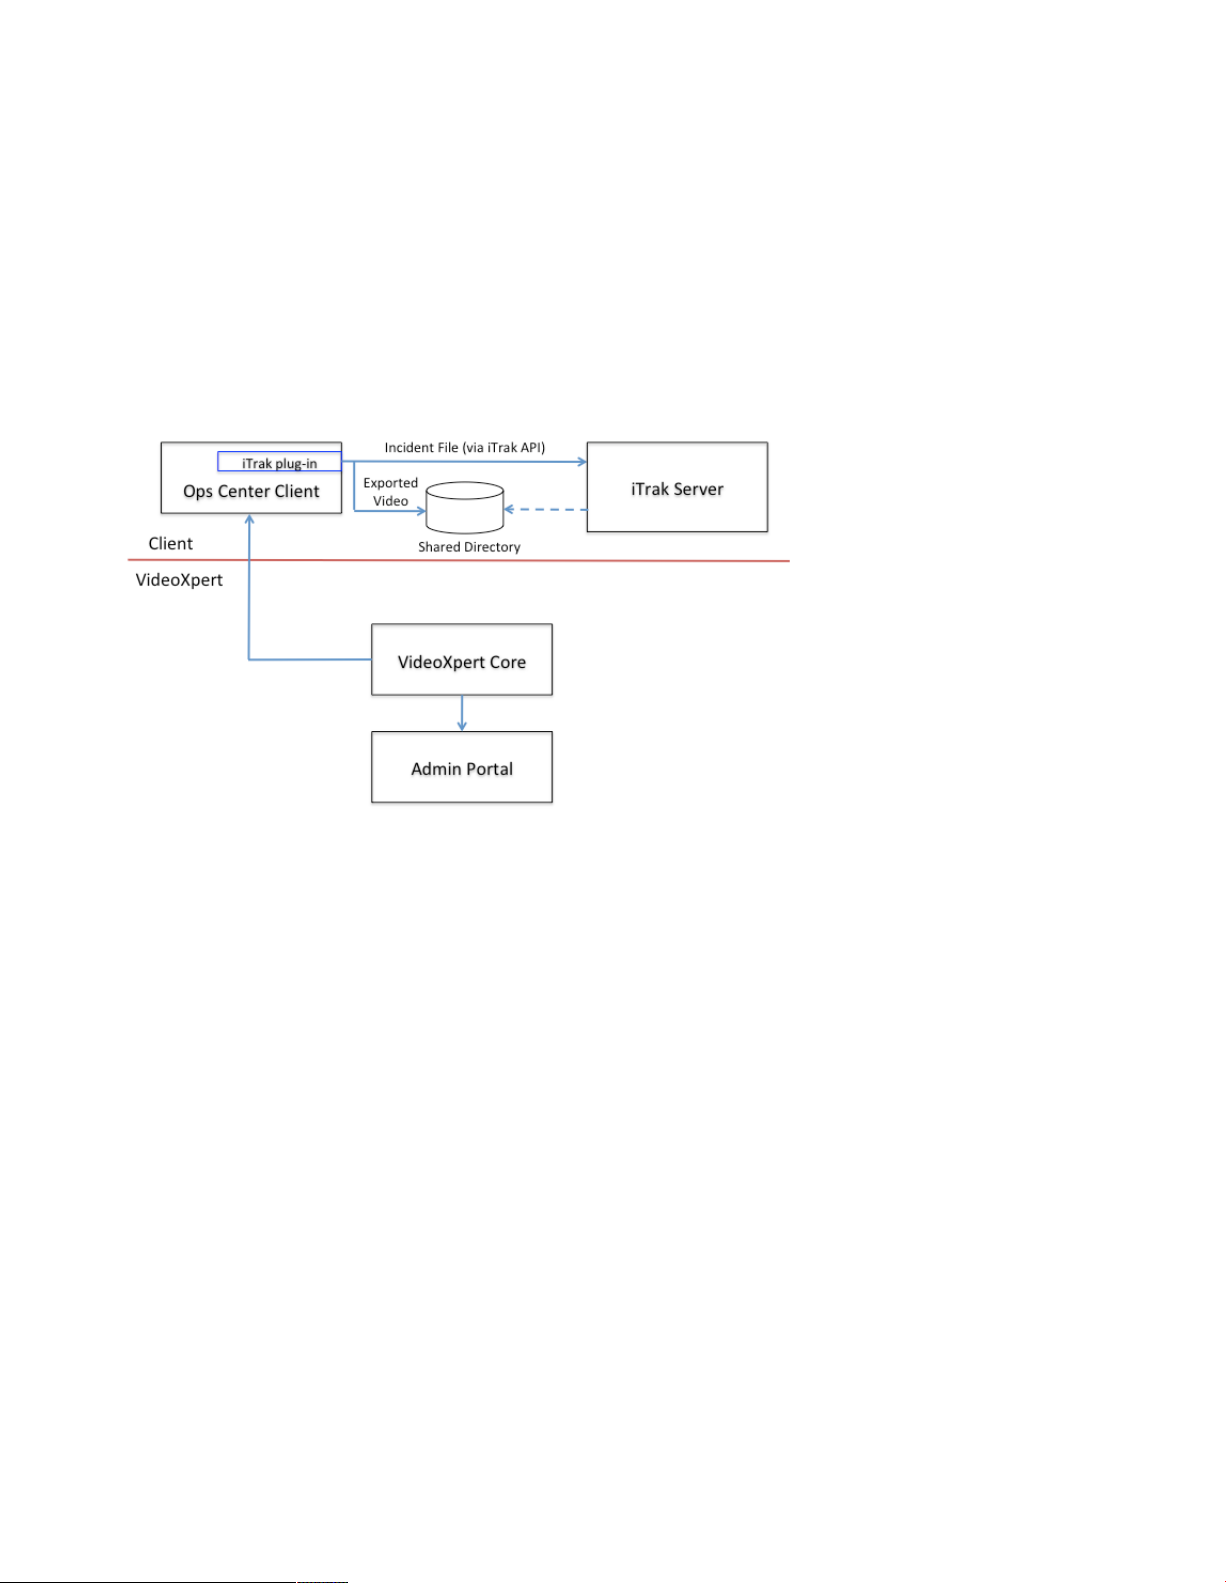
This guide shows how to install and configure the iTrak plug-in for Pelco VideoXpert.
Scope
The following diagram illustrates the two sides of the iTrak / VideoXpert installation. The iTrak plug-in installation is discussed in this
document.
Pre-requisites
The iTrak plug-in requires the following:
• iTrak Server 5.9.1 or higher (earlier versions do not support the API used by the plug-in)
• Pelco Ops Center Client for VideoXpert (1.8 or higher)
• .NET 4.5 Runtime
• Access to a shared directory in which to export video files
Any machine that meets the hardware requirements for Pelco OCC will run the iTrak plug-in. The Pelco OCC version must be 1.8 or
higher, and must match the VideoXpert version (1.8 or higher).
The iTrak product includes a Dispatch service (not the COM IDispatch interface) that is licensed on a per-customer basis. If
this module is not available then the lookups that the plug-in uses to determine valid locations/sublocations are disabled as well.
These lookups fail and log the error message "No iDispatch license." More information is available at http://www.iviewsystems.com/
idispatch.
Pelco Ops Center Client / iTrak Plug-in Guide
|3
Page 4

Installing the iTrak Plug-in
Installing the iTrak Plug-in
Installation
Installation summary:
• Requires a VideoXpert server to which to connect
• Installs on the PC running the Ops Center
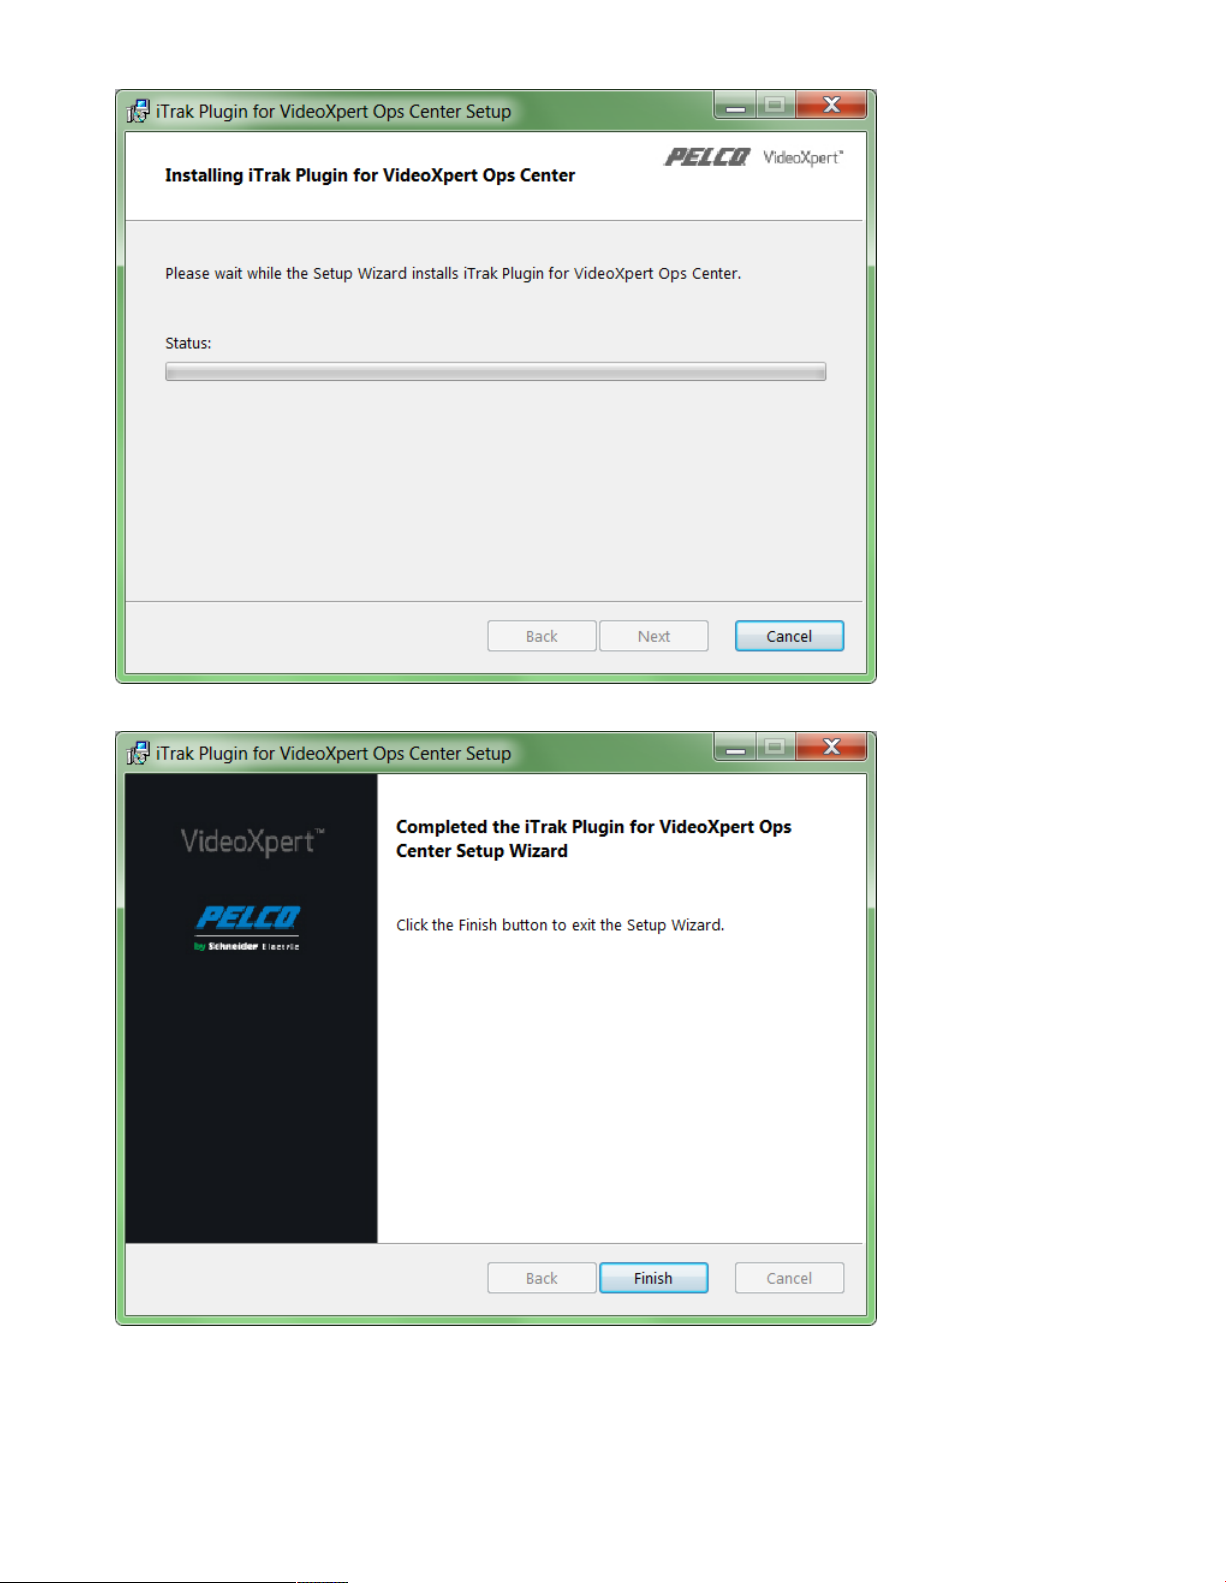
Download the iTrak plug-in installer and double-click on it to start the installation process. There are no user-configurable options at
this point so the installation should proceed until completion
1. Follow the prompts of the iTrak plug-in installer.
2. The installer provides feedback during installation.
4| Pelco Ops Center Client / iTrak Plug-in
Guide
Page 5
Installing the iTrak Plug-in
3. When the installation completes press Finish to dismiss the installer.
The following files are installed:
• All plug-in executable files are placed in C:\ProgramData\Pelco\OpsCenter\Plugins\Pelco\iViewSystems
\iTrakOCCPlugin
• The iTrak plug-in configuration file is placed in C:\ProgramData\Pelco\OpsCenter\Plugins\iTrak.xml
.
Pelco Ops Center Client / iTrak Plug-in Guide
|5
Page 6

Installing the iTrak Plug-in
After installation, the next step is to configure the plug-in.
Uninstalling the Plug-in
The plug-in can be uninstalled via the Programs and Features section of the Windows Control Panel.
NOTE: The uninstall process will also delete the iTrak configuration file (even if it has been modified) so be sure to back up this file
prior to uninstallation if it will be used by a subsequent version of the plug-in.
6| Pelco Ops Center Client / iTrak Plug-in
Guide
Page 7

Configuring and Running the iTrak Plug-in
Configuring and Running the iTrak Plug-in
Configuring the Plug-in
The plug-in reads configuration settings from an XML file at C:\ProgramData\Pelco\OpsCenter\Plugins\itrak.xml. Edit
this file to change the settings, including the location of the iTrak Server (required), and the path to the shared directory (required)
where incident files will be written.
Valid Configuration Settings:
Setting Required Notes
ServerUri Yes The URL of the iTrak server, including the
path to the web services API endpoint.
iTrakSharedDirectory Yes Location for exported video clips. Must
point to a valid local or UNC path. The
plug-in validates the path periodically.
If the path is unavailable, the plug-in
displays the yellow caution icon.
DeleteExportsUponCompletion No If true the plug-in will delete temporary
exported files from the filesystem AND
export entries from the VideoXpert Export
Archive.
IgnorePrefs No If true the plug-in will not reload settings
stored by the Ops Center Client.
Configuring the VideoXpert Core
Permissions
The iTrak plug-in depends on the ability to export media clips from VideoXpert. To allow this, users of the iTrak Plug-in must have
the Export Media Clips permission. The plug-in can be configured to delete completed exports; this requires the Delete
Exports permission.
Pelco Ops Center Client / iTrak Plug-in Guide
|7
Page 8

Configuring and Running the iTrak Plug-in
Location/Sublocation Tagging
iTrak supports Location and Sublocation fields that can be used to map Incident File entries to specific locales within a facility.
Sublocations are associated with a parent Location and Locations are associated with an iTrak Property. The iTrak Plugin uses
VideoXpert's tagging feature to associate video sources with iTrak Location/Sublocation values and pre-fills those fields within the
Create Incident dialog when a match is found.
Mapping from VideoXpert tags to iTrak Location/Sublocation works as follows:
• The plug-in looks up all tags for the current video source
• The video source must be tagged with the iTrak tag for association to continue
• If any tag matches any of the iTrak Location values then that value is associated with the Location field
• If any tag matches any of the iTrak Sublocation values associated with the selected Location value then that value is
associated with the Sublocation field
In this screenshot the selected camera has the following VideoXpert tags assigned: iTrak, First Floor, and Reception
Area.
8| Pelco Ops Center Client / iTrak Plug-in
Guide
Page 9

Configuring and Running the iTrak Plug-in
iTrak Credentials
Users of the iTrak plug-in will need separate credentials for iTrak and must supply them prior to accessing plug-in functionality.
Export Storage
iTrak can store small files internally but is not suited for storage of megabytes of video data. Instead video is "linked" to an incident
by sending iTrak the path to the file and not the file itself. To enable this a shared directory must be set up that is:
1. accessible (with read-write access) from all OCC workstations that will use the plug-in
2. accessible from the iTrak client application
3. has the same local path in both environments
One way to do this is to set up a Windows share in a location accessible to the iTrak Server machine and all OCC
machines (the iTrak Server machine itself can be used if necessary) and store all exports in a directory in the share. The
iTrakSharedDirectory setting in the iTrak configuration file should contain the path to this shared directory, either in Windows
UNC format (\\machine\share\directory) or by using the Windows SUBST command to set up a local drive mapping to the
shared directory. Windows UNC format is preferred.
Running the Plug-in
Once installed and configured, the iTrak plug-in appears in the VideoXpert list of Overlay plug-ins.
1. To launch the iTrak plug-in, click on Plug-ins > Overlay in the OCC Mission Control dialog. Drag and drop the plug-in name
string from the list on to the camera view cell. The iTrak plug-in is an overlay plug-in and can be dragged into any Ops Center
cell that is showing video.
Pelco Ops Center Client / iTrak Plug-in Guide
|9
Page 10

Configuring and Running the iTrak Plug-in
NOTE: The plug-in is not suitable for use in an OCC Investigation window.
2. The plug-in appears in a stripe along the bottom edge of the cell. It provides feedback during launch.
3. First-time users of the iTrak plug-in will see a Log In… link on the right side of the plug-in. Click on the link, enter the credentials
provided by the iTrak administrator and click Log In to proceed.
10| Pelco Ops Center Client / iTrak Plug-in
Guide
Page 11

Configuring and Running the iTrak Plug-in
Upon successful login the iTrak plug-in will store the credentials for use in subsequent logins. To log in with a different set of
credentials choose the Log Out menu item in the plug-in's popup menu, located at the right side of the plug-in.
The popup menu contains the following commands:
Show Log displays the most recent log file in a text editor.
Log Out "forgets" your iTrak credentials and forces a login next time you load the plug-in.
Exit retains your credentials and attempts to log in the next time you load the plug-in.
Pelco Ops Center Client / iTrak Plug-in Guide
|11
Page 12

Configuring and Running the iTrak Plug-in
Creating an iTrak Incident File
Once logged click the iTrak popup arrow at the left or double-click anywhere in the plug-in menubar to display the Incident form.
Since an iTrak Incident File is associated with a Daily Log entry the form collects data used in both record types and also has
options to export media clips from the current video source to be associated with the Incident File. The plug-in displays text fields
that allow the user to create an incident file containing a video clip from the selected camera.
The form contains the following fields:
Field Purpose
Topic Used to populate the Daily Log Topic.
Type Used to populate the Daily Log Type.
High Priority Used to populate the Daily Log High Priority field.
Property A selection list containing the Property values from the iTrak
system.
Location The Daily Log Location associated with the video source. This
field is pre-filled if the camera has been tagged with an iTrak
location value.
Sublocation The Daily Log Sublocation associated with the video source.
This field is pre-filled if the camera has been tagged with an
iTrak sublocation value.
Time Displays the current video timestamp. Used to populate the
Daily Log Occurred Date. Non-editable.
Length Length of media clip to associate with the Incident File.
Pre-roll Length of time preceding the incident start time to include in the
media clip.
Narrative Attaches a Narrative to the Incident File.
Exporting Video
The iTrak plug-in uses the current video timestamp to fill in the Occurred Date information in iTrak. It is assumed that the operator
will seek the video stream to the time of the incident. Using the Video and Pre-Roll items, the operator can then elect to export video
that will be associated with the new Incident File:
The video clip will start at the incident time, with an optional amount of "pre-roll" before that. For cases when the playback time is
very close to the present the video time will be adjusted so that the clip ends as close as possible to the present.
12| Pelco Ops Center Client / iTrak Plug-in
Guide
Page 13

Configuring and Running the iTrak Plug-in
NOTE: The video export items will be disabled if video is not available for some reason. In this case a Caution icon will appear next
to the Video: label; hover over the icon to see the specific reason the items are disabled.
Click Submit to create the incident and export the video.
Pelco Ops Center Client / iTrak Plug-in Guide
|13
Page 14

Configuring and Running the iTrak Plug-in
The status bar updates as the export progresses.
14| Pelco Ops Center Client / iTrak Plug-in
Guide
Page 15

The plug-in attaches the video clip. This completes the incident creation process.
Configuring and Running the iTrak Plug-in
The export will be removed from VideoXpert upon completion if DeleteExportsUponCompletion is set to true in the iTrak
configuration (and the user has the appropriate permissions within VideoXpert.) Otherwise it will appear in the Export Archive dialog
within Ops Center Client.
Logging
The iTrak plug-in logs all operations to C:\ProgramData\Pelco\OpsCenter\iTrakPlugin.log. This log file can be viewed
by selecting the Show Log menu item within the plug-in.
Pelco Ops Center Client / iTrak Plug-in Guide
|15
Page 16

Configuring and Running the iTrak Plug-in
This file is appended to during each session. Log files roll over daily or when the log exceeds 10MB. The plug-in retains a maximum
of seven archived log files.
NOTE: If the plug-in crashes during startup check the OCC log at C:\ProgramData\Pelco\OpsCenter\Logs\OpsCenter.log
for crash data. These types of crashes are not recorded in the iTrak plug-in log.
16| Pelco Ops Center Client / iTrak Plug-in
Guide
Page 17

Release Notes
New Features and Updates
This is the initial release of the iTrak plug-in.
Feature List
Table 1: iTrak Plug-in Features
Functionality iTrak Plug-in
Incident File Creation Y
Attach Video to Incident File Y
Login Y
Fixes
This is the initial release of the iTrak plug-in.
Release Notes
Known Issues and Limitations
Investigations
1. The iTrak plug-in will not work properly in Investigation mode. If the plug-in is loaded in a video cell and that cell is selected for
Investigation the plug-in will appear in the Investigation window but the Video Time field (which is used to set the Occurred Date/
Time for Incident Files) will not reflect the current playback time.
Synchronized Playback
1. The plug-in Video Time field does not reflect the current playback time in cells selected for synchronized playback.
2. The Synchronous Play icon in the video playback controls will not function in cells that have the plug-in loaded.
iTrak Server
1. The plug-in is incapable of deleting records within iTrak. This can result in orphaned Daily Log records (ones not linked to any
Incident File record) if creation of an Incident File fails for any reason.
Exported Video
1. Exported video is saved in .ZIP format and can be viewed with the VideoXport Player, which is available as part of an Ops
Center install. See the VideoXpert Ops Center User Guide (C5668M-C) for instructions on using the VideoXport Player.
2. Encrypted export files are not supported.
Pelco Ops Center Client / iTrak Plug-in Guide
|17
Page 18

Appendix: Ops Center Client Plug-ins
Appendix: Ops Center Client Plug-ins
The Pelco VideoXpert Ops Center provides a dynamic user interface that allows you to customize the workspace to suit your needs.
For example, you can display a 2x2 arrangement of video streams and third party plug-ins. These plug-ins may stand alone in
the cell or overlay the video stream. Stand alone plug-ins are "Applet" plug-ins; those that share space with a video stream are
"Overlay" plug-ins.
The figure below shows the Ops Center with the “Prime” window on the left. The Prime window contains the Video Source (camera)
list, dropdown menus that list available plug-ins, and buttons for creating workspaces and desktops. To the right of the Prime
window is a 4up “Workspace” containing four “Cells”. Each Cell may contain one of the following
• an Applet plug-in
• a video stream
• an Overlay plug-in AND a video stream
In the Ops Center instance shown below, the upper-left cell contains an Applet plug-in (specifically, a map), while the lower-left cell
contains a video stream from one of the listed cameras along with an Overlay plug-in.
Overlay Plug-ins
A plug-in may be configured to be an Overlay. An Overlay plug-in occupies the same cell as a video stream. An Overlay is intended
to annotate the video stream in some way. The overlay may contain scrolling text, buttons, a title, flyout menu, and so on. Refer to
the Overlay Plug-In Guidelines for content and style details.
In the following figure an Overlay plug-in is aligned on the right side of the cell.
18| Pelco Ops Center Client / iTrak Plug-in
Guide
Page 19

Appendix: Ops Center Client Plug-ins
Additional Features
Other features of the plug-in architecture and deployment environment include:
• Lightweight security. A plug-in is required to provide a "key", issued by Pelco, when requested by the Ops Center during
launch. The use of keys is intended to help Pelco to work more closely with plug-in providers and to discourage unauthorized
plug-ins. Plug-ins without a valid key will not be launched by the Ops Center.
• Discovery. Plug-ins are discovered by the Ops Center using .NET reflection.
• Easy installation. To install a plug-in, the DLL or EXE must be copied to a directory beneath the “Plugins” directory for the
Ops Center Client. The location pointing to the installation directory for the Ops Center Client will be stored in a registry key. A
plug-in provider (company) can create its own subfolder and a folder for each plug-in.
• Temporary data. A plug-in may use a directory that it creates to store temporary data while the plug-in is running.
• Persistent configuration. The Ops Center supports saving plug-in state as part of saving a workspace. If the workspace is
opened again at some time in the future or on some other Ops Center, the Ops Center will pass to the plug-in the state data
that it retrieved earlier. The plug-in can then apply the state that was passed.
Pelco Ops Center Client / iTrak Plug-in Guide
|19
Page 20

Pelco by Schneider Electric
3500 Pelco Way Clovis, California 93612-5699 USA
(800) 289-9100 Tel (800) 289-9150 Fax
+1 (559) 292-1981 International Tel
+1 (559) 348-1120 International Fax
www.pelco.com
© 2016 Schneider Electric. All Rights Reserved. All trademarks are owned by Schneider Electric Industries
SAS or its affiliated companies. www.schneider-electric.com
 Loading...