

Installation and Assembly:
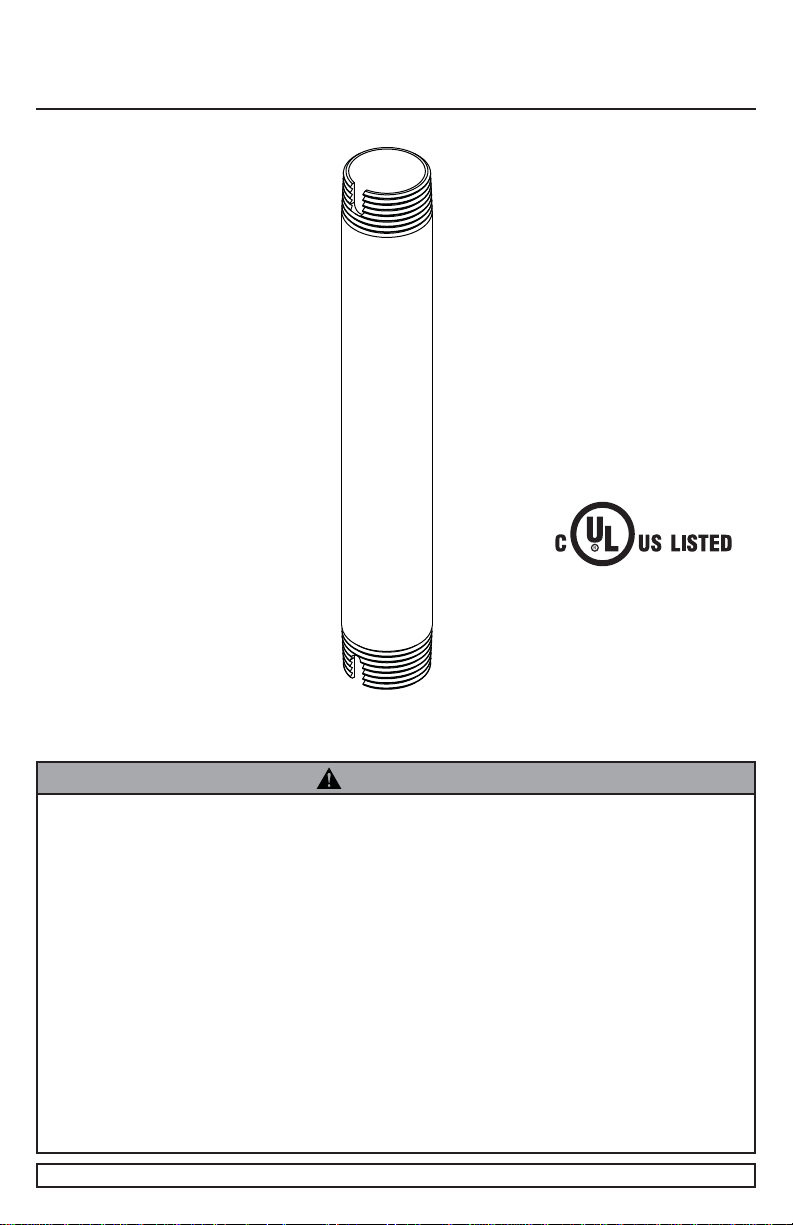
Medical Antimicrobial Extension Column 6" - 12'
Models:
EXT006-AB, EXT006-AW,
EXT018-AB, EXT018-AW,
EXT101-AB, EXT101-AW,
EXT102-AB, EXT102-AW,
EXT103-AB, EXT103-AW,
EXT104-AB, EXT104-AW,
EXT105-AB, EXT105-AW,
EXT106-AB, EXT106-AW,
EXT107-AB, EXT107-AW,
EXT108-AB, EXT108-AW,
EXT109-AB, EXT109-AW,
EXT110-AB, EXT110-AW
Max UL Load Capacity:
900 lbs (408 kg)
Note: The adjustable extension column
should only be used with Peerless UL Listed
products. The max load capacity for the
combined assembly is not to exceed the
lowest of all listed max load capacities.
NOTE: Read entire instruction sheet before you start installation and assembly.
WARNING
• Do not begin to install your product until you have read and understood the instructions and
warnings contained in this Installation Sheet. If you have any questions regarding any of the
instructions or warnings, call Peerless customer care at 1-800-865-2112.
• This product should only be installed by someone of good mechanical aptitude, has experience
with basic building construction, and fully understands these instructions.
• Make sure that the supporting surface will safely support the combined load of the equipment and
all attached hardware and components.
• Always use an assistant or mechanical lifting equipment to safely lift and position equipment.
• Tighten screws fi rmly, but do not overtighten. Overtightening can damage the items, greatly
reducing their holding power. See suggested torque values where applicable within these
instructions.
• This product is intended for indoor use only. Use of this product outdoors could lead to product
failure and personal injury.
• When installing or adjusting the ceiling mount, do not use adhesives, lubricants, or oils to prevent
the screws from loosening. If you use adhesives, lubricants, or oils to prevent the screws from
loosening, the casing may crack and the fl at panel screen or projector may fall, causing serious
injury and damage to the fl at panel screen/projector.
ISSUED:09-22-11 SHEET NO:154-9014-1
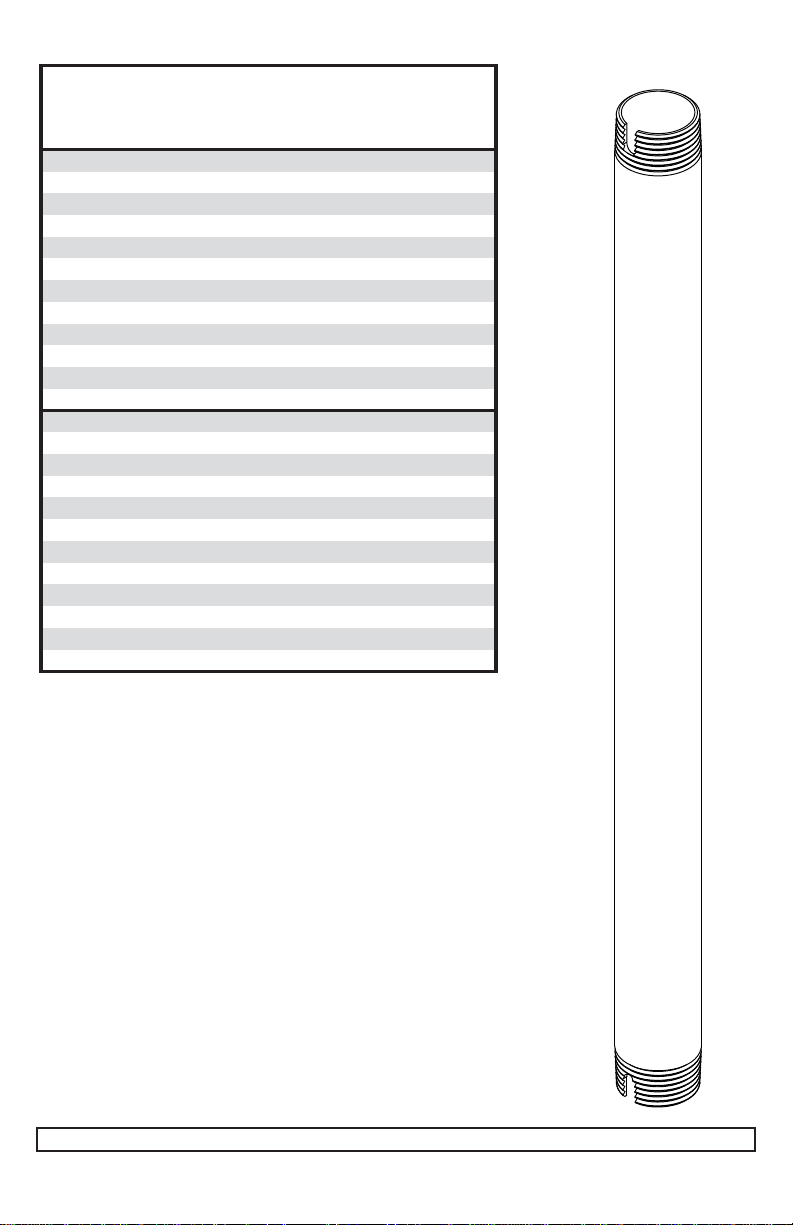
Before you begin, make sure all parts shown are included with your product.
EXT018-AW
128-S2095
Parts List A
extension pipe
Model
EXT006-AB
EXT018-AB 128-S1095
EXT101-AB 128-S1158
EXT102-AB 128-S1159
EXT103-AB 128-S1160
EXT104-AB 128-S1161
EXT105-AB 128-S1162
EXT106-AB 128-S1163
EXT107-AB 128-S1164
EXT108-AB 128-S1165
EXT109-AB 128-S1166
EXT110-AB 082-S1029
EXT006-AW 128-S2094
EXT101-AW 128-S2158
EXT102-AW 128-S2159
EXT103-AW 128-S2160
EXT104-AW 128-S2161
EXT105-AW 128-S2162
EXT106-AW 128-S2163
EXT107-AW 128-S2164
EXT108-AW 128-S2165
EXT109-AW 128-S2166
EXT110-AW 082-S2029
NOTE: Actual parts may appear slightly different than illustrated.
Quantity 1
128-S1094
A
2 of 9
ISSUED: 09-22-11 SHEET NO: 154-9014-1
1
Note: Adjustable extension column should only
be connected to UL Listed Peerless ceiling plates
with 1 1/2"-11.5 NPT threading. See instructions
provided with ceiling plate for additional
assistance.
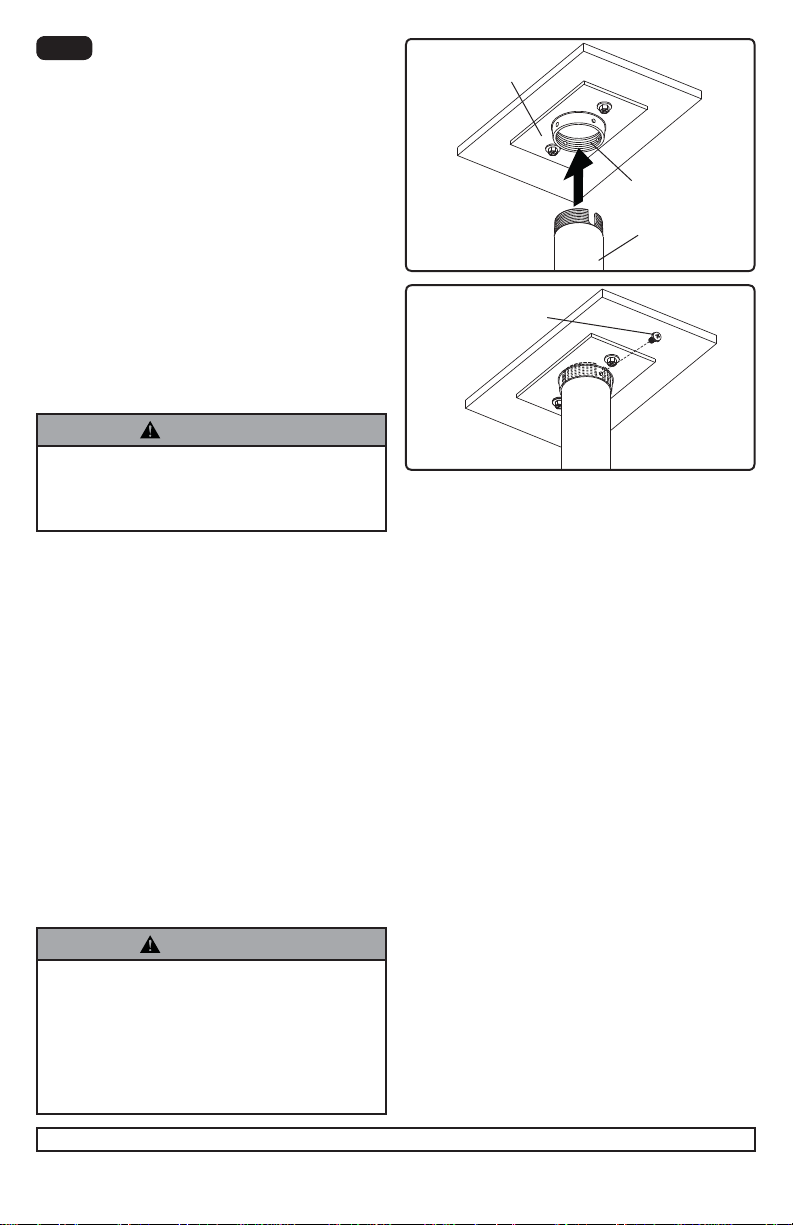
Thread extension column (A) into bottom of
threaded fi tting on ceiling plate (sold separately)
as shown in fi gure 1.1. Tighten extension column
so thread is securely engaged.
Align one small hole in the threaded fi tting of
ceiling plate with slot of extension column (A).
Insert and tighten one M5 x 10 mm screw (not
included) through the hole of threaded fi tting and
slot of extension column (A) as shown in fi gure
1.2.
ceiling plate
(sold separately)
fi g 1.1
M5 x 10mm screw
(not included)
1 1/2"-11.5 NPT
threading
A
fi g 1.2
WARNING
• Adjuster tube (A) must be fully threaded (six
or seven full turns) onto threaded fi tting in
ceiling plate and then locked with
M5 x 10 mm screw.
Recommended Cleaning Guidelines
The following procedures are not guaranteed to control infection. An infection control administrator or
epidemiologist should be consulted regarding cleaning procedures and processes.
Most painted components will withstand cleaning by commonly used, diluted, non-abrasive solutions
such as quaternary ammonia compounds, ammonia enzyme cleaners, and bleach or alcohol
solutions. However, it is recommended that any surface be tested in an inconspicuous area prior to
determine the propensity for discoloration.
• Pen or permanent and dry erase markers can be removed with 91% isopropyl alcohol and a soft
cloth.
• Iodine stains can be removed with commonly used cleaners and a soft cloth.
• Never use steel wool or other abrasive materials that will damage the surface fi nish.
• Do not use Acetone, mineral spirits, abrasive cleansers, paint thinner or any other harsh or toxic
chemicals to clean your product. These solvents will damage the surface fi nish.
WARNING
• To avoid risk of electric shock, do not expose
electrical components to water, cleaning
solutions or other potentially corrosive liquids
or substances.
• Do not use fl ammable cleaners on product
surfaces due to close proximity of electrical
power and equipment.
Peerless Industries, Inc.
2300 White Oak Circle
Aurora, IL 60502
www.peerlessmounts.com
3 of 9
All other brand and product names are trademarks or registered
ISSUED: 09-22-11 SHEET NO: 154-9014-1
© 2011, Peerless Industries, Inc. All rights reserved.
trademarks of their respective owners.

Instalación y montaje:
Columna de extensión ajustable 6" - 12'
Modelos:
EXT006-AB, EXT006-AW,
EXT018-AB, EXT018-AW,
EXT101-AB, EXT101-AW,
EXT102-AB, EXT102-AW,
EXT103-AB, EXT103-AW,
EXT104-AB, EXT104-AW,
EXT105-AB, EXT105-AW,
EXT106-AB, EXT106-AW,
EXT107-AB, EXT107-AW,
EXT108-AB, EXT108-AW,
EXT109-AB, EXT109-AW,
EXT110-AB, EXT110-AW
Máxima capacidad de carga por UL:
900 lbs (408 kg)
Nota: La columna de extensión ajustable sólo se debe
usar con los productos Listados por UL. La máxima
capacidad de carga para el montaje combinado no
deberá exceder la más baja de todas las capacidades
de carga máximas enumeradas.
NOTA: Antes de comenzar, asegúrese de que su producto incluye todas las piezas ilustradas.
ADVERTENCIA
• No comience a instalar su producto de Peerless hasta haber leído y entendido las instrucciones
y las advertencias contenidas en la Hoja de Instalación. Si tiene alguna pregunta acerca
de cualquiera de las instrucciones o las advertencias, por favor, llame a Servicio al Cliente
de Peerless al 1-800-865-2112 si está en EE. UU. Si es un cliente internacional, por favor,
comuníquese con su distribuidor local.
• Este producto sólo debe ser instalado por una persona que tenga una buena aptitud mecánica,
que tenga experiencia en construcción básica de edifi cios y que entienda estas instrucciones en
su totalidad.
• Asegúrese de que la superfi cie de apoyo sostendrá, con seguridad, la carga combinada del
equipo y todos los fi jadores y componentes.
• Siempre cuente con la ayuda de un asistente o utilice un equipo mecánico de izar para levantar y
colocar el equipo con más seguridad.
• Apriete los tornillos con fi rmeza, pero no en exceso. Apretarlos en exceso puede dañar los
artículos y puede disminuir signifi cativamente su fuerza de fi jación.
• Este producto está diseñado para uso en interiores solamente. Utilizar este producto en
exteriores podría causar fallas del producto y lesiones a individuos.
• Lors de l'installation ou de l'ajustement du support de plafond, ne pas utiliser d'adhésifs, de
lubrifi ants ni d'huiles pour empêcher les vis de se desserrer. L'utilisation d'adhésifs, de lubrifi ants
ou d'huiles pour empêcher les vis de se desserrer risque de faire craquer le boîtier et de faire
tomber le projecteur/televisore, ce qui pourrait provoquer des blessures graves et endommager le
projecteur/televisore.
PUBLICADO: 09-22-11 HOJA #: 154-9014-1

Antes de comenzar, asegúrese de que su producto incluye todas las piezas ilustradas.
128-S2094
Lista de piezas A
Tubería de Extensión
Model
EXT006-AB
EXT018-AB 128-S1095
EXT101-AB 128-S1158
EXT102-AB 128-S1159
EXT103-AB 128-S1160
EXT104-AB 128-S1161
EXT105-AB 128-S1162
EXT106-AB 128-S1163
EXT107-AB 128-S1164
EXT108-AB 128-S1165
EXT109-AB 128-S1166
EXT110-AB 082-S1029
EXT006-AW
EXT018-AW 128-S2095
EXT101-AW 128-S2158
EXT102-AW 128-S2159
EXT103-AW 128-S2160
EXT104-AW 128-S2161
EXT105-AW 128-S2162
EXT106-AW 128-S2163
EXT107-AW 128-S2164
EXT108-AW 128-S2165
EXT109-AW 128-S2166
EXT110-AW 082-S2029
NOTA: Algunas partes pueden diferir un poco de las ilustradas.
Cantidad 1
128-S1094
A
Español
5 de 9
PUBLICADO: 09-22-11 HOJA #: 154-9014-1

Español
1
Nota: La columna de extensión ajustable
únicamente deberá empalmarse a las placas
de techo Listadas por UL Peerless con roscado
1 1/2"-11.5. Consulte las instrucciones
proporcionadas con la placa de techo para recibir
ayuda adicional.
Enrosque el tubo ajustador (A) en la parte inferior
del aditamento roscado de la placa de techo
(vendido por separado),
fi gura 1.1. Apriete el tubo ajustador, para que la
rosca se fi je con fi rmeza.
Alinee uno de los agujeros pequeños del
aditamento roscado de la placa de techo con la
ranura del tubo ajustador (A). Inserte y apriete
un tornillo de M5 x 10 mm (no incluido) por el
agujero del aditamento roscado y la ranura del
tubo ajustador (A), como se muestra en la fi gura
1.2.
como se muestra en la
Placa de techo
(vendido por
separado)
roscado
1 1/2"-11.5 NPT
A
fi g 1.1
tornillo M5 x 10mm
(no incluido)
fi g 1.2
ADVERTENCIA
• El tubo ajustador (A) se tiene que enroscar
completamente (seis o siete vueltas completas) en
el aditamento roscado de la placa de techo y luego
se tiene que fi jar con el tornillo M5 x 10 mm.
Recomendaciones para la limpieza
No se garantiza que los siguientes procedimientos controlarán las infecciones. Se debe consultar a
un manejador de control de infecciones o un epidemiólogo respecto a los procedimientos y procesos
de limpieza.
La mayoría de los componentes pintados resistirán la limpieza con soluciones sin abrasivos
diluidas de uso común como los compuestos de amoniaco cuaternario, limpiadores con enzimas de
amoniaco y soluciones con blanqueador o alcohol. Sin embargo, se recomienda que se haga una
prueba en un área discreta de la superfi cie antes de determinar la propensión a descolorarse.
• Las marcas de bolígrafo o marcadores permanentes y de borrado en seco se pueden eliminar con
alcohol isopropílico al 91% y un paño suave.
• Las manchas de yodo se pueden eliminar con limpiadores de uso común y un paño suave.
• No use esponjas de acero ni otros materiales abrasivos que puedan dañar el acabado de la
superfi cie.
• No use acetona, alcoholes minerales, limpiadores abrasivos, solvente de pintura ni ningún
otro químico áspero o tóxico para limpiar el producto. Estos solventes dañarán el acabado de la
superfi cie.
ADVERTENCIA
• Para evitar el riesgo de choque eléctrico, no
exponga los componentes eléctricos al agua,
a soluciones limpiadoras ni a otros líquidos o
sustancias potencialmente corrosivos.
• No use limpiadores infl amables en las
superfi cies del producto debido a la
proximidad a tomas de corriente y otros
equipos eléctricos.
Peerless Industries, Inc.
2300 White Oak Circle
Aurora, IL 60502
www.peerlessmounts.com
6 de 9
© 2011, Peerless Industries, Inc. Todos los derechos reservados.
Cualesquiera otras marcas y nombres de productos son marcas
PUBLICADO: 09-22-11 HOJA #: 154-9014-1
comerciales o registradas de sus respectivos dueños.

Installation et assemblage:
Colonne d'extension réglable 6 po a 12 pi
Modèles:
EXT006-AB, EXT006-AW,
EXT018-AB, EXT018-AW,
EXT101-AB, EXT101-AW,
EXT102-AB, EXT102-AW,
EXT103-AB, EXT103-AW,
EXT104-AB, EXT104-AW,
EXT105-AB, EXT105-AW,
EXT106-AB, EXT106-AW,
EXT107-AB, EXT107-AW,
EXT108-AB, EXT108-AW,
EXT109-AB, EXT109-AW,
EXT110-AB, EXT110-AW
Capacité UL de charge maximale
préconisée:
900 lbs (408 kg)
REMARQUE : La colonne d'extension réglable
doit être utilisée uniquement avec des produits ho-
mologués UL. La capacité de charge maximale de
l'ensemble du support ne doit pas dépasser la plus
basse des capacités de charge max. indiquées.
REMARQUE: lisez entièrement la fi che d’instructions avant de commencer l’installation et l’assemblage.
ADVERTISSEMENT
• Ne commencez pas à installer votre produit Peerless avant d’avoir lu et assimilé les instructions
et les avertissements contenus dans cette fi che d’installation. Pour toute question concernant les
instructions ou les avertissements, veuillez appeler le service à la clientèle de Peerless au
1-800-865-2112; tous les clients internationaux sont priés de contacter leur distributeur local.
• Ce produit doit être installé uniquement par quelqu’un possédant une bonne aptitude à la
mécanique, une expérience de la construction immobilière et ayant bien compris ces instructions.
• Assurez-vous que la surface de support puisse soutenir sans danger la charge totale de
l’équipement ainsi que des pièces et composants qui y sont attachés.
• Pour lever et positionner l’équipement en toute sécurité, faites-vous toujours aider par une autre
personne ou utilisez un dispositif de levage mécanique.
• Serrez fermement les vis, mais sans excès. Un serrage excessif peut endommager les
composants et en réduire considérablement la capacité de support.
• Ce produit est conçu uniquement pour un usage intérieur. L’utilisation de ce produit à l’extérieur
peut causer une défaillance du produit et des blessures corporelles.
• Lors de l'installation ou de l'ajustement du support de plafond, ne pas utiliser d'adhésifs, de
lubrifi ants ni d'huiles pour empêcher les vis de se desserrer. L'utilisation d'adhésifs, de lubrifi ants
ou d'huiles pour empêcher les vis de se desserrer risque de faire craquer le boîtier et de faire
tomber le projecteur/téléviseur, ce qui pourrait provoquer des blessures graves et endommager le
projecteur/téléviseur.
PUBLIÉ LE: 09-22-11 FEUILLE no: 154-9014-1

Avant de commencer, veillez à ce que toutes les pièces énumérées soient incluses.
128-S2094
Liste des pièces A
Tube de Rallonge
Modelé
EXT006-AB
EXT018-AB 128-S1095
EXT101-AB 128-S1158
EXT102-AB 128-S1159
EXT103-AB 128-S1160
EXT104-AB 128-S1161
EXT105-AB 128-S1162
EXT106-AB 128-S1163
EXT107-AB 128-S1164
EXT108-AB 128-S1165
EXT109-AB 128-S1166
EXT110-AB 082-S1029
EXT006-AW
EXT018-AW 128-S2095
EXT101-AW 128-S2158
EXT102-AW 128-S2159
EXT103-AW 128-S2160
EXT104-AW 128-S2161
EXT105-AW 128-S2162
EXT106-AW 128-S2163
EXT107-AW 128-S2164
EXT108-AW 128-S2165
EXT109-AW 128-S2166
EXT110-AW 082-S2029
REMARQUE: Il est possible que les pièces semblent légèrement
différentes de celles illustrées ici.
Qté 1
128-S1094
A
Français
8 sur 9
PUBLIÉ LE: 09-22-11 FEUILLE no: 154-9014-1

1
Remarque : La colonne d'extension réglable
doit être raccordée uniquement à des plaques
de plafond homologuées UL Peerless disposant
d'un fi letage NPT de 1 1/2 po-11,5. Pour obtenir
de l'aide supplémentaire, voir les instructions
fournies avec la plaque de plafond.
Insérez le tube de réglage (A) dans la partie
inférieure du raccord fi leté de la plaque de
plafond (vendue séparément) comme illustré à la
fi gure 1.1. Serrez le tube de réglage jusqu'à ce
qu'il soit vissé à fond.
Plaque de
plafond (vendue
séparément)
A
fi g 1.1
Français
fi letage
1 1/2"-11.5 NPT
Alignez un petit trou du raccord fi leté de la plaque
de plafond avec la fente du tube de réglage
(A). Insérez et serrez une vis M5 x 10 mm (non
inclus) dans le trou du raccord fi leté, puis dans la
fente du tube de réglage (A) comme illustré à la
fi gure 1.2.
A VERTISSEMENT
• Le tube de réglage (A) doit être vissé à fond (six
ou sept tours complets) sur le raccord fi leté de la
plaque de plafond, puis maintenu en place à l'aide
d'une vis M5 x 10 mm.
vis M5 x 10mm
(non inclus)
fi g 1.2
Méthodes de nettoyage recommandées
Les procédures suivantes ne garantissent pas la prévention des infections. Il convient de consulter
un administrateur de la prévention des infections ou un épidémiologiste concernant les procédures et
processus de nettoyage.
La plupart des composants peints résistent au nettoyage avec des solutions non abrasives courantes,
sous forme diluée, telles que : composés d’ammonium quaternaire, nettoyants enzymatique à base
d’ammoniac, eau de Javel ou autres solutions à base d’alcool. Il est toutefois conseillé de faire un
essai préalable sur une partie peu visible afi n de déterminer la tendance à la décoloration.
• Les marques de stylo ou de marqueurs permanents et à essuyage à sec peuvent être éliminées à
l’aide d’alcool isopropylique à 91 % et d’un chiffon doux.
• Les taches d’iode peuvent être éliminées à l’aide de nettoyants courants et d’un chiffon doux.
• Ne jamais utiliser de laine d’acier ni d’autres matériaux abrasifs susceptibles d’endommager le fi ni
de la surface.
• Ne pas utiliser d’acétone, d’essences minérales, de nettoyants abrasifs, de diluant pour peintures ni
aucun produit chimique toxique ou puissant pour nettoyer votre produit. Ces solvants endommagent
le fi ni de la surface.
A VERTISSEMENT
• Pour éviter le risque de choc électrique, ne
pas exposer les composants électriques
à l’eau, à des solutions de nettoyage
ni à d’autres liquides ou substances
potentiellement corrosifs.
• Ne pas utiliser de nettoyants infl ammables
sur les surfaces du produit en raison de la
proximité de l’alimentation et de l’équipement
électriques.
Peerless Industries, Inc.
2300 White Oak Circle
Aurora, IL 60502
www.peerlessmounts.com
9 sur 9
Tous les autres noms de marques et de produits sont des marques
de commerce ou déposées de leurs propriétaires respectifs.
PUBLIÉ LE: 09-22-11 FEUILLE no: 154-9014-1
© 2011, Peerless Industries, Inc. Tous droits réservés.
 Loading...