

Page 1
Installation and Assembly Multi-Display Extension Columns
Models: ADD0203, ADD0305 ADD0406, ADD0507,
ADD0608, ADD0709, ADD0810, ADD0911,
ADD1012, ADD012018, ADD018024
This product is intended for use with UL
R
IMPORTANT! Read entire instruction sheet before you start inst allation and assembly .
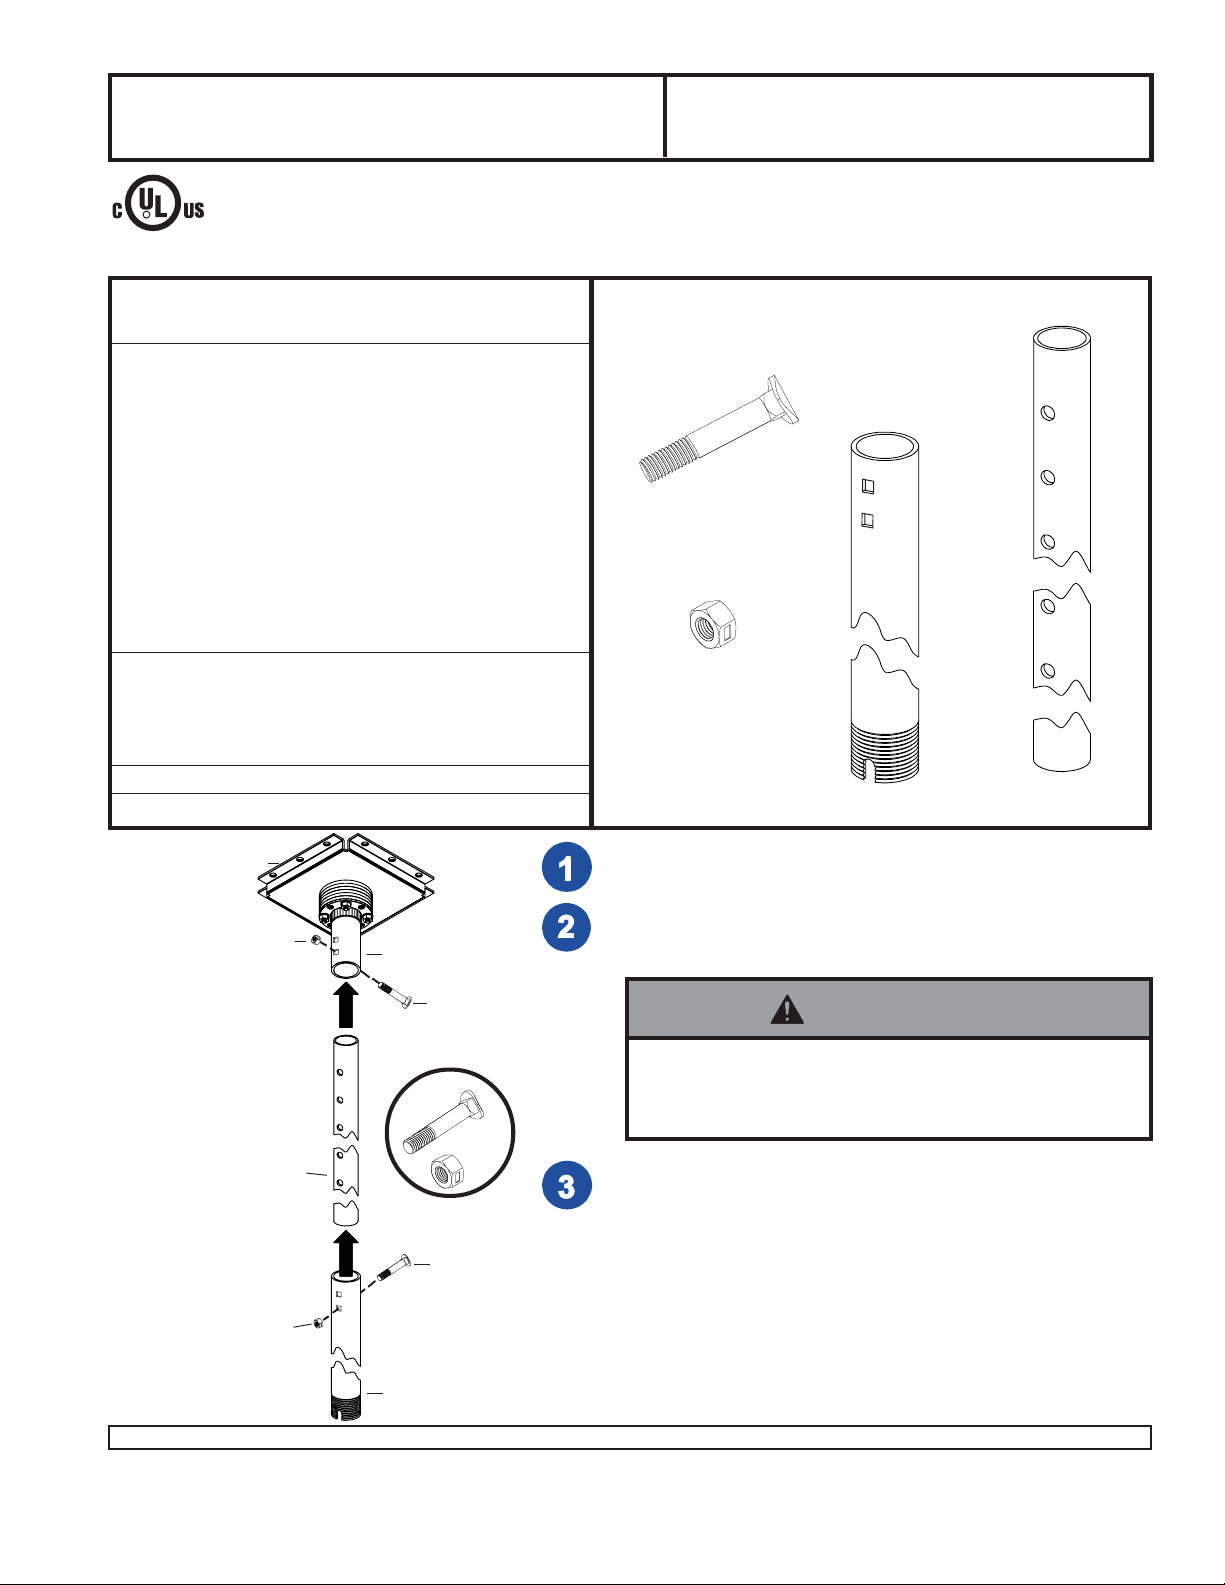
Parts List
A 2MD-55VS11D 1 extension pipe (ADD0203 only)
B 154-1001 1 adjuster tube (ADD0203 only)
C 580-1022 2 M10 x 60 mm curved carriage bolt
D 530-9402 2 M10 x 1.5 center lock nut
Listed products and must be installed by a
qualified professional installer.
PART # QTY. DESCRIPTION
2MD-55VS12D extension pipe (ADD0305 only)
2MD-55VS10D extension pipe (ADD0406 only)
2MD-55VS01D extension pipe (ADD0507 only)
2MD-55VS09D extension pipe (ADD0608 only)
2MD-55VS03W extension pipe (ADD0709 only)
2MD-55VS08W extension pipe (ADD0810 only)
2MD-55VS05W extension pipe (ADD0911 only)
2MD-55VS06W extension pipe (ADD1012 only)
154-1032 extension pipe (ADD012018 only)
154-1034 extension pipe (ADD018024 only)
154-1002 (all models except ADD0203,
ADD012018, ADD018024)
154-1029 (ADD012018, ADD018024 only)
Before you start make sure all parts listed are included with your product.
C
D
Some parts may appear slightly different than illustrated.
MAXIMUM LOAD CAPACITY : 800 lb (364 kg)
A
B
Ceiling Decoupler
D
Extension Column attaches
to ceiling decoupler (sold
separately).
B
stub
C
C
D
Install Ceiling Decoupler according to instructions provided with it.
Align hole in adjuster tube (B) with hole in stub. Attach with one bolt
(C) and lock nut (D).
WARNING
• Installer must verify that the wall will safely support
four times the combined weight of all attached equipment and hardware.
Slide extension pipe (A) over adjuster tube (B) to the desired
height. Attach with one bolt (C) and lock nut (D).
C
D
A
1 of 2
Visit the Peerless Web Site at www.peerlessindustries.com For customer service call 1-800-729-0307 or 708-865-8870.
ISSUED: 01-28-00 SHEET #: 026-9006-2 07-23-04
Page 2
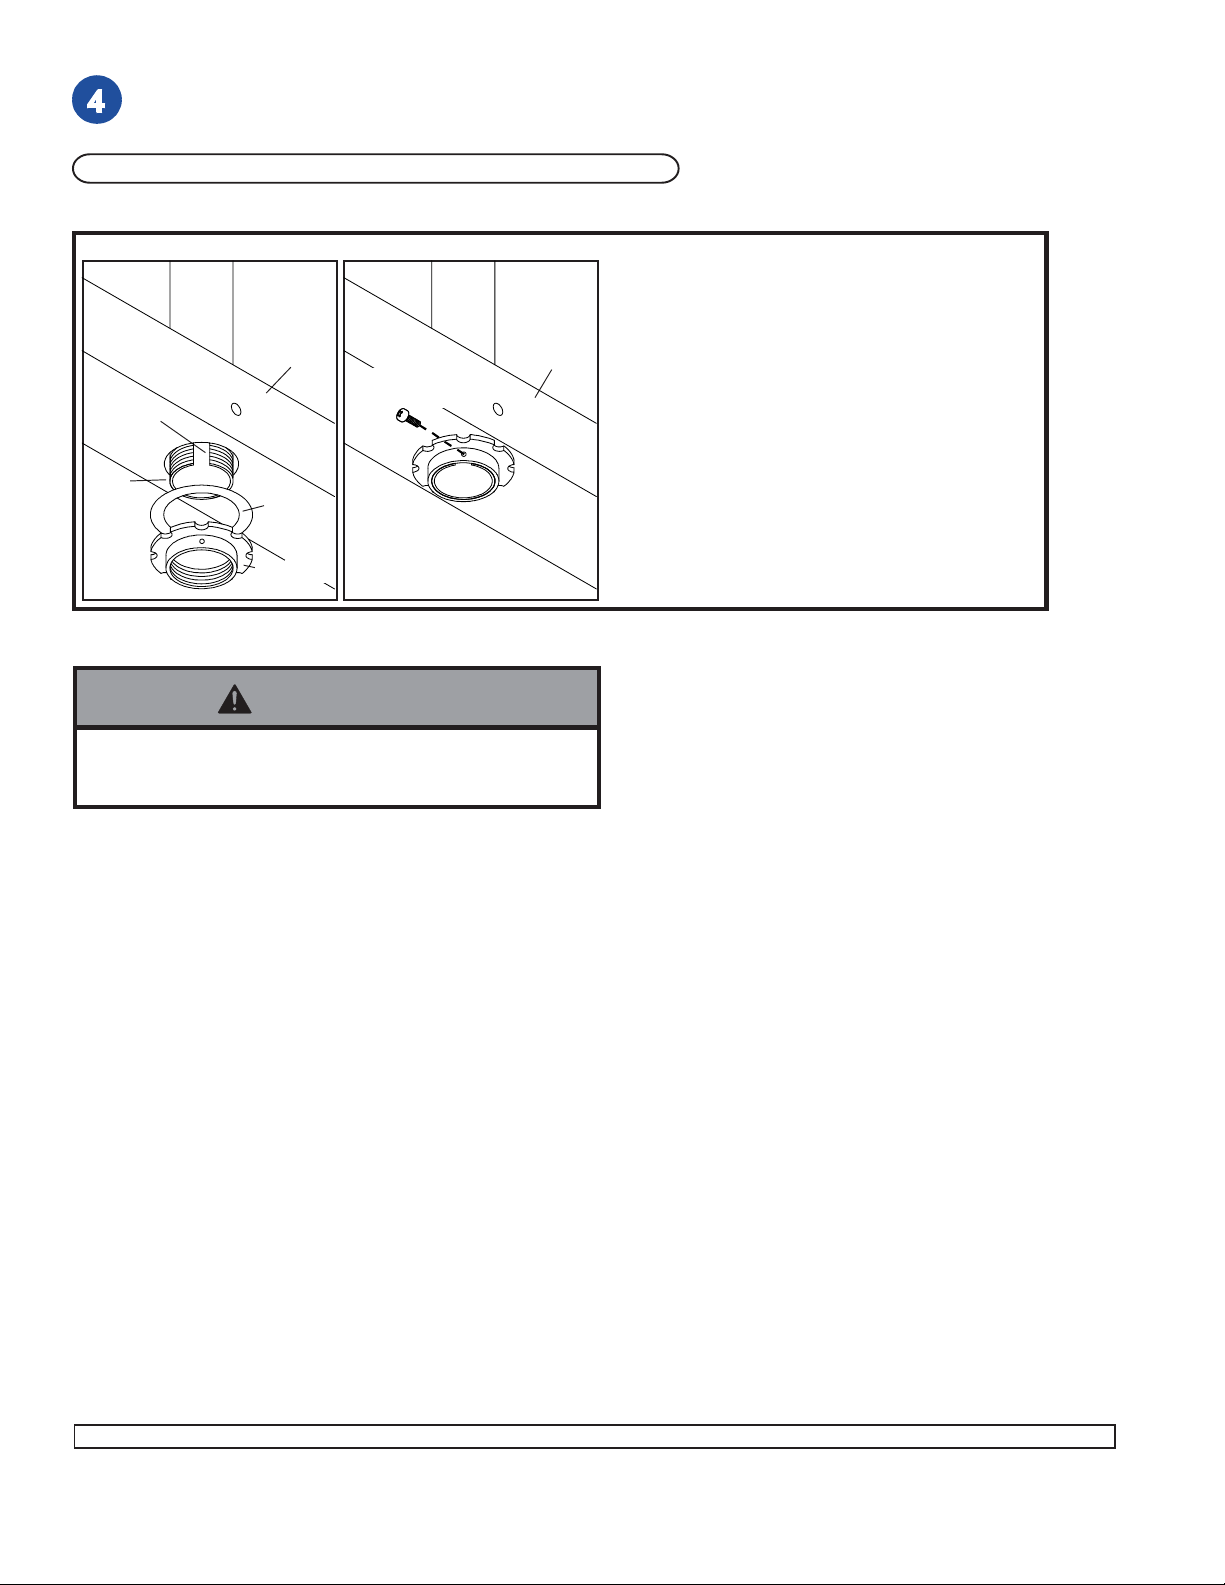
Attach extension column to multi-display mount as shown using M5 x .8 x 10 mm screw, fiber washer and retaining
collar sold with multi display systems.
IMPORTANT: Lock retaining collar as shown in DETAIL 1 .
VIEW FROM BELOW
A
Cross
Support
M5 x .8 x 10 mm
Screw
SLOT
Fiber
Washer
Retaining
Collar
Cross
Support
WARNING
• For safety retaining collar must be locked to adjuster
tube!
DETAIL 1
After tightening retaining collar onto end of
extension pipe (A), align one of the small holes in
the side of the retaining collar with slot in the end
of adjuster tube. Insert and tighten M5 x .8 x 10
mm phillips screw through side of retaining collar
into slot. This will lock the retaining collar to the
adjuster tube. Note: The part used in this step
are provided with the multi-display system.
2 of 2
Visit the Peerless Web Site at www.peerlessindustries.com For customer service call 1-800-729-0307 or 708-865-8870.
© 2004 Peerless Industries, Inc. All rights reserved.
Peerless is a registered trademark of Peerless Industries, Inc.
All other brand and product names are trademarks or registered trademarks of their respective owners.
ISSUED: 01-28-00 SHEET #: 026-9006-2 07-23-04
 Loading...