

Page 1
Installation and Assembly - Fixed Length Extension Columns
IMPORT ANT! Read entire instruction sheet
before beginning installation and assembly .
WARNING
• For a safe installation be sure to lock extension
column as instructed.
Note: Other ceiling decouplers
may be used if mounted to a
structure other than an I-Beam
(Call Customer Service for more
information).
Part List
Description Qty. Part #
A Pipe (ADD101) 1 154-1079
Pipe (ADD102) 1 154-1080
Pipe (ADD103) 1 154-1081
Pipe (ADD104) 1 154-1082
Pipe (ADD105) 1 154-1083
Pipe (ADD106) 1 154-1084
Pipe (ADD107) 1 154-1085
Pipe (ADD108) 1 154-1086
Pipe (ADD109) 1 154-1087
Pipe (ADD110) 1 154-1088
B M10 x 60mm carriage bolt 2 580-1022
C M10 center lock nut 2 530-9402
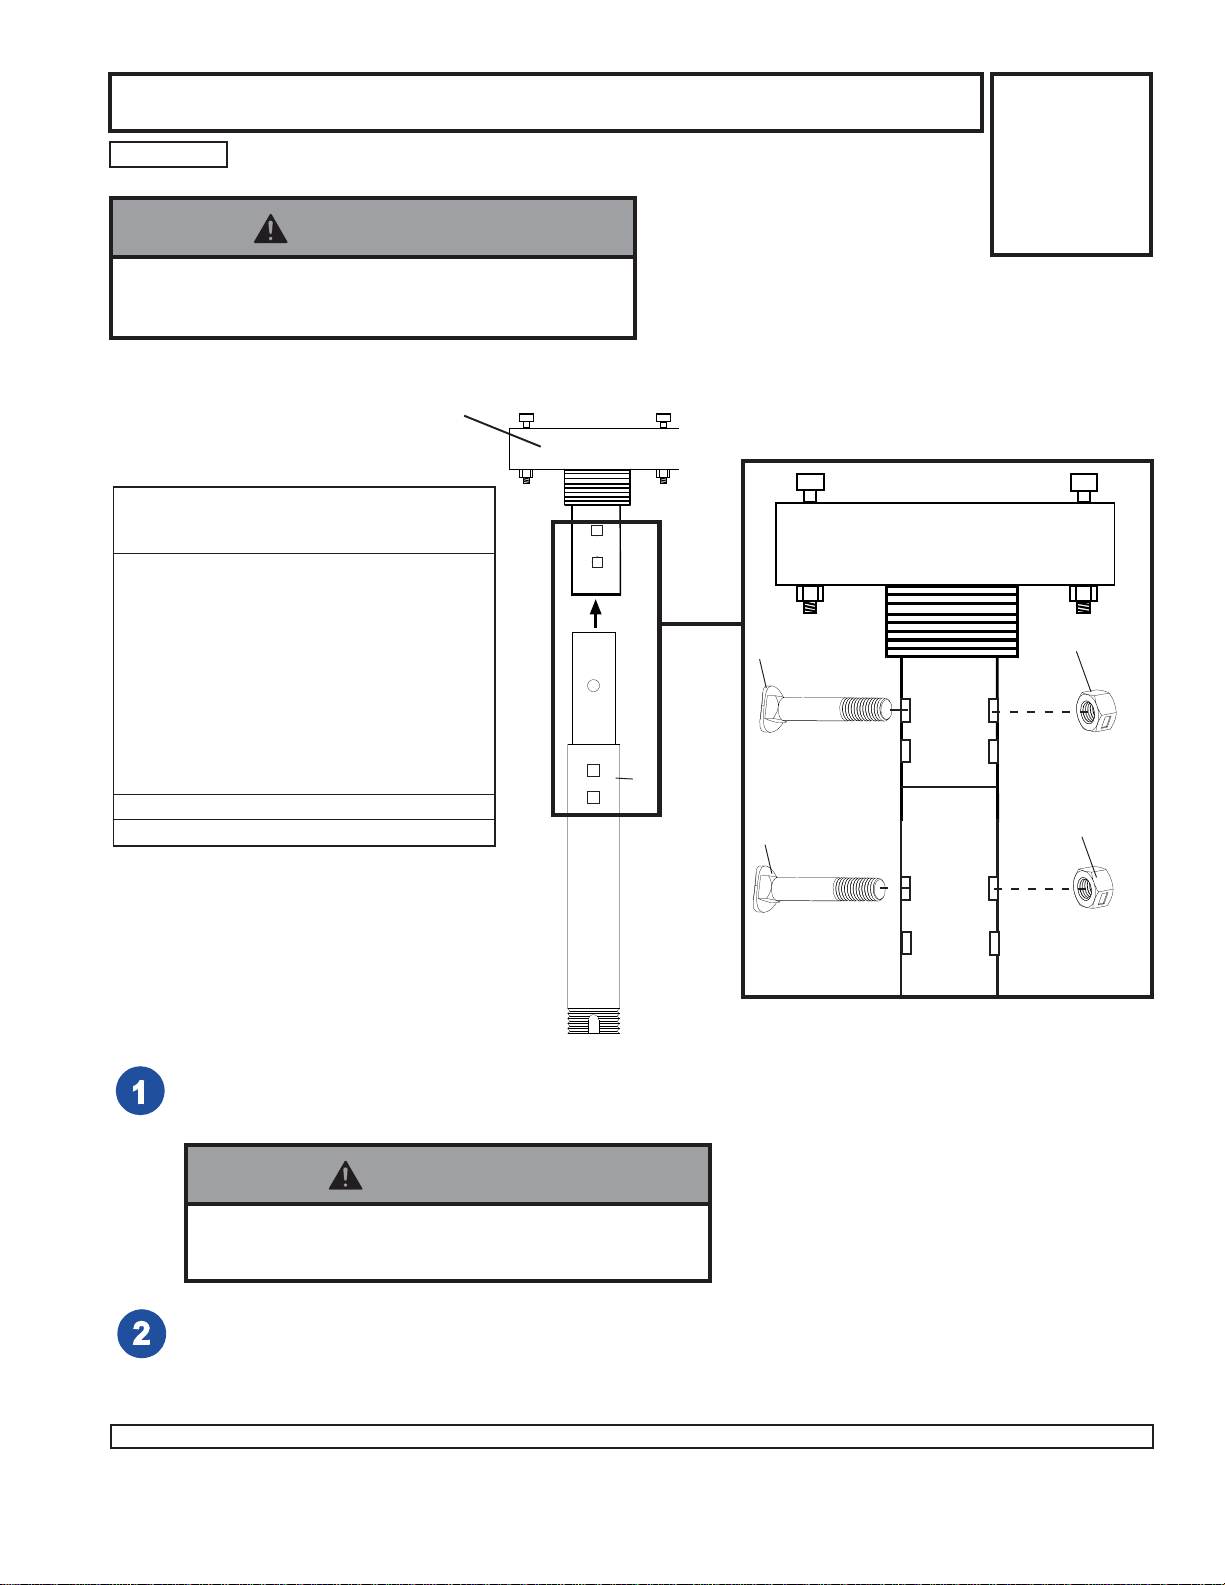
I-Beam Clamp
I-Beam Clamp
B
A
B
Models:
ADD101, ADD102,
ADD103, ADD104,
ADD105, ADD106,
ADD107, ADD108,
ADD109, ADD110
C
A
C
Follow directions supplied with mounting bracket for attaching to threaded end of column. Align slot
with one hole inside of threaded fitting. Lock extension column with one M5 x .8" x 10mm phillips
screw supplied with mount column attaches to.
WARNING
• For safety , extension column must be locked to
threaded fitting with screw!
Remove plug used for shipping from pipe (A). Align holes to desired length, then fasten with a M10
carriage bolt (B) and M10 lock nut (C).
Insert extension column to I-Beam Clamp. Align holes to desired length, then fasten with a M10
carriage bolt (B) and M10 lock nut (C).
1 of 1
Visit the Peerless Web Site at www.peerlessindustries.com For customer service call 1-800-729-0307 or 708-865-8870.
© 2004 Peerless Industries, Inc. All rights reserved.
Peerless is a registered trademark of Peerless Industries, Inc.
ISSUED: 06-30-00 SHEET #: 154-9003-3 10-26-04
 Loading...