

Page 1
Installation and Assembly - Plasma Video Conference Shelf
A
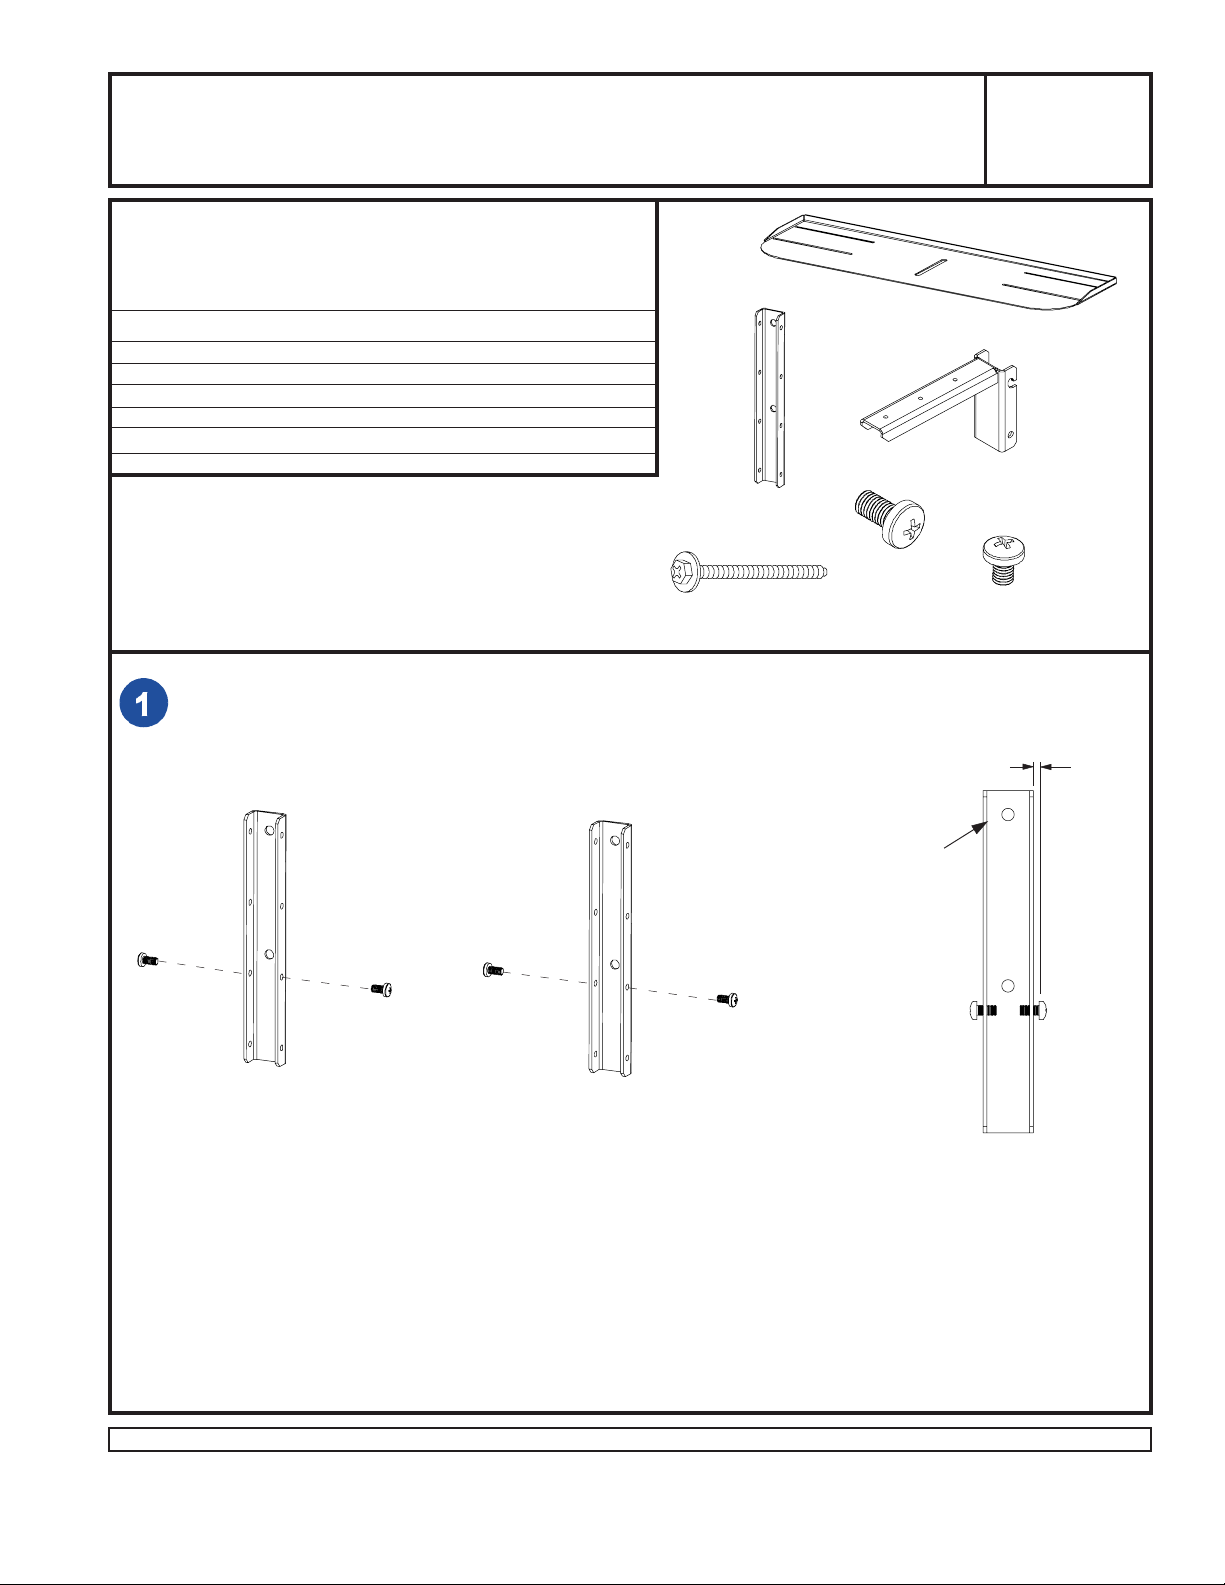
PARTS LIST
Parts List
PART # QTY. DESCRIPTION
A 200-1305 1 shelf
B 200-1306 2 shelf bracket
C 200-1307 2 wall bracket
D 200-1005 4 #14 x 2 1/4" wood screw
E 520-9250 6 M5 x .8 x 10mm phillips screw
F 520-1006 4 M4 x .7 x 6mm phillips screw
C
Model:
ACC 309
B
D
E
F
Some parts may appear slightly different than illustrated.
Fasten two M5 screws (E) into second hole of wall bracket (C) leaving about 1/4" gap as shown below.
Note: To increase the height of shelf just place screws (E) into upper holes of wall bracket (C).
C
E
C
E
Note: This end up.
1/4"
1 of 3
Visit the Peerless Web Site at www.peerlessindustries.com For customer service call 1-800-729-0307 or 708-865-8870.
ISSUED: 07-01-02 SHEET #: 200-9383-2 11-10-04
Page 2
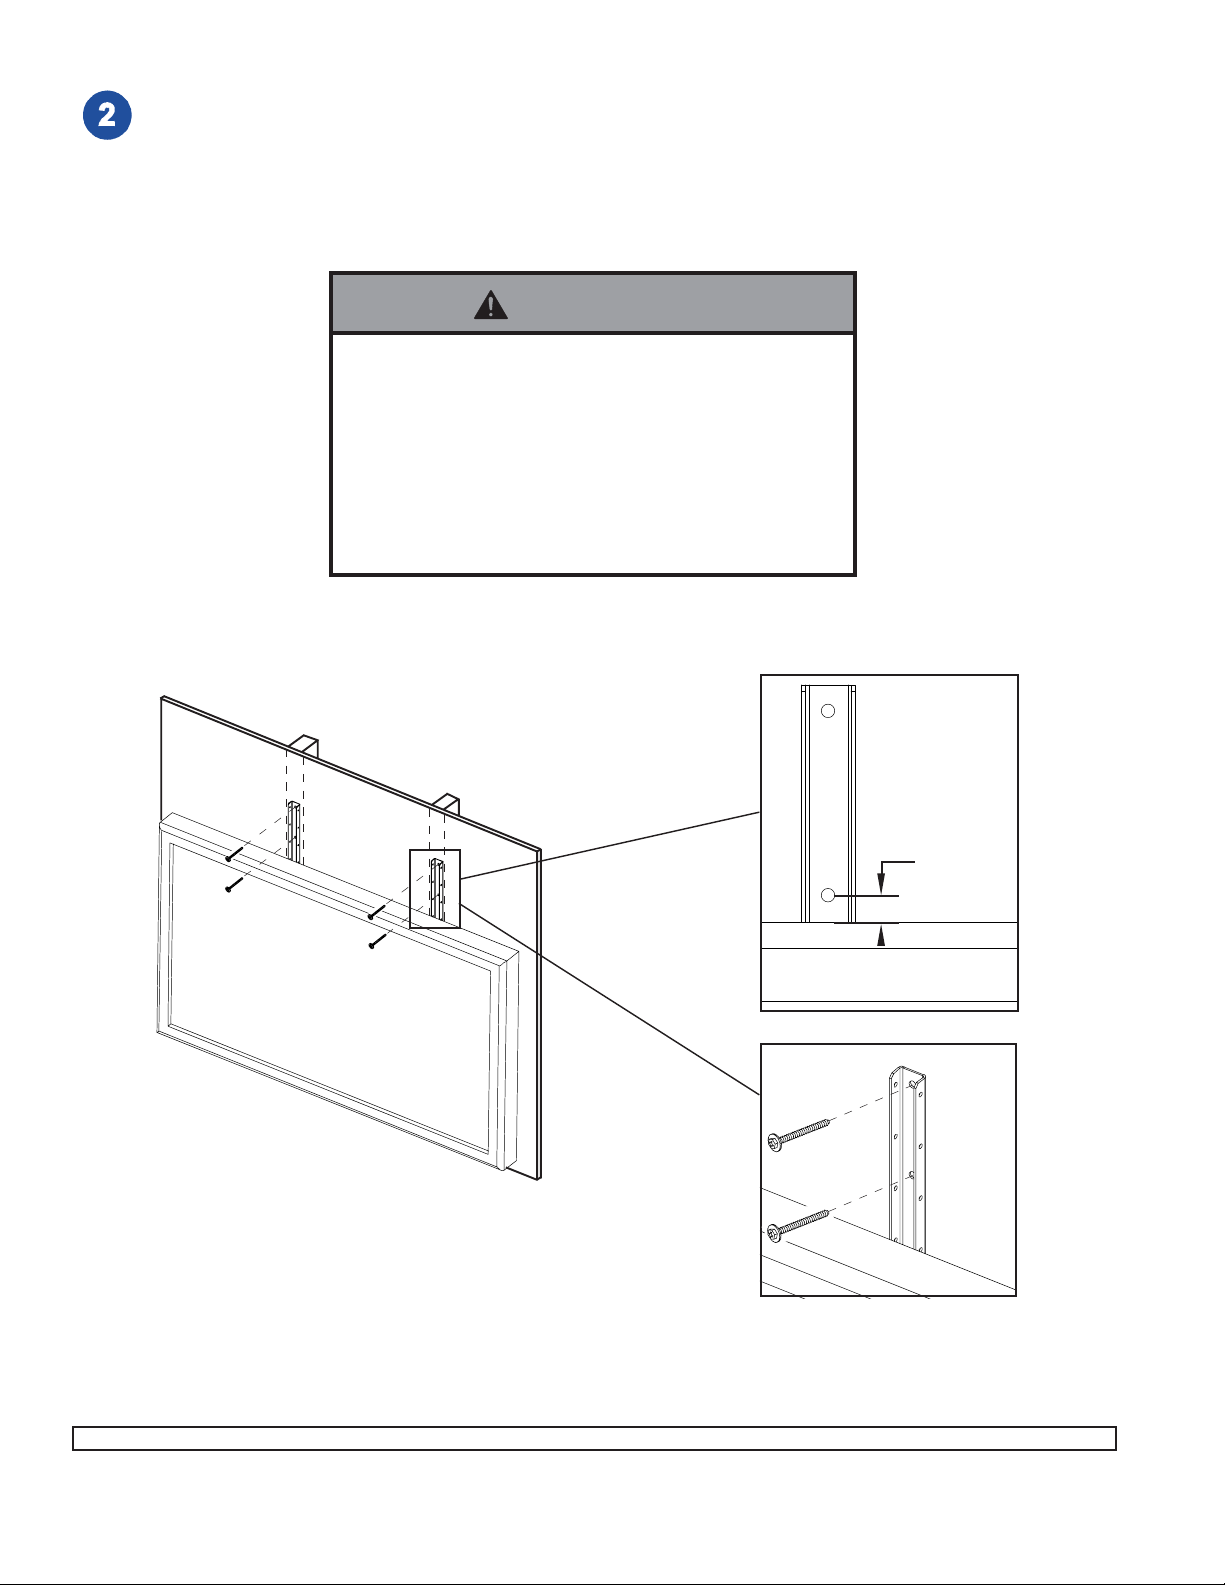
Use a stud finder and follow the directions that come with it to locate the center point of the stud. Never mount into drywall
alone!
Slide wall bracket (C) along stud behind plasma mount leaving about half an inch between center of bottom hole of wall
bracket (C) and top of plasma. Using the wall bracket (C) as a guide, mark and drill the four 5/32" (4 mm) dia. mounting
holes in the center of the stud, 2 1/2" deep. At this point, it is essential to use a level to level your wall bracket (C). If it is
only a few degrees off level, your shelf (A) will not sit straight.
Insert the four wood screws (D).
WARNING
• Tighten wood screws (D) so that wall bracket (C) is
firmly attached, but do not overtighten. Overtightening
can damage screws, greatly reducing their holding
power.
• Never tighten in excess of 80 in • lb (9 N.M.).
• Make sure that mounting screws are anchored into the
center of the studs. The use of an "edge to edge" stud
finder is highly recommended.
D
C
Approx. 1/2"
Plasma
C
2 of 3
Visit the Peerless Web Site at www.peerlessindustries.com For customer service call 1-800-729-0307 or 708-865-8870.
ISSUED: 07-01-02 SHEET #: 200-9383-2 11-10-04
Page 3

Attach shelf (A) to shelf brackets (B) using four M4 screws (F). Note: Do not fully tighten screw (F) to allow for adjustment.
F
A
B
Hook shelf bracket (B) to wall bracket (C) as shown below. Note At this point shelf brackets (B) may need to be
adjusted to hook onto wall bracket (C). After shelf bracket (B) is in place lock into place using two M5 screw (E).
Note: Use one per bracket (C) on the outside of bracket (C).
B
C
E
3 of 3
Visit the Peerless Web Site at www.peerlessindustries.com For customer service call 1-800-729-0307 or 708-865-8870.
© 2004 Peerless Industries, Inc. All rights reserved.
Peerless is a registered trademark of Peerless Industries, Inc.
ISSUED: 07-01-02 SHEET #: 200-9383-2 11-10-04
 Loading...