

Page 1
Monarch
DOS-based
PATHFINDER
Ultra System
TC6035CMUM Rev. AB 12/01 ©2001 Monarch Marking Systems, Inc. All rights reserved.
Page 2

Each product and program carries a respective written warranty, the only
warranty on which the customer can rely. Monarch reserves the right to make
changes in the product and the programs and their availability at any time and
without notice. Although Monarch has made every effort to provide complete
and accurate information in this manual, Monarch shall not be liable for any
omissions or inaccuracies. Any update will be incorporated in a later edition of
this manual.
©2001 Monarch Marking Systems, Inc. All rights reserved. No part of this
publication may be reproduced, transmitted, stored in a retrieval system, or
translated into any language in any form by any means, without the written
permission of Monarch Marking Systems, Inc.
Trademarks
MONARCH®, PATHFINDER®, Ultra® and PATHFINDER Ultra® are registered trademarks of Monarch
Marking Systems, Inc.
6035 is a trademark of Monarch Marking Systems, Inc.
Paxar is a registered trademark of Paxar Corporation.
Microsoft, MS-DOS and Windows are trademarks of Microsoft Corporation.
TrueType is a trademark of Apple Computer, Inc.
Hewlett-Packard is a trademark of Hewlett-Packard Company.
CG Triumvirate and CG Triumvirate Bold are trademarks of AGFA Monotype Corporation.
Monarch Marking Systems, Inc.
170 Monarch Lane
Miamisburg, OH 45342
Page 3

TABLE OF CONTENTS
Introduction..........................................................................................1-1
Features ...........................................................................................1-1
Terms to Know .................................................................................. 1-2
Label Sizes .......................................................................................1-3
How this Manual is Organized ............................................................1-4
Getting Started..................................................................................... 2-1
Using the Keypad and the Display....................................................... 2-2
Using the Function Keys.................................................................. 2-3
Using the Most Common Keys ............................................................ 2-4
Reading the Display........................................................................... 2-4
Entering a Sample Format.................................................................. 2-5
Printing the Sample Format ................................................................ 2-8
Using the Operator Data Entry Form ...................................................2-9
Sample Operator Data Entry Form ................................................. 2-10
Operator Data Entry Form Page 1 .................................................. 2-11
Operator Data Entry Form Page 2 .................................................. 2-12
Configuring the Printer.......................................................................... 3-1
General Options ................................................................................ 3-2
Toggle Backlight............................................................................. 3-2
Set Print Method............................................................................. 3-3
Set Date ........................................................................................3-3
Set Time ........................................................................................3-3
Set I2 of 5 Scan Lengths ................................................................. 3-4
Reset/Clear Formats ....................................................................... 3-4
Select Currency.............................................................................. 3-4
Set Supply Type ............................................................................. 3-5
Suppress Warnings......................................................................... 3-5
Format Header Options ...................................................................... 3-5
Generate Fmt Name........................................................................ 3-6
Table of Contents i
Page 4

Format Text Options .......................................................................... 3-6
Use Default Gap ............................................................................. 3-6
Use Default Color ........................................................................... 3-7
Set Default Color ............................................................................ 3-7
Use Default Character Rotation .......................................................3-7
Format Bar Code Options................................................................... 3-8
Use Default UPC Appearance .......................................................... 3-8
Set Default UPC Appearance........................................................... 3-8
Use Default Alignment.....................................................................3-8
Designing a Format .............................................................................. 4-1
Design Overview ...............................................................................4-1
Determining Format Data ...................................................................4-1
Determining the Print Area ................................................................. 4-2
Drawing Rough Sketches ................................................................... 4-2
Using Supply Layout Grids ................................................................. 4-3
Considering Field Types..................................................................... 4-4
Starting the Design Process ............................................................... 4-6
Placing Fields on a Format................................................................. 4-7
Defining Text Fields.............................................................................. 5-1
About Text Fields .............................................................................. 5-1
Entering a Sample Text Field.............................................................. 5-6
Printing the Sample Text Format......................................................... 5-9
Using a Combo Text Field ................................................................ 5-10
Entering a Sample Combo Text Field ................................................ 5-12
Printing the Sample Combo Format................................................... 5-17
Defining Bar Code Fields ......................................................................6-1
About Bar Code Fields ....................................................................... 6-1
Setting the Appearance ................................................................... 6-5
Setting the Density .........................................................................6-6
Entering Simple Bar Code Fields ........................................................ 6-6
Sample 1: Simple Fixed Bar Code .................................................... 6-7
Printing the Simple Fixed Bar Code Format ......................................... 6-9
Sample 2: Simple Variable Bar Code.............................................. 6-10
Printing the Simple Variable Bar Code Format ................................... 6-13
ii Table of Contents
Page 5

About Combo Bar Code Fields.......................................................... 6-14
Entering a Sample Combo Bar Code Field ......................................... 6-15
Printing the Sample Combo Bar Code Format .................................... 6-22
Bar Code Specifications ................................................................... 6-24
UPC Bar Codes ............................................................................ 6-24
EAN Bar Codes ............................................................................ 6-25
Code 128 Bar Codes..................................................................... 6-25
MSI ............................................................................................. 6-26
Interleaved 2 of 5 Bar Codes ......................................................... 6-26
Code 39 Bar Codes....................................................................... 6-26
Codabar Bar Codes ...................................................................... 6-27
Code 93 ....................................................................................... 6-27
Defining Constant Text Fields................................................................ 7-1
About Constant Text Fields ................................................................ 7-1
Entering a Sample Constant Text Field................................................7-5
Printing the Sample Constant Text Format........................................... 7-8
Defining Line Fields.............................................................................. 8-1
About Line Fields ..............................................................................8-1
Entering a Sample Line Field (Segments) ............................................ 8-3
Printing the Sample Line (Segment) Format......................................... 8-5
Entering a Sample Line Field (Vectors) ............................................... 8-5
Entering a Sample Line Field (Vectors) ............................................... 8-6
Printing the Sample Line (Vector) Format ............................................8-8
Defining Special Fields ......................................................................... 9-1
About Price and System Date/Time Fields ........................................... 9-1
Entering a Sample Price Field ............................................................9-7
Printing the Sample Price Format........................................................9-9
Entering a Sample Date/Time Field ................................................... 9-11
Printing the Sample Date/Time Format .............................................. 9-14
Applying Data Edits ............................................................................ 10-1
Using Data Edits ............................................................................. 10-2
Printing the Format ....................................................................... 10-5
Padding Data ............................................................................... 10-6
Printing the Format ....................................................................... 10-9
Table of Contents iii
Page 6

Extracting Characters ................................................................. 10-10
Printing the Format ..................................................................... 10-13
Stripping Characters ................................................................... 10-14
Printing the Format ..................................................................... 10-17
Extracting Characters from the Middle.......................................... 10-18
Printing the Format ..................................................................... 10-21
Inserting Characters ................................................................... 10-21
Inserting Characters ................................................................... 10-22
Printing the Format ..................................................................... 10-25
Make Into Price .......................................................................... 10-26
Printing the Format ..................................................................... 10-27
Make Into Shoe Size ................................................................... 10-27
Printing the Format ..................................................................... 10-31
Editing a Format................................................................................. 11-1
Copying a Format ............................................................................ 11-1
Editing a Field................................................................................. 11-2
Adding a Field .............................................................................. 11-2
Printing the Format ....................................................................... 11-4
Deleting a Field ............................................................................ 11-4
Printing the Format ....................................................................... 11-6
Modifying an Existing Field............................................................ 11-6
Printing the Format ....................................................................... 11-9
Changing Header Information ........................................................ 11-9
Printing the Format ..................................................................... 11-12
Deleting a Format.......................................................................... 11-13
Troubleshooting ................................................................................. 12-1
Troubleshooting Information ............................................................. 12-2
If You Receive an Error Message................................................... 12-2
Calling Technical Support.............................................................. 12-2
iv Table of Contents
Page 7

Data Errors ..................................................................................... 12-3
Format Errors (1 - 99) ................................................................... 12-3
Batch Errors (100 - 199)................................................................ 12-5
Option Errors (200 - 249) .............................................................. 12-5
Online Configuration Errors (250 - 299) .......................................... 12-6
Check Digit Errors (300 - 324) ....................................................... 12-7
General Packet Errors (400 - 435).................................................. 12-8
Data Formatting Failures.................................................................. 12-9
Machine Faults.............................................................................. 12-10
Sample Formats ...................................................................................A-1
Item Pricing ......................................................................................A-1
Item Identification............................................................................A-12
Receiving/Inventory .........................................................................A-19
Using Fonts .........................................................................................A-1
Monospaced Font Magnification..........................................................B-2
Height Magnification .......................................................................B-2
Proportional Font Magnification ..........................................................B-3
Height Magnification .......................................................................B-3
Height Magnification .......................................................................B-4
Height Magnification .......................................................................B-4
Height Magnification .......................................................................B-5
Height Magnification .......................................................................B-5
Height Magnification .......................................................................B-6
Height Magnification .......................................................................B-7
Height Magnification .......................................................................B-7
Height Magnification .......................................................................B-8
Height Magnification .......................................................................B-8
Height Magnification .......................................................................B-9
Height Magnification .....................................................................B-10
Table of Contents v
Page 8

vi Table of Contents
Page 9

INTRODUCTION
1
The Monarch DOS-based Pathfinder Ultra Configurable printer lets
you design custom labels to fit your needs. You can use the printer for a
variety of applications.
♦ Print in-store merchandise marking labels to mark every item in your
store with scannable bar codes for increased data accuracy.
♦ Print shelf labels with the product bar code number, description, and
price.
♦ Print labels for restocking of merchandise. Just scan a bar-coded
product and the printer duplicates the bar code.
♦ Print warehouse carton labels for easy carton sorting.
Features
The flexibility of this printer also provides you with the ability to:
♦ Print a variety of tags ranging from .55 to 4.0 inches in length.
♦ Print numeric, alphanumeric, or special characters. You can print 14
fonts: monospaced or proportionally spaced fonts.
♦ Use 24 different bar codes.
♦ Print horizontally or vertically on the label.
♦ Design data entry prompts for the Operator.
♦ Scan bar codes.
♦ Select different currency symbols for International use.
♦ Print combination fields. This feature allows the Operator to enter data
once, and use it in multiple fields.
Introduction 1-1
Page 10

Terms to Know
79.99
Barrier bar
Baseline Bottom of the font.
Check digit
Fixed length bar
code
Font The print style of text.
Format
Horizontal bar
code or text
Human Readable
characters
Intercharacter gap Default spacing between characters in monospaced fonts.
Monospaced font Font with fixed character spacing such as Letter Gothic.
Number system
code
The horizontal bars above and below I2of5 bar codes used
to ensure a clean scan and avoid partial scans.
A number added to a bar code ensuring that the bar code
data is read accurately.
A bar code with a fixed character length: UPC-A, UPC-E,
EAN-8, and EAN-13.
The layout of data on a label. The format determines where
and how data appears on a label.
Data that prints across the width of a label.
The characters that are visible such as a text field. Bar
codes embed characters.
A number added to a bar code ensuring that the bar code
data is read accurately.
Overlay
Pad Characters
Prompt
1-2 Introduction
The placement of one field over another such as a line on
top of a price signifying a price reduction.
Characters that are added to the left or right of a field
allowing you to fill in empty spaces when the entered data
does not fill an entire field. For example, the Operator
enters “23” and the format automatically adds zeros: 2300.
A message on the printer’s screen that tells you to
enter/scan data.
Page 11

Proportionally
spaced font
Quiet Zone
Segment line type A line type with a starting point and an end point.
Start/stop
character
Variable length
bar code
Vector line type A line type with a starting point, angle, and length of line.
Vertical bar code
or text
Void Light area on a label in a bar code or text.
Font with variable character spacing – all characters have
different widths. For example, an “i” versus a “w.”
Proportionally spaced fonts include CG Triumvirate, CG
Triumvirate Condensed, and CG Triumvirate Bold.
An area of white space required at the beginning and end of
a bar code to allow scanning. Also at the beginning/end and
edges of a label. Also know as non-print zone.
Distinct characters used at the beginning and end of each
bar code symbol that provides initial timing references and
indicates the direction of scanning.
A bar code of variable character length: I2 of 5, Code 39,
Codabar, Code 128, MSI, PostNet, and Code 93.
Data that is rotated and prints down the length of a label.
Label Sizes
The printer allows you to print the following label sizes.
Supported Supply
Widths:
1.20 Inches
1.50 Inches
2.00 Inches
NOTE: Most of the sample formats in this manual use 2” X 2” labels unless
indicated otherwise.
Call 1-800-543-6650 for more information about the various label sizes and
label types available with this printer.
Supported Supply Lengths:
.55 inches
.785 inches
1.1 inches
1.5 inches
2.0 inches
3.0 inches
4.0 inches
Introduction 1-3
Page 12

How this Manual is Organized
Chapter 1 Introduction
Provides an overview of the printer and
terms to know.
Chapter 2 Getting Started
Chapter 3 Configuring the Printer
Chapter 4 Designing a Format
Chapter 5 Defining Text Fields Tells you how to design a text field.
Chapter 6
Chapter 7
Chapter 8 Defining Line Fields
Chapter 9 Defining Special Fields
Chapter 10 Applying Data Edits
Defining Bar Code
Fields
Defining Constant Text
Fields
Provides a checklist to get you started,
keypad tips, and a sample format.
Tells you how set defaults for your printer
and select print methods.
Provides instructions on how to determine
the kind of data you want on a label and
where to place the data.
Tells you how to design a bar code field.
Tells you how to design a constant text
field.
Tells you how to design lines and
borders.
Tells you how to design time, date, and
price fields.
Tells you how to pad data, extract data,
and insert it into another field.
Chapter 11 Editing a Format Tells you how to change a format.
Chapter 12 Troubleshooting
Appendix A Sample Formats
Appendix B Using Fonts Provides information about fonts.
Provides solutions to the most common
errors and provides a list of all error
codes.
Provides sample formats of various
applications.
1-4 Introduction
Page 13

GETTING STARTED
2
This chapter tells you how to start using the printer and provides a
sample format to show you how easy it is to create your labels.
NOTE: Before you begin, read the Equipment Manual that came with your
printer.
Use this checklist when creating a format.
✔ Load labels into the printer.
✔ Charge the battery handle.
✔ Configure the printer. Refer to Chapter 3, “Configuring the Printer.”
✔
✔ Print and test your label.
✔
Create a format, which is the layout of your data on a label. Refer to
Chapter 4, “Designing a Format.”
Prepare an Operator Data Entry form for the Operator. Refer to “Using the
Operator Data Entry Form” at the end of this chapter.
Getting Started 2-1
Page 14

Using the Keypad and the Display
Your printer has an 8-line display and a 48-key keypad. This section
provides tips on
♦ Navigating through the screens on the display
♦ Using the most commonly used keys.
2-2 Getting Started
Page 15
Using the Function Keys
The key combinations on the list below make scrolling and navigating easier.
Key Combination Description
f 1 Turns the backlight on the display on or off.
f 2 Sets the print method.
f 3 Select the currency symbol.
f 4 Battery Level Status
f 5 Exit
f 6 Set the supply type.
f <Home>
f <End>
f <PgUp>
f <PgDn>
Takes you to the beginning of a list. NOTE: If you have 11
formats, pressing f <Home> takes you to format 1.
Takes you to the end of a list. NOTE: If you have 11 formats,
pressing f <End> takes you to format 11.
Takes you to the beginning of a list on the display. Pressing
f <PgUp> again moves one full screen length up. NOTE: If
you see options 3 through 10 on the display, pressing f
<PgUp> takes you to option 3.
Takes you to the end of a list on the display. Pressing f
<PgDn> again moves one full screen length down. NOTE: If
you see options 3 through 10 on the display, pressing f
<PgDn> takes you to option 10.
NOTE: See the Equipment Manual for information about using special
characters.
Getting Started 2-3
Page 16

Using the Most Common Keys
The keys listed below are the most commonly used.
Key Description
b Returns you to the previous screen.
g Moves the cursor the left and deletes the character on the left.
e Accepts your selection.
ç,è,é,ê
ç,è,
ç,
f
è
f
s Toggles between upper case and lower case/numeric.
fs Enters Caps lock.
f Ins
Scrolls left, right, up, or down through the options on the display.
When your selection is highlighted, press e.
Left and right move the cursor inside an entry. When inside an
entry, f
data) and f
data).
Toggles between overwrite mode and normal mode. In overwrite
mode, when you type, it replaces characters.
ç moves the cursor to the extreme left (beginning of
è moves the cursor to the extreme right (end of
NOTE: See the Equipment Manual for more information.
Reading the Display
The icons listed below tell you what data entry mode you are in.
If you see You are in
F Function Key Mode.
é Upper-case Alpha Mode.
X Delete Mode. Pressing g deletes the current character.
L Caps Lock Mode.
NOTE: See the Equipment Manual for more information.
2-4 Getting Started
Page 17

Entering a Sample Format
Turn on the printer. You will see the Main Menu.
- = Main Menu = -
1. Design Formats
2. Print Labels
3. Configuration
- = Design Menu = -
1. Create New Format
2. Edit Old Format
3. Copy Format
4. Delete Format
Enter Format Name
> _ _ _ _ _ _ _ _ _ _ _ _ _
L
Enter Length of
supply (55 – 400)
(eg. 400 = 4 inches)
> _ _ _
Select Supply Width
1. 1.20 Inches
2. 1.50 Inches
3. 2.00 Inches
Select Type: Fld #1
1. Text Field
2. Bar Code Field
3. Constant Text
4. Line
5. Finished
1. Press 1 to design your formats.
2. Press 1 to create a new format.
3. Type SIZE. Press e.
4. Type 200 for a 2-inch long label. Press
e.
5. Press 3 for the supply width.
6. Press 1 to define a text field.
Select Field Class
1. Simple Field
2. Price Field
3. System Date/Time
4. Complex (Merged)
Numeric or
Alpha-Numeric Data?
A/N > _
L
Enter Max. Length
> _ _ _
7. Press 1 to define a simple field.
8. Press A (alpha-numeric).
9. Type 10 as the maximum number of characters
in the field. Press e.
Getting Started 2-5
Page 18

Enter Min. Length
> _ _ _
10. Type 1 as the minimum number of characters
in the field. Press e.
Enter Field Prompt
> _ _ _ _ _ _ _ _ _ _ _ _ _ _ _ _
L
Enter Fixed Data
Press ENTER if none
> _ _ _ _ _ _ _ _ _ _ _ _ _ _ _ _
L
Add fixed data
Before or After
entry chars? B/A
> _
L
Enter Row #
> _ _ _
Enter Col. #
> _ _ _
- = Select Font = -
1. CG Trium 6.5 1000
2. CG Trium 8 pt 1001
3. CG Trium 10p 1002
4. CG Trium 12p 1003
5. CG Trium 18 p 1004
6. CG Trium 22p 1005
7. CG TrCon 6.5 1006
11. Type ENTER SIZE. Press e.
12. Type /TL for the fixed data. Press e.
13. Press A to print the fixed data after the entry
characters.
14. Type 100 for the row location. Press e.
15. Type 10 for the column location. Press
e.
8. CG TrCon 8 pt 1007
9. CG TrCon 10p 1008
10. CG TrCon 12p 1009
11. CG TrCon 18p 1010
12. CG TrCon 22p 1011
13. LetGoth 6.5 1012
14. LetGoth 9pt 1013
Enter Height Mag for
this font (1-7) > _
Enter Width Mag for
this font (1-7) > _
2-6 Getting Started
16. Select CG Trium 8 pt 1001. Press e.
17. Press 1 for the height magnification.
18. Press 1 for the width magnification.
Page 19
Set Justification
1. Left (L)
2. Right (E)
3. Center (B)
Top of Field at:
1. Top of Supply
2. Left of Supply
3. Bottom of Supply
4. Right of Supply
Select Edit #1
1. None
2. Make into Price
3. Pad Data Field
4. Extract Chars
5. Strip Chars
6. Extract from Mid
7. Insert Chars
8. Make Shoe Size
Select Type:Fld#2
1. Text Field
2. Bar Code Field
3. Constant Text
4. Line
5. Finished
Save current
format? Y/N > _
19. Press 1 for the alignment of characters in
the field.
20. Press 1 for the field rotation.
21. Press 1 for no data edits. See Chapter 10,
“Applying Data Edits,” for more information.
22. Press 5.
23. Press Y to save the format. You return to the
Design Menu.
Getting Started 2-7
Page 20

Printing the Sample Format
After designing your format, print it to see how it looks.
- = Design Menu = -
1. Create New Format
2. Edit Old Format
3. Copy Format
4. Delete Format
- = Main Menu = -
1. Design Formats
2. Print Labels
3. Configuration
Select Format
to Print
- = Format Menu - =
01 SIZE
ENTER SIZE
_ _ _ _ _ _
Printed: 1
1. Press b to exit the Design Menu.
2. Press 2 to print your format.
3. Select SIZE and press e.
4. Type XLarge. Press e. The label prints.
5. Press the trigger to print another label or press
b to return to the prompt and print a different
label.
2-8 Getting Started
Page 21

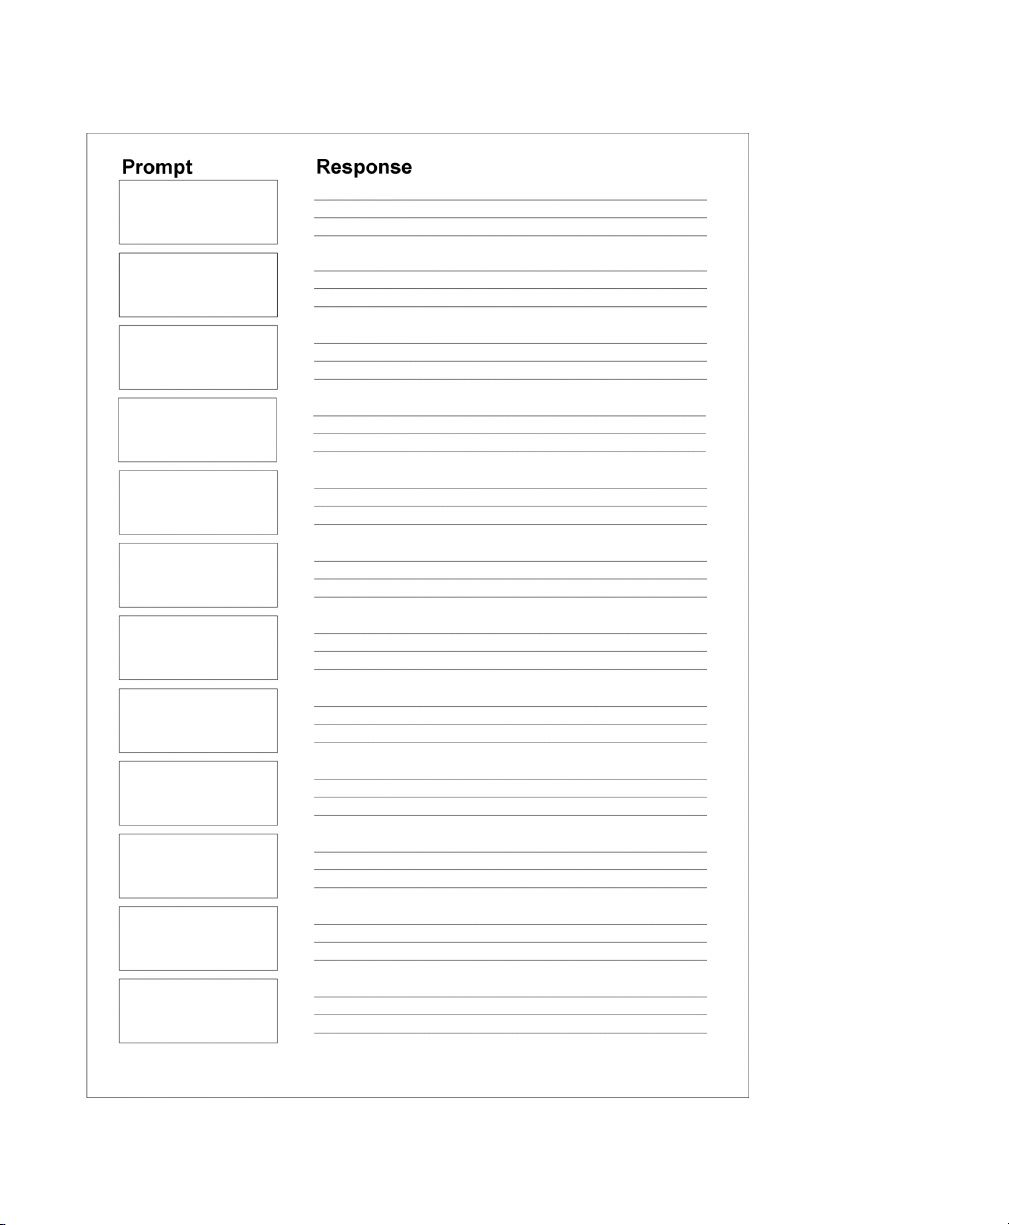
Using the Operator Data Entry Form
After you create a format, fill out the operator data entry form. This form can
be used as an instruction sheet for your operators to follow while they print
labels. Record the data entry prompts that the operator will see when using
the printer.
Follow these steps to record the data entry procedures.
1. Format Name
2. Supply Type
3. Supply Size
4. Purpose
5. Print Sample
6. Prompt
7. Response
8. Special Instructions
Enter the Format Name in the upper right corner of
the form.
Enter information about the supply type the Operator
must use.
Enter the supply size to use.
Enter the purpose of the label on the next line. For
example, you can write standard label or 25%
markdowns.
Apply a sample of the label.
Enter the first data entry prompt in the empty box at
left.
Enter the response for the prompt. Continue entering
prompts and responses until you reach the end of the
format.
In the "Special Instructions" section at the bottom of
the form, record any special instructions to the
Operator. For example, you can tell them to load the
labels for peel mode.
Blank forms are provided at the end of the chapter for you to copy.
Getting Started 2-9
Page 22

Sample Operator Data Entry Form
2-10 Getting Started
Page 23

Operator Data Entry Form Page 1
Getting Started 2-11
Page 24
Operator Data Entry Form Page 2
2-12 Getting Started
Page 25
CONFIGURING THE PRINTER
3
The printer’s configuration sets both hardware and software
options. For example, you can set defaults for the printer to use during
format design and printing. This chapter describes the configurable options.
To get started, go to the Main Menu. When you see:
-=Main Menu=-
1. Design Formats
2. Print Labels
3. Configuration
-Config. Main Menu-
1.General Options
2.Fmt Header Optns
3.Fmt Text Options
4.Fmt Barcode Optns
1. Press 3. The Configuration Main Menu.
2. Select the option you want to configure.
Selections on the Configuration Main Menu are:
General Options Sets up the printer’s backlight, print method, date,
time, scan lengths for I2 of 5 bar codes, currency
symbol, and supply type. It also deletes formats
and turns off warning messages.
Format Header Options Sets up how you can identify the format you are
printing or editing.
Format Text Options Sets up the default settings for text fields during
Format Design.
Format Barcode Options Sets up the default settings for bar code fields
during Format Design.
NOTE: When you finish configuring the printer, press b until you return to
the Main Menu.
Configuring the Printer 3-1
Page 26

General Options
To set miscellaneous options, go to the General Options Menu. When you
see:
-=General Options=-
1. Toggle Backlight
2. Set Print Method
3. Set Date
4. Set Time
5. Set I2of5 ScanLen
6. Reset/Clear Fmts
7. Select Currency
Select an option (1-9).
8. Set Supply Type
9. Suppress Warnings
Toggle Backlight
Turn the backlight on or off. The General Options Menu remains on the
screen.
3-2 Configuring the Printer
Page 27
Set Print Method
Select Print Method
Auto Print 1 Label
Print Strips
Print Loop –Trigger
On-Demand Printing
On-Demand w/Limit
Full Auto
Auto Print 1 Label Prints one label.
Print Strips Prints a strip of labels, prompting the operator for a
Print Loop – Trigger Prints one label at a time, printing another at the press
On-Demand Printing Peel Mode Only. Prints labels one at a time,
On-Demand w/Limit Peel Mode Only. Prints labels one at a time,
Full Auto Prints a strip of labels at one time. Press b to end.
Scroll to select a print method (described below)
and press e. The General Options Menu
appears. Default: Print Loop - Trigger.
quantity.
of any key or the trigger. Press b to end.
continuing only after you remove the previous one.
Press b to end.
continuing only after you remove the previous one.
The software prompts the operator for a quantity.
Set Date
Current date is Thu
2-08-2001
Enter new date (mm-d
d-yy):
Enter the date (with a four-digit year), and press
e. If the date is correct, press e.
The General Options Menu appears.
Set Time
Current time is 03:0
0:34.65p
Enter new time:
Configuring the Printer 3-3
Enter the time (including a colon to separate the
hour and minute). To indicate a.m. or p.m.,
include an a or p at the end. For example, 5:00p.
24-hour mode also works. When finished, press
e. If the time is already correct, press
e. The General Options Menu appears.
Page 28

Set I2 of 5 Scan Lengths
I2 of 5 bar codes are used in industrial environments and contain only
numeric data. This menu option specifies the two valid data lengths (number
of digits) when you scan this bar code. See Chapter 6, “Defining Bar Code
Fields,” for more information about I2 of 5 bar codes.
Enter I2of5 Scan
Length #1 >_ _
Enter I2of5 Scan
Length #2 >_ _
1. Enter the first length and press e.
2. Enter the second length and press e.
The General Options Menu appears.
NOTE: Both lengths must be an even number.
Reset/Clear Formats
Delete All Formats?
Are you sure? Y/N
L
CAUTION: You cannot undo a deletion.
Press Y to delete all formats in the printer. Press
N to keep the formats. The General Options
Menu appears.
Select Currency
-Select CurrencyUS Dollars
French Francs
Spanish Pesetas
Belgian Francs
German Marks
British Pounds
Euro
Swedish Krona
Danish Marks
Austrian Schilling
Japanese Yen
Scroll to select the currency symbol to use with
price fields and press e. The General
Options Menu appears. Default: US Dollars.
3-4 Configuring the Printer
Page 29

Set Supply Type
Select Supply Type
1. Paper Label/Tag
2. Fax Paper
3. Synthetic Label
Suppress Warnings
Suppress Warnings:
Disabled
Change? Y/N:
L
Select the type of supplies (1-3) you are using.
The General Options Menu appears. Default:
Paper Label/Tag.
Specify whether to display warning messages.
Default: Disabled.
Press Y to enable or disable the option. Then,
press e to return to the General Options
Menu.
Setting Description
Enabled
Disabled
Warning messages will not appear on
the display.
Warnings messages will appear on
the display. This value is the default.
Press N to cancel and return to the General
Options Menu.
See Chapter 4, “Designing a Format,” to learn
about a case where you might want to suppress
warnings.
Format Header Options
Format Header Options allow operators to select the format label they want
to print and allow you to edit a format you have created. When you see:
Format Header Optns
1. Generate MPCL Num
2. Generate Fmt Name
3. Skip Desc. Prompt
NOTE: Generate MPCL Num and Skip Desc. Prompt are for future use.
Configuring the Printer 3-5
Press 2 to select Generate Fmt Name.
Page 30
Generate Fmt Name
Auto-Assign Format
Name for Menu? N
(Default = N)
L
Press Y for the software to automatically assign
format names, or press N to prompt the operator
for a name. The Format Header Options Menu
appears. Default: N.
When you assign a name, we recommend that
you use a meaningful name that the operator can
easily identify, such as “20% Sale.”
Format Text Options
To set options for text fields, you must go to the Format Text Options Menu.
When you see:
-Format Text Optns-
1. Use Default Gap
2. Use Default Color
3. Set Default Color
4. Use Dflt Char Rot
NOTE: See Chapter 5, “Defining Text Fields”, for more information on these
options.
Use Default Gap
Use Default Gap
Value (0) in Text
Fields? Y
(Default = Y)
L
Select an option (1-4).
The gap is the number of dots (basic units of
print) between characters. Press Y to use the
default gap value of 0 in the formats, or press N
to prompt the operator for a value. The Format
Text Options Menu appears. Default: Y.
3-6 Configuring the Printer
Page 31

Use Default Color
Use Default Color
(0) in Text
Fields? Y
(Default = Y)
L
Press Y to use the default color for text fields, or
press N to prompt the operator for a value. The
Format Text Options Menu appears. Default: Y.
NOTE: You set the default color with the next menu selection—Set Default
Color.
Set Default Color
Sel. Default Color
1. Black –Opaque
2. White –Opaque
3. Black –Transpar.
4. White –Transpar.
Select the color (1-4) to you want to use. The
Format Text Options Menu appears. For more
information about font colors, see Chapter 5,
“Defining Text Fields.” Default: Black -Transpar.
Use Default Character Rotation
Use Default Char.
Rotation (0) in
Text Fields? Y
(Default = Y)
L
Press Y to use the default character rotation (0)
in text fields, or press N to prompt the operator
for a value. The Format Text Options Menu
appears. For more information about character
rotation, see Chapter 5, “Defining Text Fields.”
Default: Y.
Configuring the Printer 3-7
Page 32

Format Bar Code Options
To set options for bar code fields, go to the Format Bar Code Options Menu.
When you see:
-Fmt Barcode Optns-
1. Use Dflt UPC Appr
2. Set Dflt UPC Appr
3. Use Default Align
Select an option (1-3).
NOTE: See Chapter 6, “Defining Bar Code Fields”, for more information on
these options.
Use Default UPC Appearance
Use Default
Appearance (8) for
UPC/EAN Barcodes? Y
(Default = Y)
L
NOTE: You set the default appearance with the next menu selection—Set
Default UPC Appearance.
Press Y to use the default bar code appearance
in UPC and EAN bar code fields (others use nonhuman readable only), or press N to prompt the
operator during field definition. The Format Bar
Code Options Menu appears. Default: Y.
Set Default UPC Appearance
Sel Dflt Appearance
1. No C/D or Num Sys
2. Number Sys. Only
3. Check Digit Only
4. Chk Dig & Num Sys
5. No Human Readable
Select a bar code appearance for UPC and EAN
bar code fields. The Format Bar Code Options
Menu appears. See Chapter 6, “Defining Bar
Code Fields,” for more information about bar code
appearances. Default: No Human Readable.
Use Default Alignment
Use Default
Alignment (L) in
Barcode Fields? Y
(Default = Y)
L
3-8 Configuring the Printer
Press Y to use the default alignment (L = left
justification) in bar code fields, or press N to
prompt the operator for the justification. The
Format Bar Code Options Menu appears.
Default: Y.
Page 33

DESIGNING A FORMAT
4
This chapter describes how to
♦ determine what kind of information to use in your format.
♦ draw a rough sketch of your label or tag using the Supply Layout Grid
before you create the format.
♦ categorize data into field types (text, bar code, price, etc.).
♦ select fonts to use in your format.
Design Overview
Before you create a format, you must design your label.
1. Decide which fields should appear on your label. See "Determining
Format Contents" for more information.
2. Determine your label size. Labels are available from Monarch in a wide
variety of sizes. Your application and the amount of data you need to
print determines the supply size. Contact Monarch Marking for more
information.
3. Draw a rough sketch of your label. You may want to draw several
variations to see what works best. See "Drawing Rough Sketches" for
more information.
4. Identify the field types that appear on your label. See "Considering Field
5. Decide which fonts you want to use. See "Considering Fonts" for more
Determining Format Data
Before you lay out your format, you need to make a few decisions. What
data do you want to print on your label? For example:
♦ How large is your supply?
♦ Which fonts do you want to use?
♦ Do you want to include a bar code?
Designing a Format 4-1
Types" for more information.
information.
Page 34

Determining the Print Area
The print area varies, depending on the size of your supply. Below are the
maximum and minimum print areas. Notice that the top edge of the supply
exits the printer first.
Unit of
Measure
English
Maximum
Supply Size
Maximum
Print Area
Minimum
Supply Size
Minimum
Print Area
200 x 400 183 x 365 120 x 55 109 x 46
(1/100")
NOTE: You receive a “field off tag” error if you try to place a field in the
quiet zone (non-printable area).
Supported Supply
Lengths:
Supported Supply
.55 inches, .785 inches, 1.1 inches, 1.5 inches,
2.0 inches, 3.0 inches, and 4.0 inches
1.20 inches, 1.50 inches, and 2.0 inches
Widths:
Drawing Rough Sketches
As you sketch your design, you should:
♦ Identify the items you want on the label,
such as a price and bar code.
♦ Select a label size.
♦ Determine the direction of printing.
♦ Place items on the label roughly where
you would like them to appear in the
finished design.
♦ Mark any areas that are preprinted on the
label, such as a logo.
As soon as you know what information to
include on the label, and you have a rough
sketch, you can use a supply layout grid to
help you layout and size your label.
4-2 Designing a Format
Page 35

Using Supply Layout Grids
Supply Layout
(Inches)
0
50
100
150
200
A supply layout grid contains measurement markers. These markers help
you accurately position information on your label.
If you want to use supply layout grids, a copy is shown on this page. Make
copies of this page for each of your formats.
4.0" = 400
350
3.0" = 300
250
2.0" = 200
150
1.0" = 100
50
0
Designing a Format 4-3
Page 36

Considering Field Types
After you select a supply size, the next step in designing a format is to
decide what information you want to print on the label. For example, you
may want to print your company name, price of an item, and a bar code that
combines information from other places. Everything you want to print falls
into one of the following categories.
Field Type Field Class Description Examples
Text
Bar Code
Constant
Text
Line N/A
Simple
Price
Date/Time
Combo
Simple
Price
Date/Time
Combo
N/A
Contains letters,
numbers, or symbols
you want to print.
Used for printing bar
codes that can be
scanned.
Prints fixed characters
that print without
changing.
Highlights or separates
items.
For each field type, keep the following in mind:
Maximum field
length
The maximum number of characters in the field. The number of
characters depends on the font size, label size, whether you are
using a check digit, or if the field is printed horizontally or
vertically. If your data is a price, remember to include the
currency symbol (dollar sign, Franc, etc.) in the length of your
field. See Chapter 3, “Configuring the Printer” for more
information about setting a currency symbol. The range is 0 –
40.
Item number, item
description, department
number, price, date
Item or serial numbers, zip
codes, information you do
not want to have visible to
customers
Company name or
company address
Line marking out the
regular price
4-4 Designing a Format
Page 37

Font and Font
Size
When working with fonts, you have three considerations:
♦ font appearance
♦ font size
♦ font spacing (monospaced or proportional)
See Appendix B, "Using Fonts," for more information.
Rotation
Row
Column
The rotation of your field or individual characters. Fields and
characters can be rotated 0, 90, 180, or 270 degrees.
The horizontal line where printing begins. The number of rows
available depends on the label size you use. You can begin a
field at any row. However, towards the top and bottom of the
label, you must make sure there are enough rows to print the
font size or bar code selected.
The vertical line where printing begins. You can begin a field at
any column. However, on the edges of the label, you must make
sure there are enough columns to print all the characters in a
field. Bar codes require a “quiet zone” (non-printing zone) on
each side of the bars for scanning. The quiet zone is .10 inches
per side. Fore more information about bar codes, see Chapter 6,
“Defining Bar Code Fields.”
NOTE: All samples shown in the “Defining Fields” chapters are created
using 2.0-inch long by 2.0-inch wide supplies.
Designing a Format 4-5
Page 38

Starting the Design Process
Turn on the printer. You will see the Main Menu.
- = Main Menu = -
1. Design Formats
2. Print Labels
3. Configuration
1. From the Main Menu, press 1 to design
your formats.
- = Design Menu = -
1. Create New Format
2. Edit Old Format
3. Copy Format
4. Delete Format
Enter Format Name
> _ _ _ _ _ _ _ _ _ _ _ _ _
L
Enter Length of
supply (55 – 400)
(eg. 400 = 4 inches)
> _ _ _
Select Supply Width
1. 1.20 Inches
2. 1.50 Inches
3. 2.00 Inches
Select Type: Fld #1
1. Text Field
2. Bar Code Field
3. Constant Text
4. Line
5. Finished
2. Press 1 to create a new format.
3. Type UPCA for the format name. Press
e.
4. Type 200. Press e.
5. Press 3 for your supply width.
6. Select a field type (1-5) for field 1.
♦ To define text fields, see Chapter 5, “Defining
Text Fields.”
♦ To define bar code fields, see Chapter 6,
“Defining Bar Code Fields.”
♦ To define constant text fields, see Chapter 7,
“Defining Constant Text Fields.”
♦ To define line fields, see Chapter 8, “Defining
Line Fields.”
♦ Select 5 when finished designing your
format (after all fields are defined).
Save current
format? Y/N > _
4-6 Designing a Format
7. Press Y to save the format or press N to exit
without saving the format. You return to the
Design Menu.
Page 39

Placing Fields on a Format
You must be careful where you place a field on a format to ensure it does
not go off the format. There are two ways this can occur. You have placed
the field
♦ on the format, but based on its maximum length, it may go off the edge.
This way causes the software to display a warning, which you can ignore.
See Chapter 3, “Configuring the Printer,” to learn how to suppress the
display of warnings if you prefer to do so.
♦ completely off the format.
This way causes an error. You must redefine the field.
NOTE: Remember that the field can go off the format on any of the four
sides (top, bottom, left, right).
See Chapter 12, “Troubleshooting,” to learn about this error and warning.
Designing a Format 4-7
Page 40

4-8 Designing a Format
Page 41

DEFINING TEXT FIELDS
5
Create a separate definition for each text field. There are two types of text
fields:
Simple Contains data entered specifically for that field.
Combo
(combination)
NOTE: If text falls on two lines, each line of text requires a separate
definition.
All samples shown in this chapter are created using 2.0-inch long by 2.0-inch
wide supplies.
Contains data pulled from up to 10 other fields.
About Text Fields
Read the following information to become familiar with the prompts for text
fields. Valid ranges for the prompts are listed as well as information about
using text fields.
Format Name
Format Number
Format
Description
Depending on your printer’s configuration, enter a name for
the format. For more information about your printer’s
configuration, see Chapter 3, “Configuring the Printer.” The
maximum number of characters for the format name is 16.
Reserved for future use. (Depending on your printer’s
configuration, enter a number for the format. The format
number range is 1 – 99.)
Reserved for future use. (Depending on your printer’s
configuration, enter a description for the format.)
Supply Length
Defining Text Fields 5-1
The length of your loaded supply. Measure from the top of
one black mark to the top of the next black mark. The
standard supply lengths are: 55, 78, 110, 150, 200, 300, or
400 inches.
Page 42

Supply Width
Field Type Choices include text, bar code, constant text, and line.
Field Class
Type of Data
Maximum Length
Minimum Length
The width of your loaded supply. Choices include 1.20, 1.50,
or 2.00 inches.
Choices include simple, price, system date/time, and combo.
Price and system date/time fields are explained in Chapter 9,
“Defining Special Fields.” Combo (combination) fields are
explained later in this chapter. Simple fields are the most
commonly used.
Choices include alphanumeric and numeric. Decide if you
need letters or letters and numbers in your field. When
selecting a font for your data, keep in mind that point sizes
greater than 12 include only the following characters:
0123456789#$%&(),./@DFKLMPS\kpr
The maximum number of characters in the field. The number
of characters depends on the font size, label size, whether
you are using a check digit, or if the field is printed
horizontally or vertically. If your data is a price, remember to
include the currency symbol (dollar sign, cent sign, etc.) in the
length of your field. The range is 0 – 40.
The minimum number of characters in the field.
The range is 0 – 40.
ö¢£¥c
Field Prompt
Fixed Data
5-2 Defining Text Fields
Contains the prompt displayed during data entry. The
maximum number of characters is 40.
In situations where the same data appears on all labels, you
can enter the repetitive data as fixed data. The operator does
not enter the data. The maximum number of characters is 40;
however, each field has a maximum length defined, so the
fixed data must be below that maximum.
Fixed data is stored with the format and automatically
displayed with the prompt during data entry. Fixed data can
also be added before or after entry characters.
An example of fixed data is the manufacturer’s code in a
UPCA bar code.
Page 43

Row
The horizontal line where printing begins. For monospaced
fonts, distance from the bottom of print area to the pivot point.
The pivot point varies depending on how text is justified.
Column
Gap
For proportionally spaced fonts, distance
from the bottom of print area to baseline of
characters in field. The range is 0 – 365.
Baseline
The vertical line where printing begins. Type
the column position for the field. The distance
from the left edge of the print area to the pivot
point is the column location. The range is
0 – 183.
Baseline
Depending on your printer’s configuration, enter the number of
dots between characters. For more information about your
printer’s configuration, see Chapter 3, “Configuring the
Printer.”
The gap range is 0 – 9. For mono-spaced fonts, the additional
spacing is added to the existing inter-character gap. This is
also true for proportionally spaced fonts, but the intercharacter gap varies with character combinations. Any
number other than 0 affects your field width. Default spacing:
Letter Gothic Bold 6pt 1 dot
Letter Gothic Bold 9pt 2 dots
All other fonts vary with each letter
Use the default unless you want to create a special effect,
such as P R I C E (additional character spacing) in a field.
Defining Text Fields 5-3
Page 44

Font
attribute B
attribute O
The style of font for your format. Choices include CG
Triumvirate Bold 6.5, 8, 10, 12, 18, or 22 point; CG
Triumvirate Bold Condensed 6.5, 8, 10, 12, 18, and 22 point;
and Letter Gothic 6.5 and 9 point.
Height
Magnification
Width
Magnification
Font Color
Line field
not
blocked
out by
transparent
field using
Line field
blocked
out by
opaque
field using
Height magnifier for the selected font. Use a magnifier of 1
with proportionally spaced fonts, because characters lose
smoothness at higher magnifications. The range is 1 – 7.
Width magnifier for the selected font. Proportionally spaced
fonts do not have a set width. The range is 1 – 7.
Depending on your printer’s configuration, enter the color of
the selected font. For more information about your printer’s
configuration, see Chapter 3, “Configuring the Printer.”
Solid black print should not exceed 30% on a given square
inch of the label, or printhead life may be decreased. There
are two types of field color overlay attributes:
Transparent The overlay field (text or
constant text) does not block
out or “erase” existing fields.
Opaque The overlay field blocks out or
“erases” existing fields.
Field placement is an important consideration when using
field color attributes. If a line field is defined before the
overlay (text or constant text) field, the line field is blocked
out by the overlay field, depending on the overlay field's
color attribute. If a line field is defined after the overlay
field, the line field is not blocked out by the overlay field,
regardless of the overlay field's color attribute.
Choices include Black Opaque, White Opaque, Black
Transparent and White Transparent.
Justification
5-4 Defining Text Fields
Alignment of the text within the field. Choices include Left
(L), Right (E), and Center (B). Fonts 1012 and 1013 (Letter
Gothic 6.5 and 9 pt) default to L (left), regardless of
selection.
Page 45

Character
Rotation
Depending on your printer’s configuration, enter the
character rotation of the selected field. For more
information about your printer’s configuration, see Chapter
3, “Configuring the Printer.” Choices include Top of Field,
Left of Field, Bottom of Field, and Right of Field.
The field or supply does not rotate, only the characters do.
See “ABCD” in the example below.
Field Rotation
Data Edits
Rotation of the
selected field.
Choices include:
Top of Supply,
Left of Supply,
Bottom of Supply,
and Right of
Supply.
Data edits are used on text and bar code (simple and
combo) fields only. For more information about data edits,
see Chapter 10, “Applying Data Edits,” for more information.
Choices include: none, Make into Price, Pad Data Field,
Extract Characters, Extract from Middle, Insert Characters,
and Make Shoe Size.
Only two data edits are allowed per field. Shoe size and
price edits are not allowed for bar code fields.
Defining Text Fields 5-5
Page 46

Entering a Sample Text Field
We will create a sample format,
SIZE (2.0-inch long by 2.0-inch
wide) and a sample text field, TEXT.
NOTE: This sample uses the
printer’s factory-set
defaults. For more
information about your
printer’s configuration, see
Chapter 3, “Configuring the
Printer.”
- = Main Menu = -
1. Design Formats
2. Print Labels
3. Configuration
- = Design Menu = -
1. Create New Format
2. Edit Old Format
3. Copy Format
4. Delete Format
Enter Format Name
> _ _ _ _ _ _ _ _ _ _ _ _ _
L
Enter Length of
supply (55 – 400)
(eg. 400 = 4 inches)
> _ _ _
Select Supply Width
1. 1.20 Inches
2. 1.50 Inches
3. 2.00 Inches
1. Press 1 to design your formats.
2. Press 1 to create a new format.
3. Type SIZE for the format name. Press
e.
4. Type 200 for the length of your supply. Press
e.
5. Press 3 for the supply width.
5-6 Defining Text Fields
Page 47

Select Type: Fld #1
1. Text Field
2. Bar Code Field
3. Constant Text
4. Line
5. Finished
6. Press 1 to define a text field.
Select Field Class
1. Simple Field
2. Price Field
3. System Date/Time
4. Combo (Merged)
Numeric or
Alpha-Numeric Data?
A/N > _
L
Enter Max. Length
> _ _ _
Enter Min. Length
> _ _ _
Enter Field Prompt
> _ _ _ _ _ _ _ _ _ _ _ _ _ _ _ _
L
Enter Fixed Data
Press ENTER if none
> _ _ _ _ _ _ _ _ _ _ _ _ _ _ _ _
L
Add fixed data
Before or After
entry chars? B/A
> _
L
7. Press 1 to define a simple field.
8. Press A (alpha-numeric).
9. Type 10 as the maximum number of
characters in the field. Press e.
10. Type 1 as the minimum number of characters
in the field. Press e.
11. Type ENTER SIZE. Press e.
12. Type /TL for the fixed data. Press e.
13. Press A to print the fixed data after the entry
characters.
Enter Row #
> _ _ _
Enter Col. #
> _ _ _
14. Type 100 for the row location. Press e.
15. Type 10 for the column location. Press
e.
Defining Text Fields 5-7
Page 48

- = Select Font = -
1. CG Trium 6.5 1000
2. CG Trium 8 pt 1001
3. CG Trium 10p 1002
4. CG Trium 12p 1003
5. CG Trium 18 p 1004
6. CG Trium 22p 1005
7. CG TrCon 6.5 1006
8. CG TrCon 8 pt 1007
9. CG TrCon 10p 1008
10. CG TrCon 12p 1009
11. CG TrCon 18p 1010
12. CG TrCon 22p 1011
13. LetGoth 6.5 1012
14. LetGoth 9pt 1013
16. Select CG Trium 8 pt 1001. Press e.
Enter Height Mag for
this font (1-7) > _
Enter Width Mag for
this font (1-7) > _
Set Justification
1. Left (L)
2. Right (E)
3. Center (B)
Top of Field at:
1. Top of Supply
2. Left of Supply
3. Bottom of Supply
4. Right of Supply
Select Edit #1
1. None
2. Make into Price
3. Pad Data Field
4. Extract Chars
5. Strip Chars
6. Extract from Mid
7. Insert Chars
8. Make Shoe Size
17. Press 1 for the height magnification.
18. Press 1 for the width magnification.
19. Press 1 for the alignment of characters in
the field.
20. Press 1 for the field rotation.
21. Press 1 for no data edits.
5-8 Defining Text Fields
Page 49

Select Type:Fld#2
1. Text Field
2. Bar Code Field
3. Constant Text
4. Line
5. Finished
22. Press 5.
Save current
format? Y/N > _
23. Press Y to save the format. You return to the
Design Menu.
♦ To print the format, see “Printing the Sample Text Format.”
♦ To define a combo (combination) text field, see “Using a Combo Text
Field,” for more information.
♦ To define bar code fields, see Chapter 6, “Defining Bar Code Fields.”
♦ To define constant text fields, see Chapter 7, “Defining Constant Text
Fields.”
♦ To define line fields, see Chapter 8, “Defining Line Fields.”
Printing the Sample Text Format
After designing your format, print it to see how it looks.
- = Design Menu = -
1. Create New Format
2. Edit Old Format
3. Copy Format
4. Delete Format
- = Main Menu = -
1. Design Formats
2. Print Labels
3. Configuration
1. Press b to exit the Design Menu.
2. Press 2 to print your format.
Select Format
to Print
3. Select SIZE and press e.
- = Format Menu - =
01 SIZE
ENTER SIZE
_ _ _ _ _ _
Defining Text Fields 5-9
4. Type XLarge. Press e. The label
prints.
Page 50

Printed: 1
5. Press the trigger to print another label or
press b to return to the prompt and print a
different label.
This sample prints the following label.
Using a Combo Text Field
Combo (combination) fields pull data from other fields (text or bar code),
eliminating the data from being entered by an operator more than once.
These are also known as merged fields. Each combo field can pull data from
up to 10 different fields. Combo fields have three parameters:
Field Number
Starting Position
Number of Digits
to use
5-10 Defining Text Fields
Field number from which data is copied.
For example, 3 is field #3.
Position number in the source field of the first character to
be copied. Character positions are numbered 1 to 99,
starting from the left. For example, 1 is the character in
the first position to be copied.
Number of characters to copy. The range is 1 to 99. For
example, 3 copies three characters.
In cases where the source field is shorter than the combo
field, you have the option of filling (padding) data from the
left or right or none. You are also prompted for the fill
character.
Page 51

Fill Direction
one part of tag to the other.
Fill Character Specifies which character to use for filling a field.
Specifies whether to fill a short source field from the left,
right, or not fill the field. For example, if the source field
only contains 5 characters, but the combo field contains
10, you can fill the field from the left or right with zeroes or
another character.
An example of using text fields to create a combo
text field can be seen in multi-part tags. If you need
a two-part identical tag, use combo text fields to
mirror the data. The operator only has to answer the
prompts one time for both tags.
Use combo fields to copy data from
NOTE: When creating your combo field, remember
that lines and constant text fields do not count as fields, even
though they appear in the list as fields when editing a format.
For example, the constant text field, “Pretzels,” does not count as field 01,
the bar code field is field 01, if the fields were defined
in this order: pretzels, bar code, combo field (for
human readable), and price field.
NOTE: You will receive an error or unexpected data
may print in the combo field if you use the
wrong field number.
Defining Text Fields 5-11
Page 52

Entering a Sample Combo Text Field
To use a combo field, you must already have created the field(s) you want to
copy or use data from.
We will create a sample format COMBO (2.0-inch long by 2.0-inch wide) that
includes a text field (SIZE), and then create a combo text field (COPY) that
copies the data from SIZE.
NOTE: This sample uses the printer’s factory-set defaults. For more
information about your printer’s configuration, see Chapter 3,
“Configuring the Printer.”
- = Main Menu = -
1. Design Formats
2. Print Labels
3. Configuration
- = Design Menu = -
1. Create New Format
2. Edit Old Format
3. Copy Format
4. Delete Format
Enter Format Name
> _ _ _ _ _ _ _ _ _ _ _ _ _
L
Enter Length of
supply (55 – 400)
(eg. 400 = 4 inches)
> _ _ _
Select Supply Width
1. 1.20 Inches
2. 1.50 Inches
3. 2.00 Inches
Select Type: Fld #1
1. Text Field
2. Bar Code Field
3. Constant Text
4. Line
5. Finished
1. Press 1 to design your formats.
2. Press 1 to create a new format.
3. Type COMBO for the format name. Press
e.
4. Type 200 for the length of your supply. Press
e.
5. Press 3 for the supply width.
6. Press 1 to define a text field.
5-12 Defining Text Fields
Page 53

Select Field Class
1. Simple Field
2. Price Field
3. System Date/Time
4. Combo (Merged)
Numeric or
Alpha-Numeric Data?
A/N > _
L
Enter Max. Length
> _ _ _
Enter Min. Length
> _ _ _
Enter Field Prompt
> _ _ _ _ _ _ _ _ _ _ _ _ _ _ _ _
L
Enter Fixed Data
Press ENTER if none
> _ _ _ _ _ _ _ _ _ _ _ _ _ _ _ _
L
Enter Row #
> _ _ _
7. Press 1 to define a simple field.
8. Press A (alpha-numeric).
9. Type 10 as the maximum number of
characters in the field. Press e.
10. Type 1 as the minimum number of characters
in the field. Press e.
11. Type ENTER SIZE. Press e.
12. Press e for no fixed data.
13. Type 100 for the row location. Press e.
Enter Col. #
> _ _ _
14. Type 10 for the column location. Press
e.
Defining Text Fields 5-13
Page 54

- = Select Font = -
1. CG Trium 6.5 1000
2. CG Trium 8 pt 1001
3. CG Trium 10p 1002
4. CG Trium 12p 1003
5. CG Trium 18 p 1004
6. CG Trium 22p 1005
7. CG TrCon 6.5 1006
8. CG TrCon 8 pt 1007
9. CG TrCon 10p 1008
10. CG TrCon 12p 1009
11. CG TrCon 18p 1010
12. CG TrCon 22p 1011
13. LetGoth 6.5 1012
14. LetGoth 9pt 1013
Enter Height Mag for
this font (1-7) > _
Enter Width Mag for
this font (1-7) > _
Set Justification
1. Left (L)
2. Right (E)
3. Center (B)
Top of Field at:
1. Top of Supply
2. Left of Supply
3. Bottom of Supply
4. Right of Supply
15. Select CG Trium 8 pt 1001. Press e.
16. Press 1 for the height magnification.
17. Press 1 for the width magnification.
18. Press 1 for the alignment of characters in
the field.
19. Press 1 for the field rotation.
Select Edit #1
1. None
2. Make into Price
3. Pad Data Field
4. Extract Chars
5. Strip Chars
6. Extract from Mid
7. Insert Chars
20. Press 1 for no data edits.
8. Make Shoe Size
Select Type:Fld#2
1. Text Field
2. Bar Code Field
3. Constant Text
4. Line
5. Finished
5-14 Defining Text Fields
21. Press 1 to define your other text field.
Page 55

Select Field Class
1. Simple Field
2. Price Field
3. System Date/Time
4. Combo (Merged)
22. Press 4 to define a combo field.
Enter Max. Length
> _ _ _
Enter Min. Length
> _ _ _
For Combo Fields
Enter up to 10
User Field sources.
(Press key) _
Enter Field#
(First is Fld One)
(ENTER when done)
> _ _
Enter Start Position
(First is One)
> _ _ _
Enter # of Chars
> _ _ _
Enter Field#
(First is Fld One)
(ENTER when done)
> _ _
Enter Fill Direction
for short
Source Fields:
1 Fill from Left
2 Fill from Right
3 Do not Fill
23. Type 10 as the maximum number of
characters in the field. Press e.
24. Type 1 as the minimum number of characters
in the field. Press e.
25. Press any key to continue.
26. Type 1. Press e.
27. Type 1. Press e.
28. Type 6. Press e.
29. Press e to continue.
30. Press 1 to fill the field from the left.
Enter Fill
Character for
source fields: _
Enter Fixed Data
Press ENTER if none
> _ _ _ _ _ _ _ _ _ _ _ _ _ _ _ _
L
31. Type a dash (-).
32. Press e for no fixed data.
Defining Text Fields 5-15
Page 56

Enter Row #
> _ _ _
33. Type 100 for the row location. Press e.
Enter Col. #
> _ _ _
- = Select Font = -
1. CG Trium 6.5 1000
2. CG Trium 8 pt 1001
3. CG Trium 10p 1002
4. CG Trium 12p 1003
5. CG Trium 18 p 1004
6. CG Trium 22p 1005
7. CG TrCon 6.5 1006
8. CG TrCon 8 pt 1007
9. CG TrCon 10p 1008
10. CG TrCon 12p 1009
11. CG TrCon 18p 1010
12. CG TrCon 22p 1011
13. LetGoth 6.5 1012
14. LetGoth 9pt 1013
Enter Height Mag for
this font (1-7) > _
Enter Width Mag for
this font (1-7) > _
Set Justification
1. Left (L)
2. Right (E)
3. Center (B)
34. Type 90 for the column location. Press
e.
35. Select CG Trium 8 pt 1001. Press e.
36. Press 1 for the height magnification.
37. Press 1 for the width magnification.
38. Press 1 for the alignment of characters in
the field.
Top of Field at:
1. Top of Supply
2. Left of Supply
3. Bottom of Supply
4. Right of Supply
Select Edit #1
1. None
2. Make into Price
3. Pad Data Field
4. Extract Chars
5. Strip Chars
6. Extract from Mid
7. Insert Chars
39. Press 1 for the field rotation.
40. Press 1 for no data edits.
8. Make Shoe Size
5-16 Defining Text Fields
Page 57

Select Type:Fld#3
1. Text Field
2. Bar Code Field
3. Constant Text
4. Line
5. Finished
Save current
format? Y/N > _
41. Press 5.
42. Press Y to save the format. You return to the
Design Menu.
Printing the Sample Combo Format
After designing your format, print it to see how it looks.
- = Design Menu = -
1. Create New Format
2. Edit Old Format
3. Copy Format
4. Delete Format
- = Main Menu = -
1. Design Formats
2. Print Labels
3. Configuration
Select Format
to Print
- = Format Menu - =
01 COMBO
02 SIZE
1. Press b to exit the Design Menu.
2. Press 2 to print your format.
3. Select COMBO and press e.
ENTER SIZE
_ _ _ _ _ _
Printed: 1
4. Type Small. Press e. The label prints.
5. Press the trigger to print another label or
press b to return to the prompt and print a
different label.
Defining Text Fields 5-17
Page 58

This sample prints the following label.
character
Combo field is filled
on the left with the -
5-18 Defining Text Fields
Page 59

DEFINING BAR CODE FIELDS
6
Create a separate definition for each bar code field. There are two
types of bar code fields:
Simple Contains data entered specifically for that field.
Combo
(combination)
See ”Bar Code Specifications” for information about each bar code that can
be used with these bar code field types.
Contains data pulled from up to 10 other fields.
About Bar Code Fields
Read the following information to become familiar with the prompts for bar
code fields. Ranges for the prompts are listed as well as more information
about using bar code fields.
Format Name
Format Number
Format Description
Depending on your printer’s configuration, enter a
name for the format. For more information about
your printer’s configuration, see Chapter 3,
“Configuring the Printer.” The maximum number of
characters for the format name is 16.
Reserved for future use. (Depending on your printer’s
configuration, enter a number for the format. The format
number range is 1 – 99.)
Reserved for future use. (Depending on your printer’s
configuration, enter a description for the format.)
Supply Width
Field Type Choices include: text, bar code, constant, and line.
Defining Bar Code Fields 6-1
The width of your loaded supply. Choices include
1.20 inches, 1.50 inches, and 2.00 inches.
Page 60

Bar Code Type
Field Class
Field Prompt
Using Fixed Data
Choices include: UPC-A, UPC-E, Interleaved 2 of 5,
Code 39 (with no check digit), Codabar, EAN-8,
EAN-13, Code 128, MSI, UPC-A +2, UPC-A +5,
UPC-E +2, UPC-E +5, EAN-8 +2, EAN-8 +5, EAN13 +2, EAN-13 +5, Code 93, Code 39-Mod 43,
UPC-A & Price CD, EAN-13 & Price CD, and I2 of 5
with Barrier Bar.
Choices include simple, price, system date/time,
and combo. For bar codes, select either simple or
combo. Combo (combination) fields are explained
later in this chapter. Simple fields are the most
commonly used.
Contains the prompt displayed during data entry.
The maximum number of characters is 20.
In situations where the same data appears on all
labels, you can enter the repetitive data as fixed
data. The operator does not enter the data. The
maximum number of characters is 40; however,
each field has a maximum length defined, so the
fixed data must be below that maximum.
Fixed data is stored with the format and
automatically displayed with the prompt during data
entry. Fixed data can also be added before or
after entry characters.
An example of fixed data is the manufacturer’s
code in a UPC-A bar code.
6-2 Defining Bar Code Fields
Page 61

Row
Balanced Fields
Distance from the bottom of print area to the pivot
point of the field. The pivot point varies, depending
on how the field is justified. Pivot points:
Left/Center/Right-Justified Fields
End-Justified Fields
Remember to include text or numbers that may
appear with the bar code for the row
measurement.
Column
Density
Defining Bar Code Fields 6-3
The vertical line where printing begins. Type the
column position for the field. The distance from the
left edge of the print area to the pivot point is the
column location. The range is 0 – 183.
Allow a minimum of 1/10 inch between the scan
edge of bar code and label edges or other data.
The density of the bar code. The possible values
vary by the bar code selected.
Page 62

Bar Height
Appearance
Justification
Field Rotation
Height of the bar code in 1/100 inches. For
example, 100 = 1 inch. The value is dependent on
the length of the label used. The minimum value is
1.
Depending on your printer’s configuration, enter
the appearance of the bar code (UPC and EAN
family only). For more information about your
printer’s configuration, see Chapter 3, “Configuring
the Printer.” See ”Setting the Appearance” for
information about the appearance choices.
Depending on your printer’s configuration, enter an
alignment for the field. For more information about
your printer’s configuration, see Chapter 3,
“Configuring the Printer.” Choices include Left (L),
Right (E), and Center (B).
Rotation of the selected field. Choices include:
Top of Supply, Left of Supply, Bottom of Supply,
and Right of Supply.
Left/Center/Right-Justified Fields
Balanced Fields
6-4 Defining Bar Code Fields
End-Justified Fields
Page 63

Number System
Check Digit
Data Edits
Only two data edits are allowed per field.
Data edits are used on text and bar code (simple
and combo) fields only. For more information
about data edits, see Chapter 10, “Applying Data
Edits,” for more information. Choices include:
none, Make into Price, Pad Data Field, Extract
Characters, Extract from Middle, Insert Characters,
and Make Shoe Size.
NOTE: Make Shoe size and Make into Price are not allowed for bar code
fields.
Setting the Appearance
UPC and EAN bar codes only. The appearance of the bar code is the
combination of number system and/or check digits shown with the bar code.
You are prompted for the appearance during format creation, unless the
configuration specifies to use the default. The number system appears on
the left and the check digit appears on the right.
NOTE: The appearance that prints does not change unless you redefine the
field. You cannot change only the configuration and have the
printing change.
Following are the appearance options.
No C/D or Num Sys
Number Sys Only
Check Digit Only
Complete HR Text
(human-readable)
No Human Readable
Defining Bar Code Fields 6-5
Page 64

Setting the Density
The density is the amount of data per unit length in a bar code. Generally,
you measure the density in characters per inch or as percentages of the
nominal size. Density values vary by bar code. The following table lists
these values.
Bar Code Density Values
UPC and EAN 80% and 120%
Interleaved 2 of 5 1.0, 2.0, 3.0, 4.0, 5.3, 6.0, 7.1, 8.3, 9.1, 10.6, 12.0, and 13.7
Code 39 – no c/d 1.3, 1.7, 2.8, 3.3, 3.7, 4.0, 6.0, 6.6, and 12.0.
Codabar 2.0, 2.9, 4.3, 4.7, 7.7, 8.4, and 9.6
Code 128 3.5/7.0, 4.4/8.7, 5.8/11.7, and 8.7/17.5
MSI 4.0, 5.3, and 6.9
Code 93 3.6, 4.3, 5.3, 7.1, and 10.7
Code 39 – Mod43 1.3, 1.7, 2.8, 3.3, 3.7, 4.0, 6.0, 6.6, and 12.0
I2of5 – Barrier Bar 1.0, 2.0, 3.0, 4.0, 5.3, 6.0, 7.1, 8.3, 9.1, 10.6, 12.0 and 13.7
Entering Simple Bar Code Fields
Follow the steps to create sample
bar code fields.
6-6 Defining Bar Code Fields
Page 65

Sample 1: Simple Fixed Bar Code
The following procedure creates a UPC-A bar code on a 2.0-inch long by
2.0-inch wide supply.
NOTE: This sample uses the printer’s factory-set defaults. For more
information about your printer’s configuration, see Chapter 3,
“Configuring the Printer.”
-=Main Menu=-
1. Design Formats
2. Print Labels
3. Configuration
-=Design Menu=-
1.Create New Format
2.Edit Old Format
3.Copy Format
4.Delete Format
Enter Format Name
>_ _ _ _ _ _ _ _ _ _ _ _ _ _
L
Enter Length of
Supply (55-400)
(eg.400 = 4 inches)
>_ _ _
Select Supply Width
1. 1.20 Inches
2. 1.50 Inches
3. 2.00 Inches
Select Type: Fld #1
1. Text Field
2. Bar Code Field
3. Constant Text
4. Line
5. Finished
1. From the Main Menu, press 1.
2. Press 1 to create a new format.
3. Type UPCA for the format name. Press
e.
4. Type 200 for the length of your supply. Press
e.
5. Press 3 for the supply width.
6. Press 2 to define a bar code field.
-=Select Bar Code=-
1. UPC-A
2. UPC-E
3. Interleaved2of5
4. Code 39 –no c/d
5. Codabar
6. EAN-8
7. EAN-13
7. Press 1 for UPC-A.
Defining Bar Code Fields 6-7
Page 66

Select Field Class
1. Simple Field
2. Price Field
3. System Date/Time
4. Combo (Merged)
8. Press 1 to define a simple field.
Enter Field Prompt
_ _ _ _ _ _ _ _ _ _ _
L
Enter Fixed Data
Press ENTER if none
> _ _ _ _ _ _ _ _ _ _ _ _
L
Enter Row #
> _ _ _
Enter Col. #
> _ _ _
Enter Density
1. 80/ 2. 120
>_
Enter Bar Height
(Units = Inch/100)
> _ _ _
Top of Field at:
1. Top of Supply
2. Left of Supply
3. Bottom of Supply
4. Right of Supply
9. Type “SCAN UPC#.” Press e.
10. Press e for no fixed data.
11. Type 80 for the row location. Press e.
12. Type 15 for the column location. Press
e.
13. Press 1 for the density (80%).
14. Type 40 for the bar code height (.4”). Press
e.
15. Type 1 for the field rotation.
Select Edit #1
1. (None)
2. Make into Price
3. Pad Data Field
4. Extract Chars
5. Strip Chars
6. Extract from Mid
7. Insert Chars
16. Press e for no edits.
8. Make Shoe Size
6-8 Defining Bar Code Fields
Page 67

Select Type:Fld #2
1. Text Field
2. Bar Code Field
3. Constant Text
4. Line
5. Finished
Save current
format? Y/N > _
17. Press 5.
18. Press Y to save the format. You return to the
Design Menu.
♦ To print the format, see ”Printing the Simple Fixed Bar Code Format”
♦ To define a combo (combination) bar code field, see “Entering a Sample
Combo Bar Code Field” for more information.
♦ To define text fields, see Chapter 5, “Defining Text Fields.”
♦ To define constant text fields, see Chapter 7, “Defining Constant Text
Fields.”
♦ To define line fields, see Chapter 8, “Defining Line Fields.”
Printing the Simple Fixed Bar Code Format
After designing your format, print it to see how it looks.
-=Design Menu=-
1.Create New Format
2,Edit Old Format
3.Copy Format
4.Delete Format
1. Press b to exit the Design Menu.
-=Main Menu=-
1. Design Formats
2. Print Labels
3. Configuration
Select Format
to Print
2. Press 2 to print your format.
3. Select UPCA. Press e.
-=Format Menu=01 UPCA
SCAN UPC#
_ _ _ _ _ _ _ _ _ _ _ _
Defining Bar Code Fields 6-9
4. Type 028028796302. Press e. The
label prints.
Page 68

Printed : 1
5. Press the trigger to print another label or
press b to return to the prompt and print
another label.
This sample prints the following label.
Sample 2: Simple Variable Bar Code
The following procedure creates a Code 128 bar code on a 2.0-inch long by
2.0-inch wide supply.
NOTE: This sample uses the printer’s factory-set defaults. For more
information about your printer’s configuration, see Chapter 3,
“Configuring the Printer.”
-=Main Menu=-
1. Design Formats
2. Print Labels
3. Configuration
-=Design Menu=-
1.Create New Format
2,Edit Old Format
3.Copy Format
4.Delete Format
Enter Format Name
>_ _ _ _ _ _ _ _ _ _ _ _ _ _
L
Enter Length of
Supply (55-400)
(eg.400 = 4 inches)
>_ _ _
6-10 Defining Bar Code Fields
1. From the Main Menu, press 1.
2. Press 1 to create a new format.
3. Type CODE128 for the format name. Press
e.
4. Type 200 for the length of your supply. Press
e.
Page 69

Select Supply Width
1. 1.20 Inches
2. 1.50 Inches
3. 2.00 Inches
5. Press 3 for the supply width.
Select Type: Fld #1
1. Text Field
2. Bar Code Field
3. Constant Text
4. Line
5. Finished
-=Select Bar Code=-
1. UPC-A
2. UPC-E
3. Interleaved2of5
4. Code 39 –no c/d
5. Codabar
6. EAN-8
7. EAN-13
8. Code 128
9. MSI
10. UPC-A +2
11. UPC-A +5
12. UPC-E +2
13. UPC-E +5
14. EAN-8 +2
15. EAN-8 +5
16. EAN-13 +2
17. EAN-13 +5
23. Code 93
40. Code 39 –Mod 43
41. UPCA & Price CD
44. EAN-13 & Price CD
50. I2of5 – Barr. Bar
6. Press 2 to define a bar code field.
7. Press 8 for Code 128.
Select Field Class
1. Simple Field
2. Price Field
3. System Date/Time
4. Combo (Merged)
Numeric or
Alpha-Numeric Data?
A/N >_
L
Enter Max. Length
>_ _ _
8. Press 1 to define a simple field.
9. Press N to specify numeric data.
10. Type 10 as the maximum number of
characters in the field. Press e.
Defining Bar Code Fields 6-11
Page 70

Enter Min. Length
>_ _ _
Enter Field Prompt
_ _ _ _ _ _ _ _ _ _ _
L
Enter Fixed Data
Press ENTER if none
> _ _ _ _ _ _ _ _ _ _ _ _
L
Enter Row #
> _ _ _
Enter Col. #
> _ _ _
-=Select Density=-
3.5/7.0 CPI 5 dots
4.4/8.7 CPI 4 dots
5.8/11.7 CPI 3 dots
8.7/17.5 CPI 2 dots
Enter Bar Height
(Units = Inch/100)
> _ _ _
11. Type 10 as the minimum number of
characters in the field. Press e.
12. Type “SCAN DATA.” Press e.
13. Press e for no fixed data.
14. Type 80 for the row location. Press e.
15. Type 15 for the column location. Press
e.
16. Select 8.7/17.5 characters per inch.
17. Type 40 for the bar code height (.4”). Press
e.
Top of Field at:
1. Top of Supply
2. Left of Supply
3. Bottom of Supply
4. Right of Supply
Select Edit #1
1. (None)
2. Make into Price
3. Pad Data Field
4. Extract Chars
5. Strip Chars
6. Extract from Mid
7. Insert Chars
8. Make Shoe Size
18. Type 1 for the field rotation.
19. Press e for no edits.
6-12 Defining Bar Code Fields
Page 71

Select Type:Fld #2
1. Text Field
2. Bar Code Field
3. Constant Text
4. Line
5. Finished
Save current
format? Y/N > _
20. Press 5.
21. Press Y to save the format. You return to the
Design Menu.
♦ To print the format, see ”Printing the Simple Variable Bar Code Format.”
♦ To define a combo (combination) bar code field, see “Entering a Sample
Combo Bar Code Field” for more information.
♦ To define text fields, see Chapter 5, “Defining Text Fields.”
♦ To define constant text fields, see Chapter 7, “Defining Constant Text
Fields.”
♦ To define line fields, see Chapter 8, “Defining Line Fields.”
Printing the Simple Variable Bar Code Format
After designing your format, print it to see how it looks.
-=Design Menu=-
1.Create New Format
2,Edit Old Format
3.Copy Format
4.Delete Format
1. Press b to exit the Design Menu.
-=Main Menu=-
1. Design Formats
2. Print Labels
3. Configuration
Select Format
to Print
2. Press 2 to print your format.
3. Select CODE128. Press e.
-=Format Menu=01 CODE128
02 UPCA
Defining Bar Code Fields 6-13
Page 72

SCAN DATA
_ _ _ _ _ _ _ _ _ _ _ _
Printed : 1
4. Type 8520147963. Press e. The label
prints.
5. Press the trigger to print another label or
press b to return to the prompt and print
another label.
This sample prints the following label.
About Combo Bar Code Fields
Combo bar code fields pull data from other fields, eliminating the data from
being entered by the operator more than once. Combo fields have three
parameters:
Field Number
(two digits)
Starting Position
(two digits)
Number of Digits to
use (two digits)
6-14 Defining Bar Code Fields
Field number from which data is copied. For example, 3 is
field #3.
Position number in the source field of the first character to
be copied. Character positions are numbered 1 to 99,
starting from the left. For example, 1 is the character in
the first position to be copied.
Number of characters to copy. The range is 1 to 99. For
example, 3 copies three characters.
In cases where the source field is shorter than the combo
field, you have the option of filling (padding) data from the
left or right or none. You are also prompted for the fill
character.
Page 73

Each combo field pulls data from up to 10
Code 39 bar code
for human readable
different text or bar code fields. An example
of using bar code fields to create a combo
text field can be seen in the following tag.
To show human readable data with a bar code
that does not allow human readable characters,
create a combo text field from the bar
code data field.
Combo text field
(from bar code data)
Entering a Sample Combo Bar Code Field
Follow the steps for entering combo bar code fields on 2.0-inch long by 2.0inch wide supplies.
NOTE: This sample uses the printer’s factory-set defaults. For more
information about your printer’s configuration, see Chapter 3,
“Configuring the Printer.”
-=Main Menu=-
1. Design Formats
2. Print Labels
3. Configuration
-=Design Menu=-
1.Create New Format
2.Edit Old Format
3.Copy Format
4.Delete Format
Enter Format Name
>_ _ _ _ _ _ _ _ _ _ _ _ _ _
L
1. From the Main Menu, press 1.
2. Press 1 to create a new format.
3. Type COMBO for the format name. Press
e.
Enter Length of
Supply (55-400)
(eg.400 = 4 inches)
>_ _ _
Select Supply Width
1. 1.20 Inches
2. 1.50 Inches
3. 2.00 Inches
Defining Bar Code Fields 6-15
4. Enter 200 for the length of your supply. Press
e.
5. Press 3 for the supply width.
Page 74

Select Type: Fld #1
1. Text Field
2. Bar Code Field
3. Constant Text
4. Line
5. Finished
6. Press 1 to define a text field.
Select Field Class
1. Simple Field
2. Price Field
3. System Date/Time
4. Combo (Merged)
Numeric or
Alpha-Numeric Data?
A/N > _
L
Enter Max. Length
> _ _ _
Enter Min. Length
> _ _ _
Enter Field Prompt
> _ _ _ _ _ _ _ _ _ _ _ _ _ _ _ _
L
Enter Fixed Data
Press ENTER if none
> _ _ _ _ _ _ _ _ _ _ _ _ _ _ _ _
L
Enter Row #
> _ _ _
7. Press 1 to define a simple field.
8. Press N (alpha-numeric).
9. Type 6 as the maximum number of characters
in the field. Press e.
10. Type 6 as the minimum number of characters
in the field. Press e.
11. Type ENTER DATA 1. Press e.
12. Press e, for no fixed data.
13. Type 10 for the row location. Press e.
Enter Col. #
> _ _ _
14. Type 10 for the column location. Press
e.
6-16 Defining Bar Code Fields
Page 75

- = Select Font = -
1. CG Trium 6.5 1000
2. CG Trium 8 pt 1001
3. CG Trium 10p 1002
4. CG Trium 12p 1003
5. CG Trium 18 p 1004
6. CG Trium 22p 1005
7. CG TrCon 6.5 1006
8. CG TrCon 8 pt 1007
9. CG TrCon 10p 1008
10. CG TrCon 12p 1009
11. CG TrCon 18p 1010
12. CG TrCon 22p 1011
13. LetGoth 6.5 1012
14. LetGoth 9pt 1013
Enter Height Mag for
this font (1-7) > _
Enter Width Mag for
this font (1-7) > _
Set Justification
1. Left (L)
2. Right (E)
3. Center (B)
Top of Field at:
1. Top of Supply
2. Left of Supply
3. Bottom of Supply
4. Right of Supply
15. Select CG Trium 8 pt 1001 font.
16. Press 1 for the height magnification.
17. Press 1 for the width magnification.
18. Press 1 for the alignment of characters in
the field.
19. Press 1 for the field rotation.
Select Edit #1
1. None
2. Make into Price
3. Pad Data Field
4. Extract Chars
5. Strip Chars
6. Extract from Mid
7. Insert Chars
20. Press 1 for no data edits.
8. Make Shoe Size
Select Type: Fld #2
1. Text Field
2. Bar Code Field
3. Constant Text
4. Line
5. Finished
Defining Bar Code Fields 6-17
21. Press 1 to define a text field.
Page 76

Select Field Class
1. Simple Field
2. Price Field
3. System Date/Time
4. Combo (Merged)
22. Press 1 to define a simple field.
Numeric or
Alpha-Numeric Data?
A/N > _
L
Enter Max. Length
> _ _ _
Enter Min. Length
> _ _ _
Enter Field Prompt
> _ _ _ _ _ _ _ _ _ _ _ _ _ _ _ _
L
Enter Fixed Data
Press ENTER if none
> _ _ _ _ _ _ _ _ _ _ _ _ _ _ _ _
L
Enter Row #
> _ _ _
Enter Col. #
> _ _ _
23. Press N (alpha-numeric).
24. Type 6 as the maximum number of characters
in the field. Press e.
25. Type 6 as the minimum number of characters
in the field. Press e.
26. Type ENTER DATA 2. Press e.
27. Press e, for no fixed data.
28. Type 50 for the row location. Press e.
29. Type 10 for the column location. Press
e.
- = Select Font = -
1. CG Trium 6.5 1000
2. CG Trium 8 pt 1001
3. CG Trium 10p 1002
4. CG Trium 12p 1003
5. CG Trium 18p 1004
6. CG Trium 22p 1005
7. CG TrCon 6.5 1006
30. Select CG Trium 8 pt 1001 font.
8. CG TrCon 8 pt 1007
9. CG TrCon 10p 1008
10. CG TrCon 12p 1009
11. CG TrCon 18p 1010
12. CG TrCon 22p 1011
13. LetGoth 6.5 1012
14. LetGoth 9pt 1013
6-18 Defining Bar Code Fields
Page 77

Enter Height Mag for
this font (1-7) > _
31. Press 1 for the height magnification.
Enter Width Mag for
this font (1-7) > _
Set Justification
1. Left (L)
2. Right (E)
3. Center (B)
Top of Field at:
1. Top of Supply
2. Left of Supply
3. Bottom of Supply
4. Right of Supply
Select Edit #1
1. None
2. Make into Price
3. Pad Data Field
4. Extract Chars
5. Strip Chars
6. Extract from Mid
7. Insert Chars
8. Make Shoe Size
Select Type: Fld #3
1. Text Field
2. Bar Code Field
3. Constant Text
4. Line
5. Finished
32. Press 1 for the width magnification.
33. Press 1 for the alignment of characters in
the field.
34. Press 1 for the field rotation.
35. Press 1 for no data edits.
36. Press 2 to define a bar code field.
- = Select Bar Code = -
1. UPC-A
2. UPC-E
3. Interleaved2of5
4. Code 39 –no c/d
5. Codabar
6. EAN-8
7. EAN-13
Select Field Class
1. Simple Field
2. Price Field
3. System Date/Time
4. Combo (Merged)
For Combo Fields
Enter up to 10
User Field sources.
(Press key) _
37. Press e for UPC-A.
38. Press 4 to define a combo field.
39. Press any key to continue.
Defining Bar Code Fields 6-19
Page 78

Enter Field #
(First is Fld One)
( ENTER when done )
> _ _
40. Type 1 and press e for source field 1.
Enter Start Position
(First is One)
> _ _
Enter # of Chars
> _ _
Enter Field #
(First is Fld One)
( ENTER when done )
> _ _
Enter Start Position
(First is One)
> _ _
Enter # of Chars
> _ _
Enter Field #
(First is Fld One)
( ENTER when done )
> _ _
Enter Fill-Direction
for short
Source Fields:
1 Fill from Left
2 Fill from Right
3 Do not Fill
41. Type 1 and press e for copy start
position 1.
42. Type 6 and press e for 6 characters to
copy.
43. Type 2 and press e for source field 2.
44. Type 1 and press e for copy start
position 1.
45. Type 6 and press e for 6 characters to
copy.
46. Press e to continue.
47. Press 3 to not fill the field.
Enter Fixed Data
Press ENTER if none
> _ _ _ _ _ _ _ _ _ _ _ _
L
Enter Row #
> _ _ _
Enter Col. #
> _ _ _
48. Press e for no fixed data.
49. Type 100 for the row location. Press e.
50. Type 10 for the column location. Press
e.
6-20 Defining Bar Code Fields
Page 79

Enter Density
1. 80/ 2. 120
>_
51. Press 1 for the density (80%).
Enter Bar Height
(Units = Inch/100)
> _ _ _
Top of Field at:
1. Top of Supply
2. Left of Supply
3. Bottom of Supply
4. Right of Supply
Select Edit #1
1. (None)
2. Make into Price
3. Pad Data Field
4. Extract Chars
5. Strip Chars
6. Extract from Mid
7. Insert Chars
8. Make Shoe Size
Select Type:Fld #4
1. Text Field
2. Bar Code Field
3. Constant Text
4. Line
5. Finished
Save current
format? Y/N > _
52. Type 40 for the bar code height (.4”). Press
e.
53. Type 1 for the field rotation.
54. Press e for no edits.
55. Press 5.
56. Press Y to save the format. You return to the
Design Menu.
♦ To print the format, see ”Printing the Sample Combo Bar Code Format.”
♦ To define text fields, see Chapter 5, “Defining Text Fields.”
♦ To define constant text fields, see Chapter 7, “Defining Constant Text
Fields.”
♦ To define line fields, see Chapter 8, “Defining Line Fields.”
Defining Bar Code Fields 6-21
Page 80

Printing the Sample Combo Bar Code Format
After designing your format, print it to see how it looks.
-=Design Menu=-
1.Create New Format
2,Edit Old Format
3.Copy Format
4.Delete Format
-=Main Menu=-
1. Design Formats
2. Print Labels
3. Configuration
Select Format
to Print
-=Format Menu=01 COMBO
02 CODE128
03 UPCA
ENTER DATA 1
_ _ _ _ _ _ _ _ _ _ _ _
ENTER TEXT2
_ _ _ _ _ _ _ _ _ _ _ _
Printed : 1
1. Press b to exit the Design Menu.
2. Press 2 to print your format.
3. Select COMBO. Press e.
4. Type 028028. Press e.
5. Type 885452. Press e. The label
prints.
6. Press the trigger to print another label or
press b to return to the prompt and print
another label.
6-22 Defining Bar Code Fields
Page 81

This sample prints the following label.
Defining Bar Code Fields 6-23
Page 82

Bar Code Specifications
This section contains information specific to the various bar codes you can
select. This information helps you correctly enter the information to create a
bar code field for your format.
UPC Bar Codes
♦ Retailers use UPC (Universal Product Code) bar codes to identify
merchandise.
♦ Maximum and minimum lengths for +2 and +5 bar codes must be equal.
Bar Code
Length
(in characters)
UPC-A 12
UPC-A +2 14
UPC-A +5 17
UPC-A & Price CD 12
UPC-E 7
UPC-E +2 9
UPC-E +5 12
UPCA UPCE
6-24 Defining Bar Code Fields
Page 83

EAN Bar Codes
♦ Some retailers use EAN (European Article Number) bar codes to identify
merchandise.
♦ Maximum and minimum lengths for +2 and +5 bar codes must be equal.
Bar Code
Length
(in characters)
EAN-8 8
EAN-8 +2 10
EAN-8 +5 13
EAN-13 13
EAN-13 +2 15
EAN-13 +5 18
EAN-13 & Price CD 13
EAN-8 EAN-13
Code 128 Bar Codes
♦ Length:0 – 2710 characters
♦ Characters are alphanumeric, including any ASCII characters.
Defining Bar Code Fields 6-25
Page 84

MSI
MSI is a Modified Plessey bar code.
♦ Length: 0 – 14 characters
♦ Uses only numeric data.
♦ Can use a second optional check digit.
Interleaved 2 of 5 Bar Codes
Interleaved 2 of 5 is an industrial bar code. You can use it with or without a
barrier bar.
♦ Length: 0 – 2710 characters (must be numeric)
♦ The length must be even. If not, the software adds a zero at the end.
Interleaved 2 of 5
Interleaved 2 of 5
with the Barrier Bar
Code 39 Bar Codes
Code 39 is an industrial bar code. You can use Code 39 with no check digit
and Code 39 – Mod 43.
♦ Uses alphanumeric data, certain symbols, and start/stop characters.
♦ Length: 0 – 2710 characters
6-26 Defining Bar Code Fields
Page 85

Codabar Bar Codes
Codabar is an industrial bar code with numeric printing and special start/stop
characters. You can use the start/stop characters to join multiple bar codes
when scanning.
♦ To join two bar codes, the last character of one bar code and the first
character of the other bar code must be d.
♦ Other start and stop characters can be a, b, and c.
♦ Length: 0 – 26 characters
Code 93
♦ Uses data from the 128 character ASCII set.
♦ Uses two check digits.
♦ Length: 0 - 2710 characters
Defining Bar Code Fields 6-27
Page 86

6-28 Defining Bar Code Fields
Page 87

DEFINING CONSTANT TEXT
7
FIELDS
A constant text field is a set of fixed characters that prints on all labels.
Define each constant text field separately. Use constant text fields for data
that is the same, so the operator does not have to enter the repetitive data
for each label. For example, a store number should be in a constant text
field, whereas the department number should be in a text field. The store
number is the same for each label. The department number varies per label.
NOTE: The constant text field is not assigned a field number, but is counted
as a field (keep this in mind, as the printer allows a maximum of 50
fields per format). Data edits do not apply to constant text fields.
Constant text fields are very similar to text fields.
NOTE: All samples shown in this chapter are created using 2.0-inch long by
2.0-inch wide supplies.
About Constant Text Fields
Read the following information to become familiar with the prompts for
constant text fields. Valid ranges for the prompts are listed as well as
information about using constant text fields.
Format Name
Format Number
Format
Description
Supply Length
Depending on your printer’s configuration, enter a name for
the format. For more information about your printer’s
configuration, see Chapter 3, “Configuring the Printer.” The
maximum number of characters for the format name is 16.
Reserved for future use. (Depending on your printer’s
configuration, enter a number for the format. The format
number range is 1 – 99.)
Reserved for future use. (Depending on your printer’s
configuration, enter a description for the format.)
The length of your loaded supply. Measure from the top of
one black mark to the top of the next black mark. The
standard supply lengths are: 55, 78, 110, 150, 200, 300, or
400 inches.
Defining Constant Text Fields 7-1
Page 88

Supply Width
The width of your loaded supply. Choices include 1.20, 1.50,
or 2.00 inches.
Field Type Choices include text, bar code, constant text, and line.
Fixed Data
Row
In situations where the same data appears on all labels, you
can enter the repetitive data as fixed data. The operator does
not enter the data. The maximum number of characters is 40;
however, each field has a maximum length defined, so the
fixed data must be below that maximum.
Fixed data is stored with the format and automatically
displayed with the prompt during data entry.
The horizontal line where printing begins. For monospaced
fonts, distance from the bottom of print area to the pivot point.
The pivot point varies depending on how text is justified.
For proportionally spaced fonts, distance
from the bottom of print area to baseline of
characters in field. The range is 0 – 365.
Column
The vertical line where printing begins. Type
the column position for the field. The distance
from the left edge of the print area to the
pivot point is the column location. The
range is 0 – 183.
7-2 Defining Constant Text Fields
Baseline
Baseline
Page 89

Gap
Depending on your printer’s configuration, enter the number
of dots between characters. For more information about
your printer’s configuration, see Chapter 3, “Configuring the
Printer.”
The gap range is 0 – 9. For mono-spaced fonts, the
additional spacing is added to the existing inter-character
gap. This is also true for proportionally spaced fonts, but
the inter-character gap varies with character combinations.
Any number other than 0 affects your field width. Default
spacing:
Letter Gothic Bold 6pt 1 dot
Letter Gothic Bold 9pt 2 dots
All other fonts vary with each letter
Use the default unless you want to create a special effect,
such as P R I C E (additional character spacing) in a
field.
Font
Height
Magnification
Width
Magnification
The style of font for your format. Choices include CG
Triumvirate Bold 6.5, 8, 10, 12, 18, or 22 point; CG
Triumvirate Bold Condensed 6.5, 8, 10, 12, 18, and 22 point;
and Letter Gothic 6.5 and 9 point.
Height magnifier for the selected font. Use a magnifier of 1
with proportionally spaced fonts, because characters lose
smoothness at higher magnifications. The range is 1 – 7.
Width magnifier for the selected font. Proportionally spaced
fonts do not have a set width. The range is 1 – 7.
Defining Constant Text Fields 7-3
Page 90

attribute B
attribute O
Font Color
Line field
not
blocked
out by
transparent
field using
Line field
blocked
out by
opaque
field using
Depending on your printer’s configuration, enter the color of
the selected font. For more information about your printer’s
configuration, see Chapter 3, “Configuring the Printer.”
Solid black print should not exceed 30% on a given square
inch of the label, or printhead life may be decreased. There
are two types of field color overlay attributes:
Transparent The overlay field (text or
constant text) does not block
out or “erase” existing fields.
Opaque The overlay field blocks out or
“erases” existing fields.
Field placement is an important consideration when using
field color attributes. If a line field is defined before the
overlay (text or constant text) field, the line field is blocked
out by the overlay field, depending on the overlay field's
color attribute. If a line field is defined after the overlay
field, the line field is not blocked out by the overlay field,
regardless of the overlay field's color attribute.
Choices include Black Opaque, White Opaque, Black
Transparent and White Transparent.
Justification
Character Rotation
7-4 Defining Constant Text Fields
Alignment of the text within the field. Choices include Left
(L), Right (E), and Center (B). Fonts 1012 and 1013 (Letter
Gothic 6.5 and 9 pt) default to L (left).
Depending on your printer’s configuration, enter the
character rotation of the selected field. For more information
about your printer’s configuration, see Chapter 3,
“Configuring the Printer.” Choices include Top of Field, Left
of Field, Bottom of Field, and Right of Field.
The field or supply does not rotate, only the characters do.
See “ABCD” in the example below.
Page 91

Field Rotation
Rotation of the
selected field.
Choices include:
Top of Supply, Left
of Supply, Bottom
of Supply, and
Right of Supply.
Entering a Sample Constant Text Field
We will create a sample format,
CONSTANT (2.0-inch long by 2.0-inch
wide) and a sample constant text field.
- = Main Menu = -
1. Design Formats
2. Print Labels
3. Configuration
- = Design Menu = -
1. Create New Format
2. Edit Old Format
3. Copy Format
4. Delete Format
Enter Format Name
> _ _ _ _ _ _ _ _ _ _ _ _ _
L
Enter Length of
supply (55 – 400)
(eg. 400 = 4 inches)
> _ _ _
Select Supply Width
1. 1.20 Inches
2. 1.50 Inches
3. 2.00 Inches
1. Press 1 to design your formats.
2. Press 1 to create a new format.
3. Type CONSTANT. Press e.
4. Type 200 for the length of your supply. Press
e.
5. Press 3 for the supply width.
Defining Constant Text Fields 7-5
Page 92

Select Type: Fld #1
1. Text Field
2. Bar Code Field
3. Constant Text
4. Line
5. Finished
6. Press 3 to define a constant text field.
Enter Fixed Data
Press ENTER if none
> _ _ _ _ _ _ _ _ _ _ _ _ _ _ _ _
L
Enter Row #
> _ _ _
Enter Col. #
> _ _ _
- = Select Font = -
1. CG Trium 6.5 1000
2. CG Trium 8 pt 1001
3. CG Trium 10p 1002
4. CG Trium 12p 1003
5. CG Trium 18 p 1004
6. CG Trium 22p 1005
7. CG TrCon 6.5 1006
8. CG TrCon 8 pt 1007
9. CG TrCon 10p 1008
10. CG TrCon 12p 1009
11. CG TrCon 18p 1010
12. CG TrCon 22p 1011
13. LetGoth 6.5 1012
14. LetGoth 9pt 1013
Enter Height Mag for
this font (1-7) > _
7. Type STYLE NO. and press e.
8. Type 70 for the row location. Press e.
9. Type 10 for the column location. Press
e.
10. Select CG Trium 8 pt 1001. Press e.
11. Press 1 for the height magnification.
Enter Width Mag for
this font (1-7) > _
Set Justification
1. Left (L)
2. Right (E)
3. Center (B)
Top of Field at:
1. Top of Supply
2. Left of Supply
3. Bottom of Supply
4. Right of Supply
12. Press 1 for the width magnification.
13. Press 1 for the alignment of characters in
14. Press 1 for the field rotation.
7-6 Defining Constant Text Fields
the field.
Page 93

Select Type:Fld#2
1. Text Field
2. Bar Code Field
3. Constant Text
4. Line
5. Finished
15. Press 5.
Save current
format? Y/N > _
16. Press Y to save the format. You return to the
Design Menu.
♦ To print the format, see “Printing the Sample Constant Text Format.”
♦ To define text fields, see Chapter 5, “Defining Text Fields.”
♦ To define bar code fields, see Chapter 6, “Defining Bar Code Fields.”
♦ To define line fields, see Chapter 8, “Defining Line Fields.”
Defining Constant Text Fields 7-7
Page 94

Printing the Sample Constant Text Format
After designing your format, print it to see how it looks.
- = Design Menu = -
1. Create New Format
2. Edit Old Format
3. Copy Format
4. Delete Format
- = Main Menu = -
1. Design Formats
2. Print Labels
3. Configuration
Select Format
to Print
- = Format Menu - =
01 CONSTANT
02 COMBO
03 SIZE
Printed: 1
1. Press b to exit the Design Menu.
2. Press 2 to print your format.
3. Select CONSTANT and press e. The
label prints.
4. Press the trigger to print another label or
press b until you return to the Format
Menu.
This sample prints the following label.
7-8 Defining Constant Text Fields
Page 95

DEFINING LINE FIELDS
8
Use lines to form borders or mark out original prices. Define each
line separately.
NOTE: This field is not assigned a field number, but is counted as a field
(keep this in mind, as the printer allows a maximum of 50 fields per
format).
You can define any line length and a thickness up to 10 dots, as long as the
solid black print does not exceed 30% of any given square inch of the label.
Data edits do not apply to line fields.
NOTE: All samples shown in this chapter are created using 2.0-inch long by
2.0-inch wide supplies.
About Line Fields
Read the following information to become familiar with the prompts for line
fields. Valid ranges for the prompts are listed as well as information about
using line fields.
Format Name
Format Number
Format
Description
Supply Length
Supply Width
Field Type Choices include text, bar code, constant text, and line.
Depending on your printer’s configuration, enter a name for
the format. For more information about your printer’s
configuration, see Chapter 3, “Configuring the Printer.” The
maximum number of characters for the format name is 16.
Reserved for future use. (Depending on your printer’s
configuration, enter a number for the format. The format
number range is 1 – 99.)
Reserved for future use. (Depending on your printer’s
configuration, enter a description for the format.)
The length of your loaded supply. Measure from the top of
one black mark to the top of the next black mark. The
standard supply lengths are: 55, 78, 110, 150, 200, 300, or
400 inches.
The width of your loaded supply. Choices include 1.20, 1.50,
or 2.00 inches.
Defining Line Fields 8-1
Page 96

Line Type
Choices include segment or vector. With segments, you
choose the starting point and ending point. With vectors, you
choose the starting point, the angle, and the length of the line.
Start Row
Start Column
End Row
End Column
Line Angle
Line Length
The horizontal line where printing begins.
The range is 0 – 365.
The vertical line where printing begins. The
range is 0 – 183.
For segment lines only, the horizontal ending point for the
line. The range is 0 – 365. On horizontal lines, this value
must match the value for row.
For segment lines only, the vertical ending point for the line.
The range is 0 – 183. On vertical lines, this value must
match the value for column.
For vector lines only, choices include rotating the line 0, 90,
180, or 270 degrees to the left.
For vector lines only, specifies how long the line is. The
range depends on the length and/or width of your supply and
the non-print zone.
Thickness
8-2 Defining Line Fields
The thickness of the line. The range is 1 – 10. As thickness
increases, the line fills upward on horizontal lines or to the
right on vertical lines.
Page 97

Entering a Sample Line Field (Segments)
We will create a sample format, LINE
(2.0-inch long by 2.0-inch wide) and a
sample segment line field.
- = Main Menu = -
1. Design Formats
2. Print Labels
3. Configuration
- = Design Menu = -
1. Create New Format
2. Edit Old Format
3. Copy Format
4. Delete Format
Enter Format Name
> _ _ _ _ _ _ _ _ _ _ _ _ _
L
Enter Length of
supply (55 – 400)
(eg. 400 = 4 inches)
> _ _ _
Select Supply Width
1. 1.20 Inches
2. 1.50 Inches
3. 2.00 Inches
1. Press 1 to design your formats.
2. Press 1 to create a new format.
3. Type LINE for the format name. Press e.
4. Type 200 for the length of your supply. Press
e.
5. Press 3 for the supply width.
Defining Line Fields 8-3
Page 98

Select Type: Fld #1
1. Text Field
2. Bar Code Field
3. Constant Text
4. Line
5. Finished
6. Press 4 to define a line field.
Is line Segment or
Vector? S/V >
Enter Row #
for First Point
> _ _ _
Enter Col. #
for First Point
> _ _ _
Enter Row #
for Last Point
> _ _ _
Enter Col. #
for Last Point
> _ _ _
Enter Thickness
(2 = 0.01 inch)
> _ _
Select Type:Fld#2
1. Text Field
2. Bar Code Field
3. Constant Text
4. Line
5. Finished
Save current
format? Y/N > _
7. Press S.
8. Type 48 for the row location. Press e.
9. Type 10 for the column location. Press
e.
10. Type 48 for the end row location. Press
e.
11. Type 80 for the end column location. Press
e.
12. Type 3 and press e.
13. Press 5.
14. Press Y to save the format. You return to the
Design Menu.
♦ To print the format, see “Printing the Sample Line (Segment) Format.”
♦ To define a text field, see Chapter 5, “Defining a Text Field,” for more
information.
♦ To define bar code fields, see Chapter 6, “Defining Bar Code Fields.”
♦ To define constant text fields, see Chapter 7, “Defining Constant Text
Fields.”
8-4 Defining Line Fields
Page 99

Printing the Sample Line (Segment) Format
After designing your format, print it to see how it looks.
- = Design Menu = -
1. Create New Format
2. Edit Old Format
3. Copy Format
4. Delete Format
1. Press b to exit the Design Menu.
- = Main Menu = -
1. Design Formats
2. Print Labels
3. Configuration
Select Format
to Print
- = Format Menu - =
01 LINE
02 CONSTANT
03 COMBO
04 SIZE
Printed: 1
2. Press 2 to print your format.
3. Select LINE and press e. The label
prints.
4. Press the trigger to print another label or
press b until you return to the Format
Menu.
This sample prints the following label.
Defining Line Fields 8-5
Page 100

Entering a Sample Line Field (Vectors)
We will create a sample format,
LINE (2.0-inch long by 2.0-inch
wide) and a sample vector line field.
- = Main Menu = -
1. Design Formats
2. Print Labels
3. Configuration
- = Design Menu = -
1. Create New Format
2. Edit Old Format
3. Copy Format
4. Delete Format
Enter Format Name
> _ _ _ _ _ _ _ _ _ _ _ _ _
L
Enter Length of
supply (55 – 400)
(eg. 400 = 4 inches)
> _ _ _
Select Supply Width
1. 1.20 Inches
2. 1.50 Inches
3. 2.00 Inches
Select Type: Fld #1
1. Text Field
2. Bar Code Field
3. Constant Text
4. Line
5. Finished
1. Press 1 to design your formats.
2. Press 1 to create a new format.
3. Type LINE2 for the format name. Press
e.
4. Type 200 for the length of your supply. Press
e.
5. Press 3 for the supply width.
6. Press 4 to define a line field.
8-6 Defining Line Fields
 Loading...