

Page 1

QUICK REFERENCE
Use this
Sport™ 3R 9430R Printer. More information can be found in the
Operator’s Handbook
CD-ROM.
Quick Reference
and
along with your Paxar Monarch Sierra
Programmer’s Manual
, included on the
Reading the LED
This table explains the LED indicators.
LED Indicators Status
Red or
Orange
Amber
Green On
LED Indicators
On
On
Off The battery is fully charged.
The printer has an error and is not ready to
accept data.
The battery is charging at a fast rate. If the
battery voltage is below 5.0V, the battery is
“trickle” charged until the battery reaches
5.0V.
The printer is on and ready to accept data.
If there is no activity for longer than
20-30 seconds, the printer goes into sleep
mode to conserve the battery. The printer
“wakes up” when it receives any information
from the host or you press the power (P)
button.
With Bluetooth printers, the printer has a
mode where it can stay on all the time.
Installing the Battery
One battery may be included with the
printer. The printer’s battery must be
charged before using it.
1. Unlock the battery door by sliding
down the tabs using your thumbs.
2. Open the battery door.
TC9430RQR Rev. AC 11/03 2003 Paxar Americas, Inc. All rights reserved.
Tab
Page 2
3. Insert the battery with contact end first.
4. Close the battery door.
5. Lock the battery door by sliding
up the tabs.
To remove the battery, partially
open the battery door and tip out
the battery. If the battery door is
completely open, the hinge prevents
the battery from falling out.
Charging the Battery
The printer’s battery must be charged before using it. The battery
can be charged
♦ using the single or four-station charger.
♦ inside the printer using
the plug-in charger for
select printers. However,
not all printers allow
the battery to be
charged inside the
printer.
1. Plug the cable into the
socket located on the side of
the printer.
2. Insert the plug-in charger into an electrical outlet. Charging time
is approximately 1.5 hours.
Power
Feed
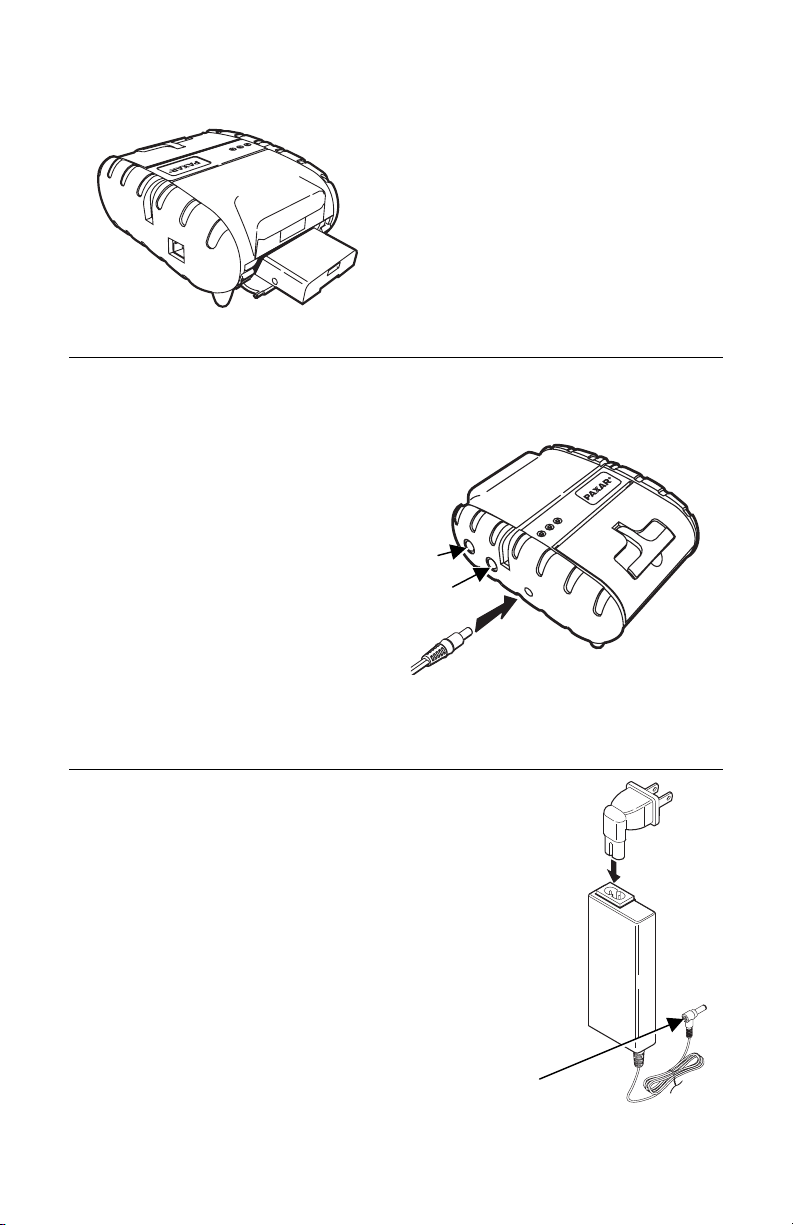
Using the AC Adapter
Some printers use an AC adapter, which allows you
to use the printer while it is plugged into a wall
outlet. Using the AC adapter eliminates the need to
charge the battery, since the printer operates on AC
current instead.
1. Connect the plug to the AC adapter.
2. Plug the cable into the socket located on the side
of the printer.
3. Plug the AC adapter into an electrical outlet.
Connects to printer
2
Page 3

Connecting the Printer
1. Plug your host into the printer’s RS232
port using a modular connector.
2. Turn on the printer.
3. Make sure the DIP switches are set to
match the communication
values on your host.
RS232 Port
Loading Supplies
The printer can print text, bar codes,
and some limited graphics on thermal
direct receipt paper.
1. Lift up the “T” lever on the supply
door and wrap your fingers around
it.
2. Pull up firmly on the supply door to
open it.
“T” Lever
3. Drop the supply into the
well. Make sure the supply
unwinds from the bottom.
Supply Door
4. Position the supply between
the printhead guides.
5. Make sure 2-3 inches of supply extends past the printhead.
6. Close the supply door.
Tearing Supply
The printer’s supply door acts as a
tear bar. Tear down against the tear
bar to remove receipts.
Do not tear supply up against the
printhead or sideways, because
the supply door may open.
Tear Bar
3
Page 4

Troubleshooting
If you cannot fix a problem, call Technical Support. For optimal
printer performance, we recommend cleaning the printer according
to the directions found in the
Operator’s Handbook
service or assistance, call toll free: 1-800-543-6650 (in the U.S.A.).
See our Web site (www.paxar.com) for additional information.
Problem Action
Does not feed or
has a paper jam.
Does not print. Check or replace the printer’s battery.
Light/heavy
printing or voids
in printing.
Red or Orange
(Error) LED is on.
Paxar is a trademark of Paxar Corporation. Monarch is a registered
trademark of Paxar Americas, Inc. 9430R and Paxar Monarch Sierra Sport
are trademarks of Paxar Americas, Inc.
Remove any jammed supplies. Reload supplies.
Your data stream may include a query for the
battery voltage.
Make sure the supplies are loaded correctly and
not upside down.
Open and then close the supply door evenly. If
both sides of the supply door are not completely
closed, uneven printing may occur.
Verify communications between the host and
printer. See your System Administrator.
The printer’s duty cycle may be exceeded. In
high temperature environments, pause the
printer for one minute after every four inches
printed. If the duty cycle is exceeded, the
printer may not print all of the information that
was sent to it.
NOTE: This is not a continuous batch printer.
Clean the printhead.
Check or recharge the battery. See “Charging
the Battery,” for more information.
Your System Administrator may need to adjust
the print contrast.
Open and then close the supply door evenly. If
both sides of the supply door are not completely
closed, uneven printing may occur.
Check or load supply.
Error reading magnetic card’s data.
The printer’s duty cycle may be exceeded. In
high temperature environments, pause the
printer for one minute after every four inches
printed. If the duty cycle is exceeded, the
printer may not print all of the information that
was sent to it.
NOTE: This is not a continuous batch printer.
4
. For supplies,
 Loading...