


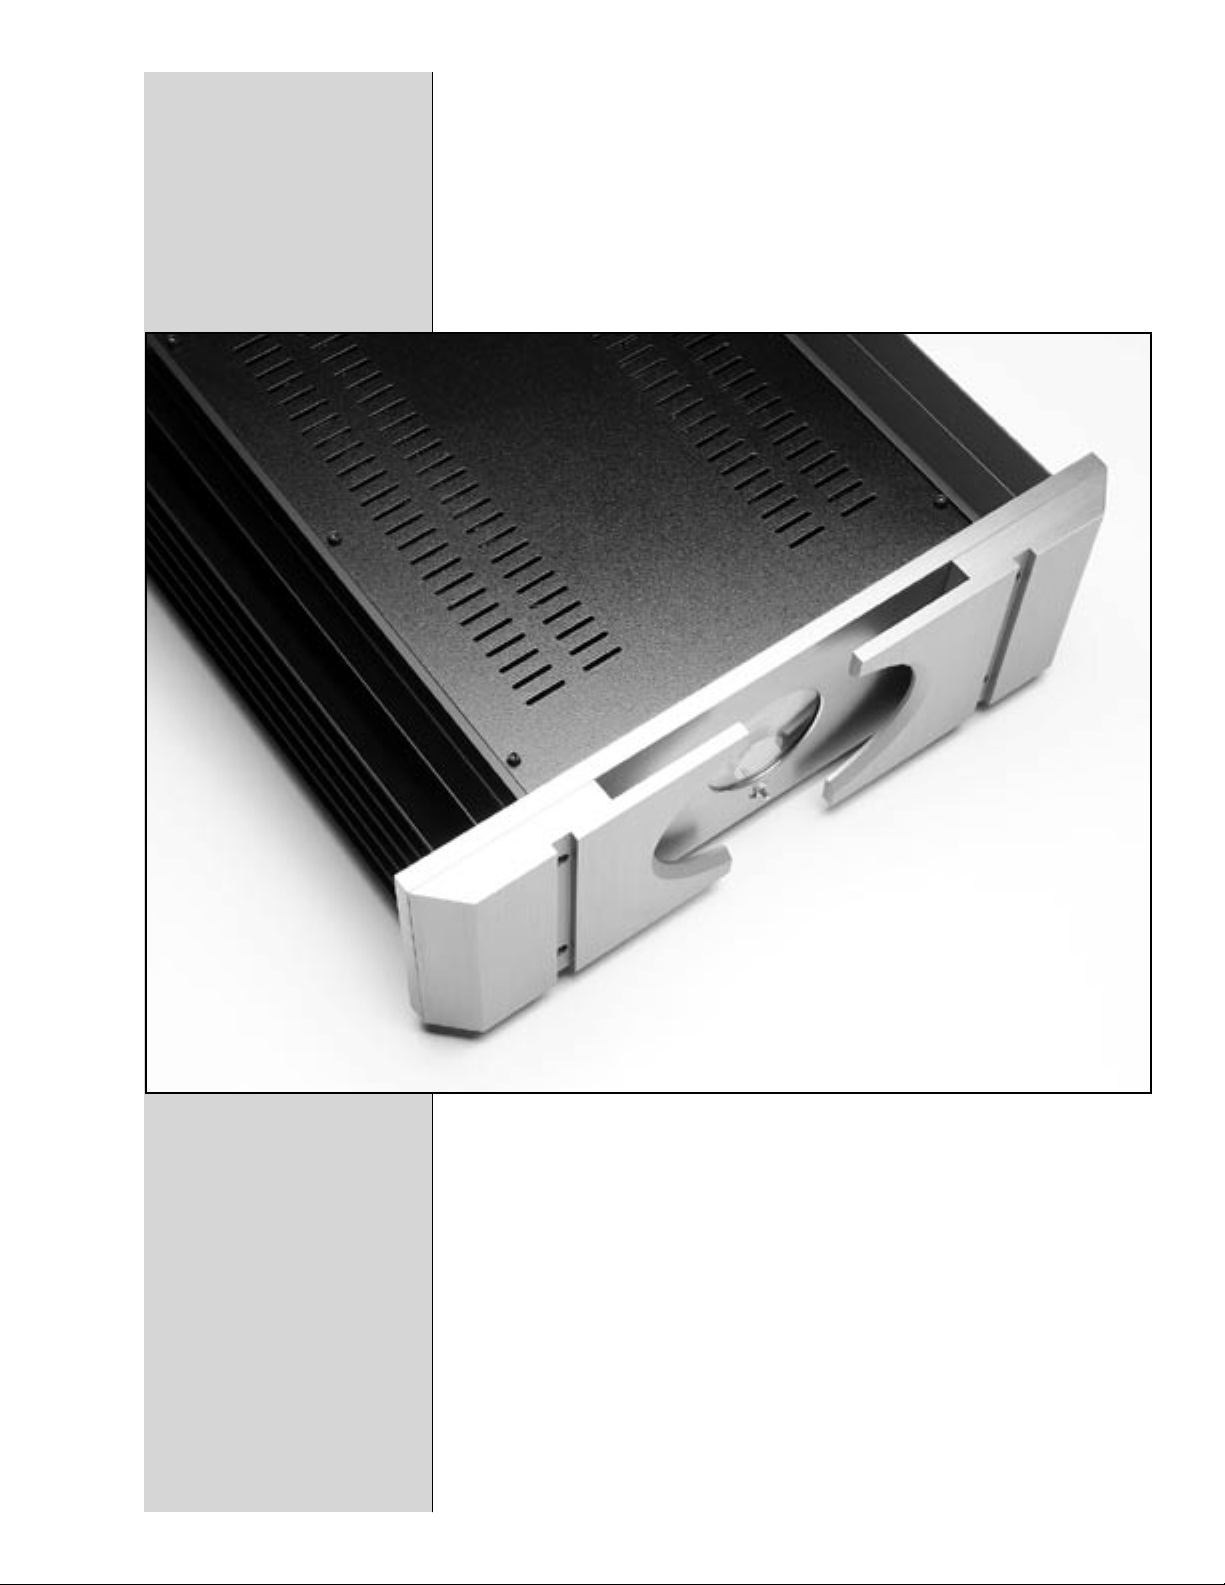
XA60
pass
TM
May 18, 2006
XA60 Owner’s Manual
XA60 Owner’s Manual
1

Introduction
Analog designer Nelson Pass has over the years produced some
truly great solid-state amplifiers, each unique in it’s own way. Not
surprisingly, the Pass Laboratories™ XA60 monoblock amplifier
is no exception. The XA60’s sleek industrial design is a stunning
understatement of artistic form integrated with state of the art
function.
Since their introduction in 1997, the X amplifier series using the
patented Supersymmetry™ circuit topology have been the mainstay
of amplifier offerings from Pass Laboratories™. These amplifiers
are heavily biased Class A/B designs with only two gain stages and
an absolutely minimal component count in the signal path. In spite
of this simplicity and thanks to the unique characteristic of the X
topology, these amplifiers achieve very high power with outstanding
subjective and objective performance.
With the introduction of the XA60 Pass Laboratories™ significantly
raises the performance standard of excellence by introducing an
entirely new series of power amplifiers. The new “XA” series of
amplifiers feature a refined and elegantly simple, very highly biased,
pure Class A mode of operation. This is a new and unique circuit
topology that we descriptively characterize as being Single-ended
Class A. This new topology combines the very best characteristics of
Pass Laboratories™ “X” series amplifiers and the highly rated “Pass
Laboratories Aleph™”. The XA series is the marriage of a highly
refined Aleph™ output stage with the patented Supersymmetry™
“X” front end.
XA60 Owner’s Manual
The emphasis of the XA series is to accentuate performance and
sonic refinement over power. The XA series has the characteristic
warm midrange and sweet top end of the Aleph™ product
conjoined with the extreme dynamic range and definitive bass
control of the X series amplifiers.
The XA60 is packaged in an artistically refined variant of the massive
chassis previously reserved for the 150 watt X-150.5 two channel
stereo amplifier, but running more than twice the Class A bias
current of our A/B amplifiers.
The Pass Laboratories™ XA60 will deliver 60 watts rms into 8
ohms of impedance. This is the amplifiers class A limit, driving
the XA60 harder or reducing the impedance of the load will not
convey any additional power. Driving into a short will not convey
any additional power. These are not design oversights or flaws in
the XA60, but rather a condition of the very highly biased Class A
operation. However; as an interesting point of reference, 60 watts
driving a 87dB/1W/1m speaker will deliver well in excess of 100 dB
2

(very loud) average acoustic signal in a 100 cubic meter room, peaks
will be somewhat higher.
The XA60 has a massive toroidal transformer coupled to a high
current DC reservoir. Recognizing that the XA60’s ability to resolve
microdynamics is best experienced with clean power, the extreme
low-level resolution of the XA-series benefits from a specially
designed power supply that significantly reduces and rejects power
line borne noise.
The XA amps open the sonic soundstage to the very limits of the
recording format. Through the XA60 complex musical passages
reveal themselves in the most dramatic manner. With the XA60 you
will hear everything within the upper octaves, which includes any
recording, source or loudspeaker issues. Keep this in mind when
choosing complementary equipment, remembering that recordings
and the other components in the signal chain will strongly dictate
soundstage width and imaging and likely be the limiting factors in
your listening environment. The room itself will also add its acoustic
signature, and should be considered an audio component.
Requirements
Speaker selection should be strictly a matter of personal taste.
The XA60 is unconditionally stable into any load presented by a
loudspeaker, but will provide less power into other than 8 ohms. The
XA60 accommodates both single ended (RCA) and balanced inputs
(XLR). Input impedance’s are 11 kohm unbalanced and 22 kohm
balanced to permit integration with the widest possible range of
upstream components.
You can position this amplifier anywhere you wish, but it must have
ventilation. We do not recommend placing it in enclosed cabinets
or small closets without means for air to circulate freely. Stacking
these power amplifiers directly upon each other or upon other
audio components is not recommended for the same reason. This
amplifier idles at approximately 300 watts, the equivalent of an
incandescent reading light. At idle most of that energy is dissipated
across the heat sinks, so the heat generated by each XA60 is
equivalent to an incandescent reading light. To dissipate this heat the
product should have about 6 inches clearance to the top and sides for
adequate air circulation.
Let’s talk about power requirements. The amplifier draws about 2.5
amps (continuous rms) at 120 volts out of the wall during operation,
and this reflects mostly the idle current that we run through the
output stage. When not actually intending to play music the XA60
should be left in standby mode. In standby mode it draws only a few
watts of power, that necessary to keep the capacitors charged.
XA60 Owner’s Manual
3

We have provided a standard IEC power cord that fits into the
standard 15 amp IEC receptacle at the rear of the amplifier chassis.
Two XA60’s may be run on a single 15-amp circuit in conjunction
with other audio components. This amplifier is equipped for
operation with an earth ground provided by the users AC outlet.
Never defeat this ground connection. The signal ground of this
amplifier is connected to earth through a power thermistor, which
provides a safety ground but provides protection from irritating
ground loops.
As a safety issue we suggest that the power cord should be the last
cable installed on your power-amplifier. You may, if you wish,
substitute a 15-amp aftermarket power cord for the one we have
supplied. Only use power cords, which meet all local safety standards
and carry acceptance marks from the local regulatory authority. The
power cord should be attached to the amplifier prior to plugging
into house power. Place the rear-mounted switch in the off (down)
position before plugging in this amplifier.
The amplifier’s voltage and current rating are indicated on the
rear panel. It will be either 240 volts, 220 volts, 120 volts or 100
volts, all units protected by a type 3-AG slow blow fuse of the
appropriate ampacity. The operational voltage is not user changeable.
Transformers are input voltage specific and their change is not a
trivial matter.
Setup
The frequency rating of the AC line source is 50 to 60 Hz in all
cases. Please verify that the amplifiers indicated voltage requirements
are consistent with the supplied voltage and current at your location.
Looking at the rear panel you will see the IEC AC power cord
receptacle, a power switch, type 3-AG fuse holder, two pairs of
output connectors which allow for speaker bi-wiring, a single pair of
5 way connectors for remote turn-on, a single RCA input connector
and a single XLR balanced input connector.
Make sure that the rear panel power switch is off (down). Plug
the AC cord into the back of the amplifier, and then into the wall.
Then turn the power switch on (up). The lights in your house may
blink when the power supply charges the capacitors. (Note: The
power switch is never to be used as a “safety device” or “emergency
disconnect” for this product. This device will not provide
comprehensive personal shock protection in the event of a reversed
hot / neutral, lack of grounding or other improper wiring of the
supplied mains voltage.)
XA60 Owner’s Manual
4

On the front panel, the “Standby” LED indicator should be glowing
blue, indicating that AC power is available and the capacitor banks
are charged. The “Power” LED should not be on. If the “Power”
LED is on, don’t get excited, just use the front panel stand-by switch
to go to stand-by mode, with the “Standby” LED on and the “Power
“ LED off.
OK, so the amplifier is sitting there in stand-by mode with just the
single blue LED lit. No speaker connected yet. You can go ahead
and connect the source and speakers. Make sure you are in standby
mode to protect your speakers from transients. The prudent installer
will unplug the XA60’s power cord from the mains while attaching
speaker cables.
To avoid the possibility of short circuits always connect speaker
cables to the speakers prior to connecting to the amplifier. The
output binding posts will accept either bare wire or spades.
(Regulatory agencies in many countries have banned binding posts
that will accept a banana plug, forcing us to abandon this option.)
Make sure that your speaker wires only attach to the outputs of the
amplifier, not to each other and never to the amplifier case.
Some powered subwoofers require an audio signal ground reference
and their makers may suggest that a black speaker terminal is
where this voltage reference might be found. On complementary
designs, which would be typical of all power amps produced by Pass
Laboratories™, this is an incorrect and unsafe assumption. On all
Pass Laboratories™ power amplifiers a reference of 0 volts will be
found only at pin 1 of the XLR input or at the shell of the RCA
input.
Reference connections for these devices require special consideration
when used with our product. If you have such a device, and wish
to use it with our product, please contact our Foresthill, California
factory for specific instructions.... you have been warned.
The amplifier may be driven single-end or balanced, your choice.
Single-ended input will always occur through the RCA connector
and balanced input will always occur through the XLR connector. If
driving the amplifier single-ended leave the supplied jumper in place
between pins 1 & 3 on the input XLR. On the XLR connectors pin
1 is ground, pin two is positive input and pin 3 is inverted (negative)
input. Pin numbers are marked on the XLR. If you re-install the
jumper incorrectly or leave it lying about, the amplifier will not work
properly. You must choose either XLR or RCA inputs it is not
advised to try and run both concurrently.
XA60 Owner’s Manual
5
 Loading...