

Page 1
Car Sail
Model No. ME-9595
Instruction Manual
Manual No. 012-08443A
Page 2

Page 3

Model No. ME-9595
Table of Contents
Equipment List........................................................... 3
Introduction ............................................................. 4
Equipment Setup ........................................................ 4
Suggested Experiments .............................................. 5-8
Experiment 1: Investigating Air Resistance............................................................................... 5-6
Experiment 2: Surface Area and Terminal Velocity.................................................................. 7-8
Sample Data/Results.................................................... 9
Appendix A: DataStudio Instructions ............................... 10
Appendix B: Technical Support ....................................... 11
Appendix C: Copyright and Warranty Information .................. 11
2
®
Page 4

Model No. ME-9595 Car Sail
Car Sail
Model No. ME-9595
Equipment List
7
6
2
3
4
1
5
Included Equipment Replacement
Model Number*
1. 3600 cm2 Sail, mass=290 grams
2. 1800 cm2 Sail, mass=145 grams
3. 900 cm2 Sail, mass=73 grams
4. Sail Bracket
5. Thumbscrew (10-32x 1/2) for mounting sail to bracket
5. Washer for mounting screw to sail
6. Thumbscrews for mounting sail to cart (2)
648-08216
648-08215
648-08214
648-08213
617-001
615-107
613-075
*Use Replacement Model Numbers to expedite replacement orders.
Additional Equipment Required (for experiments)
Any PASCO data acquisition device (
interface)
DataStudio® software
PAScar, GOcar, or Dynamics Cart
Motion Sensor
Base and Support Rod
Dynamics Track
ScienceWorkshop
® or PASPORT
™
ME-6950 or ME-6951 or
various
(See PASCO catalog)
various
(See PASCO catalog)
ME-9430
PS-2103 or CI-6742
ME-9355
ME-6958
®
3
Page 5

Car Sail Model No. ME-9595
Introduction
The Car Sail (ME-9595) allows students to observe the effects of air
resistance on the motion of an object. In addition, the sail(s) can be
fastened to a Dynamics Cart, PAScar, or GOcar and used along with a
Dynamics Track to discover the concept of terminal velocity. A sturdy
mounting bracket is included to which any of the three sails may be
easily attached to a PASCO car. For further investigations, students
can create their own sails from standard cardboard and investigate the
relationship between surface area and terminal velocity.
Equipment Setup
Attaching the Sail to a Cart
1. Use the small thumbscrew (6x 0.25) to mount the base of the bracket to
the cart.
2. Insert the sail into the bracket.
3. Use the large thumbscrew (10-32x 1/2) and washer to attach the sail
to the bracket. (The screw inserts through a hole in the bracket and a
cut hole in the sail.)
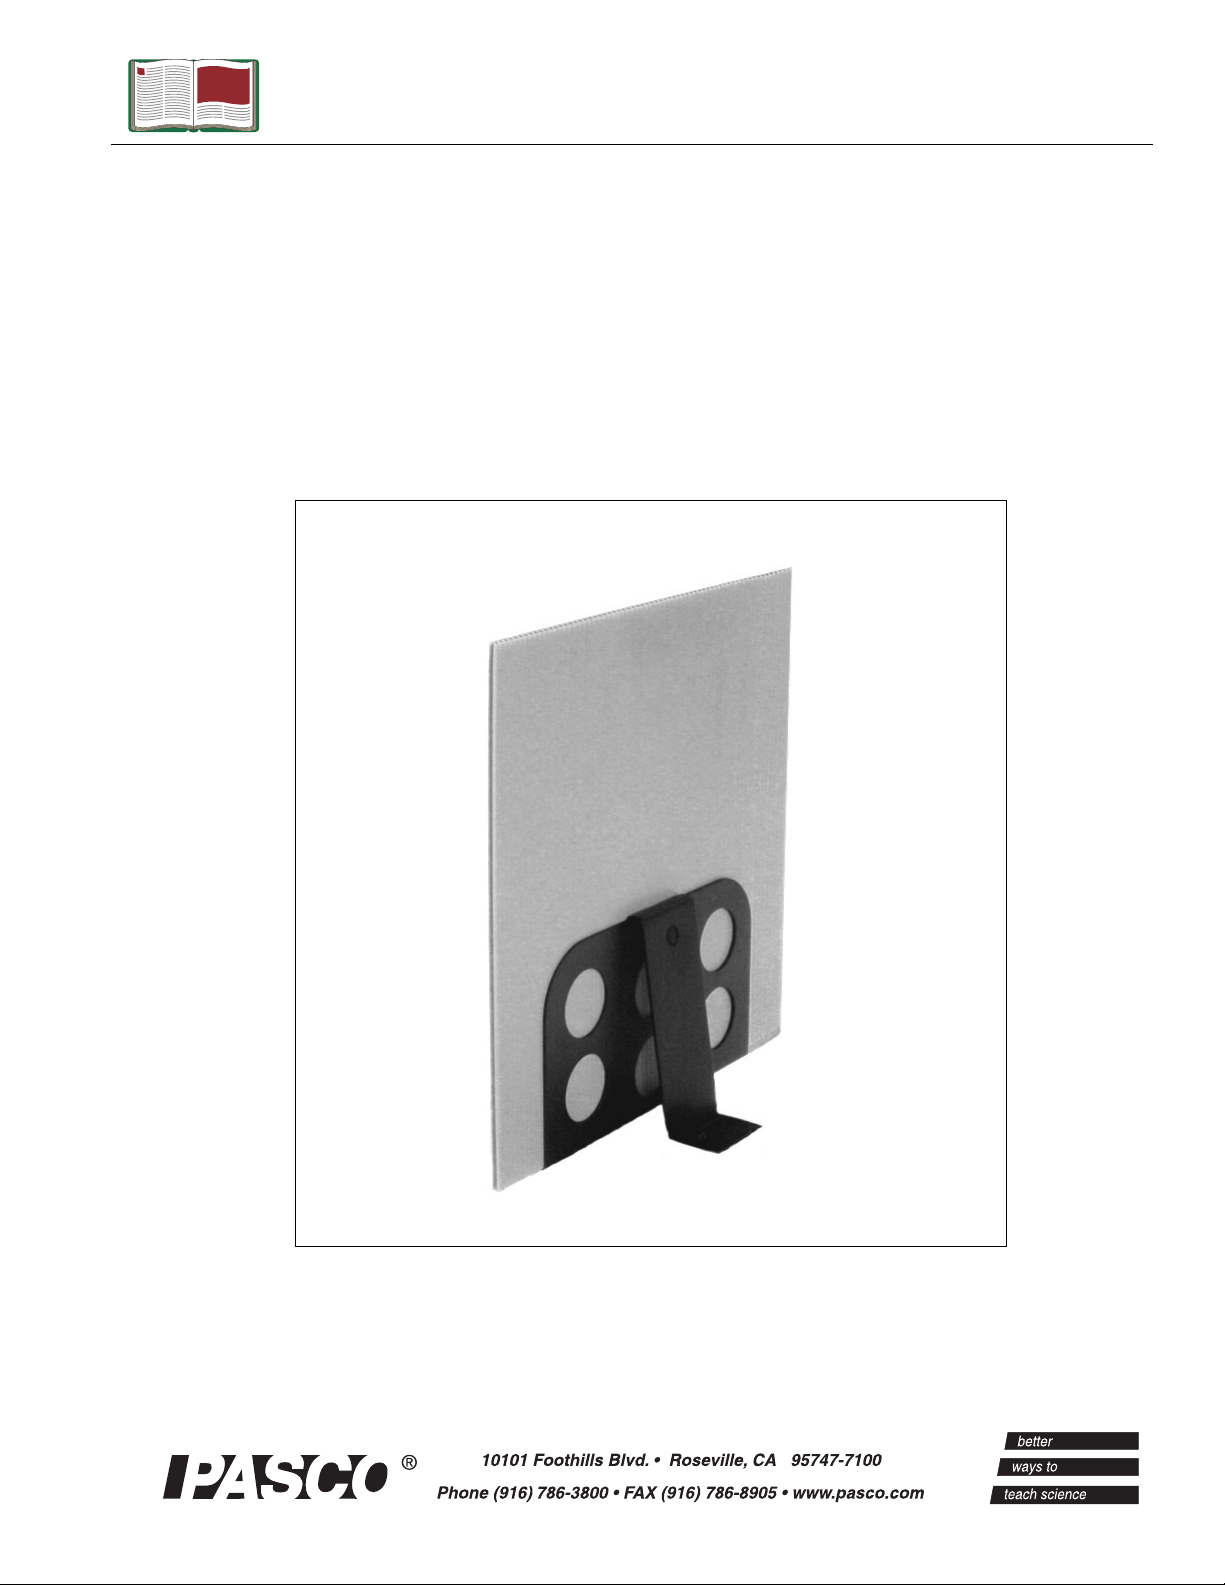
sail
thumb
screw
bracket
Figure 1a: Sail in
Bracket (front view)
bracket
PA S ca r
Figure 1b: Sail in
Bracket (back view)
4
®
Page 6

Model No. ME-9595 Car Sail
Suggested Experiments
Experiment 1: Investigating Air Resistance
Equipment Required:
Car Sail (ME-9595) DataStudio Software, version 1.5
or later (various, see PASCO
catalog)
Motion Sensor (PS-2103 or CI-6742)
PAScar, GOcar, or Dynamics Cart
(ME-6950 or ME-6951 or ME-9430)
Base and Support Rod (ME-9355)
ScienceWorkshop
interface (various, see PASCO
catalog))
Dynamics Track (ME-9453)
or PASPORT
Introduction
In this activity, students will explore the motion of a car as it rolls
down an incline with various sails attached to it.
Procedure
1. Mount a steel rod to a base support.
2. Clamp the Dynamics
Track to the rod, and
incline the Dynamics
Motion
Sensor
Car Sail
Track at a small
angle (5 degrees or
less).
3. Clamp a Motion
Sensor to the upper
end of the rod.
Figure 2: Car (with sail) released
from upper end of Dynamics Track
4. Connect the Motion
Sensor to an interface (PASPORT or ScienceWorkshop) connected
to your computer.
5. Set the range switch on the Motion Sensor to the near (cart) setting.
®
5
Page 7

Car Sail Model No. ME-9595
6. In DataStudio, create a Velocity-Time graph. (For DataStudio setup
instructions, see Appendix A).
7. Place the car on the track (without the bracket or sail).
8. Click the Start button in DataStudio; then release the car. Catch the
car before it reaches the end of the track; then click the Stop button
in DataStudio.
9. Insert a sail and repeat Steps 7-8 for each of the sails in the set.
Analysis
1. Compare the Velocity-Time graphs for each of the four runs.
2. Why does the motion of the car differ for each of the runs?
3. Draw a force diagram for each of the data runs:
a) No sail
b) Small Sail
c) Medium Sail
d) Large Sail
6
®
Page 8

Model No. ME-9595 Car Sail
Experiment 2: Surface Area and Terminal
Velocity
Equipment Required:
Car Sail (ME-9595) DataStudio Software, version 1.5
or later (various, see PASCO
catalog)
Motion Sensor (PS-2103 or CI-6742)
PAScar, GOcar, or Dynamics Cart
(ME-6950 or ME-6951 or ME-9430)
Base and Support Rod (ME-9355)
Introduction
ScienceWorkshop
interface (various, see PASCO
catalog)
Dynamics Track (ME-9453)
or PASPORT
After establishing the concept of terminal velocity in Experiment 1,
students can use this experiment to investigate the relationship
between the surface area of the sail and terminal velocity.
Procedure
1. Mount a steel rod to a base support.
2. Clamp a Dynamics
Track to the rod, and
incline the Dynamics
Motion
Sensor
Motion
Sensor
Car Sail
Car Sail
Track at a small angle
(5 degrees or less).
PA S ca r
3. Clamp a Motion
Sensor to the upper
end of the rod.
Figure 3: Car moving down an incline
4. Connect the Motion
Sensor to an interface (PASPORT or ScienceWorkshop) connected
to your computer.
5. Set the range switch on the Motion Sensor to the near (cart) setting.
6. In DataStudio, create a Velocity-Time graph. (For DataStudio setup
instructions, see Appendix A).
7. Place the car on the track with the smallest sail attached.
®
7
Page 9

Car Sail Model No. ME-9595
8. Click the Start button in DataStudio; then give the car a push down
the incline. This is necessary to be certain that the car reaches its
terminal velocity.
9. Catch the car before it reaches the end of the track; then click the
Stop button in DataStudio.
10. Repeat step 7-9 three times.
11. Repeat steps 7-9 for the other two sails.
Analysis
1. For each of the sails, determine the average terminal velocity.
2. Produce a graph of terminal velocity vs. sail surface area. The
student may need to create several other sails with different surface
areas to establish the relationship between terminal velocity and
sail surface area.
3. What does the graph suggest about the relationship between
terminal velocity and sail surface area?
4. Explain why this relationship does or does not follow physical
intuition.
8
®
Page 10

Model No. ME-9595 Car Sail
Sample Data/Results
(m/s)
®
9
Page 11

Car Sail Model No. ME-9595
Appendix A: DataStudio Instructions (for
ScienceWorkshop
1. Connect the Motion sensor to digital channels 1 and 2 (or 3 and 4) on
the ScienceWorkshop interface.
2. Open DataStudio and create an experiment.
3. In the Sensors list, click and drag the Motion Sensor icon to two
digital channels on the picture of the interface (the same two
numbers to which you have the sensor connected).
4. To create a position vs. time graph, drag the Position icon from the
Data list to a Graph display.
OR
To create a velocity vs. time graph, drag the Velocity icon from the
Data list to a Graph display.
5. To begin data collection, click the Start button.
Sensors)
DataStudio Instructions (for PASPORT
Sensors)
1. Connect a PASPORT interface to a USB-compatible computer.
2. Connect the PASPORT Motion Sensor to a PASPORT interface
(USB Link, PowerLink, etc.).
3. When the PASPORTAL window opens, select “Launch
DataStudio.” A display will automatically open with time(s) on the
x-axis and position (m) on the y-axis.
Note: To create a velocity vs. time graph, click the Setup button to
open the Experiment Setup window. Scroll to the Motion Sensor box
and click in the box next to “Velocity.” From the Data list, drag the
velocity icon over the y-axis on the graph and release the mouse.
4. To begin collecting data, click the Start button.
10
®
Page 12

Model No. ME-9595 Car Sail
Appendix B: Technical Support
For assistance with the ME-9595 Car Sail or any other PASCO
products, contact PASCO as follows:
Address: PASCO scientific
10101 Foothills Blvd.
Roseville, CA 95747-7100
Phone: (916) 786-3800
FAX: (916) 786-3292
Web: www.pasco.com
Email: techsupp@pasco.com
Appendix C: Copyright and Warranty Information
Copyright Notice
The PASCO scientific 012-08443A Car Sail Manual is copyrighted and all rights reserved.
However, permission is granted to non-profit educational institutions for reproduction of any
part of the 012-08443A Car Sail Manual, providing the reproductions are used only for their
laboratories and are not sold for profit. Reproduction under any other circumstances, without
the written consent of PASCO scientific, is prohibited.
Limited Warranty
PASCO scientific warrants the product to be free from defects in materials and workmanship
for a period of one year from the date of shipment to the customer. PASCO will repair or
replace, at its option, any part of the product which is deemed to be defective in material or
workmanship. The warranty does not cover damage to the product caused by abuse or
improper use. Determination of whether a product failure is the result of a manufacturing
defect or improper use by the customer shall be made solely by PASCO scientific.
Responsibility for the return of equipment for warranty repair belongs to the customer.
Equipment must be properly packed to prevent damage and shipped postage or freight
prepaid. (Damage caused by improper packing of the equipment for return shipment will not
be covered by the warranty.) Shipping costs for returning the equipment after repair will be
paid by PASCO scientific.
®
11
 Loading...