

Page 1
Instruction Sheet
for the PASCO
Model ME-6952
PAScar/GOcar Accessories
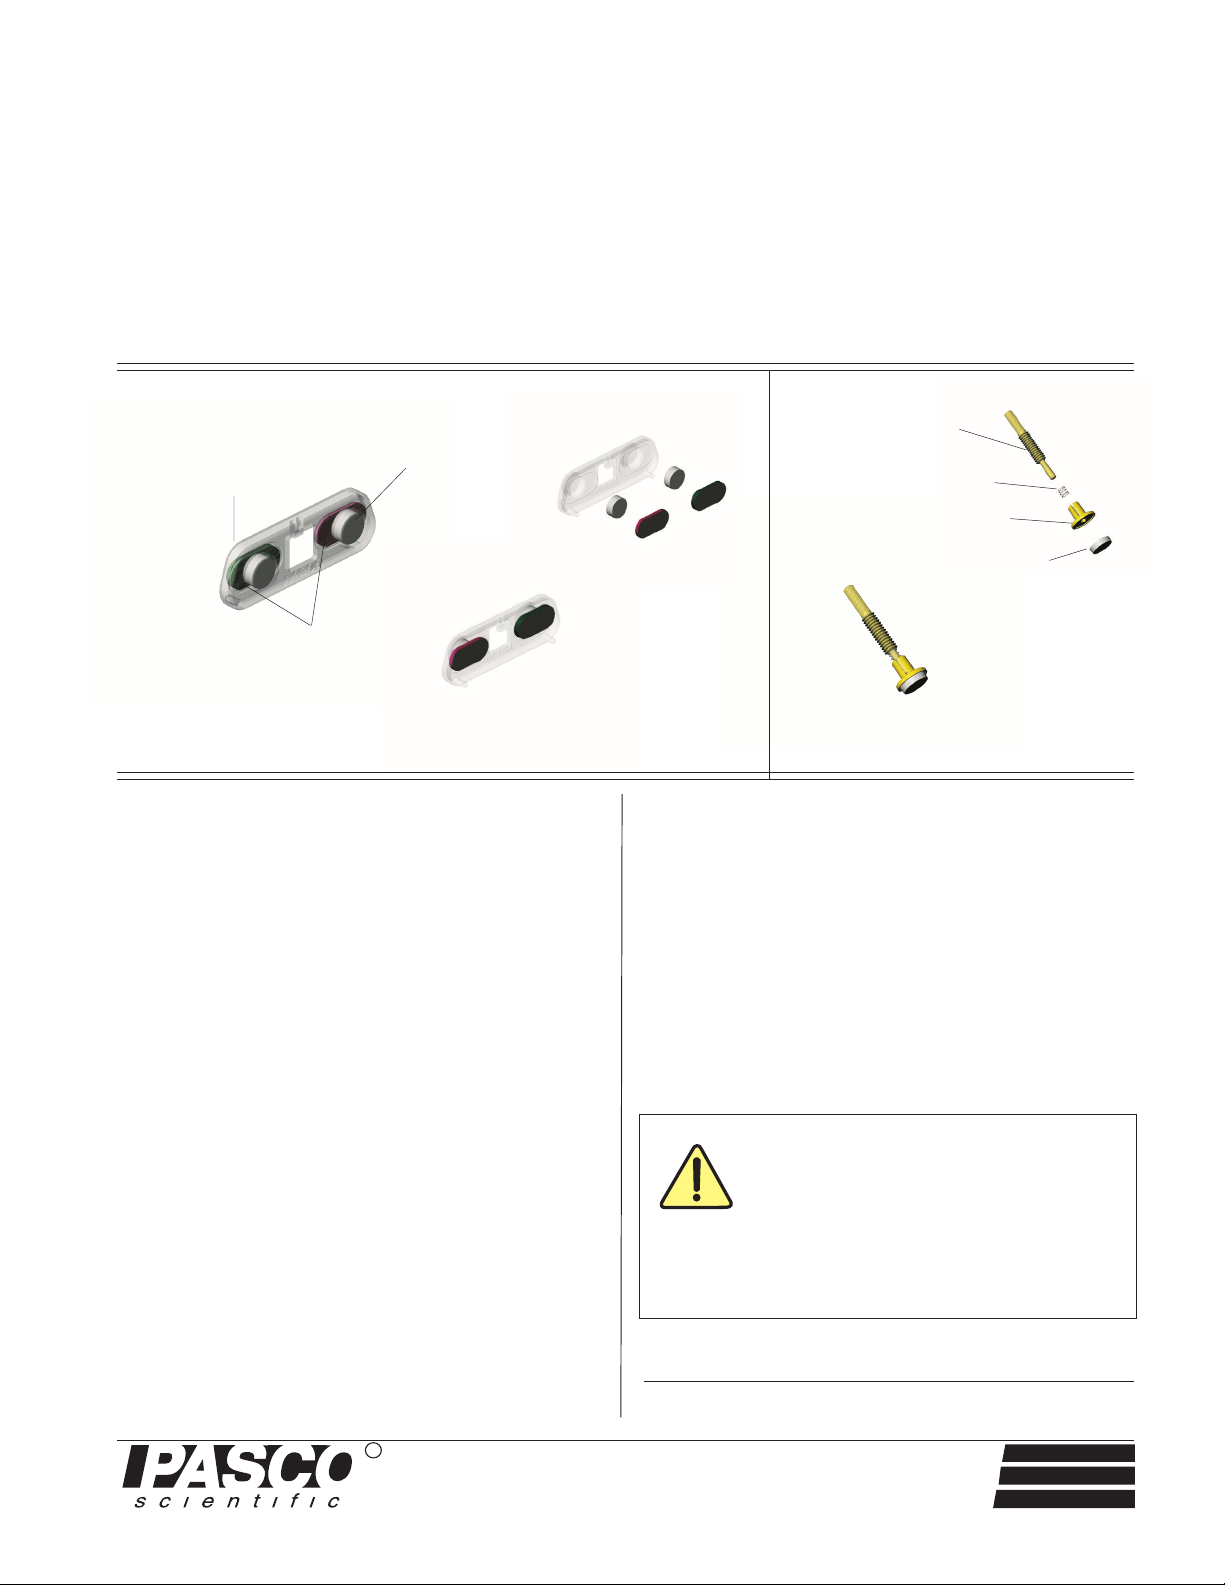
Plastic end piece
012-07672A
11/00
$1.00
Threaded rod
Magnet
Spring
Foot
Velcro pads
Magnetic Bumper
(front view)
Magnetic Bumper
(rear view)
Introduction
The ME-6952 PAScar/GOcar Accessories can be
used with PASCO’s PAScar (ME-6950) or GOcar
(ME-6951). The magnetic bumper piece attaches
to the Velcro™ pads on one end of the PAScar
and can be used for experiments involving elastic
collisions. The friction accessory screw can be
threaded from the underside of the PAScar or
GOcar. The foot pad on the friction accessory
screw rests on any surface, such as a Dynamics
Track, and allows the student to introduce
additional friction to the experiment.
Equipment Included:
• 1 magnetic bumper with Velcro pads and
magnets (part no. 003-07399)
• 1 friction accessory screw with spring (part no.
003-07398)
Exploded view
(rear)
Friction Accessory Screw
(side view)
Velcro foot pad
Exploded view
(side)
Additional Equipment Required:
• 1 (or more) PAScar(s) or GOcar(s)
Specifications:
Magnetic bumper: Plastic-molded, polycarbonate,
transparent color; includes 2 neodymium magnets and
2 Velcro™ pads
Friction accessory screw: 1/4-20 UNC-2A
CAUTION: The neodymium magnets
can be hazardous to electronic or
magnetic devices and will erase computer
disks. Store the magnets away from
computer disks, computer monitors
and television sets.
© 2000 PASCO scientific
R
10101 Foothills Blvd. • P.O. Box 9011 • Roseville, CA 95678-9011 USA
•
Phone (916)786-3800
FAX (916)786-8905 • email: techsupp @ PASCO.com
better
ways to
teach science
Page 2
PAScar/GOcar Accessories 012-07672A
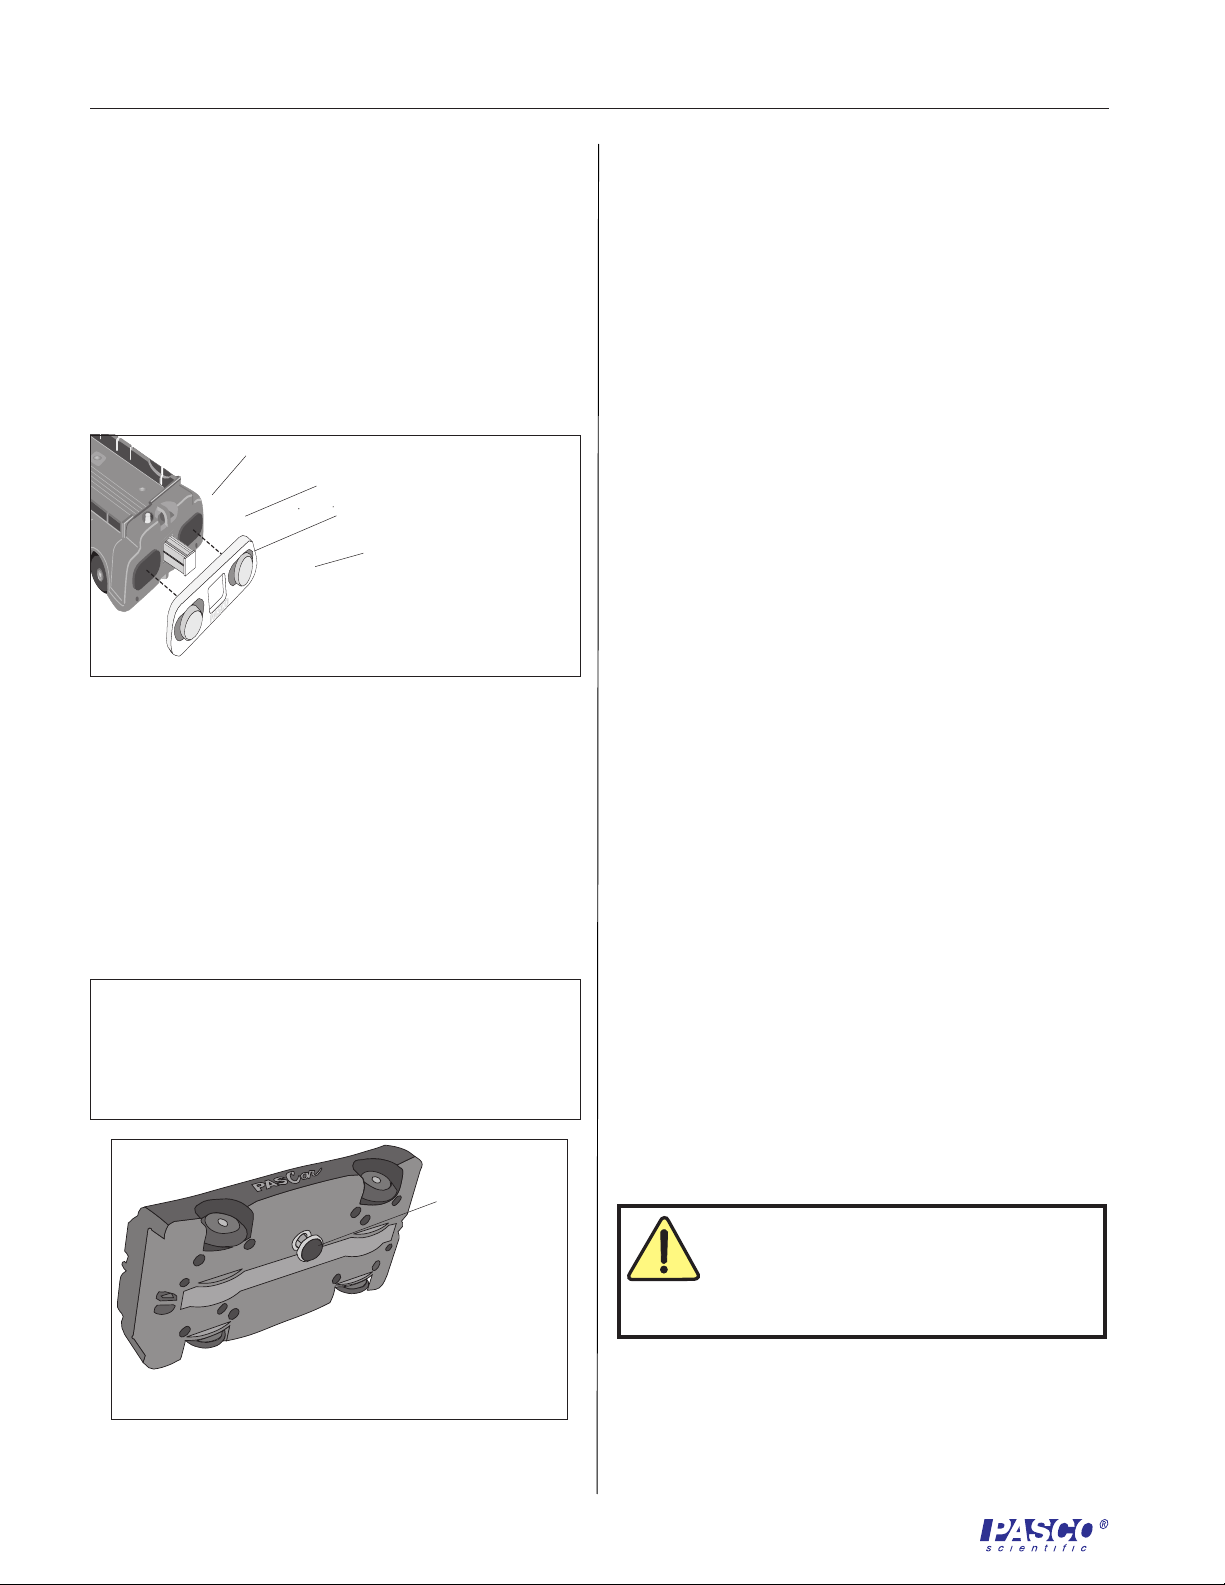
Attaching the Magnetic Bumper Accessory to
the PAScar Model ME-6950
1. Slide Magnetic Bumper Accessory over the
PAScar plunger, pressing the plunger in after
accessory is in place. Velcro pads on the accessory
should align with the Velcro pads on the PAScar.
The hooks on the accessory slide into the two small
holes on the front bumper of the car (see Figure 1).
PAScar
Front bumper
Plunger
Magnetic Bumper
Accessory
Figure 1: Placement of the
Magnetic Bumper
Inserting the Friction Accessory Screw into the
PAScar or GOcar
1. Hold the PAScar/GOcar upside down, such that the
underside of the car is facing up.
2. Insert the threaded rod into the center hole on
the bottom of the car. Rotate the screw
clockwise until the foot pad rests against the
plastic frame (see Figure 2).
NOTE: The metal rod on the screw will protrude out
from the top side of the PAScar or GOcar. To
remove the screw, turn the foot pad counterclockwise
to loosen the thread and pull out.
Limited Warranty
PASCO scientific warrants the product to be free
from defects in materials and workmanship for a
period of one year from the date of shipment to the
customer. PASCO will repair or replace, at its
option, any part of the product which is deemed to
be defective in material or workmanship. The
warranty does not cover damage to the product
caused by abuse or improper use. Determination of
whether a product failure is the result of a
manufacturing defect or improper use by the
customer shall be made solely by PASCO
scientific. Responsibility for the return of
equipment for warranty repair belongs to the
customer. Equipment must be properly packed to
prevent damage and shipped postage or freight
prepaid. (Damage caused by improper packing of
the equipment for return shipment will not be
covered by the warranty.) Shipping costs for
returning the equipment after repair will be paid by
PASCO scientific.
Address: PASCO scientific
10101 Foothills Blvd.
Roseville, CA 95747-7100
Phone: 1-800-772-8700 (inside the U.S.) or
(916) 786-3800
FAX: (916) 786-3292
e-mail: techsupp@pasco.com
Web site: www.pasco.com
Footpad
Figure 2: Placement of the
Friction Accessory Screw
The exclamation point within an
equilateral triangle is intended to alert the
user of important operating and safety
instructions that will help prevent damage
to the equipment or injury to the user.
2
 Loading...