

Page 1
®
Instruction Manual
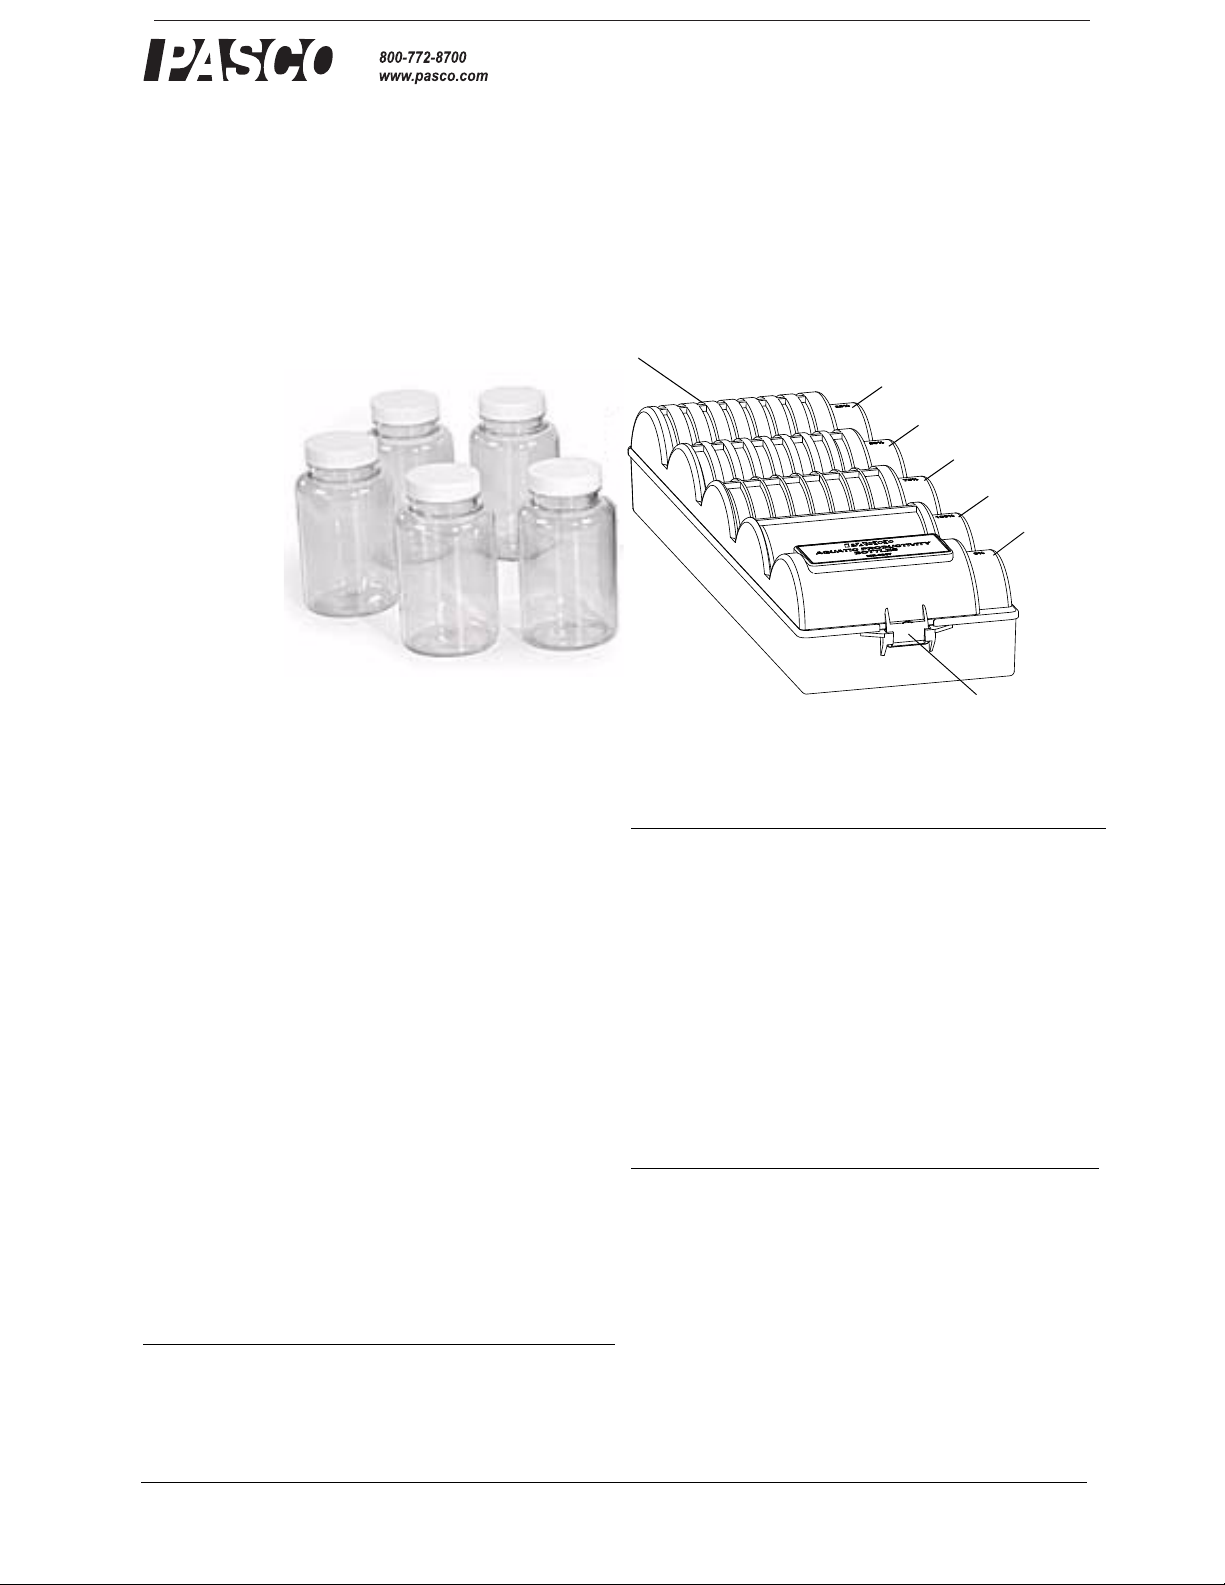
Rack
Bottles
Lid
25%
50%
75%
100%
0%
Latch
012-10941A
Aquatic Productivity Bottles
ME-6937
Introduction
The ME-6937 Aquatic Productivity Bottles rest in a rack
that provides consistent and reliable light control for
quantitative aquatic productivity studies. Students fill
the bottles with algae solution or pond water and then
measure the dissolved oxygen concentration in the solutions before and after incubation in fluorescent light. By
comparing the dissolved oxygen concentrations in each
solution, students learn about the relationship between
light intensity, dissolved oxygen concentration, photosynthetic activity, and the primary productivity of
aquatic ecosystems.
• The identical transparent bottles nest in each of
five rack positions.
• The custom design of the rack shields the bottles
from light by blocking a fixed percentage of light
in 25% increments from zero to 100%.
Sensor Model
PASPORT Dissolved Oxygen Sensor PS-2108
Dissolved Oxygen Sensor CI-6542
Option Model
PASPORT Water Quality Sensor PS-2169
The PASPORT Water Quality Sensor measures temperature, pH, dissolved oxygen, and conductivity. It also
supports Ion Selective Electrodes (ISE) and the Oxygen
Reduction Potential Electrode (ORP). It is designed for
a wide range of water studies.
The PASPORT Dissolved Oxygen Sensor and Water
Quality Sensor work with a PASPORT interface such as
the ones listed below.
PASPORT Interface Model
Xplorer GLX PS-2002
Xplorer PS-2000
PowerLink PS-2001
USB Link PS-2100
SPARK Science Learning System PS-2008
SPARKlink PS-2009
800-772-8700 www.pasco.com
Page 2

Model No. ME-6937 Sample Activity
An option is to use the PS-2169
Water Quality Sensor with its
Dissolved Oxygen Probe.
The CI-6542 Dissolved Oxygen Sensor works with a ScienceWorkshop interface.
ScienceWorkshop Interface Model
ScienceWorkshop 750 CI-7650
ScienceWorkshop 500 CI-6400
See the PASCO catalog or the PASCO web site at www.pasco.com
for more information about PASCO sensors and interfaces.
Sample Activity
Measuring the Effects of Light Intensity on the Dissolved Oxygen Concentration
and Primary Productivity of an Algae Solution
Teacher Preparation
Materials: algae solution or pond water, test tube rack, sterile disposable pipet, large sterile container (9 L), Alga-Gro® concen-
trate, Aquatic Productivity Bottles, wax pencil, sticker or marker, fluorescent light source
• Prepare algae culture (for 8 groups): Each group will need at least 1500 mL of algae culture. If you buy your
algae from a biological supply company, immediately remove it from the container when it arrives. Remove
the test tube from the container, place it in a test tube rack, and remove the cap. Use a disposable pipet to squirt
air bubbles into the test tube and then place the algae in a cool place with indirect light until ready to culture.
• When you are ready to make the culture, obtain a large, sterile container (at least 9 L). Mix all of the algae with
8 L of distilled water and 160 mL of Alga-Gro
®
concentrate. Stir to mix. Place the algae in a cool place in
direct light until ready to use. If you are making culture for a different number of groups, use 20 mL of
Alga-Gro
®
per liter of water and test tube of algae.
• To prevent students from mixing up their bottles of algae after incubation, they should label the bottom of the
bottles. To save time, you can label the bottles prior to the lab. With a wax pencil, sticker or marker, write the
percentages of light on the bottom of each bottle (e.g., 0%, 25%, 50%, 75%, 100%).
• Set up a light source for incubation of the Aquatic Productivity Bottles: Place the bottles far enough from the
light source that they will not be heated. To ensure this, place your hand where you want the bottles to sit. You
should not feel any warmth from the light. Another option is to create a heat sink by placing a large, clear vessel of water between the light source and the bottles.
• If you do not have access to an algae culture, you can use local pond water. In this case, no culturing is necessary. Dissolved oxygen data will vary greatly depending upon the algae source. Pond water may have a higher
level of heterotrophic and decomposing organisms than pure algae culture. These organisms consume oxygen
through respiration and can affect your results
Day One
Materials: algae culture, Dissolved Oxygen Sensor and PASCO Interface, wash bottle, Aquatic Productivity Bottles and rack, fluorescent light, wax pencil, sticker or marker, paper towels
1. Start a new experiment on the data collection system.
2. Connect a dissolved oxygen (DO) sensor to the data collection system.
3. Display Dissolved Oxygen (mg/L) in a digits display.
4. Obtain approximately 1500 mL of algae culture.
2
Page 3

Model No. ME-6937 Sample Activity
5. Calibrate the DO sensor. (See the instructions that came with the sensor and the data collection system.)
6. Begin monitoring data without recording.
7. Remove the DO probe from its storage bottle and carefully insert the probe into the culture. The silver ring on the
probe should be immersed in the culture, but the probe should not be touching the bottom of the beaker.
8. Measure the concentration of DO of the algae culture while gently swirling the probe in the culture.
9. When the DO levels have stabilized on the digits display, note the DO concentration as the initial concentration
of DO. Record the data in Table 1.
10. Rinse the DO probe with the wash bottle and return the probe to its storage bottle.
11. If your teacher has not already done so, label the bottoms of the five Aquatic Productivity Bottles with the per-
centages of light (e.g., 0%, 25%, 50%, 75%, 100%).
12. Fill the bottles, one by one, by completely immersing them in the large vessel of algae culture. While each bottle
is submerged, shake it to ensure that all air bubbles have left the bottle and then place the cap on the bottle while
it is still submerged.
13. Remove the capped bottle from the algae culture and dry it with a paper towel.
14. When all of the bottles are filled, remove the lid of the rack and place the bottles into the matching rack cham-
bers. (To remove the lid, press in on the latches at both ends of the rack.) After putting in the bottles, replace the
lid on the rack. Place the rack with the bottles in the incubation area under a fluorescent light and allow them to
sit undisturbed for 24 hours.
NOTE: Be sure that each labeled bottle goes into the matching rack chamber.
Day Two
15. After 24 hours, find your bottles, bring them back to your lab station, and remove the rack lid.
16. Connect a dissolved oxygen (DO) sensor to the data collection system.
17. Display Dissolved Oxygen (mg/L) in a digits display.
18. Lay several paper towels onto the lab table. Starting with the 100% bottle, take the bottle out of the rack, place it
onto the paper towels and carefully remove the cap.
19. Begin monitoring data without recording.
20. Remove the DO probe from the storage bottle and carefully insert it into the culture. The silver ring on the probe
should be immersed in culture, but the probe should not be touching the bottom of the bottle.
21. Measure the concentration of DO of the algae culture while gently swirling the probe in the culture.
NOTE: Try not to introduce any air bubbles into the algae solution during data collection.
22. When the DO levels have stabilized on the digits display, note the DO concentration as the final concentration of
DO. Record the data in Table 1. Rinse the DO probe with the wash bottle.
23. Repeat this procedure with each of the remaining four bottles (75%, 50%, 25%, and 0%). Rinse the DO probe
with the wash bottle in between each bottle. Return the probe to its storage bottle when finished.
3
Page 4

Model No. ME-6937 Sample Data
Table 1: Dissolved Oxygen and Productivity at Various Light Intensities
Light Intensity Initial [DO]
(mg/L)
Final [DO]
(mg/L)
Respiration
Rate (mg/L)
Net Primary
Productivity (mg/L)
Gross Primary
Productivity (mg/L)
Data Analysis
1. Calculate the respiration rate (R) for your group's algae solution and record in Table 1. R equals the total amount
of dissolved oxygen consumed in the bottle that received no light (0% bottle), since there was no photosynthetic
activity in that bottle. So:
R = Initial DO concentration - Final DO concentration (0% bottle).
2. Calculate the net primary productivity (NPP) of the algae in each of your group's bottles and record in Table 1.
NPP = Final [DO] of bottle - Initial [DO] of bottle
3. Calculate the gross productivity of the algae in each of your group's bottles.
GPP = NPP of bottle + R
Sample Data
Table 1: Dissolved oxygen at varying light intensities
4
Page 5

Model No. ME-6937 Sample Data
NOTE: See the PASCO PS-2876 Advanced Biology Lab Manual for a full productivity lab.
Graph 1: Light Intensity (%) vs. Net Primary Productivity (mg/L)
Graph 2: Light Intensity (%) vs. Gross Primary Productivity (mg/L
5
Page 6

Model No. ME-6937 Technical Support
Technical Support
For assistance with any PASCO product, contact PASCO at:
Address: PASCO scientific
10101 Foothills Blvd.
Roseville, CA 95747-7100
Phone: 916-786-3800 (worldwide)
800-772-8700 (U.S.)
Fax: (916) 786-7565
Web: www.pasco.com
Email: support@pasco.com
For more information about the Aquatic Productivity Bottles and the latest revision of this Instruction Manual, visit:
www.pasco.com/go?ME-6937
Limited Warranty For a description of the product warranty, see the PASCO catalog.
Copyright The PASCO scientific 012-10941A Aquatic Productivity Bottles Instruction Manual is copyrighted with all rights reserved.
Permission is granted to non-profit educational institutions for reproduction of any part of this manual, providing the reproductions are
used only in their laboratories and classrooms, and are not sold for profit. Reproduction under any other circumstances, without the
written consent of PASCO scientific, is prohibited.
Trademarks PASCO and PASCO scientific are trademarks or registered trademarks of PASCO scientific, in the United States
and/or in other countries. All other brands, products, or service names are or may be trademarks or service marks of, and are used to
identify, products or services of their respective owners. For more information visit www.pasco.com/legal.
6
 Loading...