

Page 1
®
Instruction Sheet
012-10515A
Curved PAStrack
ME-6841
1
2
3
Included Equipment
1. Concave-down section
2. Concave-up section
3. Connectors (2 pieces)
Other Equipment Required
• Straight PAStrack (PASCO part ME-6960, which
consists of two straight sections)
• Rods, stands, and clamps for supporting elevated track
sections (see options on page 2)
• PASCO Dynamics Cart (ME-6950, ME-6951, ME-9430,
or ME-9454)
Quick Start
1. Use connector pieces to join the curved sections (part of
ME-6841) and straight sections (part of ME-6960) in any
order (see examples in figures 6 through 9).
Ensure that the wide and narrow grooves match from one
section to the next (see Figure 2).
2. Tighten the screws on the connectors.
3. Use rods, stands, and clamps to support the elevated straight
sections (see figures 3 through 5).
Introduction
PASCO model ME-6841 consists of two curved sections that can
be joined with straight PAStrack sections to form a single track
with different levels. The combined track can be used to study
how a change in height affects the motion of a cart. The track is
compatible with all PASCO dynamics carts (including plastic
PAScars and classic aluminum carts) and other dynamics system
accessories.
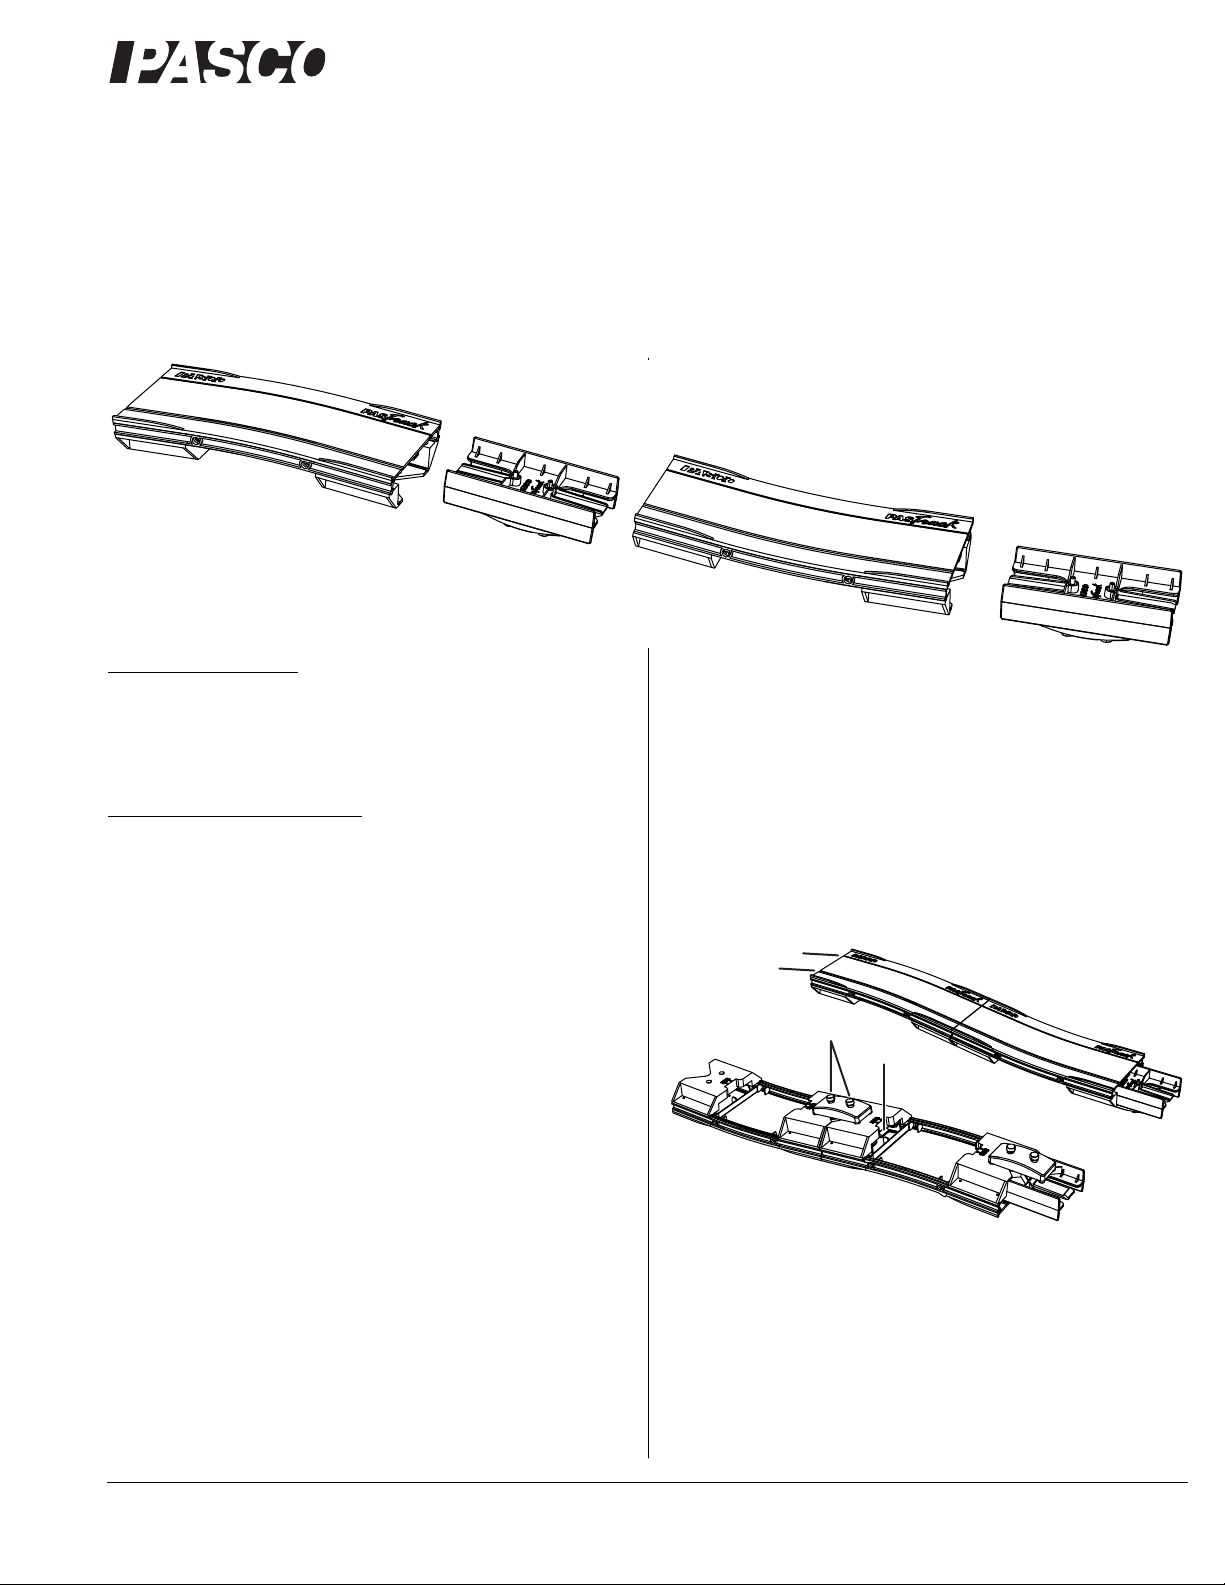
Parts of the Curved PAStrack
a
b
c
d
Figure 1
a. Narrow groove
b. Wide groove
c. Connector screws
d. Release tab
800-772-8700 www.pasco.com
Page 2

Curved PAStrack ME-6841
Assembly
1. Slide a connector piece into a track section. Push it hard until
you hear it snap.
2. Slide the next track section onto the connector piece. Push it
until it snaps.
NOTE: Every track section has one narrow groove and one wide groove.
Orient the pieces so that the grooves match from one section to the next
(see Figure 2).
Figure 3: Pivot Clamp
3. Turn the track upside down and tighten the screws on the
connector (part c in Figure 1).
4. Repeat steps 2 through 3 until all sections are assembled as
desired.
Correct Incorrect
Figure 2: Ensure that the wide and narrow grooves match from one
section to the next.
Disassembly
1. Loosen the connector screws.
Horizontal Rod Method Secure a rod (such as SA-9242) in
the built-in rod clamp of the straight section (Figure 4). Use a
right-angle clamp (such as SE-9442) to secure this rod on a vertical rod at the desired height.
Figure 4: Horizontal Rod
Block Method Place blocks, or other objects such as books or
lab jacks, under the feet of the straight section (Figure 5).
Figure 5: Block
2. Press and hold the release tabs on the bottom of the track
(part d in Figure 1).
3. Pull the track sections apart.
Options for Supporting
Elevated Track Sections
The elevated straight sections of the assembled track can be supported using one of the methods illustrated in figures 3, 4, and 5.
The number of support points needed depends on the length of
the track. In most cases, two are sufficient.
Pivot Clamp Method Attach a Pivot Clamp (ME-9810) to
the T-slot on the side of a straight section (Figure 3). Secure the
Pivot Clamp at the desired height on a vertical rod. The vertical
rod can be supported by a table clamp (such as ME-9376B) or by
a rod base (such as ME-8976).
2
Configuration Examples
Small Height Change
Figure 6: Small height change using both curved sections and two
straight sections
In this configuration, the higher level is about 34 mm above the
lower level. Use photogates or motions sensors to measure the
velocity of a cart at both levels. Calculate and compare the
changes in potential energy and kinetic energy.
The track is slightly flexible so that the higher level can be made
slightly inclined. This makes it possible to release the cart from
the top level without pushing it.
With this small height change, it is possible to launch a plastic
PAScar from the lower level to the higher level using the cart’s
built-in plunger.
®
Page 3

Curved PAStrack ME-6841
Larger Height Change
Figure 7: Larger height change using both curved sections and
three straight sections
For a larger height change, add one or more straight sections
between the curved sections. In the configuration shown in Figure 7, the height change is about 10 cm. The flexibility of the
track allows the height to be varied slightly.
Ramp
Figure 8: Ramp using the concave-up curved section and two
straight sections
In this configuration, the angle of the inclined section is about 8°.
The flexibility of the track allows the angle to be varied slightly.
Release a cart from various points on the inclined section and use
photogates or a motion sensor to measure the velocity on the
level section.
Oscillator
Technical Support
For assistance with any PASCO product, contact PASCO at:
Address: PASCO scientific
10101 Foothills Blvd.
Roseville, CA 95747-7100
Phone: 916-786-3800 (worldwide)
800-772-8700 (U.S.)
Fax: (916) 786-7565
Web: www.pasco.com
Email: support@pasco.com
For more information about the Curved PAStrack and the latest
revision of this Instruction Sheet, visit:
www.pasco.com/go?ME-6841
Limited Warranty For a description of the product warranty, see the
PASCO catalog. Copyright The PASCO scientific 012-10515A
PAStrack Instruction Sheet
sion is granted to non-profit educational institutions for reproduction of any
part of this manual, providing the reproductions are used only in their laboratories and classrooms, and are not sold for profit. Reproduction under
any other circumstances, without the written consent of PASCO scientific,
is prohibited. Trademarks PASCO and PASCO scientific are trade-
marks or registered trademarks of PASCO scientific, in the United States
and/or in other countries. All other brands, products, or service names are
or may be trademarks or service marks of, and are used to identify, products or services of, their respective owners. For more information visit
www.pasco.com/legal.
is copyrighted with all rights reserved. Permis-
Curved
Figure 9: Oscillator using the concave-up curved section and two
straight sections
The oscillator uses the same combination of sections as the ramp,
but both straight sections are inclined. A cart released from one
end will oscillate several times before coming to rest at the center.
®
3
 Loading...