

Parsun T40BM, T30BM, T40BW, T30BW, T30FW Owner's Manual
...
OUTBOARD MOTOR
OWNER’S MANUAL
T40/30BM
T40/30BW
T40/30FW
SUZHOU PARSUN POWER MACHINE CO., LTD.

Thank you for owning a PARSUN outboard motor.
Thank you for your trust in our company and products.
“PARSUN” outboard motors are powerful, economic and safe with advanced technology
and processing techni q ue.
Please read this manual carefully before operating your outboard motor. A thorough
understanding of the manual will help you to know this product for proper operation,
maintenance and care. This will ensure that your outboard motor is operated well under
various conditions.
“PARSUN” seeks continuous improvement in product quality. Therefore, while this
manual contains the most current product information available at the time of printing,
there may be minor discrepancies between your machine and this manual. If there is
any question concerning the manual, please consult your local PARSUN dealer.
Data, illustrations or explanations in this Owner’s Manual do not const it ute base for any
legal claim against our com p a ny.
SUZHOU PARSUN POWER MACHINE CO., LTD
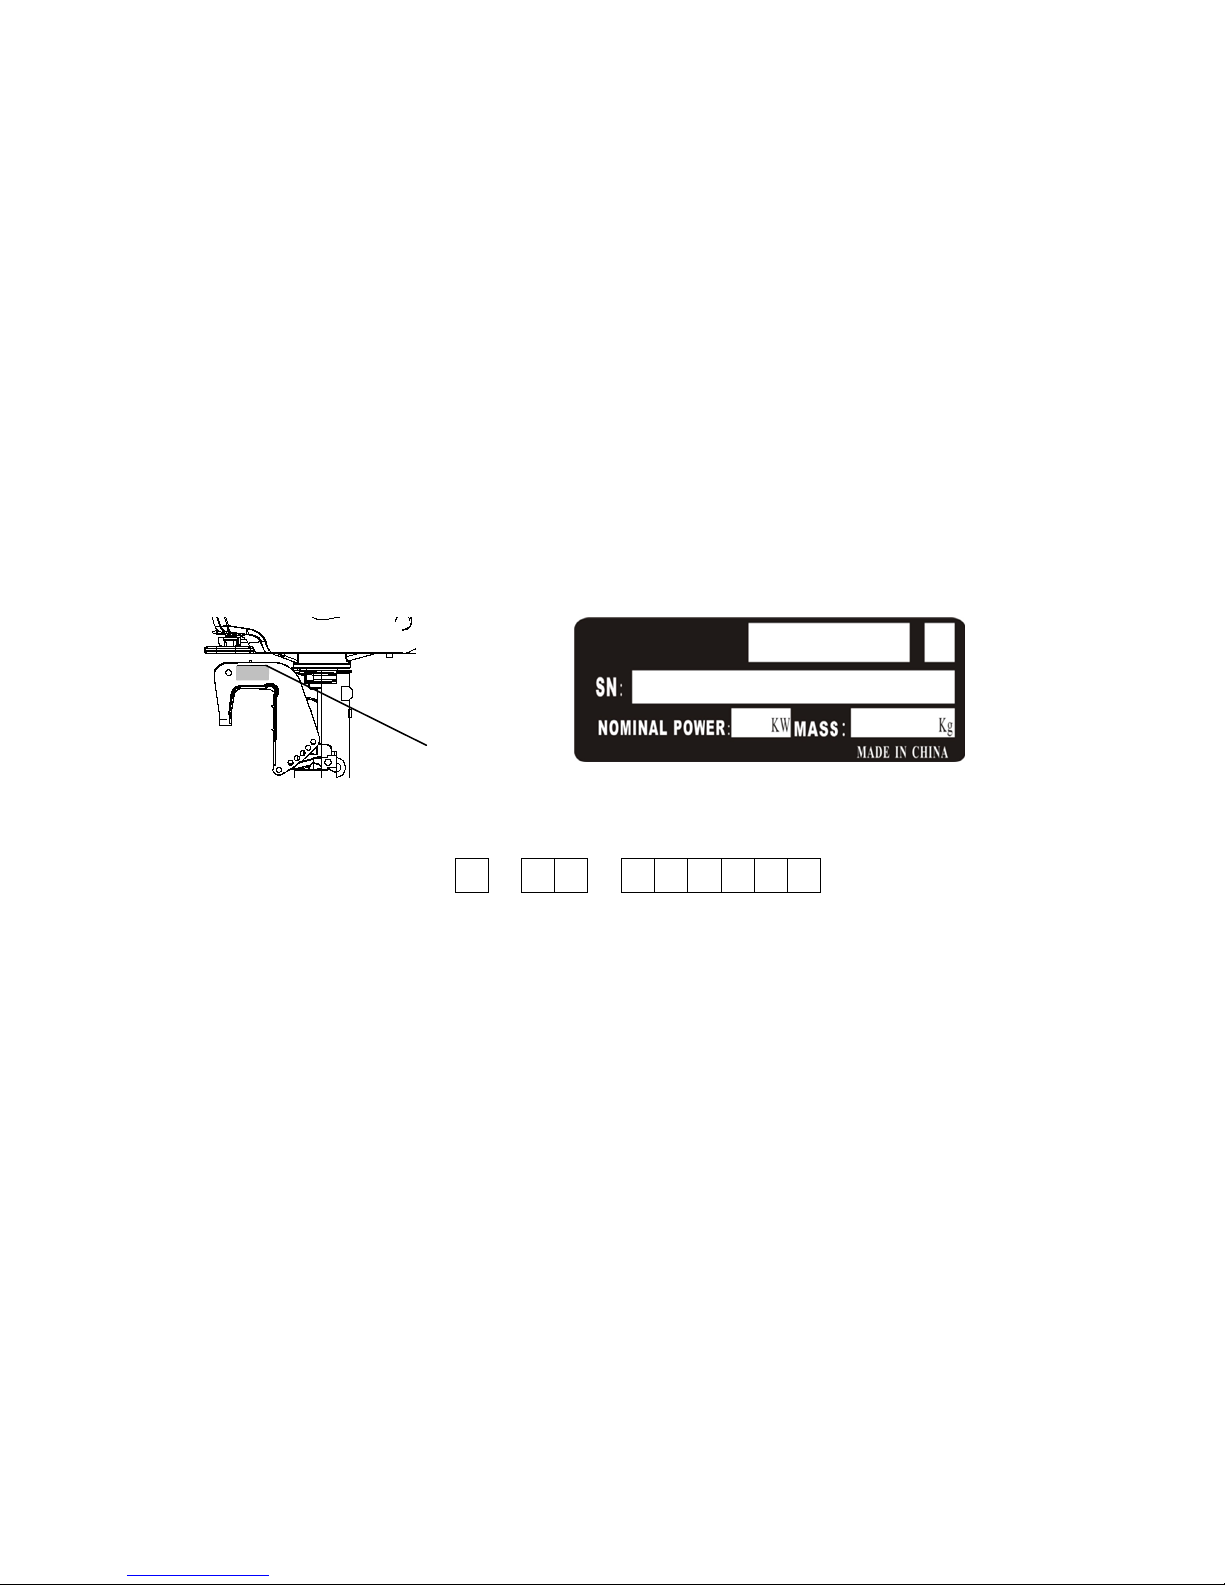
Engine Identification Numbers
Outboard motor serial number
The outboard motor seria l num ber is marked on the label. The label can be found on the bracket
left assembly or on the upper part of the bracket swi vel.
Record your outboard mot or ser ia l number in the spaces prov i ded to assist you in ordering spare
parts from your Parsun de aler, or for reference in case your out boar d motor is stolen.
1. Outboard motor serial number location
Serial number as follows:
SN
1

Engine serial number
The engine serial number is carved on the aluminum casting of engine.
Serial number as follows:

Table of contents
1. Main components and General information ··············································· 1
1.1 Main components ····································································· 1
1.2 General information ···································································4
1.2.1 Specifications ······································································4
1.2.2 Fueling instructions································································· 5
1.2.3 Propeller selection ································································· 6
2. Operation ············································································· 8
2.1 Installation ··········································································· 8
2.1.1 Mounting height ···································································· 9
2.1.2 Clamping the outboard motor························································ 10
2.2 Breaking in engine ···································································11
2.3 Pre-operation checks ································································· 12
2.4 Filling fuel ···········································································13
2.5 Starting engine ······································································ 14
2.6 Warming up engine ·································································· 22
2.7 Shifting ············································································· 22
2.7.1 Forward ···········································································23
2.7.2 Reverse ···········································································24
2.8 Tiller ················································································ 25
2.9 Stopping engine ·····································································27
2.10 Trimming outboard motor ··························································· 29
2.11 Tilting up and down ································································29
2.11.1 Tilting up ········································································30
2.11.2 Tilting down ······································································33
2.12 Cruising in other conditions ························································34
2.12.1 Cruising in shallow water ··························································34
2.12.2 Cruising in salt water ·····························································35

3. Maintenance ········································································· 36
3.1 Greasing ············································································36
3.2 Cleaning and adjusting spark plug ···················································37
3.3 Checking fuel system ·······························································37
3.3.1 Cleaning the fuel filter ·····························································38
3.4 Inspecting idling speed ·······························································39
3.5 Checking wiring and connectors·······················································40
3.6 Checking for leakage································································· 40
3.7 Checking propeller···································································· 40
3.7.1 Removing the propeller······························································42
3.7.2 Installing the propeller ······························································42
3.8 Changing gear oil ··································································· 43
3.9 Cleaning fuel tank ··································································· 44
3.10 Checking and replacing anode(s) ····················································45
3.11 Checking top cowling ······························································· 46
3.12
Maintenance table ·······························································47
4. Transporting and storing outboard motor ··············································
··49
4.1 Transporting ········································································· 49
4.2 Storing ·············································································· 50
5. Action in emergency ·································································· 53
5.1 Impact damage ······································································53
5.2 Starter will not operate ·······························································53
5.3 Treatment of submerged motor ·······················································55
6. Troubleshooting ·······································································57
7. Circuit diagram ······································································· 61
1. Main components and General information
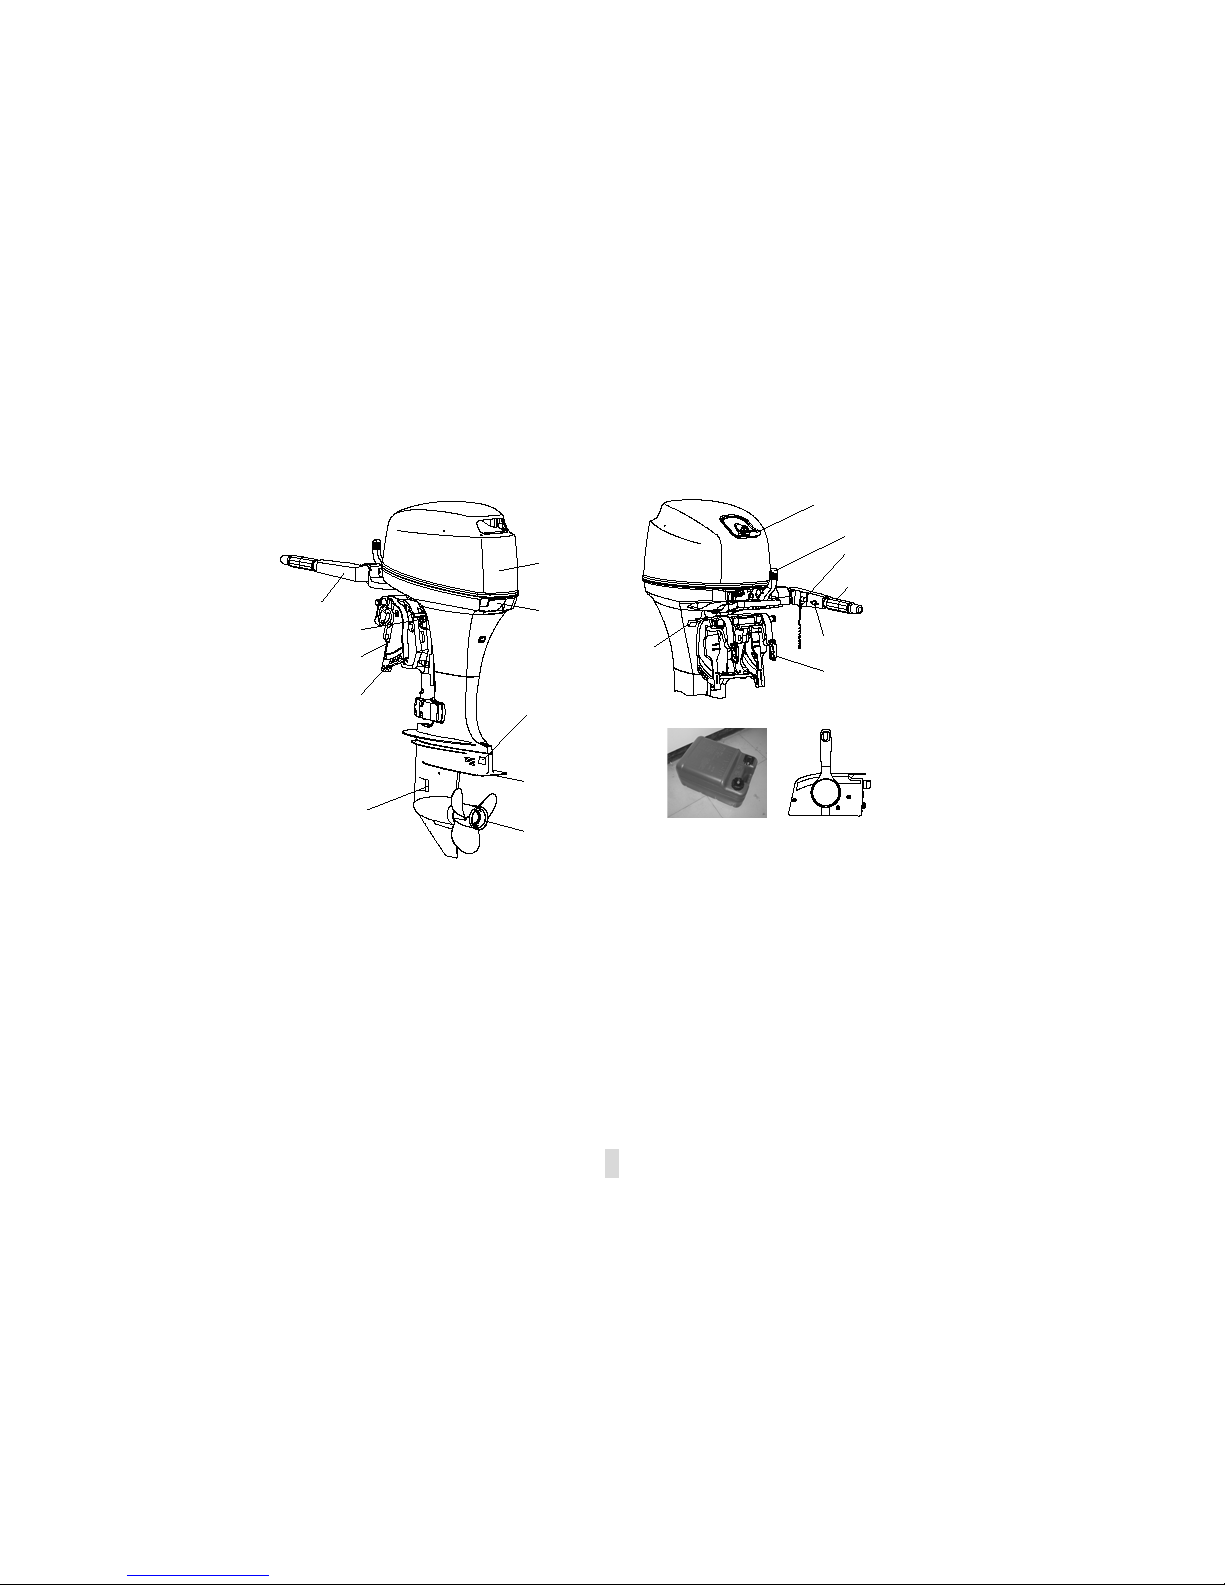
1.1 Main components
1. Top cowling 8. Clamp bracket
14. Throttle grip
2. Top cowling lock handle
9. Steering friction adjuster 15. Throttle friction adjuster
3. Anode
10. Tiller handle 16. Clamp screw
4. Anti-cavitation plate
11. Manual starter handle 17. Tilt lock lever
5. Propeller
12. Gear shift lever 18. Fuel tank
6. Cooling water inlet
13.
Engine stop button/ 19. Remote control
7. Trim rod Engine stop lanyard switc h
1
17
1
2
3
4
6
7
8
9
10
12
15
14
13
16
5
11
1918
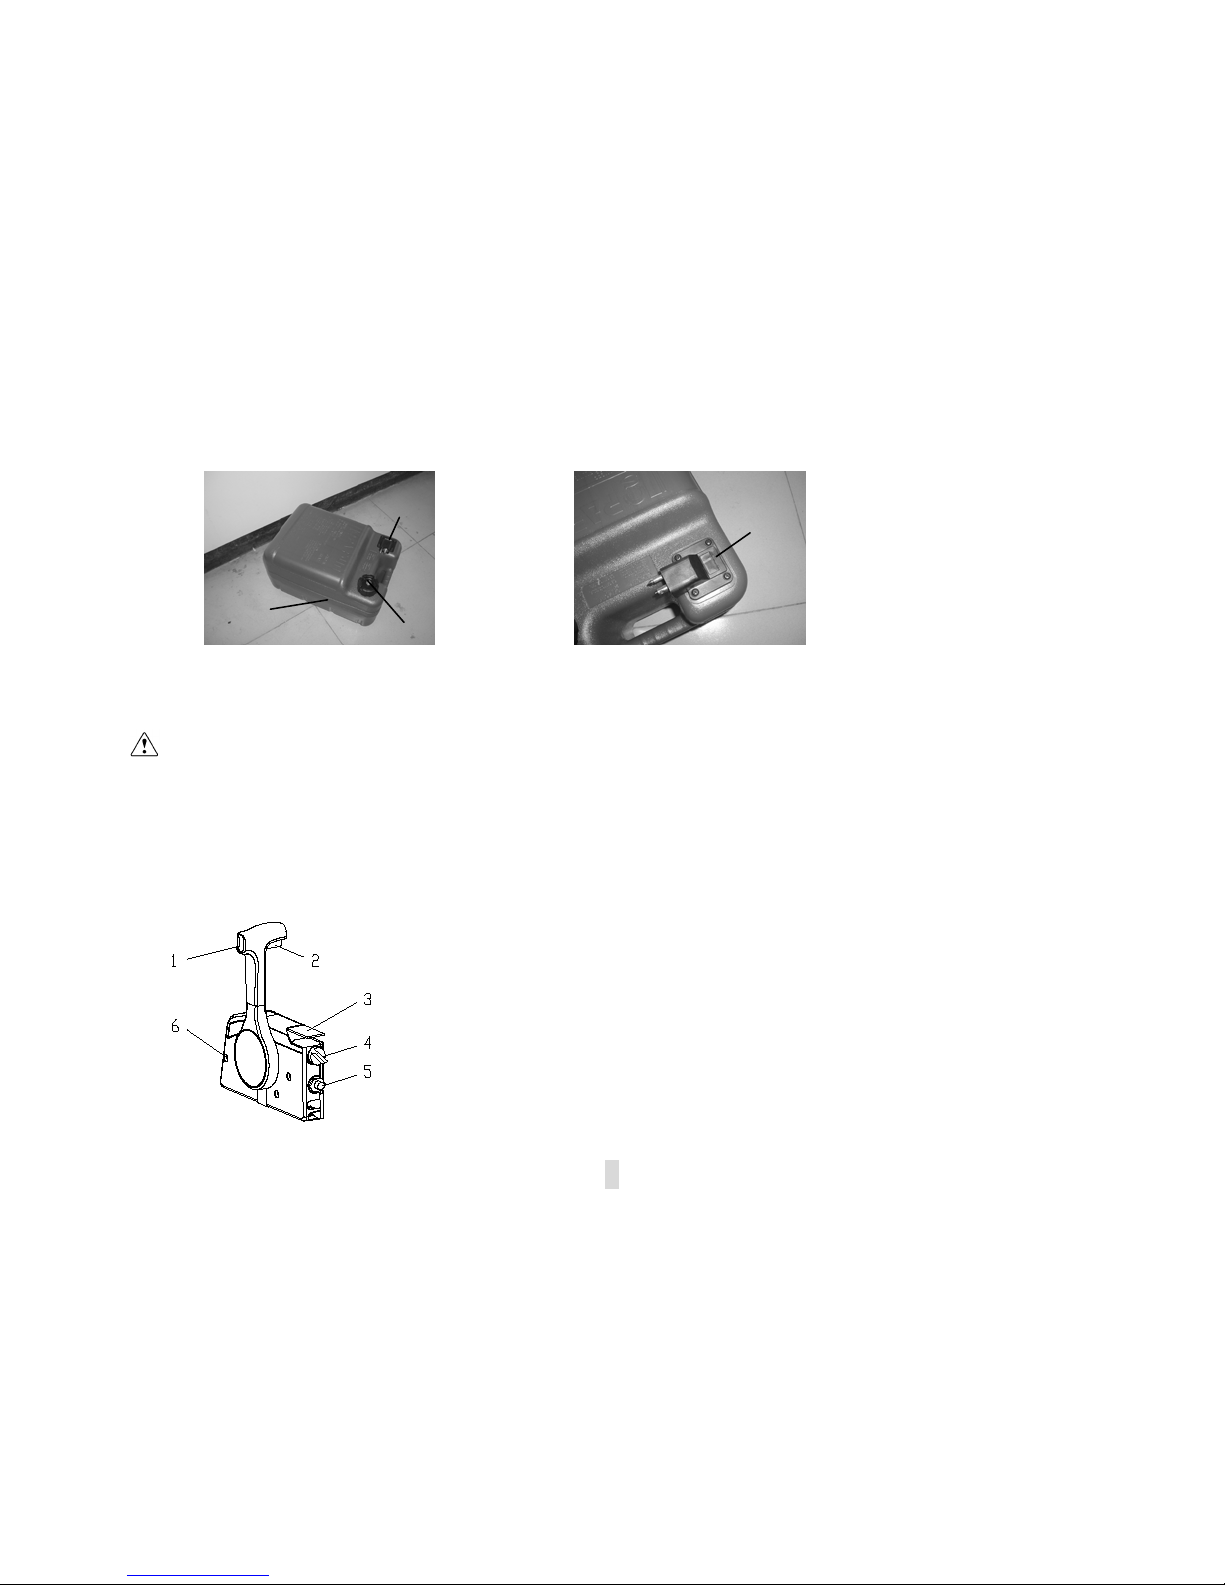
If your model includes a por table fuel tank, its parts are as follows:
1. Fuel tank cap 3. Air vent screw
2. Fuel joint 4. Fuel gauge
WARNING
The fuel tank supplied wit h this engine could o nly be used as supply of fuel f or its running
and must not be as a fuel st orage container.
Remote contr ol
The remote control lever actuates both the shifter and the throttle. The electrical switches are mounted
on the remote control box.
1. Remoter control lever
2. Neutral interlock trigger
3. Neutral throttle lever
4. Main s witch/choke switch
5. Engi ne stop lany ard sw itch
6. T hrot tle fric tion adjust er
2
1
3
2
4
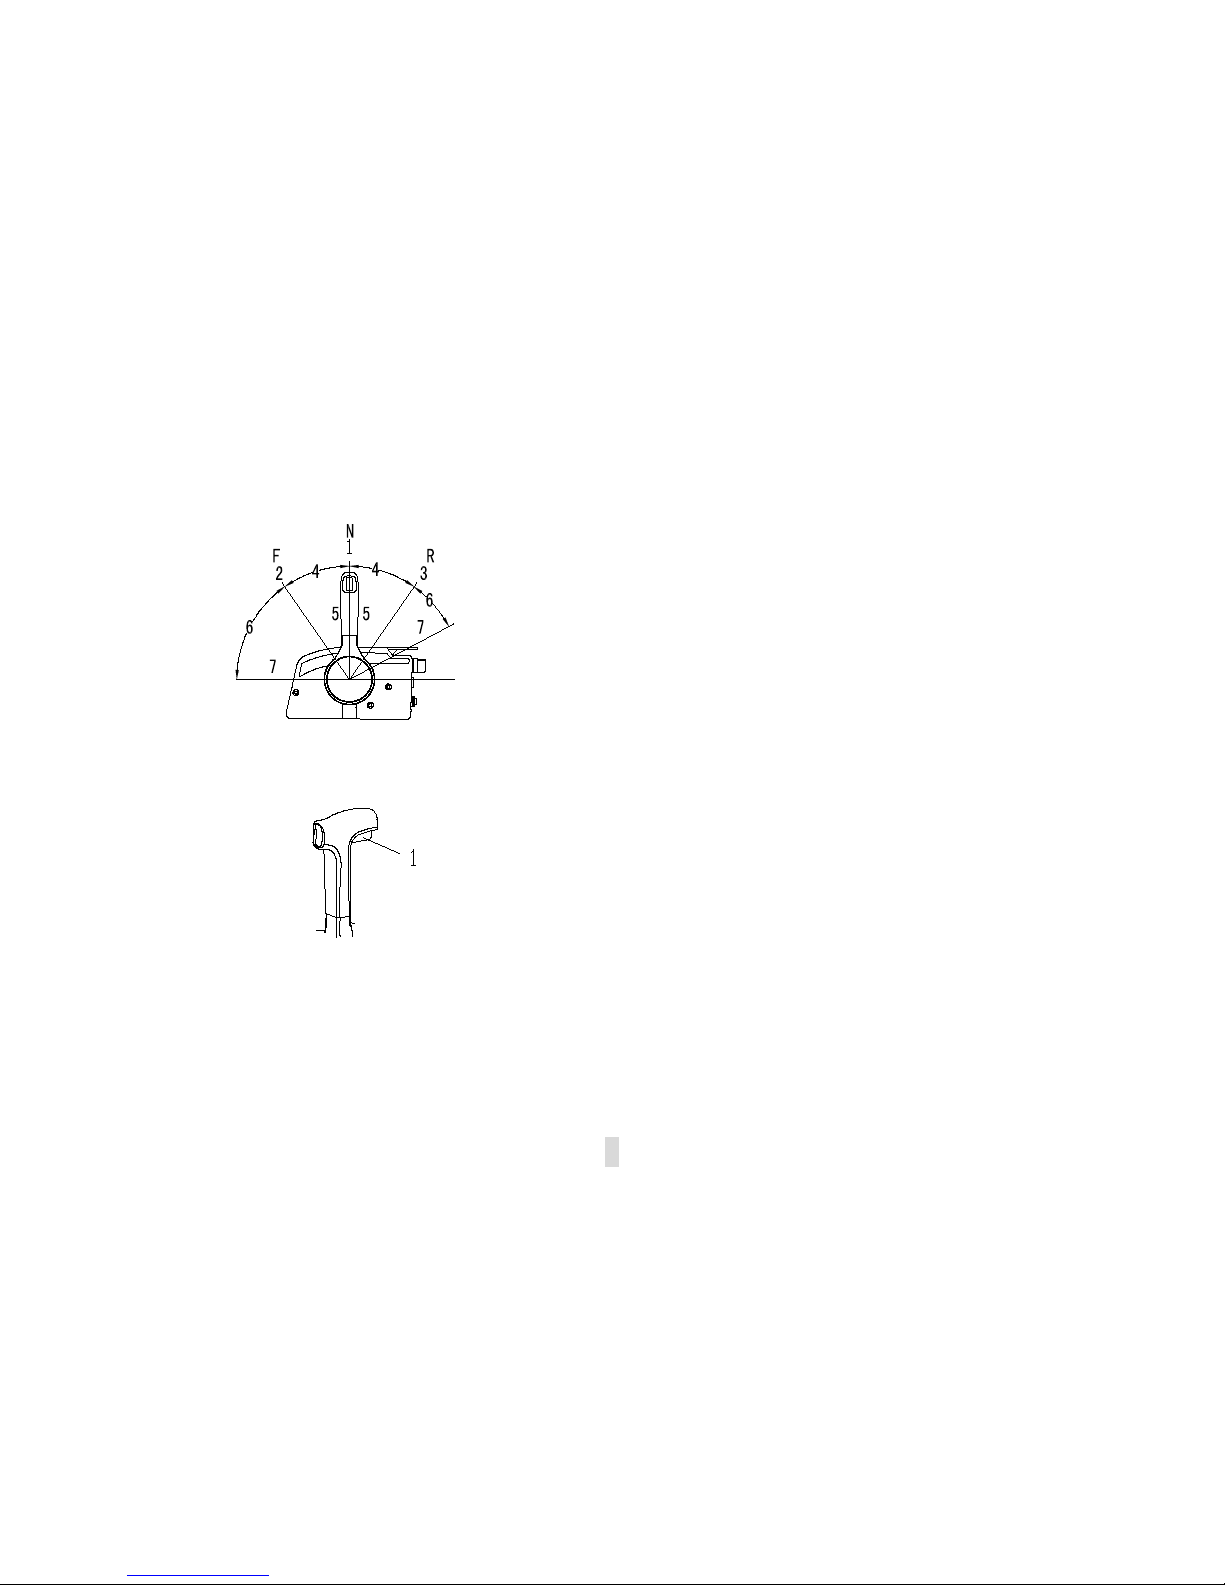
Remote control lev er
Moving the lever forward fr om the neutral position engages forward gear. Pulling the lever back from
neutral engages reverse. The engine will continue to run at idle until the lever is moved about 35º (a det ent
can be felt). Moving the lever farther opens the throttle, and the engine will begin to accelerate.
1. Neutral “N”
2. Forward “F”
3. Reverse “R”
4. Shift
5. Fully closed
6. Throttle
7. Fully open
Neutral interlock trigger
To shift out of neutral, first pull th e neut r al interlock trigger up.
1. Neutral interlock trigger
Neutral throttle lever
To open the throttle without shift ing into either forward or reverse, put the remote control lever in the
neutral position and lift the neutral throttle lever.
NOTE:
The neutral throttle lever will operate only when t he r em ote control lever is in neutral .The rem ote
control lever will operate only when the neutr al t hrot tle lever is in the closed position
3

1. Fully open
2. Fully closed
1.2 General information
1.2.1 Specifications
Parameter
Items
Data
Items
Data
Type of engine 2-stroke L Weight L (BM/W) 75.1kg/77.7kg
Displacement 703cm3 Transom S (BM/W) 426mm
Bore X stroke 80mm×70mm Transom L (BM/W) 553mm
Gear ratio 2.00(26/13) Recommended fuel Unleaded regular gasoline
Overall length (BM/W) 1106mm/645mm Recommended engine oil 2-stroke engine oil
Overall width (BM/W) 408mm/372mm Recommended gear oil Hypoid gear oil SAE#90
Overall height S (BM/W) 1213mm Gear oil quantity 430 cm3
Overall height L (BM/W) 1340mm Spark plug BR7HS
Weight S (BM/W) 73.5kg/76.1kg Spark plug gap 0.6~0.7mm
4

Performance
Items
Data
Items
Data
Maximum output
(40HP) 29.4kw/5000 rpm Idling speed (in neutral) 1000±50 rpm
(30HP) 22kw/5000 rpm
Tightening torque
for engine
Spark plug 25.0Nm
Full throttle
operating range
4500~5500 rpm Propeller nut 17.0Nm
1.2.2 Fueling instructions
Fueling instructions:
Recommended gasoline:
Regular unleaded gasoline, If
it is not available,
then premium gasoline.
If knocking or pinging occ ur s, use a different brand of ga solin e or pr emium unleaded fuel. If eaded
gasoline is usually used, engi ne valves and related parts should be inspected after every 100 hours of
operation.
WARNING:
Do not smoke when refueling, an d keep away from sparks, flames, or other sources of ignition.
St op engine before refueling.
Refuel in a well-ventilated area. Refuel portable f uel tanks off the boat.
Do not ov e r f ill the fuel t ank.
Take care not to spill gasoline, if gasoline spills, wipe it up immediately.
Tight en the filler cap securely after refueling.
If y ou should swallow some gasoline, inhale a lot of gas ol ine vapor, or get gasoline in your eye,
get immediate medical attentions.
5

If any gas ol ine spills onto your skin, immediately wash with soap and water . Change clothing i f
gasoline spills on it.
Touch the fuel nozzle to metal components to prevent electrostatic sparks.
CAUTION:
Use only new clean gasoline which has been stored in clean con tainers and is not contaminated
with water or foreign matter.
Engine oil:
Recommended engine oil: 2-stroke outboard motor oil.
Gasoline and oil mixing:
Break-in period
25:1
Gasoline 1L 12L 14L 24L
Engine oil 0.04L 0.48L 0.56L 0.96L
After break-in
50:1
Gasoline 1L 12L 14L 24L
Engine oil 0.02L 0.24L 0.28L 0.48L
CAUTION:
Be sure to mix gasoline and oi l com pl etely, otherwise the engine may be damaged.
1.2.3 Propeller select ion
The performance of your out board motor will be critically affected by y our choice of propeller, as an
incorrect choice could adversely affect performance. The outboard motor is fitted with propellers chos en to
perform well over a ra nge of app lications, but ther e may be us es where a propeller with a di ffer ent pitch would
6

be more appropriate. “PARSUN” dealers stock a range of propellers and can advise you and install a
propeller on your outboar d t hat is best suit ed t o your application.
For a greater boat load and a low engine speed, a sma ller-p itch pr ope ller is mor e suit able. Conv ersely, a
large-pitch propeller is more s uitab le for a sma ller operating load as it enables the cor rect engin e spe ed to be
maintained.
7

2. Operation
2.1 Installation
Mount the outboard motor on the center line (keel line) of the boat. For boats without a keel or which are
asymmetrical, consult your dealer.
1
1. Center line (keel line)
NOTE:
During water testing check the buoyancy of t he boat, at r est, with its maxi m um l oad. Check that
the static water l evel on the exhaust housi ng i s l ow enough to prevent water ent r y into the power
head, when water rises due to waves wh e n the out boar d is not run ni ng.
WARNING:
Overpowering a boat could cause sever e instabi l ity. Do not install an outboard motor with more
horsepower than t he ma xi mum rati ng on th e c apacity plate of the boat. If the boat do es not hav e
a capacity pl at e, consult the boat manufacturer.
8

Improp e r m ounting of the outboard motor could result in hazardous conditions.
For permanently mounted mo dels, your dealer or other person experienced i n pr oper rigging
should mount t he motor. If you are mounting the motor y our se l f , you should be trai ne d by an
experienced person. For portable models, your dealer or other person experienced in pr oper
outboard motor mounting shoul d show you how to mount your m ot or.
The inf or m ation presente d i n this section is int ended as reference only. Proper mounting
depends in part on experience and the speci f i c boat and motor combinati on.
2.1.1 Mounting height
The mounting height of the outboard motor greatly affects your boat runn ing efficiency. If the mounting
height is too high, cavitation tends to occur, t hus r educi ng the propulsion. If the mounting height is too low,
the water resistance w ill increase and thereby reduce engine effic iency. Mount the outboard motor so that
the anti-cavitation plate is between the bottom of the boat and a level 25mm below it.
9
~
NOTE:
The optimum mounting height of the outboard motor is affecte d by the boat and motor
combination and the desired us e . T est runs at a different height can help determine the optimum
mounting height . For further information, consult your “PARSUN” dealer or boat manuf actur er.
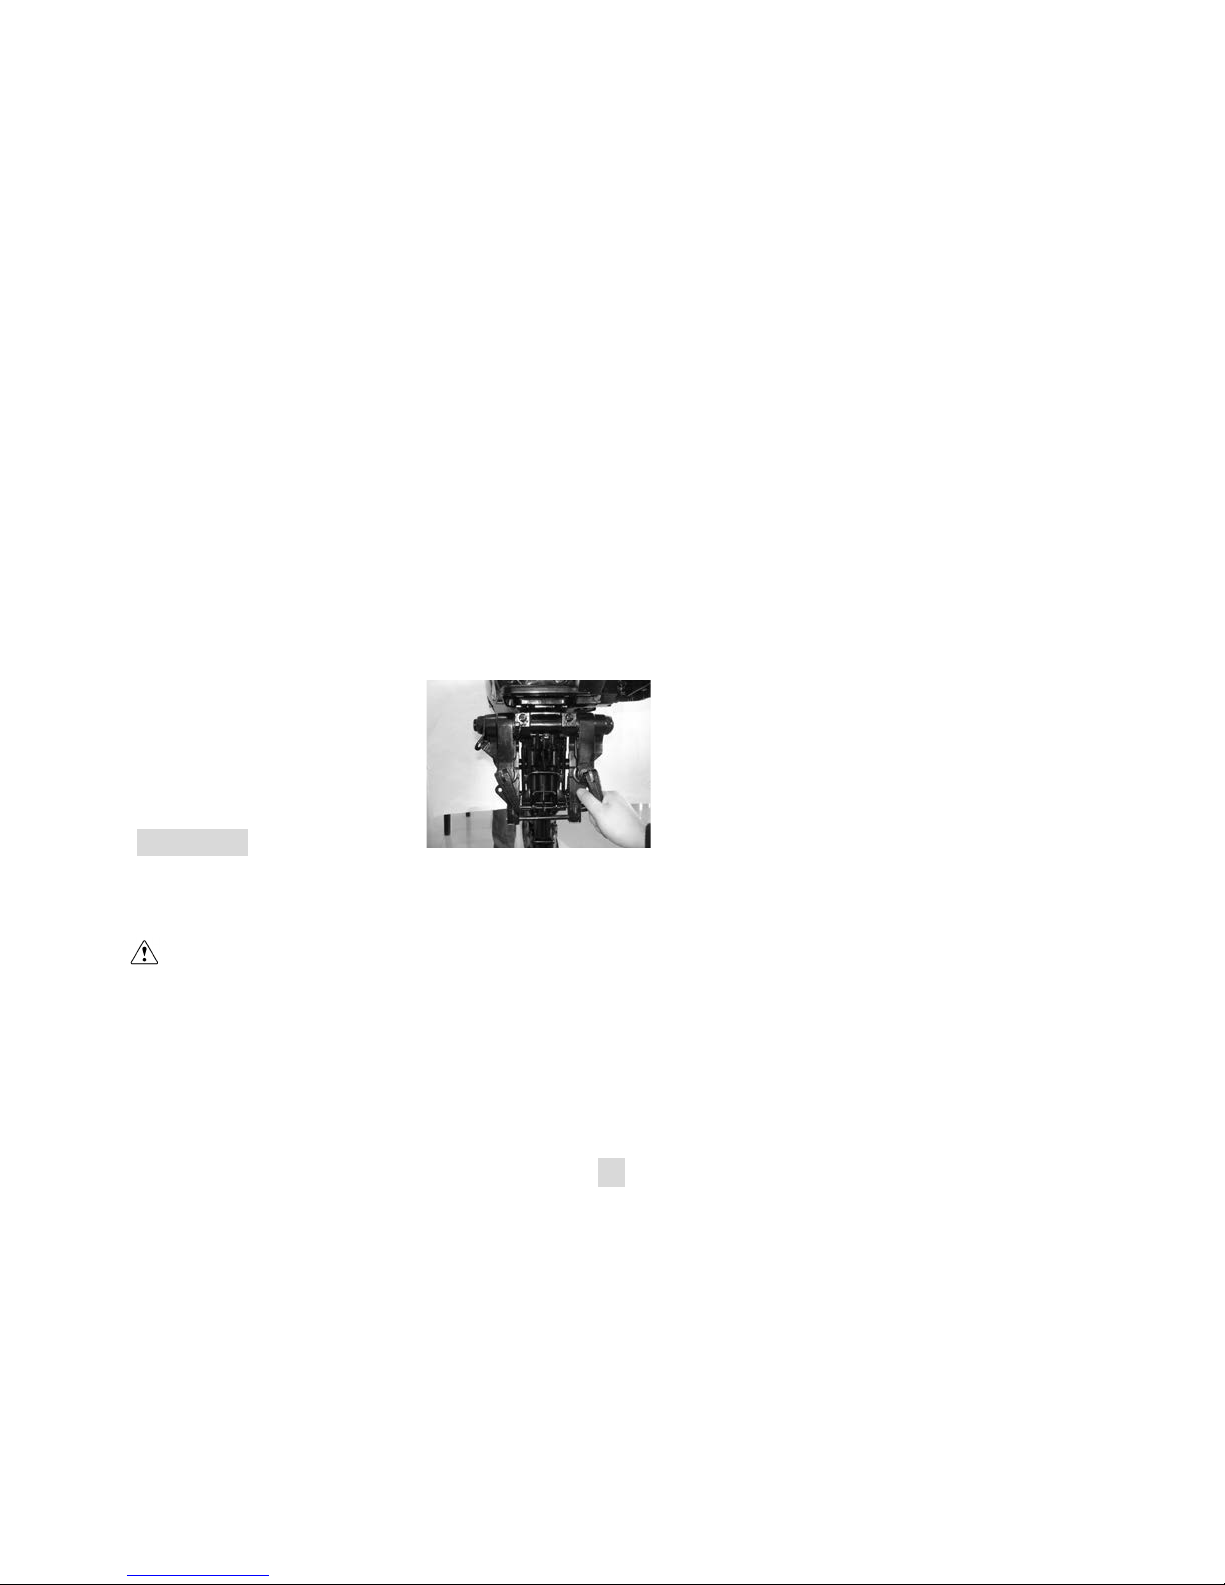
2.1.2 Clamping the outboard motor
1. Tighten the transom clamp scr ew evenly and securely. Occasionally check the clamp scr ew s f or
tightness during operati on of the outboard motor because they could become loose due to engine
vibration.
CAUTION:
Outboards that use clamp brack et screws alo ne are INSUFFI CIENT to pr operly and safely secure
the outboard to the Transom. Pr ope r i nstallation of the outb oard includes bol t ing the engine to th e
boat through the transom.
WARNING:
Loose cl amp screws could allow the o ut board motor to fall off or move on t he t r ansom. This
could cause los s of control.
Make sure the cl amp screws are tightened securely. Occasionally check the screws for t
ightness during operation.
10

2. If the engine restraint cable attachment is equipp ed on your engin e, an engine r estraint cable or chain
should be used. Attach to a secure mounting poi nt on t he b oat to av oid th e e ngine b ein g co mplet ely
lost if it acc id entally falls off the transom.
3. Secure the clamp bracket to the transom using the a ppropriate bolts. For details, consult your
PARSUN dealer.
WARNING:
Avoid using bolts, nuts or washers inappropriate. After ti ght e ni ng, test running the engine and
check their tightness.
2.2 Breaking in engine
Your new engine requires a period o f br ea k-in to a llo w mat ing sur faces o f movi ng p ar t s to w ear in even ly.
Gasoline and oil mixing:
11
Break-in period
25:1
Gasoline 1L 12L 14L 24L
Engine oil
0.04L
0.48L
0.56L
0.96L

CAUTION:
Failure to foll ow t he break-in procedure could result in reduced engine life or even severe engi ne
damage.
1. First 10 minutes:
Run the engine at idle.
2. Next 50 minutes:
Run the engine at 3000 r/m in or at appr oximately half throttle.
3. Next 2 hours of operation:
Run the engine at 4000 r/min or at approxim at ely three-quarter throttle.
4. Next 7 hours of operation:
Avoid continuous operation at full throttle for mor e than five minutes at a time.
5. Operate the engine normally.
2.3 Pre-operation checks
Fuel
Check to be sure you have plenty of fuel for your trip.
Make sure th er e ar e no fuel leaks or gasoline fumes.
Check fue l line connections to be sure they are t ight .
Be sure the fu el tank is positioned on a secure, flat surface, and that the fuel line is not twisted or
flattened, or likely to contact sharp objects.
12

Controls
Check throttle, shift and steerin g for proper operation before starting the engine.
The controls s hould work smoothly, without binding or unusual free play.
Look for loose or damaged connections.
Check operation of the starter and stop switches when the outboard motor is in the water.
Engine
Check the en gi ne and engine mounting.
Look for loose or damaged fasteners.
Check the propeller for damage.
WARNING:
If any item in the pre-operation check is not working prop er ly, have it inspected and repaired
before operati ng the outboard motor. Otherwise an accident could occur.
CAUTION:
Do not star t t he en gi ne out of water. Overheating and serious engine damag e can occur.
2.4 Filling fuel
WARNING:
Gasoline and its vapors are highly fl am m abl e and explosive. Keep away from sparks, cigarettes,
flames, or other sources of ignition.
1. Remove the fuel tan k cap.
13
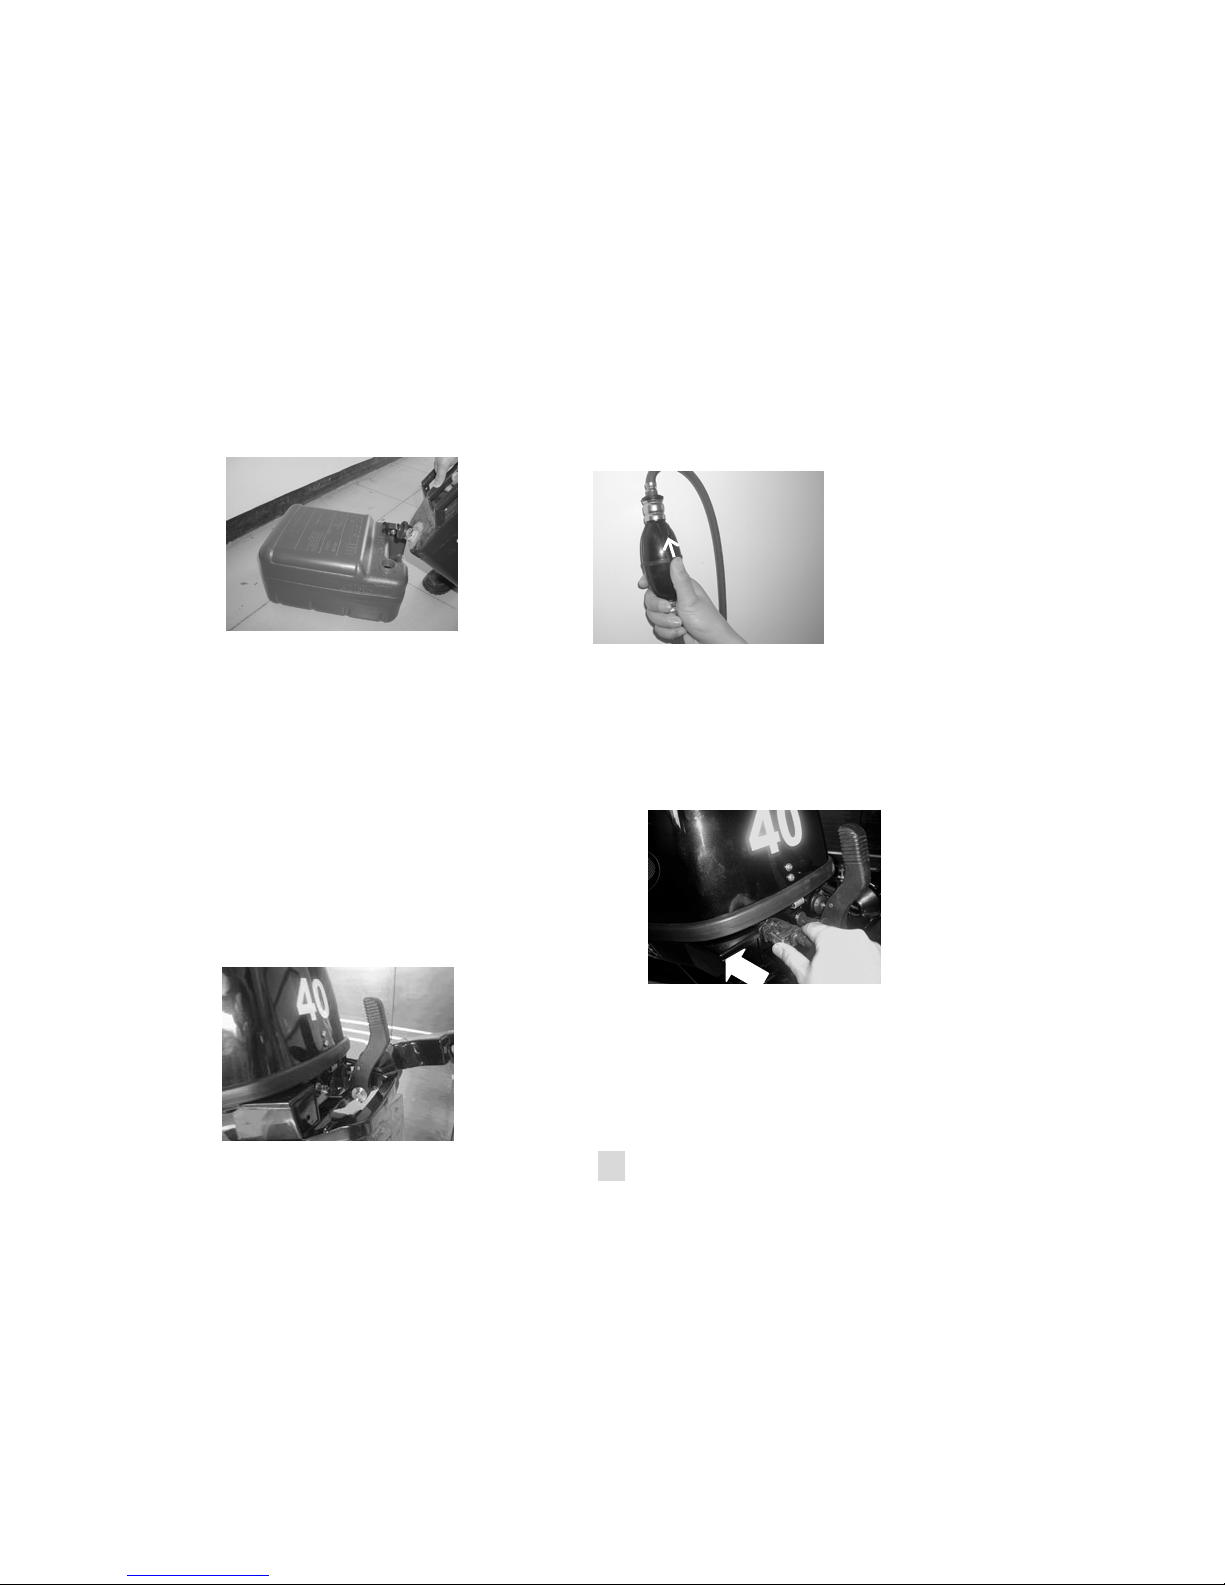
2. Carefully fill the fuel tank.
3. Securely close the cap after filling the tank. Wipe up any spilled fuel.
2.5 Starting engine
For T40/30BM
1. Loosen the air vent screw on the fuel tank cap, 2 or 3 turns.
2. Connect fuel joints securely and squeeze the
primer pump with the outlet end up until y ou
feel it become fir m (i f equipped the fuel joint).
3. Place the gear shift lever in neutral.
14

WARNING:
The engine must be started in neutra l ot herwise damage to the starter can occur.
Do not attach the lanyard to clot hing that could tear loose. Do not route the lanyard where it
could become entangled, preventin g i t from functioning.
A v oid acci dent al ly pulli ng the lany ar d durin g nor mal op eratio n. Lo ss of e ngin e po wer mean s th e
loss of steering control. Also, without engine power, the boat could sl ow rapidly. This could
cause people and object s i n the boat to be thro w n forwar
d.
NOTE:
The start-in-gear protection device prev ents the engine
from startin g except when in neutral. Att ach the engine
stop switch lanyard to secure place on your clothing, or
your arm or leg. Then instal l the lock plate on the other
end of the lany a r d i nto the engine stop swit ch.
4. Place the throttle grip in the “START” (start) position.
15
 Loading...