

Page 1
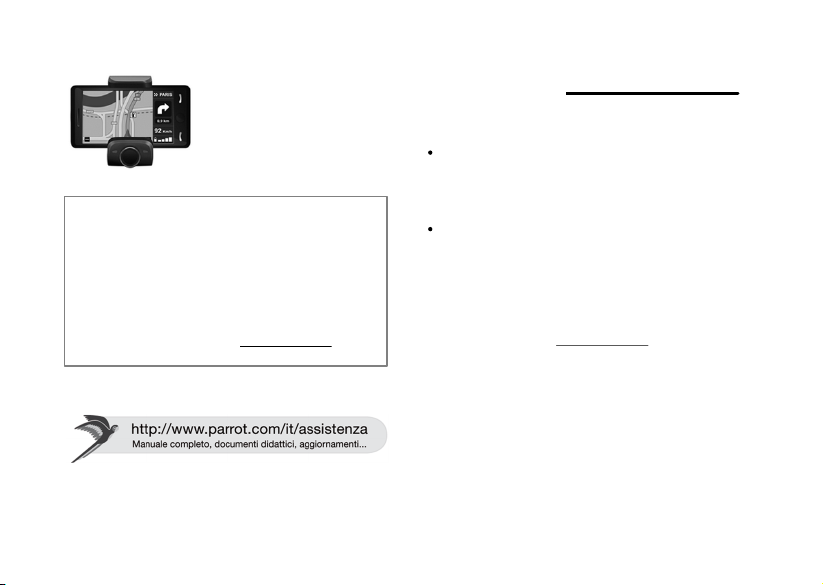
Parrot MINIKIT Smart
Quick start guide
Guide d’utilisation rapide
Guía de instalación rápida
Bedienungsanleitung
Guida all’uso
Gebruikershandleiding
Manual do utilizador
Page 2

Page 3

.......................................................................8English
.......................................................................16Français
.......................................................................23Español
.......................................................................30Deutsch
.......................................................................37Italiano
.......................................................................44Nederlands
.......................................................................51Portuguese
SmartParrot MINIKIT
www.parrot.com
Page 4
456
Page 5
Page 6
Page 7

7
Page 8
Quick start
guide
About this guide: In order to limit our paper
consumption, and as part of our environmentally friendly
and responsible appro ach, Parrot prefers to put user
documents online rather than print them out.
This simplified guide to the Parrot Parro t MINIKIT Smart is
therefore limited to providing you with the main
instructions that will make it easy for you to use the device.
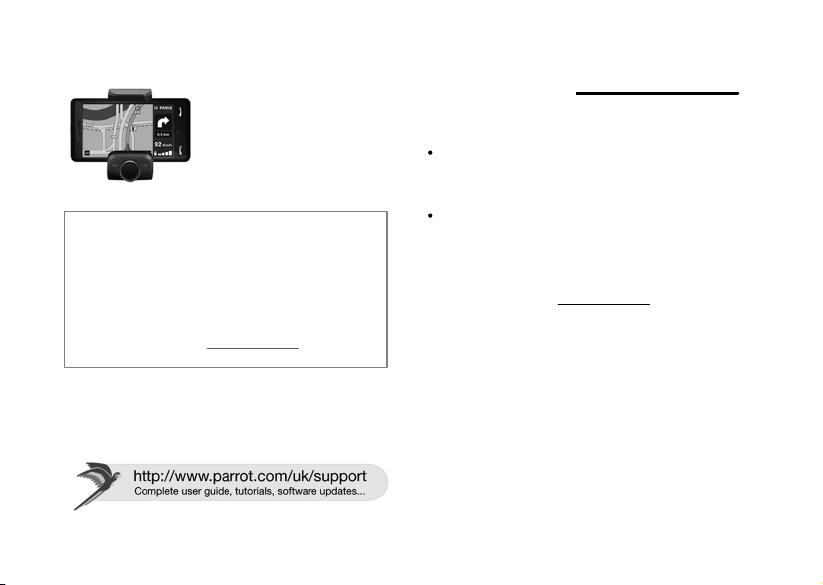
More information can be found on the Support & Downloads
section of our website, www.parro t.com: the complete
manual, FAQs, tutorials, and more.
8 English
Before you begin
Warning
All functions requiring an increased att ention should
only be used while the vehicle is stationary. Your
safety and the one of the other road users prevails
over your phone call or the GPS instructions.
The quality of your GPS signal may be decreased if
your vehicle has an athermic windscreen.
Software updates
Download the latest update for free (and check the update
procedure) o n our website www.parrot.com, in the Suppor t
& Downloads section. These updates will enable you to
receive new features and impr ove the product’s
compatibilit y.
Page 9
Installation
Warning: Avoid any installation which could hinder the
use of any import ant command or hinder the driver's
visibility. Do not install the Parrot MINIKIT Smart in the
airbag deployment area or in a possible head impact
area. Make sure it is not exposed to the air stream from
air vents.
Installing the Parrot MINIKIT Smart
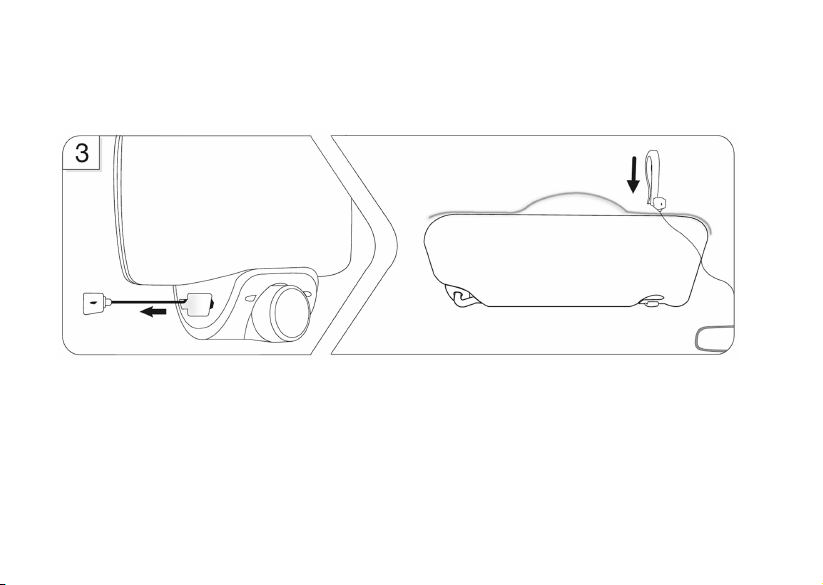
Extract the microphone from the Parrot MINIKIT
Smart and use the pro vided clips to install it on the
sunvisor or on the dashboard (diagram 3 p.5).
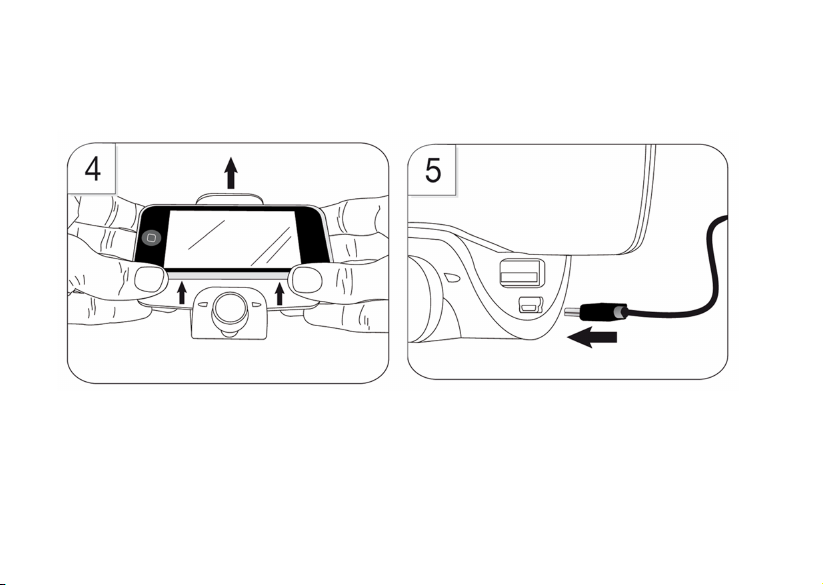
Installing the phone
Install your phone on the Parrot MINIKIT Smart by
inserting its upper side first (diagram 4 p.6).
If your phone supports the GPS feature, install it in an
easily accessible and visible location.
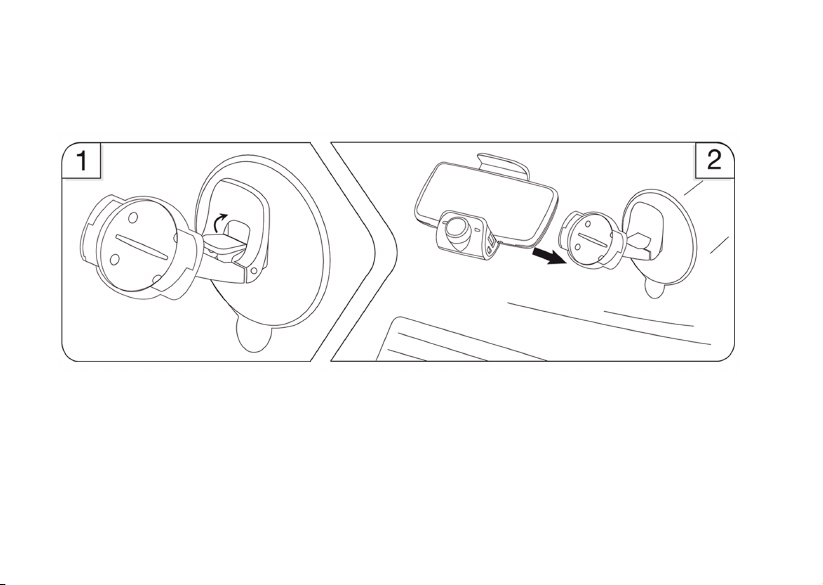
Clean the area with an appropriate cleaning product
then mount the craddle on the windscreen (diagram 1
p.4). To do so, press the suction cup against the
windscreen and lift the lo cking lever until the
mounting kit is correctly fixed.
The cooling and heating cycle inside your vehicle may
cause the suction cup to detach from the windscreen.
Make sure the suction cup is properly affixed to the
windscreen each time you use the Parrot MINIKIT
Smart. If it is not the case, the device may fall whilst
driving. Reinstall the suction cup if necessary.
Install the Par rot MINIKIT Smart o n the mounting kit
(diagram 2 p.4). T o release the Parrot MINIKIT Smart ,
press the release buttons o n the craddle (diagram 6
p.7).
Charging the Parrot MINIKIT Smart
The Parrot MINIKIT Smart must be charged before
being used for the first time. To do so, plug the
char ger into your vehicle’s cigar lighter or connect the
Parrot MINIKIT Smart to your computer using a USB/
mini-USB cable (diagram 5 p.6).
The LED located next to the mini-USB port turns on
to indicate that the battery is being charged. The LED
turns off once the Parrot MINIKIT Smart is fully
char ged. It takes around 2 hours to charge the Parrot
MINIKIT Smart.
When the battery level is low, the Parrot MINIKIT
Smart emits a series of beeps. The Parrot MINIKIT
Smart will turn off approximately 15 minutes later.
English 9
Page 10
Charging the phone
Note: The Parrot MINIKIT Smart USB port will also allow
you to install the software updates of the kit.
If your phone can be charged via USB, you can use the
Parrot MINIKIT Smart to char ge it (refer to your
phone user manual for more information). Use the
cable provided wit h your phone if necessary.
Charging yo ur phone is only possible if the Parrot
MINIKIT Smart is connected to the cigar lighter
char ger.
Getting started
Turning the Parrot MINIKIT Smart on / off
Hold down the red button for 3 seconds to turn on / off the
Parrot MINIKIT Smart.
Accessing the Parrot MINIKIT Smart menu
Press the jog wheel to access the main menu.
Browse through the menus by turning the jog wheel
and confirm with the green button or by pressing the
jog wheel.
To exit the menu, press the red button or wait for a
few seconds.
10 English
Connecting a phone by Bluetooth
Befo re using the Parrot MINIKIT Smart with your phone,
you first have t o pair both devices. The pairing pro cess
is only required once.
From your Bluet ooth® phone, search for
1.
Bluetoo th peripherals.
Select «Parrot MINIKIT Smart».
2.
Enter the « 0000 » PIN code if prompted to do
3.
so.
> The Parrot MINIKIT Smart says « Pairing
successful ».
Depending on the model of your phone, the
connection will then be automatic as soon as you
enter your vehicle.
If your phone supports the GPS feature and if it can
send the navigation instructions via Bluetooth (A2DP
profile), the navigation instructions will be played by
the Parrot MINIKIT Smart. Refer to the support
section of our website www.parrot.com for more
information about the Parrot MINIKIT Smart
compatibilit y.
Page 11
Synchronising the phonebook
Note: Only the contacts stored in the phone
memory are synchronized. If your contacts are
stored in the SIM card memory, t ransfer them into
the phone memory.
With some Bluetooth phones, the phonebook is
automatically synchronized in the kit’s memory.
If your phone doesn’t support automatic
synchronizatio n, you can also send contacts manually
from your mobile to the car kit via Bluetoot h. To do
so, select Receive contacts. Refer to your phones’
user guide for more information about sending
contacts (via Object Push).
Recording voice tags
All your contacts, after automatic synchronization or
Object Push process, ar e directly provided with a
voice tag in the Parrot MINIKIT Smart. Consequently,
you don’t have to record your own voice tag on each
contact to make a call via the voice recognition
process.
However, if the Parrot MINIKIT Smart doesn’t
understand the name of one of your contacts or if a
voice tag is t oo long, you can record a new one. To
do so, select Add voice tags and then select the
contact and record your voice.
Phone
Receiving a call
An incoming call is indicated by a vocal message. The name
of the caller is announced if his number is recorded in the
phonebook o f the phone connected t o the Parrot MINIKIT
Smart.
If you want to answer the call, press the green button.
If you want to refuse the call, press the red button.
Making a call
To make a call via voice recognition:
To start the voice recognition feature, press the
1.
green button.
> The Parrot MINIKIT Smart asks you the name
of the contact you want to call.
Say the name of the contact and the type of
2.
number («Work», «Cellphone»...) if there are
several numbers associated to your contact.
> The call is automatically launched if the vo ice
tag is correctly understo od.
> If it is not the case, a confirmation message is
asked by the kit. Co nfirm by saying «Yes» or
«Call».
English 11
Page 12
Note: At any time, press the red key to exit voice
recognition mode.
To make a call manually
Note: Navigation instructions are not played by the Parrot
MINIKIT Smart during a call.
Press the jog wheel and select Phonebook.
1.
Select a letter and push t he jog wheel.
2.
Once the contact chosen, press the green key to
3.
call this contact or use the jo g wheel to choose
between different numbers of the same contact.
Hold down the green key of the Parrot MINIKIT Smart
for two seconds to redial the last dialled number.
Using the Parrot MINIKIT Smart while on a call
Use the jog wheel during a call to adjust the
communication volume. The volume sett ing is saved
for subsequent calls.
During a call, if you want to continue the conversation
on your phone (private conversation), press the gr een
butto n.
During a call, the Parrot Parrot MINIKIT Smart allows
you to send DTMFs t o manage yo ur voice mail for
example. To do so, press the jog wheel to access the
DTMF menu.
12 English
Troubleshooting
The kit says «Memory full»
You can pair up to ten devices. If you attempt to pair an
elevent h phone, the kit says «memory full». You must clear
the memory by holding down both the red button and the
jogwheel for three seconds. Doing so also clears all the
contacts.
The kit seems to be frozen
In case of malfunction, you can r eboot the Parrot MINIKIT
Smart. To do so, press the Reset button (diagram 7 p.7).
The kit does not seem to work with my phone
Make sure your phone is compatible with the Parrot
MINIKIT Smart. To do so, refer to the compatibility list
of the Parrot MINIKIT Smart available on our website
www.parrot.com, in the Support & Downloads section.
If your phone is compatible with the Parrot MINIKIT
Smart, make sur e you have the latest software version on
your Parrot MINIKIT Smart. This update and the update
procedure are available on our website www.parrot.com,
in the Support & Downloads section.
Page 13

General information
Warranty
Without prejudice of legal warranty, Parrot pro ducts ar e
warranted during 1 year from the date of purchase for
defects in materials and workmanship, pr ovided that no
deterioratio n to the product has been made, and upon presentatio n
of proo f of purchase (date of purchase, location of sale and
product serial number) to the retailer. Warranty does no t
cover: upgrading o f the software items of the Parrot products with Bluetooth cell phones for compatibility purpose,
data recovery, deterioration of the external aspect due to
normal use of the product, any damage caused by accident,
misuse, misapplication, or non-Parrot products. Parrot is
not responsible for storage, loss or damaged to data during
transit or repair. Any product wrongfully declared to be
defective will be returned to sender and inspection, process
and carriage costs will be invoiced to him.
Correct disposal of This Product(Waste Elec trical &
Electronic Equipment)
This marking shown on the product or its literature,
indicates that it should not be disposed with other
household wastes at the end of it s working life. To prevent
possible harm to the environment or human health from
uncontrolled waste disposal, please separate this from other
types of wastes and recycle it r esponsibly to promote the
sustainable reuse of material resources.
Household users should contact either the retailer where
they purchased this product, or their local government office, for details of where and how they can take this item for
environmentally safe recycling. Business users should
contract t heir supplier and the terms and conditions of the
purchase contract. This product should not be mixed with
other commercial wastes for dispo sal.
Modifications
The explanations and specifications in this guide are given
for informatio n purposes only and may be modified without
prio r notice. T hey are deemed to be correct at time of going
to press. The utmost care has been taken when writing this
guide,as part of the aim to provide you with accurate
information.
However, Parro t shall not be held responsible for any
consequences arising from any errors or omissions in t he
guide, nor for any damage or accidental loss of data
resulting directly or indirectly from the use of the information
herein. Parrot reserves the right to amend or improve the
product design or user guide without any restrictions and
without any obligatio n to notify users. As part of our
ongoing concern to upgrade and improve our products, the
product that you have pur chased may differ slightly from t he
model described in this guide. If so, a later version of this
guide might be available in electronic format at Parrot ’s
website at www.parrot.com.
FCC Compliance Statement
This device complies with part 15 of the FCC rules.
Operation is subject to the following two conditions:
English 13
Page 14

(1). t his device may not cause harmful int erference, and
We, Parrot S.A. of 174 quai de Jemmapes, 75010
Paris, France, declare under our sole
responsibility that our product, the Parrot
MINIKIT Smart to which this declaration relates in
conformity with appropr iate standards EN300328,
EN301489-17, EN60950 following the provision of
Radio Equipment and Telecommunication
Equipment dir ective (1999/5/EC R&TTE), with
requirements covering EMC dir ective 2004/108/
EC, Low Voltage directive 73/23/EEC and
automot ive directive 72/245/EEC amended by
2006/28/EC directive.
Identification N. 394 149 496 R.C.S. PARIS - Parro t
S.A.
(2). this device must accept any interference received,
including interference that may cause undesired operation.
Note: The manufacturer is not responsible for any radio or tv
interference caused by unauthorized modifications to this
equipment. Such modifications could void the user’s
authority to operate the equipment.
FCC §15.105 statement: This equipment has been tested and
found to comply with the limits for a Class B digit al device,
pursuant to part 15 of the FCC Rules. These limit s are
designed to provide reasonable protection against harmful
interference in a residential installation.
This equipment generates, uses and can radiate radio
frequency energy and, if not installed and used in accordance
with the instructions, may cause harmful interference to radio
communications. However, there is no guarant ee that
interference will not occur in a part icular installation. If this
equipment does cause harmful interference to radio or
television reception, which can be determined by turning the
equipment off and o n, the user is encouraged to try to
correct the interference by one or more of the following
measures:
- Reo rient or relocate the receiving antenna.
- Increase the separation between the equipment and
receiver.
- Connect the equipment into an outlet on a circuit different
from that to which the receiver is connected.
- Consult the dealer or an experienced radio/TV technician
14 English
for help.
Canada Class B statement: This Class B digital apparatus
complies with Canadian ICES-003
Decla ration of Conformity
Copyrights
Copyr ight © 2010 Parrot.
Licences
The Bluetooth word mark and logos are owned by the
Bluetoo th SIG, Inc. and any use of such marks by Parrot S.A.
is under license. Bluetoot h QDID : B016898, B013838, B012423
Page 15

Parrot, Par rot Minikit and the Parro t logo are registered
trademarks of PARROT SA
Other trademarks and trade names are those of their
respective owners.
English 15
Page 16
Guide
d'utilisation
rapide
A propos de ce guide : Afin de limit er notre
consommatio n de papier et dans le cadre de notre
démarche aussi responsable et respectueuse que possible
de l’environnement, Parrot privilégie la mise en ligne des
documents utilisateurs plutôt que leur impression.
Ce guide simplifié du Parrot MINIKIT Smart se limite donc
à vous fournir les principales instructio ns qui vous
permettront d’utiliser facilement cet appareil. Vous
tro uverez plus d’informatio ns sur la section Support et
téléchargement de notre site web www.parrot.com : notice
complète, FAQ, didacticiels...
16 F rançais
Avant de commencer
Avertissement
Les fonctions requérant une attention prolongée doivent
uniquement être utilisées lorsque le véhicule est à l’arrêt.
Votre sécurité et celle des aut res usagers de la r oute
prime sur les appels téléphoniques et sur les instructions
fournies par votre GPS.
Si votre véhicule est équipé d’un pare brise athermique,
la réception du signal GPS sur votre téléphone peut être
affectée.
Mise à jour
Téléchargez gratuitement la dernière mise à jour de votr e
produit (et consultez la procédure de mise à jour) sur not re
site web www.parrot.com section Support et
téléchargements. Ces mises à jour vous permettro nt de
bénéficier de nouvelles fonctionnalités et d’améliorer la
compatibilit é du produit.
Page 17
Installation
Avertissement : Evitez toute installation pouvant
entraver l’utilisation de commandes importantes ou
pouvant réduire la visibilité du conducteur. N’installez
pas le Parrot MINIKIT Smart là où il pourrait être
propulsé par l’ouverture d’un airbag ou à pro ximité
d’une bouche d’aération ou d’air conditionné du
véhicule.
Installer le Parrot MINIKIT Smart
Netto yez la surface de montage puis installez le
support de fixation sur le pare-brise (schéma 1 p.4).
Pour cela, pressez fermement la vento use contre le
parebrise et levez la manette de verr ouillage jusqu'à
ce que le support soit correctement fixé.
Le cycle normal de réchauffement et refroidissement à
l’intérieur d’une voiture peut ent rainer le décollage de
la vent ouse. Si la vent ouse n’adhèr e pas corr ectement
à la surface d’installation, l’appareil peut tomber au
cours d’un virage ou en passant sur un dos d'âne.
Vérifiez donc l’adhésion de la ventouse à chaque fois
que vous utilisez le Parrot MINIKIT Smart.
Réinstallez-la si nécessaire.
Installez le Parrot MINIKIT Smart sur le support de
montage (schéma 2 p.4). Pour retirer le Parrot
MINIKIT Smart du support de montage, appuyez sur
les boutons situés derrière celui-ci (schéma 6 p.7).
Sortez le microphone du Parrot MINIKIT Smart et
utilisez les pièces en plastique fournies pour l'installer
sur le pare-soleil ou sur le tableau de bord (schéma 3
p.5).
Installer le téléphone
Installez votre téléphone sur le Parrot MINIKIT Smart
en insérant d’abord sa face supérieure (schéma 4 p.5).
Si vous dispo sez de la fonction GPS sur votre
téléphone, inst allez-le sur le support de montage de
manière à pouvoir visualiser à tout moment les
informations de navigation.
Charger le Parrot MINIKIT Smart
Avant la première utilisation, le Parrot MINIKIT Smart
doit être chargé. Pour cela, utilisez la prise allume
cigare de votre véhicule ou connect ez le Parrot
MINIKIT Smart à votre PC en ut ilisant un câble USB /
mini USB (schéma 5 p.6).
La LED située à côté de la prise mini-USB s'allume
pour indiquer que la charge est en cours. Une fois la
char ge terminée, la LED s’ét eint. La durée de
char gement est de 2 heures.
Lorsque la batterie est faible, le Parrot MINIKIT Smart
émet une série de bips. Cette indicatio n sig nifie qu’il
reste environ 15 mn d’autonomie.
Français 17
Page 18

Charger le téléphone
Note: Le port USB permet également d'effectuer les mises
à jour du Parrot MINIKIT Smart.
Vous pouvez charger la batterie de votre téléphone
en le connectant au Parrot MINIKIT Smart. Pour cela,
votr e téléphone doit pouvoir se charg er en USB
(consultez la notice de votre téléphone pour plus
d’informatio ns). Utilisez le câble fourni avec votre
téléphone si nécessaire.
Le chargement du téléphone est uniquement possible
lorsque le Par rot MINIKIT Smart est connecté au
char geur 12V allume-cigare.
Première utilisation
Allumer / éteindre le Parrot MINIKIT Smart
Appuyez sur le bouto n rouge pendant 3 secondes pour
allumer / éteindre le Parrot MINIKIT Smart.
Accéder aux menus du Parrot MINIKIT Smart
Appuyez sur la molett e pour accéder aux menus.
Naviguez dans les menus en t ournant la molett e, et
validez avec le bouton vert ou en appuyant sur la
molette.
18 F rançais
Pour sortir du menu, appuyez sur le bouto n rouge ou
patientez quelques secondes.
Connecter un téléphone par Bluetooth
Avant d’utiliser le Parrot MINIKIT Smart avec votre
téléphone, vo us devez appairer les deux appareils.
Lorsque les deux appareils se seront détectés
mutuellement, il ne ser a plus nécessaire de procéder à
cette opération.
Depuis votre téléphone Bluet ooth®, lancez une
1.
recherche de périphériques Bluetoot h.
Sélectionnez «Parrot MINIKIT Smart».
2.
Entrez « 0000 » sur votre téléphone si celui-ci
3.
vous y invite.
> Le Parrot MINIKIT Smart anno nce « Appairage
réussi ».
La connexion avec votre téléphone se fera ensuite
automatiquement dès que vous allumerez le Parrot
MINIKIT Smart. Selon le modèle de votre téléphone,
vous devrez peut -être autoriser la connexion au
Parrot MINIKIT Smart pour permettre cette
connexion aut omatique.
Si vous dispo sez de la fonction GPS sur votre
téléphone et si votre téléphone permet l'envoi des
instructions de navigation par Bluetoot h (profil
A2DP), les instructions de navigatio n seront énoncées
sur le Parrot MINIKIT Smart. Consultez la section
support de notre site web pour plus d'informations
sur la compatibilité du Parrot MINIKIT Smart.
Page 19
Synchroniser le répertoire du téléphone
Note: Seuls les contacts enregistrés dans la
mémoire du téléphone se synchronisent. Si vo s
contacts sont enregistrés dans la mémoire de la
carte SIM, transférez-les dans la mémoire du
téléphone.
Avec certains téléphones Bluetooth, le réperto ire du
téléphone est automatiquement synchronisé dans la
mémoire du kit.
Si votre téléphone n’effectue pas la synchronisation
automatique, vous pouvez aussi envoyer vos
contacts manuellement vers le Parrot MINIKIT Smart
par Bluetoo th (via Object Push). Pour cela, appuyez
sur la molette et sélectionnez Recevoir des contacts.
Consultez la notice de votre téléphone pour connaît re
la procédure d’envoi de contacts par Bluet ooth.
Enregistrer des empreintes vocales
Tous vo s contacts, après synchronisation ou envoi
par Bluet ooth, sont automatiquement dotés d’une
empreinte vocale dans le Parrot MINIKIT Smart. Vous
n’avez donc pas à enregistrer votre propr e empreinte
sur chaque contact avant de procéder à un appel par
reconnaissance vocale.
Si le Parrot MINIKIT Smart interprète mal le nom d’un
de vos contacts ou si vous souhaitez enregistrer une
empreinte vocale plus courte, il vous est possible
d’enregistrer une nouvelle empreinte. Pour cela,
appuyez sur la molette et sélectionnez l’option
Ajouter des empreintes vocales.
Téléphone
Recevoir un appel
Un appel entrant est indiqué par un message vocal. Le nom
du contact est annoncé si le numéro de ce contact est
enregistré dans le répertoire du téléphone connecté au
Parrot MINIKIT Smart.
Si vous souhaitez accepter cet appel, appuyez sur le
bouton vert.
Si vous souhaitez refuser cet appel, appuyez sur le
bouton rouge.
Emettre un appel
Pour émettre un appel par reconnaissance vocale:
Appuyez sur le bouton vert pour initier le
1.
processus de reconnaissance vocale.
> Le nom du contact que vous souhaitez appeler
vous est demandé.
Prononcez le nom du contact que vous souhaitez
2.
appeler suivi du type de numéro («Bureau»,
«Portable»...) si ce contact dispose de
plusieurs numéro s.
> L’appel vers ce contact est automatiquement
initié si la commande vocale a ét é bien comprise.
Français 19
Page 20

> Dans le cas co ntraire, le kit mains libres diffuse
Note: A tout moment, appuyez sur le bouton rouge
pour quitt er le mode de reconnaissance vocale.
Note: Les instructions de navigation ne sont pas diffusées
par le Parrot MINIKIT Smart pendant un appel.
un message de confirmation. Confirmez en
prononçant «oui» ou «appeler».
Le Parrot MINIKIT Smart vo us permet d’envoyer des
DTMF en communication pour gérer votre
messagerie vocale par exemple. Pour cela, appuyez
sur la molette au cours de la communication.
Pour émettre un appel manuellement:
Appuyez sur la molette et sélectionnez
1.
Répertoire.
Sélectionnez une lettre et appuyez sur la molett e.
2.
Une fo is le contact cho isi, appuyez sur le bouto n
vert pour lancer l’appel vers le numéro par défaut
ou utilisez la molette pour choisir parmi les
différents numéros du contact («Bureau»,
«Portable»...).
Si vous souhaitez rappeler le dernier numéro
composé, appuyez deux secondes sur le bouton vert.
Utilisation pendant un appel
Pour régler le volume sonore lo rs d’une
communication, utilisez la molette. Le volume est
sauveg ardé pour les communications suivantes.
Si vous souhaitez transférer une communication en
cours sur votre téléphone, appuyez sur le bouton
vert.
20 F rançais
Problèmes fréquents
Le Parrot MINIKIT Smart annonce «Mémoire pleine»
Vous pouvez jumeler jusqu’à 10 appareils avec le Parrot
MINIKIT Smart. Si vous jumelez un onzième téléphone, le kit
annonce « Mémoire pleine ». Vous devez alor s effacer la
mémoire du Parrot MINIKIT Smart en appuyant
simultanément sur le bouton rouge et sur la molette pendant
3 secondes. Ceci effacera aussi tous les contacts.
Le Parrot MINIKIT Smart semble bloqué
En cas de problème, vous po uvez redémarrer le Parrot
MINIKIT Smart. Pour cela, appuyez sur le bouton Reset .
(schéma 7 p.7).
Impossible d'utiliser mon téléphone avec le kit
Vérifiez la compatibilité de votre téléphone avec le
Parrot MINIKIT Smart. Vous trouverez la liste de
compatibilit é du Parrot MINIKIT Smart sur notre site
web www.parrot.com, section Support et
Téléchargement.
Si votre téléphone est affiché compatible, vous devez
peut être mettre à jour votre Parrot MINIKIT Smart. Vous
Page 21

tro uverez la procédure de mise à jour du Parrot MINIKIT
Smart sur notre site web www.parrot .com, section
Support et Téléchargement.
Informations générales
Garantie
Sans préjudice de la g arantie légale, les produits Parrot sont
garantis, pièces et main d’oeuvre, pendant 1 an à compter de
la date d’achat, sauf altération du pro duit, et sur
présentation d’une preuve d’achat (date et lieu d’achat n° de
série du produit) au revendeur.
La garantie ne couvre pas la mise à jour des logiciels inclus
dans les produits Parro t avec des téléphones mobiles
Bluetoo th à des fins de compatibilit é, la récupération de
données, la détérioration extérieure du produit due à une
utilisation normale du produit, tout dommage causé par
accident , une utilisation anormale ou non aut orisée du
produit, un produit non Par rot. Parrot n’est pas responsable
du sto ckage, de la perte ou de l’endommagement des
données durant le transport ou la réparation.
Tout produit s’avérant non défectueux sera retourné à
l’expéditeur et les frais de traitement, de vérification et de
transport lui seront facturés.
Comment recycler ce produit
Déchets d’équipements élect riques et électroniques
Le symbole sur le produit ou sa documentation indique qu’il
ne doit pas être éliminé en fin de vie avec les autres déchets
ménagers. L’élimination incontrôlée des déchets pouvant
porter préjudice à l’environnement ou à la sant é humaine,
veuillez le séparer des autres types de déchets et le recycler
de façon responsable. Vous favoriserez ainsi la réutilisation
durable des ressources matérielles.
Les particuliers sont invités à contacter le distributeur leur
ayant vendu le produit ou à se renseigner auprès de leur
mairie pour savoir où et comment ils peuvent se débarrasser
de ce produit afin qu’il soit recyclé en respectant
l’environnement. Les entreprises sont invitées à contacter
leurs fournisseurs et à consulter les conditions de leur
contrat de vente. Ce produit ne doit pas être éliminé avec les
autres déchets commerciaux.
Modifications
Les explications et spécifications contenues dans ce guide
utilisateur ne sont fournies qu’à titre d’information et peuvent
être modifiées sans notificatio n préalable. Ces informations
sont correctes au moment de l’impression et le plus grand
soin est apport é lors de leur rédactio n afin de vous fournir
des informations les plus précises possible.
Cependant , Parrot S.A. ne saurait être tenu responsable,
directement ou indirectement, des évent uels préjudices ou
pertes de données accidentelles résultant d’une erreur ou
omission au sein du présent document. Parrot S.A. se
réserve le droit d’amender ou améliorer le pr oduit ainsi que
son guide utilisateur sans aucune restrictio n ou obligation de
prévenir l’utilisateur. Dans le cadre de l’attention portée par
Parrot S.A. sur l’amélioration de nos pr oduits, il est possible
que le produit que vous avez acheté diffère légèrement de
celui décrit au sein du présent document. Dans ce cas, vous
pourrez évent uellement trouver une nouvelle version du
Français 21
Page 22

guide utilisateur au format électronique sur le site www.
Parrot SA, 174 quai de Jemmapes, 75010 Paris,
France, déclare sous son unique responsabilité
que le produit décrit dans le présent guide
utilisateur est en conformité avec les normes
techniques EN300328, EN301489-17, EN60950
suivant les disposit ions de la directive R&TTE
99/5/EC, ainsi qu’avec les exigences de la directive
EMC 2004/108/CE, de la directive 73/23/CEE
relative aux appareils à basse tension et de la
directive Aut omobile 72/245/CEE amendée par la
directive 2006/28/ CE.
parrot.com.
Décla ration de conf ormité
Copyright
Copyr ight © 2010 Parrot.
Marques déposées
Le nom et le logo Bluetooth sont des marques déposées de
Bluetoo th® SIG, Inc. et toute utilisation de ces derniers par
Parrot S.A. est faite sous licence. Bluetooth QDID : B016898,
B013838, B012423
Parrot, Parrot Minikit, les marques et le logo Par rot so nt la
propriété de PARROT SA.
Les autre marques mentionnées dans ce do cument sont
protégées et sont la propriété de leurs titulaires respectifs.
22 F rançais
Page 23

Guía de
instalación
rápida
A propósito de este manual: Para limitar nuestro
consumo de papel, siguiendo nuestra actuación lo más
responsable y respetuosa posible con el medio ambiente,
Parrot pr efiere poner en línea los documentos para los
usuarios en lugar de imprimir los.
Este manual simplificado del Parrot MINIKIT Smart se
limit a por tanto a aportarle las principales instrucciones
que le permit irán utilizar el aparato con facilidad. Podrá
enco ntrar más información en la sección Apoyo al cliente
de nuestra página web www.parrot .com: manual
completo, preguntas frecuent es, softwares didácticos...
Antes de comenzar
Advertencia
Las funciones que requieran una atención prologada
se deben utilizar únicamente cuando el vehículo esté
parado. Su seguridad y la de las demás personas que
circulan por la carretera es más importante que las
llamadas telefónicas y las instrucciones dadas por el
GPS.
Si su vehículo está equipado con un parabrisas
atérmico, la recepción de la señal GPS de su teléfono
puede ver se afectada.
Actualización del software
Descargue gratis la última actualización del Parrot MINIKIT
Smart (y consulte el procedimiento de actualización en
nuestra página web www.parrot .com, sección Apoyo al
cliente. Las actualizaciones le permitirán disfrutar de nuevas
funciones y mejorar la compatibilidad del Parrot MINIKIT
Smart.
Español 23
Page 24
Installation
Advertencia: Evite realizar una instalación que
pueda obstaculizar el uso de los mandos
importantes o pueda reducir la visibilidad del
conductor. No instale el Parrot MINIKIT Smart
donde pueda ser propulsado por la apertura de un
airbag o cerca de una boca de aireación o de aire
acondicionado del vehículo.
Instalar el Parrot MINIKIT Smart
Limpie la superficie de montaje e instale el soporte de
fijación en el parabrisas (esquema 1 p.4). Para ello,
presione con fuerza la ventosa contra el parabrisas y
levante la palanca de bloqueo hasta que el soporte
quede co rrectament e sujeto.
El ciclo normal de calentamiento y enfriamiento
dentro de un coche puede hacer que se despegue la
ventosa. Si la ventosa no se ha adherido
correctamente a la superficie en la que se ha
colocado, el aparato se podr ía caer al tomar una
curva o al pasar por un badén. Compruebe que la
ventosa está bien adherida siempre que utilice el
Parrot MINIKIT Smart. Vuelva a instalarla si es
necesario .
Colo que el Parrot MINIKIT Smart sobre el so porte
24 Español
de montaje (esquema 2 p.4). Para sacar el Par rot
MINIKIT Smart del soport e de montaje, pulse los
botones que están detrás de éste (esquema 6 p.7).
Saque el micrófono del Parrot MINIKIT Smart y utilice
las piezas de plástico suministradas para colocarlo
en el parasol o en el salpicadero (esquema 3 p.5).
Instalar el teléfono
Instale su teléfono en el Parrot MINIKIT Smart
introduciendo primero la cara superior (esquema 4
p.6).
Si su teléfono tiene la función GPS, instálelo en el
soporte de montaje para tener a la vista las
informaciones de navegación.
Cargar el Parrot MINIKIT Smart
Antes de utilizarlo por primera vez, debe cargar
primero el Parrot MINIKIT Smart . Para ello, utilice la
toma del encendedor del coche o conecte el Parrot
MINIKIT Smart a su PC utilizando un cable USB / mini
USB (esquema 5 p.6).
Se encenderá el LED que se encuentra al lado de la
toma mini-USB para indicar que se est á car gando.
Una vez finalizada la carga, se apagará el LED. El
tiempo de carga es de 2 horas.
Cuando la batería está baja, el Parrot MINIKIT Smart
emite una serie de bips. Esto significa que quedan
unos 15 minutos de autonomía.
Page 25

Cargar el teléfono
Nota: El puerto USB del Parrot MINIKIT Smart también
permit e realizar actualizaciones.
Puede cargar la batería de su teléfono conectándolo
al Parrot MINIKIT Smart. Para ello, su teléfono se
debe poder cargar en USB (consulte el manual de su
teléfono para más información). Si es necesario,
utilice el cable incluido con el teléfono.
Sólo se puede cargar el teléfono si el Parrot MINIKIT
Smart está conectado al cargador 12V del
encendedor.
Primera utilización
Encender / apagar el Parrot MINIKIT Smart
Para encender / apagar el Parrot MINIKIT Smart mantenga
presionado el botón rojo durante 3 segundos.
Entrar en los menús del Parrot MINIKIT Smart
Pulse la rueda cent ral para acceder a los menús.
Navegue por lo s menús gir ando la rueda, y valide
pulsando el botón verde o la rueda.
Para salir del menú, pulse el botón rojo o espere.
Conectar un teléfono mediante Bluetooth
Antes de utilizar el Parrot MINIKIT Smart con su
teléfono, hay que enlazar ambos aparatos. El proceso
de enlace se requiere solamente una vez.
Desde su teléfono, inicie una búsqueda de
1.
dispositivos Bluetooth®.
Seleccione «Parrot MINIKIT Smart».
2.
Marque “0000” en su teléfono cuando esté le
3.
invite a hacerlo.
> El Parro t MINIKIT Smart enuncia « Enlace
realizada » una vez finalizada el proceso de
conexión entr e ambos dispositivos.
Según el modelo de teléfono que t enga, es posible
que deba autorizar la conexión al Parrot MINIKIT
Smart para que se pueda efectuar la conexión
automática entre los 2 aparatos.
Si su teléfono tiene la función GPS y permite enviar
instrucciones de navegación por Bluetoot h (perfil
A2DP), las instrucciones de naveg ación aparecerán
enunciadas en el Parrot MINIKIT Smart. Consulte la
sección soporte de nuest ra página web para o btener
más información sobre la compatibilidad del Parrot
MINIKIT Smart.
Sincronizar la agenda del teléfono
Con algunos teléfonos Bluetooth, la agenda del
teléfono se sincroniza automáticamente en la
memoria del kit.
Español 25
Page 26
Nota: Sólo se sincronizan los contactos guardados
en la memoria del teléfono. Si sus contactos están
guardados en la memoria de la tarjeta SIM, deberá
pasarlos a la memoria del teléfono. Consulte el
manual del usuario de su teléfono para más
información.
Si no es el caso, puede utilizar la función Object Push
de su teléfono para enviar contactos de su teléfono
hacia el Parrot MINIKIT Smart mediante Bluetooth.
Para hacer esto, seleccione la opción Recibir
contactos. Consulte el manual de usuario de su
teléfono para conocer el proceso de envío de
contactos mediante Object Push.
Grabar etiquetas vocales
Tras la sincr onización o el envío por Object Push,
todos sus contactos están dotados de una etiqueta
vocal en el Parrot MINIKIT Smart. Entonces, no
necesit a grabar su propia et iqueta vocal en cada
contacto para realizar una llamada mediante
reconocimiento de voz.
Sin embargo , si el Parrot MINIKIT Smart no entiende
el nombre de uno de sus contactos, se puede grabar
una nueva etiqueta. Para hacer est o, pulse la rueda y
seleccione la opción Añadir registros de voz.
26 Español
Teléfono
Recibir una llamada
Las llamadas ent rantes se anuncian co n un mensaje de vo z. El
nombre del contacto est á anunciado si su número está
memorizado en la agenda del t eléfono conectado al Parrot
MINIKIT Smart.
Si desea aceptar esa llamada, pulse el botón verde.
Si desea r echazar esa llamada, pulse el bo tón rojo.
Realizar una llamada
Para hacer una llamada a través del reconocimiento
de voz:
Pulse el botón verde para iniciar el proceso de
1.
reconocimiento de voz
> Se le pedirá el nombre del contacto al que
desea llamar.
Diga el nombre del contacto seguido del tipo
2.
de número (“Trabajo”, “Móvil”…) si el
contacto tiene vario s números.
> La llamada a ese contacto se har á
automáticamente si la instrucción de voz ha sido
comprendida.
> En caso contrario, el kit de manos libres
emitirá un mensaje de confirmación. Confirme
diciendo “sí”, “llama” o “llamar”.
Page 27

Nota: Para salir del modo de reconocimiento de
voz, puede pulsar en cualquier momento el botón
rojo.
Nota: Las instrucciones de navegación no son difundidas
por el Parrot MINIKIT Smart durante una llamada.
durante una llamada para gestionar su buzón por
ejemplo. Pulse la rueda para entrar en el menú de los
DTMF .
Para hacer una llamada manualmente:
Pulse la rueda y seleccione la opción Agenda.
1.
Seleccione una letra y pulse la rueda.
2.
Una vez seleccionado el contacto, pulse la tecla
3.
verde para realizar la llamada al número por
defecto. Si es necesario, utilice la rueda para
elegir entre los dist intos números del contacto.
Mantenga pulsado el botó n verde del Parrot MINIKIT
Smart durante 2 segundos para llamar al último
número marcado.
Utilización durante una llamada
Durante una llamada, el Parrot MINIKIT Smart le
permit e ajustar el volumen de la comunicación. Para
hacer esto, utilice la rueda. El volumen está guardado
para las próximas llamadas.
Durante una llamada, pulse el bot ón verde para
transferir una llamada a su teléfono. La llamada pasa
automáticamente en su teléfono.
El Parrot MINIKIT Smart le permite enviar DTMF
En caso de problema
El Parrot MINIKIT Smart anuncia “Memoria llena”
Se puede enlazar hasta 10 dispositivos. Al enlazar un
undécimo teléfono, el kit enuncia “memoria llena”. T iene que
borrar la memoria del Par rot MINIKIT Smart pulsando
simultáneamente el botón rojo y la rueda durante 3
segundos. Este pro ceso borra también todos los
contactos.
El Parrot MINIKIT Smart parece que está bloqueado
En caso de problema, puede reiniciar el Parrot MINIKIT
Smart. Para ello, pulse el botón Reset (esquema 7 p.7).
No consigo utilizar mi teléfono con el kit
Compruebe la compatibilidad del teléfono con el Parrot
MINIKIT Smart. Encontrará la lista de co mpatibilidad del
Parrot MINIKIT Smart en nuestra página web www.parrot.
com, sección Apoyo al cliente.
Si su teléfono aparece co mo compatible, es posible que
tenga que actualizar su Parrot MINIKIT Smart. Encontrará el
modo de actualización del Parrot MINIKIT Smart en nuest ra
página web www.parrot .com, sección Apoyo al cliente.
Español 27
Page 28

Información general
Garantía
Sin perjudicar la garantía legal, Parrot garantiza sus
productos, piezas y mano de obra incluidos, por el perío do
de 1 año a partir de la fecha de compr a, salvo en caso de
alteración del producto.
Esta fecha de compra debe estar certificada por una prueba
de compra original del producto (fecha y lugar de compra,
número de serie del producto) presentada al dependiente. La
garantía no cubre: la actualización de los prog ramas
incluidos en los productos Parrot con teléfo nos móviles
dotados de la funcionalidad Bluetooth® con objetivo de
compatibilidad, la recuperación de datos, la deterioración
exterior del producto causada por la utilización cotidiana
del producto, cualquier daño causado por un accidente, un
uso anormal o no autorizado del producto, un producto de
una marca diferente. Parrot no es responsable del
almacenamiento de los datos, de sus pérdidas o de daños
ocurrido s durante el transporte o la reparación.
Cualquier producto que no sería defectuoso se retornará al
cliente, y los gasto s de intervención y de tr ansporte serán a
su carga.
Eliminación correcta de este producto (material
eléctrico y elec trónico de desca rte)
La presencia de esta marca en el producto o en el material
informativo que lo acompaña, indica que al finalizar su vida
útil no deberá eliminarse junto con otros residuos
28 Español
domésticos. Para evitar los posibles daños al medio
ambiente o a la salud humana que representa la eliminación
incontrolada de residuos, separe este producto de otros
tipos de residuos y recíclelo correctamente para promover
la reutilización sostenible de recursos materiales.
Los usuarios particulares pueden contactar con el
establecimiento donde adquirieron el producto, o con las
autoridades locales pertinent es, para
informarse sobre cómo y dónde pueden llevarlo para que
sea sometido a un r eciclaje ecológico y seguro. Los usuarios
comerciales pueden contactar con su proveedor y consultar
las condiciones del contrato de compra. Este producto no
debe eliminarse mezclado con otros residuos comerciales.
Modificaciones
Las explicaciones y especificaciones contenidas en este
manual son meramente informativas y pueden ser
modificadas sin previo aviso. Se consideran correctas en el
momento de enviar la publicación a imprenta. Este manual
se ha redactado con el máximo cuidado, con el fin de
proporcionarle una información precisa.
Sin embargo, Parrot no asume responsabilidad alguna por
las consecuencias derivadas de los errores u omisio nes que
pueda haber en el manual, ni por los da ños o pérdidas
accident ales de datos que se produzcan como consecuencia
directa o indirecta del uso de la información aquí contenida.
Parrot se reserva el derecho a modificar o mejorar el diseño
del producto o el manual de usuario sin restricciones y sin la
obligación de notificárselo a los usuarios.
En ar as de actualizar y mejorar nuestros productos, es
Page 29

posible que el producto que usted haya adquirido sea
Parrot SA, 174 quai de Jemmapes, 75010 París,
Francia, declara bajo su exclusiva responsabilidad
la conformidad del producto descrito en est e
mismo manual de usuario con las siguientes
normas técnicas: EN300328, EN301489-17,
EN60950 de acuerdo con las dispo siciones de la
Directiva R&TTE 1999/5/EC, de la directiva EMC
2004/108/CE, de la directiva de Bajo Voltaje 73/23/
EEC y de la directiva Automóvil 72/245/EEC
enmendada por la Directiva 2006/28/CE.
ligeramente distinto al modelo que se describe en este
manual. En tal caso, tiene a su disposición una versión más
reciente de este manual en formato electrónico en la página
web de Par rot: www.parrot.com.
Decla ración de conformidad
Marcas registradas
El nombre y el logotipo Bluetoo th son marcas registradas
de Bluetooth ® SIG, Inc. y toda utilización de estos últimos
por Parrot S.A se hace con una licencia. Bluetooth QDID :
B016898, B013838, B012423
Parrot, Parro t Minikit, las marcas y el lo gotipo Parrot son
propiedad de PARROT SA.
Las demás marcas citadas en este documento están
protegidas y son propiedad de sus respect ivos titulares.
Español 29
Page 30
Bedienungs
anleitung
Zu diesem Leitfaden : Wir wollen unser en
Papierverbrauch einschränken und so
verantwortungsbewusst und umwelt freundlich wie möglich
handeln. Daher zieht Parrot es vor, Dokument e für die
Benutzer im Internet zu veröffentlichen, anstatt sie
auszudrucken.
Diese vereinfachte Anleitung des Parrot MINIKIT Smart
beschränkt sich daher auf die wichtigst en Anweisungen,
damit Sie dieses Gerät leicht benutzen können. Weitere
Angaben finden Sie im Bereich Support und Downloads auf
unserer Website www.parro t.com: Vollständige Anleitung,
häufige Fragen, Lernsoftware...
30 D eutsch
Bevor Sie beginnen
Warnung
Funktionen, die längere Aufmerksamkeit erfordern,
dürfen nur dann verwendet werden, wenn das
Fahrzeug steht. Ihre Sicherheit und die der anderen
Verkehrsteilnehmer haben Vorrang vor den
Telefonanrufen und den GPS-Anweisungen.
Wenn Ihr Wagen mit einer adiabatischen
Windschutzscheibe ausgestattet ist, kann der
Empfang des GPS-Signals auf Ihrem Telefon
beeinflusst werden.
Update der Software
Das letzte Update Ihres Parrot MINIKIT Smart können Sie
kostenlos von unserer Website www.parrot.com aus dem
Bereich Support und Downloads herunter laden (und sich
gleichzeitig über das Update-Verfahren informieren). Dank
dieser Updates können Sie neue Funkt ionen nutzen und die
Kompatibilit ät des Parrot MINIKIT Smart verbessern.
Page 31
Installation
Hinweis: Installieren Sie das Gerät nicht so, dass die
Verwendung wicht iger Befehle oder die Sicht des Fahrers
beeinträchtigt werden. Installieren Sie das Parrot MINIKIT
Smart nicht dort, wo es bei der Öffnung des Airbags
weggeschleudert werden könnte, oder in der Nähe eines
Lüftungsausgangs des Fahrzeugs.
Das Parrot MINIKIT Smart installieren
Reinigen Sie die Montageoberfläche und installieren
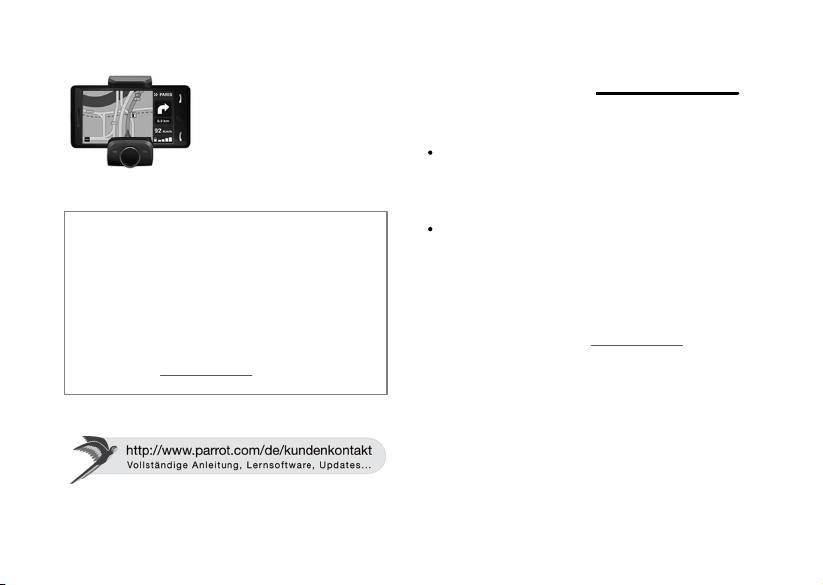
Sie dann das Gestell auf der Windschutzscheibe
(Schema 1 S.4). Drücken Sie dafür den Sauger fest
gegen die Windschut zscheibe und heben Sie den
Verriegelungsgriff an, bis die Halterung korrekt fixiert
ist.
Die normale Erwärmung und Abkühlung im Wagen
können eine Ablösung der Saugvorrichtung bewirken.
Wenn die Saugvorr ichtung nicht korrekt an der
Installationsoberfläche haftet, kann des Gerät in einer
Kurve oder beim Fahren über eine Kuppe
herunterfallen. Überprüfen Sie also die Haftwirkung
der Saugvorrichtung jedes Mal, wenn Sie das Parrot
MINIKIT Smart verwenden. Installieren Sie sie
nochmals, falls nö tig.
Installieren Sie das Parrot MINIKIT Smart auf dem
Montagegestell (Schema 2 S.4). Um das Parrot
MINIKIT Smart aus der Halterung zu entfernen,
drücken Sie die dahinter liegenden Tasten (Schema 6
S.7).
Nehmen Sie das Mikrofon des Parrot MINIKIT Smart
heraus und verwenden Sie die mit gelieferten
Plastikteile, um es auf der Windschutzscheibe oder auf
dem Armaturenbrett zu installieren (Schema 3 S.5).
Das Telefon installieren
Installieren Sie Ihr Telefo n auf dem Parrot MINIKIT
Smart,indem Sie zuerst die obere Seite einschieben
(Schema 4 S.6).
Wenn Sie auf Ihrem Telefon über die GPS-Funktion
verfügen, installieren Sie es zunächst auf dem
Montageträger, sodass jederzeit die
Navigationsinformationen darg estellt werden kö nnen.
Das Parrot MINIKIT Smart aufladen
Vor der ersten Verwendung muss das Parrot MINIKIT
Smart aufgeladen werden. Ver wenden Sie dafür den
Zigarettenanzünder Ihres Autos oder verbinden Sie
das Parrot MINIKITSmartmit Ihr em PC mithilfe eines
USB-Kabels oder USB-Minis (Schema 5 S. 6).
Die LED-Anzeige neben dem USB-Mini-Stecker
erleucht et, um den Ladevorgang anzuzeigen. Wenn
der Ladevorgang beendet ist, erlö scht die LEDAnzeige wieder. Die Ladezeit beträgt 2 Stunden.
Wenn die Bat terie schwach ist, sendet das Parrot
MINIKIT Smart eine Reihe von Pieptönen. Dies
Deutsch 31
Page 32

bedeutet, dass noch etwa 15 Minuten Betriebsdauer
Hinweis: Über den USB-Anschluss des Parrot
MINIKIT Smart können Sie auch Updates
vornehmen.
übrig sind.
Das Telefon aufladen
Sie können die Batterie Ihres Telefons aufladen, indem
Sie es an Ihr Parrot MINIKIT Smart anschließen.. Dafür
ist es nötig, dass Ihr Telefon mit USB aufgeladen
werden kann (konsultieren Sie die
Gebrauchsanweisung Ihres Telefons für weitere
Informationen). Verwenden Sie falls nö tig das mit
Ihrem Telefon mitgelieferte Kabel.
Das Aufladen des Telefons ist nur möglich, wenn das
Parrot MINIKIT Smart an das 12V-Ladegerät des
Zigarettenanzünders angeschlo ssen ist.
Erste Verwendung
Das Parrot MINIKIT Smart ein-/ausschalten
Halten Sie die rote Taste drei Sekunden gedrückt um das
Parrot MINIKIT Smart einzuschalten / auszuschalten.
32 D eutsch
Zugriff auf die Menüs der Freisprechanlage
Drücken Sie das zentrale Reglerrad, um auf die Menüs
zuzugreifen.
Die For tbewegung in den Menüs erfolgt durch Drehen
des Reglerrads, zur Bestätig ung einer Auswahl
drücken Sie die grüne Taste oder das Reg lerrad.
Um die Menüs wieder zu verlassen, drücken Sie die
rot e Taste oder warten Sie einfach ein paar Sekunden.
Kopplung Ihres Bluetooth-Mobiltelefons
Bei der ersten Verwendung des Telefons mit dem
Parrot MINIKIT Smart müssen Sie beide Geräte
zunächst miteinander koppeln. Sobald sich die zwei
Geräte einmal gegenseitig identifiziert haben, braucht
dieser Vorg ang nicht mehr wiederholt zu werden.
Starten Sie ausgehend von Ihrem Bluetoot h®-
1.
Telefon eine Suche nach BluetoothPeripheriegeräten.
Wählen Sie «Parrot MINIKIT Smart».
2.
Drücken Sie « 0000 » auf Ihrem Telefon, wenn Sie
3.
dazu aufgefordert werden.
Je nach Modell Ihres Telefons müssen Sie eventuell
die Verbindung zum Parrot MINIKIT Smart freigeben,
damit eine auto matische Verbindung (zwischen den
beiden Geräten) hergestellt werden kann.
Wenn Sie auf Ihrem Telefon die GPS-Funktion besitzen
und Ihr Telefon Navigationsanweisungen per
Page 33

Bluetoo th (A2DP-Profil) senden kann, werden die
Hinweis: Nur die im Speicher Ihres Telefons
erfassten Kontakte werden synchronisiert. Wenn Ihre
Kontakte auf Ihr er SIM-Karte gespeichert sind,
müssen Sie sie in den Speicher Ihres Telefons
übertragen.
Navigationsanweisungen am Parrot MINIKIT Smart
angesagt. Für weitere Informationen zur
Kompatibilit ät des Parrot MINIKIT Smart besuchen
Sie den Abschnitt Support auf unserer Homepage.
Verwendung des Adressbuchs
Für zahlreiche Telefone wird automatisch eine
Synchronisation des Adressbuchs mit der Parrot
MINIKIT Smart durchgeführt.
Sollte Ihr Telefo n keine automatische Synchronisation
unterstützen, können Sie Ihre Telefo nkontakte per
Object Push auf die Parrot MINIKIT Smart übertragen.
Wählen Sie im Hauptmenü der Parrot MINIKIT Smart
die Option Kontakte empfangen. Detaillierte
Anweisungen zur Übertragung der Kontakte per
Object Push können Sie der Bedienungsanleitung Ihres
Telefons entnehmen.
Speichern von Stimmabdrücken
Nach der Synchronisation o der der Übertragung per
Object Push werden Ihre Kontakte in der Parrot
MINIKIT Smart automatisch mit einem Stimmabdr uck
versehen. Sie selbst brauchen somit keine
Stimmabdrücke für Ihr e Kontakte aufzuzeichnen,
sondern können für Ihre Anrufe direkt auf die
Spracherkennung zurückgreifen.
Es kann jedoch vorkommen, dass die Parrot MINIKIT
Smart den Namen eines Kontakts falsch interpretiert.
In diesem Fall kann für den betro ffenen Kontakt ein
neuer Stimmabdruck aufgezeichnet werden. D rücken
Sie dazu das Reglerrad und wählen Sie die Option
Stimmabdrücke hinzufügen.
Telefon
Empfangen eines Anrufs
Hereinkommende Anrufe werden durch Vo ice-Messages
angezeigt. Der Name des Kontakts wird laut ausgegeben,
sofern die zugehörige Rufnummer im Adressbuch des mit
der Parrot MINIKIT Smart verbundenen Telefons enthalten
ist.
Wenn Sie diesen Anruf annehmen wollen, drücken Sie
die grüne Taste.
Wenn Sie diesen Anruf nicht annehmen wollen, drücken
Sie die rote Taste.
Tätigen eines Anrufs
Um einen Anruf durch Spracherkennung einzuleiten:
Drücken Sie die grüne Taste, um das Stimmerken
1.
nungsverfahren zu initiieren
Deutsch 33
Page 34

> Sie werden nach dem Namen der
Hinweis: Durch einen Druck auf die rote Taste
können Sie die Spracherkennung jederz eit
ausschalten.
Hinweis: Während eines Anrufs werden die
Navigat ionsanweisungen vom Parrot MINIKIT
Smart nicht übertragen.
Kontaktperson gefragt, die Sie anrufen wollen.
Nennen Sie den Namen des Kontaktes gefolgt
2.
von der Art der Nummer („Büro“, „Handy“ ...),
sofern für den Kontakt mehrere Nummern
vorhanden sind.
> Der Kontakt wird automatisch angerufen, wenn
die Sprachanweisung richtig verstanden wurde.
> Ansonsten gibt die Freisprechanlage eine
Bestätigung aus. Bestätigen Sie über „Ja“, „Ruft
an“ oder „Anrufen“.
Um einen Anruf manuell einzuleiten:
Drücken Sie das Reglerrad und wählen Sie
1.
Telefonbuch.
Wählen Sie den gewünschten Kontakt und
2.
drücken Sie dann das Reg lerrad.
Halten Sie die grüne Taste der Parrot MINIKIT Smart
zwei Sekunden lang gedrückt, um die letzte gewählte
Nummer anzurufen.
Drehen Sie während eines laufenden Gesprächs das
Drehknopf auf dem Parrot MINIKIT Smart. Die
eingestellte Laut stärke wird für alle folgenden
Gespräche gespeichert.
Wenn Sie ein Gespräch auf Ihr Telefon übertragen
möchten, drücken Sie auf die grüne Taste Ihrer Parrot
MINIKIT Smart.
Die Parrot MINIKIT Smart ermöglicht Ihnen, DTMFs
zu versenden, um z.B. Ihren Sprachspeicherdients zu
verwalten. Drücken Sie das zentrale Reg lerrad, um auf
das DTMF-Menü zuzugreifen.
Bei Problemen
Das Parrot MINIKIT Smart meldet „Speicher voll“
Sie können bis zu 10 Geräte mit dem Parrot MINIKIT Smart
koppeln. Bei dem Versuch, ein elfte Gerät zu koppeln, gibt
die Freispr echeinrichtung den Hinweis «Speicher voll» aus.
Um das neue Telefon koppeln zu können, müssen Sie zuerst
den Speicher löschen. Um das Parrot MINIKIT Smart aus der
Halterung zu entfernen, drücken Sie die dahint er liegenden
Tasten.
Verwendung während eines Anrufs
34 D eutsch
Das kit scheint blockiert zu sein
Sollten Probleme auftreten, dann können Sie die Parrot
MINIKIT Smart neu starten. Drücken Sie dafür die Taste
Reset (Schema 7 S.7).
Page 35

Ich kann mein Mobil mit dem Kit nicht verwenden
Prüfen Sie, ob Ihr Telefon mit dem Parrot MINIKIT Smart
kompatibel ist. Die Liste der mit dem Parrot MINIKIT
Smart kompatiblen Geräte können Sie von unserer
Website www.parrot.com.
Wenn Ihr Telefon in der Liste kompatibler Geräte
aufg eführt ist, müssen Sie Ihr Parrot MINIKIT Smart
aktualisieren. Das Verfahren zur Aktualisierung des Parrot
MINIKIT Smart können Sie von unserer Website www.
parrot.com abrufen.
Allgemeine Hinweise
Änderunge n
Die in dieser Anleitung enthaltenen Beschreibungen und
technischen Kenndaten dienen ausschließlich der Information
und können Änderungen ohne vorhergehende Ankündigung
unterliegen. Zum Zeitpunkt des Drucks galten die enthaltenen
Angaben als zutreffend. Bei der Verfassung dieser Anleitung
wurde größte Sorgfalt auf deren Inhalt angewendet, damit
Ihnen möglichst präzise Informationen bereitgestellt werden
können.
Parrot haftet jedoch weder für F olg en, die sich aus ggf. in
dieser Anleitung enthaltenen Fehlern oder Unterlassung en
ergeben, noch für Schäden oder den versehent lichen Verlust
von Daten als direkte oder indirekte Folge der Verwendung
der enthaltenen Informationen. Parrot behält sich das Recht
vor, das Produktdesign oder die Bedienungsanleitung zu
ändern bzw. zu verbessern, ohne dass diesbezüglich
Beschränkung en vorliegen und ohne jede Verpflichtung, die
Benutzer hiervon in Kenntnis zu setzen.
Korrekte Entsorgung dieses Produkts (Elektromüll)
(Anzuwenden in den Ländern der Europäischen Union und
anderen europäischen Ländern mit einem separaten
Sammelsystem) Die Kennzeichnung auf dem Produkt bzw.
auf der dazugehörig en Literatur gibt an, dass es nach seiner
Lebensdauer nicht zusammen mit dem normalen
Haushaltsmüll entsorgt werden darf. Entsorgen Sie dieses
Gerätbitte getrennt von anderen Abfällen, um der Umwelt
bzw. der menschlichen Gesundheit nicht durch
unkontrolliert e Müllbeseitigung zu schaden. Recyceln Sie das
Gerät, um die nachhaltige Wiederverwertung vo n stoffl ichen
Ressourcen zu fördern.
Private Nutzer sollten den Händler, bei dem das Produkt
gekauft wurde, oder die zuständigen Behö rden kontaktieren,
um in Erfahrung zu bringen, wie sie das Gerät auf
umweltfreundliche Weise recyceln können. Gewerbliche
Nutzer sollten sich an Ihren Lieferant en wenden und die
Bedingungen des Verkaufsvert rags konsultieren. Dieses
Produkt darf nicht zusammen mit anderem Gewerbemüll
entsorgt werden.
Änderunge n
Die in dieser Anleitung enthaltenen Beschreibungen und
technischen Kenndaten dienen ausschließlich der Information
und können Änderungen ohne vorhergehende Ankündigung
unterliegen. Zum Zeitpunkt des Drucks galten die enthaltenen
Angaben als zutreffend. Bei der Verfassung dieser Anleitung
wurde größte Sorgfalt auf deren Inhalt angewendet, damit
Deutsch 35
Page 36

Ihnen möglichst präzise Informationen bereitgestellt werden
Parrot SA, 174 quai de Jemmapes, 75010 Paris,
Frankreich, übernimmt die alleinige
Verantwortung, dass das in der vorliegenden
Bedienungsanleitung beschriebene Produkt mit
den technischen Normen EN300328, EN301489-17,
EN60950 gemäß den Regelungen der R&TTERichtlinie 99/5/EG sowie den Anforderungen der
EMV-Richtlinie 2004/108/EG, der Richt linie 73/23/
EWG bezüglich Niederspannungsgeräten und der
Kraftfahrzeugrichtlinie 72/245/EWG, die durch
Richtlinie 2006/28/ EG geändert wurde, konform
ist.
können.
Parrot haftet jedoch weder für F olg en, die sich aus ggf. in
dieser Anleitung enthaltenen Fehlern oder Unterlassung en
ergeben, noch für Schäden oder den versehent lichen Verlust
von Daten als direkte oder indirekte Folge der Verwendung
der enthaltenen Informationen. Parrot behält sich das Recht
vor, das Produktdesign oder die Bedienungsanleitung zu
ändern bzw. zu verbessern, ohne dass diesbezüglich
Beschränkung en vorliegen und ohne jede Verpflichtung, die
Benutzer hiervon in Kenntnis zu setzen.
Konformitätserklärung
Eingetragene Marken
Die Marke und das Logo Bluetooth sind eingetragene
36 D eutsch
Marken der Bluetoo th. Bluet ooth QDID : B016898, B013838,
B012423
Parrot, Parrot Minikit, die Marken und das Parrot -Logo sind
Eigentum der PARROT SA.
Die anderen in diesem Dokument erwähnten Marken sind
geschüt zt und Eigentum der jeweiligen Inhaber.
Page 37
Guida
all’uso
A proposito di questa guida : Per limitare il nostro
consumo di carta e nell’ambito della no stra azione
responsabile volta alla tutela dell’ambiente, abbiamo
scelto l’immissione on line dei documenti destinati ag li
utenti, che quindi non saranno più stampati.
La presente guida semplificata del Parrot MINIKIT Smart si
limit a quindi a dare le principali istruzioni che vi
consent iranno di utilizzare facilmente questo apparecchio.
Troverete maggiori informazioni nella sezione Assistenza /
Scaricare del nostro sito web www.parrot.com: manuale
completo, FAQ, document i didattici, ecc.
Prima di iniziare
Avvertenza
Le funzioni che richiedono una attenzione prolungata
devono essere utilizzate solo a veicolo fermo. La
vostr a sicurezza e quella degli altri utenti della strada
sono più importanti delle telefonat e e le istruzioni
fornite dal vostro GPS.
Se il vostro veicolo è munito di un parabrezza
atermico, la ricezione del segnale GPS sul vostro
telefono potrebbe esserne influenzata.
Aggiornamento del software
Scaricate gratuitamente l’ultimo aggiornamento del Parrot
MINIKIT Smart (e consultate la procedura di aggiornamento)
nel nostro sito web www.parrot.com, alla sezione
Assistenza / Scaricare. Questi aggiornamenti vi
permetteranno di utilizzare le nuo ve funzionalità e di
migliorare la co mpatibilità del Parrot MINIKIT Smart.
Italiano 37
Page 38

Installation
Avvertenza: Evitare qualsiasi installazione che
possa intralciare l'uso di comandi import anti o
possa ridurre la visibilità del conducente. Non
installare il Parrot MINIKIT Smart dove potrebbe
essere spinto dall'apertura di un airbag o in
prossimità di una uscita di aerazione o di aria
condizio nata del veicolo’.
Installazione del Parrot MINIKIT Smart
Tirar fuo ri il microfono dal Parrot MINIKIT Smart e
utilizzare i pezzi in plastica forniti per inst allarlo sul
parasole o sul cruscotto (schema 3 p. 5).
Installazione del telefono
Installare il telefono sul Parrot MINIKIT Smart
inserendo prima la parte superiore (schema 4 p. 6).
Se si dispone della funzione GPS sul telefono,
installarlo sul support o di montaggio in modo da
poter visualizzare in ogni momento le informazioni di
navigazione.
Pulire la superficie di montaggio e poi installare il
support o di fissaggio sul parabrezza (schema 1 p. 4).
A tale scopo, premere fort e la vent osa contro il
parabrezza e sollevare la levetta di blo ccaggio fino a
quando il supporto è correttamente fissato.
Il ciclo normale di riscaldamento e raffreddamento
all'interno di una vettura può comportare lo
scollamento della ventosa. Se la vent osa non aderisce
correttamente alla superficie di installazio ne,
l'apparecchio può cadere in curva o passando su un
dosso. Verificare dunque che la ventosa aderisca bene
ogni volt a che si utilizza il Parrot MINIKIT Smart.
Reinstallarla se necessario.
Installare il Par rot MINIKIT Smart sul supporto di
montaggio (schema 2 p.4). Per togliere il Parrot
38 It aliano
MINIKIT Smart dal supporto, premere i pulsanti
ubicati dietro quest'ultimo (schema 6 p.7).
Carica del Parrot MINIKIT Smart
Prima di utilizzarlo la prima volta, il Parrot MINIKIT
Smart deve essere caricato. Per fare ciò, utilizzare la
presa accendisigari della macchina o connettere il
Parrot MINIKIT Smart al vostr o PC utilizzando un
cavo USB / mini USB (schema 5 p. 6).
Il LED collo cato a lato della presa mini-USB si
accende per indicare che la carica è in corso. Una
volta terminata la carica, il LED si spegne. La durata
della carica è di 2 ore.
Quando la batteria è quasi scarica, il Parrot MINIKIT
Smart emette una serie di bip. Questa indicazione
significa che restano circa 15 minut i di autonomia.
Page 39

Carica del telefono
Nota: La porta USB del Parrot MINIKIT Smart
permette anche di effettuare gli aggiornamenti.
Si può caricare la batteria del telefono connettendolo
al Parrot MINIKIT Smart. Per fare ciò, il t elefono deve
potersi caricare in USB (consultare le istruzioni del
telefono per maggio ri informazioni). Utilizzare il cavo
fornito con il telefono se necessario.
La carica del telefono è po ssibile solo quando il
Parrot MINIKIT Smart è connesso al caricabatterie
12V accendisigari.
Primo utilizzo
Accendere /spegnere il Parrot MINIKIT Smart
Per accendere / spegnere il Parrot MINIKIT Smart, tenere
premuto il tasto rosso per circa tre seco ndi.
Accesso ai menu del kit
Premere la rotellina cent rale per accedere ai menu.
Utilizzare i menu ruotando la rotellina e co nfermare
con il tasto verde oppure premendo la rotellina
stessa.
Per uscire da un menu, premere il tasto rosso oppure
attendere alcuni secondi.
Connessione del telefono Bluetooth
Prima di utilizzare Parrot MINIKIT Smart con il
telefono cellulare, è necessario effettuare la
connessione tra i due apparecchi. Se è la prima volta
che si utilizza l’apparecchio con il Parrot MINIKIT
Smart, è necessario innanzitutto effet tuare
l’associazione dei due apparecchi; una volta che i due
apparecchi si sono rilevati a vicenda, no n sarà più
necessario eseguire quest a operazione.
Dal telefono Bluetooth, avviare una ricerca
1.
delle periferiche Bluet ooth®.
Selezionare «Parrot MINIKIT Smart».
2.
Digitate « 0000 » sul telefono se richiesto.
3.
> Quando i due apparecchi sono connessi, il
Parrot MINIKIT Smart emette un messaggio
ad indicare che l’associazio ne é stata
eseguita.
A seconda del telefono in uso, sarà necessario
autorizzare la connessione al Parrot MINIKIT Smart
per consentire l’associazione automatica (tra i 2
apparecchi).
Se avete a disposizione la funzione GPS sul vostro
telefono e se il telefono permette l'invio delle
istruzioni di navigazio ne mediante Bluet ooth (profilo
A2DP), le istruzioni di navigazione saranno enunciate
sul Parrot MINIKIT Smart. Consultare la sezione di
support o del nostro sito web per maggiori
informazioni sulla compatibilità del Parrot MINIKIT
Italiano 39
Page 40

Smart.
Nota: Si sincronizzano solo i contatti registrati nella
memoria del telefono.
Sincronizzazione della rubrica telefonica
La sincronizzazione della rubrica telefonica con il Parrot
MINIKIT Smart avviene automaticamente per molti
telefoni cellulari.
Se il telefono in uso non consente di effettuare la
sincronizzazione automatica, è possibile trasferire i
contatti del telefono sul kit tramite il profilo Object Push.
A tale scopo, nel menu principale di Parrot MINIKIT
Smart, selezionare Ricevi contatti. Per informazioni sulla
procedura di invio di ontatti tramit e il pr ofilo Object
Push, consultare le istruzioni del telefono in uso. avviene
automaticamente per molti telefoni cellulari.
Salvataggio dei nomi vocali
In seguito alla sincronizzazione o all’invio tramit e il
profilo Object Push, tutt i i contatti vengono dotati
automaticamente di un nome vocale nel Parrot
MINIKIT Smart. Pertanto, non è necessario salvare
personalmente i nomi vocali per ciascun contatto per
effettuare una chiamata tramite la funzione di
riconoscimento vocale.
Tuttavia, se il Parrot MINIKIT Smart interpreta
erroneamente il nome di un contatto, è possibile
salvare un nuovo nome vocale.A tale scopo , premere
40 It aliano
la rotellina e selezionare l’opzione Aggiungere dei
nomi vocali.
Telefono
Ricevere una chiamata
Una chiamata in arrivo viene indicata da un messaggio
vocale. Se il numero del contatto è registrato nella rubrica
del telefono connesso al Parrot MINIKIT Smart, viene
emesso il nome di tale contatto.
Se si desidera accettare la chiamata, premere il tasto
verde.
Se si desidera rifiutare la chiamata, premere il tasto
rosso.
Inviare una chiamata
Per effettuare una chiamata mediante riconoscimento
vocale:
Premere il pulsante verde per avviare il processo
1.
di riconoscimento vocale.
> Viene richiesto il nome del contatto che si
intende chiamare.
Dire il nome del co ntatto seguito dal tipo di
2.
numero di telefono («Lavoro», «Cellulare»,
ecc.) se questo contatto ha più numeri di
telefono.
> La chiamata di questo contatto inizia
automaticamente se il comando vocale è stato
Page 41

capito correttamente.
Nota: Per uscire dal modo riconoscimento vocale,
premere il tast o rosso.
Nota: Le istruzioni di navigazio ne non so no trasmesse
dal Parrot MINIKIT Smart durante una chiamata.
Problemi frequenti
Per effett uare una chiamata manualmente:
Premere la rotellina per accedere al menu
1.
principale, quindi selezionare Rubrica.
Selezionare il contatto seguito dal tipo di
2.
numero di telefono («Ufficio», «Cellulare»,
ecc.) se questo contatto ha più numeri di
telefono.
Per richiamare l’ultimo numero compo sto, tenere
premuto il tasto verde per due secondi.
Utilizzo durante una chiamata
Per regolare il volume sonoro durante una
comunicazione, servirsi della rotella. Il volume è
salvato per le conversazioni successive.
Se si desidera trasferire una comunicazione in corso
sul telefono, premere il tasto verde.
Il Parrot MINIKIT Smart permette di inviare DTMF in
conversazione per gestire – per esempio – la
messaggeria vocale. Premere la rotellina per
accedere al menu dei DTMF.
Il Parrot MINIKIT Smart annuncia «Memoria piena»
È possibile eseg uire l’associazione di un massimo di 10
apparecchi. Se viene associato un undicesimo telefono, il kit
chiede un messaggio ad indicare che la memoria è piena.
Bisogna cancellare la memoria del Parrot MINIKIT Smart
premendo contemporaneamente il pulsante rosso e la
rot ella dentata, per 3 secondi. Questa o perazione elimina
inoltr e tutti i contatti.
Il Parrot MINIKIT Smart sembra bloccato
In caso di problemi, è possibile riavviare il Parrot MINIKIT
Smart. Per fare ciò, premere il tasto Reset (schema 7 p. 7).
E’ impossibile utilizzare il telefono con il kit
Verificare la co mpatibilità del telefono con il Parrot MINIKIT
Smart. La lista dei telefoni compatibili con il Parrot MINIKIT
Smart è disponibile nel nostro sito web www.parrot .com,
alla sezione Assistenza / Scaricare.
Se il telefono è compatibile, forse sarà necessar io
aggiornare il vostro Parrot MINIKIT Smart. La procedura di
aggiornamento del Parrot MINIKIT Smart è disponibile nel
nostro sito web www.parrot.com, alla sezione Assistenza /
Scaricare.
Italiano 41
Page 42

Informazioni generali
Garanzia
Senza pregiudizio della g aranzia legale, i prodot ti Parrot
sono garantiti, per sostituzione pezzi e mano d’opera, per 1
anno a partire dalla data di acquisto, salvo alterazioni del
prodotto, e su present azione di una prova di acquisto (data
e luogo di acquisto, numero di serie del prodo tt o) al
rivendito re.
La garanzia non copre gli aggiornamenti dei software inclusi
nei prodotti Parrot con i telefo ni cellulari Bluetooth® ai fini di
compatibilit à, il recupero di dati, il deterio ramento esterno
del prodotto dovuto al normale uso del pr odo tt o stesso, i
danni causati accidentalmente, da un uso anomalo o non
autorizzato del prodot to, un pr odo tt o non Parrot . Parrot
non è responsabile della memoria, della perdita o del
danneggiamento dei dati durante il trasporto o la
riparazione. D ate le caratteristiche tecniche del presente
prodotto, l’installazione deve essere effettuata da un tecnico.
Parrot non pot rà in alcun caso essere ritenut a responsabile
per event uali pr oblemi di funzionamento dovuti ad
un’installazione non conforme a quanto indicato nelle
istruzioni e/o ad un’installazione non conforme effet tuata
dall’utente stesso.
Corretto smaltimento del prodotto
(Applicabile nei Paesi dell’Unione Europea e in quelli con
sistema di raccolta differenziata)
Il marchio riport ato sul prodo tto o sulla sua
42 It aliano
documentazione indica che il pro dot to non deve essere
smaltit o con altri rifi uti domestici al termine del ciclo di vit a.
Per evitare eventuali danni all‘ambiente o alla salute causati
dall‘inoppo rtuno smaltimento dei rifi uti, si invita l‘utente a
separare questo pr odo tt o da altri tipi di rifi uti e di riciclarlo
in maniera responsabile per favorire il riutilizzo sostenibile
delle risor se materiali.
Gli utenti domestici sono invitati a contattare il rivendito re
presso il quale è stato acquistato il prodotto o l‘uffi cio
locale preposto per tutte le informazioni relative alla
raccolta differenziata e al riciclaggio per questo tipo di
prodotto. Gli ut enti aziendali sono invitati a contattare il
proprio fornitore e verifi care i termini e le condizioni del
contratto di acquisto. Quest o prodotto non deve essere
smaltit o unitamente ad altri rifi uti commerciali.
Modifiche
Le spiegazioni e le specifiche r iportate nella presente guida
sono solo a scopo informativo e posso no subire modifiche
senza preavviso. Tali informazioni sono da considerarsi
corrette al momento della pubblicazione. La presente guida
è stata redatta prestando grande at tenzione, al fine di fornire
ai clienti informazioni precise e attendibili.
Tuttavia, Parrot non può essere ritenuta responsabile per
event uali conseguenze derivanti da omissioni o errori nella
presente guida, né per event uali danni o perdite accidentali
di dati causati direttamente o indirettamente dall’uso delle
informazioni ivi co ntenute. Parrot si riserva il dirit to di
modificare/migliorare il prodotto o la guida per l’utent e
senza limit azione alcuna e senza l’obbligo di notifica agli
utenti.
Page 43

Poiché il co stante impegno dell’azienda è volto a garantire
La Parrot SA, 174 quai de Jemmapes, 75010
Parigi, Francia, dichiara sotto la sua totale
responsabilit à che il prodotto descritto nella
presente guida dell'utente è conforme alle norme
tecniche EN300328, EN301489-17, EN60950
secondo le disposizioni della direttiva R&TTE
99/5/EC, e alle esigenze della dirett iva EMC
2004/108/CE, della direttiva 73/23/CEE relativa
agli apparecchi a bassa tensione e della direttiva
Automobili 72/245/CEE modificata dalla direttiva
2006/28/CE.
continui aggiornamenti e miglior amenti, il prodotto
acquistato dall’utente potrebbe risultare leggermente
diverso dal modello descritt o nella presente guida. In t al
caso, verificare la disponibilità di una versione aggiornata
della guida in for mato elettronico nel sito Web di Parrot
all’indirizzo www.parrot .com.
Marchi registrati
Il nome e il logo Bluetooth sono marchi registrati di
Bluetoo th SIG, Inc. e il loro uso da parte di Parrot S.A. è
sogg etto a regolari contratti di licenza.
Bluetoo th QDID : B016898, B013838, B012423
Parrot, Parrot Minikit, le marche ed il log o Parrot sono
proprietà della PARROT SA.
Le altre marche citate nel present e documento sono protette
e appartengono ai loro rispett ivi proprietari.
Dichiarazione di conformità
Italiano 43
Page 44

Gebruikers
handleiding
Over deze gids : Om ons papierverbruik te beperken en in
het kader van onze zo verant woordelijk mo gelijke aanpak
op het gebied van milieubehoud, geeft Parrot er de
voorkeur aan om documentatie online beschikbaar te
stellen in plaats van deze af te drukken.
Deze vereenvoudigde gids voor de Parrot MINIKIT Smart
geeft u dus slechts de belangrijkste instructies die u nodig
heeft om dit apparaat makkelijk te gebruiken. U vindt meer
informatie in het onderdeel Support & Downloads van onze
website www.parrot.com: complete document atie, FAQ,
educat ieve software…
44 Nederlands
Voordat u begint
Waarschuwing
De functies die langere tijd de aandacht opeisen
mogen alleen worden gebruikt wanneer de auto
stilstaat. Uw veiligheid en die van de andere
weggebruikers is belangrijker dan
telefoongesprekken en instructies van uw GPS.
Als uw auto is uitgerust met een athermische voorruit
kan de ontvangt van het GPS signaal door uw
telefoon hierdoor beïnvloed worden.
De software updaten
Download gratis de recentste versie van uw Parrot MINIKIT
Smart (en raadpleeg de updateprocedure) op onze websit e
www.parrot.com, onderdeel Support & Downloads. Via
deze updates profiteert u van nieuwe functies en een
verbeterde compatibiliteit van uw Parrot MINIKIT Smart.
Page 45

Installation
Waarschuwing: voorkom installatie op een manier
die het gebruik van belangrijke bediening en kan
hinderen of het zicht van de bestuurder kan
belemmeren. Installeer de Parrot MINIKIT Smart
niet zo dat hij door het openen van een airbag kan
worden geraakt, of vlak bij een ventilatie- of
airconditioningopening van de auto.
De Parrot MINIKIT Smart installeren
Reinig het montageoppervlak en installeer de houder
op de voorr uit (schema 1 p.4). Hiertoe drukt u de
zuignap stevig tegen de voorruit en haalt de
vergrendelingshendel omhoog tot hij stevig
bevestigd is.
De normale cyclus van opwarmen en afkoelen in een
auto kan het losraken van de zuignap veroorzaken. Als
de zuignap niet goed aan de installatieondergrond
hecht, kan het apparaat vallen in een bocht of als u
over een hobbel rijdt. Contro leer dus elke keer dat u
de Parrot MINIKIT gebr uikt of de hechting nog goed
is. Smart. Installeer hem opnieuw indien no dig.
Installeer de Parrot MINIKIT Smart op de houder
(schema 2 p.4). Om de Parrot MINIKIT Smart uit de
houder te halen drukt u op de knoppen op de
acht erkant van de houder (schema 6 p.7).
Haal de microfoon uit de Parrot MINIKIT Smart en
gebruik de meegeleverde plastic onderdelen voor
installatie op de zonneklep of op het dashboard
(schema 3 p. 5).
De telefoon installeren
Installeer uw telefoon op de Parrot MINIKIT Smart
door eerste de bovenkant te installeren (schema 4
p.6).
Als uw telefoon een GPS functie heeft, installeert u
hem op de houder zodat u op elk moment de
navigatie-informatie kunt zien.
De Parrot MINIKIT Smart opladen
Voor het eerste gebruik moet de Parrot MINIKIT
Smart opgeladen wor den. Hiertoe gebruikt u de
sigarett enaansteker van uw auto of sluit u de Parrot
MINIKIT Smart aan op uw PC met een USB / mini
USB sno er (schema 5 p.6).
De LED naast de mini USB aansluiting gaat aan om
aan te geven dat het opladen bezig is. Wanneer het
laden voltooid is gaat de LED uit. Het opladen duurt
2 uur.
Als de batterij zwak is geeft de Parrot MINIKIT Smart
een serie pieptonen. Dit geeft aan dat u nog ongeveer
een kwartier autonomie heeft.
Nederlands 45
Page 46

De telefoon opladen
Let op: De USB-poort van de Parrot MINIKIT Smart
maakt het ook mogelijk om updates uit te voeren.
U kunt de batterij van uw telefoon opladen door hem
aan te sluiten op de Parrot MINIKIT Smart. Hierto e
moet uw telefoon oplaadbaar zijn via een SUB
aansluiting (raadpleeg de handleiding van uw telefoon
voor meer informatie). Gebruik het met uw telefoon
geleverde snoer indien nodig.
U kunt uw telefoon alleen opladen als de Parrot
MINIKIT Smart is aangesloten op de 12V
sigarett enaansteker oplader.
Eerste ingebruikneming
De Parrot MINIKIT Smart in- en uitschakelen
Druk 3 seconden op de rode knop om de Parrot MINIKIT
Smart aan te zetten / uit te schakelen.
De menu’s van de set oproepen
Druk op de draaitoets in het midden om de menu’s
op te roepen.
Navigeer in de menu’s do or de draaiknop te draaien
en bevestig uw keuzes door een druk op de groene
toets of op de draaiknop.
46 Nederlands
Om het menu te verlaten, drukt u op de rode knop of
wacht u enkele seconden.
Uw Bluetooth telefoon koppelen
Als u uw telefoon voor het eerst met de Par rot
MINIKIT Smart gebruikt, moet u de twee apparaten
eerst koppelen. Als de twee apparaten elkaar eenmaal
wederzijds hebben gedetecteerd, is het voort aan niet
meer nodig deze handeling uit te voeren.
Start op uw Bluetooth telefoon de funct ie
1.
Bluetoo th® randapparaten zoeken.
Selecteer ‘Parrot MINIKIT Smart’.
2.
Voer via uw telefoon "0000" in wanneer u dat
3.
wordt gevraagd.
> Zodra de twee apparaten gekoppeld zijn,
meldt de Parrot MINIKIT Smart dat de
‘Koppeling volt ooid’ is.
Volgens het model van uw telefoon zult u misschien
de verbinding met de Parro t MINIKIT Smart moeten
toestaan om een aut omatische verbinding tussen 2
apparaten mogelijk te maken.
Als u over de GPS-funct ie beschikt op uw telefoon en
als uw telefoon het verzenden van navigatieinstructies via Bluetooth (profiel A2DP) ondersteunt,
worden de navigatie-instructies op Parrot MINIKIT
Smart vermeld. Zie de sectie support van onze
website voor meer informatie over de comptabiliteit
van de Parrot MINIKIT Smart.
Page 47
Het telefoonboek gebruiken
Let op: alleen de contacten die zijn opgeslagen in
het geheugen van de telefoon worden
gesynchroniseerd.
Bij vele telefoons wordt het telefoonboek van uw
telefoon automatisch met de Parrot MINIKIT Smart
gesynchr oniseerd.
Als uw telefoon deze automatische synchronisatie niet
toelaat, kunt u met behulp van Object Push uw
contacten van de telefoon naar de Parrot MINIKIT
Smart overbrengen.
In het hoofdmenu van de Parrot MINIKIT Smart
1.
selecteert u Contacten ontvangen.
Zie de gebruiksaanwijzing van uw telefoon om te
2.
weten wat de procedure is voor het verzenden
van contacten via Object Push.
Gesproken namen opnemen
Na synchronisatie of verzending door Object Push
wordt aan al uw contacten automatisch een
gesproken naam (voice tag) toegevoegd in de Parrot
MINIKIT Smart . U hoeft dus niet zelf voor ieder
contact een gesproken naam op te nemen om deze
via spraakherkenning te kunnen bellen.
Maar als de Parrot MINIKIT Smart de naam van een
van uwcontacten verkeerd uitspreekt, kunt u hiervoor
een nieuwe voice tag opnemen. Om dit te doen drukt
u op de scrollknop en selecteert de optie Gesproken
namen toevoegen.
Telefoon
Een oproep ontvangen
Een binnenkomend gesprek wordt aangegeven door een
voicebericht. De naam van de contactperso on wordt
uitgesproken als het nummer van deze persoon is
opgenomen in het telefoonboek van de met de Parrot
MINIKIT Smart verbonden telefoon.
Als u een inkomend gesprek wilt aannemen, drukt u op de
groene t oets.
Als u een inkomend gesprek wilt weigeren, drukt u op de
rode toets.
Een oproep starten
Om te bellen met behulp van de spraakherkenning:
Druk op de groene to ets om de
1.
spraakherkenning te initiëren.
> De set vraagt u om de naam van het contact
dat u wilt bellen.
Spreek de naam van het contact uit, gevolgd
2.
door het soort nummer (“Werk”, “Mobiel”,
enz.) als dit contact verschillende nummers heeft.
> Als de spraakopdracht goed begrepen is,
wordt automatisch begonnen met bellen.
> In het tegengestelde geval wordt om
Nederlands 47
Page 48

bevestiging gevraagd door de hands-free set.
Let op: Op elk moment kunt u o p de rode toets
drukken om de modus spraakherkenning te verlaten.
Let op: De navigatie-instructies zijn niet uitgezonden
door de Parrot MINIKIT Smart tijdens een gesprek.
Bevest ig door “ja”, «bel» of «bellen» te
zeggen.
Om handmatig te bellen:
Druk op de scrollknop om het hoofdmenu te
1.
openen en selecteer Telefoonboek.
Selecteer het contact en druk op de scrollknop.
2.
Houdt de groene knop twee seconden lang ingedrukt
om het laatst gebelde nummer nogmaals te bellen.
Gebruik tijdens een gesprek
Vaak voorkomende problemen
De Parrot MINIKIT Smart geeft aan “Geheugen vol”
U kunt maximaal 10 apparaten koppelen. Als u een elfde
telefoon koppelt, meldt de set ‘geheugen vol’. U moet dan
het geheugen van de Parrot MINIKIT Smart wissen door
gelijktijdig te drukken op de rode knop en het wieltje,
gedurende drie seconden. Dit wist eveneens alle
bijbehorende t elefoonnummers.
De Parrot MINIKIT Smart lijkt geblokkeerd
Als er een probleem is, kunt u de Parrot MINIKIT Smart
opnieuw opstarten. Hierto e drukt u op de Reset knop (zie
schema 7 p.6).
Om het geluidsvolume van een gesprek in te stellen
gebruikt u de scrollknop. Het volume wordt
opgeslagen voor volgende gesprekken.
Als u een lopend gesprek wilt overzetten op uw
telefoon, drukt u op de groene knop.
Met de Parrot MINIKIT Smart kunt u DTMF’s
verzenden tijdens een gesprek om bijvoorbeeld uw
voicemail t e beheren. Drukt u op de scr ollknop om
het DTMF menu te openen.
48 Nederlands
Ik kan mijn telefoon niet gebruiken met de kit
Controleer of uw telefoon compatibel is met de Parrot
MINIKIT Smart. U vindt de compatibiliteitslijst van de Parrot
MINIKIT Smart op onze website www.parrot.com,
onderdeel Support & Downloads.
Als uw telefoon als compatibel wordt aangegeven, moet u
uw Parrot MINIKIT Smart misschien updaten. U vindt de
updateprocedure van de Parrot MINIKIT Smart op onze
website www.parrot .com, onderdeel Support & Downloads.
Page 49

Algemene informatie
Garantie
Op de Parrot producten rust gedurende 1 jaar vanaf de
verkoopdatum garantie op onderdelen en arbeidsloon,
behoudens aan het pro duct aangebracht e veranderingen,
tegen overlegging van de koopbon (met datum en plaats van
aankoop en serienummer van het product) aan de leverancier.
De garantie heeft geen betrekking op het voor doeleinden
van compatibiliteit met de mobiele Bluetooth ® telefoons
updaten van de in de Parrot producten inbegrepen software,
het terughalen van gegevens, de uitwendige verslecht ering
van het product tengevolge van normaal gebruik van het
product, per ongeluk veroorzaakte schade, abnormaal of
ongeoor loo fd gebruik van het product, een niet-Parrot
product. Parrot is niet aansprakelijk voor de opslag, het
verlies of de beschadig ing van gegevens tijdens het
transport of de reparatie. Ieder product dat niet defect blijkt
te zijn zal aan de afzender worden geretourneerd en de
kosten voor behandeling, verificatie en transport zullen hem
in rekening worden gebracht.
Wegens het technisch karakter van dit product raden wij u
aan de installatie te laten verrichten door uw garagehouder.
Parrot is in geen geval aansprakelijk voor een verkeerde
werking veroorzaakt door een installatie die niet
overeenkomt met de in de gebruiksaanwijzing gegeven
aanwijzingen en/of een do or uzelf uitgevoerde niet-conforme
installatie.
Afgedankte elektrische en ele ktronische apparatuur
(WEEE)
In overeenstemming met de Eur opese richtlijn 2002/96/EG
betreffende afgedankte elektrische en elektronische
apparatuur (AEEA) geeft de vermelding van het hierboven
vermelde symbool op het product of de verpakking aan dat
dit artikel niet in de normale, niet-gesorteerde stedelijke
afvalstroom mag worden verwerkt. In plaats daarvan ligt de
verantwoordelijkheid van de afvoer van dit product bij de
gebruiker, die het dient aan te bieden bij een inzamelpunt
voor de recyclage van afgedankte elektrische en
elektronische apparatuur. De gescheiden inzameling van dit
afval helpt de eventuele te recupereren materialen terug te
winnen of te recycleren en vermindert de impact ervan op het
milieu en de gezondheid van de mens. Voor meer informatie
betreffende de juiste afvoermethode.
Wijzigingen
De in deze handleiding gegeven uitleg en technische
gegevens dienen uitsluitend ter informatie en kunnen zonder
voorafgaande kennisgeving worden gewijzigd. Deze
gegevens worden geacht correct te zijn op het moment van
het ter perse gaan van deze handleiding. Aan het opstellen
van deze handleiding is de uiterste zorg besteed in het kader
van ons streven u accurate infor matie te verschaffen.
Parrot zal echter niet aansprakelijk gesteld kunnen worden
voor de gevolgen die voortvloeien uit vergissingen of weglatingen
in deze handleiding, evenmin als voor enige beschadiging of
accident eel verlies van gegevens die direct of indirect
Nederlands 49
Page 50

voortkomen uit het gebruik van de in deze handleiding
Parrot SA, 174 quai de Jemmapes, 75010 Paris,
Frankrijk, verklaart onder haar eigen
verantwoordelijkheid dat het pr oduct beschreven
in deze handleiding voldoet aan de technische
normen EN300328, EN301489-17, EN60950 volgens
de bepalingen van de richtlijn R&TTE 99/5/EC, en
met de eisen van de richtlijn EMC 2004/108/CE,
richtlijn 73/23/CEE met betrekking tot
laagspanningsapparatuur en met de richtlijn
Automobiel 72/245/CEE zoals gewijzigd door de
richtlijn 2006/28/CE.
vervatte informatie. Parrot behoudt zich het recht voor het
productontwerp of de gebruikershandleiding te wijzigen of
verbeteren zonder enige beperkingen en zonder de
verplichting de gebruikers hiervan op de ho ogte te stellen.
In het kader van ons voortdurende streven om onze
producten uit te breiden en te verbeteren, kan het door u
gekochte product enig szins ver schillen van het in deze
handleiding beschreven model. In dit geval is mogelijk een
recentere versie van deze handleiding in elektr onische vorm
beschikbaar op de Parrot website: www.parrot.com.
Verklaring over conformiteit
Gedeponeerde merke n
De naam en het logo Bluetooth zijn gedeponeerde merken
van Bluetoo th ® SIG, Inc. en ieder gebruik hiervan door
Parrot S.A. gebeurt onder licent ie. Bluetoot h QDID :
B016898, B013838, B012423
50 Nederlands
Parrot, Parrot Minikit, de handelsmerken en het logo Parrot
zijn eigendom van PARROT SA.
De andere merken die in dit document worden beschermd,
zijn eigendom van hun respectievelijke eigenaars.
Page 51

Manual do
utilizador
Acerca deste guia : De modo a limitar o nosso consumo
de papel, e no âmbito do nosso procedimento também
responsável e respeitando ao máximo o ambiente, a
Parrot privilegia a colocação online do s documentos para
os utilizadores, em vez de os imprimir.
Este guia simplificado do Parrot MINIKIT Smart limita-se a
fornecer-lhe as principais instruções, que lhe irão permit ir
utilizar facilmente este aparelho. Encontrará mais
informações na secção Support & Downloads do nosso
website www.parrot.com: Manual completo, perguntas
frequentes, software didáctico…
Antes de começar
Aviso
As funçõ es que necessitam de uma atenção
prolongada devem ser utilizadas apenas quando o
veículo está parado. A sua segurança e a dos outros
condutores é mais importante do que as chamadas
telefónicas e instruções fo rnecidas pelo seu GPS.
Se o seu veículo vem equipado com um pára-brisas
atérmico, a recepção do sinal de GPS no seu telefone
pode ser afect ada.
Acerca deste guia
De modo a limitar o nosso consumo de papel, e no âmbito
do nosso pr ocedimento também responsável e respeitando
ao máximo o ambiente, a Parrot privilegia a colocação
online dos documentos para os utilizadores, em vez de os
imprimir.
Este guia simplificado do Parrot MINIKIT Smart limit a-se a
fornecer-lhe as principais instruções, que lhe irão permitir
utilizar facilmente este aparelho. Encontrará mais
informações na secção Support & Downloads do nosso
website www.parrot.com: Manual completo, perguntas
frequentes, software didáctico…
Portuguese 51
Page 52

Actualização do software
Aviso: Evite qualquer instalação que possa impedir
a utilização de comandos importantes ou que
possa reduzir a visibilidade do condutor. Não
instale o Parrot MINIKIT Smart onde ele possa ser
atirado devido à activação de um airbag, ou perto
de uma saída de ventilação ou de ar condicionado
do veículo.
Descarregue gratuitamente a última actualização do seu
Parrot MINIKIT Smart (e consulte o processo de
actualização ) no nosso website www.parro t.com na secção
Support & Downloads. Estas actualizações irão permitir-lhe
beneficiar de novas funcio nalidades e melhorar a
compatibilidade do Parrot MINIKIT Smart.
Installation
Instalar o Parrot MINIKIT Smart
Limpe a superfície de montagem e depois instale o
suporte de fixação no pára-brisas (esquema 1 p.4).
Para isso, prima fortemente a ventosa contra o párabrisas e levante a manete de bloqueio até que o
suporte fique correctamente fixado.
O ciclo normal de aquecimento e arrefecimento no
52 Portuguese
interior de um aut omó vel pode dar origem ao
descolar da ventosa. Se a ventosa não aderir
correctamente à superfície de instalação, o aparelho
pode cair durante uma viragem ou ao passar numa
zona atribulada. Verifique, por isso, a aderência da
ventosa sempre que utilizar o Parrot MINIKIT Smart.
Reinstale-a, se necessár io.
Instale o Parrot MINIKIT Smart no suporte de
montagem (esquema 2 p.4). Para retirar o Parrot
MINIKIT Smart do suport e de montagem, prima os
botões que se encontram na parte traseira deste
(esquema 6 p.7).
Retire o microfone do Parrot MINIKIT Smart e
instale-o no retrovisor (esquema 3 p.5).
Instalar o telefone
Instale o seu telefone no Parrot MINIKIT Smart
inserindo, antes de mais, a sua parte superior
(esquema 4 p.6).
Se tiver a função GPS no seu telefone, instale-o no
suporte de montagem, de modo a poder visualizar a
qualquer momento as info rmações de navegação.
Carregar o Parrot MINIKIT Smart
Antes da primeira utilização, o Parrot MINIKIT Smart
deve ser carregado. Para isso, ut ilize a tomada do
isqueiro do seu automóvel, ou ligue o Parrot MINIKIT
Smart ao seu PC, utilizando um cabo USB / mini
USB (esquema 5 p.6).
O LED que se encontra ao lado da ent rada mini-USB
acende para indicar que o carregamento está a ser
Page 53

efectuado. Quando o carregamento tiver terminado,
Nota: A porta USB do MINIKIT Smart permite também
efectuar actualizações.
o LED desliga-se. O tempo de carregamento é de 2
horas.
Quando a bateria estiver fraca, o Parrot MINIKIT
Smart emite um co njunto de "bips". Essa indicação
significa que ainda tem cerca de 15 minutos de
autonomia.
Primeira utilização
Ligar / desligar o MINIKIT Smart
Prima o bot ão vermelho durante 3 segundos para ligar /
desligar o Parrot MINIKIT Smart.
Carregar o telefone
Pode carregar a bateria do seu telefone, ligando-o ao
Parrot MINIKIT Smart. Para isso, o seu telefone deve
ter a opção de se poder carregar com USB (consulte
o manual do seu telefone para obt er mais
informações). Utilize o cabo fornecido com o seu
telefone, se necessário.
O carregamento do telefone só é possível quando o
Parrot MINIKIT Smart estiver ligado ao carregador
de 12V do isqueiro do carro.
Acesso aos menus do Parrot MINIKIT Smart
Prima o botão rotativo central para aceder aos
menus.
Para navegar entre menus utilize o bot ão rotativo,
validan do a sua opção com o botão verde ou
premindo o botão rotativo.
Para sair do menu, prima o botão vermelho ou
aguarde alguns segundos.
Ligar o seu telefone Bluetooth
Antes de utilizar o Parrot MINIKIT Smart com o seu
telefone, deverá lig ar o s dois aparelhos. Se for a 1ª
vez que utiliza este aparelho com o Parrot MINIKIT
Smart deverá, em primeiro lugar, efect uar um
emparelhament o dos dois aparelhos: depois de
detectados os dois aparelhos em simultâneo, não
será necessário voltar a executar esta operação.
No seu t elefone Bluetoo th®, faça uma busca a
1.
periféricos Bluetooth.
Seleccione «Parrot MINIKIT Smart».
2.
Portuguese 53
Page 54
Insira “0000” no seu telefone, caso este o peça.
Nota: Apenas os contactos gravado s na memória
do telefone se sincronizam.
3.
> O aviso do Parrot MINIKIT Smart
«Emparelhamento concluído com êxito» indica
que os dois aparelhos estão ligados.
De acordo com o modelo do seu telefo ne, poderá ter
de autorizar a ligação ao Parrot MINIKIT Smart para
permit ir a ligação automática entre os 2 aparelhos.
Se tiver a função GPS no seu telefone, e se o seu
telefone permit ir o envio das instruções de
naveg ação por Bluetooth (perfil A2DP), as instruções
de navegação serão enunciadas no Parrot MINIKIT
Smart. Consulte a secção de apoio do nosso website
para obter mais informações acerca da
compatibilidade do Parrot MINIKIT Smart.
Utilizar o directório
A sincronização do seu directór io (list a) telefónico
com o Parrot MINIKIT Smart é aut omática co m a
maior parte dos telefones.
No caso do seu telefone não permit ir esta
sincronização auto mática, po de transferir os seus
contactos do telefo ne para o Parrot MINIKIT Smart
através de Object Push. Para tal, seleccione Receber
contactos. Consulte o folheto info rmativo do seu
telefone para conhecer o procedimento de envio de
contactos através do Object Push.
54 Portuguese
Registar os comandos de voz
Todos os seus contactos, após a sincronização ou
envio por Object Push, possuem automaticamente
um comando de voz no Parrot MINIKIT Smart. Não
será necessário registar o seu próprio comando para
cada co ntacto, de modo a efect uar uma chamada por
meio de reconhecimento de voz.
De qualquer modo, caso o Parrot MINIKIT Smart
interprete incorrectamente o nome de um dos seus
contactos, poderá adicionar um novo comando. Para
tal, prima o botão rotativo e seleccione a opção
Adicionar comandos de voz.
Telefone
Receber uma chamada
O nome do contacto é anunciado no caso do número deste
contacto estar regist ado no directório do telefone ligado ao
Parrot MINIKIT Smart.
Se pretender aceit ar a chamada, pr ima o botão
verde.
Se pretender rejeitar a chamada, prima o botão
vermelho.
Page 55

Fazer uma chamada
Nota: A qualquer altura, prima o botão vermelho
para sair do modo de reconhecimento de voz .
Nota: As instruções de navegação não são
apresentadas pelo Parrot MINIKIT Smart durante uma
chamada.
Para fazer uma chamada através do reconhecimento
de voz:
Carregue no botão verde para iniciar o
1.
processo de reconhecimento por voz.
> O nome do contacto que desejar ligar ser-lheá solicitado.
Pronuncie o nome do contacto, seguido do tipo
2.
de número (“Casa”, “Telemóvel”...), caso
este contacto tenha vário s números.
> A chamada para este contacto é iniciada
automaticamente, caso o comando de voz seja
compreendido correctamente.
> Caso contrário , o kit mãos-livres emite uma
mensagem de confirmação. Confirme, dizendo
“sim”, “telefonar” ou “chamada”.
Utilização durante uma chamada
O Parrot MINIKIT Smart permite-lhe regular o volume
da comunicação durante uma chamada. Para tal,
utilize o botão rotativo. O volume é guardado para
as comunicações seguintes.
Durante uma comunicação, se pretender retomar a
chamada no seu telefo ne (co municação pr ivada), deve
premir o botão verde do Parrot MINIKIT Smart.
O Parrot MINIKIT Smart permite-lhe enviar DTMF em
comunicação para gerir, por exemplo, a sua caixa de
correio de voz. Prima o botão rotativo para aceder
ao menu do s DTMF .
Para fazer uma chamada manualmente:
Prima o botão para aceder ao menu principal,
1.
depois seleccione Directório.
Seleccione o co ntacto seguido do tipo de
2.
número (“Casa”, “Telemóvel”...), caso este
contacto tenha vários números.
Prima o bot ão verde do kit durante dois segundos para
voltar a ligar para o último número marcado.
Problemas frequentes
O Parrot MINIKIT Smart indica “Memória cheia”
Pode emparelhar um máximo de 10 aparelhos. Se tentar
emparelhar um décimo primeiro aparelho, o kit indicará
«memória cheia». Deve então apagar a memória do Parrot
MINIKIT Smart, premindo em simultâneo o botão vermelho
e o botão girató rio durante 3 segundos. Esse pr ocedimento
apagará também todos os contactos.
Portuguese 55
Page 56

O Parrot MINIKIT Smart parece bloqueado
Em caso de problemas, poderá reiniciar o Par rot MINIKIT
Smart. Para isso, prima o botão Reset (esquema 7 p.7).
Não consigo utilizar o meu telemóvel com o kit
Verifique a compatibilidade do seu telemóvel com o Parrot
MINIKIT Smart. Encontrará a lista de compatibilidade do
Parrot MINIKIT Smart no nosso website www.parrot .com,
secção Support & Downloads.
Se o seu t elemóvel for indicado como co mpatível, poderá
ter de actualizar o seu Parrot MINIKIT Smart. Encontrará o
processo de actualização do Parrot MINIKIT Smart no
nosso website www.parrot.com, secção Support &
Downloads.
Informação geral
Garantia
Os produtos Parrot , peças e mão-de-obra, têm garant ia de
1 ano a contar da data de aquisição, salvo alteração do
produto e mediante a apresentação da prova de co mpra
(data e local de co mpra, n.º de série do produto) ao
revendedor.
A garantia não cobre a act ualização dos softwares incluídos
nos produtos Parrot com telemóveis Bluetoot h ® com vista
a torná-los compatíveis, a recuperação de dados, a
deterioração exterior do pro duto causada pelo seu uso
normal, qualquer dano resultante de acidentes, uma
56 Portuguese
utilização anormal ou não conforme do pro duto, um
produto que não seja Parrot. A Parrot não é responsável
pela armazenagem, perda ou dano de dados durant e o
transporte ou reparação.
Todos os produtos considerados sem defeito serão
remetido s ao expedidor e os custos de tratamento, de
verificação e transporte ser-lhe-ão imputados.
Devido à especificidade técnica deste produto ,
recomendamos que a sua instalação seja feita pelo seu
mecânico. Em nenhum caso a Parrot será responsável por
qualquer dano causado por uma instalação que não esteja
em conformidade com as instruções constantes no folheto
informativo e/ou uma instalação incorrecta efectuada pelo
cliente.
Eliminação correta deste produto
Esta marca, apresentada no produto ou no seu manual
indica que ele não deverá ser eliminado juntament e com os
resíduos domésticos comuns no final do seu período de
vida útil. Para impedir danos ao ambiente e à saúde humana
causado s pela eliminação incontrolada de resíduos, este
equipamento deverá ser separado de outros tipos de
resíduos e reciclado de forma responsável, para promover
uma reut ilização sust entável dos recursos materiais.
Modificações
As explicaçõ es e especificações presentes neste manual são
meras informações concedidas, podendo ser modificadas
sem aviso prévio. Poderão ainda ser sujeitas a correcções
Page 57

aquando da sua impressão. Este manual foi redigido com
A Parrot SA, 174 quai de Jemmapes, 75010 Paris,
France, declara sob sua única responsabilidade
que o produto descrito no present e guia do
utilizado r se encontra em co nformidade com as
normas técnicas EN300328, EN301489-17,
EN60950, de acordo com as disposições da
directiva R&TTE 99/5/EC, bem como com as
exigências da directiva EMC 2004/108/CE, da
directiva 73/23/CEE relativa aos aparelhos de
baixa tensão e da directiva Automóvel 72/245/
CEE, melhorada pela directiva 2006/28/CE.
bastante atenção, visando o fornecimento de informação o
mais precisa possível.
No entanto, a Parro t não será responsável por
consequências resultantes de erros ou omissões no
presente manual, nem por danos ou perdas acident ais
resultante directa ou indirectamente da utilização da
informação aqui constante. A Parrot reserva-se o direito de
alterar ou aperfeiçoar o design do produto ou o manual de
utilização sem quaisquer restrições e sem qualquer
obrigação de notificar o utilizador.
Como parte da nossa preocupação contínua em actualizar e
aperfeiçoar os nossos produtos, o produto que adquiriu
pode ser ligeiramente diferente do modelo descr ito no
presente manual. Se for o caso, poderá existir uma versão
mais recent e do presente manual em formato electrónico no
sítio da Internet da Parrot, em www.parrot .com.
Decla ração de conformidade
Copyright
Copyr ight © 2010 Parrot.
Marca registada
O nome e o logotipo Bluetooth são marcas registadas de
Bluetoo th ® SIG, Inc., e qualquer utilização pela Parrot S.A.
enco ntra-se licenciada.
Bluetoo th QDID : B016898, B013838, B012423
Parrot, Parrot Minikit, as marcas e o logótipo da Parrot são
propriedade da PARROT SA.
As outras marcas mencionadas neste documento estão
protegidas e são propriedade dos seus respectivos
proprietários.
Portuguese 57
Page 58

Page 59

Page 60

 Loading...