

Page 1

User guide
Guide utilisateur
Manual del usuario
Guida per l’utente
Bedienungsanleitung
Manual do Utilizador
用户手册
完全使用手冊
Page 2

English
1
English ...................................................................................................... 1
Français .................................................................................................. 21
Español ................................................................................................... 41
Italiano .................................................................................................... 61
Deutsch .................................................................................................. 81
Português ............................................................................................. 101
简体中文 ............................................................................................... 121
繁體中文 ............................................................................................... 141
............................................................................................... 161
Pусский ................................................................................................ 181
Page 3

English
2 3
SEQUOIA - User Guide
INTRODUCTION
Thank you for choosing Sequoia, the sensor specifically for precision
farming. Sequoia is one of the lightest sensors on the market. It
provides extremely accurate images:
• 16 Mpx RGB sensor: photos of your crops in visible light.
• Four narrow band and synchronised 1.2 Mpx monochrome sensors
(Green, Red, Red Edge and Near Infrared)
• An automatically calibrated camera thanks to the sunshine module
Sequoia also has:
• A sensor weighing 72 grams which is suitable for all types of drones
• A removable protective lens
• Integrated GPS/GNSS to locate the camera when photos are being
taken
• 64GB internal memory, corresponding to 10 flights
• An SD card slot
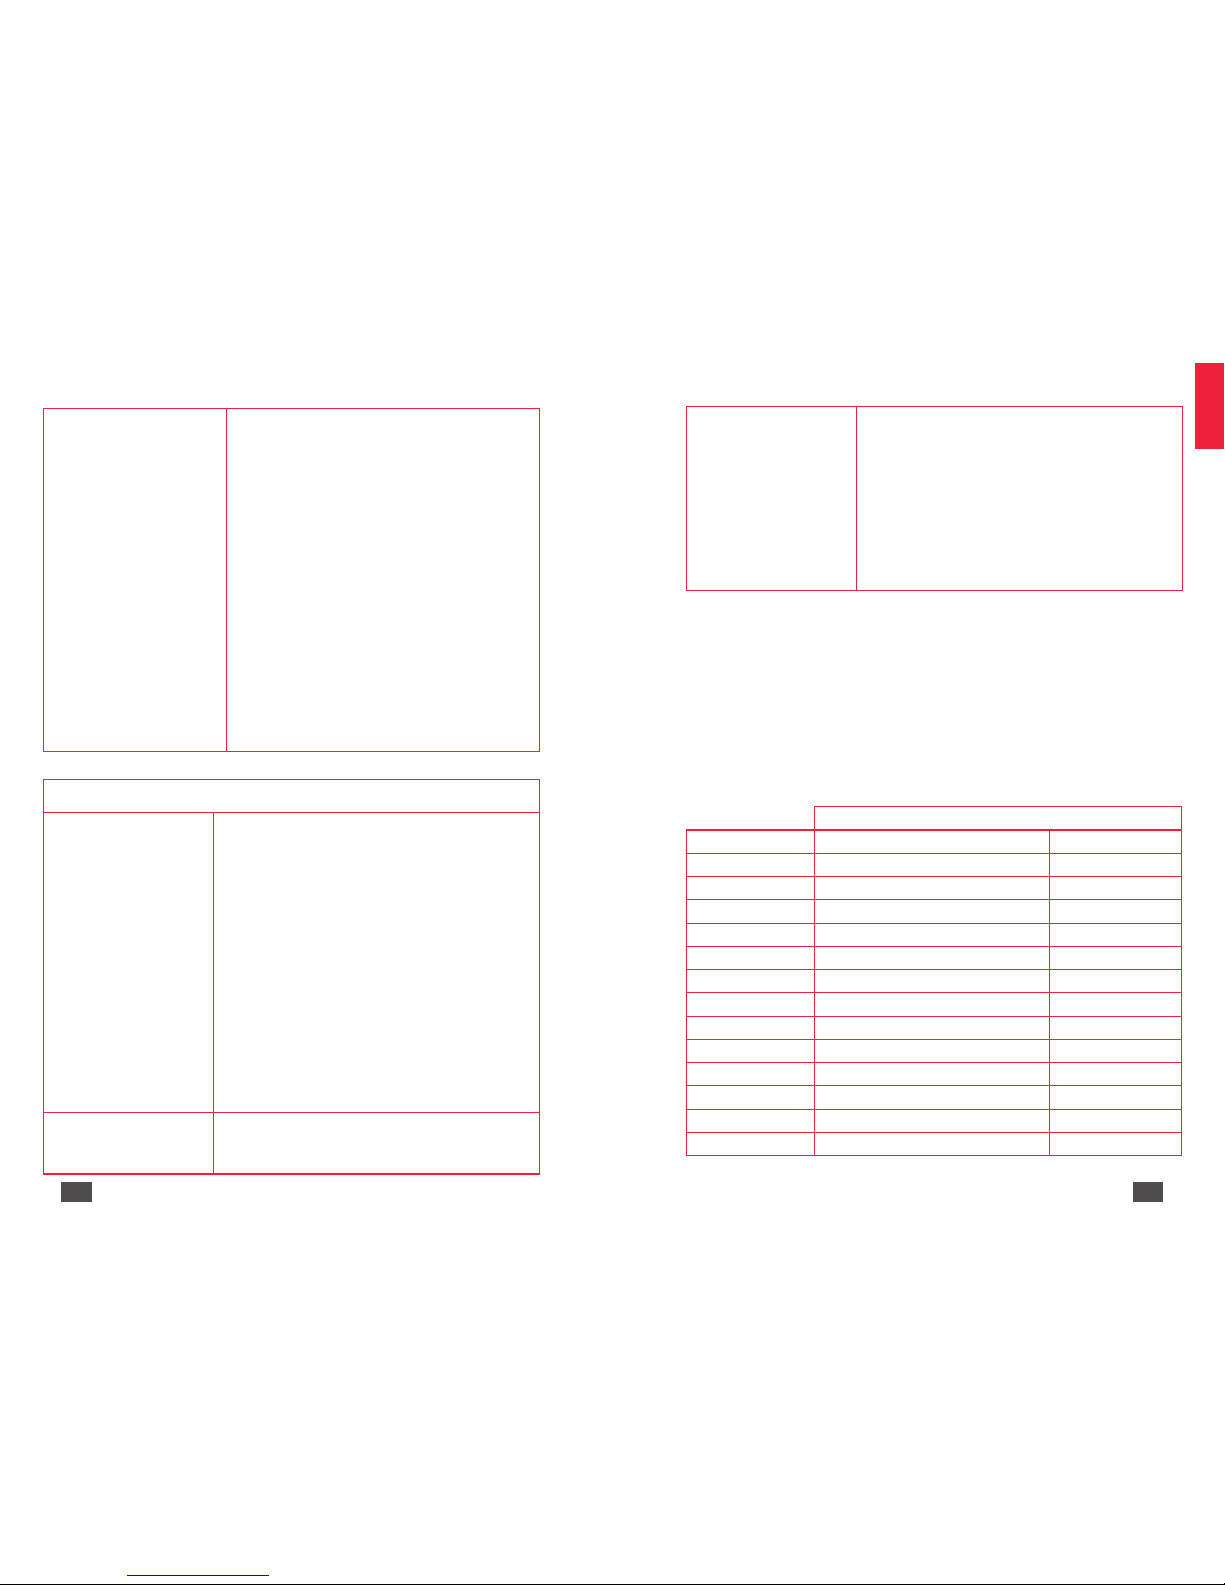
PACKAGE CONTENTS
Multispectral camera Sunshine sensor
Micro USB cable to connect
the two modules
Micro USB cable to connect
Sequoia to the drone
Protective lens User Guide
Microfibre cloth Quick Start Guide
Sunshine sensor holders (x 3) 32 GB SD Card
Sequoia works without batteries. Sequoia is powered directly by the
drone using a micro USB connection.
Page 4

English
4 5
SEQUOIA PRESENTATION
Sequoia is a multispectral sensor specifically for farming. It is designed
according to three main criteria: outstanding precision, minimum size and
weight and ease of use. The Sequoia sensor is designed to be suitable for
all types of drones, those with fixed wings and multi-rotors and mounted on
gimbals or not. It can be used to get images of agricultural fields in several
spectral bands which measure the state of the vegetation: Green (550nm
wavelength, 40nm bandwidth), Red (660nm wavelength, 40nm bandwidth),
Red Edge (735nm wavelength, 10nm bandwidth) and Near Infrared (790nm
wavelength, 40nm bandwidth).
The photos taken can then be analysed using various software. They
can be used to make indexed maps (NDVI, NDRE, etc.) and make
recommendations regarding nitrogen fertilisation.
Green
550nm wavelength,
40nm bandwidth
Definition: 1.2 Mpx
Red
660nm wavelength,
40nm bandwidth
Definition: 1.2 Mpx
Red-edge
735nm wavelength,
10nm bandwidth
Definition: 1.2 Mpx
Near infrared
790nm wavelength,
40nm bandwidth
Definition: 1.2 Mpx
RGB
Definition: 16Mpx
Page 5

English
6 7
Multispectral sensor
The multispectral sensor is installed under the drone, facing the crops. It is
powered directly by the drone.
1
2
3
4
5
6
1
1.2 megapixel monochrome sensors collect data in discrete
spectral bands : Green (550nm - 40Nm Bandwidth), Red (660nm 40nm Bandwidth), Red Edge (735nm - 10nm Bandwidth) and Near
Infrared (790nm - 40nm Bandwidth).
2 16 megapixel RGB sensor.
3 Indicator light: reference for taking photos and calibration.
4
Shutter button: enable/disable burst mode, enable/ disable Wi-Fi
and take a photo.
5
Micro USB host port : connects the multispectral sensor to
the sunshine sensor.
6
Micro USB device port : connects the multispectral sensor to
the drone.
Other multispectral sensor features:
• Inertial measurement unit.
• 64 GB internal memory.
• Magnetometer.
• Wi-Fi interface.
• Weight: 72g.
• Size:
Sunshine sensor
The sunshine sensor is used to calibrate the images depending on the
sunlight. This makes it possible to compare photos over time, despite
variations in light during photo shoots. The sunshine sensor is attached
on the upper part of the drone, facing the sky. During flights the sunshine
sensor is powered by the multispectral sensor.
1
2
3
4
1
4 ambient light sensors. These sensors are fitted with band-pass
filters identical to those on the multispectral sensor.
2 Slot for an SD card.
3
Indicator light: Reference for calibration and indicates if GPS/
GNSS is enabled.
4
USB device port : connects the sunshine sensor to the
multispectral sensor.
Other sunshine sensor features:
• GPS /GNSS module.
• Inertial measurement unit.
• Magnetometer.
• Weight: 35g.
• Size:
FP3 - GoPro Form Factor
59 mm
41 mm
Sunshine
sensor
59 mm
41 mm
47 mm
29,5 mm
21,2 mm
39,6 mm 18,5 mm
Sunshine
sensor
47 mm
39,6 mm 18,5 mm
Page 6

English
8 9
Sunshine sensor holders
There are three different holders for attaching the sunshine sensor to the
drone.
• Flat bottom holder to attach the sunshine sensor to a flat surface.
• Concave bottom holder to attach the sunshine sensor to a rounded
surface.
• Pivoted holder to attach the sunshine sensor to a rounded surface.
This holder means you can direct the sunshine sensor in the direction
you want.
Flat bottom
holder
Concave bottom
holder
Pivoted holder
CONFIGURING SEQUOIA
You can set up Sequoia using either flight planning software (such as
Pix4Dmapper Capture or eMotion from SenseFly for example), or Wi-Fi via
an HTML interface. Your set up data will be saved in the Sequoia memory.
Setting up Sequoia via Wi-Fi
Wi-Fi is enabled on Sequoia as the default option. Press four times on
the multispectral sensor button to enable/disable Wi-Fi on Sequoia.
Subsequently, Sequoia keeps the last Wi-Fi set up in its memory, when it
is switched on or off.
You can set up Sequoia from a computer, smartphone or tablet:
1. Connect the multispectral sensor USB device port to a drone or a
USB battery.
> Sequoia turns on automatically.
2. Make sure that the Wi-Fi appears in the list of available Wi-Fi. If not,
press four times on the multispectral sensor button.
3. Connect to the Wi-Fi network: Sequoia_XXXX.
4. Open your internet browser
5. In the address bar of your browser, type the following address:
192.168.47.1
> The HTML interface for setting up Sequoia opens. You can set up
Sequoia.
HTML interface for setting up Sequoia
The Sequoia set up interface consists of three screens:
• Home
• Status
• Gallery
Page 7

English
10 11
Home
The Home screen is used to set up Sequoia.
Setting up the capture mode
Select the capture mode you want:
• Single: take one shot at a time.
• Time-lapse: take burst shots at regular intervals. In the "time-lapse"
field specify in seconds the interval of time that you want between
each shot.
• GPS: take burst shots at regular distances. In the "GPS" field, specify
the distance in meters between each photo.
Once the set up is complete, press the Shot button. The camera starts
taking shots. To stop taking shots, press the Stop shot button.
Setting up the sensors
Select:
• Image resolution: 0.3 Mpx or 1.2 Mpx.
• Bit depth: 8-bit or 10-bit.
• The sensors that you want to enable during the flight (Green, Red, Red
Edge, Near Infrared and RGB). To do this, click on the sensors that you
want to enable or disable.
Status
GPS
Parrot Sequoia Home Status Gallery
GPS
Number of satellite: 7
Precision: 1m
Speed: 10m/s
Altitude: 35m
Instruments
Sunshine sensor
Temperature
The GPS screen tells you about:
• The number of satellites detected.
• Sequoia's precise GPS /GNSS position in meters.
• Sequoia's travel speed in meters per second.
• Sequoia's altitude in meters.
Instruments
Parrot Sequoia Home Status Gallery
GPS
Instruments
Body Sunshine sensor
ROLL
-26°
PITCH
21°
YAW
22°NE
ROLL
2°
PITCH
-3°
YAW
22°NE
Sunshine sensor
Temperature
The Instruments screen tells you about the orientation of the multispectral
sensor and the sunshine sensor.
Page 8

English
12 13
Irradiance
Parrot Sequoia Home Status Gallery
GPS
Instruments
Sunshine sensor
GREEN
24.324
RED
400
RED EDGE
43.420
NEAR IR
57.239
Temperature
The Irradiance screen tells you about the light intensity of each band
(Green, Red, Red Edge, Near Infrared).
Temperature
Parrot Sequoia Home Status Gallery
GPS
Instruments
Sunshine sensor
Temperature
Body
P7
75°
P7MU
65°
P7
75°
Wifi
35°
IMU
50°
Sensors
Green
55°
Red
54°
RE
54°
NIR
54°
Sunshine sensor
IMU
50°
The Temperature screen tells you about the temperature of all Sequoia's
parts.
Gallery
The Gallery screen can be used to retrieve the photos taken during your
flights. You can select the photos that you would like to view (All, RGB,
Green, Red, Red Edge and Near Infrared).
Media View
Parrot Sequoia Home Status Gallery
Media View
INTERNAL MEMORY
USED 35 Gb
AVAILABLE 28.5 Gb
SD CARD
USED 1.3Gb
AVAILABLE 64 Gb
The Media View screen tells you about the available space in Sequoia's
internal memory and on the SD card.
CHECKS TO BE MADE BEFORE USE
Before each flight with Sequoia, make the following checks:
• Make sure that the lenses are clean. Use the microfibre cloth (supplied)
to clean them.
• Release enough memory (either in the multispectral sensor internal
memory, or on your SD card) so you can save all the photos taken
during the flight.
• Make sure that the two modules are properly attached to the drone
and that they are not likely to come away during the flight.
• Make sure that the micro USB device cable which connects the drone
to the multispectral sensor is connected.
• Make sure that the two sensors are calibrated. For more information,
see the Calibrating Sequoia section.
• Wait until the sunshine sensor indicator light is green. When it is green
this means that the GPS/GNSS is enabled.
Page 9

English
14 15
USING SEQUOIA
Note: If Sequoia detects an SD card the shots are saved on this SD
card. If no SD card is detected, Sequoia automatically saves the shots
in its internal memory. Installing the protective lens
Installing the protective lens
Use the protective lens to protect the sensors during landing.
1. Insert the protective lens on the multispectral sensor.
2. Press lightly on the protective lens as far as it will go on the sensor.
Attaching Sequoia to a drone
Sequoia can be attached to all types of drones.
1. Select the sunshine sensor holder which is most suitable for your drone.
2. Remove the plastic film from the holder and stick the holder on the
back of the drone.
!
The holder must be positioned parallel to the drone (diagram A).
Diagram A
3. Insert the sunshine sensor in its holder.
!
To avoid distorting the data the sunshine sensor must not be
covered during photo shoots.
4. Insert the multispectral sensor under the drone, in the kit provided for
this purpose.
5. Connect the multispectral sensor to the sunshine sensor using the USB
host cable.
6. Connect the multispectral sensor to the drone using the USB device
cable.
> Sequoia turns on automatically (Diagram B).
Diagram B
!
Make sure that the Sequoia cables do not get caught in the drone
propellers during the flight.
Connecting Sequoia to a USB battery
You can use Sequoia without a drone. To do this you need a 2A USB
battery at least.
6. 1. Connect the multispectral sensor to the sunshine sensor using the
USB host cable.
7. 2. Connect the multispectral sensor to the battery using the USB
device cable.
> Sequoia turns on automatically (Diagram C).
Diagram C
Calibrating Sequoia
Before using Sequoia for the first time you must calibrate it. Before starting
the calibration, make sure that the two sensors are properly attached and
connected to the drone.
!
The multispectral sensor and the sunshine sensor must be
attached perpendicularly. It is recommended to calibrate the two
sensors at the same time.
Note: You can calibrate the sensors separately. However the
sunshine sensor must be connected to the multispectral sensor to
be calibrated.
1. Make sure that the Sequoia indicator light flashes purple (Diagram D).
Diagram D
Page 10

English
16 17
2. Turn the drone on the Z axis (yaw axis) (Diagram E) until the
multispectral sensor indicator light flashes green.
Diagram E
3. Turn the drone on the Y axis (pitch axis) (Diagram F) until the
multispectral sensor indicator light flashes blue.
Diagram F
4. Turn the drone on the X axis (pitch axis) (Diagram G) until the
multispectral sensor indicator light changes colour.
Diagram G
Note: Once the calibration is complete the colour of the multispectral
sensor light varies depending on Sequoia's status. For example, if the
multispectral sensor memory is full, the indicator light will flash yellow.
Functions of the multispectral sensor button
Use the button to enable/disable burst mode, take photos and enable/
disable Wi-Fi on Sequoia.
Note: Sequoia must be turned on to activate these features.
1 clik
Take a photo
2 clicks Enable/disable shots
4 clicks Enable/disable Wi-Fi
Hold down (3 seconds)
Switch off Sequoia
Disconnect the multispectral
Press and hold the Sequoia button for 3 seconds to turn it off. The
indicator light goes out. If you disconnect Sequoia while the indicator is
still on the latest photos may be corrupted.
LED properties
Multispectral sensor
Start up
When you turn on Sequoia the LED has the following properties:
Autre
LED properties Meaning
Quick flashing orange Shutting down
Slow flashing orange Update in progress
Flashing blue Enabling/Disabling Wi-Fi
Problem
Flashing red Hardware malfunction
Flashing red
Corrupted memory. Repair in progress.
Once the repair is complete the LED
returns to green. This operation may take
several seconds depending on the space
available on your SD card.
Flashing yellow Memory full
Page 11

English
18 19
1. Connect your USB key to a computer and make sure that it contains
no files in .plf format.
2. Go to the Sequoia help page: www.parrot.com/fr/ support/
3. Download the update file available in .plf format.
4. Copy the file to the root directory on your USB key without putting it
in a folder or renaming it.
5. Connect your micro USB OTG cable to the USB host port on the
multispectral sensor.
6. Connect the USB key containing the update file to the other end of
the cable.
7. Turn on Sequoia.
> The update happens automatically. During the update the multis-
pectral sensor light flashes orange (diagram I). Once the update is
complete the light turns green.
Diagram I
Via an SD
Before you begin make sure that the multispectral sensor is connected to
the sunshine sensor.
1. Connect your USB key to a computer and make sure that it contains
no files in .plf format.
2. Go to the Sequoia help page: www.parrot.com/fr/ support/
3. Download the update file available in .plf format.
4. Copy the file to the root directory on your SD Card without putting it
in a folder or renaming it.
5. Insert the SD card in the sunshine sensor.
6. Turn on Sequoia.
> The update happens automatically. During the update the multis-
pectral sensor light flashes orange (Diagram J). Once the update is
complete the light turns green.
Diagram J
Calibration
Flashing purple The sensor needs to be calibrated
Flashing green Calibration in progress (pitch axis)
Flashing blue Calibration in progress (roll axis)
Photo shoot
Continuous blue Shot being taken
Continuous light green At least one of the four sensors is enabled
Sunshine sensor
LED properties Meaning
Problem
Continuous red Hardware malfunction
Flashing yellow SD Card full
Calibration
Flashing purple Calibration in progress (yaw axis)
Flashing green Calibration in progress (pitch axis)
Flashing cyan Calibration in progress (roll axis)
GPS/GNSS
Continuous yellow GPS /GNSS connection not established
Continuous green GPS /GNSS connection established
UPDATING SEQUOIA
There are two ways to update Sequoia.
Via USB
To update Sequoia via USB you must use a micro USB OTG cable male
plug with a USB female socket (Diagram H).
Diagram H
Page 12

English
20 21
RETREIVING DATA
It is recommended to transfer your data to a computer after each flight.
You can transfer your data in three different ways: via USB, via Wi-Fi and
via an SD card.
The photos taken by Sequoia are in .tiff format for the four monochrome
sensors, and in .jpeg format for the RGB sensor.
Via USB
1. Using the micro USB cable (supplied), connect the micro USB device
port on the multispectral sensor to your computer.
2. In Windows: go to Start > Computer > Sequoia
> Internal. This will take you to the multispectral sensor internal me-
mory. You can retrieve the photos taken during the flight.
Note : Sequoia creates a folder for each sequence of shots. For example,
if you have taken a single shot and then a shot in burst mode, you will have
two different folders in the Sequoia memory.
3. For Mac: open Image Transfer. This will take you to the multispectral
sensor internal memory. You can retrieve the photos taken during the
flight.
Via Wi-Fi
1. Connect the multispectral sensor USB device port to a drone or a
USB battery.
> Sequoia turns on automatically.
2. Make sure that the Wi-Fi appears in the list of available Wi-Fi. If not,
press four times on the multispectral sensor button.
> The multispectral sensor indicator light flashes blue when Wi-Fi is
enabled.
3. Connect your computer, tablet or smartphone to the Wi-Fi network:
Sequoia_XXXX.
4. Open your internet browser and log on to the IP address
192.168.47.1.
5. Go to the Gallery tab and retrieve the photos taken during the flight.
Via an SD Card
1. Insert your SD card into an adapter which is compatible with your
computer.
2. Retrieve the photos taken during the flight.
You can also use the sunshine sensor as an SD card reader. To do this
connect the sensor's micro USB device port to your computer.
SEQUOIA MAINTENANCE
Cleaning the sensors
If dust or dirt gets on the lens and/or the sensors:
1. Use the microfibre cloth (supplied) to clean the lens.
2. Remove any remaining traces with a cotton bud soaked in lens cleaner.
Obtaining spare parts
The following parts are available:
• Protective lens.
• Sunshine sensor.
• Sunshine sensor holders
For more information, contact your dealer at:
www.sensefly.com, www.airinov.fr, www.micasense.com, www.pix4d.com.
Page 13

English
22 23
PROCESSING DATA
The data retrieved by Sequoia can be processed in several ways.
With the MicaSense ATLAS data management software
You can analyse the photos taken by Sequoia with the MicaSense ATLAS
software. For more information, go to www.micasense.com
With the PIX4Dmapper mapping software
You can analyse the photos taken by Sequoia with the PIX4DMapper
software. For more information, go to www. pix4d.com.
Agronomic recommendations from AIRINOV
Airinov offers a nitrogen fertiliser recommendation service for rapeseed and
wheat. For more information, go to www.airinov.fr.
INTEGRATING SEQUOIA VIA PTP OR PTP/IP
PTP and PTP/IP protocol can be used to control and set up Sequoia.
PTP and PTP/IP software such as gphoto2 and ptpcam must be used and
this means that programmes integrating Sequoia can be developed or
communication with another media can be established.
Sequoia supports the following PTP commands:
Standard
Request
GET_STORAGE_IDS
GET_STORAGE_INFO
GET_NUM_OBJECTS
GET_OBJECT_HANDLES
GET_OBJECT_INFO
GET_OBJECT
GET_THUMB
DELETE_OBJECT
GET_PARTIAL_OBJECT
INITIATE_CAPTURE
FORMAT_STORE
GET_DEVICE_PROP_DESC
GET_DEVICE_PROP_VALUE
SET_DEVICE_PROP_VALUE
RESET_DEVICE_PROP_VALUE
TERMINATE_OPEN_CAPTURE
INITIATE_OPEN_CAPTURE
Event
EVENT_CANCEL_TRANSACTION
EVENT_OBJECT_ADDED
EVENT_OBJECT_REMOVED
EVENT_STORE_ADDED
EVENT_STORE_REMOVED
EVENT_DEVICE_PROP_CHANGED
EVENT_DEVICE_INFO_CHANGED
EVENT_STORE_FULL
EVENT_CAPTURE_COMPLETE
Page 14
English
24 25
Device Properties
FUNCTIONAL_MODE
IMAGE_SIZE
COMPRESSION_SETTING
WHITE_BALANCE
F_NUMBER
FOCAL_LENGTH
FOCUS_DISTANCE
FOCUS_MODE
EXPOSURE_METERING_MODE
EXPOSURE_PROGRAM_MODE
DATETIME
STILL_CAPTURE_MODE
TIMELAPSE_NUMBER
TIMELAPSE_INTERVAL
FOCUS_METERING_MODE
Custom
Request
GET_SUNSHINE_VALUES
GET_TEMPERATURE_VALUES
GET_ANGLE_VALUES
GET_GPS_VALUES
GET_GYROSCOPE_VALUES
GET_ACCELEROMETER_VALUES
GET_MAGNETOMETER_VALUES
GET_IMU_VALUES
GET_STATUS_MASK
START_MAGNETO_CALIB
STOP_MAGNETO_CALIB
MAGNETO_CALIB_STATUS
SEND_FIRMWARE_UPDATE
Event
STATUS
MAGNETO_CALIBRATION_STATUS
Properties
PHOTO_SENSORS_ENABLE_MASK
PHOTO_SENSORS_KEEP_ON
MULTISPECTRAL_IMAGE_SIZE
MAIN_BIT_DEPTH
MULTISPECTRAL_BIT_DEPTH
HEATING_ENABLE
WIFI_STATUS
WIFI_SSID
Refer to the documentation for your PTP or PTP/IP software (gphoto2 or
ptpcam for example).
For more information on the Sequoia PTP and PTP/IP protocols, see the
Integration Guide available in the Sequoia set up interface help section
and on www.parrot.com/fr/ support/parrot-sequoia.
TECHNICAL SPECIFICATIONS
Sensor resolution
The ground resolution of the RGB sensor and the multispectral sensor
depends on the height of the flight. Refer to the table to determine the
flight height depending on the required resolution.
Ground resolution (cm/px)
Height (m) Monochrome RGB
30 3,7 0,8
40 4,9 1,1
50 6,2 1,4
60 7,4 1,6
70 8,6 1,9
80 9,9 2,2
90 11,1 2,4
100 12,4 2,7
110 13,6 2,9
120 14,8 3,3
130 16,1 3,5
140 17,3 3,7
150 18,6 4,1
Page 15

English
26 27
Activating the sensors
Photo 2
Coverage
Area to be mapped
Drone route
Distance between
two flight lines
Photo 1
For the best coverage rate during flights at a certain altitude you must
allow for a time lapse between shots. The RGB sensor can take shots with
a minimum delay of 1 second between each photo. Multispectral sensors
can take shots with a minimum delay of 0.5 seconds between each photo.
To find out the minimum time to be respected depending on the flight
height refer to the following chart and diagram.
Time between shots
Height (m) 5 m/s 10 m/s 13 m/s 20 m/s
30 1,1 0,5 0,4 0,3
40 1,4 0,7 0,5 0,4
50 1,8 0,9 0,7 0,5
60 2,2 1,1 0,8 0,6
70 2,6 1,3 1,0 0,7
80 2,9 1,4 1,1 0,74
90 3,3 1,6 1,2 0,8
100 3,7 1,8 1,4 0,9
110 4,1 2,1 1,6 1,0
120 4,4 2,2 1,7 1,1
130 4,8 2,4 1,9 1,2
140 5,2 2,6 2,0 1,3
150 5,6 2,8 2,2 1,4
Key:
• In red: the multispectral sensor and the RGB sensor cannot be
activated.
• In blue: the RGB sensor cannot be activated.
• In green: all the sensors can be activated.
0
0,5
1
1,5
2
2,5
3
3,5
4
4,5
5
5,5
6
30 50 70 90 110 130 150
Time between shots (s)
Flight height (m)
Time between shots
(for an 80% coverage rate)
V = 5 m/s
V = 10 m/s
V = 13 m/s
V = 20 m/s
Page 16

English
28 29
Distance between shots (m)
Height (m) 0,7 0,75 0,8 0,85
30 8,4 7,0 5,6 4,2
40 11,2 9,3 7,5 5,6
50 14,0 11,7 9,3 7,0
60 16,8 14,0 11,2 8,4
70 19,6 16,4 13,1 9,8
80 22,4 18,7 15,0 11,2
90 25,2 21,0 16,8 12,6
100 28,0 23,4 18,7 14,0
110 30,8 25,7 20,6 15,4
120 33,7 28,0 22,4 16,8
130 36,5 30,4 24,3 18,2
140 39,3 32,7 26,2 19,6
150 42,1 35,1 28,0 21,0
0
5
10
15
20
25
30
35
40
45
30 50 70 90 110 130 150
Distance between two flight lines (m)
Flight height (m)
Distance between shots
Overlap = 70%
Overlap = 75%
Overlap = 80%
Overlap = 85%
Distance between two flight lines
Refer to the diagram below to find out the distance between two flight
lines depending on the Sequoia flight height.
0
5
10
15
20
25
30
35
40
45
50
55
60
30 50 70 90 110 130 150
Distance between two flight lines (m)
Flight height (m)
Distance between two flight lines
Overlap = 70%
Overlap = 75%
Overlap = 80%
Overlap = 85%
Memory used per hectare
Refer to the diagram below to find out the memory required by Sequoia
for a given number of hectares.
0
500
1000
1500
2000
2500
3000
3500
4000
30 50 70 90 110 130 150
Memory used per hectare
Altitude AGL (m)
Memory used per hectare
Overlap = 70%
Overlap = 75%
Overlap = 80%
Overlap = 85%
Overlap = 70%
Overlap = 75%
Overlap = 80%
Overlap = 85%
Other technical specifications
• The frame rate is 1 fps (frame per second) maximum.
• Environmental operating conditions:
o Light range: 3000 to 120,000 lux. Use between
-10°C and +45°C.
• Power consumption: 5 to 12 W.
Page 17

English
30 31
• Power supply by micro USB 5V - 2A. Sequoia is powered by the drone
on which it is mounted.
• The power supply must be Safety Extra Low Voltage (SELV) and
Limited Power Source (LPS).
GENERAL INFORMATION
Precautions for use and maintenance
Only use accessories specified by the manufacturer.
If sand or dust gets into Sequoia it may be irreparably damaged and no
longer function correctly.
Do not use Sequoia in adverse weather conditions (rain, strong wind and
snow) or when visibility is poor (at night).
Keep Sequoia away from high voltage power lines, buildings or any other
potentially hazardous areas.
Do not use this device near liquids. Do not place Sequoia on water or on
a wet surface as this could cause irreparable damage.
Avoid making Sequoia undergo significant changes in altitude.
Do not leave Sequoia in the sun.
Risk of ingestion of small objects. The packaging is not part of the product
and must be discarded as a safety measure.
If you use Sequoia with a drone refer to the general information for your
drone.
Wi-Fi
Before you use your Sequoia check the restrictions regarding the use
of Wi-Fi frequencies in the place where you are going to fly. Certain
frequencies may be restricted or prohibited.
Warning regarding privacy and respect for property
Recording and broadcasting an individual's image and voice without their
permission may constitute an invasion of privacy and you may be held
liable.
Ask for permission before filming and recording an individual's voice,
particularly if you would like to save your recordings and/or broadcast
them on the Internet.
Do not broadcast degrading images or sounds which may affect an
individual's reputation or dignity
Recording and broadcasting the image of property without the permission
of its owner may constitute an infringement of the property image rights
and you may be held liable; ask for the owner's permission before filming
a property.
Warranty
For the warranty terms please refer to the General Conditions of sale for
the dealer where you purchased Sequoia.
Amendments
The explanations and specifications contained in this user guide are
provided for information purposes only and may be amended without
prior notification. This information is correct at the time of printing and
the utmost care has been taken in preparing it to provide you with the
most accurate information possible. However, Parrot Drones SAS cannot
be held responsible or liable, directly or indirectly, for any damages
or unintentional loss of data resulting from an error or omission in this
document. Parrot Drones SAS reserves the right to amend or improve the
product as well as the user guide without any restrictions or any obligation
to inform the user. As part of Parrot Drones SAS' focus on improving our
products, it is possible that the product you have purchased differs slightly
from the one described in this document. In this case you may be able
to find a new version of the user guide in electronic format on the www.
parrot.com website.
How to recycle this product
The symbol on the product or documentation indicates that it must
not be disposed of with household waste. The uncontrolled
disposal of waste may harm the environment or human health,
please separate it from other types of waste and recycle it
responsibly. This will help to foster the sustainable re-use of
material resources. Individuals may contact the dealer who sold them
their product, or their local council, to find out how and where they can
dispose of this product to ensure that it is recycled in an environmentally
friendly way. Companies may contact their suppliers or refer to the terms
of their sales contract.
Registered trademarks
Parrot is a registered trademark of Parrot SA.
Sequoia is a filed or registered trademark of Parrot Drones SAS.
Mac is a trademark of Apple Inc., registered in the USA and other
countries.
Wi-Fi® is a registered trademark of the Wi-Fi Alliance®.
All other products, trademarks and intellectual property rights mentioned
in this guide are the property of their respective owners.
Declaration of Conformity
This device can be used in: DE, AT, BE, BG, CY, HR, DK, ES, EE, FI, FR, GR,
HU, IE, IT, LV, LT, LU, MT, NL, PL, PT, CZ, RO, GB, SK, SI, SE.
Parrot Drones SAS, 174 quai de Jemmapes, 75010 Paris, France, declares
Page 18

English
32 33
under its sole responsibility that the product described in this user guide
conforms with technical standards EN300328 (v1.8.1), EN301489-17
(v2.1.1), EN 60950-1:2006/A11:2009/A1: 2010/A12: 2011/A2: 2013 in
accordance with the provisions of the R&TTE Directive 1999/5/EC, the
Low Voltage Directive 2006/95/EC and the RoHS Directive 2011/65/EC.
Declaration of Conformity in Canada
This Class B digital camera complies with Canadian standards ICES-003
and RSS-210.
This device complies with the Industry Canada RSS applicable to license-
exempt radio apparatus. Operation is permitted subject to the following
two conditions:
(1) the device must not produce interference, and (2) the user of the device
must accept any radio interference encountered, even if the interference
is likely to compromise operations.
FCC/IC
To comply with the FCC/IC RF exposure guidelines for transmission
equipment, a distance of at least 20cm must be maintained between
the product antenna and individuals. To remain compliant it is not
recommended to use the product at any distance less than this.
Federal Communications Commission (FCC) Statement
To meet the FCC/IC requirements on exposure to RF for transmission
devices, a distance of at least 20 cm must be maintained between the
product’s antenna and people. To ensure compliance, it is recommended
that the device not be used at any shorter distance.
This equipment has been tested and found to comply with the limits
for a Class B digital device, pursuant to part 15 of the FCC rules. These
limits are designed to provide reasonable protection against harmful
interference in a residential installation. This equipment generates or uses
or can radiate radio frequency energy and, if not installed and used in
accordance with the instructions, may cause harmful interference to radio
communications. However, there is no guarantee that interference will
not occur in a particular installation. If this equipment does cause harmful
interference to radio or television reception, which can be determined by
turning the equipment off and on, the user is encouraged to try to correct
the interference by one or more of the following measures:
• Reorient or relocate the receiving antenna.
• Increase the separation between the equipment and receiver.
• Connect the equipment into an outlet on a circuit different from that
to which the receiver is connected.
• Consult the dealer or an experienced radio/TV technician for help.
This device complies with Part 15 of the FCC Rules. Operation is subject
to the following two conditions:
1) This device may not cause harmful interference and
2) This device must accept any interference received, including interference
that may cause undesired operation of the device.
Changes or modifications not expressly approved by the party responsible
for compliance could void the user’s authority to operate the equipment.
Canada, Industry Canada (IC) Notices
This Class B digital apparatus complies with Canadian ICES-003 and RSS-
210.
This device complies with Industry Canada license-exempt RSS standard(s).
Operation is subject to the following two conditions: (1) this device may
not cause interference, and (2) this device must accept any interference,
including interference that may cause undesired operation of the device.
Page 19

34 35
Français
SOMMAIRE
INTRODUCTION ...............................................................................22
CONTENU DE L’EMBALLAGE ...........................................................23
PRÉSENTATION DE SEQUOIA ..........................................................24
Le capteur multispectral..........................................................................26
Le sunshine sensor ..................................................................................27
Les supports du sunshine sensor ............................................................28
CONFIGURER SEQUOIA ...................................................................29
Configurer Sequoia via Wi-Fi ..................................................................29
Interface HTML de configuration de Sequoia.........................................29
VÉRIFICATIONS AVANT UTILISATION ...............................................33
UTILISER SEQUOIA ...........................................................................34
Installer la lentille de protection .............................................................34
Fixer Sequoia sur un drone .....................................................................34
Brancher Sequoia à une batterie USB ....................................................35
Calibrer Sequoia ......................................................................................35
Fonctions du bouton du capteur multispectral ......................................36
Débrancher le capteur multispectral ......................................................37
Comportement de la LED .......................................................................37
METTRE À JOUR SEQUOIA ..............................................................38
Via USB ....................................................................................................38
Via une carte SD ......................................................................................39
RÉCUPÉRER LES DONNÉES .............................................................40
Via USB ....................................................................................................40
Via Wi-Fi ..................................................................................................41
Via une carte SD ......................................................................................41
ENTRETIEN DU SEQUOIA ................................................................41
Nettoyer les capteurs ..............................................................................41
Obtenir des pièces détachées ................................................................41
TRAITER LES DONNÉES ...................................................................42
Avec le logiciel de gestion de données MicaSense ATLAS ....................42
Avec le logiciel de cartographie Pix4Dmapper ......................................42
Les prescriptions agronomiques de AIRINOV ........................................42
INTÉGRER SEQUOIA VIA PTP OU PTP/IP .........................................43
SPÉCIFICATIONS TECHNIQUES ........................................................45
Résolution des captures ..........................................................................45
Déclenchement des capteurs..................................................................46
Distance entre deux lignes de vol...........................................................49
Mémoire utilisée par hectare ..................................................................49
Autres spécifications techniques .............................................................49
INFORMATIONS GÉNÉRALES ...........................................................50
Français
SEQUOIA - Guide d’utilisation
INTRODUCTION
Merci d’avoir choisi Sequoia, le capteur dédié à l’agriculture de
précision. Sequoia est l’un des capteurs les plus légers du marché. Il
fournit des images extrêmement précises :
• Capteur RGB 16 Mpx : photo en lumière visible de vos cultures.
• Quatre capteurs monochromes 1.2 Mpx en bande étroite et synchronisées
(vert, rouge, red-edge et proche infra-rouge)
• Un appareil automatiquement calibré grâce au sunshine sensor
Sequoia c’est aussi :
• Un capteur de 72 grammes qui s’adapte à tous les types de drones
1
• Une lentille de protection amovible
• Un GPS/GNSS intégré permettant de localiser l’appareil lors des prises
de photos
• Une mémoire interne de 64 Go, correspondant à 10 vols
• Un emplacement de carte SD
1 La liste des drones compatibles est consultable sur le site www.parrot.com
Page 20

36 37
Français
CONTENU DE L’EMBALLAGE
Appareil photo multispectral Sunshine sensor
Câble micro-USB pour relier
les deux modules
Câble micro-USB pour relier
Sequoia au drone
Lentille de protection Guide utilisateur
Chiffon microfibre Guide de démarrage rapide
Support pour le sunshine
sensor (x3)
Carte SD 32 Go
Sequoia fonctionne sans batterie. Sequoia est alimenté directement
par le drone via une connexion micro-USB.
PRÉSENTATION DE SEQUOIA
Sequoia est un capteur multispectral dédié à l’agriculture. Sa conception
s’est faite selon trois critères principaux : une excellente précision, une
taille et un poids réduits au maximum et une grande facilité d’usage. Le
capteur Sequoia est prévu pour s’adapter à tous les types de drones, ailes
volantes et multi-rotors, embarqué dans des nacelles stabilisées ou non. Son
utilisation permet d’obtenir des images de parcelles agricoles dans plusieurs
bandes spectrales mesurant l’état de la végétation : vert (longueur d’onde
550nm bande passante 40nm), rouge (longueur d’onde 660nm bande
passante 40 nm), red-edge (longueur d’onde 735nm bande passante 10nm)
et proche infrarouge (longueur d’onde 790nm bande passante 40nm).
Les photos prises peuvent ensuite être analysées par différents logiciels.
Elles permettent la réalisation de cartes indexées (NDVI, NDRE, etc.) et la
réalisation de prescriptions pour fertilisation azotée.
Le capteur multispectral
Vert
Longueur d’onde 550nm
Bande passante 40nm
Définition : 1.2 Mpx
Rouge
Longueur d’onde 660nm
Bande passante 40 nm
Définition : 1.2 Mpx
Page 21

38 39
Français
Red-edge
Longueur d’onde 735nm
Bande passante 10nm
Définition : 1.2 Mpx
Proche infrarouge
Longueur d’onde 790nm
Bande Passante 40nm
Définition : 1.2 Mpx
RGB
Définition : 16Mpx
Le capteur multispectral
Le capteur multispectral s’installe sous le drone, face aux cultures. Il est
alimenté directement par le drone.
1
2
3
4
5
6
1
Capteurs photos monochromes 1.2 mégapixels collectent les données
dans les bandes spectrales discrètes : vert (longueur d’onde 550nm
bande passante 40nm), rouge (longueur d’onde 660nm bande passante
40 nm), red-edge (longueur d’onde 735nm bande passante 10nm) et
proche infrarouge (longueur d’onde 790nm bande passante 40nm).
2 Capteur photos RGB 16 mégapixels.
3 Voyant lumineux : référence pour les prises de photo et la calibration.
4
Déclencheur : activer/désactiver le mode rafale, activer/désactiver
le Wi-Fi et prendre une photo.
5
Port micro-USB host : connecte le capteur multispectral au
sunshine sensor.
6
Port micro-USB device : connecte le capteur multispectral au drone.
Autres éléments du capteur multispectral :
• Centrale inertielle.
• Mémoire interne de 64 Go.
• Magnétomètre.
• Interface Wi-Fi.
• Poids : 72g.
• Dimensions :
FP3 - GoPro Form Factor
59 mm
41 mm
Sunshine
sensor
59 mm
41 mm
47 mm
29,5 mm
21,2 mm
39,6 mm 18,5 mm
Page 22

40 41
Français
Le sunshine sensor
Le sunshine sensor permet de calibrer les images en fonction de
l’ensoleillement. Grâce à lui il est possible de comparer des photos dans le
temps, malgré les variations de lumière lors de la prise de vue. Le sunshine
sensor se fixe sur la partie supérieure du drone, face au ciel. Pendant le
vol, le sunshine sensor est alimenté par le capteur multispectral.
1
2
3
4
1
4 capteurs de lumière ambiante. Ces capteurs sont munis d’un
filtre passe-bande identique aux filtres du capteur multispectral.
2 Emplacement pour une carte SD.
3
Voyant lumineux : Référence pour la calibration et indique si le
GPS/GNSS est activé.
4
Port USB host :Connecte le sunshine sensor au capteur
multispectral.
Autres éléments du sunshine sensor :
• Module GPS/GNSS.
• Centrale inertielle.
• Magnétomètre.
• Poids : 35g.
• Dimensions :
Sunshine
sensor
47 mm
39,6 mm 18,5 mm
Les supports du sunshine sensor
Il existe trois supports différents pour fixer le sunshine sensor au drone
• Support à fond plat pour fixer le sunshine sensor sur une surface
plate.
• Support à fond concave pour fixer le sunshine sensor sur une surface
arrondie.
• Support à pivot pour fixer le sunshine sensor sur une surface arrondie.
Ce support vous permet d’orienter le sunshine sensor dans la direction
que vous souhaitez.
Support à
fond plat
Support à
fond concave
Support à pivot
Page 23

42 43
Français
CONFIGURER SEQUOIA
Vous pouvez configurer Sequoia soit depuis un logiciel de plan de vol
(comme par exemple Pix4Dmapper Capture ou eMotion de SenseFly), soit
par Wi-Fi via une interface HTML. Vos données de configuration seront
sauvegardées dans la mémoire de Sequoia.
Configurer Sequoia via Wi-Fi
Par défaut, le Wi-Fi de Sequoia est activé. Appuyez quatre fois sur
le bouton du capteur multispectral pour activer/désactiver le Wi-Fi
de Sequoia. Par la suite, Sequoia garde en mémoire la dernière
configuration du Wi-Fi, éteint ou allumé.
Vous pouvez configurer Sequoia depuis un ordinateur, un smartphone ou
une tablette :
1. Branchez le port USB device du capteur multispectral à un drone ou
à une batterie USB.
> Sequoia s’allume automatiquement.
2. Assurez-vous que le Wi-Fi apparaît dans la liste des Wi-Fi disponibles.
Si ce n’est pas le cas, appuyez quatre fois sur le bouton du capteur
multispectral.
3. Connectez-vous au réseau Wi-Fi : Sequoia_XXXX.
4. Ouvrez votre navigateur internet.
5. Dans la barre d’adresse de votre navigateur, tapez l’adresse suivante :
192.168.47.1
> L’interface HTML de configuration de Sequoia s’ouvre. Vous pouvez
configurer Sequoia.
Interface HTML de configuration de Sequoia
L’interface de configuration de Sequoia est composée de trois écrans :
• Home
• Status
• Gallery
Home
L’écran Home vous permet de configurer Sequoia.
Configurer le mode de capture
Sélectionnez le mode de capture souhaité :
• Single : faire une capture à la fois.
• Time-lapse : faire des captures en rafale à intervalles de temps régu-
liers. Dans le champ « time-lapse », indiquez en secondes l’intervalle
de temps que vous voulez entre chaque capture.
• GPS : faire des captures en rafale à intervalles de distances réguliers.
Dans le champ « gps », indiquez la distance en mètres entre chaque photo.
Une fois la configuration terminée, appuyez sur le bouton Capture. Les captures
démarrent. Pour arrêter les captures, appuyez sur le bouton Stop capture.
Configurer les capteurs
Sélectionnez :
• La résolution des captures : 0.3 Mpx ou 1.2 Mpx.
• La profondeur de bits : 8 bit ou 10 bit.
• Les capteurs que vous voulez activer pendant le vol (Vert, Rouge, Red-
edge, proche Infrarouge et RGB). Pour cela, cliquez sur le capteur que
vous voulez activer ou désactiver.
Page 24

44 45
Français
Status
GPS
Parrot Sequoia Home Status Gallery
GPS
Number of satellite: 7
Precision: 1m
Speed: 10m/s
Altitude: 35m
Instruments
Sunshine sensor
Temperature
L’écran GPS vous informe sur :
• Le nombre de satellites détectés.
• La précision de la position GPS/GNSS de Sequoia en mètres.
• La vitesse de déplacement de Sequoia en mètres par seconde.
• L’altitude de Sequoia en mètres.
Instruments
Parrot Sequoia Home Status Gallery
GPS
Instruments
Body Sunshine sensor
ROLL
-26°
PITCH
21°
YAW
22°NE
ROLL
2°
PITCH
-3°
YAW
22°NE
Sunshine sensor
Temperature
L’écran Instruments vous informe sur l’orientation du capteur multispectral
et du sunshine sensor.
Sunshine sensor
Parrot Sequoia Home Status Gallery
GPS
Instruments
Sunshine sensor
GREEN
24.324
RED
400
RED EDGE
43.420
NEAR IR
57.239
Temperature
L’écran sunshine sensor vous informe sur l’intensité lumineuse par bande
(vert, rouge, red-edge, proche infrarouge).
Temperature
Parrot Sequoia Home Status Gallery
GPS
Instruments
Sunshine sensor
Temperature
Body
P7
75°
P7MU
65°
P7
75°
Wifi
35°
IMU
50°
Sensors
Green
55°
Red
54°
RE
54°
NIR
54°
Sunshine sensor
IMU
50°
L’écran Temperature vous informe sur la température de chaque élément
de Sequoia.
Gallery
L’écran Gallery vous permet de récupérer les photos prises lors de vos
sessions de vol. Vous pouvez sélectionner les photos que vous souhaitez
afficher (Toutes, RGB, Vert, Rouge, Red-edge et proche infrarouge).
Page 25

46 47
Français
Media View
Parrot Sequoia Home Status Gallery
Media View
INTERNAL MEMORY
USED 35 Gb
AVAILABLE 28.5 Gb
SD CARD
USED 1.3Gb
AVAILABLE 64 Gb
L’écran Media View vous informe sur l’espace disponible dans la mémoire
interne de Sequoia et sur la carte SD.
VÉRIFICATIONS AVANT UTILISATION
Avant chaque session de vol avec Sequoia, procédez aux vérifications
suivantes :
• Assurez-vous que les objectifs sont propres. Utilisez le chiffon micro-
fibre (fourni) pour les nettoyer.
• Libérez assez de mémoire (soit dans la mémoire interne du capteur
multispectral, soit sur votre carte SD) afin d’enregistrer toutes les photos prises pendant le vol.
• Assurez-vous que les deux modules sont correctement fixés au drone
et qu’ils ne risquent pas de se détacher durant le vol.
• Assurez-vous que le câble micro-USB device qui relie le drone au cap-
teur multispectral est branché.
• Assurez-vous que les deux capteurs sont calibrés. Pour plus d’informa-
tions, voir la section Calibrer Sequoia.
• Attendez que le voyant lumineux du sunshine sensor soit vert. Lorsqu’il
est vert, cela signifie que le GPS/GNSS est activé.
UTILISER SEQUOIA
Note : Si Sequoia détecte une carte SD, les captures sont enregistrées
sur cette carte SD. Si aucune carte SD n’est détectée, Sequoia enregistre automatiquement les captures dans sa mémoire interne.
Installer la lentille de protection
Utilisez la lentille de protection pour protéger les capteurs lors de l’atterrissage.
1. Insérez la lentille de protection sur le capteur multispectral.
2. Appuyez légèrement sur la lentille de protection jusqu’à la butée du
capteur.
Fixer Sequoia sur un drone
Sequoia peut se fixer sur tous les types de drones.
1. Sélectionnez le support du sunshine sensor le plus adapté à votre drone.
2. Retirez le film plastique du support et collez le support sur le dos du drone.
!
Le support doit être positionné de façon parallèle au drone
(schéma A).
Schéma A
3. Insérez le sunshine sensor dans son support.
!
Afin de ne pas fausser les données, le sunshine sensor ne doit pas
être recouvert lors des prises de vue.
4. Insérez capteur multispectral sous le drone, dans le kit prévu à cet effet.
5. Connectez le capteur multispectral au sunshine sensor à l’aide du câble
USB host.
6. Connectez le capteur multispectral au drone à l’aide du câble USB device.
> Sequoia s’allume automatiquement (schéma B).
Schéma B
Page 26

48 49
Français
!
Assurez-vous que les câbles du Sequoia ne se prennent pas dans
les hélices du drone pendant le vol.
Brancher Sequoia à une batterie USB
Vous pouvez utiliser Sequoia sans drone. Pour cela, il vous faut une
batterie USB d’au moins 2A.
1. Connectez le capteur multispectral au sunshine sensor à l’aide du
câble USB host.
2. Connectez le capteur multispectral à la batterie à l’aide du câble USB
device.
> Sequoia s’allume automatiquement (schéma C).
Schéma C
Calibrer Sequoia
Avant d’utiliser Sequoia pour la première fois vous devez le calibrer. Avant
de commencer la calibration, assurez-vous que les deux capteurs sont bien
fixés et branchés au drone.
!
Le capteur multispectral et le sunshine sensor doivent être fixés
de manière perpendiculaire. Il est recommandé de calibrer les
deux capteurs en même temps.
Note : Vous pouvez calibrer les capteurs séparément. Le sunshine
sensor doit cependant être branché au capteur multispectral pour
être calibré.
1. Assurez-vous que le voyant lumineux de Sequoia clignote violet
(schéma D).
Schéma D
2. Tournez le drone sur l’axe Z (yaw/lacet) (schéma E) jusqu’à ce que le
voyant lumineux du capteur multispectral clignote vert.
Schéma E
3. Tournez le drone sur l’axe Y (pitch/tangage) (schéma F) jusqu’à ce que
le voyant lumineux du capteur multispectral clignote cyan.
Schéma F
4. Tournez le drone sur l’axe X (roll/roulis) (schéma G) jusqu’à ce que le
voyant lumineux du capteur multispectral change de couleur.
Schéma G
Note : Une fois la calibration terminée, la couleur du voyant du capteur
multispectral varie en fonction de l’état de Sequoia. Par exemple, si la
mémoire du capteur multispectral est pleine, le voyant clignotera jaune.
Fonctions du bouton du capteur multispectral
Utilisez le bouton pour activer/désactiver le mode rafale, prendre des
photos et activer/désactiver le Wi-Fi de Sequoia.
Note : Sequoia doit être allumé pour activer ces fonctionnalités.
Page 27

50 51
Français
1 clic
Prendre une photo
2 clics Activer/désactiver les captures
4 clics Activer/désactiver le Wi-Fi
Appui long (3 secondes)
Eteindre Sequoia
Débrancher le capteur multispectral
Maintenez le bouton de Sequoia pendant 3 secondes pour l’éteindre.
Le voyant lumineux s’éteint. Si vous débranchez Sequoia pendant que le
voyant est allumé, les dernières photos pourront être corrompues.
Comportement de la LED
Capteur multispectral
Démarrage
Lorsque vous allumez Sequoia, la LED a le comportement suivant :
Autre
Comportement de la LED Signification
Orange clignotant rapidement Arrêt en cours
Orange clignotant lentement Mise à jour en cours
Bleu clignotant Activation/désactivation du Wi-Fi
Problème
Rouge fixe Dysfonctionnement matériel
Rouge clignotant
Mémoire corrompue. La réparation est en
cours. Une fois la réparation terminée, la
LED repasse au vert. Cette opération peut
prendre plusieurs secondes en fonction de
l’espace disponible sur votre carte SD.
Jaune clignotant Mémoire pleine
Le capteur est prêt à prendre
une photo.
Le capteur doit être
calibré.
Calibration
Violet clignotant Le capteur doit être calibré
Vert clignotant Calibration en cours (pitch/tangage)
Cyan clignotant Calibration en cours (roll/roulis)
Prise de vue
Bleu fixe Capture en cours
Vert clair fixe
Au moins un des quatre capteurs est
activé
Sunshine sensor
Comportement de la LED Signification
Problème
Rouge fixe Dysfonctionnement matériel
Jaune clignotant Carte SD pleine
Calibration
Violet clignotant Le capteur doit être calibré
Vert clignotant Calibration en cours (pitch/tangage)
Cyan clignotant Calibration en cours (roll/roulis)
GPS/GNSS
Jaune fixe Connexion GPS/GNSS non-établie
Vert fixe Connexion GPS/GNSS établie
METTRE À JOUR SEQUOIA
Il existe deux méthodes pour mettre à jour Sequoia.
Via USB
Pour mettre à jour Sequoia via USB vous devez utiliser un câble OTG
micro-USB fiche mâle avec une prise USB femelle (schéma H) et une clé USB.
Schéma H
Page 28

52 53
Français
1. Connectez votre clé USB sur un ordinateur et assurez-vous qu’elle ne
contient pas de fichiers en format .plf.
2. Rendez-vous sur la page support de Sequoia : www.parrot.com/fr/support/
3. Téléchargez le fichier de mise à jour disponible au format .plf.
4. Copiez le fichier à la racine de votre clé USB, sans le mettre dans un
dossier et sans le renommer.
5. Branchez votre câble OTG micro-USB au port USB host du capteur
multispectral.
6. Branchez la clé USB contenant le fichier de mise à jour au l’autre
extrémité du câble.
7. Allumez Sequoia.
> La mise à jour se fait automatiquement. Pendant la mise à jour, le
voyant du capteur multispectral clignote orange (schéma I). Une fois
la mise à jour terminée, le voyant devient vert.
Schéma I
Via une carte SD
Avant de commencer, assurez-vous que le capteur multispectral est
connecté au sunshine sensor.
1. Insérez votre carte SD dans un ordinateur et assurez-vous qu’elle ne
contient pas de fichiers en format .plf.
2. Rendez-vous sur la page support de Sequoia : www.parrot.com/fr/support/
3. Téléchargez le fichier de mise à jour disponible au format .plf.
4. Copiez le fichier à la racine de votre carte SD, sans le mettre dans un
dossier et sans le renommer.
5. Insérez la carte SD dans le sunshine sensor.
6. Allumez Sequoia.
> La mise à jour se fait automatiquement. Pendant la mise à jour, le
voyant du capteur multispectral clignote orange (Schéma J). Une
fois la mise à jour terminée, le voyant devient vert.
Schéma J
RÉCUPÉRER LES DONNÉES
Il est recommandé de transférer ses données sur ordinateur après chaque
vol. Vous pouvez transférer vos données de trois façons différentes : via
USB, via Wi-Fi et via une carte SD.
Les photos prises par le Sequoia sont en format .tiff pour les quatre
capteurs photo monochromes, et en format .jpeg pour le capteur photo
RGB.
Via USB
1. A l’aide du câble micro-USB (fourni), connectez le port micro-USB
Device du capteur multispectral à votre ordinateur.
2. Sur Windows : allez dans Démarrer > Ordinateur > Sequoia > Internal.
> Vous accédez à la mémoire interne du capteur multispectral. Vous
pouvez récupérer les photos prises lors de la session de vol.
Note : Sequoia créé un dossier pour chaque séquence de capture. Par
exemple, si vous avez fait une capture simple puis une capture en mode
rafale, vous aurez deux dossiers différents dans la mémoire de Sequoia.
3. Sur Mac : ouvrez Transfert d’images. Vous accédez à la mémoire interne
du capteur multispectral. Vous pouvez récupérer les photos prises lors
de la session de vol.
Page 29

54 55
Français
Via Wi-Fi
1. Branchez le port USB device du capteur multispectral à un drone ou
à une batterie USB.
> Sequoia s’allume automatiquement.
2. Assurez-vous que le Wi-Fi apparaît dans la liste des Wi-Fi disponibles.
Si ce n’est pas le cas, appuyez quatre fois sur le bouton du capteur
multispectral.
> Le voyant lumineux du capteur multispectral clignote bleu lorsque
le Wi-Fi est activé.
3. Connectez votre ordinateur, votre tablette ou votre smartphone au
réseau Wi-Fi : Sequoia_XXXX.
4. Ouvrez votre navigateur internet et connectez-vous à l’adresse IP
192.168.47.1.
5. Allez dans l’onglet Gallery et récupérez les photos prises lors de la
session de vol.
Via une carte SD
1. Insérez votre carte SD dans un adaptateur compatible avec votre
ordinateur.
2. Récupérez les photos prises lors de la session de vol.
Vous pouvez aussi utiliser le sunshine sensor comme lecteur de carte
SD. Pour cela, connectez le port micro-USB device du capteur à votre
ordinateur.
!
Ne pas retirer la carte SD lorsque Sequoia est allumé.
ENTRETIEN DE SEQUOIA
Nettoyer les capteurs
En cas de poussière ou de terre sur la lentille et/ou les capteurs :
1. Utilisez le chiffon microfibres (fourni) pour nettoyer la lentille.
2. Retirez les traces restantes avec un coton-tige imbibé de produit pour
nettoyer les lentilles.
Obtenir des pièces détachées
Les pièces suivantes sont disponibles :
• Lentille de protection.
• Sunshine sensor.
• Supports du sunshine sensor.
Pour plus d’informations, contactez votre revendeur :
www.sensefly.com, www.airinov.fr, www.micasense.com, www.pix4d.com.
TRAITER LES DONNÉES
Les données récupérées par Sequoia peuvent être traitées de plusieurs
façons.
Avec le logiciel de gestion de données MicaSense ATLAS
Vous pouvez analyser les photos prises par Sequoia avec le logiciel
MicaSense ATLAS. Pour plus d’informations, rendez-vous sur le site
www.micasense.com.
Avec le logiciel de cartographie Pix4Dmapper
Vous pouvez analyser les photos prises par Sequoia avec le logiciel
Pix4DMapper. Pour plus d’informations, rendez-vous sur le site
www.pix4d.com.
Les prescriptions agronomiques de AIRINOV
La société Airinov propose un service de prescriptions pour fertilisation
azotée pour le colza et le blé. Pour plus d’informations, rendez-vous sur
www.airinov.fr.
Page 30

56 57
Français
INTÉGRER SEQUOIA VIA PTP OU PTP/IP
Le protocole PTP et PTP/IP permet de contrôler et de configurer
Sequoia. L’utilisation de logiciels PTP et PTP/IP tels gphoto2 et ptpcam
est nécessaire et permet de développer des programmes qui intègrent
Sequoia ou d’établir une communication avec un autre support.
Sequoia supporte les commandes PTP suivantes :
Standard
Request
GET_STORAGE_IDS
GET_STORAGE_INFO
GET_NUM_OBJECTS
GET_OBJECT_HANDLES
GET_OBJECT_INFO
GET_OBJECT
GET_THUMB
DELETE_OBJECT
GET_PARTIAL_OBJECT
INITIATE_CAPTURE
FORMAT_STORE
GET_DEVICE_PROP_DESC
GET_DEVICE_PROP_VALUE
SET_DEVICE_PROP_VALUE
RESET_DEVICE_PROP_VALUE
TERMINATE_OPEN_CAPTURE
INITIATE_OPEN_CAPTURE
Event
EVENT_CANCEL_TRANSACTION
EVENT_OBJECT_ADDED
EVENT_OBJECT_REMOVED
EVENT_STORE_ADDED
EVENT_STORE_REMOVED
EVENT_DEVICE_PROP_CHANGED
EVENT_DEVICE_INFO_CHANGED
EVENT_STORE_FULL
EVENT_CAPTURE_COMPLETE
Device Properties
FUNCTIONAL_MODE
IMAGE_SIZE
COMPRESSION_SETTING
WHITE_BALANCE
F_NUMBER
FOCAL_LENGTH
FOCUS_DISTANCE
FOCUS_MODE
EXPOSURE_METERING_MODE
EXPOSURE_PROGRAM_MODE
DATETIME
STILL_CAPTURE_MODE
TIMELAPSE_NUMBER
TIMELAPSE_INTERVAL
FOCUS_METERING_MODE
Custom
Request
GET_SUNSHINE_VALUES
GET_TEMPERATURE_VALUES
GET_ANGLE_VALUES
GET_GPS_VALUES
GET_GYROSCOPE_VALUES
GET_ACCELEROMETER_VALUES
GET_MAGNETOMETER_VALUES
GET_IMU_VALUES
GET_STATUS_MASK
START_MAGNETO_CALIB
STOP_MAGNETO_CALIB
MAGNETO_CALIB_STATUS
SEND_FIRMWARE_UPDATE
Event
STATUS
MAGNETO_CALIBRATION_STATUS
Page 31

58 59
Français
Properties
PHOTO_SENSORS_ENABLE_MASK
PHOTO_SENSORS_KEEP_ON
MULTISPECTRAL_IMAGE_SIZE
MAIN_BIT_DEPTH
MULTISPECTRAL_BIT_DEPTH
HEATING_ENABLE
WIFI_STATUS
WIFI_SSID
Référez-vous à la documentation de votre logiciel PTP ou PTP/IP (gphoto2
ou ptpcam par exemple).
Pour plus d’informations sur les protocoles PTP et PTP/IP de Sequoia,
consultez le Guide d’Intégration disponible dans la rubrique d’aide de
l’interface de configuration de Sequoia et sur www.parrot.com/fr/support.
SPÉCIFICATIONS TECHNIQUES
Résolution des captures
La résolution au sol du capteur RGB et du capteur multispectral dépend
de la hauteur de vol. Référez-vous au tableau pour déterminer la hauteur
de vol en fonction de la résolution souhaitée.
Résolution au sol (cm/px)
Hauteur (m) Monochrome RGB
30 3,7 0,8
40 4,9 1,1
50 6,2 1,4
60 7,4 1,6
70 8,6 1,9
80 9,9 2,2
90 11,1 2,4
100 12,4 2,7
110 13,6 2,9
120 14,8 3,3
130 16,1 3,5
140 17,3 3,7
150 18,6 4,1
Déclenchement des capteurs
Pour un taux de recouvrement optimal lors de vos vols à une certaine
altitude, vous devez respecter un laps de temps entre les captures. Le
capteur RGB peut faire des captures avec un délai minimum de 1 seconde
entre chaque photo. Les capteurs multispectraux peuvent faire des
captures avec un délai minimum de 0.5 seconde entre chaque photo.
Pour connaitre le délai minimum à respecter en fonction de la hauteur de
vol, référez-vous au tableau et au schéma suivants.
Page 32

60 61
Français
Temps entre les captures
Hauteur (m) 5 m/s 10 m/s 13 m/s 20 m/s
30 1,1 0,5 0,4 0,3
40 1,4 0,7 0,5 0,4
50 1,8 0,9 0,7 0,5
60 2,2 1,1 0,8 0,6
70 2,6 1,3 1,0 0,7
80 2,9 1,4 1,1 0,74
90 3,3 1,6 1,2 0,8
100 3,7 1,8 1,4 0,9
110 4,1 2,1 1,6 1,0
120 4,4 2,2 1,7 1,1
130 4,8 2,4 1,9 1,2
140 5,2 2,6 2,0 1,3
150 5,6 2,8 2,2 1,4
Légende :
• En rouge : le capteur multispectral et le capteur RGB ne peuvent pas
se déclencher.
• En bleu : le capteur RGB ne peut pas se déclencher.
• En vert : tous les capteurs peuvent se déclencher.
0
0,5
1
1,5
2
2,5
3
3,5
4
4,5
5
5,5
6
30 50 70 90 110 130 150
Temps entre les captures (s)
Hauteur de vol (m)
Temps entre les captures
(pour un taux de recouvrement de 80%)
V = 5 m/s
V = 10 m/s
V = 13 m/s
V = 20 m/s
Pour un taux de recouvrement optimal lors de vos vols à une certaine
altitude, vous devez respecter une distance entre les captures. Référezvous au tableau et au schéma suivants pour plus d’informations.
Distance entre les captures (m)
Hauteur (m) 0,7 0,75 0,8 0,85
30 8,4 7,0 5,6 4,2
40 11,2 9,3 7,5 5,6
50 14,0 11,7 9,3 7,0
60 16,8 14,0 11,2 8,4
70 19,6 16,4 13,1 9,8
80 22,4 18,7 15,0 11,2
90 25,2 21,0 16,8 12,6
100 28,0 23,4 18,7 14,0
110 30,8 25,7 20,6 15,4
120 33,7 28,0 22,4 16,8
130 36,5 30,4 24,3 18,2
140 39,3 32,7 26,2 19,6
150 42,1 35,1 28,0 21,0
0
5
10
15
20
25
30
35
40
45
30 50 70 90 110 130 150
Ditance entre les captures
(m)
Hauteur de vol (m)
Distance entre les captures (m)
Recouvrement = 70%
Recouvrement = 75%
Recouvrement = 80%
Recouvrement = 85%
Page 33

62 63
Français
Distance entre deux lignes de vol
Référez-vous au schéma ci-dessous pour connaître la distance entre deux
lignes de vol en fonction de la hauteur de vol de Sequoia.
0
5
10
15
20
25
30
35
40
45
50
55
60
30 50 70 90 110 130 150
Distance entre deux lignes de vol (m)
Hauteur de vol (m)
Distance entre deux lignes de vol
Recouvrement = 70%
Recouvrement = 75%
Recouvrement = 80%
Recouvrement = 85%
Mémoire utilisée par hectare
Référez-vous au schéma ci-dessous pour connaître la mémoire nécessaire
à Sequoia pour un nombre d’hectares donné.
0
500
1000
1500
2000
2500
3000
3500
4000
30 50 70 90 110 130 150
Mémoire utilisée par hectare
Hauteur de vol (m)
Mémoire utilisée par hectare
Recouvrement = 70%
Recouvrement = 75%
Recouvrement = 80%
Recouvrement = 85%
Recouvrement = 70%
Recouvrement = 75%
Recouvrement = 80%
Recouvrement = 85%
Autres spécifications techniques
• La fréquence de prise de photos est de 1 fps (frame per second)
maximum.
• Conditions d’utilisations environnementales :
o Gamme d’éclairement : de 3000 à 120 000 lux. Utilisation de -10°C
à +45°C.
• Consommation : 5 à 12 W.
• Alimentation par micro-USB 5V – 2A. Le Sequoia est alimenté par le
drone qui l’embarque.
• La source d’alimentation doit être un circuit Très Basse Tension de
Sécurité (TBTS) et à Puissance Limitée (SPL).
INFORMATIONS GÉNÉRALES
Précautions d’utilisation et entretien
Utilisez uniquement les accessoires spécifiés par le constructeur.
Si du sable ou de la poussière pénètre dans Sequoia, celui-ci peut ne plus
fonctionner correctement, de manière irréversible.
N’utilisez pas Sequoia dans des conditions météorologiques défavorables
(pluie, vent fort, neige) ou lorsque les conditions de visibilité sont
insuffisantes (nuit).
Maintenez Sequoia à l’écart de lignes de haute tension, bâtiments ou
toute autre zone potentiellement dangereuse.
N’utilisez pas cet appareil à proximité de substances liquides. Ne posez
pas Sequoia sur l’eau ou sur une surface humide, cela pourrait causer des
dommages irréversibles.
Evitez de faire subir au Sequoia des changements d’altitude trop
importants.
Ne laissez pas Sequoia au soleil.
Risque d’ingestion de petits éléments. Les emballages ne font pas partie
du produit et doivent être jetés par mesure de sécurité.
Si vous utilisez Sequoia avec un drone, référez-vous aux informations
générales de votre drone.
Wi-Fi
Avant d’utiliser votre Sequoia, renseignez-vous sur les restrictions
d’utilisation des fréquences Wi-Fi de votre lieu de vol. Certaines
fréquences peuvent être restreintes ou interdites.
Mise en garde concernant le respect de la vie privée et le
respect des biens
Enregistrer et diffuser l’image et la voix d’une personne sans son
autorisation peut constituer une atteinte à sa vie privée et être susceptible
d’engager votre responsabilité.
Demandez l’autorisation avant de filmer et d’enregistrer la voix des
personnes, notamment, si vous souhaitez conserver vos enregistrements
et/ou diffuser sur Internet.
Ne diffusez pas d’images dégradantes ou pouvant porter atteinte à la
réputation ou à la dignité d’une personne
Enregistrer et diffuser l’image d’un bien sans l’autorisation de son
Page 34

64 65
Français
propriétaire peut constituer une atteinte au droit à l’image du bien et
être susceptible d’engager votre responsabilité ; demandez l’autorisation
à son propriétaire avant de filmer un bien
Garantie
Pour connaître les conditions de garanties, merci de vous référer aux
Conditions Générales de vente du revendeur auprès de qui vous avez
acheté Sequoia.
Modifications
Les explications et spécifications contenues dans ce guide utilisateur
ne sont fournies qu’à titre d’information et peuvent être modifiées sans
notification préalable. Ces informations sont correctes au moment de
l’impression et le plus grand soin est apporté lors de leur rédaction afin
de vous fournir des informations les plus précises possible. Cependant,
Parrot Drones SAS ne saurait être tenu responsable, directement
ou indirectement, des éventuels préjudices ou pertes de données
accidentelles résultant d’une erreur ou omission au sein du présent
document. Parrot Drones SAS se réserve le droit d’amender ou améliorer
le produit ainsi que son guide utilisateur sans aucune restriction ou
obligation de prévenir l’utilisateur. Dans le cadre de l’attention portée
par Parrot Drones SAS sur l’amélioration de nos produits, il est possible
que le produit que vous avez acheté diffère légèrement de celui décrit
au sein du présent document. Dans ce cas, vous pourrez éventuellement
trouver une nouvelle version du guide utilisateur au format électronique
sur le site www.parrot.com.
Comment recycler ce produit
Le symbole sur le produit ou sa documentation indique qu’il ne
doit pas être éliminé en fin de vie avec les autres déchets
ménagers. L’élimination incontrôlée des déchets pouvant porter
préjudice à l’environnement ou à la santé humaine, veuillez le
séparer des autres types de déchets et le recycler de façon
responsable. Vous favoriserez ainsi la réutilisation durable des ressources
matérielles. Les particuliers sont invités à contacter le distributeur leur
ayant vendu le produit ou à se renseigner auprès de leur mairie pour savoir
où et comment ils peuvent se débarrasser de ce produit afin qu’il soit
recyclé en respectant l’environnement. Les entreprises sont invitées à
contacter leurs fournisseurs et à consulter les conditions de leur contrat
de vente.
Marques déposées
Parrot est une marque enregistrée de Parrot SA.
Sequoia est une marque déposée ou enregistrée de Parrot Drones SAS.
Mac est une marque d’Apple Inc., enregistrée aux USA et dans d’autres
pays.
Wi-Fi® est une marque enregistrée de Wi-Fi Alliance®.
Tous les autres produits, marques et droits de propriétés intellectuelles
mentionnés dans ce guide sont la propriété de leurs titulaires respectifs.
Déclaration de conformité
Parrot Drones SAS, 174 quai de Jemmapes, 75010 Paris, France, déclare
sous son unique responsabilité que le produit décrit dans le présent
guide utilisateur est en conformité avec les normes techniques EN300328
(v1.8.1), EN301489-17 (v2.1.1), EN 60950-1:2006/A11:2009/A1: 2010/A12:
2011/A2: 2013 suivant les dispositions de la directive R&TTE 1999/5/CE,
de la directive 2006/95/CE relative aux appareils à basse tension et de la
directive ROHS 2011/65/EC.
Déclaration de conformité Canada
Cet appareil numérique de classe B est conforme aux normes canadiennes
ICES-003 et RSS-210.
Le présent appareil est conforme aux CNR d’Industrie Canada applicables
aux appareils radio exempts de licence. L’exploitation est autorisée aux
deux conditions suivantes:
(1) l’appareil ne doit pas produire de brouillage, et (2) l’utilisateur de
l’appareil doit accepter tout brouillage radioélectrique subi, même si le
brouillage est susceptible d’en compromettre le fonctionnement.
FCC/IC
Pour répondre aux exigences relatives à l’exposition RF de la FCC/IC pour
les appareils de transmission, une distance d’au moins 20cm doit être
maintenue entre l’antenne du produit et les personnes. Pour assurer la
conformité, l’utilisation à une distance inférieure n’est pas recommandée.
Page 35

Español
6766
Page 36

Español
68 69
Español
Page 37

Español
70 71
Page 38

Español
72 73
Page 39

Español
74 75
Page 40

Español
76 77
Page 41

Español
78 79
Page 42

Español
80 81
Page 43

Español
82 83
Page 44

Español
84 85
Page 45

Español
86 87
Page 46

Italiano
88 89
Italiano
Page 47

Italiano
90 91
Page 48

Italiano
92 93
Page 49

Italiano
94 95
Page 50

Italiano
96 97
Page 51

Italiano
98 99
Page 52

Italiano
100 101
Page 53

Italiano
102 103
Page 54

Italiano
104 105
Page 55

Italiano
106 107
Page 56

108 109
Deutsch
Deutsch
Page 57

110 111
Deutsch
Page 58

112 113
Deutsch
Page 59

114 115
Deutsch
Page 60

116 117
Deutsch
Page 61

118 119
Deutsch
Page 62

120 121
Deutsch
Page 63

122 123
Deutsch
Page 64

124 125
Deutsch
Page 65

126 127
Deutsch
Page 66

128 129
Português
Português
Page 67

130 131
Português
Page 68

132 133
Português
Page 69

134 135
Português
Page 70

136 137
Português
Page 71

138 139
Português
Page 72

140 141
Português
Page 73

142 143
Português
Page 74

144 145
Português
Page 75

146 147
Português
Page 76

148 149
简体中文
简体中文
Page 77

150 151
简体中文
Page 78

152 153
简体中文
Page 79

154 155
简体中文
Page 80

156 157
简体中文
Page 81

158 159
简体中文
Page 82

160 161
简体中文
Page 83

162 163
简体中文
Page 84

164 165
简体中文
Page 85

166 167
简体中文
Page 86

168 169
繁體中文
繁體中文
Page 87

170 171
繁體中文
Page 88

172 173
繁體中文
Page 89

174 175
繁體中文
Page 90

176 177
繁體中文
Page 91

178 179
繁體中文
Page 92

180 181
繁體中文
Page 93

182 183
繁體中文
Page 94

184 185
繁體中文
Page 95

186 187
繁體中文
Page 96

188 189
Français
Page 97

190 191
Page 98

192 193
Page 99

194 195
Page 100

196 197
 Loading...