

ParkZone PKZ3480 User Manual

2
ParkZone® products are distributed exclusively by
Horizon Hobby, Inc.
4105 Fieldstone Road
Champaign, IL 61822
© 2008 Horizon Hobby, Inc.
Horizon Hobby UK
Units 1-4, Ployters Road
Staple Tye
Harlow, Essex
CM187NS
United Kingdom
BNF
Instruction Manual
Horizon Hobby Deutschland GmbH
Hamburger Strasse 10
25335 Elmshorn
Germany
Multiple Patents Pending
DSM and DSM2 are trademarks or registered trademarks of Horizon Hobby, Inc.
The Spektrum trademark is used with permission of Bachmann Industries, Inc.
Futaba is a registered trademark of Futaba Denshi Kogyo Kabushiki Kaisha Corporation of Japan
www.parkzone.com
13644
MICRO FLYERS, MAXIMUM FUN.
Receiver: 3-channel DSM2 ultra micro
Battery: 3.7V, 70mAh Li-Po
Wingspan: 16.5 in (420mm)
Length: 13.25 in (335mm)
Flying Weight: 0.7 oz (20 g)
integrated ESC and servos

1
2
Ember™ 2 BNF
Introduction
An exciting innovation from Horizon Hobby is changing the way people
experience RC flight. New models offered in Ready-To-Fly form have been
desired by experienced fliers, but they have been disappointed with the need
to purchase the additional transmitters included in the RTF boxes. Bind-N-Fly
solves this problem. This revolutionary new way to deliver Spektrum
technology allows pilots to use a compatible transmitter with a growing
number of electric aircraft from Horizon. The new era in RC flight made its
debut with ParkZone’s Vapor
ultra-micro aircraft. Now the Ember 2 is continuing ParkZone’s Etomic line of
Spektrum DSM2 aircraft.
Many modelers develop a unique comfort level with their own radios, and are
not interested in purchasing another transmitter just to fly a specific plane.
That’s why Bind-N-Fly helps take them to an entirely different level of RC flight.
It also offers consumers everything they want and need in a plane, without the
inclusion of unnecessary components. All they have to do is bind their DSM2
transmitters to the ultra-micro aircraft (including the transmitter utilized by
E-flite’s remarkably popular Blade
and the fun begins. In no time at all, modelers will be ready to enjoy superb
flight with the Ember 2.
Aside from the transmitters, Bind-N-Fly products are packaged with everything
else needed to get them in the air, including a flight battery and charger (as
well as AA batteries for the charger). An integrated unit that houses the receiver, ESC and servos makes this groundbreaking completion level possible.
These stylish aircraft make for fun collectibles and, since their prices do not
include transmitters, are more affordably priced than the ready-to-fly versions
that are also available.
™
, a member of the unique Etomic™ series of
®
CX2, Blade mCX and ParkZone® Vapor)
™
DSM2™
™
Opening up new possibilities for modelers everywhere by allowing owners of
DSM2 transmitters to have their aircraft flying in no time, Bind-N-Fly is truly
the future of RC flight. All DSM2 transmitters are compatible with Bind-N-Fly
aircraft, including:
PKZ3341 Transmitter, 2.4GHz w/Spektrum DSM2 (Vapor/Ember 2)
LP5DSM (E-flite Blade CX2 transmitter)
MLP4DSM (Blade mCX transmitter)
Spektrum DX7
Spektrum DX6i (Blade 400 transmitter)
JRX9303
JR 12X
Spektrum DX5e
Spektrum DSM2 module systems for JR
DX6 is not compatible with Bind-N-Fly aircraft
Not all transmitters available in all territories.
For a full list of compatible transmitters, or to learn more about
Bind-N-Fly, visit: www.bindnfly.com
We at ParkZone are committed to giving you the most enjoyable
flight experience possible. In order to have a safe and successful flight, we
ask that you do not fly until you have read these instructions thoroughly.
Your Ember 2 features the latest in ultra sub-micro technology,
including a 2.4GHz DSM2 fully proportional 3–channel receiver board with full
control of throttle, rudder and elevator. Your Ember 2 also comes complete
with the latest in lightweight electronic speed control technology, two linear
servos, a 3.7V 70mAh Li-Po flight battery and a convenient charger.
®
and Futaba transmitters.
3
4
Warning
Though your ParkZone Ember 2 comes ready to y, this aircraft is for
experienced RC pilots only and is not a toy. It can cause serious bodily
harm and damage to property.
FCC Statement
This device complies with part 15 of the FCC rules. Operation is subject
to the following two conditions: (1) This device may not cause harmful
interference, and (2) this device must accept any interference received,
including interference that may cause undesired operation.
This product contains a radio transmitter with wireless technology which
has been tested and found to be compliant with the applicable
regulations governing a radio transmitter in the 2.400 GHz to 2.4835 GHz
frequency range.
The associated regulatory agencies of the following countries recognize
the noted certications for this product as authorized for sale and use:
UK DE DK TR NO SE FI
EE LV LT PL CZ SK HU
RO SI AT IT ES PT IE
NL LU MT SY CG
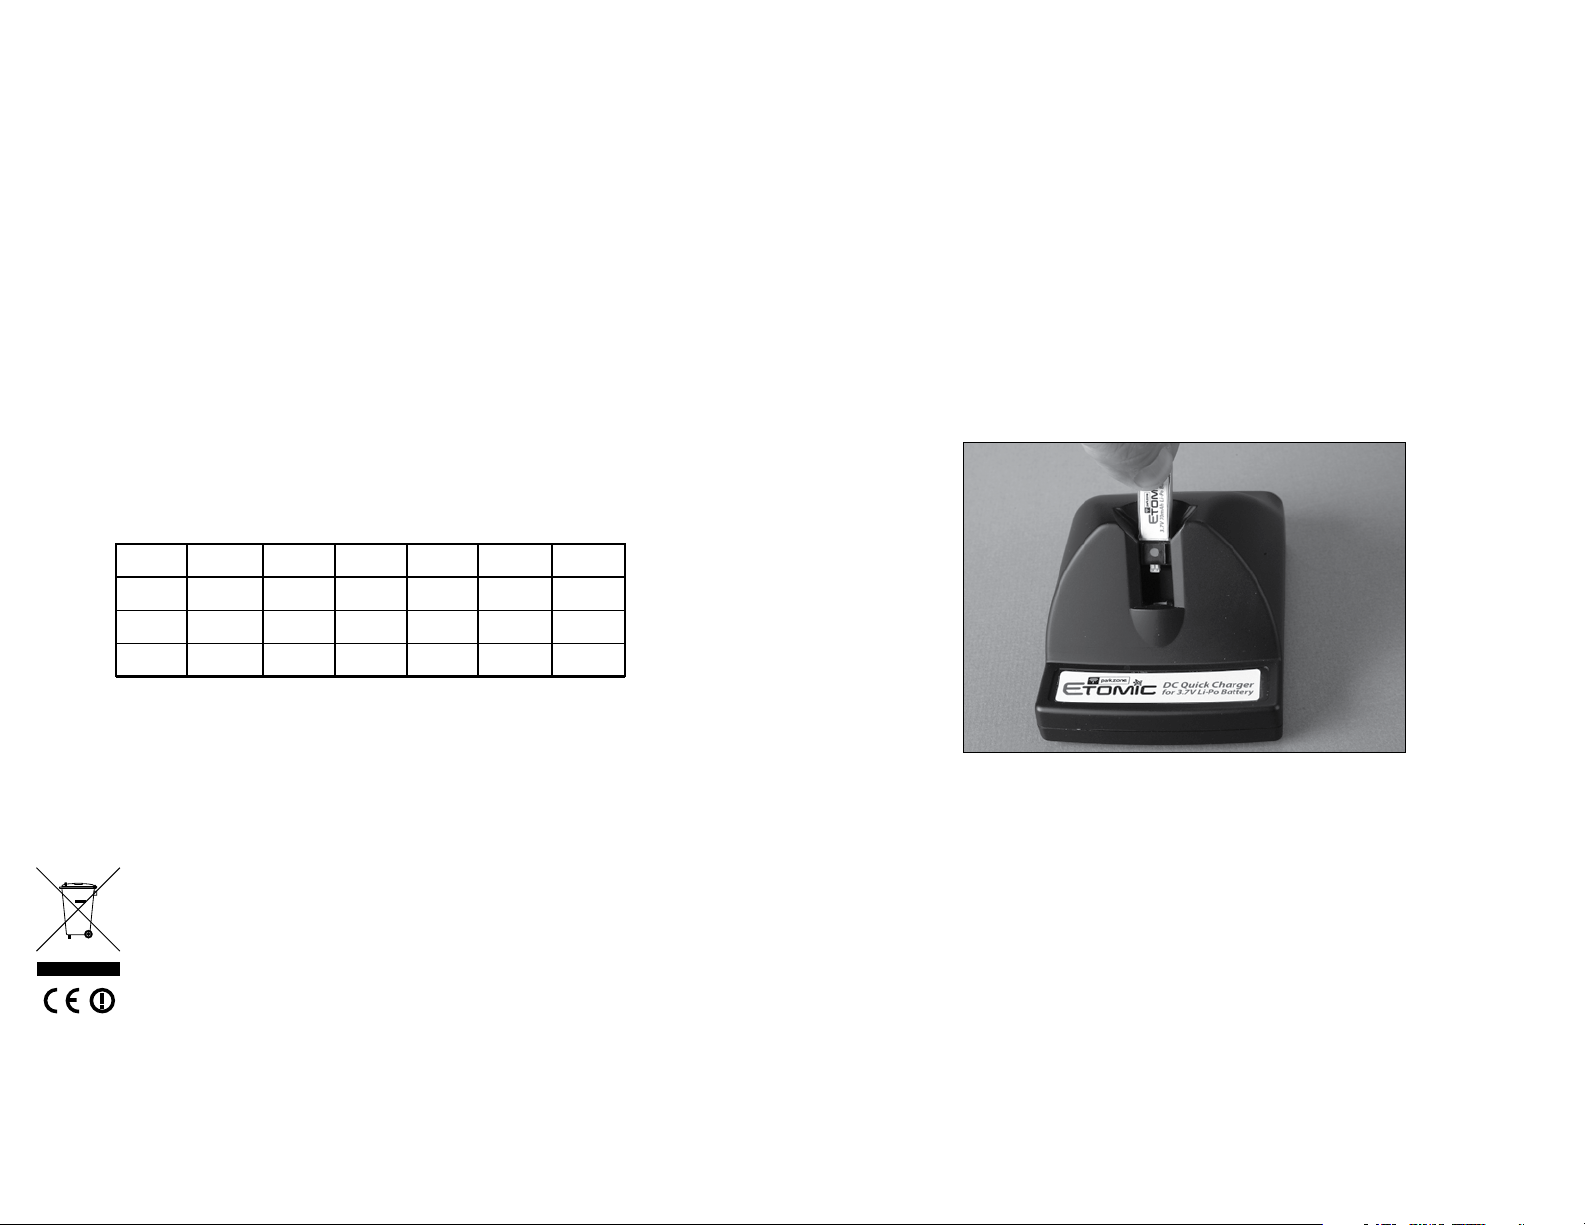
Step 1 – Charging the Aircraft Battery
It is important that you only charge the included 3.7V 70mAh Li-Po
battery (PKZ3001) with the included 1S 3.7V DC Li-Po Charger
(PKZ3240). Attempting to charge the battery using another Li-Po charger
or non-Li-Po compatible charger could result in serious damage.
To charge your ParkZone 3.7V 70mAh battery:
1. Install four of the included AA batteries in the charger base, noting
proper polarity.
2. Slide the battery into the charge slot on the charger.
3. Gently press the battery into the charging jack in the bottom of the
slot. The LED light on the base will turn solid red.
Caution
Changes or modications not expressly approved by the party
responsible for compliance could void the user’s authority to operate the
equipment.
Instructions for Disposal of WEEE by Users in the
European Union
This product must not be disposed of with other waste. Instead,
it is the user’s responsibility to dispose of their waste equipment
by handing it over to a designated collections point for the
recycling of waste electrical and electronic equipment. The
separate collection and recycling of your waste equipment at the time of
disposal will help to conserve natural resources and ensure that it is
recycled in a manner that protects human health and the environment.
For more information about where you can drop off your waste
equipment for recycling, please contact your local city ofce, your
household waste disposal service or where you purchased the product.
4. A nearly depleted battery will charge in approximately 20 minutes.
5. As the battery nears a full charge, the LED will begin to blink. When
fully charged, the LED will blink once every 20 seconds.
6. You can expect to be able to charge the ight battery about
15–20 times before it will become necessary to replace the four AA
batteries. Replacing with alkaline batteries will provide more
charge cycles.
Note: The Li-Po battery included with your Ember 2 will arrive
partially charged. For this reason the initial charge may only take
10–15 minutes.
5
6
Step 2 – Binding the Ember 2
Transmitter Preparation
Please make sure you have fresh/charged batteries in your transmitter.
If applicable, set your transmitter model to Airplane. JR/Spektrum
transmitters’ servo settings should be set to default (normal) servo
direction. Futaba transmitters (equipped with Spektrum modules) may
require you to reverse the throttle channel.
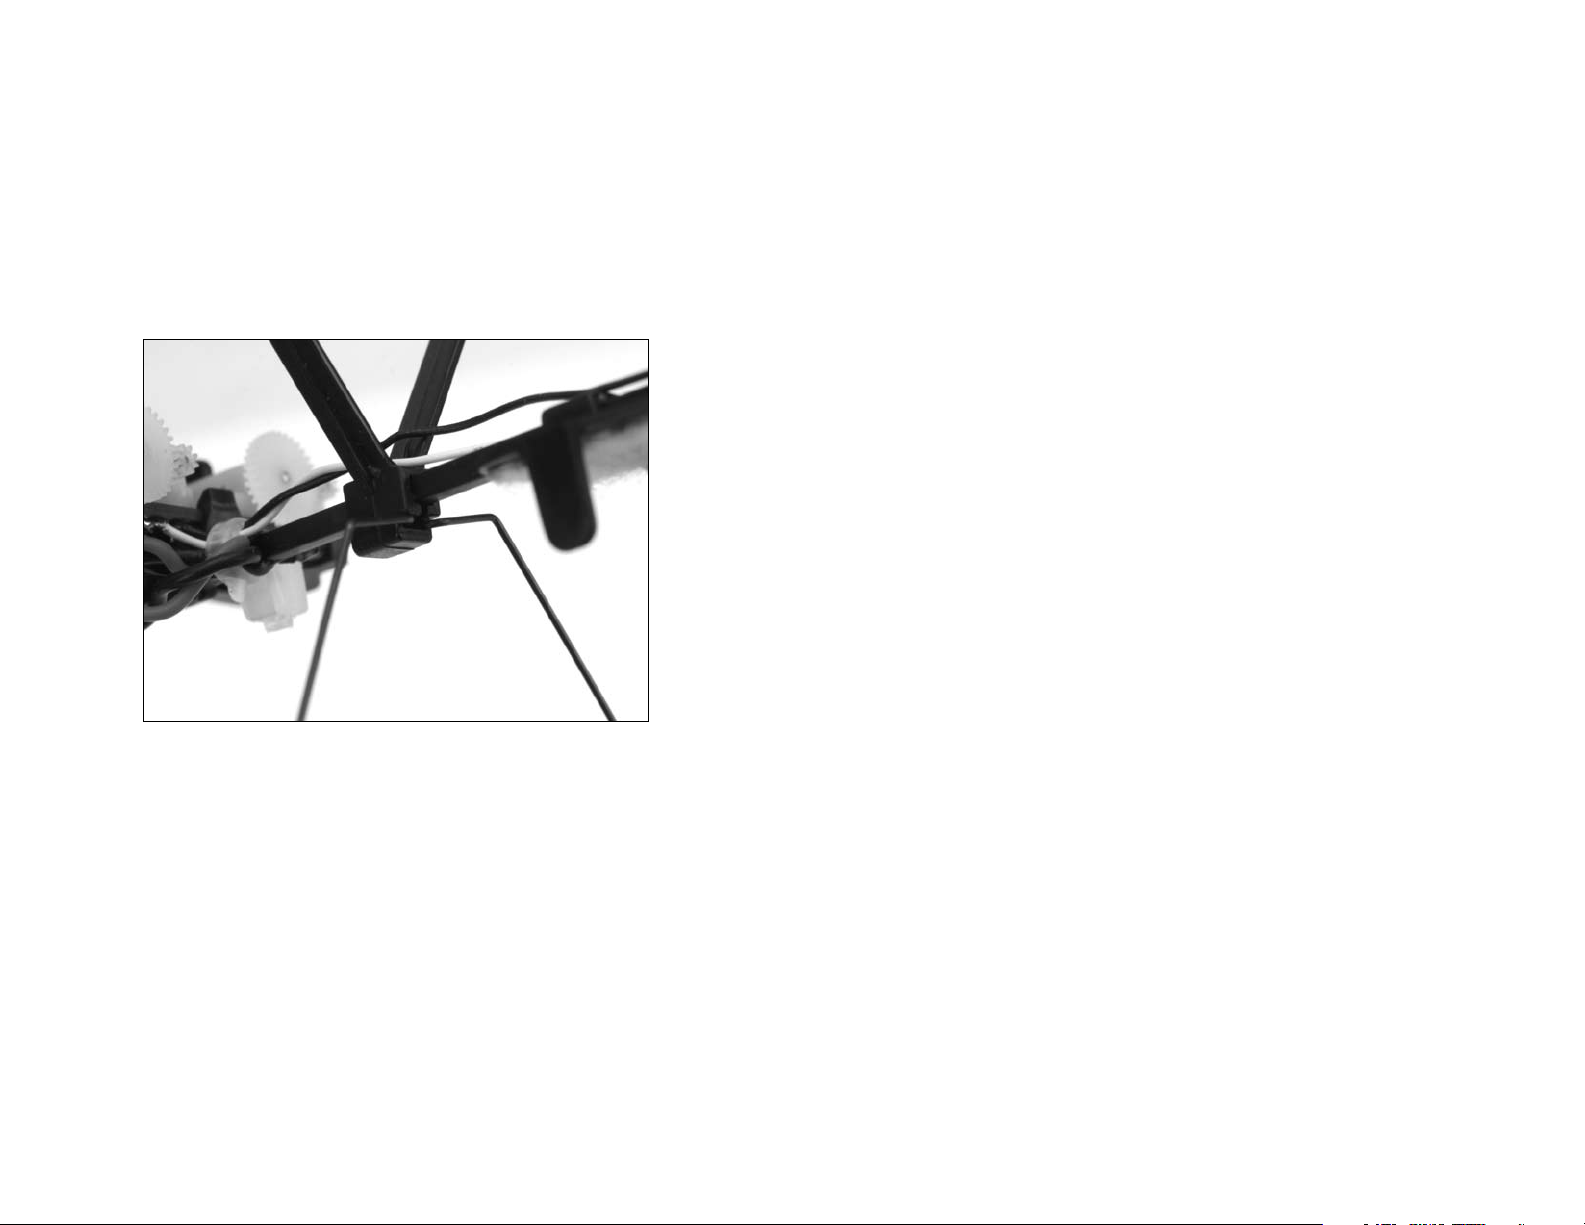
Installing the Landing Gear
Attach the main landing gear by sliding the gear into the lower slot
located on the front wing mount.
Binding the Ember 2 to Your Transmitter
Binding is the process of programming the receiver of the control unit to
recognize the GUID (Globally Unique Identier) code of a single specic
transmitter. It will be necessary for you to ‘bind’ your chosen Spektrum
DSM2 technology equipped transmitter to the receiver/ESC for proper
operation.
The following is a list of some of the Spektrum DSM2 equipped
transmitters and modules that will bind to the receiver/ESC of the
Ember 2:
E-ite LP5DSM JR 12X 2.4
E-ite HP6DSM Spektrum DX5e
E-ite MLP4DSM Spektrum DX6i
ParkZone Vapor/Ember 2 Transmitter Spektrum DX7
JR X9303 2.4 Spektrum Modules
Note: The Spektrum DX6 (SPM2460) is equipped with DSM (not
DSM2) technology and is not compatible with the receiver/ESC
included in the Ember 2 or in the original ParkZone Ember.
The following steps outline the binding process:
Installing the Flight Battery
Once the Li-Po battery has been fully charged, it’s ready to be installed in
the Ember 2.
Install the battery in the Ember 2 by pressing it to the battery tray with
the label facing downward and the connector oriented toward the back
of the airplane.
Note: Be sure to press the battery against the battery tray so that it is
properly secured by the hook and loop material.
1. Conrm the process of entering the bind mode for your chosen
transmitter by reviewing the instruction manual included with the
transmitter.
2. Make sure the ight battery is disconnected from the receiver/ESC
unit and the transmitter is turned off.
3. Plug the ight battery into the receiver/ESC unit. After 5 seconds
the LED on the ESC unit will begin ashing.
4. After verifying the LED is ashing on the receiver/ESC
follow the steps that allow your chosen transmitter to enter bind
mode.
5. If you entered bind mode correctly, you will see a solid LED
approximately 5 to 10 seconds later on the receiver/ESC. You
should now be bound to the transmitter, and have full control
and function.
™
Additional Smartbind
Information
Prior to each ight, you should ensure that you power on your transmitter
and wait about 5 seconds before you plug in the ight battery into
the receiver/ESC unit. Doing this allows time for the transmitter to scan
 Loading...