

Parkside KH 3049 DRILL SHARPENER User Manual

PBSG 1
BORRSLIPARE
Bruksanvisning och säkerhetsanvisningar
Översättning av bruksanvisning i original
BORSLIBER
Brugs- og sikkerhedsanvisninger
Oversættelse af den originale driftsvejledning
ΑΚΟΝΙΣΤΗΣ ΤΡΥΠΑΝΙΩΝ
Υποδείξεις χειρισμού και ασφαλείας
Μετάφραση των αυθεντικών οδηγιών λειτουργίας
3
PORANTERIEN TEROITUSLAITE
Käyttö- ja turvaohjeet
Alkuperäisen käyttöohjeen käännös
DRILL SHARPENER
Operation and Safety Notes
Translation of original operation manual
BOHRERSCHÄRFGERÄT
Bedienungs- und Sicherheitshinweise
Originalbetriebsanleitung

GB / IE / CY Operation and Safety Notes Page 5
FI Käyttö- ja turvaohjeet Sivu 13
SE Bruksanvisning och säkerhetsanvisningar Sidan 21
DK Brugs- og sikkerhedsanvisninger Side 29
GR / CY Υποδείξεις χειρισμού και ασφαλείας Σελίδα 37
DE / AT / CH Bedienungs- und Sicherheitshinweise Seite 45
Before reading, unfold the page containing the illustrations and familiarise yourself with all functions of the
device.
Käännä ennen lukemista kuvallinen sivu esiin ja tutustu seuraavaksi laitteen kaikkiin toimintoihin.
Vik ut bildsidan och ha den till hands när du läser igenom anvisningarna och gör dig bekant med
apparatens / maskinens funktioner.
Før du læser, vend siden med billeder frem og bliv bekendt med alle apparatets funktioner.
Πριν ξεκινήσετε την ανάγνωση, ανοίξτε τη σελίδα με τις εικόνες και εξοικειωθείτε με όλες τις λειτουργίες της
συσκευής.
Klappen Sie vor dem Lesen die Seite mit den Abbildungen aus und machen Sie sich anschließend mit allen
Funktionen des Gerätes vertraut.

A
5
B
6
C
8
9
D E F
10
3
1
11
1
4
7
7
3
2

5 GB/IE/CY
Table of contents
Introduction
Proper use ......................................................................................................................Page 6
Description of parts and features .................................................................................Page 6
Scope of delivery ..........................................................................................................Page 6
Technical data ...............................................................................................................Page 7
General safety advice
Working safely ..............................................................................................................Page 7
Device-specific safety instructions for drill sharpeners ................................................Page 8
Original accessories / Attachments ..............................................................................Page 9
Use
Sharpening a drill .........................................................................................................Page 9
Replacing the sharpening stone ...................................................................................Page 9
Maintenance and cleaning .........................................................................Page 10
Service ......................................................................................................................... Page 10
Warranty ...................................................................................................................Page 10
Disposal ......................................................................................................................Page 10
Declaration of Conformity / Manufacturer ...................................Page 11
6 GB/IE/CY
Drill sharpener PBSG1
Introduction
Please make sure you familiarise your-
self fully with the way the device works
before you use it for the first time and
that you understand how to handle electrical power
tools correctly. To help you do this please read the
accompanying operating instructions. Keep these
instructions in a safe place. If you pass the device
on to anyone else, please ensure that you also pass
on all the documentation.
Proper use
The device is designed to sharpen steel drill bits
according to DIN 338, DIN 340, DIN 345,
DIN 1869 and DIN 1897 (MODEL Type N).
Carbide drill bits must not be milled with this device.
Any other use or modification to the device shall be
considered as improper use and could give rise to
considerable dangers. The manufacturer will not
accept liability for loss or damage arising from
improper use. The device is not intended for
commercial use.
Description of parts and features
1
Sharpening head
2
Ventilation slot
3
Motor unit
4
ON / OFF switch
5
Rubber foot
6
Motor unit screw
7
Sharpening stone cover screw
8
Sharpening stone cover
9
Sharpening head push rod
10
Motor unit push rod
11
Drill guides
Scope of delivery
1 Drill sharpener PBSG1
1 Carrying case
16 titanium-coated HSS drills
2 spare sharpening stones
1 Set of operating instructions
Introduction
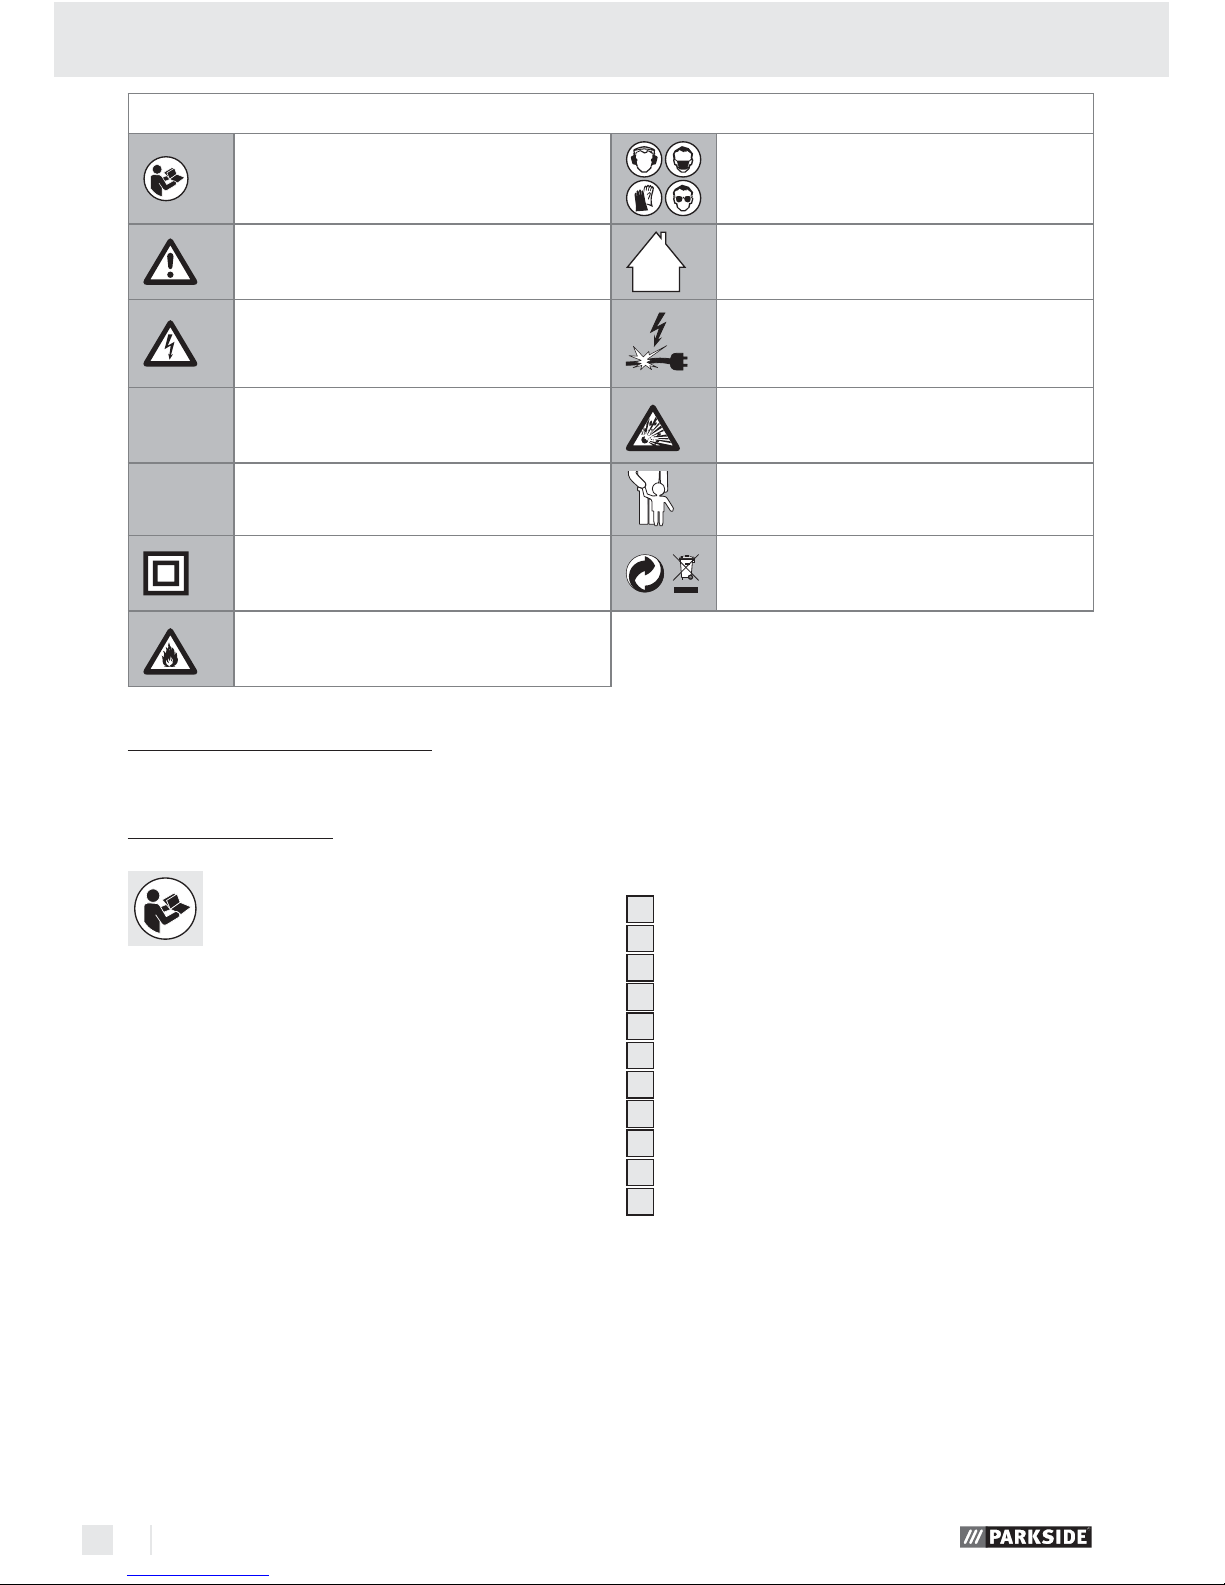
The following pictograms are used in these operating instructions / on the device:
Read instruction manual!
Wear hearing protection, dust
protection mask, protective glasses
and protective gloves.
Observe caution and safety notes! For indoor use only!
Caution – electric shock!
Danger to life!
Risk of loss of life by electric shock from
damaged mains lead or mains plug!
V
~
Volt (AC) Risk of explosion!
W
Watts (effective power)
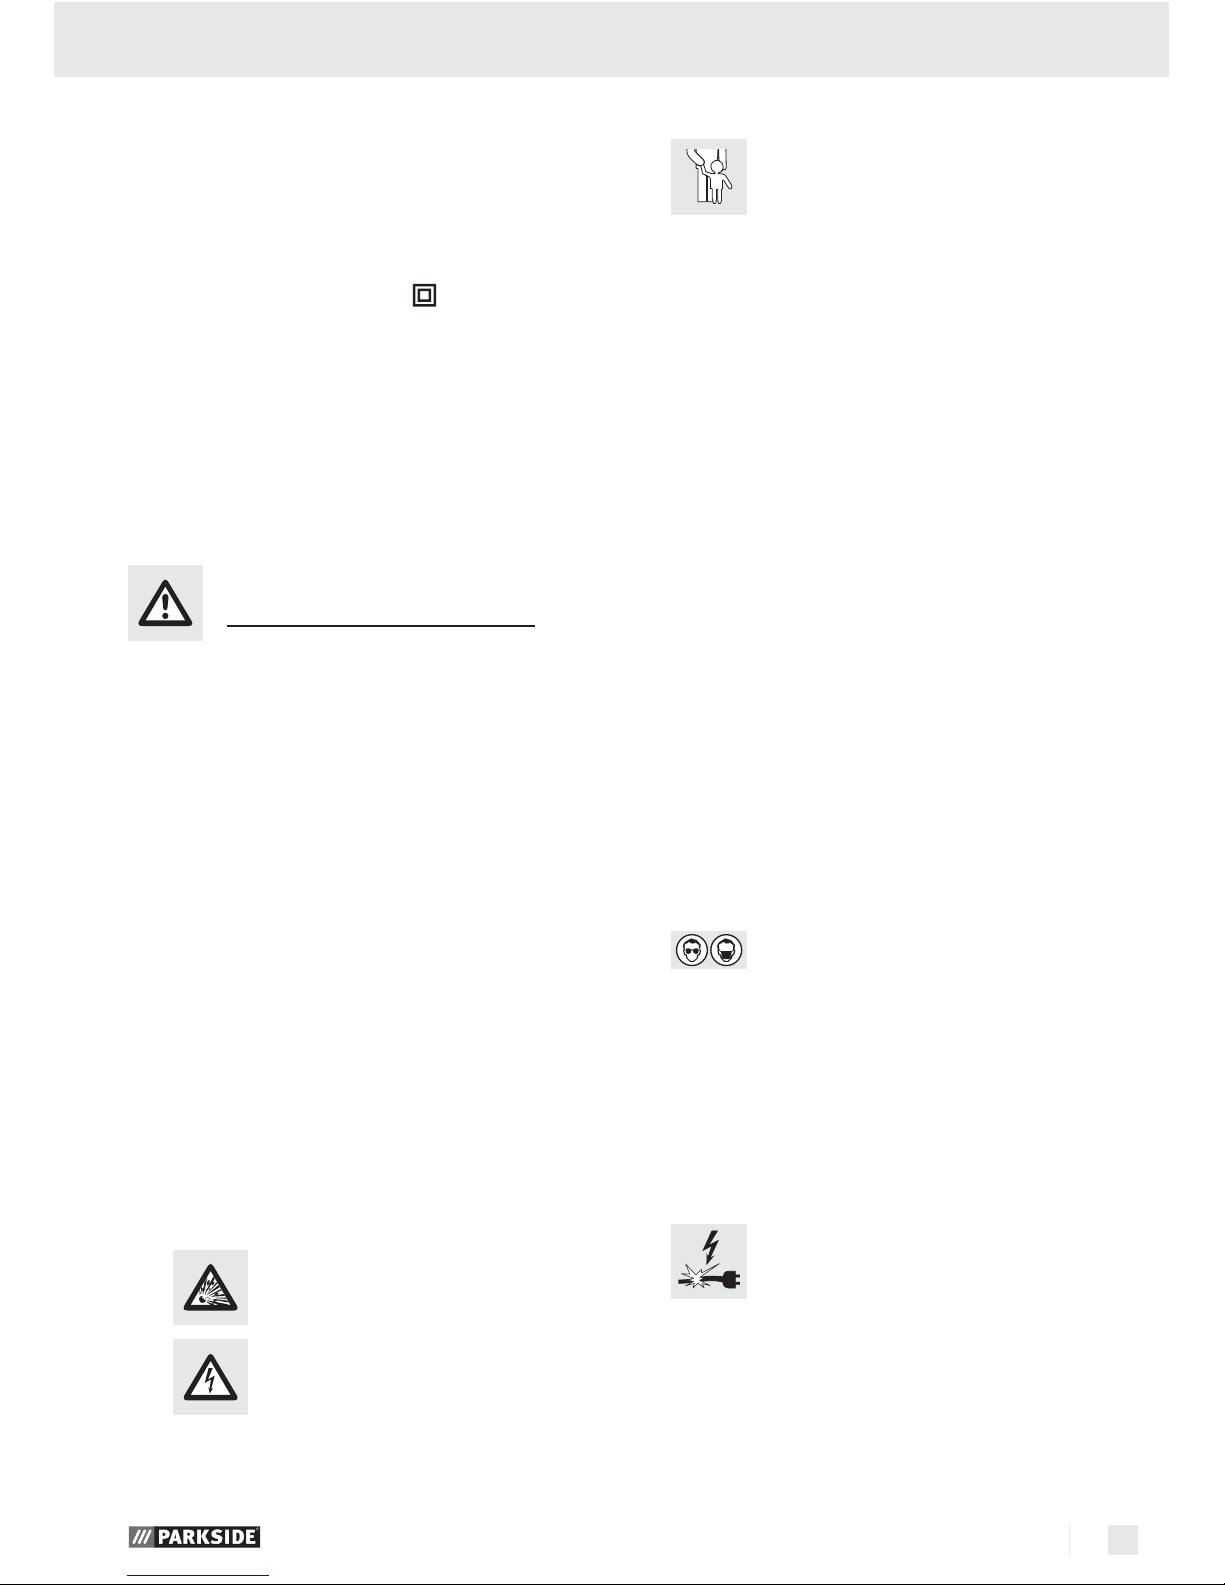
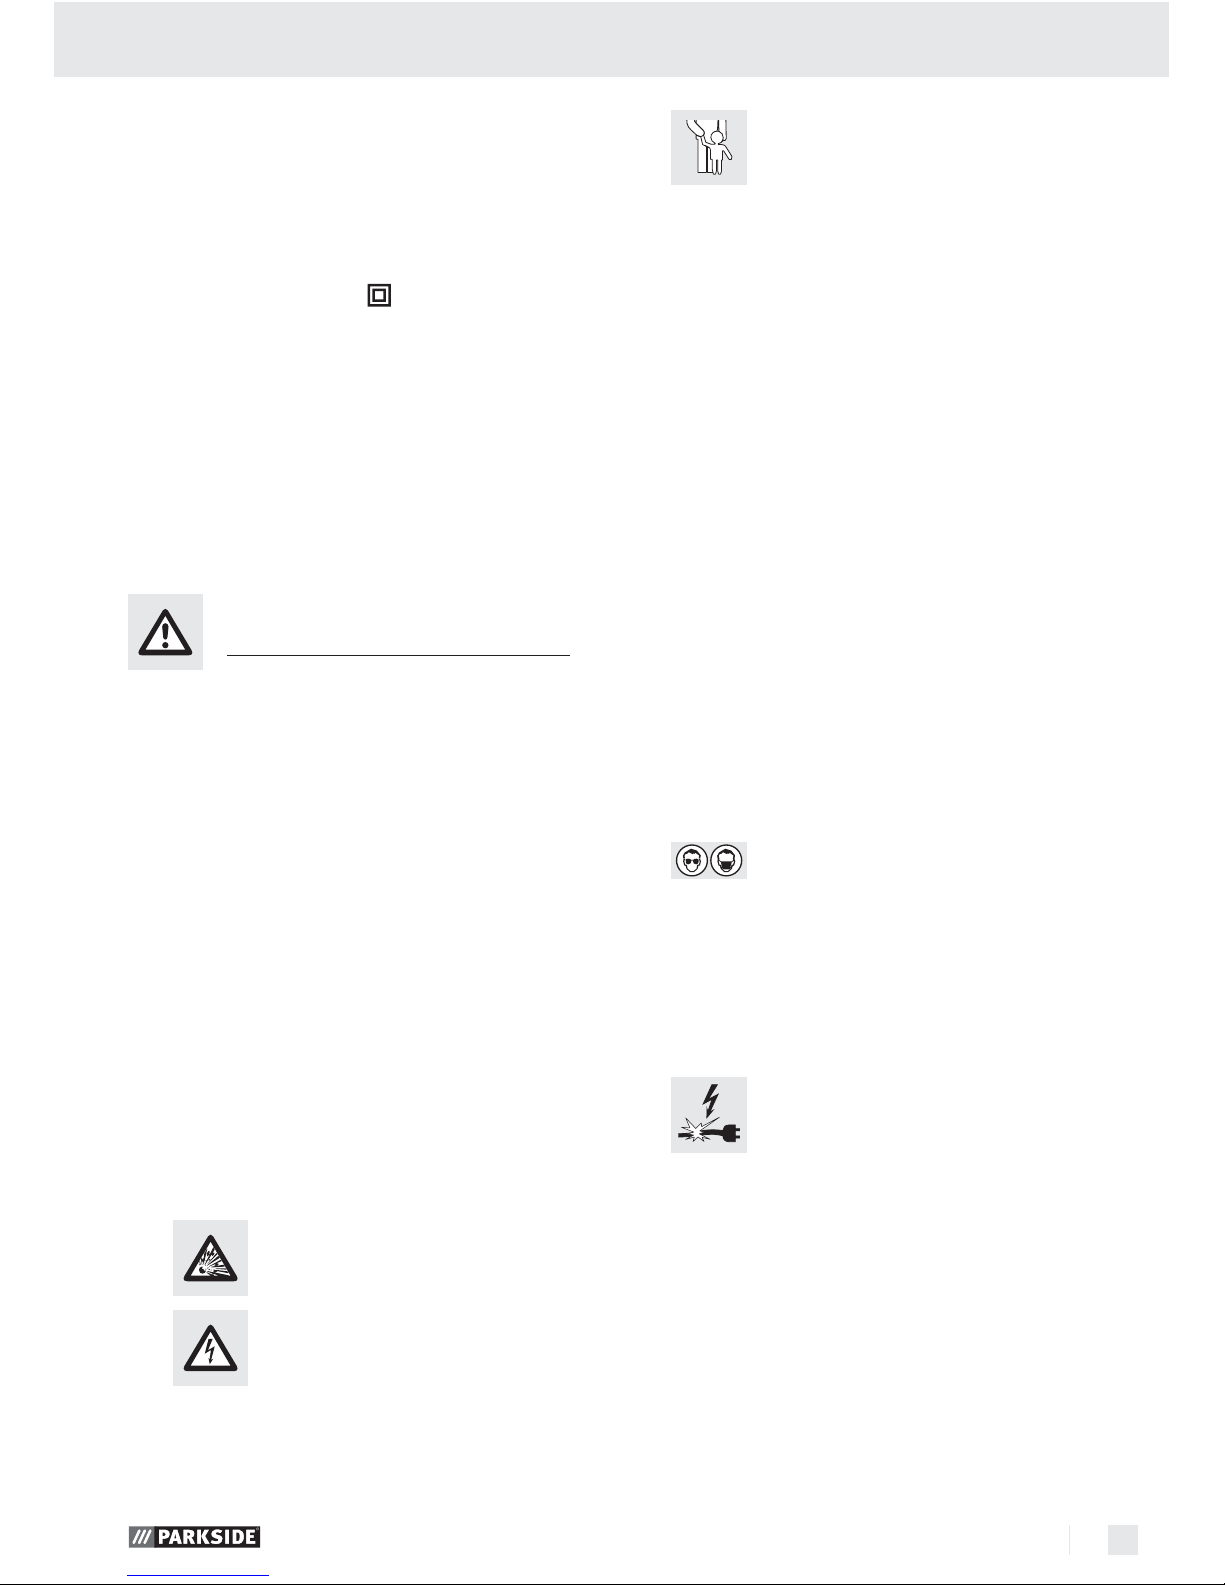
Keep children away from electrical
power tools!
Safety class II
Dispose packaging and appliance in
an environmentally-friendly way!
Risk of fire!
7 GB/IE/CY
Technical data
Nominal voltage: 230 V ~ 50 Hz
Nominal output: 55 W
Nominal rotation speed: 1500 rpm
For drill bits of diameter: 3 – 10 mm
Protection class: II /
Noise data:
Refers to A-weighted sound level.
Sound pressure level: 75.30 dB (A)
Sound level: 85.00 dB (A)
Values determined in accordance with EN 61029.
General safety advice
ATTENTION! In order to protect yourself from
the danger of electric shock, injury or fire when
using electrical power tools, please observe
the following basic safety precautions. Read all
these requirements before you use the electrical
power tool, and keep the safety advice in a
safe place.
Working safely
1. Keep your working area clean and
tidy.
A disorderly working area can lead to accidents.
2. Be aware of the effects of the envi-
ronment.
Do not leave electrical power tools out in the
rain.
Do not use electrical power tools in moist or
wet surroundings.
Ensure that your working area is well lit.
Do not use electrical power tools in
areas where there is risk of fire or
explosion.
3.
Protect yourself from electric
shock.
Avoid touching earthed objects such as pipes,
heating radiators, ovens or refrigerators with
parts of your body.
4. Keep other people at a safe distance.
Do not allow other people, in partic-
ular children, to touch the electrical
power tool or the mains lead.
Keep them away from your working area.
5. Store currently unused electrical
power tools in a safe place.
When not being used electrical power tools
should be stored in dry conditions in a high or
enclosed place, out of reach of children.
6. Do not overload your electrical pow-
er tool.
By keeping within the specified working range
of the tool you will work more safely and
achieve a better result.
7. Use the right electrical power tool for
the task.
Do not use low-output devices for heavy tasks.
Do not use an electrical power tool for purposes
for which it was not intended. For example, do
not use a hand operated circular saw for trimming tree branches or cutting logs.
8. Wear suitable clothing.
Do not wear loose-fitting clothing or jewellery.
They could become caught on moving parts.
We recommend that you wear anti-slip foot-
wear when working outdoors.
If you have long hair, wear a hair net.
9.
Use personal protective
equipment.
Wear protective glasses.
Wear a dust mask if your work generates
dust.
10. Attaching the vacuum dust extraction
device.
Where there are connection points provided
for vacuum dust extraction please ensure that
the connections are made and used properly.
11.
Do not use the mains lead for
purposes for which it was
not intended.
Do not use the mains lead to pull the plug out
of the mains socket. Protect the mains lead
from heat, oil and sharp edges.
12. Securely support the workpiece.
Use clamps or a vice to grip the workpiece
firmly. This is much safer than holding it with
your hand.
Introduction / General safety instructions

8 GB/IE/CY
13. Avoid placing your body in an
unnatural position.
Keep proper footing and balance at all times.
14. Look after your tools carefully.
Keep cutting tools sharp and clean. This way
you will work more safely and achieve better
results.
Follow the advice on tool lubrication and con-
sumables replacement.
Check the condition of the mains lead on your
electrical power tool regularly and have any
damage repaired by a competent specialist.
Check the condition of extension leads regu-
larly and replace them if they are damaged.
Keep handles and hand grips clean, dry and
free of oil and grease.
15. Pull the mains plug out of the mains
socket.
Do this if the electrical power tool is not being
used, before carrying out maintenance tasks
on the electrical power tool and whenever you
are changing inserted tools, e.g. saw blades,
drills or router bits.
16. Make sure that no spanners, keys
etc. are left attached.
Check before switching on that all spanners,
keys and setting tools have been removed.
17. Avoid unintentionally starting up the
device.
Check that the switch is set to OFF on the de-
vice when the mains plug is inserted into the
mains socket.
18. Using an extension lead for working
outdoors.
When working outside, always use an approved
and appropriately labelled extension lead.
19. Remain alert.
Watch what you are doing. Proceed with cau-
tion. Do not use electrical power tools if you
cannot concentrate.
20. Check the electrical power tool for
damage.
Before the electrical power tool is used, care-
fully check the safety equipment and any
slightly damaged parts to see that they are still
working properly.
Check that all moving parts on the tool are
working properly, can move freely and are not
damaged. All parts must be correctly attached
and fulfil all the requirements necessary to allow
the electrical power tool to operate properly.
Damaged safety equipment and components
must be properly repaired or replaced at a
competent electrical equipment repair centre
unless otherwise indicated in the operating instructions.
Damaged switches must be replaced at a
Customer Service Centre.
Never use an electrical power tool that cannot
be switched on and off properly.
21. CAUTION!
The use of inserted tools and accessories other
than those recommended by the manufacturer
could lead to you being injured.
22. Have your electrical power tool
repaired at an electrical equipment
repair specialist.
This electrical power tool complies with the
relevant safety regulations. Repairs may only
be carried out by a specialist electrical repair
centre using original spare parts, otherwise
injury could occur to the user.
Device-specific safety
instructions for drill
sharpeners
Make sure that the device is switched
off before inserting the mains plug
into the socket.
Always pull the mains plug out before
carry out cleaning or maintenance
work. This is to prevent the device starting up
by accident.
The ventilation openings
2
of the mo-
tor unit
3
must always be kept clear.
Otherwise there is a risk of the device over
heating.
When carrying out work on the device
as well as transporting or storing it,
move the ON / OFF switch
4
to the
“0” position (off) in order to prevent
it switching itself on by accident.
FIRE HAZARD DUE TO FLYNG
SPARKS! Grinding metal will
cause sparks to fly. That is why you
General safety instructions

9 GB/IE/CY
should always make sure that no-one is at risk
from them and that no combustible materials
are located in the proximity of the area of work.
WARNING!
RISK OF INJURY! Use the
ON/OFF switch
4
to switch the grinder off in
the event of a power failure or when pulling out
the mains plug. This prevents the grinder restarting
by accident, which could cause injury to you.
Never operate the grinder if the power
cable or mains plug is damaged.
Grinding stones must be carefully
stored and handled according to the
manufacturer’s instructions.
Make sure that the grinding tools are
appropriate in line with the instructions
of the manufacturer.
Check the grinding stone before using
it; do not use any broken, cracked or other-
wise damaged goods.
Make sure that a grinding tool is cor-
rectly fitted and fastened before using
it. Place the grinder in a safe place and allow
it to run idly for 30 seconds. Stop it immediately
if considerable oscillations occur or if defects
are observed. If this occurs, check the machine
to find out the cause.
Original accessories /
Attachments
Use only the accessories and attachments de-
tailed in the operating instructions. The use of
inserted tools or accessories other than those
recommended in the operating instructions
could lead to you suffering an injury.
Use
Sharpening a drill
Insert the drill into the smallest suitable drill
guide
11
on the drill sharpener.
Press the ON / OFF switch
4
into position “I”
to switch on the device.
Turn the drill under slight pressure loosely and
quickly to and fro between the left and right
stops about 10 times (with small drills about
5 times).
This sharpens the first cutting edge of the drill.
Pull the drill out, turn it through 180° (horizon
tally)
and insert it again until it meets the sharpening
stone.
Turn the drill in the same way as for grinding
the first edge. This sharpens the second cutting
edge of the drill.
If necessary repeat whole process until both
cutting edges of the drill are sharp.
Press the ON / OFF switch
4
into position “0”
to switch off the device.
NOTE: The cutting edges of the drill must be of the
same length.
Replacing the sharpening stone
WARNING!
DANGER OF INJURY! Al-
ways pull the mains plug is out of the socket before
doing any work on the device. Replace the sharpening stone if it is worn or damaged. You will need
a Phillips screwdriver for this procedure.
Remove the four rubber feet
5
from the underside of the device, refer to Fig. A. If necessary
use a small slotted head screwdriver or similar
device as an aid for doing this.
Using a Phillips screwdriver, screw out the four
motor unit screws
6
under the rubber feet,
refer to Fig. B.
Remove the motor unit
3
and set it to one side.
Screw out the four sharpening stone cover
screws
7
, refer to Fig. C.
Remove the sharpening stone cover
8
. Remove
the sharpening stone.
Clamp the sharpening head push rod
9
in a
vice. Using a 20 mm open spanner, release the
threaded connection holding the sharpening
stone on the shaft.
NOTE! LEFT-HANDED THREAD - TURN
CLOCKWISE TO RELEASE!
Mount the new sharpening stone on the shaft
with flattened edge at the bottom. Insert the
sharpening stone into the device.
General safety instructions / Use
10 GB/IE/CY
Put the sharpening stone cover
8
back in
place. Screw the cover in place with the four
sharpening stone cover screws
7
.
Align the sharpening head push rod
9
perfect-
ly with the motor unit push rod
10
. Otherwise
the motor unit
3
will not fit together with the
sharpening stone head cover
1
.
Now place the sharpening head cover
1
pre-
cisely back on to the motor unit
3
(refer to Fig.
E) and tighten the four motor unit screws
6
.
Put the four rubber feet
5
back in place.
Maintenance and cleaning
Apart from replacing the sharpening stone, drill
sharpener is maintenance-free.
Regularly clean the device straight after using it.
To clean the casing, use a dry cloth; on no
account should you use any petrol, solvents or
cleaning agents.
WARNING!
Never open the devices. Any
repairs or replacements should only be carried
out by the service centre or an electrician.
Service
WARNING!
Have your device
repaired at the service centre or by
qualified specialist personnel using
original manufacturer parts only. This
will ensure that your device remains safe to use.
WARNING!
If the plug or lead needs
to be replaced, always have the
replacement carried out by the manufacturer or its service centre. This will
ensure that your device remains safe to use.
Warranty
The warranty for this appliance is for 3
years from the date of purchase. The appliance has been manufactured with care
and meticulously examined before delivery. Please retain your receipt as proof
of purchase. In the event of a warranty
claim, please make contact by telephone
with our Service Department. Only in this
way can a post-free despatch for your
goods be assured.
The warranty covers only claims for material and
maufacturing defects, but not for transport damage,
for wearing parts or for damage to fragile compo
nents,
e.g. buttons or batteries. This product is for private
use only and is not intended for commercial use.
The warranty is void in the case of abusive and
improper handling, use of force and internal tampering not carried out by our authorized service
branch. Your statutory rights are not restricted in
any way by this warranty.
The warranty period will not be extended by repairs
made unter warranty. This applies also to replaced
and repaired parts. Any damage and defects extant
on purchase must be reported immediately after
unpacking the appliance, at the latest, two days after
the purchase date. Repairs made after the expiration of the warranty period are subject to payment.
GB
DES UK LTD
Tel.: 0871 5000 700 (£ 0.10 / minute)
e-mail: support.uk@kompernass.com
IE
Kompernass Service Ireland
Tel: 1850 930 412 (0,082 EUR/Min.)
Standard call rates apply. Mobile
operators may vary.
e-mail: support.ie@kompernass.com
Disposal
The packaging is wholly composed of
environmentally-friendly materials that
can be disposed of at a local recycling
centre.
Do not dispose of electrical
power tools with the household
rubbish!
Use / Maintenance and cleaning / Service / Warranty / Disposal

11 GB/IE/CY
In accordance with European Directive
2002 / 96 / EC (covering waste electrical and electronic equipment) and its transposition into national
legislation, worn out electrical power tools must be
collected separately and taken for environmentally
compatible recycling.
Contact your local refuse disposal authority for
more details of how to dispose of your worn out
electrical devices.
Declaration of Conformity /
Manufacturer
We, Kompernaß GmbH, the person responsible for
documents: Mr Dennis Dohm, Burgstr. 21,
D-44867 Bochum, Germany, hereby declare that
this product complies with the following standards,
normative documents and EU directives:
Machinery Directive
(2006 / 42 / EC)
Electromagnetic Compatibility
(2004 / 108 / EC)
Type / Device description:
Drill sharpener PBSG1
Date of manufacture (DOM): 02 - 2010
Serial number: IAN 45839
Bochum, 31.01.2010
Hans Kompernaß
- Managing Director -
We reserve the right to make technical modifications in the course of further development.
Disposal / Declaration of Conformity / Manufacturer

12

13 FI
Sisällysluettelo
Aluksi
Ohjeidenmukainen käyttö ..............................................................................................Sivu 14
Osien kuvaus ..................................................................................................................Sivu 14
Toimitukseen kuuluu ........................................................................................................ Sivu 14
Tekniset tiedot ................................................................................................................. Sivu 15
Yleiset turvallisuusohjeet
Turvallinen työskentely ...................................................................................................Sivu 15
Poranterien teroituslaitteiden laitekohtaiset turvallisuusohjeet .....................................Sivu 16
Alkuperäisvarusteet ja -varaosat ...................................................................................Sivu 17
Käyttöönotto
Poranterän hionta ........................................................................................................... Sivu 17
Hiomalaikan vaihto ........................................................................................................ Sivu 17
Huolto ja puhdistus ............................................................................................ Sivu 18
Huolto ...........................................................................................................................Sivu 18
Takuu ............................................................................................................................. Sivu 18
Hävittäminen .......................................................................................................... Sivu 18
Vaatimustenmukaisuusvakuutus / Valmistaja ........................... Sivu 19

14 FI
Aluksi
Poranterien teroituslaite PBSG1
Aluksi
Tutustu ennen käyttöönottoa laitteeseen,
sen käyttöohjeisiin ja sähkölaitteita kos-
keviin yleisiin turvallisuusohjeisiin. Lue
tämä käyttöopas huolella. Säilytä käyttöopas huolellisesti. Saatat myöhemmin tarvita sen tietoja. Jos
luovut laitteesta, anna uudelle omistajalle myös
kaikki laitteen asiakirjat.
Ohjeidenmukainen käyttö
Laite on tarkoitettu DIN 338, DIN 340, DIN 345,
DIN 1869 ja DIN 1897 (versio tyyppi N) mukaisten
teräksisten poranterien teroitukseen. Kovametelliporanteriä ei saa hioa. Laitteen ohjeidenvastainen käyttö,
samoin kuin muuntelu, saattaa kasvattaa tapaturmien
riskiä. Valmistaja ei vastaa ohjeidenvastaisesta
käytöstä aiheutuneista vahingoista. Laitetta ei ole
tarkoitettu ammattikäyttöön.
Osien kuvaus
1
Teroituspään kansi
2
Tuuletusrako
3
Moottoriyksikkö
4
PÄÄLLE- /POIS -kytkin
5
Kumijalat
6
Moottoriyksikön ruuvi
7
Hiomalaikan suojuksen ruuvi
8
Hiomalaikan suojus
9
Teroituspään työnnin
10
Mootoriyksikön työnnin
11
Poranohjaus
Toimitukseen kuuluu
1 Poranterien teroituslaite PBSG1
1 Kantolaukku
16 titaanipinnoitettua HSS-poranterää
2 varahiomakiveä
1 Käyttöohje
Tässä käyttöohjeessa / laitteessa käytetään seuraavia kuvakkeita:
Lue käyttöohje!
Käytä aina laitteella työskennellessäsi
suojalaseja, kuulo- ja hengityssuojaimia
sekä asianmukaisia työkäsineitä.
Huomioi varoitus- ja turvaohjeet!
Tarkoitettu käytettäväksi
ainoastaan sisätiloissa!
Varo sähköiskua!
Hengenvaara!
Viallisen verkkojohdon tai pistokkeen
käyttöön liittyvän sähköiskun aiheuttama hengenvaara!
V
~
Voltti (Vaihtojännite) Räjähdysvaara!
W
Watti (vaikutusteho) Pidä lapset loitolla sähkötyökalusta!
Suojausluokka II
Hävitä pakkaus ja laite
ympäristöystävällisesti!
Palonvaara!
15 FI
Aluksi / Yleiset turvallisuusohjeet
Tekniset tiedot
Nimellisjännite: 230 V
~
50 Hz
Nimellisteho: 55 W
Nimelliskierrosluku: 1500 r / min.
poranterälle Ø: 3 – 10 mm
Suojausluokka: II /
Äänenvoimakkuutta koskevat tiedot:
Melutason mittaustapa A.
Äänenpaine, max.: 75,30 dB (A)
Melutaso, max.: 85,00 dB (A)
Mittaustulokset ilmoitettu normin EN 61029
mukaisesti.
Yleiset turvallisuusohjeet
HUOMIO! Sähkötyökalujen käytössä on nou-
datettava seuraavia varotoimenpiteitä, jotta
loukkaantumis- ja tulipalonvaara vältettäisiin.
Lue turvaohjeet ennen laitteen käyttöä, noudata niitä ja säilytä niitä hyvin.
Turvallinen työskentely
1. Pidä työskentelyalue järjestyksessä.
Epäjärjestys työskentelyalueella voi johtaa
tapaturmiin.
2. Huomioi ympäristön vaikutukset.
Älä altista sähkötyökaluja sateelle.
Älä käytä sähkötyökaluja kosteassa tai märäs-
sä ympäristössä.
Huolehdi työskentelyalueen hyvästä valaistuk-
sesta.
Älä käytä sähkötyökaluja paikoissa,
joissa on tulipalon ja räjähdyksen
vaara.
3.
Suojaudu sähköiskulta.
Vältä koskettamasta maadoitettuja osia (esim.
putkia, lämpöpattereita, sähköliesiä, jäähdytyslaitteita).
4. Pidä muut ihmiset loitolla.
Älä anna muiden ihmisten, erityisesti
lasten, koskettaa sähkötyökalua tai
johtoa. Älä päästä heitä työskentely-
alueelle.
5. Säilytä sähkötyökaluja turvallisessa
paikassa.
Säilytä sähkötyökaluja kuivassa, korkeassa tai
lukitussa tilassa lasten ulottumattomissa.
6. Älä kuormita sähkötyökalua liikaa.
Työskentely on parempaa ja turvallisempaa,
kun käytät annettua tehoaluetta.
7. Käytä oikeaa sähkötyökalua.
Älä käytä vaativissa töissä pienitehoisia
koneita.
Älä käytä sähkötyökalua tarkoituksissa, joissa
niitä ei ole tarkoitettu käytettävän. Älä esimerkiksi käytä käsipyörösahaa puunoksien tai halkojen sahaamiseen.
8. Käytä tarkoitukseen soveltuvia vaat-
teita.
Älä käytä väljiä vaatteita tai koruja, sillä ne
voivat jäädä kiinni koneen liikkuviin osiin.
Ulkona työskenneltäessä kannattaa käyttää
luistamattomia kenkiä.
Suojaa pitkät hiukset hiusverkolla.
9.
Käytä suojavarusteita.
Käytä suojalaseja.
Käytä pölyävissä töissä hengityssuojainta.
10. Liitä pölynimulaite.
Mikäli käytettävissä on liitäntöjä pölyimua
varten, varmista, että ne on liitetty ja että niitä
käytetään oikein.
11.
Älä käytä johtoa väärin.
Älä irrota pistotulppaa pistorasiasta johdosta
vetämällä. Suojaa johtoa kuumuudelta, öljyltä
ja teräviltä reunoilta.
12. Kiinnitä työstökappale.
Käytä työstökappaleen kiinnityksessä kiinnitys-
laitteita tai ruuvipuristinta. Työstökappale pysyy
silloin varmemmin paikoillaan kuin käsin
pideltynä.
13. Älä työskentele epänormaaleissa
asennoissa.
Asetu tukevaan asentoon ja pysyttele koko
ajan tasapainossa.

16 FI
Yleiset turvallisuusohjeet
14. Hoida työkalujasi huolellisesti.
Pidä katkaisutyökalut terävinä ja puhtaina,
jolloin työskentely on nopeampaa ja turvallisempaa.
Noudata voitelua ja työkalujen vaihtoa koskevia
ohjeita!
Tarkasta sähkötyökalun liitäntäjohto huolellisesti,
ja anna alan ammattilaisen vaihtaa viallinen
johto.
Tarkasta jatkojohdot säännöllisesti ja vaihda
vialliset johdot uusiin.
Pidä kahvat kuivina ja puhtaina. Niissä ei saa
olla öljyä ja rasvaa.
15. Vedä pistotulppa pois pistorasiasta:
Kun sähkötyökalu ei ole käytössä, ennen sen
huoltoa ja työkalujen (esim. sahanterä, poranterä, jyrsin) vaihdon yhteydessä.
16. Älä jätä työkaluavaimia paikoilleen.
Tarkista ennen laitteen käynnistämistä, että
avaimet ja säätötyökalut on otettu pois.
17. Vältä tahatonta käynnistymistä.
Varmista, että virtakytkintä ei ole kytketty
päälle, kun pistät pistotulpan pistorasiaan.
18. Käytä ulkona vain ulkokäyttöön tar-
koitettua jatkojohtoa.
Käytä ulkona vain ulkokäyttöön sallittua ja
vastaavalla tavalla merkittyä jatkojohtoa.
19. Ole tarkkaavainen.
Tarkkaile työskentelyäsi. Työskentele järkevästi.
Älä käytä sähkötyökalua, jos et pysty keskittymään.
20. Tarkasta sähkötyökalu mahdollisten
vaurioiden varalta.
Ennen kuin käytät sähkötyökalua uudelleen,
tarkista suojusten tai hieman viallisten osien
moitteeton ja käyttötarkoituksen mukainen toiminta.
Tarkista, toimivatko liikkuvat osat moitteettomasti
ja jumittumatta. Varmista, ettei niissä ole vikoja.
Kaikki osat on asennettava oikein paikoilleen
ja niiden on täytettävä kaikki sähkölaitteiden
turvallista käyttöä koskevat edellytykset.
Vialliset suojukset ja osat on annettava hyväksy-
tyn korjaamon korjattavaksi tai vaihdettavaksi,
mikäli käyttöohjeessa ei toisin mainita.
Valmistajan valtuuttaman korjaamon on vaih-
dettava vialliset kytkimet.
Älä käytä sähkölaitetta, jonka virtakytkintä ei
voi kytkeä päälle tai pois päältä.
21. VARO!
Muiden kuin laitteen omien työkalujen tai
muiden lisävarusteiden käyttö voi merkitä loukkaantumisvaaraa.
22. Anna sähkötyökalu sähkömiehen
korjattavaksi.
Tämä sähkötyökalu on voimassa olevien turva-
määräysten mukainen. Ainoastaan sähkömies
saa tehdä mahdollisesti tarvittavat korjaukset.
Vialliset osat on vaihdettava alkuperäisiin varaosiin; laitteen käyttö saattaa muuten johtaa
onnettomuuksiin.
Poranterien teroituslaitteiden laitekohtaiset
turvallisuusohjeet
Varmistaudu, että laitteesta on
katkaistu virta, ennen kuin pistät
pistokkeen pistorasiaan.
Irrota verkkopistoke aina ennen puh-
distustöihin ryhtymistä. Tämä
estää laitteen tahattoman käynnistyksen.
Moottoriyksikön
3
ilmanvaihtoauk-
kojen
2
on oltava aina vapaat. Muussa
tapauksessa laite voi ylikuumentua.
Käännä PÄÄLLE- /POIS -kytkin
4
asentoon „0“ (Pois), kun työskentelet
laitteella sekä kuljetuksen ja
varastoinnin ajaksi, näin vältät
tahattoman käynnistyksen.
LENTÄVÄT KIPINÄT AIHEUTTA-
VAT TULIPALOVAARAN! Metal-
lin hionnassa syntyy lentäviä
kipinöitä. Varmistaudu siksi ehdottomasti, ettei
kukaan ole vaarassa eikä palavia materiaaleja
ole työalueen lähistöllä.
VAROLTUS!
LOUKKAANTUMIS-
VAARA! Kytke laite heti pois päältä PÄÄLLE- /
POIS -kytkimellä
4
virtakatkon ajaksi tai kun
verkkopistoke irrotetaan. Tämä estää tahattoman
uudelleen käynnistyksen, josta voi aiheutua
loukkaantumisvaara.

17 FI
Yleiset turvallisuusohjeet / Käyttöönotto
Älä koskaan käytä laitetta, jos verk-
kojohto tai verkkopistoke on vaurioitunut.
Hiomalaikat on säilytettävä ja niitä
on käsiteltävä varovaisesti valmistajan ohjeita noudattaen.
Varmistaudu, että hiomatyökalut on
kiinnitetty paikoilleen valmistajan ohjeiden mukaan.
Tarkista hiomalaikka ennen käyt-
töönottoa; älä koskaan käytä katkennutta,
murtunutta tai muuten vahingoittunutta tuotetta.
Huolehdi, että hiomatyökalu on ennen
käyttöönottoa aina oikein paikoillaan
ja kiinnitetty kunnolla. Anna työkalun käy-
dä tyhjäkäyntiä 30 sekuntia varmassa asennossa, pysäytä se heti, mikäli esiintyy huomattavaa
tärinää tai toteat puutteita. Mikäli havaitset
tällaista, tarkista kone ja etsi syy häiriöihin.
Alkuperäisvarusteet
ja -varaosat
Käytä ainoastaan käyttöoppaassa mainittuja
varusteita ja lisälaitteita. Muiden kuin käyttöoppaassa mainittujen työkalujen tai varusteiden
käyttö saattaa heikentää laitteen käyttöturvallisuutta.
Käyttöönotto
Poranterän hionta
Aseta poranterä pienimpään sopivaan porante-
ränohjaukseen
11
poranteränteroituslaitteella.
Käännä PääLLE- / POIS-kytkin
4
asentoon I,
kun haluat käynnistää laitteen.
Kierrä poranterää kevyesti painaen vasemman
ja oikean vasteen välissä noin 10 kertaa edes
takaisin (pienien poranterien ollessa kyseessä
noin 5 kertaa).
Näin ensimmäinen poranterä on hiottu.
Vedä poranterä ulos, kierrä sitä 180° (vaaka-
suorassa) ja vie se taas hiomalaikalle.
Kierrä poranterää samoin kuin ensimmäistä terää
hiottaessa. Nyt myös toinen poranterä on hiottu.
Jatka koko tätä toimitusta tarvittaessa, kunnes
molemmat terät ovat teräviä.
Käännä PÄÄLLE- / POIS -kytkin
4
asentoon
”0”, kun haluat kytkeä laitteen pois.
HUOMAUTUS: Poranterien on oltava samanpituiset.
Hiomalaikan vaihto
VAROLTUS!
LOUKKAANTUMISVAARA!
Irrota aina verkkopistoke pistorasiasta ennen töiden
suorittamista laitteella. Vaihda hiomalaikka, jos se
on kulunut tai vaurioitunut. Tähän työvaiheeseen
tarvitset ristipääruuvinvääntimen.
Poista neljä kumijalkaa
5
laitteen alapuolelta,
katso myös kuva A. Ota tarvittaessa avuksi pieni ristipääruuvinväännin tms.
Ruuvaa sen alla olevat neljä moottoriyksikön
ruuvia
6
irti ristipääruuvinvääntimellä, katso
myös kuva B.
Ota moottoriyksikkö
3
irti ja pane se syrjään.
Irrota hiomalaikan suojuksen neljä ruuvia
7
,
katso myös kuva C.
Poista hiomalaikan suojus
8
. Ota hiomalaikka
pois paikoiltaan.
Kiristä teroituspään työnnin
9
ruuvipuristimeen.
Avaa kovasinta akselilla kiinnipitävä ruuviliitos
20 mm:n kita-avaimella.
HUOMAUTUS! AVAA VASENKÄTISET
KIERTEET OIKEALLE KIERTÄMÄLLÄ!
Asenna uusi hiomalaikka akselille tasoitettu reu-
na alaspäin. Aseta hiomalaikka laitteeseen.
Aseta hiomalaikan suojus
8
takaisin paristotilalle. Ruuvaa ne kiinni hiomalaikan suojuksen
neljällä ruuvilla
7
.
Ojenna teroituspään työnnin
9
, niin että se on
identtinen mooottoriyksikön työntimen
10
kans-
sa. Muussa tapauksessa moottoriyksikköä
3
ei
voida asentaa yhteen teroituspään
1
kannen
kanssa.
Aseta teroituspään kansi
1
takaisin paikoilleen
tarkasti yhteensopivaksi moottoriyksikköön
3
(katso myös kuva E) ja kiristä taas neljä moottoriyksikön ruuvia
6
.
Aseta neljä kumijalkaa
5
takaisin paikoilleen.
 Loading...