

Page 1
LITHIUM-IONENAKKUBOHRSCHRAUBER
Bedienungs- und Sicherheitshinweise
X 14,4 - LI
TALADRADORA CON BATERÍA
DE IONES DE LITIO
Instrucciones de utilización y de seguridad
TRAPANO RICARICABILE
Indicazioni per l’uso e per la sicurezza
LITHIUM ION BATTERY
DRILL/DRIVER
Operation and Safety Notes
TALADRADORA CON
BATERÍA DE IONES DE LITIO
TRAPANO RICARICABILE
E3335_Akkubohr-Schrauber_Cover_X14.4V_LB5.indd 2 23.04.2008 16:16:09 Uhr
Page 2

ES Instrucciones de utilización y de seguridad Página 5
IT / MT Indicazioni per l’uso e per la sicurezza Pagina 15
GB / MT Operation and Safety Notes Page 25
DE / AT Bedienungs- und Sicherheitshinweise Seite 35
Klappen Sie vor dem Lesen die Seite mit den Abbildungen aus und machen Sie sich anschließend mit
allen Funktionen des Gerätes vertraut.
Antes de empezar a leer abra la página que contiene las imágenes y, en seguida, familiarícese con
todas las funciones del dispositivo.
Before reading, unfold the page containing the illustrations and familiarise yourself with all functions of
the device.
Prima di leggere aprire la pagina con le immagini e prendere confidenza con le diverse funzioni
dell’apparecchio.
E3335_Akkubohr-Schrauber_Cover_X14.4V_LB5.indd 3 23.04.2008 16:16:10 Uhr
Page 3
1
3
2
4
5
6
7
A B C
11
13
12
10
D
2
1
9
8
E3335_Akkubohr-Schrauber_Cover_X14.4V_LB5.indd 4 23.04.2008 16:16:16 Uhr
Page 4

Kompernaß GmbH
Burgstraße 21
44867 Bochum
(Germany)
Estado de las informaciones · Versione delle informazioni
Last Information Update · Stand der Informationen:
04 / 2008 · Ident.-No.: X 14,4 - LI042008-5
TALADRADORA CON
BATERÍA DE IONES DE LITIO
TRAPANO RICARICABILE
E3335_Akkubohr-Schrauber_Cover_X14.4V_LB5.indd 1 23.04.2008 16:16:07 Uhr
Page 5

5 ES
Índice
Introducción
Uso conforme a lo previsto ............................................................................................. Página 6
Equipamiento ................................................................................................................... Página 6
Volumen de suministro ..................................................................................................... Página 7
Características técnicas ................................................................................................... Página 7
Indicaciones generales de seguridad
para herramientas eléctricas
1. Seguridad en el lugar de trabajo ............................................................................... Página 8
2. Seguridad eléctrica ..................................................................................................... Página 8
3. Seguridad de las personas ......................................................................................... Página 8
4. Manejo y uso cuidadoso de las herramientas eléctricas ......................................... Página 9
5. Manejo y uso cuidadoso de los aparatos de batería .............................................. Página 10
¡Cuidado, cables! ............................................................................................................ Página 10
Accesorios originales /-complementos ........................................................................... Página 10
Indicaciones de seguridad para el taladro
atornillador con batería ................................................................................... Página 10
Antes de la puesta en marcha
Retirar / cargar / colocar batería .................................................................................... Página 11
Cambio de herramientas ................................................................................................. Página 11
Caja de cambios de 2 velocidades ............................................................................... Página 11
Preselección de par de giro ............................................................................................ Página 11
Puesta en funcionamiento
Conexiòn / desconexiòn .................................................................................................. Página 12
Selección de velocidad ................................................................................................... Página 12
Cambio de la dirección de giro ...................................................................................... Página 12
Consejos y trucos ............................................................................................................. Página 12
Mantenimiento y limpieza............................................................................ Página 13
Eliminación de residuos ................................................................................... Página 13
Informaciones
Asistencia técnica ............................................................................................................ Página 13
Declaración de conformidad / fabricante
.........................................................................Página 14
E3335_Akkubohr-Schrauber_Content_X14.4V_LB5.indd 5 22.04.2008 16:22:50 Uhr
Page 6
6 ES
Introducción
Taladro atornillador
a batería X14.4 - LI
Q
Introducción
Familiarícese con las funciones del aparato
antes del primer uso e infórmese acerca
de las directrices sobre el mane-jo de
herramientas eléctricas. Lea las siguientes instrucciones
de uso. Guarde convenientemente estas instrucciones.
Cédalas en caso de traspasar el aparato a terceros.
Q
Uso conforme a lo previsto
Este aparato está indicado para taladrar y atornillar
en madera, plástico y metal. Utilice el aparato sólo
como se describe y para las zonas de aplicación
indicadas. Cualquier uso distinto del aparato no se
considera conforme al previsto y puede entrañar
riego de accidentes considerables. El fabricante no
se res-ponsabiliza de los daños derivados por un
uso no conforme al previsto. No está indicado
para el uso industrial.
Q
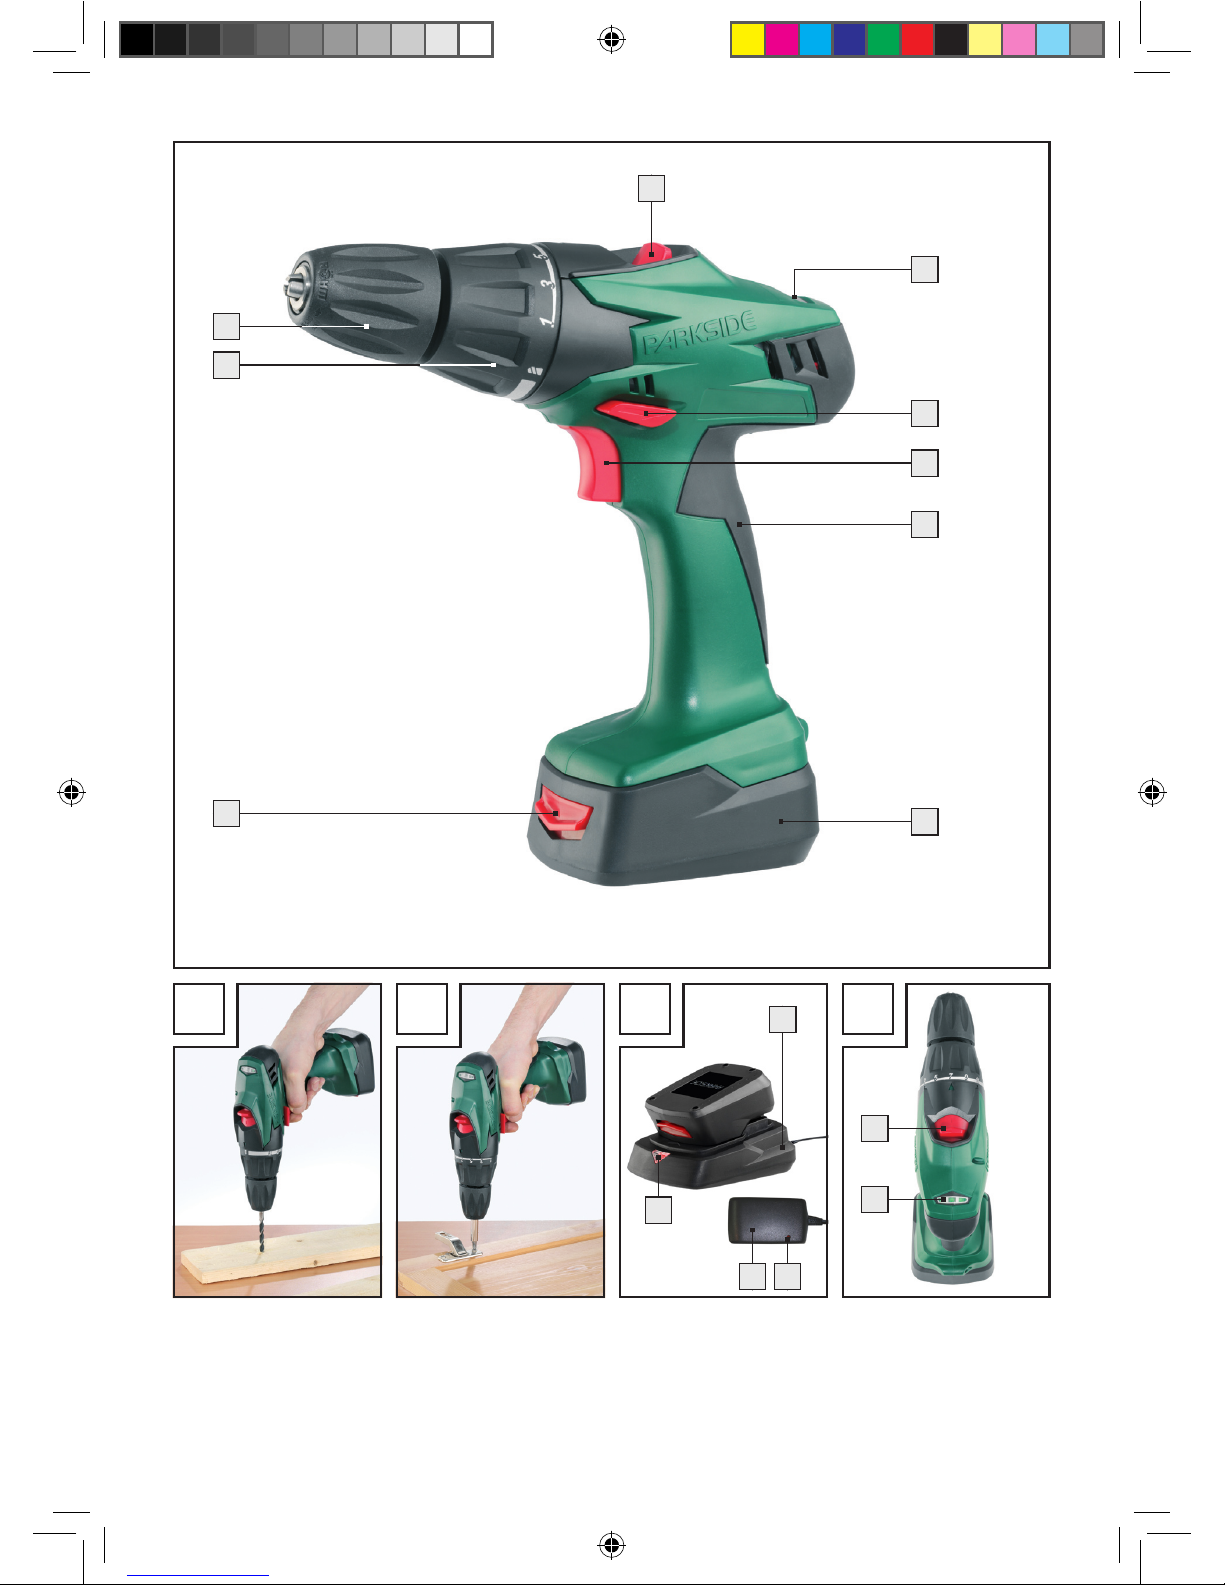
Equipamiento
1
Selector de marchas
2
Pantalla LED a batería
3
Conmutador del sentido de giro / bloqueo
4
Interruptor de CONEXIÒN / DESCONEXIÒN
5
Empuñadura suave
6
Alojamiento para la batería
7
Botón para desbloquear la batería
8
Preselección del par de fuerzas
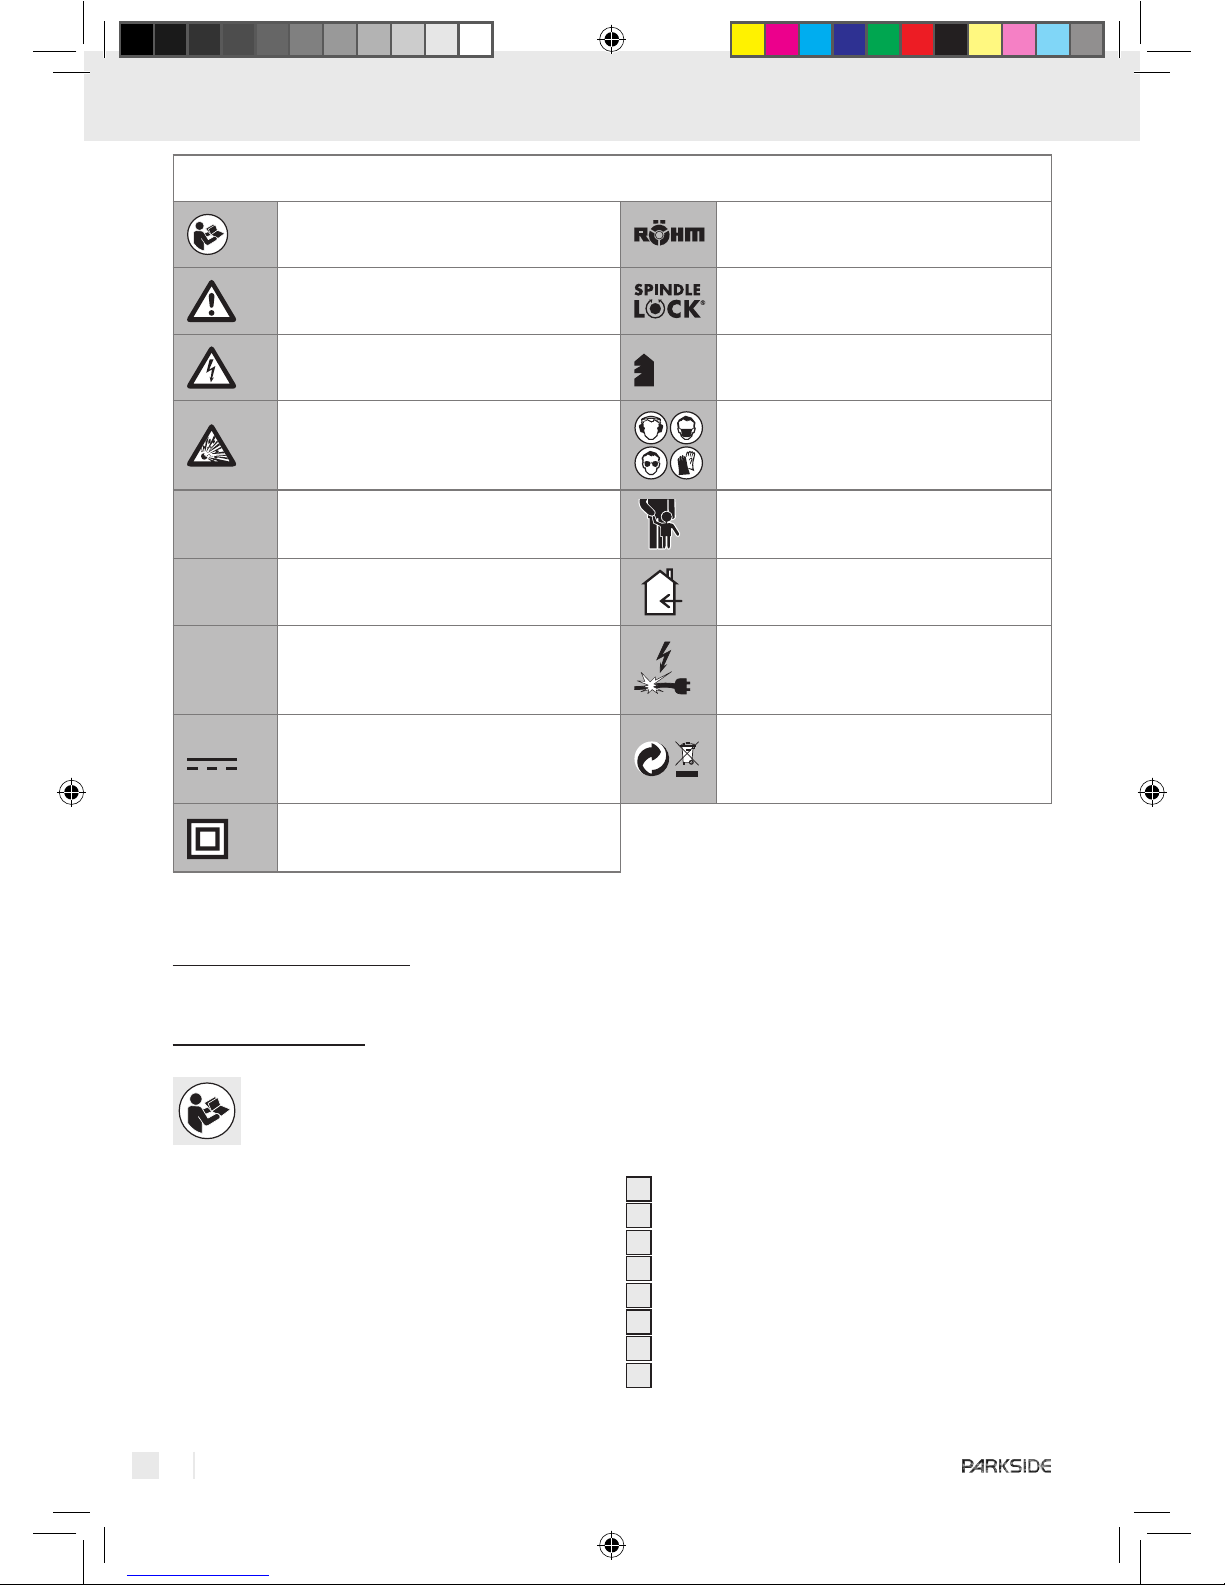
En estas instrucciones de uso / en el aparato se utilizan los siguientes pictogramas:
¡Lea las instrucciones de uso! Portabrocas, Made In Germany
¡Siga las indicaciones de
prevención y seguridad!
Bloqueo del husillo
¡Tenga cuidado con las descargas
eléctricas! Peligro de vida!
Nivel de perforación (preselección
del par de fuerzas)
¡Peligro de explosión!
Use gafas de protección, protección
auditiva, mascarilla y guantes
de protección.
n
0
Revoluciones nominales en ralentí
¡Mantener fuera del alcance de
los niños!
V
~
Voltios (Tensión alterna) ¡Proteger el aparato de la humedad!
mA
A / Ah
Miliamperio / Amperio /
Amperios-hora
¡Controle regularmente el buen
estado del aparato, el cable de
alimentación y la clavija!
Corriente continua
(tipo de corriente y de tensión)
¡Evacue el embalaje y el aparato
de for ma respetuosa con el medio
ambiente!
Clase de protección II
E3335_Akkubohr-Schrauber_Content_X14.4V_LB5.indd 6 22.04.2008 16:22:50 Uhr
Page 7
7 ES
Introducción
9
Mandril de sujeción rápida de
portabrocas
10
Fuente de alimentación
11
LED de control
12
Estación de carga
13
LED de control de carga
Q
Volumen de suministro
1 Taladro atornillador a batería X14.4 - LI
1 Alojamiento para la batería X14.4 - LI - 1
1 Estación de carga X14.4 - LI - 2
1 Fuente de alimentación X14.4 - LI - 3
1 Manual de instrucciones
1 Cuaderno “Garantía y asistencia técnica“
Q
Características técnicas
Revoluciones
nominales en ralentí: 1. marcha: n
0
0 – 400 min-1
Revoluciones
nominales en ralentí: 2. marcha: n
0
0 – 1200 min-1
Tensión nominal: 14,4 V
Capacidad de sujeción
de portabrocas: 1,0 – 10 mm
Diámetro de
taladrado máximo:
Acero: 10 mm
Madera: 30 mm
Niveles de par
de fuerza: 19 más nivel de perforación
Alojamiento para la batería X14.4-LI-1:
Tipo: LITIO-ION
Tensión nominal: 14,4 V
Capacidad: 1300 mAh
Estación de carga X14.4-LI-2:
Fuente de alimentación X14.4-LI-3
Principal:
Tensión nominal: 100 - 240 V ~ 50 / 60 Hz
Potencia nominal: 0,6 A
Secundario:
Tensión nominal: 16,8 V
Potencia nominal: 0,65 A
Duración de la carga: 3 horas aprox.
Información sobre ruido y vibración:
Valor de medición calculado según EN 60745.
El nivel de presión acústica A evaluado del aparato
es normalmente de 70 dB (A). Tolerancia K=3 dB.
El nivel de ruido al trabajar puede superar los
80 dB (A).
¡Debe llevarse protección
auditiva!
Valores totales de vibración (suma de los vectores
de tres direcciones) calculados según EN 60745:
Taladrar en metal: Valor de emisión de vibraciones
a
h, D
= 1,944 m / s2,
tolerancia K= 1,5 m / s
2
,
Tornillos: Valor de emisión de vibraciones
a
h
= 2,101 m / s2,
tolerancia K= 1,5 m / s
2
.
¡ADVERTENCIA!
El nivel de vibración indicado en estas instrucciones se ha determinado según
un procedimiento de medición fijado en la norma
EN 60745 y puede usarse como base para la
comparación con otros aparatos.
El nivel de vibraciones variará dependiendo del
uso de la herramienta eléctrica y puede en muchos
casos superar el valor indicado en estas instrucciones.
Podría subestimarse la carga de vibraciones si se usa
con regularidad la herramienta eléctrica de este
modo.
Advertencia: Para un cálculo exacto de la carga
de oscilación durante un determinado intervalo de
trabajo se deben tener en cuenta los tiempos en los
que la máquina está desconectada o está conectada
pero no está funcionando. Esto podría reducir considerablemente la carga de oscilación en el intervalo
total de trabajo.
E3335_Akkubohr-Schrauber_Content_X14.4V_LB5.indd 7 22.04.2008 16:22:53 Uhr
Page 8
8 ES
Indicaciones generales de seguridad para herramientas eléctricas
Indicaciones generales
de seguridad para
herramientas eléctricas
¡ADVERTENCIA!
¡Lea las advertencias
e indicaciones de seguridad!
El incumplimiento de las advertencias e indicaciones
de seguridad puede provocar descargas eléctricas,
incendios y / o lesiones graves.
¡GUARDAR TODAS LAS ADVERTENCIAS E
INDICACIONES DE SEGURIDAD POR SI LAS
NECESITA EN UN FUTURO!
1.Seguridad en el lugar de
trabajo
a) Mantenga el lugar de trabajo limpio
y bien iluminado. El desorden y los lugares
de trabajo mal iluminados pueden provocar
accidentes.
b)
No utilice el aparato en
áreas potencialmente explosivas en las que haya líqui
dos, gases o polvos inflamables. Las
herramientas eléctricas producen chispas que
podrían encender el polvo o los vapores.
c)
Mantenga a los niños y a
otras personas alejados de
la herramienta eléctrica
cuando la esté utilizando. Las distracciones
pueden hacerle perder el control del aparato.
2. Seguridad eléctrica
Evite el peligro de muerte
por descarga eléctrica:
a) El enchufe debe ser el adecuado
para la toma de corriente. No se
debe modificar de ningún modo el
enchufe del aparato. No utilice nunca
adaptadores con los aparatos que
están provistos de derivación a tierra.
Los conectores sin modificar y las tomas ade-
cuadas reducen el riesgo de descarga eléctrica.
b) Evite el contacto físico con superficies
conectadas a tierra, como tubos metálicos, radiadores, cocinas o frigoríficos. Existe un riesgo muy elevado de des-
carga eléctrica si su cuerpo deriva a tierra.
c)
Mantenga el aparato protegido
de la lluvia y la humedad. Si
penetra agua en un aparato eléctrico
aumenta el riesgo de descarga eléctrica.
d)
No utilice el cable para otros
fines, como para transportar
o colgar el aparato o para
tirar de la clavija de red al desenchu-
farlo. Mantenga el cable al resguardo del calor, del aceite, de los bordes
afilados o de las piezas móviles del
aparato. Los cables dañados o retorcidos au-
mentan el riesgo de descarga eléctrica.
e) Al trabajar con herramientas eléctricas
al aire libre, utilice sólo cables de extensión que también estén autorizados
para su uso en exteriores. El uso de una
extensión adecuada para su empleo en exteriores disminuye el riesgo de descarga eléctrica.
f) Si es inevitable usar esta herramienta
eléctrica en un entorno húmedo, utilice un interruptor de corriente de defecto. El uso de un interruptor de corriente de
defecto reduce el riesgo de descarga eléctrica.
3. Seguridad de las personas
a) Sea cuidadoso en todo momento,
preste atención a lo que hace y proceda con prudencia al trabajar con
una herramienta eléctrica. No utilice
el aparato si está cansado o si se encuentra bajo el efecto de drogas, alcohol o medicamentos. Un simple mo-
mento de descuido durante el uso del aparato
podría causar lesiones graves.
b)
Lleve equipo de protección
individual y siempre unas
gafas de protección. Si lleva
equipo de protección personal, como mascari-
E3335_Akkubohr-Schrauber_Content_X14.4V_LB5.indd 8 22.04.2008 16:22:53 Uhr
Page 9

9 ES
Indicaciones generales de seguridad para herramientas eléctricas
lla antipolvo, zapatos de seguridad antideslizantes, casco de seguridad o protección auditiva,
en función del tipo y la utilización de la herramienta eléctrica, reducirá el riesgo de daños.
c)
Evite una conexión accidental del aparato.
Asegúrese de que la herramienta
eléctrica esté desconectada antes de
conectarla al suministro eléctrico,
antes de sostenerla o moverla. Si al
mover el aparato ha puesto el dedo sobre el
interruptor de CONEXIÓN / DESCONEXIÓN
o si ha conectado el aparato, podrían producirse accidentes.
d) Extraiga las herramientas de ajuste
o llaves antes de encender el aparato.
Cualquier herramienta o llave que se encuentre
en una pieza giratoria del aparato puede
provocar lesiones.
e) Evite posturas inadecuadas. Procure
estar en una posición segura y mantenga en todo momento el equilibrio.
De este modo podrá controlar mejor el aparato, especialmente en situaciones inesperadas.
f) Utilice ropa adecuada. No use joyas
ni ropas flojas. Mantenga su cabello,
ropa y guantes alejados de las partes móviles. La ropa floja, las joyas o el
pelo largo pueden engancharse en las piezas
móviles.
g) Si los dispositivos de aspiración y re-
colección de polvo están montados,
asegúrese de que estén conectados y
sean correctamente utilizados. El uso
de estos dispositivos disminuye los peligros
causados por el polvo.
4.Manejo y uso cuidadoso de
las herramientas eléctricas
a) No sobrecargue el aparato. Emplee
en su trabajo la herramienta eléctrica
adecuada para el mismo. Si usa la
herramienta adecuada dentro de la potencia
indicada trabajará mejor y de forma más segura.
b) No utilice una herramienta eléctrica
cuyo interruptor tenga algún defecto.
Una herramienta eléctrica que no se puede
encender o apagar es un peligro y debe repararse.
c) Retire la clavija del enchufe antes de
realizar ajustes en el aparato, cambiar accesorios o depositar el aparato
sobre una superficie. Esta medida de
precaución evita que se ponga en marcha el
aparato por accidente.
d) Conserve las herramientas eléctricas
que no use fuera del alcance de los
niños. No permita utilizar el aparato
a personas que no estén familiarizadas con él o que no hayan leído estas
indicaciones. Las herramientas eléctricas
son peligrosas si las usan personas sin experiencia.
e) Cuide el aparato. Compruebe que las
piezas móviles funcionen correctamente y no se atasquen, y que no
haya piezas rotas o tan dañadas que
perjudiquen al funcionamiento del
aparato. Haga reparar las piezas
dañadas antes de usar el equipo. La
causa de muchos accidentes es el uso de he
rramientas eléctricas que no han recibido el
mantenimiento adecuado.
f) Mantenga las herramientas de corte
afiladas y limpias. Las herramientas de
corte con filos cortantes conservadas cuidadosamente se enganchan menos y son más fáciles de manejar.
g) Utilice la herramienta eléctrica, los
accesorios, las herramientas adicionales, etc. de acuerdo con estas indicaciones y del modo que se describe
para este tipo de aparato en concreto.
Tenga en cuenta las condiciones de
trabajo y la actividad que se va a
realizar. El uso de herramientas eléctricas
para fines diferentes de los previstos puede
provocar situaciones peligrosas.
E3335_Akkubohr-Schrauber_Content_X14.4V_LB5.indd 9 22.04.2008 16:22:54 Uhr
Page 10
10 ES
Indicaciones... / Indicaciones de seguridad para el taladro atornillador con batería
5. Manejo y uso cuidadoso
de los aparatos de batería
a) Cargue la batería únicamente en carga-
dores recomendados por el fabricante.
Si se usa un cargador que está pensado para
un tipo determinado de baterías con un tipo
de baterías diferentes existe riesgo de incendio.
b) Emplee en los aparatos eléctricos úni-
camente las baterías previstas para
ello. El uso de otras baterías podría provocar
lesiones e incendios.
c) Cuando no esté usando la batería,
manténgala alejada de clips, monedas,
llaves, clavos, tornillos y otros objetos
metálicos pequeños que podrían provocar un puente entre los contactos. Si
los contactos de la batería forman un cortocircuito
podrían producirse quemaduras o un incendio.
d)
¡ADVERTENCIA!
Si se utiliza la
batería de forma incorrecta puede salir
líquido de la misma. Evite el contacto
con este líquido. En caso de contacto
accidental enjuague con agua. Si el
líquido penetrase en los ojos, busque
además la ayuda de un médico. El líquido
que sale de las baterías puede causar irritación
cutánea o quemaduras.
Q
¡Cuidado, cables!
¡ADVERTENCIA!
Asegúrese de no
golpear líneas eléctricas, de gas o agua
al trabajar con herramientas eléctricas.
Si es necesario compruebe la superficie con un detector de líneas, antes de taladrar o perforar una
pared.
Q
Accesorios originales /-
complementos
J Utilice sólo los accesorios y comple-
mentos indicados en las instrucciones
de uso. El uso de herramientas complementa-
rias u otros accesorios diferentes a los recomen-
dados en las instrucciones de uso, puede
suponer un riesgo de lesiones para usted.
Indicaciones de seguridad
para el taladro atornillador
con batería
J Sujete la pieza de trabajo. Es más seguro
sujetar la pieza de trabajo con dispositivos de
fijación o tornillos de banco que con las manos.
¡ADVERTENCIA!
¡POLVOS TÓXICOS!
J El polvo nocivo / tóxico generado durante el
trabajo supone un riesgo para la salud de quien
maneja el aparato o de las personas que estén
cerca.
J
¡Lleve gafas de protección y
mascarilla antipolvo!
J No trabaje con materiales que contie-
nen amianto. El amianto puede ser cancerí-
geno.
J Sujete la herramienta eléctrica con fir-
meza. Al apretar y aflojar los tornillos pueden
generarse brevemente altas fuerzas de reacción.
J Desconecte el aparato inmediatamente
si pieza de inserción se atasca. Esté pre-
parado para fuerzas de reacción altas que
causan un retroceso del aparato. La herramienta
de inserción se bloquea cuando la herramienta
eléctrica se sobrecarga o se descentra dentro
de la pieza que se está trabajando.
¡ADVERTENCIA!
Agarre la herra-
mienta eléctrica únicamente por las
superficies de sujeción aisladas cuando
realice trabajos en los que la herramienta pueda coincidir con conducciones eléctricas ocultas o con el propio
cable de red. El contacto con un conductor
de tensión coloca también en tensión las partes
metálicas de la herramienta eléctrica y produce
una descarga eléctrica.
J Cuando realice trabajos en el aparato,
lo transporte o lo guarde, coloque el
conmutador de sentido de giro en la
posición central (bloqueo) para evitar
que se ponga en marcha accidentalmente.
E3335_Akkubohr-Schrauber_Content_X14.4V_LB5.indd 10 22.04.2008 16:22:55 Uhr
Page 11
11 ES
Antes de la puesta en marcha
Q
Antes de la puesta en marcha
Q
Retirar / cargar /
colocar batería
¡ADVERTENCIA!
Desenchufe siempre la
fuente de alimentación
10
de la corriente eléctrica
antes de retirar o colocar la batería en la estación
de carga
12
.
Advertencia: Se suministra la batería con media
carga. Antes del primer uso cargue la batería en el
aparato de carga durante al menos 3 horas. De
esta manera se garantiza una capacidad total de
la batería. Usted puede cargar la batería de Li-Iones
en todo momento sin que esto reduzca la vida útil
de la misma. Si se detiene el proceso de carga no
se daña la batería.
1. Para retirar el alojamiento de la batería
6
presione el botón de desbloqueo
7
y retire el
alojamiento de la batería
6 hacia adelante.
2. Inserte el alojamiento de la batería
6 desde
la parte de adelante en la estación de carga
12
.
3. Introduzca la fuente de alimentación
10
en la
toma de corriente. El LED de control
11
se
enciende.
4. Conecte la fuente de alimentación
10
con la
estación de carga
12
. El LED de control de
carga
13
en la estación de carga 12 se
enciende.
5. El LED verde de control de carga
13
le indica
que el proceso de carga ha finalizado y que
el alojamiento de baterías
6 ya está listo
para el uso.
6. Para retirar el alojamiento de la batería
6
presione el botón de desbloqueo
7
y retire el
alojamiento de la batería
6 hacia delante de
la estación de carga.
7. Para colocar el alojamiento de la batería
6
en el aparato inserte el alojamiento de la batería
6 desde adelante en el aparato.
Q
Cambio de herramientas
Su taladro con batería dispone de un bloqueo de
broca totalmente automático
y está equipado
con un cabezal porta-brocas de una abertura
„Made in Germany“ de
.
En caso de paro del motor se bloqueará el ramal
de impulso, para que pueda abrir la boquilla de
sujeción rápida
9
girándola .
Después de haber colocado la herramienta deseada y de haberla asegurado girando
el cabezal
porta-brocas, puede volver a trabajar enseguida. El
bloqueo de broca se desliga automáticamente al
arrancar el motor (confirmación del interruptor de
CONEXIÒN / DESCONEXIÒN
4
).
Q
Caja de cambios de
2 velocidades
Advertencia! Accione el selector de marchas 1
sólo cuando el aparato no esté en funcionamiento.
Si estuviese en funcionamiento podrían producirse
daños en el aparato.
En la primera velocidad (interruptor de
selección de velocidad
1
en posición: 1)
conseguirá aprox. 400 r.p.m.
revoluciones y un par
de giro alto. Esta configuración está indicada para
todo tipo de trabajos de enroscado, pero también
para utilizar accesorios.
En la segunda velocidad(interruptor de
selección de velocidad
1
en posición: 2)
conseguirá aprox. 1200 r.p.m. revoluciones para
trabajos de taladrado.
Q
Preselección de par de giro
Puede configurar la fuerza de giro con el par de
giro
8
.
Una vez se haya alcanzado la fuerza de giro, el
embrague desconecta el impulso. Así puede
E3335_Akkubohr-Schrauber_Content_X14.4V_LB5.indd 11 22.04.2008 16:22:56 Uhr
Page 12

12 ES
Antes de la puesta en marcha / Puesta en funcionamiento
atornillar tornillos a una profundidad determinada,
idóneo p. ej. para atornilladuras en serie.
j Seleccione un nivel bajo para tornillos pequeños
o materiales de trabajo blandos.
j Elija un nivel alto para los tornillos grandes,
materiales de trabajo duros, o para destornillar
tornillos.
j Para realizar perforaciones con el taladro se-
leccione el nivel de taladrado, posicionando la
preselección del par de giro
.
j Para trabajos de taladrado empuje hacia delan-
te el interruptor de selección de velocidad
1
(posición: 2).
Q
Puesta en funcionamiento
Q
Conexiòn / desconexiòn
m ¡PRECAUCIÓN! Coloque el aparato sobre
el tornillo únicamente cuando esté desconectado
Las herramientas de inserción giratorias podrían
resbalar. Las consecuencias podrían ser daños en
la pieza de trabajo.
Conexión:
j Para poner en funcionamiento el aparato pulse
el interruptor de CONEXIÒN / DESCONEXIÒN
4
y manténgalo presionado.
Desconexión:
j Para apagar el aparato suelte el interruptor de
CONEXIÒN / DESCONEXIÒN
4
.
Q
Selección de velocidad
El interruptor de CONEXIÒN / DESCONEXIÒN 4
dispone de un regulador variable de velocidad.
j Pulsando el interruptor de CONEXIÒN / DE-
SCONEXIÒN
4
aumentan las revoluciones.
Advertencia: El freno de motor integrado facilita
la parada rápida – ideal p. ej. para atornilladuras
en serie.
Q
Cambio de la dirección de giro
j Cambie la dirección de giro, presionando el
interruptor de cambio de dirección
3
hacia
la derecha o la izquierda.
Q
Consejos y trucos
Al atornillar sobre madera, metal y
otros materiales debe considerar:
j Comprobar antes del uso si la broca de atorni-
llar o de taladrar está correctamente montada,
es decir, centrada en el cabezal porta-brocas.
j Las puntas para tornillos están identificadas con
sus medidas y forma. Si usted no está seguro,
pruebe siempre primero si la punta encaja sin
holgura en el cabezal del tornillo.
Par de giro:
j Se pueden dañar especialmente los tornillos y
puntas pequeños, si utiliza la máquina con un
par de giro demasiado alto o / y a demasiadas
revoluciones.
Atornillado duro:
j Seleccione un par de giro alto, p. ej. para ator-
nillar en metal y utilice acoplamientos de llave
de vaso. Seleccione un nivel de revoluciones
bajo.
Atornillado suave:
j Atornille también aquí con pocas revoluciones,
para que no se dañe por ejemplo la superficie
de madera por el contacto con el cabezal metálico del tornillo. Utilice un avellanador.
Al atornillar sobre madera, metal y
otros materiales debe considerar:
j Con brocas de diámetro pequeño utilice un nivel
alto de revoluciones y con brocas de diámetro
grande un nivel de revoluciones pequeño.
j Si trabaja con materiales duros seleccione un
nivel bajo de revoluciones, con materiales
suaves un nivel de revoluciones alto.
j Asegure o sujete (si es posible) la pieza en un
dispositivo de sujeción.
E3335_Akkubohr-Schrauber_Content_X14.4V_LB5.indd 12 22.04.2008 16:22:57 Uhr
Page 13
13 ES
Puesta en... / Mantenimiento y limpieza / Eliminación de residuos / Informaciones
j Marque el lugar sobre el que quiere taladrar
con un punzón o un clavo y y seleccione para la
perforación inicial un nivel bajo de revoluciones.
j Retire la broca en rotación repetidas veces
del agujero, para extraer la viruta o el serrín
y ventilarla.
Taladrar en metal:
j Utilice brocas para metal (HSS). Para conseguir
mejores resultados deberá refrigerar la broca
con aceite. Puede utilizar brocas para metal
también para taladrar en plástico.
Taladrar en madera:
j Utilice una broca para madera con punta de
centrar. Para perforaciones profundas utilice una
“broca serpiente” y para perforaciones con un
diámetro grande una broca tipo Forstner. También puede atornillar sobre madera blanda
directamente, sin hacer una perforación previa.
Q
Mantenimiento y limpieza
m ¡PRECAUCIÓN! Lleve el conmutador de
sentido de giro
3
a la posición media antes de
realizar todo tipo de trabajos en el aparato, por
ejemplo, cambio de herramienta o mantenimiento,
así como para el transporte o cuando vaya a guardar el aparato. Si el interruptor de CONEXIÒN /
DESCONEXIÒN
4
se acciona accidentalmente
existe riesgo de lesiones.
Antes de realizar cualquier trabajo de limpieza o
mantenimiento desenchufe la fuente de alimentación
10
de la toma de corriente y retire la batería.
El taladro con batería no necesita mantenimiento.
j El aparato debe mantenerse siempre limpio,
seco y libre de aceite o grasas lubricantes.
j Limpie el aparato inmediatamente después de
finalizar el trabajo.
j No deben entrar líquidos al interior del
dispositivo.
j Utilice un paño para limpiar la carcasa del
aparato. Nunca utilice bencina, disolventes o
detergentes que puedan dañar el plástico.
Q
Eliminación de residuos
El embalaje está compuesto tan sólo de
material ecológico. Deséchelo en los
contenedores de reciclaje locales.
¡No tire las herramientas eléc-
tricas con la basura doméstica!
Según la Directiva europea 2002 / 96 / CE sobre
residuos de aparatos eléctricos y electrónicos y en
cumplimiento con el derecho nacional, las herramientas eléctricas usadas se tienen que separar y
reciclar sin dañar el medioambiente.
¡No tire las baterías a la
basura doméstica!
Las baterías defectuosas o agotadas deben reciclarse según la directiva 91 / 157 / CEE.
Deseche la batería y / o el aparato a través de los
puntos de recogida disponibles.
Para deshacerse del aparato una vez que ya no sirva
pregunte a las autoridades locales o municipales.
Q
Informaciones
Q
Asistencia técnica
El centro de asistencia técnica de su país lo puede
extraer de la documentación de la garantía.
¡ADVERTENCIA!
Deje que el servicio
de mantenimiento o un técnico electri-
cista reparen sus aparatos y sólo con
repuestos originales. De este modo se
garantiza que el aparato seguirá siendo
seguro.
¡ADVERTENCIA!
Si es necesario
cambiar el enchufe o el cable de ali-
mentación, encargue este trabajo al
fabricante del aparato o a su servicio
de atención al cliente. De este modo se
garantiza que el aparato seguirá siendo
seguro.
E3335_Akkubohr-Schrauber_Content_X14.4V_LB5.indd 13 22.04.2008 16:22:57 Uhr
Page 14

14 ES
Informaciones
Q
Declaración de conformidad /
fabricante
Nosotros, Kompernaß GmbH, Burgstr. 21, 44867
Bochum, Alemania, exponemos aquí en relación a
este producto, la conformidad con las siguientes
directrices de la CE:
Normativa para maquinaria
(98 / 37 / EG)
Directiva para baja tensión CE
(2006 / 95 / EG)
Compatibilidad electromagnética
(2004 / 108 / EG)
Tipo / denominación del aparato:
Taladro atornillador a batería X14.4 - LI
Bochum, 30.04.2008
Hans Kompernaß
- Gerente -
Se reserva el derecho a hacer modificaciones técnicas para
el desarrollo ulterior.
E3335_Akkubohr-Schrauber_Content_X14.4V_LB5.indd 14 22.04.2008 16:22:59 Uhr
Page 15

15 IT/MT
Contenuto
Introduzione
Uso conforme ................................................................................................................... Pagina 16
Dotazione ......................................................................................................................... Pagina 16
Volume della fornitura ..................................................................................................... Pagina 17
Dati tecnici ........................................................................................................................ Pagina 17
Istruzioni di sicurezza generali per utensili elettrici
1. Sicurezza dell’area di lavoro ..................................................................................... Pagina 18
2. Sicurezza elettrica ....................................................................................................... Pagina 18
3. Sicurezza delle persone ............................................................................................. Pagina 18
4. Utilizzo attento di dispositivi elettrici .......................................................................... Pagina 19
5. Utilizzo attento degli accumulatori ............................................................................. Pagina 19
Attenzione linee! ............................................................................................................. Pagina 20
Accessori originali / apparecchi aggiuntivi .................................................................... Pagina 20
Indicazioni di sicurezza per trapani
avvitatori ad accumulatore ......................................................................... Pagina 20
Prima della messa in funzione
Estrarre / caricare / inserire l‘accumulatore .................................................................... Pagina 21
Sostituzione degli utensili ................................................................................................ Pagina 21
Funzionamento a 2 marce .............................................................................................. Pagina 21
Preselezione del momento torcente ................................................................................ Pagina 22
Messa in funzione
Accensione / spegnimento .............................................................................................. Pagina 22
Impostazione della velocità ............................................................................................ Pagina 22
Commutazione della direzione di rotazione.................................................................. Pagina 22
Consigli e suggerimenti ................................................................................................... Pagina 22
Manutenzione e pulizia ................................................................................... Pagina 23
Smaltimento ................................................................................................................ Pagina 23
Informazioni
Assistenza ......................................................................................................................... Pagina 24
Dichiarazione di conformità /produttore ........................................................................ Pagina 24
E3335_Akkubohr-Schrauber_Content_X14.4V_LB5.indd 15 22.04.2008 16:22:59 Uhr
Page 16

16 IT/MT
Avvitatore ad accumulatore
X14.4-LI
Q
Introduzione
Prima della prima messa in funzione,
familiarizzarsi con le funzioni dell’appa-
recchio e informarsi sull’uso corretto degli
elettroutensili. Leggere il presente manuale di istruzioni per l’uso. Conservare con cura il manuale. In
caso di cessione dell’apparecchio a terzi, consegnare anche tutta la documentazione relativa.
Q
Uso conforme
Questo apparecchio è destinato alla foratura e
avvitamento nel legno, plastica e metallo. Utilizzare
l’apparecchio solo come descritto e per i campi di
impiego indicati.
Qualunque altro impiego o modifica dell’apparecchio è da considerarsi non conforme alla destinazione e comporta gravi rischi di infortunio. Il
produttore non si assume alcuna responsabilità per
i danni derivanti da un utilizzo non conforme. Non
destinato all’uso commerciale.
Q
Dotazione
1
Interruttore di selezione della velocità
2
Display a LED dell’accumulatore
3
Selettore del senso di rotazione / Fermo
4
Interruttore ON / OFF
5
Impugnatura in materiale morbido
6
Accumulatore
7
Tasto di sblocco dell’accumulatore
8
Preselezione coppia di reazione
9
Mandrino portapunta a chiusura rapida
10
Alimentatore
Introduzione
In queste istruzioni d'uso / sull'apparecchio sono riportati i seguenti pittogrammi:
Leggere il manuale di istruzioni
per l’uso!
Mandrino portapunta,
Made In Germany
Rispettare le avvertenze e le
indicazioni per la sicurezza!
Arresto mandrino
Attenzione, rischio di scossa elettrica!
Pericolo di morte!
Livello di foratura
(preselezione momento torcente)
Pericolo di esplosione!
Indossare occhiali protettivi, protezioni per l’udito, mascherina antipolvere
e guanti protettivi.
n
0
Velocità nominale a vuoto
Tenere lontano i bambini dall’apparecchio elettrico!
V
~
Volt (tensione alternata)
Proteggere l’apparecchio elettrico
dall’umidità!
mA
A / Ah
Milliampere/Ampere/Ampere ore
Fare attenzione a che l’apparecchio,
il cavo di alimentazione e la spina
non siano danneggiati!
Corrente continua (Tipo di energia
elettrica e di tensione)
Smaltire l’imballaggio dell’apparecchio in modo ecocompatibile!
Classe di protezione II
E3335_Akkubohr-Schrauber_Content_X14.4V_LB5.indd 16 22.04.2008 16:23:00 Uhr
Page 17

17 IT/MT
Introduzione
11
LED di controllo
12
Stazione di carico
13
LED della stazione di carico
Q
Volume della fornitura
Avvitatore ad accumulatore X14.4-LI
1 Accumulatore X14.4-LI-1
1 Stazione di carico X14.4-LI-2
1 Alimentatore X14.4-LI-3
1 Manuale di istruzioni per l’uso
1 Libretto „Garanzia e assistenza“
Q
Dati tecnici
Velocità
nominale a vuoto: 1. Velocità: n
0
0 – 400min-1
Velocità
nominale a vuoto: 2. Velocità: n
0
0 – 1200min
-1
Tensione nominale: 14,4 V
Capacità di serraggio
del mandrino
portapunta: 1,0 - 10mm
Diametro max.
di serraggio:
Acciaio: 10 mm
Legno: 30 mm
Livelli di coppia
di reazione: 19 più livello di foratura
Accumulatore X14.4 LI-1:
Tipo: LITIO-IONE
Tensione nominale: 14,4 V
Capacità.: 1300 m Ah
Stazione di carico X14.4 LI-2:
Alimentatore X14.4-LI-3
Primario:
Tensione nominale: 100-240 V~50/60Hz
Potenza nominale: 0,6 A
Secondario:
Tensione nominale: 16,8 V
Potenza nominale: 0,65 A
Durata di carico: circa 3 ore
Informazioni relative al rumore / e alle
vibrazioni
I valori di misurazione sono stati rilevati in conformità
alle disposizioni della norma EN 60745.
Generalmente il valore di livello sonoro ponderato
A generato dall’apparecchio è di 70 dB (A).
Scostamento di K=3 dB.
Il valore di livello sonoro nel corso di esecuzione di
una lavorazione può superare gli 80 dB (A).
Utilizzare strumenti di
protezione dell‘udito!
I valori complessivi di vibrazione (somma vettoriale
relativa a tre direzioni) sono stati rilevati in conformità alle disposizioni della norma EN 60745:
Esecuzione di foro
in metallo: Valore di emissione di vibrazione
a
h, D
= 1,944 m / s2,
Scostamento K= 1,5 m / s
2
,
Viti: Valore di emissione di vibrazione
a
h
= 2,101 m / s2,
Scostamento K= 1,5 m / s
2
.
ATTENZIONE!
Il valore relativo al livello di
vibrazioni indicato nelle presenti istruzioni d’uso è
stato misurato in conformità alla procedura di misurazione esplicata nella norma EN 60745 e può
essere utilizzato per il confronto tra apparecchi.
Il livello di vibrazioni si modifica a seconda del tipo
di utilizzo dell’apparecchio elettrico, ed in alcuni
casi può essere superiore al valore indicato nelle
presenti istruzioni d’uso. Il carico di vibrazione
potrebbe essere sottostimato qualora l’apparecchio
elettrico fosse regolarmente utilizzato in tale modo.
Nota: Per una corretta valutazione dell’affaticamento
da vibrazioni durante un determinato periodo di
lavorazione devono essere considerati anche i tempi
in cui l’apparecchio è disinserito o è funzionante,
senza però essere utilizzato. Ciò può ridurre in
E3335_Akkubohr-Schrauber_Content_X14.4V_LB5.indd 17 22.04.2008 16:23:01 Uhr
Page 18

18 IT/MT
Introduzione / Istruzioni di sicurezza generali per utensili elettrici
misura notevole l’affaticamento da vibrazioni lungo
il periodo di lavorazione complessivo.
Istruzioni di sicurezza
generali per utensili elettrici
ATTENZIONE!
Leggere tutte le indi-
cazioni e gli avvisi di sicurezza!
Eventuali mancanze nell’osservanza delle indicazioni
e degli avvisi di sicurezza possono provocare una
scossa elettrica, un incendio e / o gravi lesioni.
CONSERVARE TUTTE LE INDICAZIONI E GLI AVVISI
DI SICUREZZA PER EVENTUALI NECESSITA’ FUTURE!
1. Sicurezza dell’area di lavoro
a) Mantenere l’area di lavoro pulita e
ben illuminata. Il disordine ed aree di lavoro
poco illuminate possono determinare incidenti.
b)
Non lavorare con l’apparec-
chio in un’atmosfera dove si
trovino liquidi infiammabili,
esplosiva, gas e polveri. Gli utensili elettrici
generano scintille che possono infiammare la
polvere o i gas.
c)
Durante l’utilizzo del disposi-
tivo elettrico tenere lontani
bambini e persone estranee.
In caso di distrazione potreste perdere il con-
trollo dell’apparecchio.
2. Sicurezza elettrica
Evitare il pericolo di morte
a seguito di scossa elettrica:
a) La spina di connessione dell’apparec-
chio deve essere adatta alla presa elettrica nella quale essa viene inserita.
In nessun caso l’adattatore deve
essere modificato. Non utilizzare
spine con apparecchi messi a terra.
Spine non modificate e prese adatte riducono
il rischio di una scossa elettrica.
b)
Evitare il contatto del corpo con superfici
messe a terra, quali ad esempio quelle
di tubi, caloriferi, cucine economiche
e frigoriferi. Sussiste un elevato rischio di
scossa elettrica, qualora il Vostro corpo fosse
messo a terra.
c)
Mantenere l’apparecchio
lontano da pioggia o umidità.
La penetrazione di acqua in un
apparecchio elettrico accresce il rischio di
scossa elettrica.
d)
Non utilizzare il cavo in modo
non conforme, cioè per tirare
l’apparecchio, per appenderlo
o per estrarre la spina dalla presa elet-
trica. Tenere il cavo lontano da calore,
olio, spigoli acuti o di parti in movimento
dell’apparecchio. Cavi danneggiati o attor-
cigliati accrescono il rischio di scossa elettrica.
e) In caso di lavori all’aperto utilizzare
solamente prolunghe ammesse anche
per un loro utilizzo all‘aperto. L’utilizzo
di una tale prolunga riduce il rischio di scossa
elettrica.
f) Qualora non si possa evitare l‘eserci-
zio dell’elettroutensile in un ambiente
umido, fare uso di un interruttore
differenziale, circostanza che riduce il
rischio di una scossa elettrica.
3. Sicurezza delle persone
a) Fare sempre estrema attenzione a
ciò che si fa e accostarsi al lavoro con
il dispositivo elettrico sempre in modo
cosciente. Non utilizzare l’apparecchio quando si è stanchi o sotto l’influsso di droghe, alcol o medicinali.
Un solo attimo di disattenzione nell’utilizzo
dell’apparecchio può provocare serie lesioni.
b)
Indossare sempre l’equipag-
giamento di protezione personale e gli occhiali protettivi.
Indossando l’equipaggiamento di protezione
personale, quale una mascherina antipolvere,
E3335_Akkubohr-Schrauber_Content_X14.4V_LB5.indd 18 22.04.2008 16:23:02 Uhr
Page 19

19 IT/MT
Istruzioni di sicurezza generali per utensili elettrici
scarpe di sicurezza antisdrucciolevoli, un casco di protezione o una protezione auricolare,
a seconda del tipo e dell’utilizzo dell’apparecchiatura elettrica, riduce il rischio di lesioni.
c) Evitare qualsiasi avvio involontario
dell’utensile. Assicurarsi che l’utensile
sia disinserito prima di collegarlo
alla rete di alimentazione elettrica,
di sollevarlo o di trasportarlo. Se
durante il trasporto dell’apparecchio il dito
dell’utilizzatore si trova sull’interruttore
ON / OFF oppure l’apparecchio è inserito,
possono determinarsi incidenti.
d) Prima di avviare l’apparecchio,
rimuovere il dispositivo di regolazione
o la chiave per dadi. Un utensile o una
chiave che si trovi in una parte di apparecchio
in rotazione può provocare lesioni.
e) Mantenere una postura del corpo
normale. Assicurarsi di avere un sostegno
sicuro e mantenere sempre l’equilibrio. In questo
modo è possibile controllare meglio l’apparecchio, in modo particolare in caso di situazioni
impreviste.
f) Indossare un abbigliamento appro-
priato. Non indossare un abbigliamento largo o bigiotteria. Mantenere
capelli, abbigliamento e guanti lontano da parti in movimento. Abbiglia-
mento sciolto, gioielli o capelli lunghi possono
essere trascinati da parti in movimento.
g) Quando vengono montati dispositivi
di aspirazione e di cattura della polvere, assicurarsi che questi siano stati
montati ed utilizzati correttamente.
L’utilizzo di questi dispositivi riduce i pericoli
provocati dalla polvere.
4. Utilizzo attento
di dispositivi elettrici
a) Non sovraccaricare l’apparecchio. Per
un determinato lavoro utilizzare sempre il dispositivo elettrico a ciò appropriato. Con il dispositivo elettrico appropriato
si lavora meglio e con maggiore sicurezza nello
specifico ambito di utilizzo.
b) Non utilizzare dispositivi elettrici il cui
interruttore sia difettoso. Un dispositivo
elettrico che non si può più accendere e spegnere
rappresenta un pericolo, e deve essere riparato.
c) Estrarre la spina dalla presa elettrica
prima di eseguire regolazioni all‘apparecchio, di sostituire di accessori o di
riporre l’apparecchio. Queste misure di
prudenza impediscono l’avvio involontario
dell’apparecchio.
d) Mantenere dispositivi elettrici non uti-
lizzati fuori dalla portata di bambini.
Non fare utilizzare l’apparecchio da
persone che non lo conoscano o del
quale non abbiano letto le istruzioni
d’uso. I dispositivi elettrici sono pericolosi se
utilizzati da persone inesperte.
e) Avere cura dell’apparecchio. Control-
lare se parti mobili dell’apparecchio
funzionano perfettamente e non si
bloccano, se parti di esso sono rotte o
danneggiate, che la funzionalità
dell’apparecchio non sia messa a
rischio. Fare riparare le parti danneggiate prima di utilizzare di nuovo l’apparecchio. Molti incidenti sono provocati
dal fatto che i dispositivi elettrici non vengono
sottoposti ad una corretta manutenzione.
f) Mantenere gli utensili di taglio affilati
e puliti. Utensili di taglio curati con attenzione
e fornitidi bordi taglienti si incastrano meno frequentemente e sono semplici da guidare durante
il lavoro.
g) Utilizzare dispositivi elettrici, acces-
sori, i dispositivi da inserire ecc, in
conformità alle presenti istruzioni e
nel modo descritto per questo particolare tipologia di apparecchio. In
questo senso, tenere presente le
condizioni di lavoro e l’attività da
eseguire. L’utilizzo di dispositivi elettrici per
scopi diversi da quelli previsti può provocare
situazioni di pericolo.
E3335_Akkubohr-Schrauber_Content_X14.4V_LB5.indd 19 22.04.2008 16:23:02 Uhr
Page 20

20 IT/MT
Istruzioni di... / Indicazioni di sicurezza per trapani avvitatori ad accumulatore
5. Utilizzo attento degli
accumulatori
a) Collegare gli accumulatori solo in cari-
catori suggeriti dal produttore. Un cari-
catore adatto ad un particolare tipo di accumulatore può provocare un incendio se utilizzato
con altri accumulatori.
b) Utilizzare nell’apparecchio elettrico
solamente accumulatori previsti per
tale tipologia di apparecchi. L’utilizzo di
altri accumulatori può provocare lesioni e
determinare un pericolo di incendio.
c) Mantenere l’accumulatore non utiliz-
zato lontano da graffette per ufficio,
monete, chiavi, chiodi, viti o altri piccoli
oggetti metallici, i quali potrebbero
provocare un cavallottamento dei
contatti. Un cortocircuito tra i contatti dell’ac-
cumulatore può avere come conseguenza
bruciature o incendi.
d)
ATTENZIONE!
Del liquido può fuoriuscire dall’accumulatore in caso di
suo errato utilizzo. Evitare qualsiasi
contatto con tale liquido. In caso di
contatto accidentale risciacquare con
acqua. Se il liquido viene a contatto
con gli occhi, chiedere l’intervento di
un medico. Il liquido fuoriuscito dall’accumu-
latore può provocare irritazioni alla pelle o
bruciature.
Q
Attenzione linee!
ATTENZIONE!
Accertarsi di non
intercettare linee di corrente, condutture
di gas o acqua, mentre si lavora con un
elettroutensile. Controllare eventualmente con
un rilevatore di linee, prima di perforare o fendere
una parete.
Q
Accessori originali /
apparecchi aggiuntivi
J Utilizzare solo accessori e apparecchi
aggiuntivi indicati nel manuale di
istruzioni. L’uso di apparecchi diversi da
quelli consigliati o da altri accessori indicati nel
manuale di istruzioni può comportare il pericolo di lesioni.
Indicazioni di sicurezza
per trapani avvitatori
ad accumulatore
J Bloccare il pezzo da lavorare. Un pez-
zo bloccato con un dispositivo di bloccaggio o
da una morsa a vite viene trattenuto con
maggiore sicurezza che non nella mano
dell’utilizzatore.
ATTENZIONE!
POLVERI VELENOSE!
J Le polveri dannose / velenose generate durante
la lavorazione rappresentano un pericolo per
la salute dell’operatore e delle persone che si
trovano nelle vicinanze.
J
Indossare occhiali protettivi e una
mascherina antipolvere!
J Non lavorare materiale contenente
asbesto. L’asbesto è ritenuto un materiale
cancerogeno.
J Mantenere ben fermo l’apparecchio
elettrico. Stringendo o allentando viti si pos-
sono generare improvvise ed elevate coppie di
reazione.
J Disinserire immediatamente l’utensile
elettrico quando l’utensile utilizzato si
blocca. L’utilizzatore deve essere pronto per
elevate coppie di reazione che provocano un
contraccolpo. L’utensile utilizzato si blocca
quando l’utensile elettrico viene sovraccaricato
o si ribalta nel pezzo da lavorare.
ATTENZIONE!
Qualora si eseguissero
lavori nel corso dei quali l’utensile uti-
lizzato potrebbe incontrare cavi in
tensione nascosti, afferrare l’apparecchio elettrico solamente per le superfici
di presa isolate. Il contatto con un cavo in
E3335_Akkubohr-Schrauber_Content_X14.4V_LB5.indd 20 22.04.2008 16:23:03 Uhr
Page 21

21 IT/MT
Indicazioni di sicurezza per trapani avvitatori... / Prima della messa in funzione
tensione mette in tensione anche gli elementi
metallici dell’apparecchio elettrico e determina
una scossa elettrica.
J In caso di interventi sull’apparecchio
o di sua movimentazione o immagazzinaggio è necessario portare il selettore di senso di rotazione in posizione
centrale (di fermo). In questo modo si evita
qualsiasi avvio involontario dell‘apparecchio.
Q
Prima della messa in funzione
Q
Estrarre / caricare / inserire
l‘accumulatore
ATTENZIONE!
Separare sempre l’alimenta-
tore
10
dall’elettricità prima di estrarre l’accumula-
tore dalla stazione di carico o inserirlo in esso
12
.
Nota: L’accumulatore viene fornito in uno stato di
parziale caricamento. Prima di utilizzarlo per la
prima volta, caricare l’accumulatore per almeno 3
ore nel caricatore. In questo modo viene garantita
la piena potenza dell’accumulatore. E’ possibile
caricare l’accumulatore litio-ione in qualsiasi momento, senza per questo abbreviarne la vita operativa.
Un’eventuale interruzione della procedura di
caricamento non danneggia l’accumulatore.
1. Per estrarre l’accumulatore
6 premere il tasto
di sblocco
7
ed estrarre lo stesso accumulato-
re
6 in avanti fuori dell’apparecchio.
2. Spingere l’accumulatore
6 dalla posizione
avanzata nella stazione di carico
12
.
3. Inserire l’alimentatore
10
nella presa. Il LED di
controllo
11
si accende.
4. Collegare l’alimentatore
10
con la stazione di
carico
12
. Il LED della stazione di carico 13
posto sulla medesima stazione di carico
12
si
accende assumendo un colore rosso.
5. Il LED della stazione di carico
13
segnala che
la procedura di carico è terminata e l’accumulatore
6 è pronto per essere utilizzato.
6. Per estrarre l’accumulatore
6 premere il tasto
di sblocco
7
ed estrarre lo stesso accumulato-
re
6 in avanti fuori della stazione di carico.
7. Per inserire l’accumulatore
6 nell’apparecchio
spingere lo stesso accumulatore
6 da una po-
sizione avanzata nell’apparecchio.
Q
Sostituzione degli utensili
Il trapano avvitatore con accumulatore è provvisto
di arresto del mandrino completamente automatizzato
e di un mandrino a manicotto singolo
„Made in Germany“ di
.
Con motore fermo, la trasmissione viene bloccata,
per consentire di aprire il mandrino a serraggio
rapido
9
tramite rotazione .
Dopo aver inserito l’utensile desiderato e averlo fissato tramite rotazione del mandrino
, si può continuare immediatamente con il lavoro. L’ arresto del
mandrino si disattiva automaticamente con l’avvio
del motore (azionamento dell’interruttore
ON / OFF
4
).
Q
Funzionamento a 2 marce
Nota: Operare l’interruttore di selezione della
velocità
1
solo ad apparecchio disinserito. In
caso contrario l’apparecchio potrebbe subire dei
danni.
Nella prima marcia (selettore di marcia
1
in posizione: 1)
si ottiene un numero di giri di ca. 400 min
-1
e un
elevato momento torcente. Questa impostazione è
idonea per tutti i lavori di avvitamento, ma anche
per l’impiego di accessori.
Nella seconda marcia (selettore di marcia
1
in posizione: 2)
si ottiene un numero di giri di ca. 1200 min
-1
per
l’esecuzione di lavori di perforazione.
E3335_Akkubohr-Schrauber_Content_X14.4V_LB5.indd 21 22.04.2008 16:23:04 Uhr
Page 22

22 IT/MT
Prima della messa in funzione / Messa in funzione
Q
Preselezione del
momento torcente
Tramite la preselezione del momento torcente 8 si
può regolare la forza di torsione.
Una volta raggiunta la forza di torsione impostata,
l’innesto stacca la trasmissione. In tal modo si possono avvitare le viti alla profondità preimpostata,
opzione ideale ad es. per l’avvitamento in serie.
j Selezionare un livello basso per viti piccole,
materiali morbidi.
j Selezionare un livello alto per viti grandi, mate-
riali duri, o nell’estrazione di viti.
j Per i lavori di perforazione, selezionare il livello
di perforazione, impostando la preselezione
del momento torcente in posizione
.
j Per i lavori di perforazione, spingere anche l’in-
terruttore per la selezione di marcia
1
in
avanti (posizione: 2).
Q
Messa in funzione
Q
Accensione / spegnimento
m ATTENZIONE! Porre l’apparecchio sulle vita
solamente quando è disinserito. Gli utensili rotanti
potrebbero provocare uno scivolamento, provocando
lesioni e danneggiamenti al pezzo da lavorare.
Accensione:
j Per mettere in funzione l’apparecchio, premere
l’ interruttore ON / OFF
4
e tenerlo premuto.
Spegnimento:
j Per spegnere l’apparecchio, rilasciare l’interrut-
tore ON / OFF
4
.
Q
Impostazione della velocità
L’interruttore ON / OFF 4 è provvisto di una regolazione variabile della velocità.
j Premendo l’interruttore ON / OFF
4
si aumenta
il numero di giri.
Nota: Il freno motore integrato fornisce un arresto
rapido, ideale ad es. per l’avvitamento in serie.
Q
Commutazione della
direzione di rotazione
j Per commutare la direzione di rotazione, premere
il commutatore di direzione di rotazione
3
a
destra o a sinistra.
Q
Consigli e suggerimenti
Nell’avvitare in materiali come legno,
metallo e altro, tenere assolutamente
presente quanto segue:
j Prima della messa in funzione, controllare che
l’accessorio per l’avvitamento o la perforazione
sia stato inserito correttamente, cioè centrato
nel mandrino.
j I bit per l’avvitamento sono contrassegnati con
dimensioni e forma. In caso di dubbio, controllare prima che il bit entri nella testa della vite
senza gioco.
Momento torcente:
j Viti speciali più piccole e bit possono danneg-
giarsi se si regola un momento torcente e / o
un numero di giri troppo elevato sull’apparecchio.
Avvitamento duro:
j Momenti torcenti particolarmente elevati si for-
mano ad es. in caso di avvitamento di metalli
con l’uso di inserti con chiave a bussola. Selezionare un numero di giri inferiore.
Avvitamento morbido:
j Avvitare anche qui con un numero di giri inferio-
re, per ad es. non danneggiare la superficie di legno al contatto con la testa della vite in metallo.
Utilizzare un allargatore.
E3335_Akkubohr-Schrauber_Content_X14.4V_LB5.indd 22 22.04.2008 16:23:05 Uhr
Page 23

23 IT/MT
Messa in funzione / Manutenzione e pulizia / Smaltimento
Nella perforazione di materiali come legno, metallo e altro, tenere assolutamente
presente quanto segue:
j In caso di diametro di perforazione ridotto,
utilizzare un alto numero di giri, e in caso di
diametro di perforazione più ampio un numero
di giri inferiore.
j Per i materiali duri scegliere un numero di giri bas-
so, per i materiali morbidi un numero di giri alto.
j Fissare o assicurare (se possibile) il pezzo da
lavorare con un dispositivo apposito.
j Marcare il punto da perforare con un punzone
o un chiodo e per perforare scegliere un numero
di giri basso.
j Estrarre più volte la punta del trapano dal foro,
per rimuovere i trucioli o la segatura e per farla
aerare.
Perforazione del metallo:
j Utilizzare punte in metallo (HSS). Per ottenere
i risultati migliori, raffreddare la punta con olio.
La punta in metallo può essere anche utilizzata
per perforare la plastica.
Perforazione del legno:
j Utilizzare una punta in legno con punta centrata,
per perforazioni profonde utilizzare una „punta
a elica”, per diametri di foratura maggiori una
punta Forstner. Le viti piccole nel legno morbido
possono essere inserite anche senza precedente
foratura.
Q
Manutenzione e pulizia
m ATTENZIONE! Prima di ogni intervento
sull’apparecchio, ad esempio di cambio utensile o
di manutenzione, nonché in caso di sua movimentazione o immagazzinaggio, portare il selettore di
senso di rotazione
3
in posizione centrale. in caso
di azionamento involontario dell’interruttore di
ON / OFF
4
sussiste il pericolo di lesioni.
Prima di eseguire ogni intervento di riparazione e
di manutenzione, estrarre l‘alimentatore
10
dalla
presa ed estrarre l‘accumulatore.
Il trapano avvitatore con accumulatore non necessita di manutenzione.
j L’apparecchio deve essere sempre pulito, asciutto
e privo di olio o grasso.
j Pulire l’apparecchio subito dopo avere terminato
il lavoro.
j Nessun liquido deve penetrare nell’interno
dell‘apparecchio.
j Per la pulizia dell’alloggiamento utilizzare un
panno; non utilizzare mai benzina, solventi o
detersivi aggressivi per la plastica.
Q
Smaltimento
L’imballaggio consiste esclusivamente di
materiali ecocompatibili. Smaltirli negli
appositi contenitori di riciclaggio locali.
Non gettare mai gli elettrouten-
sili insieme ai normali rifiuti
domestici!
In conformità alla direttiva europea 2002 / 96 / EG
sui rifiuti di apparecchiature elettriche ed elettroniche
e relativa trasposizione nel diritto nazionale, gli
utensili elettrici usati devono essere raccolti separatamente e riciclati in maniera compatibile con
l’ambiente.
Non gettare le batterie nella
spazzatura domestica!
Gli accumulatori difettosi o esausti devono essere
riciclati in base alla direttiva 91 / 157 / CEE.
Riconsegnare gli accumulatori e / o i caricabatteria
presso gli appositi centri di raccolta.
E’ possibile conoscere le possibilità di smaltimento
dell’apparecchio usato presso l’amministrazione
comunale o cittadina locale.
E3335_Akkubohr-Schrauber_Content_X14.4V_LB5.indd 23 22.04.2008 16:23:05 Uhr
Page 24

24 IT/MT
Informazioni
Q
Informazioni
Q
Assistenza
Il centro di assistenza competente è indicato sulla
documentazione di garanzia.
ATTENZIONE!
Fare riparare l’appa-
recchio dal Centro di Assistenza o da
un elettricista specializzato e solo con
pezzi di ricambio originali. In questo
modo viene garantita la sicurezza dell’apparecchio.
ATTENZIONE!
Fare eseguire una
sostituzione della spina o del cavo di
alimentazione solamente dal produttore dell’apparecchio o dal suo Centro di Assistenza. In questo modo viene
garantita la sicurezza dell’apparecchio.
Q
Dichiarazione di conformità /
produttore
Noi sottoscritti, Kompernaß GmbH, Burgstr. 21,
44867 Bochum, Germania, dichiariamo qui di
seguito che il presente prodotto è conforme alle
seguenti direttive CE:
Direttiva macchine (98 / 37 / EG)
Direttiva CE Bassa tensione
(2006 / 95 / EG)
Compatibilità elettromagnetica
(2004 / 108 / EG)
Tipo / contrassegno apparecchio:
Avvitatore ad accumulatore X14.4-LI
Bochum, 30.04.2008
Hans Kompernaß
- Direttore -
Con riserva di modifiche tecniche volte al miglioramento del prodotto.
E3335_Akkubohr-Schrauber_Content_X14.4V_LB5.indd 24 22.04.2008 16:23:06 Uhr
Page 25

25 GB/MT
Table of content
Introduction
Intended purpose ............................................................................................................. Page 26
Equipment Components ................................................................................................. Page 26
Items supplied .................................................................................................................. Page 27
Technical Data ................................................................................................................. Page 27
General safety advice for electrical power tools
1. Workplace safety ........................................................................................................ Page 27
2.
Electrical safety ........................................................................................................... Page 28
3. Personal safety............................................................................................................. Page 28
4.
Careful handling and use of electrical power tools .................................................. Page 29
5. Careful handling and use of rechargeable devices .................................................. Page 29
Attention - Service lines! ................................................................................................. Page 30
Original ancillaries / accessories .................................................................................... Page 30
Safety advice relating to cordless drill drivers ........................ Page 30
Before first use
Removing / charging / inserting rechargeable battery pack ......................................... Page 30
Changing tools ................................................................................................................. Page 31
2 Gear Drive .................................................................................................................... Page 31
Torque pre-selection ......................................................................................................... Page 31
Preparing the tool for use
Switching ON /OFF ....................................................................................................... Page 31
Adjusting the speed ......................................................................................................... Page 31
Switching direction of rotation ........................................................................................ Page 32
Tips and Tricks .................................................................................................................. Page 32
Cleaning and Maintenance .......................................................................... Page 32
Disposal ........................................................................................................................... Page 33
Information
Service .............................................................................................................................. Page 33
Conformity Declaration /Manufacturer
.............................................................................. Page 33
E3335_Akkubohr-Schrauber_Content_X14.4V_LB5.indd 25 22.04.2008 16:23:07 Uhr
Page 26

26 GB/MT
Introduction
Cordless drill driver X14.4 - LI
Q
Introduction
Before you use it for the first time, it is es-
sential that you make yourself fully familiar
with the functions of the appliance and
find out how to correctly handle electrically powered
tools. To do this, read the following operating instructions carefully. Retain these instructions for future
reference. Additionally, pass them on to whoever
might acquire the appliance at a future date.
Q
Intended purpose
This appliance is designed for drilling and screwing
into wood, plastic and metal. Use the appliance only
as described and only for the purposes indicated.
Any other uses, and modifications to the appliance,
are deemed to be improper usage and may result
in serious physical injury. The manufacturer accepts
no responsibility for damage(s) resulting from
improper usage. The appliance is not intended for
commercial use.
Q
Equipment Components
1
Gear selector switch
2
Battery display LED
3
Direction of rotation switch/lock
4
ON/OFF switch
5
Soft-grip
6
Battery pack
7
Battery unlocking button
8
Torque preselection
9
Quick-release chuck
10
Mains adapter
11
Mains adapter LED
12
Charging station
13
Charging indicator LED
The following icons / symbols are used in this instruction manual:
Read instruction manual! Drill chuck, Made In Germany
Observe caution and safety notes! Spindle lock
Caution – electric shock!
Danger to life!
Drill setting (torque preselect)
Explosive material!
Wear hearing protection, dust
protection mask, protective glasses
and protective gloves.
n
0
No-load speed
Keep children away from electrical
power tools!
V
~
Voltage
Protect electrical power tools from
moisture!
mA
A / Ah
Milliamps / Amps / Amp-hours
Check that the device, mains lead
and plug are in good condition!
DC (current and voltage type)
Dispose packaging and appliance in
an environmentally-friendly way!
Safety class II
E3335_Akkubohr-Schrauber_Content_X14.4V_LB5.indd 26 22.04.2008 16:23:08 Uhr
Page 27

27 GB/MT
Introduction / General safety advice for electrical power tools
Q
Items supplied
1 Cordless drill driver X14.4 - LI
1 Rechargeable battery pack X14.4 - LI - 1
1 Charging station X14.4 - LI - 2
1 Mains adapter X14.4 - LI - 3
1 Operating manual
1 Booklet “Warranty and Service”
Q
Technical Data
No-load speed: 1st gear: n0 0 – 400 min-1
No-load speed: 2nd gear: n
0
0 – 1200 min
-1
Nom. voltage: 14 V
Chuck capacity: 1.0 – 10 mm
Maximum drill size:
Steel: 10 mm
Wood: 30 mm
Torque settings: 19 plus drill setting
X14.4-LI-1 rechargeable battery pack:
Type: LITHIUM-ION
Nom. voltage: 14 V
Capacity: 1300 mAh
X14.4-LI-2 charging station:
X14.4-LI-3 mains adapter:
Primary:
Nom. voltage: 100 - 240 V ~ 50 / 60 Hz
Rated current: 0.6 A
Secondary:
Nom. voltage: 16.8 V
Rated current: 0.65 A
Charging period: Approx. 3 hrs.
Noise / vibration data:
Values determined in accordance with EN 60745
The sound pressure level (A-weighted) of the device
is typically 70 dB (A). Uncertainty K=3 dB.
The sound level while working can exceed 80 dB (A).
Wear ear protection!
Total vibration (vector sum of three directions) is
calculated in accordance with EN 60745:
Drilling in metal: Vibration emission value
a
h, D
= 1.944 m / s2,
uncertainty K= 1.5 m / s
2
,
Screwing: Vibration emission value
a
h
= 2.101 m / s2,
uncertainty K= 1.5 m / s
2
.
WARNING!
The vibration level given in these
instructions has been measured in accordance with
a standardised measurement procedure specified
in EN 60745 and can be used to compare devices.
Different uses of the device give rise to different
vibration levels and in many cases they may exceed
the values given in these instructions. It is easy to
underestimate the vibration load if the electrical
power tool is used regularly in particular circumstances.
Note: If you wish to make an accurate assessment
of the vibration loads experienced during a particular
period of working, you should also take into account
the intervening periods of time when the device is
switched off or is running but is not actually in use.
This can result in a much lower vibration load over
the whole of the period of working.
General safety advice
for electrical power tools
WARNING!
Read all the safety advice
and instructions! Failure to observe the safety
advice and instructions may result in electric shock,
fire and / or serious injury.
KEEP ALL THE SAFETY ADVICE AND INSTRUCTIONS
IN A SAFE PLACE FOR FUTURE REFERENCE!
1. Workplace safety
a) Keep your working area clean and
well lit. Untidy or poorly lit working areas
can lead to accidents.
E3335_Akkubohr-Schrauber_Content_X14.4V_LB5.indd 27 22.04.2008 16:23:09 Uhr
Page 28

28 GB/MT
General safety advice for electrical power tools
b) Do not work with the device
in potentially explosive environments in which there
are inflammable liquids, gases or
dusts. Electrical power tools create sparks,
which can ignite dusts or fumes.
c)
Keep children and other
people away while you are
operating the electrical tool.
Distractions can cause you to lose control of
the device.
2. Electrical safety
To avoid danger to life from
electric shock:
a)
The mains plug on the device must match
the mains socket. The plug must not
be modified in any way. Do not use
an adapter plug with devices fitted
with a protective earth. Unmodified
plugs and matching sockets reduce the risk of
electric shock.
b) Avoid touching earthed surfaces such
as pipes, radiators, ovens and refrigerators with any part of your body.
There is an increased risk of electric shock if
your body is earthed
.
c) Keep the device away from
rain or moisture. Water entering
an electrical device increases the
risk of electric shock.
d)
Do not use the mains lead for
any purpose for which it was
not intended, e.g. to carry the
device, to hang up the device or to pull
the mains plug out of the mains socket.
Keep the mains lead away from heat,
oil, sharp edges or moving parts of the
device. Damaged or tangled mains leads
increase the risk of electric shock.
e) When working outdoors with an electri-
cal power tool always use extension cables that are also approved for use outdoors. The use of an extension cable suitable for
outdoor use reduces the risk of electric shock.
f) Use a residual current device (RCD)
for protection if operating the electrical
power tool in a moist environment is
unavoidable. The use of an RCD reduces
the risk of electric shock.
3. Personal safety
a) Remain alert at all times, watch what
you are doing and always proceed
with caution. Do not use the device if
you are tired or under the influence
of drugs, alcohol or medication. One
moment of carelessness when using the device
can lead to serious injury.
b)
Wear personal protective
equipment and always wear
safety glasses. The wearing of
personal protective equipment such as dust
masks, non-slip safety shoes, safety helmets or
ear protectors, appropriate to the type of electrical power tool used and work undertaken,
reduces the risk of injury.
c) Avoid unintentional operation of the
device. Check that the electrical power tool is switched off before you
connect it to the mains, pick it up or
carry it. Accidents can happen if you carry
the device with your finger on the ON / OFF
switch or with the device switched on.
d) Remove any setting tools or span-
ners before you switch the device on.
A tool or spanner left attached to a rotating
part of a device can lead to injury.
e) Avoid placing your body in an unnat-
ural position. Keep proper footing
and balance at all times. By doing this
you will be in a better position to control the
device in unforeseen circumstances.
f) Wear suitable clothing. Do not wear
loose clothing or jewellery. Keep your
hair, clothing and gloves clear of moving parts. Loose clothing, jewellery or long
hair can become trapped in moving parts.
g) If vacuum dust extraction and collec-
E3335_Akkubohr-Schrauber_Content_X14.4V_LB5.indd 28 22.04.2008 16:23:09 Uhr
Page 29

29 GB/MT
General safety advice for electrical power tools
tion devices are fitted do not forget to
check that they are properly connected
and correctly used. The use of these de-
vices reduces the hazard presented by dust.
4.Careful handling and use of
electrical power tools
a)Do not overload the device. Always
use an electrical power tool that is
intended for the task you are undertaking. By using the right electrical power
tool for the job you will work more safely and
achieve a better result.
b)Do not use an electrical power tool if
its switch is defective. An electrical power
tool that can no longer be switched on and off
is dangerous and must be repaired.
c)Pull the mains plug out of the socket
before you make any adjustments to
the device, change accessories or
when the device is put away. This pre-
caution is intended to prevent you from unintentionally starting the device.
d)When not in use always ensure that
electrical power tools are kept out of
reach of children. Do not let anyone
use the device if he or she is not familiar with it or has not read the
instructions and advice. Electrical power
tools are dangerous when they are used by
inexperienced people.
e)Look after the device carefully. Check
that moving parts are working properly and move freely. Check for any
parts that are broken or damaged
enough to detrimentally affect the
functioning of the device. Have damaged parts repaired before you use
the device. Many accidents have their ori-
gins in poorly maintained electrical power
tools.
f) Keep cutting tools clean and sharp.
Carefully maintained cutting tools with sharp
cutting edges are less likely to jam and are
easier to control.
g) Use the electrical power tool, acces-
sories, inserted tools etc. in accordance with these instructions and
advice, and the stipulations drawn
up for this particular type of device.
In doing this, take into account the
working conditions and the task in
hand. The use of electrical power tools for
purposes other than those intended can lead to
dangerous situations.
5. Careful handling and use of
rechargeable devices
a) Charge a rechargeable battery unit
using only the charger recommended
by the manufacturer. Chargers are often
designed for a particular type of rechargeable
battery unit. There is the danger of fire if other
types of rechargeable battery units are used.
b) Only the rechargeable battery units
supplied are to be used with an electrical power tool. The use of other recharge-
able battery units may lead to the danger of
injury or fire.
c) When they are not being used, store
rechargeable battery units away from
paperclips, coins, keys. nails, screws
or other small metal objects that could
cause the contacts to be bridged. Short-
circuiting the contacts of a rechargeable battery
unit may result in heat damage or fire.
d)
WARNING!
Fluids may leak out of
rechargeable battery units if they are
misused. If this happens, avoid contact
with the fluid. If contact occurs, flush
the affected area with water. Seek
additional medical help if any of the
fluid gets into your eyes. Escaping battery
fluid may cause skin irritation or burns.
E3335_Akkubohr-Schrauber_Content_X14.4V_LB5.indd 29 22.04.2008 16:23:10 Uhr
Page 30

30 GB/MT
General safety... / Safety advice relating to cordless drill drivers / Before first use
Q
Attention - Service lines!
WARNING!
Take steps to ensure that
you do not hit upon any service lines
(electricity, gas, water) when working
with electrical appliances. Check, if need be
with a service line detector, before you start to cut
or bore into a surface.
Q
Original ancillaries /
accessories
J Use only the ancillaries and accessories
that are detailed in the operating
instructions. The use of ancillaries and
accessories other than those recommended in
the operating instructions could lead to an
increased risk of personal injury for you.
Safety advice relating
to cordless drill drivers
J Securely support the workpiece. A
workpiece held in a clamp or vice is kept more
securely in place than one held by your hand.
WARNING!
POISONOUS DUSTS!
J Harmful / noxious dusts generated from your
work represent a risk to the health of the person
operating the device and to anyone near the
work area.
J
Wear safety glasses and a dust
mask!
J Do not drill any material containing
asbestos. Asbestos is a known carcinogen.
J Hold the electrical power tool firmly.
High reaction torques may occur momentarily
during tightening or loosening of screws.
J If the inserted tool jams, switch off the
electrical power tool immediately. Be
prepared for high reaction torques as they may
cause kickback. The inserted tool may jam if
the electrical power tool is overloaded or is
held at an angle to the workpiece.
WARNING!
The inserted tool may
strike concealed electricity cables,
therefore when working you must
hold the electrical power tool by the
insulated handle areas only. Contact
with a live wire means that the metal parts of
the electrical power tools may become live and
this can result in an electric shock.
J Before you carry out any tasks on the
device, transport or store it, make
sure that the direction of rotation
switch is in the middle position (lock).
To prevent the device from starting up unintentionally.
Q
Before first use
Q
Removing / charging / inserting
rechargeable battery pack
WARNING!
Always disconnect the mains
adapter
10
from the mains supply before you
remove or insert the battery pack from/into the
charging station
12
.
Note: The battery is supplied partially charged.
Charge the battery in the charging station for at
least three hours before first use. By doing this the
battery will operate at its highest capacity. You can
charge the Li-Ion battery at any time without risk of
shortening battery life. Interrupting the charging
process does not damage the battery.
1. To remove the battery pack
6
press the bat-
tery unlocking button
7
and pull the battery
pack
6
forward off the device.
2. Push the battery pack
6
from the front into the
charging station
12
.
3. Insert the mains adapter
10
into the mains
socket. The mains adapter LED
11
illuminates.
4. Connect the mains adapter
10
to the charging
station
12
. The charging indicator LED 13 on
the charging station
12
illuminates red.
5. The green charge indicator LED
13
shows that
the charging process is complete and the
battery pack
6
is ready for use.
6. To remove the battery pack
6
press the
battery unlocking button
7
and pull the
E3335_Akkubohr-Schrauber_Content_X14.4V_LB5.indd 30 22.04.2008 16:23:11 Uhr
Page 31

31 GB/MT
Before first use / Preparing the tool for use
battery pack 6 forward out of the charging
station.
7. Push the battery pack
6
from the front into the
device to insert the battery pack
6
into the
device.
Q
Changing tools
Your cordless electric drill / screwdriver has a fully
automatic spindle lock
and is fitted with an
enclosed keyless chuck incorporating the latest
technology from
”Made in Germany”.
Once the motor has come to a halt, the drive shaft
is automatically locked, so that the chuck
9
can
be opened simply by turning it
.
After you have inserted the required bit and fixed it
in place by turning the chuck
, you can immediately continue working. The spindle lock releases
itself automatically when the motor is started (by
operation of the ON / OFF switch
4
).
Q
2 Gear Drive
Note: Move the gear selector switch 1 only
after the device has come to a standstill.
Failure to observe this advice may result in damage
to the device.
In the first gear (Gear selector switch
1
in Position: 1)
A speed of up to approx. 400 rpm can be
achieved
and a high torque. This setting is intended
for use with all screwing tasks and for accessories.
In the second gear (Gear selector switch
1
in Position: 2)
It achieves a speed of up to approx. 1200 rpm, for
the carrying out of drilling tasks.
Q
Torque pre-selection
You can adjust the torque by using 8 torque preselection.
When the value of the torque setting is reached, the
clutch disengages the drive connection to the chuck.
By doing this, screws can be driven to a predetermined depth, which is ideal for repetitive work.
j Select a low setting for small screws, soft work
material.
j Select a high setting for large screws, hard
work materials and for the extraction of screws.
j For drilling, push the selector to the setting for
drilling, in that you adjust the torque pre-selector
to the position
.
j For drilling tasks, also push the gear selector
switch
1
to the front (Position: 2).
Q
Preparing the tool for use
Q
Switching ON /OFF
m CAUTION! Make sure the device not operat-
ing when it contacts the screw. A rotating inserted
tool may slip. This could result in personal injury or
damage to the workpiece.
Switching on:
j To start the appliance squeeze on the ON /
OFF switch
4
and then keep it pressed down.
Switching off:
j To stop the appliance, release the ON / OFF
switch
4
.
Q
Adjusting the speed
The ON / OFF switch 4 has a variable speed
regulator.
j By increasing the pressure on the ON / OFF
switch
4
you can increase the R.P.M.
E3335_Akkubohr-Schrauber_Content_X14.4V_LB5.indd 31 22.04.2008 16:23:12 Uhr
Page 32

32 GB/MT
Preparing the tool for use / Cleaning and Maintenance
Note: The integrated motor brake ensures the
shaft quickly stops rotating - so that you can get to
work again fast.
Q
Switching direction of rotation
j To switch the direction of rotation, push the
direction of rotation switch
3
to either the
right or to the left.
Q
Tips and Tricks
When screwing into wood, metal and
other materials, take note of the following
advice:
j Before you use the appliance, check to see
that the screw or drill bit is properly fitted, i.e.
located centrally in the chuck.
j Screw bits are designated with their dimensions
and their shape. If you are unsure, always try
the particular screw bit out to see whether it sits
in the screw head without any free play.
Torque:
j Smaller screws and bits in particular can be
easily damaged if you adjust the appliance
with too high a torque and/or rotation speed.
Hard screw bed:
j Particularly high torques can occur, for example
with metal screws tightened by socket tool bits.
Select a lower rotation speed.
Soft screw bed:
j You should also select a low speed in order not
to damage the wood workpiece surface through
contact with the metal screw head. Use a countersinker.
When drilling into wood, metal and other
materials, take note of the following advice:
j With small diameter drill bits use a high drill
speed. For large diameter drill bits, use a low
drill speed.
j For hard materials, select a low drill speed.
For soft materials, select a high drill speed.
j Secure or fix down the workpiece (if possible)
in a clamp or vice.
j Mark the intended position of the hole with a
centre punch or a nail and select a low drill speed
for drilling.
j Take the rotating drill bit out of the hole frequently
so that swarf or drill dust can be re-moved and
the hole and tool is ventilated.
Drilling in metal:
j Use a metal drill bit (HSS). For the best results,
you should cool the bit with oil. Metal drill bits
can also be used to drill into plastic.
Drilling in wood:
j Normally you should use a wood drill with a
centring point. For deep holes, use an auger
type bit. For large diameter holes, use a forstner bit. You can screw small screws into soft
wood without the need for pre-drilling.
Q
Cleaning and Maintenance
m CAUTION! Place the direction of rotation
switch
3
into the middle position before carrying
out any tasks on the device, e.g. changing tools or
maintenance, or before transporting or storing the
device. Inadvertent operation of the ON / OFF
switch
4
may result in injury.
Always pull the mains adapter
10
out of the mains
socket and remove the battery pack before you
clean or maintain the device.
The Cordless Drill / Screwdriver is maintenance-free.
j Always keep the device clean, dry and free of
oil or grease.
j Clean the device immediately after you have
finished using it.
j Do not allow any liquids to enter the device.
Use a cloth to clean the housing.
j Never use petrol, solvents or cleaning agents
that might attack plastic.
E3335_Akkubohr-Schrauber_Content_X14.4V_LB5.indd 32 22.04.2008 16:23:12 Uhr
Page 33

33 GB/MT
Disposal / Information
Q
Disposal
The packaging comprises exclusively en-
vironmentally-friendly material. Dispose
of it in your local recycling containers.
Do not dispose of electrical
appliances with your
domestic waste!
In accordance with European Directive
2002 / 96 / EC (covering waste electrical and electronic equipment) and its transposition into national
legislation, worn out electrical power tools must be
collected separately and taken for environmentally
compatible recycling.
Do not dispose of rechargeable
batteries with your household
refuse!
Defective or worn out rechargeable batteries must
be recycled according to Directive 91 / 157 / EEC.
In this regard, read the special safety notices for
charging stations and battery packs.
Contact your local refuse disposal authority for
more details of how to dispose of your worn-out
devices.
Q
Information
Q
Service
You will find contact information for the service
department responsible for your country in the
warranty documents.
WARNING!
Have your device
repaired at the service centre or by
qualified specialist personnel using
original manufacturer parts only. This
will ensure that your device remains safe to use.
WARNING!
If the plug or lead needs
to be replaced, always have the
replacement carried out by the manufacturer or its service centre. This will
ensure that your device remains safe to use.
Q
Conformity Declaration /
Manufacturer
We, Kompernaß GmbH, Burgstr. 21, 44867 Bochum,
Germany, hereby declare that this product complies
with the requirements of the following
EU directives:
EC machine guideline: (98 / 37 / EG)
EC Low Voltage Directive (2006 / 95 / EG)
EMC (Electromagentic Compatibility)
(2004 / 108 / EG)
Type / Appliance Designation:
Cordless drill driver X14.4 - LI
Bochum, 30.04.2008
Hans Kompernaß
- Managing Director-
We reserve the right to make technical modifications in the course
of further development.
E3335_Akkubohr-Schrauber_Content_X14.4V_LB5.indd 33 22.04.2008 16:23:13 Uhr
Page 34

34
E3335_Akkubohr-Schrauber_Content_X14.4V_LB5.indd 34 22.04.2008 16:23:14 Uhr
Page 35

35 DE/AT
Inhaltsverzeichnis
Einleitung
Bestimmungsgemäßer Gebrauch ................................................................................... Seite 36
Ausstattung ....................................................................................................................... Seite 36
Lieferumfang ..................................................................................................................... Seite 37
Technische Daten ............................................................................................................. Seite 37
Allgemeine Sicherheitshinweise für Elektrowerkzeuge
1. Arbeitsplatz-Sicherheit ................................................................................................. Seite 38
2. Elektrische Sicherheit ................................................................................................... Seite 38
3. Sicherheit von Personen .............................................................................................. Seite 38
4. Verwendung und Behandlung des Elektrowerkzeugs ............................................... Seite 39
5. Sorgfältiger Umgang und Gebrauch von Akkugeräten ............................................ Seite 40
Achtung Leitungen! .......................................................................................................... Seite 40
Originalzubehör / -zusatzgeräte........................................................................................... Seite 40
Sicherheitshinweise für Akku-Bohrschrauber ............................ Seite 40
Vor derInbetriebnahme
Akku-Pack entnehmen / laden / einsetzen ...................................................................... Seite 41
Werkzeuge wechseln ...................................................................................................... Seite 41
2-Gang Getriebe ............................................................................................................. Seite 41
Drehmomentvorwahl ........................................................................................................ Seite 41
Inbetriebnahme
Ein- / Ausschalten ............................................................................................................. Seite 42
Geschwindigkeit einstellen .............................................................................................. Seite 42
Drehrichtung umschalten ................................................................................................. Seite 42
Tipps und Tricks ................................................................................................................ Seite 42
Wartung und Reinigung .................................................................................. Seite 43
Entsorgung ................................................................................................................... Seite 43
Informationen
Service .............................................................................................................................. Seite 43
Konformitätserklärung / Hersteller
....................................................................................... Seite 44
E3335_Akkubohr-Schrauber_Content_X14.4V_LB5.indd 35 22.04.2008 16:23:15 Uhr
Page 36

36 DE/AT
Einleitung
Akku-Bohrschrauber
X14.4 - LI
Q
Einleitung
Machen Sie sich vor der ersten Inbetrieb-
nahme mit den Funktionen des Gerätes
vertraut und informieren Sie sich über
den richtigen Umgang mit Elektrowerkzeugen.
Lesen Sie die nachfolgende Bedienungsanleitung.
Bewahren Sie diese Anleitung auf. Händigen Sie
alle Unterlagen bei Weitergabe des Gerätes an
Dritte aus.
Q
Bestimmungsgemäßer
Gebrauch
Dieses Gerät ist zum Bohren und Schrauben in
Holz, Kunststoff und Metall bestimmt. Benutzen Sie
das Gerät nur wie beschrieben und für die angegebenen Einsatzbereiche. Das Gerät ist nicht für den
gewerblichen Einsatz bestimmt. Jede andere Verwendung oder Veränderung des Gerätes gilt als
nicht bestimmungsgemäß und birgt erhebliche
Unfallgefahren. Für aus bestimmungswidriger
Verwendung entstandene Schäden übernimmt der
Hersteller keine Haftung.
Q
Ausstattung
1
Gangwahlschalter
2
Akku-Display-LED
In dieser Bedienungsanleitung / am Gerät werden folgende Piktogramme verwendet:
Bedienungsanleitung lesen!
Schnellspannbohrfutter,
Made in Germany
Warn- und Sicherheitshinweise
beachten!
Spindelarretierung
Vorsicht vor elektrischem Schlag!
Lebensgefahr!
Bohrstufe
Explosionsgefahr!
Tragen Sie einen Gehörschutz, eine
Atem- / Staubschutzmaske, eine
Schutzbrille und Schutzhandschuhe.
n
0
Nennleerlaufdrehzahl
Kinder vom Elektrowerkzeug
fernhalten!
V
~
Volt (Wechselspannung) Elektrowerkzeug vor Nässe schützen!
mA
A / Ah
Milliampere / Ampere / Amperestunden
Auf Unversehrtheit von Gerät,
Netzkabel und Netzstecker achten!
Gleichstrom
(Strom- und Spannungsart)
Entsorgen Sie Verpackung und Gerät
umweltgerecht!
Schutzklasse II
E3335_Akkubohr-Schrauber_Content_X14.4V_LB5.indd 36 22.04.2008 16:23:15 Uhr
Page 37

37 DE/AT
Einleitung
3
Drehrichtungsumschalter / Sperre
4
EIN- / AUS-Schalter
5
Softgriff
6
Akku-Pack
7
Taste zur Entriegelung des Akkus
8
Drehmomentvorwahl
9
Schnellspannbohrfutter
10
Netzteil
11
Kontroll-LED
12
Ladestation
13
Ladekontroll-LED
Q
Lieferumfang
1 Akku-Bohrschrauber X14.4 - LI
1 Akku-Pack X14.4 - LI - 1
1 Ladestation X14.4 - LI - 2
1 Netzteil X14.4 - LI - 3
1 Bedienungsanleitung
1 Heft „Garantie und Service“
Q
Technische Daten
Nennleerlaufdrehzahl: 1. Gang: n0 0 – 400 min-1
Nennleerlaufdrehzahl: 2. Gang: n
0
0 – 1300 min
-1
Nennspannung: 14,4 V
Bohrfutterspannbereich: 1,0 – 10 mm
Maximaler
Bohrdurchmesser:
Stahl: 10 mm
Holz: 30 mm
Drehmoment-Stufen: 19 plus Bohrstufe
X14.4-LI-1 Akku-Pack:
Typ: LITHIUM-ION
Nennspannung: 14,4 V
Kapazität: 1300 mAh
X14.4-LI-2 Ladestation:
X14.4-LI-3 Netzteil
Primär:
Nennspannung: 100 - 240 V ~ 50 / 60 Hz
Nennleistung: 0,6 A
Sekundär:
Nennspannung: 16,8 V
Nennleistung: 0,65 A
Ladedauer: ca. 3 Std.
Geräusch und Vibrationsinformationen:
Messwerte ermittelt entsprechend EN 60745.
Der A-bewertete Schalldruckpegel des Gerätes
beträgt typischerweise 70 dB (A). Unsicherheit
K = 3 dB. Der Geräuschpegel beim Arbeiten kann
80 dB (A) überschreiten.
Gehörschutz tragen!
Schwingungswerte (Vektorsumme dreier Richtungen)
ermittelt entsprechend EN 60745:
Bohren in Metall: Schwingungsemissionswert
a
h, D
= 1,944 m / s
2
Unsicherheit K= 1,5 m / s
2
Schrauben: Schwingungsemissionswert
a
h, D
= 2,101 m / s2
Unsicherheit K= 1,5 m / s
2
WARNUNG!
Der in diesen Anweisungen
angegebene Schwingungspegel ist entsprechend
einem in EN 60745 genormten Messverfahren gemessen worden und kann für den Gerätevergleich
verwendet werden.
Der Schwingungspegel wird sich entsprechend
dem Einsatz des Elektrowerkzeugs verändern
und kann in manchen Fällen über dem in diesen
Anweisungen angegebenen Wert liegen. Die
Schwingungsbelastung könnte unterschätzt werden,
wenn das Elektrowerkzeug regelmäßig in solcher
Weise verwendet wird.
Hinweis: Für eine genaue Abschätzung der
Schwingungsbelastung während eines bestimmten
Arbeitszeitraumes sollten auch die Zeiten berücksichtigt werden, in denen das Gerät abgeschaltet ist
oder zwar läuft, aber nicht tatsächlich im Einsatz
ist. Dies kann die Schwingungsbelastung über den
gesamten Arbeitszeitraum deutlich reduzieren.
E3335_Akkubohr-Schrauber_Content_X14.4V_LB5.indd 37 22.04.2008 16:23:16 Uhr
Page 38

38 DE/AT
Allgemeine Sicherheitshinweise für Elektrowerkzeuge
Allgemeine
Sicherheitshinweise
für Elektrowerkzeuge
WARNUNG!
Lesen Sie alle Sicherheits-
hinweise und Anweisungen.
Versäumnisse bei der Einhaltung der Sicherheitshinweise und Anweisungen können elektrischen Schlag,
Brand und / oder schwere Verletzungen verursachen.
BEWAHREN SIE ALLE SICHERHEITSHINWEISE
UND ANWEISUNGEN FÜR DIE ZUKUNFT AUF!
1. Arbeitsplatz-Sicherheit
a) Halten Sie Ihren Arbeitsbereich sauber
und gut beleuchtet. Unordnung und unbe-
leuchtete Arbeitsbereiche können zu Unfällen
führen.
b)
Arbeiten Sie mit dem Elektro-
werkzeug nicht in explosionsgefährdeter Umgebung, in
der sich brennbare Flüssigkeiten, Gase
oder Stäube befinden. Elektrowerkzeuge
erzeugen Funken, die den Staub oder die
Dämpfe entzünden können.
c)
Halten Sie Kinder und andere
Personen während der Benutzung des Elektrowerkzeugs
fern. Bei Ablenkung können Sie die Kontrolle
über das Gerät verlieren.
2. Elektrische Sicherheit
Vermeiden Sie Lebensgefahr
durch elektrischen Schlag:
a) Der Anschlussstecker des Elektrowerk-
zeuges (bzw. Netzteils) muss in die
Steckdose passen. Der Stecker darf
in keiner Weise verändert werden.
Verwenden Sie keine Adapterstecker
gemeinsam mit schutzgeerdeten Elektrowerkzeugen. Unveränderte Stecker und
passende Steckdosen verringern das Risiko eines
elektrischen Schlages.
b) Vermeiden Sie Körperkontakt mit ge-
erdeten Oberflächen, wie von Rohren,
Heizungen, Herden und Kühlschränken.
Es besteht ein erhöhtes Risiko durch elektrischen
Schlag, wenn Ihr Körper geerdet ist.
c)
Halten Sie Elektrowerkzeuge
von Regen oder Nässe fern.
Das Eindringen von Wasser in ein
Elektrogerät erhöht das Risiko eines elektrischen
Schlages.
d)
Zweckentfremden Sie das
Kabel nicht, um das Elektrowerkzeug zu tragen, aufzu-
hängen oder um den Stecker aus der
Steckdose zu ziehen. Halten Sie das
Kabel fern von Hitze, Öl, scharfen
Kanten oder sich bewegenden Geräteteilen. Beschädigte oder verwickelte Kabel
erhöhen das Risiko eines elektrischen Schlages.
e) Wenn Sie mit einem Elektrowerkzeug
im Freien arbeiten, verwenden Sie nur
Verlängerungskabel, die auch für den
Außenbereich zugelassen sind. Die
Anwendung eines für den Außenbereich
geeigneten Verlängerungskabels verringert
das Risiko eines elektrischen Schlages.
f) Wenn der Betrieb des Elektrowerk-
zeuges in feuchter Umgebung nicht
vermeidbar ist, verwenden Sie einen
Fehlerstromschutzschalter. Der Einsatz
eines Fehlerstromschutzschalters vermindert
das Risiko eines elektrischen Schlages.
3. Sicherheit von Personen
a) Seien Sie stets aufmerksam, achten Sie
darauf, was Sie tun und gehen Sie mit
Vernunft an die Arbeit mit einem Elektrowerkzeug. Benutzen Sie kein Elektrowerkzeug, wenn Sie müde sind oder
un
ter dem Einfluss von Drogen, Alkohol
oder Medikamenten stehen. Ein Moment
der Unachtsamkeit beim Gebrauch des Elektrowerkzeuges kann zu ernsthaften Verletzungen führen.
b)
Tragen Sie persönliche
Schutzausrüstung und immer
eine Schutzbrille. Das Tragen
E3335_Akkubohr-Schrauber_Content_X14.4V_LB5.indd 38 22.04.2008 16:23:17 Uhr
Page 39

39 DE/AT
Allgemeine Sicherheitshinweise für Elektrowerkzeuge
persönlicher Schutzausrüstung wie Staubmaske,
rutschfeste Sicherheitsschuhe, Schutzhelm oder
Gehörschutz, je nach Art und Einsatz des
Elektrowerkzeuges, verringert das Risiko von
Verletzungen.
c) Vermeiden Sie eine unbeabsichtigte
Inbetriebnahme. Vergewissern Sie
sich, dass das Elektrowerkzeug ausgeschaltet ist, bevor Sie es an die
Stromversorgung anschließen, es
aufnehmen oder tragen. Wenn Sie beim
Tragen des Elektrowerkzeuges den Finger am
Schalter haben oder das Gerät bereits eingeschaltet an die Stromversorgung anschließen,
kann dies zu Unfällen führen.
d) Entfernen Sie Einstellwerkzeuge oder
Schraubenschlüssel, bevor Sie das
Elektrowerkzeug einschalten. Ein Werk-
zeug oder Schlüssel, der sich in einem drehenden
Geräteteil befindet, kann zu Verletzungen führen.
e) Vermeiden Sie eine abnormale Körper-
haltung. Sorgen Sie für einen sicheren
Stand und halten Sie jederzeit das
Gleichgewicht. Dadurch können Sie das
Elektrowerkzeug in unerwarteten Situationen
besser kontrollieren.
f) Tragen Sie geeignete Kleidung. Tragen
Sie keine weite Kleidung oder Schmuck.
Halten Sie Haare, Kleidung und Handschuhe fern von sich bewegenden
Teilen. Lockere Kleidung, Schmuck oder lange
Haare können von sich bewegenden Teilen
erfasst werden.
g) Wenn Staubabsaug- und -auffangein-
richtungen montiert werden können,
vergewissern Sie sich, dass diese
angeschlossen sind und richtig verwendet werden. Die Verwendung einer
Staubabsaugung kann Gefährdungen durch
Staub verringern.
4. Verwendung und Behandlung
des Elektrowerkzeugs
a) Überlasten Sie das Gerät nicht. Ver-
wenden Sie für Ihre Arbeit das dafür
bestimmte Elektrowerkzeug. Mit dem
passenden Elektrowerkzeug arbeiten Sie besser
und sicherer im angegebenen Leistungsbereich.
b) Benutzen Sie kein Elektrowerkzeug,
dessen Schalter defekt ist. Ein Elektrowerkzeug, das sich nicht mehr ein- oder
ausschalten lässt, ist gefährlich und muss
repariert werden.
c) Ziehen Sie den Stecker aus der Steck-
dose und / oder entfernen Sie den
Akku, bevor Sie Geräteeinstellungen
vornehmen, Zubehörteile wechseln
oder das Gerät weglegen. Diese
Vorsichtsmaßnahme verhindert den unbeabsichtigten Start des Elektrowerkzeuges.
d) Bewahren Sie unbenutzte Elektrowerk-
zeuge außerhalb der Reichweite von
Kindern auf. Lassen Sie Personen das
Gerät nicht benutzen, die mit diesem
nicht vertraut sind oder diese Anweisungen nicht gelesen haben. Elektrowerk-
zeuge sind gefährlich, wenn sie von unerfahrenen Personen benutzt werden.
e) Pflegen Sie Elektrowerkzeuge mit
Sorgfalt. Kontrollieren Sie, ob bewegliche Teile einwandfrei funktionieren
und nicht klemmen, ob Teile gebrochen
oder so beschädigt sind, dass die
Funktion des Elektrowerkzeuges beeinträchtigt ist. Lassen Sie beschädigte
Teile vor dem Einsatz des Gerätes
reparieren. Viele Unfälle haben ihre Ursache
in schlecht gewarteten Elektrowerkzeugen.
f) Halten Sie Schneidwerkzeuge scharf
und sauber. Sorgfältig gepflegte Schneidwerkzeuge mit scharfen Schneidkanten verklemmen sich weniger und sind leichter zu führen.
g) Verwenden Sie Elektrowerkzeug,
Zubehör, Einsatzwerkzeuge usw.
entsprechend diesen Anweisungen.
Berücksichtigen Sie dabei die Arbeitsbedingungen und die auszuführende
Tätigkeit. Der Gebrauch von Elektrowerkzeu-
gen für andere als die vorgesehenen Anwendungen kann zu gefährlichen Situationen führen.
E3335_Akkubohr-Schrauber_Content_X14.4V_LB5.indd 39 22.04.2008 16:23:17 Uhr
Page 40

40 DE/AT
5. Sorgfältiger Umgang und
Gebrauch von Akkugeräten
a) Laden Sie die Akkus nur in Ladegeräten
auf, die vom Hersteller empfohlen
werden. Für ein Ladegerät, das für eine
bestimmte Art von Akkus geeignet ist, besteht
Brandgefahr, wenn es mit anderen Akkus
verwendet wird.
b) Verwenden Sie nur die dafür vorgese-
henen Akkus in den Elektrowerkzeugen.
Der Gebrauch von anderen Akkus kann zu
Verletzungen und Brandgefahr führen.
c) Halten Sie den nicht benutzten Akku
fern von Büroklammern, Münzen,
Schlüsseln, Nägeln, Schrauben oder
anderen kleinen Metallgegenständen,
die eine Überbrückung der Kontakte
verursachen könnten. Ein Kurzschluss
zwischen den Akkukontakten kann Verbrennungen oder Feuer zur Folge haben.
d)
WARNUNG!
Bei falscher Anwendung kann Flüssigkeit aus dem Akku
austreten. Vermeiden Sie den Kontakt
damit. Bei zufälligem Kontakt mit
Wasser abspülen. Wenn die Flüssigkeit in die Augen kommt, nehmen Sie
zusätzlich ärztliche Hilfe in Anspruch.
Austretende Akkuflüssigkeit kann zu Hautreizungen oder Verbrennungen führen.
Q
Achtung Leitungen!
WARNUNG!
Vergewissern Sie sich,
dass Sie nicht auf Strom-, Gas- oder
Wasserleitungen stoßen, wenn Sie mir dem
Elektrowerkzeug arbeiten. Prüfen Sie ggf.
mit einem Leitungssucher, bevor Sie in eine Wand
bohren bzw. aufschlitzen.
Q
Originalzubehör / -zusatzgeräte
J Benutzen Sie nur Zubehör und Zusatz-
geräte, die in der Gebrauchsanweisung
angegeben sind. Der Gebrauch anderer
als in der Bedienungsanleitung empfohlener
Einsatzwerkzeuge oder anderen Zubehörs
kann eine Verletzungsgefahr für Sie bedeuten.
Sicherheitshinweise
für Akku-Bohrschrauber
J Sichern Sie das Werkstück. Ein mit
Spannvorrichtungen oder Schraubstock festgehaltenes Werkstück ist sicherer gehalten als mit
Ihrer Hand.
J
WARNUNG!
GIFTIGE STÄUBE!
Die durch die Bearbeitung entstehenden
schädlichen / giftigen Stäube stellen eine
Gesundheitsgefährdung für die Bedienperson
oder in der Nähe befindliche Personen dar.
J
Tragen Sie Schutzbrille und Staub-
maske!
J Bearbeiten Sie kein asbesthaltiges
Material. Asbest gilt als krebserregend.
J Halten Sie das Elektrowerkzeug fest.
Beim Festziehen und Lösen von Schrauben können kurzfristig hohe Reaktionsmomente auftreten.
J Schalten Sie das Elektrowerkzeug
sofort aus, wenn das Einsatzwerkzeug
blockiert. Seien Sie auf hohe Reaktionsmo-
mente gefasst, die einen Rückschlag verursachen.
Das Einsatzwerkzeug blockiert, wenn das
Elektrowerkzeug überlastet wird oder es im zu
bearbeitenden Werkstück verkantet.
J
WARNUNG!
Fassen Sie das Elektrowerkzeug nur an den isolierten
Griffflächen an, wenn Sie Arbeiten
ausführen, bei denen das Einsatzwerkzeug verborgene Stromleitungen
treffen kann. Kontakt mit einer spannungs-
führenden Leitung setzt auch Metallteile des
Elektrowerkzeuges unter Spannung und führt
zu einem elektrischen Schlag.
J Bei Arbeiten am Gerät, sowie Transport
bzw. Aufbewahrung bringen Sie den
Drehrichtungsumschalter in die Mittelposition (Sperre). So verhindern Sie unbe-
absichtigtes Anlaufen des Elektrowerkzeuges.
E3335_Akkubohr-Schrauber_Content_X14.4V_LB5.indd 40 22.04.2008 16:23:18 Uhr
Page 41

41 DE/AT
Vor der Inbetriebnahme
Q
Vor derInbetriebnahme
Q
Akku-Pack entnehmen / laden /
einsetzen
WARNUNG!
Trennen Sie immer das
Netzteil
10
vom Strom, bevor Sie den Akku-Pack
von der Ladestation
12
nehmen bzw. einsetzen.
Hinweis: Der Akku wird teilgeladen ausgeliefert.
Laden Sie den Akku vor der ersten Inbetriebnahme
mindestens 3 Stunden im Ladegerät auf. So gewährleisten Sie die volle Leistung des Akkus. Sie
können den Li-Ionen-Akku jederzeit aufladen, ohne
die Lebensdauer zu verkürzen. Eine Unterbrechung
des Ladevorgangs schädigt den Akku nicht.
1. Zur Entnahme des Akku-Packs
6
drücken
Sie die Entriegelungstaste
7
und ziehen den
Akku-Pack
6
nach vorne aus dem Gerät.
2. Schieben Sie den Akku-Pack
6
von vorne in
die Ladestation
12
ein.
3. Stecken Sie das Netzteil
10
in die Steckdose.
Die Kontroll-LED
11
leuchtet.
4. Verbinden Sie das Netzteil
10
mit der
Ladestation
12
. Die Ladekontroll-LED 13 an
der Ladestation
12
leuchtet rot.
5. Die grüne Ladekontroll-LED
13
signalisiert Ihnen,
dass der Ladevorgang abgeschlossen und der
Akku-Pack
6
einsatzbereit ist.
6. Zur Entnahme des Akku-Packs
6
drücken Sie
die Entriegelungstaste
7
und ziehen den Akku-
Pack
6
nach vorne von der Ladestation ab.
7. Zum Einsetzen des Akku-Pack
6
in das Gerät
schieben Sie den Akku-Pack
6
von vorne ins
Gerät ein.
Q
Werkzeuge wechseln
Ihr Akku-Bohrschrauber hat eine vollautomatische
Spindelarretierung
und ist mit einem einhülsigen Bohrfutter „Made in Germany“ von
ausgestattet.
Beim Stillstand des Motors wird der Antriebsstrang
verriegelt, so dass Sie das Schnellspannbohrfutter
9
durch Drehen öffnen können.
Nachdem Sie das gewünschte Werkzeug eingesetzt
und durch Drehen des Bohrfutters
festgespannt
haben, können Sie sofort weiter arbeiten. Die Spindelarretierung löst sich automatisch mit Starten des
Motors (Betätigung des EIN- / AUS-Schalters
4
).
Q
2-Gang Getriebe
Hinweis: Betätigen Sie den Gangwahlschalter 1
nur bei Stillstand des Gerätes. Ansonsten droht
Beschädigung des Gerätes.
Im ersten Gang (Gangwahlschalter
1
in
Position: 1)
erreichen Sie eine Drehzahl von ca. 400 min
-1
und ein hohes Drehmoment. Diese Einstellung eignet
sich für alle Schraubarbeiten, aber auch zur
Verwendung von Zubehör.
Im zweiten Gang (Gangwahlschalter 1 in
Position: 2)
erreichen Sie eine Drehzahl von ca. 1200 min-1 zur
Durchführung von Bohrarbeiten.
Q
Drehmomentvorwahl
Sie können über die Drehmomentvorwahl 8 die
Drehkraft einstellen. Ist die eingestellte Drehkraft
erreicht, trennt die Kupplung den Antrieb. Dadurch
können Sie Schrauben in eine vorbestimmte Tiefe
einschrauben, ideal z.B. für Serienverschraubungen.
j Wählen Sie eine niedrige Stufe für kleine
Schrauben, bzw. weiche Werkstoffe.
j Wählen Sie eine hohe Stufe für große Schrauben,
harte Werkstoffe, bzw. beim Herausdrehen von
Schrauben.
j Wählen Sie für Bohrarbeiten die Bohrstufe,
indem Sie die Drehmomentvorwahl in die
Position einstellen.
j Schieben Sie für Bohrarbeiten auch den Gang-
wahlschalter
1
nach vorne (Position: 2).
E3335_Akkubohr-Schrauber_Content_X14.4V_LB5.indd 41 22.04.2008 16:23:19 Uhr
Page 42

42 DE/AT
Inbetriebnahme / Wartung und Reinigung
Q
Inbetriebnahme
Q
Ein- / Ausschalten
m VORSICHT! Setzen Sie das Gerät nur ausge-
schaltet auf die Schraube auf. Sich drehende Einsatzwerkzeuge können abrutschen. Verletzungen
und Beschädigungen am Werkstück können die
Folge sein.
Einschalten:
j Drücken Sie zur Inbetriebnahme des Gerätes
den EIN- / AUS-Schalter
4
und halten Sie ihn
gedrückt.
Ausschalten:
j Lassen Sie zum Ausschalten des Gerätes den
EIN- / AUS-Schalter
4
los.
Q
Geschwindigkeit einstellen
Der EIN- / AUS-Schalter 4 verfügt über eine variable
Geschwindigkeitsregelung.
j Durch Drücken des EIN- /AUS-Schalters
4
erhöhen Sie die Drehzahl.
Hinweis: Die integrierte Motorbremse sorgt für
schnellen Stillstand – ideal z.B. für Serienverschraubungen.
Q
Drehrichtung umschalten
j Wechseln Sie die Drehrichtung, indem Sie den
Drehrichtungsumschalter
3
nach rechts bzw.
links durchdrücken.
Q
Tipps und Tricks
Beim Schrauben in Holz, Metall und
anderen Materialien unbedingt berücksichtigen:
j Überprüfen Sie vor dem Betrieb, ob der
Schraub- bzw. Bohreinsatz korrekt angebracht
ist, d.h. zentriert im Bohrfutter sitzt.
j Schraub-Bits sind mit ihren Maßen und der
Form gekennzeichnet. Falls Sie sich unsicher
sind probieren Sie immer zuerst aus, ob das Bit
ohne Spiel im Schraubkopf sitzt.
Drehmoment:
j Speziell kleinere Schrauben und Bits können
beschädigt werden, wenn Sie ein zu hohes
Drehmoment oder / und eine zu hohe Drehzahl
an der Maschine einstellen.
Harter Schraubfall:
j Besonders hohe Drehmomente entstehen z.B.
bei Metallverschraubungen unter Verwendung
von Steckschlüsseleinsätzen. Wählen Sie eine
niedrige Drehzahl.
Weicher Schraubfall:
j Schrauben Sie auch hier mit geringer Drehzahl,
um z.B. die Holzoberfläche beim Kontakt mit
dem Schraubkopf aus Metall nicht zu beschädigen. Verwenden Sie einen Senker.
Beim Bohren in Holz, Metall und anderen
Materialien unbedingt berücksichtigen:
j Benutzen Sie bei kleinem Bohrer-Durchmesser
eine hohe Drehzahl und bei großem BohrerDurchmesser eine niedrige Drehzahl.
j Wählen Sie bei harten Materialien eine niedrige
Drehzahl, bei weichem Material eine hohe
Drehzahl.
j Sichern oder befestigen Sie (wenn möglich) das
Werkstück in einer Spannvorrichtung.
j Markieren Sie die Stelle, an der gebohrt werden
soll mit einem Körner oder einem Nagel und wählen Sie zum Anbohren eine niedrige Drehzahl.
j Ziehen Sie den drehenden Bohrer mehrmals
aus dem Bohrloch, um Späne oder Bohrmehl
zu entfernen und es zu lüften.
Bohren in Metall:
j Verwenden Sie Metallbohrer (HSS). Für beste
Ergebnisse sollten Sie den Bohrer mit Öl kühlen.
Metallbohrer können Sie auch zum Bohren in
Kunststoff verwenden.
E3335_Akkubohr-Schrauber_Content_X14.4V_LB5.indd 42 22.04.2008 16:23:20 Uhr
Page 43

43 DE/AT
Inbetriebnahme / Wartung und Reinigung / Entsorgung / Informationen
Bohren in Holz:
j Verwenden Sie einen Holzbohrer mit Zentrier-
spitze. Für tiefe Bohrungen verwenden Sie einen
„Schlangenbohrer”, für große Bohr-Durchmesser
einen Forstner-Bohrer. Kleine Schrauben in weichem Holz können Sie auch ohne Vorbohren
direkt eindrehen.
Q
Wartung und Reinigung
m VORSICHT! Bringen Sie vor sämtlichen Arbeiten
am Gerät, z.B. Werkzeugwechsel oder Wartung,
sowie beim Transport oder der Aufbewahrung des
Gerätes den Drehrichtungsumschalter
3
in Mittelstellung. Bei unabsichtlicher Betätigung des EIN- / AUSSchalters
4
besteht ansonsten Verletzungsgefahr.
Ziehen Sie vor allen Reinigungs- und Wartungsarbeiten das Netzteil
10
aus der Steckdose und
entnehmen Sie den Akku.
Der Akku-Bohrschrauber ist wartungsfrei.
j Das Gerät muss stets sauber, trocken und frei
von Öl oder Schmierfetten sein.
j Reinigen Sie das Gerät, direkt nach Abschluss
der Arbeit.
j Es dürfen keine Flüssigkeiten in das Innere der
Geräte gelangen.
j Verwenden Sie zum Reinigen des Gehäuses ein
Tuch. Verwenden Sie niemals Benzin, Lösungsmittel oder Reiniger, die Kunststoff angreifen.
Q
Entsorgung
Die Verpackung besteht aus umweltfreund-
lichen Materialien, die Sie über die örtlichen Recyclingstellen entsorgen können.
Werfen Sie Elektrowerkzeuge
nicht in den Hausmüll!
Gemäß Europäischer Richtlinie 2002 / 96 / EG
müssen verbrauchte Elektrowerkzeuge getrennt
gesammelt und einer umweltgerechten Wiederverwertung zugeführt werden.
Werfen Sie Akkus nicht in
den Hausmüll!
Defekte oder verbrauchte Akkus müssen gemäß
Richtlinie 91 / 157 / EEC recycelt werden.
Geben Sie Akku-Pack und / oder das Gerät über
die angebotenen Sammeleinrichtungen zurück.
Möglichkeiten zur Entsorgung des ausgedienten
Gerätes erfahren Sie bei Ihrer Gemeinde- oder
Stadtverwaltung.
Q
Informationen
Q
Service
Die zuständige Servicestelle Ihres Landes entnehmen
Sie bitte den Garantieunterlagen.
WARNUNG!
Lassen Sie Ihre Geräte
von der Servicestelle oder einer Elek-
trofachkraft und nur mit OriginalErsatzteilen reparieren. Damit wird
sichergestellt, dass die Sicherheit des Gerätes
erhalten bleibt.
WARNUNG!
Lassen Sie den Austausch
des Steckers oder der Netzleitung im-
mer vom Hersteller des Gerätes oder
seinem Kundendienst ausführen. Damit
wird sichergestellt, dass die Sicherheit des
Gerätes erhalten bleibt.
E3335_Akkubohr-Schrauber_Content_X14.4V_LB5.indd 43 22.04.2008 16:23:21 Uhr
Page 44

44 DE/AT
Informationen
Q
Konformitätserklärung /
Hersteller
Wir, Kompernaß GmbH, Burgstr. 21,
44867 Bochum, Deutschland, erklären
hiermit für dieses Produkt die Übereinstimmung
mit folgenden EG-Richtlinien:
Maschinenrichtlinie (98 / 37 / EG)
EG-Niederspannungsrichtlinie
(2006 / 95 / EG)
Elektromagnetische Verträglichkeit
(2004 / 108 / EG)
Typ / Gerätebezeichnung:
Parkside Akku-Bohrschrauber X14.4 - LI
Bochum, 30.04.2008
Hans Kompernaß
- Geschäftsführer -
Technische Änderungen im Sinne der Weiterentwicklung
sind vorbehalten.
E3335_Akkubohr-Schrauber_Content_X14.4V_LB5.indd 44 22.04.2008 16:23:22 Uhr
 Loading...