

Page 1
R/EQ-150 Owner's Manual
O W N E R ' S M A N U A L
R/EQ-150 Room Equalizer
Congratulations on your purchase of this precision audio component and thank you for choosing
Parasound. We are sure that you will find the R/EQ-150 to be a very useful problem solving tool. Even
if you have used an equalizer before, please take time to review this manual to take complete advantage
of the R/EQ-150’s unique capabilities.
R/EQ-150 Room Equalizer
l
e
v
e
L
s
s
a
p
y
B
z
H
k
6
z
H
k
.5
2
z
H
0
2
1
z
H
0
8
z
H
0
4
Product Overview
Loudspeakers interact with every room differently. Often room acoustics are challenging and
compromises in speaker size and placement have to be made for aesthetic reasons. Consequently, the
quality of sound may not be as good as intended. Your Parasound R/EQ-150 permits you to subtly
adjust the frequency response characteristics in these situations and improve overall sound quality.
The Parasound R/EQ-150 has one-half octave width ±8 dB boost and cut controls centered at 40 Hz,
80 Hz, 120 Hz, 2.5 kHz and 6 kHz. These frequency ranges were carefully selected so that you can
easily make precise improvements in frequency response curves in difficult installations while
minimizing potential adverse effects should the controls become accidentally misadjusted.
Unpacking the R/EQ-150
You should find the following items within the packing carton:
• The R/EQ-150
• An 18 AWG audiophile-grade AC cord
• Owner's manual
Save your carton and packing inserts for safe transport in case you move or the unit ever requires repair.
If you ever need to ship the R/EQ-150 to us, be sure to pack it into an additional outer carton for
protection against shipping damage. Locate the serial number for the R/EQ-150 on the bottom of the
unit and record it here for future reference: __________________
-1-
Page 2
Parasound
CAUTION
RISK OF ELECTRIC SHOCK
DO NOT OPEN
120 Vac/60 Hz 5W
R/EQ-150 Room Equalizer
Parasound Products, Inc.
San Francisco, CA USA
Input
Output
R
L
Fuse
Holder
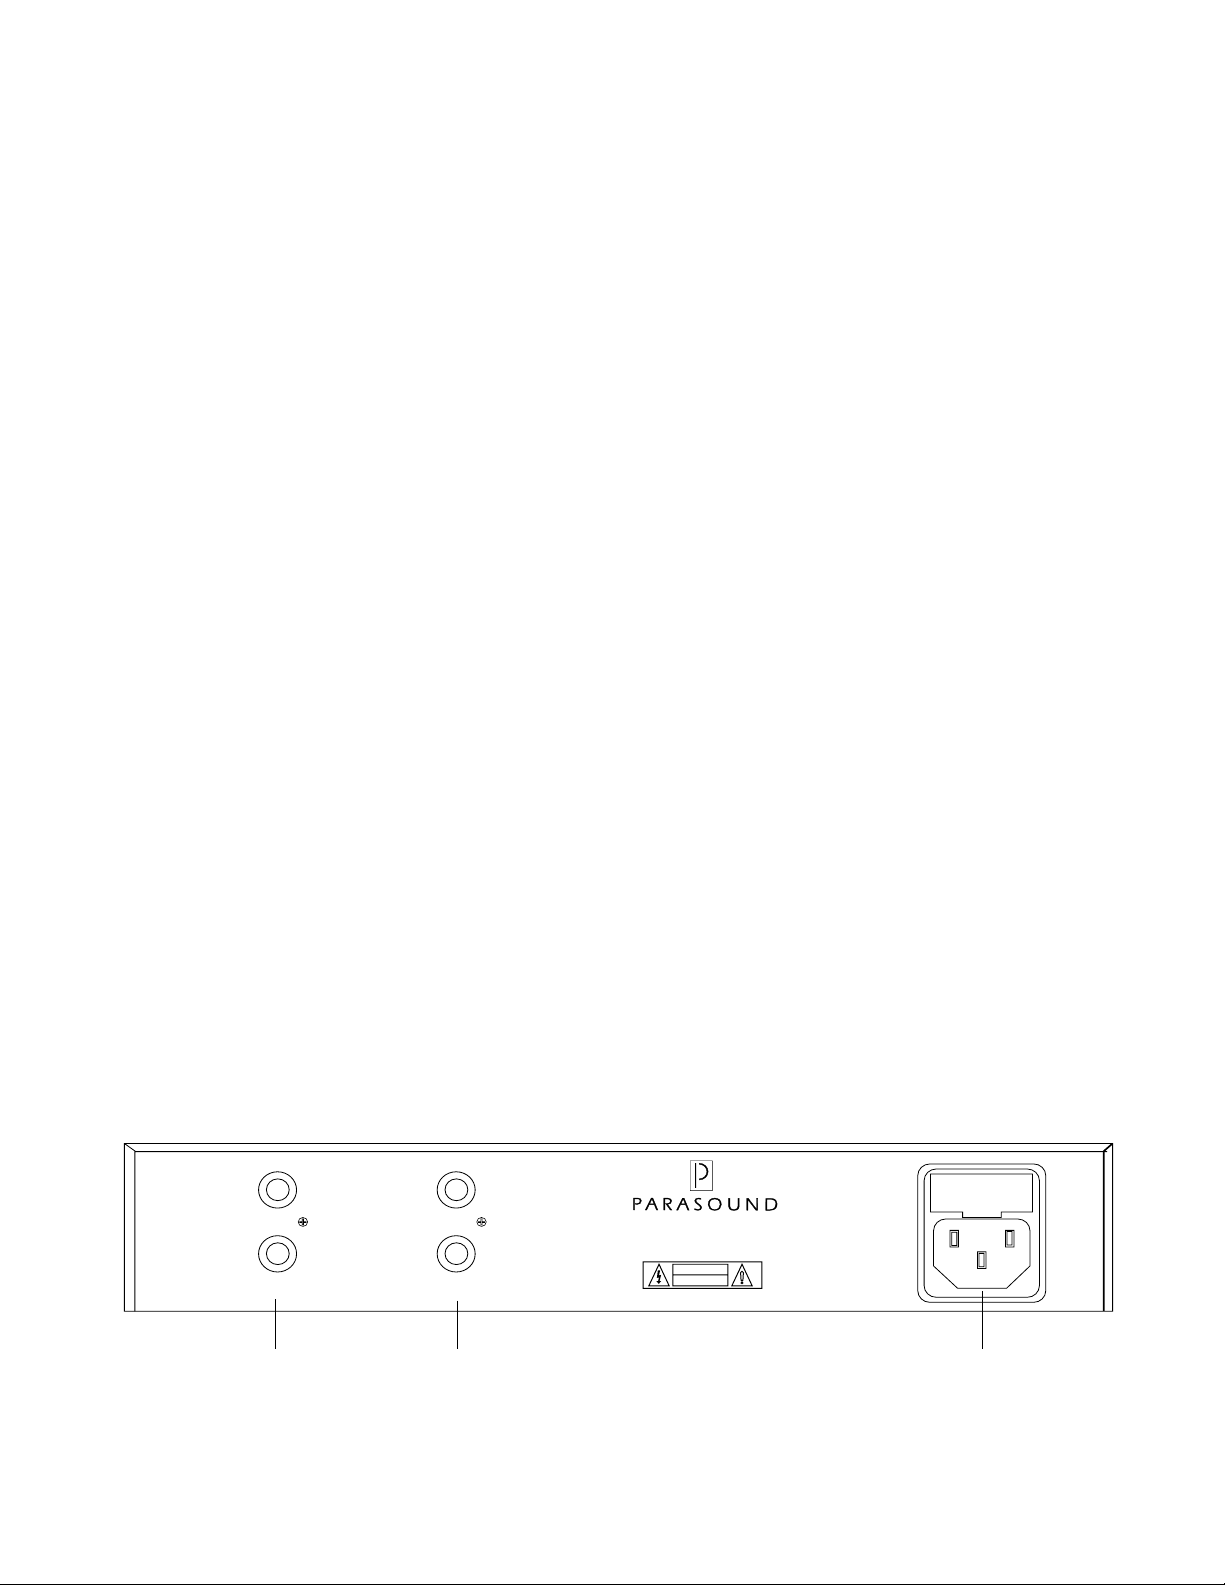
Connect Input Jacks
to line Output Jacks
of Preamp or Play/Out
of Receiver Tape
Monitor Loop
AC Connector Connect Output Jacks
to Input Jacks of
Power Amp or Rec/In Jacks
of Receiver Tape Monitor Loop
Placement of Your R/EQ-150
Your R/EQ-150 may be located with your other audio/video components. Once final adjustments have
been made, you can even locate it out of sight. Try to keep your R/EQ-150 away from AC power cords
or power amplifiers that might induce hum and noise. The R/EQ-150 generates virtually no heat so it
does not require ventilation.
AC Connections
Connect the supplied AC cord from the AC inlet of the R/EQ-150 to a nearby AC wall outlet or power
strip. There is no AC switch on the R/EQ-150; it is powered on whenever it is plugged in. Its power
consumption is negligible, so you do not need to worry about switching it on and off with the rest of
your system.
Connecting Your R/EQ-150 Between a Preamplifier and Power Amplifier
Connect your preamplifier’s left and right line or main outputs to the left and right input jacks on your
R/EQ-150. Next, connect the left and right outputs of the R/EQ-150 to the left and right input jacks of
your power amplifier.
Connecting Your R/EQ-150 into a Tape Monitor Loop
If your preamplifier or receiver has an unused tape monitor loop, connect the Rec/Out jacks of the
preamp or receiver to the left and right input jacks of your R/EQ-150. Next, connect the output jacks of
the R/EQ-150 to the Play/In jacks of your preamp or receiver. Press the preamplifier or receiver's
monitor button to engage the R/EQ-150
Connecting Your R/EQ-150 into a Surround System
Connect your surround processor’s front left and right line or main outputs to the left and right input
jacks on your R/EQ-150. Next, connect the left and right outputs of the R/EQ-150 to the left and right
input jacks of your power amplifier. With additional R/EQ-150s, you can also this process for your
center, surround, and subwoofer channels. Do not connect the R/EQ-150 to the processor's input to
prevent overload and distortion.
Drawing # 1: Rear Panel Connections
-2-
Page 3

R/EQ-150 Owner's Manual
Operating Your R/EQ-150
Adjusting the R/EQ-150 Level Control
Once you have installed the R/EQ-150 into your system, set all its frequency controls to their center
detented positions. Next, set the volume control on your preamp or receiver to a comfortable level.
Finally, adjust the level control on the R/EQ-150 so that the relative output level through the speakers is
the same when its bypass switch is switched in and out. This establishes a “unity gain” position. You
may boost or cut the overall level of the R/EQ-150 with this control as desired for best signal to noise
performance.
Bypass Switch
The bypass switch is a handy way to compare music with and without equalization. In the on
(depressed) position, the signal from the preamplifier is routed around all of the equalization circuits
while leaving the level control active. This allows you to instantly compare between flat and equalized
settings without having to individually readjust the frequency controls to flat. An LED alerts you to the
bypass status.
R/EQ-150 Room Equalizer
40 Hz
80 Hz
120 Hz
2.5 kHz
6 kHz
Bypass
Level
Drawing # 2: Front Panel Controls
Adjusting the R/EQ-150 Frequency Controls
Before adjusting the R/EQ-150 frequency controls, make certain that all tone controls, loudness buttons,
and other filters on your preamplifier or receiver are set at their flat or bypassed positions. This helps
avoid interaction between multiple equalization circuits that can adversely affect the sound or overload
your amplifiers or speakers.
40 and 80 Hz Low Bass Adjustments:
The 40 Hz and 80 Hz controls have an adjustment range of ±8 dB and a frequency bandwidth of
one-half octave. Turning these controls clockwise (boosting) adds very low bass so often missing from
smaller or in-wall loudspeakers. Turning these controls counterclockwise (attenuating) can help reduce
unwanted low frequencies that may contain inaudible information that can waste amplifier power and
strain woofers. Attenuating these controls can also help tame boominess when speakers are mounted
near room boundaries where bass is acoustically reinforced. The 80 Hz control will have a greater
audible effect simply because most music contains more information at 80 Hz than at 40 Hz.
-3-
Page 4

Parasound
120 Hz Mid Bass Adjustment:
The 120 Hz control has an adjustment range of ±8 dB and a frequency bandwidth of one-half octave.
Turning this control clockwise (boosting) can add mid-bass information to speakers with smaller
woofers or speakers mounted in ceilings. Turning this control counterclockwise (attenuating) can
tighten up muddy bass from speakers that are mounted in corners that reinforce bass frequencies.
2.5 kHz Upper-Mid Range “Presence” Adjustment
This is the range in which your ear is most sensitive. Small adjustments will have very noticeable
effects. Turning this control clockwise (boosting) adds intelligibility in acoustically absorptive rooms.
Turning this control counterclockwise (attenuating) can help compensate for speakers with overly
pronounced mid-range frequencies in acoustically "live" rooms.
6 kHz Upper-Mid Range “Air” Adjustment
Boosting the 6 kHz control can help add a sense of “airiness” to many recordings and can compensate
for off-axis high frequency deficiencies of tweeters. Attenuating this control can help remove some
digital harshness and restore proper balance in very live rooms that may accentuate high frequencies.
Reference Settings:
Once you have adjusted your R/EQ-150, use the drawings below and use a pencil to mark the optimum
settings for each control knob. That way, if the R/EQ-150 becomes accidentally misadjusted, you can
easily return the frequency controls to their pre-adjusted level. You may wish to copy this drawing and
attach it to the unit for future reference.
R/EQ-150 Room Equalizer
40 Hz 80 Hz 120 Hz 2.5 kHz 6 kHz Bypass Level
Reference Drawing #1
R/EQ-150 Room Equalizer
40 Hz 80 Hz 120 Hz 2.5 kHz 6 kHz Bypass Level
Reference Drawing #2
-4-
Page 5

R/EQ-150 Specifications
Frequency Response (Frequency Controls at Center Detent)
20 Hz-20 kHz +/- 0.5 dB
Frequency Control Center Frequencies
40 Hz, 80 Hz, 120 Hz, 2.5 kHz, 6 kHz
Frequency Control Bandwidth
1/2 Octave
Frequency Control Range
+/- 8 dB
Voltage Gain: (Frequency Controls at Center Detent)
14 dB
Signal to Noise Ratio
88 dB
R/EQ-150 Owner's Manual
THD
Less than 0.05%
Specifications subject to change or improvement without notice
-5-
Page 6

Parasound
Parasound Products, Inc. 950 Battery Street, San Francisco, CA 94111
415-397-7100 / FAX 415-397-0144
-6-
 Loading...