

Page 1

FrameSaver® SLV
Configuration Reference
Document No. 9000-A2-GB31-00
December 2002
Page 2

Copyright © 2002 Paradyne Corporation.
All rights reserved.
Printed in U.S.A.
Notice
This publication is protected by federal copyright law. No part of this publication may be copied or distributed,
transmitted, transcribed, stored in a retrieval system, or translated into any human or computer language in any form or
by any means, electronic, mechanical, magnetic, manual or otherwise, or disclosed to third parties without the express
written permission of Paradyne Corporation, 8545 126th Ave. N., Largo, FL 33773.
Paradyne Corporation makes no representation or warranties with respect to the contents hereof and specifically
disclaims any implied warranties of merchantability or fitness for a particular purpose. Further, Paradyne Corporation
reserves the right to revise this publication and to make changes from time to time in the contents hereof without
obligation of Paradyne Corporation to notify any person of such revision or changes.
Changes and enhancements to the product and to the information herein will be documented and issued as a new
release to this manual.
Warranty, Sales, Service, and Training Information
Contact your local sales representative, service representative, or distributor directly for any help needed. For additional
information concerning warranty, sales, service, repair, installation, documentation, training, distributor locations, or
Paradyne worldwide office locations, use one of the following methods:
n
Internet: Visit the Paradyne World Wide Web site at www.paradyne.com. (Be sure to register your warranty at
www.paradyne.com/warranty.)
n
Telephone: Call our automated system to receive current information by fax or to speak with a company
representative.
— Within the U.S.A., call 1-800-870-2221
— Outside the U.S.A., call 1-727-530-2340
Document Feedback
We welcome your comments and suggestions about this document. Please mail them to Technical Publications,
Paradyne Corporation, 8545 126th Ave. N., Largo, FL 33773, or send e-mail to userdoc@paradyne.com. Include the
number and title of this document in your correspondence. Please include your name and phone number if you are
willing to provide additional clarification.
Tradem ark s
ACCULINK, COMSPHERE, FrameSaver, Hotwire, MVL, NextEDGE, OpenLane, and Performance Wizard are
registered trademarks of Paradyne Corporation. GranDSLAM, GrandVIEW, ReachDSL, and TruePut are trademarks of
Paradyne Corporation. All other products and services mentioned herein are the trademarks, service marks, registered
trademarks, or registered service marks of their respective owners.
Patent Notification
FrameSaver products are protected by U.S. Patents: 5,550,700 and 5,654,966. Other patents are pending.
A December 2002 9000-A2-GB31-00
Page 3

Contents
About This Guide
n Purpose and Intended Audience . . . . . . . . . . . . . . . . . . . . . . . . . . . . . v
n Document Organization . . . . . . . . . . . . . . . . . . . . . . . . . . . . . . . . . . . . v
n Product-Related Documents . . . . . . . . . . . . . . . . . . . . . . . . . . . . . . . . vi
n Conventions Used . . . . . . . . . . . . . . . . . . . . . . . . . . . . . . . . . . . . . . . . viii
1 Configuration Procedures
n Configuration Menu . . . . . . . . . . . . . . . . . . . . . . . . . . . . . . . . . . . . . . . 1-2
n Configuration Option Areas . . . . . . . . . . . . . . . . . . . . . . . . . . . . . . . . . 1-3
n Accessing and Displaying Configuration Options . . . . . . . . . . . . . . . . 1-4
n Changing Configuration Options . . . . . . . . . . . . . . . . . . . . . . . . . . . . . 1-5
n Saving Configuration Options . . . . . . . . . . . . . . . . . . . . . . . . . . . . . . . 1-6
2 Basic Configuration
n Using the Easy Install Feature . . . . . . . . . . . . . . . . . . . . . . . . . . . . . . . 2-2
n Using RIP with FrameSaver SLV CSU/DSUs . . . . . . . . . . . . . . . . . . . 2-11
n Entering System Information and Setting the System Clock . . . . . . . . 2-12
n Setting Up Auto-Configuration . . . . . . . . . . . . . . . . . . . . . . . . . . . . . . . 2-13
Selecting a Frame Relay Discovery Mode. . . . . . . . . . . . . . . . . . . 2-14
Automatically Removing a Circuit . . . . . . . . . . . . . . . . . . . . . . . . . 2-16
3 Configuration Options
n Configuration Option Tables . . . . . . . . . . . . . . . . . . . . . . . . . . . . . . . . 3-1
n Configuring the Overall System . . . . . . . . . . . . . . . . . . . . . . . . . . . . . . 3-3
Configuring Frame Relay and LMI for the System (CSU/DSUs) . . 3-3
Configuring PPP Options. . . . . . . . . . . . . . . . . . . . . . . . . . . . . . . . 3-7
Configuring Class of Service Definitions . . . . . . . . . . . . . . . . . . . . 3-8
Code Point Definitions . . . . . . . . . . . . . . . . . . . . . . . . . . . . . . . . . . 3-10
Configuring Service Level Verification Options . . . . . . . . . . . . . . . 3-11
Configuring General System Options . . . . . . . . . . . . . . . . . . . . . . 3-14
9000-A2-GB31-00 December 2002 i
Page 4

Contents
n Configuring Physical Interfaces . . . . . . . . . . . . . . . . . . . . . . . . . . . . . . 3-17
Configuring the Network Interface . . . . . . . . . . . . . . . . . . . . . . . . . 3-17
T1 Network Interface . . . . . . . . . . . . . . . . . . . . . . . . . . . . . . . . . . . 3-18
T3 Network Interface . . . . . . . . . . . . . . . . . . . . . . . . . . . . . . . . . . . 3-22
DDS Network Interface . . . . . . . . . . . . . . . . . . . . . . . . . . . . . . . . . 3-23
IDSL Network Interface . . . . . . . . . . . . . . . . . . . . . . . . . . . . . . . . . 3-25
SDSL Network Interface . . . . . . . . . . . . . . . . . . . . . . . . . . . . . . . . 3-26
SHDSL Network Interface . . . . . . . . . . . . . . . . . . . . . . . . . . . . . . . 3-27
Synchronous Network Interface. . . . . . . . . . . . . . . . . . . . . . . . . . . 3-28
HSSI Network Interface . . . . . . . . . . . . . . . . . . . . . . . . . . . . . . . . . 3-30
Configuring a User Data Port (CSU/DSUs) . . . . . . . . . . . . . . . . . . 3-31
V.35 Data Port Physical Interface . . . . . . . . . . . . . . . . . . . . . . . . . 3-31
EIA-530-A/X.21/V.35 Data Port Physical Interface . . . . . . . . . . . . 3-36
HSSI Data Port Physical Interface. . . . . . . . . . . . . . . . . . . . . . . . . 3-38
Configuring the T3 User Port (9520-ILM) . . . . . . . . . . . . . . . . . . . 3-41
Configuring the DSX-1 Interface (9126, 9128) . . . . . . . . . . . . . . . 3-42
Configuring the ISDN DBM Interface (9126, 9128, 9626) . . . . . . . 3-44
Setting Up ISDN Link Profiles (9126, 9128, 9626) . . . . . . . . . . . . 3-48
n Assigning Time Slots/Cross Connections . . . . . . . . . . . . . . . . . . . . . . 3-50
Assigning Time Slots to the Network Interface . . . . . . . . . . . . . . . 3-51
Assigning DSX-1 Time Slots to the Network Interface . . . . . . . . . 3-52
Assigning a Synchronous Data Port to Network or DSX-1 Time Slots 358
Clearing Assignments . . . . . . . . . . . . . . . . . . . . . . . . . . . . . . . . . . 3-59
n Configuring Frame Relay for an Interface . . . . . . . . . . . . . . . . . . . . . . 3-60
n Configuring PPP for an Interface . . . . . . . . . . . . . . . . . . . . . . . . . . . . . 3-63
n Manually Configuring DLCI Records . . . . . . . . . . . . . . . . . . . . . . . . . . 3-64
n Configuring Circuit Records for the Network Interface. . . . . . . . . . . . . 3-68
n Configuring ATM for the Network Interface . . . . . . . . . . . . . . . . . . . . . 3-71
n Configuring PVC Connections . . . . . . . . . . . . . . . . . . . . . . . . . . . . . . . 3-72
n Configuring the IP Path List . . . . . . . . . . . . . . . . . . . . . . . . . . . . . . . . . 3-76
n Setting Up Management and Communication Options . . . . . . . . . . . . 3-77
Configuring Node IP Information . . . . . . . . . . . . . . . . . . . . . . . . . . 3-78
Configuring Management PVCs . . . . . . . . . . . . . . . . . . . . . . . . . . 3-82
Configuring General SNMP Management . . . . . . . . . . . . . . . . . . . 3-88
Configuring Telnet and/or FTP Session Support . . . . . . . . . . . . . . 3-89
Configuring SNMP NMS Security . . . . . . . . . . . . . . . . . . . . . . . . . 3-92
Configuring SNMP Traps and Trap Dial-Out . . . . . . . . . . . . . . . . . 3-93
Configuring Ethernet Management . . . . . . . . . . . . . . . . . . . . . . . . 3-99
Configuring the Communication Port. . . . . . . . . . . . . . . . . . . . . . . 3-101
Configuring the Modem Port . . . . . . . . . . . . . . . . . . . . . . . . . . . . . 3-105
n Configuring the Criteria for Automatic Backup . . . . . . . . . . . . . . . . . . . 3-109
ii December 2002 9000-A2-GB31-00
Page 5

4 Feature-Specific Configuration
n Setting Up an External Modem . . . . . . . . . . . . . . . . . . . . . . . . . . . . . . 4-2
n Setting Up an Internal Modem . . . . . . . . . . . . . . . . . . . . . . . . . . . . . . . 4-3
Setting Up Call Directories for Trap Dial-Out . . . . . . . . . . . . . . . . . 4-3
Setting Up to Use the Modem PassThru Feature . . . . . . . . . . . . . 4-4
n Setting Up Dial Backup . . . . . . . . . . . . . . . . . . . . . . . . . . . . . . . . . . . . 4-5
Setting Up the DBM Physical Interface . . . . . . . . . . . . . . . . . . . . . 4-5
Setting Up Automatic Backup Configuration . . . . . . . . . . . . . . . . . 4-6
Modifying ISDN Link Profiles . . . . . . . . . . . . . . . . . . . . . . . . . . . . . 4-9
Restricting Automatic Backup and Configuring Backup Timers . . 4-10
Configuring the DBM Interface to Send SNMP Traps . . . . . . . . . . 4-11
Assigning DLCIs to a Backup Group . . . . . . . . . . . . . . . . . . . . . . . 4-11
n PVC Backup Over the Network Interface . . . . . . . . . . . . . . . . . . . . . . . 4-12
n Setting Up Back-to-Back Operation . . . . . . . . . . . . . . . . . . . . . . . . . . . 4-12
Changing Operating Mode. . . . . . . . . . . . . . . . . . . . . . . . . . . . . . . 4-12
Contents
Index
9000-A2-GB31-00 December 2002
iii
Page 6

Contents
iv December 2002 9000-A2-GB31-00
Page 7

About This Guide
Purpose and Intended Audience
This document lists and describes the configuration options of the following
FrameSaver SLV CSU/DSUs and routers running firmware release 2.1 or above:
9123, 9126, 9128 standalone, 9128 carrier-mount, 9520, 9520-ILM, 9623, 9626,
9720, 9783, 9788, 9820-2M, 9820-8M, and 9820-45M.
Features introduced in firmware release 2.1 are described in this manual but may
not be available in all models.
Document Organization
Section Description
Chapter 1, Configuration
Procedures
Chapter 2, Basic Configuration Describes the Easy Install screens, how to set up
Chapter 3, Configuration Options Describes configuration options for CSU/DSUs and
Chapter 4, Feature-Specific
Configuration
Index Lists key terms, acronyms, concepts, and sections.
A master glossary of terms and acronyms used in Paradyne documents is
available on the World Wide Web at www.paradyne.com. Select Support
Technical Manuals →Technical Glossary.
Shows how to access and save configuration
options.
RIP, and using Auto-Configuration.
routers.
Provides procedures for setting up internal and
external modems, Data Backup Modules (DBMs),
and back-to-back operation.
→
9000-A2-GB31-00 December 2002 v
Page 8

About This Guide
Product-Related Documents
Complete Paradyne documentation for this product is available at
www.paradyne.com. Select Support
Relay Devices.
Document
Number Document Title
The FrameSaver SLV reference library contains:
9000-A2-GB30 FrameSaver SLV Technical Description
9000-A2-GB31 FrameSaver SLV Configuration Reference
9000-A2-GB32 FrameSaver SLV SNMP Reference
→Technical Manuals →FrameSaver Frame
Describes the features, interfaces, and cables for FrameSaver SLV
CSU/DSUs and routers.
Lists and describes the configuration options available for
FrameSaver SLV CSU/DSUs and routers.
Describes MIB details, SNMP traps, and RMON data collection
used for FrameSaver SLV CSU/DSUs and routers.
9000-A2-GB33 FrameSaver SLV Operations Guide
Explains how to operate and troubleshoot FrameSaver SLV
CSU/DSUs and routers.
9000-A2-GB34 FrameSaver SLV Router Command Line Interface
Describes special configuration procedures and the command line
interface for FrameSaver SLV routers.
Other FrameSaver model-specific documentation includes:
9000-A2-GN19 FrameSaver SLV ISDN Installation Instructions
9000-A2-GN1D 9000 Series Access Carrier Installation Instructions
9123-A2-GN10 FrameSaver FLEX 9123 Installation Instructions
9126-A2-GN11 FrameSaver SLV 9126 1-Slot Unit Installation Instructions
9126-A2-GN12 FrameSaver SLV 9126 Router Installation Instructions
9128-A2-GN10 FrameSaver SLV 9128 1-Slot Housing-to-9000 Series Access
Carrier Upgrade Instructions
9128-A2-GN11 FrameSaver SLV 9128 Network Access Module (NAM) Installation
Instructions
9128-A2-GN12 FrameSaver SLV 9128 1-Slot Unit Installation Instruction
9520-A2-GN10 FrameSaver SLV 9520 Installation Instructions
9520-A2-GN11 FrameSaver SLV 9520-ILM Installation Instructions
9623-A2-GN10 FrameSaver FLEX 9623 Installation Instruction
9626-A2-GN10 FrameSaver SLV 9626 Installation Instructions
9783-A2-GN10 Framesaver DSL 9783 CSU/DSU Installation Instructions
vi December 2002 9000-A2-GB31-00
Page 9

About This Guide
Document
Number Document Title
9783-A2-GN11 FrameSaver DSL 9783 Router Installation Instructions
9788-A2-GN10 Framesaver DSL 9788 CSU/DSU Installation Instructions
9788-A2-GN11 Framesaver DSL 9788 Router Installation Instructions
9820-A2-GN10 FrameSaver SLV, Models 9820-2M and 9820-8M, Installation
Instructions
9820-A2-GN11 FrameSaver SLV, Model 9820-45M, Installation Instructions
To order a paper copy of this or any of the above documents:
n Within the U.S.A., call 1-800-PARADYNE (1-800-727-2396)
n Outside the U.S.A., call 1-727-530-8623
9000-A2-GB31-00 December 2002
vii
Page 10

About This Guide
Conventions Used
Convention Used When Used
Italic To indicate variable information (for example, DLCI nnnn,
Menu sequence: To provide an abbreviated method for indicating the
(Path:) To provide a check point that coincides with the menu path
Brackets [ ] To indicate multiple selection choices when more than one
where nnnn denotes a 4-digit number).
selections to be made from a menu or selections from within
a menu before performing a procedural step.
For example,
Main Menu →Status → System and Test Status indicates
that you should select Status from the Main Menu, then
select System and Test Status.
shown at the top of the screen. Always shown within
parentheses so you can verify that you are referencing the
correct table (e.g., Path: main/config/alarm).
selection is available (e.g., Performance
Statistics→Status→ [Network/Port-1]).
Text highlighted in blue To indicate a hyperlink to additional information when viewing
this manual online. Click on the highlighted text.
viii December 2002 9000-A2-GB31-00
Page 11

Configuration Procedures
This chapter includes the following:
n Configuration Menu
n Configuration Option Areas
n Accessing and Displaying Configuration Options
n Changing Configuration Options
n Saving Configuration Options
1
9000-A2-GB31-00 December 2002 1-1
Page 12

1. Configuration Procedures
Configuration Menu
Configuration option settings determine how the FrameSaver unit operates. Use
the FrameSaver unit’s Configuration Edit/Display menu to display or change
configuration option settings.
Configuration options available depend on the model and its features. The
Configuration Edit/Display menu shown below is for a FrameSaver SLV 9128 with
the optional ISDN backup feature.
Configuration Menu Example
main/config 9128-II
Device Name: Node A 11/01/2002 09:32
CONFIGURATION EDIT/DISPLAY
System
Network
DSX-1
Data Ports
ISDN
Time Slot Assignment
PVC Connections
Management and Communication
Auto Backup Criteria
-------------------------------------------------------------------------------Ctrl-a to access these functions, ESC for previous menu M
ave
S
ainMenu Exit
Changing an Auto-Configuration setting can also change the FrameSaver unit’s
configuration. See Setting Up Auto-Configuration in Chapter 2, Basic
Configuration, for additional information.
1-2 December 2002 9000-A2-GB31-00
Page 13

Configuration Option Areas
The FrameSaver unit arrives with configured factory default settings, which are
located in the Factory Default Configuration option area. You can find the default
settings for configuration options in the Configuration Option Tables in Chapter 3,
Configuration Options.
If the factory default settings do not support your network’s configuration, you can
customize the configuration options to better suit your application.
Four configuration option storage areas are available.
Configuration Option Area Description
Current Configuration The currently active set of configuration options.
Customer Configuration An alternate set of configuration options that you can set
Scratchpad Configuration An alternate configuration area for temporary use. The
1. Configuration Procedures
up and store for future use.
Scratchpad configuration is reset to the factory default
settings when the unit is powered off and on.
Default Factory Configuration A read-only configuration area containing the factory
default set of configuration options.
You can load and edit default factory configuration
settings, but you can save changes only to the Current,
Customer, or Scratchpad configuration option areas.
9000-A2-GB31-00 December 2002
1-3
Page 14

1. Configuration Procedures
Accessing and Displaying Configuration Options
To access and display configuration options, load (copy) the applicable
configuration option set into the edit area.
Procedure
To load a set of configuration options for editing:
1. From the Main Menu, press the down arrow key so the cursor is on
Configuration.
2. Press Enter to display the Configuration menu. The Load Configuration
From: menu appears.
NOTE:
Loading a configuration with many DLCIs from a unit’s Customer or
Scratchpad configuration option area may take time. Allow a minute or
more for the file to be loaded.
3. Select the configuration option area from which you want to load configuration
options and press Enter (Current Configuration, Customer Configuration,
Scratchpad Configuration, or Default Factory Configuration).
The selected set of configuration options is loaded into the configuration edit
area and the Configuration Edit/Display menu appears.
This sequence of steps would be shown as the menu selection sequence:
Main Menu
→ Configuration
1-4 December 2002 9000-A2-GB31-00
Page 15

Changing Configuration Options
Procedure
To change configuration option settings:
1. From the Configuration Edit/Display menu, select a set of configuration
options and press Enter.
For example:
Configuration
2. Select the configuration options that are applicable to your network, and make
appropriate changes to the setting(s). See the FrameSaver SLV Operations
Guide for additional information.
When creating new PVC connections or management PVCs, some
configuration options will be blank. For a valid setting to appear, Tab to the
configuration option and press the spacebar.
3. Repeat Steps 1 and 2 until all changes are complete.
→ PVC Connections
1. Configuration Procedures
NOTES:
— Only Security Access Level 1 users can change configuration options.
— Security Access Level 2 users can only view configuration options and run
tests.
— Security Access Level 3 users can only view configuration options; they
cannot change configuration options or run tests.
9000-A2-GB31-00 December 2002
1-5
Page 16

1. Configuration Procedures
Saving Configuration Options
When changes to the configuration options are complete, use the Save function
key to save your changes to either the Current, Customer, or Scratchpad
configuration areas. Note that the Scratchpad configuration is reset to the factory
default settings when the unit is powered off and on.
Procedure
To save the configuration option changes:
1. Press Ctrl-a to switch to the function key area at the bottom of the screen.
2. Type s or S to select the S
The Save Configuration To: screen appears.
ave function and press Enter.
NOTE:
If you try to exit the Configuration menu without saving changes, a Save
Configuration screen appears requiring a Yes or No response.
— If you select N
are not saved.
— If you select Y
3. Select the configuration option area to which you want to save your changes
(normally the Current Configuration) and press Enter.
When Save is complete, Command Complete appears in the message area
at the bottom of the screen.
o, the Main Menu screen reappears and the changes
es, the Save Configuration To: screen appears.
NOTE:
There are other methods of changing configurations, like SNMP and
Auto-Configuration. Since multiple sessions can be active at the same
time, the last change made overwrites any previous or current changes
being made. For instance:
— Saving your configuration changes would cause configuration
changes made via another method to be lost.
— If you are making changes and someone else makes changes and
saves them, your changes would be lost.
1-6 December 2002 9000-A2-GB31-00
Page 17

Basic Configuration
This chapter includes the following:
n Using the Easy Install Feature on page 2-2
n Using RIP with FrameSaver SLV CSU/DSUs on page 2-11
n Entering System Information and Setting the System Clock on page 2-12
n Setting Up Auto-Configuration on page 2-13
— Selecting a Frame Relay Discovery Mode
— Automatically Removing a Circuit
2
9000-A2-GB31-00 December 2002 2-1
Page 18

2. Basic Configuration
Using the Easy Install Feature
The Easy Install feature provides a straightforward installation menu that requires
minimal configuration to get the FrameSaver unit up and running quickly, and to
set up remote configuration and management via Telnet access from the NOC
(Network Operations Center).
Main Menu
→ Easy Install
Easy Install Screen Example – T1 Interface
main/easy_install 9126
Device Name: Node A 11/01/2002 02:01
EASY INSTALL
Service Type: Frame Relay
Node IP Address: 000.000.000.000
Node Subnet Mask: 000.000.000.000
TS Access: DLCI
Create a Dedicated Network Management Link
Ethernet Management Options Screen
Time Slot Assignment Screen
Network 1 Line Framing Format: ESF
Network 1 Line Build Out (LBO): 0.0
Network 1 Line Coding Format: B8ZS
DS0 Base rate (Kbps) Nx64
-------------------------------------------------------------------------------Ctrl-a to access these functions, ESC for previous menu M
ave
S
980
Clear
Clear
ainMenu Exit
Easy Install Screen Example – T3 Interface
main/easy_install 9520-ILM
Device Name: Wasau 11/01/2002 12:01
EASY INSTALL
Node IP Address: 010.102.070.014 Clear
Node Subnet Mask: 255.255.255.000 Clear
TS Access: None
Create a Dedicated Network Management Link
Ethernet Port Options Screen
Network 1 Line Build Out(LBO): Short
Port 1 Line Build Out(LBO): Short
------------------------------------------------------------------------------Ctrl-a to access these functions, ESC for previous menu MainMenu Exit
Save
2-2 December 2002 9000-A2-GB31-00
Page 19

2. Basic Configuration
Easy Install Screen Example – DDS Interface
main/easy_install 9623-SLV
Device Name: Node A 11/01/2002 02:03
EASY INSTALL
Service Type: Frame Relay
Node IP Address: 000.000.000.000
Node Subnet Mask: 000.000.000.000
TS Access: DLCI
Create a Dedicated Network Management Link
Ethernet Port Options Screen
Transmit Timing: Receive
DDS Line Rate (Kbps): Initialize From Network
Network Initiated DCLM: V.54 & ANSI
DSU Latching Loopback (64KCC): Enable
Require DSU Latching Loopback Preamble: Enable
980
Clear
Clear
-------------------------------------------------------------------------------Ctrl-a to access these functions, ESC for previous menu M
ave
S
ainMenu Exit
Easy Install Screen Example – DSL Interface
main/easy_install 9783
Device Name: Node A 09/06/2002 04:02
EASY INSTALL
DSLAM Type: Paradyne
Node IP Address: 000.000.000.000 Clear
Node Subnet Mask: 000.000.000.000
TS Access: VPI,VCI
Create a Dedicated Network Management Link
Ethernet Management Options Screen
Network 1 DSL Line Rate (Kbps) AutoRate
Network 1 FRF.8 Encapsulation Mode Transparent
-------------------------------------------------------------------------------Ctrl-a to access these functions, ESC for previous menu M
ave
S
0 , 35
Clear
ainMenu Exit
To remotely access the FrameSaver unit in Frame Relay mode, use the Dedicated
Network Management Link that was created during installation, using the Node IP
Address that was entered for the unit.
See the installation instructions shipped with your unit for additional information
and installation procedures.
9000-A2-GB31-00 December 2002
2-3
Page 20

2. Basic Configuration
The menu structure and selections, and the features and functions of the
FrameSaver unit, are changed based upon the type of service being used.
Table 2-1, Easy Install Configuration Options, describes the entries on the Easy
Install screens.
Table 2-1. Easy Install Configuration Options (1 of 7)
Service Type
Possible Settings: Frame Relay, Leased Line, PPP
Default Setting: [Depends on model]
Specifies the type of service to which the unit is to be connected.
Frame Relay – Frame Relay-aware mode, for connection to a frame relay service. This is
the default operational mode, and it is used to configure the FrameSaver unit in frame
relay mode so that frame relay parameters and SLV functionality can be set up.
If a 9123 unit is set to Leased Line, then changed to Frame Relay, Time Slot Discovery is
temporarily suspended until LMI communication is reestablished, and all frame
relay-related configuration options previously set up are restored, except for the Sync
Data Port Assignments. In this case, all port assignments set to S1Port-1 are converted to
FrameRly1 assignments on the Frame Relay Network 1 Assignment timeslot assignment
screen.
Leased Line – Leased-line mode, for connection to a standard leased-line service. This
mode provides a simple and straightforward screen to guide the installer during initial
installation, and to set up remote access to the unit.
When operating in leased-line mode, no frame relay-related statuses, performance
statistics, tests, configuration options, or control features are available; only physical layer
functions are available.
If the unit is set to Frame Relay then changed to Leased Line, all frame relay-related
screens and features are filtered so they are transparent to the user. All frame relay links,
DLCIs. and PVCs are preserved. For 9123 units, all Frame Relay Network 1 FrameRly1
time slot assignments are converted to S1Port-1 on the Sync Data Port Assignments
screen.
PPP – Point-to-Point Protocol mode. A single PPP circuit exists between Port1 and Net1.
Changing to or from PPP mode causes a reset.
2-4 December 2002 9000-A2-GB31-00
Page 21

2. Basic Configuration
Table 2-1. Easy Install Configuration Options (2 of 7)
DSLAM Type (9783)
Possible Settings: Paradyne, Alcatel (NewBridge), PairGain, Nokia
Default Setting: Paradyne
Ensures interoperability with non-Paradyne DSLAMs, not just the Hotwire GranDSLAM.
This option is only available from the Easy Install screen.
NOTES:
– The default is set before the unit is shipped, based upon the CLEC customer
ordering the unit. If you change the default, you must S
effect, which will reset the unit.
– When the default is changed, the default settings for other configuration options
change.
Paradyne – The FrameSaver device is used with a Hotwire GranDSLAM.
Alcatel (NewBridge) – The FrameSaver device is used with Alcatel’s NewBridge
DSLAM.
PairGain – The FrameSaver device is used with PairGain’s DSLAM.
Nokia – The FrameSaver device is used with Nokia’s DSLAM.
ave the change for it to take
Node IP Address
Possible Settings: 001.000.000.000– 126.255.255.255,
128.000.000.000–223.255.255.255, Clear
Default Setting: Clear (000.000.000.000)
Specifies the IP address needed to access the node. Since an IP address is not bound to
a particular port, it can be used for remote access via a management PVC.
001.000.000.000 – 223.255.255.255 – Shows the IP address for the node, which can be
viewed or edited. The first octet of the address cannot be decimal 0 or 127, or greater than
223.
Clear – Fills the node IP address with zeros.
Node Subnet Mask
Possible Settings: 000.000.000.000 – 255.255.255.255, Clear
Default Setting: 000.000.000.000
Specifies the IP address subnet mask that is needed to access the node. Since the
subnet mask is not bound to a particular port, it can be used with the Node IP address for
remote access via a management PVC.
000.000.000.000 – 255.255.255.255 – Shows the subnet mask for the node, which can be
viewed or edited.
Clear – Fills the node subnet mask with zeros. When the node’s subnet mask is all zeros,
the IP protocol creates a default subnet mask based upon the IP address class
(Class A: 255.000.000.000, Class B: 255.255.000.000, or Class C: 255.255.255.000).
9000-A2-GB31-00 December 2002
2-5
Page 22

2. Basic Configuration
Table 2-1. Easy Install Configuration Options (3 of 7)
TS Access
Possible Settings: None, DLCI, VPI,VCI, DLCI_on_VPI,VCI
Default Setting: [Depends on model]
Specifies the type of Virtual Circuit (VC) by which special troubleshooting (TS) access is
provided to service providers.
Display Conditions – This setting does not appear if Service Type is PPP.
None – No special troubleshooting link is defined.
DLCI – (Models whose network interface does not support ATM.) Allows the user to select
a frame relay DLCI to be designated for special troubleshooting access.
VPI,VCI – (Models whose network interface supports ATM.) Specifies an ATM VC on a
specific ATM VPI,VCI for TS access. It specifies the VPI and VCI on the network interface
for service provider troubleshooting. ATM data is presumed to be encapsulated according
to RFC 1483. VPI 0,VCI 35 is the default management path between the
FrameSaver device and the DSLAM. The VPI and VCI are entered separately.
– VPI range is 0–15.
– VCI range is 32–255.
DLCI_on_VPI,VCI – (Models whose network interface supports ATM.) Specifies a frame
relay DLCI VC on a specific ATM VPI,VCI for TS access. DLCI range is 16–1007. ATM
data is presumed to be encapsulated according to RFC 1490.
Create a Dedicated Network Management Link
Possible Settings: 16 –1007
Default Setting: Initially blank
Enter a DLCI number and (for units that support ATM) VPI,VCI for a dedicated network
management PVC.
NOTE: With the cursor on the Create a Dedicated Network Management Link field,
press Enter. The Which DLCI would you like to Create a Dedicated
Frame Relay Management PVC on? prompt appears. If the DLCI entered is over
an ATM link, prompts for VPI and VCI also appear.
Display Conditions – This setting does not appear if Service Type is PPP.
16 – 1007 – Specifies the DLCI number be used.
Ethernet Management Options Screen
For units with an Ethernet port, provides a link to the Ethernet Management Options
Screen. Press Enter and the screen appears. After configuring Ethernet options, press the
Esc key to return to the Easy Install screen.
Time Slot Assignment Screen (9123, 9126, 9128)
For units with a T1 network interface, provides a link to the timeslot assignment screen
appropriate to the Service Type. Press Enter and:
n
If Service Type is Frame Relay, the Network 1 Frame Relay Assignments screen
appears.
n
If Service type is Leased Line, the Sync Data Port Assignments screen appears.
After configuring timeslots, press the Esc key to return to the Easy Install screen.
2-6 December 2002 9000-A2-GB31-00
Page 23

2. Basic Configuration
Table 2-1. Easy Install Configuration Options (4 of 7)
Network 1 Line Framing Format (9123, 9126, 9128)
Possible Settings: D4, ESF
Default Setting: ESF
For units with a T1 network interface, specifies the framing format for transmitted and
received signals on the T1 network interface.
D4 – Uses D4 framing format.
NOTE: This setting is not recommended by network carriers. False yellow alarms may
occur after traffic has been running and the channel returns to idle, or when there is
light traffic when other settings are selected. ESF format does not create this problem.
ESF – Uses Extended Superframe framing format.
Network 1 Line Coding Format (9123, 9126, 9128)
Possible Settings: AMI, B8ZS
Default Setting: B8ZS
For units with a T1 network interface, specifies the line coding format for the network
interface.
AMI – Uses Alternate Mark Inversion (AMI) line coding format.
B8ZS – Uses Bipolar 8 Zero Substitution (B8ZS) line coding format.
Network 1 Line Build Out (9123, 9126, 9128)
Possible Settings: 0.0, –7.5, –15, –22.5
Default Setting: 0.0
For units with a T1 network interface, specifies the line build out for the signal transmitted
to the network.
0.0, –7.5, –15, –22.5 – Specifies line build out in dB.
Network 1 Line Build Out (9520, 9520-ILM)
Possible Settings: Short, Long
Default Setting: Short
For units with a T3 network interface, specifies whether a line equalization filter is
activated to simulate a longer cable.
Short – The equalization filter is activated. Use this option for network cables less than
100 feet long.
Long – The equalization filter is not activated. Use this option for network cables 100 feet
or longer.
Port 1 Line Build Out (9520-ILM)
Possible Settings: Short, Long
Default Setting: Short
For units with a T3 data port interface, specifies whether a line equalization filter is
activated to simulate a longer cable.
Short – The equalization filter is activated. Use this option for DTE cables less than 100
feet long.
Long – The equalization filter is not activated. Use this option for DTE cables 100 feet or
longer.
9000-A2-GB31-00 December 2002
2-7
Page 24

2. Basic Configuration
Table 2-1. Easy Install Configuration Options (5 of 7)
DS0 Base Rate (9123, 9126, 9128)
Possible Settings: Nx64, Nx56
Default Setting: Nx64
Selects the base rate for the DS0s allocated to frame relay on the network interface.
Nx64 – The base rate is 64 Kbps.
Nx56 – The base rate is 56 Kbps.
Network 1 Port Type (9820-2M, 9820-8M)
Possible Settings: E530, V.35, X.21
Default Setting: V.3 5
Selects the type of port to be used for the network data port.
E530 – The port is configured as an EIA-530-A-compatible DTE. An EIA-530 compatible
DCE can be directly connected to the DB25 connector for this port on the rear of the
FrameSaver unit.
V.3 5 – The port is configured as a V.35-compatible DTE. A V.35-compatible DCE can be
connected to the DB25 connector for this port using an adapter cable on the rear of the
FrameSaver unit.
X.21 – The port is configured as a V.11/X.21-compatible DTE. A V.11/X.21-compatible
DCE can be connected to the DB25 connector for this port using an adapter cable on the
rear of the FrameSaver unit.
Network 1 DSL Line Rate Mode (9720, 9783, 9788)
Possible Settings: Hunt (9783), AutoRate, Fixed
Default Setting: AutoRate
Specifies the mode to be used for rate selection.
Hunt – (9783 only.) The unit attempts to train at rate specified by Network 1 DSL Line
Rate. If that fails, the unit attempts to train at the next higher rate, and, if unsuccessful,
cycles through all the rates until training is successful or the unit is reset.
AutoRate – The unit automatically detects the line rate from the network interface.
Fixed – The unit uses the line rate specified by Network 1 DSL Line Rate.
2-8 December 2002 9000-A2-GB31-00
Page 25

2. Basic Configuration
Table 2-1. Easy Install Configuration Options (6 of 7)
Network 1 DSL Line Rate (9783)
Possible Settings:
– If DSLAM Type is set to Paradyne, or if DSLAM Type is set to Nokia and Network 1
DSL Line Rate Mode is set to Fixed: 144, 192, 208, 256, 272, 384, 400, 512, 528,
768, 784, 1024, 1152, 1168, 1536, 1552, 2320
– If DSLAM Type is set to Alcatel (NewBridge): 208, 400, 784, 1168, 1552, 2320
– If DSLAM Type is set to Nokia and Network 1 DSL Line Rate Mode is set to Hunt:
192, 384, 768, 1152, 1536
– If DSLAM Type is set to PairGain: 144, 192, 208, 256, 272, 384, 400, 512, 528,
768, 784, 1024, 1152, 1168, 1536, 1552, 2320
Default Setting:
– If DSLAM Type is set to Alcatel (NewBridge) and Network 1 DSL Line Rate Mode is
set to Hunt: 208
– If DSLAM Type is set to Nokia and Network 1 DSL Line Rate Mode is set to Hunt:
384
– If DSLAM Type is set to PairGain and Network 1 DSL Line Rate Mode set to Fixed:
784
– (If DSLAM Type is set to Paradyne, Network 1 DSL Line Rate Mode is set to
AutoRate and Network 1 DSL Line Rate does not appear)
Determines whether the rate on the DSL interface is set to a specific value or
automatically detected using the Conexant AutoBaud algorithm.
144 – 2320 – Sets the DSL line rate in kbps.
Network 1 DSL Line Rate (9788)
Possible Settings:
– If PSD Mask is Symmetric: 200, 264, 328, 392, 456, 520, 584, 648, 712, 776, 784,
840, 904, 968, 1032, 1096, 1160, 1224, 1288, 1352, 1416, 1480, 1544, 1552, 1608,
1672, 1736, 1800, 1864, 1928, 1992, 2056, 2120, 2184, 2248, 2312
– If PSD Mask is Asymmetric and Region Setting is Annex A: 776, 784, 1544, 1552
– If PSD Mask is Asymmetric and Region Setting is Annex B: 2056, 2312
Default Setting: [None]
Determines the rate on the DSL network interface. Valid rates, and the rates presented on
the screen, depend on the values of Region Setting and PSD Mask on the Network
Physical Interface Options screen. If a change to another configuration option renders the
selected DSL Line Rate invalid, the line rate is set to AutoRate.
Display Conditions – Network 1 DSL Line Rate does not appear if Network 1 DSL Line
Rate Mode is set to AutoRate.
200 – 2312 – The DSL line rate is set to the specified rate in kbps.
Network 1 Operating Rate (9720)
Possible Settings: AutoRate, 64, 128, 144
Default Setting: AutoRate
Determines the rate on the IDSL network interface.
AutoRate – The unit automatically detects the line rate from the network interface.
64, 128, 144 – The IDSL line rate is set to the specified rate in kbps.
9000-A2-GB31-00 December 2002
2-9
Page 26

2. Basic Configuration
Table 2-1. Easy Install Configuration Options (7 of 7)
Network 1 Channel (9720)
Possible Settings: B1, B2
Default Setting: B1
Specifies the B channel used for data transfer when the line rate is 64 kbps.
Display Conditions – Network 1 Channel appears only when Network 1 Operating Rate
is set to 64.
B1 – The B1 channel is used for data transfer.
B2 – The B2 channel is used for data transfer.
Port-1 Port Type (9520, 9788, 9820-2M, 9820-8M)
Possible Settings: E530, V.35, X.21, HSSI
Default Setting:
– 9520: HSSI
– 9788, 9820-2M, 9820-8M: V.3 5
Specifies the port type of the data port.
E530 – The port is configured as an EIA-530-A-compatible DCE. An EIA-530-Acompatible DTE may be directly connected to the DB25 connector for the port.
V.3 5 – The port is configured as a V.35-compatible DCE. A V.35-compatible DTE may be
connected to the port using a DB25-to-MS34 adapter.
X.21 – The port is configured as an X.21-compatible DCE. An X.21-compatible DTE may
be connected to the port using a DB25-to-DB15 adapter.
HSSI – The port is configured as a HSSI-compatible DCE. A HSSI-compatible DTE may
be directly connected to the DB25 connector for the port.
Port 1 Port Rate (9520)
Possible Settings (HSSI): 7456, 11184, 17250, 25875, 44736, 51750
Default Setting (HSSI): 51750
Possible Settings (V.35): 512, 1025, 1537, 2050, 2562, 3074, 3587, 4099, 4611, 5124,
5636, 6149, 6661, 7073, 7685, 8197
Default Setting (V.35): 6149
Selects the clock rate in Kbps for the user data port.
Network 1 FRF.8 Encapsulation Mode (9783 and 9788)
Possible Settings: Translational, Transparent
Default Setting: Transparent
Specifies the type of FRF.8 upper-layer protocol encapsulation used on the link for each
pair of interoperable Frame Relay and ATM PVCs.
Translational – Encapsulated data is translated (RFC 1490 to RFC 1483). FrameSaver
multiplexing and SLV communications are not supported in this mode.
Transparent – Encapsulated data is forwarded without being translated.
2-10 December 2002 9000-A2-GB31-00
Page 27

Using RIP with FrameSaver SLV CSU/DSUs
Using the system’s standard Routing Information Protocol (RIP) feature, routing
information is passed to the router over the management PVC, so the router can
learn routes to FrameSaver devices. Node IP information should be set up (see
Using the Easy Install Feature on page 2-2).
Procedure
To set up your router and FrameSaver SLV CSU/DSU so that the router can learn
routes to FrameSaver devices:
1. Configure the router to receive RIP.
For example, if using a Cisco router, you would use the commands
config-t, router RIP, int serialx, IP RIP Receive version 1,
then ctl-z WR.
2. Create a Standard DLCI for the user data port.
2. Basic Configuration
Configuration
3. Create a Management PVC using the user data port DLCI just configured.
Configuration
4. Set Primary Link RIP to Standard_Out, and S
Refer to Table 3-26, DLCI Record Options, and Table 3-32, Management PVC
Options, in Chapter 3, Configuration Options, for configuration information.
→ Data Ports→ DLCI Records
→ Management and Communication → Management PVCs
ave the configuration.
9000-A2-GB31-00 December 2002
2-11
Page 28

2. Basic Configuration
Entering System Information and Setting the System Clock
Select System Information to set up or display the general SNMP name for the
unit, its location, and a contact for the unit, as well as to set the system clock.
Main Menu
The following information is available for viewing. S
If the selection is . . . Enter the . . .
Device Name Unique name for device identification of up to 20 characters.
System Name SNMP system name; can be up to 255 characters.
System Location System’s physical location; can be up to 255 characters.
System Contact Name and how to contact the system person; can be up to
Date Current date in the month/day/year format (mm/dd/yyyy).
Time Current time in
→ Control→ System Information
ave any entries or changes.
255 characters.
the hours:minutes format (hh:mm).
NOTE:
To clear existing information, place the cursor in the Clear field (Tab to the
Clear field) and press Enter.
See the FrameSaver SLV Operations Guide to set up and administer logins.
2-12 December 2002 9000-A2-GB31-00
Page 29

Setting Up Auto-Configuration
The auto-configuration feature is available in frame relay mode on all models
except those with DSL interfaces. It allows you to select a method of automatic
configuration and connection of DLCIs within the FrameSaver unit, as well as to
automatically remove DLCIs and connections that are no longer supported by the
network service provider.
2. Basic Configuration
Main Menu
→ Auto-Configuration
Auto-Configuration Screen Example
main/auto-configuration 9128-II
Device Name: Node A 8/18/2000 23:32
AUTO-CONFIGURATION
Frame Relay Discovery Mode: 1MPort
Automatic Circuit Removal: Enable
Automatic Backup Configuration: Single_Site_Backup
-------------------------------------------------------------------------------Ctrl-a to access these functions, ESC for previous menu M
ave
S
ainMenu Exit
This feature also maintains associated DLCI option settings when Standard LMI is
used on the network interface.
If an ISDN DBM is not installed, Automatic Backup Configuration does not appear
(see Setting Up Automatic Backup Configuration in Chapter 4, Feature-Specific
Configuration) for additional information).
9000-A2-GB31-00 December 2002
2-13
Page 30
2. Basic Configuration
Selecting a Frame Relay Discovery Mode
When a Frame Relay Discovery Mode is active, the FrameSaver unit “discovers”
network DLCIs from the network LMI status response message. It configures a
network DLCI and a user data port DLCI, and automatically connects them to
create a PVC.
Main Menu
→ Auto-Configuration→ Frame Relay Discovery Mode
Automatically configured network DLCIs are multiplexed, and each automatically
configured port DLCI carries the same DLCI Number as its corresponding network
DLCI. These are the same DLCI numbers that would have been available had the
FrameSaver unit not been inserted in the link, between your equipment and the
network.
NOTE:
A local Management PVC (e.g., the PVC between the router and the
FrameSaver unit’s user data port) must be configured manually.
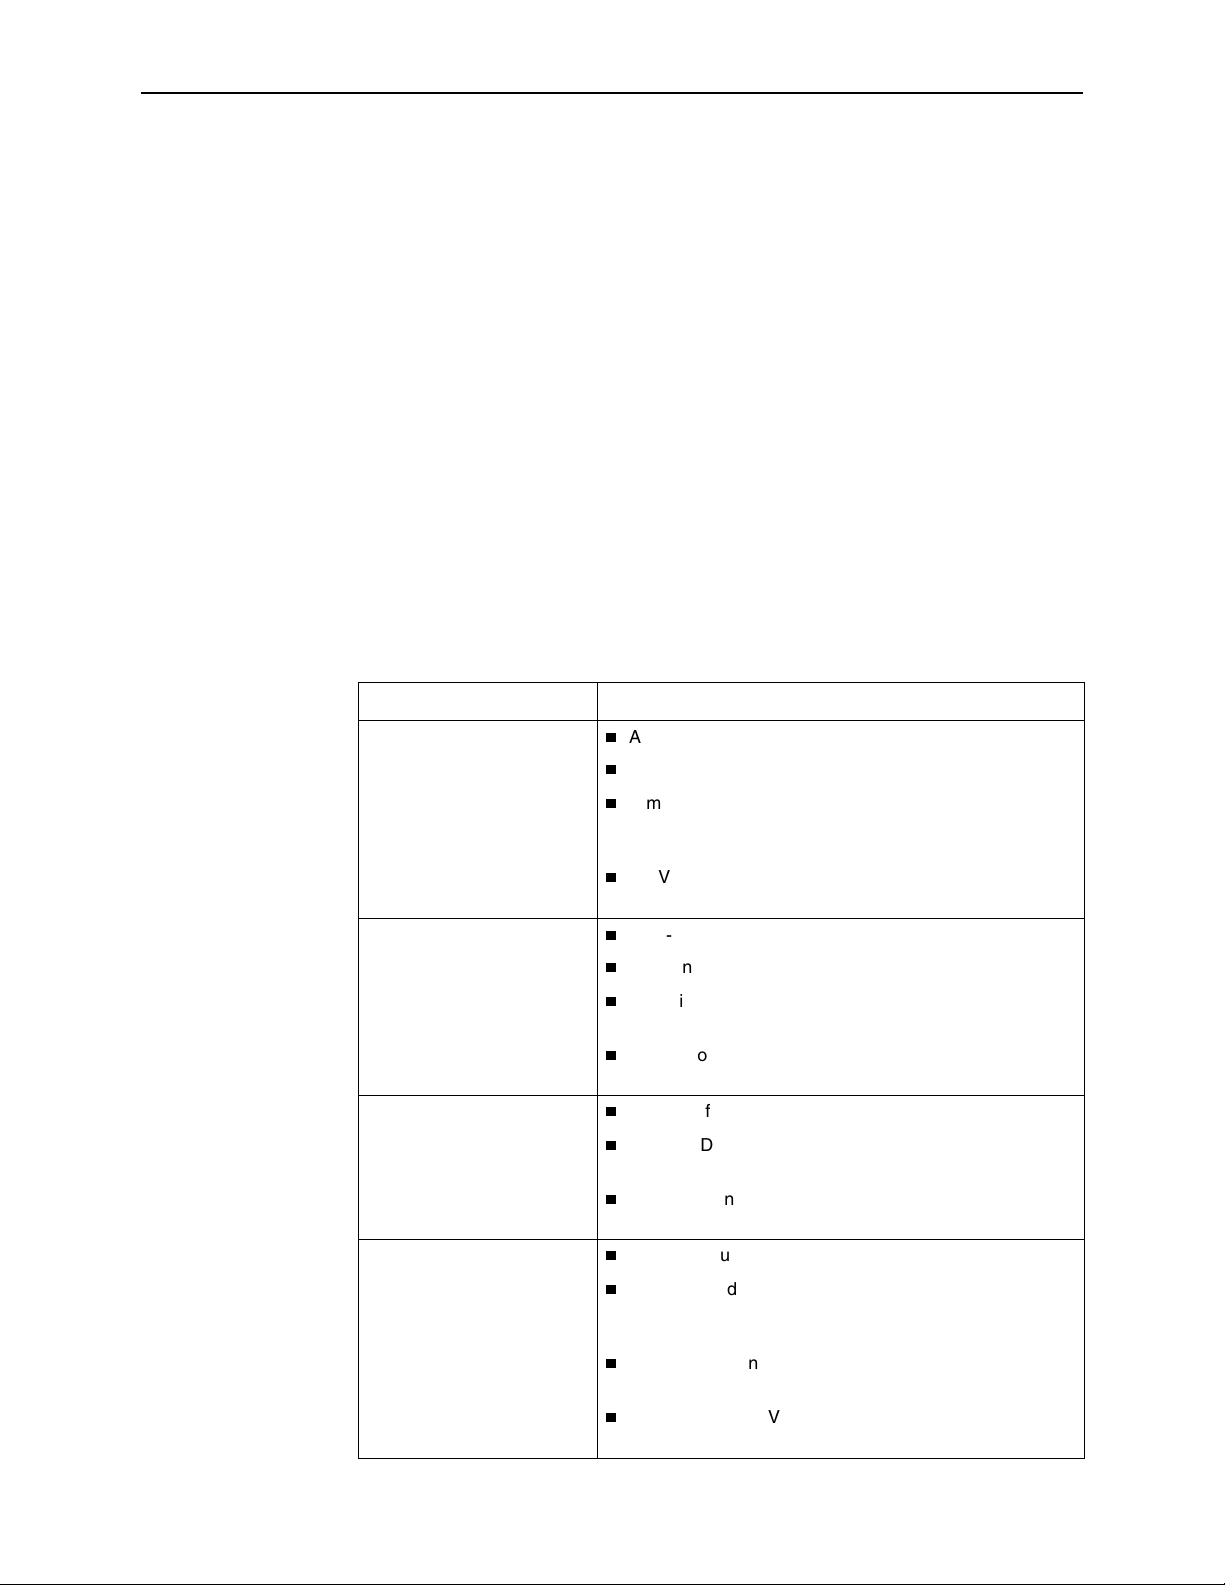
The following will occur when a Frame Relay Discovery Mode is selected:
Discovery Mode Configuration Description
1MPort
n
Auto-configuration is enabled on Port-1.
n
A management DLCI is configured.
n
A multiplexed network DLCI containing two embedded
DLCIs (EDLCIs) is configured for Port-1 user data and
management data.
n
A PVC connection is configured between the network
and port DLCIs.
1Port
1PPort
2MPorts
(only applies to models with
multiple data ports)
n
Auto-configuration is enabled on Port-1.
n
No management DLCI is configured.
n
A multiplexed network DLCI is configured for Port-1 user
data.
n
A PVC connection is configured between the network
and port DLCIs.
n
Auto-Configuration is enabled on Port-1.
n
A Port-1 DLCI is created for each network DLCI and
automatically cross-connected to it.
n
Payload management is configured for the network
DLCI and assigned the Node IP Address.
n
Auto-configuration is enabled on both Port-1 and Port-2.
n
A multiplexed network DLCI containing three EDLCIs is
configured for Port-1 customer data, Port-2 customer
data, and management data.
n
PVC connections are configured between the network
and port DLCIs.
n
A management PVC is configured on the network
interface.
2-14 December 2002 9000-A2-GB31-00
Page 31

Discovery Mode Configuration Description
2. Basic Configuration
NetOnly
Disable
n
Auto-configuration of a network DLCI only; no Port-1 or
PVC connections are configured.
n
No Port-1, PVC connection, or management DLCI is
configured.
n
No frame relay discovery or automatic configuration
takes place.
The FrameSaver unit will be configured manually.
NOTE:
If the default setting (1MPort or 1PPort) is not the setting required for your
application, change the Frame Relay Discovery Mode before connecting the
network cable or editing discovered option settings. Otherwise, the
FrameSaver unit will start discovering DLCIs as soon as it powers up.
If this occurs, you can recover by deleting the discovered DLCIs. If only a local
management PVC between the router and the FrameSaver unit has been
configured, simply select the desired Frame Relay Discovery Mode and S
the change.
The default discovery mode, depending on model, is 1MPort or 1PPort.
When 1MPort mode is active, the unit creates for each DLCI discovered on the
network a multiplexed network interface DLCI (which contains two EDLCIs: one for
Port-1 data and the other for management), a standard Port-1 DLCI (with the
same number as the network interface DLCI), and a Management PVC, then
cross-connects them. When LMI is active on the network interface and PVC status
information (with provisioned DLCI numbers) is next received from the network,
the unit automatically saves the settings to the Current Configuration area.
ave
When 1PPort mode is active, the unit uses the Network DLCI values obtained from
the Network LMI status response message to automatically configure for each
DLCI a corresponding DLCI for Port 1 having the same numeric value as the
Network DLCI, and automatically cross connects them. The DLCIs created on the
network side are IP Enabled (not standard or multiplexed) DLCIs. In addition,
payload management is configured for the network DLCI and assigned the Node
IP Address.
Configuration options set by selecting a discovery mode can be manually
modified, refined, or deleted at any time using the Configuration menus. No
previously discovered and configured DLCIs or cross-connections will be removed
unless authorized or Automatic Circuit Removal is enabled (see Automatically
Removing a Circuit on page 2-16). Additional discovered DLCIs will be configured
according to the current Frame Relay Discovery Mode setting. Selecting or
changing the setting will not affect IP Addresses or Subnet Masks.
NOTE:
When auto-configuration creates a multiplexed DLCI, but a standard DLCI is
needed, change the DLCI to standard from the network DLCI Records screen:
Configuration
→ Network→ DLCI Records
9000-A2-GB31-00 December 2002
2-15
Page 32

2. Basic Configuration
When a Frame Relay Discovery Mode is changed and saved, the Saving will
cause Auto-Configuration to update and Restart. Are you sure?
prompt appears. N
n If Yes (y) is entered, the Delete All DLCIs and PVC Connections?
prompt appears. N
o is the default for this prompt.
o is the default for this prompt.
— If Y
es is entered, all multiplexed DLCIs and PVC Connections are deleted,
except for Management PVCs with the user data port as the primary
destination and the Management PVC that is designated as TS
Management Link.
— If N
o is entered, previously discovered and auto-configured option settings
will not be removed, but configuration updates due to LMI response
messages are performed according to the just saved mode setting.
n If No (n) is entered, or if you exit the screen without responding to the prompt,
no Auto-Configuration updates are performed and updates due to LMI
response messages are performed according to the previously saved setting.
Automatically Removing a Circuit
Using the automatic circuit removal feature, which comes enabled, network DLCIs
and PVCs can be automatically removed from the unit’s configuration when the
network service provider no longer supports them. Automatic deletion is based
upon information from a LMI full status response on an active frame relay link.
When this feature is set to:
n Enable – The following will be automatically removed from the unit’s
configuration:
— Unsupported network DLCIs and PVC connections that include
multiplexed network DLCIs.
— Standard network DLCIs that are Payload Managed or IP Enabled.
— Unsupported standard network DLCIs that are not configured as the
primary destination in a management PVC.
— Non-management PVCs in which unsupported standard network DLCIs
are included.
— DLCIs not included in three consecutive LMI full status response
messages.
— LMI status responses that indicate a Deleted status for the DLCI.
All configured options relating to the deleted circuits are also deleted and they
revert to their default settings.
A DLCI will not be deleted if the physical interface or frame relay link is down,
or if the DLCI is used for the TS Management Link.
n Disable – Unused network DLCIs, PVC connections, and management PVCs
must be manually removed.
If the model has ISDN backup capability, ISDN Link Profiles associated with
the deleted records and alternate destinations will be deleted, as well.
2-16 December 2002 9000-A2-GB31-00
Page 33

Configuration Options
This chapter includes the following:
n Configuring the Overall System on page 3-3
n Configuring Physical Interfaces on page 3-17
n Assigning Time Slots/Cross Connections on page 3-50
n Configuring PPP for an Interface on page 3-63
n Manually Configuring DLCI Records on page 3-64
n Configuring Circuit Records for the Network Interface on page 3-68
3
n Configuring ATM for the Network Interface on page 3-71
n Configuring PVC Connections on page 3-72
n Configuring the IP Path List on page 3-76
n Setting Up Management and Communication Options on page 3-77
n Configuring the Criteria for Automatic Backup on page 3-109
Configuration Option Tables
Configuration option descriptions contained in this chapter are in menu order, even
though this may not be the order in which you access each when configuring the
unit.
The following configuration option tables are included:
n Table 3-1, System Frame Relay and LMI Options
n Table 3-2, PPP Options
n Table 3-3, Class of Service Definitions
n Table 3-4, Code Point Definitions
n Table 3-5, Service Level Verification Options
n Table 3-6, General System Options
n Table 3-7, T1 Network Physical Interface Options
9000-A2-GB31-00 December 2002 3-1
Page 34

3. Configuration Options
n Table 3-8, T3 Network Physical Interface Options
n Table 3-9, DDS Network Physical Interface Options
n Table 3-10, IDSL Network Physical Interface Options
n Table 3-11, SDSL Network Physical Interface Options
n Table 3-12, SHDSL Network Physical Interface Options
n Table 3-13, Synchronous Network Data Port Physical Interface Options
n Table 3-14, HSSI Network Data Port Physical Interface Options
n Table 3-15, V.35 Data Port Physical Interface Options
n Table 3-16, EIA-530-A/X.21/V.35 Data Port Physical Interface Options
n Table 3-17, HSSI Data Port Physical Interface Options
n Table 3-18, T3 User Port Physical Interface Options
n Table 3-19, DSX-1 Physical Interface Options
n Table 3-20, ISDN BRI DBM Physical Interface Options (9126, 9626)
n Table 3-21, ISDN PRI DBM Physical Interface Options (9128)
n Table 3-22, ISDN Link Profile Options
n Table 3-23, Signaling and Trunk Conditioning Values
n Table 3-24, Interface Frame Relay Options
n Table 3-25, Interface PPP Options
n Table 3-26, DLCI Record Options
n Table 3-27, Circuit Records Options
n Table 3-28, Network ATM Options
n Table 3-29, PVC Connection Options
n Table 3-30, IP Path List
n Table 3-31, Node IP Options
n Table 3-32, Management PVC Options
n Table 3-33, General SNMP Management Options
n Table 3-34, Telnet and FTP Session Options
n Table 3-35, SNMP NMS Security Options
n Table 3-36, SNMP Traps and Trap Dial-Out Options
n Table 3-37, Ethernet Management Options
n Table 3-38, Communication Port Options
n Table 3-39, Modem Port Options
n Table 3-40, Auto Backup Criteria Options
3-2 December 2002 9000-A2-GB31-00
Page 35

Configuring the Overall System
The System menu options are explained in the following sections:
n Configuring Frame Relay and LMI for the System (CSU/DSUs)
n Configuring PPP Options
n Configuring Class of Service Definitions
n Configuring Service Level Verification Options
n Configuring General System Options
Configuring Frame Relay and LMI for the System (CSU/DSUs)
Select Frame Relay and LMI from the System menu to display or change the
Frame Relay and LMI options for the entire system (see Table 3-1, System Frame
Relay and LMI Options). The option appears only when Service Type is Frame
Relay.
3. Configuration Options
Main Menu
→ Configuration→ System → Frame Relay and LMI
See Configuring PPP for an Interface on page 3-63 to set an interface’s frame
relay options.
Table 3-1. System Frame Relay and LMI Options (1 of 4)
LMI Behavior
Possible Settings: Independent,
Net1-FR1_Follows_Port-1,
Net1-FR1_Follows_Port-2,
Net1-FR1_Follows_Rtr-S0,
Port-1_Follows_Net1-FR1,
Port-2_Follows_Net1-FR1,
Rtr-S0_Follows_Net1-FR1,
All_Ports_Follow_Net1-FR1,
Port-1_Codependent_with_Net1-FR1,
Port-2_Codependent_with_Net1-FR1,
Rtr-S0_Codependent_with_Net1-FR1,
Default Setting: Independent
Configures the device to allow the state of the LMI to be passed from one interface to
another, determining how the unit will handle a change in the LMI state. Sometimes
referred to as LMI pass-through.
Display Conditions – Port-n options are available on CSU/DSUs and Rtr-S0 options
are available on FrameSaver SLV Routers. Port-2 options are available on units with
two data ports.
NOTE: LMI Behavior cannot be changed while Auto Backup is enabled. A warning
message appears at the bottom of the screen if auto backup is enabled. First, disable
Auto Backup, and then change LMI Behavior.
Independent – Handles the LMI state of each interface separately so that the LMI state of
one interface has no effect on the LMI state of another interface. Provides LMI Spoofing.
This is the recommended setting when backup is configured, and for Network Service
Providers (NSPs).
9000-A2-GB31-00 December 2002
3-3
Page 36

3. Configuration Options
Table 3-1. System Frame Relay and LMI Options (2 of 4)
LMI Behavior (continued)
Net1-FR1_Follows_Port-1 – Brings LMI down on the network interface when LMI on
Port-1 goes down, disabling the network interface and deasserting its control leads. When
LMI on Port-1 comes back up, the network interface is reenabled. The LMI state on the
network interface has no effect on the LMI state on Port-1. That is, the network interface’s
LMI follows Port-1’s LMI. Used at central sites, this setting is useful when the remote site
router on the other end of the PVC connection can initiate recovery via a redundant
central site when there is a catastrophic central site LAN or router failure. Not
recommended for NSPs.
Net1-FR1_Follows_Port-2 – Reacts like the Net1-FR1_Follows_Port-1 selection, but for
Port-2 instead.
Rtr-S0_Follows_Port-1 – Brings LMI down on the network interface when LMI on Rtr-S0
goes down, disabling the network interface and deasserting its control leads. When LMI
on Rtr-S0 comes back up, the network interface is reenabled. The LMI state on the
network interface has no effect on the LMI state on Rtr-S0. That is, the network interface’s
LMI follows Rtr-S0’s LMI.
Port-1_Follows_Net1-FR1 – Brings LMI down on Port-1 when LMI on the network
interface goes down, disabling Port 1 and deasserting its control leads. When LMI on the
network interface comes back up, Port-1 is reenabled and its control leads are reasserted.
The LMI state on Port-1 has no effect on the LMI state on the network interface. That is,
Port-1’s LMI follows the network interface’s LMI. This setting is useful if the router
connected to Port-1 is used to initiate recovery when network failures are detected.
Port-2_Follows_Net1-FR1 – Reacts like the Port-1_Follows_Net1-FR1 selection, but for
Port-2 instead.
Rtr-S0_Follows_Net1-FR1 – Brings LMI down on Rtr-S0 when LMI on the network
interface goes down, disabling Rtr-S0. When LMI on the network interface comes back
up, Rtr-S0 is reenabled. The LMI state on Rtr-S0 has no effect on the LMI state on the
network interface. That is, Rtr-S0’s LMI follows the network interface’s LMI.
All_Ports_Follow_Net1-FR1 – Brings LMI down on all user data ports when LMI on the
network interface goes down, disabling all ports and deasserting their control leads.
Allows LMI to come back up and reenables the ports when LMI comes up on the network.
That is, LMI on each port follows the network interface’s LMI. The state of LMI on the port
will not affect the state of LMI on the network interface.
Port-1_Codependent_with_Net1-FR1 – Brings LMI down on the network interface when
LMI on Port-1 goes down (or LMI down on Port-1 when LMI on the network interface goes
down), and allows LMI to come back up when LMI comes back on the other interface.
That is, the LMI state for one interface is dependent on the other. Use this setting when
backup is through the router instead of the unit. It is not recommended since it makes fault
isolation more difficult.
Port-2_Codependent_with_Net1-FR1 – Reacts like the
Port-1_Codependent_with_Net1-FR1 selection, but for Port-2 instead. The state of LMI
on the network interface will not affect the state of LMI on Port-1.
Rtr-S0_Codependent_with_Net1-FR1 – Brings LMI down on the network interface when
LMI on Rtr-S0 goes down (or LMI down on Rtr-S0 when LMI on the network interface
goes down), and allows LMI to come back up when LMI comes back on the other
interface. That is, the LMI state for one interface is dependent on the other.
3-4 December 2002 9000-A2-GB31-00
Page 37

3. Configuration Options
Table 3-1. System Frame Relay and LMI Options (3 of 4)
LMI Behavior (9783 and 9788)
Possible Settings: Independent, Net1-FR1_Follows_Port-1,
Port-1_Follows_Net1-FR1, Port-1_Codependent_with_Net1-FR1
Default Setting: Port-1_Codependent_with_Net1-FR1
For units that support ATM, configures the state of LMI on Port-1 and the state of the ATM
link on the network interface to be passed from one interface to another.
Independent – Handles the state of each interface separately so that the LMI state of
Port-1 has no effect on the state of the ATM link on the network interface, and vice versa.
Net1-FR1_Follows_Port-1 – Brings down VCs cross-connected to Port-1 on the network
interface when LMI on Port-1 goes down, and sends F5 OAM cells on all network VCs
cross-connected to Port-1 DLCIs to alert the network and far-end device that frame relay
data can not be delivered through the device. When LMI on Port-1 comes back up, the
network VCs are also re-enabled. This setting is useful at a central site when the remote
site router on the other end of the PVC connection can initiate recovery via a redundant
central site when there is a catastrophic central site LAN or router failure. Not
recommended for NSPs.
Port-1_Follows_Net1-FR1 – Brings down LMI on Port-1 when there is a physical failure
or ATM failure on the network interface. When the alarm on the network interface is
cleared, Port-1 is re-enabled and its control leads are reasserted. This setting is useful if
the router connected to Port-1 is used to initiate recovery when network failures are
detected.
Port-1_Codependent_with_Net1-FR1 – The LMI state for Port 1 and the Net1-FR1
interface are dependent on each other. If the LMI is down on either interface, the system
will bring the LMI down on the other interface. When the LMI is up on either interface, the
system will bring the LMI up on the other interface. When Port-1 LMI goes down, in
addition to bringing down the internal network frame relay link, the unit also sends
F5 OAM cells on all network VCs cross-connected to Port-1 DLCIs to alert the network
and far-end device that frame relay data can not be delivered through the device. Use this
setting when backup is through the router instead of the unit. Note that when the router is
disconnected, the NSP cannot access the unit using multiplexed VCs.
LMI Error Event (N2)
Possible Settings: 1, 2, 3, 4, 5, 6, 7, 8, 9, 10
Default Setting: 3
Configures the LMI-defined N2 parameter, which sets the number of errors that can occur
on the LMI link before an error is reported. Applies to both the user and network sides of a
UNI.
1 – 10 – Specifies the maximum number of errors.
LMI Clearing Event (N3)
Possible Settings: 1, 2, 3, 4, 5, 6, 7, 8, 9, 10
Default Setting: 1
Configures the LMI-defined N3 parameter, which sets the number of error-free messages
that must be received before clearing an error event. Applies to both the user and network
sides of a UNI.
1 – 10 – Specifies how many error-free messages it will take to clear the error event.
9000-A2-GB31-00 December 2002
3-5
Page 38

3. Configuration Options
Table 3-1. System Frame Relay and LMI Options (4 of 4)
LMI Status Enquiry (N1)
Possible Settings: 1, 2, 3, 4, . . . 255
Default Setting: 6
Configures the LMI-defined N1 parameter, which sets the number of status enquiry polling
cycles that the user side of the LMI initiates before a full status enquiry is initiated. Applies
to the user side of a UNI only.
1 – 255 – Specifies the number of status enquiry polling cycles that can be initiated before
a full status enquiry is initiated.
LMI Heartbeat (T1)
Possible Settings: 5, 10, 15, 20, 25, 30
Default Setting: 10
Configures the LMI-defined T1 parameter, which sets the number of seconds between the
initiation of status enquiry messages on the user side of the LMI. Applies to the user side
of a UNI only.
5 – 30 – Specifies the number of seconds between the initiation of status enquiry
messages in increments of 5.
LMI Inbound Heartbeat (T2)
Possible Settings: 5, 10, 15, 20, 25, 30
Default Setting: 15
Configures the LMI-defined T2 parameter, which sets the number of seconds between the
receipt of status enquiry messages on the network side of the LMI. Applies to the network
side of a UNI only.
5 – 30 – Specifies the number of seconds between the receipt of status enquiry messages
in increments of 5.
LMI N4 Measurement Period (T3)
Possible Settings: 5, 10, 15, 20, 25, 30
Default Setting: 20
Configures the LMI-defined T3 parameter, which is the time interval (in seconds) that the
network side of the LMI uses to measure the maximum number of status enquiry
messages that have been received (N4) from the user side.
5 – 30 – Specifies the interval of time in increments of 5.
3-6 December 2002 9000-A2-GB31-00
Page 39

Configuring PPP Options
PPP options are selected from the System menu (see Table 3-2, PPP Options).
The option appears only when Service Type is PPP.
Table 3-2. PPP Options
PPP
Possible Settings: Independent, Port-1_Follows_Net
Default Setting: Independent
Allows you to pass the state of PPP from one interface to the other.
Independent – The state of PPP on one interface does not affect the state of the other.
Port-1_Follows_Net – The state of PPP on Port 1 depends on the state of PPP on the
Network 1 interface. If PPP is down on Network 1, the system brings down PPP on the
Port 1 interface and disables the port, causing the DSR, CD, and CSR control leads to be
deasserted. If PPP is up on Network 1, the system enables Port 1 and asserts the control
leads.
3. Configuration Options
Main Menu→ Configuration→ System→ PPP
9000-A2-GB31-00 December 2002
3-7
Page 40

3. Configuration Options
Configuring Class of Service Definitions
Select Class of Service Definitions from the System menu to display or change the
Class of Service definitions to be used with latency, availability, and throughput
measurements of IP traffic on IP Enabled circuits.
Main Menu
→ Configuration→ System → Class of Service Definitions
The Class of Service Definitions screen appears.
Procedure
To create a new Class of Service definition:
1. To manually assign definition names and code points, proceed to Step 4
2. To automatically create Class of Service names and associate them with code
points according to RFCs 2474, 2497, and 2498, select R
following settings are established:
Field Setting After RfcCodePoints Selected
Class of Service Name 1 – NewCtrl
2 – Expd Fwd
3 – AFClass4
4 – AFClass3
5 – AFClass2
6 – AFClass1
7 – Default
Measure Latency & Availability 1 – N
2 – Y
3 – Y
4 – Y
5 – Y
6 – Y
7 – Y
fcCodePoints. The
Code Points 1 (NetwCtrl) – 110000, 111000
2 (Expd Fwd) – 101110
3 (AFClass4) – 100010, 100100, 100110
4 ( A F C l as s3) – 0110 1 0 , 011100, 011110
5 (AFClass2) – 010010, 010100, 010110
6 (AFClass1) – 001010, 001100, 001110
7 (Default) – 000000
3. If these settings are satisfactory, proceed to Step 10.
4. Type a name of up to 8 characters into one of the Name fields next to IDs 1–6.
5. To unassign all code points by inserting blank names, select C
lrAllCodePoints.
To assign all Code Points to a Class of Service name of Default, select
efaultCodePoints.
D
6. Select PgD
n or PgUp. The Code Point Assignment screen appears.
7. For any Code Point you want to assign to the name, type the name you
selected in Step 4 into the Name field to the right of the Code Point.
3-8 December 2002 9000-A2-GB31-00
Page 41

3. Configuration Options
8. Select Save, then select PgDn or PgUp. The Class of Service Definitions page
reappears. In the Code Points Assigned column next to your selected name
there is now a Y for Yes.
9. If latency and availability should be measured for the selected name, change
the N in the Measure Latency & Availability column to Y.
10. Select S
ave.
To configure these options, Service Type on the Easy Install screen must be set to
Frame Relay.
Table 3-3. Class of Service Definitions
Class of Svc Name
Possible Settings: ASCII Text Entry
Default Setting:
For IDs 2–7: blank
For ID 1: Default
Specifies a name to identify a Class of Service definition.
ASCII Text Entry – Enter a unique name for the definition (maximum length
8 characters).
Measure Latency & Availability
Possible Settings: N, Y
Default Setting:
For IDs 2–7: N
For ID 1: Y
Determines whether latency and availability are measured for this Class of Service ID.
Display Conditions – This option is set to N and is read-only until the class of service is
defined and code points are assigned to it.
N – Latency and availability are not measured for this Class of Service ID.
Y – Latency and availability are measured for this Class of Service ID.
Code Points Assigned
Possible Settings: Y, N
Default Setting:
For IDs 2–7: N
For ID 1: Y
This read-only field shows whether a Code Point has been assigned to this Class of
Service ID on the Code Point Definitions screen.
N – No Code Point is assigned to this ID.
Y – At least one Code Point is assigned to this ID.
9000-A2-GB31-00 December 2002
3-9
Page 42

3. Configuration Options
Code Point Definitions
Select Class of Service Definitions from the System menu, then PgDn or PgUp, to
display or change the Code Point definitions for a Class of Service ID. See
Configuring Class of Service Definitions on page 3-8 for instructions.
Table 3-4. Code Point Definitions
Code Pnt
Possible Settings: 000000–111111
Default Setting: None.
This read-only field shows the possible Code Points. Code Points are described in
RFC 2474.
ID
Possible Settings: 1–7
Default Setting: 1
This read-only field shows the ID associated with the Name field. If you change a name in
a Name field on this screen and select Save, the ID changes to match the name.
Name
Possible Settings: ASCII Text
Default Setting: Default
The Name field specifies the Class of Service to which you want to assign the Code Point.
ASCII Text – Specifies one of the Class of Service Names entered on the Class of
Service Definitions screen.
3-10 December 2002 9000-A2-GB31-00
Page 43

Configuring Service Level Verification Options
SLV options are selected from the System menu (see Table 3-5, Service Level
Verification Options).
Main Menu→ Configuration→ System→ Service Level Verification
Table 3-5. Service Level Verification Options (1 of 3)
SLV Sample Interval (secs)
Possible Settings: 10 – 3600
Default Setting: 60
Sets the inband communications interval between FrameSaver SLV devices. Inband
communications are used to pass frames that calculate latency, as well as transmission
success and other SLV information.
10 – 3600 – Sets the SLV Sample Interval (secs) in seconds.
SLV Synchronization Role
Available Settings: Tributary, Controller, None
Default Setting: Tributary
3. Configuration Options
Determines the role the unit plays in maintaining synchronization of user history data
collection and storage between FrameSaver devices.
Tributary – Uses network timing received from incoming SLV communications and
provides network-based synchronization information to other devices in the network.
Controller – Uses its own internal time-of-day clock and provides synchronization
information to other devices in the network based upon its own clock.
NOTE: Only one device in the network should be configured as the SLV
synchronization controller.
None – Incoming timing information is ignored and no timing information is sent out. This
setting should only be used when network synchronization is not desirable, or when a
single unit connects multiple networks or network segments.
SLV Type
Available Settings: Standard, COS 1–COS 7
Default Setting:
If SLV Feature is enabled: Standard
If SLV Feature is disabled: COS 1
Determines the type of SLV measurements to which these other SLV options apply:
n
SLV Timeout Error Event Threshold
n
SLV Timeout Clearing Event Threshold
n
SLV Round Trip Latency Error Threshold
n
SLV Latency Clearing Event Threshold
n
SLV Packet Size
Standard – The options selected apply to standard FrameSaver SLV measurements,
utlizing an EDLCI for FrameSaver-to-FrameSaver communication. This option is not
available if the SLV Feature is disabed or if Service Type is PPP.
COS 1–COS 7 – The options selected apply to this Class of Service. Different settings
may be saved for each Class of Service.
9000-A2-GB31-00 December 2002
3-11
Page 44

3. Configuration Options
Table 3-5. Service Level Verification Options (2 of 3)
SLV Delivery Ratio
Possible Settings: Enable, Disable
Default Setting: Disable
Determines whether communication of Frame and Data Delivery Ratios (FDR/DDR)
between FrameSaver SLV devices is enabled. To use this capability, both ends of all
PVCs must be FrameSaver SLV devices. If some of the units are FrameSaver 9124s or
9624s, they must be running software version 1.2 or higher.
Display Conditions – This option appears only if SLV Type is Standard and Service
Type is not PPP.
Enable – An extra byte for FDR/DDR statistics collection is included with each frame,
which is used at the receiving end to determine the amount of data dropped by the
network.
Disable – Extra byte is not included.
DLCI Down on SLV Timeout
Available Settings: Enable, Disable
Default Setting: Disable
Determines whether missed SLV packets will be monitored along with the LMI status to
determine the status of PVC connections to remote FrameSaver units.
NOTE: This option does not apply to multiplexed DLCIs connected to a far-end unit
with hardware bypass capability.
Display Conditions – This option appears only if SLV Type is Standard and Service
Type is not PPP.
Enable – After the configured threshold for missed SLV packets has been exceeded,
causing the DLCI’s status to turn Inactive, an alarm and SNMP trap are generated, and a
Health and Status message created.
Disable – Missed SLV packets are monitored, but the DLCI is not declared down.
SLV Timeout Error Event Threshold
Available Settings: 1, 2, 3, 4 . . . 20
Default Setting: 3
Specifies the number of consecutive missed SLV communications that must be detected
before a DLCI Inactive status is declared.
1–20 – Sets the limit for these error events.
SLV Timeout Clearing Event Threshold
Available Settings: 1, 2, 3, 4 . . . 20
Default Setting: 1
Specifies the number of consecutive SLV messages that must be received before the
DLCI Inactive status is cleared.
1 – 20 – Sets the limit for the clearing event.
3-12 December 2002 9000-A2-GB31-00
Page 45

3. Configuration Options
Table 3-5. Service Level Verification Options (3 of 3)
SLV Round Trip Latency Error Threshold (ms)
Available Settings: 50, 51, 52, . . . 10000
Default Setting: 10000
Specifies the number of milliseconds that must be exceeded before an SLV Latency
Threshold alarm event is declared and backup, if configured, is initiated for a DLCI.
If SLV Type is Standard, the latency applies to a multiplexed DLCI.
If SLV Type is a Class of Service (COS 1 – COS 7), the latency applies to the COS on an
IP Enabled path.
50–10000 – Sets the limit for these error events.
SLV Latency Clearing Event Threshold
Available Settings: 1, 2, 3, 4 . . . 20
Default Setting: 2
Specifies the number of consecutive SLV latency measurements below the error
threshold that must be received before the error status is cleared.
1 – 20 – Sets the limit for the clearing event.
SLV Packet Size (bytes)
Available Settings: 64 – 2048
Default Setting: 64
Sets the size of packets, in bytes, that will be used for SLV communications. SLV packets
are used to track latency and other SLV-related variables.
When the packet size is changed, a new round trip and average latency calculation must
be performed, so these measurements will not appear on the SLV Performance Statistics
screen until a new sampling interval has occurred.
64 – 2048 – Sets the packet size for SLV communications.
9000-A2-GB31-00 December 2002
3-13
Page 46

3. Configuration Options
Configuring General System Options
Select General from the System menu to configure the general system
configuration options (see Table 3-6, General System Options).
Main Menu→ Configuration→ System→ General
Table 3-6. General System Options (1 of 3)
Test Timeout
Possible Settings: Enable, Disable
Default Setting: Enable
Determines whether or not loopback and pattern tests have a duration after which they
are terminated automatically.
Enable – All Loopback and Pattern tests have a timeout. This setting is recommended
when the FrameSaver unit is managed remotely through an in-band data stream. If the
FrameSaver unit is accidently commanded to execute a disruptive test on the interface
providing the management access, control can be regained after the timeout expires,
terminating the test.
Disable – Loopback and pattern tests must be manually terminated.
Test Duration (min)
Possible Settings: 1 – 120
Default Setting: 10
Specifies the maximum duration of the tests.
Display Conditions – This option only appears when Test Timeout is set to Enable.
1 – 120 – Sets the Test Timeout period in minutes (inclusive).
Primary Clock Source
Possible Settings: Net1, DSX, Internal, DBM
Default Setting: Net1
Allows you to select the primary clock source for the unit. The source selected provides all
of the timing within the FrameSaver unit and the clocks for all of the external interfaces.
Failure of the clock specified by this configuration option results in automatic fallback to
the Secondary Clock Source configuration option setting.
NOTE: For the Primary and Secondary Clock Source options, only Internal can be
selected for both options. All other selections must have different settings (e.g., if
Primary Clock Source is set to Net1, Secondary Clock Source cannot be set to Net1).
Net1 – The primary clock is derived from the Network1 T1 interface.
DSX – The primary clock for the unit is derived from the DSX-1 interface. This setting only
appears if the DSX-1 interface is enabled (see Configuring the T3 User Port (9520-ILM)
on page 3-41).
Internal – The primary clock is the internal clock.
DBM – The primary clock is derived from the DBM. This selection only appears if the DBM
is installed and enabled.
3-14 December 2002 9000-A2-GB31-00
Page 47

3. Configuration Options
Table 3-6. General System Options (2 of 3)
Secondary Clock Source
Possible Settings: Net1, DSX, Internal, DBM
Default Setting: Internal
Provides a secondary clock source when the primary clock source fails. The source
selected for this configuration option provides all of the timing within the unit and the
clocks for all of the external interfaces.
The clock source will switch back to primary when the primary clock source returns and is
stable for 10 seconds. If the secondary clock source fails, the clock source will switch to
internal. The clock source will switch back to primary when the primary clock source
returns and is stable for 10 seconds.
NOTE: For the Primary and Secondary Clock Source options, only Internal can be
selected for both options. All other selections must have different settings (e.g., if
Primary Clock Source is set to Net1, Secondary Clock Source cannot be set to Net1).
Net1 – The secondary clock is derived from the Network1 T1 interface.
DSX – The secondary clock for the unit is derived from the DSX-1 interface. This setting
only appears if the DSX-1 interface is enabled.
Internal – The secondary clock is the internal clock.
DBM – The secondary clock is derived from the DBM. This selection only appears if the
DBM is installed and enabled.
9000-A2-GB31-00 December 2002
3-15
Page 48

3. Configuration Options
Table 3-6. General System Options (3 of 3)
System Alarm Relay
Possible Settings: Enable, Disable
Default Setting: Disable
Specifies whether an alarm condition for the unit will activate the system alarm relay. The
alarm relay is deactivated when the condition causing the alarm is corrected. If more than
one alarm condition is present, the alarm relay remains active until all alarm conditions
are cleared.
You can also deactivate an alarm via the System Alarm Relay Cut-Off selection from the
Control menu; however, the alarm itself is not cleared. When another alarm condition is
detected, the alarm is reactivated again, requiring another manual deactivation of the
alarm relay.
Display Conditions – This option only appears for a FrameSaver SLV 9128 installed in
the 9000 Series Access Carrier.
Alarm conditions are:
n
Alarm Indication Signal (AIS) received at the Network, DSX-1, or PRI interface
n
Continuous Loss of Signal (LOS) condition at the Network, DSX-1, or PRI interface
n
CTS Down
n
DBM Download Required
n
DBM BRI Card Failed
n
Device Fail
n
DLCI Down
n
DTR Down
n
Ethernet Link Down
n
Excessive Error Rate (EER) detected at the Network or PRI interface
n
Internal Modem Failed
n
ISDN Network Failure
n
LMI Down
n
Network Communication Link Down
n
Out of Frame (OOF) at Network, DSX-1, or PRI
n
Primary or Secondary Clock Failure
n
Power Supply/Fan Failure
n
RTS Down
n
Self-Test Failure
n
SLV Latency Exceeded
n
SLV Timeout
n
Suboptimal (Maximum) Link Rate Cannot be Achieved
n
Two Level-1 Users Accessing Device
n
Yellow Alarm Signal on the Network, DSX-1, or PRI interface
Enable – Activates alarm conditions on the system alarm relay when an alarm condition
occurs.
Disable – Does not activate the system alarm relay when an alarm condition occurs.
3-16 December 2002 9000-A2-GB31-00
Page 49

Configuring Physical Interfaces
Characteristics for physical interfaces are explained in the following sections:
n Configuring the Network Interface
n Configuring a User Data Port (CSU/DSUs)
n Configuring the T3 User Port (9520-ILM)
n Configuring the DSX-1 Interface (9126, 9128)
n Configuring the ISDN DBM Interface (9126, 9128, 9626)
Configuring the Network Interface
When configuring the physical characteristics for the network interface, select
Physical from the Network menu.
3. Configuration Options
Main Menu
→ Configuration→ Network→ Physical
See:
n Table 3-7, T1 Network Physical Interface Options (9123, 9126, 9128)
n Table 3-8, T3 Network Physical Interface Options (9520, 9520-ILM)
n Table 3-9, DDS Network Physical Interface Options (9623, 9626)
n Table 3-10, IDSL Network Physical Interface Options (9720)
n Table 3-11, SDSL Network Physical Interface Options (9783, 9783 Router)
n Table 3-12, SHDSL Network Physical Interface Options (9788, 9788 Router)
n Table 3-13, Synchronous Network Data Port Physical Interface Options
(9820-2M, 9820-8M)
n Table 3-14, HSSI Network Data Port Physical Interface Options (9820-45M)
9000-A2-GB31-00 December 2002
3-17
Page 50

3. Configuration Options
T1 Network Interface
FrameSaver Models 9123, 9126, and 9128 have a T1 network interface.
Table 3-7. T1 Network Physical Interface Options (1 of 4)
Line Framing Format
Possible Settings: D4, ESF
Default Setting: ESF
Specifies the framing format for transmitted and received signals on the T1 network
interface.
D4 – Uses D4 framing format.
NOTE: This setting is not recommended by network carriers. False yellow alarms may
occur after traffic has been running and the channel returns to idle, or when there is
light traffic when other settings are selected. ESF format does not create this problem.
ESF – Uses Extended Superframe framing format.
Line Coding Format
Possible Settings: AMI, B8ZS
Default Setting: B8ZS
Specifies the line coding format for the network interface.
AMI – Uses Alternate Mark Inversion (AMI) line coding format.
B8ZS – Uses Bipolar 8 Zero Substitution (B8ZS) line coding format.
Line Build Out
Possible Settings: 0.0, –7.5, –15, –22.5
Default Setting: 0.0
Specifies the line build out for the signal transmitted to the network.
0.0, –7.5, –15, –22.5 – Specifies line build out in dB.
Bit Stuffing
Possible Settings: 62411, Disable
Default Setting: 62411
Determines the type of bit insertion to provide ones density requirements for data
transmitted to the network.
Display Conditions – This option does not appear when Line Coding Format is set to
B8ZS.
62411 – Inserts a one in the data after 15 consecutive zeros are received or the density of
ones falls below 12.5%. This setting complies with AT&T TR 62411, but is not
recommended for frame relay data because it inserts errors in the data traffic.
Disable – Disables bit stuffing. Ones density is not enforced on data sent to the network.
3-18 December 2002 9000-A2-GB31-00
Page 51

3. Configuration Options
Table 3-7. T1 Network Physical Interface Options (2 of 4)
Transmit Timing
Possible Settings: System, Interface
Default Setting: System
Allows transmit timing to be selected from either the system master clock source or from
the currently selected interface.
System – Transmit timing is derived from the current system clock source (see Ta bl e 3 - 6 ,
General System Options).
Interface – Transmit timing is derived from this interface.
NOTE: When Interface is configured, the clock must be synchronized to the system
clock source.
Network Initiated LLB
Possible Settings: Enable, Disable
Default Setting: Enable
Allows the initiation and termination of the line loopback (LLB) to be controlled by the
receipt of LLB-Actuate and LLB-Release commands from the network.
Enable – LLB is controlled by LLB-Actuate and LLB-Release commands. Receiving a
LLB-Actuate command causes the FrameSaver unit to enter a line loopback (provided an
LLB can be performed in the FrameSaver unit’s current state). Receiving an LLB-Release
command terminates the LLB.
Disable – The FrameSaver unit ignores the LLB-Actuate and LLB-Release commands.
NOTE: When disabled, the system is not in compliance with ANSI T1.403 or
AT&T TR 62411.
Network Initiated PLB
Possible Settings: Enable, Disable
Default Setting: Enable
Allows the initiation and termination of the payload loopback (PLB) to be controlled by the
receipt of PLB-Actuate and PLB-Release commands from the network.
Display Conditions – This option only appears when Line Framing Format is set to
ESF.
Enable – PLB is controlled by PLB-Actuate and PLB-Release commands. Receiving a
PLB-Actuate command causes the system to enter a payload loopback (provided a PLB
can be performed in the unit’s current state). Receiving a PLB-Release command
terminates the PLB.
Disable – The FrameSaver unit ignores the PLB-Actuate and PLB-Release commands.
NOTE: When disabled, the unit is not in compliance with ANSI T1.403 or
AT&T TR 54016.
9000-A2-GB31-00 December 2002
3-19
Page 52

3. Configuration Options
Table 3-7. T1 Network Physical Interface Options (3 of 4)
Network Initiated DCLB
Possible Settings: Disable, V.54_&_ANSI
Default Setting: V.54_&_ANSI
Allows the initiation and termination of the Data Channel Loopback (DCLB V.54 Loop 2) to
be controlled by the receipt of a DCLB-actuate or DCLB-release sequence (either V.54 or
FT1-ANSI compliant) from the network on the DS0s used for the network frame relay link.
When enabled and a DCLB-activate sequence is received, the unit initiates a DCLB on
the network interface. When a DCLB-release sequence is received, the DCLB is stopped.
Disable – DCLB-actuate and DCLB-release sequences are ignored.
V.54_&_ANSI – DCLB-actuate and DCLB-release sequences that comply with either V.54
or ANSI T1.403, Annex B standard will be recognized and will control initiation and
termination of a DCLB for the network frame relay link. The actuate and release
sequences do not need to match (for example, a DCLB started with a V.54 actuate
sequence can be stopped with an FT1 release sequence).
ANSI Performance Report Messages
Possible Settings: Enable, Disable
Default Setting: Disable
Specifies whether ANSI T1.403 compliance performance report messages (PRMs) are
generated and sent to the network over the ESF facility data link every second.
Display Conditions – This option only appears when Line Framing Format is set to
ESF.
Enable – Generates and sends PRMs.
Disable – Does not generate and send PRMs.
3-20 December 2002 9000-A2-GB31-00
Page 53

3. Configuration Options
Table 3-7. T1 Network Physical Interface Options (4 of 4)
Excessive Error Rate Threshold
Possible Settings: 10E-4, 10E-5, 10E-6, 10E-7, 10E-8, 10E-9
Default Setting: 10E-4
Sets the error rate threshold that determines when an EER condition is declared. The
excessive error rate is determined by the ratio of the number of CRC6 errors to the total
number of bits received over a set period of time.
Display Conditions – This option only appears when Line Framing Format is set to
ESF.
10E-4 – Declares an EER if more than 1,535 CRC6 errors are detected in a 10 second
period. Clears when fewer than 1,536 CRC6 errors are detected within the same time
period.
10E-5 – Declares an EER if more than 921 CRC6 errors are detected in a 60 second
period or a 10
within the same time period.
10E-6 – Declares an EER if more than 92 CRC6 errors are detected in a 60 second period
or a 10-5 or 10-4 condition occurs. Clears when fewer than 93 CRC6 errors are detected
within the same time period.
10E-7 – Declares an EER if more than 9 CRC6 errors are detected in a 60 second period
or a 10
detected within the same time period.
10E-8 – Declares an EER if more than 41 CRC6 errors are detected in three 15 minute
intervals or a 10-7, 10-6, 10-5, 10-4 condition occurs. Clears when fewer than 42 CRC6
errors are detected within the same time period.
10E-9 – Declares an EER if more than 4 CRC6 errors are detected in three 15 minute
intervals or a 10
5 CRC6 errors are detected within the same time period.
-4
condition occurs. Clears when fewer than 922 CRC6 errors are detected
-6
, or 10-5, or 10-4 condition occurs. Clears when fewer than 10 CRC6 errors are
-8
, 10-7, 10-6, 10-5, or 10-4 condition occurs. Clears when fewer than
Circuit Identifier
Possible Settings: ASCII Text Entry, Clear
Default Setting: blank
Identifies the transmission vendor’s circuit information to facilitate troubleshooting.
ASCII Text Entry – Edit or display circuit identifier information (maximum 255 characters).
Clear – Removes the circuit identifier information.
9000-A2-GB31-00 December 2002
3-21
Page 54

3. Configuration Options
T3 Network Interface
FrameSaver Models 9520 and 9520-ILM have a T3 network interface.
Table 3-8. T3 Network Physical Interface Options
Circuit Identifier
Possible Settings: ASCII Text Entry, Clear
Default Setting: blank
Identifies the transmission vendor’s circuit information to facilitate troubleshooting.
ASCII Text Entry – Edit or display circuit identifier information (maximum 255 characters).
Clear – Removes the circuit identifier information.
Line Build Out
Possible Settings: Short, Long
Default Setting: Short
Specifies the line build out for the signal transmitted to the network.
Short – Activates an equalization filter to simulate a longer cable. Use this option for a
network cable less than 100 feet.
Long – The equalization filter is bypassed. Use this option for a network cable 100 feet or
longer.
Network Initiated LLB
Possible Settings: Enable, Disable
Default Setting: Enable
Allows the initiation and termination of the line loopback (LLB) to be controlled by the
receipt of LLB-Actuate and LLB-Release commands from the network.
Enable – LLB is controlled by LLB-Actuate and LLB-Release commands. Receiving a
LLB-Actuate command causes the FrameSaver unit to enter a line loopback (provided an
LLB can be performed in the FrameSaver unit’s current state). Receiving an LLB-Release
command terminates the LLB.
Disable – The FrameSaver unit ignores the LLB-Actuate and LLB-Release commands.
3-22 December 2002 9000-A2-GB31-00
Page 55

DDS Network Interface
FrameSaver Models 9623 and 9626 have a DDS network interface.
Table 3-9. DDS Network Physical Interface Options (1 of 2)
Transmit Timing
Possible Settings: Internal, Receive
Default Setting: Receive
Specifies the unit’s timing source based upon how the unit will be used. When the unit is
connected to a DDS (Digital Data Service) network for standard operation, timing is
provided by the network. In a LADS, or LDM, application (local area data set/limited
distance modem), where local and remote FrameSaver units are directly connected, one
of the units provides timing for both units.
Internal – Timing for the unit and its attached LADS partner is derived from the unit’s
internal clock. Use this setting when the unit will be used as a LADS primary timing unit,
where the FrameSaver unit establishes overall timing for the two interconnected units.
Receive – Timing for the unit is derived from the network Received signal. Use this setting
for standard DDS operation, or when the unit will be used as a LADS secondary timing
unit. See DDS Line Rate (Kbps).
3. Configuration Options
DDS Line Rate
Possible Settings: Auto_On_No_Signal, Initialize_From_Network, 56, 64CC
Default Setting: Auto_On_No_Signal
Configures the network interface’s line speed to match the Digital Data Service’s (DDS’s)
line speed. This is the rate at which data is transmitted over the DDS line.
Display Conditions – This option only appears when Transmit Timing is set to Receive.
Auto_On_No_Signal – Automatically detects the line rate on the network interface
whenever a No Signal alarm is declared, the unit is reset, or the line rate is changed to
Auto_On_No_Signal and saved, then changes the unit’s operating rate to match the
network’s. It may take up to 15 seconds each time automatic rate detection and
adjustment occurs.
Initialize_From_Network – Automatically detects the line rate on the network interface
once, then changes the unit’s operating rate to match the network’s. Automatic rate
detection and adjustment, or Autobaud, will not occur again unless the line rate is
changed to Initialize_From_Network or Auto_On_No_Signal and saved. It may take up to
15 seconds for automatic rate detection and adjustment to occur.
56 – Forces the line rate to 56 Kbps.
64CC – Forces the line rate to 64 Kbps Clear Channel (72 Kbps on the line).
9000-A2-GB31-00 December 2002
3-23
Page 56

3. Configuration Options
Table 3-9. DDS Network Physical Interface Options (2 of 2)
Network Initiated DCLB
Possible Settings: Disable, V.54_&_ANSI
Default Setting: V.54_&_ANSI
Allows the initiation and termination of the Data Channel Loopback (DCLB V.54 loop 2) to
be controlled by the receipt of a DCLB-actuate or DCLB-release sequence (either V.54 or
FT1-ANSI compliant) from the network or a far-end FrameSaver device. When enabled
and a DCLB-activate sequence is received, the unit initiates a DCLB on the network
interface. When a DCLB-release sequence is received, the DCLB is stopped.
Disable – DCLB-actuate and DCLB-release sequences are ignored.
V.54_&_ANSI – DCLB-actuate and DCLB-release sequences that comply with either V.54
or ANSI T1.403, Annex B standard will be recognized and will control initiation and
termination of a DCLB for this frame relay link. The actuate and release sequences do not
need to match (for example, a DCLB started with a V.54 actuate sequence can be
stopped with an FT1 release sequence).
DSU Latching Loopback
Possible Settings: Enable, Disable
Default Setting: Enable
Specifies whether the FrameSaver unit responds to the DSU Latching Loopback
sequence sent by the network, as specified by TR62310.
Enable – Responds to DSU latching loopback commands. The unit remains in loopback
until the network receives the loopback release sequence.
Disable – Does not respond to the DSU loopback commands, or terminates the latching
loopback test if it is active.
NOTE: Because the latching loopback code is a control sequence, as opposed to a
bipolar violation sequence, user data may activate the loopback. Disable this option to
stop an unintentional latching loopback.
Require DSU Latching Loopback Preamble
Possible Settings: Enable, Disable
Default Setting: Disable
Specifies whether the FrameSaver unit requires the ANSI or FRF proposed preamble for
the network-initiated DSU Latching Loopback when detecting the loopback sequence.
Display Conditions – This option only applies when the unit is operating on a standard
DDS 64KCC circuit and DSU Latching Loopback (64KCC) is enabled.
Enable – Does not respond to the DSU Latching Loopback commands unless the
preamble is received.
Disable – Responds to DSU Latching Loopback commands, whether or not the preamble
is received.
3-24 December 2002 9000-A2-GB31-00
Page 57

IDSL Network Interface
FrameSaver Model 9720 has an IDSL network interface.
Table 3-10. IDSL Network Physical Interface Options
Operating Rate
Possible Settings: AutoRate, 64, 128, 144
Default Setting: AutoRate
Specifies the IDSL line rate.
AutoRate – The line rate is automatically detected when the frame relay LMI is brought
up on one or both channels.
64 – The line rate is 64 kbps. One B channel is used for the data transfer, and automatic
rate detection is disabled.
128 – The line rate is 128 kbps. Both B channels are used for the data transfer, and
automatic rate detection is disabled.
144 – The line rate is 144 kbps. Both B channels are used for the data transfer, and
automatic rate detection is disabled.
3. Configuration Options
Channel
Possible Settings: B1, B2
Default Setting: B1
Specifies the B channel used for data transfer when the line rate is 64 kbps.
Display Conditions – Channel appears only when Operating Rate is set to 64.
B1 – The B1 channel is used for data transfer.
B2 – The B2 channel is used for data transfer.
9000-A2-GB31-00 December 2002
3-25
Page 58

3. Configuration Options
SDSL Network Interface
The FrameSaver DSL 9783 CSU/DSU and Router have an SDSL network
interface.
Table 3-11. SDSL Network Physical Interface Options
Line Rate Mode
Possible Settings: Hunt, AutoRate, Fixed
Default Setting: AutoRate
Specifies the mode to be used for rate selection.
Hunt – The unit attempts to train at rate specified by DSL Line Rate. If that fails, the unit
attempts to train at the next higher rate, and, if unsuccessful, cycles through all the rates
until training is successful or the unit is reset.
AutoRate – The unit automatically detects the line rate from the network interface.
Fixed – The unit uses the line rate specified by DSL Line Rate.
DSL Line Rate (Kbps)
Possible Settings:
Default Setting:
– If DSLAM Type is set to Paradyne, or if DSLAM Type is set to Nokia and Line Rate
Mode is set to Fixed: 144, 192, 208, 256, 272, 384, 400, 512, 528, 768, 784,
1024, 1152, 1168, 1536, 1552, 2320
– If DSLAM Type is set to Alcatel (NewBridge): 208, 400, 784, 1168, 1552, 2320
– If DSLAM Type is set to Nokia and Line Rate Mode is set to Hunt: 192, 384, 768,
1152, 1536
– If DSLAM Type is set to PairGain: 144, 192, 208, 256, 272, 384, 400, 512, 528,
768, 784, 1024, 1152, 1168, 1536, 1552, 2320
– If DSLAM Type is set to Alcatel (NewBridge) and Line Rate Mode is set to Hunt: 208
– If DSLAM Type is set to Nokia and Line Rate Mode is set to Hunt: 384
– If DSLAM Type is set to PairGain and Line Rate Mode is set to Fixed: 784
– (If DSLAM Type is set to Paradyne, Line Rate Mode is set to AutoRate and DSL
Line Rate does not appear)
Determines the rate on the DSL network interface (if Line Rate Mode is Fixed), or the rate
the device will first use to attempt to train (if Line Rate Mode is Hunt).
Display Conditions – DSL Line Rate does not appear if DSL Line Rate Mode is set to
AutoRate.
144 – 2320 – The DSL line rate is set to the specified rate in Kbps.
SNR Margin Alarm Threshold (dB)
Possible Settings: –5, –4, –3, –2, –1, 0, 1, 2, 3, 4, 5, 6, 7, 8, 9, 10
Default Setting: 3
Specifies the level in decibels at which a Signal to Noise Ratio (SNR) margin alarm
condition is declared.
–5 – 10 – Specifies the threshold level in dB.
3-26 December 2002 9000-A2-GB31-00
Page 59

SHDSL Network Interface
The FrameSaver DSL 9788 CSU/DSU and Router have an SHDSL network
interface.
Table 3-12. SHDSL Network Physical Interface Options (1 of 2)
Line Rate Mode
Possible Settings: AutoRate, Fixed
Default Setting: AutoRate
Specifies the mode to be used for rate selection.
AutoRate – The unit automatically detects the line rate from the network interface.
Fixed – The unit uses the line rate specified by DSL Line Rate.
DSL Line Rate (Kbps)
Possible Settings:
– If PSD Mask is Symmetric: 200, 264, 328, 392, 456, 520, 584, 648, 712, 776, 784,
– If PSD Mask is Asymmetric (available in future release) and Region is Annex A:
– If PSD Mask is Asymmetric (available in future release) and Region is Annex B:
Default Setting: [Depends on settings of Line Rate Mode, PSD Mask, and Region]
3. Configuration Options
840, 904, 968, 1032, 1096, 1160, 1224, 1288, 1352, 1416, 1480, 1544, 1552, 1608,
1672, 1736, 1800, 1864, 1928, 1992, 2056, 2120, 2184, 2248, 2312
776, 784, 1544, 1552
2056, 2312
Determines the rate on the DSL network interface. Valid rates, and the rates presented on
the screen, depend on the values of Region and PSD Mask. If a change to another
configuration option renders the selected DSL Line Rate invalid, the Line Rate Mode is set
to AutoRate.
Display Conditions – DSL Line Rate does not appear if DSL Line Rate Mode is set to
AutoRate.
200 – 2312 – The DSL line rate is set to the specified rate in Kbps.
Region
Possible Settings: Annex A, Annex B
Default Setting: [Depends on model]
Determines the annex of the G.991.2 recommendation that the unit will conform to. The
value of Region in part determines what DSL Line Rates are available. If a change in the
Region renders the current DSL Line Rate invalid, the Line Rate Mode is set to AutoRate.
Annex A – The unit conforms to Annex A (for North America).
Annex B – The unit conforms to Annex B (for Europe).
9000-A2-GB31-00 December 2002
3-27
Page 60

3. Configuration Options
Table 3-12. SHDSL Network Physical Interface Options (2 of 2)
PSD Mask
Possible Settings: Symmetric
Default Setting: Symmetric
Read-only. Specifies the Power Spectral Density (PSD) mask the unit will use. The value
of PSD Mask in part determines what DSL Line Rates are available. If a change in the
PSD Mask setting (available in a future release) renders the current DSL Line Rate
invalid, the Line Rate Mode is set to AutoRate.
Asymmetric – (Future use.) The unit uses the asymmetric PSD mask.
Symmetric – The unit uses the symmetric PSD mask.
Synchronous Network Interface
FrameSaver Models 9820-2M and 9820-8M have an EIA-530-A network interface.
Table 3-13. Synchronous Network Data Port Physical Interface Options (1 of 2)
Port Type
Possible Settings: E530, V.35, X.21
Default Setting: V.3 5
Selects the type of port to be used for the network data port.
E530 – The port is configured as an EIA-530-A-compatible DTE. An
EIA-530-A-compatible DCE can be directly connected to the DB25 connector for this port
on the rear of the FrameSaver unit.
V.3 5 – The port is configured as a V.35-compatible DTE. A V.35-compatible DCE can be
connected to the DB25 connector for this port using an adapter cable on the rear of the
FrameSaver unit.
X.21 – The port is configured as a V.11/X.21-compatible DTE. A V.11/X.21-compatible
DCE can be connected to the DB25 connector for this port using an adapter cable on the
rear of the FrameSaver unit.
Invert Internal Clock
Possible Settings: Enable, Disable
Default Setting: Disable
Specifies whether the internal clock (used for timing data transmitted to the DCE) will be
phase-inverted with respect to the clock received at the interface. This option is useful
when long cable lengths between the FrameSaver device and the DCE are causing
errors.
Enable – The internal clock used to transmit data to the DCE is phase inverted with
respect to the clock supplied by the DCE to this port.
Disable – The internal clock is not inverted (normal).
3-28 December 2002 9000-A2-GB31-00
Page 61

3. Configuration Options
Table 3-13. Synchronous Network Data Port Physical Interface Options (2 of 2)
Monitor DSR
Possible Settings: Enable, Disable
Default Setting: Enable
Specifies whether the state of the DCE Ready (DSR) circuit on the network data port will
be used to determine when valid data communication is possible with the unit. When this
condition is detected, an alarm is generated, LMI is declared down, and no further transfer
of frame relay data can occur on this interface.
Display Conditions – This option does not appear when Port Type is set to X.21. The
signal is assumed to be asserted.
Enable – Interchange circuit CC (ITU/CCITT 107) – DSR is monitored to determine when
valid data is being sent from the DCE.
Disable – DSR is not monitored. DSR is assumed to be asserted and data is transmitted,
regardless of the actual state of the lead.
Monitor CTS
Possible Settings: Enable, Disable
Default Setting: Enable
Specifies whether the state of the Clear to Send (CTS) circuit on the network data port will
be used to determine when valid data communication is possible with the unit. When this
condition is detected, an alarm is generated, LMI is declared down, and no further transfer
of frame relay data can occur on this interface.
Display Conditions – This option does not appear when Port Type is set to X.21. The
signal is assumed to be asserted.
Enable – Interchange circuit CB (ITU/CCITT 106) – CTS is monitored to determine
whether data should be transmitted to the DCE.
Disable – CTS is not monitored. CTS is assumed to be asserted and data is transmitted,
regardless of the actual state of the lead.
Monitor RLSD
Possible Settings: Enable, Disable
Default Setting: Enable
Specifies whether the state of the Received Line Signal Detector (RLSD) circuit on the
network data port will be used to determine when valid data communication is possible
with the unit. When this condition is detected, an alarm is generated, LMI is declared
down, and no further transfer of frame relay data can occur on this interface.
If Port Type is set to X.21, the Indication interchange circuit is monitored instead of RLSD.
Enable – Interchange circuit CF (ITU/CCITT 109) – RLSD is monitored to determine
when valid data communication is possible with the DCE.
Disable – RLSD is not monitored. RLSD is assumed to be asserted and data is
transmitted, regardless of the actual state of the lead.
9000-A2-GB31-00 December 2002
3-29
Page 62

3. Configuration Options
HSSI Network Interface
FrameSaver Model 9820-45M has a HSSI network interface.
Table 3-14. HSSI Network Data Port Physical Interface Options
Monitor DSR
Possible Settings: Enable, Disable
Default Setting: Enable
Specifies whether the state of the DCE Ready (DSR) circuit on the network data port will
be used to determine when valid data communication is possible with the unit. When this
condition is detected, an alarm is generated, LMI is declared down, and no further transfer
of frame relay data can occur on this interface.
Enable – Interchange circuit CC (ITU/CCITT 107) – DSR is monitored to determine when
valid data is being sent from the DCE.
Disable – DSR is not monitored. DSR is assumed to be asserted and data is transmitted,
regardless of the actual state of the lead.
3-30 December 2002 9000-A2-GB31-00
Page 63

Configuring a User Data Port (CSU/DSUs)
Select Physical from the Data Ports menu to display or change the physical
characteristics of the data port connected to the DTE.
Main Menu→ Configuration→ Data Ports→ Physical
See:
n Table 3-15, V.35 Data Port Physical Interface Options
n Table 3-16, EIA-530-A/X.21/V.35 Data Port Physical Interface Options
n Table 3-17, HSSI Data Port Physical Interface Options
V.35 Data Port Physical Interface
FrameSaver Models 9123, 9126, 9623, 9626, and 9783 have a V.35 data port.
The Model 9128 standalone and carrier-mounted units have two V.35 data ports.
3. Configuration Options
Table 3-15. V.35 Data Port Physical Interface Options (1 of 6)
Port Status
Possible Settings: Enable, Disable
Default Setting: Enable
Determines whether the data port is being used and can be configured.
Enable – The port is active, and can be used to transmit and receive data.
Disable – The port is not active. When the port is disabled, the following will occur:
n
No alarms or traps configured for the port will be generated.
n
LED for the port will be held in an Off state.
No – The operation is canceled. (Pressing either the Esc or Ctrl-a key also acts as a
No.)
Yes – Port status is disabled.
Port Type (9788, 9820-2M, 9820-8M)
Possible Settings: E530, V.35, X.21
Default Setting: V.3 5
Specifies the port type of the data port.
E530 – The port is configured as an EIA-530-A-compatible DCE. An EIA-530-Acompatible DTE may be directly connected to the DB25 connector for the port.
V.3 5 – The port is configured as a V.35-compatible DCE. A V.35-compatible DTE may be
connected to the port using a DB25-to-MS34 adapter.
X.21 – The port is configured as an X.21-compatible DCE. An X.21-compatible DTE may
be connected to the port using a DB25-to-DB15 adapter.
9000-A2-GB31-00 December 2002
3-31
Page 64

3. Configuration Options
Table 3-15. V.35 Data Port Physical Interface Options (2 of 6)
Port Use (9128)
Possible Settings: Frame Relay, Synchronous Data
Default Setting:
Frame Relay when the port supports frame relay.
Synchronous Data when the port only supports synchronous data.
Determines how the data port will be used.
Display Conditions – This option only appears for user data on Port-2, and only when
Service Type is Frame Relay.
Frame Relay – The port is configured for frame relay traffic. Frame relay links, DLCis, and
PVC connections can be configured on this port.
Synchronous Data – The port is configured for standard TDM data, and can be
cross-connected to a time slot on a T1 interface.
n
No alarms or traps configured for the port will be generated.
n
The LED for the port will be held in an Off state.
n
Existing cross-connect assignments associated with the port are cleared.
Max Port Rate (9128)
Possible Settings: 1536, 2048
Default Setting: 1536
Specifies the maximum clock rate for a user data port. The data rate for this port is limited
to the rate specified by this option so that the maximum rate supported by an attached
DTE is not exceeded.
Display Conditions – This option only appears when the Port Use is set to Frame Relay
or PPP, the port rate is not otherwise configurable, and the selected port is Port-2.
1536 – The maximum port rate for the port is 1536 Kbps.
2048 – The maximum port rate for the port is 2048 Kbps.
Port Base Rate (9128)
Possible Settings: Nx64, Nx56
Default Setting: Nx64
Specifies the base rate for the data port, which is a multiple (from 1 to 24) of the base rate
specified by this option. N is a number from 1 to 24.
Display Conditions – This option only appears when Port Use is set to Synchronous
Data.
Nx64 – The base rate for the port is 64 Kbps.
Nx56 – The base rate for the port is 56 Kbps.
3-32 December 2002 9000-A2-GB31-00
Page 65

3. Configuration Options
Table 3-15. V.35 Data Port Physical Interface Options (3 of 6)
Invert Transmit Clock
Possible Settings: Auto, Enable, Disable
Default Setting: Auto
Determines whether the clock supplied by the FrameSaver unit on interchange circuit DB
(ITU 114) – Transmit Signal Element Timing (DCE Source) TXC is phase inverted with
respect to the clock used to time the incoming Transmitted Data (TD).
Auto – The port checks the clock supplied by the DCE on TXC on this port. If necessary,
the port automatically phase inverts the clock with respect to the transmitted data.
Enable – Phase inverts the TXC clock. Use this setting when long cable lengths between
the FrameSaver unit and the DTE are causing data errors.
Disable – Does not phase invert the TXC clock.
Transmit Clock Source
Possible Settings: Internal, External
Default Setting: Internal
Determines whether the DTE’s transmitted data is clocked into the FrameSaver unit by its
internal transmit clock or by the external clock provided by the DTE.
NOTE: Changing settings for this configuration option causes the FrameSaver unit to
abort any physical port tests, including any DTE-initiated loopback tests.
Internal – The FrameSaver unit uses the interchange circuit DB (ITU 114) – Transmit
Signal Element Timing (TXC) (DCE source) for timing the incoming data.
External – The DTE provides the clock for the transmitted data, and the FrameSaver unit
uses the interchange circuit DA (ITU 113) – Transmit Signal Element Timing (XTXC) (DTE
source) for timing the incoming data.
Monitor RTS
Possible Settings: Enable, Disable
Default Setting: Enable
Specifies whether the state of the Request To Send (RTS) circuits on the user data port
will be used to determine when valid data communication is possible with the DTE. When
this condition is detected, CTS is deasserted, LMI is declared down, and no further
transfer of frame relay data can occur on this interface.
Enable – Interchange circuit CA (ITU 105) – RTS is monitored to determine when valid
data communication is possible with the DTE.
Disable – RTS is not monitored. RTS is assumed to be asserted and data is being
transmitted, regardless of the state of the lead.
9000-A2-GB31-00 December 2002
3-33
Page 66

3. Configuration Options
Table 3-15. V.35 Data Port Physical Interface Options (4 of 6)
Monitor DTR
Possible Settings: Enable, Disable
Default Setting: Enable
Specifies whether the state of the DTE Ready (DTR) circuit on the user data port will be
used to determine when valid data communication is possible with the DTE. When this
condition is detected, an alarm is generated, LMI is declared down, and no further transfer
of frame relay data can occur on this interface.
Enable – Interchange circuit CD (ITU 108/1/2) – DTR is monitored to determine whether
data should be transmitted to the DTE.
Disable – DTR is not monitored. DTR is assumed to be asserted and data is being
transmitted, regardless of the state of the lead.
Port (DTE) Initiated Loopbacks
Possible Settings:
For Port-1, or Port-2 when Port Use is set to Frame Relay: Disable, Local
For Port-2 when Port Use is set to Synchronous Data: Disable, DTPLB, DCLB, Both
Default Setting: Disable
Possible Settings: Local, Disable
Default Setting: Disable
For Port-1, or Port-2 (9128 only) when Port Use is set to Frame Relay:
Allows a local external DTE Loopback to be started or stopped via the data terminal
equipment attached to the port’s interchange lead LL (ITU 141), as specified by V.54.
Disable – The DTE attached to the port cannot control the local external DTE Loopback.
Local – The DTE attached to the port controls the local external DTE Loopback.
For Port-2 (9128 only) when Port Use is set to Synchronous Data:
Allows local Data Terminal Loopbacks (DTPLBs) and remote Data Channel Loopbacks
(DCLBs) to be controlled by the DTE connected to this port.
Disable – The DTE attached to the port cannot control Local Data Terminal Loopbacks
(DTPLBs) and remote Data Channel Loopbacks (DCLBs).
DTPLB – The DTE attached to the port controls DTPLBs via circuit LL – CCITT 141, as
specified by V.54. The port remains in loopback as long as the circuit stays on.
DCLB – The DTE attached to the port controls DCLBs via circuit RL – CCITT 140, as
specified by V.54. The far-end equipment must support inband V.54 loopbacks.
Both – The DTE attached to the port controls both local DTPLBs and remote DCLBs.
3-34 December 2002 9000-A2-GB31-00
Page 67

3. Configuration Options
Table 3-15. V.35 Data Port Physical Interface Options (5 of 6)
Invert Transmit and Receive Data (9128)
Possible Settings: Enable, Disable
Default Setting: Disable
Specifies whether transmitted and received data for the synchronous data port is logically
inverted before being transmitted or after being received from the network. Use this
configuration option for applications where data is being transported using HDLC protocol,
whereby inverting the data ensures that the ones density requirements for the network are
met.
Display Conditions – This option only appears for Port-2 on a FrameSaver SLV 9128,
when Port Use is set to Synchronous Data.
Enable – Inverts the transmitted and received data for the port.
Disable – Does not invert the transmitted and received data for the port.
Action on Network Yellow Alarm (9128)
Possible Settings: None, Halt
Default Setting: Halt
Specifies the action to take on the synchronous data port when a yellow alarm is received
on the network interface. A yellow alarm indicates a problem with the signal being
transmitted to the network.
Display Conditions – This option only appears for Port-2 on a FrameSaver SLV 9128,
when Port Use is set to Synchronous Data.
None – No action taken when a yellow alarm is received.
Halt – Halts the transmission of data received on the synchronous data port and all ones
are sent on circuit BB (ITU 104) – Receive Data (RD) and circuit CB (ITU 106) –
Clear-to-Send (CTS) is deasserted to the port when a yellow alarm is received.
9000-A2-GB31-00 December 2002
3-35
Page 68

3. Configuration Options
Table 3-15. V.35 Data Port Physical Interface Options (6 of 6)
Network Initiated Data Channel Loopback (9128)
Possible Settings: Disable, V.54, ANSI_FT1, V.54_&_ANSI
Default Setting: Disable
Allows the initiation and termination of the Data Channel Loopback (V.54 Loop 2) to be
controlled by the receipt of a DCLB-actuate and DCLB-release sequence (either V.54, or
FT1 [ANSI] compliant sequences) from the network or far end unit. When this
configuration is enabled (V.54, FT1, or Both), receiving a DCLB-actuate sequence on a
particular port causes the unit to initiate a DCLB on that port (provided that a DCLB can be
performed based on the current state of the port and unit). Receiving a DCLB-release
sequence terminates the DCLB.
Display Conditions – This option only appears for Port-2 on a FrameSaver SLV 9128,
when Port Use is set to Synchronous Data.
Disable – Ignores the DCLB-actuate and DCLB-release for the port.
V.5 4 – DCLB-actuate and DCLB-release sequences that comply with the V.54 standard
for “inter-DCE signaling for point-to-point circuits” are recognized and will control the
initiation and termination of a DCLB (V.54 Loop 2) for the port.
ANSI_FT1 – DCLB-actuate and DCLB-release sequences that comply with either the
ANSI.403, Annex B standard for “in-band signaling for fractional T1 (FT1) channel
loopbacks” are recognized and will control the initiation and termination of a DCLB for the
port.
V.54_&_ANSI – DCLB-actuate and DCLB-release sequences that comply with either the
ANSI or V.54 standard are recognized and will control the initiation and termination of a
DCLB for the port.
EIA-530-A/X.21/V.35 Data Port Physical Interface
FrameSaver Models 9788, 9820-2M, and 9820-8M have an EIA-530-A data port
that can be adapted for use as an X.21 or V.35 data port.
Table 3-16. EIA-530-A/X.21/V.35 Data Port Physical Interface Options (1 of 3)
Port Type
Possible Settings: E530, V.35, X.21
Default Setting: V.3 5
Specifies the port type of the data port.
E530 – The port is configured as an EIA-530-A-compatible DCE. An EIA-530-Acompatible DTE may be directly connected to the DB25 connector for the port.
V.3 5 – The port is configured as a V.35-compatible DCE. A V.35-compatible DTE may be
connected to the port using a DB25-to-MS34 adapter.
X.21 – The port is configured as an X.21-compatible DCE. An X.21-compatible DTE may
be connected to the port using a DB25-to-DB15 adapter.
3-36 December 2002 9000-A2-GB31-00
Page 69

3. Configuration Options
Table 3-16. EIA-530-A/X.21/V.35 Data Port Physical Interface Options (2 of 3)
Transmit Clock Source
Possible Settings: Internal, External
Default Setting: Internal
Determines whether the DTE’s transmitted data is clocked into the FrameSaver unit by its
internal transmit clock or by the external clock provided by the DTE.
NOTE: Changing settings for this configuration option causes the FrameSaver unit to
abort any physical port tests, including any DTE-initiated loopback tests.
Internal – The FrameSaver unit uses the interchange circuit DB (ITU 114) – Transmit
Signal Element Timing (TXC) (DCE source) for timing the incoming data.
External – The DTE provides the clock for the transmitted data, and the FrameSaver unit
uses the interchange circuit DA (ITU 113) – Transmit Signal Element Timing (XTXC)
(DTE source) for timing the incoming data.
Invert Transmit Clock
Possible Settings: Auto, Enable, Disable
Default Setting: Auto
Determines whether the clock supplied by the FrameSaver unit on interchange circuit DB
(ITU 114) – Transmit Signal Element Timing (DCE Source) TXC is phase inverted with
respect to the clock used to time the incoming Transmitted Data (TD).
Auto – The port will check the clock supplied by the DCE on TXC on this port. If
necessary, the port will automatically phase invert the clock with respect to the transmitted
data.
Enable – Phase inverts the TXC clock. Use this setting when long cable lengths between
the FrameSaver unit and the DTE are causing data errors.
Disable – Does not phase invert the TXC clock.
Monitor DTR
Possible Settings: Enable, Disable
Default Setting: Enable
Specifies whether the state of the DTE Ready (DTR) circuit on the user data port will be
used to determine when valid data communication is possible with the DTE. When the
DTR off condition is detected, an alarm is generated, LMI is declared down, and no further
transfer of frame relay data can occur on this interface.
Enable – Interchange circuit CD (ITU 108/1/2) – DTR is monitored to determine when
valid data is sent from the DTE.
Disable – DTR is not monitored. DTR is assumed to be asserted and data is being
transmitted, regardless of the state of the lead.
9000-A2-GB31-00 December 2002
3-37
Page 70

3. Configuration Options
Table 3-16. EIA-530-A/X.21/V.35 Data Port Physical Interface Options (3 of 3)
Monitor RTS
Possible Settings: Enable, Disable
Default Setting: Enable
Specifies whether the state of the Request To Send (RTS) circuits on the user data port
will be used to determine when valid data communication is possible with the DTE. When
the RTS off condition is detected, CTS is deasserted, LMI is declared down, and no
further transfer of frame relay data can occur on this interface.
Enable – Interchange circuit CA (ITU 105) – RTS is monitored to determine when valid
data communication is possible with the DTE.
Disable – RTS is not monitored. RTS is assumed to be asserted and data is being
transmitted, regardless of the state of the lead.
Port (DTE) Initiated Loopbacks (9520)
Possible Settings: Local, Disable
Default Setting: Disable
Allows a local external DTE Loopback to be started or stopped via the port’s attached data
terminal equipment using the port’s interchange lead LL (ITU 141) for V.35, or LA (ITU
143) for HSSI.
Local – The DTE attached to the port controls the local external DTE Loopback.
Disable – The DTE attached to the port cannot control the local external DTE Loopback.
HSSI Data Port Physical Interface
FrameSaver Model 9520 has two HSSI data ports, and Model 9820-45M has one.
Table 3-17. HSSI Data Port Physical Interface Options (1 of 3)
Port Status
Possible Settings: Enable, Disable
Default Setting: Enable
Determines whether the data port is being used and can be configured.
Enable – The port is active, and can be used to transmit and receive data.
Disable – The port is not active. When the port is disabled, the following will occur:
n
No alarms or traps configured for the port will be generated.
n
LED for the port will be held in an Off state.
No – The operation is canceled. (Pressing either the Esc or Ctrl-a key also acts as a
No.)
Yes – Port status is disabled.
3-38 December 2002 9000-A2-GB31-00
Page 71

3. Configuration Options
Table 3-17. HSSI Data Port Physical Interface Options (2 of 3)
Port Type (9520)
Possible Settings: HSSI, V.35
Default Setting: HSSI
Specifies the port type of the data port.
V.3 5 – The port is configured as a V.35-compatible DCE. A V.35-compatible DTE may be
connected to the port using a DB25-to-MS34 adapter.
HSSI – The port is configured as a HSSI-compatible DCE. A HSSI-compatible DTE may
be directly connected to the DB25 connector for the port.
Port Rate (9520)
Possible Settings (HSSI): 7456, 11184, 17250, 25875, 44736, 51750
Default Setting (HSSI): 51750
Possible Settings (V.35): 512, 1025, 1537, 2050, 2562, 3074, 3587, 4099, 4611, 5124,
5636, 6149, 6661, 7073, 7685, 8197
Default Setting (V.35): 6149
Selects the clock rate in kbps for the user data port.
Transmit Clock Source (9520)
Possible Settings: Internal, External
Default Setting: Internal
Determines whether the DTE’s transmitted data is clocked into the FrameSaver unit by its
internal transmit clock or by the external clock provided by the DTE.
NOTE: Changing settings for this configuration option causes the FrameSaver unit to
abort any physical port tests, including any DTE-initiated loopback tests.
Display Conditions – This option does not appear when Port Type is set to HSSI.
Internal – The FrameSaver unit uses the interchange circuit DB (ITU 114) – Transmit
Signal Element Timing (TXC) (DCE source) for timing the incoming data.
External – The DTE provides the clock for the transmitted data, and the FrameSaver unit
uses the interchange circuit DA (ITU 113) – Transmit Signal Element Timing (XTXC)
(DTE source) for timing the incoming data.
Invert Transmit Clock (9520)
Possible Settings: Auto, Enable, Disable
Default Setting: Auto
Determines whether the clock supplied by the FrameSaver unit on interchange circuit DB
(ITU 114) – Transmit Signal Element Timing (DCE Source) TXC is phase inverted with
respect to the clock used to time the incoming Transmitted Data (TD).
Display Conditions – This option does not appear when Port Type is set to HSSI.
Auto – The port will check the clock supplied by the DCE on TXC on this port. If
necessary, the port will automatically phase invert the clock with respect to the transmitted
data.
Enable – Phase inverts the TXC clock. Use this setting when long cable lengths between
the FrameSaver unit and the DTE are causing data errors.
Disable – Does not phase invert the TXC clock.
9000-A2-GB31-00 December 2002
3-39
Page 72

3. Configuration Options
Table 3-17. HSSI Data Port Physical Interface Options (3 of 3)
Monitor DTR
Possible Settings: Enable, Disable
Default Setting: Enable
Specifies whether the state of the DTE Ready (DTR) circuit on the user data port will be
used to determine when valid data communication is possible with the DTE. When the
DTR off condition is detected, an alarm is generated, LMI is declared down, and no further
transfer of frame relay data can occur on this interface.
Enable – Interchange circuit CD (ITU 108/1/2) – DTR is monitored to determine when
valid data is sent from the DTE.
Disable – DTR is not monitored. DTR is assumed to be asserted and data is being
transmitted, regardless of the state of the lead.
Monitor RTS (9520)
Possible Settings: Enable, Disable
Default Setting: Enable
Specifies whether the state of the Request To Send (RTS) circuits on the user data port
will be used to determine when valid data communication is possible with the DTE. When
the RTS off condition is detected, CTS is deasserted, LMI is declared down, and no
further transfer of frame relay data can occur on this interface.
Display Conditions – This option does not appear when Port Type is set to HSSI.
Enable – Interchange circuit CA (ITU 105) – RTS is monitored to determine when valid
data communication is possible with the DTE.
Disable – RTS is not monitored. RTS is assumed to be asserted and data is being
transmitted, regardless of the state of the lead.
Port (DTE) Initiated Loopbacks
Possible Settings: Local, Disable
Default Setting: Disable
Allows a local external DTE Loopback to be started or stopped via the port’s attached data
terminal equipment using the port’s interchange lead LL (ITU 141) for V.35 (9520 only), or
LA (ITU 143) for HSSI.
Local – The DTE attached to the port controls the local external DTE Loopback.
Disable – The DTE attached to the port cannot control the local external DTE Loopback.
3-40 December 2002 9000-A2-GB31-00
Page 73

Configuring the T3 User Port (9520-ILM)
Select Physical to display or change the physical characteristics of the user data
port connected to the DTE (see Table 3-18, T3 User Port Physical Interface
Options).
3. Configuration Options
Main Menu
→ Configuration→ T3 User Ports → Physical
Table 3-18. T3 User Port Physical Interface Options
Line Build Out
Possible Settings: Short, Long
Default Setting: Short
Specifies whether a line equalization filter is activated to simulate a longer cable.
Short – The equalization filter is activated. Use this option for DTE cables less than 100
feet long.
Long – The equalization filter is not activated. Use this option for DTE cables 100 feet or
longer.
9000-A2-GB31-00 December 2002
3-41
Page 74

3. Configuration Options
Configuring the DSX-1 Interface (9126, 9128)
Select DSX-1 to display or change the physical configuration options when a
DSX-1 interface is installed (see Table 3-19, DSX-1 Physical Interface Options).
Main Menu→ Configuration→ DSX-1
Table 3-19. DSX-1 Physical Interface Options (1 of 2)
Interface Status
Possible Settings: Enable, Disable
Default Setting:Disable
Specifies whether the DSX-1 interface selected is available for use.
Enable – The interface is available.
Disable – The interface is not available for use. If there are time slots assigned to the
DSX-1 interface when you attempt to disable it, the message This action will
clear all DSX-1 Cross Connections. Are You Sure? No
select:
No – The operation is cancelled.
Yes – The following occurs:
n
All existing DSX-1 interface cross-connect assignments are cleared.
n
Alarms or traps associated with the DSX-1 interface are not generated.
n
LEDs associated with the DSX-1 interface are held in an “off’’ state.
appears. If you
Line Framing Format
Possible Settings: D4, ESF
Default Setting: ESF
Specifies the framing format for transmitted and received signals on the DSX-1 interface.
D4 – Uses D4 framing format.
ESF – Uses Extended Superframe (ESF) framing format.
Line Coding Format
Possible Settings: AMI, B8ZS
Default Setting: B8ZS
Specifies the line coding format for the DSX-1 interface.
AMI – Uses Alternate Mark Inversion (AMI) line coding format.
B8ZS – Uses Bipolar 8 Zero Substitution (B8ZS) line coding format.
3-42 December 2002 9000-A2-GB31-00
Page 75

3. Configuration Options
Table 3-19. DSX-1 Physical Interface Options (2 of 2)
Line Equalization
Possible Settings: 0–133, 133– 266, 266 – 399, 399 – 533, 533–655
Default Setting: 0–133
Permits a standard DSX signal to be delivered over a distance of up to 655 feet.
0–133 – Equalization on the DSX-1 side allows up to 133 feet of cable between the
FrameSaver unit and the DTE.
133–266 – Equalization on the DSX-1 side allows up to 266 feet of cable between the
FrameSaver unit and the DTE.
266–399 – Equalization on the DSX-1 side allows up to 399 feet of cable between the
FrameSaver unit and the DTE.
399–533 – Equalization on the DSX-1 side allows up to 533 feet of cable between the
FrameSaver unit and the DTE.
533–655 – Equalization on the DSX-1 side allows up to 655 feet of cable between the
FrameSaver unit and the DTE.
Send All Ones on DSX-1 Failure
Possible Settings: Enable, Disable
Default Setting: Enable
Determines whether action is taken when a valid signal cannot be recovered for the
DSX-1 (LOS, continuous OOF, or AIS).
Enable – Sends all ones on the DS0 channels allocated to the DSX-1 interface in the
event of an LOS, AIS, or continuous OOS condition on the DSX-1 interface.
Disable – No action is taken when a signal fails on the DSX-1 interface. The data
received is passed through the network interface channels unchanged.
9000-A2-GB31-00 December 2002
3-43
Page 76

3. Configuration Options
Configuring the ISDN DBM Interface (9126, 9128, 9626)
For models with ISDN backup capability, select Physical from the ISDN menu to
configure the physical characteristics for DBM Interface.
Main Menu→ Configuration→ ISDN→ Physical
When configuring a BRI DBM, refer to Table 3-20, ISDN BRI DBM Physical
Interface Options (9126, 9626).
When configuring a PRI DBM, refer to Table 3-21, ISDN PRI DBM Physical
Interface Options (9128).
Table 3-20. ISDN BRI DBM Physical Interface Options (9126, 9626)
Interface Status
Possible Settings: Enable, Disable
Default Setting: Disable
Determines whether the ISDN interface is available for use.
Enable – The ISDN interface is enabled.
Disable – The ISDN interface cannot be configured, nor can it transmit or receive data.
No PVC connections or frame relay DLCIs will be deleted. Disabling the ISDN interface
results in the following:
n
All currently connected ISDN calls are terminated.
n
Alarms or traps associated with this interface are not generated or displayed.
Service Profile ID (SPID) 1 or 2
Possible Settings: 3 – 20 digits
Default Setting: Clear
Specifies the SPID number assigned by the ISDN service provider for Bearer channel 1
(B1) and Bearer channel 2 (B2). SPID numbers are used by the switch to identify which
ISDN services the DBM can access. All blanks is a valid setting.
3 – 20 digits – You can enter a SPID number, or you can leave blanks. If a nondigit/
numeric is entered, an Invalid Character (x ) message appears at the bottom of
the screen. If fewer than three digits/numerics are entered, an Invalid – SPID must
be at least 3 digits message appears at the bottom of the screen.
Clear – Clears the SPID field so it can be reentered.
Local Phone Number 1 or 2
Possible Settings: 10 digits
Default Setting: Clear
Provides the telephone number associated with Bearer channel 1 (B1) and 2 (B2). All
blanks is a valid setting.
10 digits – Enter the telephone number, up to 10 digits. If a nondigit/numeric is entered,
an Invalid Character (x) message appears at the bottom of the screen.
Clear – Clears the phone number field so it can be reentered.
3-44 December 2002 9000-A2-GB31-00
Page 77

3. Configuration Options
Refer to the Table 3-21 when configuring a PRI DBM.
Table 3-21. ISDN PRI DBM Physical Interface Options (9128) (1 of 3)
Interface Status
Possible Settings: Enable, Disable
Default Setting: Disable
Determines whether the ISDN interface is available for use.
Enable – The ISDN interface is enabled.
Disable – The ISDN interface cannot be configured, nor can it transmit or receive data.
No PVC connections or frame relay DLCIs will be deleted. Disabling the ISDN interface
results in the following:
n
All currently connected ISDN calls are terminated.
n
Alarms or traps associated with this interface are not generated or displayed.
n
LEDs associated with this interface are held in an “off" state. Specifically, the
DSX/PRI LEDs are held off if they represent the PRI status.
Switch Type
Possible Settings: NI-2, ATT_4ESS, ATT_5ESS
Default Setting: NI-2
Specifies type of ISDN switch provided by the server.
NI-2 – The DBM will communicate with a service provider supporting the National ISDN-2
switching standard.
ATT_4ESS – The DBM will communicate with a service provider supporting the
ATT 4ESS switching standard.
ATT_5ESS – The DBM will communicate with a service provider supporting the
ATT 5ESS switching standard.
Local Phone Number
Possible Settings: 10 digits
Default Setting: Clear
Provides the telephone number associated with all Bearer channels. All blanks is a valid
setting.
10 digits – Where you enter the telephone number, up to 10 digits. If a nondigit/numeric is
entered, an Invalid Character (x) message appears at the bottom of the screen.
Clear – Clears the phone number field so it can be reentered.
Line Framing Format
Possible Settings: D4, ESF
Default Setting: ESF
Specifies the framing format for transmitted and received signals on the ISDN interface.
D4 – Uses D4 framing format.
NOTE: This setting is not recommended by network carriers. False yellow alarms may
occur after traffic has been running and the channel returns to idle, or when there is
light traffic when other settings are selected. ESF format does not create this problem.
ESF – Uses Extended Superframe framing format.
9000-A2-GB31-00 December 2002
3-45
Page 78

3. Configuration Options
Table 3-21. ISDN PRI DBM Physical Interface Options (9128) (2 of 3)
Line Build Out (LBO)
Possible Settings: 0.0, –7.5, –15, –22.5
Default Setting: 0.0
Specifies the line build out for the signal transmitted to the ISDN.
0.0, –7.5, –15, –22.5 – Specifies line build out in dB.
Network Initiated LLB
Possible Settings: Enable, Disable
Default Setting: Enable
Allows the initiation and termination of the line loopback (LLB) to be controlled by the
receipt of LLB-Actuate and LLB-Release commands from the ISDN.
Enable – LLB is controlled by LLB-Actuate and LLB-Release commands. Receiving a
LLB-Actuate command causes the system to enter a line loopback (provided an LLB can
be performed in the system’s current state). Receiving an LLB-Release command
terminates the LLB.
Disable – The system ignores the LLB-Actuate and LLB-Release commands.
NOTE: When disabled, the system is not in compliance with ANSI T1.403 or
AT&T TR 62411.
Network Initiated PLB
Possible Settings: Enable, Disable
Default Setting: Enable
Allows the initiation and termination of the payload loopback (PLB) to be controlled by the
receipt of PLB-Actuate and PLB-Release commands from the ISDN.
Display Conditions – This option only appears when Line Framing Format is set to
ESF.
Enable – PLB is controlled by PLB-Actuate and PLB-Release commands. Receiving a
PLB-Actuate command causes the system to enter a payload loopback (provided a PLB
can be performed in the system’s current state). Receiving a PLB-Release command
terminates the PLB.
Disable – The system ignores the PLB-Actuate and PLB-Release commands.
NOTE: When disabled, the unit is not in compliance with ANSI T1.403 or
AT&T TR 54016.
ANSI Performance Report Messages
Possible Settings: Enable, Disable
Default Setting: Disable
Specifies whether ANSI T1.403 compliance performance report messages (PRMs) are
generated and sent to the ISDN over the ESF facility data link every second.
Display Conditions – This option only appears when Line Framing Format is set to
ESF.
Enable – Generates and sends PRMs.
Disable – Does not generate and send PRMs.
3-46 December 2002 9000-A2-GB31-00
Page 79

3. Configuration Options
Table 3-21. ISDN PRI DBM Physical Interface Options (9128) (3 of 3)
Excessive Error Rate Threshold
Possible Settings: 10E-4, 10E-5, 10E-6, 10E-7, 10E-8, 10E-9
Default Setting: 10E-4
Sets the error rate threshold that determines when an EER condition is declared. The
excessive error rate is determined by the ratio of the number of CRC6 errors to the total
number of bits received over a set period of time.
Display Conditions – This option only appears when Line Framing Format is set to
ESF.
10E-4 – Declares an EER if more than 1,535 CRC6 errors are detected in a 10 second
period. Clears when fewer than 1,536 CRC6 errors are detected within the same time
period.
10E-5 – Declares an EER if more than 921 CRC6 errors are detected in a 60 second
period or a 10
within the same time period.
10E-6 – Declares an EER if more than 92 CRC6 errors are detected in a 60 second period
or a 10-5 or 10-4 condition occurs. Clears when fewer than 93 CRC6 errors are detected
within the same time period.
10E-7 – Declares an EER if more than 9 CRC6 errors are detected in a 60 second period
or a 10
detected within the same time period.
10E-8 – Declares an EER if more than 41 CRC6 errors are detected in three 15 minute
intervals or a 10-7, 10-6, 10-5, 10-4 condition occurs. Clears when fewer than 42 CRC6
errors are detected within the same time period.
10E-9 – Declares an EER if more than 4 CRC6 errors are detected in three 15 minute
intervals or a 10
5 CRC6 errors are detected within the same time period.
-4
condition occurs. Clears when fewer than 922 CRC6 errors are detected
-6
, or 10-5, or 10-4 condition occurs. Clears when fewer than 10 CRC6 errors are
-8
, 10-7, 10-6, 10-5, or 10-4 condition occurs. Clears when fewer than
Circuit Identifier
Possible Settings: ASCII Text Entry, Clear
Default Setting: blank
Identifies the transmission vendor’s circuit information to facilitate troubleshooting.
ASCII Text Entry – Assigns a name to identify the circuit (maximum 255 characters).
Clear – Removes the circuit identifier information.
9000-A2-GB31-00 December 2002
3-47
Page 80

3. Configuration Options
Setting Up ISDN Link Profiles (9126, 9128, 9626)
For models with ISDN backup capability, select ISDN Link Profiles from the ISDN
menu to set up the ISDN Link Profiles (see Table 3-22, ISDN Link Profile Options).
Main Menu→ Configuration→ ISDN→ ISDN Link Profiles
Table 3-22. ISDN Link Profile Options (1 of 3)
Link Name
Possible Settings: ASCII Text Entry, HQ_Site
Default Setting: HQ_Site for first link; blank for all others
Assigns the name to the ISDN link profile. It is generally the backup destination for a
frame relay link. Each profile must have a unique link name. If the link name field is blank,
the link profile will be deleted. Use ASCII text, 8 characters maximum.
ASCII Text Entry – Assigns a name to identify the ISDN link (maximum 255 characters).
NOTE: To prevent confusion, do not use the following link names: Network, Net1-FR1,
Port-1, or Port-2. These names will be treated as nonunique and the Link Name Not
Unique message appears and you must enter another name.
HQ_Site – The link name configured in the remote site unit (originating a backup call) for
the central site unit (answering a backup call). One link has a default value of HQ_Site to
allow for Automatic Backup Configuration.
Link Status
Possible Settings: Auto, Disable
Default Setting: Auto
Determines whether the ISDN frame relay link is in or out of service.
Auto – The link is configured to be in service when needed. Packets will be transmitted
and received on the interface, and the LMI for a PVC connection will become active when
the link is required. If this profile is configured as the alternate link and the primary link or
DLCI fails, the unit dials the Outbound Phone Number, or the Alternate Outbound Phone
Number if the first call was unsuccessful. The unit also answers calls from Inbound Call
IDs associated with this link. This link profile becomes active when:
n
This profile is configured as the alternate link and there is a failure of a primary link
or DLCI.
n
Source or Primary Destination DLCIs are configured on this link.
When the primary link recovers, the call is automatically disconnected.
Disable – The frame relay link is out of service. No data will be transmitted or received on
the interface. If there is are any active calls when disabled, the calls are ended and no
calls will be answered or originated using this profile.
3-48 December 2002 9000-A2-GB31-00
Page 81

3. Configuration Options
Table 3-22. ISDN Link Profile Options (2 of 3)
Outbound Phone Number
Possible Settings: 0 – 9, *, #, space, _ , –, (, or )
Default Setting: none
Specifies the primary phone number to call (the ISDN Called Party Identifier) for the Link
Profile. Up to 18 valid characters can be entered. Each Outbound Phone Number must be
unique. If not, the Outbound Phone Number is Not Unique message appears and
you must enter another phone number.
NOTE: For every originating (outbound) phone number entered, an answering
(inbound) phone number must be entered at the far end, and vice versa.
Currently active calls are not effected when this number is changed.
Inbound Calling ID 1 or 2
Possible Settings: 0 – 9
Default Setting: none
Specifies the local phone number of a remote device from which that the unit will accept
calls (the ISDN Calling Party Identifier). Up to 18 digits can be entered. Each Inbound
Calling ID must be unique. If not, the Inbound Calling ID n is Not Unique
message appears and you must enter another phone number.
For remote devices with a PRI DBM, only one Inbound Calling ID is required. Inbound
Calling ID 2 is provided to identify incoming calls from a second phone number assigned
to a remote device with a BRI DBM.
NOTES:
– Inbound Calling ID 2 is only useful when multiple local phone numbers are
programmed at the originating site (e.g., a 2B+D BRI location).
– For every originating (outbound) phone number entered, an answering (inbound)
phone number must be entered at the far end, and vice versa.
Currently active calls are not effected when this number is changed.
0 – 9 – Specifies the numbers in the remote device’s local phone number.
Maximum Link Rate (Kbps)
Possible Settings:
For a BRI DBM: 64, 128
For a PRI DBM: 64 – 1472
Default Setting: 64
Specifies the maximum rate that will be attempted for the frame relay link when it is
activated. The actual rate achieved on the link depends upon the number of successful
calls placed or answered, and the negotiated rate on each call.
NOTE: This option takes effect as soon as a change is saved. If the rate is increased,
additional calls will be placed. If the rate is decreased, calls will be dropped. For extra
calls to be successful, the Maximum Link Rate must be increased at the originating
device before it is increased at the answering device.
64 – An individual frame relay link is formed and a single call is placed using a B-channel
when the link is activated.
128 . . . 1472 – A constituent link is configured for each multiple of 64 Kbps in the
specified bandwidth. This bundle of constituent links will function as a single frame relay
multilink. When the multilink aggregate link is activated, calls will be placed or answered
on as many constituent links as possible based upon available B-channels.
9000-A2-GB31-00 December 2002
3-49
Page 82

3. Configuration Options
Table 3-22. ISDN Link Profile Options (3 of 3)
Caller Identification Method
Possible Settings: Caller ID, Proprietary
Default Setting: Caller ID
Specifies the method used to identify callers.
NOTE: The Caller Identification Method setting must be the same at both ends of the
circuit.
Caller ID – Incoming calls will only be answered and the frame relay link on this Link
Profile will only be activated when the Caller ID received from the switch matches one of
the configured Inbound Calling IDs.
Proprietary – Incoming calls will always be answered, even when no Caller ID is provided
by the switch, provided the following conditions are met:
n
Link Status is set to Auto (the default).
n
At least one ISDN Link Profile is enabled.
When using the Proprietary method, the unit queries the originating unit for its Local
Phone Number. If the returned phone number matches one of the configured Inbound
Calling IDs, the call is accepted. If the queried unit does not respond with its phone
number within five seconds, the unit drops the call.
Alternate Outbound Phone Number
Possible Settings: 0 – 9, *, #, space, _ , –, (, or )
Default Setting: none
Specifies an alternate phone number to call (the ISDN Called Party Identifier) when a call
using the primary Outbound Phone Number was unsuccessful. Up to 18 valid characters
can be entered. Each Outbound Phone Number must be unique. If not, the Alt
Outbound Phone Number is Not Unique message appears and you must enter
another phone number.
NOTE: For every originating (alternate outbound) phone number entered, an
answering (inbound) phone number must be entered at the far end, and vice versa.
Currently active calls are not effected when this number is changed.
Assigning Time Slots/Cross Connections
The Time Slot Assignment/Cross Connect feature provides an easy method of
assigning time slots for frame relay data and creating cross-connections to the
synchronous data interface. The system allows you to assign DS0s on the T1
network interface and between the user data port and network interface in order to
share the T1 network.
You can also clear cross-connection assignments for the system, or for a selected
slot or interface.
NOTE:
Although it is not required, it is suggested that you progress through each
screen in order, from top to bottom.
3-50 December 2002 9000-A2-GB31-00
Page 83

Assigning Time Slots to the Network Interface
Before assigning network time slots for use by frame relay traffic, configure the
Network physical and Frame Relay options (if needed), then allow Time Slot
Discovery to autodetect and assign the appropriate time slots to frame relay.
If there are multiple Frame Relay data links on the network interface, or if Time
Slot Discovery is not currently active, you can manually assign time slots on the
network interface for frame relay traffic using the Frame Relay Network
Assignments screen. This screen is read-only when Time Slot Discovery is set to
Enable for the network interface.
Link Layer Network Time Slot Assignment Screen Example
main/config/tslot_assign/frame_relay 9128-II
Device Name: Node A 11/05/2002 13:03
3. Configuration Options
LINK LAYER NETWORK 1
Time Slot Discovery: Disable
N01 N02 N03 N04 N05 N06 N07 N08
Available
N09 N10 N11 N12 N13 N14 N15 N16
Available
N17 N18 N19 N20 N21 N22 N23 N24
FrameRly1
-------------------------------------------------------------------------------Ctrl-a to access these functions, ESC for previous menu M
ave PgDn PgUp ClearAll DSXAssign
S
Available Available Available Available Available Available Available
Available FrameRly1 FrameRly1 FrameRly1 FrameRly1 FrameRly1 FrameRly1
FrameRly1 FrameRly1 FrameRly1 FrameRly1 FrameRly1 FrameRly1 FrameRly1
ASSIGNMENT
ainMenu Exit
Valu e Me an in g
Time Slot
Discovery
Specifies whether the time slots used for frame relay traffic should
be discovered from the network interface upon detection of an LMI
failure. This option allows additional time slots to be added without
manually reconfiguring the device.
Ntt This field represents time slot tt of the selected network interface.
Assigned The time slot is already assigned to something other than frame
relay, so it is unavailable. Assigned time slots cannot be modified
from this screen.
Available The time slot is currently unassigned.
FrameRly1 The time slot is assigned to frame relay service, link 1.
FrameRly2 The time slot is assigned to frame relay service, link 2.
PPP The time slot is assigned to the network interface.
9000-A2-GB31-00 December 2002
3-51
Page 84

3. Configuration Options
For easy movement between screens, select the DSXAssign function key to go
directly to the DSX-1 to Network Assignments screen.
Time Slot Assignment Rule:
Valid network time slots are either Available or contain a Frame Relay Link 1
assignment.
Procedure
1. Follow this menu selection sequence:
Main Menu
→ Configuration → Time Slot Assignment →
Link Layer Network Assignments
The Frame Relay Network Assignments screen appears. This screen contains
a matrix of the current assignment status of all time slots on the network
interface.
2. Enable or disable Time Slot Discovery.
— When enabled, the unit examines all time slots not cross-connected to
other ports to determine which time slots are being used by the network
for frame relay traffic. These time slots are set to FrameRly1. This is the
factory default.
— When disabled, time slot assignments must be manually configured.
3. If Time Slot Discovery is disabled, assign network time slots for use by frame
relay service, link 1, by typing FrameRly1 in the selected Network field.
4. Repeat Step 3 until all desired time slots are assigned.
ave the configuration.
5. S
Assigning DSX-1 Time Slots to the Network Interface
DSX-1 time slots are assigned by channel allocation, where you specify individual
time slots. The DSX-1 interface must be enabled to assign DSX-1 time slots to the
network interface (see Table 3-19, DSX-1 Physical Interface Options).
Valu e Me an in g
Ntt It represents time slot tt of the selected network interface.
Assigned The time slot is already assigned to something other than a DSX-1
time slot, so it is unavailable. Assigned time slots cannot be modified
from this screen.
Available The time slot is currently unassigned.
DSX-1/tt Slot tt of the DSX-1 interface is assigned to the network interface
time slot identified right above it (Ntt).
3-52 December 2002 9000-A2-GB31-00
Page 85

3. Configuration Options
DSX-1 to Network Time Slot Assignment Screen Example (Page 1)
main/config/tslot_assign/dsx 9128-II
Device Name: Node A 5/26/1999 23:32
DSX-1 TO NETWORK 1
N01 N02 N03 N04 N05 N06 N07 N08
DSX-1/01
N09 N10 N11 N12 N13 N14 N15 N16
DSX-1/09
N17 N18 N19 N20 N21 N22 N23 N24
Available
-------------------------------------------------------------------------------Ctrl-a to access these functions, ESC for previous menu M
ave PgDn PgUpClearAll FrAssign
S
DSX-1/02 DSX-1/03 DSX-1/04 Assigned Assigned Assigned Assigned
DSX-1/01 Available Available Available Available Available Available
Available Available Available Available Available Available Available
ASSIGNMENTS Page 1 of 2
ainMenu Exit
Page 2 of 2 is for defining signaling assignments and trunk conditioning for each
DSX-1 interface time slot. See DSX-1 Signaling Assignments and Trunk
Conditioning (Page 2) on page 3-54 for an example of this screen.
For easy movement between screens, select the F
rAssign function key to go
directly to the Frame Relay Network Assignments screen.
Time Slot Assignment Rules:
n Valid Network time slots are either Available or contain a DSX-1 time slot
assignment.
n Valid DSX-1 time slots are those that are unassigned, including the currently
assigned time slot.
n Order of display is as follows:
— Available is the first selection.
— Then, from the lowest DSX-1 interface to the highest DSX-1 interface.
— Then the lowest available time slot number to the highest available time
slot number.
For example, if the cursor is on a field with the Available value under
assigned time slot Ntt, pressing the Spacebar causes this field’s values to
cycle through all valid DSX-1 time slots, starting with Ds-p/yy, assuming it is
unassigned. If Ds-p/tt is already assigned, the next valid time slot in the order
described above is displayed.
9000-A2-GB31-00 December 2002
3-53
Page 86

3. Configuration Options
Procedure
1. Follow this menu selection sequence:
Configuration
→ Time Slot Assignment→ DSX-to-Network Assignments
The DSX-1 to Network Assignments screen appears. This screen contains a
matrix of the current cross-connect status of all time slots on the network
interface.
2. Move the cursor to the next time slot that can be edited (underlined). Use the
spacebar or type in the desired time slot to display its time slot assignment.
3. Repeat Step 2 until all desired time slots are assigned.
ave the configuration.
4. S
DSX-1 Signaling Assignments and Trunk Conditioning (Page 2)
The second page of the DSX-1 to Network Assignments screen allows you to
define the signaling assignments and trunk conditioning for each time slot on the
DSX-1 interface. You can specify whether robbed bit signaling information is being
passed within a given DS0, and the value of the signaling bits that will be
transmitted for that DS0 to the other cross-connected T1 network interface if a
Carrier Group Alarm (CGA) occurs on a T1 network interface.
DSX-1 to Network Time Slot Assignment Screen Example (Page 2)
main/config/tslot_assign/dsx 9128-II
Device Name: Node A 5/26/2000 23:32
DSX-1 TO NETWORK 1
SIGNALING AND TRUNK CONDITIONING
Network 1 Side DSX-1 Side Network 1 Side DSX-1 Side
Net1/01 E&M-busy - DSX-1/01 E&M-busy Net1/02 E&M-busy - DSX-1/01 E&M-busy
Net1/03 E&M-busy - DSX-1/03 E&M-busy Net1/04 E&M-busy - DSX-1/04 E&M-busy
Net1/09 None - DSX-1/09 None Net1/10 None - DSX-1/10 None
-------------------------------------------------------------------------------Ctrl-a to access these functions, ESC for previous menu M
ave PgDn PgUpClearAll VocAssign FrAssign
S
For easy movement between screens, select the F
directly to the Frame Relay Network Assignments screen or the DSX
ASSIGNMENTS Page 2 of 2
ainMenu Exit
rAssign function key to go
Assign
function key to go to the DSX-1 to Network Assignments screen.
3-54 December 2002 9000-A2-GB31-00
Page 87

3. Configuration Options
Only those DSX-1-to-Network assignments from page 1 are displayed on this
page, from left to right and top to bottom in ascending order, by network and time
slot.
When a CGA condition (LOS, OOF, or AIS) is declared for a T1 interface, the
signaling bits being transmitted to the other T1 interface for the DS0 are forced to
idle for two seconds (except for user-defined patterns which are transmitted
immediately). This drops any call in progress. The signaling bits are then forced to
the selected state (Busy or Idle), and remain in this state until the CGA condition
clears. At this point, the received signaling bits from the T1 interface which
formerly had the CGA condition are passed through to the other T1 interface.
NOTE:
Trunk conditioning will only occur on DS0s that are cross-connected to
another T1 interface. All other DS0s remain unaffected by trunk conditioning.
Enter one of the values shown in Table 3-23, Signaling and Trunk Conditioning
Values, in each of the fields on both the Network side and the DSX-1 side.
Although you can choose any value for the DSX-1 side, the default value
displayed is based on a typical setting that would be used with the corresponding
Network side value. Typical pairs of values are shown in the table below. If you
change the Network side value, the DSX side value is changed to the
corresponding default value.
Table 3-23. Signaling and Trunk Conditioning Values (1 of 3)
Network Side Meanings DSX-1 Side
None No signaling used on this DS0. Use this setting if
there is no voice signaling information being passed
on this DS0 (clear channel).
RBS (default) Robbed Bit Signaling is used on this DS0, but no
trunk conditioning. Signaling bits will be passed to the
T1 interface to which this DS0 is cross-connected
when this T1 interface is not in CGA, but the signaling
bits will be all ones when CGA is present.
The following values configure the cross-connect for RBS, as well as perform the
trunk conditioning. Although ABCD signaling bits for each setting are described,
only AB bits are transmitted when the cross-connected T1 network interface is
using D4 framing.
None
RBS
9000-A2-GB31-00 December 2002
3-55
Page 88

3. Configuration Options
Table 3-23. Signaling and Trunk Conditioning Values (2 of 3)
Network Side Meanings DSX-1 Side
E&M-idle The signaling bits transmitted to the cross-connected
T1 interface during a CGA represent the idle state for
an E&M interface (ABCD = 0000).
E&M-busy The signaling bits transmitted to the cross-connected
T1 interface during a CGA represent the busy state
for an E & M interface (AB C D = 1111 ).
FXOg-idle The signaling bits transmitted to the cross-connected
T1 interface during a CGA represent the idle state for
an FXO Ground-Start interface (ABCD = 1111).
FXOg-busy The signaling bits transmitted to the cross-connected
T1 interface during a CGA represent the busy state
for an FXO Ground-Start interface (ABCD = 0101).
FXOl-idle The signaling bits transmitted to the cross-connected
T1 interface during a CGA represent the idle state for
an FXO Loop-Start interface (ABCD = 0101).
FXOl-busy The signaling bits transmitted to the cross-connected
T1 interface during a CGA represent the busy state
for an FXO Loop-Start interface (ABCD = 0101).
FXSg-idle The signaling bits transmitted to the cross-connected
T1 interface during a CGA represent the idle state for
an FXS Ground-Start interface (ABCD = 0101).
FXSg-busy The signaling bits transmitted to the cross-connected
T1 interface during a CGA represent the busy state
for an F X S Ground-Star t i n t erface (ABCD = 1111 ) .
E&M idle
E&M busy
FXSg-idle
FXSg-busy
FXSl-idle
FXSl-busy
FXOg-idle
FXOg-busy
FXSl-idle The signaling bits transmitted to the cross-connected
T1 interface during a CGA represent the idle state for
an FXS Loop-Start interface (ABCD = 0101).
FXSl-busy The signaling bits transmitted to the cross-connected
T1 interface during a CGA represent the busy state
for an F X S Loop-Start in t e r f a ce (ABCD = 1111).
FXOD-idle The signaling bits transmitted to the cross-connected
T1 interface during a CGA represent the idle state for
an FXODN interface (ABCD = 0000).
FXOD-busy The signaling bits transmitted to the cross-connected
T1 interface during a CGA represent the busy state
for an FX O D N i n t e r f a ce (ABCD = 1111).
FXSD-idle The signaling bits transmitted to the cross-connected
T1 interface during a CGA represent the idle state for
an FXSDN interface (ABCD = 0000).
FXSD-busy The signaling bits transmitted to the cross-connected
T1 interface during a CGA represent the busy state
for an F X SDN interfac e ( A BCD = 1111).
FXOl-idle
FXOl-busy
FXSD-idle
FXSD-busy
FXOD-idle
FXOD-busy
3-56 December 2002 9000-A2-GB31-00
Page 89

3. Configuration Options
Table 3-23. Signaling and Trunk Conditioning Values (3 of 3)
Network Side Meanings DSX-1 Side
PLAR3idle The signaling bits transmitted to the cross-connected
T1 interface during a CGA represent the idle state for
a PLAR D3 interface (ABCD = 0000).
PLAR3busy The signaling bits transmitted to the cross-connected
T1 interface during a CGA represent the busy state
for an P L A R D3 interface ( A BCD = 1111).
PLAR4idle The signaling bits transmitted to the cross-connected
T1 interface during a CGA represent the idle state for
a PLA R D 4 interface (ABC D = 1111 ) .
PLAR4busy The signaling bits transmitted to the cross-connected
T1 interface during a CGA represent the busy state
for an PLAR D4 interface (ABCD = 0000).
DPO-idle The signaling bits transmitted to the cross-connected
T1 interface during a CGA represent the idle state for
a DPO interface (ABCD = 0000).
DPO-busy The signaling bits transmitted to the cross-connected
T1 interface during a CGA represent the busy state
for a DPO interface (ABCD = 1111).
DPT-idle The signaling bits transmitted to the cross-connected
T1 interface during a CGA represent the idle state for
a DPT interface (ABCD = 0000).
DPT-busy The signaling bits transmitted to the cross-connected
T1 interface during a CGA represent the busy state
for a D PT interfac e ( A B C D = 1111).
PLAR3idle
PLAR3busy
PLAR4idle
PLAR4busy
DPT-idle
DPT-busy
DPO-idle
DPO-busy
USER-xxxx The signaling bits transmitted to the cross-connected
T1 interface during a CGA represent a user-defined
pattern of ABCD = xxxx.
* xxxx is the same value on both the Network and the DSX-1 sides.
USER-xxxx*
9000-A2-GB31-00 December 2002
3-57
Page 90

3. Configuration Options
Assigning a Synchronous Data Port to Network or DSX-1 Time Slots
For a FrameSaver SLV unit with two data ports, another assignment screen is
available. Use the Sync Data Port Assignment screen to view the status of:
n All DS0 assignments on the Network interface
n All DS0 assignments on the DSX-1 interface
Then, you can a assign synchronous data port to:
n Network interface time slots
n DSX-1 interface time slots
Synchronous Data Port Assignment Screen Example
main/config/tslot_assign/sync_data/net 9128-II
Device Name: Node A 5/26/2000 23:32
SYNC DATA PORT ASSIGNMENT
Assign To: Net1
N01 N02 N03 N04 N05 N06 N07 N08
Assigned Assigned Assigned Assigned Assigned Port-2
N09 N10 N11 N12 N13 N14 N15 N16
Assigned Assigned Assigned Assigned Assigned Port-2
N17 N18 N19 N20 N21 N22 N23 N24
Available
-------------------------------------------------------------------------------Ctrl-a to access these functions, ESC for previous menu M
ave ClearAll DSXAssign FrAssign
S
Available Available Available Available Available Available Available
Port-1 Assigned
Port-1 Available
ainMenu Exit
Valu e Me an in g
Assign To Specifies either Net1 (network) or DSX1-1 (DSX-1) time slots.
Ntt
Dtt
This field represents time slot tt of the network interface.
This field represents time slot tt of the DSX-1 interface.
Assigned The time slot is already assigned to a network or DSX-1 time slot.
Assigned time slots cannot be modified from this screen.
Available The time slot is currently unassigned.
Port-2 For a FrameSaver SLV unit with two data ports, synchronous data
Port-2 is assigned to the time slot.
3-58 December 2002 9000-A2-GB31-00
Page 91

3. Configuration Options
For easy movement between screens, select the FrAssign function key to go
directly to the Frame Relay Network Assignments screen or the DSX
Assign
function key to go to the DSX-1 to Network Assignments screen.
Time Slot Assignment Rules:
n To assign a synchronous data port to network or DSX-1 time slots, Port-2’s
Port Use option must be set for Synchronous Data (see Table 3-15, V.35 Data
Port Physical Interface Options).
n If the DSX-1 interface is disabled, only Net1 is available for synchronous data
port assignment (see the Interface Status option in Table 3-19, DSX-1
Physical Interface Options).
Procedure
1. Select one of the following menu selection sequences:
Clearing Assignments
Main Menu
→ Configuration → Time Slot Assignment →
Sync Data Port Assignments or
Main Menu
→ Easy Install→ Time Slot Assignment Screen
2. Select an interface in the Assign To field. A matrix of the current cross-connect
status of all time slots on the selected interface appears.
3. Move the cursor to the next time slot that can be edited (underlined). Use the
spacebar or type in the desired time slot to display its time slot assignment.
4. Repeat Step 3 until the synchronous data port is assigned to all desired time
slots.
ave the configuration.
5. S
Clearing assignments sets all time slots to Unassgn (unassigned).
Main Menu
→ Configuration→ Time Slot Assignment → Clear Assignments
9000-A2-GB31-00 December 2002
3-59
Page 92

3. Configuration Options
Configuring Frame Relay for an Interface
Select Frame Relay from the interface’s menu to display or change the Frame
Relay options for an individual interface (see Table 3-25, Interface PPP Options).
Frame Relay is not an option on the Network menu unless Service Type is Frame
Relay.
Main Menu
→ Configuration→ [Network/Data/T3 User Ports] → Frame Relay
See Configuring PPP for an Interface on page 3-63, for additional information.
Table 3-24. Interface Frame Relay Options (1 of 3)
LMI Protocol
Possible Settings: Initialize_From_Net1FR1,
Initialize_From_Interface,
Auto_On_LMI_Fail,
Standard,
Annex-A,
Annex-D
Default Setting:
For a user data port link: Initialize_From_Interface
For a network link: Auto_On_LMI_Fail
Specifies either the LMI protocol supported on the frame relay interface or the discovery
source for the LMI protocol.
Initialize_From_Net1FR1 – The LMI type supported on this frame relay link will be
configured to match the LMI protocol initially discovered on the primary Network frame
relay link (Net1FR1). LMI Protocol is set to None internally, but once a protocol has
become active or is set on the primary Network link, the protocol will be set to the same
value on this link (Standard, Annex-A or Annex-D). The protocol will not be updated based
on changes to Net1FR1 after being set initially.
Display Conditions – This option value only appears for a user data port.
Initialize_From_Interface – The LMI type supported on this frame relay link will be
configured to match the LMI protocol discovered from the attached Network line or DTE
device. Once a protocol has become active, the protocol will be set to the protocol
discovered (Standard, Annex-A or Annex-D) on the frame relay link. The protocol will not
be updated after being initially discovered. Frame relay links on user data ports discover
the LMI protocol from an attached device via LMI status polls. Frame relay links on the
network interface discover LMI protocol by sending polls to an attached Network line and
“listening” for correct poll response messages.
Auto_On_LMI_Fail – The LMI type supported on this frame relay link will be configured to
match the LMI protocol discovered from the attached Network line or the DTE device
whenever an LMI Link Down failure occurs. This option is available for frame relay links on
the Port and network interfaces. Frame relay links on user data ports discover the LMI
protocol from LMI status polls by attached DTE devices. Frame relay links on the network
interface discover LMI protocol by sending polls to an attached Network line and
“listening” for correct poll response messages.
Standard – Supports Standard LMI and the Stratacom enhancements to the Standard
LMI.
Annex-A – Supports LMI as specified by Q.933, Annex A.
Annex-D – Supports LMI as specified by ANSI T1.617, Annex D
.
3-60 December 2002 9000-A2-GB31-00
Page 93

3. Configuration Options
Table 3-24. Interface Frame Relay Options (2 of 3)
Traffic Policing
Possible Settings: Enable, Disable
Default Setting: Disable
Determines whether or not CIR (Committed Information Rate) and EIR (Excess
Information Rate) will be enforced by the unit on frames being sent on network frame relay
links.
Enable – CIR and EIR are enforced.
n
Frames that exceed CIR will be marked Discard Eligible (DE). These frames are
counted in the Above CIR but within EIR category until this category is full.
Once full, additional frames are counted as being in the Within CIR category.
n
Frames in excess of EIR will be discarded.
n
For CSU/DSUs only, DE frames received from the external router are credited as
frames transmitted above CIR. They are credited as frames transmitted between
CIR and EIR until that count reaches its limit, at which point they are counted as
frames transmitted above EIR.
Disable – CIR and EIR are not enforced.
LMI Parameters
Possible Settings: System, Custom
Default Setting: System
Allows you to use the system LMI options, or to set specific LMI options for this interface.
System – Use system LMI options (see Table 3-1, System Frame Relay and LMI
Options).
Custom – Use the following options in this table to configure LMI parameters.
Frame Relay DS0s Base Rate
Possible Settings: Nx64, Nx56
Default Setting: Nx64
Selects the base rate for the DS0s allocated to frame relay on the network interface.
Nx64 – The base rate is 64 Kbps.
Nx56 – The base rate is 56 Kbps.
LMI Error Event (N2)
Possible Settings: 1, 2, 3, 4, 5, 6, 7, 8, 9, 10
Default Setting: 3
Configures the LMI-defined N2 parameter, which sets the number of errors that can occur
on the LMI link before an error is reported. Applies to both the user and network sides of a
UNI.
1 – 10 – Specifies the maximum number of errors.
9000-A2-GB31-00 December 2002
3-61
Page 94

3. Configuration Options
Table 3-24. Interface Frame Relay Options (3 of 3)
LMI Clearing Event (N3)
Possible Settings: 1, 2, 3, 4, 5, 6, 7, 8, 9, 10
Default Setting: 1
Configures the LMI-defined N3 parameter, which sets the number of error-free messages
that must be received before clearing an error event. Applies to both the user and network
sides of a UNI.
1 – 10 – Specifies how many error-free messages it will take to clear the error event.
LMI Status Enquiry (N1)
Possible Settings: 1, 2, 3, 4, . . . 255
Default Setting: 6
Configures the LMI-defined N1 parameter, which sets the number of status enquiry polling
cycles that the user side of the LMI initiates before a full status enquiry is initiated. Applies
to the user side of a UNI only.
1 – 255 – Specifies the number of status enquiry polling cycles that can be initiated before
a full status enquiry is initiated.
LMI Heartbeat (T1)
Possible Settings: 5, 10, 15, 20, 25, 30
Default Setting: 10
Configures the LMI-defined T1 parameter, which sets the number of seconds between the
initiation of status enquiry messages on the user side of the LMI. Applies to the user side
of a UNI only.
5 – 30 – Specifies the number of seconds between the initiation of status enquiry
messages in increments of 5.
LMI Inbound Heartbeat (T2)
Possible Settings: 5, 10, 15, 20, 25, 30
Default Setting: 15
Configures the LMI-defined T2 parameter, which sets the number of seconds between the
receipt of status enquiry messages on the network side of the LMI. Applies to the network
side of a UNI only.
5 – 30 – Specifies the number of seconds between the receipt of status enquiry messages
in increments of 5.
LMI N4 Measurement Period (T3)
Possible Settings: 5, 10, 15, 20, 25, 30
Default Setting: 20
Configures the LMI-defined T3 parameter, which is the time interval (in seconds) that the
network side of the LMI uses to measure the maximum number of status enquiry
messages that have been received (N4) from the user side.
5 – 30 – Specifies the interval of time in increments of 5.
3-62 December 2002 9000-A2-GB31-00
Page 95

Configuring PPP for an Interface
Select PPP from the interface’s menu to display or change the PPP options for an
individual interface (see Table 3-25, Interface PPP Options). PPP is not an option
on the Network or Data Ports menus unless Service Type is PPP.
3. Configuration Options
Main Menu
→ Configuration→ [Network/Data Ports] → PPP
Table 3-25. Interface PPP Options
Circuit Type
Possible Settings: Standard, IP Enabled
Default Setting:
For a user data port link: Standard
For a network link: IP Enabled
Specifies the type of PPP circuit configured on the interface.
Standard – The circuit operates normally, supporting neither Payload Management nor
IP Enabled characteristics. This option value only appears for a user data port.
IP Enabled – The circuit is IP Enabled. This option is read-only for the network interface.
Keep Alive
Possible Settings: Enable, Disable
Default Setting: Enable
Determines whether Link Control Protocol (LCP) echo requests are generated on the
circuit.
Enable – LCP Echo-Request codes are generated on the circuit, and Echo-Reply codes
are generated for Echo-Requests received from the remote end.
Disable – LCP Echo-Request codes are not generated on the circuit, but Echo-Reply
codes are generated for Echo-Requests received from the remote end.
DS0 Base Rate
Possible Settings: Nx64, Nx56
Default Setting: Nx64
Selects the base rate for the DS0s allocated to PPP on the network interface.
Display Conditions – This option appears only for network interfaces that support
DS0s.
Nx64 – The base rate is 64 Kbps.
Nx56 – The base rate is 56 Kbps.
9000-A2-GB31-00 December 2002
3-63
Page 96

3. Configuration Options
Manually Configuring DLCI Records
The Auto-Configuration feature automatically configures DLCI Records and their
PVC Connections. DLCI Records can also be created manually (see Table 3-26,
DLCI Record Options).
Main Menu
→ Configuration → [Network/Data Port/ISDN/Virtual Router Ports]
→ DLCI Records
Available paths to DLCI Records Options depend on the Service Type and
FrameSaver model:
n DLCI Records is not an option on the Network menu unless Service Type is
Frame Relay
n Data Port is available only on CSU/DSUs
n ISDN is available only when the FrameSaver unit has an ISDN DBM installed
n Virtual Router Ports is available only on the FrameSaver SLV Router
Typically, DLCI Records only need to be configured when building Management
PVCs between the NOC and the central site unit; the unit automatically configures
non-management DLCI Records and PVC Connections.
Table 3-26. DLCI Record Options (1 of 4)
DLCI Number
Possible Settings: 16 – 1007
Default Setting: Initially blank; no default.
Specifies the number for the DLCI in the DLCI record. The parameter determines which
DLCI record is used for transferring data on a particular frame relay interface. DLCI
numbers range from 0to1023. However, the numbers 0 – 15 and 1008 – 1023 are
reserved. Entry of an invalid number results in the error message Value Out of Range
(16–1007). If the DLCI number is part of a connection, this field is read-only.
NOTES:
– If a DLCI number is not entered, the DLCI record is not created.
– The DLCI number entered must be unique for the interface.
– Changing settings for this configuration option causes the FrameSaver unit to abort
any active frame relay tests.
16 – 1007 – Specifies the DLCI number (inclusive).
3-64 December 2002 9000-A2-GB31-00
Page 97

3. Configuration Options
Table 3-26. DLCI Record Options (2 of 4)
DLCI Type
Possible Settings: Standard, Multiplexed, IP Enabled
Default Setting:
For user data port DLCIs: Standard
For network interface DLCIs: Multiplexed
Specifies whether the DLCI is standard or multiplexed. This field is read-only when the
selected DLCI is used in a PVC or Management link connection and the DLCI Type is
Standard.
Display Conditions – This option does not appear for a user data port or a virtual router
port, and it cannot be changed if the DLCI is specified as the TS Access Management
Link.
Standard – Supports standard DLCIs as specified by the Frame Relay Standards. Use
this setting when a non-FrameSaver unit is at the other end.
Multiplexed – Enables multiplexing of multiple connections into a single DLCI. Allows a
single PVC through the frame relay network to carry multiple DLCIs as long as these
connections are between the same two endpoints (proprietary). Do not select Multiplexed
unless there are FrameSaver units at both ends of the connection.
IP Enabled – Enables connection to one or more endpoints through a Layer 3 network. A
Payload Management PVC is created as well as the IP Enabled DLCI.
CIR (bps)
Possible Settings:
For 9123, 9126, 9128: 0 – 1536000
For 9520, 9520-ILM: 0 – 44210000
For 9623, 9626: 0 – 64000
For 9820-2M: 0 – 2048000
For 9820-8M: 0 – 8192000
For 9820-45M: 0 – 44210000
Default Setting: 0
Determines the data rate for the DLCI that the network commits to accept and carry
without discarding frames; the CIR in bits per second. Entry of an invalid rate causes the
error message Value Out of Range (0 – x), where x = the maximum line rate
available on the port.
0 – maximum – Specifies the network-committed data rate.
Tc
Possible Settings: 1 – 65535
Default Setting: Read Only
Displays the DLCI’s calculated value of its committed rate measurement interval (Tc) in
milliseconds. This value is calculated based upon the settings for the Committed Burst
Size Bc (Bits) and CIR (bps) options.
9000-A2-GB31-00 December 2002
3-65
Page 98

3. Configuration Options
Table 3-26. DLCI Record Options (3 of 4)
Committed Burst Size Bc (Bits)
Possible Settings: CIR, Other
Default Setting: CIR
Specifies whether the DLCI’s committed burst size will follow the CIR, or whether it will be
entered independently. This value is the maximum amount of data that the service
provider has agreed to accept during the committed rate measurement interval (Tc).
CIR – Uses the value in the CIR (bps) option as the committed burst size (Bc). The Bc and
excess burst size (Be) options are updated when a CIR update is received from the
network switch.
Other – Allows you to specify the committed burst size for the DLCI. When Other is
selected, the Bc and Be values must be manually entered and maintained, as well.
Bc
Possible Settings:
For 9123, 9126, 9128: 0 – 1536000
For 9520, 9520-ILM: 0 – 44210000
For 9623, 9626: 0 – 64000
For 9820-2M: 0 – 2048000
For 9820-8M: 0 – 8192000
For 9820-45M: 0 – 44210000
Default Setting: 0
Allows you to display or change the DLCI’s committed burst size.
Display Conditions – This option only appears when Committed Burst Size is set to
Other.
0 – maximum – Specifies the DLCI’s committed burst size.
Excess Burst Size (Bits)
Specifies the maximum amount of data in bits that the network may accept beyond the
CIR without discarding frames.
Be
Possible Settings:
For 9123, 9126, 9128: 0 – 1536000
For 9520, 9520-ILM: 0 – 44210000
For 9623, 9626: 0 – 64000
For 9820-2M: 0 – 2048000
For 9820-8M: 0 – 8192000
For 9820-45M: 0 – 44210000
Default Setting: [Maximum]
Allows you to display or change the DLCI’s excess burst size.
0 – maximum – Specifies the DLCI’s excess burst size.
3-66 December 2002 9000-A2-GB31-00
Page 99

3. Configuration Options
Table 3-26. DLCI Record Options (4 of 4)
DLCI Priority
Possible Settings: Low, Medium, High
Default Setting: High
Specifies the relative priority for data received on the DLCI from an attached device (also
known as quality of service). All data on Port 1 is cut-through, as long as there is no
higher-priority data queued from another user port. The DLCI priority set for an interface
applies to data coming into that interface. For example, the priority set for DLCIs on Port 1
applies to data coming into Port 1 from the attached equipment (such as a router).
NOTE: For units with multiple user data ports, since pipelining occurs on Port-1, it is
recommended that higher priority data be connected to Port-1 .
Display Conditions – This option is not available for the network interface or, if the
model has ISDN backup capability, an ISDN DBM interface.
Low – Data configured for the DLCI has low priority.
Medium – Data configured for the DLCI has medium priority.
High – Data configured for the DLCI has high priority.
Outbound Management Priority
Possible Settings: Low, Medium, High
Default Setting: Medium
Specifies the relative priority for management traffic sent on management PVCs on this
DLCI to the network.
Display Conditions – This option is not available on a user data port or a virtual router
port.
Low – Management data configured for the DLCI has low priority.
Medium – Management data configured for the DLCI has medium priority.
High – Management data configured for the DLCI has high priority.
Backup Group
Possible Settings: A, B, C, . . . Z, None
Default Setting: None
Assigns DLCIs to a backup group so backup does not take place unless all DLCIs in the
group are no longer operational or latency has been exceeded. Backup is terminated
when one DLCI in the group is operational again. This feature reduces backup charges
when redundant PVCs have been configured.
Display Conditions – This option is not available on a user data port, a virtual router
port, or an ISDN DBM interface.
A – Z – Specifies the designation for this group of DLCIs. Only DLCIs in a PVC will be
considered part of a Backup Group.
None – No Backup Groups have been set up.
9000-A2-GB31-00 December 2002
3-67
Page 100

3. Configuration Options
Configuring Circuit Records for the Network Interface
For Models 9783 and 9788, circuit records can be created or modified and PVCs
can be created based on existing DLCIs using the Network Circuit Records
screen.
Main Menu
→ Configuration → Network → Circuit Records
If any DLCI records exist, you may enter a DLCI number at the bottom of the
screen to display, copy from, or modify a DLCI record.
Select C
reatePVC to create a new PVC based on an existing DLCI record.
Table 3-27. Circuit Records Options (1 of 3)
DLCI Number
Possible Settings: 16 – 1007
Default Setting: Initially blank
Specifies the number for the DLCI in the DLCI record. The parameter determines which
DLCI record is used for transferring data on a particular frame relay interface. DLCI
numbers range from 0–1023 with numbers 0–15 and 1008–1023 reserved. Entry of an
invalid number results in the error message Value Out of Range (16–1007). If the
DLCI number is part of a connection, this field is read-only.
NOTES:
– If a DLCI number is not entered, the DLCI record is not created.
– The DLCI number entered must be unique for the interface.
– Changing this setting causes the FrameSaver unit to abort any active frame relay
tests.
16 – 1007 – Specifies the DLCI number.
VPI,VCI Number
Possible Settings:
– For the VPI: 0–15
– For the VCI: 32 – 255
Default Setting: Initially blank
Specifies the VPI and VCI. Entry of an invalid number results in the error message Value
Out of Range (0 – 15) for the VPI, and Value Out of Range (32 – 255) for
the VCI. The VPI/VCI must be unique on the ATM link.
0 – 15 – Specifies the VPI.
32 – 255 – Specifies the VCI.
3-68 December 2002 9000-A2-GB31-00
 Loading...