

Page 1
TM50 Touch User Guide - Digiplex EVO Systems
Page 2
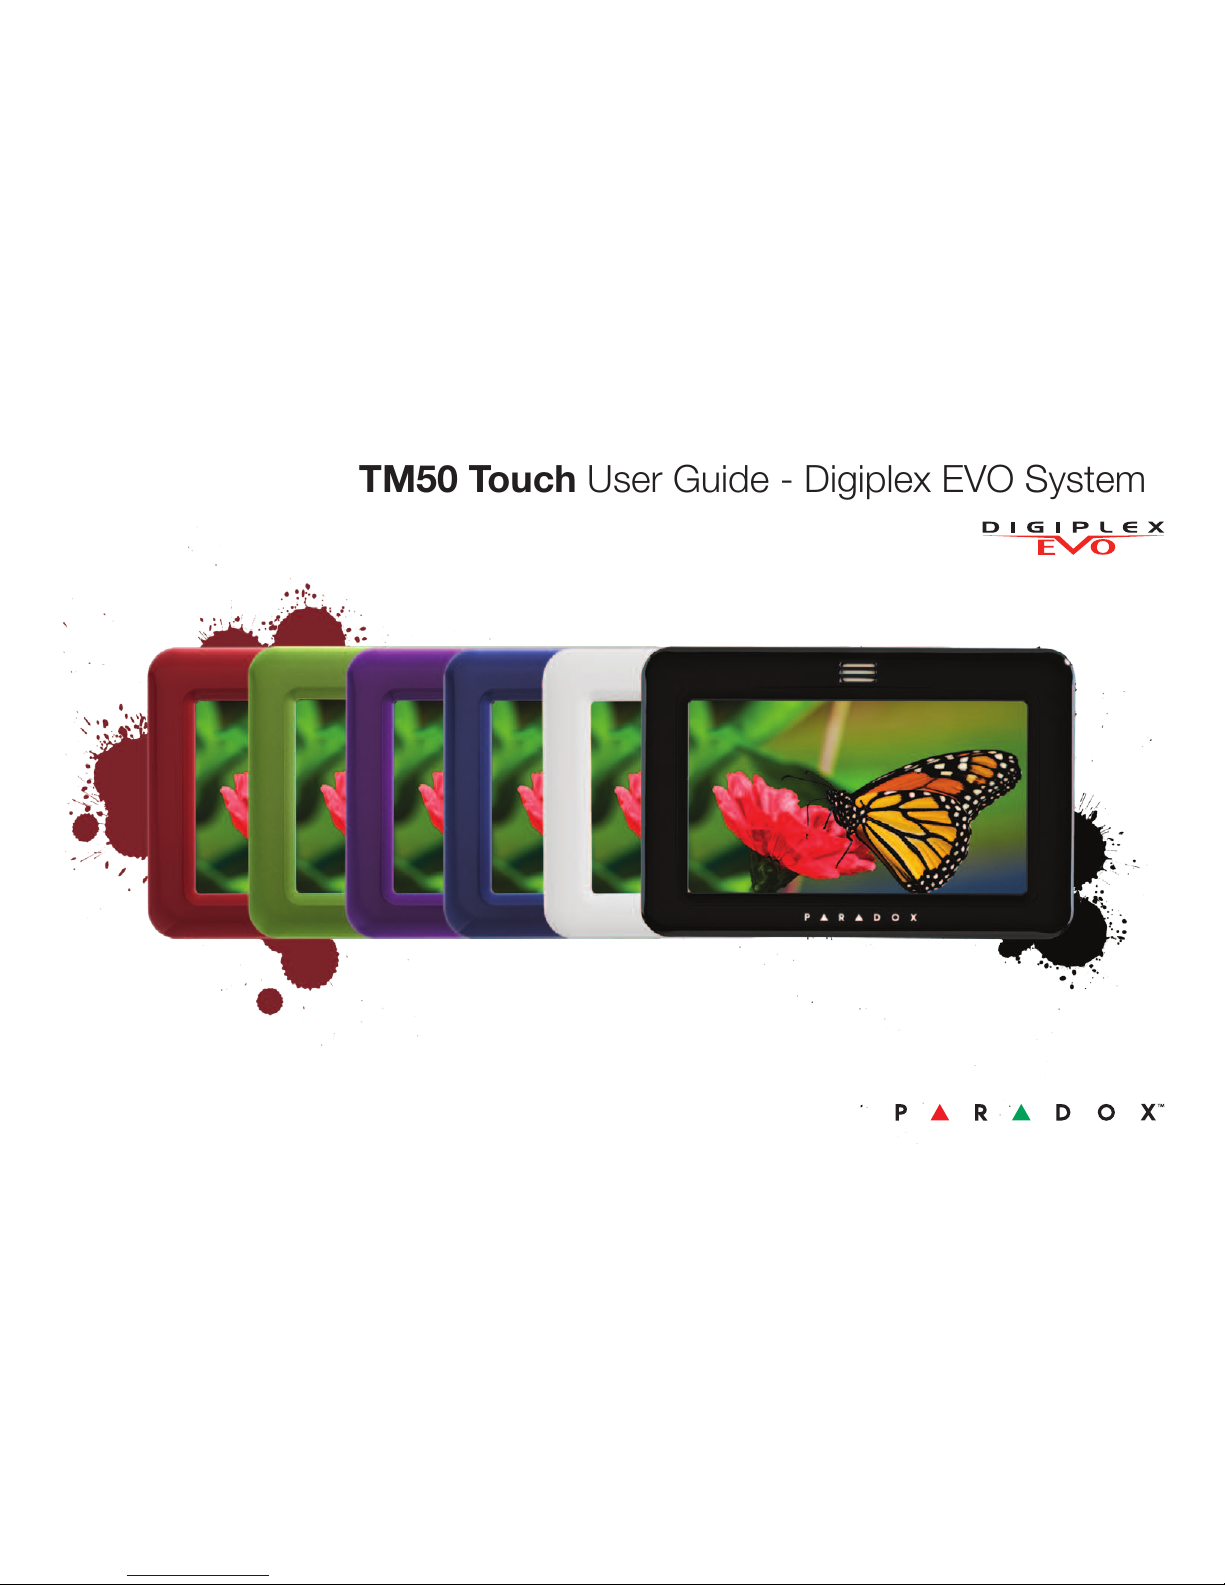
Main Screen
Menu
Outside/Inside temperature
Date/Time
Arm/Disarm
Panic
Zones
Info
Slide Show
OneScreen Monitoring
SpotOn Locator
Page 3
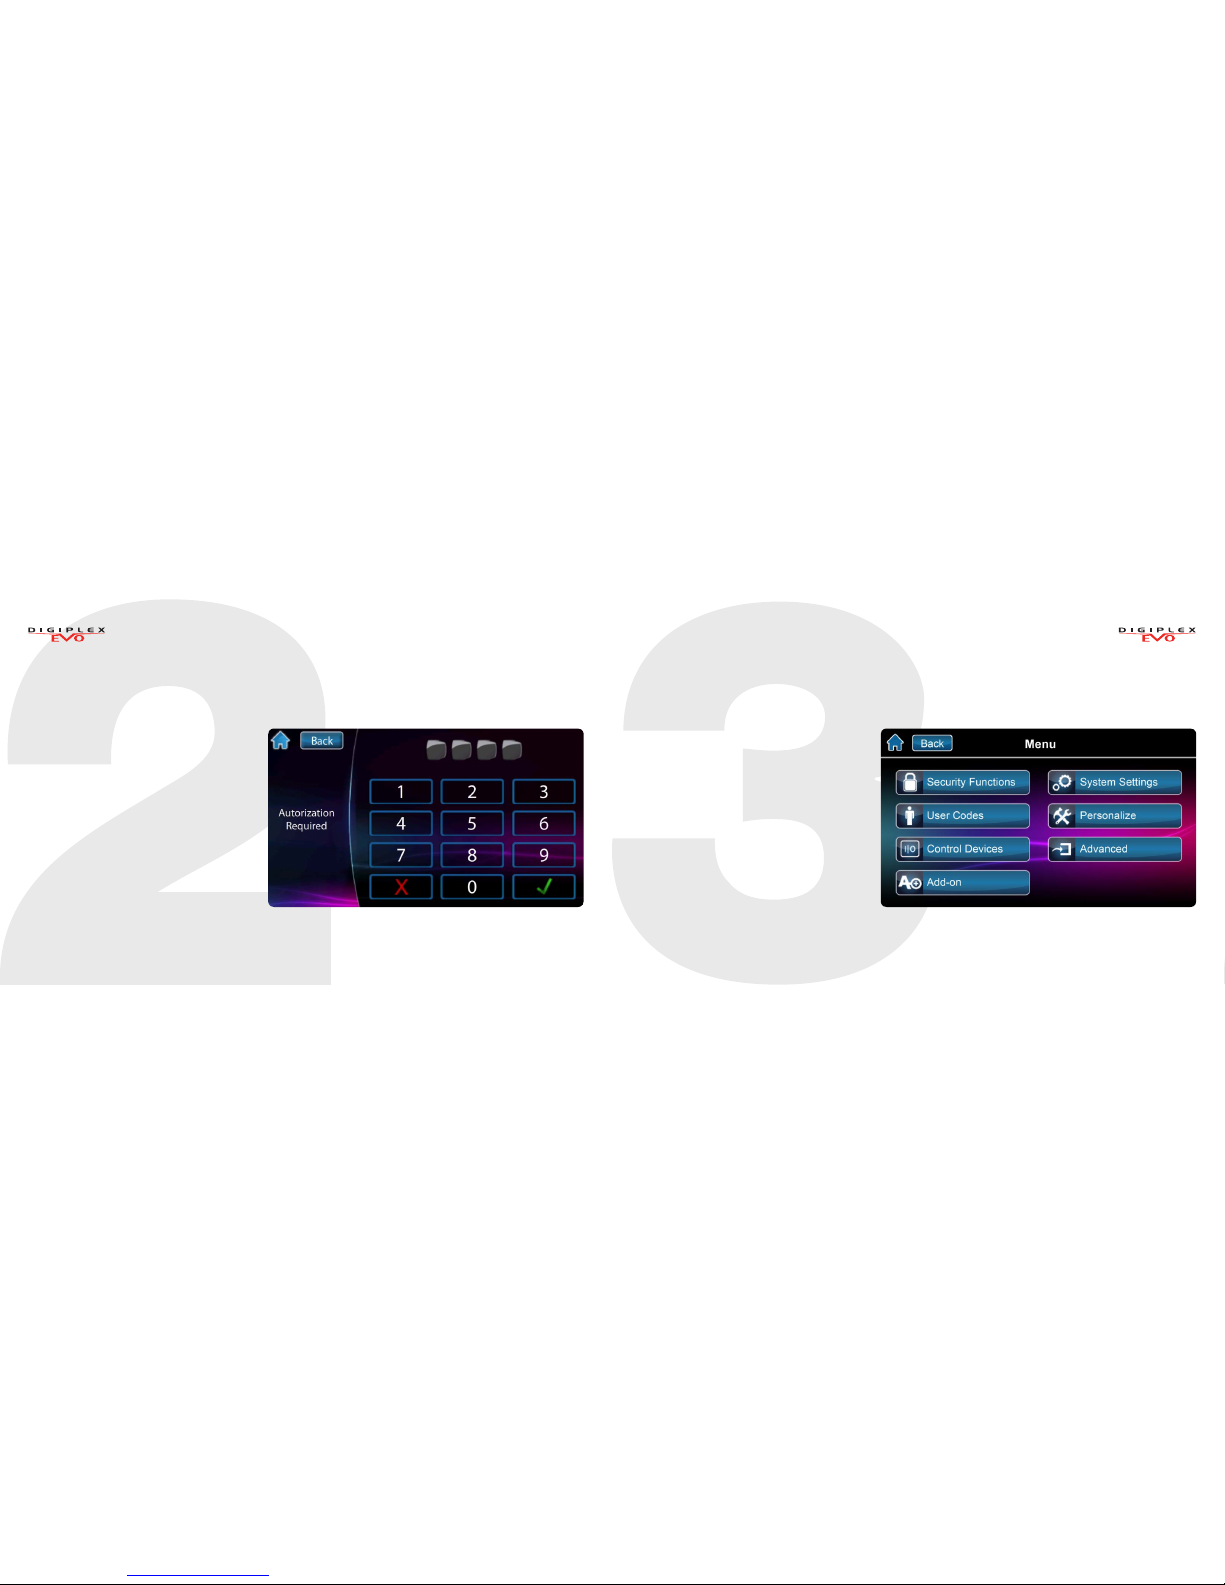
Menu
For menu options press the Menu
button and follow the on-screen
prompts. Menu options include:
• Security Functions
• User Codes
• Control Devices
• Add-on
• System Settings
• Personalize
• Advanced
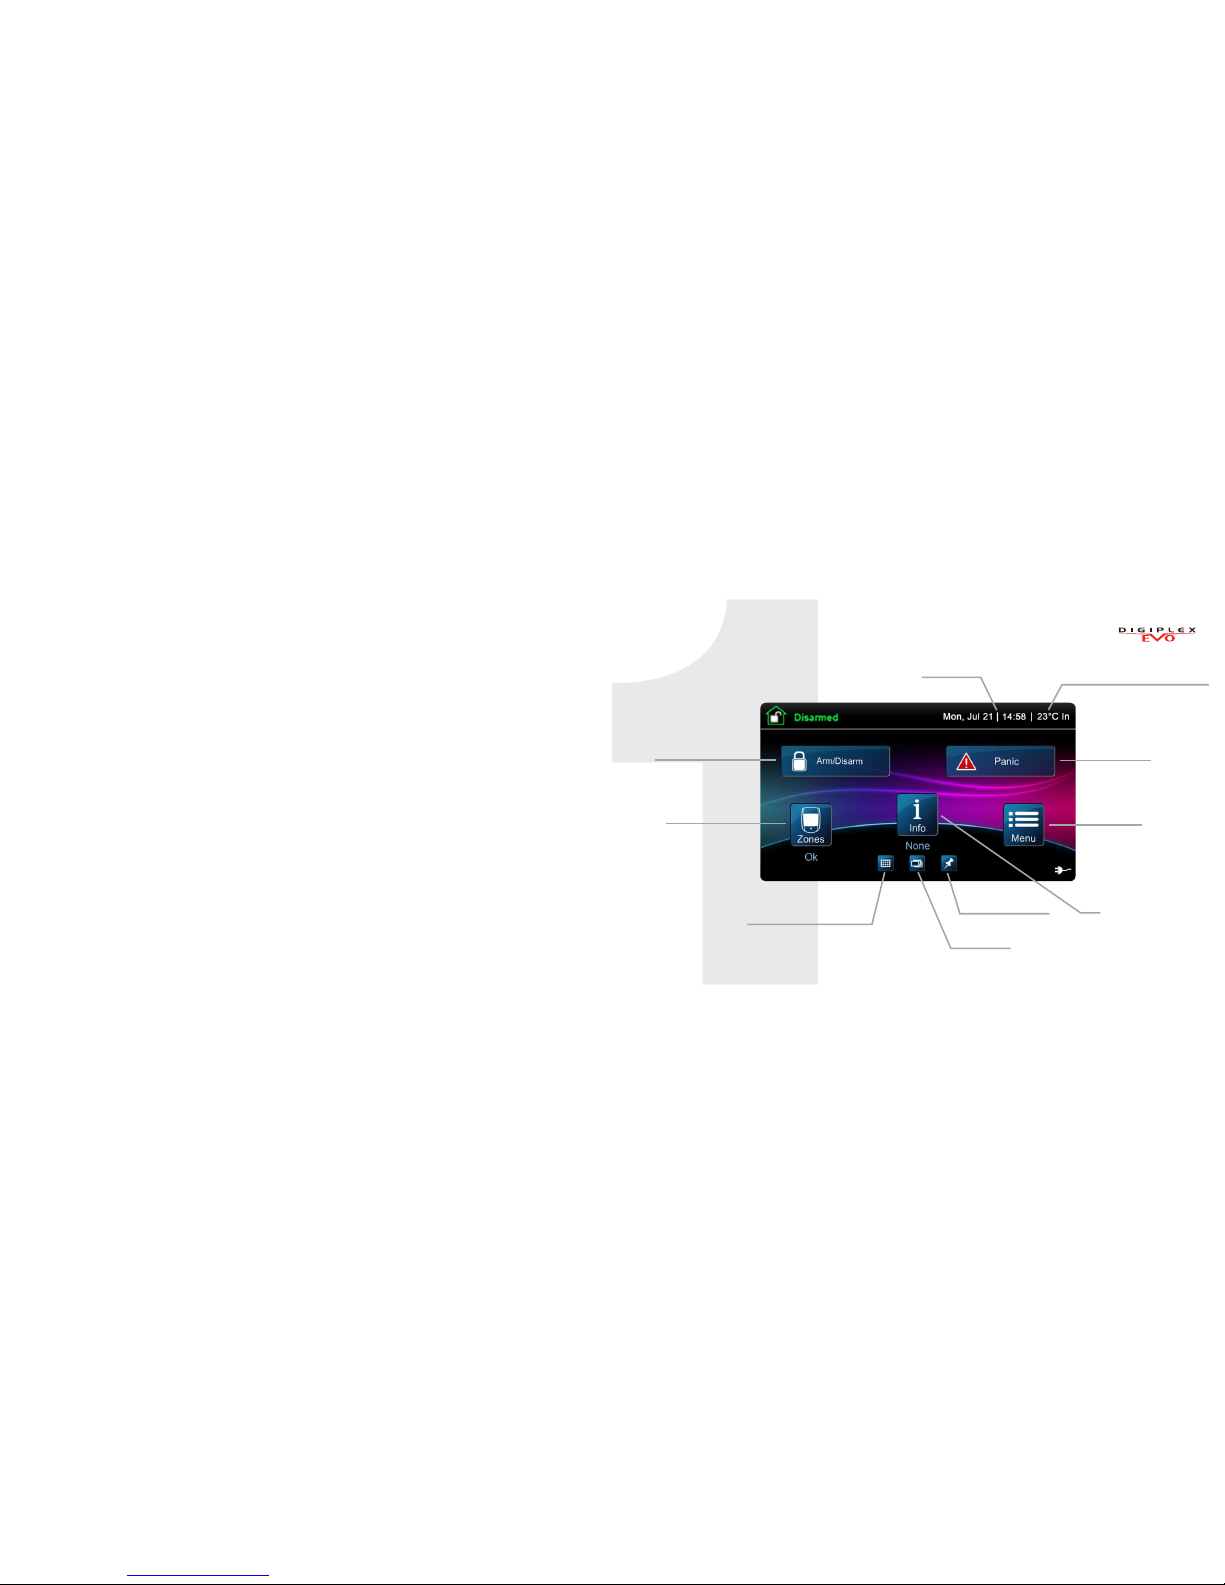
Arming/Disarming your System
Arming/Disarming your system:
1. Press Arm/Disarm button
from main screen.
2. Select Arming method.
3. Enter code (4 to 6 digits).
Page 4

Programming a New UserEntering User programming
Enter user programming:
1. Press Menu.
2. Press User Codes.
3. Enter Master Code.
Programming a new user:
1. Press the Add button to add a user.
2. Modify Label or press Skip.
3. Enter new user code and press Next.
4. Confirm user code by entering a
2nd time then press Next.
5. Option to learn remote in, press
button on remote or press Skip.
6. Enter access card number
or press Skip.
7. User Settings or press Done.
8. User is now valid.
Page 5

OneScreen Monitoring™Settings Screen
Setting screen accessed through
Menu then System Settings.
Settings include:
• Time & Date
• Display Setting
• Clean Screen
• Volume/Mute
• Permissions
To Access OneScreen Monitoring*:
1. Press the button.
2. View open/closed zones (an open door
means a zone is open).
3. Press on the Test button to test all
your zones (SoloTest Mode).
4. Press on the Settings button (top
right corner) to access more options.
*OneScreen Monitoring is an optional feature.
Please contact your installer for more information.
Page 6

SlideShow
To Access SlideShow:
1. Press the button to view the
default slideshow.
2. Press on the Settings button
(bottom right corner) to access
more options.
SpotOnLocator™
To Access SpotOn Locator*:
1. Press the button.
2. Follow the onscreen instructions on
how to upload your personalized
floor plans.
3. Follow the onscreen instructions on
how to add/move/delete zones from
your floor plan.
*SpotOn Locator is an optional feature. Please
contact your installer for more information.
Page 7

0
microSD Card microSD Card
The TM50’s integrated SD card slot has a cover
clip for its protection.
If it is foreseen that the microSD card will be used
frequently, it is best that the microSD card cover clip
be removed before installation. This is because once
the keypad is installed, removal of the microSD card
requires you to unclip the entire front plate of the TM50.
To remove/replace the microSD (without cover clip):
1. Push down on the microSD card to unlock.
2. Gently pull out the microSD card to remove.
If desired, replace card.
To remove/replace the microSD card
with cover clip:
1. Using a screwdriver, pry the front
housing assembly from the backplate.
Once removed, you will notice that the
microSD cover clip protection is part of
the backplate.
2. Remove the microSD card from the
front housing assembly. If desired,
replace card.
Page 8

Warranty: For complete warranty information on this product, please refer to the Limited Warranty Statement found on the Web site www.paradox.com/
terms. Your use of the Paradox product signifies your acceptance of all warranty terms and conditions. One or more of the following US patents may apply:
7046142, 6215399, 6111256, 6104319, 5920259, 5886632, 5721542, 5287111, and RE39406 and other pending patents may apply. Canadian and international
patents may also apply. © 2013 Paradox Ltd. All rights reserved. Specifications may change without prior notice. www.paradox.com
Notes
Page 9

TM50E-EU00
Printed in Canada 01/2013
 Loading...