

Page 1
NEware RS-485/RS-232 Converter
(DGP-CONV1)
Instructions
DGPCONV1-EI00
INTRODUCTION
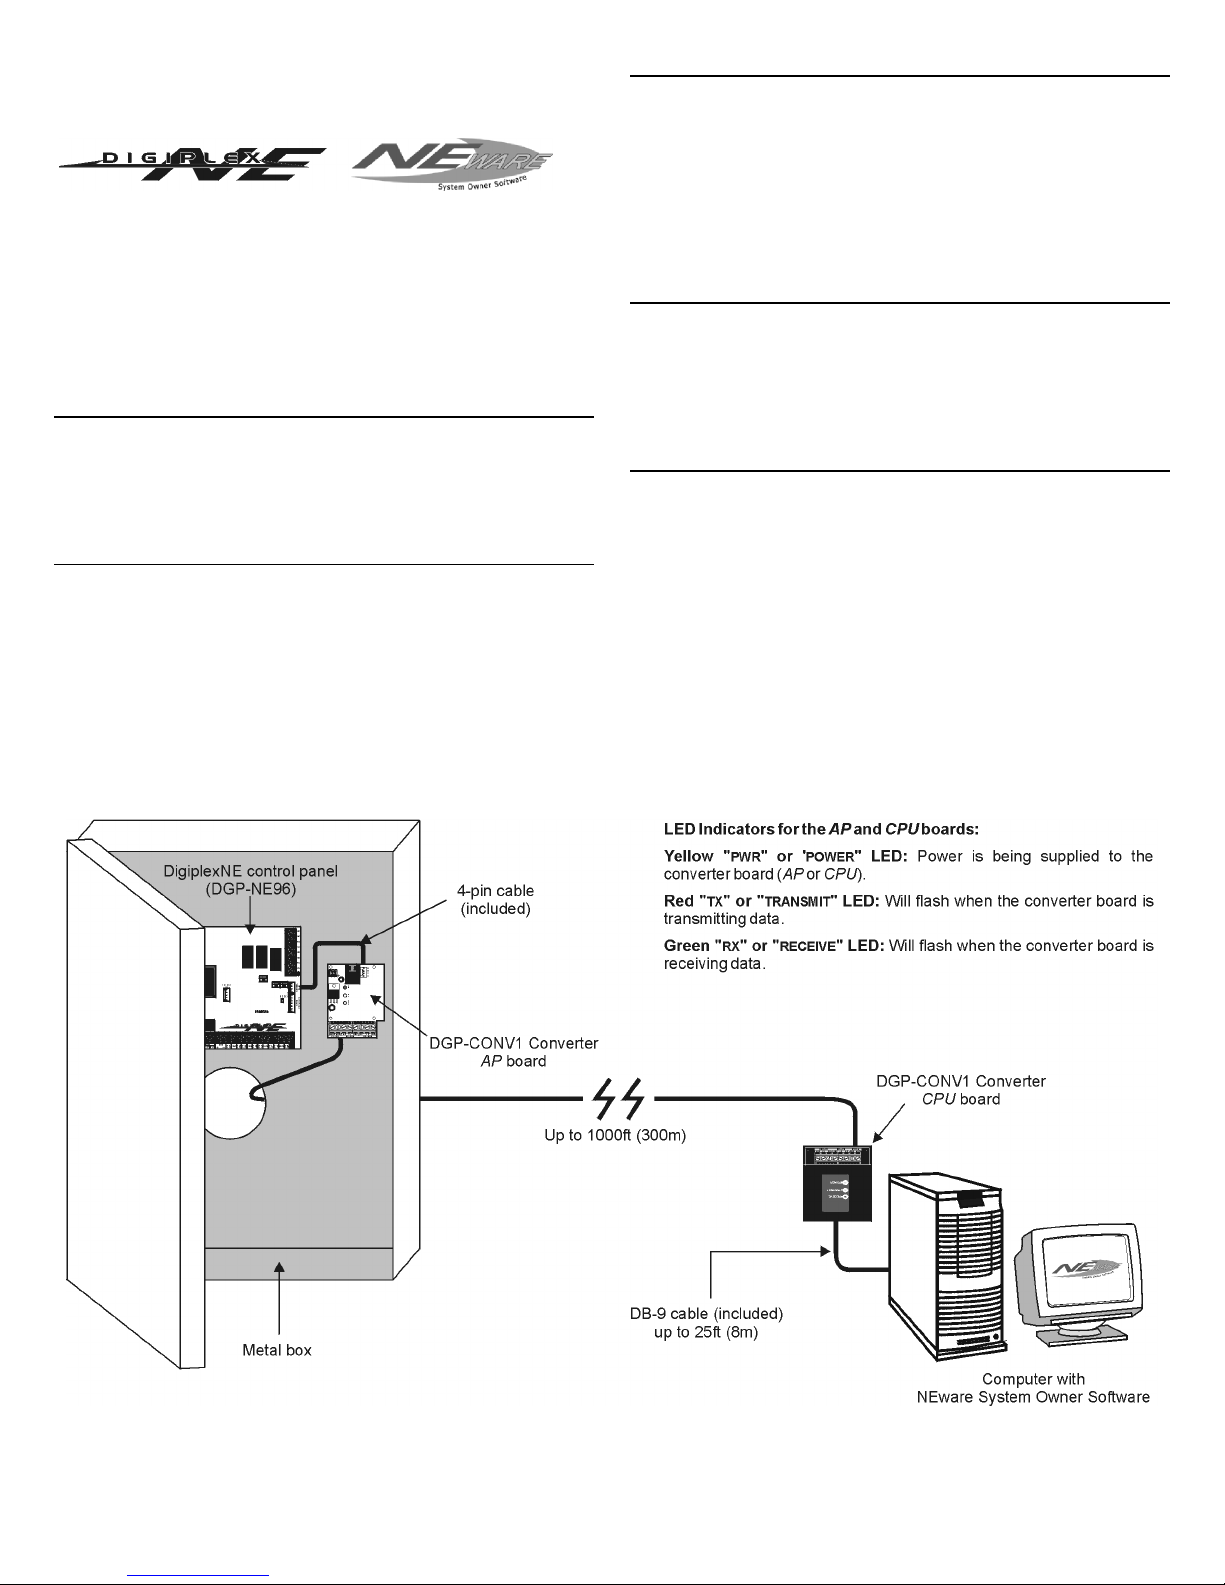
The DGP-CONV1 converter is a local interface between the DigiplexNE
(DGP-NE96) control panel and the NEware System Owner Software.
Connected directly between a computer and the DigiplexNE, the DGPCONV1 will transfer information at a speed of 19,200 or 38,400 baud to a
distance of up to 1000ft (300m).
OVERVIEW
The converter comes in two parts, the Alarm Panel (AP) Board and the
Computer (CPU) Board (see Figure 1). The AP board is installed in the metal
box that houses the control panel while the CPU board is installed close to
the computer. The boards are then connected together to complete the
interface. Figure 1 shows a general overview of the DGP-CONV1 converter.
HARDWARE INSTALLATION
1. Attach the supplied 4-pin cable to the 4-pin connector on the AP board
and then insert the other end of the cable into the 4-pin connector labeled
“SERIAL PORT” on the DigiplexNE control panel (see Figure 2).
2. Connect the +12V, GND, A+ and B- terminals of the AP board to the corresponding terminals of the CPU board as shown in Figure 2.
3. Insert the phone jack end of the supplied DB-9 cable into the telephone
connector of the CPU board. Connect the other end of the DB-9 cable into
the desired COM port of the computer. Refer to Figure 2.
NEWARE SETUP
In order to use the DGP-CONV1 it must be setup in the NEware software.
After starting the software, click the COM Port icon. The COM Port
Configuration window will appear. Select the COM port to which the
converter is connected to and then select the communication speed (BPS baud rate). Note: When selecting the baud rate, be sure to select the
same baud rate as set in the DigiplexNE. When finished, click OK.
CONNECTING THE DGP-CONV1 WITHIN 8M (25FT.)
If the distance between the between the DigiplexNE and the computer is
within 8m (25ft.), only the AP board will be required. To connect the DGPCONV1 using this method:
1. Attach the 4-pin supplied cable to the 4-pin connector on the AP board
and then insert the other end of the cable into the 4-pin connector labeled
“SERIAL PORT” on the DigiplexNE control panel (see Figure 3).
2. Insert the phone jack end of the supplied DB-9 cable into the telephone
connector on the AP board. Connect the other end of the DB-9 cable into
the desired COM port of the computer. Refer to Figure 3.
Figure 1: DGP-CONV1 Overview
Page 2
Figure 2: Connecting the DGP-CONV1 Converter
Figure 3: Connecting the DGP-CONV1 8m (25ft.)
 Loading...