

Page 1

TM
HERO
by
TM
User’s Manual
Page 2

LEGAL2LEGAL
Hero User’s Manual.
© 2006 Pantech Wireless, Inc. © 2006 Helio LLC. All rights
reserved.
Under copyright law, this manual may not be reproduced
in any form, in whole or in part, without the prior written
consent of Pantech Wireless, Inc and Helio LLC.
Disclaimer
Pantech Wireless, Inc. and Helio LLC have reviewed this
manual and provide it only as a guide to operation. All
statements, technical information, and recommendations
in this manual and in any guides or related documents
are believed reliable, but the accuracy and completeness
thereof are not guaranteed or warranted, and they are
not intended to be, nor should they be understood to be,
representations or warranties concerning the products
described.
Specifications are subject to change without notice.
Trademarks
Helio, the Helio figures, the Helio flame, Hero, and H.O.T.
are trademarks of Helio LLC. Pantech is a registered
trademark of Pantech Co., Ltd.
All brand and product names not owned by Helio LLC or
Pantech Wireless, Inc. are the property of their respective
owners.
Page 3

• Product meets current FCC Radio Frequency Exposure
Guidelines. FCC Equipment Authorization ID:
PP4PN-E8300. Additional details within and at http://fcc.
gov/oet/fccid.
• TTY compatible.
• Phone appearance and features may vary from device
shown.
• Screen shots simulated. Actual results vary.
• Meets FCC SAR limit.
• All features, functionality or other product specifications
are subject to change without notice or obligation.
Battery should be recycled or disposed of properly.
• Phone made in Korea with Korean and foreign
components. Other items imported. See each item for
country of origin.
• Hearing Aid Compatibility (HAC) level = M3.
Some features, content, and applications are not available
in all areas and are device dependent. Service and features
are subject to change without notice. Coverage and service
are network dependent and are not available everywhere.
Airtime, messaging, application, and content charges may
apply depending on your rate plan. Higher rates apply
to international calls and messages. Accessories are sold
separately. Helio LLC is not responsible for any third party
applications, content, information, or data that is accessible
on your Helio device. See enclosed Subscriber Agreement
(on CD) for complete terms and conditions. By activating
your Helio device, you are agreeing to the Subscriber
Agreement. Some screen shots are representations, and the
image you see on your Helio device may be different.
3
Page 4

WELCOME
Thank you for choosing the Helio
developed by Pantech. Pantech’s dedicated team of top
researchers have designed your mobile device to support high
speed communication services, such as web browsing and data
services, and the device has an animated graphic menu system
for easy access to its many features.
Among its many advanced features, T9
makes it much easier to enter letters and type messages, and
Voice Recognition adds the convenience of hands-free dialing.
Other included technologies are:
•
Full graphic display of 9 text input lines and 1 icon line with
variable font size
•
Simple text entry using T9 Predictive Text Input
•
Enhanced for web browsing and data services
•
Animated Graphical User Interface (GUI) compliant with 3G
(CDMA2000 1X and EVDO)
•
CSTN 65K color LCD
•
Mobile camera (2.0 megapixel) with flash
•
Navigation Key and 21 keys aligned for easy access
•
Sophisticated speakerphone features
•
Text messaging and web browsing services
•
Authentication, call forwarding, call transfer, and call
waiting
IMPORTANT INFORMATION
This user’s manual contains very important information about
how to handle and use your mobile device. Please read it
thoroughly. Pay attention to the warranty at the end of this
user’s manual, and be alert to the exclusions and limitations
related to the use of unauthorized components.
®
Hero mobile device,
®
Predictive Text Input
4
Page 5

TABLE OF CONTENTS
CHAPTER 1. BEFORE USING YOUR DEVICE ..................... 9
INSIDE THE PACKAGE .................................................10
DEVICE DESCRIPTION .................................................11
DEVICE VIEW .................................................................... 11
FUNCTION KEYS ............................................................... 12
DISPLAY INDICATORS ................................................. 13
BATTERY USAGE .......................................................... 15
BATTERY INSTALLATION .................................................. 15
BATTERY REMOVAL ......................................................... 15
BATTERY CHARGING ........................................................ 16
BATTERY HANDLING INFORMATION .......................... 18
DOs ................................................................................... 18
DON’Ts .............................................................................. 18
CHAPTER 2. BASIC OPERATION ..................................... 19
TURNING THE DEVICE ON AND OFF ........................... 20
TURNING THE DEVICE ON ............................................... 20
TURNING THE DEVICE OFF .............................................. 20
ACCESSING THE MENU ............................................... 21
MENU SUMMARY .......................................................22
BASIC FUNCTIONS ....................................................... 26
MAKING A CALL .............................................................. 26
ANSWERING A CALL ........................................................ 27
SPEAKERPHONE ............................................................... 27
CALLER ID ......................................................................... 27
LOCK MODE ..................................................................... 28
THREE-WAY CALLING ...................................................... 28
CALL WAITING ................................................................. 29
2SEC/HARD PAUSE ........................................................... 29
ADJUSTING VOLUME ....................................................... 30
DURING A CALL .......................................................... 31
AVAILABLE OPTIONS DURING A CALL ........................... 31
MAKING AN EMERGENCY CALL ................................ 32
911 IN LOCK MODE ......................................................... 32
911 USING ANY AVAILABLE SYSTEM ............................. 32
5
Page 6

TABLE OF CONTENTS
CHAPTER 3. MEMORY FUNCTIONS ................................ 33
STORING CONTACT INFO ............................................ 34
ENTERING LETTERS, NUMBERS, AND SYMBOLS ........ 35
STANDARD INPUT MODE ................................................ 36
T9 INPUT MODE ............................................................... 37
NUMERIC MODE .............................................................. 38
SYMBOL MODE ................................................................ 38
KOREAN MODE ................................................................ 38
MAKING A CALL FROM THE CONTACT LIST ............... 39
ONE-TOUCH/TWO-TOUCH DIALING ............................... 39
CHAPTER 4. MENU FUNCTIONS ..................................... 41
STYLE ........................................................................... 42
RINGS ................................................................................ 42
SCREENS ............................................................................ 43
CALL SCREENS .................................................................. 44
H.O.T. SCREENS ................................................................ 45
SURF ............................................................................ 46
ACCESS THE INTERNET .................................................... 46
BROWSER MENU .............................................................. 46
SNAP ............................................................................ 50
PHOTO CAMERA .............................................................. 50
VIDEO CAMERA ............................................................... 55
PHOTO ALBUM ................................................................ 60
VIDEO ALBUM .................................................................. 61
SETTINGS .......................................................................... 62
PRINT PHOTOS ................................................................. 63
MEMORY INFO. ................................................................ 64
TEXT ............................................................................. 65
NEW TEXT MSG ................................................................ 65
TEXT MESSAGES ............................................................... 66
NEW PIC MSG ................................................................... 70
PIC MESSAGES .................................................................. 71
EMAIL ............................................................................... 75
VOICE MAIL ...................................................................... 76
SPAM INBOX .................................................................... 77
DELETE MSGS ................................................................... 78
SETTINGS .......................................................................... 79
6
Page 7

TABLE OF CONTENTS
CONTACT .....................................................................83
NEW CONTACT ................................................................. 83
CONTACT LIST .................................................................. 84
GROUPS ............................................................................ 85
SPEED DIALS ..................................................................... 87
CALL LOG ......................................................................... 88
CALL TIMER ...................................................................... 90
SERVICE NUMBER ............................................................. 92
SYNC CONTACTS .............................................................. 93
MY NUMBER .................................................................... 94
APPS ............................................................................ 95
THE LOST SISTER .............................................................. 95
PLAN ............................................................................ 98
CALENDAR ........................................................................ 98
WAKEUP CALL ................................................................ 101
ALARM ............................................................................ 103
ANNIVERSARY ................................................................ 105
WORLD TIME .................................................................. 106
TIP CALCULATOR ............................................................ 107
CALCULATOR .................................................................. 108
VOICE RECORDER .......................................................... 109
STOP WATCH .................................................................. 110
NOTEPAD ........................................................................ 111
VIDEO+MUSIC ........................................................... 112
VIDEO ............................................................................. 112
MUSIC ............................................................................. 113
MEMORY INFO. .............................................................. 114
SETUP ........................................................................ 115
SOUND ............................................................................ 115
DISPLAY .......................................................................... 120
CALL ................................................................................ 125
NETWORK ....................................................................... 127
DEVICE ............................................................................ 128
SECURITY ........................................................................ 130
LANGUAGE ..................................................................... 133
AIRPLANE MODE ........................................................... 134
7
Page 8

TABLE OF CONTENTS
CHAPTER 5. SAFETY AND WARRANTY ....................... 135
SAFETY INFORMATION FOR WIRELESS HANDHELD
PHONES ..................................................................... 136
SAFETY INFORMATION FOR FCC RF EXPOSURE ....... 141
SAR INFORMATION ................................................... 142
FCC HEARING-AID COMPATIBILITY (HAC)
REGULATIONS FOR WIRELESS DEVICES ................... 144
FDA CONSUMER UPDATE ......................................... 146
PROTECT YOUR WARRANTY ..................................... 153
12 MONTH LIMITED WARRANTY .............................. 154
8
Page 9

CHAPTER 1 BEFORE USING YOUR DEVICE
CHAPTER 1
BEFORE
USING
YOUR DEVICE
This chapter provides important information about using the Hero,
including:
INSIDE THE PACKAGE
DEVICE DESCRIPTION
DISPLAY INDICATORS
BATTERY USAGE
BATTERY HANDLING INFORMATION
Page 10
BEFORE USING
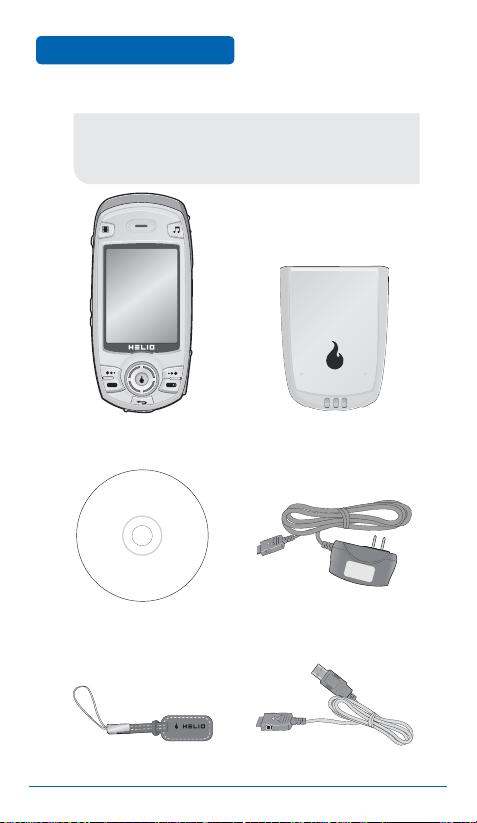
This package should include all items pictured below. If any
are missing or different, immediately contact the Helio store
where you bought your mobile device.
INSIDE THE PACKAGE
Hero Battery
CD Charger
Screen Cleaner USB Cable
10
Page 11
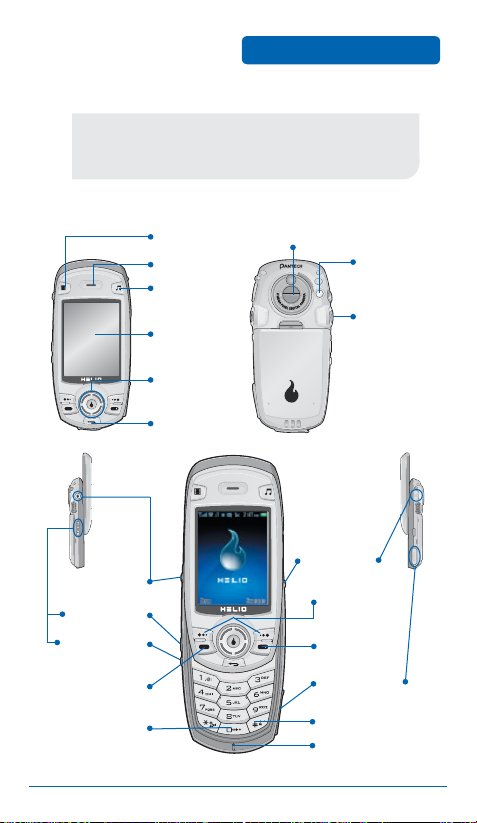
DEVICE DESCRIPTION
This device is a single-mode 3G digital phone with camera
and web browsing capabilities. The Hero weighs 4.84 oz. The
dimensions are 1.93” × 4.27” × 0.95”.
■
DEVICE VIEW
VOD Key
Earpiece
MOD Key
BEFORE USING
Camera Lens
Camera
Flash
Speaker
Display
Screen
Navigation
Keys
Back Key
Headset
Camera Key
Volume Key
Voice Memo
Jack
Left/Right
Soft Keys
End Key
Key
Send Key
T-Flash Slot
International
Function Key
Lock Key
Microphone
11
Page 12
BEFORE USING
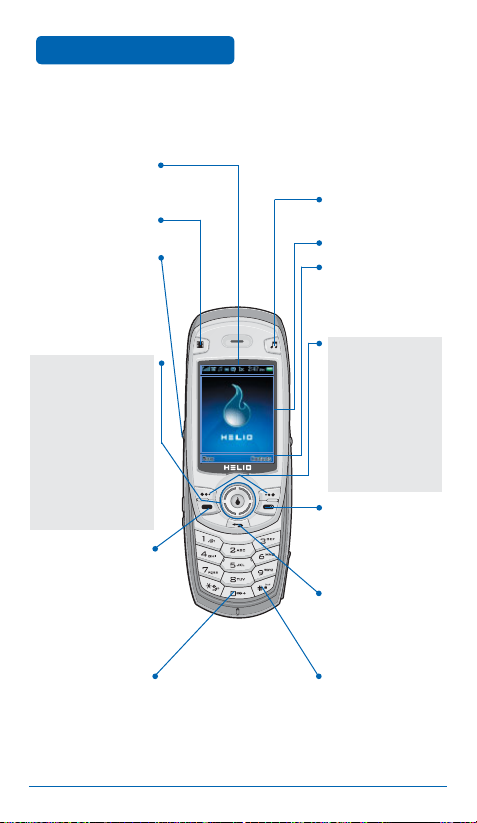
■
FUNCTION KEYS
Display Indicators
See page 13 for a
list of icons.
VOD Key
Camera Key
In Idle Mode, press and
hold to open camera
In Camera Mode, press to
viewfinder
shoot a photo or video
NAVIGATION PAD
In Idle Mode
Press Up for Surf
Down for Video+Music
Left for Text
Right for Apps
Inside a menu
Within a menu, use to
scroll through menu
options, or to select a
function displayed on
the screen
Press to make or
receive a call, or
display recent calls
Press and hold to enter
a plus symbol (+)
DEVICE DESCRIPTION
MOD Key
Text & Graphic area
Soft Key Indicators
Shows the functions
currently assigned to
each soft key and
displays some icons
FUNCTION KEYS
Left Soft Key
Press to access
the main menu or
the function displayed
at bottom left of LCD
Right Soft Key
Press to access the
Contacts menu or the
function displayed at
bottom right of LCD
Press to turn the phone
on/off, to terminate a
call, or to return to the
initial page
Back
Press to clear a digit
from the display or to
return to the previous
page
Press and hold to enter
lock mode
12
Page 13
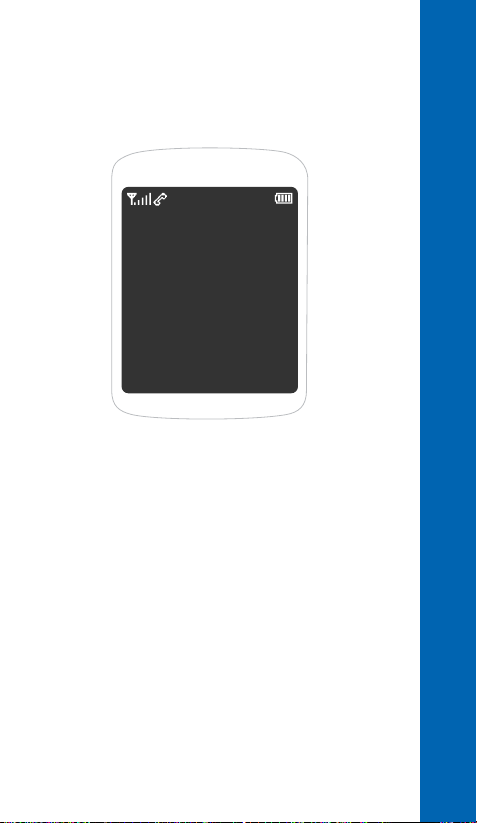
DISPLAY INDICATORS
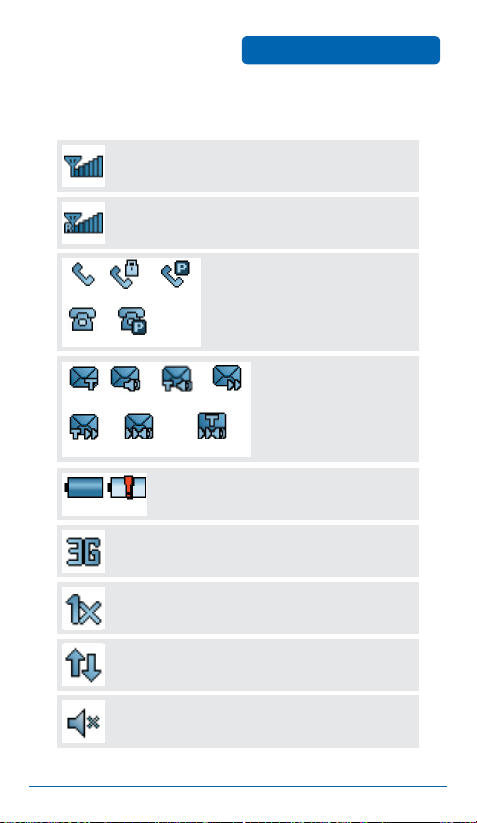
■
DISPLAY INDICATORS
Signal Strength
Current signal strength: the more lines, the stronger
the signal
Roaming
Device is out of Helio service area
Calling
Call Lock Voice Privacy
Standby Privacy Mode
Text PicVoice Text & Voice
Text & Pic Pic & Voice Text & Pic & Voice
Battery
Battery charge: the fuller the battery icon, the
Empty
Full Charge
stronger the charge
3G Mode
Device is operating in 3G mode
1X
Device is in 1x service area
BEFORE USING
Service Indicator
A call is in progress or the device
cannot receive a signal from the
system
Message Waiting
New text, picture, or voice
messages
Data Service
Internet access is active
Manner Mode
Device is in Silent Mode — all sounds are off
13
Page 14
BEFORE USING
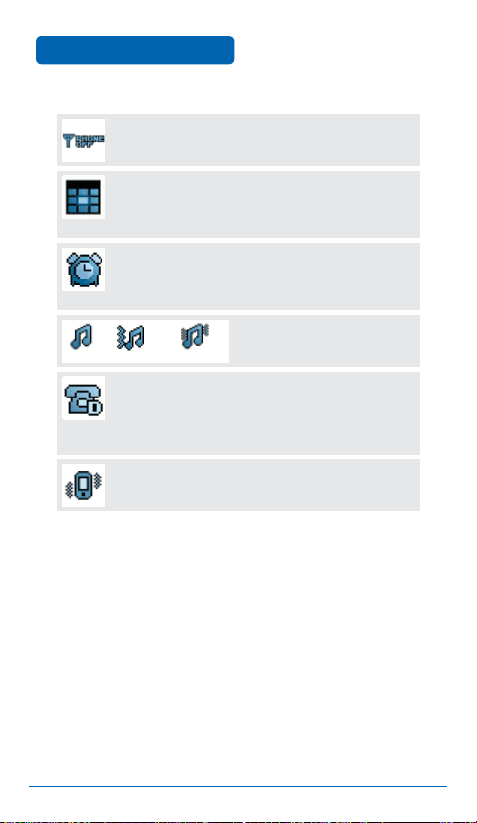
Airplane Mode
Device is in Airplane Mode and cannot make or receive
voice or data calls
Anniversary
An anniversary is set
Alarm / Wakeup Call
An alarm or wakeup call is set
Ring Vibrate then Ring Ring and Vibrate
Dormant
Device is in Dormant Mode during a data call. Your device
goes into Dormant Mode when you have not had any
activity on a page for some time — your connection is still
active and you can make and receive calls.
Vibrate
Device will vibrate when a call is received
DISPLAY INDICATORS
Ring Mode
Indicates the device's current
ring mode
14
Page 15
BATTERY USAGE
■
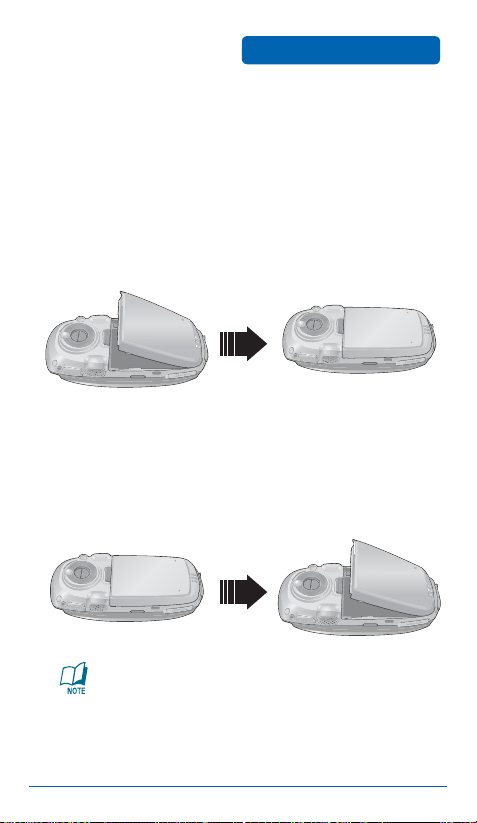
BATTERY INSTALLATION
As shown in the picture below, position the metal locators of the
battery in the holes located in the bottom of the device.
Place the battery on the back of the device and
➊
BEFORE USING
slide into place.
➋
Push the battery down until it locks into place.
■
BATTERY REMOVAL
➊
Pull down the release latch, then lift up the battery.
➋
Remove the battery from the device.
If the battery is not correctly placed in the compartment,
the device will not turn on and/or the battery may detach
during use.
15
Page 16
BEFORE USING
■
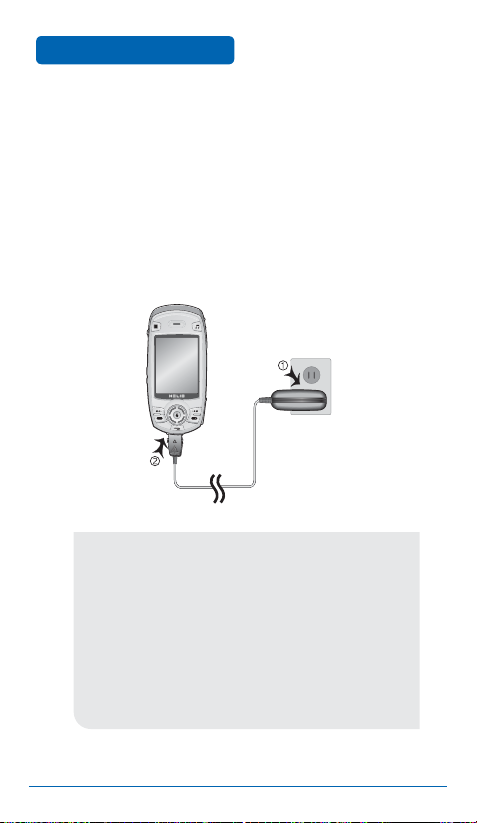
BATTERY CHARGING
BATTERY USAGE
POWER CONNECTION
➊
Ensure the battery is installed.
Plug the Wall Charger into a standard outlet. Plug
➋
the other end of the Wall Charger into the bottom
of the device.
•
When you charge the battery with the device off, you
will see a charging status screen. You cannot operate the
device until it is powered on.
•
Fully charge the battery before use.
•
It is more efficient to charge the battery with the device
powered off.
•
The battery must be connected to the phone before it can
be charged.
•
Battery life gradually decreases over time.
•
If the battery fails to perform normally, you may need to
replace it.
16
Page 17
BATTERY USAGE
BEFORE USING
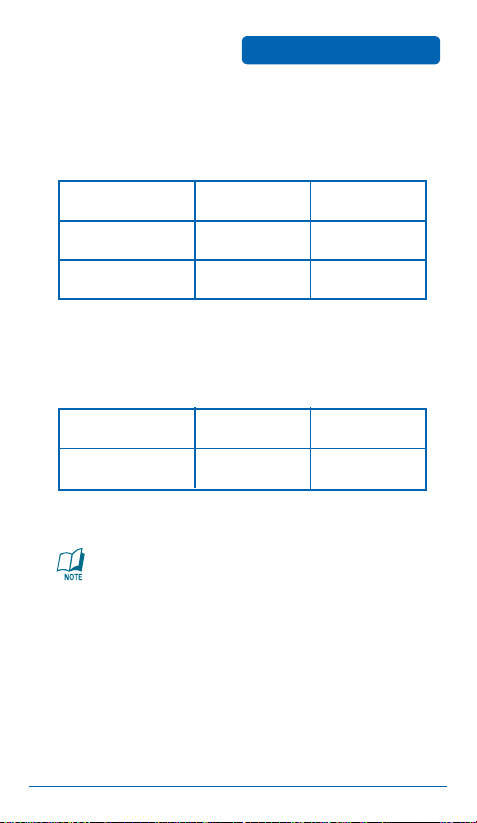
BATTERY USAGE TIMES
Battery life is subject to your device usage and configuration.
Battery Capacity DCS PCS
Low Gain Mode
High Gain Mode
Up to 300 minutes Up to 310 minutes
Up to 210 minutes Up to 217 minutes
BATTERY STANDBY TIME
Battery life is subject to your device usage and configuration.
Battery Capacity DCS PCS
STD 1200 mAh
These times are for a new battery. Usage and Standby time
may decrease over time.
228–231 hours 212–248 Hours
17
Page 18

BEFORE USING
■
DOs
•
Only use the battery and charger approved by the
manufacturer.
•
Only use the battery for its original purpose.
•
Keep the battery temperature between 41ºF (5ºC) and
95ºF (35ºC).
•
If the battery is stored in temperatures above or below
the recommended range, give it time to warm up or cool
down before using.
•
Completely drain the battery before recharging. It may
take one to four days to completely drain.
•
Store the discharged battery in a cool, dark, and dry place.
•
Purchase a new battery when the life of the current
battery has decreased gradually over time.
•
Properly dispose of the battery according to local laws.
■
DON’Ts
•
Don’t attempt to disassemble the battery — it is a sealed
unit with no serviceable parts.
•
Don’t accidentally short circuit the battery by carrying it
in your pocket or purse with other metallic objects such as
coins or pens. This may critically damage the battery.
•
Don’t leave the battery in hot or cold temperatures, which
can significantly reduce the capacity and lifetime of the
battery.
•
Don’t dispose of the battery in a fire.
BATTERY HANDLING
INFORMATION
18
Page 19

CHAPTER 2
BASIC
OPERATION
This chapter addresses and explains the basic features of your
mobile device, including:
TURNING THE DEVICE ON AND OFF
ACCESSING THE MENU
MENU SUMMARY
BASIC FUNCTIONS
DURING A CALL
MAKING AN EMERGENCY CALL
CHAPTER 2 BASIC OPERATION
Page 20
BASIC OPERATION
■
TURNING THE DEVICE ON
TURNING THE DEVICE
ON AND OFF
Slide the device open, then press and hold until
the Power On logo and animation appears and the
wake up tone sounds.
•
If the device is locked, enter your four-digit password
to unlock it when “Password” appears on the display.
•
The default password is '0000'.
■
TURNING THE DEVICE OFF
Slide the device open, then press and hold until
the Power Off logo and animation appears and the
tone sounds.
•
Immediately change or recharge the battery when
“Low Battery Warning Power Off” appears on the
display. Memory may be damaged if the device turns
off as a result of the battery completely draining.
•
Turn the device off before removing or replacing the
battery. If the device is on, unsaved data may be lost.
20
Page 21

ACCESSING THE MENU
Your device can be customized via the menu. Each function can
be accessed by scrolling with the Navigation Key or by pressing
the number that corresponds with the menu item.
➊
To access the menu in idle mode, slide the device
BASIC OPERATION
open and press [Menu].
Use the Navigation Key to scroll through the menu.
➋
To return to the previous page, press . To exit
➌
the menu and return to idle mode, press .
To select a function, use the Navigation Key or press
➍
the number assigned to the function.
Hotkey
In idle mode, use the Navigation Key as follows to access
these functions:
•
Up: SURF
•
Down: VIDEO+MUSIC
•
Right: APPS
•
Left: TEXT
21
Page 22

BASIC OPERATION
MENU SUMMARY
MAIN MENU 2ND DEPTH 3RD DEPTH 4TH DEPTH
1. STYLE
2. SURF
3. SNAP
4. TEXT
22
1. Rings
2. Download
3. Screens
4. Download
5. Call Screens
6. Download
7. H.O.T. Screens
8. Download
1. Camera
2. Video Camera
3. Photo Album
4. Video Album
5. Settings
6. Print Photos
7. Memory Info
1. New Text Msg
2. Text Message
3. New Pic Msg
4. Pic Messages
1. Internal
2. External
1. New Text Msg
2. Timed Text
3. Inbox
4. Outbox
5. Drafts
6. Timed Text Box
7. Saved
1. Compose
2. Inbox
3. Outbox
4. Drafts
5. Media
6. Settings
1. Received Msg
2. Saved
3. Spam Msg
1. Sent Msg
2. Saved
1. Photos
2. Music
3. Movies
1. Background
2. Font Color
3. Msg Rcv Alert
4. Spam Filter
5. Photo Size
6. Msg Auto Save
Page 23

MENU SUMMARY
BASIC OPERATION
MAIN MENU 2ND DEPTH 3RD DEPTH 4TH DEPTH
5. CONTACT
5. Email
6. Voice Mail
7. Spam Inbox
8. Delete Msgs
9. Settings
1. New Contact
2. Contact List
3. Groups
4. Speed Dials
5. Call Log
6. Call Timer
7. Service Number
8. Sync Contacts
9. My Number
1. Call Voice Mail
2. Clear Envelope
1. Text Inbox
2. Text Outbox
3. Text Drafts
4. Timed Text Box
5. Text Saved
6. Spam Msg
7. Quick Text
8. All Msgs
1. Msg Alert
2. Quick Text
3. Spam Msg Settings
1. All Calls
2. Incoming
3. Outgoing
1. Last Call
2. All Calls
3. Lifetime Calls
1. Info.
2. Customer Care
3. Emergency
1. Sync Contacts
2. Preview Sync
3. Username/Password
4. Help
1. Restricted List
2. Restricted Text
3. Spam On/Off
23
Page 24

BASIC OPERATION
MENU SUMMARY
MAIN MENU 2ND DEPTH 3RD DEPTH 4TH DEPTH
6. APPS
7. PLAN
8. VIDEO+MUSIC
9. SETUP
1. Calendar
2. Wakeup Call
3. Alarm
4. Anniversary
5. World Time
6. Tip Calculator
7. Calculator
8. Voice Recorder
9. Stop Watch
*. Notepad
1. Video
2. Download
3. Music
4. Download
5. Memory Info
1. Sound
2. Display
1. Internal
2. External
1. Rings
2. Group Rings
3. Alerts
4. Vibration
5. Volume
6. Sound Effects
7. Missed Call
8. Downloads
1. Screens
2. Incoming Call
3. Menu Theme
4. Font
5. Backlight
6. External Keys
7. Network Light
8. Device Closed
9. Downloads
1. Rings
2. Bell Rings
1. My Screens
2. World Time
3. Anniversary
1. Helio
2. Pantech
1. VideoScreens
2. Screens
24
Page 25

MENU SUMMARY
BASIC OPERATION
MAIN MENU 2ND DEPTH 3RD DEPTH 4TH DEPTH
3. Call
4. Network
5. Device
6. Security
7. Language
8. Airplane Mode
1. Answer Call On
2. Auto Functions
3. TTY
1. Helio Settings
2. Network Mode
1. Memory Info
2. S/W Version
3. My Number
4. Reset
1. Phone Lock
2. Function Lock
3. Info Lock
4. Set Password
1. English
2. Korean
1. Internal
2. External
1. Delete Contacts
2. Reset Defaults
25
Page 26
BASIC OPERATION
NUMBER
■
MAKING A CALL
➊
Slide the device open and enter a phone number.
To modify the phone number you have entered:
•
Erase one digit at a time by pressing .
•
Erase the entire number by pressing and holding .
To send a text or photo message to the phone number:
•
Enter a part of the phone number, then press [Menu]
and select New Text Msg or New Pic Msg. Refer to pages
67–76 for more details on text and picture messages.
➋
Press . The indicator appears on the
BASIC FUNCTIONS
display.
•
If “CALL FAILED” appears on the display or the line is
busy, press or .
•
If you activate the Auto Redial function, the phone will
automatically retry for the number of times you have
selected (refer to page 128).
•
When you place or receive a call from stored phone
numbers, both the name and phone number will be
displayed.
•
If “Enter Lock Code” appears on the display, enter your
four-digit password to unlock your device.
➌
To end a call, slide the device closed or press .
26
Page 27
BASIC FUNCTIONS
■
ANSWERING A CALL
When your device rings or vibrates, slide it open and
➊
BASIC OPERATION
press to answer the incoming call. (Depending
on your device settings, you may also answer
incoming calls by opening the phone or by pressing
any number key.)
To ignore an incoming call and silence the ring, press
[Silent]. Press [Reject] a second time to reject the call.
To end the call, slide the device closed or press .
➋
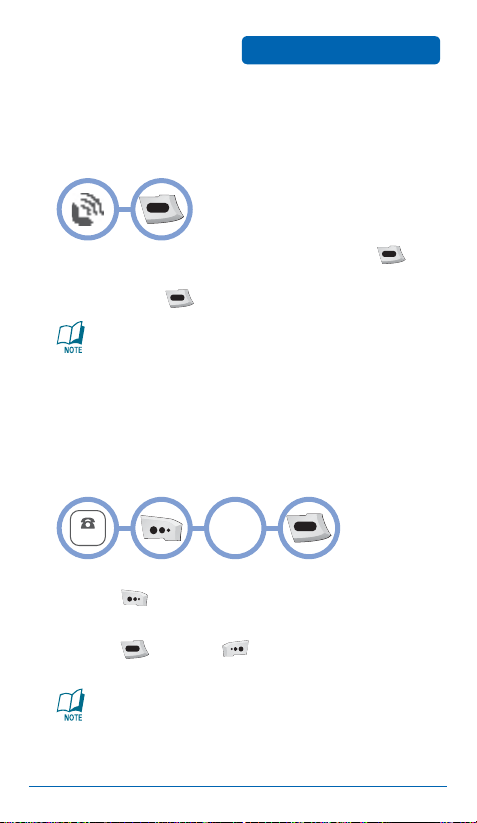
■
SPEAKERPHONE
The speakerphone feature lets you hear audio through the speaker
and talk without holding the device to your ear.
To turn speakerphone on/off while on a call, press .
The device returns to normal (speakerphone off) after
ending a call or when it is turned off and back on.
■
CALLER ID
Identifies callers by displaying their phone number.
If the caller’s name and number are already stored in
your phone book, they will both appear.
Caller ID information is stored in Call History.
27
Page 28
BASIC OPERATION
NUMBER
NUMBER
■
LOCK MODE
To lock the device, slide it open, then press and
➊
BASIC FUNCTIONS
hold .
To unlock the device, press any function key
➋
(except ), then input your password.
■
THREE-WAY CALLING
With Three-Way Calling, you can talk to two people at the same
time. When using this feature, normal airtime rates will apply to
the two calls.
➊
Slide the device open, enter a number you wish to
call, and press .
➋
Once you have established the connection, enter
the second number you wish to call and press .
➌
When you’re connected to the second party,
press again to begin your Three-Way Call.
If one of the people you called hangs up during your
call, you and the remaining caller stay connected. If you
initiated the call and are the first to hang up, all three
callers are disconnected.
28
Page 29
BASIC FUNCTIONS
NUMBER
■
CALL WAITING
Notifies you of an incoming call when you are already on a call by
sounding a beep tone and displaying the caller’s phone number.
BASIC OPERATION
To answer another call while on the phone, press .
This places the first call on hold. To switch back to the
first caller, press again.
Call Waiting is a system dependent feature. Please contact
Helio for details.
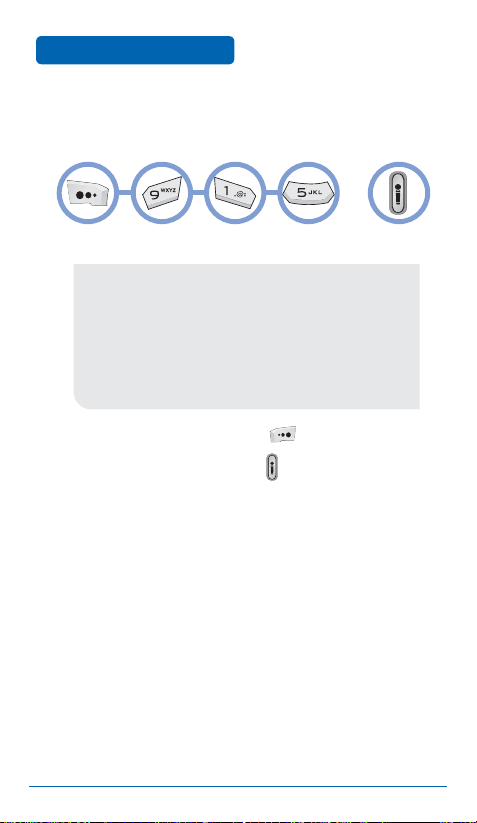
■
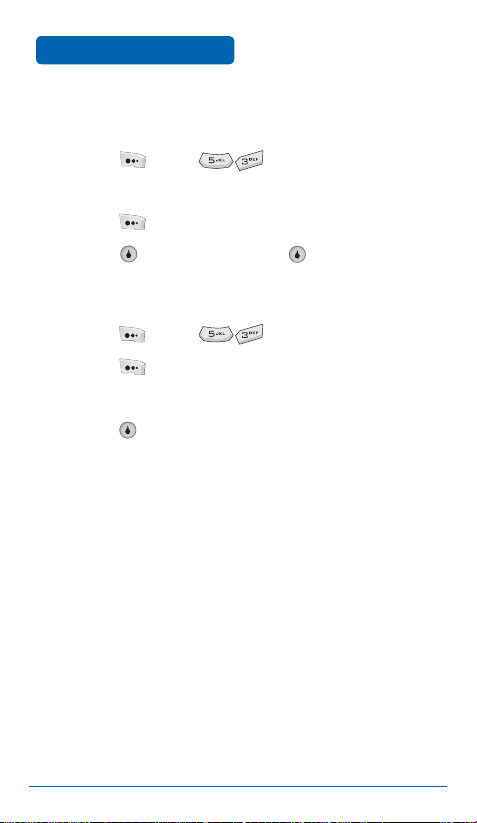
2SEC/HARD PAUSE
Pauses are used for automated systems (for example, voice mail or
calling cards). When you insert a pause after a phone number and
then enter another group of numbers, the second set of numbers
is dialed automatically after the pause. This feature is useful for
dialing into systems that require a code.
Select
“P” or ”W”
➊
To insert a pause, enter a phone number, then
press [Menu]. Select either a 2sec Pause
(“P” appears) or a Hard Pause (“W” appears).
➋
Press to dial, or [Save] to store the phone
number.
Please refer to page 36 for more details about storing a
phone number.
29
Page 30
BASIC OPERATION
■
ADJUSTING VOLUME
Adjust the volume of the ring, key beep, and speaker.
➊
Select one of the following:
•
Ring: Controls the ring volume
•
Call: Controls the call volume
•
Effect: Controls the volume of special effects
•
Alerts: Controls the alert volume
•
Alarm: Controls the alarm volume
•
Msg: Controls the message notification volume
•
Game: Controls the volume of game audio
•
On&Off: Controls the on/off volume
➋
Adjust the volume and press [Save] to save it.
BASIC FUNCTIONS
OR
In Idle Mode, you can also press to adjust the
volume.
30
Page 31

DURING A CALL
■
AVAILABLE OPTIONS DURING A CALL
To display menu options during a call, press [Menu]. To adjust
the call volume, press the Navigation Key up or down. To mute the
call (the other party can’t hear you, but you can hear them),
press [Mute]. Press [Unmute] again to unmute.
•
The phone will automatically unmute in Emergency Call or
Callback mode.
BASIC OPERATION
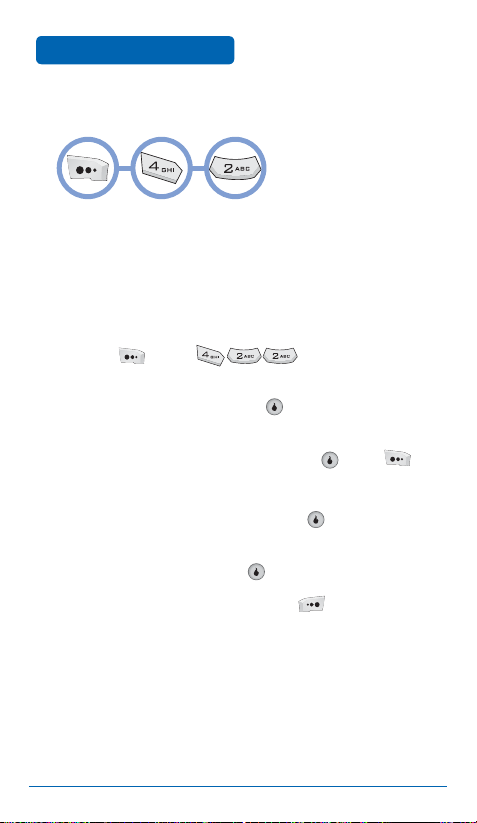
1. CONTACTS
Allows you to view and update your contact list during a call.
Press then .
2. READ MESSAGE
Allows you to view text messages during a call.
Press then .
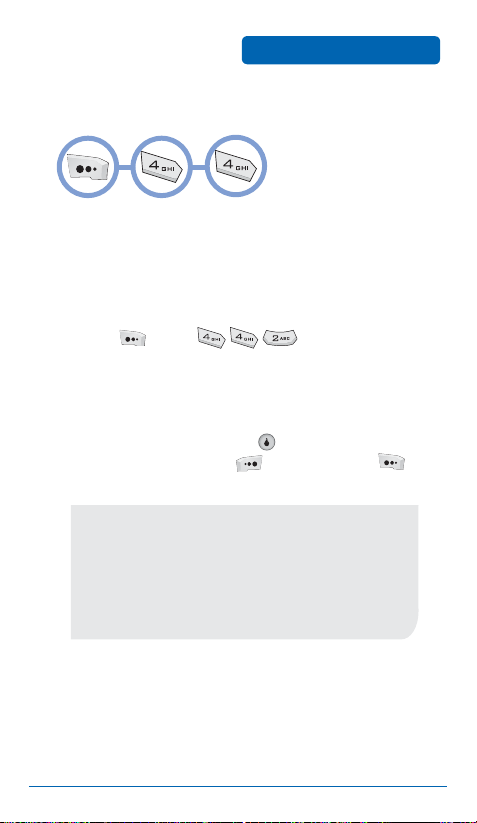
3. SEND MY #
Automatically transmits your mobile number during a call—for
instance, to a pager.
Press then .
4. PRIVACY
Turns on privacy.
Press then .
5. DTMF TYPE
Sets the length of touch tone dialing tones: short or long. Use long
tones for noisy lines.
Press then .
31
Page 32

BASIC OPERATION
Dialing 911 puts the device in the Emergency Call Mode. Note that
you can also dial 911 when your device is locked or you are out of
the service area.
Emergency
Number
■
911 IN LOCK MODE
911 service is available even when the device is locked.
➊
Enter “911” and press .
➋
The call connects.
➌
The device exits Lock Mode for five minutes.
•
When the call ends, the device returns to Lock Mode.
■
911 USING ANY AVAILABLE SYSTEM
911 service is available even when out of the service area.
➊
Enter “911” and press .
➋
The call connects.
➌
The device maintains Emergency Mode for
MAKING AN
EMERGENCY CALL
five minutes.
•
While the device is in Emergency Mode, it can receive an
incoming call from any available system. However, it cannot
make a call.
The 911 call is not recorded in the recent call list.
32
Page 33
CHAPTER 3
MEMORY
FUNCTIONS
This chapter addresses memory functions, including:
STORING CONTACT INFO
ENTERING LETTERS, NUMBERS, AND SYMBOLS
MAKING A CALL THROUGH THE CONTACT LIST
CHAPTER 3 MEMORY FUNCTIONS
Page 34
MEMORY FUNCTIONS
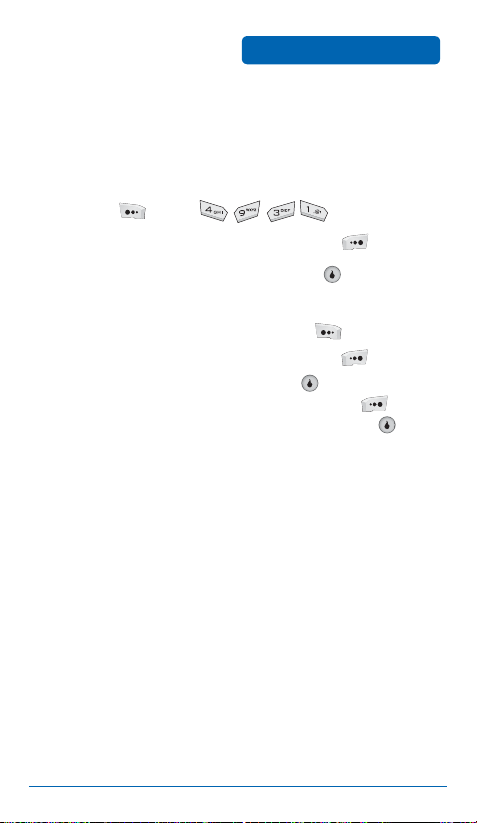
The contact list stores up to 1200 entries.
➊
Slide the device open, enter the phone number,
STORING
CONTACT INFO
press [Save], and choose New Contact or
Update Contact. Press to select.
If you select New Contact, the phone number will
➋
appear above a list. Press the Navigation Key up or
down to choose the type of number you’re adding,
as indicated by the icon. Press to select.
If you select Update Contact, your contact list is
displayed. Choose the entry to add the phone
number to, then press . You will then see the
phone number listed. Press to select.
Enter a name.
➌
Refer to page 37 for more details on entering
letters, numbers, and symbols. To change the input
mode, press [Abc]. Press the Navigation Key
down to select other options. If you entered a
phone number, press [Menu] to select one of
the following options:
•
Add Number
•
Add Email
•
Add Memo
•
Add Birthday
•
Add Photo
•
Add New Group
•
Delete Number
➍
To store the entry, press [Save]. “Saving...”
then “Saved” will be displayed.
34
Page 35

ENTERING LETTERS,
NUMBERS, & SYMBOLS
MEMORY FUNCTIONS
T9 input mode will automatically be activated when
necessary to enter letters and numbers. As shown
below, there are five available modes: T9 input mode
(T9Word), capitalized standard input mode (ABC), initial
caps standard input mode (Abc), numeric mode (123),
symbol mode (Symbols), and Korean mode (Korean).
The input mode indicator appears in the lower right
corner of the display when letters and numbers are
entered. To select the desired input mode from the six
available modes, press [Abc].
The following table describes the function assigned to each
key when entering text.
FUNCTIONKEY
Abc
Press to change the text input mode:
[T9Word][ABC][Abc][123][Symbols][Korean]
Next
Press to view the next matching word if the
highlighted word is not the word you intended.
Space
Press to accept a word and add a space.
Caps Lock
Press to select the letter case for standard text input
or T9 text input mode. “Abc,” “ABC,” or “abc”
indicate the case. Press and hold to change mode.
Back
Press to delete a character to the left of the cursor.
Send
Send the letters and numbers you enter.
35
Page 36

MEMORY FUNCTIONS
■
STANDARD INPUT MODE
Use the number keys to enter letters, numbers, and symbols.
Enter letters using the keypad as follows:
➊
ENTERING LETTERS,
NUMBERS, & SYMBOLS
Press
Key
1 time
2ABC
3DEF
4GHI
:
9WXYZ
To enter a symbol, press repeatedly until the
Press
2 times
A
D
G
:
W
Press
3 times
B
E
H
:
X
Press
4 times
C
F
I
:
Y
Press
5 times
2
A
3
D
4
G
:
:
Z
9
desired symbol appears (. @ ? ! - , & : ‘ 1). To
change the input mode, press [Abc].
To enter a space, press .
Repeat until all letters are entered.
➋
To delete a character, press . To delete all
➌
characters, press and hold .
To change from lowercase to uppercase, press .
➍
36
Page 37

ENTERING LETTERS,
NUMBERS, & SYMBOLS
■
T9 INPUT MODE
The T9 input mode incorporates a built-in dictionary to determine
a word based on the characters entered. Using T9, a word can be
entered more quickly by pressing a key once per character.
Select T9 mode by pressing [Abc] and selecting
➊
MEMORY FUNCTIONS
T9Word.
For each character in the word you want to enter,
➋
press the corresponding key once.
To view the next matching word, press .
➌
To accept a matching word and enter a space,
➍
press .
To enter a compound word:
➀
Enter the first part of the word, then press the
Navigation Key right to accept it.
➁
Enter the last part of the word, then press to enter
the word.
37
Page 38

MEMORY FUNCTIONS
■
NUMERIC MODE
Allows you to enter numbers.
Press [Abc] and select 123 to select numeric
➊
ENTERING LETTERS,
NUMBERS, & SYMBOLS
mode.
To enter a number, press a digit key.
➋
■
SYMBOL MODE
Allows you to enter symbols.
Press [Abc] and select Symbols to select
➊
symbol mode.
Select the symbol you want to enter with the
➋
Navigation Key.
•
Use the Navigation Key to view a different line of symbols.
■
KOREAN MODE
Allows you to enter Korean characters.
➊
Press [Abc] and select Korean to select symbol
mode.
➋
To enter a character, press a key on the keypad.
38
Page 39

MAKING A CALL FROM
THE CONTACT LIST
■
ONE-TOUCH/TWO-TOUCH DIALING
Ideal for frequently dialed numbers, this feature allows contact list
entries to be dialed via the keypad with only one or two key
presses.
MEMORY FUNCTIONS
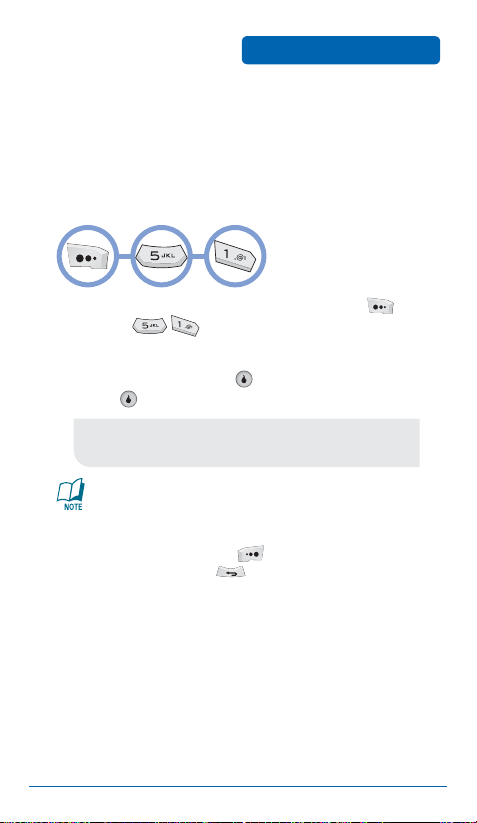
ONE-TOUCH DIALING:
1–9: Press and hold the corresponding memory
number for more than one second.
TWO-TOUCH DIALING:
10–99: Press the first digit of the memory number, then
press and hold the second digit for more than
one second.
•
If no phone number is stored in the location entered,
“Invalid Speed Dial” will appear on the screen.
•
The first speed dial slot is reserved for voice mail access.
•
Refer to page 87 for more information on speed dialing.
39
Page 40

MEMO
40
Page 41

CHAPTER 4 MENU FUNCTIONS
CHAPTER 4
MENU
FUNCTIONS
This chapter addresses accessing the menu and using its functions
and features to customize your device:
STYLE
SURF
SNAP
TEXT
CONTACT
APPS
PLAN
VIDEO+MUSIC
SETUP
Page 42

MENU FUNCTIONS
■
RINGS
Press [Menu] .
➊
Select your ringtone, volume, and vibrate and ring
➋
STYLE
settings.
To download rings, press [Menu] .
42
Page 43

STYLE
■
SCREENS
Press [Menu] .
➊
Select your idle screen options. Press [Preview]
➋
MENU FUNCTIONS
to view the current options. Note that you can
change the currently selected setting while
previewing by pressing the Navigation Key left or
right.
To download screens, press [Menu] .
43
Page 44

MENU FUNCTIONS
■
CALL SCREENS
➊
Press [Menu] .
Select the screen to display when a call is coming in.
➋
STYLE
To download call screens, press [Menu] .
44
Page 45

STYLE
■
H.O.T. SCREENS
MENU FUNCTIONS
To turn on H.O.T.TM (Helio On Top):
➊
Press [Menu] .
➋
Highlight a H.O.T. screen and press [Menu].
➌
Select Turn On H.O.T. and press three times.
➍
Close and re-open the device. The H.O.T. screen is
now running.
To turn off H.O.T.:
➊
With H.O.T. active, press [Menu] and select
Turn Off H.O.T.
To download H.O.T. screens, press
[Menu]
.
Note: H.O.T. screens are separate applications and
must be downloaded to your Helio device. Go to
Helio.com/support for more information about
downloading and configuring H.O.T. screens
45
Page 46

MENU FUNCTIONS
■
ACCESS HELIO ONLINE
You can access news, sports, weather, and email from your mobile
device. Contact Helio for a list of available websites and service
details.
OR
SURF
To launch the mobile web browser and access websites
through your mobile device, press [Menu] or
press the Navigation Key up.
■
BROWSER MENU
The browser menu contains various browser options. To access the
browser menu, press [Menu] while in the mobile web browser.
Press the Navigation Key left and right to navigate the menus,
then up and down to select items within the menus. The following
menus are available:
FAST ACCESS
Lists quick navigation links:
HOME
Navigates to the home page.
SEARCH
Navigates to the search page.
46
Page 47

SURF
MENU FUNCTIONS
GO
Asks for a URL and navigates to it.
FORWARD
Navigates to the next page in the history list. This is only
available if you have navigated backward in the history.
BOOKMARKS
Allows you to create and navigate to bookmarks:
ADD
Creates a bookmark for the current page.
➊ Select Add.
➋ Press and enter a name for the bookmark.
➌ Press the Navigation Key down and select a folder,
or press [Edit Folder] to create a new folder or
change an existing folder.
To add a new folder:
➀ Select New Folder Name, press , enter the new
name with the keypad, then press again.
➁ Select Add Folder and press .
47
Page 48

MENU FUNCTIONS
SURF
To edit an existing folder:
➀ Select the folder to be edited by pressing and
using the Navigation Key.
➁ To change the folder name, select New Folder
Name, press , enter the new name with the
keypad, press again, then press [Save].
(Note that you cannot change the name of the
Favorites folder.)
To delete the selected folder, select Delete
Selected Folder and press .
VIEW ALL
Displays all bookmarks and allows you to navigate to
them.
HISTORY
Displays the history list, where you can view and delete all stored
history pages.
SETTINGS
Display various browser options.
REFRESH PAGE
Refreshes the current page.
48
Page 49

SURF
MENU FUNCTIONS
SETUP OPTIONS
Sets browser settings:
•
Scrolling Mode: Changes the page scrolling mode: Line by
Line, Half Page, or Single Page.
•
Autosave Last Menu Selection: Saves the last menu
selection and returns to that menu when you bring up the
browser menu again.
•
Reset: Sets the browser settings back to factory defaults.
LOOKUP CONTACT
Allows you to look up a contact while browsing.
BROWSER INFO
Displays browser version information.
49
Page 50
MENU FUNCTIONS
■
PHOTO CAMERA
Taking pictures with your mobile device’s built-in camera is as simple
as choosing a subject, pointing the lens, and pressing a button.
SNAP
OR
TAKING A PHOTO
➊
Open the camera cover by sliding the release
clockwise.
➋
The camera viewfinder will appear. If the camera
cover is already open and the viewfinder doesn’t
appear, press and hold the side camera button to
activate Camera Mode.
➌
Point the camera lens at your subject. You can check
the photo framing through the main display screen.
➍
Press or to take the photo.
➎
The picture will be saved automatically in the Photo
Album.
When you are done taking photographs, close the
camera cover to exit Camera Mode.
•
You cannot place or receive calls while in Camera Mode.
All incoming voice calls will be forwarded to voice mail.
50
Page 51

SNAP
MENU FUNCTIONS
TAKING A PHOTO THROUGH THE MENU
➊
Ensure the camera cover is open.
➋
Press [Menu] .
➌
Point the camera lens at your subject. You can
check the photo framing through the main display
screen.
➍
Press or the side camera button to take the
photo.
➎
The picture will be saved automatically in the Photo
Album.
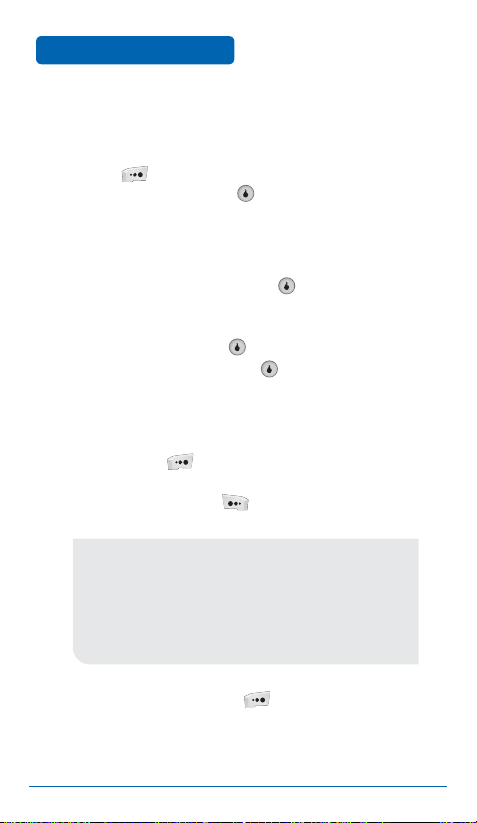
CAMERA MODE OPTIONS
When the device is in Camera Mode, several camera options are
available.
WHITE BALANCE
Press to adjust the white balance: Auto, Outside,
Cloudy, Fluorescent, or Bulb.
FLASH
Press to set the flash: Auto, Off, or On.
51
Page 52

MENU FUNCTIONS
When the device is closed:
SNAP
BRIGHTNESS
Press the Navigation Key up/down to adjust the
brightness. The current brightness level appears at the
bottom of the screen.
ZOOM
Use the and buttons to change the
magnification. The current zoom level appears on the
right side of the screen.
When the device is open:
BRIGHTNESS
Press the Navigation Key left/right to adjust the
brightness. The current brightness level appears at the
bottom of the screen.
ZOOM
Press the Navigation Key up/down to change the
magnification. The current zoom level appears on the
right side of the screen.
52
Page 53

SNAP
MENU FUNCTIONS
CAMERA MODE MENU
Press [Menu] to bring up the menu in Camera Mode:
1. Resolution
Selects the picture resolution.
Device open: 320×240, 240×320, or 240×180
Device closed: 1600×1200, 1280×960, 1024×768,
800×600, 640×480, 320×240, 240×320, or 240×180
2. White Balance
Adjusts the white balance: Auto, Outside, Cloudy,
Fluorescent, or Bulb.
3. Flash
Sets the flash: Auto, Off, or On.
4. Quality
Selects the picture quality: Super Fine, Fine, or Normal.
5. Multishot Mode
Selects a multishot mode: Single, Auto Series 4cuts,
Auto Series 6cuts, Auto Series 9cuts, Split Series 4cuts,
Split Series 9cuts, or Split Series 16cuts.
6. Camera Mode
Selects the camera mode: Auto, Portrait, Landscape,
Portrait_Landscape, or Night.
53
Page 54

MENU FUNCTIONS
SNAP
7. Timer
Sets the camera’s timer: Timer Off, 2sec, 5sec, or 10sec.
8. Effect
Selects a picture effect: Effect Off, Gray, Sepia, Purple,
Blue, Green, Negative, Old Film, B&W Film, Posterize,
Mono Posterize, Sketch, Conte, Mosaic, Emboss,
Sharpen, Colored Pencil, Pencil, Gorgeous, Thin, High
Contrast, Low Contrast, or Milky.
Preview Slide Close
Determines whether a preview stops when the device is
closed: Stop Preview or Continue Preview.
Ready Sound
Selects a ready sound: Mute, Beep, Ready?, Cheese,
Whisky, or Smile.
Shutter Sound
Selects a shutter sound: Sound 1–4.
*. Memory
Selects the location for saved pictures: Int. Memory or
Ext. Memory.
#. Help
Displays a help message.
Press [Save] to save the camera options.
54
Page 55
SNAP
■
VIDEO CAMERA
Taking videos with your mobile device’s built-in camera is as simple as
choosing a subject, pointing the lens, and pressing a button.
➊
Open the camera cover to enter Camera Mode.
MENU FUNCTIONS
➋ If the device is closed, press the Navigation Key left
to enter Video Mode. If the device is open, press .
➌
Point the camera lens at your subject. You can check
the framing through the main display screen.
➍
Press or the side camera button to start
recording video.
➎
To stop recording, press or .
➏
The video will automatically be saved in the Video
Album.
•
You cannot place or receive calls while in Video Mode.
All incoming voice calls will be forwarded to voice mail.
55
Page 56

MENU FUNCTIONS
SNAP
VIDEO MODE OPTIONS
When the device is open and in Video Mode, several camera
options are available:
PREVIEW
Press to preview saved videos.
FLASH
Press to set the flash: Auto, Off, or On.
When the device is closed:
WHITE BALANCE
Press the Navigation Key left to adjust the white
balance: Auto, Outside, Cloudy, Fluorescent, or Bulb.
BRIGHTNESS
Press the Navigation Key up/down to adjust the
brightness. The current brightness level appears at the
bottom of the screen.
ZOOM
Use the and buttons to change the
magnification. The current zoom level appears on the
right side of the screen.
56
Page 57

SNAP
When the device is open:
MENU FUNCTIONS
WHITE BALANCE
Press to adjust the white balance: Auto, Outside,
Cloudy, Fluorescent, or Bulb.
BRIGHTNESS
Press the Navigation Key left/right to adjust the
brightness. The current brightness level appears at the
bottom of the screen.
ZOOM
Press the Navigation Key up/down to change the
magnification. The current zoom level appears on the
right side of the screen.
VIDEO MODE MENU
Press [Menu] to bring up the menu in Video Mode:
1. Resolution
Sets the video resolution: 640×480, 320×240, or
176×144.
2. Recording Time
Sets the video recording time: Normal Video or Color
Mail Video.
57
Page 58

MENU FUNCTIONS
SNAP
3. White Balance
Sets the white balance: Auto, Outside, Cloudy,
Fluorescent, or Bulb.
4. Flash
Sets the flash: On While Recording, Off, or On.
5. Quality
Sets the video quality: High, Standard, or Economy.
6. Camera Mode
Sets the camera mode: Auto, Portrait, Landscape,
Portrait_Landscape, or Night.
7. Effect
Selects a video effect: Effect Off, Gray, Sepia, Purple,
Blue, Green, Negative, Old Film, B&W Film, Posterize,
Mono Posterize, Sketch, Conte, Mosaic, Emboss,
Sharpen, Colored Pencil, Pencil, Gorgeous, Thin, High
Contrast, Low Contrast, or Milky.
8. Movie Frame
Sets the movie frame: No Photo Frame, Puzzle, Flower
Frame, Action, Little Prince, Interview, Photo Frame
1, Photo Frame 2, Mount, Apple Man, Postcard,
Superman, Primitive Man, Pig, James Dean, or Marilyn
Monroe.
58
Page 59

SNAP
MENU FUNCTIONS
9. Preview Slide Close
Determines whether a preview stops when the device is
closed: Stop Preview or Continue Preview.
0. Video Sound
Sets the video sound: Camcorder or Beep.
*. Memory
Sets the location for saved video: Int. Memory or Ext.
Memory.
#. Help
Displays a help message.
Press [Save] to save the video options.
59
Page 60

MENU FUNCTIONS
■
PHOTO ALBUM
In Review Mode you can view all the pictures you have taken, store
selected images in your mobile device, send pictures to the Online
Album, delete images, and access additional picture options.
➊
Press [Menu] .
➋
In Review Mode, you can view all the pictures you
SNAP
have stored.
➌
Select the picture you want to view with the
Navigation Key and then press . To access options,
press [Menu]:
•
Set as...: Sets the selected picture as a screen: Background
or Incoming Call.
•
Send Picture: Sends a picture message containing the
selected photo.
•
Change Order: Selects the file sort method: Sort by Date,
Sort by Size, Sort by Name, or Sort by User.
•
Transfer File: Moves the selected photo to a different
location: Album1, Album2, or External Memory.
•
Delete: Deletes the current picture.
•
Edit/Rename: Edits or renames the picture.
•
Protect/Hide: Protects or hides the picture.
•
Select All: Selects all pictures.
•
View Info: Displays information on the selected picture.
60
Page 61

SNAP
■
VIDEO ALBUM
In Review Mode, you can view all the videos you have taken, store
selected videos, send videos to the Online Album, delete videos, and
access additional video options.
➊
Press [Menu] .
➋
In Review Mode, you can view all the videos you
MENU FUNCTIONS
have stored.
➌
Select the video you want to view with the Navigation
Key and then press [Play]. To access options,
press [Menu]:
•
Set as...: Sets the selected video as a ring/screen:
Background or Incoming Call.
•
Send Video: Sends a picture message with the selected
video attached.
•
Change Order: Selects the file sort method: Sort by Date,
Sort by Size, Sort by Name, or Sort by User.
•
Transfer File: Moves the selected video to a different
location: Album1, Album2, or External Memory.
•
Delete: Deletes the current video.
•
Rename: Renames the video.
•
Protect/Hide: Protects or hides the video.
•
Select All: Selects all videos.
•
View Info: Displays information on the selected video.
61
Page 62

MENU FUNCTIONS
■
SETTINGS
Allows you to set camera options.
➊
Press [Menu] .
➋
Press [Save] to save the options.
SNAP
62
Page 63
SNAP
■
PRINT PHOTOS
The Hero comes equipped with a 2-megapixel built-in camera that
allows you to print images directly to a printer using PictBridge
technology. A USB cable must be connected between your Hero
device and the printer before any printing can occur.
➊
Connect the USB cable between your mobile device
MENU FUNCTIONS
and the USB connector on the printer (printer must
support PictBridge technology).
➋
Press [Menu] .
➌
Read the message and press .
63
Page 64
MENU FUNCTIONS
■
MEMORY INFO
Displays internal or external memory information.
➊
Press [Menu] .
➋
Select Internal or External with the Navigation Key.
➌
The memory information appears.
➍
To return to the previous page, press .
SNAP
64
Page 65

TEXT
■
NEW TEXT MSG
To compose a new text message:
➊
Press [Menu] .
➋
The Message Contents field is highlighted. Type a
MENU FUNCTIONS
new text message, then press .
•
By pressing [Menu], you can choose from the following:
Copy Text: Saves the message text to the Quick Text list.
Paste Text: Pastes text from the Quick Text list.
Save Draft: Saves a draft of the message.
➌
The Recipient field is highlighted. Type the recipient
phone number and press .
•
By pressing [To:], you can choose from the following:
Contacts: Brings up your contact list so you can select a
number.
Call Log: Brings up the call log so you can select a number.
Groups: Brings up the groups list so you can add an entire
group or a member of a specific group.
Save Draft: Saves a draft of the message.
Delete All Num: Deletes all recipient phone numbers.
➍
To send the text message, press [Send].
65
Page 66
MENU FUNCTIONS
■
TEXT MESSAGES
TEXT
NEW TEXT MSG
Composes a new text message.
TIMED TEXT
Composes a timed text message, which will be sent at a specified
time:
➊
Press [Menu] .
➋
The Message Contents field is highlighted. Type a
new text message and press .
➌
The Reserving Time field is highlighted. Use the
keypad to enter the date, then press . Press
to switch from A.M. to P.M. or vice versa, or press
the Navigation Key right to leave it as-is. Use the
keypad to enter a time, then press .
➍
The Recipient field is highlighted. Type the recipient
phone number and press .
➎
To save the timed message, press [Resv].
66
Page 67

TEXT
MENU FUNCTIONS
INBOX
The Inbox holds received text messages.
Press [Menu] .
➊
Select a message and press . The message is
➋
displayed. To delete a message, press [Del].
Press [Reply] to reply to the message. Press [Fwd]
to forward the message. Press [Menu] to choose
from the following:
DELETE MESSAGE
Deletes the current message.
SAVE MSG
Saves the current message in the Saved folder.
ADD CONTACT
Adds the message’s sender to your contact list.
CALL
Calls the sender of the text message.
67
Page 68

MENU FUNCTIONS
TEXT
OUTBOX
Holds sent text messages or messages waiting to be sent.
Press [Menu] .
➊
Select a message and press . The message is
➋
displayed. To delete a message, press [Del].
Press [Del] to delete the message. Press [Write]
to resend the message.
DRAFTS
Holds draft messages from the Inbox/Outbox.
Press [Menu] .
➊
The draft message list displays. Select a message
➋
and press . The message is displayed. To delete a
message, press [Del].
To edit a message, press , then to send the text
➌
message, press [Send].
68
Page 69

TEXT
MENU FUNCTIONS
TIMED TEXT BOX
Holds timed text messages.
➊
Press [Menu] .
The timed text message list displays. To delete all
➋
messages, press [Menu] then select Delete All
Msgs.
➌
Select a message and press . The message is
displayed. To delete a message, press [Del].
➍
To edit a message, press , then to send the text
message, press [Send].
SAVED
Holds saved messages from the Inbox/Outbox.
Press [Menu] .
➊
The saved message list displays. To delete all
➋
messages, press [Menu] then select Delete All
Msgs.
Select a message and press . The message is
➌
displayed. To delete a message, press [Del].
➍
To edit a message, press , then to send the text
message, press [Send].
69
Page 70

MENU FUNCTIONS
■
NEW PIC MSG
To compose a new picture message:
Press [Menu] .
➊
The Message field is highlighted. Type a message
➋
TEXT
and push the Navigation Key down.
•
By pressing [Menu], you can choose from the following:
Emoticon: Inserts an emoticon.
Quick Text: Inserts text from the Quick Text list.
The Add field is highlighted. Insert an image or
➌
music.
•
By pressing [Add], you can choose from the following:
Add Photo: Attach a photo image.
Add Music: Attach a music file.
Add Video Rec: Attach a video file.
Delete Media: Delete an attached file.
➍
The Recipient field is highlighted. Type the recipient
phone number or email address.
•
By pressing [To:], you can choose from the following:
Enter Email: Enter an email address.
Search by Group: Find a phone number via the group list.
Contacts: Find a phone number in the contact list.
➎
To send the picture message, press [Send].
70
Page 71
TEXT
■
PIC MESSAGES
MENU FUNCTIONS
COMPOSE
Composes a new picture message.
INBOX
The Inbox holds received picture messages.
➊
Press [Menu] .
➋
Select a message box: Received Msg, Saved (saved
received messages), or Spam Msg (messages marked
as spam).
➌
Select a message and press to display it. To
delete a message, press [Del]. By pressing
[Menu], you can choose from the following:
•
Reply: Replies to the message.
•
Details: Displays the time the message was sent as well as
its sender.
•
Forward: Forwards the message.
•
Save Message: Saves the message in Saved. (Received Msg
and Spam Msg boxes only.)
•
Delete All: Deletes all messages in the box.
71
Page 72

MENU FUNCTIONS
TEXT
OUTBOX
Holds sent picture messages or messages waiting to be sent.
➊
Press [Menu] .
➋
Select a message box: Sent Msg (sent messages) or
Saved (saved sent messages).
➌
Select a message and press . The message is
displayed. To delete a message, press [Delete].
➍
To edit and resend the message, press [Edit/
Send]. By pressing [Menu], you can choose
from the following:
•
Delete: Deletes the message.
•
Recipient: Displays the time the message was sent as well
as its recipient.
•
Save Message: Saves the message in Saved.
72
Page 73

TEXT
MENU FUNCTIONS
DRAFTS
Holds draft messages from the Inbox/Outbox.
➊
Press [Menu] .
➋
The list of draft messages displays. To delete all
messages, press [Menu] and select Delete All.
➌
Select a message and press to display it. To
delete a message, press [Delete].
➍
Once a message has been displayed, edit it and
press [Send] to send it.
MEDIA
Displays a list of saved media files.
➊
Press [Menu] .
➋
Select Photos, Music, or Movies to display the media
files stored on your device.
73
Page 74

MENU FUNCTIONS
TEXT
SETTINGS
Manages messaging settings.
➊
Press [Menu] .
➋
Set the following picture message options:
•
Background: Sets an image, photo, or color background, or
no background.
•
Font Color: Sets the font color.
•
Msg Rcv Alert: Sets alert options for message received
alerts:
Alarm Settings: Select 1 Time, Every 2min, or Mute.
Alert Type: Select Message Received or one of Bell 1–4..
Alert Volume: Set the alert volume.
•
Spam Filter: Sets spam protection options:
Block Number: Add/delete numbers to be blocked.
Spam Setting: Turn spam protection on or off.
•
Photo Size: Sets photo resize options for picture messages:
Reduced Size (640×480) or Original Size.
•
Msg Auto Save: Turns message auto save on/off.
74
Page 75

TEXT
■
EMAIL
Takes you to the web email interface.
➊
Press [Menu] .
MENU FUNCTIONS
75
Page 76

MENU FUNCTIONS
■
VOICE MAIL
TEXT
To access voice mail:
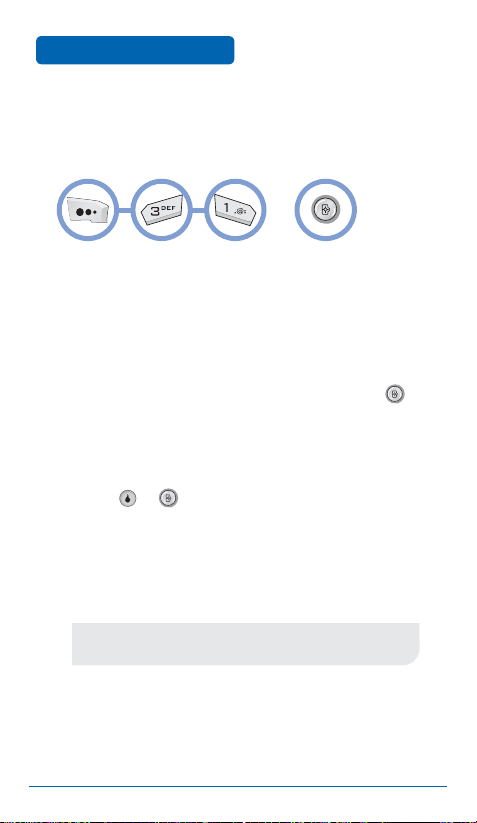
Press [Menu] .
OR
In Idle Mode, press and hold .
To clear the message icon on the main display:
Press [Menu] .
76
Page 77

TEXT
■
SPAM INBOX
➊
Press [Menu] .
MENU FUNCTIONS
77
Page 78

MENU FUNCTIONS
■
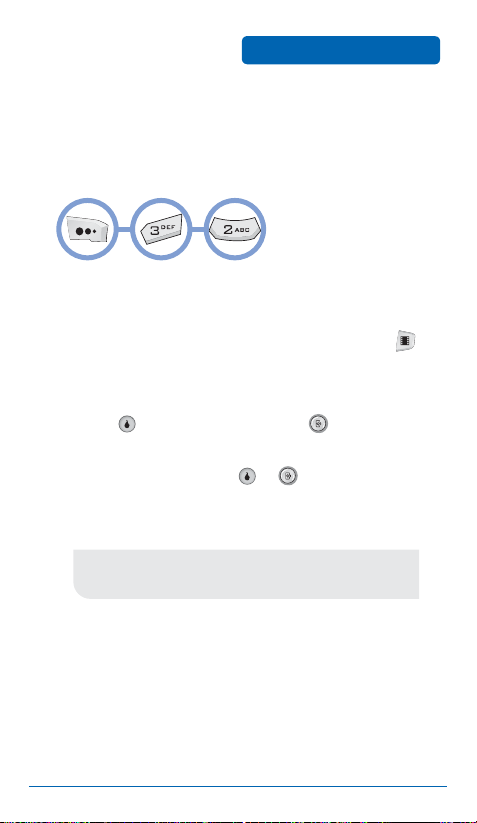
DELETE MSGS
Press [Menu] .
➊
Enter your password (the default password is
➋
TEXT
'0000').
Select one of the message folders by pushing the
➌
Navigation Key up/down and pressing :
•
Text Inbox
•
Text Outbox
•
Text Drafts
•
Timed Text Box
•
Text Saved
•
Spam Msg
•
Quick Text
•
All Msgs
Select Yes or No by pushing the Navigation Key left
➍
or right.
Press to delete all messages in the selected
➎
folder.
78
Page 79

■
SETTINGS
TEXT
MENU FUNCTIONS
MSG ALERT
Sets message alert options:
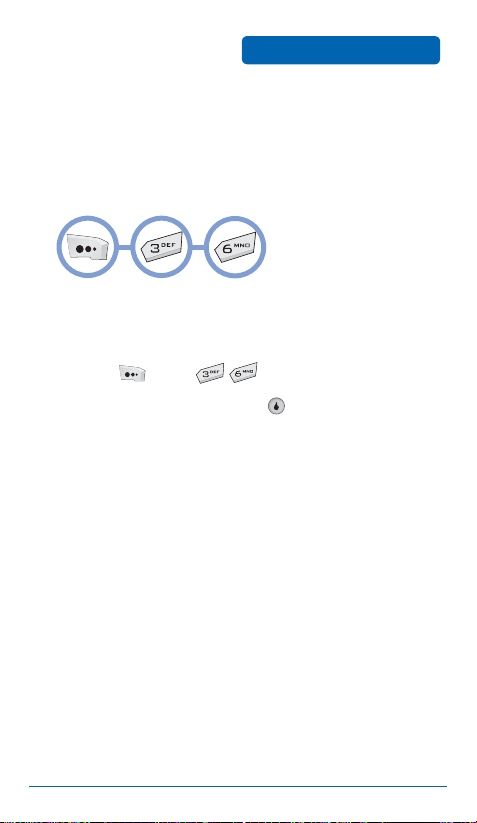
Press [Menu] .
➊
Select one of the following options with the
➋
Navigation Key:
•
Alarm Ring Set: Set the alarm ring type by pushing the
Navigation Key left or right: 1 Time, Every 2min, or Mute.
•
Alarm Type: Set the alarm tone type by pushing the
Navigation Key left or right: Message Received or one of the
Bells, 1–4.
•
Alarm Volume: Set the alarm volume by pushing the
Navigation Key left/right.
•
Busy Alarm: To turn the alarm on/off, press .
➌
To save, press [Save].
79
Page 80

MENU FUNCTIONS
TEXT
QUICK TEXT
Allows you to edit the Quick Text list.
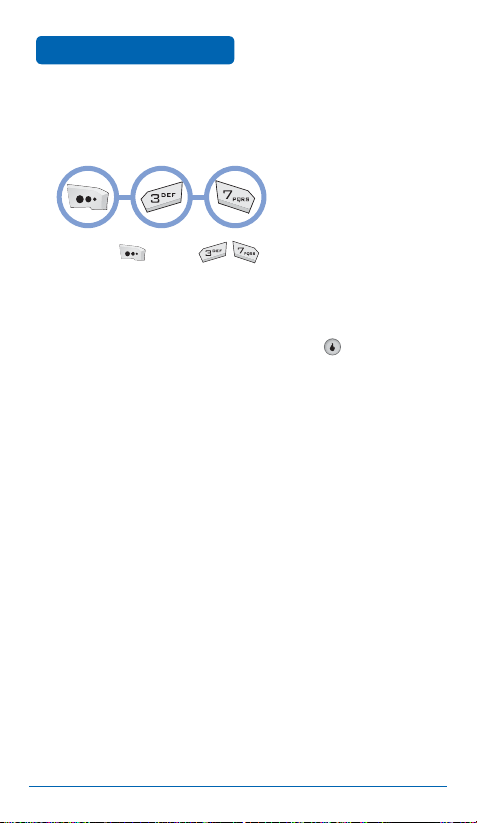
Press [Menu] .
➊
To add a message, press [New].
➋
Enter the message, then press .
➌
The Quick Text list is displayed.
➍
– To delete a message, press [Menu] and select
Delete.
– To enter a new message, press [New].
➎
Select a message and press . The selected
message will appear. To delete the message,
press [Del]. To send the message, press
[Write].
80
Page 81
TEXT
MENU FUNCTIONS
SPAM MSG SETTINGS
Sets spam options:
RESTRICTED LIST
Press [Menu] .
➊
To add a number to the spam list, press [New].
➋
Enter the phone number, then press [Done].
➌
The list of all spam phone numbers is displayed.
➍
– To delete a phone number, press [Del].
– To enter a new phone number, press [New].
➎
Select a phone number and press . The selected
phone number will appear. To edit it, press
[Edit], enter a new phone number, then press [ to
save the phone number.
81
Page 82

MENU FUNCTIONS
TEXT
RESTRICTED TEXT
Press [Menu] .
➊
To enter a new phrase, press [New].
➋
➌
Enter the phrase, then press .
The list of all restricted phrases is displayed.
➍
– To delete a phrase, press [Del].
– To enter a new phrase, press [New].
➎
Select a phrase and press . The selected phrase
appears. To edit it, press [Edit] and enter a new
phrase, then press to save the phrase.
SPAM ON/OFF
Press [Menu] .
➊
Press , turn Spam Blocking On/Off, then press
➋
again.
To save, press [Save].
➌
82
Page 83
CONTACT
The contact list stores up to 1200 entries, each of which can be
assigned to a group. Entries can be retrieved by name, phone
number, or group.
■
NEW CONTACT
Adds a new entry.
➊
To add a new entry to the contact list, press
MENU FUNCTIONS
[Menu] .
➋
To enter info, use the Navigation Key to select the
appropriate field, press , enter the info, then
press again.
•
Fields: First Name, Last Name, Group, Phone Numbers (with
Type), Image. Select Add Info to add fields.
Refer to page 37 for details on entering letters, numbers,
and symbols.
➌
To save the entry, press [Save]. To return to the
previous page, press .
83
Page 84

MENU FUNCTIONS
■
CONTACT LIST
Displays all the entries stored in your contact list. You can find an
entry quickly by entering all or part of a name.
Press [Menu] .
➊
➋
The list of names in your contact list is displayed
CONTACT
alphabetically.
Enter the name of the contact you are looking for
➌
and press , or scroll through alphabetically using
the Navigation Key.
All matching entries will be displayed. Highlight
➍
an entry and press [OK] to edit the entry.
Press [Find] to search for a contact. Press
[Menu] to select from the following options:
•
Send Message: Sends a text message to the selected
contact.
•
Set Speed Dial: Adds the selected contact to the speed dial
list.
•
New Contact: Creates a new contact.
•
Delete: Deletes the selected contact.
To call the selected number, press .
➎
84
Page 85

CONTACT
■
GROUPS
Allows you to classify contacts into groups.
MENU FUNCTIONS
ADD NEW GROUP
Press [Menu] .
➊
Press [Add].
➋
Enter a new group name.
➌
Press , select whether or not this should be a
➍
Secret Group, then press to save.
CHANGE GROUP NAME
Press [Menu] .
➊
Use the Navigation Key to select an existing group
➋
name.
Press [Menu] and select Edit.
➌
Enter a new group name. (Change other options for
➍
the group as desired.)
Press [Save] to save it.
➎
85
Page 86
MENU FUNCTIONS
CONTACT
DELETE GROUP
Press [Menu] .
➊
Use the Navigation Key to select the group.
➋
Press [Menu] and select Delete.
➌
Press , select Yes, then press to delete.
➍
CHANGE ORDER
Press [Menu] .
➊
Press [Menu] and select Change Order.
➋
Select Sort by Name or Sort by User.
➌
Press to sort.
➍
86
Page 87

CONTACT
■
SPEED DIALS
In idle mode, you can place a call to a number stored in speed dial
by pressing and holding the location number on the keypad. For a
2-digit location number, press the first number then press and hold
the second number.
Press [Menu] .
➊
➋
To assign a phone number to a location, select the
MENU FUNCTIONS
location and press .
•
If a phone number is already assigned to the location,
press [Del], select Yes , then press to delete it,
press [Edit] to edit it.
Select the desired contact with the Navigation Key
➌
or
and press .
Select the phone number with the Navigation Key
➍
and press .
If a phone number is set as Secret, you will have to enter
the password.
87
Page 88

MENU FUNCTIONS
■
CALL LOG
Displays information about all received and dialed calls.
CONTACT
ALL CALLS
Press [Menu] .
➊
➋
A list of the 40 most recent received and dialed calls
displays. If a number is stored in your contact list,
only the name appears. Otherwise, only the phone
number appears.
➌
To view details, press .
Call details include type of call, date, time, and phone
number.
Press to enter the selected number for dialing,
➍
or press [Del] to delete it. Press [Menu] to
select from the following options:
•
Calling Time: Displays past call times.
•
New Contact: Stores the number in a new contact.
•
Update Contact: Adds the number to an existing contact.
•
Contacts: If the number is stored in a contact list entry,
displays the entry.
•
Write Text Msg: Sends a message to the selected number.
•
Delete All: Deletes all call log entries.
88
Page 89

CONTACT
MENU FUNCTIONS
INCOMING CALLS
Press [Menu] .
➊
A list of the 20 most recent received calls displays.
➋
OUTGOING CALLS
Press [Menu] .
➊
A list of the 20 most recent dialed calls displays.
➋
89
Page 90

MENU FUNCTIONS
■
CALL TIMER
Checks the usage time and manages your calls within the limit you
set. The 11 timers include Voice Sent Time, Voice Received Time,
WWW Use Time, Data Sent Time, and Data Received Time:
CONTACT
LAST CALL
➊
Press [Menu] .
The last call timers display.
➋
To return to the previous page, press .
➌
ALL CALLS
Press [Menu] .
➊
all calls are displayed.
To initialize the call timers, press [Menu] and
➋
select one of the following:
•
Reset Voice Snd: Initializes sent voice call total.
•
Reset Voice Rcv: Initializes received voice call total.
•
Reset WWW: Initializes web usage total.
•
Reset Data Snd: Initializes sent data total.
•
Reset Data Rcv: Initializes received data total.
•
Reset All: Initializes total for all calls.
To return to the previous page, press .
➌
The timers for
90
Page 91

CONTACT
MENU FUNCTIONS
LIFETIME CALLS
Press [Menu] .
➊
The call timers for all calls made on the device
➋
displays.
To return to the previous page, press .
➌
91
Page 92

MENU FUNCTIONS
■
SERVICE NUMBER
Gives access to service numbers.
➊
Press [Menu] .
Select the desired number:
➋
•
Information (411)
•
Customer Care (611)
•
Emergency (911)
CONTACT
92
Page 93

CONTACT
■
SYNC CONTACTS
Allows you to synchronize your contacts between your mobile
device and your Helio online contact list.
➊
Press [Menu] .
➋
Select one of the following options using the
MENU FUNCTIONS
Navigation Key:
•
Sync Contacts: Syncs contacts with your online contact list.
•
Preview Sync: Previews the actions that are to be taken
during synchronization.
•
Username/Password: Sets your username and password for
your online contact list.
•
Help: Displays a help message.
93
Page 94

MENU FUNCTIONS
■
MY NUMBER
Displays and allows you to edit your information.
➊
Press [Menu] .
Change your information as desired: First Name,
➋
CONTACT
Last Name, Birthday, Mobile Phone Number, Home
Phone Number, Email Address, Home Address,
Picture.
To save your information, press .
➌
94
Page 95

APPS
■
THE LOST SISTER
The player becomes Jack, the main character of the game, and goes
to the front to rescue his kidnapped sister from the wicked wizard
Pandemes. In a previous war, Jack killed Pandemes’s two sisters—to
exact his revenge, Pandemes has kidnapped Jack’s sister and waits
for Jack with his monsters in the dungeon’s darkness. To rescue
his sister, Jack must go to the dungeon for the final battle against
Pandemes.
MENU FUNCTIONS
Select
3D Game
GAME FEATURES
•
RPG game with 3D background
•
You can level up by obtaining green gems hidden in the
dungeon. As your level goes up, you can acquire special
skills.
•
Light and fog effects
•
Background music and effects created with high quality
MIDI
MAIN CHARACTERS
Jack
Zombie
Bone
Zombie
Cleaver
Zombie
OrcSoul Demon Barbarian Pandemes
Shotgun
Zombie
95
Page 96

MENU FUNCTIONS
APPS
WEAPONS
Short Sword Long Sword Quarterstaff Battleaxe Damage Spell
SPECIAL ITEMS
•
Key: Moves Jack on to the next stage.
•
Armor: Refills Jack’s energy when he is in a critical situation.
•
Double Damage: Doubles the damage to an enemy for
10 seconds.
•
Damage Spell: A magical attack from a long distance. You need
to acquire an item to use this attack, and the number of times
you can use it is limited.
•
Short Sword: Jack’s fundamental weapon.
•
Long Sword: An upgraded form of the Short Sword.
•
Quarterstaff: The weapon with the longest attack range.
•
Battleaxe: The most powerful weapon Jack can use.
•
Gem: Jack uses these to level up.
MAIN MENU
•
New Game: Starts a new game
from the first stage.
•
Load Game: Loads a saved game.
•
Options: Background music, sound
effects, vibration, on/off menu.
•
Instruction: Displays information
on game controls, weapons, and
items.
•
Quit: Ends the game.
96
Page 97

APPS
MENU FUNCTIONS
GAME SCREENS
•
Player Health: Shows Jack's
remaining energy. If the gauge
runs out, Jack dies.
•
Enemy Health: Shows the
energy level of the enemy that
is fighting against you.
•
Damage Spells: Shows the
number of magical attacks
available for use.
•
Gem Counter: Shows the number of gems Jack has obtained. If
Jack collects 20 gems, the play goes up by one level.
•
Key: An item Jack must obtain to finish the stage being played.
If Jack obtains a key, it is displayed at the bottom of the screen.
Jack can level up by obtaining green gems hidden in the
dungeon. Every time he collects 20 gems, he goes up one
level. As Jack’s level advances, he can attain various skills.
However, there are many demons and zombies wandering
around the gems.
GAME CONTROL KEYS
Secondary AttackPrimary Attack
Change Weapon
4-Way Direction
Control
Make Selection
Pause Game
or
Go To Previous Screen
or
Quit Game (Main Menu)
97
Page 98
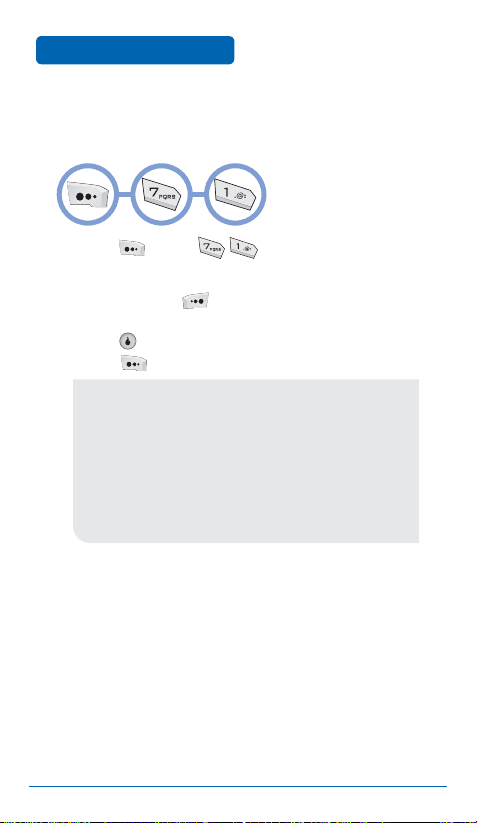
MENU FUNCTIONS
■
CALENDAR
Allows you to set event reminders.
➊
Press [Menu] .
➋
Use the Navigation Key to choose a date in the
PLAN
calendar. Press to toggle the display mode
between the monthly, weekly, and daily views.
Press [View] to view events on the selected date.
Press [Menu] to select one of the following:
•
New Event: Sets a new event on the selected date.
•
New Anniversary: Sets a new anniversary on the selected
date.
•
Delete Range: Deletes events or anniversaries for a
selected date range.
•
View List: Displays a list of all events or anniversaries.
•
Alarm Settings: Allows you to change alarm settings for
events and anniversaries.
•
View Month: Jumps to a specified month.
NEW EVENT
➀ Select Set Time (for a non-repeating event),
Everyday, Every Week, Every Month, or Every Year.
➁ Set the following options:
PERIOD
(For repeating events.) Use the keypad to enter the
date range.
98
Page 99

PLAN
MENU FUNCTIONS
TITLE
Use the keypad to enter a title.
START TIME
Use the keypad to set a start time and then press
to select A.M. or P.M.
END TIME
Use the keypad to set an end time and then press
to select A.M. or P.M.
CONTENTS
Use the keypad to enter a description for the event.
ALARM ON
Press the Navigation Key left/right to turn the alarm
on/off.
ALARM TIME
Use the keypad to set an alarm time and then press
to select A.M. or P.M.
➂ Press [Save] to save the event.
99
Page 100

MENU FUNCTIONS
PLAN
NEW ANNIVERSARY
➀ Set the following options:
TITLE
Use the keypad to enter a title.
ANNIVERSARY
Use the keypad to enter the date of the anniversary.
ANNUALLY
Press to set an annual reminder.
CONTENTS
Use the keypad to enter a description for the
anniversary.
➁
Press [Save] to save the anniversary.
100
 Loading...