


Panasonic of North America 96NKX WT126 User Manual
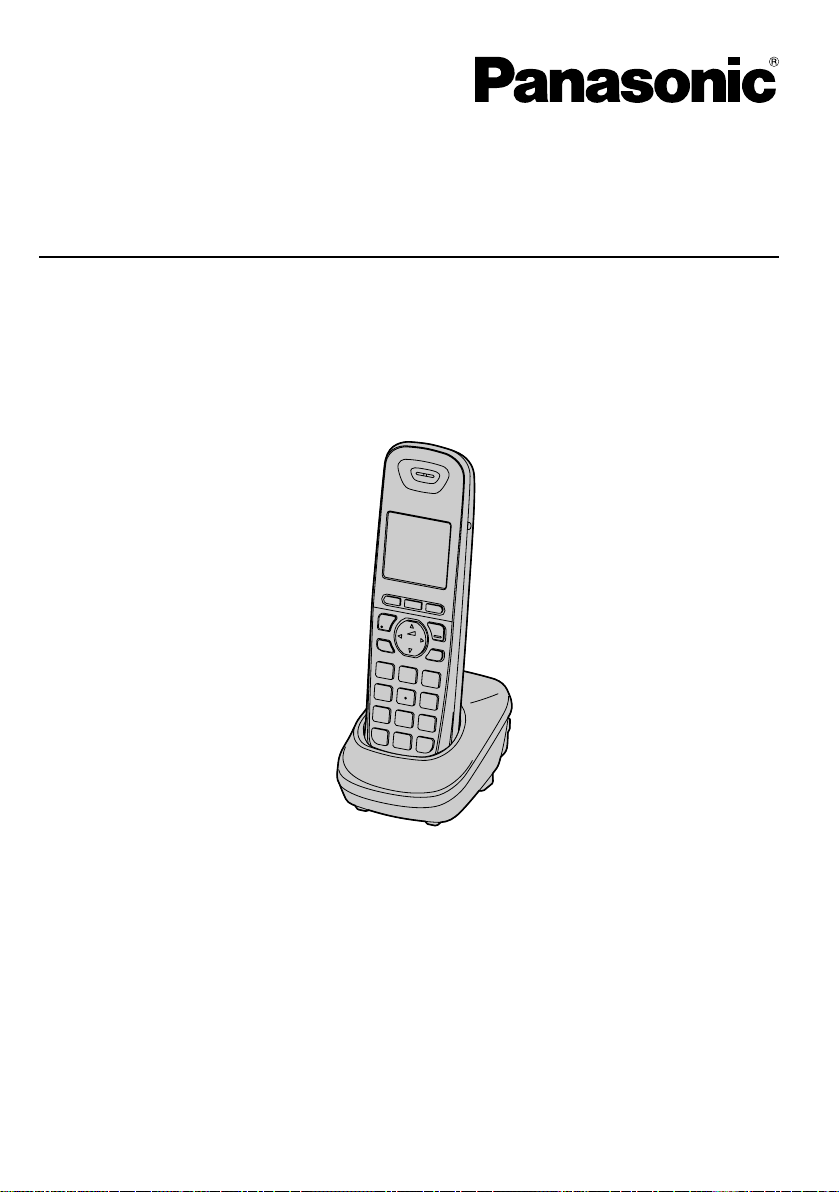
Model No.
Operating Instructions
DECT 6.0 Portable Station
KX-WT125/KX-WT126
Thank you for purchasing a Panasonic DECT 6.0 Portable Station.
Please read this manual carefully before using this product and save this manual for
future use.
Please use only the batteries provided and charge the batteries for about 7 hours before
using the handset for the first time.
Document Version 2010-10

Table of Contents
Table of Contents
Before Initial Use ......................................................................................4
Accessories (included) ..................................................................................4
Installation ......................................................................................................5
Battery Installation ......................................................................................5
Charger Connection ....................................................................................5
Charging the Batteries ................................................................................6
Charger Wall Mounting ...............................................................................6
Attaching the Belt Clip .................................................................................7
Before Operating the Handset ................................................................8
Location of Controls ......................................................................................8
Key Lock ...................................................................................................10
Silent Mode ...............................................................................................10
Advanced Voice Clarity .............................................................................10
Selecting the Display Language .................................................................11
Editing the Standby Display Name .............................................................12
Editing the Names of the Flexible CO Keys ...............................................13
Editing the Names of the Soft Keys for the Flexible CO Keys .................14
Adjusting the Ringer Volume ......................................................................15
Adjusting the Ringer Volume or Turning the Ringer off while
Ringing ..........................................................................................................15
Changing the Vibrate Setting (KX-WT126 only) ........................................16
Adjusting the Receiver/Speaker/Headset Volume ....................................16
Display ..........................................................................................................17
Soft Keys .......................................................................................................18
Operation Outline .........................................................................................19
Function Keys ..............................................................................................20
Flexible CO Keys ..........................................................................................22
Operation ................................................................................................23
Making Calls .................................................................................................23
Searching for an item stored in the Phonebook ........................................27
Receiving Calls .............................................................................................30
Caller ID ....................................................................................................31
During a Conversation .................................................................................32
Useful Features ............................................................................................34
Making Use of the Voice Mail Service ........................................................39
Using the Handset Phonebook .............................................................41
Handset Phonebook ....................................................................................41
Private Ring ..............................................................................................41
Storing an Item in the Handset Phonebook ...............................................42
Storing a New Item ...................................................................................42
Editing a Stored Item ................................................................................43
Storing an Item Using Predialing ..............................................................45
Storing an Item Using the Outgoing Call Log ............................................46
Storing an Item Using the Incoming Call Log ............................................47
Storing an Item Using the PBX System/Extension Phonebook ................48
2

Table of Contents
Editing Category Names ...........................................................................49
Assigning Hot Keys .....................................................................................50
Entering Characters .....................................................................................51
Character Mode Table ..............................................................................52
Locking the Handset Phonebook ...............................................................53
Locking/Unlocking the Handset Phonebook .............................................53
Unlocking the Handset Phonebook Temporarily .......................................53
Deleting Stored Items ............................................................................54
Deleting Stored Items in Handset Phonebook/Hot Key Dial/Outgoing Call
Log/Incoming Call Log ................................................................................54
Handset Phonebook .................................................................................54
Hot Key Dial ..............................................................................................55
Outgoing Call Log .....................................................................................56
Incoming Call Log .....................................................................................56
Configuring Handset Settings ..............................................................57
Changing the Initial Settings .......................................................................57
Handset Setting Menu Layout ...................................................................58
Memo Alarm Setting .................................................................................65
Troubleshooting and Error Messages .................................................68
Troubleshooting ...........................................................................................68
Error Messages ............................................................................................70
Important Information ............................................................................71
Battery Information ......................................................................................71
Important Safety Instructions .....................................................................72
For Your Safety ............................................................................................72
For Best Performance ..................................................................................74
Security Information ....................................................................................75
FCC and Other Information .........................................................................76
Customer Information ...............................................................................77
3
Before Initial Use
Please read "Important Information" on page 71 before using. Read and understand
all instructions.
Before Initial Use
Accessories (included)
AC adaptor: 1
[Part No.]
PQLV219
Charger: 1 Battery: 2 Belt Clip: 1
[Part No.] [Part No.] [Part No.]
HHR-65AAAB
Belt Clip Holder: 1 Battery Cover: 1 Screws and Washers: 2
[Part No.] [Part No.] [Part No.]
• To order accessories, call toll free 1-800-332-5368.
4
To AC Outlet
Hooks
Before Initial Use
Installation
Battery Installation
Open the battery cover, insert the batteries, and close the cover as indicated below.
Charger Connection
Connect the AC adaptor to the charger.
• The AC adaptor should be connected to a vertically oriented or floor-mounted AC outlet.
Do not connect the AC adaptor to a ceiling-mounted AC outlet, as the weight of the
adaptor may cause it to become disconnected.
• Fasten the AC adaptor cord to the cord holder.
• Use only the included Panasonic AC adaptor. (See "Accessories (included)" on page
4.)
WARNING
• To reduce the risk of fire or electric shock, do not overload AC outlets and extension
cords.
• Do not bundle the charger’s AC adaptor cord with the power cords of machines located
nearby.
• Completely insert the AC adaptor/power plug into the AC outlet. Failure to do so may
cause electric shock and/or excessive heat resulting in a fire.
5
25 mm
(1 in)
for charger
Washer
Drive the screw
to this point.
25 mm
(1 in)
Screws
(Included)
Before Initial Use
Charging the Batteries
At the time of shipment, the batteries are not charged. Please charge the batteries for
about 7 hours before using the handset for the first time.
• When the batteries are fully charged, the charge
indicator goes off and "Fully charged" is displayed.
For more information, see "Battery Information" on
page 71.
• It is normal for the handset and charger to feel warm
while the batteries are charging.
• Keep devices sensitive to magnetic fields away from the
charger.
• Use only the included charger.
Charger Wall Mounting
1. Install the two screws in the wall, spacing them 25 mm (1 in) apart.
2. Mount the charger securely on the wall.
• Please copy this page and use as a reference for wall mounting.
Make sure to set the print size to correspond with the size of this page. If the dimension
of the paper output still deviates slightly from the measurement indicated here, use the
measurement indicated here.
• When mounting the charger, ensure that the correct screws are used for the type of wall.
• Make sure that the wall that the charger will be attached to is strong enough to support
the total weight of the handset and charger (approx. 190 g). If not, it is necessary for the
wall to be reinforced.
• When this product is no longer in use, make sure to detach it from the wall.
• When inserting screws, avoid pipes and electrical cables, etc, that may be present/
buried.
• The screw heads should not be flush to the wall.
• Certain types of wall may require plugs to be anchored in the wall before the screws are
inserted.
6
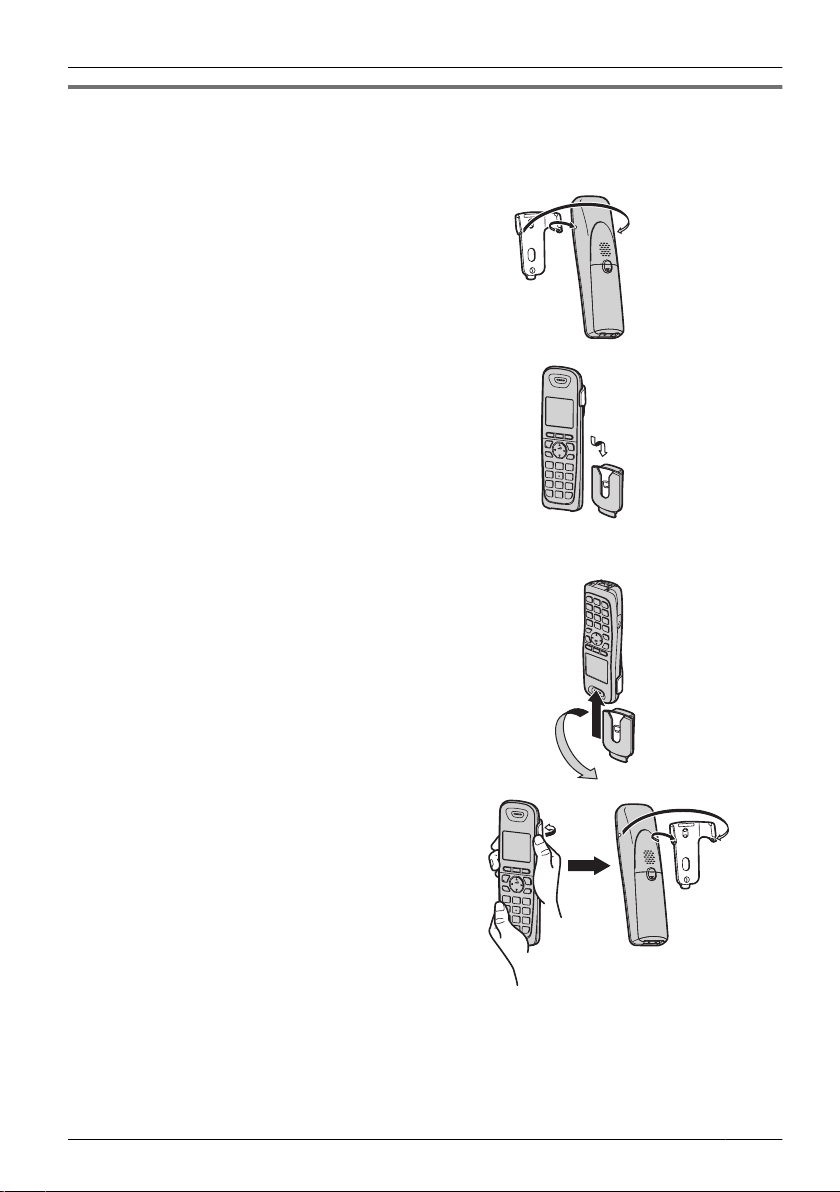
Attaching the Belt Clip
You can attach the handset to your belt by following the steps below.
[To attach]
1 Insert the clip into the designated notches in
the handset.
2 Slide the clip into the holder until it clicks.
[To remove]
1
Make sure to turn the handset 180° when you
take it off.
Before Initial Use
2 Remove the belt clip.
7
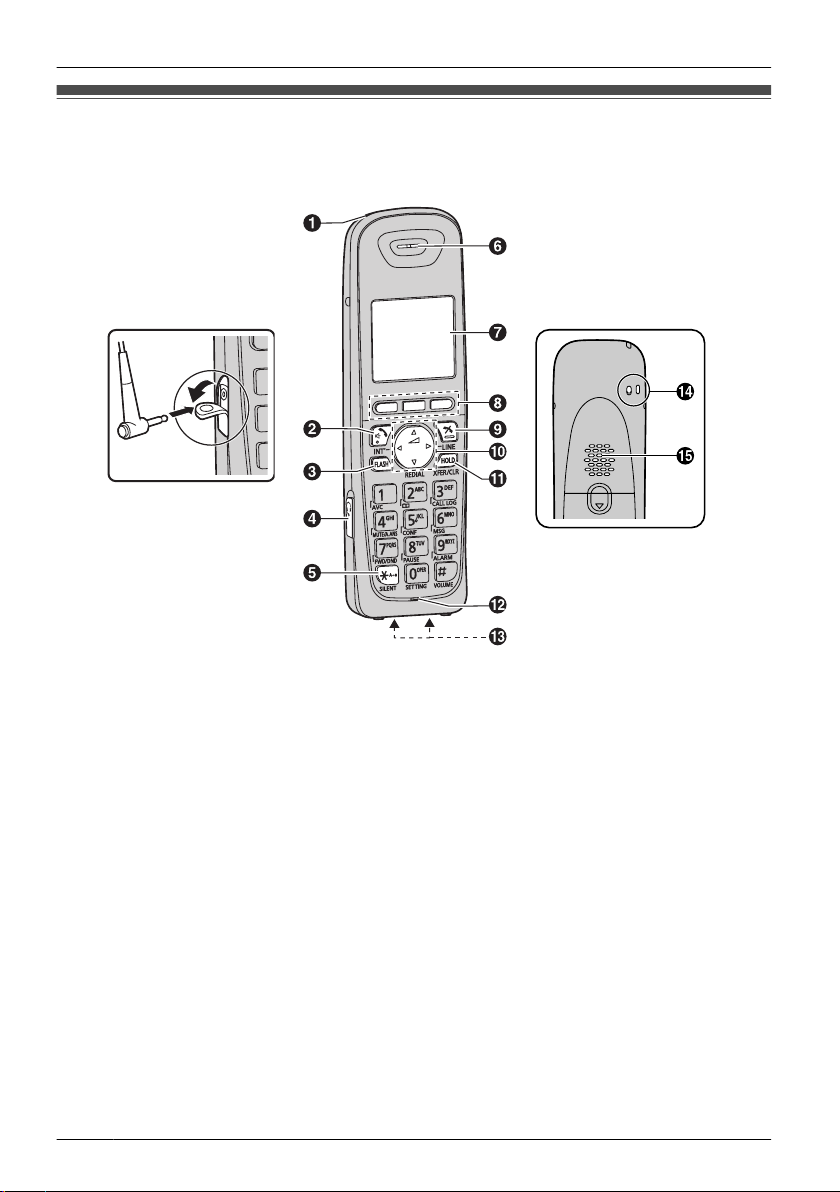
Before Operating the Handset
Location of Controls
Before Operating the Handset
The headset is an optional
accessory.
Please use only a
Panasonic headset below.
KX-TCA93/KX-TCA94/
KX-TCA95/KX-TCA400/
KX-TCA430
Open the cover.
[Back View]
A
Ringer/Charge Indicator
B TALK/SP-PHONE (Speakerphone) Key
Used to make or answer calls, or toggle between the Receiver/Hands-free*1 mode
during a conversation.
C FLASH Key
Used to disconnect the current call and make another call without hanging up.
D Headset Jack
E Silent Mode Key
Used to turn Silent Mode on or off when pressed for more than 2 seconds in standby
mode. For more information, refer to "Silent Mode" on page 10.
F Receiver
G Display
Refer to "Display" on page 17.
H Soft Keys
The handset features 3 soft keys. By pressing a soft key, you can select the feature
shown directly above it on the display.
I CANCEL Key
Used to end calls or exit Function mode.
8

Before Operating the Handset
J Navigator Key
Used to adjust the ringer/receiver volume or move the cursor to select an item.
In standby mode, pressing each arrow enables the following functions:
UP ® Opens the Phonebook Menu.
DOWN ® Displays the Outgoing Call Log.
Left ® Makes or answers intercom calls.
Right ® Displays a list of flexible CO keys.
K HOLD/TRANSFER/CLEAR Key
Used to place a call on hold or transfer a call to another party. It is also used to clear
digits or characters. For more information on switching between HOLD and
TRANSFER, refer to "Key Option" on page 61.
L Microphone
M Charge Contacts
N Strap Holes
Used to attach phone straps and similar items.
O Speaker
*1 You can talk with the other party alternately through the speaker in a quiet room. During a
conversation using a headset, Hands-free mode does not work.
9
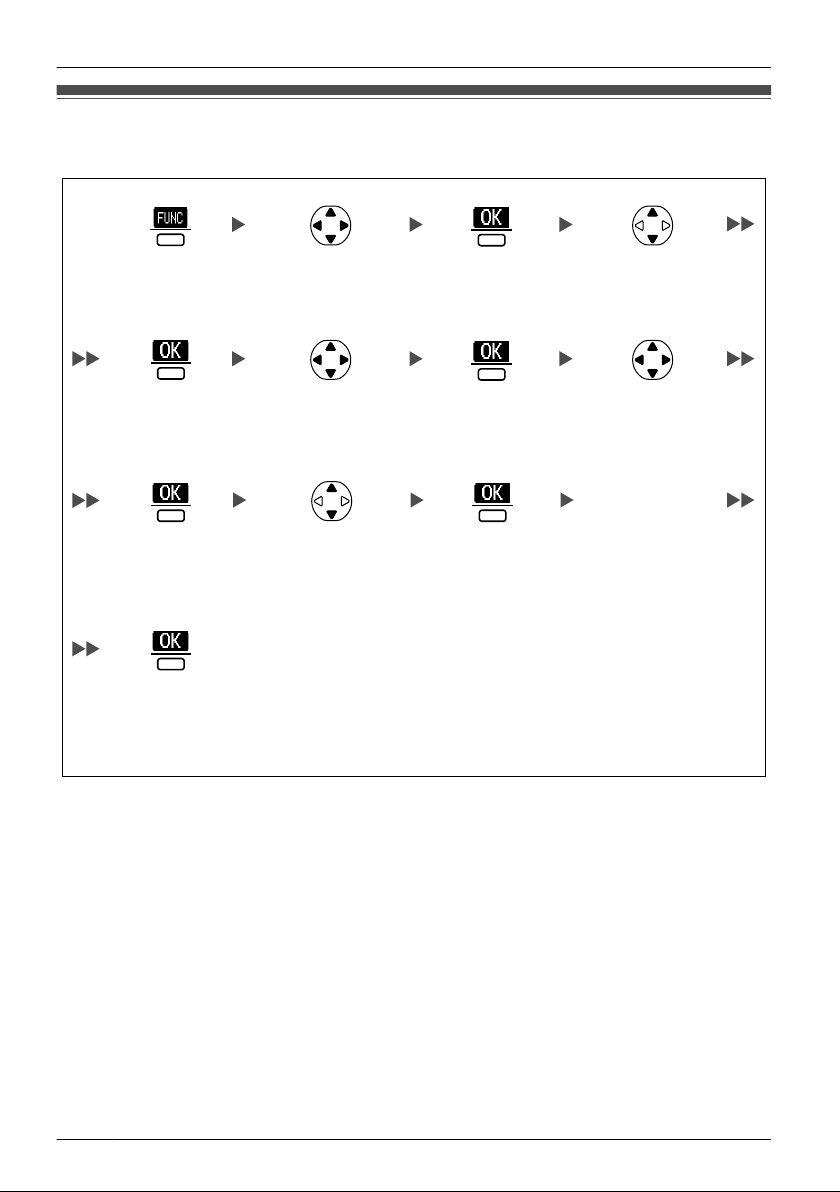
Select
"1:Voice
Clarity".
Press the
center soft key.
Press the
center soft key.
Select "On".
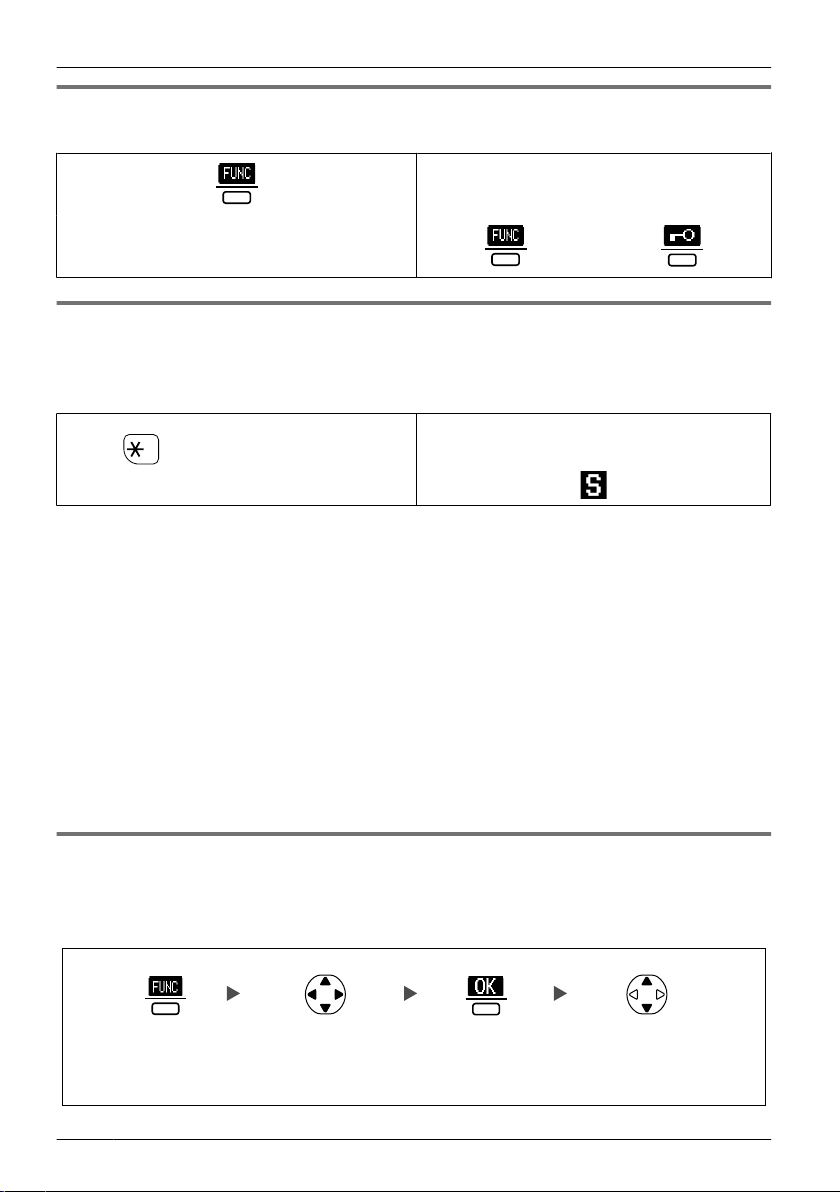
Before Operating the Handset
Key Lock
You can lock all keys while the handset is in standby mode.
[Display Icon]
Unlocked Locked
Press the center soft key for more than 2
seconds to lock/unlock.
Silent Mode
Silent Mode turns off the ringer and sets the handset to vibrate*1 when calls are received.
This can be useful in situations where you do not want to be disturbed, such as during a
meeting.
[Display Icon]
Press for more than 2 seconds to set/
cancel the Silent Mode.
When Silent Mode is active, the microphone’s sensitivity is increased, and the following
features are turned off automatically, regardless of their settings.
– Ringer Volume
– Ring On Charger
– Auto Answer
– Key Tone
– Range Alarm
– Low Battery Alarm
• If you set the handset on the charger during Silent Mode, the handset will not vibrate.
*1 The vibrate feature is available only for the KX-WT126.
*2 Please note that if you set the handset on the charger while receiving an incoming call, vibration
will stop. Once the vibration stops, the handset will not vibrate again for that call, even if the handset
is lifted up again. (If Quick Answer is set, lifting up the handset will answer the call.)
Silent Mode
*2
Advanced Voice Clarity
When this feature is enabled, clear conversation is provided on both the sending side and
the receiving side. It is useful in noisy environments such as warehouses, manufacturing
plants, restaurants, and garages.
10
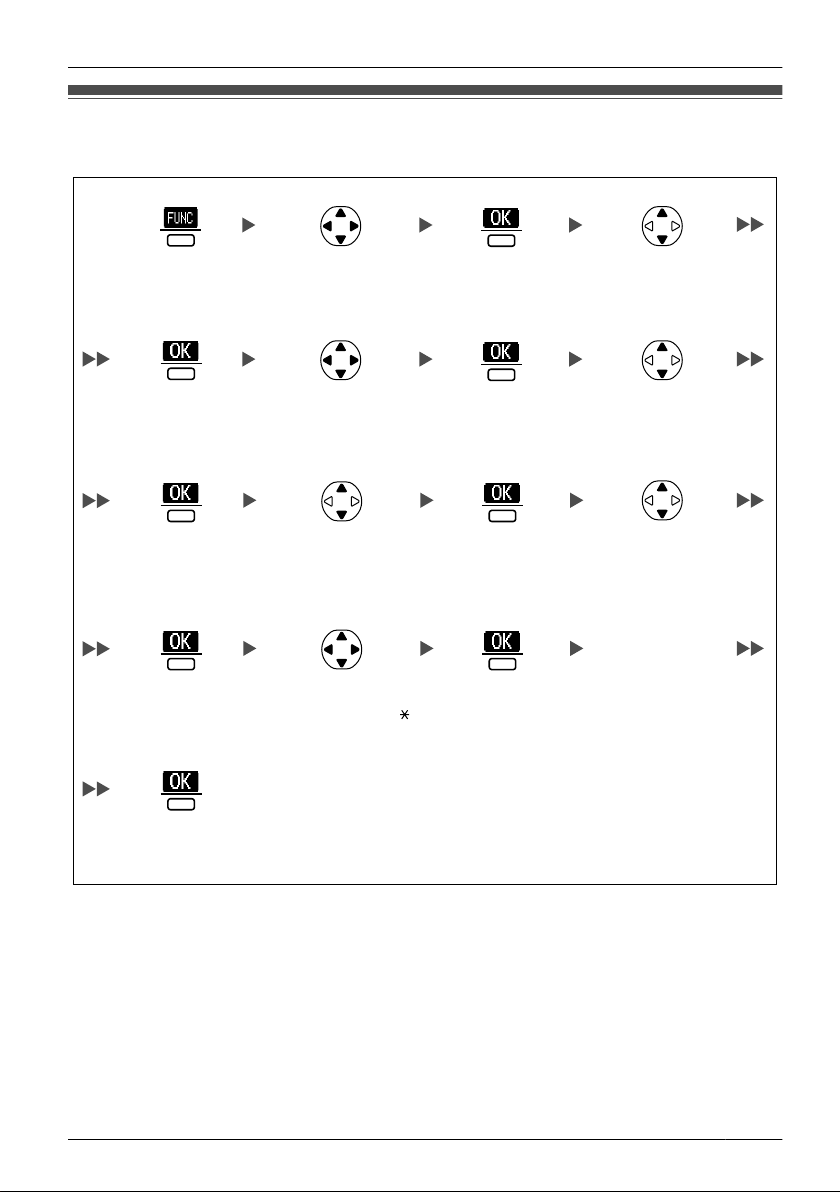
Select
"0:Setting".
Press the
center soft key.
Press the
center soft key.
Select "Setting
Handset".
Select "Display
Option".
Press the
center soft key.
Press the
center soft key.
Select
"Language".
Select the desired
language.
(Auto/English/
Español/
FRANÇAIS)
Press the
center soft key.
Press the
center soft key.
Before Operating the Handset
Selecting the Display Language
You can select the language displayed on your handset.
• When set to "Auto", the language settings of the PBX will be used.
• The display language of both the handset and PBX can be selected, and both should
be set to the same language. For more information, refer to the user documentation for
your PBX.
11
Select
"0:Setting".
Press the
center soft key.
Press the
center soft key.
Select "Setting
Handset".
Press the
center soft key.
Press the
center soft key.
Select "Standby
Display".
Select "Edit".
Press the
center soft key.
Press the
center soft key.
Enter name.
(max. 16 characters)
Select "Display
Option".
Press the
center soft key.
Before Operating the Handset
Editing the Standby Display Name
You can edit the name displayed when the handset is in standby mode.
• To enter characters, see page 51.
12
Select
"0:Setting".
Press the
center soft key.
Press the
center soft key.
Select "Setting
Handset".
Press the
center soft key.
Press the
center soft key.
Select "F-CO
Key Name".
Select the desired
base. (Base 1-4)
Press the
center soft key.
Press the
center soft key.
Enter name.
(max. 12 characters)
Select "Key
Option".
Press the
center soft key.
Select "Text".
Select the desired
CO Key No. [0-9, ,
#].
Press the
center soft key.
Press the
center soft key.
Before Operating the Handset
Editing the Names of the Flexible CO Keys
You can edit a name for each Flexible CO Key of the handset.
• To enter characters, see page 51.
13
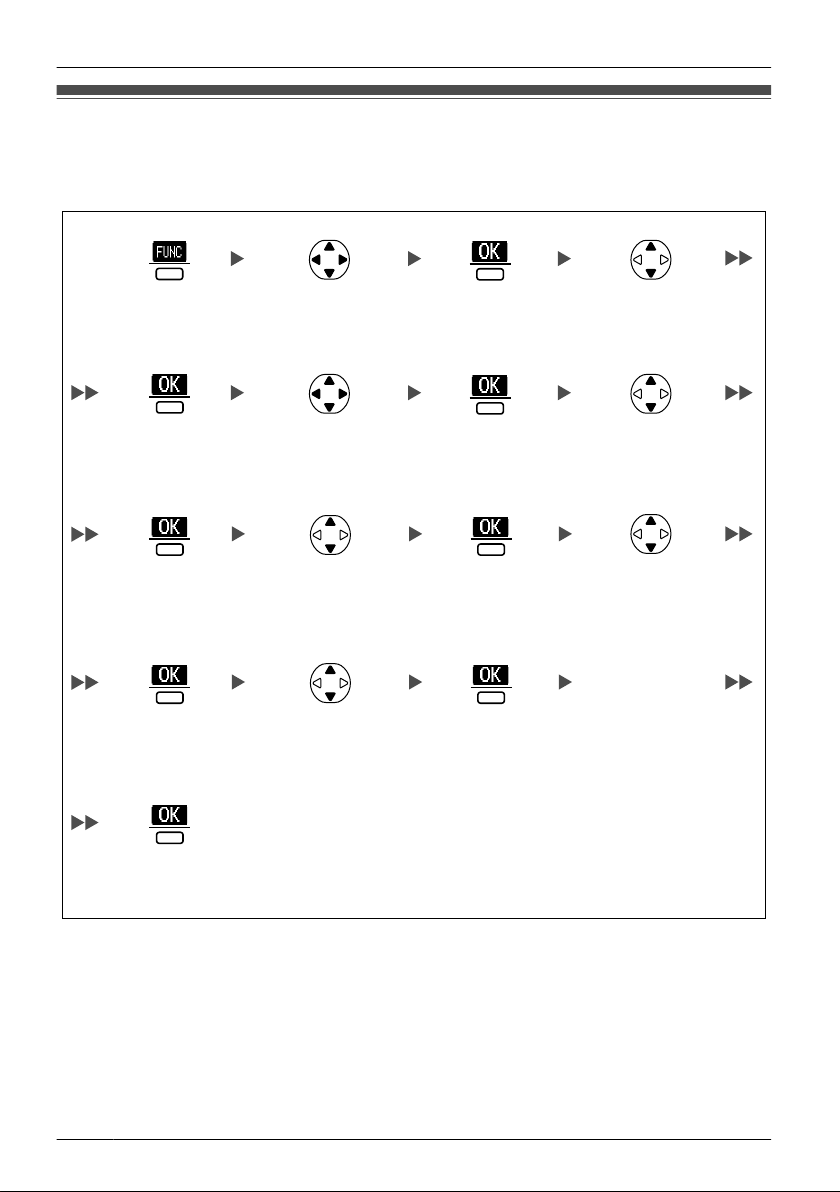
Select
"0:Setting".
Press the
center soft key.
Press the
center soft key.
Select "Setting
Handset".
Press the
center soft key.
Press the
center soft key.
Select "F-CO
Key Name".
Select the desired
base. (Base 1-4)
Press the
center soft key.
Press the
center soft key.
Enter name.
(max. 5 characters)
Select "Key
Option".
Press the
center soft key.
Select "Soft
Key".
Select the desired
CO Key No. [1, 2].
Press the
center soft key.
Press the
center soft key.
Before Operating the Handset
Editing the Names of the Soft Keys for the Flexible CO Keys
You can edit the name of the Soft Key for each Flexible CO Key of the handset.
• To enter characters, see page 51.
14
Adjusting the Ringer Volume
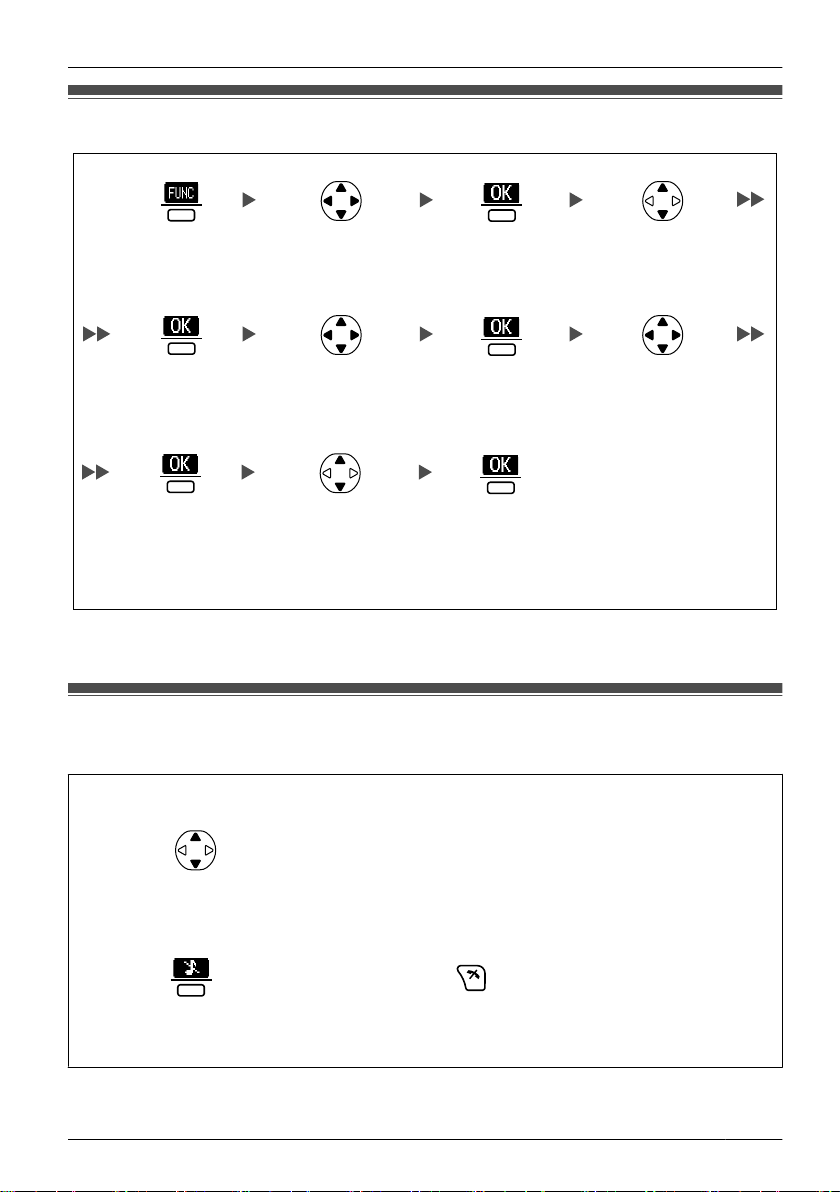
Select
"0:Setting".
Press the
center soft key.
Press the
center soft key.
Select "Setting
Handset".
Press the
center soft key.
Press the
center soft key.
Select "Ringer
Volume".
Select "Incoming
Option".
Press the
center soft key.
Press the
center soft key.
Select the desired
setting. (Step Up/
Step Down/
Level 1-6/Off)
OR
Press the
center soft key.
Press CANCEL.
Before Operating the Handset
• To set the ringer pattern, see "Incoming Option" on page 60.
Adjusting the Ringer Volume or Turning the Ringer off while Ringing
While receiving a call
[To adjust the ringer volume]
Press Up or Down to adjust the volume.
[To turn the ringer off]
*1 The adjusted volume level will also be used for subsequent calls.
*1
15

Select
"0:Setting".
Press the
center soft key.
Press the
center soft key.
Select "Setting
Handset".
Press the
center soft key.
Press the
center soft key.
Select "Vibrate".
Press the
center soft key.
Press the
center soft key.
Select "Incoming
Option".
Select one of the
following:
- Vib.& Ring
- Vib. Ring
- Off
Before Operating the Handset
• If you attach the headset while receiving an incoming call, the ring from the handset
does not switch to the headset. If you attach the headset before receiving an incoming
call, and headset ringer is set to "On", a tone will be heard from the headset. If Vibrate
is set to on (KX-WT126 only), the handset will vibrate whether a headset is attached or
not.
Changing the Vibrate Setting (KX-WT126 only)
• To set Vibrate only, without ringing, select "Vib.& Ring" and set the Ringer Volume
to off, or turn Silent Mode on. (See page 10, 15.)
Adjusting the Receiver/Speaker/Headset Volume
During a conversation
Press Up or Down to adjust the volume.
(Receiver Volume—Level 1-4, Speaker Volume—Level 1-6, Headset Volume—Level 1-4)
16
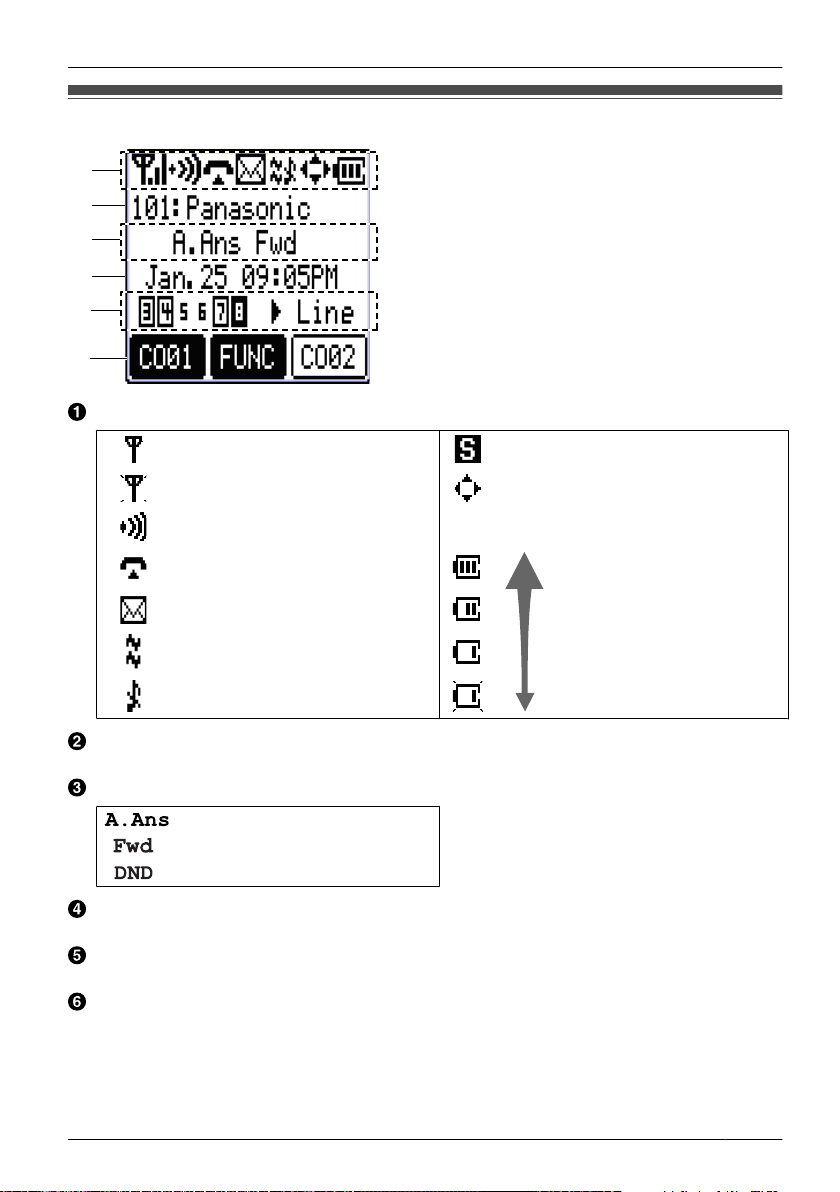
Display
E
F
A
B
C
D
Pictograph
Before Operating the Handset
Within range of a Cell Station (CS) Silent Mode (See page 10.)
Out of range Navigation Key Guidance
Intercom Indicator
Off-hook Status Full
Message Waiting
Vibrate (See page 16.)
Ringer Volume Off (See page 15.)
Battery Indicator
*1
Low
Needs to be charged.
Extension Number and Name
To edit the standby display name, see page 12.
Handset Status Information
Auto Answer
Call Forwarding (See page 34.)
Do Not Disturb (See page 34.)
Date and Time Display
If there are missed calls, that information will be displayed instead of the date and time.
Flexible CO Key Status
For more information, see page 22.
Soft Keys
For more information, see page 18.
*1 See "Battery Information" on page 71.
17
Before Operating the Handset
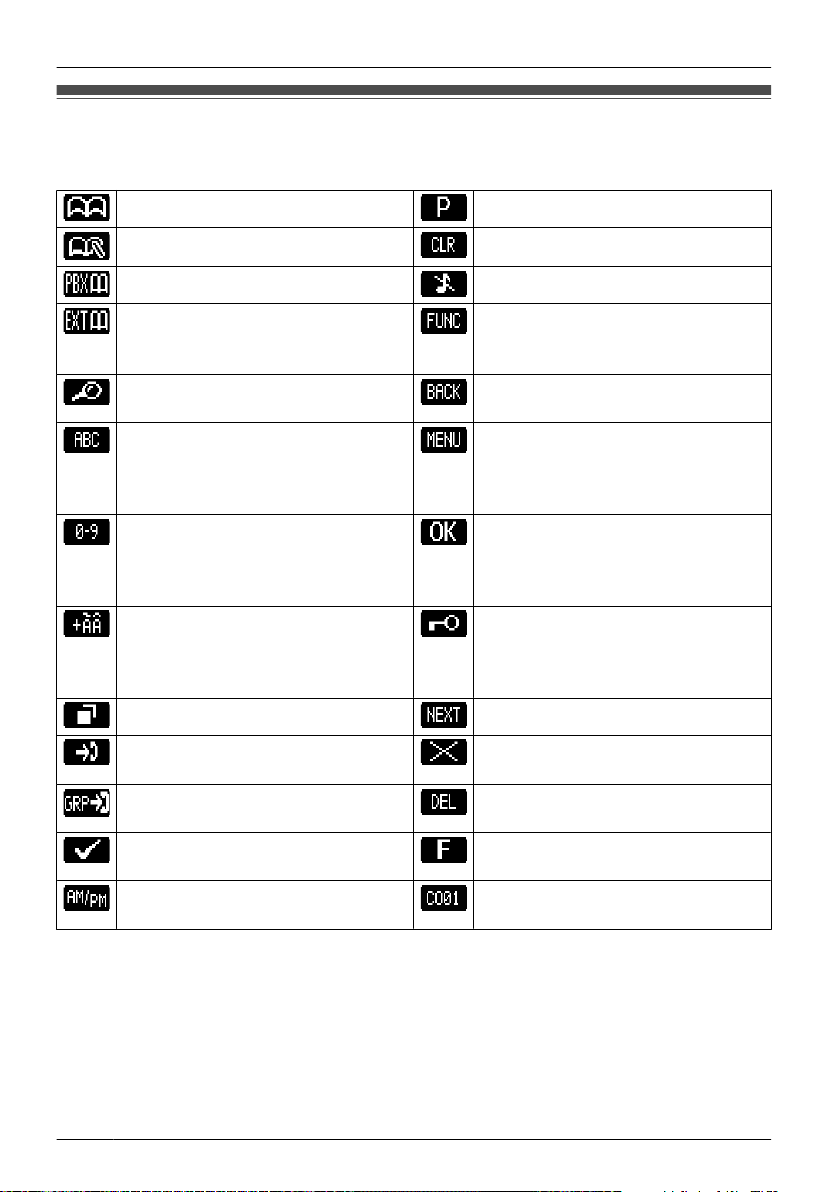
Soft Keys
Icons and information shown on the display will vary depending on the context. To select
an item shown on the display, press the corresponding soft key.
Opens the Phonebook. Inserts a dialing pause.
Stores a new item in the Phonebook. Clears digits or characters.
Opens the PBX System Phonebook. Turns the ringer off.
Opens the PBX Extension
Phonebook.
Searches for an item in the
Phonebook alphabetically.
Displayed when in Alphabetic
character entry mode.
Pressing this key switches to Numeric
character entry mode.
Displayed when in Numeric character
entry mode.
Pressing this key switches to Special
character entry mode.
Displayed when in Special character
entry mode.
Pressing this key switches to
Alphabetic character entry mode.
Displays the Outgoing Call Log. Advances to the next display.
Displays the Incoming Call Log. Used to enter an "X" when storing the
Displays the Incoming Call Log
Group.
Used to select an item when in setting
mode.
Used to select AM or PM when setting
the Memo Alarm feature.
Opens the function key list.
Pressing this key for more than 2
seconds locks all keys.
Returns to the previous display.
Opens the list menu (edit/delete in the
Phonebook, etc.).
Confirms the entry.
Displayed when in Key Lock mode.
Pressing this key for more than 2
seconds unlocks the keys.
Line Access CD.
Used to clear the Memo Alarm display
setting.
Used to register the handset with the
PBX simply.
Used to seize an outside line in order
to make or receive a call.
18
[Function Keys]
*2
[Outgoing Log]
[Intercom] [In standby mode] [Flexible CO Keys]
[Phonebook]
*1
[Incoming Log]
[Group Log]
Before Operating the Handset
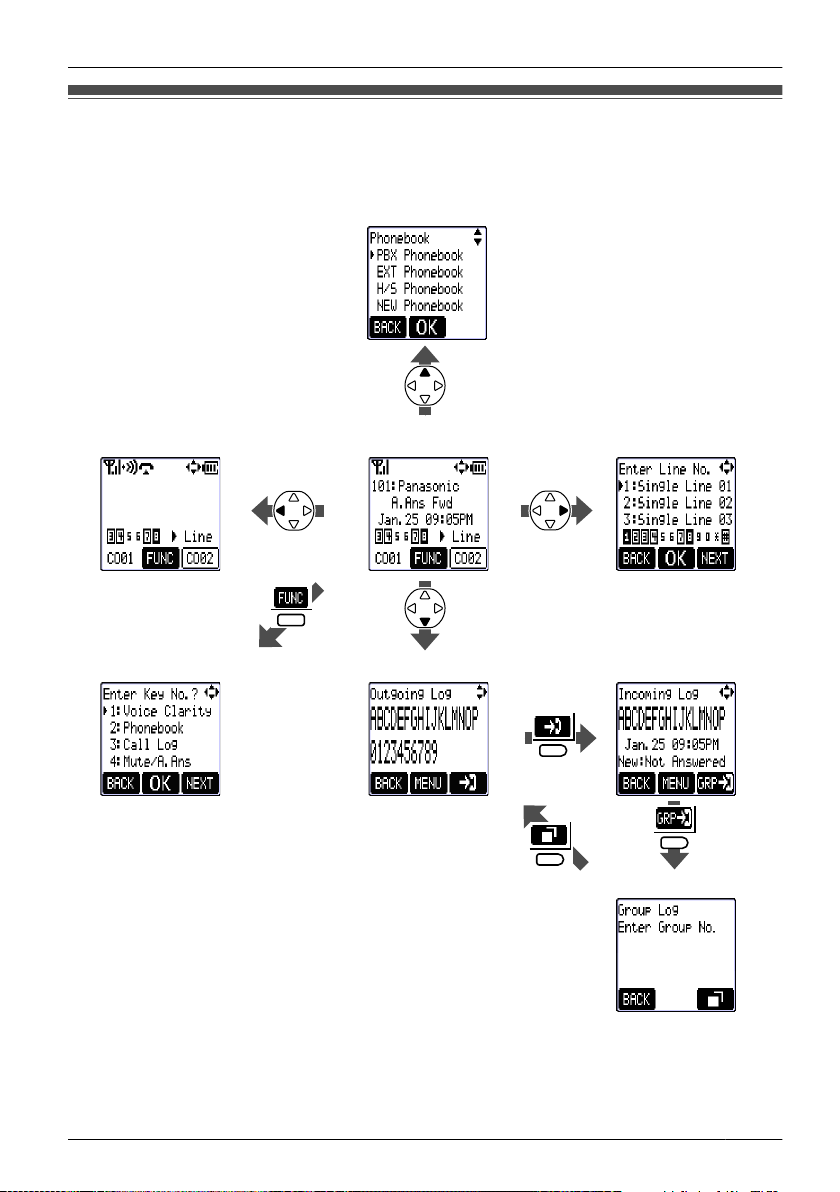
Operation Outline
Handset functions are accessed through the display menu and selected with the Navigator
Key and soft keys.
*1 For more information, see page 41.
*2 For more information, see page 20.
19
Before Operating the Handset
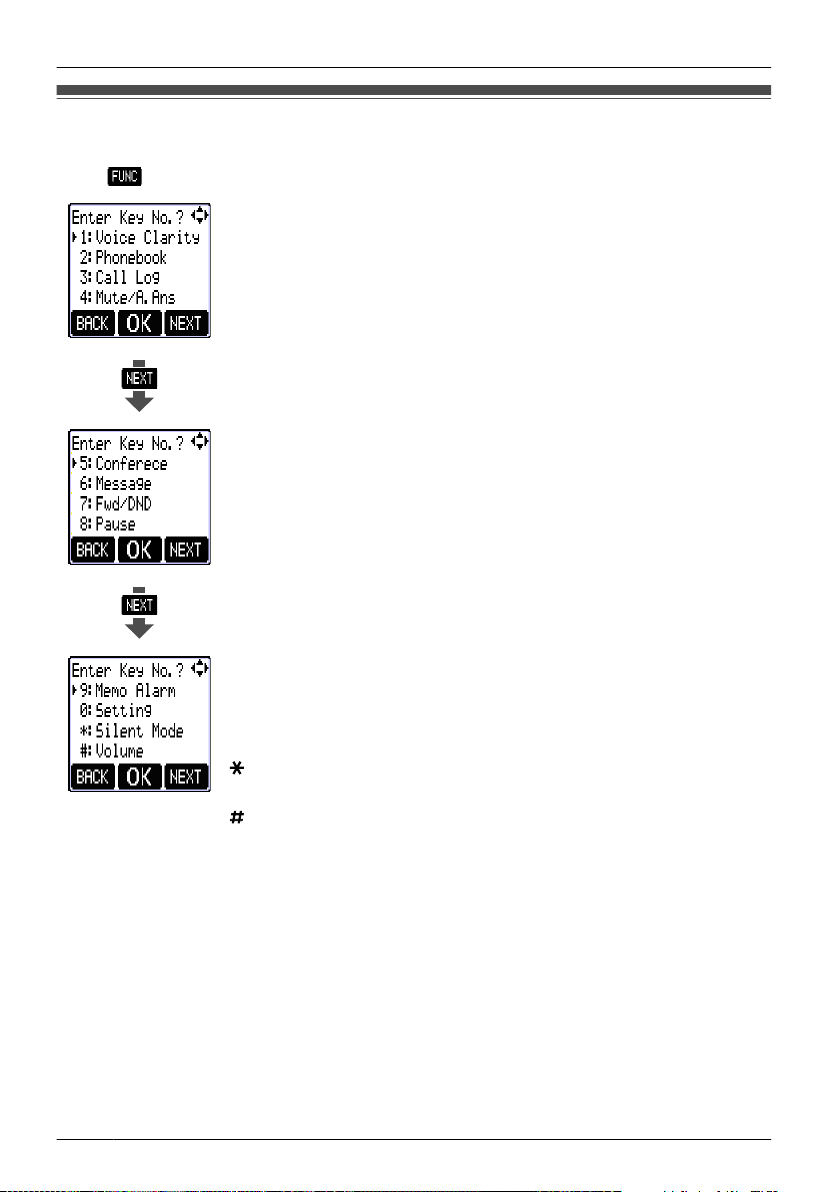
Function Keys
Handset functions can be activated through the display key list.
Press
(the center soft key) to display the function key list.
1: Voice Clarity
Reduces background noise to make voice communication clearer.
2: Phonebook
Makes a call using the PBX/EXT/Handset Phonebook.
3: Call Log
Makes a call using the Incoming/Outgoing Call Log.
4: Mute/Auto Answer
Turns the microphone mute feature on or off during a conversation.
Answers an incoming call automatically in hands-free mode.
"A.Ans" is displayed in standby mode.
5: Conference
Establishes a multiple-party conversation.
6: Message
Refers to the message left on your handset or calls back the
message sender.
7: Fwd/DND
Displays and/or sets Call Forwarding and Do Not Disturb.
8: Pause
Inserts a dialing pause.
9: Memo Alarm
Accesses the "Memo Alarm" settings.
0: Setting
Enters Setting Handset mode or PBX Personal Programming mode.
: Silent
Turns Silent Mode on or off.
: Volume
Adjusts the ringer volume in standby mode, and adjusts the
Receiver/Speaker/Headset volume during a conversation.
• For PBX Personal Programming, refer to the user documentation for your PBX.
20
Voice Clarity Fwd/DND
Phonebook Pause
Call Log Memo Alarm
Mute/Auto Answer Setting
Conference Silent
Message Volume
• For operation, see page 23.
Before Operating the Handset
Shortcut Combinations
21
Before Operating the Handset
Flexible CO Keys
A Flexible CO Key can be used either to seize a line in order to make or receive an outside
call (F-CO key), or used as a function key. Press the Navigator Key to display the Flexible
CO Key list. Here you can access the 12 Flexible CO Keys. The key numbers displayed on
the 5th line of the screen indicate the lines’ statuses, similar to the LED indicators on a
Proprietary Telephone.
[Example]
Understanding the Flexible CO Keys
Key number square's color
on You are currently using this line.
Black
White
No color This line is idle.
*1 The meanings of these colors of key numbers vary depending on the status of the outside line.
flashing rapidly
flashing slowly You have a call on hold on this line.
on This line is in use by someone else.
flashing rapidly
flashing slowly Someone has a call on hold on this line.
You have an incoming call on this line.
(An outside call is coming in on a single extension.)
You have an incoming call on this line.
(An outside call is coming in on multiple extensions
simultaneously.)
*1
Line status
• To select a key, press its key number, or press the Navigator Key or to select the
desired key and press (the center soft key).
• To edit the names of Flexible Keys, see page 13.
• For more information, refer to the feature documentation for your PBX.
22
Extension No.Extension No.
Outside Phone No.
OR
CO Line Group No.
OR
idle CO Key No. [0-9, , #]
(idle CO Key)
Outside Phone No.
Outside Phone No.
X
X
Press the dialing key assigned as a
Hot Key for more than 1 second.
(if required)
Incoming Call
Log Group No.
Operation
Making Calls
Operation
To an extension
To an outside party
–Using the Line Access Numbers
–Using Flexible CO Keys
–Using Soft Keys
Calling
Using Hot Key Dial
*1
Using the Outgoing Call Log
Using the Incoming Call Log
Using the Incoming Call Log Group
*2
23
OR
(if required)
OR
Select "2:
Phonebook".
Select the type
of phonebook:
PBX, EXT,
Handset(H/S).
Enter name.
*4
(Flexible CO Key)
Desired No.
Select "0:
Setting".
Select "PBX
Program".
(One-touch dialing key)
Desired Phone No.
Operation
Calling
Using the Phonebook (PBX System/PBX Extension/Handset)
One-touch Dialling
To store
*2*3
To dial
To store
24
Hot Line