

Panasonic of North America 96NKX TG2584 User Manual

2.4GHz Cordless Answering System
Pulse-or-tone dialing capability
Model No.
KX-TG2584S
PLEASE READ BEFORE USE AND SAVE.
Charge the battery for about 15 hours before initial use.
Contents:
Location of Controls 2
Connections 5
Battery Installation/Battery Charge 6
Recording a Greeting Message 7
Making/Answering Calls with the Handset 8
Making/Answering Calls with the Portable Handset 9
Caller ID Service 9
Automatic Answering Operation 10
Listening to Messages 10
Important Safety Instructions 11
FCC and Other Information 13
Operating Instructions
– 2 –
Location of Controls
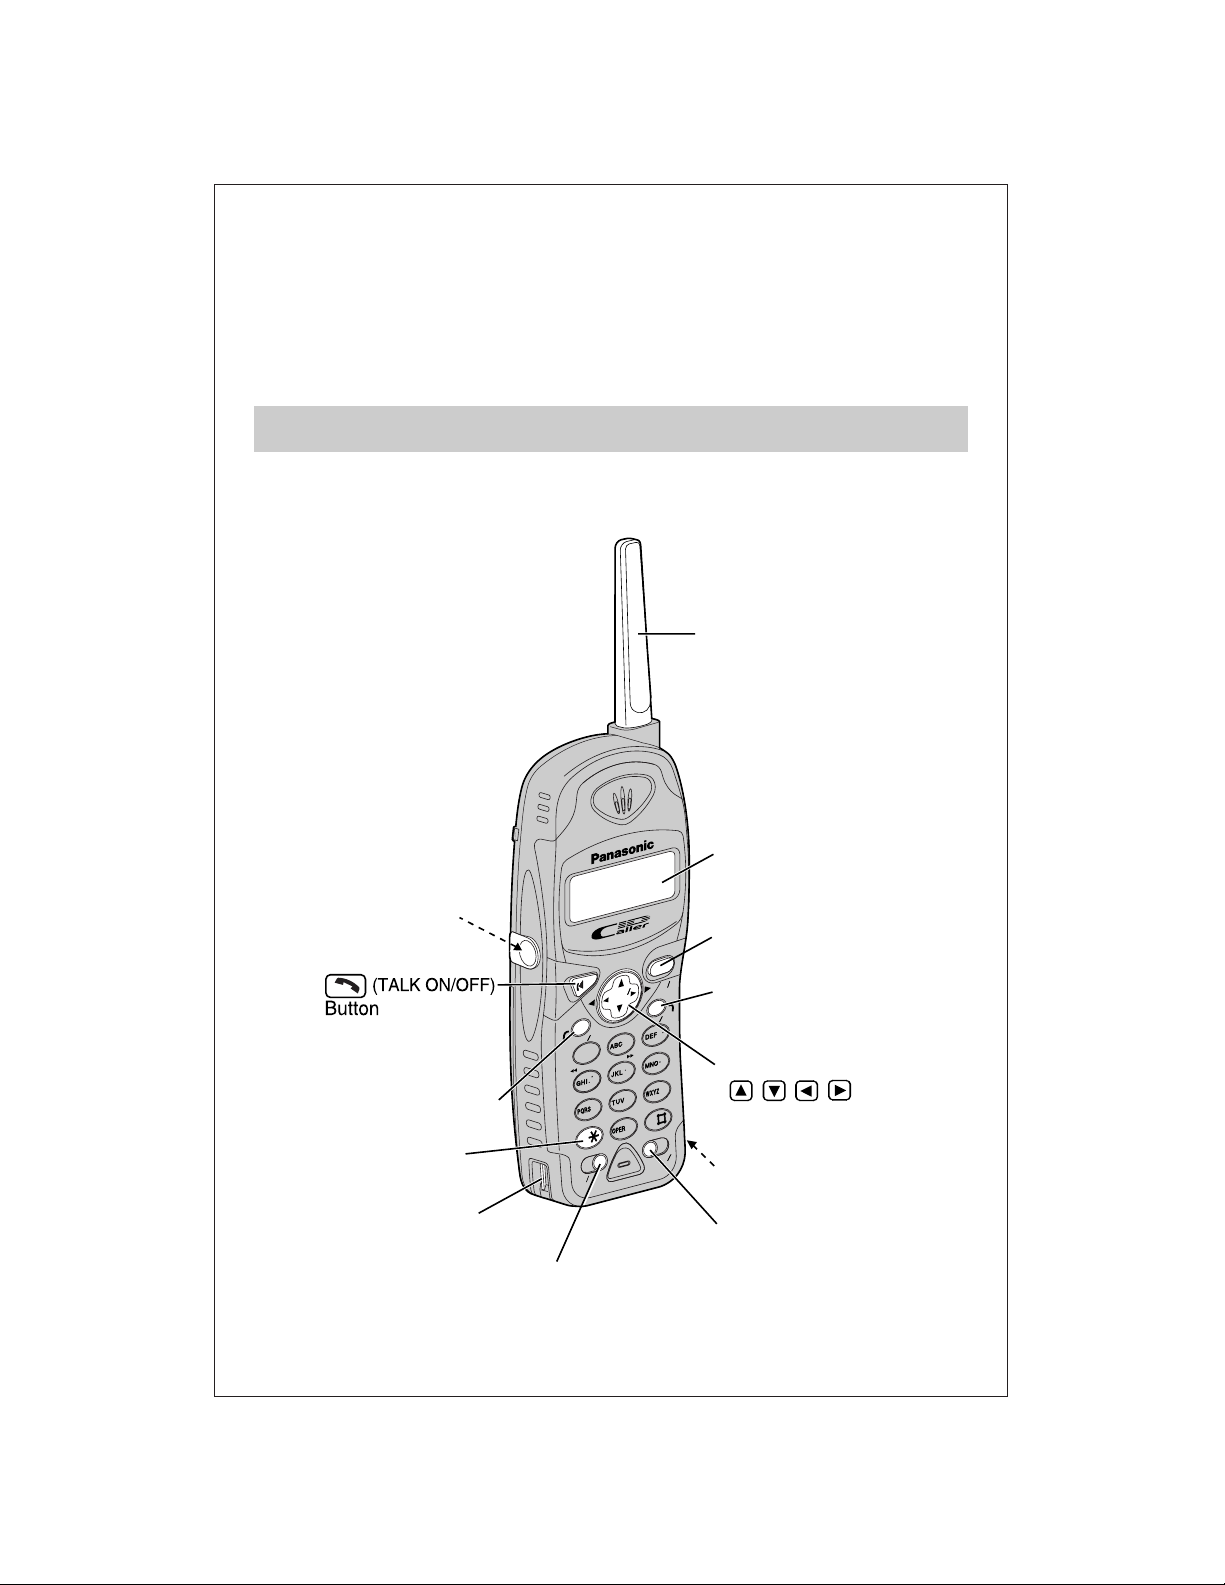
∫Handset
TALK
4
FLFLASHSH
REDIALREDIAL
CALL WAL WAIT
PAUSEPAUSE
PLPL AYBABACK
TONE
STOP
ANS ON
7
8
9
0
ANS
OFFOFF
CH
FUNCTION EXIT
INTINTERCOM
ERCOM HOLD HOLD
SKIPKIP
REPEPEAT
1
2
3
ALL MSG
NEW W MSG
5
6
BACKBACK
FWD
EDITEDIT
MUTEMUTE
LOUD LOUD
SEARCH
O
N
O
F
F
(INTERCOM/HOLD)/
(CLEAR)
Button
(FLASH/CALL\WAIT/PLAYBACK)
Button
Headset Jack
(TONE) Button
Navigator Key
( , , , )
Display
(FUNCTION/EXIT) / (CH)
(Channel) Button
Charge Contact
(REDIAL/PAUSE) Button
Antenna
C
LE
A
R
CLEAR
Charge Contact
(MUTE) Button
Please read IMPORTANT SAFETY
INSTRUCTIONS on pages 11 before use.
Read and understand all instructions.
– 3 –
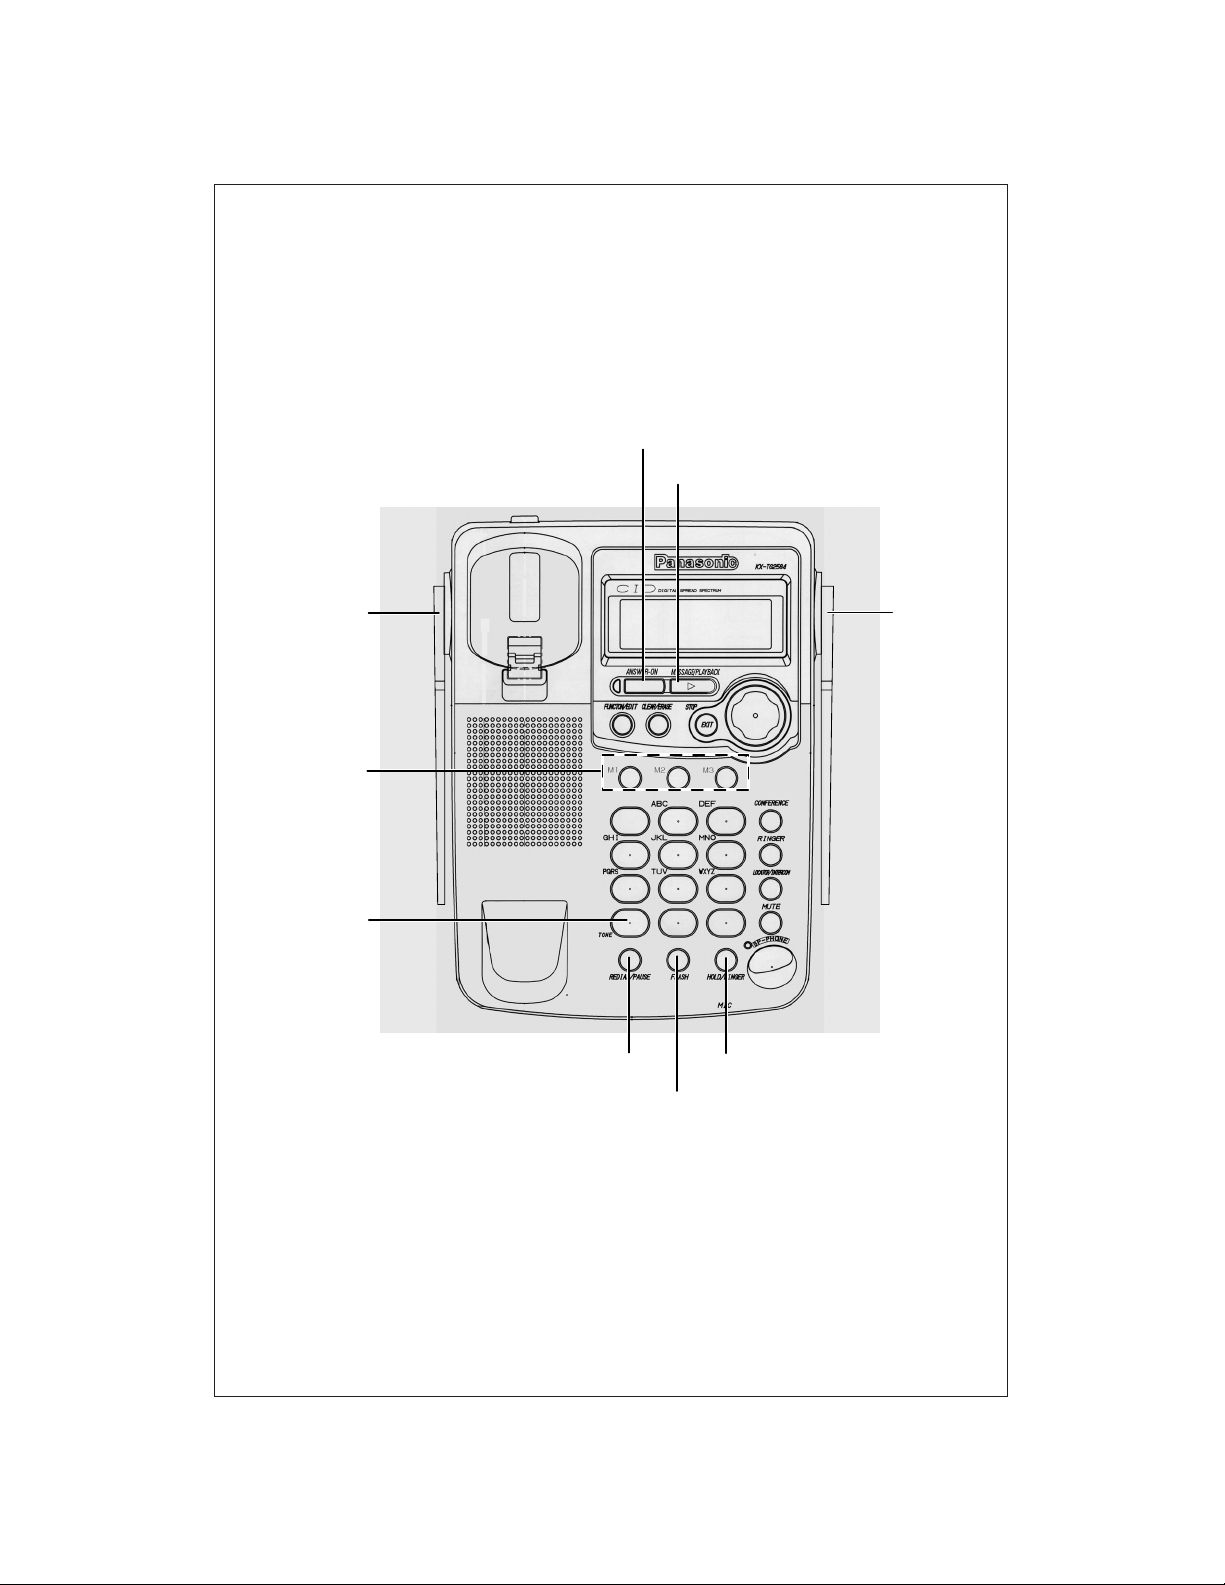
∫Base unit
(ANSWER\ON) Button
Antenna
(TONE) Button
Antenna
(REPLAY\PAUSE) Button
(FLASH/CALL\WAIT) Button
(HOLD) Button
(MESSAGE\PLAYBACK) Button
One-Touch
Auto Dial
Buttons
– 4 –
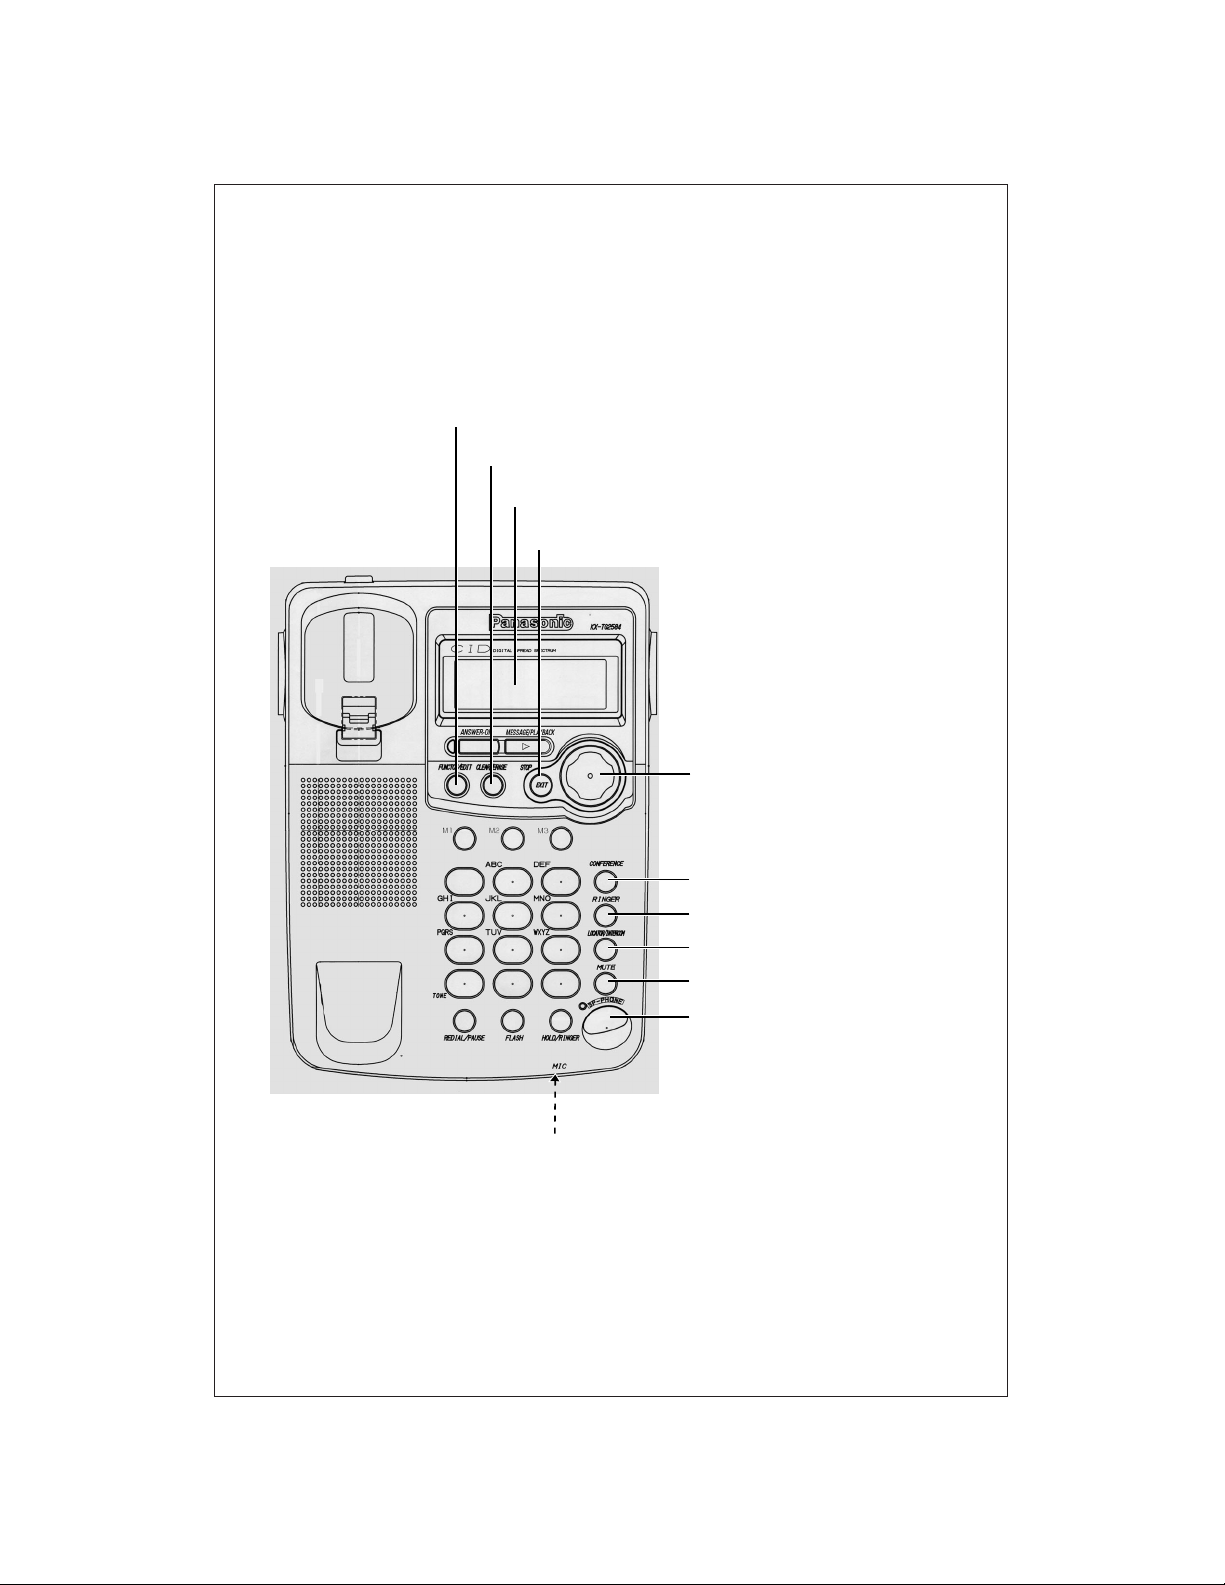
∫Base unit
(FUNCTION/EDIT) Button
(CLEAR/ERASE) Button
(STOP/EXIT) Button
MIC (Microphone)
Navigator Key
(
(‹), (›), (fi), (fl))
(CONFERENCE) Button
(RINGER) Button
(LOCATION/INTERCOM) Button
(MUTE) Button
(DIGITAL\SP-PHONE)
Button and indicator
Display
– 5 –
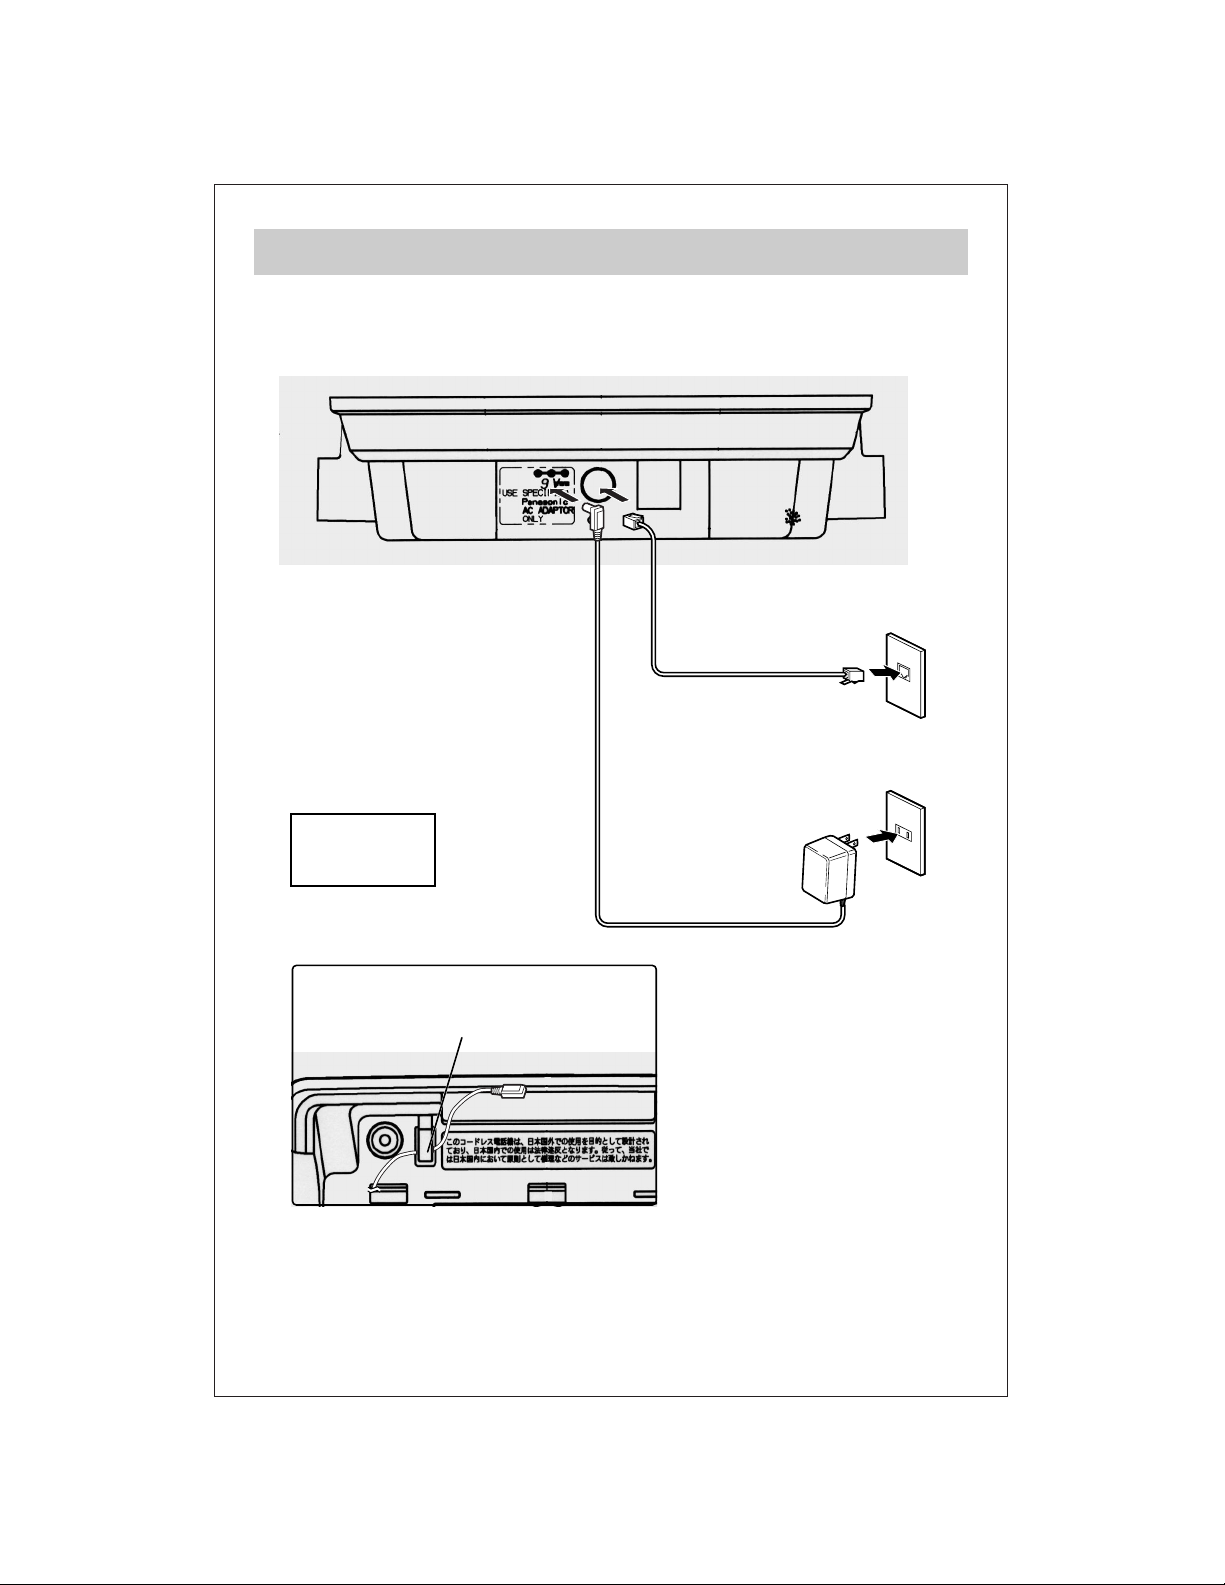
Connections
≥USE ONLY WITH Panasonic AC ADAPTOR PQLV10ZA.
≥The AC adaptor must remain connected at all times. (It is normal for the
adaptor to feel warm during use.)
Telephone Line Cord
Single-Line
Telephone Jack
(RJ11C)
Power Outlet
(AC 120 V, 60 Hz)
AC Adaptor
Raise the
antennas.
∫Connect the AC adaptor and the telephone line cord.
Fasten the AC adaptor cord to prevent it
from being disconnected.
Hook
 Loading...